Designing an effective outdoor decor patio requires balancing aesthetics with functionality, especially when accommodating both dining and lounging needs. Professional landscape architects approach layout planning by creating distinct zones that flow seamlessly while serving multiple purposes throughout the day. Fresh Garden Ideas brings you expert-tested configurations that maximize comfort, visual appeal, and practical use of your outdoor space.
Design SnapshotKey Principles
- Zone Definition: Establish clear functional areas using planters, level changes, or furniture orientation while maintaining visual connectivity
- Traffic Flow: Design pathways 36-48 inches wide between zones to prevent bottlenecks during gatherings
- Scale Balance: Position largest furniture pieces first along longest edges to anchor the space and create proportion
- Focal Integration: Orient seating toward natural or created focal points like fire features, water elements, or view corridors
Dual-Zone Patio Configurations
Creating separate but connected dining and lounging areas maximizes patio functionality without requiring physical walls. Designers achieve this through strategic furniture placement, level transitions, or soft partitioning elements that maintain sightlines while signaling distinct purposes.
1. Parallel Axis Layout with Planter Divider
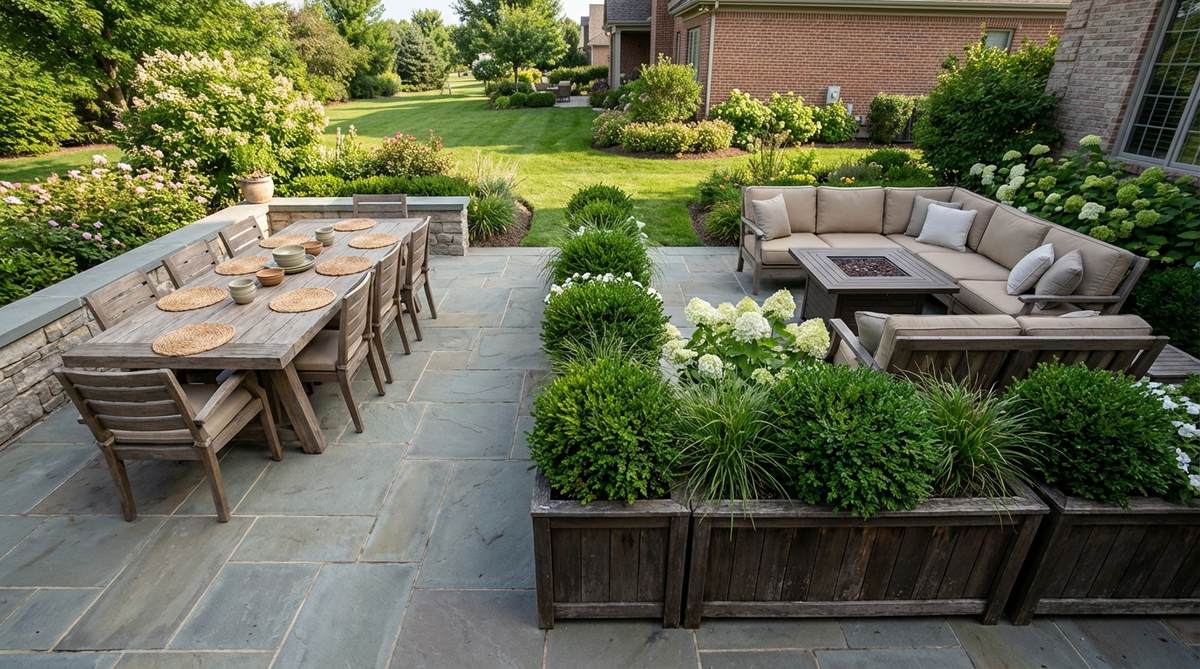
Position a dining table along one wall axis with a lounge sectional on the opposite side, separated by a linear row of waist-high planters. The greenery creates a visual boundary without blocking conversation flow between zones.
This arrangement works particularly well on rectangular patios measuring 16×24 feet or larger. Choose planters with consistent heights between 30-36 inches to define space effectively while maintaining open sight lines above the foliage.
The layout accommodates 6-8 diners and 4-6 loungers comfortably. Traffic naturally flows around both ends of the planter divider, preventing guests from cutting through active dining or relaxation zones.
2. L-Shaped Corner Segregation
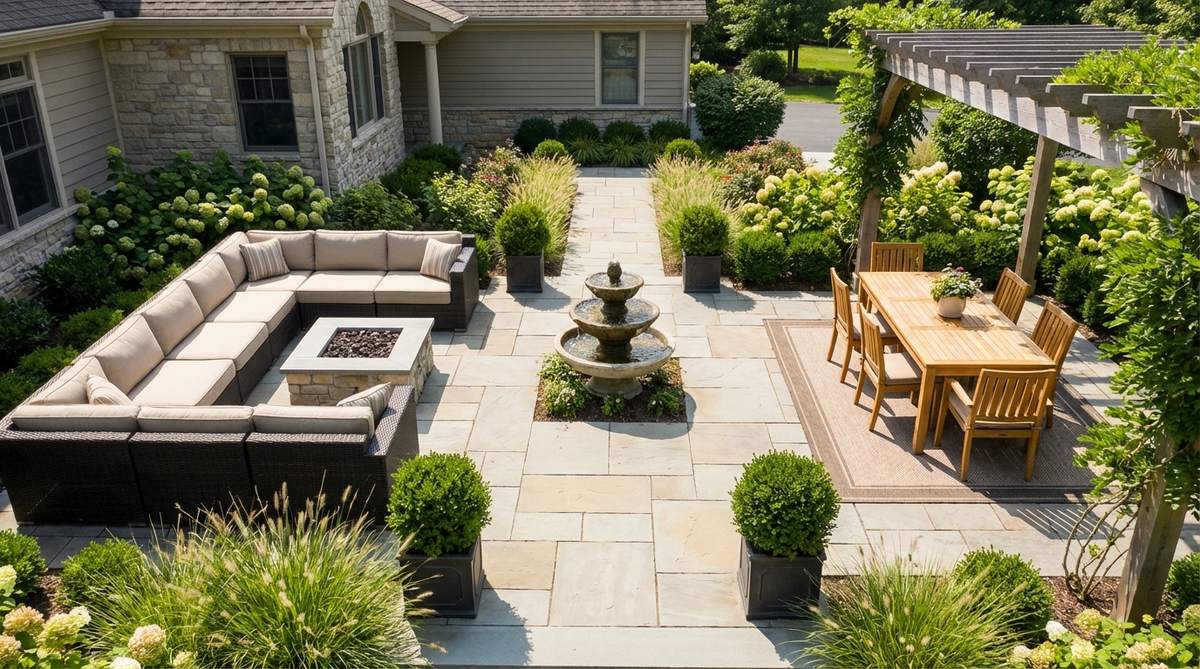
Anchor a sectional sofa in one corner forming an L-shape, then position the dining set in the adjacent corner at a 90-degree orientation. This perpendicular arrangement creates two distinct gathering points within a single footprint.
The configuration naturally directs foot traffic through a central corridor between the two zones. Place a focal element like a fountain or sculpture at the intersection point to enhance the spatial division.
This layout excels on square patios or those with corner access points. The perpendicular orientation prevents diners from facing loungers directly, maintaining privacy for both activities.
3. Elevated Dining Platform
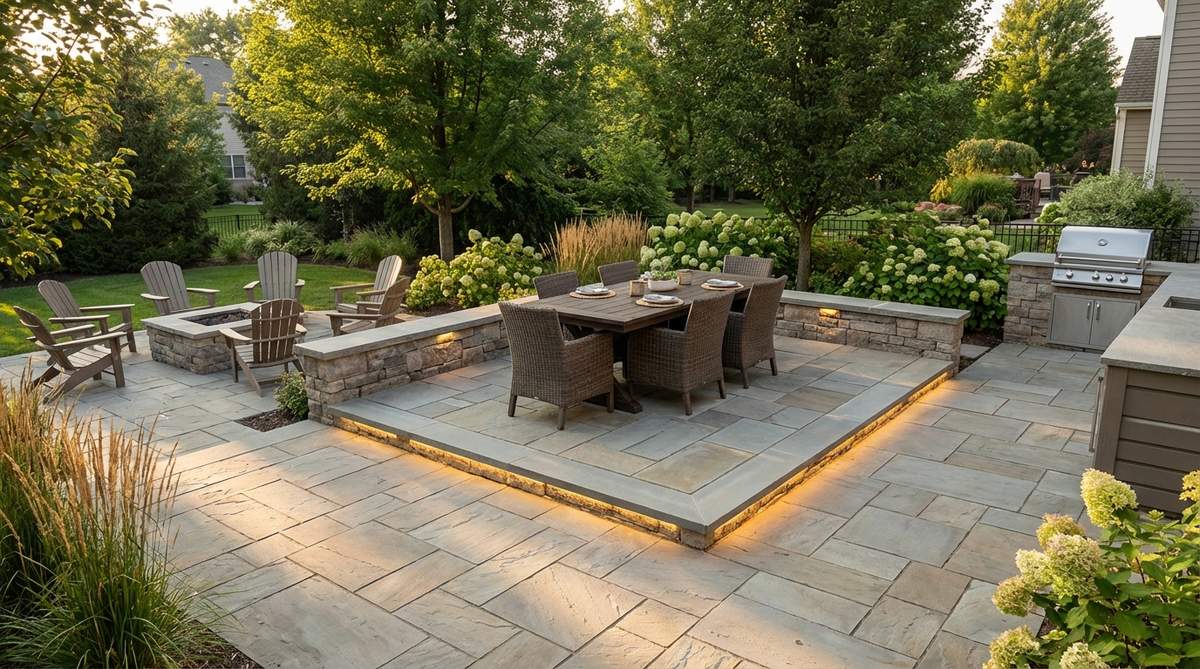
Raise the dining area 8-12 inches above the main patio level using a built platform or stepped hardscape transition. The elevation change immediately signals a functional shift from lounge to dining territory.
Build the platform with matching or complementary paving materials to maintain design cohesion. Edge the elevation change with integrated LED strip lighting for safety and ambiance during evening meals.
The height difference provides diners with a slightly elevated view while seated, creating psychological separation without physical barriers. This solution works best when the dining zone occupies 30-40% of total patio square footage.
4. Circular Fire Pit Hub with Radiating Zones
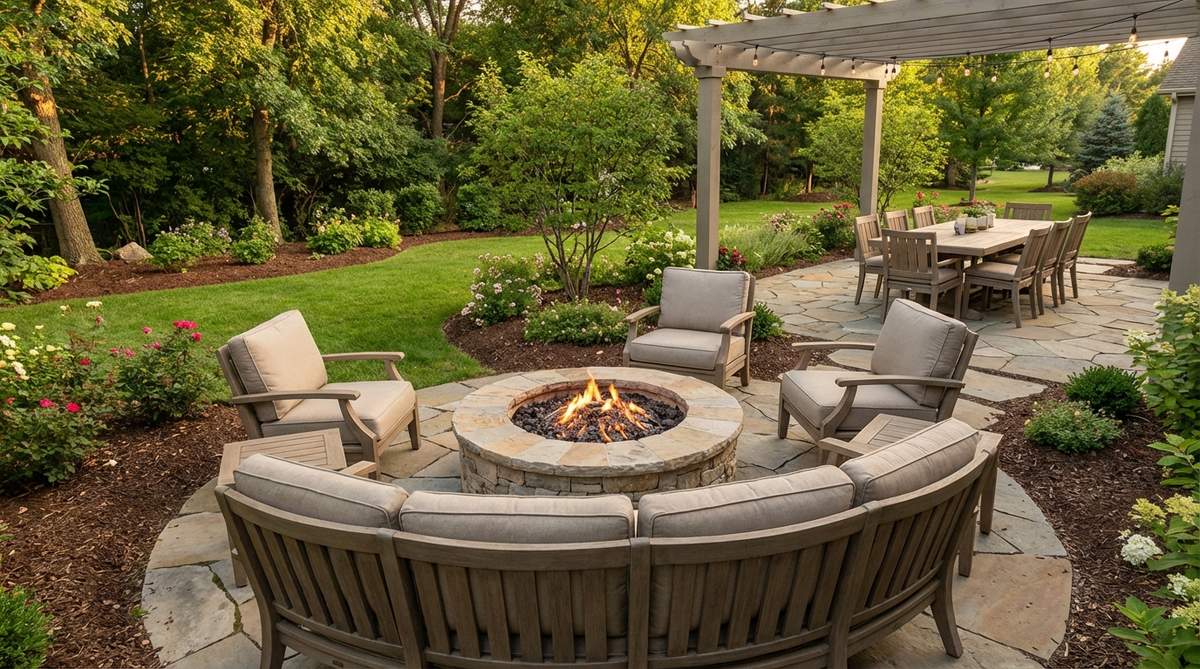
Center a round fire pit as the primary focal point, then arrange dining and lounge furniture in opposite radial positions around it. The fire feature acts as a shared anchor point that visually connects both zones.
Position the dining table at approximately 10-12 feet from the fire pit to avoid smoke interference during meals. Place lounge seating 6-8 feet away for optimal warmth during evening relaxation sessions.
This radial configuration works on circular or irregularly shaped patios. The fire element draws both zones together during gatherings while allowing each area to function independently during daytime use.
5. Parallel Dining Table with Perpendicular Lounge

Align a rectangular dining table parallel to the house wall, shortening kitchen-to-table serving distances. Position a lounge sectional perpendicular to the dining axis, facing outward toward the yard or garden view.
This T-shaped arrangement maximizes efficiency for hosts moving between indoor kitchen and outdoor dining. The perpendicular lounge orientation prevents loungers from staring directly at diners during meals.
Reserve a 48-inch clearance between table edge and sectional back for comfortable passage. The configuration naturally creates three distinct spacesdining, circulation, and lounging.
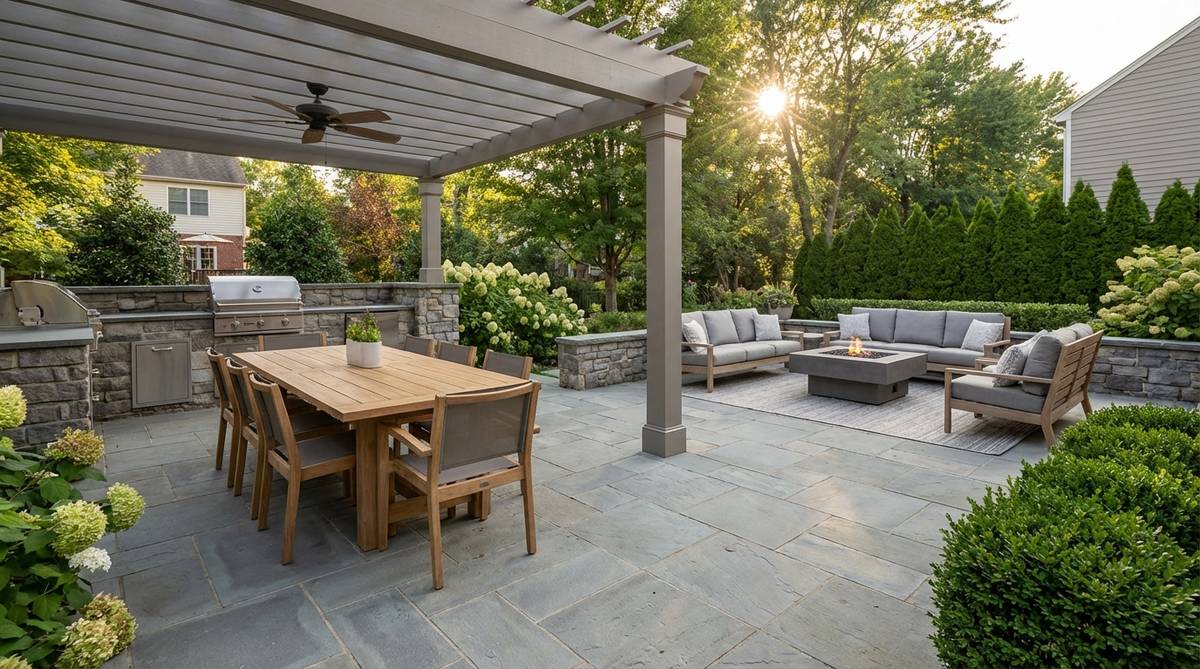
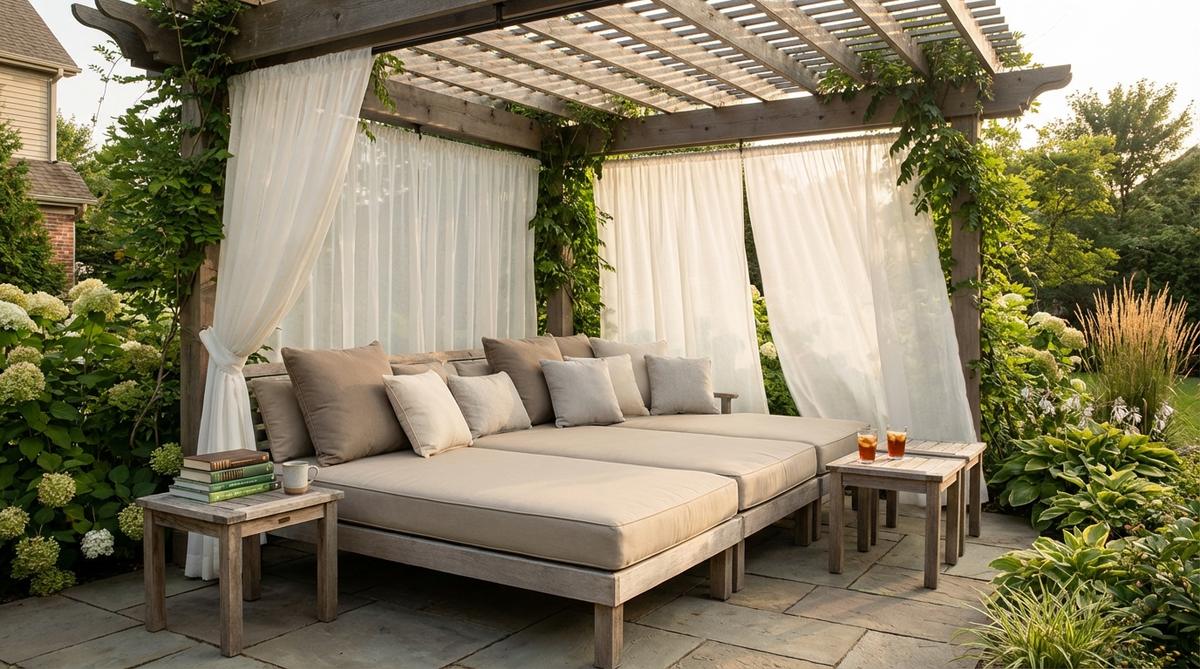
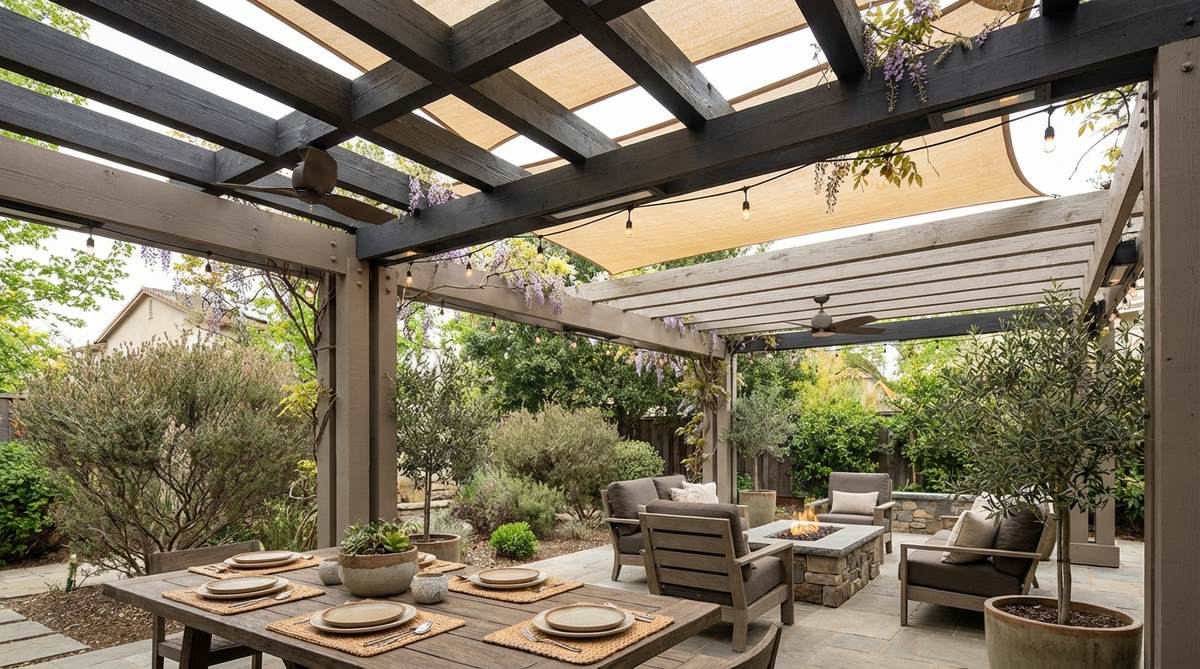
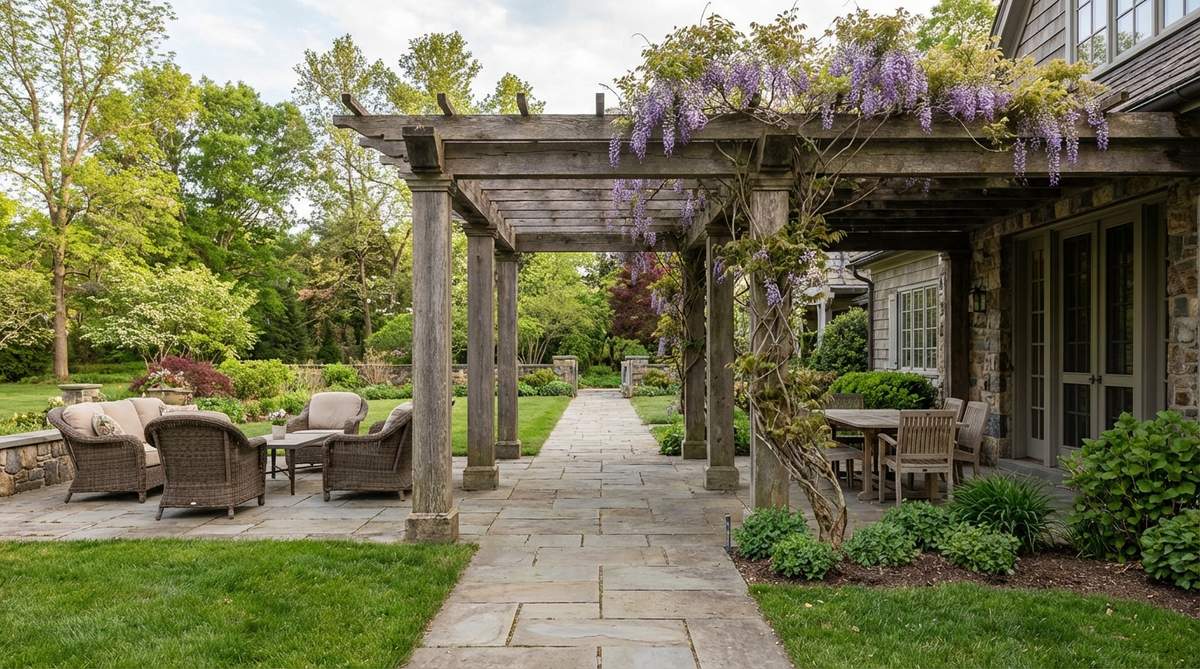
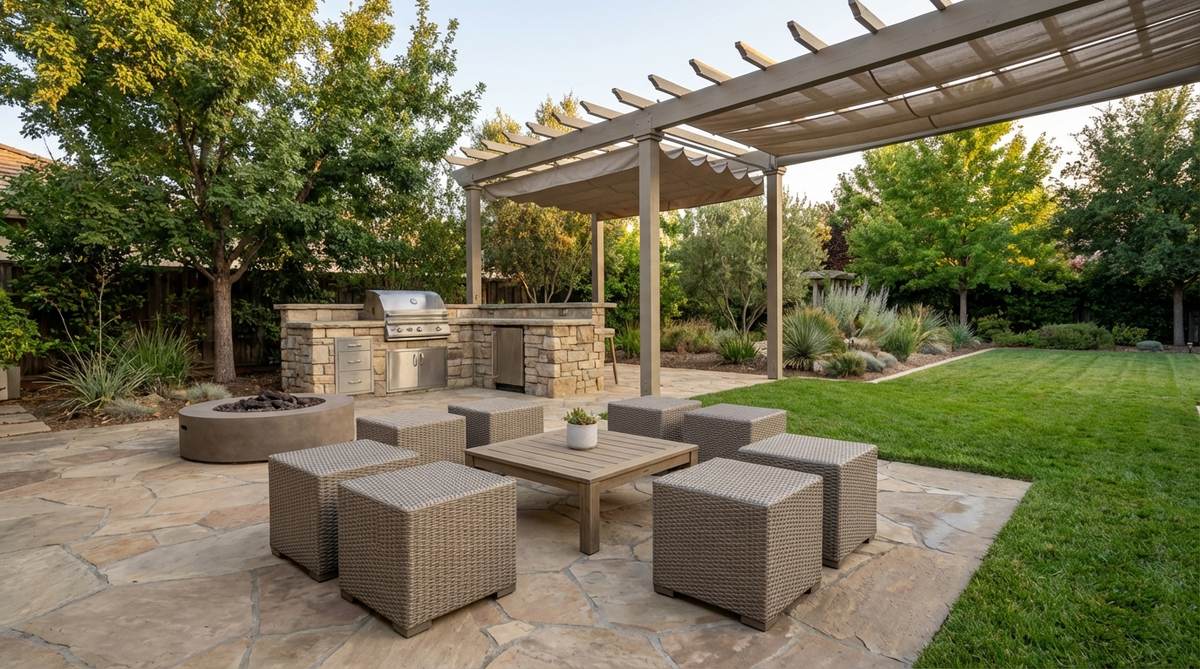
6. Pergola-Defined Dining with Open Lounge
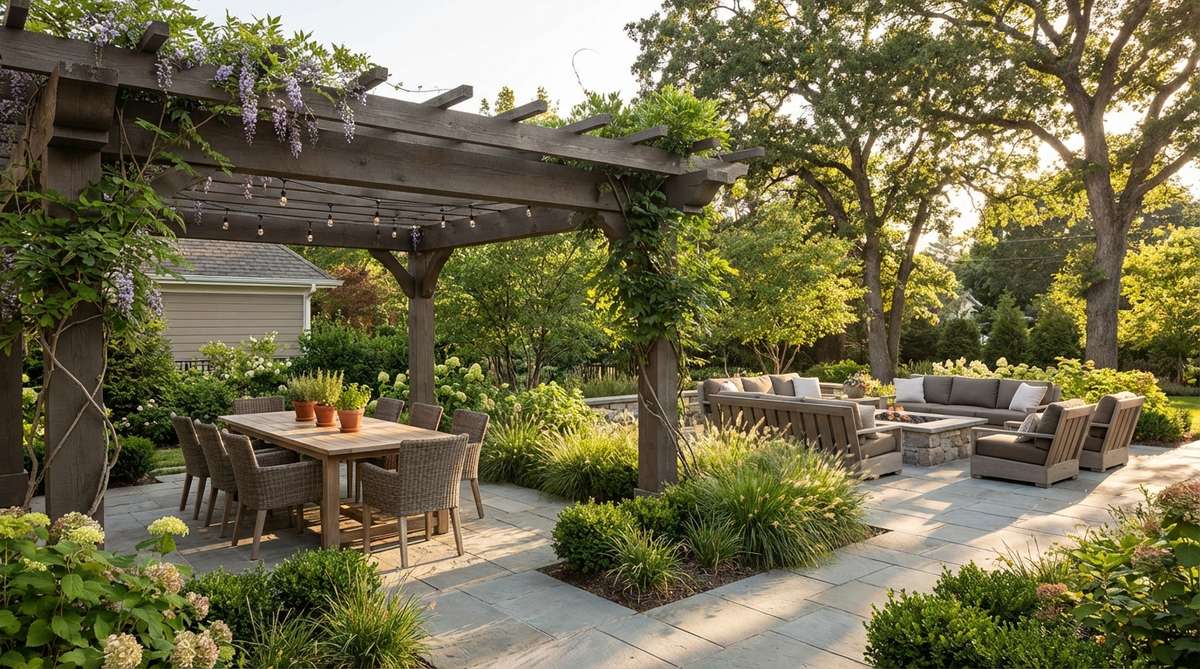
Install a pergola structure over the dining zone exclusively, leaving the lounge area open to sky. The overhead architecture immediately designates the dining space while providing shade during midday meals.
The pergola creates a room-like feel for formal dining without enclosing the entire patio. Add climbing vines or outdoor curtains to the pergola for additional definition and sun control.
Position lounge furniture 6-10 feet beyond the pergola edge in full sun or dappled shade from adjacent trees. This configuration appeals to households wanting a protected dining area while maintaining open lounging for sunbathing.
7. Diagonal Table Placement for Spatial Expansion
Rotate the dining table 45 degrees off the patio’s primary axis to create dynamic angles and visual interest. Position lounge seating along one straight edge for contrast between geometric and organic arrangements.
The diagonal orientation makes rectangular patios feel more spacious by drawing the eye along longer sight lines. This layout particularly benefits narrow spaces measuring 12 feet wide or less.
Ensure adequate clearance at all table corners for chair pull-out. The angled placement naturally creates triangular zones perfect for accent plants or decorative elements.
Dining-Focused Outdoor Decor Table Arrangements
When dining takes priority, the outdoor decor table becomes the spatial anchor around which all other elements orbit. Professional designs balance table size, seating capacity, and clearance requirements while incorporating shade, lighting, and serving logistics.
8. Extended Farmhouse Table with Bench Seating
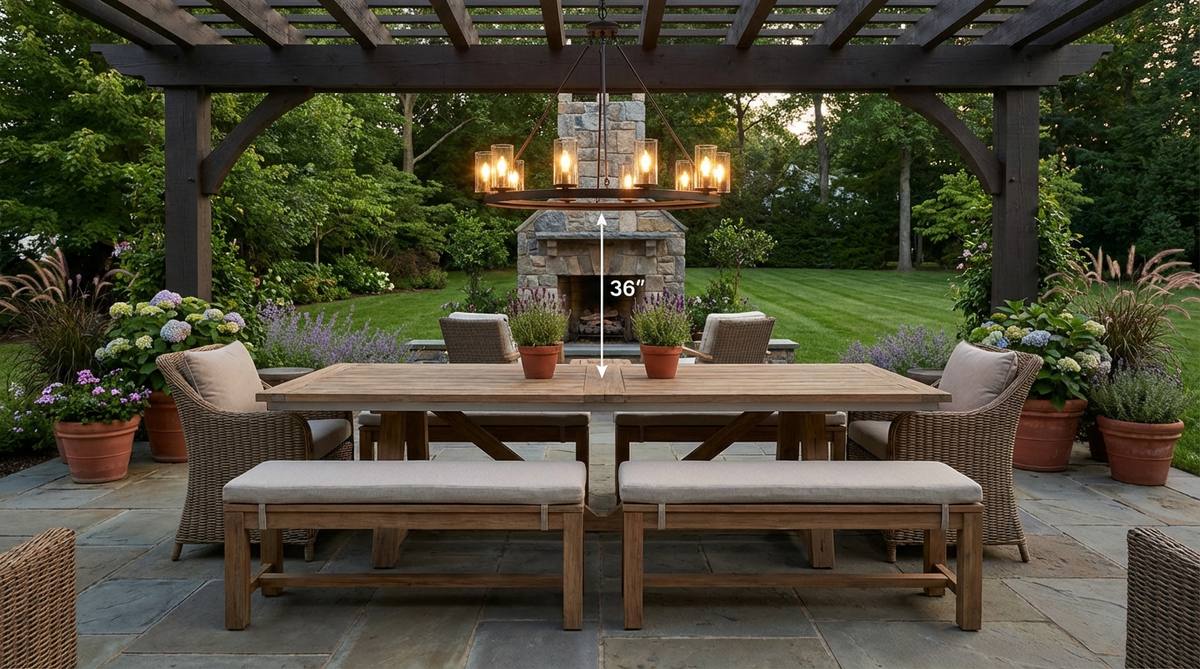
Install a 96-120 inch farmhouse-style table as the centerpiece, flanked by matching benches on both long sides and individual chairs at the heads. The elongated proportions accommodate 8-12 guests comfortably while creating dramatic visual impact.
Benches increase seating capacity by 20-30% compared to individual chairs. Choose teak or aluminum frames with weather-resistant cushions for durability in exposed conditions.
Center an oversized outdoor chandelier or three pendant lights above the table at 30-36 inches above the surface. This height provides adequate illumination without obstructing cross-table conversation.
9. Round Pedestal Table for Conversation Flow
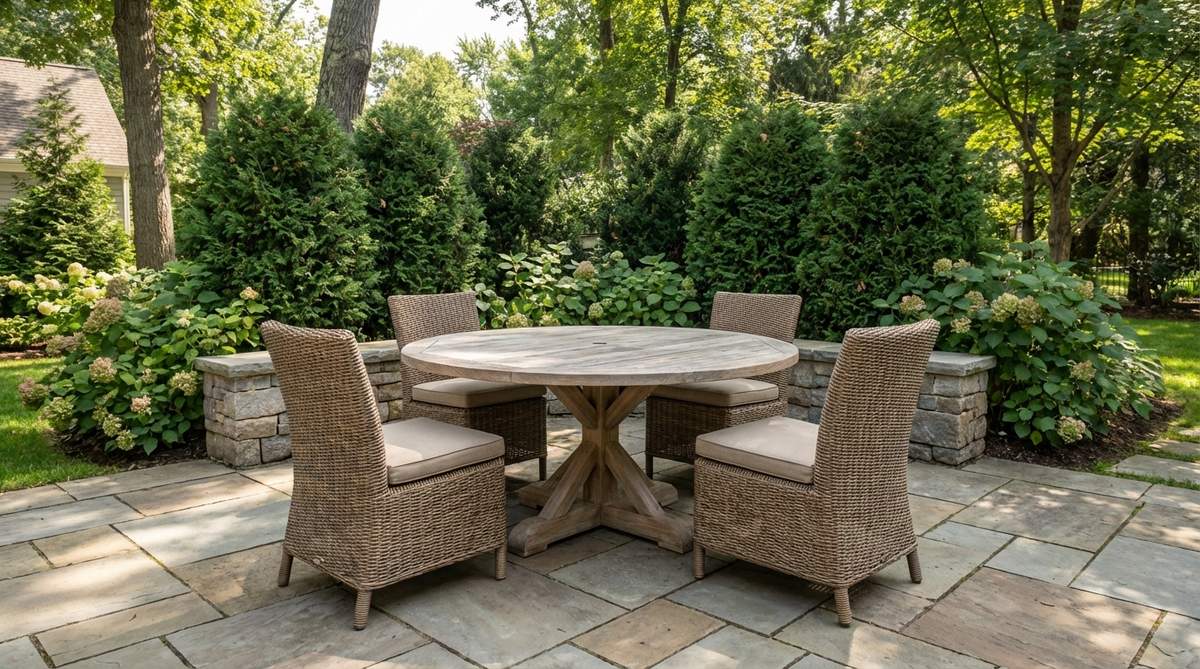
Select a 50-72 inch round table with central pedestal base to maximize legroom and conversation equity. The circular format ensures no guest sits at a hierarchical head position.
Round tables fit efficiently into corner spaces and tight areas where rectangular options would block circulation. The shape encourages equal participation during meals and eliminates awkward corner seating.
Pair with armless dining chairs to allow easy entry and exit from any position. Reserve 36 inches of clearance from table edge to nearest obstacle for comfortable chair pullout.
10. Bar Height Counter with Swivel Stools
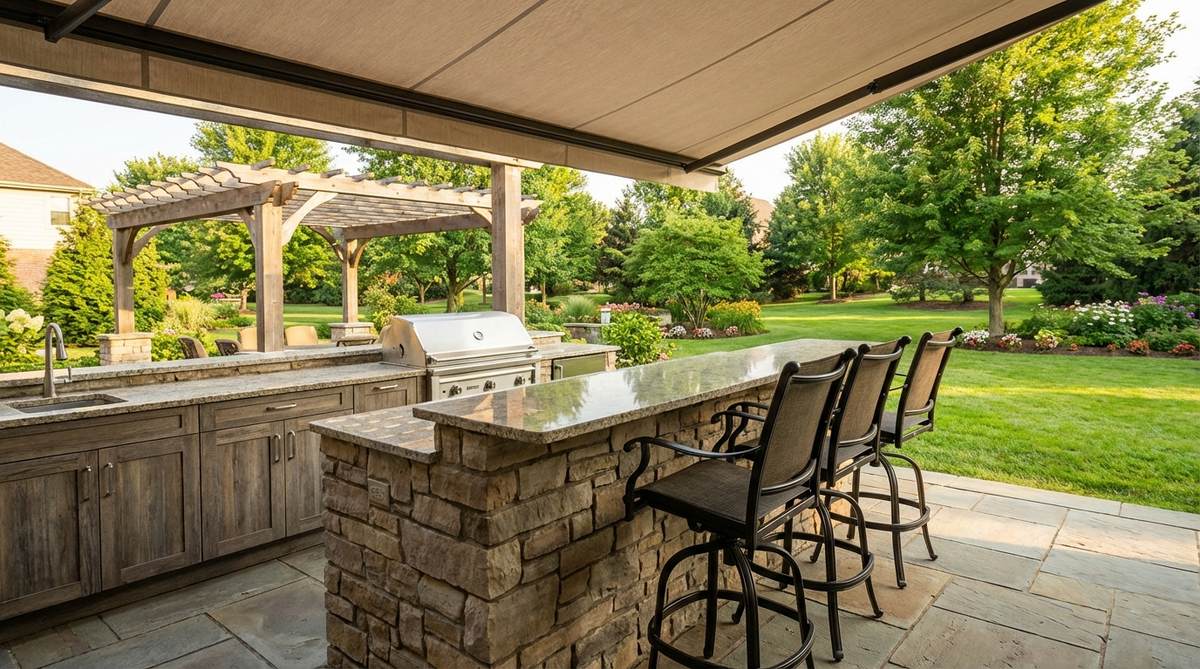
Build or position a 42-inch bar-height counter along the patio’s kitchen-facing edge with swivel counter stools. This elevated dining option creates a casual atmosphere perfect for breakfast and quick meals.
The counter doubles as a serving buffet during parties when paired with waterproof bar cabinets underneath. Swivel stools with backs provide comfort during extended conversations while occupying less floor space than traditional dining chairs.
Install a roof overhang or retractable awning above the counter for sun and rain protection. The elevated sight line allows diners to survey the entire patio and yard while eating.
11. Modular Table System for Flexible Capacity
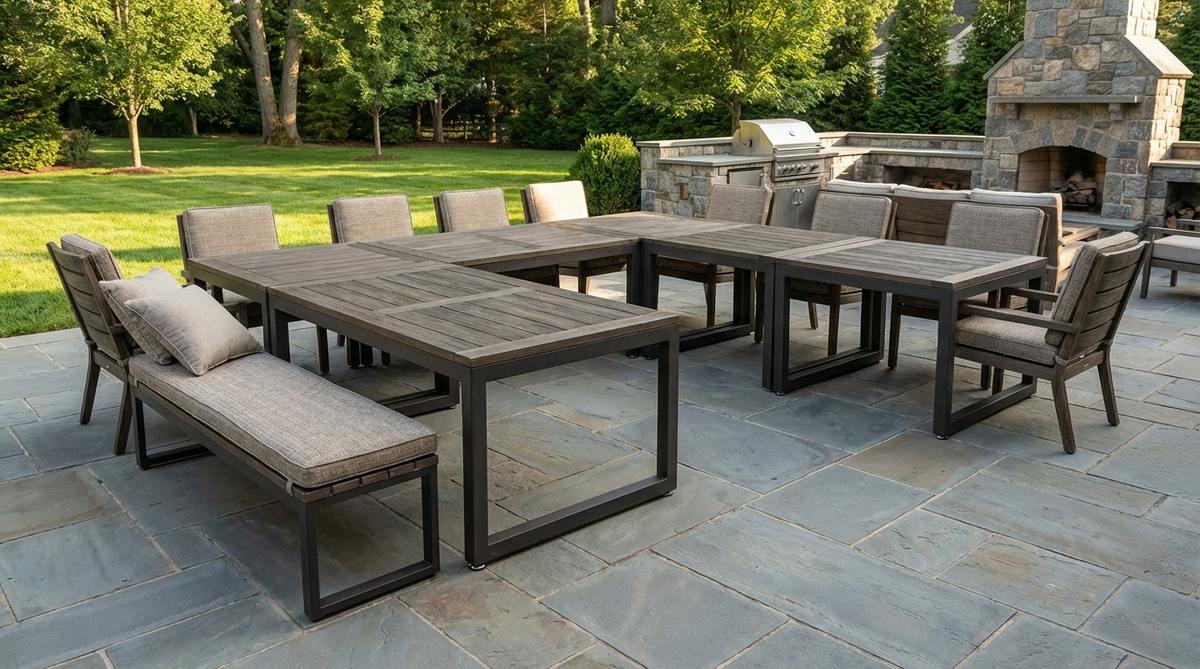
Invest in square or rectangular table modules measuring 36×36 or 36×72 inches that connect seamlessly. Configure them in various arrangements based on guest countsingle for 2-4 people, doubled for 6-8, or L-shaped for 10-12.
Modular systems adapt to different entertaining needs throughout the season. Store extra modules in a deck box or garage when hosting intimate gatherings.
Choose tables with self-leveling feet to accommodate slightly uneven patio surfaces. The flexibility allows hosting book clubs, family dinners, and neighborhood cookouts without furniture limitations.
12. Bistro Cluster for Intimate Dining
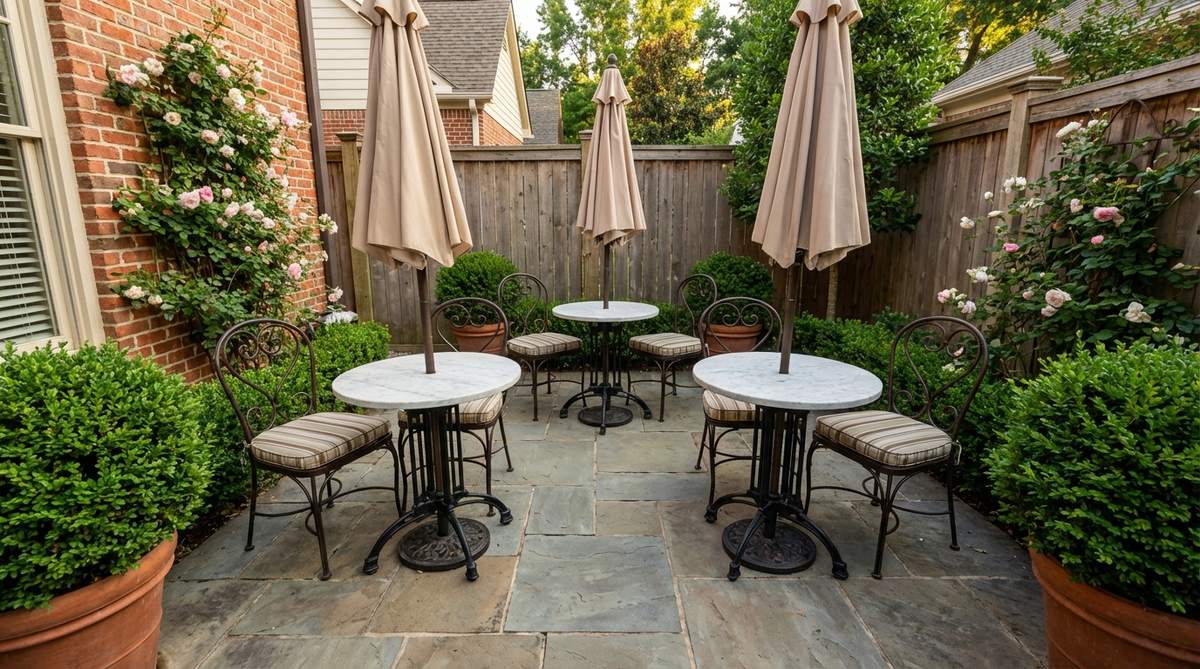
Create a European café atmosphere with 2-3 small bistro tables (24-30 inches diameter) grouped in close proximity. Each table seats two guests, totaling 4-6 diners in an intimate configuration.
This arrangement excels on narrow balconies, small patios, or as a secondary dining zone on larger properties. The clustered placement maintains social connectivity while providing individual table space for each couple.
Pair with classic bistro chairs featuring curved backs and woven seats. Add market umbrellas to each table for individualized shade control and visual charm.
13. Convertible Fire Table for Year-Round Use
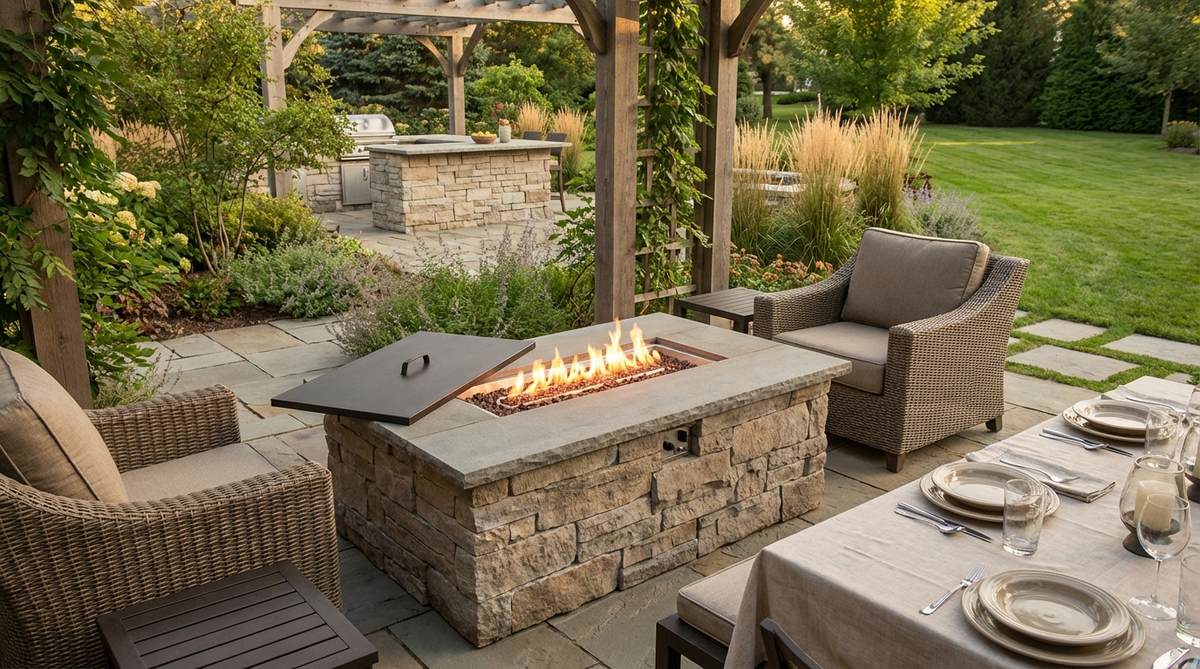
Install a rectangular fire table (50-72 inches) with a removable lid that converts the fire pit center into a solid dining surface. The dual functionality extends patio use across seasons.
During warm months, remove the fire pit lid and install the dining conversion top for standard meal service. In cooler weather, expose the fire feature and use the table perimeter for cocktails and appetizers.
Select models with adjustable flame height and electronic ignition for convenience. The fire element continues providing ambiance during dinner service when set to low flame.
14. Trestle Table with Built-In Planters
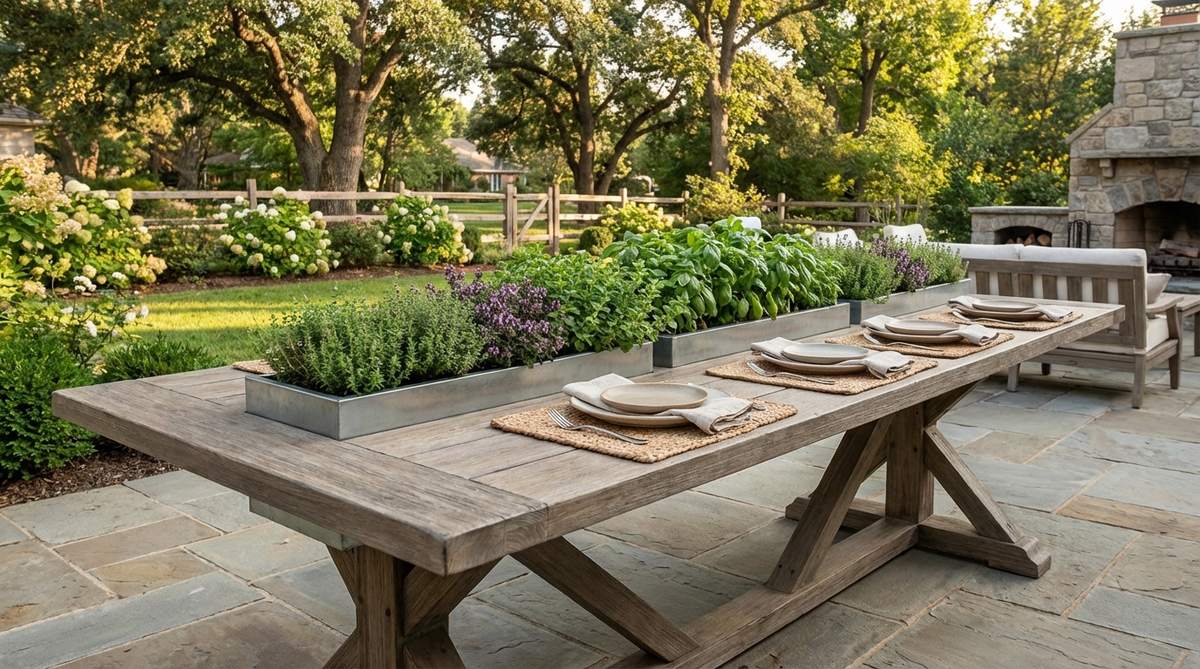
Commission or construct a custom trestle dining table with integrated planter boxes running down the center. Fill planters with low-growing herbs like thyme, oregano, and basil for functional edible centerpieces.
The living centerpiece eliminates the need for separate floral arrangements while providing fresh garnishes within arm’s reach. Choose drought-tolerant herbs that withstand occasional neglect during busy weeks.
Build planters with waterproof liners and drainage holes to protect the table structure. The integrated design prevents centerpiece items from blowing away during windy conditions.
15. Nautical Rope-Suspended Table
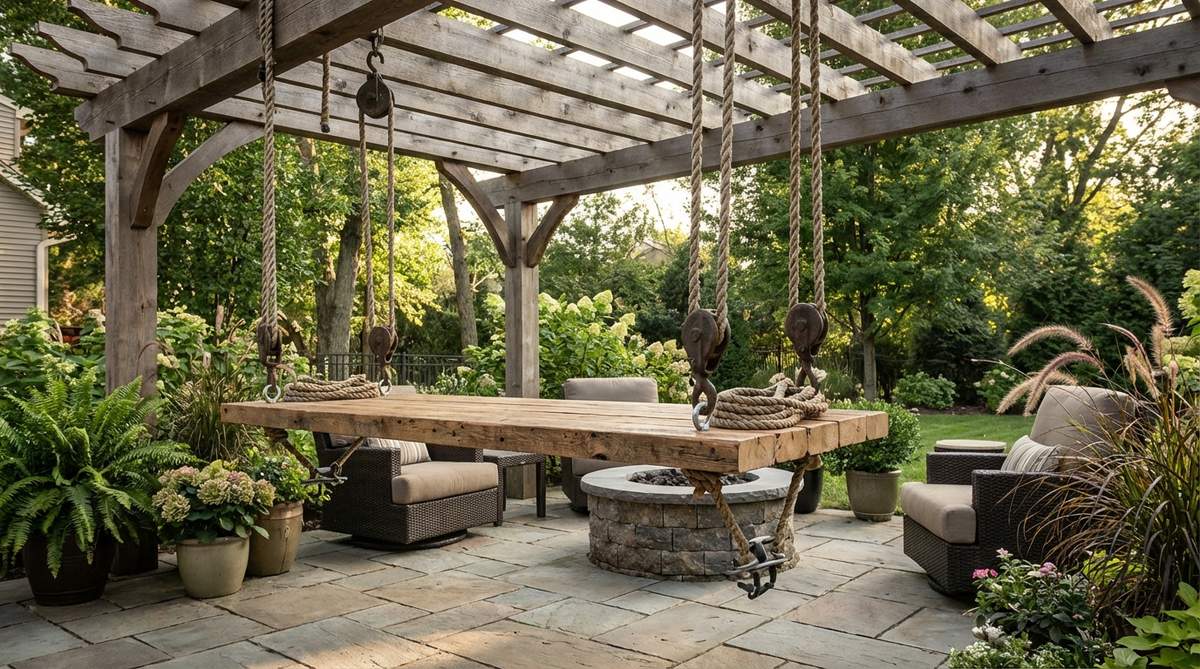
Suspend a wooden plank table from a pergola or sturdy overhead beam using marine-grade rope and pulleys. The hanging configuration creates a floating effect and nautical aesthetic.
The suspension system allows height adjustment for different usesstandard dining height at 30 inches or raised position when the space serves other functions. Secure the table at multiple points to prevent swaying during use.
This installation works best for lightweight gatherings rather than heavy formal dining. The suspended design becomes a striking focal point that generates conversation among guests.
Lounge-Centric Layouts
Relaxation-focused patios prioritize comfortable seating, optimal views, and ambient features over formal dining infrastructure. These layouts emphasize low furniture profiles, plush cushioning, and arrangements that facilitate casual conversation or solo unwinding.
16. U-Shaped Sectional Conversation Pit
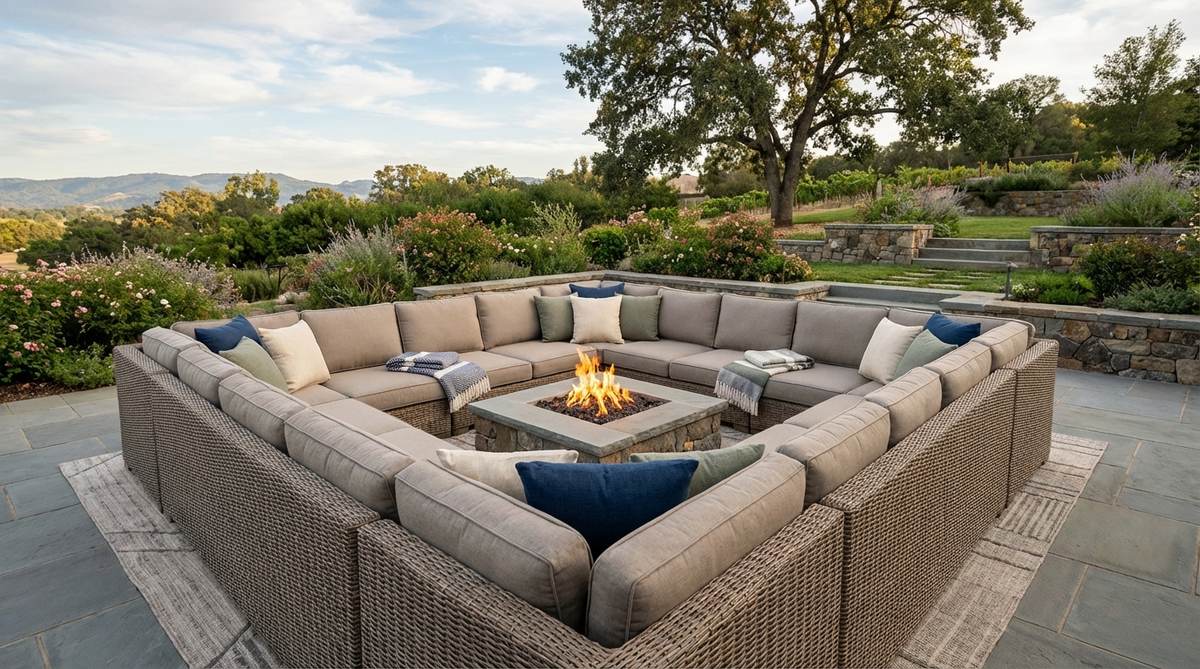
Arrange a three-sided sectional sofa in U-formation facing a central coffee table or fire pit. The wraparound seating creates an intimate enclosure that encourages face-to-face interaction among 8-10 guests.
Position the open side of the U toward the best view corridor or most attractive landscape feature. Install the sectional on an area rug sized 18-24 inches larger than the furniture footprint to define the lounge zone.
Add weatherproof throw pillows and outdoor blankets for texture and comfort. The high back cushions provide lumbar support during extended lounging sessions.
17. Daybed Pavilion for Ultimate Relaxation
Install a large outdoor daybed (72-84 inches) under a dedicated shade structure or pergola corner. The horizontal lounging option provides a resort-style escape for afternoon naps and reading sessions.
Dress the daybed with waterproof mattresses and UV-resistant cushions in neutral tones. Hang sheer outdoor curtains on three sides for privacy and sun control while maintaining airflow.
Position side tables at each end for beverages and books. The daybed serves double duty during gatherings as additional seating when fitted with back pillows and bolsters.
18. Paired Chaise Lounges with Shade Sails
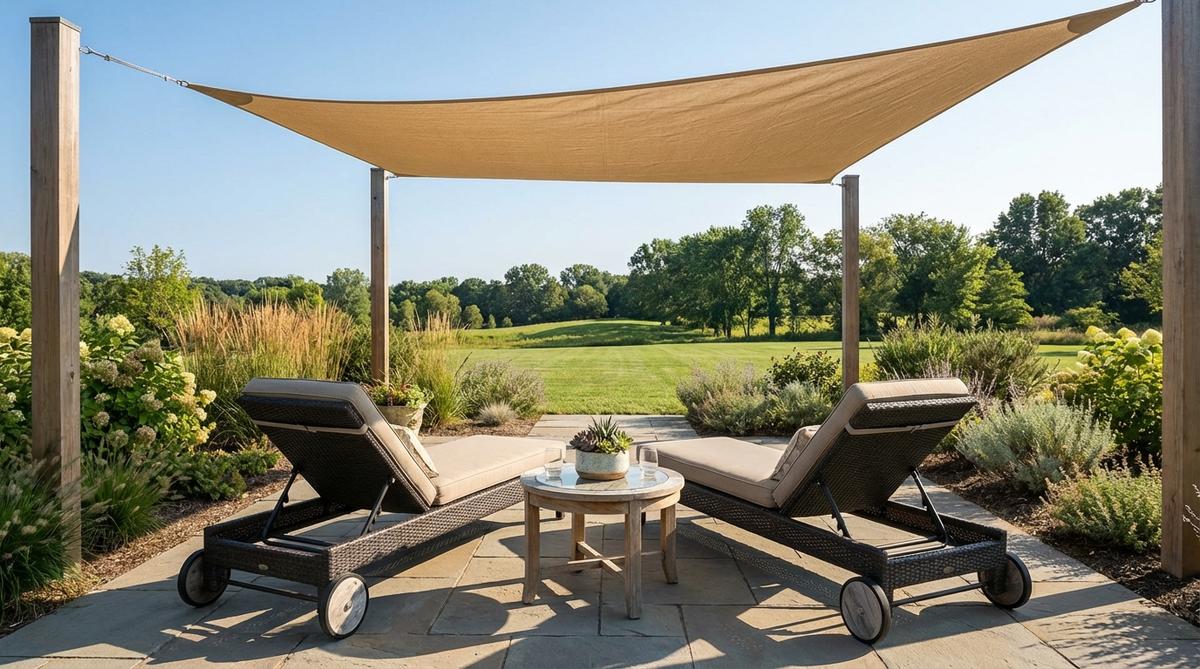
Place two adjustable chaise lounges side-by-side at a slight angle, both oriented toward sun or view. Install a triangular shade sail overhead at 10-12 feet height for movable sun protection.
Position a shared side table between lounges at arm’s reach for both users. Select chaises with wheels for easy repositioning as sun patterns shift throughout the day.
The parallel placement accommodates couples who want proximity without forced conversation. Adjust chaise backs independently to support different activities like sunbathing versus reading.
19. Circular Seating Around Central Fire Bowl

Arrange individual lounge chairs or curved sectional segments in a complete circle around a central fire bowl. The 350-degree configuration ensures equal warmth distribution and no hierarchical seating positions.
Maintain 6-8 feet between seat front and fire bowl edge for comfortable heat exposure. The circular arrangement accommodates 8-12 guests depending on chair size and spacing.
This layout works exceptionally well for evening entertaining focused on conversation rather than activities. The fire glow creates natural ambient lighting that eliminates the need for additional fixtures.
20. Hammock Grove with Palm Planters
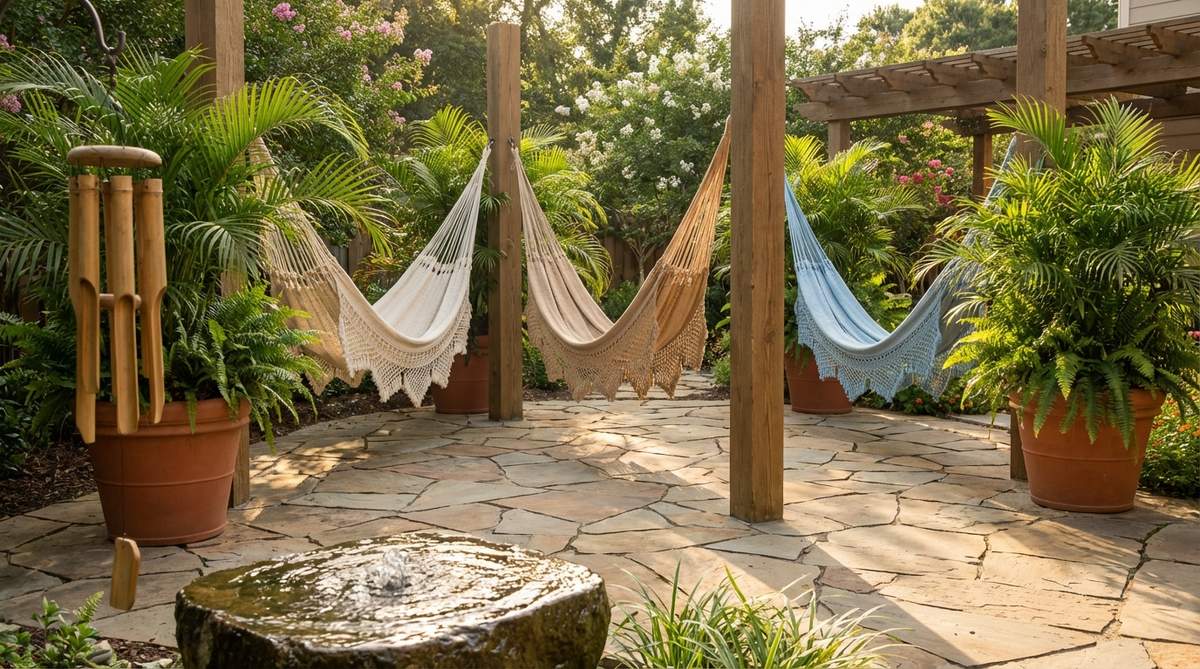
String 2-3 hammocks between existing trees or install dedicated hammock posts, creating a relaxation zone. Flank hammocks with large planters containing tropical palms for an island resort atmosphere.
Space hammocks 6-8 feet apart to prevent collisions when occupied. Choose Brazilian-style hammocks with spreader bars for easier entry and exit compared to traditional gathered-end designs.
The hammock zone requires minimal square footage while providing maximum relaxation value. Position near water features or wind chimes for enhanced sensory experience.
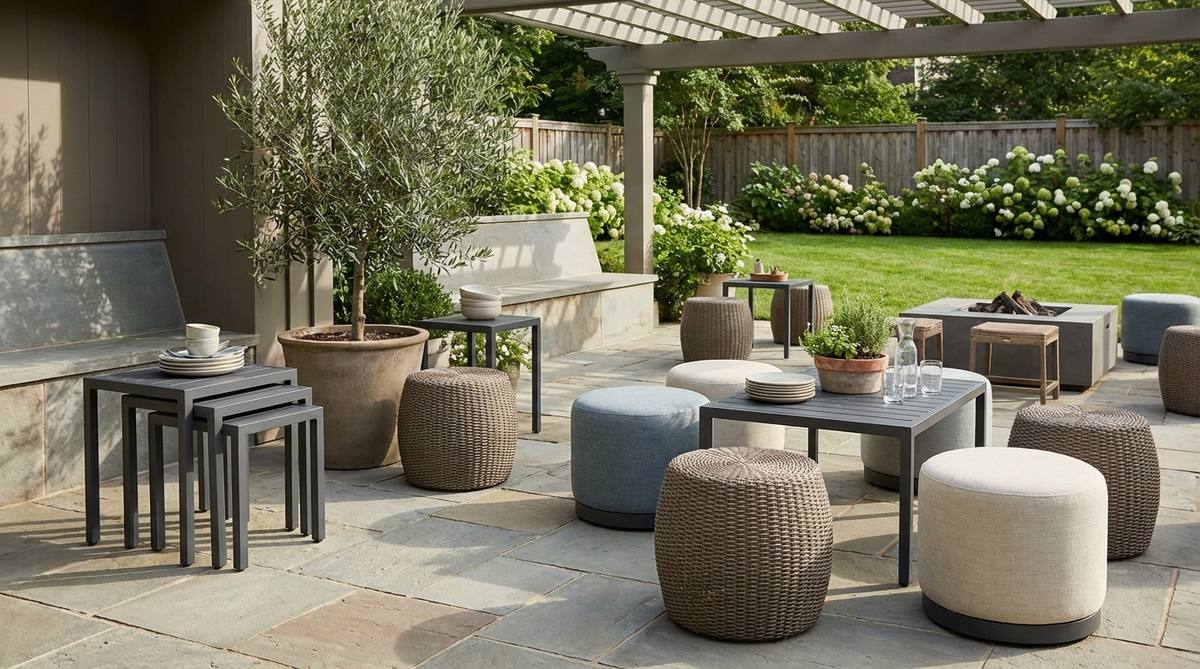
21. Modular Floor Cushion Arrangement
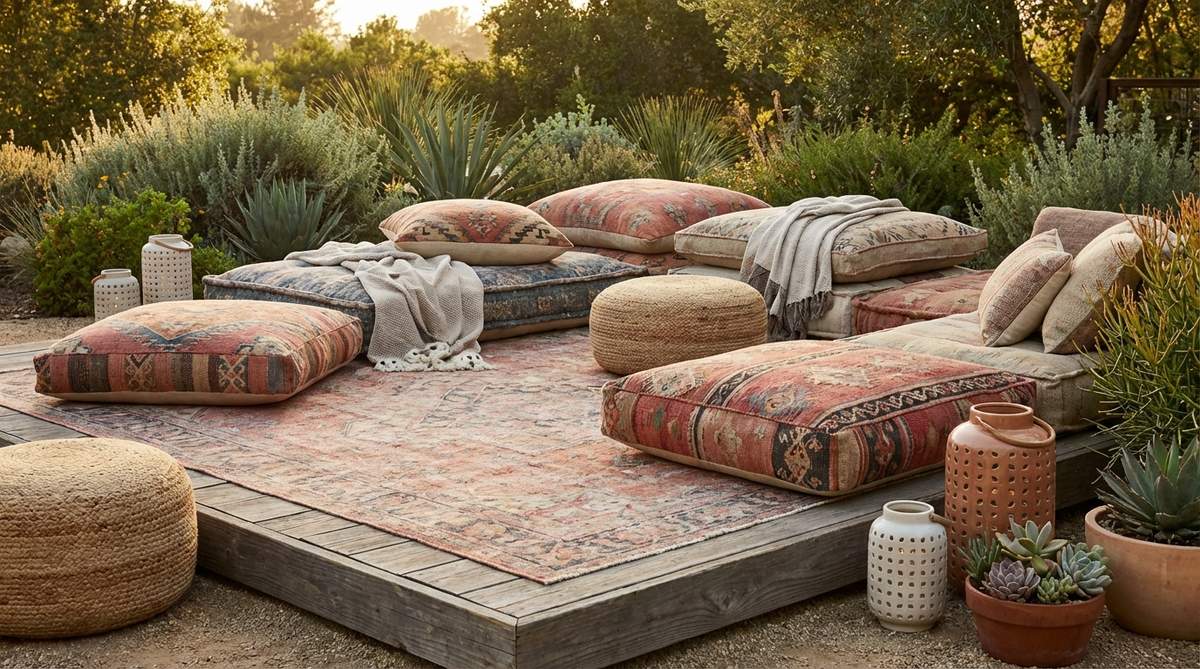
Create a bohemian lounge using oversized outdoor floor cushions (36×36 inches) and poufs arranged on a large outdoor rug. The low-profile seating offers flexible configuration and easy storage.
Layer cushions in varying heights and patterns for visual interest and comfort options. Use a low platform (4-6 inches high) as the base to keep cushions elevated above ground moisture.
This casual arrangement suits younger households and informal gatherings. Stack and store cushions in a deck box during inclement weather to extend their lifespan.
22. Swing Bench with Canopy Frame

Install a three-seat porch swing suspended from a dedicated A-frame or pergola beam. The gentle rocking motion provides soothing relaxation while accommodating multiple users.
Add a retractable canopy overhead for sun protection during peak daylight hours. Position the swing facing the most appealing view corridor with 4-5 feet of clearance in front for safe swinging motion.
Include weatherproof cushions with ties to prevent sliding during use. The swing becomes a gathering magnet during parties and a peaceful retreat during quiet moments.
23. Pod Chair Cluster for Individual Retreats
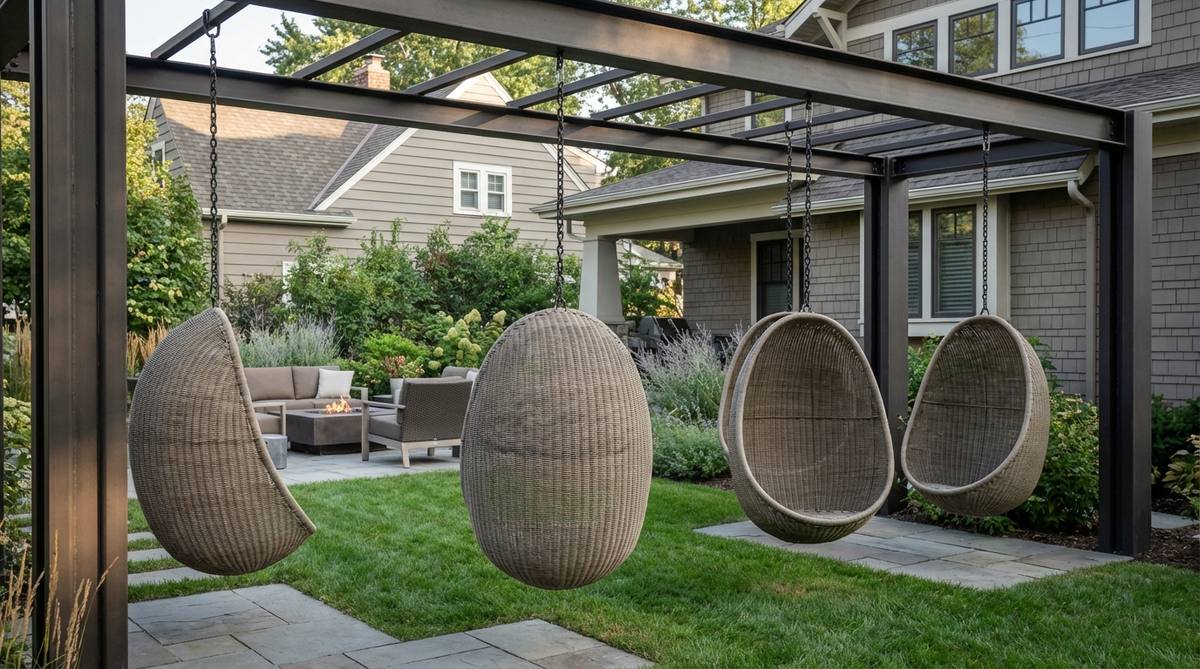
Arrange 3-4 egg-shaped or pod hanging chairs suspended from a pergola or steel frame structure. Each enclosed chair provides a private nook while maintaining visual connection to the group.
Space pod chairs 5-6 feet apart to prevent collisions during swinging. The partially enclosed design offers psychological privacy perfect for reading or meditation.
Install at varying heights to accommodate users of different ages and mobility levels. The sculptural forms create striking visual interest even when unoccupied.
Multi-Functional Hybrid Spaces
Patios serving multiple purposes require adaptable furniture and strategic design that supports easy transitions between dining, lounging, entertaining, and activity modes throughout the day and season.
24. Convertible Sectional with Dining-Height Table
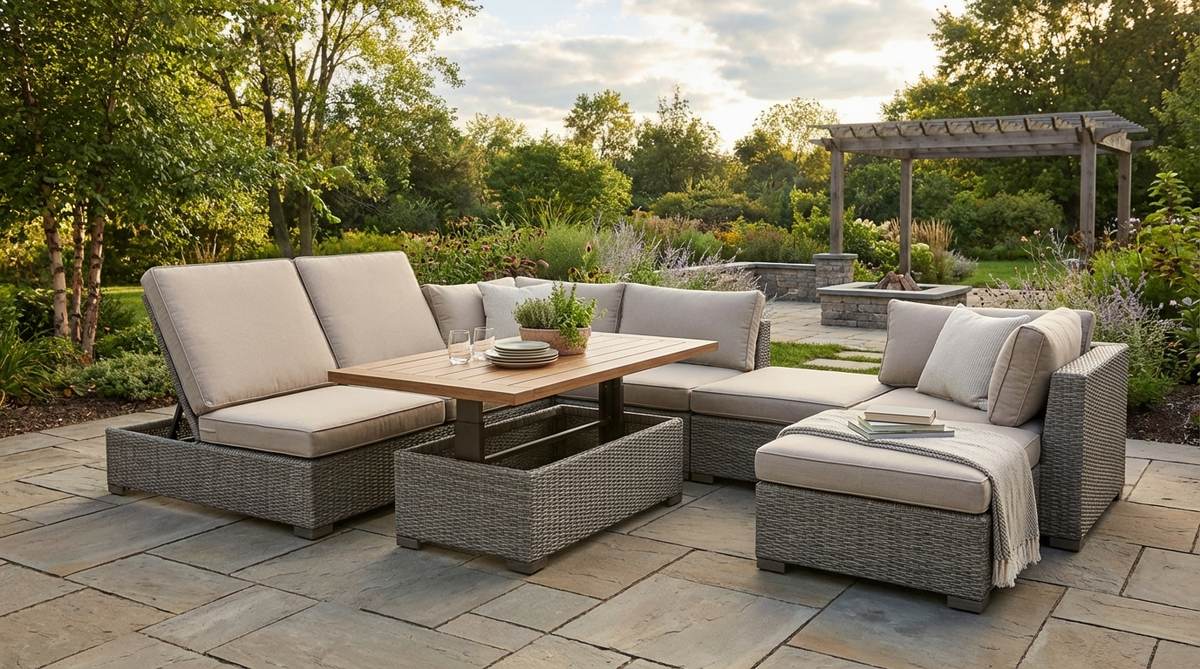
Select a sectional sofa system with adjustable backs that convert from reclined lounge position to upright dining posture. Pair with a height-adjustable coffee table that rises from 18 to 30 inches for meal service.
The convertible configuration eliminates the need for separate dining and lounge furniture on space-limited patios. Transition between modes in under two minutes without moving heavy pieces.
Store dining cushions and table risers in a nearby deck box for quick access. This solution particularly benefits households alternating between casual family use and formal entertaining.
25. Rolling Bar Cart Service Station
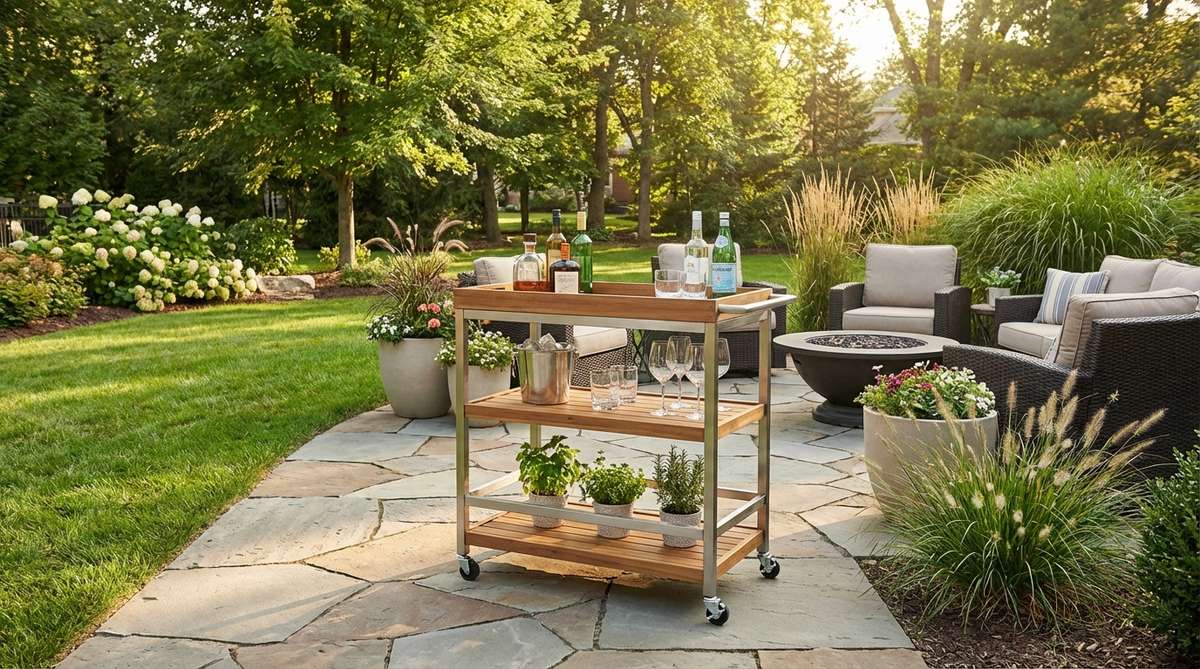
Position a weather-resistant bar cart on locking wheels as a mobile service hub that transitions between dining support and cocktail station. Stock the cart with dining essentials during meals, then reconfigure for beverage service during lounge hours.
The mobility allows repositioning based on sun, shade, or activity location. Choose three-tier carts with built-in bottle storage and stemware racks.
Park the cart against a wall or in a corner when not active to clear circulation space. The functional furniture piece reduces trips to the indoor kitchen by 50-70% during outdoor gatherings.
26. Fold-Down Wall-Table System
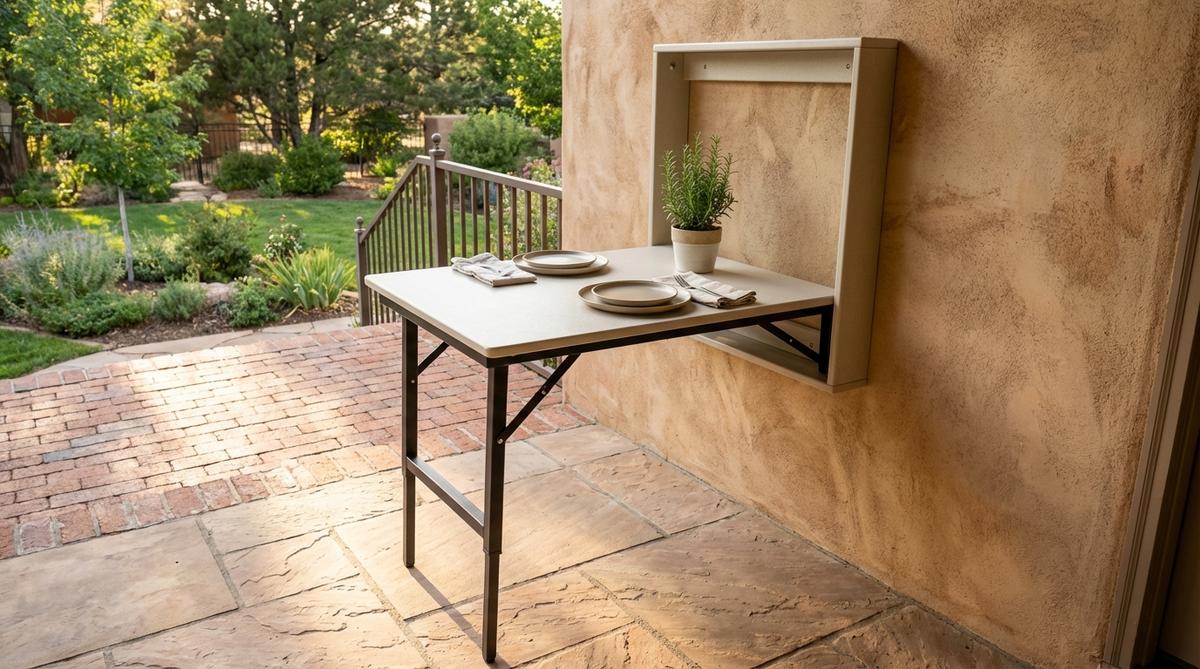
Install a wall-mounted fold-down table that collapses to 6 inches depth when not in use. Deploy the surface for dining or serving, then fold flat to reclaim square footage for lounge activities.
Build or purchase units with integrated support legs that swing down automatically when the table deploys. The compact solution works exceptionally well on narrow patios, balconies, or against house walls.
Choose marine-grade plywood or composite materials that withstand weather exposure year-round. Add a locking mechanism to prevent accidental collapse during use.
27. Nesting Furniture Clusters
Invest in nesting side tables, stools, and ottomans that stack or tuck together when not needed. Deploy extra surfaces during dining and entertaining, then consolidate to minimal footprint during daily relaxation.
Nesting pieces provide flexibility without requiring storage space outside the patio area. Select weather-resistant materials like powder-coated aluminum or all-weather wicker.
Position the consolidated nest in a corner or under a side table when collapsed. The adaptive furniture system supports gatherings ranging from 2 to 12+ guests without permanent spatial commitment.
28. Pavilion with Retractable Screens
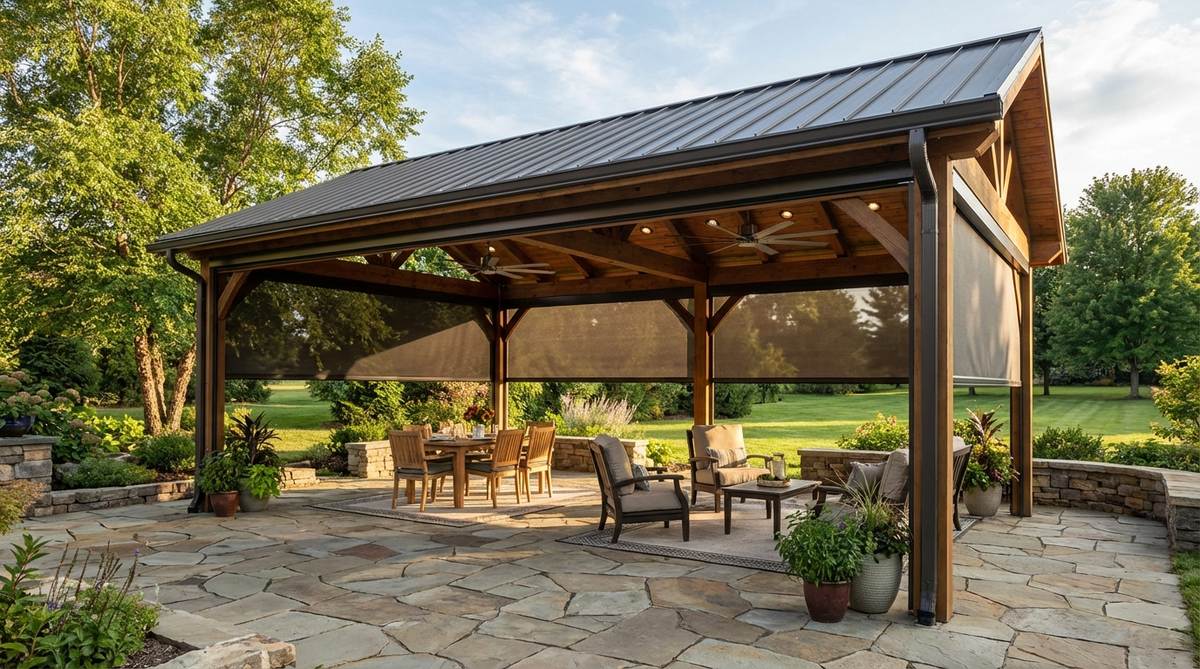
Build a solid-roof pavilion covering 50-80% of the patio with motorized retractable screens on three sides. Deploy screens for intimate dining with insect protection, then retract for open lounging and entertaining.
The enclosed mode creates a outdoor room suitable for dining during buggy evenings or windy conditions. Open configuration maintains visual connection to the landscape and cooling breezes.
Install screens with UV-resistant mesh that provides shade without blocking views entirely. The pavilion structure supports ceiling fans and lighting fixtures for enhanced comfort.
29. Multi-Tier Deck with Designated Zones
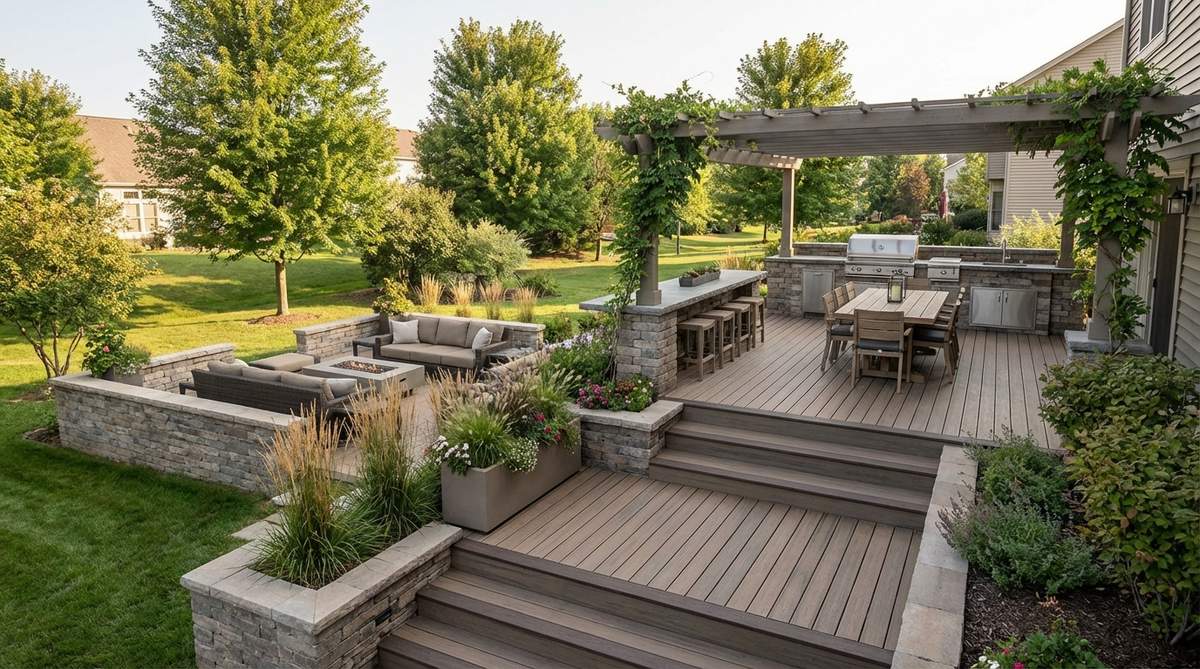
Construct the patio with two or three levels separated by 8-12 inch step transitions. Designate each tier for specific functionsupper level dining, mid-level transition or bar, lower level lounging.
The vertical separation creates natural spatial definition without physical dividers or furniture. Guests intuitively understand functional zones based on elevation changes.
Edge each tier with built-in planters or low walls to enhance safety and visual interest. The multi-level design works particularly well on sloped properties where grading creates natural opportunities.
30. Outdoor Kitchen Peninsula with Flip-Up Counter
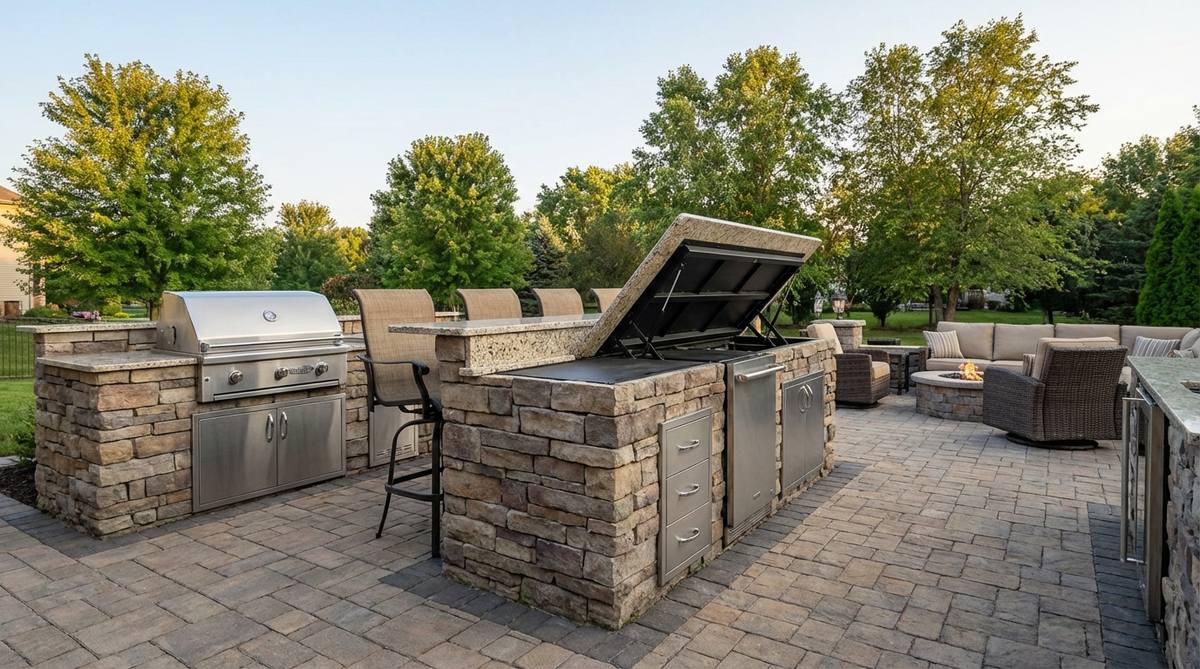
Design an outdoor kitchen with a peninsula counter featuring a flip-up extension that expands dining surface from 24 to 48 inches. The extended position accommodates 4-6 bar-height diners, while lowered position provides standard prep space.
Install the flip mechanism with hydraulic supports for easy one-person operation. The peninsula naturally separates cooking zone from lounge area while maintaining social connection.
Finish the flip-up surface with the same material as the main counter for seamless visual integration. This design concentrates three functions—cooking, serving, and dining—in one efficient footprint.
Architectural Definition Strategies
Built structures and permanent landscape features create spatial definition more effectively than furniture alone. Architects employ these elements to establish hierarchy, circulation patterns, and functional boundaries within outdoor living spaces.
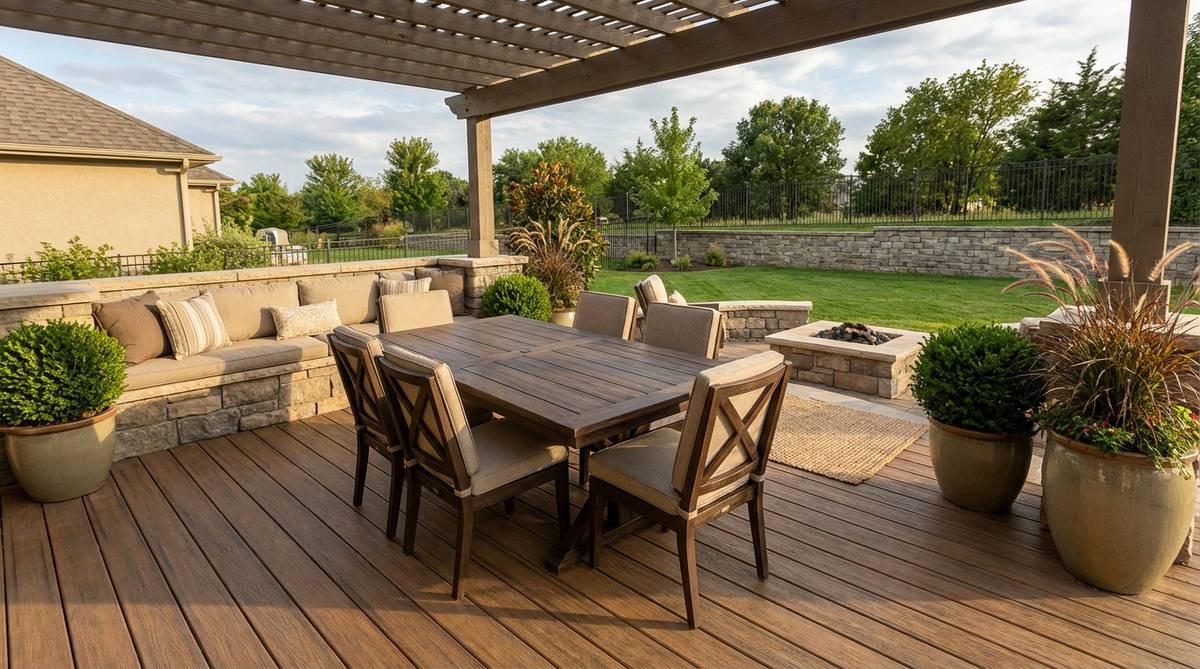
31. Privacy Wall with Integrated Seating
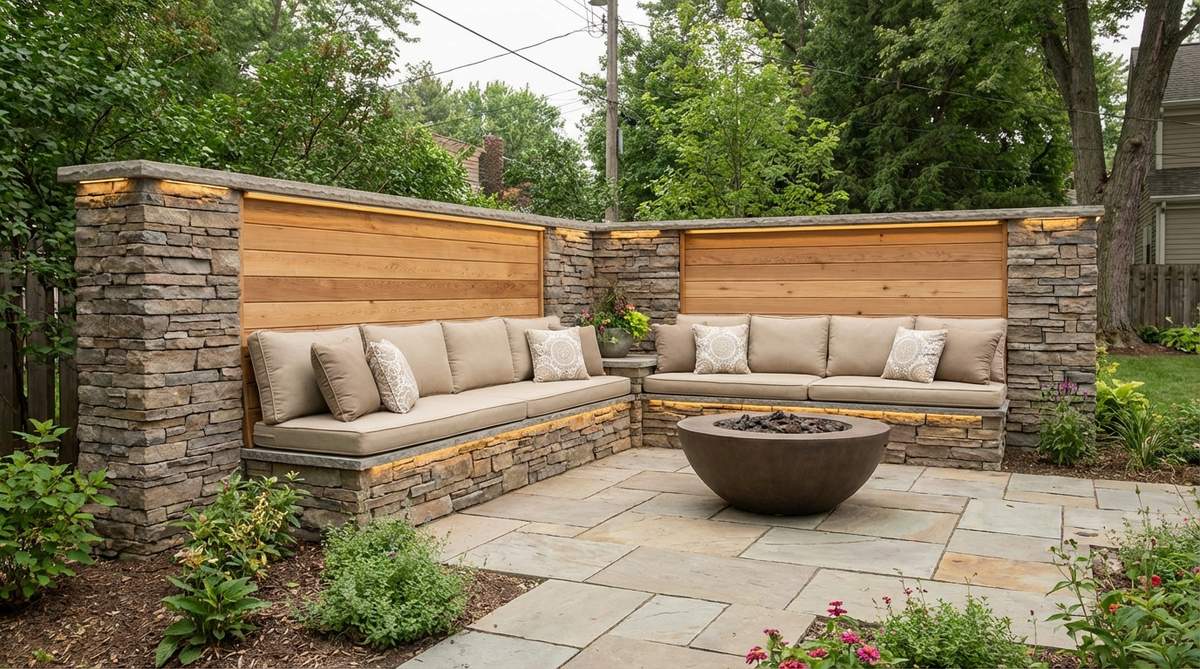
Construct a 42-inch privacy wall along one patio edge with the facing side designed as built-in bench seating. The dual-purpose structure provides boundary definition and additional guest seating simultaneously.
Cap the wall with thick cushions attached via Velcro or ties. The bench height allows seated adults to converse comfortably with standing guests during parties.
Integrate lighting into the wall structure for ambient evening illumination. The permanent installation increases property value while solving multiple functional needs.
32. Overhead Beam Grid for Zone Designation
Install a pergola with beam runs that align with functional zones belowbeams running north-south over dining, east-west over lounge. The directional change overhead subconsciously signals spatial transition.
Paint or stain beams in contrasting tones to enhance the visual separation between zones. The overhead architecture provides structure for shade sails, string lights, or climbing vines specific to each area’s needs.
The grid system creates a ceiling plane that defines outdoor rooms without enclosing walls. Add electrical runs through beam cavities for lighting and fan installation.
33. Living Wall Divider with Vertical Garden
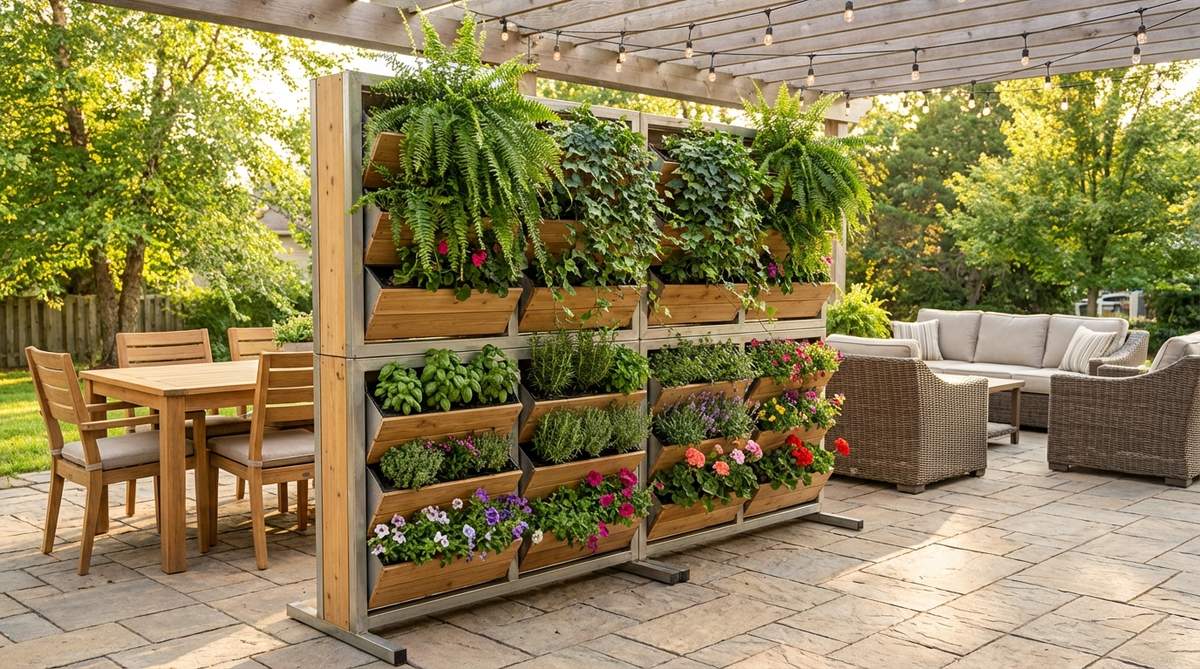
Install a freestanding vertical garden system measuring 6-8 feet tall and 8-12 feet wide as a living partition between dining and lounge zones. The planted screen provides visual separation while maintaining airflow.
Select trailing plants like ferns and vines for the upper sections, with compact herbs and flowers in middle and lower pockets. The green wall requires irrigation connections but creates dramatic impact.
Position the living divider perpendicular to the main patio axis to maximize spatial division. The vertical garden reduces ambient temperature by 5-10 degrees in the immediate vicinity through transpiration.
34. Sunken Lounge Pit with Surrounding Grade
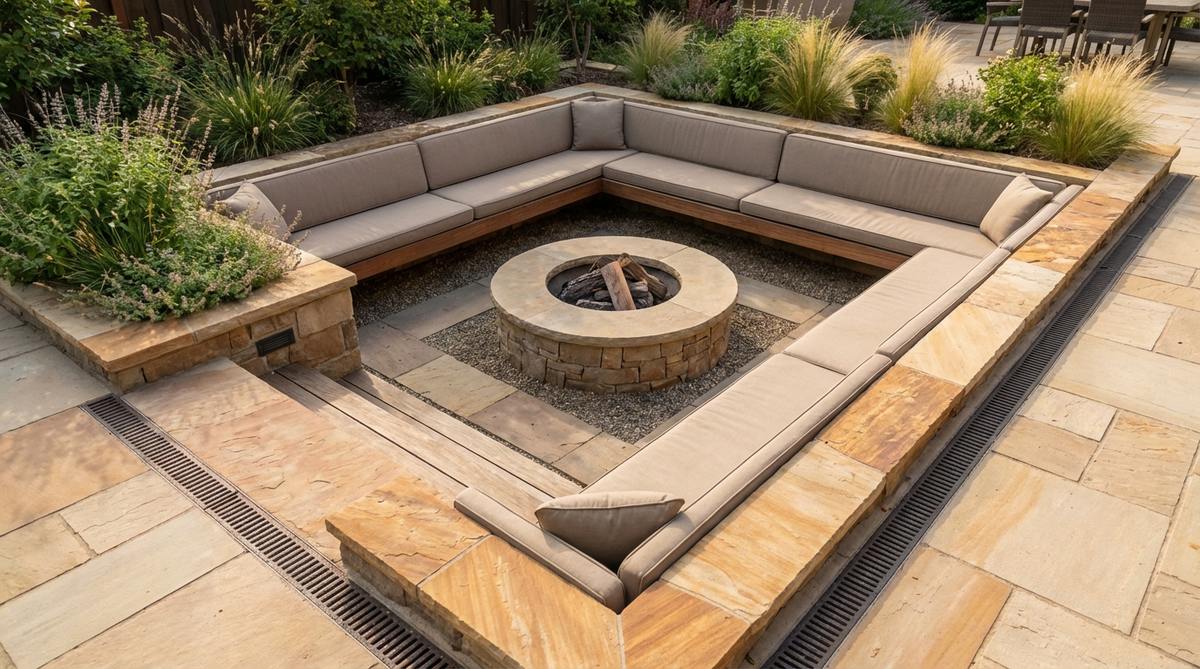
Excavate the lounge zone 18-24 inches below the main patio grade, creating a conversation pit with built-in perimeter seating. The lowered position provides psychological coziness and wind protection.
Edge the pit with the same paving material as the main patio to maintain visual cohesion. Install the recessed area with excellent drainage to prevent water pooling during rain events.
The elevation change naturally separates lounging from active circulation areas. Add a fire pit in the center of the sunken space for a resort-style focal point.
35. Colonnade Walkway Defining Circulation
Construct a series of 4-6 columns connected by overhead beams, creating a covered walkway that separates active use zones from circulation paths. The colonnade establishes a clear traffic route while providing architectural drama.
Space columns 8-10 feet apart to frame views while maintaining structural integrity. The covered corridor protects guests moving between indoor and outdoor spaces during light rain.
Train climbing roses or wisteria on the columns for seasonal color and fragrance. The architectural element increases perceived property scale and sophistication.
36. Water Feature Boundary with Linear Fountain
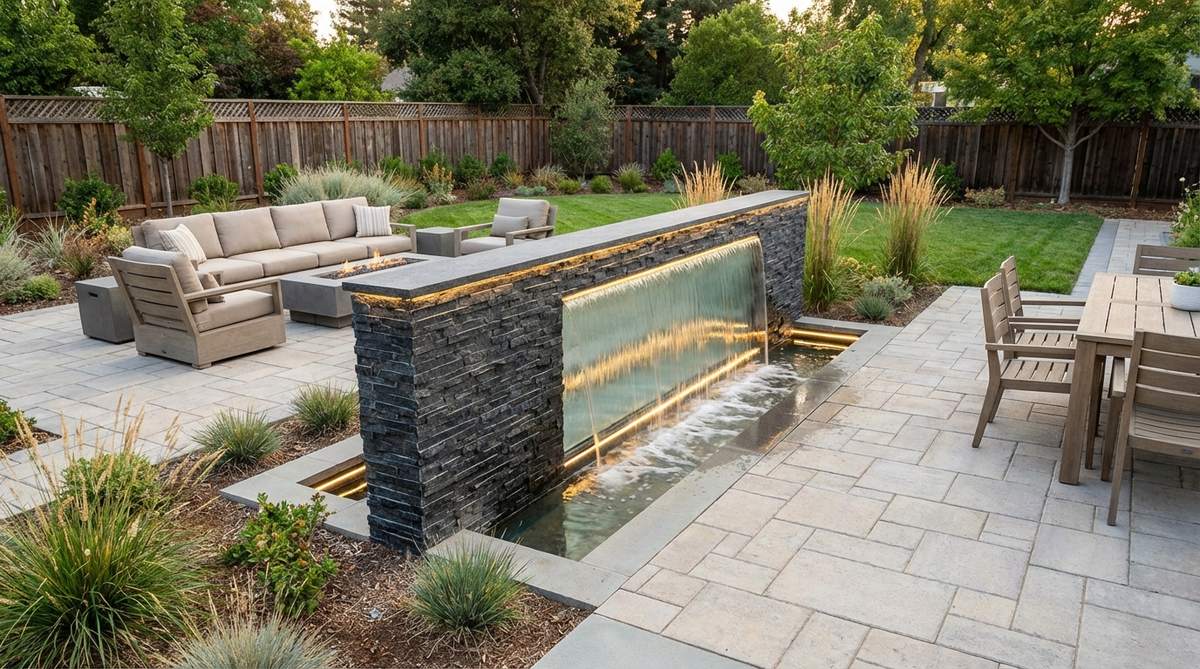
Install a linear fountain or water wall measuring 8-12 feet long as a sensory divider between patio zones. The sound and movement create psychological separation without blocking views entirely.
Position the water feature perpendicular to the main view axis to avoid obstructing desirable sight lines. The fountain provides white noise that masks traffic sounds and neighboring conversations.
Integrate LED lighting within the water feature for evening ambiance. The moving water reduces perceived temperature by 3-5 degrees in the immediate area.
37. See-Through Fireplace as Dual Focal Point
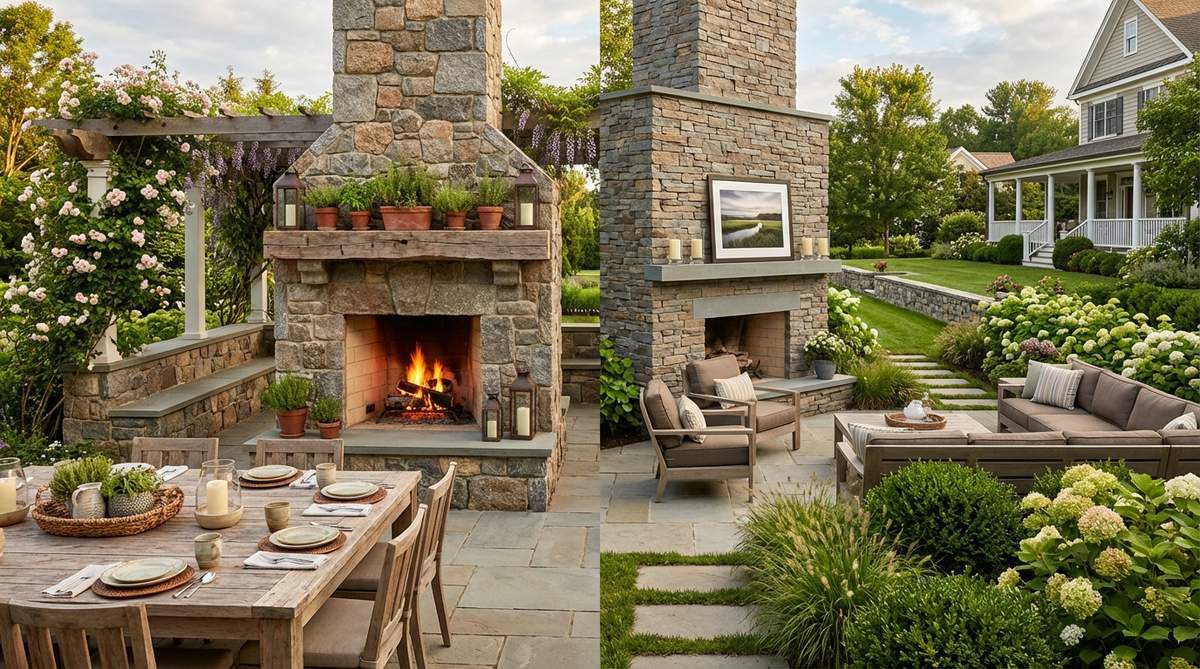
Build or install a double-sided fireplace that serves both dining and lounge zones from opposite sides. The shared feature creates connection while clearly marking the boundary between spaces.
Position the fireplace structure perpendicular to the main patio axis with adequate clearance on both sides. The dining side provides warmth during cool-weather meals while the lounge side serves as conversation centerpiece.
Select a design with different mantel treatments on each face to suit the distinct character of each zone. The fireplace becomes the primary focal point visible from anywhere on the patio.
Compact Patio Solutions
Small patios and balconies require strategic space planning where every element serves multiple purposes. Designers maximize functionality through vertical space utilization, furniture scaling, and flexible configurations.
38. Wall-Mounted Fold-Out Dining Ledge
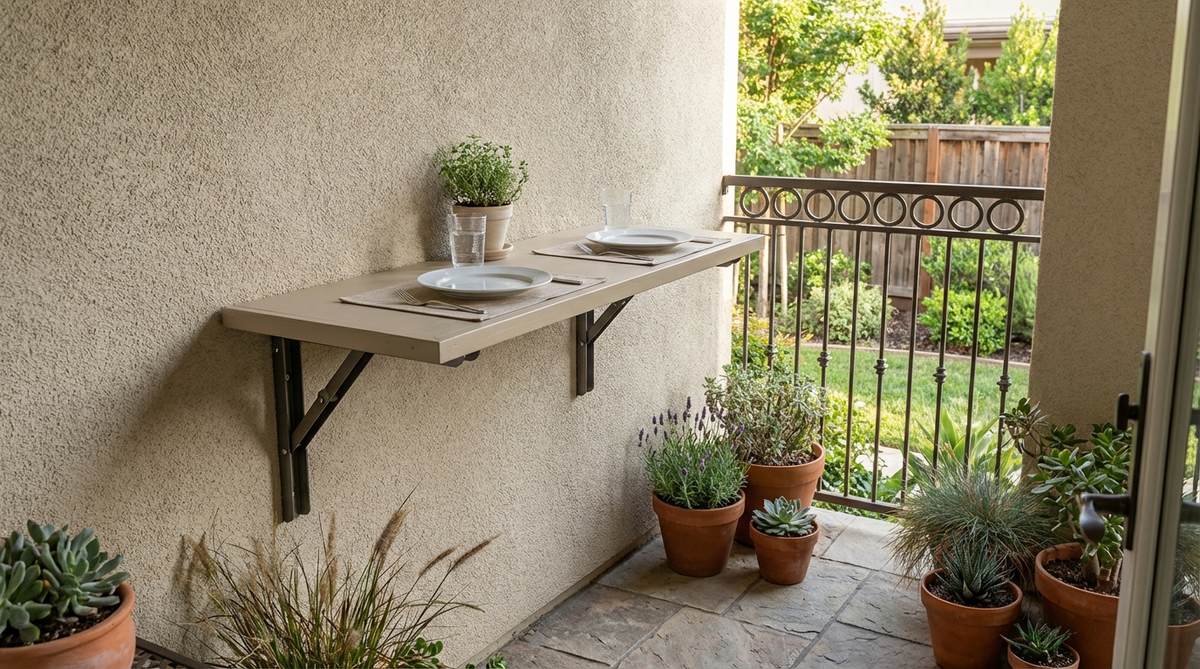
Attach a 36-inch fold-down shelf to the patio or house wall at 30-inch height, creating instant dining surface for 2-3 people. The ledge folds flat to 3 inches when not needed, restoring the full floor space for lounging.
Install with heavy-duty brackets rated for 150+ pounds to support dining use. Add fold-down legs at the outer edge for stability during meals.
Paint or finish the ledge to match the wall color so it reads as architectural detail rather than added furniture. This solution works exceptionally well on balconies under 80 square feet.
39. Vertical Garden Wall with Bench Base
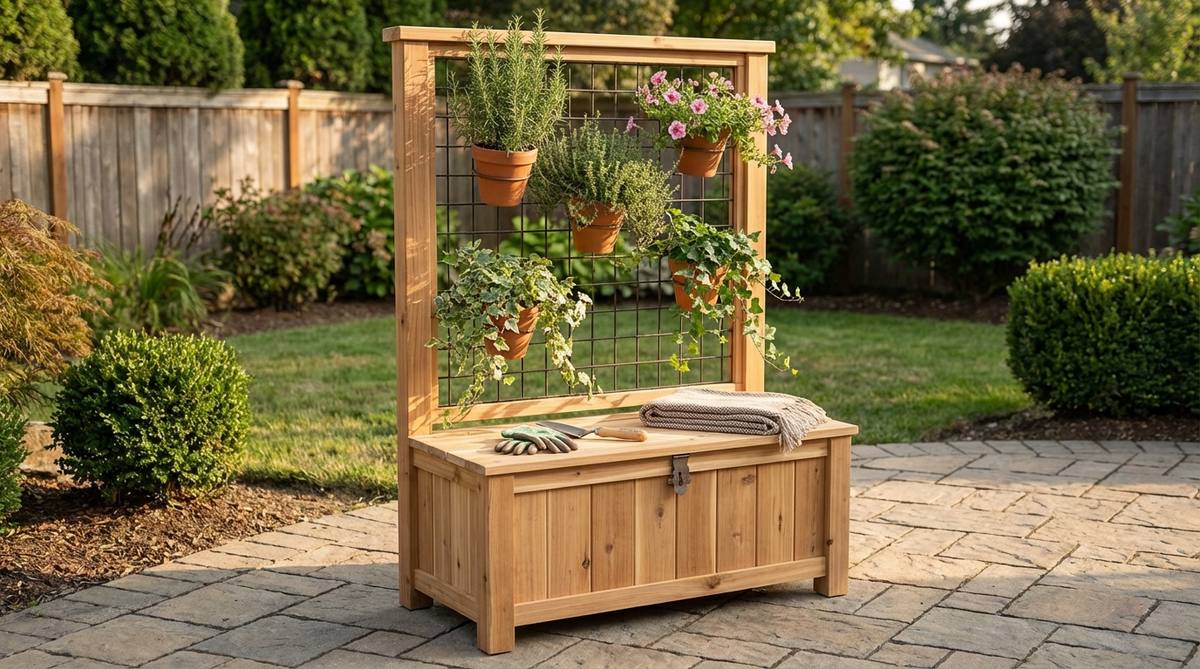
Build a freestanding unit combining a storage bench base (18 inches deep, 48 inches wide) topped with a vertical planter grid rising 6 feet. The dual-purpose structure provides seating, storage, and greenery in a 4-square-foot footprint.
Store cushions and outdoor dining supplies inside the bench compartment. Plant the vertical section with compact herbs and flowers that cascade down toward seating level.
Position the unit against the longest wall to maximize remaining floor space. The vertical emphasis draws the eye upward, making the small patio feel more spacious.
40. Corner Sectional with Lift-Top Storage
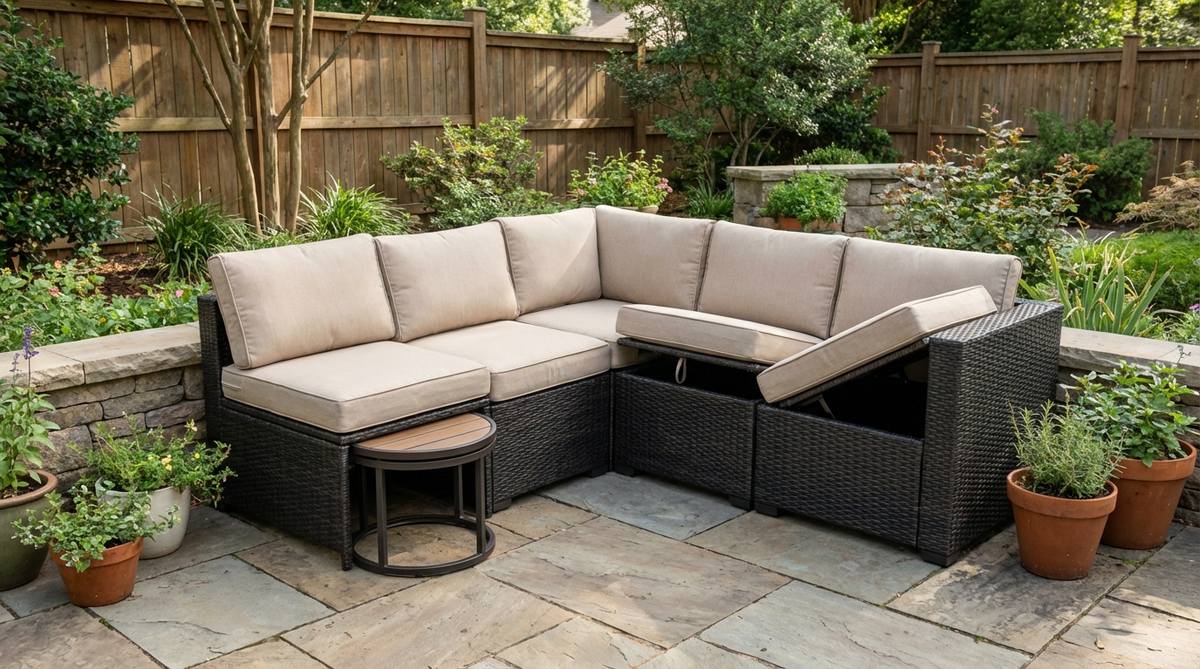
Install a compact L-shaped sectional measuring 50×50 inches in one corner with lift-top seats revealing weatherproof storage. The corner placement maximizes seating capacity (4-5 people) while keeping the center area clear.
Store dining accessories in the hidden compartments to eliminate the need for additional storage furniture. Add a small nesting table that slides under the sectional when not deployed for dining or drinks.
The L-configuration creates an intimate conversation zone while directing foot traffic naturally along the two open sides. Choose models with removable backs that convert to dining-height when needed.
41. Hanging Chair with Underneath Side Table
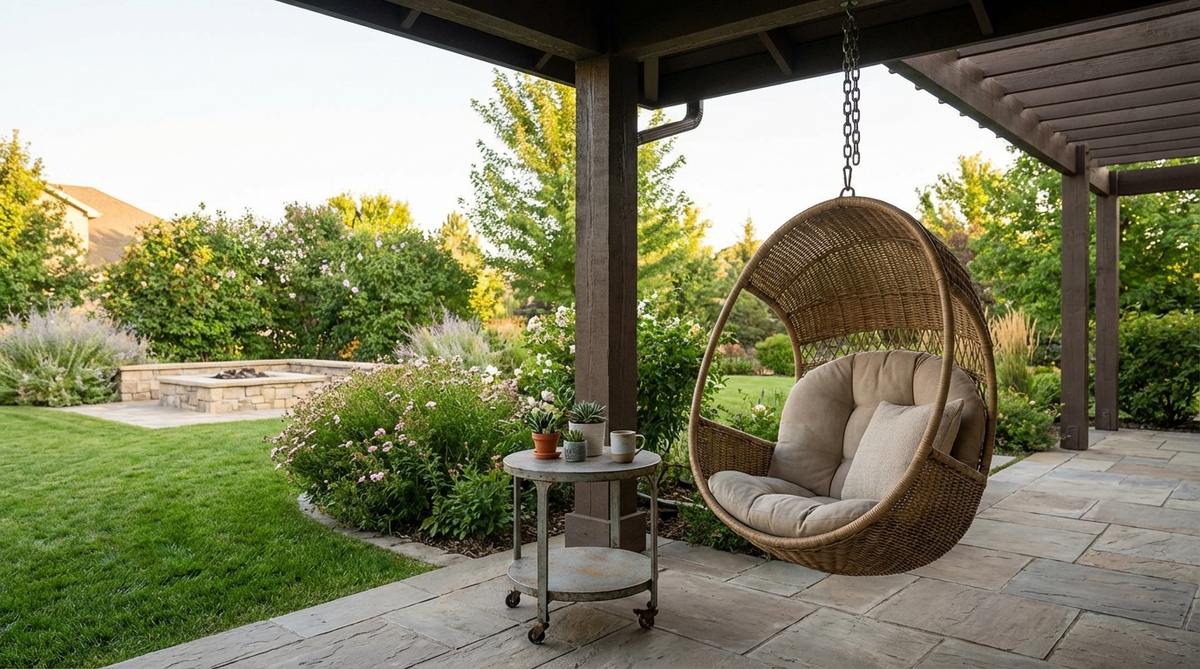
Suspend a single pod chair from a ceiling beam or dedicated stand, positioning a compact side table directly underneath. The hanging chair occupies zero floor space while providing prime lounge seating.
The table slides underneath the chair when both elements are in use, then pulls out when the chair is unoccupied. Select a side table on wheels for easy repositioning.
This vertical stacking approach accommodates both lounging and surface needs in an 18-24 inch footprint. The suspended furniture creates visual interest and conversation focus.
42. Rail-Mounted Folding Table for Balconies
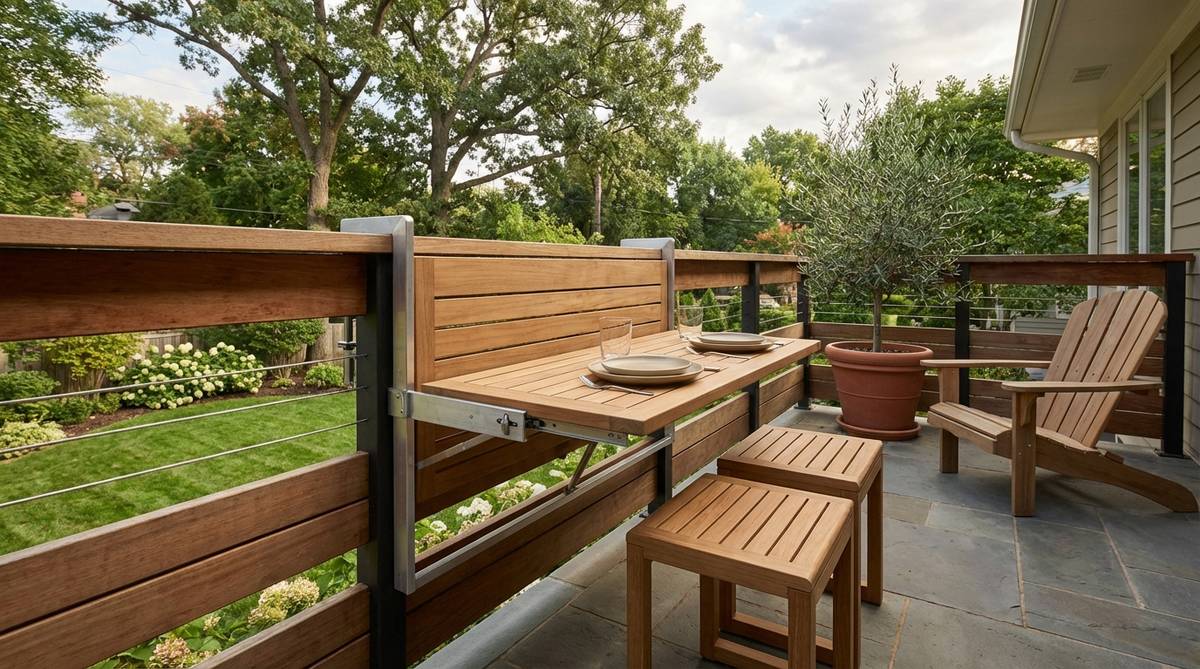
Clamp a specialized folding table to the balcony railing, creating a cantilevered dining surface for two that extends over the rail rather than consuming floor space. The table folds down vertically against the rail when not in use.
Pair with stackable stools that nest when not needed. The rail-mounted solution leaves the entire balcony floor clear for lounge chair placement during non-dining hours.
Select tables with locking mechanisms to prevent accidental folding during use. This design works exclusively on balconies with solid rails rated for lateral loads.
43. Ottoman Cluster as Modular Seating
Furnish the entire patio with 6-8 identical cube ottomans measuring 18×18 inches instead of traditional furniture. Configure cubes as individual seats, pushed together as sectional, or arranged as a low coffee table.
The modular approach allows complete reconfiguration based on activitysocial gathering, intimate dinner for two, or yoga practice. Stack and store half the ottomans when hosting smaller groups.
Choose weather-resistant ottomans with removable tops revealing storage for dining supplies. The uniform elements create visual cohesion while offering maximum functional flexibility.
Conclusion
Successful outdoor decor patio layouts balance spatial efficiency with aesthetic appeal, creating distinct zones for dining and lounging without sacrificing flow or functionality. Designers achieve this through strategic furniture placement, architectural elements, and adaptable systems that respond to different entertaining needs throughout seasons. Whether working with expansive properties or compact balconies, the principles of zone definition, traffic management, and focal point orientation remain constant. Implement these professional strategies to transform your outdoor space into a versatile environment that serves casual family dinners and sophisticated gatherings with equal effectiveness.
Frequently Asked Questions
What is the ideal space allocation between dining and lounge zones on a patio?
Professional designers typically allocate 40-45% of patio square footage to dining areas and 55-50% to lounge zones when both functions are equally important. This ratio accounts for the larger clearance requirements around dining tables (24-36 inches per side for chair pullout) compared to lounge seating. On patios under 200 square feet, consider convertible furniture that transforms between dining and lounge modes rather than dedicating permanent space to each function. The specific allocation should reflect your actual usage patternshouseholds that entertain weekly may increase dining allocation to 50%, while those preferring daily relaxation might reduce it to 30%.
How far should dining furniture be positioned from outdoor kitchens or grills?
Maintain a minimum of 6 feet between active cooking surfaces and the nearest dining chair back to prevent smoke interference and ensure guest safety. Professional landscape architects prefer 8-10 feet of separation, which allows heat and smoke to dissipate before reaching diners while providing adequate circulation space for the cook. Position dining tables perpendicular or at angles to prevailing wind direction so breezes carry smoke away from eating areas. On compact patios where 6-foot clearance is impossible, install the cooking station downwind from dining areas and consider adding a partial screen or tall planters to deflect smoke patterns.
What outdoor rug size works best under dining tables?
Select outdoor rugs extending 24-30 inches beyond all sides of the dining table to ensure chair legs remain on the rug surface even when pulled out for seating and standing. For a standard 72-inch rectangular table, this requires a rug measuring at least 10×12 feet. Round tables need circular or square rugs sized 36-48 inches larger than the table diameter. The rug defines the dining zone visually while protecting patio surfaces from furniture scuffing. Choose low-pile outdoor rugs (under 0.5 inches) to prevent tripping hazards and allow smooth chair movement. Avoid undersized rugs that create an unfinished appearance and cause chair legs to catch on rug edges.
Can fire pits function effectively between dining and lounge areas?
Fire features work well as shared focal points when positioned 8-12 feet from both dining and lounge furniture, though they serve each zone differently. Lounge seating should face the fire at 6-8 feet for optimal warmth and ambiance during conversation. Dining placement at 10-12 feet provides visual interest and light without exposing diners to excessive heat or smoke during meals. Select fire pits with adjustable flame controls to modulate heat output based on activity and season. Avoid positioning fire features directly upwind from dining areas where smoke will drift across the table. On smaller patios under 300 square feet, choose between a fire feature serving the lounge zone or additional dining/lounge space rather than compromising both functions.
What lighting strategy works best for dual-function patios?
Implement layered lighting with separate controls for each zone and functionbright task lighting (500-700 lumens) over dining tables operated independently from ambient lounge lighting (200-300 lumens) around seating areas. Install dimmable fixtures to adjust intensity based on activity—bright for dinner service, dimmed for after-meal conversation. Professional designers place dining pendants or chandeliers 30-36 inches above table surfaces to illuminate food and faces without glare. Lounge zones benefit from indirect sources like LED strips under seating, path lights along edges, and accent lighting on architectural features. Add 2-3 lighting layers per zone—overhead, accent, and path-level—creating flexibility for different times and moods while maintaining safety along circulation routes.