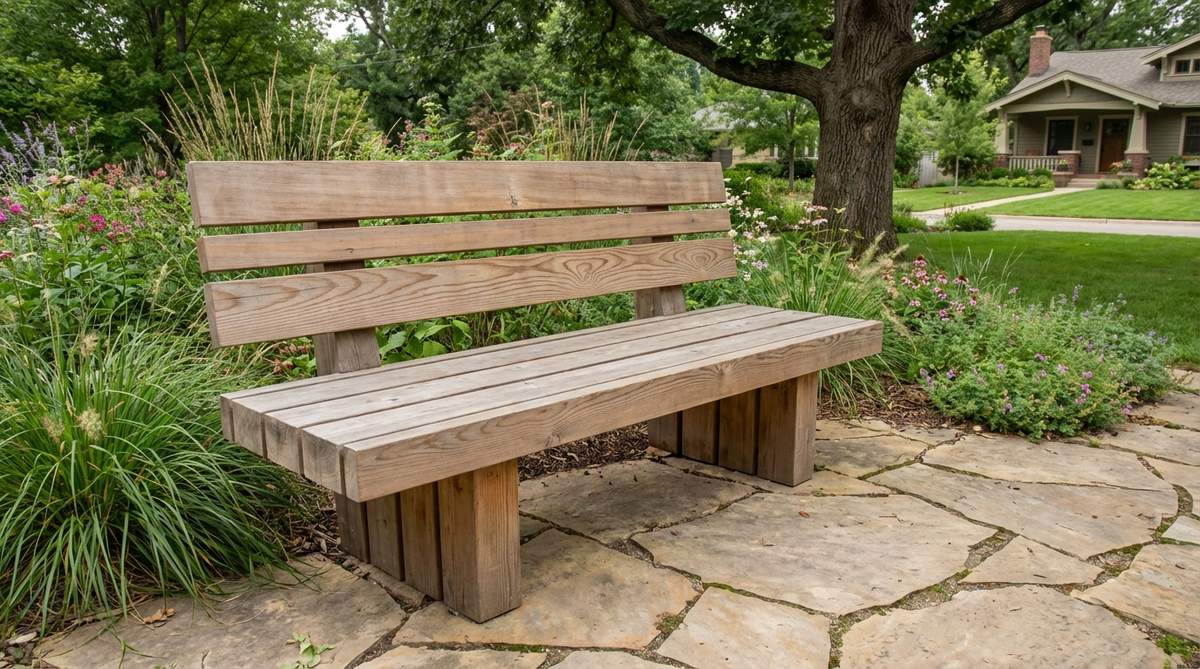
The combination of warm wood slats and industrial concrete creates a modern garden bench aesthetic that works across architectural styles, from minimalist courtyards to rustic outdoor spaces. These designs prioritize durability and low maintenance while delivering clean lines and contemporary appeal. Fresh Garden Ideas brings you expert-curated concepts that transform ordinary seating into landscape focal points.
Design SnapshotKey Principles
- Material Contrast: Wood grain warmth paired with concrete’s industrial texture creates visual balance
- Weather Resistance: Both materials withstand UV exposure and moisture when properly sealed
- Structural Integrity: Concrete legs provide stability; wood slats offer flex and comfort
- Dimensional Flexibility: Modular components allow custom lengths from 4 to 12 feet
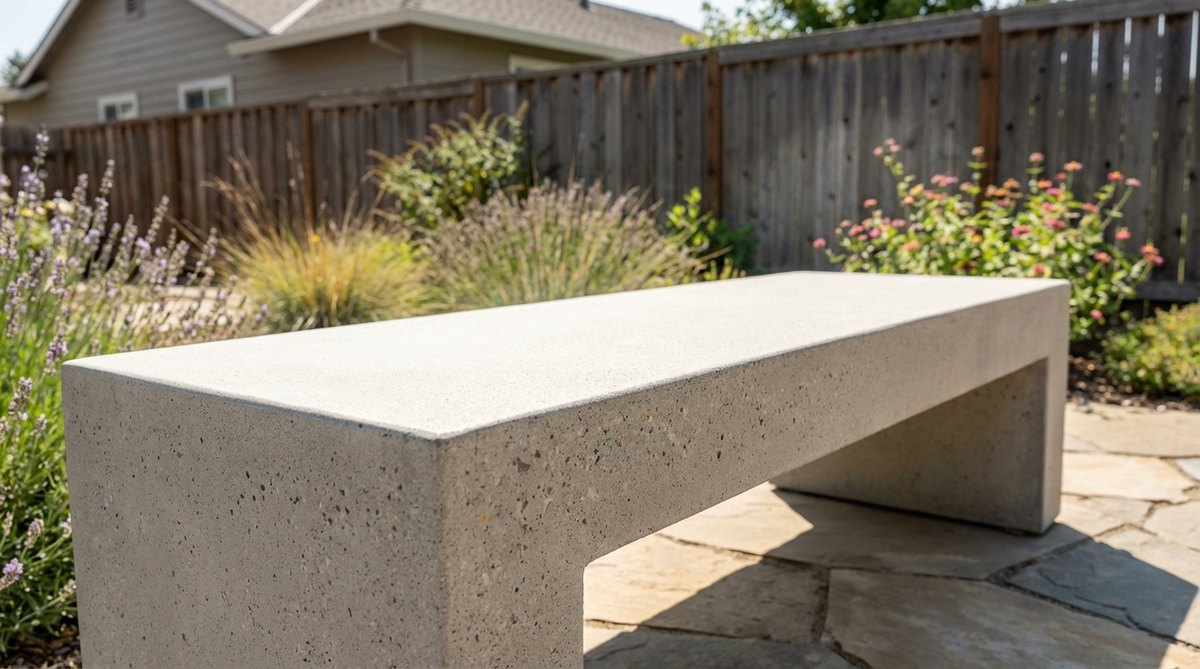
Minimalist FoundationsClean-Lined Concrete Base Designs
Square concrete legs paired with horizontal wood planks form the foundation of modern outdoor seating. These designs emphasize geometric simplicity and structural honesty.
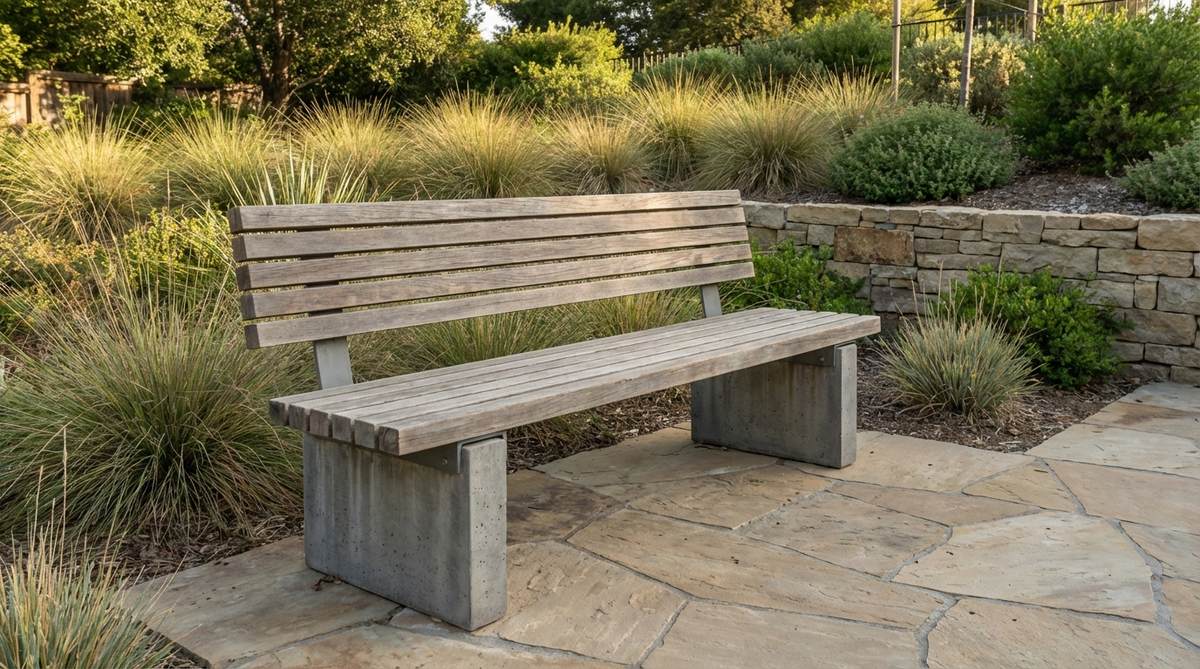
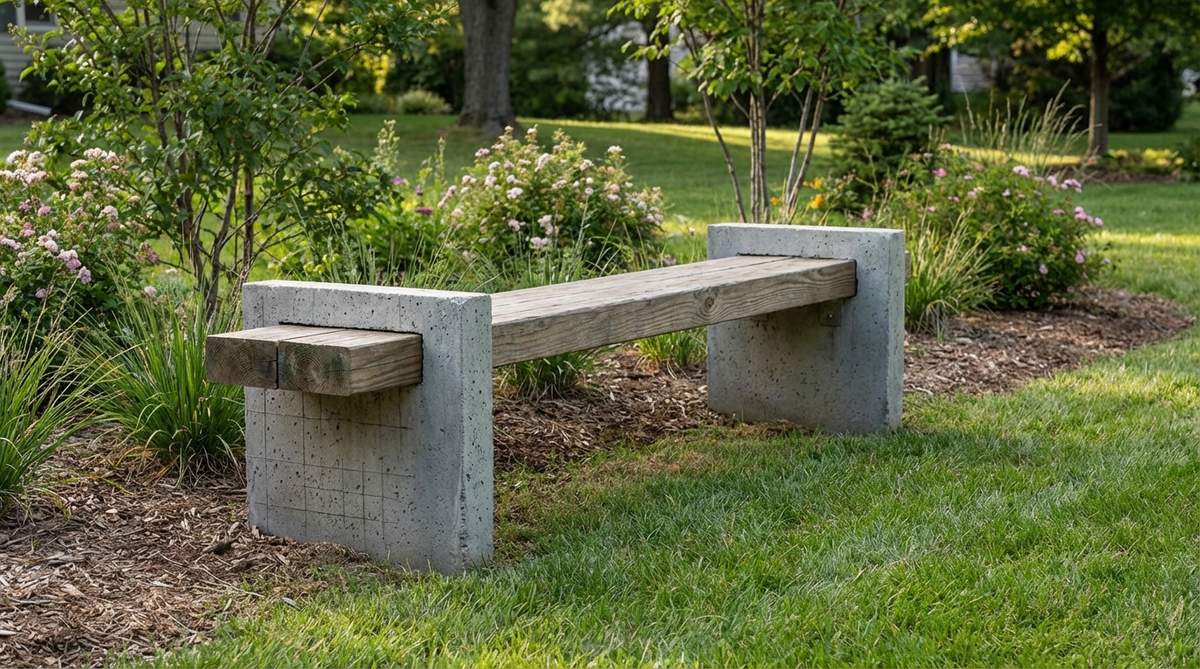
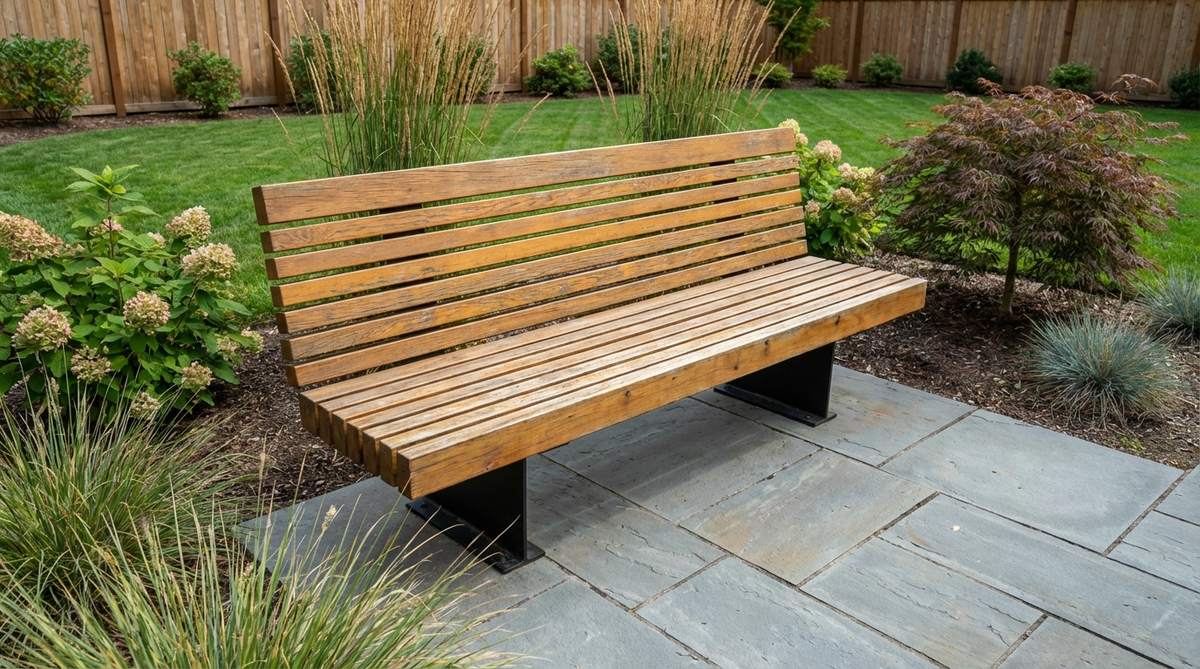
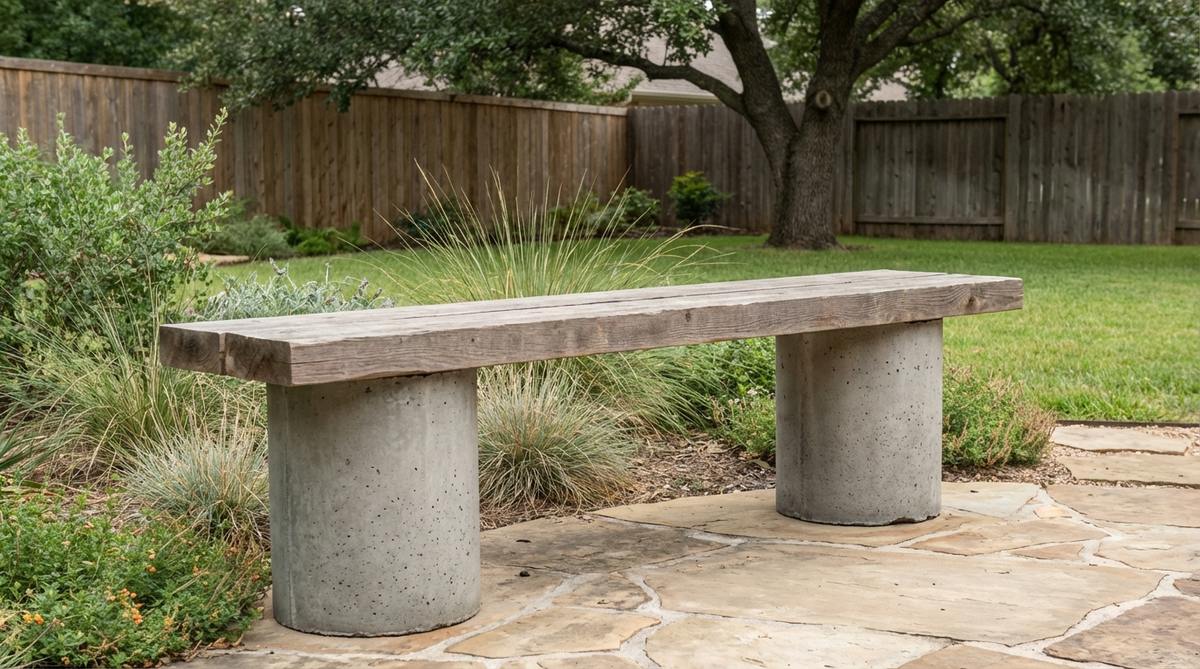
1. Classic Square Leg Cedar Top
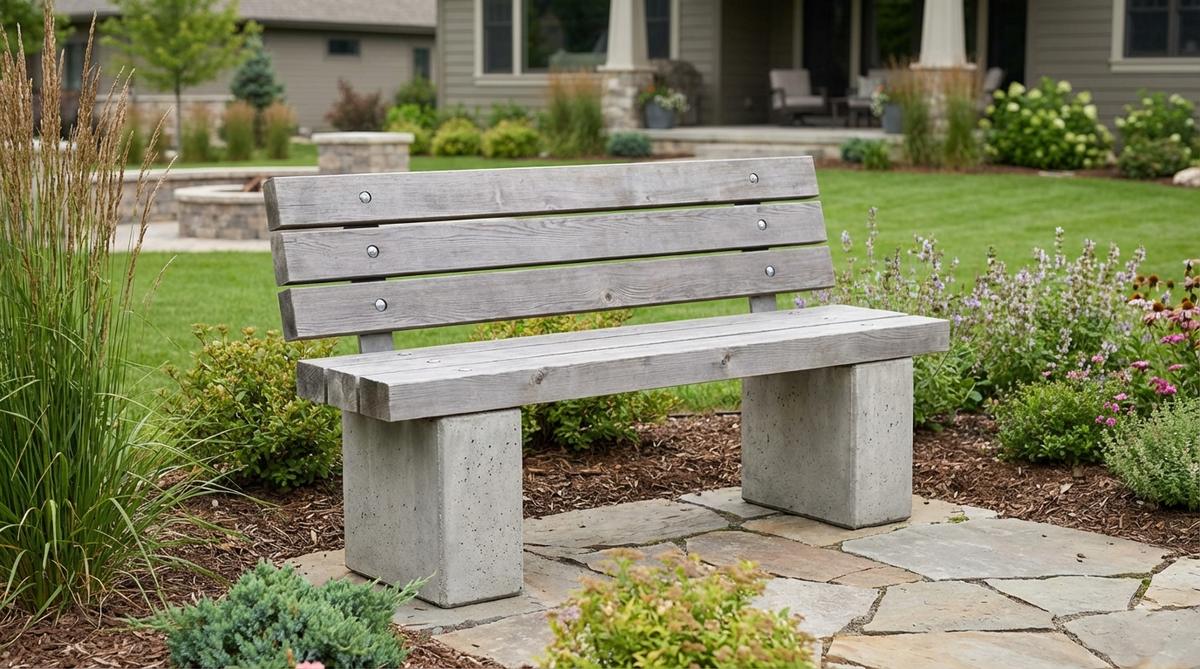
Two 10-inch square concrete columns support three 2×6 cedar planks in this timeless configuration. The concrete legs stand 16 inches high, positioning the seat at standard dining height.
Anchor bolts cast into the concrete tops attach directly to the wood planks using countersunk washers. A stretcher bolt between legs prevents lateral movement under load.
Red cedar resists rot naturally and weathers to silvery gray over 2-3 seasons. Apply penetrating oil annually to maintain rich amber tones.
2. Floating Cantilever Concrete Beam
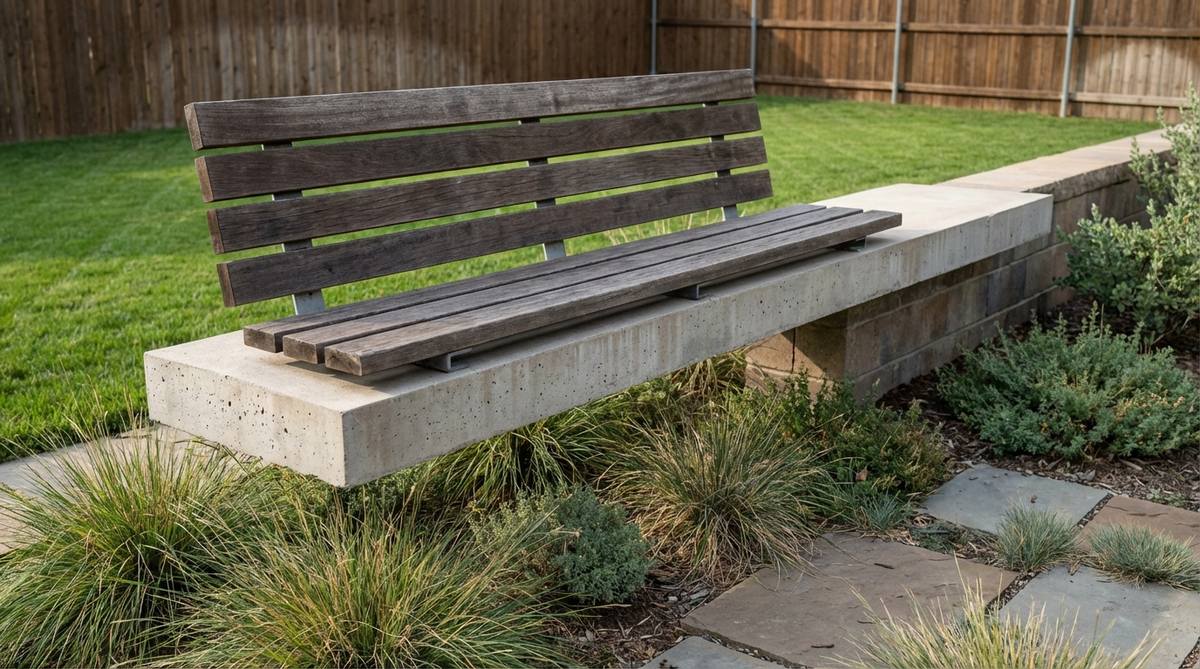
A single poured concrete beam extends 6 feet with wood slats mounted on steel brackets. The beam sits on two buried footings, creating a suspended appearance.
Wood slats span perpendicular to the beam with 1/2-inch gaps for drainage. Powder-coated steel L-brackets bolt through pre-drilled holes in the concrete.
This design works well along property lines where space behind the bench is limited. The cantilevered structure requires reinforced concrete with steel rebar.
3. Tapered Wedge Leg Construction
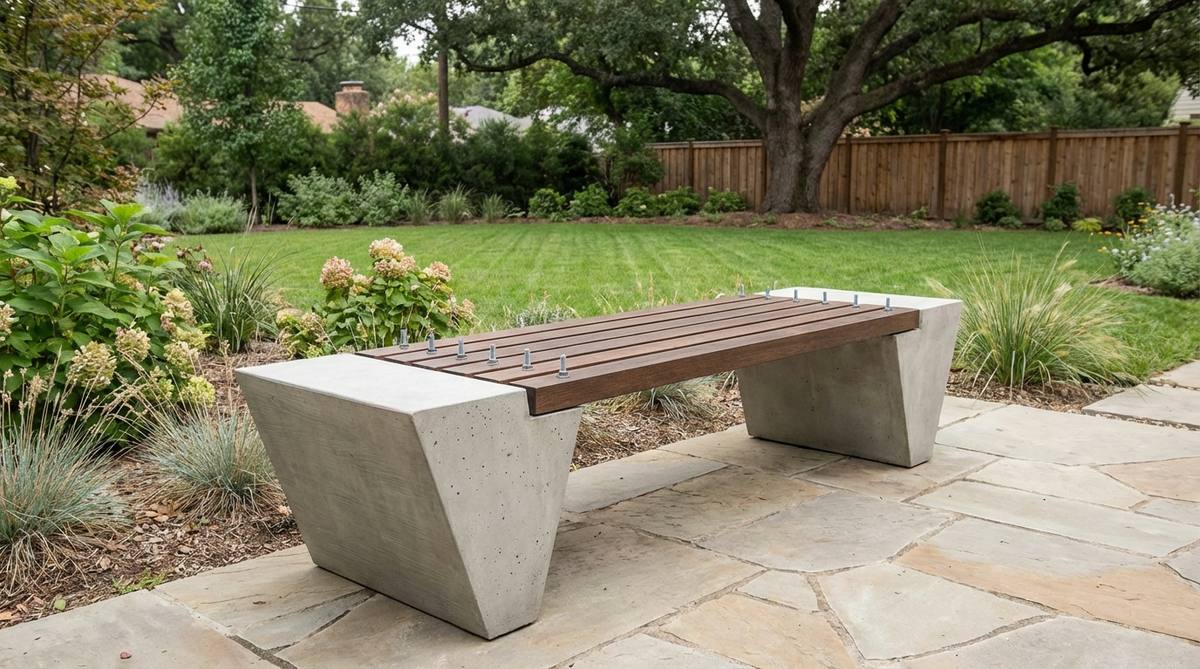
Concrete legs taper from 12 inches at the base to 8 inches at the top, reducing visual weight. Oak slats span across the narrowed tops, secured with embedded threaded rods.
The wedge angle follows a 15-degree slope, requiring custom plywood formwork. Release agent on form surfaces produces smooth concrete finishes.
Tapered designs require 20% more concrete than straight legs but gain stability from the wider base. Position on level ground to prevent tipping.
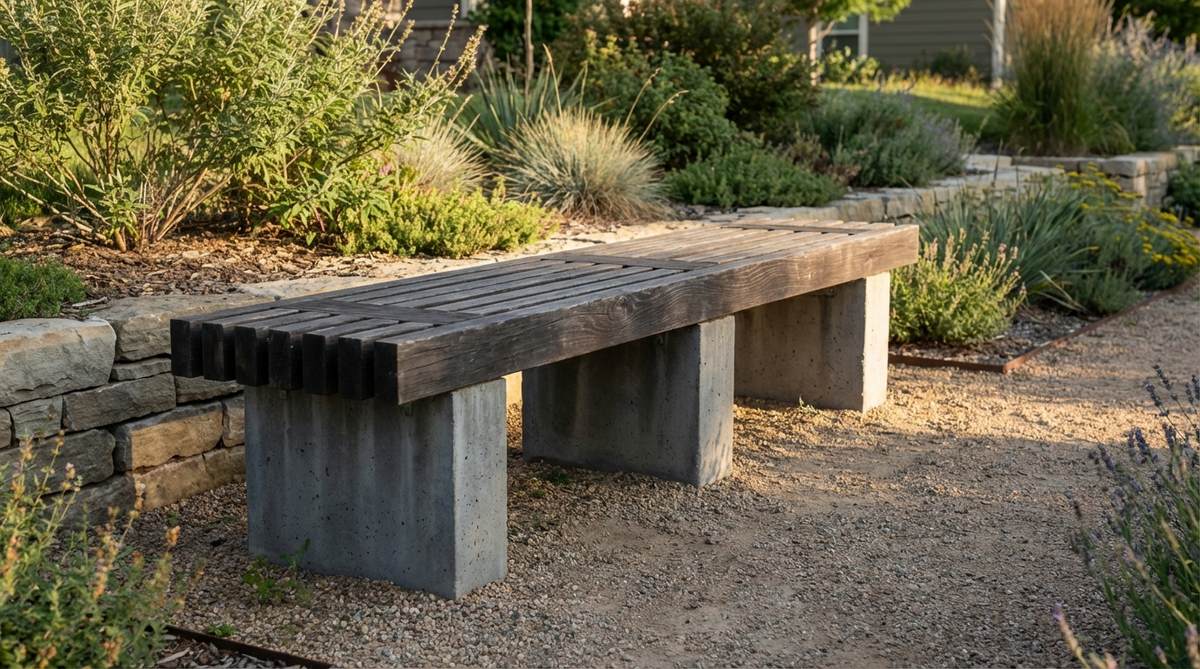
4. Ultra-Low Profile Slab Base
Two concrete slabs 18 inches tall and 3 inches thick create blade-like supports for the wood seat. The minimal thickness emphasizes horizontal lines.
Reinforcing steel mesh inside the slabs prevents cracking. Pressure-treated lumber attaches via masonry anchors drilled after concrete cures.
The low center of gravity makes this design stable on sloped terrain. Space slab supports 4 feet apart for 6-foot bench lengths.
5. Double Column Symmetrical Layout
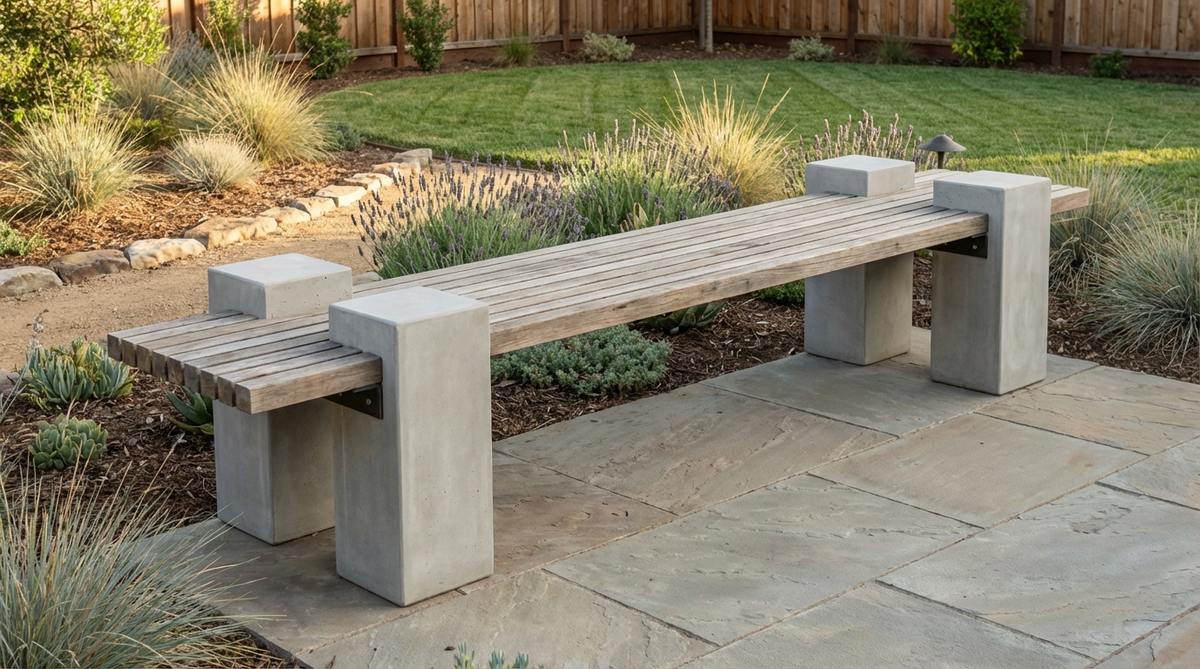
Four 8×8-inch concrete columns arranged in two pairs support a 10-foot span of wood planks. The paired columns create visual rhythm.
Each pair sits 18 inches apart, with 6 feet between pairs. Teak slats rest on continuous steel angle iron bolted across column tops.
Extended lengths require central support to prevent wood deflection. Add a fifth column at midspan for benches exceeding 10 feet.
Textured Concrete VariationsAdding Visual Depth
Surface treatments on concrete components introduce tactile interest while maintaining structural performance. These techniques range from simple board forming to advanced aggregate exposure.
6. Vertical Board Form Texture
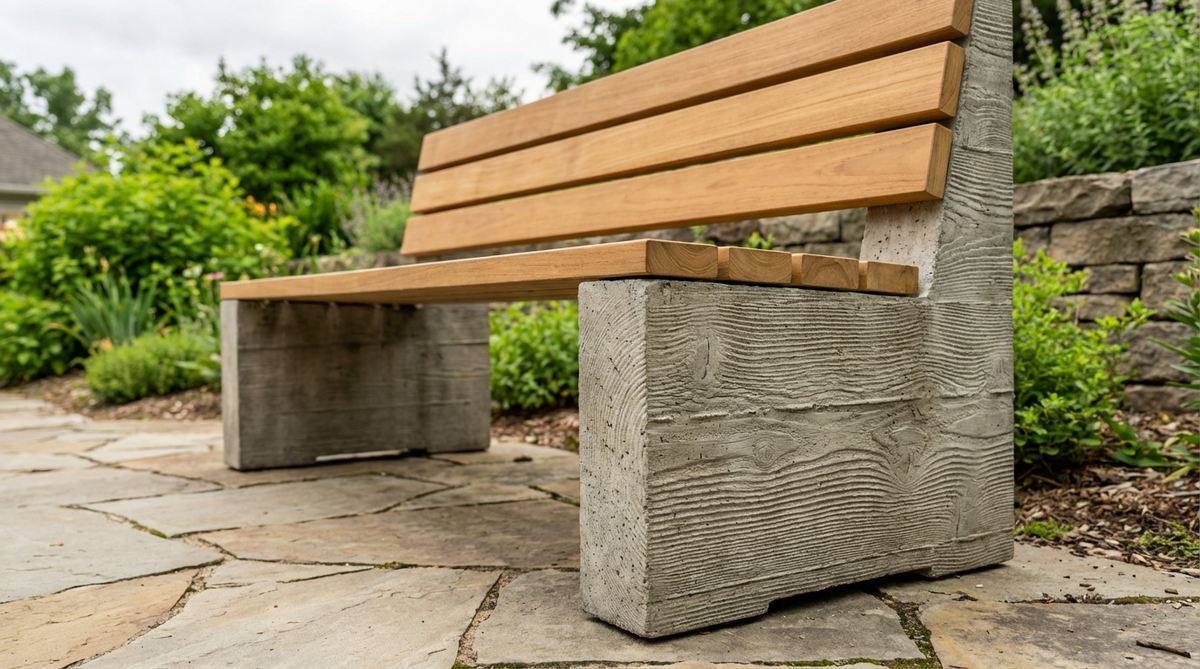
Rough-sawn lumber lining the concrete forms imprints wood grain patterns into the legs. The organic texture contrasts with smooth wood slats above.
Cedar or pine boards with prominent grain produce the clearest impressions. Secure form boards tightly to prevent concrete seepage at seams.
Leave forms in place for 48 hours before removal to allow concrete surfaces to harden. The vertical grain pattern emphasizes the leg height.
7. Exposed Aggregate Finish
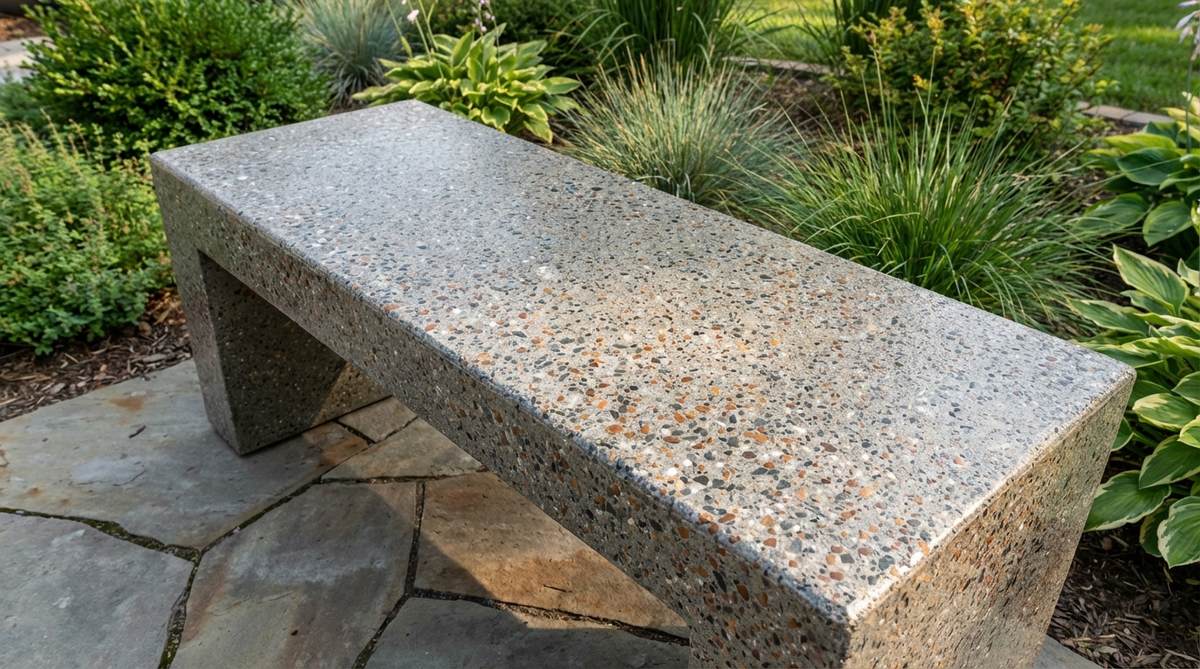
Washing concrete surfaces 6-8 hours after pouring reveals decorative stone aggregates. River rock or crushed granite adds color and sparkle.
Spray form release retardant on the inside surfaces before pouring. Use a pressure washer to remove the surface cement paste once partially set.
Match aggregate colors to your landscape palette—gray granite for cool tones, red rock for warm schemes. Seal exposed aggregate after 28-day cure.
8. Geometric Panel Relief Pattern
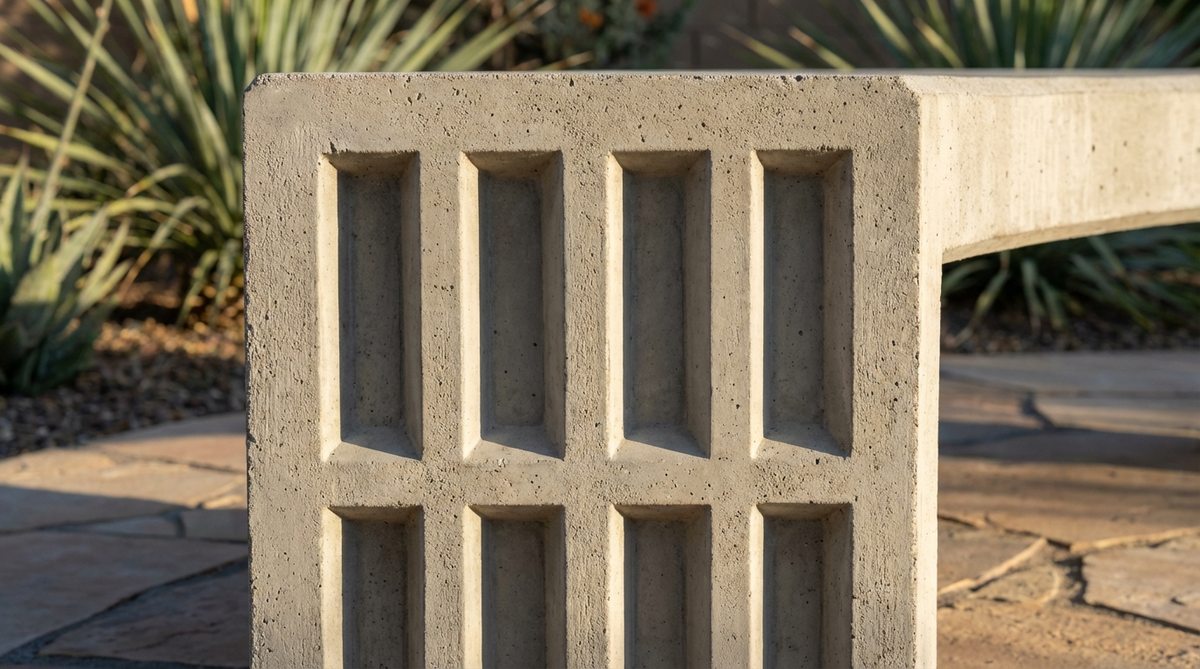
Foam insulation board cut into rectangles and adhered to form walls creates recessed panels in concrete legs. The dimensional pattern catches shadows throughout the day.
Arrange 4×8-inch foam panels in a grid pattern with 1-inch reveals. Spray adhesive holds foam temporarily during pour.
Peel foam away carefully during form removal to preserve crisp edges. This technique adds architectural detail without structural compromise.
9. Smooth Trowel Polished Surface
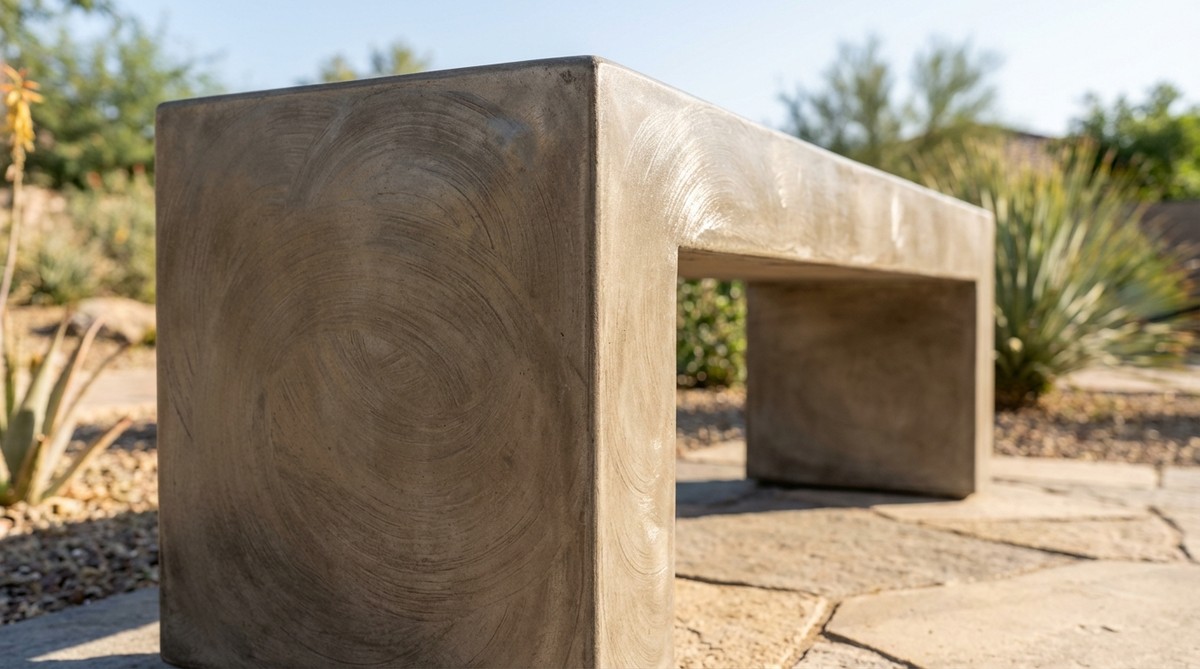
Steel-troweled concrete legs achieve a near-polished finish when worked in multiple passes. The refined surface complements contemporary landscapes.
Trowel in circular motions once the surface water disappears, repeating every 30 minutes. Apply concrete densifier after curing to enhance sheen.
Polished concrete shows imperfections clearly—carefully mix concrete to consistent color. Use high-quality formwork without gaps or warping.
10. Sandblasted Matte Texture
Mechanical sandblasting after the 28-day cure creates uniform matte surfaces. The treatment removes the cement film layer, exposing fine aggregates.
Sandblasting equipment requires compressor capacity above 5 CFM. Work in consistent passes to avoid creating low spots.
The matte finish hides minor surface flaws and reduces glare in full-sun locations. Coordinate with local concrete finishing contractors for best results.
Wood Slat ConfigurationsPattern and Proportion
The arrangement, spacing, and dimensions of wood slats determine both visual rhythm and seating comfort. Strategic planning prevents weak points and optimizes material use.
11. Wide Plank Minimal Joinery
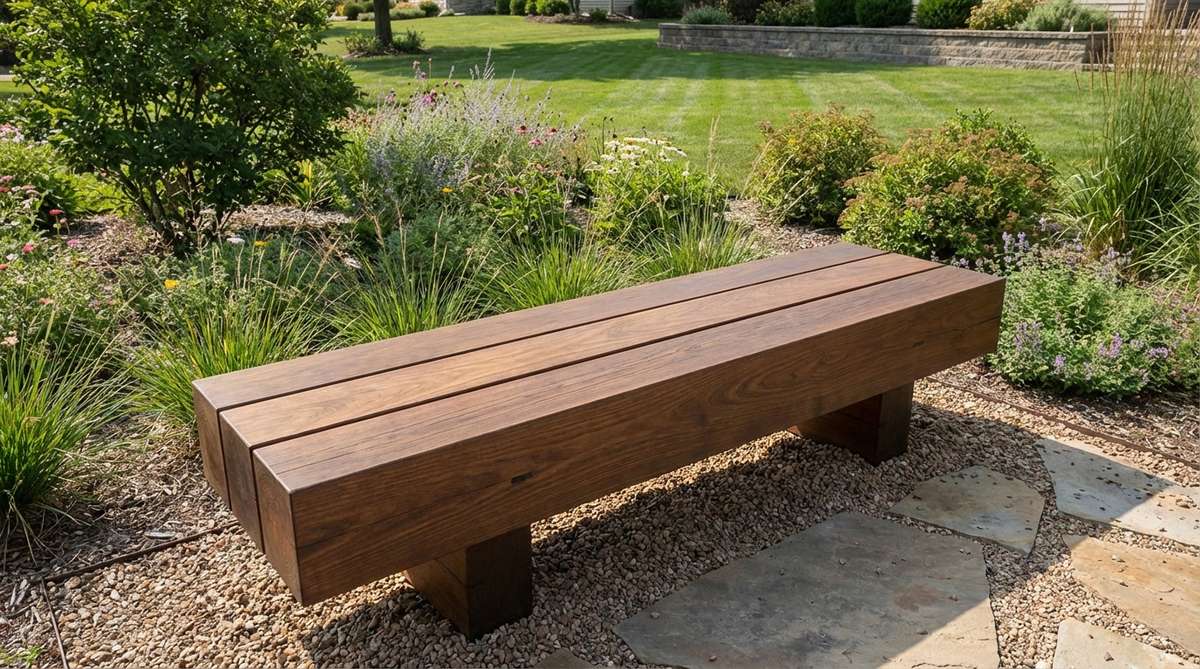
Three 2×10 planks create a substantial seat with minimal joints. The wider boards reduce construction time and hardware count.
Space planks with 3/8-inch gaps using temporary spacers during installation. Wide planks require kiln-dried lumber to prevent excessive cupping.
This configuration works best with dense hardwoods like ipe or cumaru. Softer woods may split when drilled near edges with wide dimensions.
12. Narrow Slat Rhythmic Spacing
Five to seven 1×4 slats arranged with equal gaps create a classic park bench aesthetic. The repetitive pattern reads as lighter and more casual.
Maintain 1/2-inch spacing for drainage and ventilation. Use a jig to ensure consistent gaps across the seat length.
Narrower slats dry faster after rain and adapt better to wood movement. Secure each slat individually rather than edge-joining.
13. Alternating Width Composition
Mix 2×4 and 2×6 planks in an irregular pattern for visual interest. Vary the arrangement—wide-narrow-wide-narrow-wide—to break monotony.
Use the same wood species throughout to maintain color consistency. Orient planks with growth rings alternating up and down to counter warping.
This design allows efficient use of mixed lumber stock. Center the widest plank or position it at the back for ergonomic support.
14. Perpendicular Cross Slat Pattern
Wood slats run front-to-back instead of side-to-side, supported by three concrete legs. The orientation change creates unexpected visual lines.
This configuration requires slats spanning only 18-24 inches between supports. Use 2×4 lumber on edge for the needed rigidity.
Front-to-back slats shed water more effectively on gentle slopes. Position the bench with the slope running parallel to slat direction.
15. Chevron Angled Assembly
Wood pieces cut at 45-degree angles meet at the bench centerline, forming a V-pattern. The dynamic geometry suits contemporary settings.
Each piece requires precise miter cuts and doubled-up supports at the center joint. Use marine-grade construction adhesive in addition to fasteners.
This design consumes 30% more material due to angled cuts. Plan carefully to minimize waste and maintain structural integrity at mitered joints.
Integrated Landscape FeaturesMulti-Functional Concepts
Benches that incorporate planters, storage, or lighting become landscape focal points rather than mere seating. These designs require additional planning but deliver outsized impact.
16. Built-In Planter Box Ends
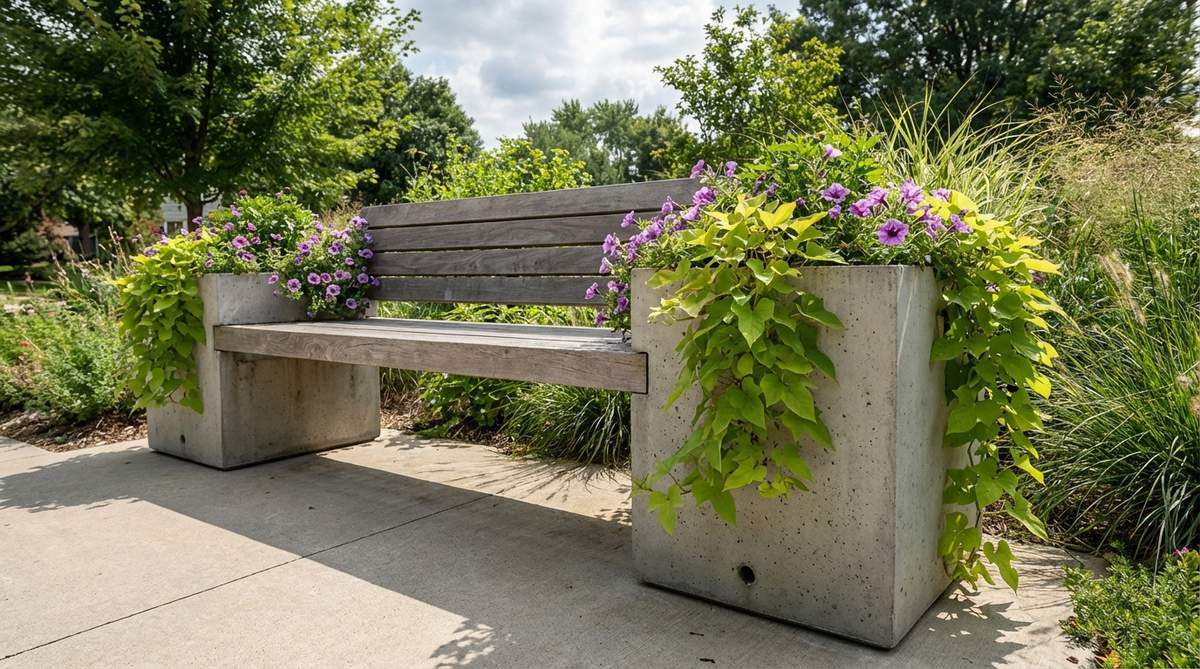
Concrete legs extend upward 24 inches past the seat, forming integrated planters. Wood slats span between the planted columns, surrounded by cascading foliage.
Include drainage holes in planter bottoms and line with landscape fabric. Fill with lightweight potting mix to reduce dead load on the structure.
Plant trailing varieties like sweet potato vine or petunias that spill over the seat edges. The living elements soften the bench’s hard materials.
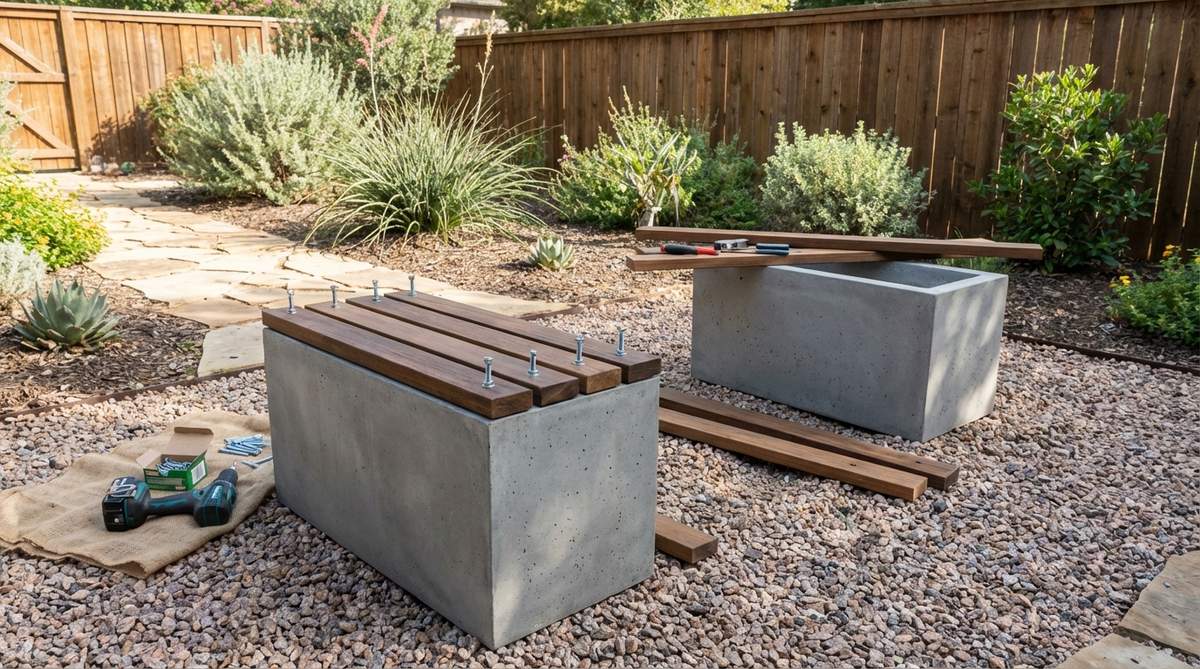
17. Underneath Storage Compartment
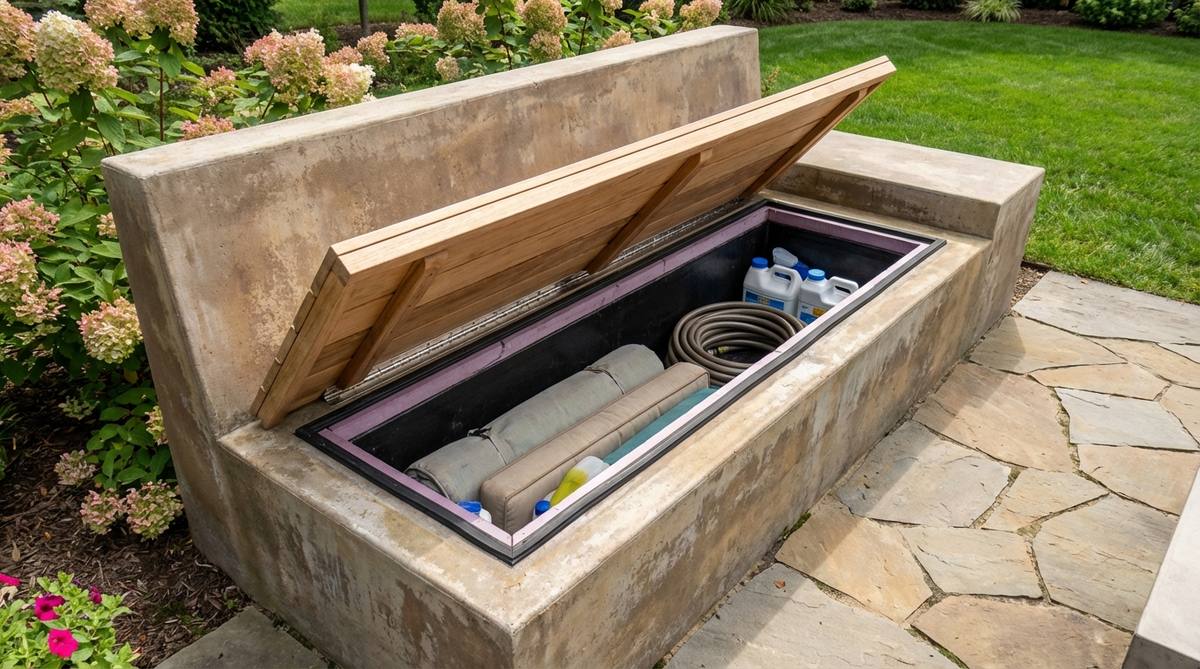
A hinged seat section lifts to reveal storage space within a hollow concrete base. The waterproof compartment holds cushions, garden tools, or pool supplies.
Frame the storage cavity during the concrete pour using rigid foam insulation. Install stainless steel piano hinges along the seat back edge.
Add a rubber gasket around the opening perimeter to keep contents dry. Size the opening for easy access but maintain structural support at bench ends.
18. Integrated LED Strip Lighting
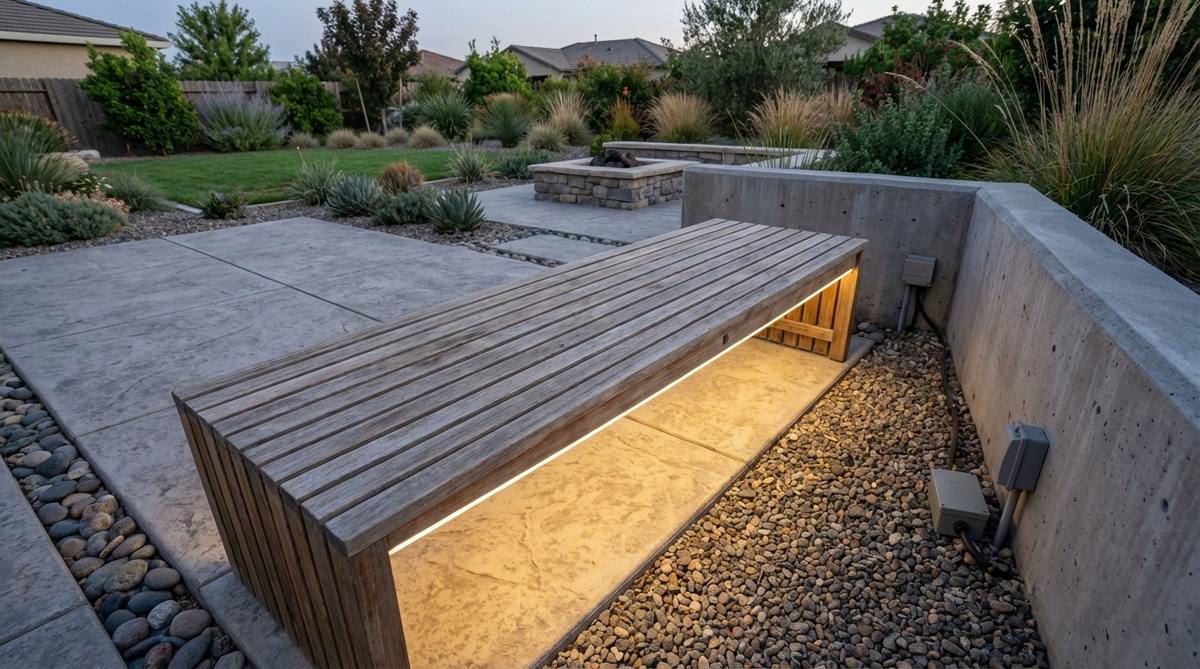
Low-voltage LED strips mount to the underside of wood slats, illuminating the ground below. The indirect lighting creates evening ambiance without glare.
Route electrical conduit through hollow concrete legs or bury cable in adjacent soil. Use outdoor-rated transformers and waterproof connectors.
Warm white LEDs complement wood tones; cool white suits modern concrete finishes. Install on a timer or photocell for automatic operation.
19. Retaining Wall Integrated Seating
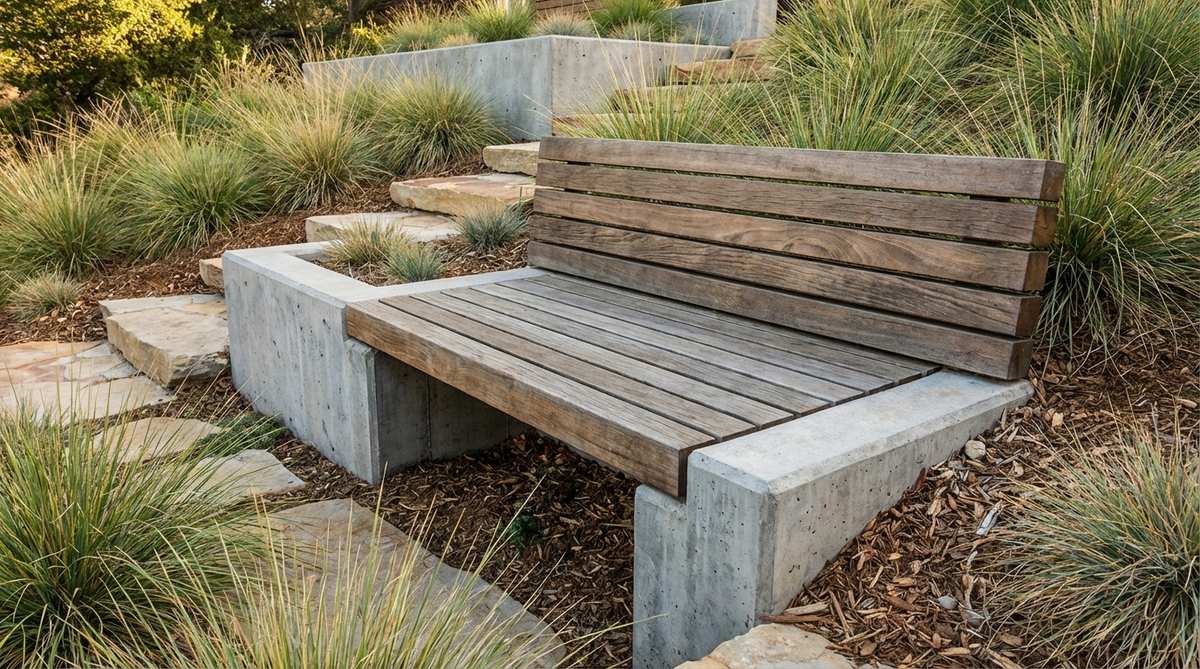
The bench becomes part of a terraced landscape, with the concrete leg forming a low retaining wall. Wood slats cap the wall, providing seating along grade changes.
Reinforce concrete legs heavily and provide proper drainage behind the wall section. The combined structure handles both seating loads and soil pressure.
This design works particularly well on sloped properties where terracing already exists. Extend the seat length to define entire patio edges.
20. Fire Feature Surround Bench
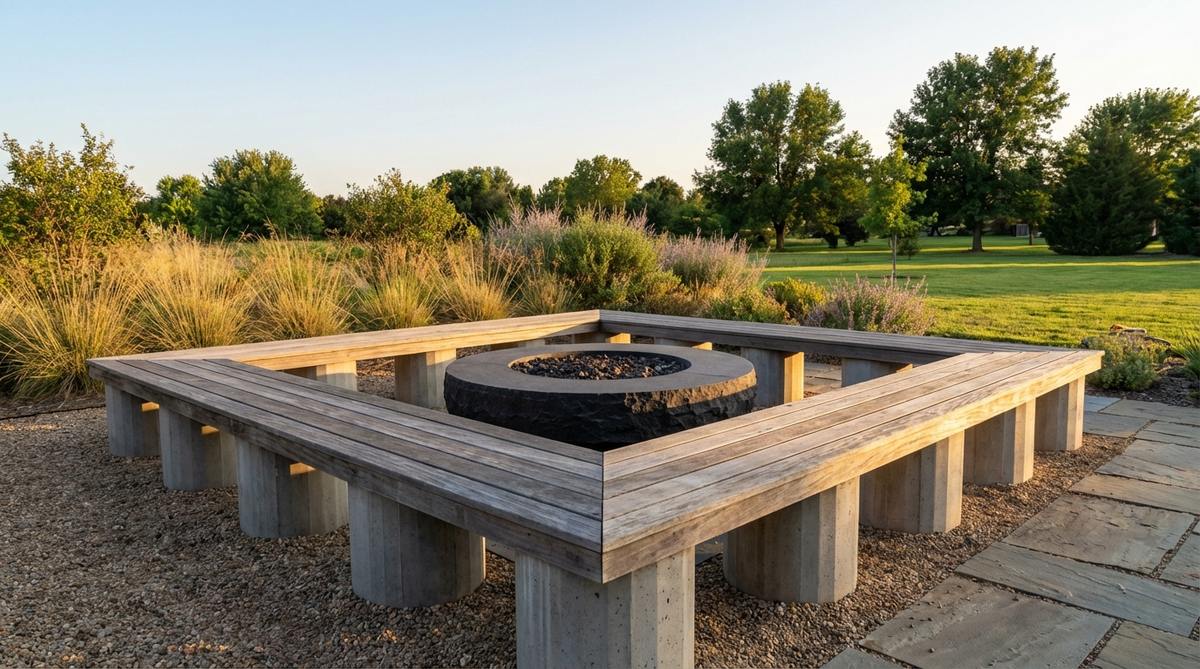
U-shaped or circular bench configurations wrap around fire pits or water features. Concrete legs positioned radially create conversation-friendly layouts.
Maintain 36-inch minimum clearance between seating and open flames. Use fire-resistant sealers on concrete and wood within the heat zone.
Curved arrangements require specialized forming techniques or multiple straight sections angled to approximate curves. The social seating encourages gatherings.
Accessible Construction Methods
Simplified techniques and readily available materials make these designs achievable for weekend builders. Focus on basic tools and forgiving construction tolerances.
21. Concrete Block Leg Assembly

Standard 8x8x16-inch concrete blocks stack to create instant legs without pouring forms. Wood slats attach to capping pieces secured with construction adhesive.
Stack blocks two or three high, filling cores with concrete or rebar for stability. Use landscape adhesive between courses to prevent shifting.
This approach eliminates formwork, mixing, and curing wait times. Paint or stucco blocks for a finished appearance matching your landscape style.
22. Bucket Mold Column Legs
Five-gallon plastic buckets serve as ready-made concrete forms. Cut the bottom out after curing to release cylindrical legs.
Fill buckets with concrete mixed to a stiff consistency. Insert anchor bolts before the top surface sets.
The 10-inch diameter columns provide adequate support for 6-foot benches. Paint the cured cylinders or leave natural for industrial aesthetic.
23. Precast Concrete Base Modification
Purchase ready-made concrete piers or deck blocks, then attach wood slats using masonry anchors. The no-pour approach suits quick weekend projects.
Drill pilot holes with a masonry bit and install expanding anchors. Position precast elements on level ground or gravel pads.
This method lacks the custom sizing of poured concrete but requires zero forming skills. Standard precast dimensions dictate final bench proportions.
24. Cardboard Tube Forming System
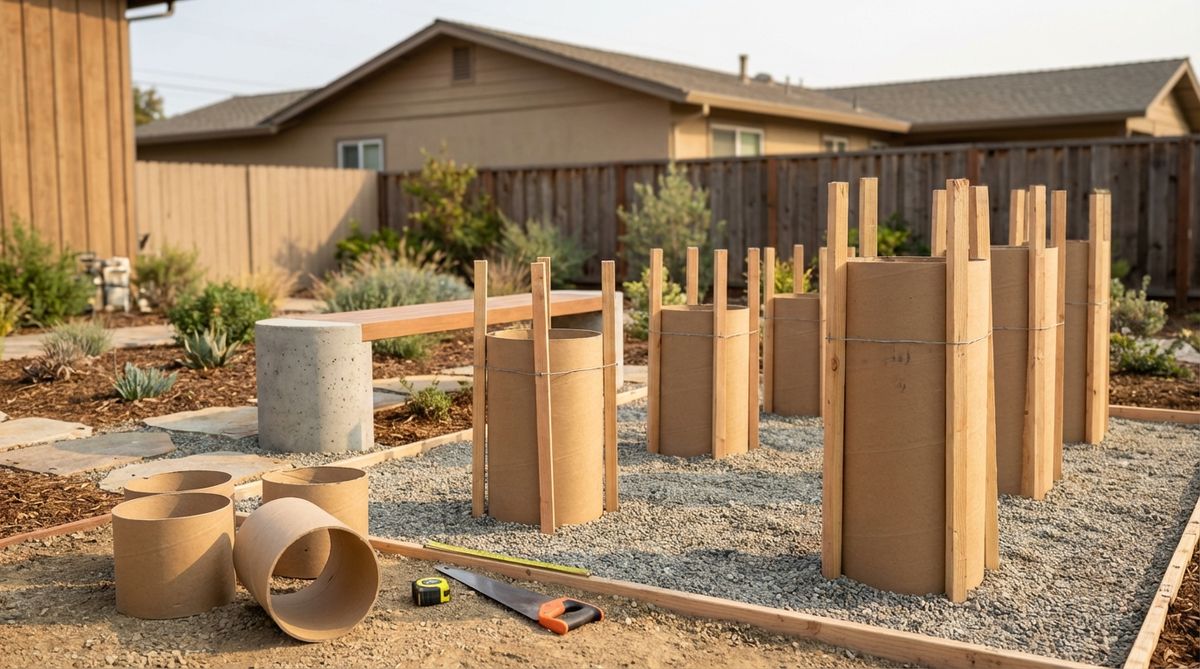
Sono-tubes designed for deck footings create circular concrete legs. The disposable forms peel away after curing, leaving smooth columns.
Brace tubes vertically using stakes and cross-bracing before pouring. Standard 10-inch and 12-inch diameters suit most bench scales.
Cut tubes to desired leg height with a handsaw. This system produces consistent results without woodworking skills needed for reusable forms.
25. Stacked Wood Frame Concrete Pour
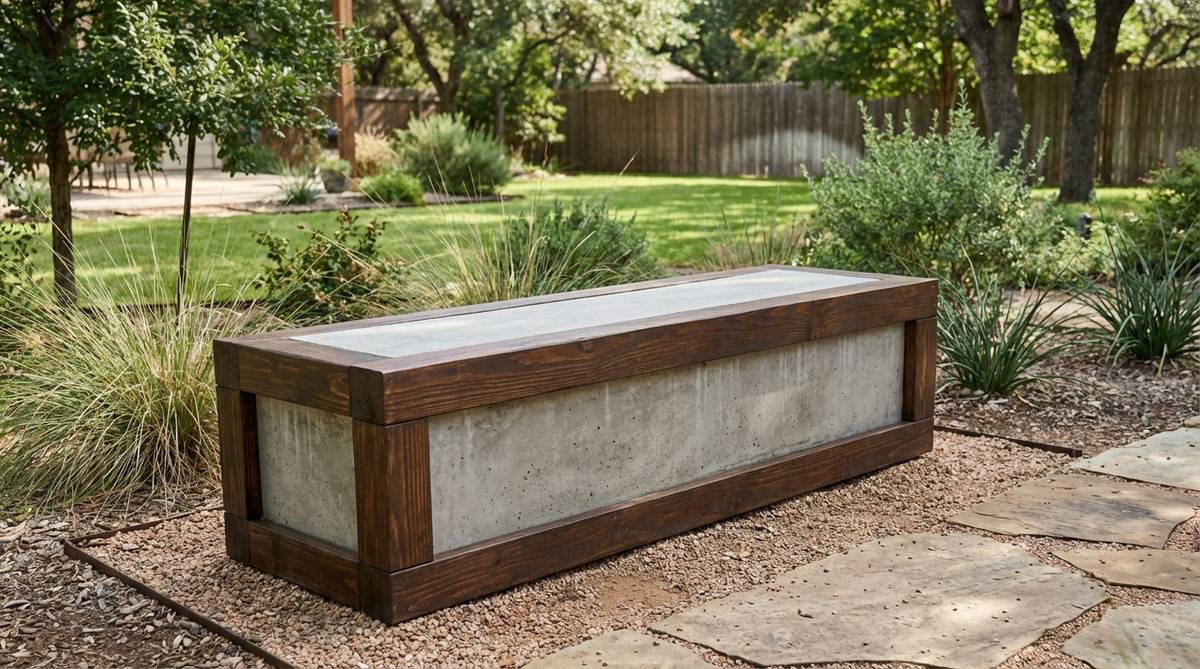
Build a simple rectangular box from 2×10 lumber, pour concrete inside, and the wood becomes permanent formwork. The exposed lumber edges frame the concrete faces.
Screw frame corners from the inside to hide fasteners. Line with plastic sheeting before pouring to prevent concrete bonding to wood.
This hybrid approach showcases both materials equally. Apply exterior stain to the wood frame for contrast against natural concrete.
26. Mortared Stone Veneer Facade

Apply thin stone veneer to basic concrete legs using mortar adhesive. The natural stone face adds texture while concrete provides structure.
Pour simple rectangular legs, then attach flat stones or manufactured stone products after full cure. Work from bottom to top, allowing each course to set.
Choose stones 1-2 inches thick to keep added weight manageable. The veneer technique personalizes basic concrete forms without advanced forming skills.
27. Salvaged Material Hybrid Construction

Combine reclaimed materials—broken concrete pieces as aggregate, weathered fence boards for slats—to create character-rich benches. The imperfect aesthetic suits cottage gardens.
Break up old concrete and embed pieces in fresh pours for exposed aggregate effects. Sand and refinish old wood to safe, splinter-free condition.
Salvaged construction reduces material costs by 40-50% while delivering unique results. Inspect reclaimed wood for hidden fasteners before cutting or drilling.
Bringing Your Vision to Life
The marriage of wood slats and concrete in modern garden bench construction delivers durability that outlasts weather extremes while maintaining contemporary appeal. Start with a design matching your skill level—concrete block assemblies for beginners, custom poured forms for experienced builders. Proper sealing of both materials extends lifespan beyond 15 years with minimal maintenance. Select a concept from these 27 ideas, adapt dimensions to your space, and create outdoor seating that transforms your landscape into a functional gathering space.
Frequently Asked Questions
What wood species work best for outdoor bench slats paired with concrete?
Cedar, teak, ipe, and white oak offer natural rot resistance for outdoor applications. Cedar provides the best value for most climates, naturally resisting decay while developing an attractive silver patina. Teak and ipe deliver superior longevity in high-moisture environments but cost 3-4 times more than cedar. Pressure-treated pine offers a budget option but requires annual sealing. Apply penetrating oil or exterior stain to any species for enhanced UV and moisture protection.
How do I prevent concrete legs from cracking over winter freeze-thaw cycles?
Use air-entrained concrete mix with a minimum 4000 PSI rating and reinforce with steel rebar or welded wire mesh. The air-entrainment creates microscopic bubbles that accommodate water expansion during freezing, preventing crack formation. Allow concrete to cure fully for 28 days before first freeze exposure. Apply penetrating concrete sealer annually to reduce water absorption. Design legs with adequate drainage—avoid flat tops where water pools and freezes repeatedly.
What spacing should I maintain between wood slats for proper drainage?
Space slats 3/8 to 1/2 inch apart for optimal water drainage and air circulation. Gaps smaller than 3/8 inch trap debris and slow drying; wider than 5/8 inch becomes uncomfortable for seating and allows small items to fall through. Use temporary spacers during installation to maintain consistent gaps. Wood expands when wet, so install during dry conditions to prevent slats touching after rain absorption. The gaps also reduce cupping by allowing both surfaces to dry evenly.
Can I build a concrete and wood bench without specialized tools?
Yes—use precast concrete blocks or bucket molds to eliminate forming requirements, and purchase pre-cut lumber to avoid table saw needs. Basic tools include a drill with masonry bits for anchors, adjustable wrench for tightening bolts, level for positioning, and a mixing tub for small concrete batches. Ready-mix concrete in 50-pound bags requires only water and a mixing hoe. Construction adhesive applied with a caulk gun bonds wood to concrete for no-drill designs. Budget $80-150 for materials and complete construction in one weekend.
How much weight can a typical wood slat and concrete bench support?
A properly constructed bench with two concrete legs spaced 4-5 feet apart safely supports 800-1200 pounds when using 2×6 lumber slats. The concrete legs themselves handle loads exceeding 2000 pounds—wood slat deflection becomes the limiting factor. Add a third central leg for benches longer than 6 feet or when using softer wood species. Support capacity drops significantly if concrete lacks internal reinforcement or wood contains defects like knots near ends. Test completed benches with distributed weight before placing in service.
Should I seal wood and concrete immediately after construction?
Allow concrete to cure fully for 28 days before applying sealers—early sealing traps moisture and causes discoloration. Wood can be sealed immediately if kiln-dried; let pressure-treated lumber dry 2-4 weeks as it arrives saturated with preservative. Use penetrating concrete sealers rather than film-forming types that trap moisture and peel. Apply wood sealers on dry days when temperatures exceed 50°F for proper absorption. Reapply wood treatments annually in full-sun locations, every 2-3 years in shade. Concrete requires resealing every 3-5 years depending on wear.