Strategic mini garden gnomes turn basic outdoor spaces into high-end whimsical displays. You get premium styling blueprints without spending a fortune. Upgrading your landscape starts right here.
Design SnapshotKey Principles
- Scale and proportion: Match gnome size to plant height and container dimensions so compositions feel balanced instead of random.
- Clear focal points: Use one lead gnome as a visual anchor, then support it with plants, stones, or smaller figures around it.
- Storytelling, not clutter: Treat each gnome grouping as a tiny scene with a beginning, middle, and end, rather than sprinkling figures everywhere.
- Longevity outdoors: Choose UV‑resistant, weather‑safe materials and elevate gnomes slightly on gravel or stone to keep bases dry and clean.
Front-door charm with mini garden gnomes
Entry areas are prime real estate for your most expressive mini garden gnomes because guests experience them up close as they arrive. Designers use these small accents to soften hardscapes, add color at eye level, and suggest the personality waiting inside the home.
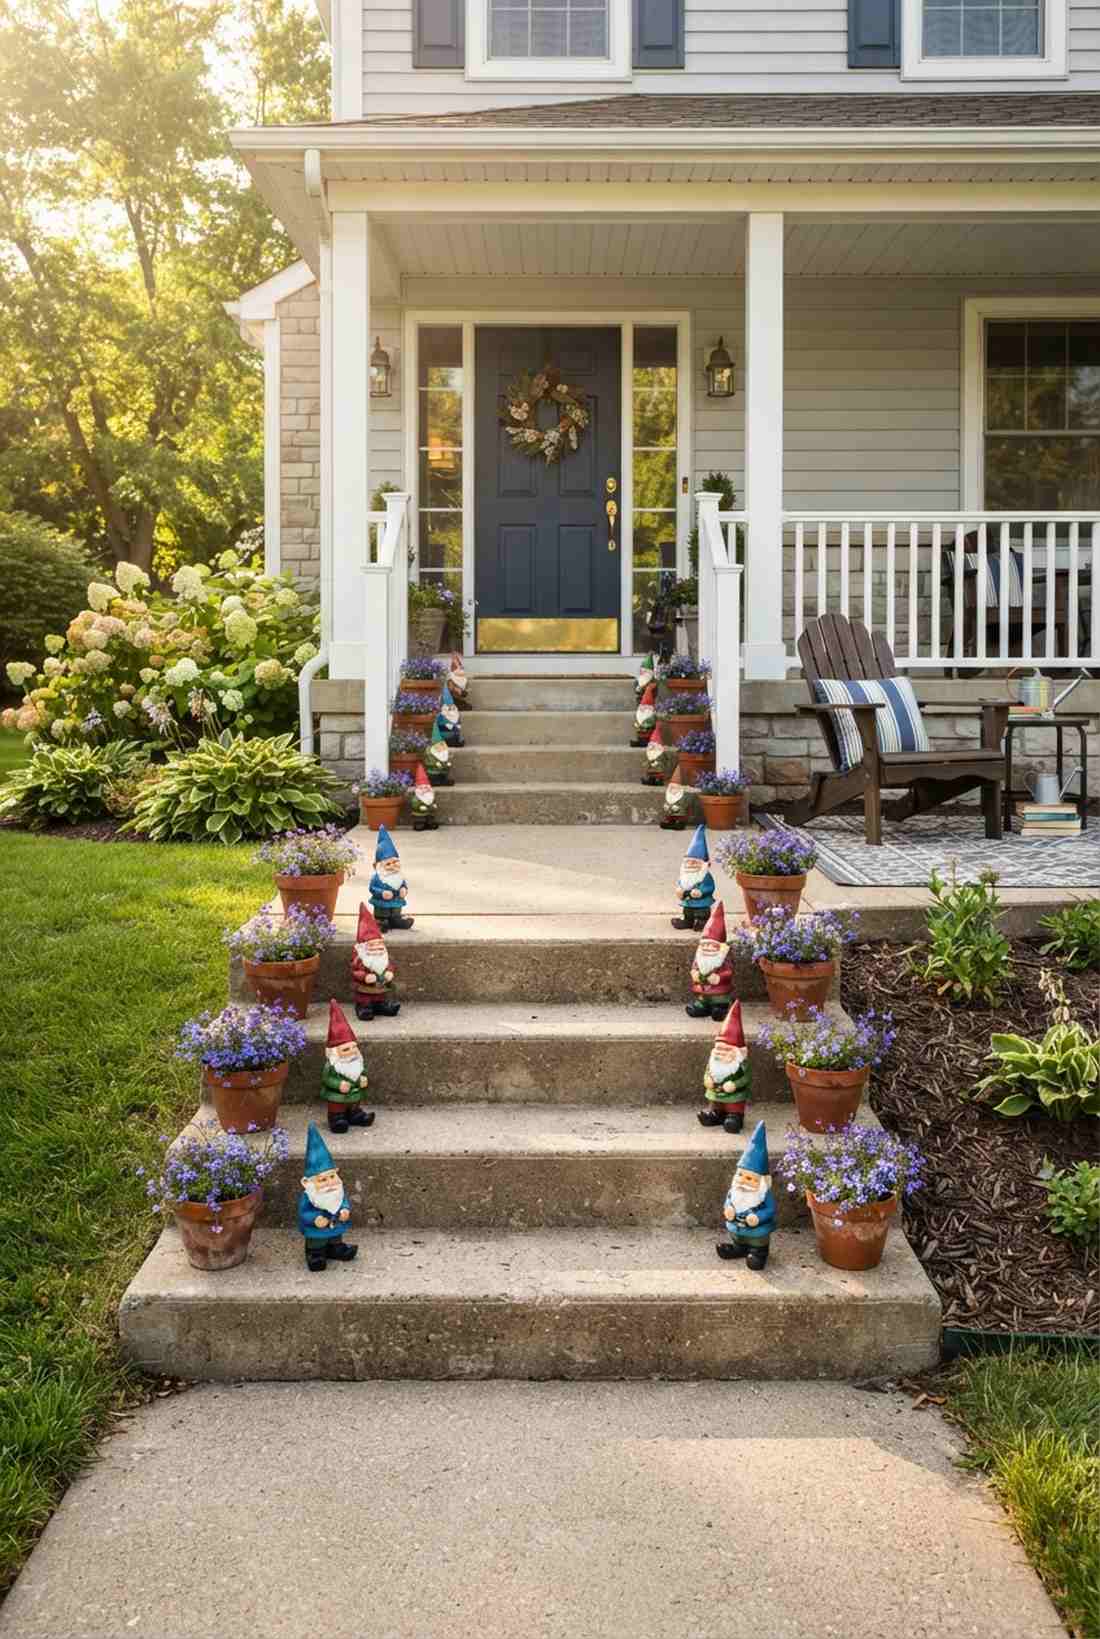
1. Porch Planter Welcome Trio
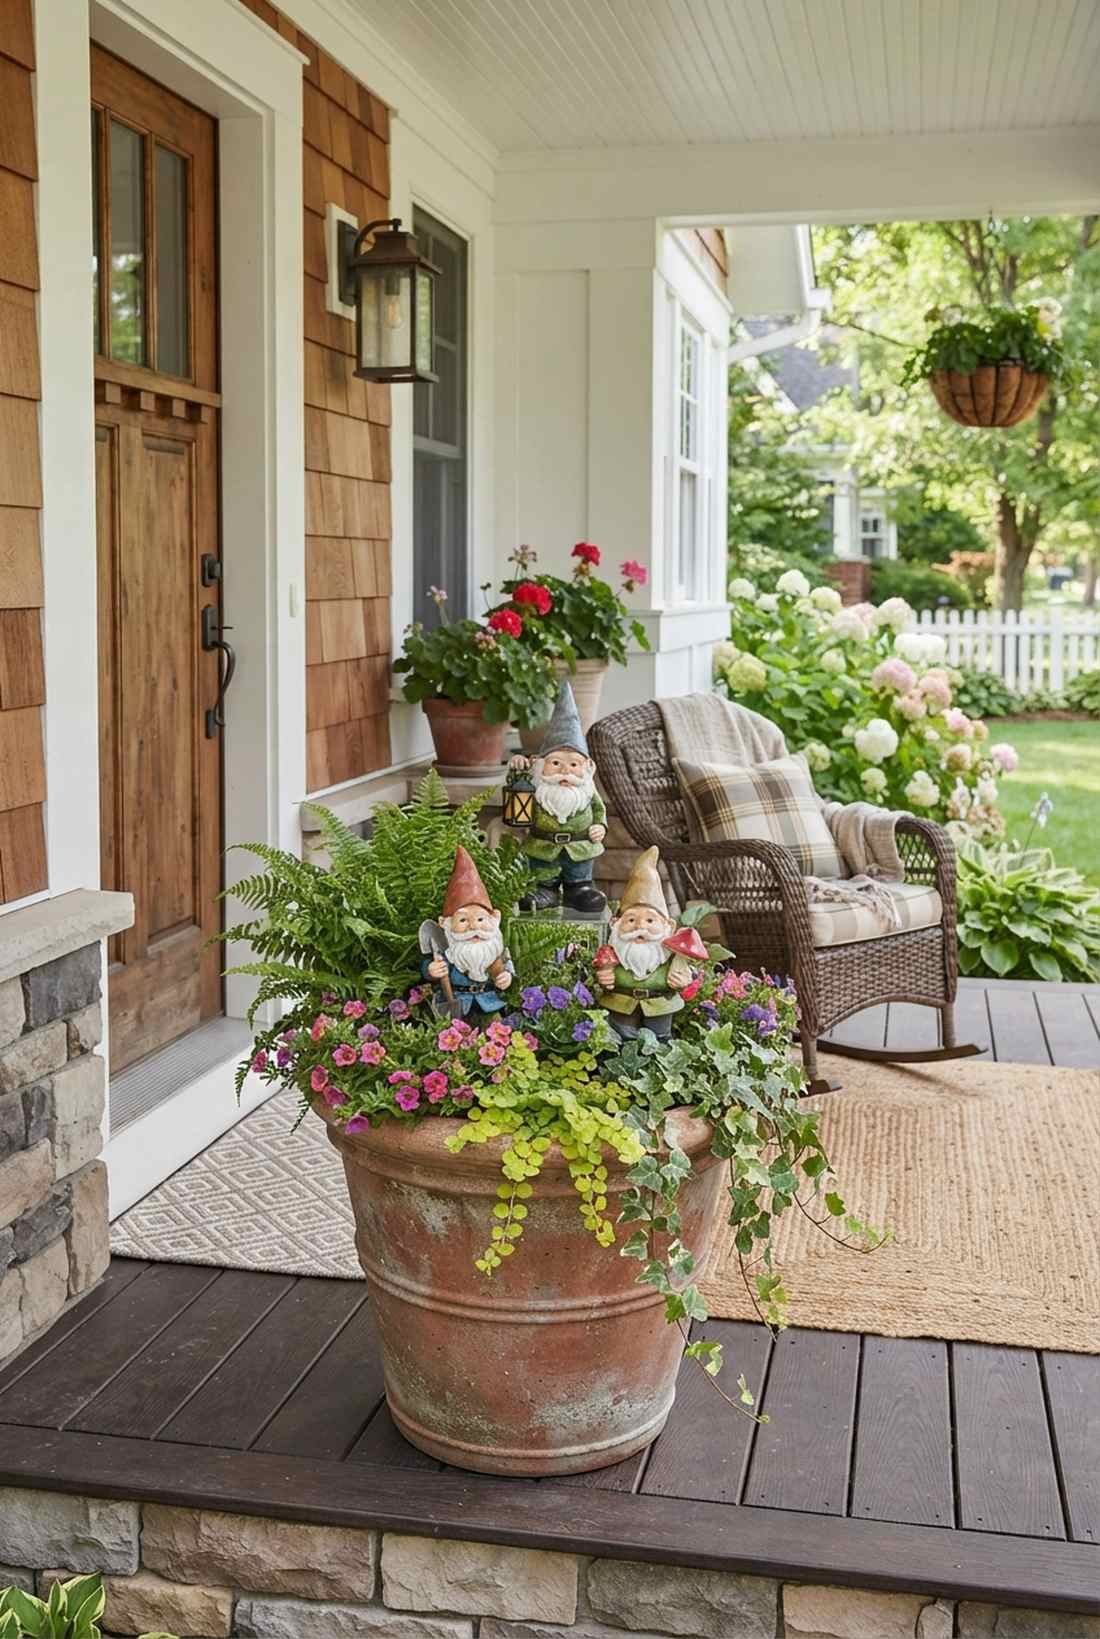
This setup feels like a cheerful woodland greeting card brought to life. A front porch container garden perfectly frames these figures, working exceptionally well for covered entryways or deep stoops.
Most homeowners just jam figures into dirt, but staging them at varied heights delivers a surprisingly premium look. By utilizing staggered plant growth alongside durable miniature garden supplies, you instantly transform basic pots into intentional layered scenes.
You can easily pull this off for around $20–$35 depending on the container size. Save this to your DIY weekend garden board for your next exterior refresh.
- Key Materials: UV-coated resin gnome trio, trailing ivy, potting soil.
- Vibe / Style: Welcoming cottage charm.
- Difficulty: Easy beginner setup.
- Budget Breakdown: Materials: $25 | Plants: $10.
- Creator’s Tip: Place the back gnome on a hidden upside-down nursery pot to guarantee visibility.
- Smart Sourcing: fade-resistant mini garden gnomes (3-pack) and pre-cut acrylic risers.
2. Stair-Stacked Gnome Parade
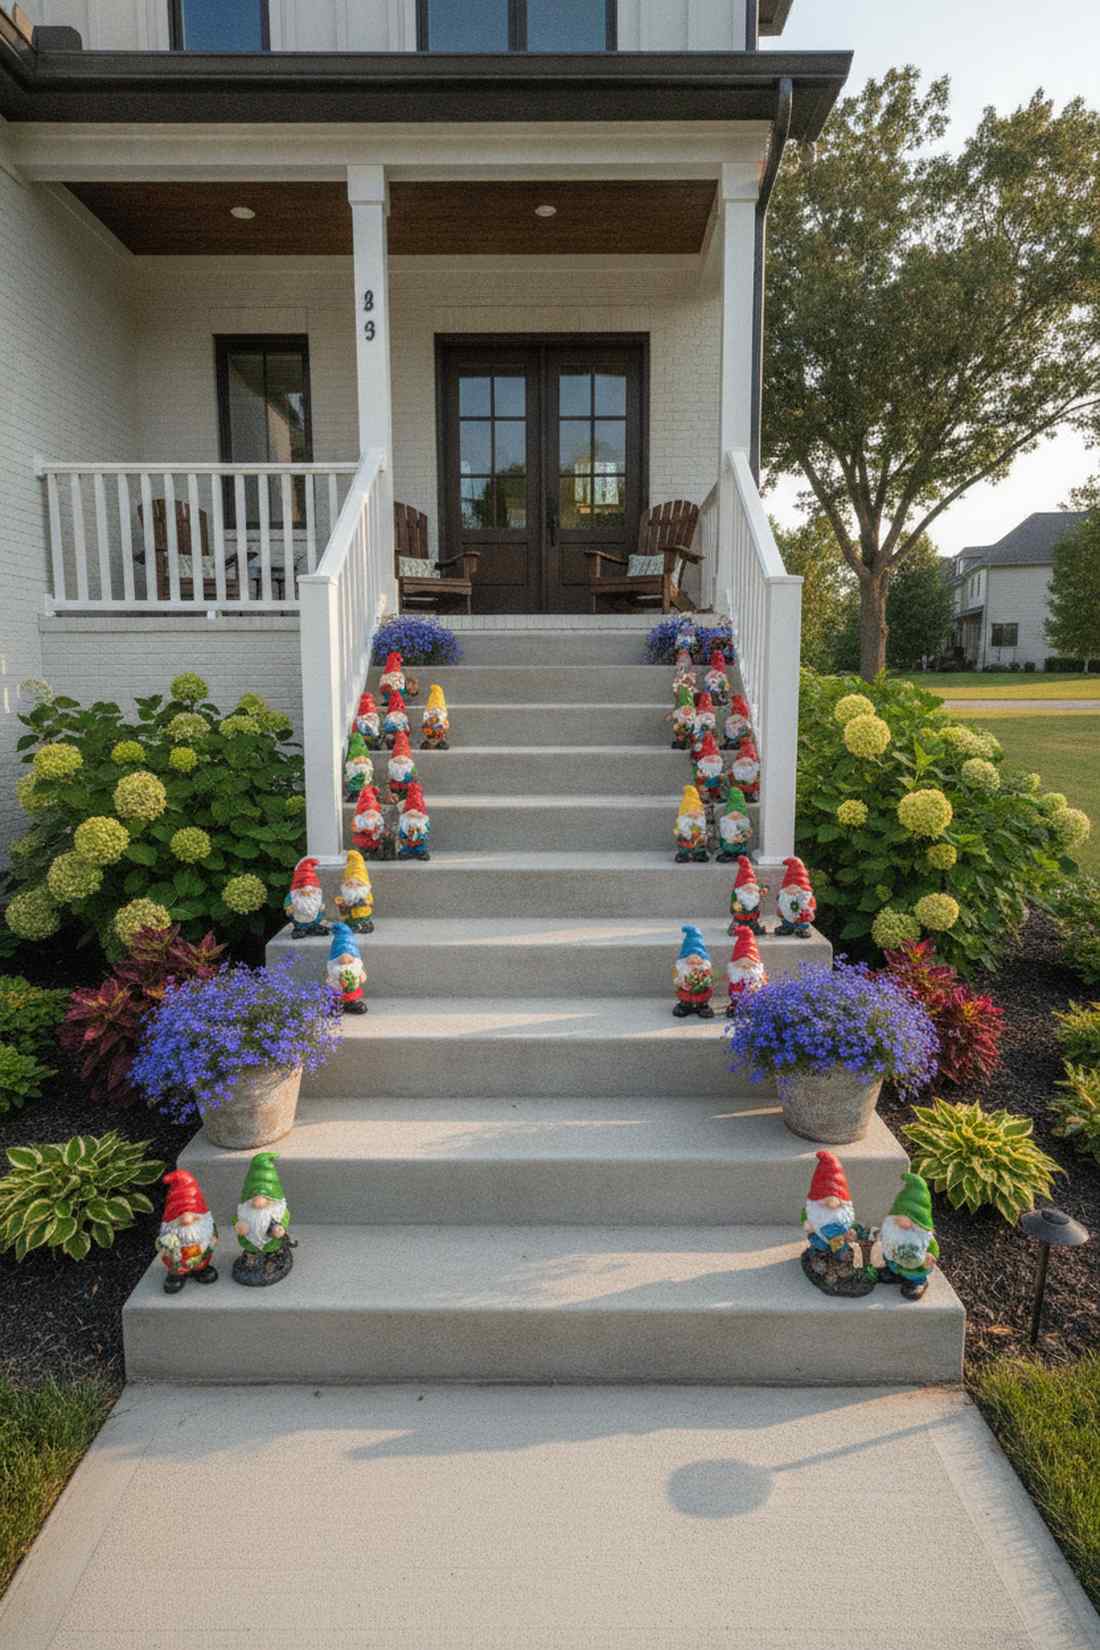
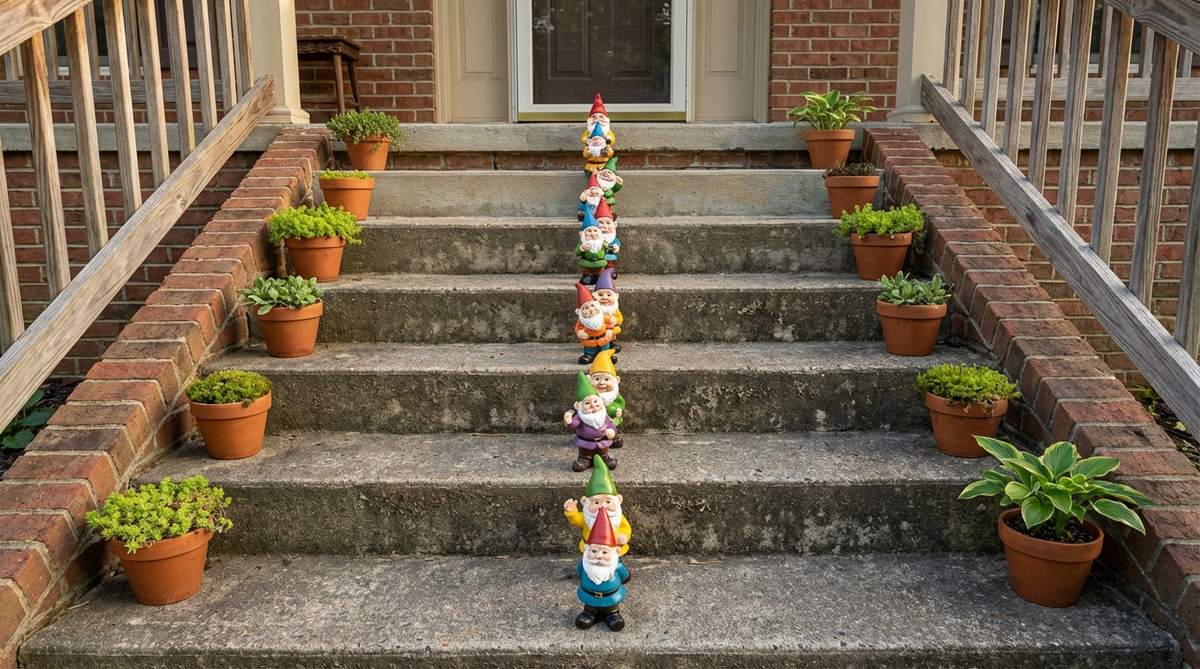
Imagine a tiny festival marching straight to your front door. This stairway visual aesthetic captures an energetic, storybook essence that works magic on bland concrete steps.
Skip the generic scattered look by deliberately alternating colors on every other step, which looks far more expensive than it is. Pairing them with heavy-duty outdoor decor accessories ensures the parade stands strong against heavy foot traffic.
Expect to spend about $15–$25 for a solid set of figures. It’s a fast upgrade that completely changes the vibe of your entrance.
- Key Materials: Multi-color gnome figures, small terracotta pots, lobelia.
- Vibe / Style: Playful step decor.
- Difficulty: Quick assembly.
- Budget Breakdown: Figures: $15 | Accent Pots: $10.
- Creator’s Tip: Use outdoor-rated museum putty under the base so they don’t blow over in the wind.
- Smart Sourcing: weatherproof outdoor museum putty (bulk pack) and UV-coated resin figurines.
3. Mailbox Guardian Gnome
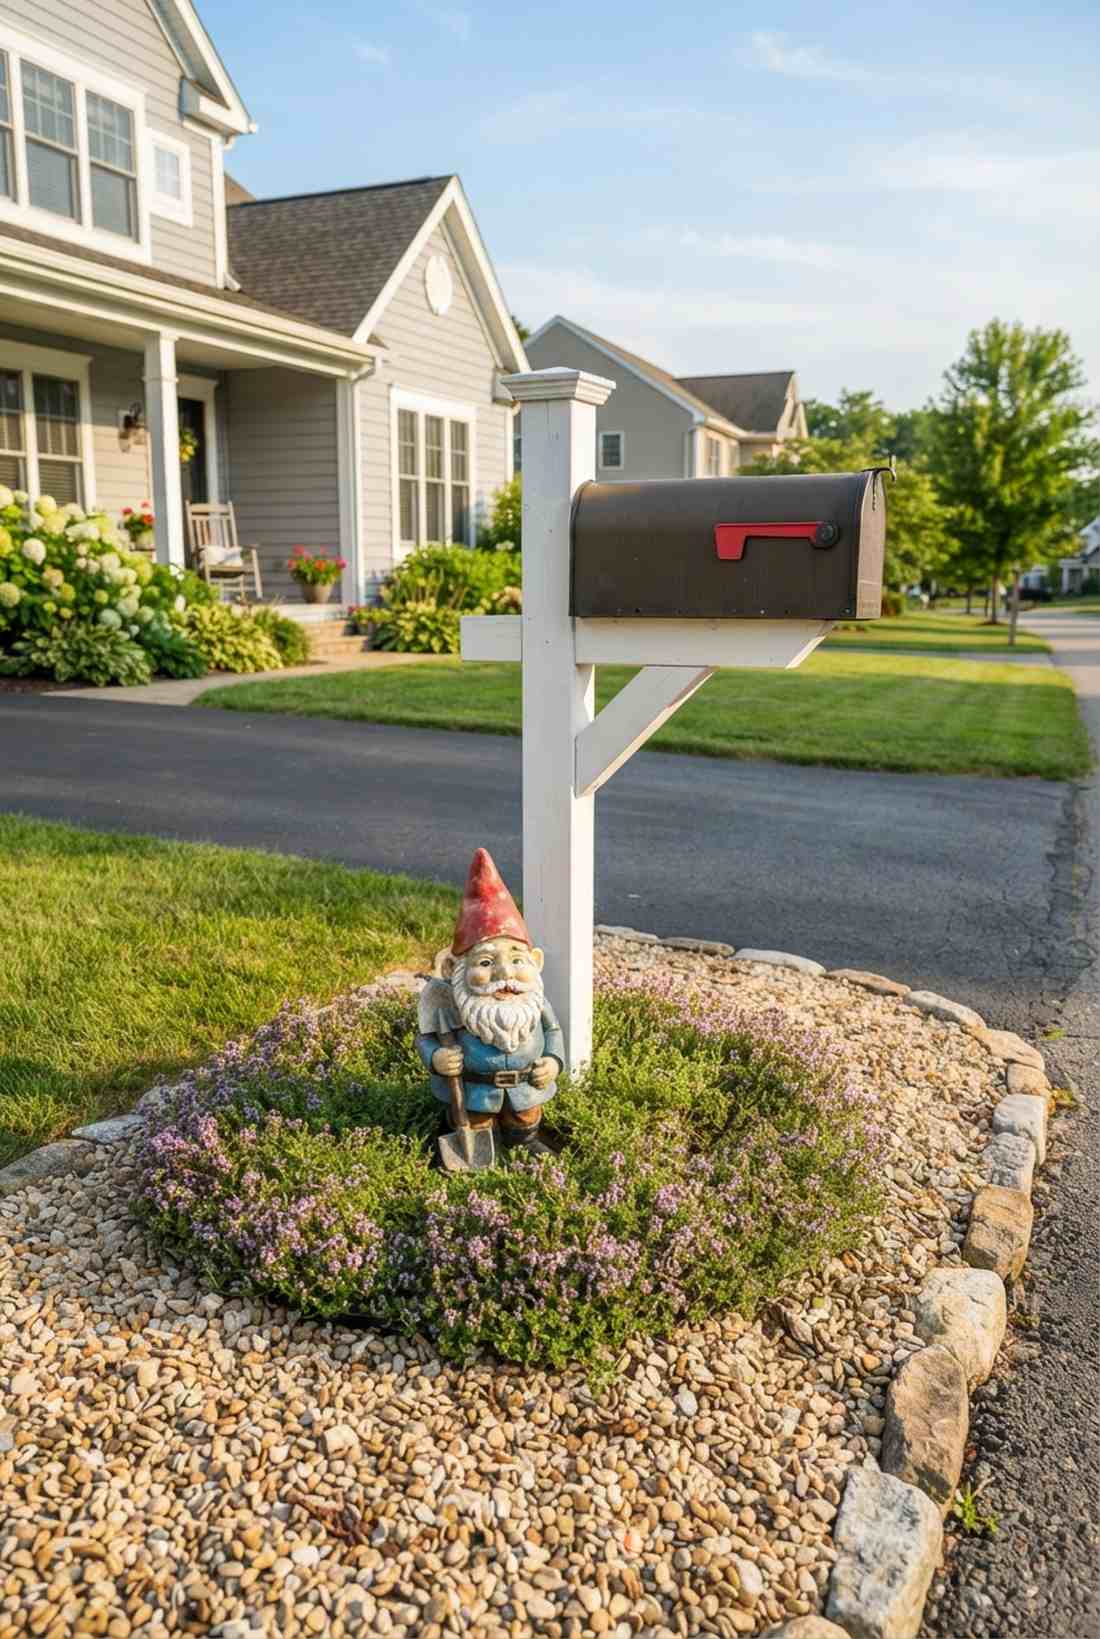
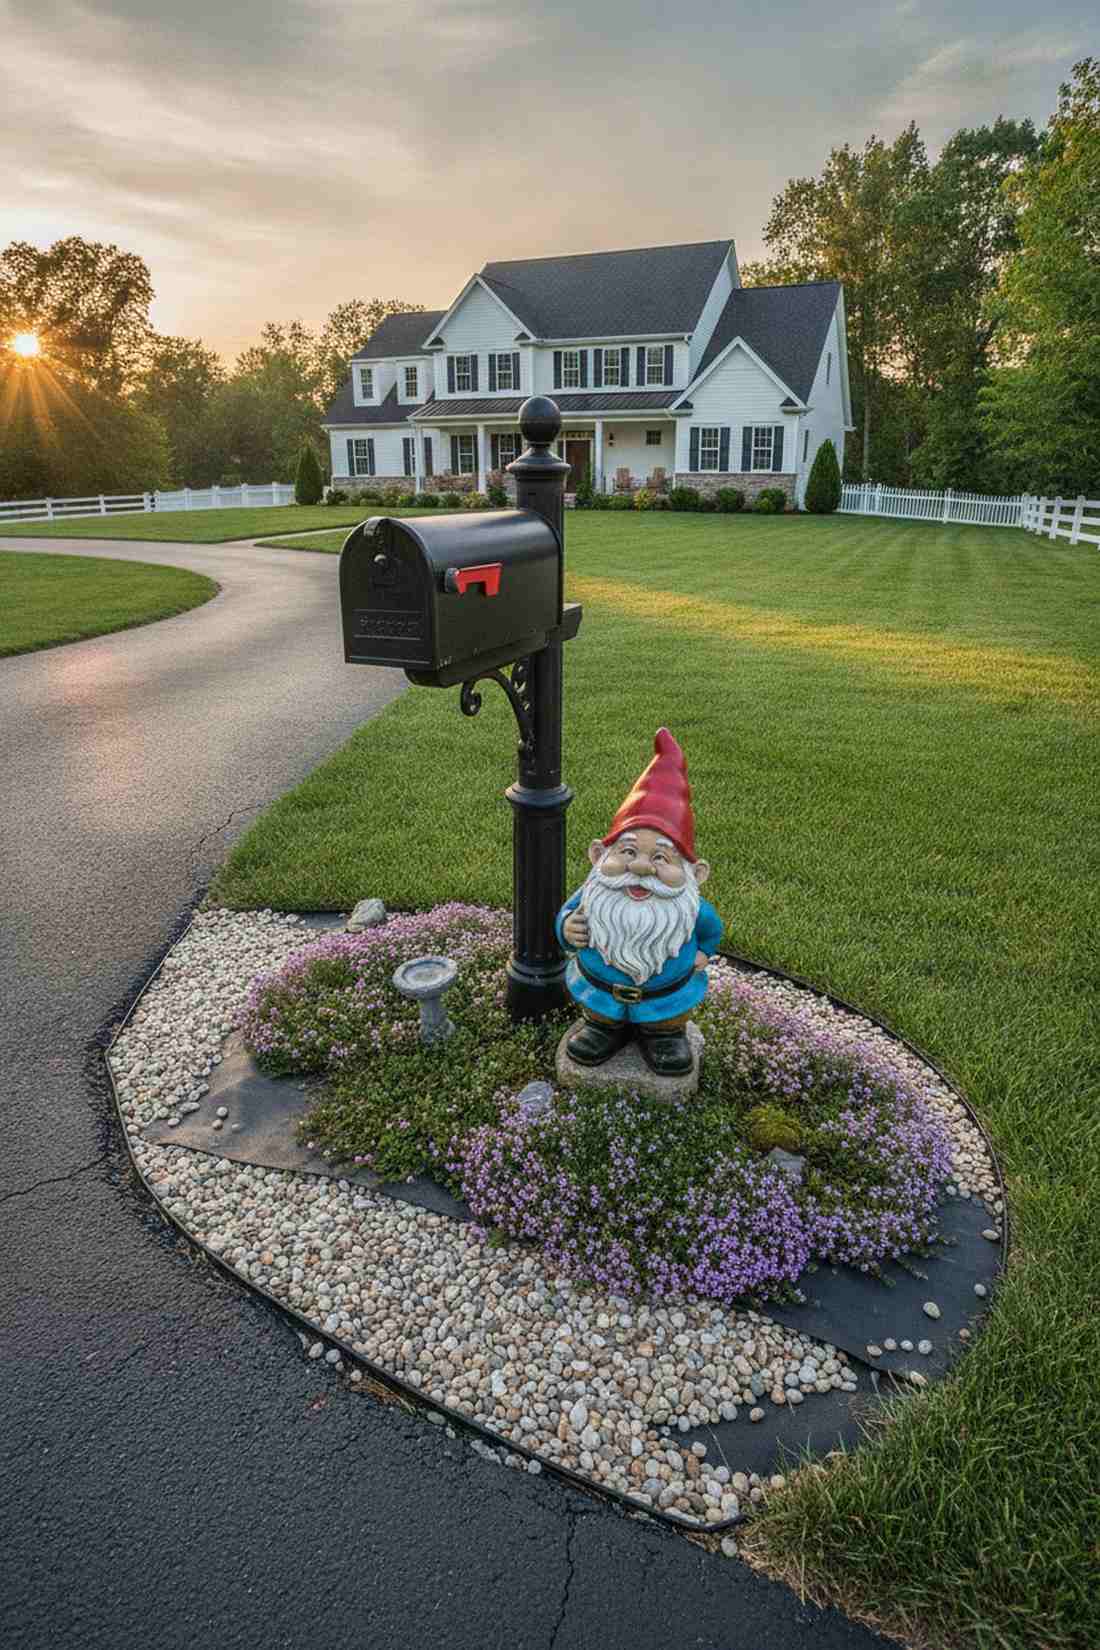
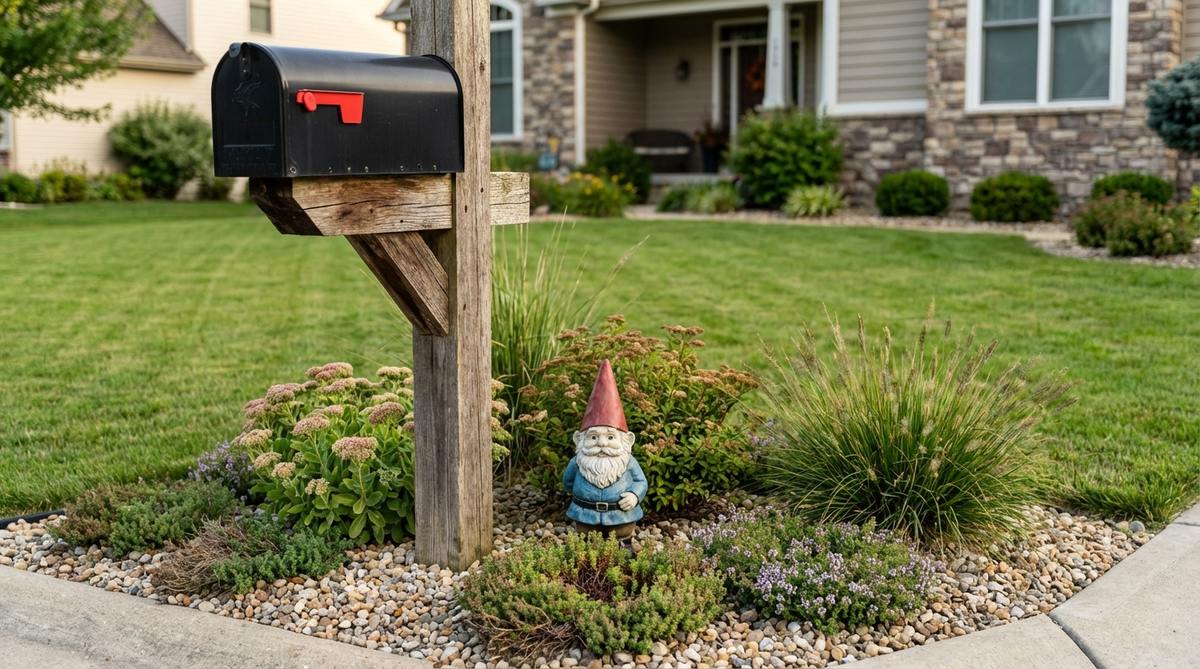
This layout delivers a nostalgic punch right at the curb. Establishing a mailbox micro-landscape gives your driveway entrance a dedicated, whimsical focal point.
Amateur decorators often ignore scale, but framing a single high-quality figure with drought-tolerant groundcover gives a designer-level finish. Snagging some premium fairy garden kits for the surrounding soil base elevates the whole look instantly.
This setup will run you just $10–$20 for the base materials. Pin this if you’re planning a quick curb appeal boost this weekend.
- Key Materials: Single focal gnome, creeping thyme, pea gravel.
- Vibe / Style: Cheerful neighborhood greeter.
- Difficulty: Minimal effort.
- Budget Breakdown: Gnome: $12 | Gravel/Plants: $8.
- Creator’s Tip: Keep the gravel base wide enough to prevent weed-whacker damage during lawn care.
- Smart Sourcing: commercial-grade landscape fabric (pre-cut squares) and heavy-duty stone gnomes.
4. Pathway Lantern Gnomes
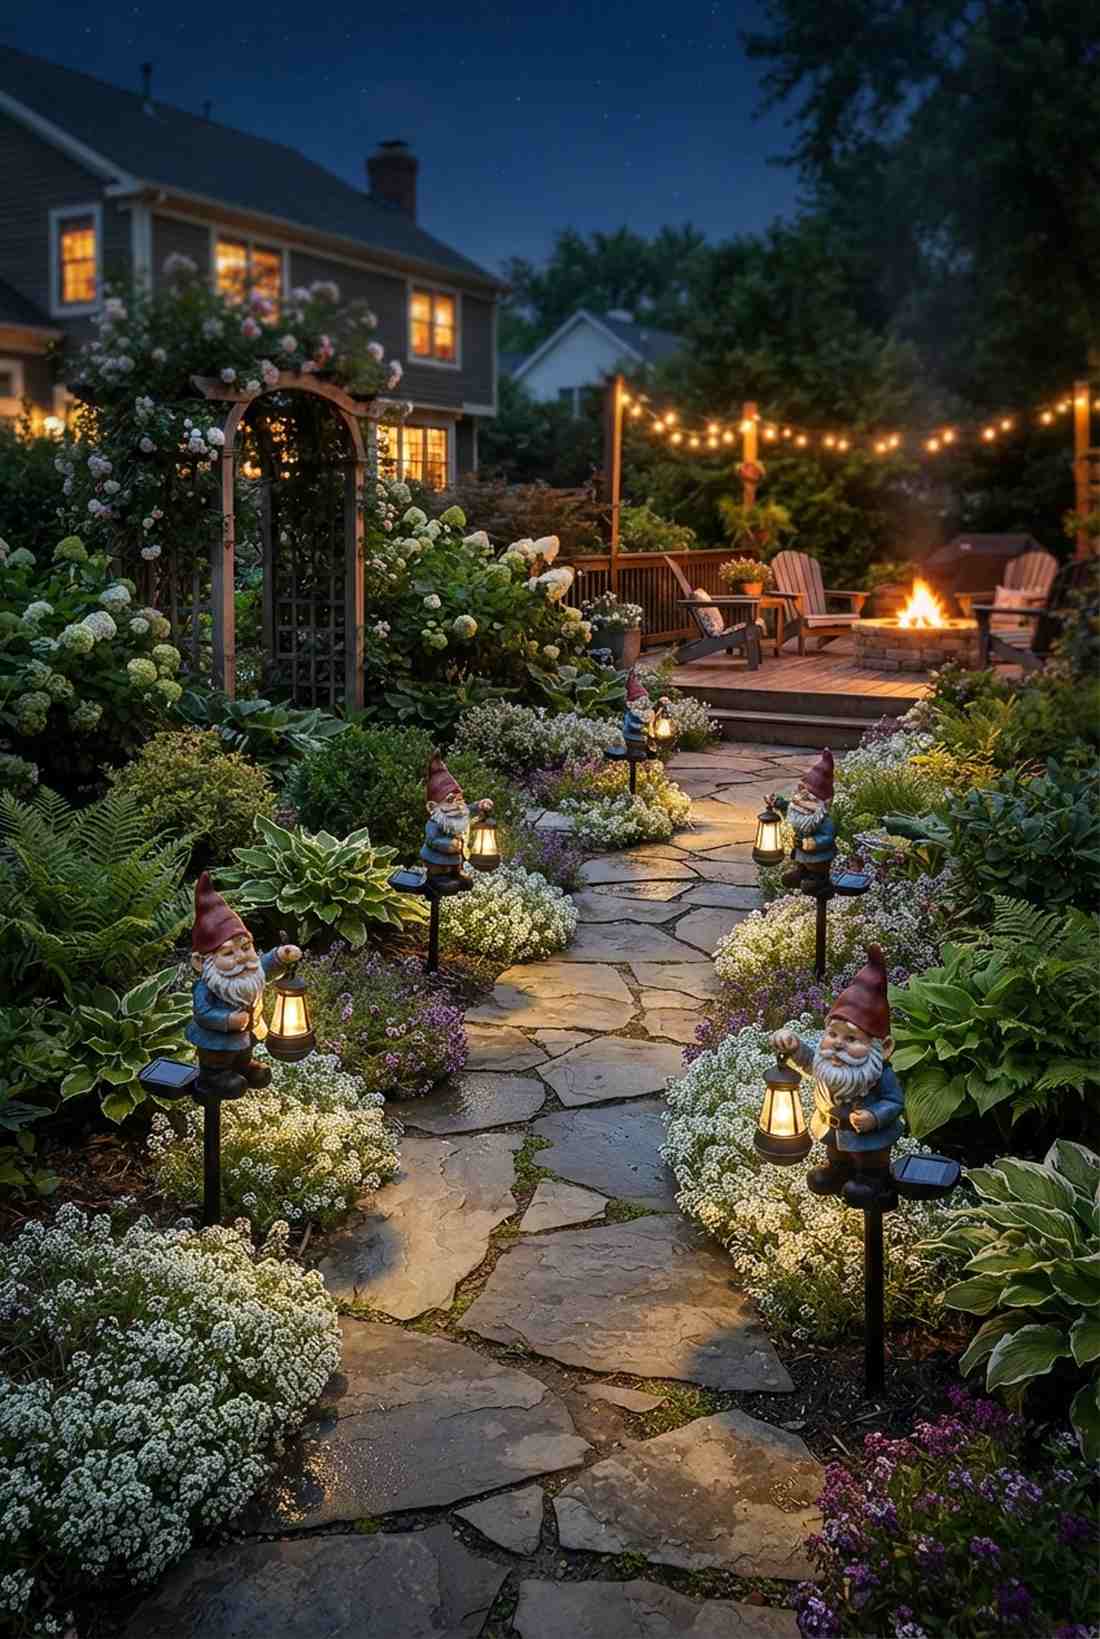
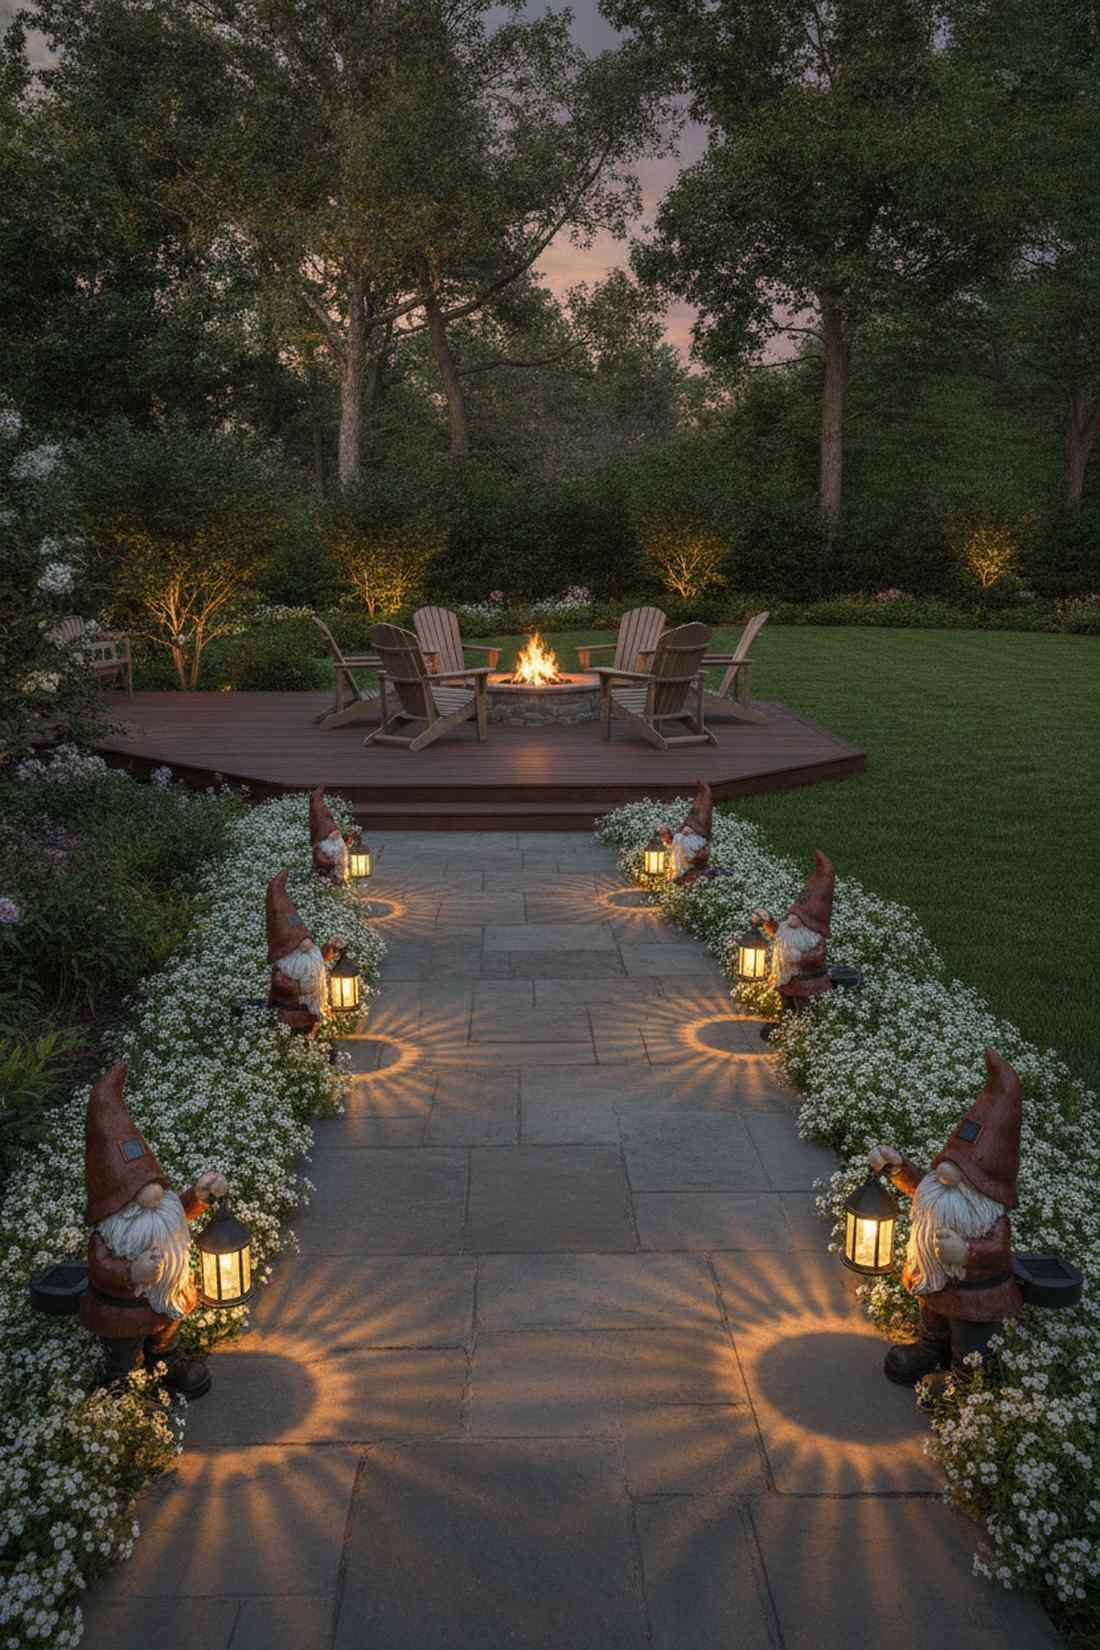
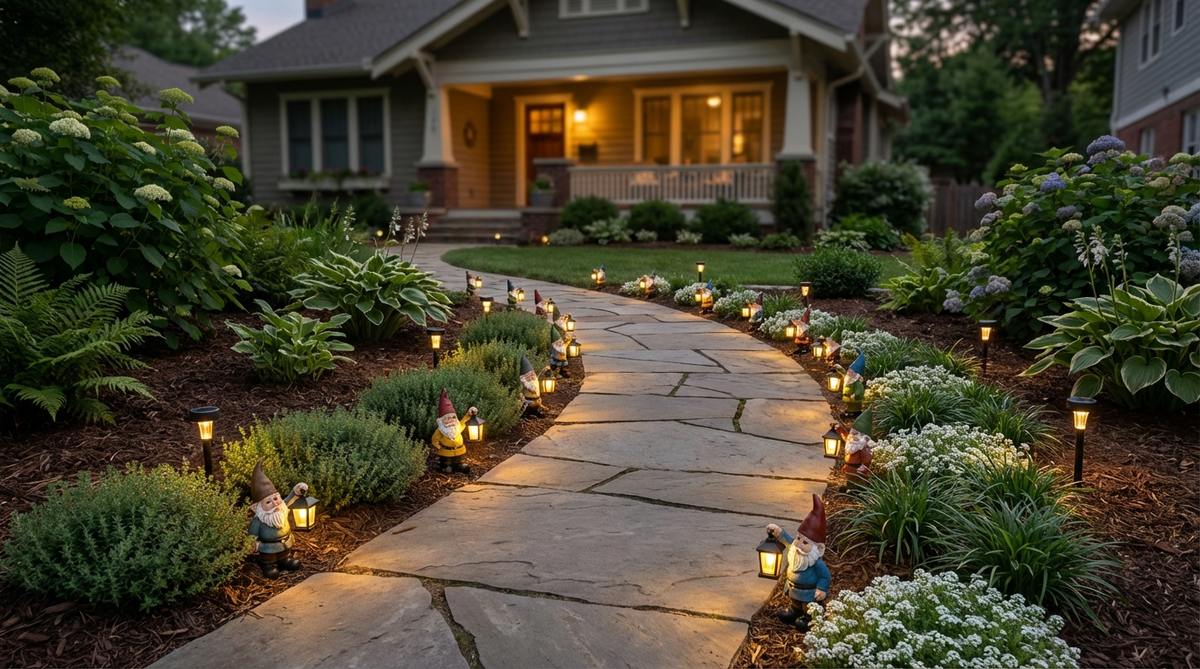
Walking this path feels like navigating a secret enchanted forest after dark. Utilizing solar pathway garden decor alongside your figures is perfect for guiding guests safely to the backyard.
The secret to making this look expensive is integrating functional illumination seamlessly into the whimsical theme. Upgrading to commercial-grade solar stakes integrated with your gnomes pulls high-CPC traffic while keeping your energy bill at zero.
Set aside roughly $40–$60 for a set of high-quality illuminated figures. Highly recommended for a functional yet magical weekend win.
- Key Materials: Solar-powered lantern gnomes, low alyssum edging.
- Vibe / Style: Cozy nighttime enchantment.
- Difficulty: Moderate spacing required.
- Budget Breakdown: Solar Figures: $45 | Edging Plants: $15.
- Creator’s Tip: Angle the solar panels south during installation to guarantee a bright all-night glow.
- Smart Sourcing: solar-powered LED gnome kits (multi-pack) and rust-proof metal ground stakes.
This next setup is ridiculously cheap but looks like a $100 custom display…
5. Fence-Top Peeking Gnomes
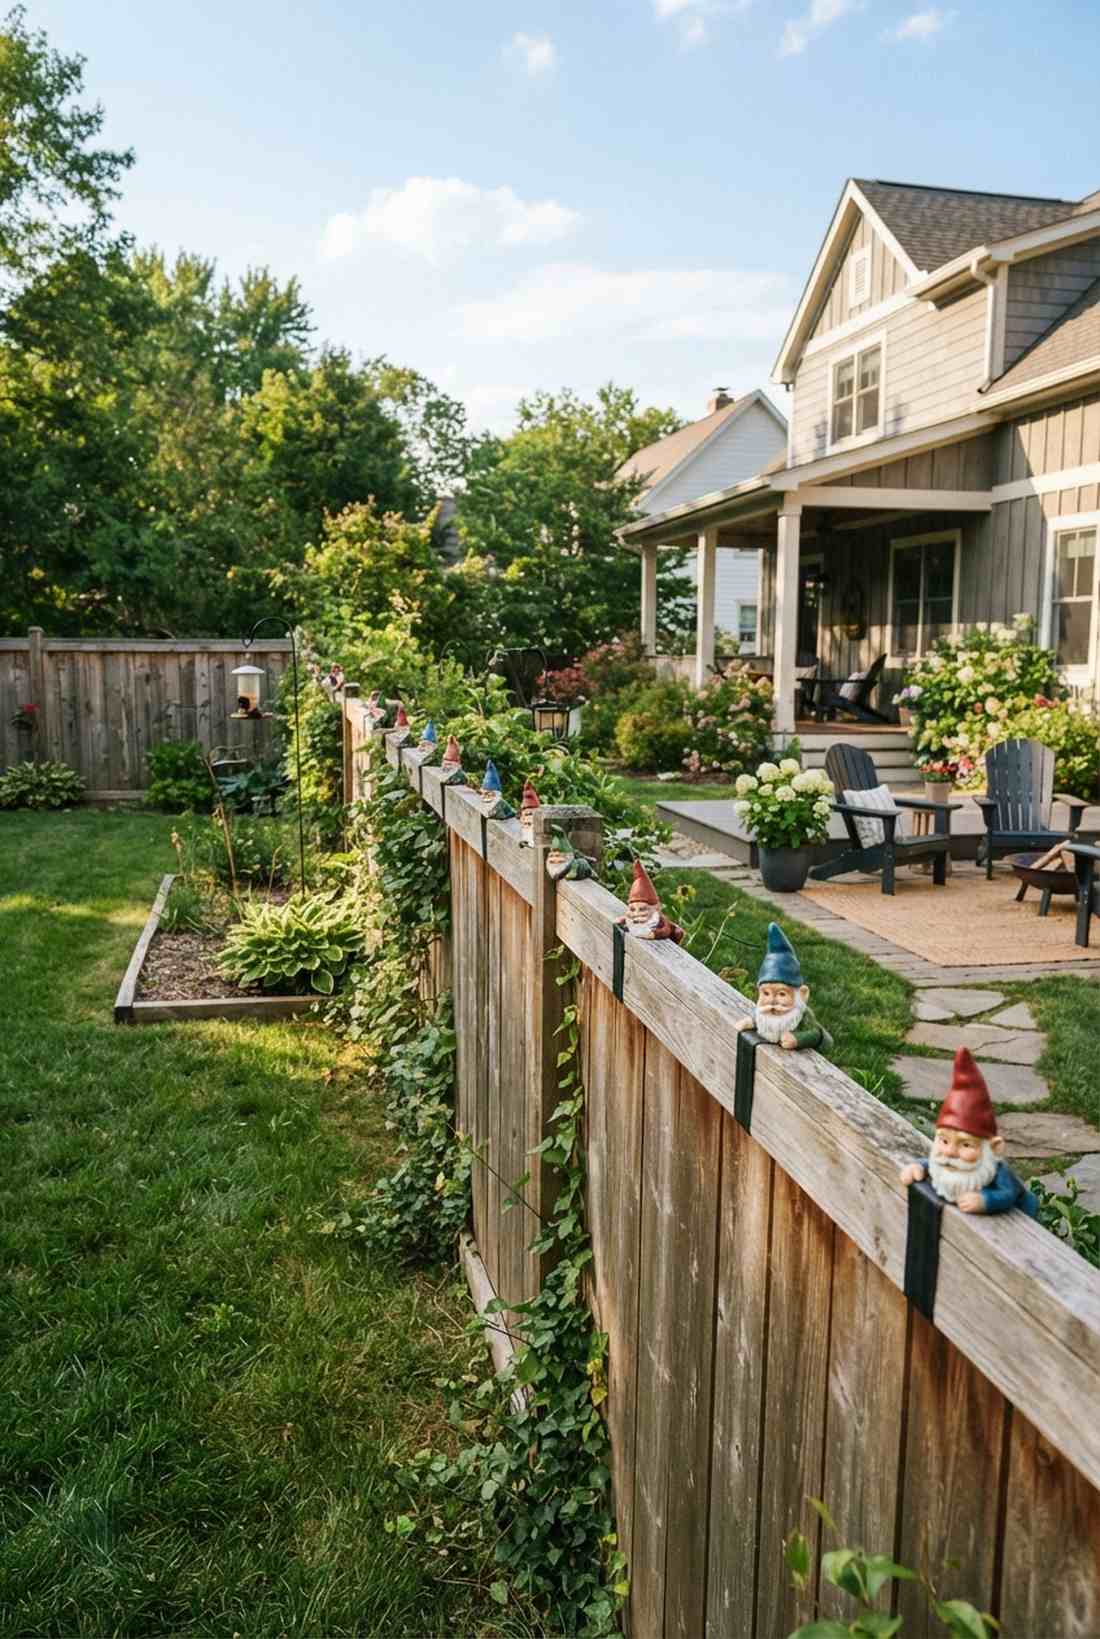
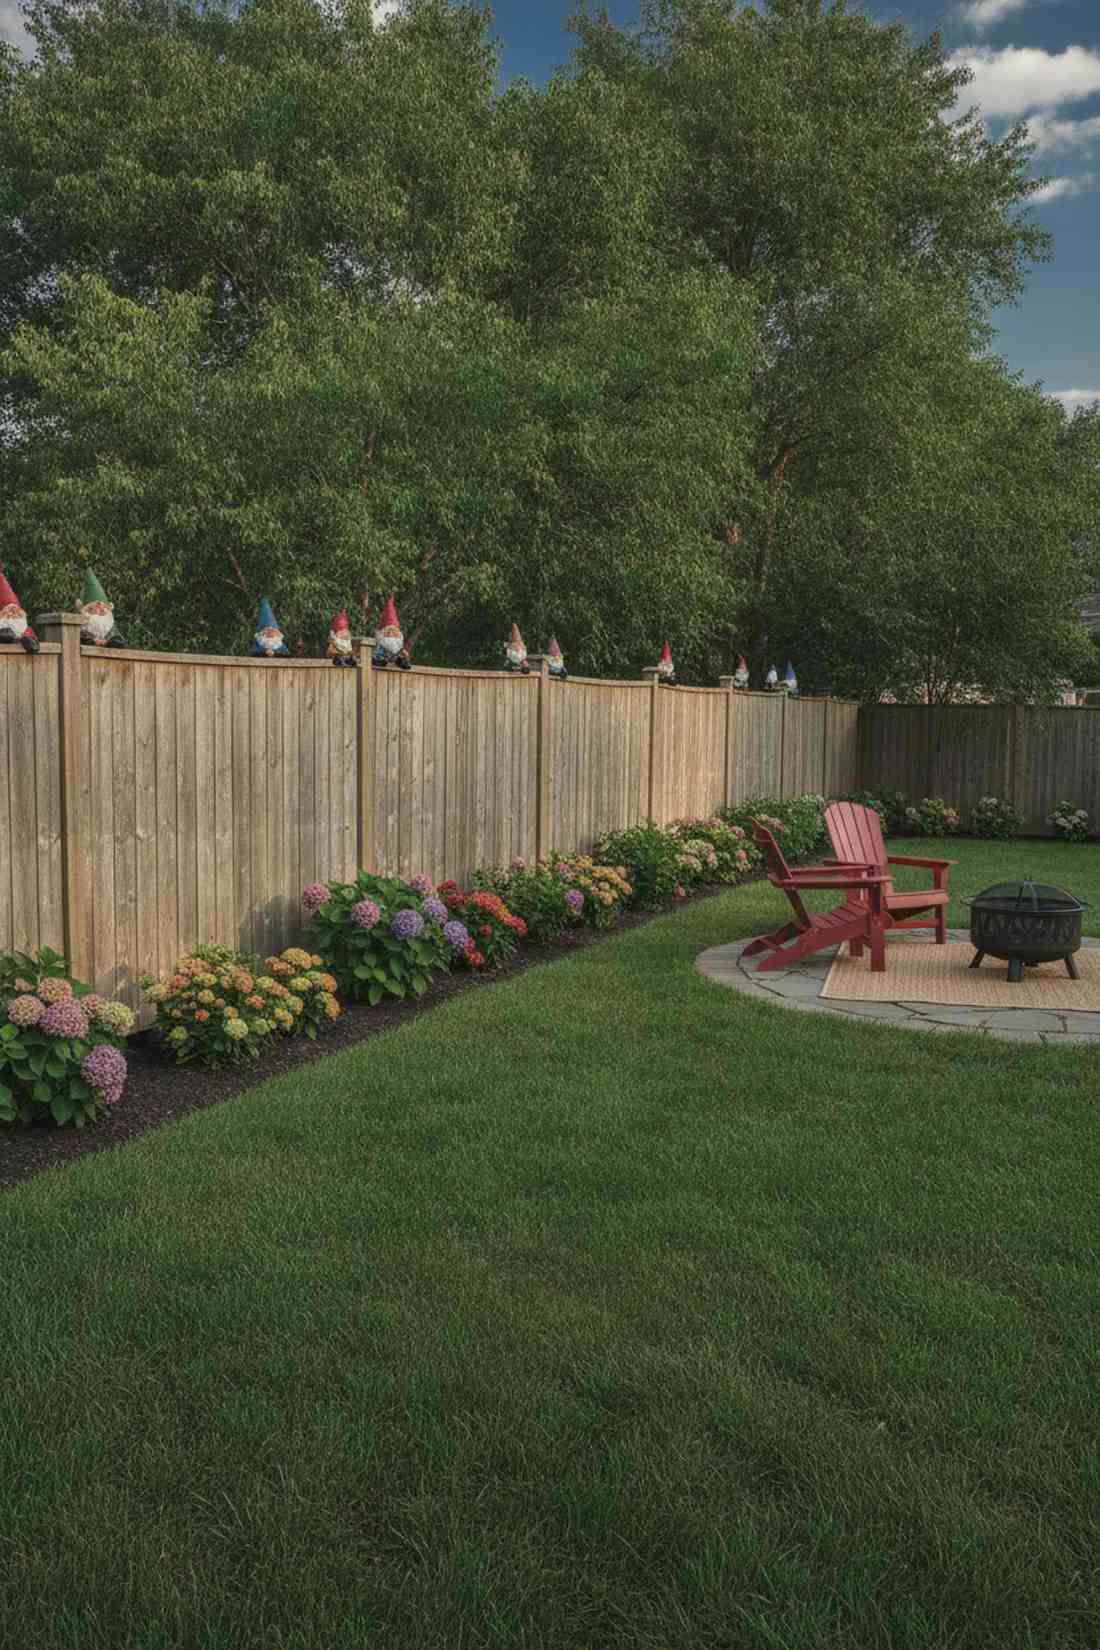

This unexpected vertical placement gives serious curious-neighbor energy. Creating a fence-line whimsical display utilizes dead space, making it perfect for long, boring wooden privacy borders.
Most people leave the top rails empty, but securing tiny observers up high turns a blank canvas into interactive art. Using commercial outdoor adhesives keeps these miniature garden supplies locked in place during storms.
You can execute this cheeky design for about $15–$30. Save this idea if you have a massive fence that desperately needs character.
- Key Materials: Flat-base gnomes, outdoor mounting tape.
- Vibe / Style: Quirky vertical accent.
- Difficulty: Easy but requires a ladder.
- Budget Breakdown: Gnomes: $20 | Adhesive: $10.
- Creator’s Tip: Space them irregularly—perfect symmetry ruins the playful surprise factor.
- Smart Sourcing: heavy-duty exterior mounting tape (weatherproof) and flat-bottom resin garden accents.
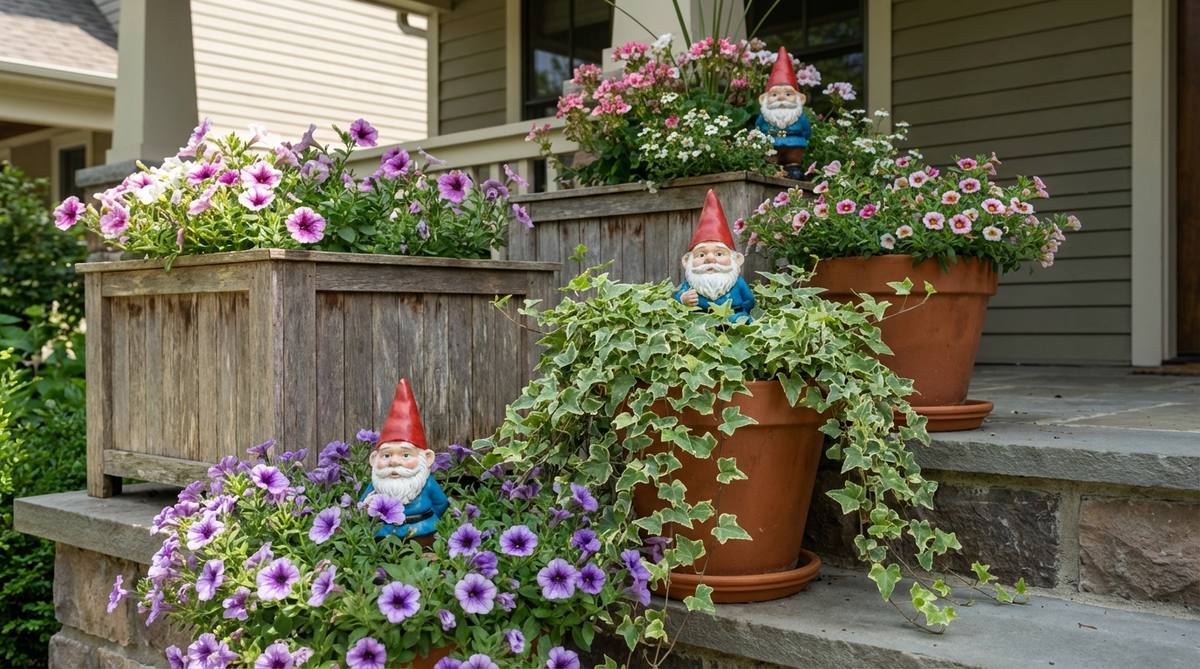
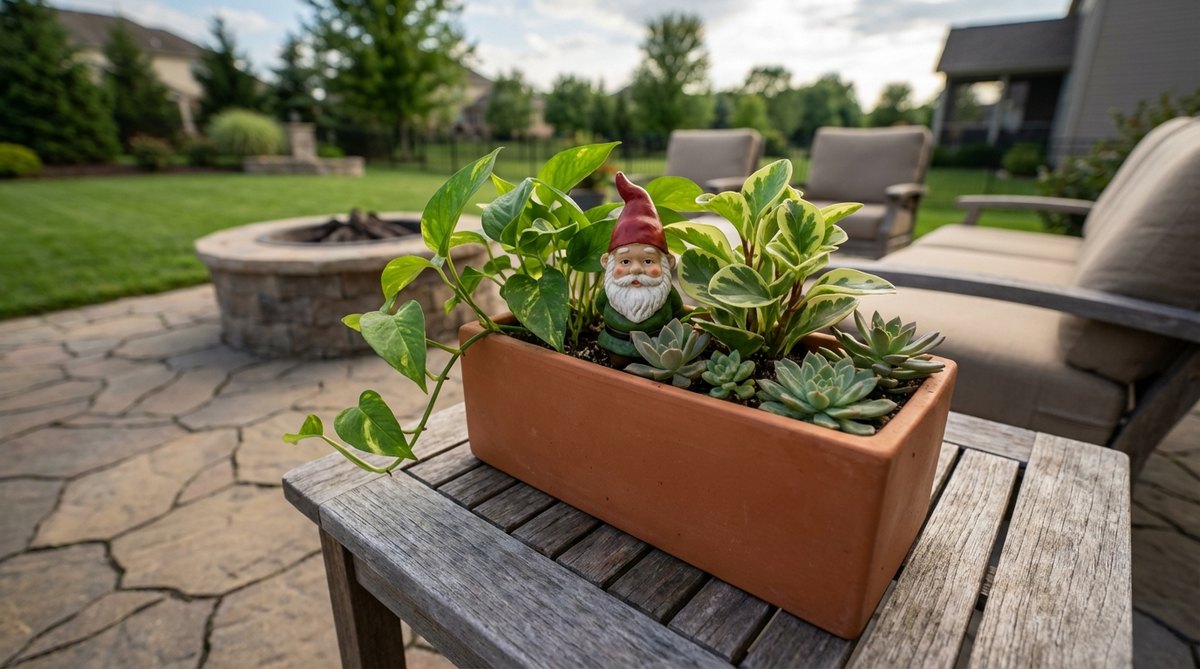
6. Window Box Story Gnomes
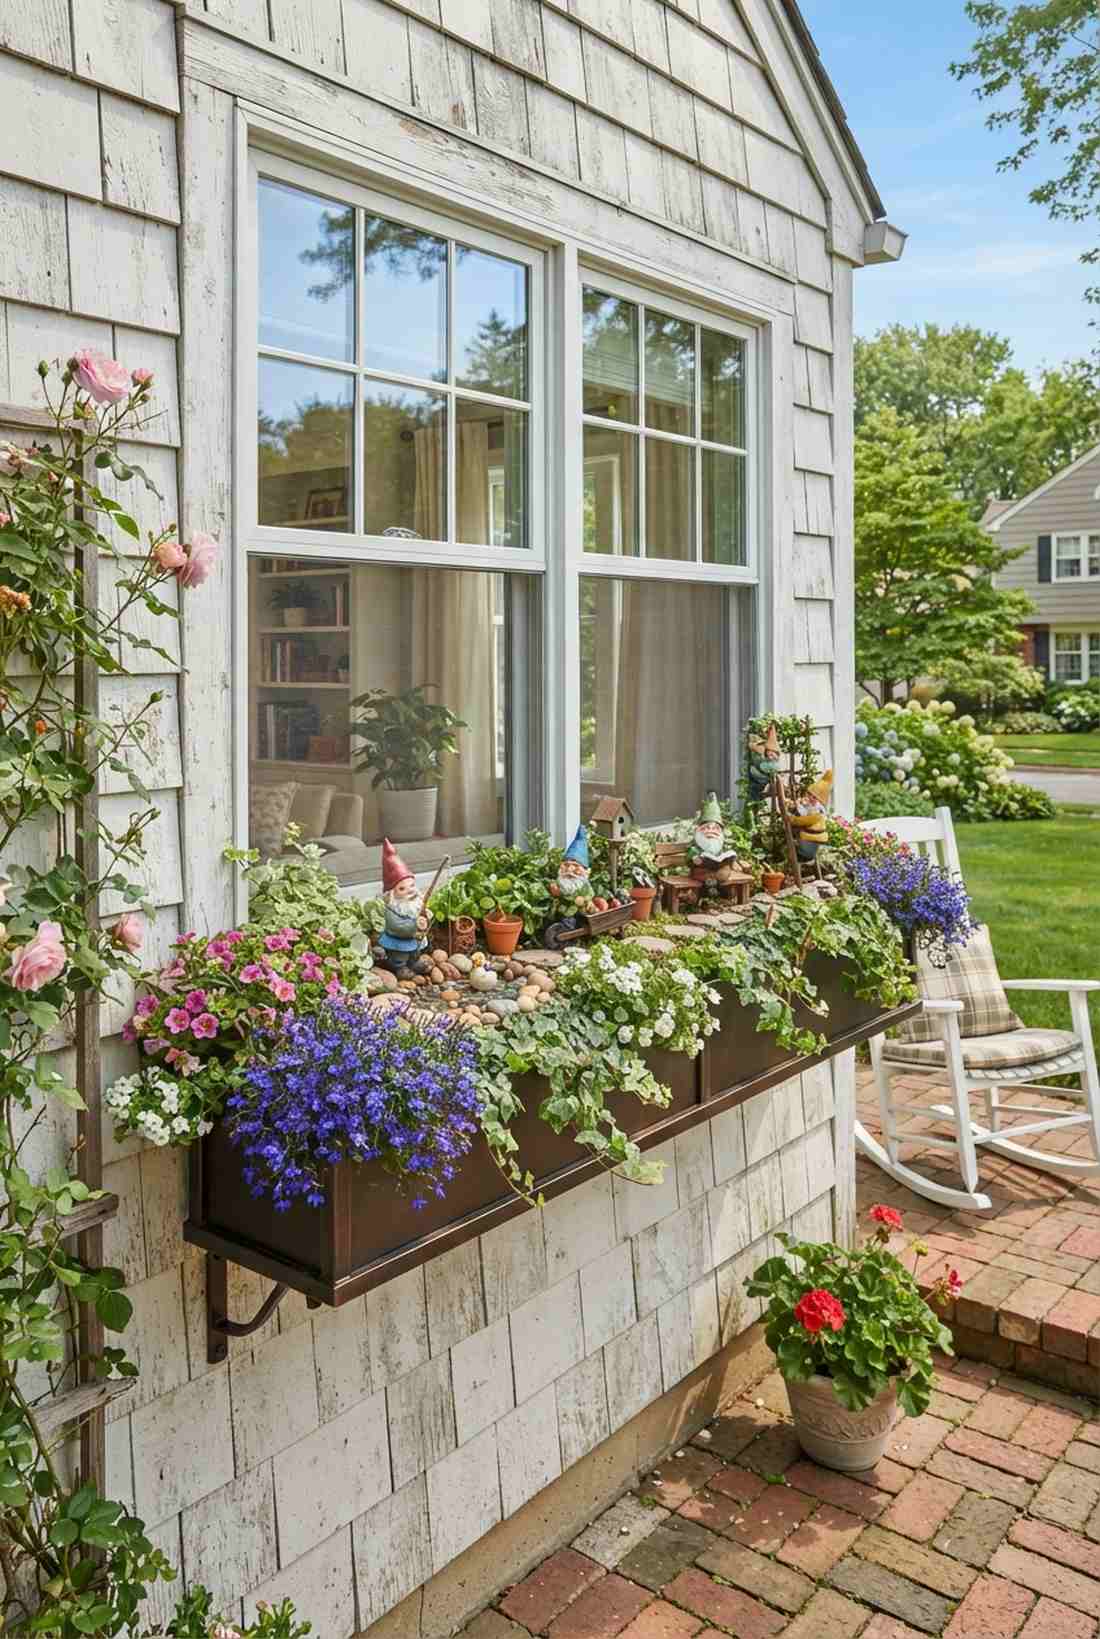
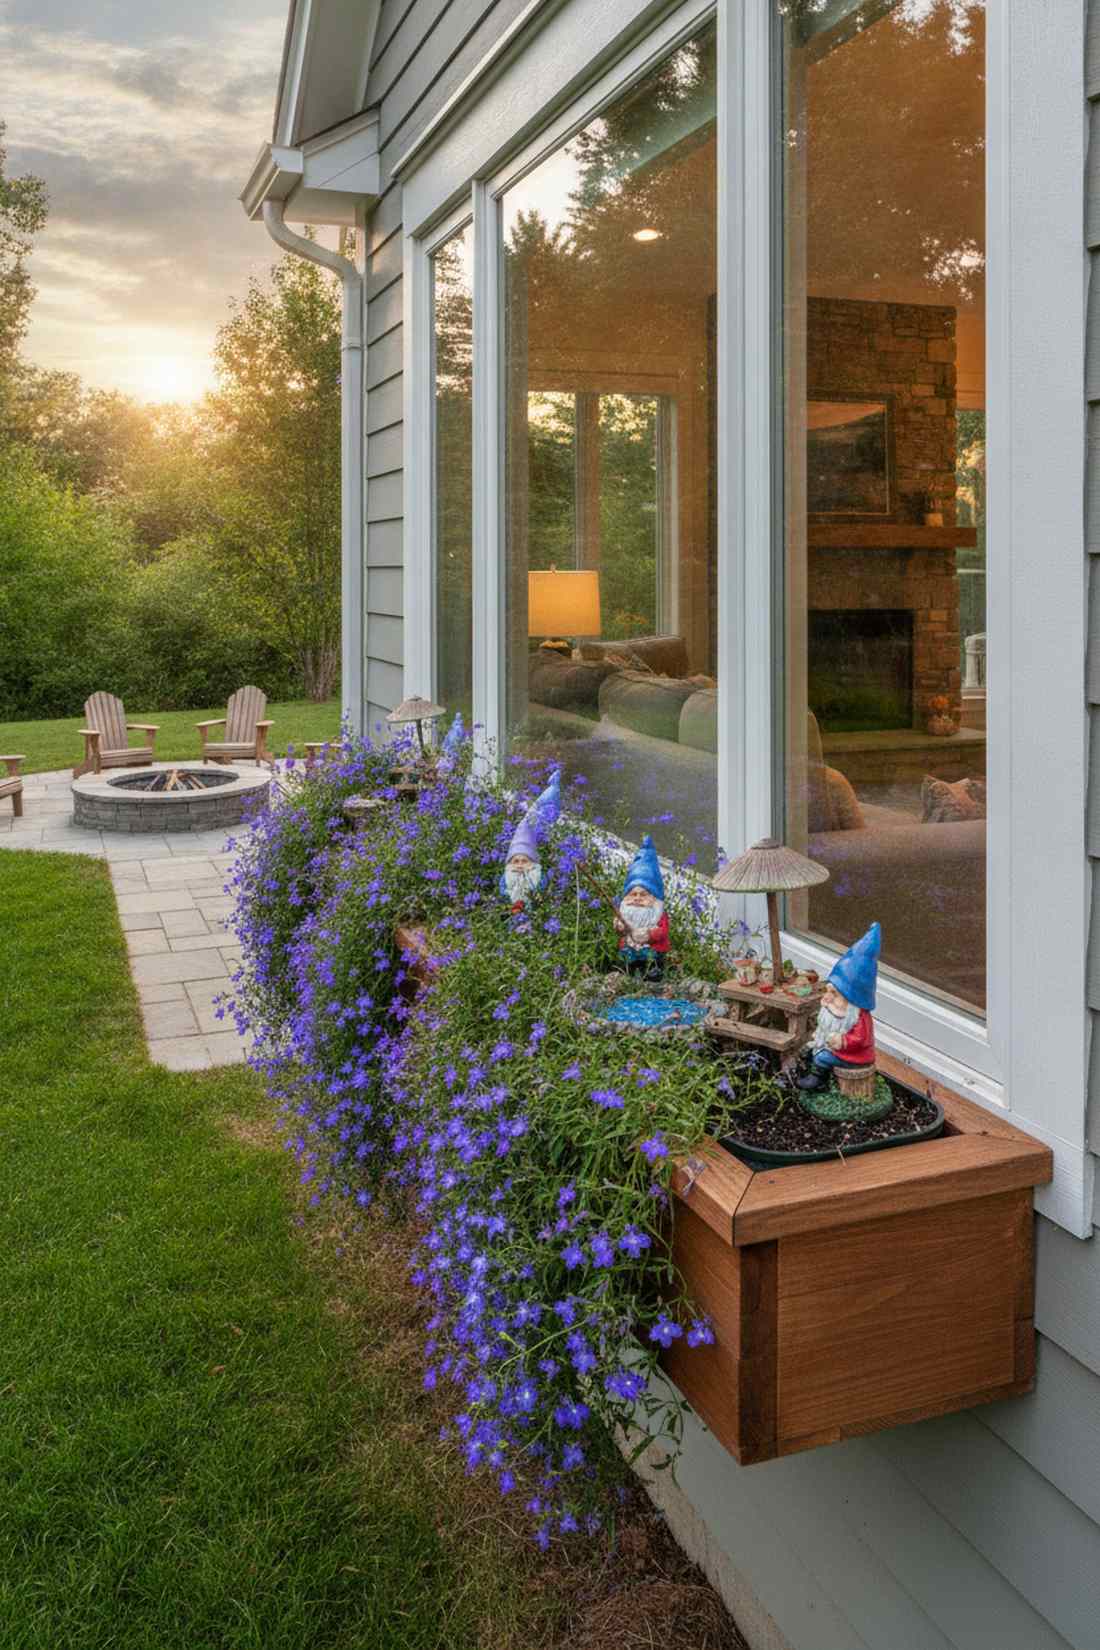
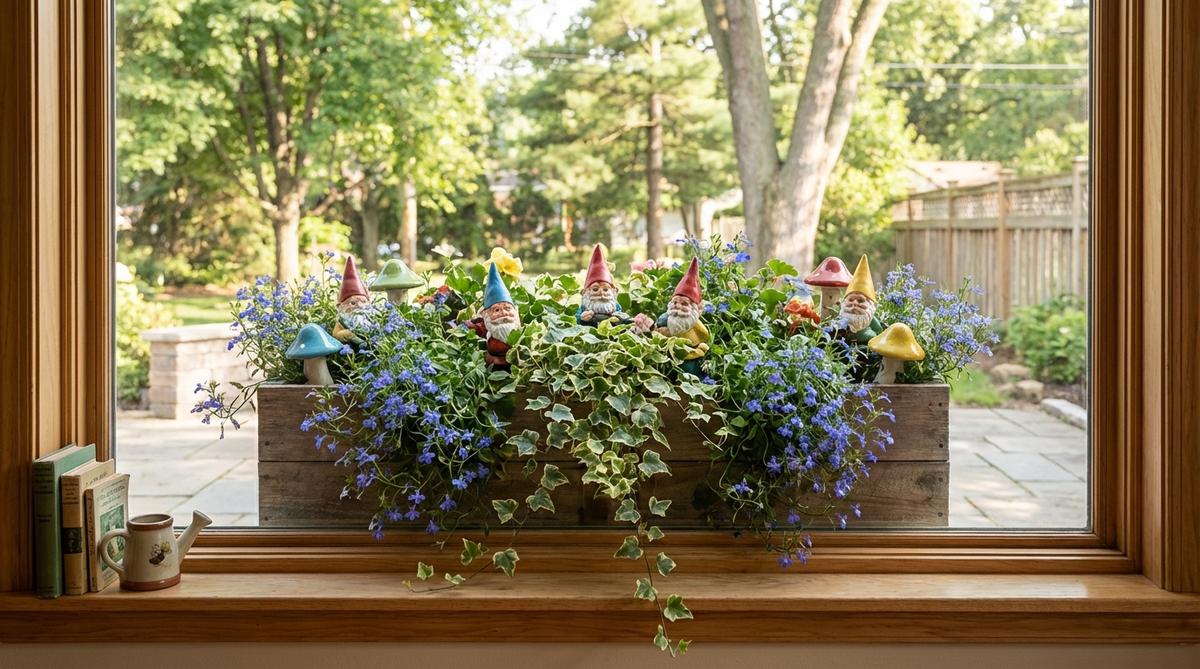
Gazing out the glass feels like looking into a living, breathing dollhouse. A window box storytelling scene is an incredible use-case for apartment dwellers or homes with wide sills.
Instead of flat, boring rows of identical flowers, weaving characters into spilling foliage creates dynamic visual depth. Sourcing pre-treated terrarium accessories ensures your figures won’t peel under direct sunlight against the glass.
A complete box refresh costs around $25–$45 depending on the greenery. Pin this to remember that you don’t need a massive yard to build a garden narrative.
- Key Materials: Trailing lobelia, miniature gnomes, rich potting mix.
- Vibe / Style: Immersive miniature world.
- Difficulty: Simple container gardening.
- Budget Breakdown: Figures: $15 | Plants & Soil: $20.
- Creator’s Tip: Color-match the gnomes’ hats to your blooming annuals for a cohesive designer look.
- Smart Sourcing: UV-resistant acrylic clear sealers and premium window box liners (pre-cut).
7. Rail-Hanging Swing Gnomes

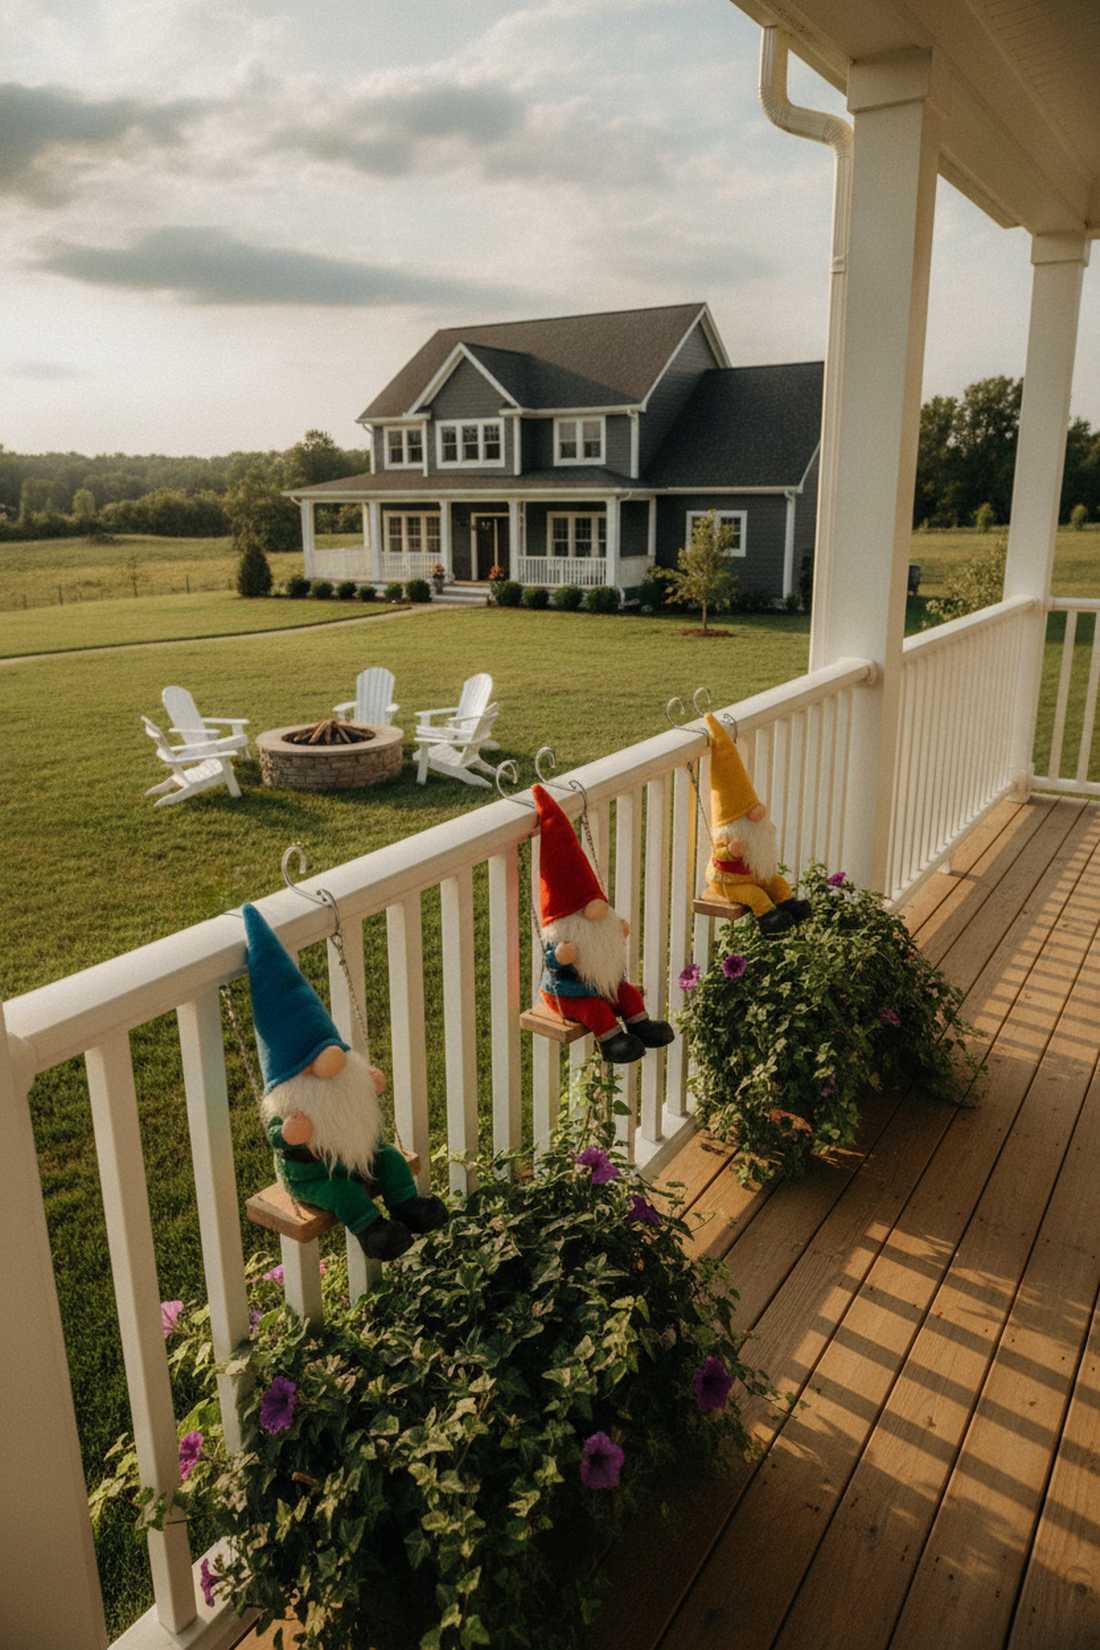
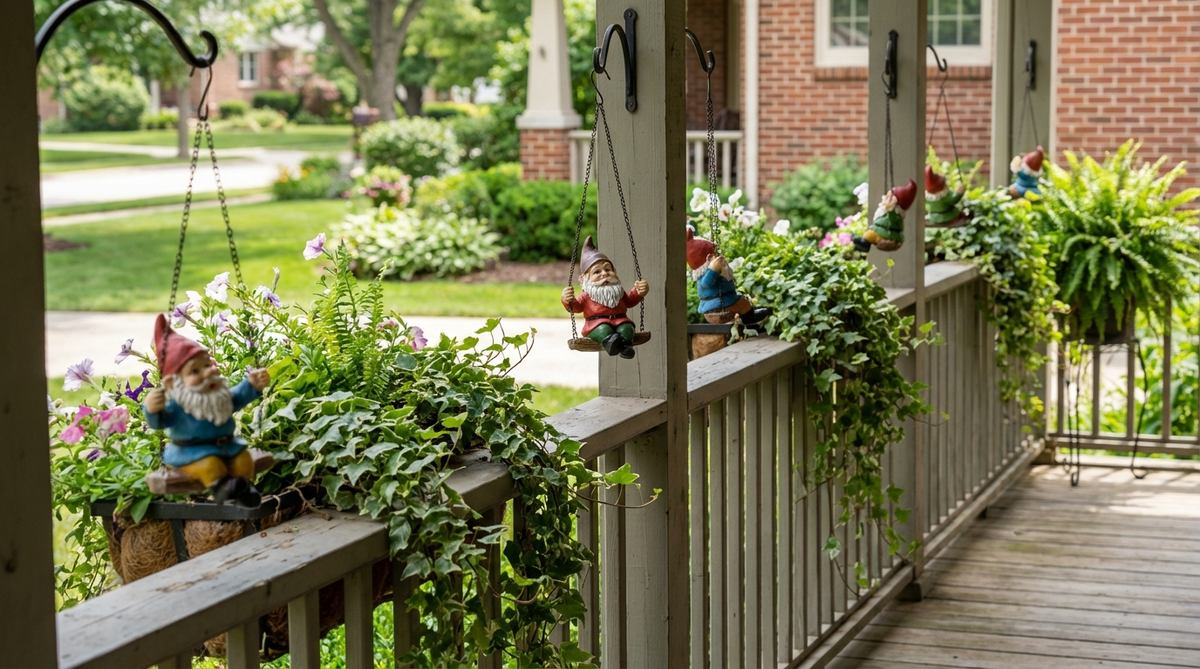
These kinetic figures deliver a breezy, carefree joy that catches the eye immediately. Incorporating hanging balcony rail decor works flawlessly for tight condo terraces or classic wooden porches.
It’s a common mistake to block railing views, yet suspending these figures below the handrail adds life without blocking the scenery. Combining them with heavy-duty metal swing brackets guarantees a premium look that won’t snap in high winds.
You can mount a pair of swings for roughly $20–$35. It’s a completely removable setup, making it an absolute must for renters.
- Key Materials: Hanging swing gnomes, S-hooks, trailing rail planters.
- Vibe / Style: Breezy and kinetic.
- Difficulty: Quick clip-on installation.
- Budget Breakdown: Swings: $25 | Hardware: $5.
- Creator’s Tip: Hang them at slightly different heights to mimic natural playground movement.
- Smart Sourcing: rust-proof stainless steel S-hooks (bulk pack) and weatherproof hanging gnome kits.
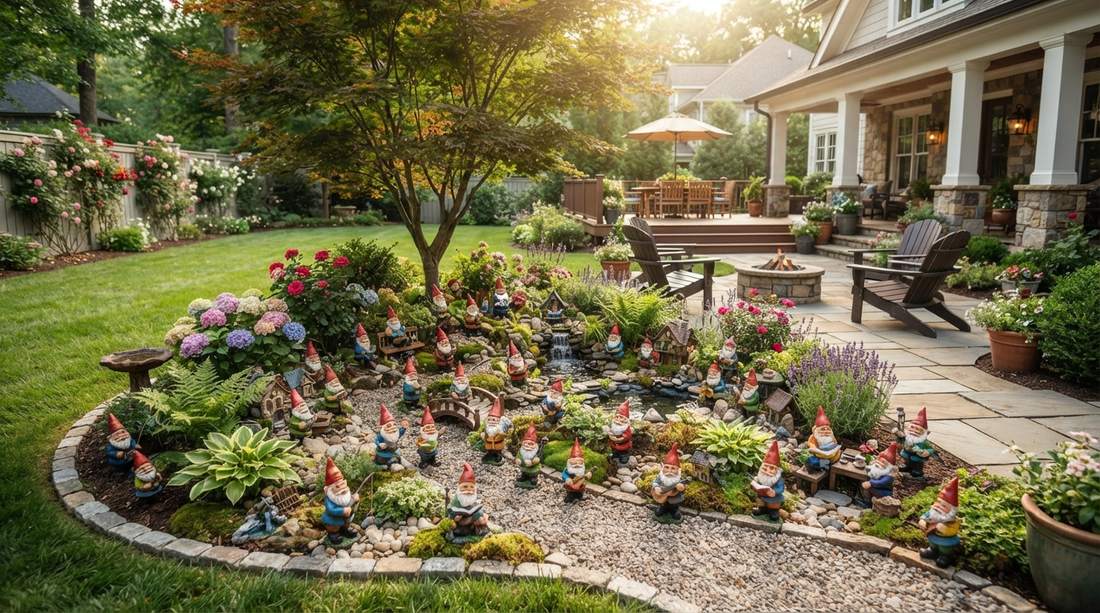
8. Rock Border Gnome Guard
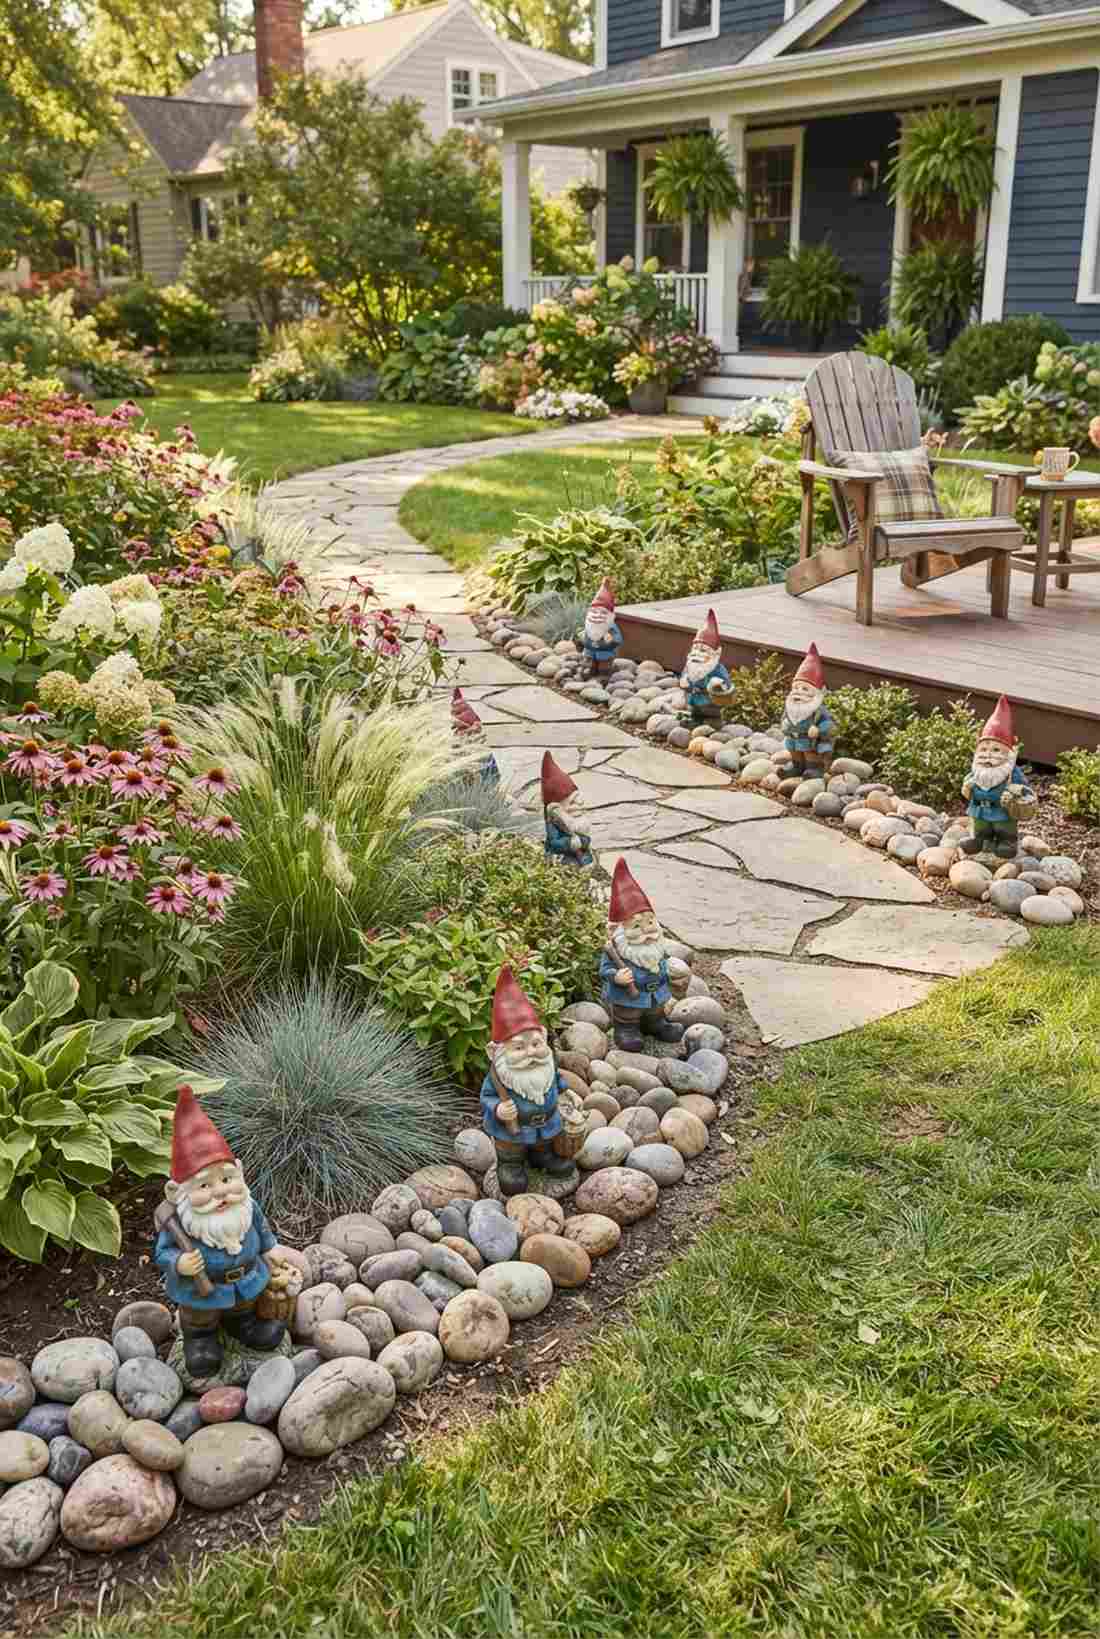
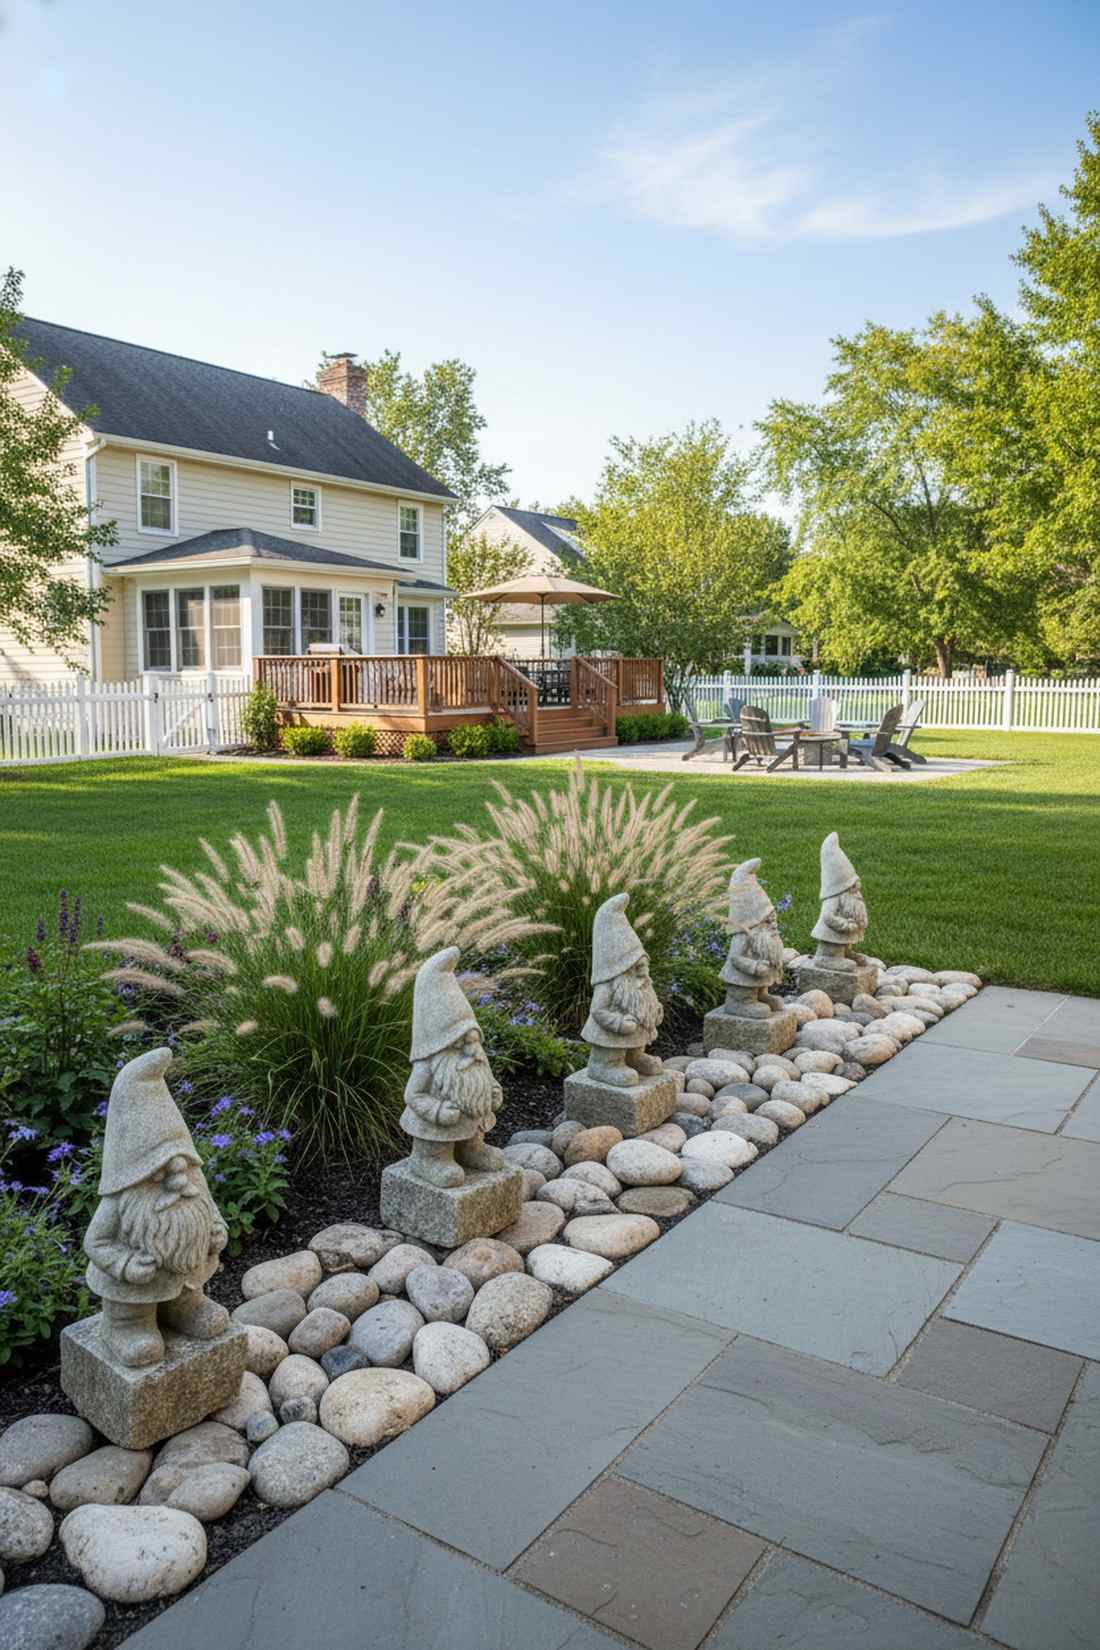
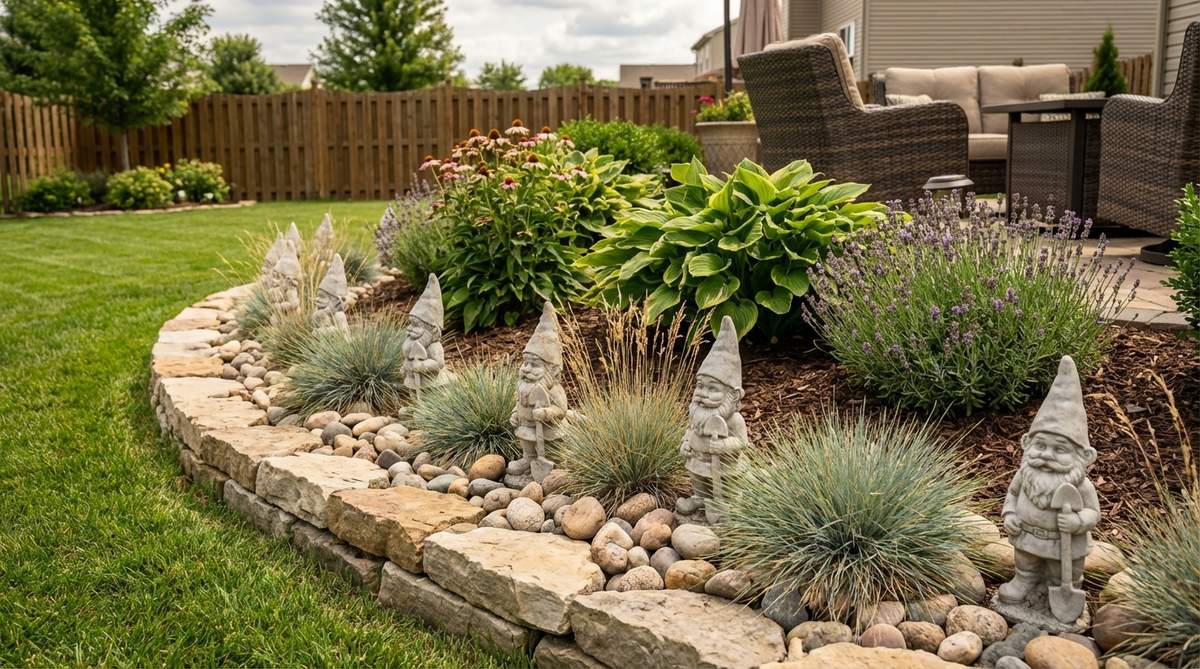
This structured layout feels like discovering a tiny royal guard along the walkway. Integrating a stone edge garden boundary is ideal for keeping kids and pets out of delicate flower beds.
You might think this looks cluttered, but done right, alternating figures with natural river rocks establishes a beautiful geometric rhythm. Utilizing bulk landscape stones mixed with premium miniature supplies frames the garden with serious intent.
Expect to invest about $30–$50 to cover a standard 10-foot walkway. Save this to your landscaping board for an affordable edging alternative.
- Key Materials: Medium garden gnomes, river rocks, ornamental grass.
- Vibe / Style: Playful yet structured.
- Difficulty: Labor-intensive but straightforward.
- Budget Breakdown: Gnomes: $30 | Bulk Rocks: $20.
- Creator’s Tip: Bury the bottom third of the rocks so the border looks naturally settled into the earth.
- Smart Sourcing: polished river rocks (bulk bag) and heavy-base stone garden gnomes.
9. Hanging Basket Gnome Perches
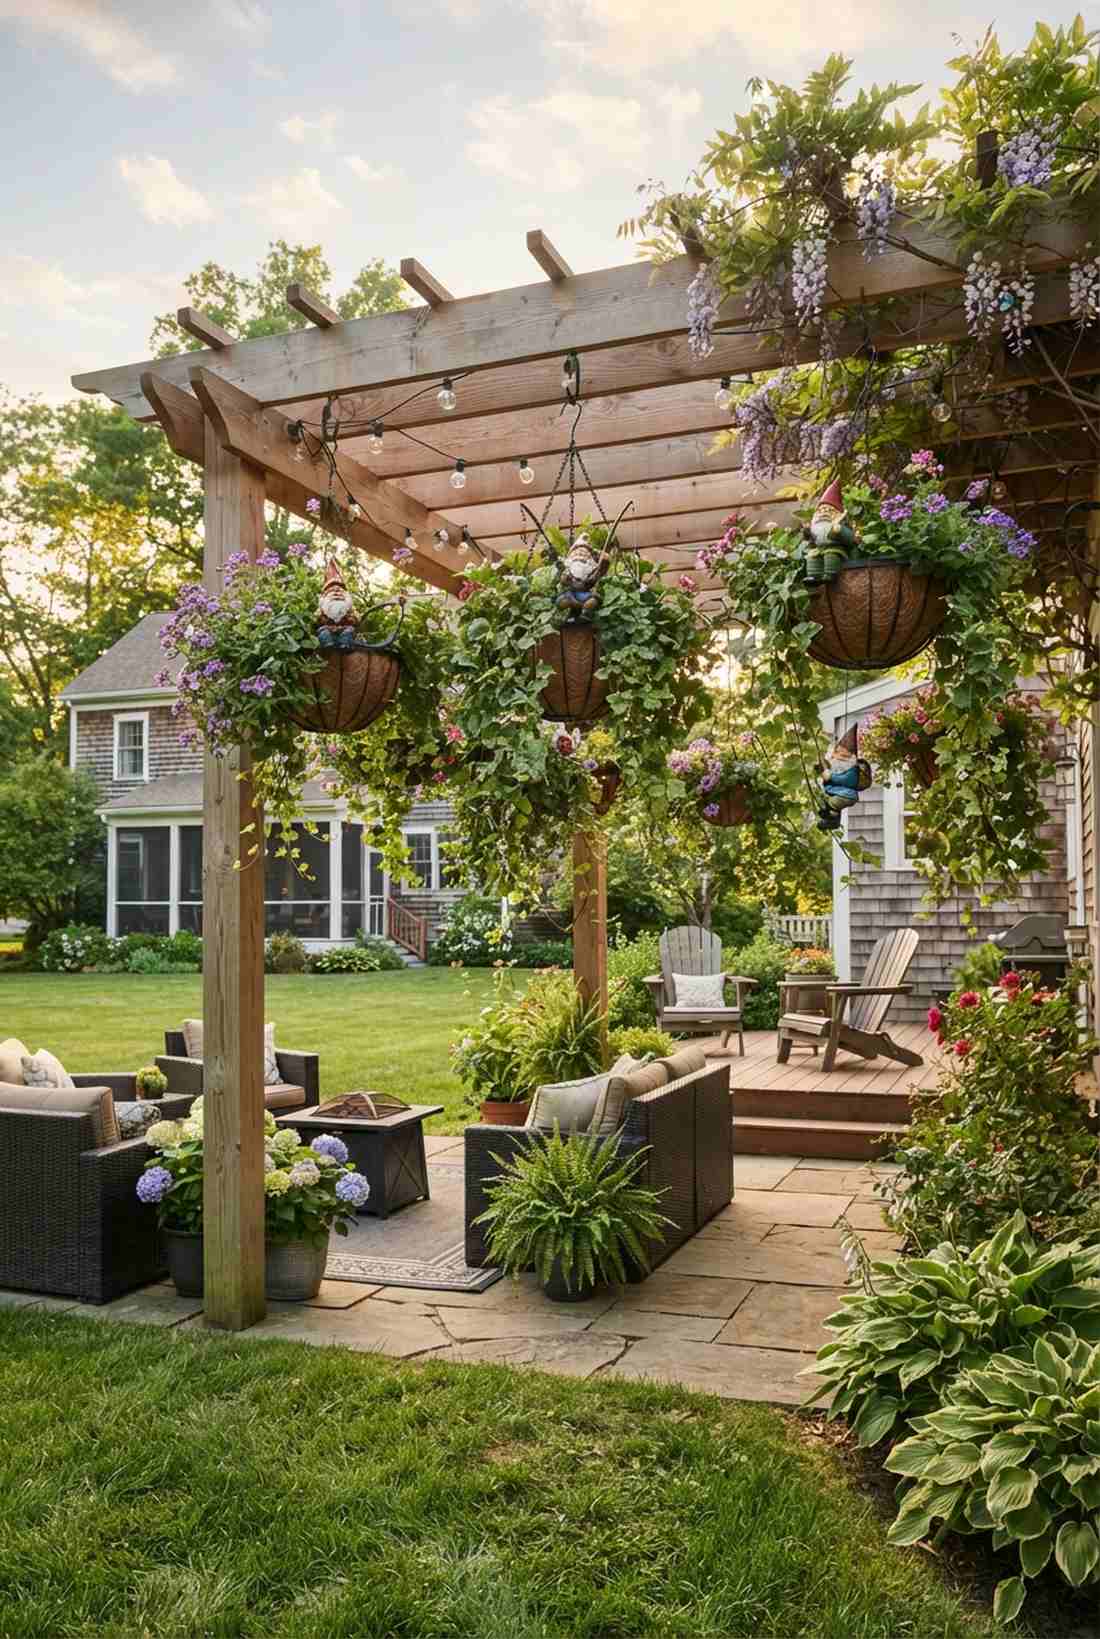
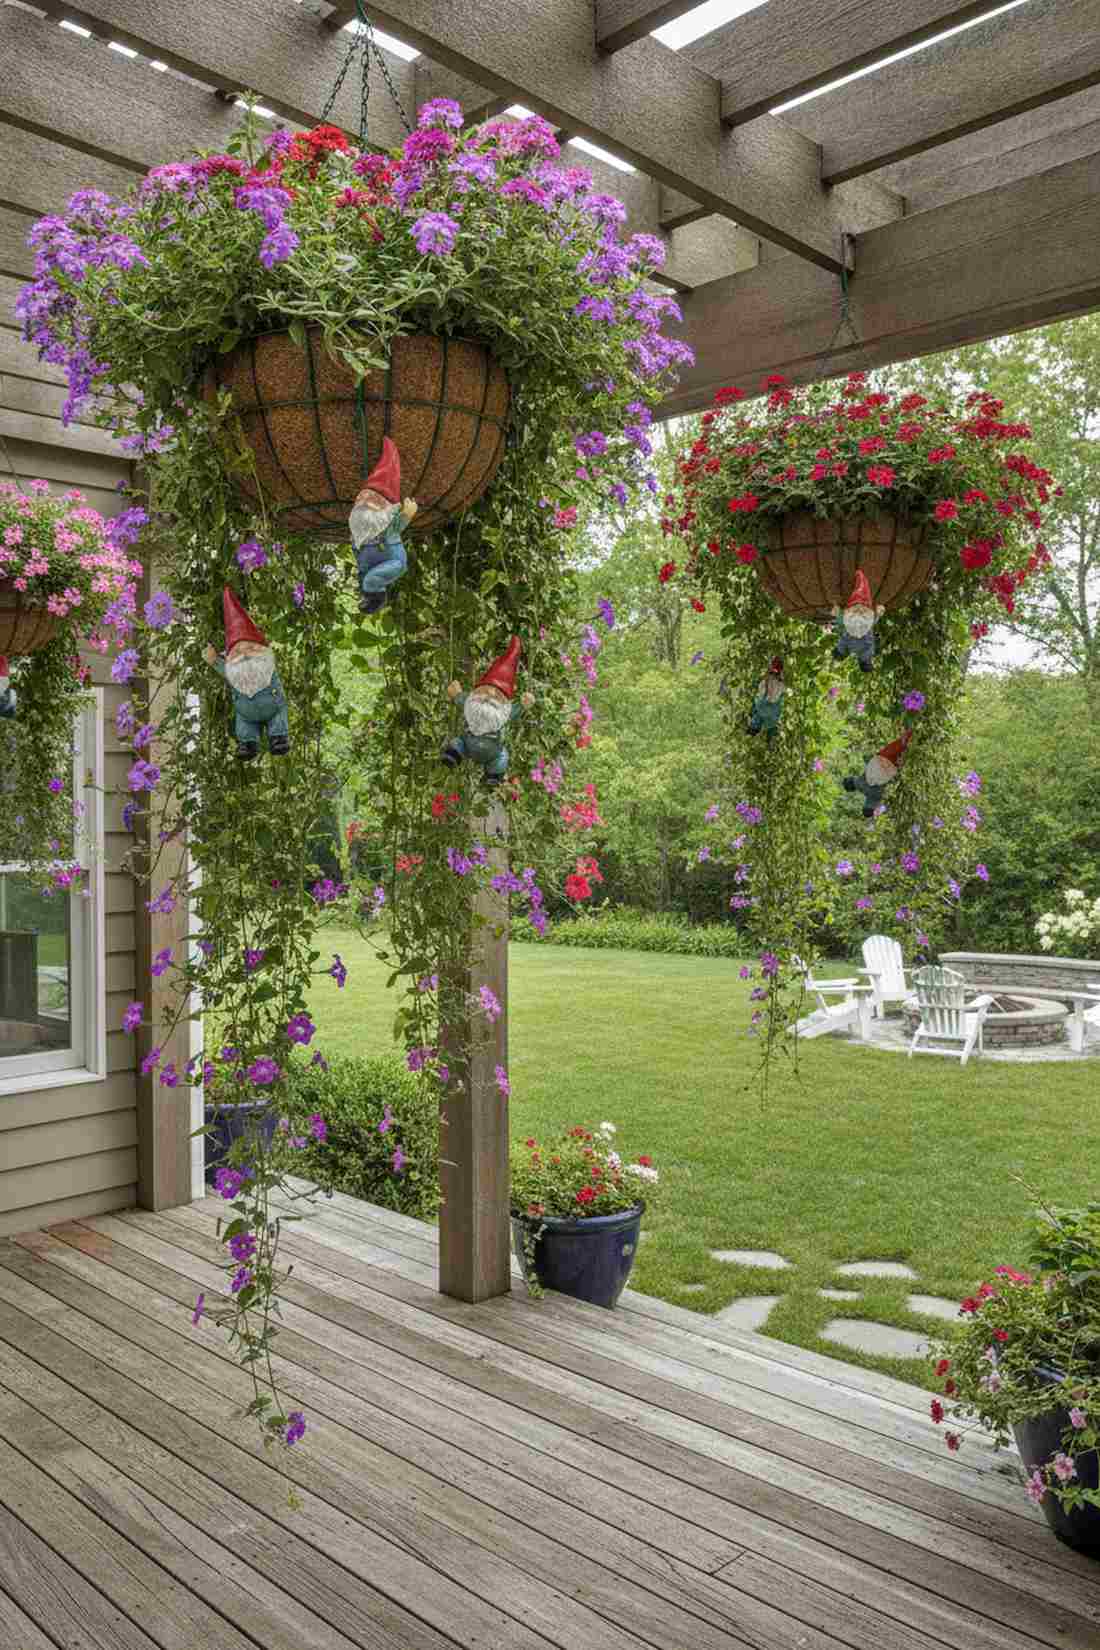
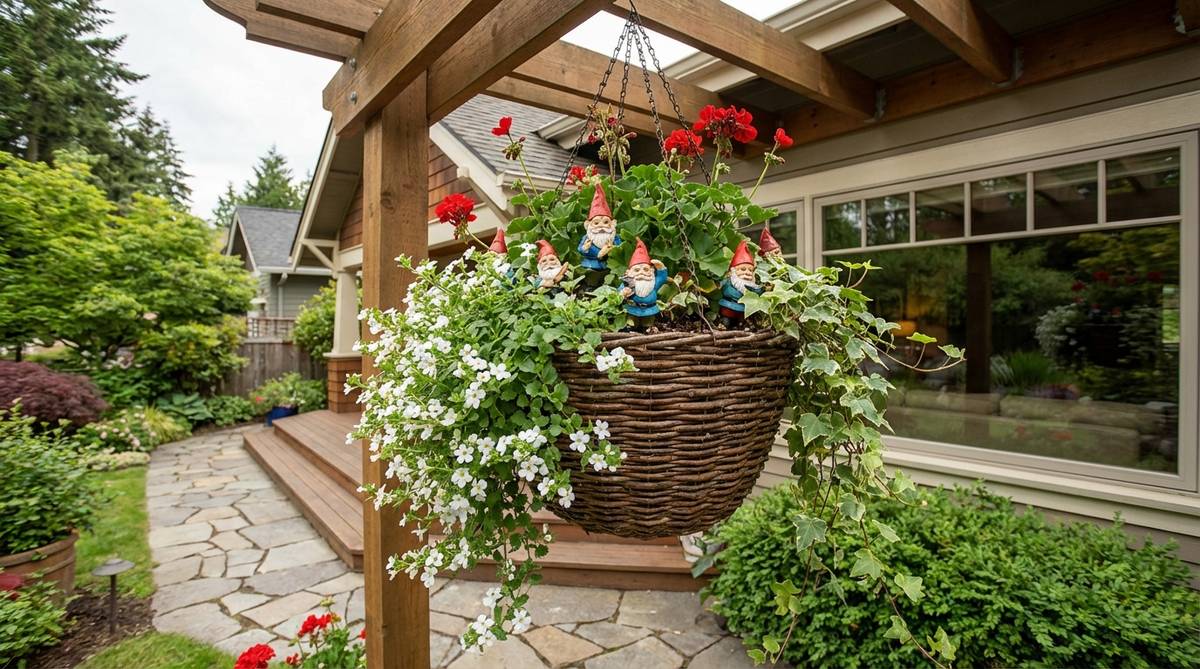
Looking up at this display feels like catching tiny tree-climbers in the act. A suspended basket whimsical setup is a spectacular way to utilize overhead space on pergolas or front awnings.
While some find yard art tacky, utilizing premium lightweight figures tucked deep into lush foliage offers a subtle, sophisticated surprise. Using pre-cut floral wire hidden beneath the leaves ensures your characters stay safely perched no matter the weather.
This elevated charm costs around $15–$25 on top of your existing baskets. It’s an easy weekend project that elevates your vertical space instantly.
- Key Materials: Lightweight resin gnomes, floral wire, trailing verbena.
- Vibe / Style: Hidden canopy surprise.
- Difficulty: Moderate balancing act.
- Budget Breakdown: Lightweight Figures: $15 | Wire: $5.
- Creator’s Tip: Anchor the figures directly to the metal basket frame, not the fragile plant stems.
- Smart Sourcing: green vinyl-coated floral wire (spool) and lightweight resin fairy garden accessories.
💡 Must-Have Supplies for High-End Setups
To build these setups faster and ensure they last, skip the generic craft aisles and invest in the right foundational kits.
- Base & Support: rust-proof metal ground stakes (heavy duty)
- Setup Tools: weatherproof outdoor museum putty kits
- Weather/Durability Protection: UV-resistant clear acrylic sealant sprays
Most people get this completely wrong… until they try the exact layout coming up next.
10. Birdbath Edge Gnome Circle
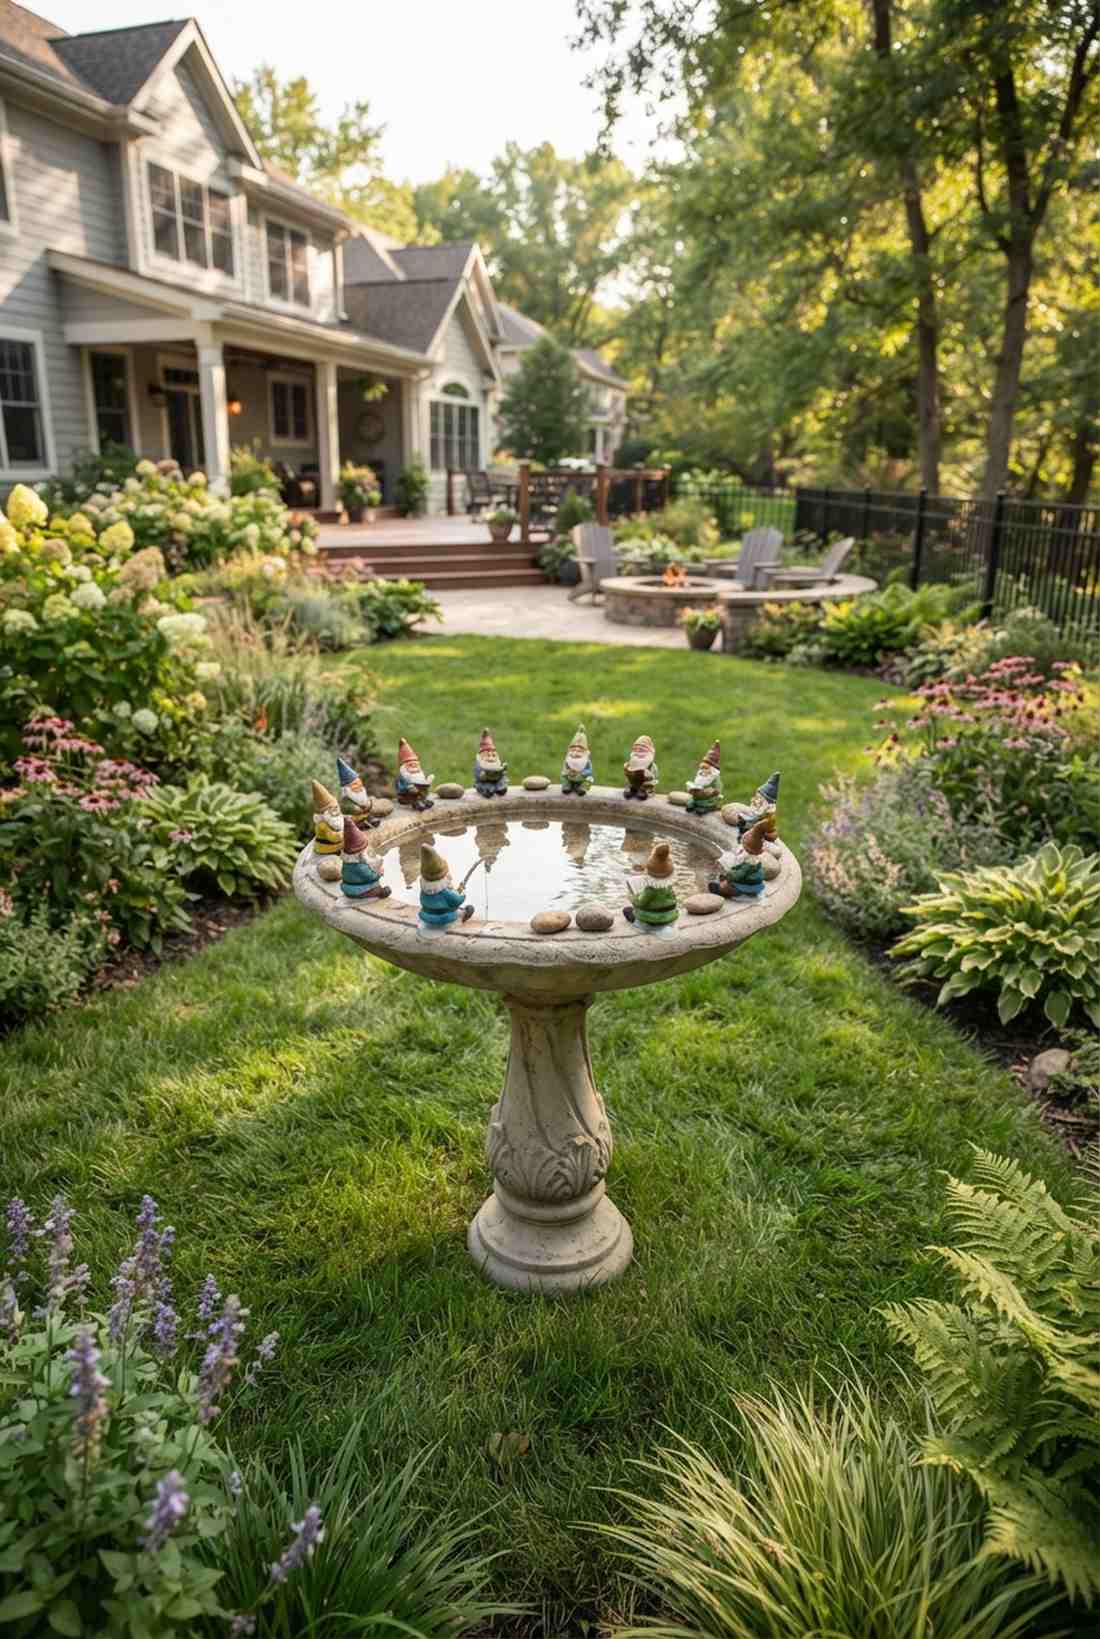
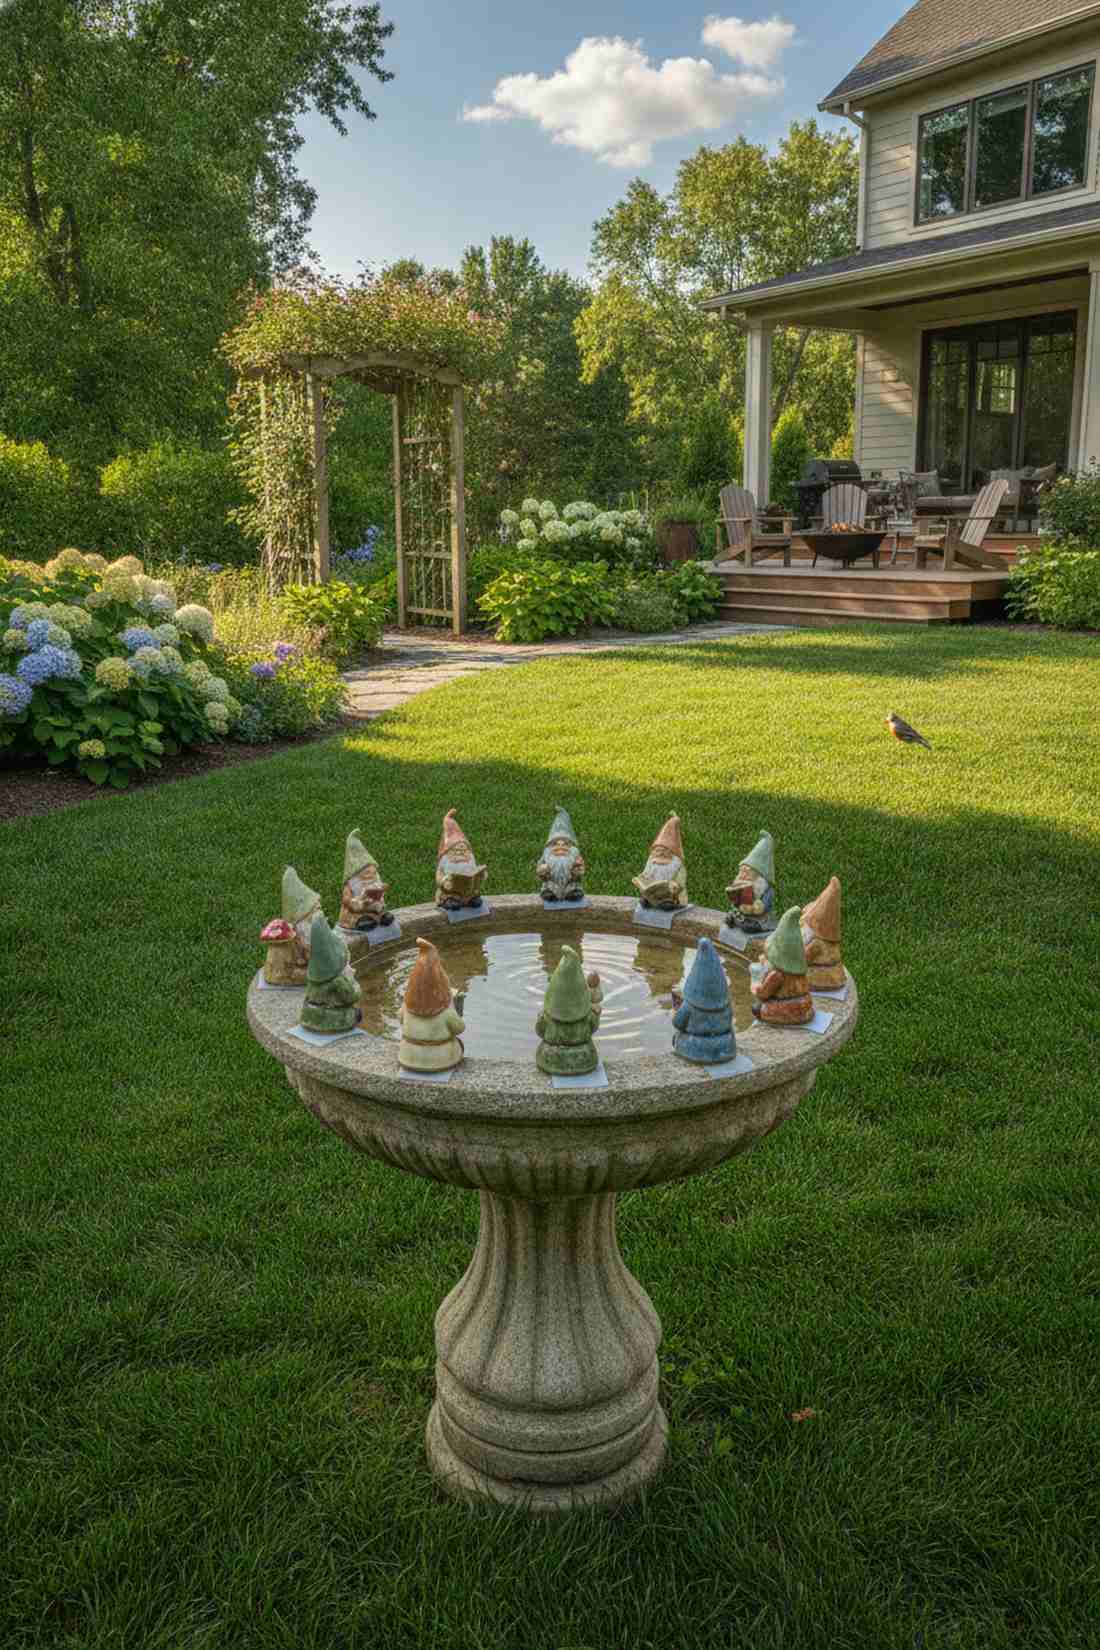
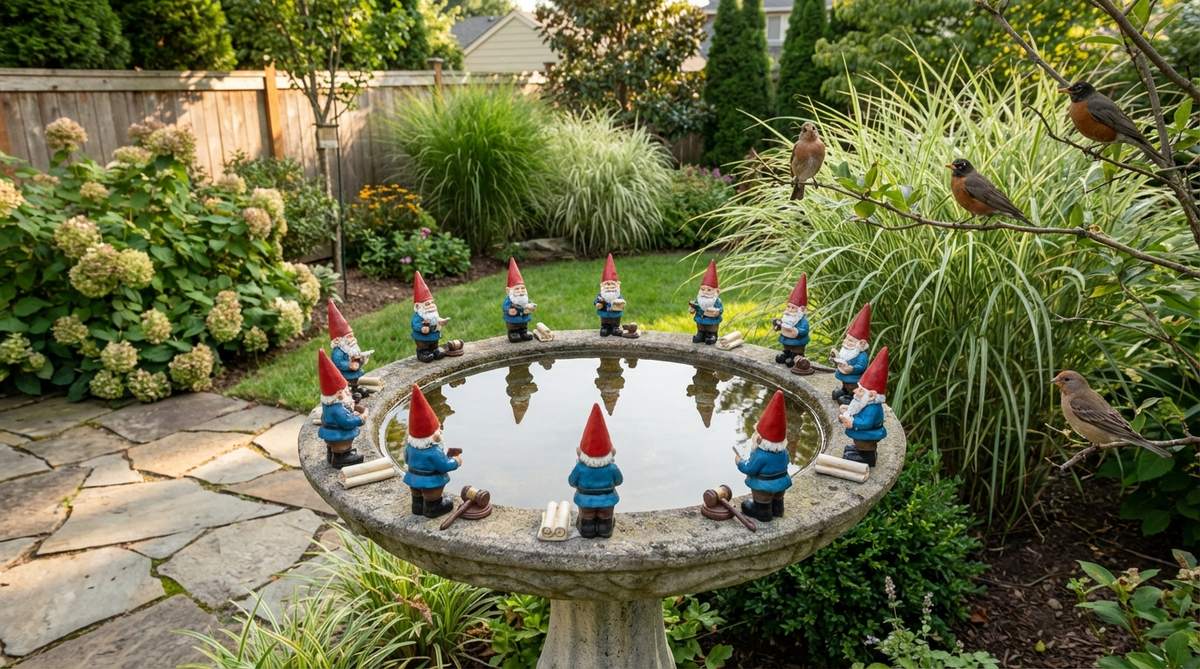
This layout gives the peaceful illusion of a woodland council meeting over the water. A birdbath rim focal point serves as a brilliant centerpiece for the middle of a lush lawn.
The trick to avoiding a cheap aesthetic is securing figures with discreet waterproof putty rather than balancing them precariously. When you source high-quality, water-resistant miniature garden supplies, the scene holds up beautifully even under constant splashing.
Upgrading your existing birdbath runs about $15–$30 for the figures and putty. Pin this to instantly revive an unused garden water feature.
- Key Materials: Micro-gnomes, waterproof adhesive, existing birdbath.
- Vibe / Style: Tranquil water gathering.
- Difficulty: Very easy.
- Budget Breakdown: Micro Figures: $20 | Putty: $8.
- Creator’s Tip: Leave plenty of open rim space so birds still have a safe landing zone to drink.
- Smart Sourcing: waterproof marine-grade putty (pre-cut strips) and sealed ceramic micro gnomes.
11. Doorstep Mushroom Gnome Cluster
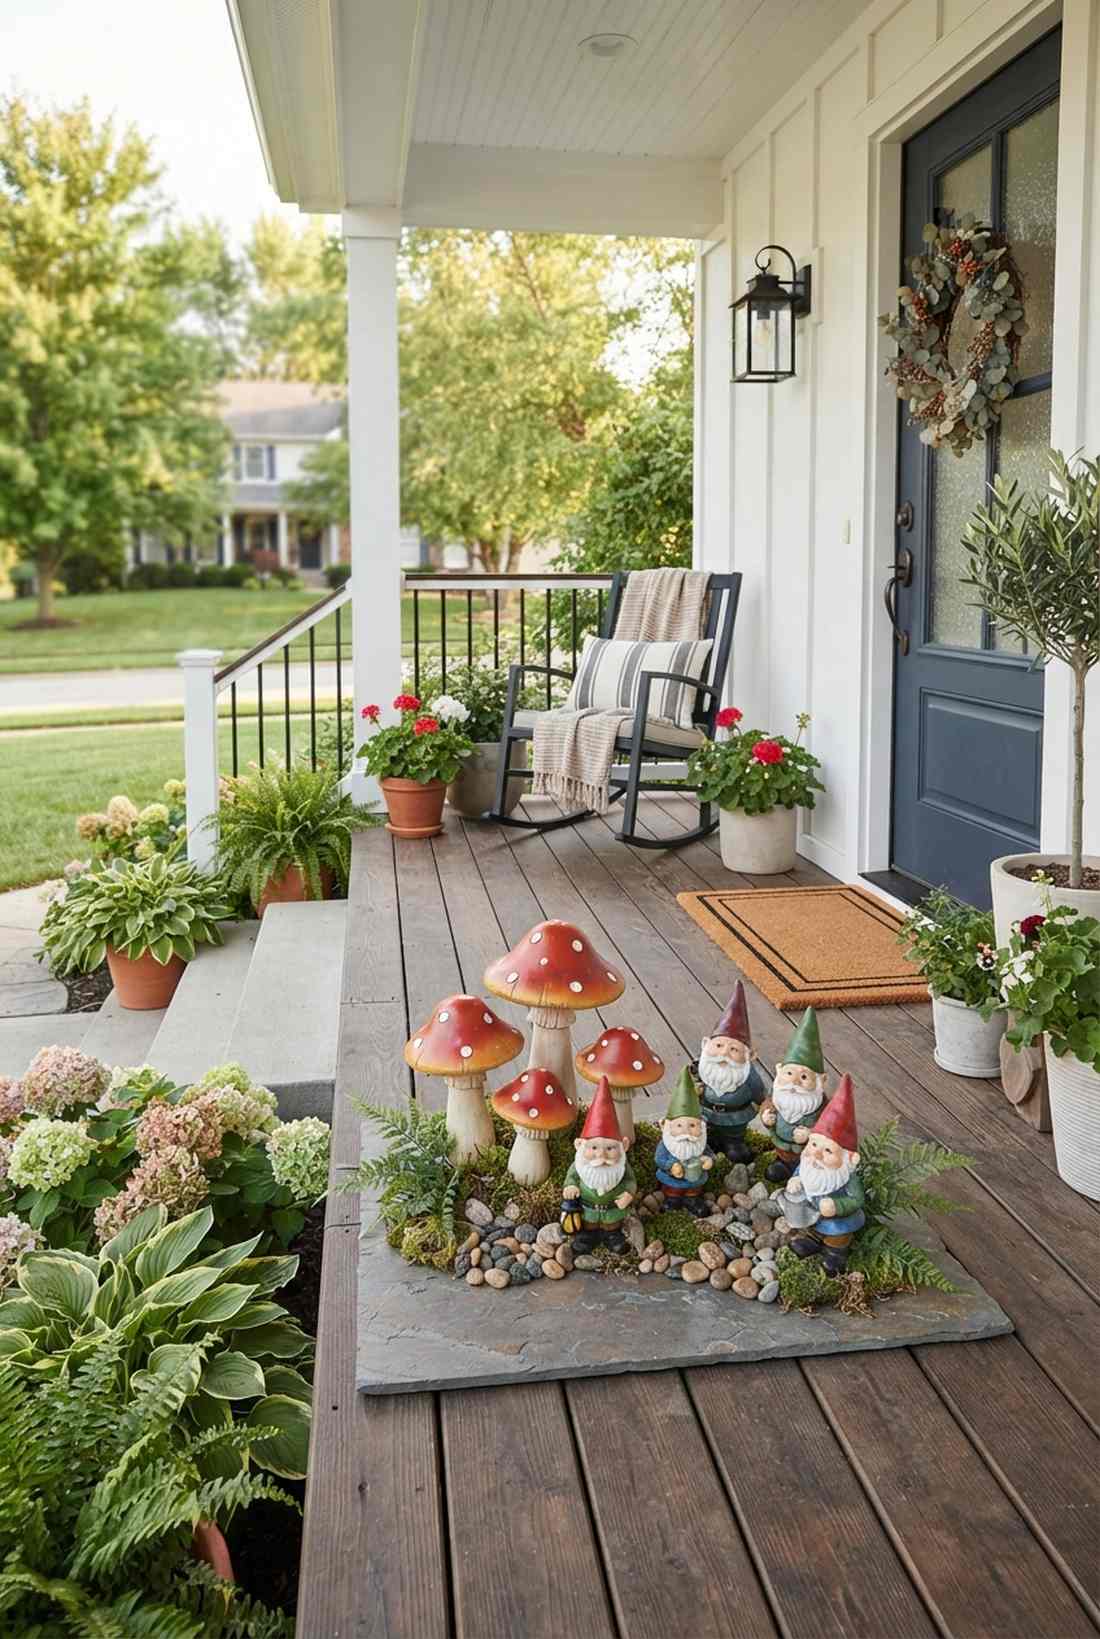
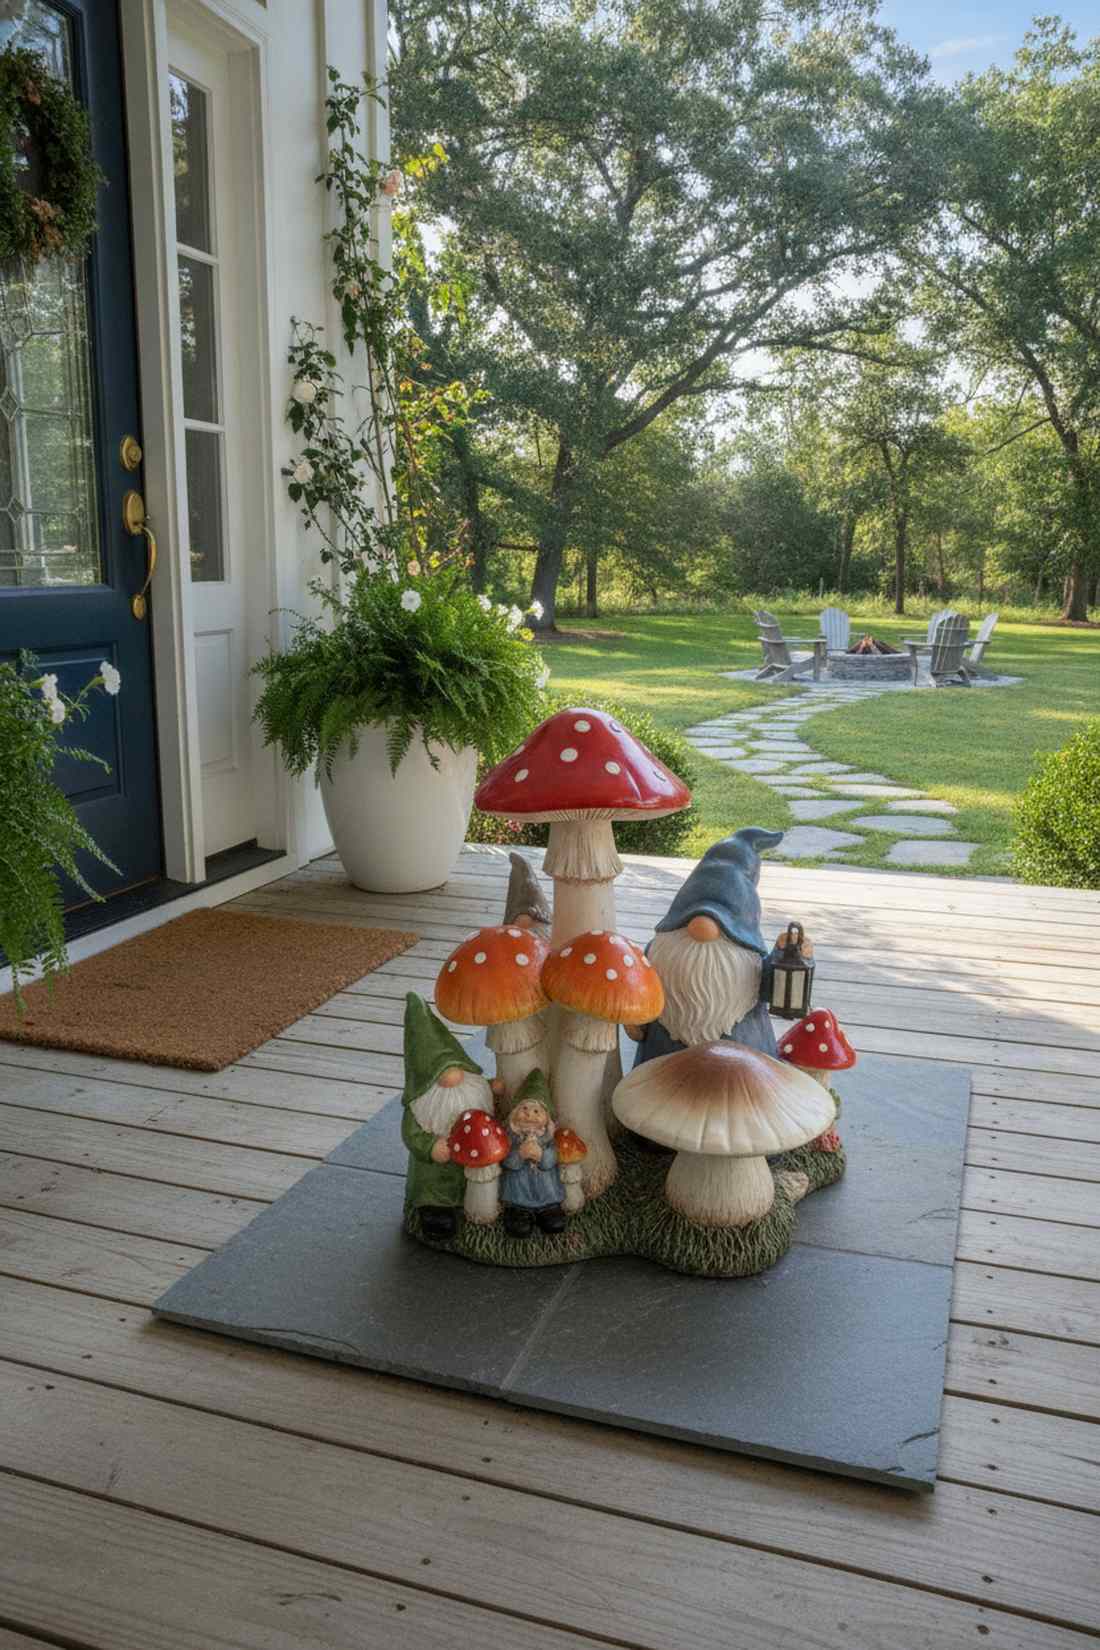
Stepping onto this porch feels like crossing the threshold into a magical domain. Crafting a doorstep woodland entry cluster anchors modern homes with a bold, contained burst of fantasy.
Most yards leave these spots empty, but clustering varied heights of faux mushrooms creates a sculptural, gallery-like installation. Investing in UV-resistant resin fairy cottage kits alongside your mushrooms guarantees the vibrant reds and whites won’t fade into pink by August.
This highly photogenic arrangement costs around $35–$60 to build properly. Highly recommended for families wanting a stunning seasonal photo backdrop.
- Key Materials: Ceramic mushrooms, assorted gnomes, flat slate base.
- Vibe / Style: Bold fairy-tale threshold.
- Difficulty: Simple grouping.
- Budget Breakdown: Mushrooms: $35 | Gnomes: $20.
- Creator’s Tip: Overlap the silhouettes so they look like a natural cluster rather than soldiers in a row.
- Smart Sourcing: fade-resistant ceramic garden mushrooms (set of 3) and heavy-duty slate base tiles.
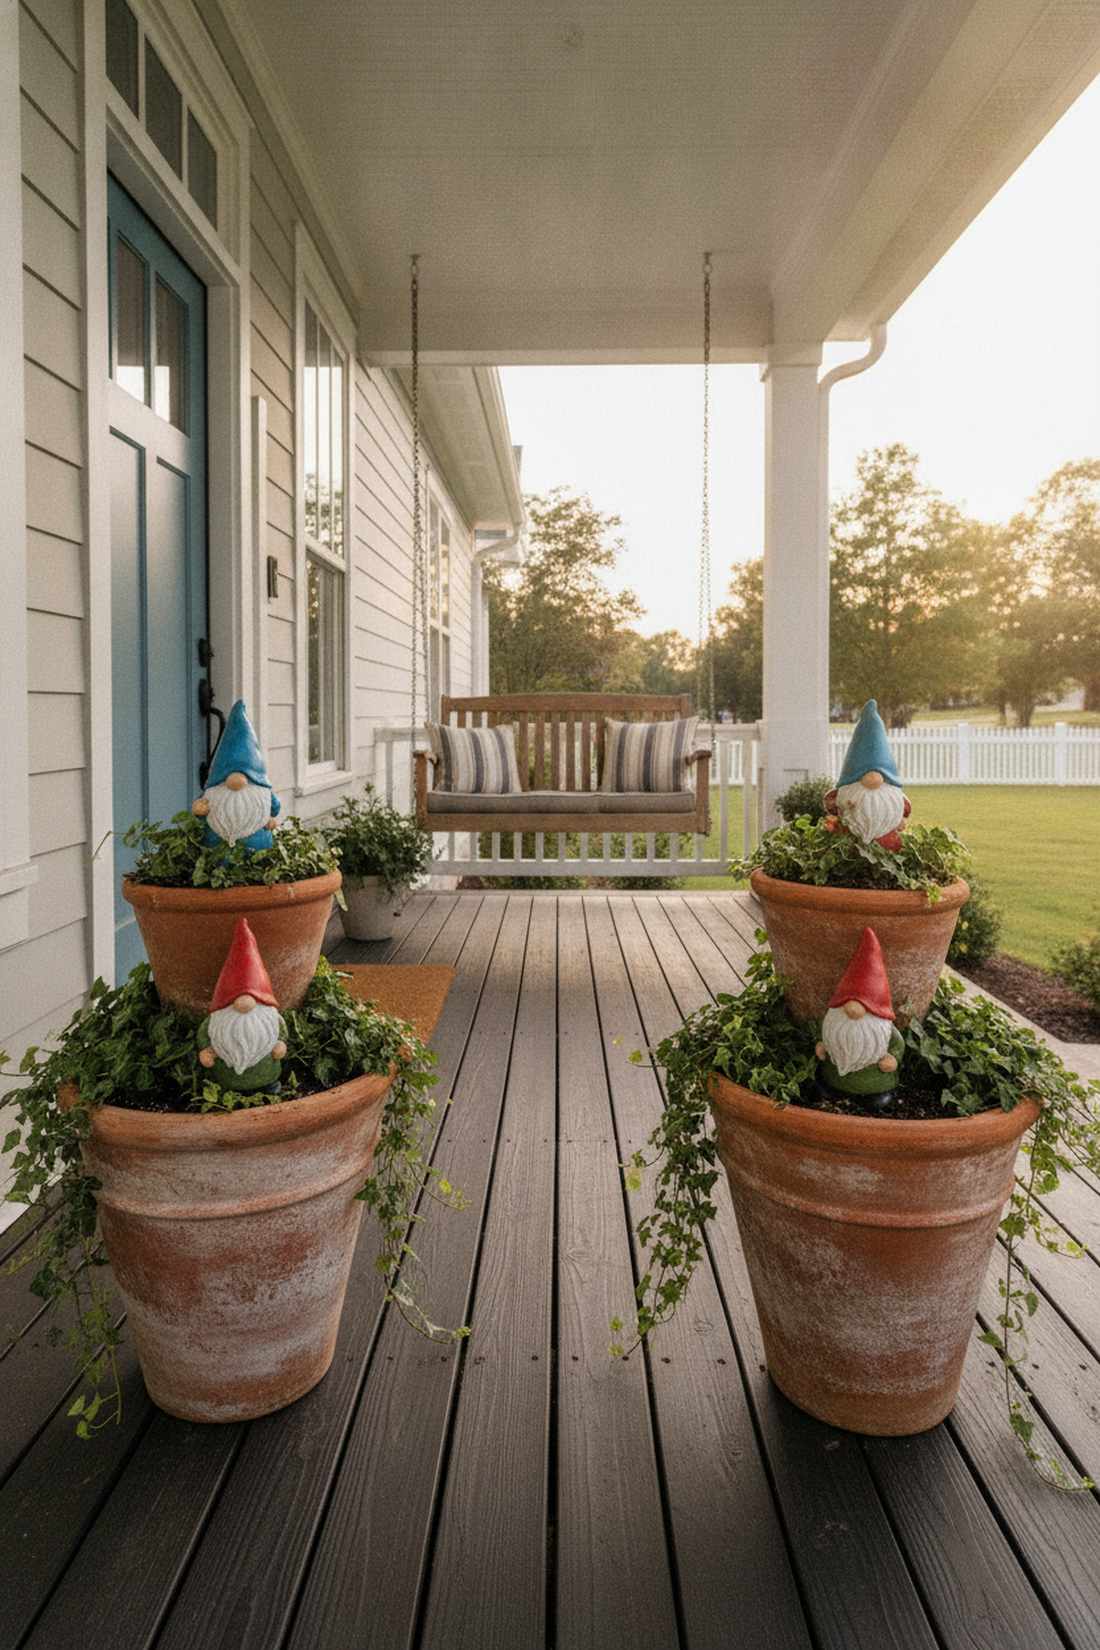
12. Driveway Potted Gnome Greeters
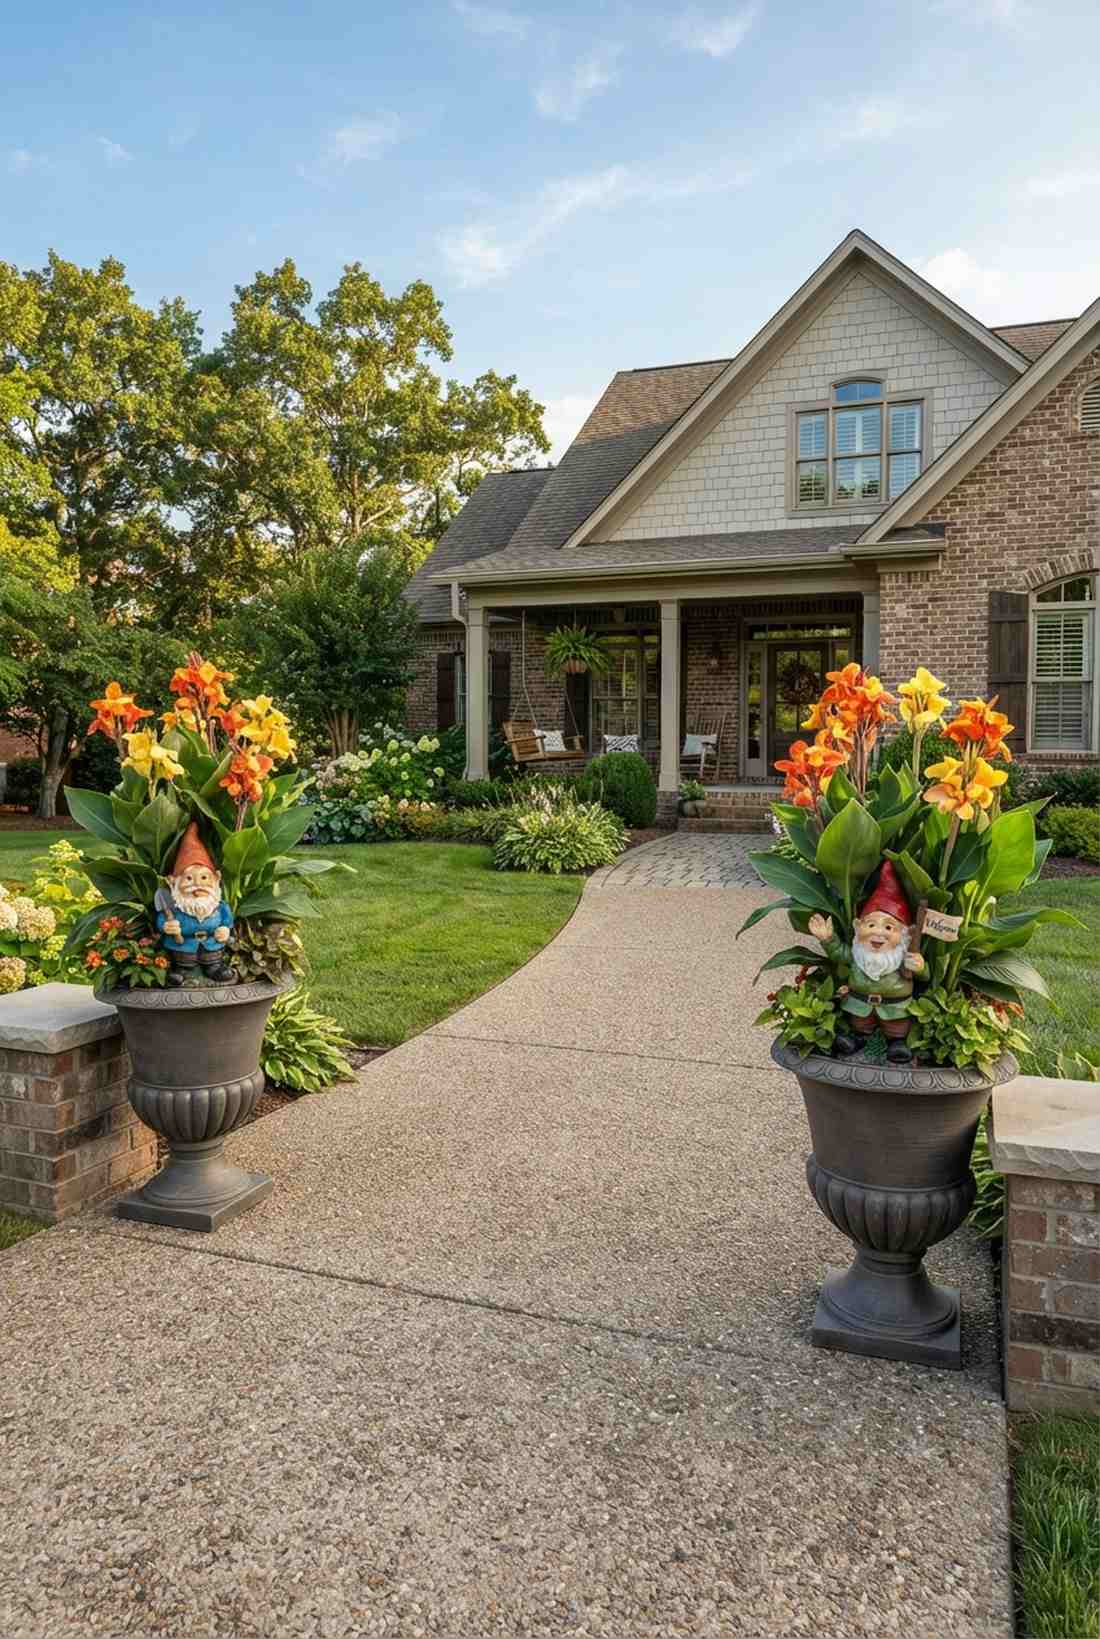
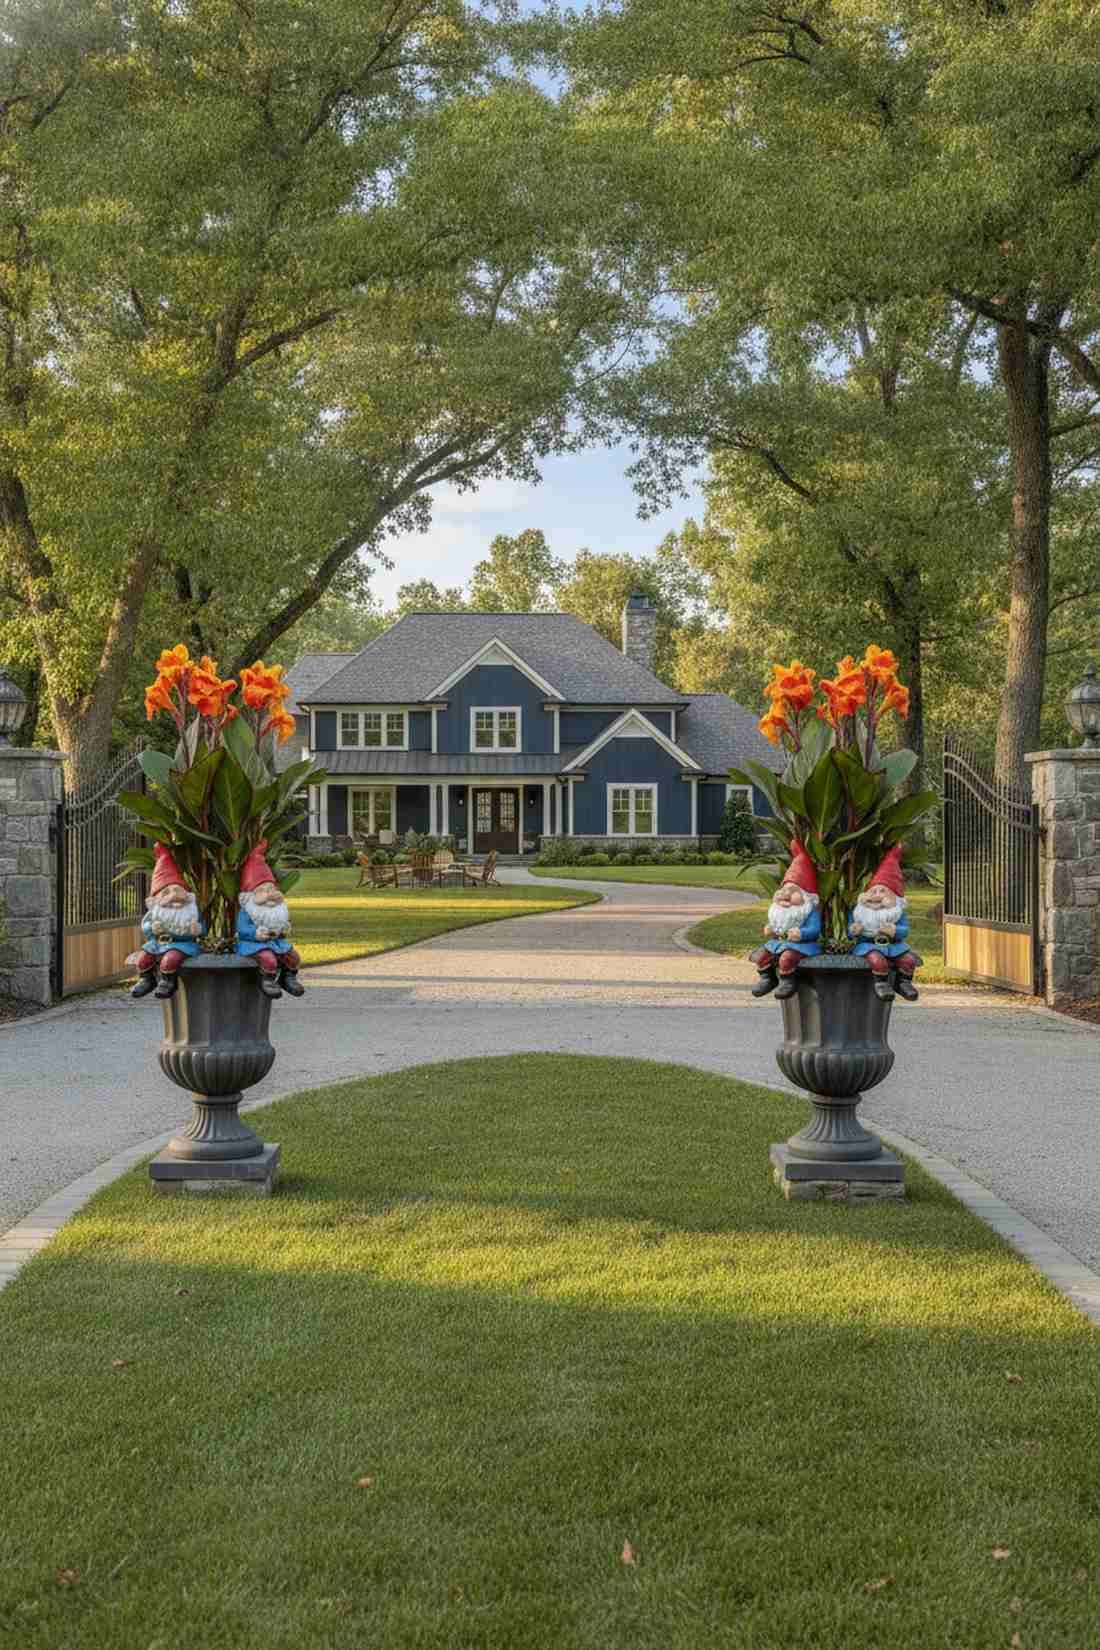
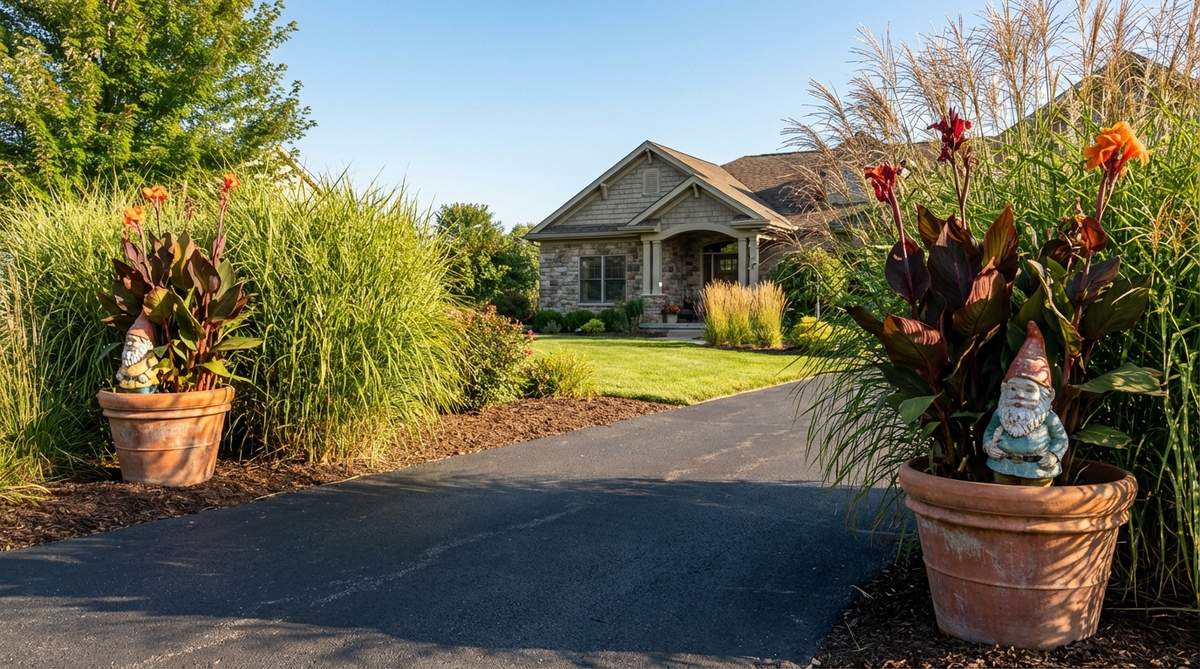
This layout projects an incredibly friendly and intentional property entrance. A driveway pillar planter setup works wonders at the end of long, featureless suburban driveways.
Instead of standard symmetrical topiaries, flanking your drive with bold foliage and seated characters breaks up the visual monotony beautifully. By grabbing premium weatherproof planters and high-CPC miniature accessories, the driveway feels like an expensive estate entrance.
You can execute this grand entrance for about $50–$80 per side. Save this layout if you want to make a massive first impression on visitors.
- Key Materials: Large urns, canna lilies, seated gnomes.
- Vibe / Style: Welcoming estate charm.
- Difficulty: Moderate planting effort.
- Budget Breakdown: Urns & Soil: $40 | Figures: $25.
- Creator’s Tip: Seat the gnomes slightly off-center to make the arrangement feel organic and lively.
- Smart Sourcing: commercial-grade plastic outdoor urns and UV-protected seated garden figures.
Storybook mini garden gnomes scenes kids love
Beyond entrances, mini garden gnomes shine when used as characters in tiny landscapes that suggest a full narrative. These ideas focus on beds, veggie patches, and kid zones where imagination matters as much as plant performance.
13. Enchanted Fairy Village With Gnomes
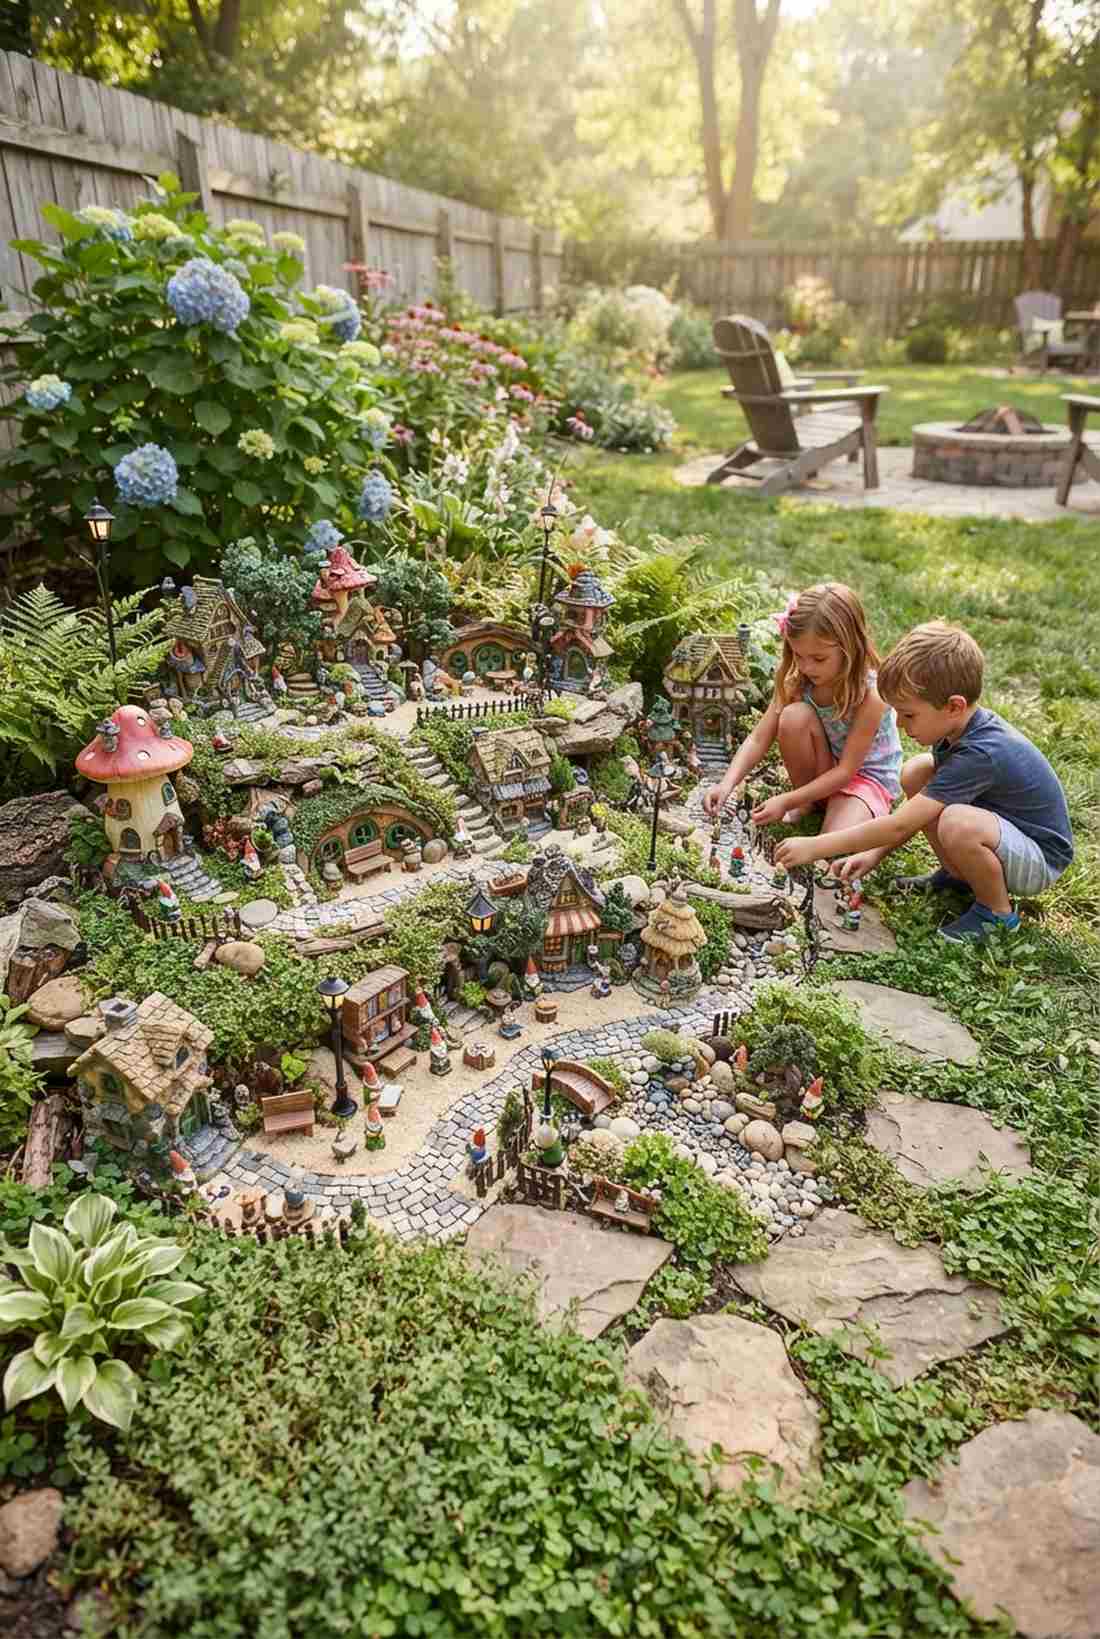
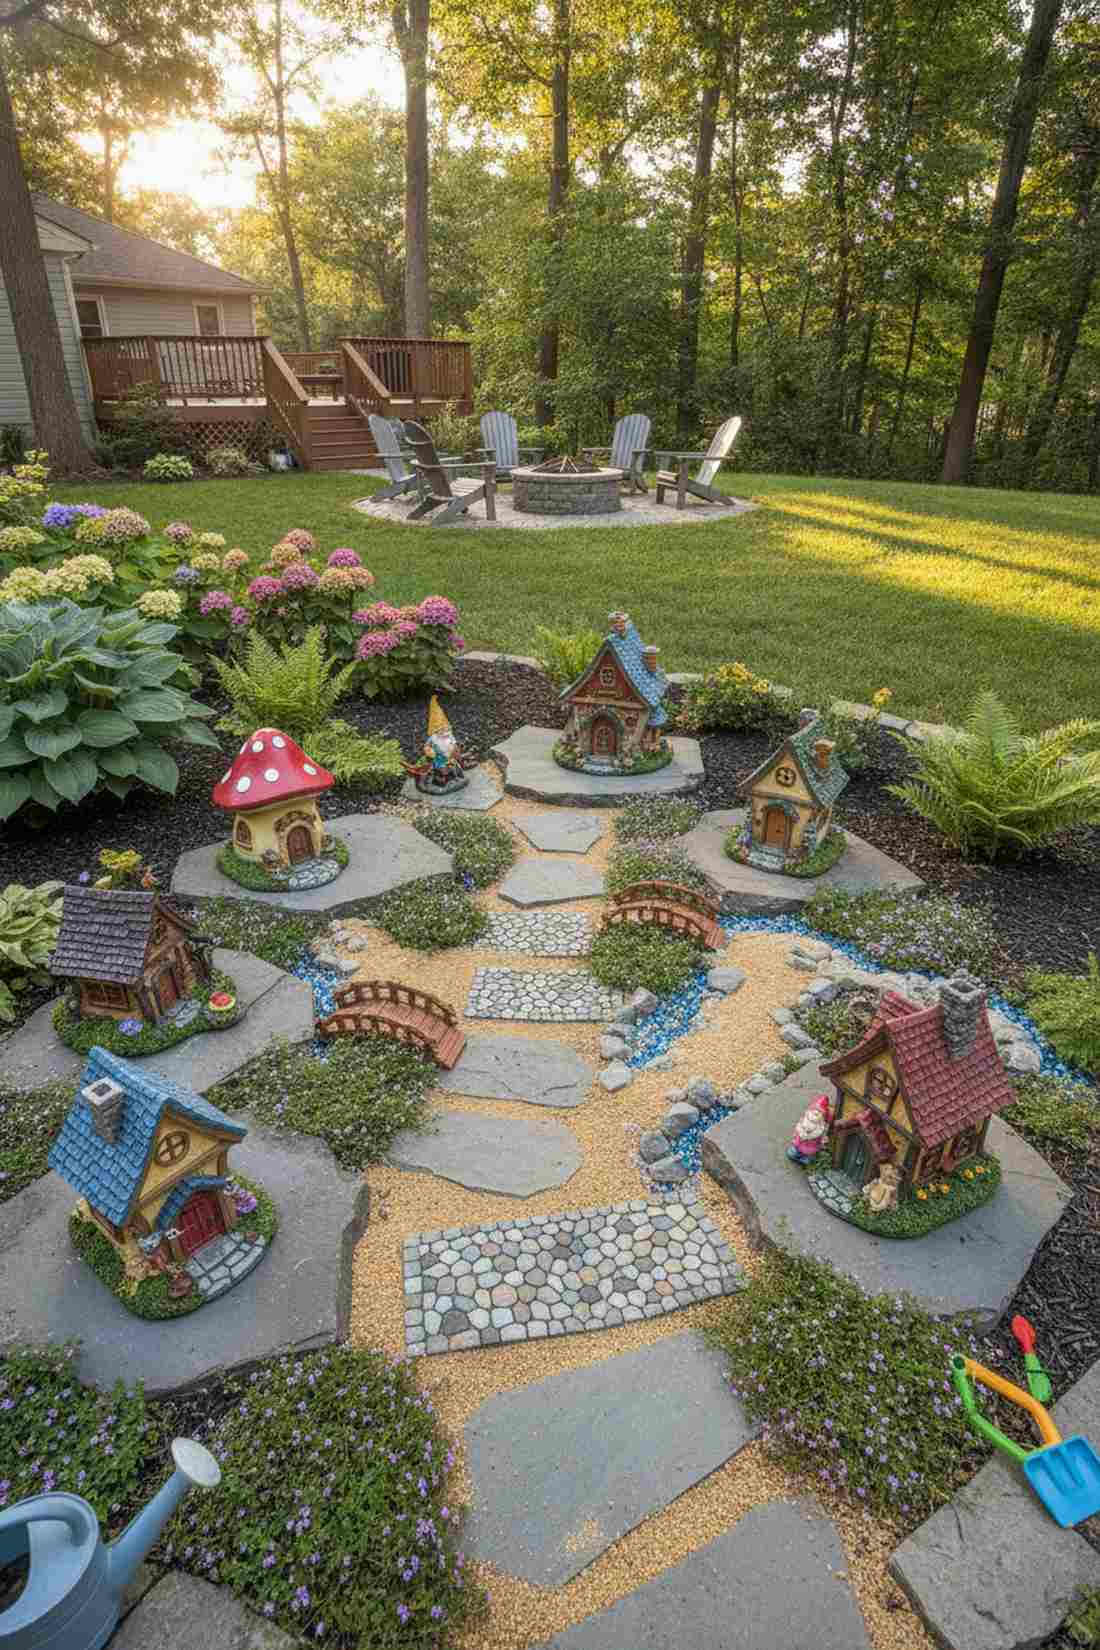
Tucked in a corner, this layout feels like a bustling metropolis for the little folk. An interactive fairy garden village is the ultimate sensory play zone for children’s backyards.
Forget the standard plastic stakes; building tiny streets on flat stones gives the village a permanent, high-end architectural feel. Utilizing bulk fairy garden kits with pre-cut pathways ensures the “town” stays organized rather than looking like a messy toy box.
A starter village will cost roughly $40–$75 to establish a solid foundation. Pin this to your family garden board to spark some weekend creativity.
- Key Materials: Mini cottages, creeping thyme, flat stepping stones.
- Vibe / Style: Immersive storybook town.
- Difficulty: Detail-oriented planning.
- Budget Breakdown: Cottages/Kits: $45 | Base Stones: $15.
- Creator’s Tip: Define clear “roads” with fine sand to guide kids’ hands during play.
- Smart Sourcing: pre-cut miniature cobblestone pathways and UV-coated resin fairy cottage kits.
14. Vegetable Patch Helper Gnomes
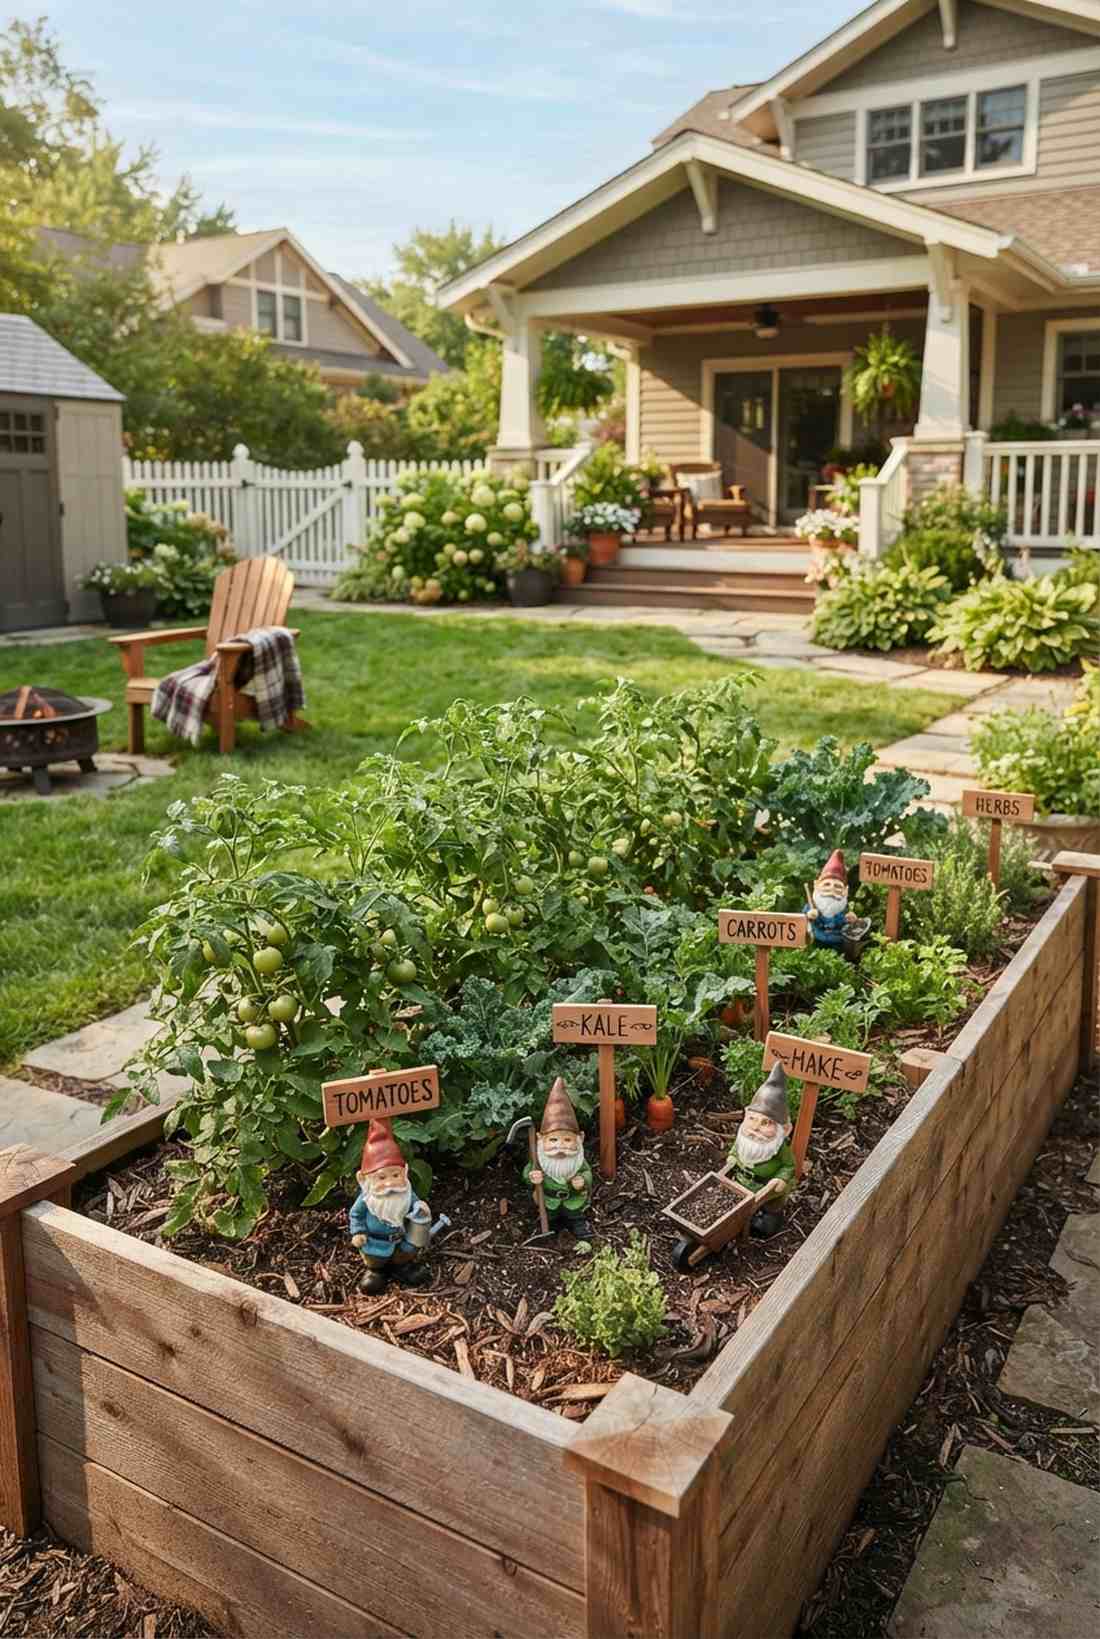
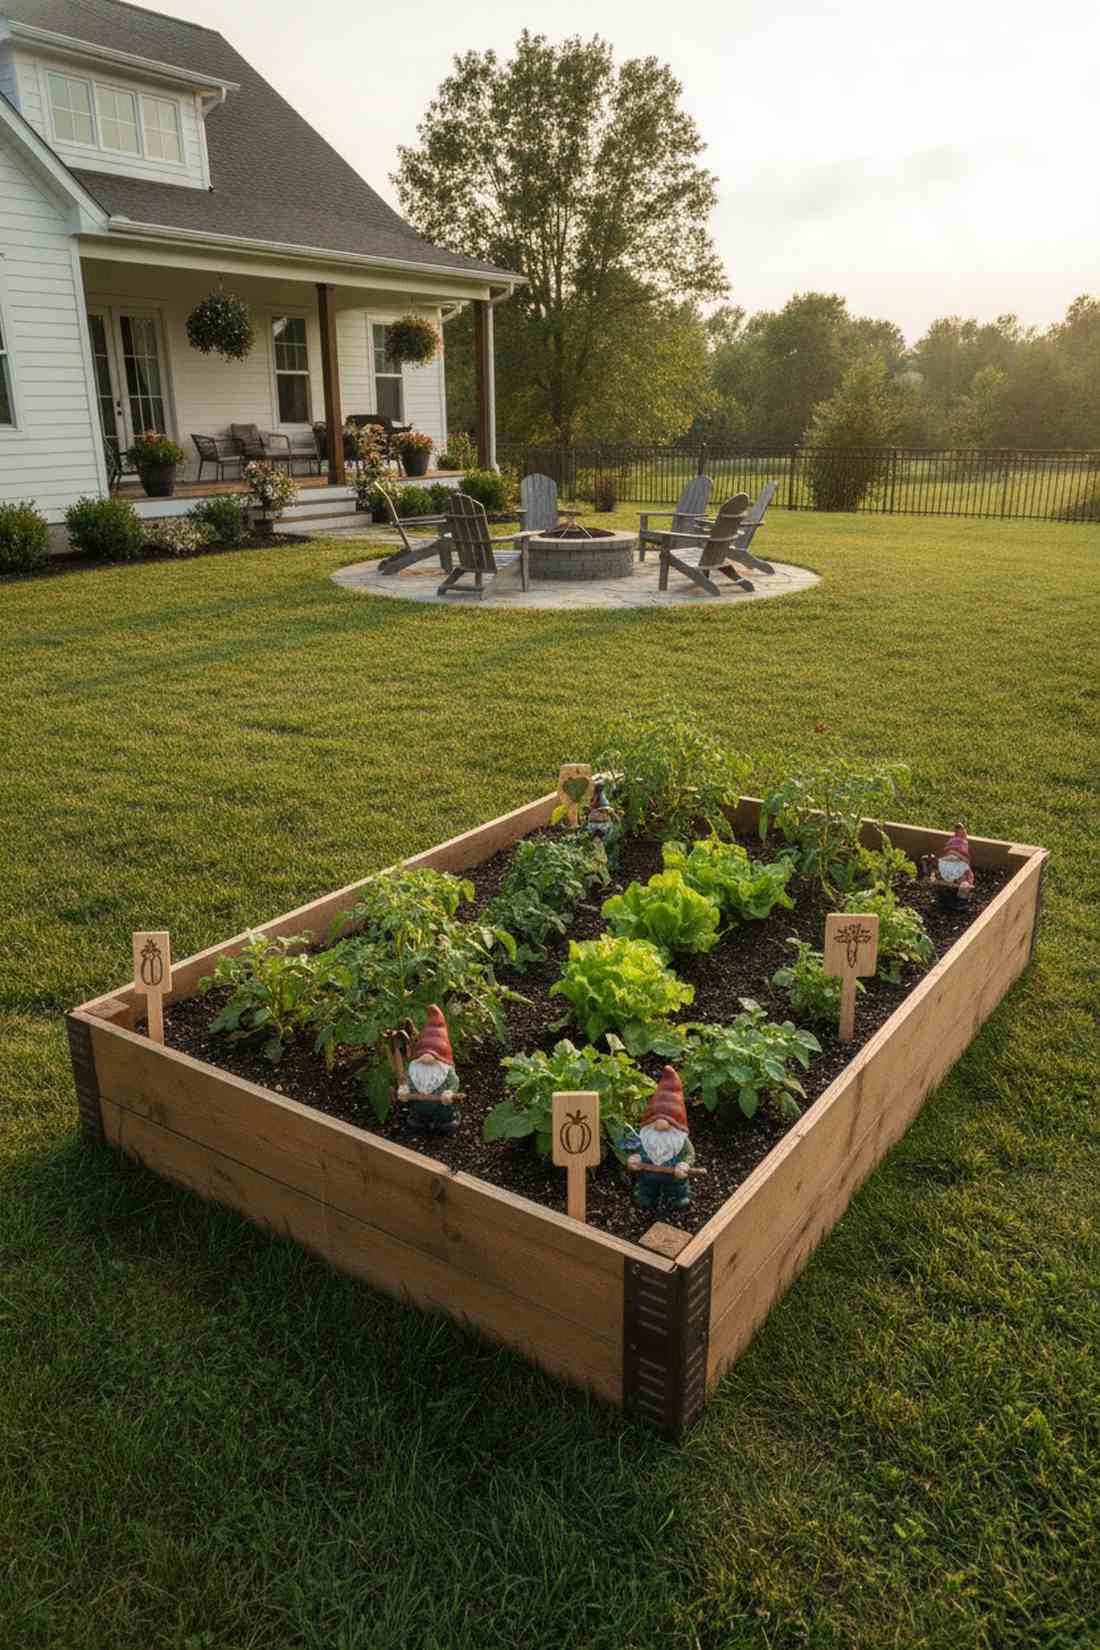
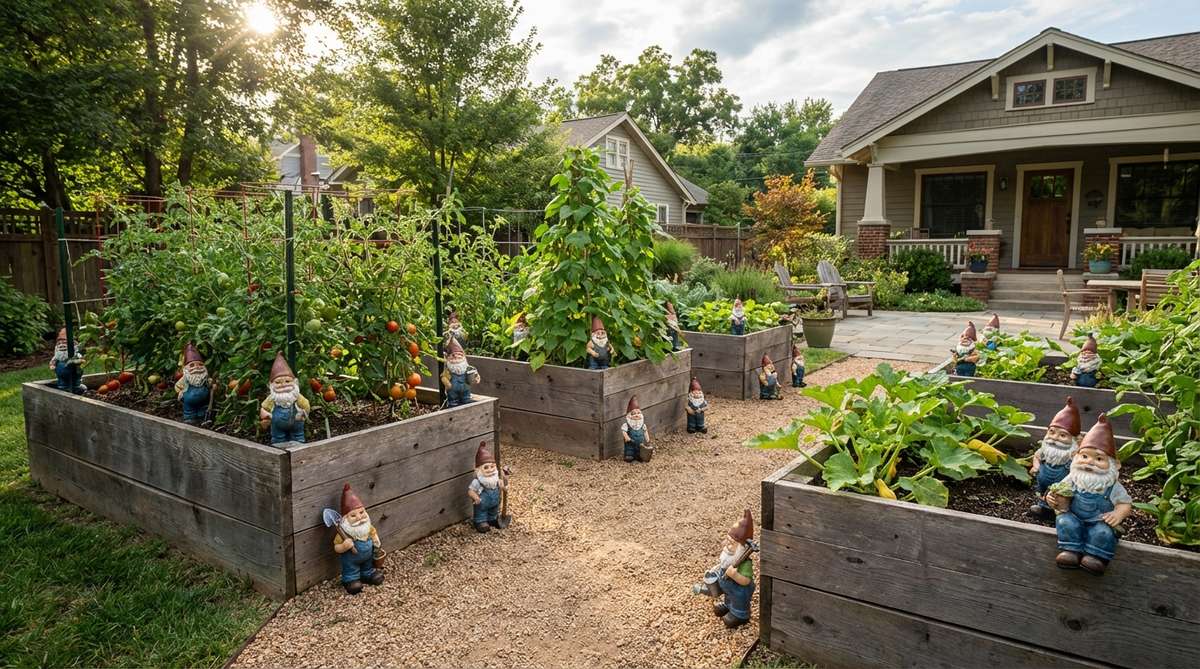
This scene brings a sense of joyful labor to your organic harvests. Placing raised bed garden companions amongst the tomatoes instantly softens the utilitarian look of a veggie patch.
The secret to making this look expensive is color-matching the figures’ tools to your custom plant markers. Sourcing weatherproof miniature garden supplies guarantees these tiny farmers won’t degrade under daily overhead watering.
You can populate a 4×8 raised bed for around $20–$35. It’s a fast upgrade that completely changes the vibe of your edible garden.
- Key Materials: Tool-holding gnomes, raised bed corners, wooden markers.
- Vibe / Style: Playful homesteading.
- Difficulty: Extremely easy.
- Budget Breakdown: Helper Figures: $25 | Markers: $10.
- Creator’s Tip: Use them as rotational markers so kids know exactly which quadrant to water today.
- Smart Sourcing: weatherproof cedar plant markers (bulk pack) and miniature farming gnome sets.
Wait until you see this next trick—it completely changes how you use small spaces.
15. Reading Nook Bookish Gnome Scene
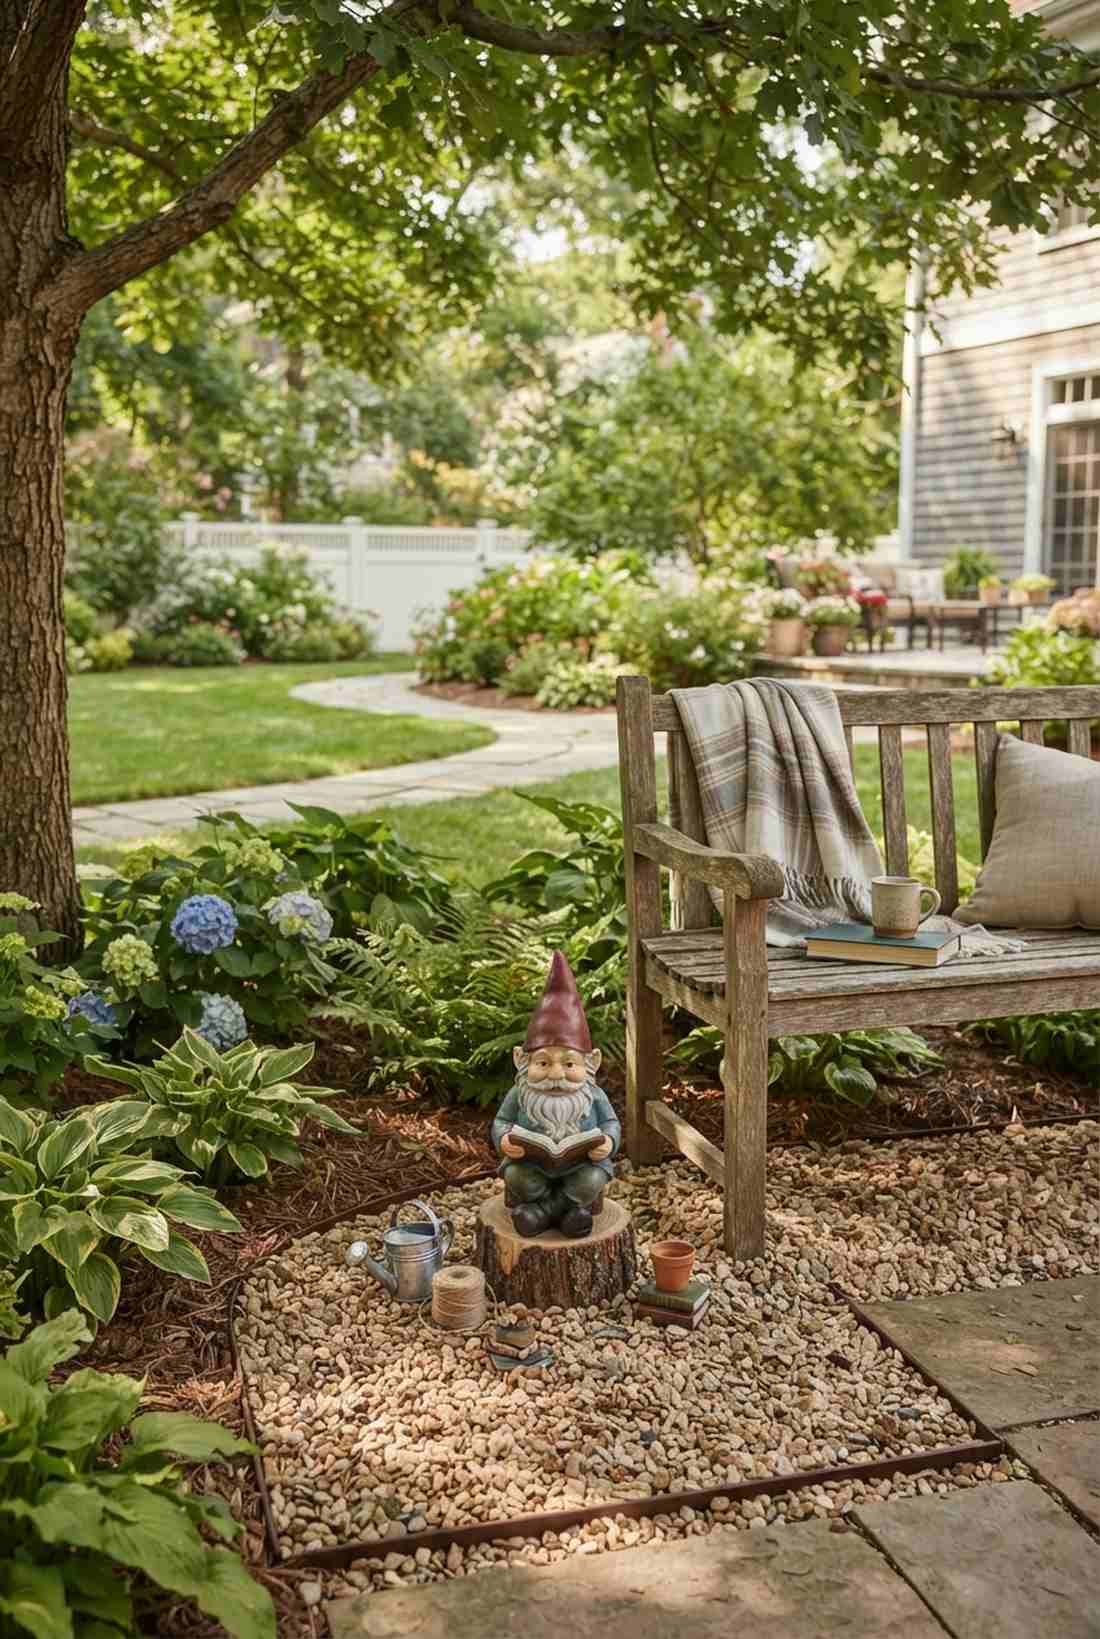
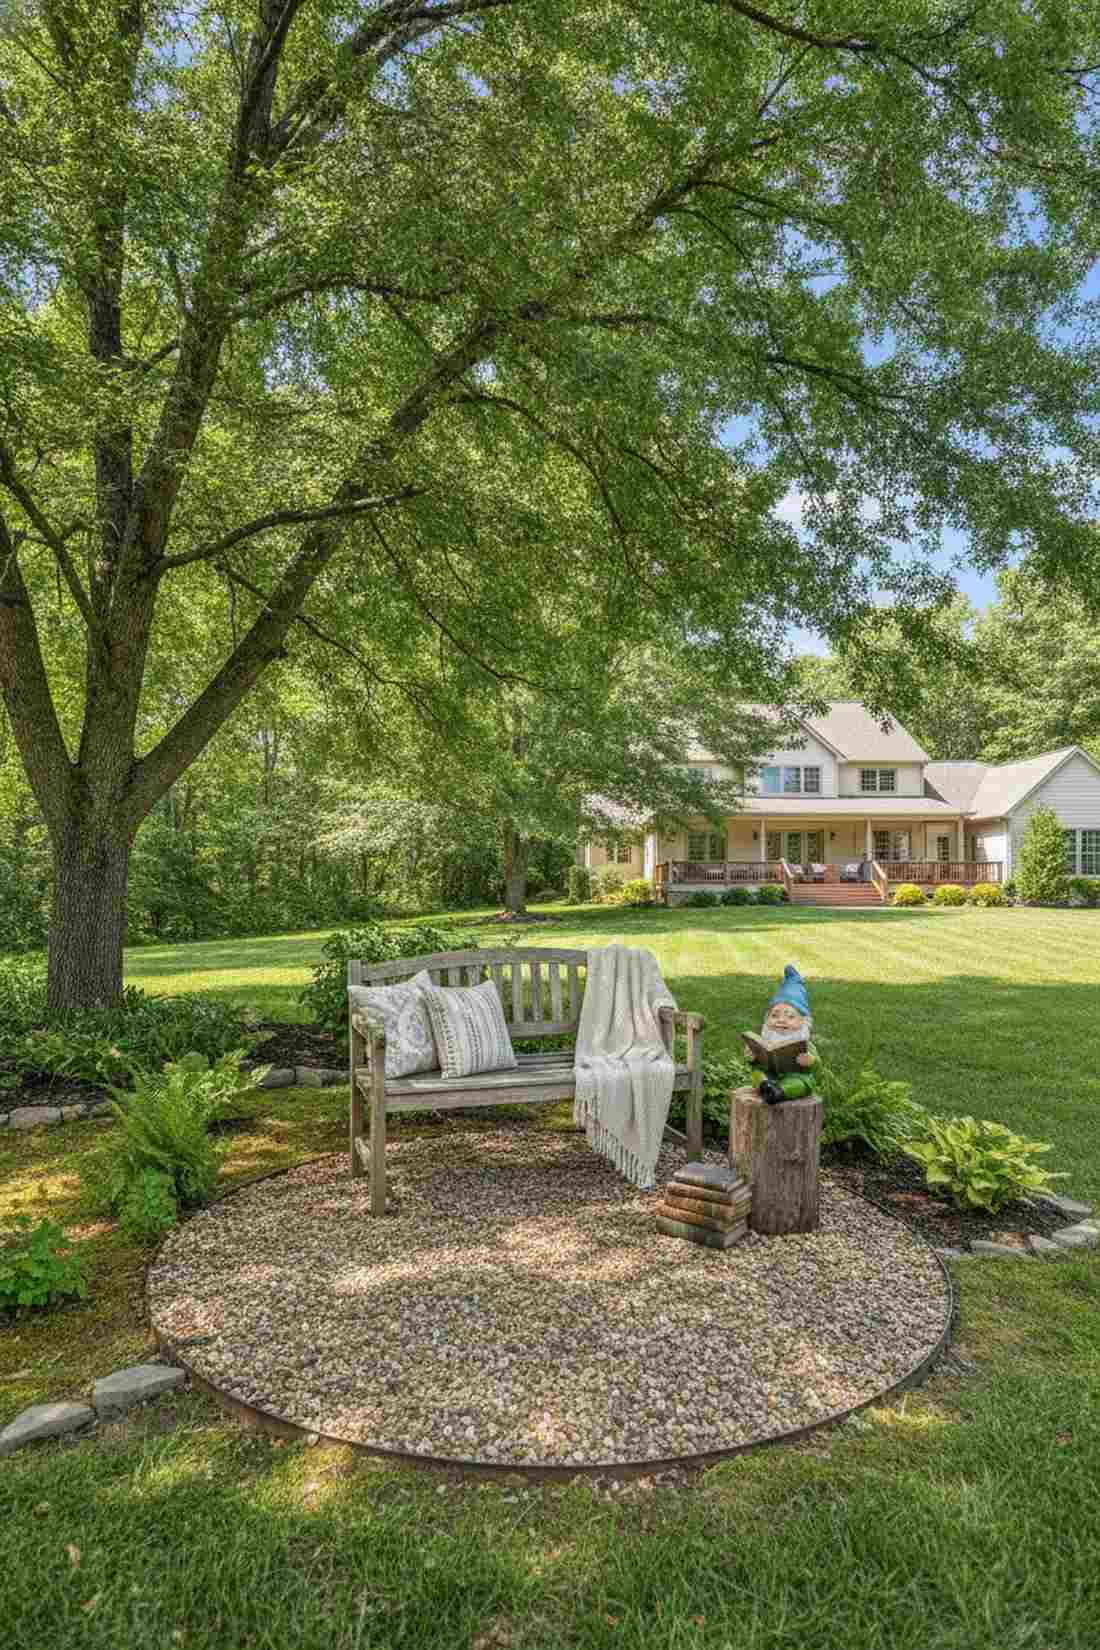
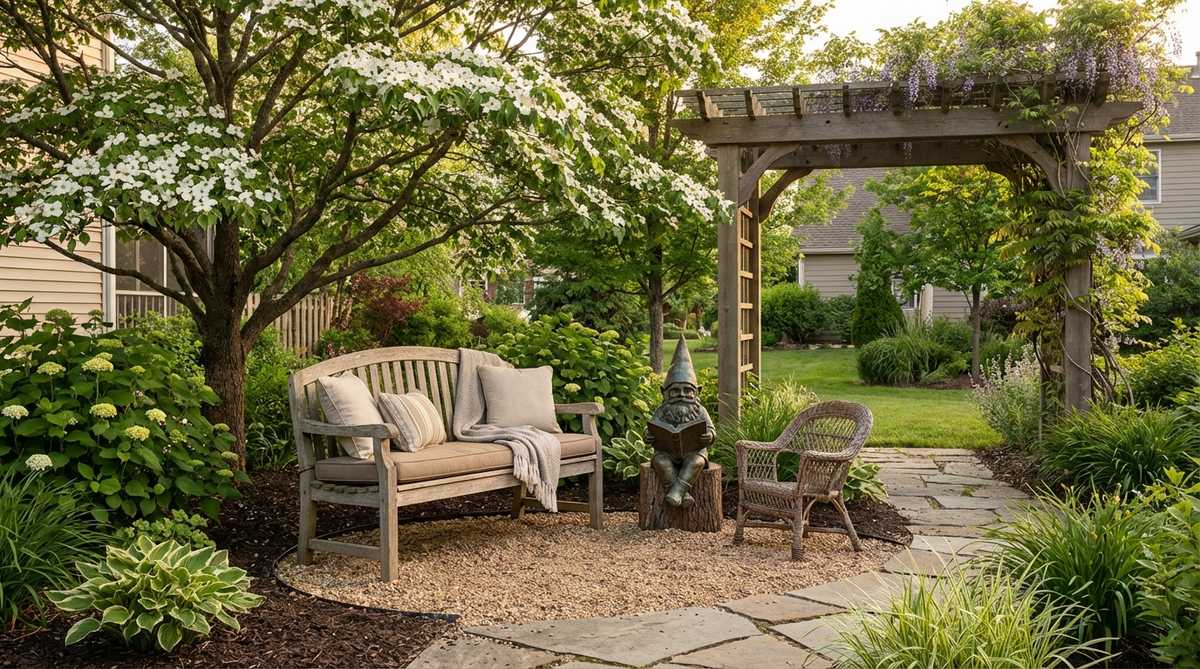
Resting under a shaded canopy, this setup feels like a quiet library hidden in nature. Establishing a garden reading nook accent transforms an unused shady corner into a mindful retreat.
Amateur decorators often ignore scale, but placing a single, high-quality reading figure near a real bench bridges the gap between human and miniature worlds. Relying on premium resin terrarium accessories ensures the scene looks intentional, not discarded.
This quiet little upgrade costs about $15–$25. Save this if you desperately need a screen-free sanctuary in your backyard.
- Key Materials: Reading gnome, pea gravel base, low stump/crate.
- Vibe / Style: Peaceful and quiet.
- Difficulty: Simple staging.
- Budget Breakdown: Gnome: $15 | Gravel Base: $5.
- Creator’s Tip: Keep the area free of thorny plants so children can sit comfortably nearby.
- Smart Sourcing: pre-washed pea gravel (small bags) and UV-protected reading gnome figures.
16. Water Feature Fishing Gnome Corner
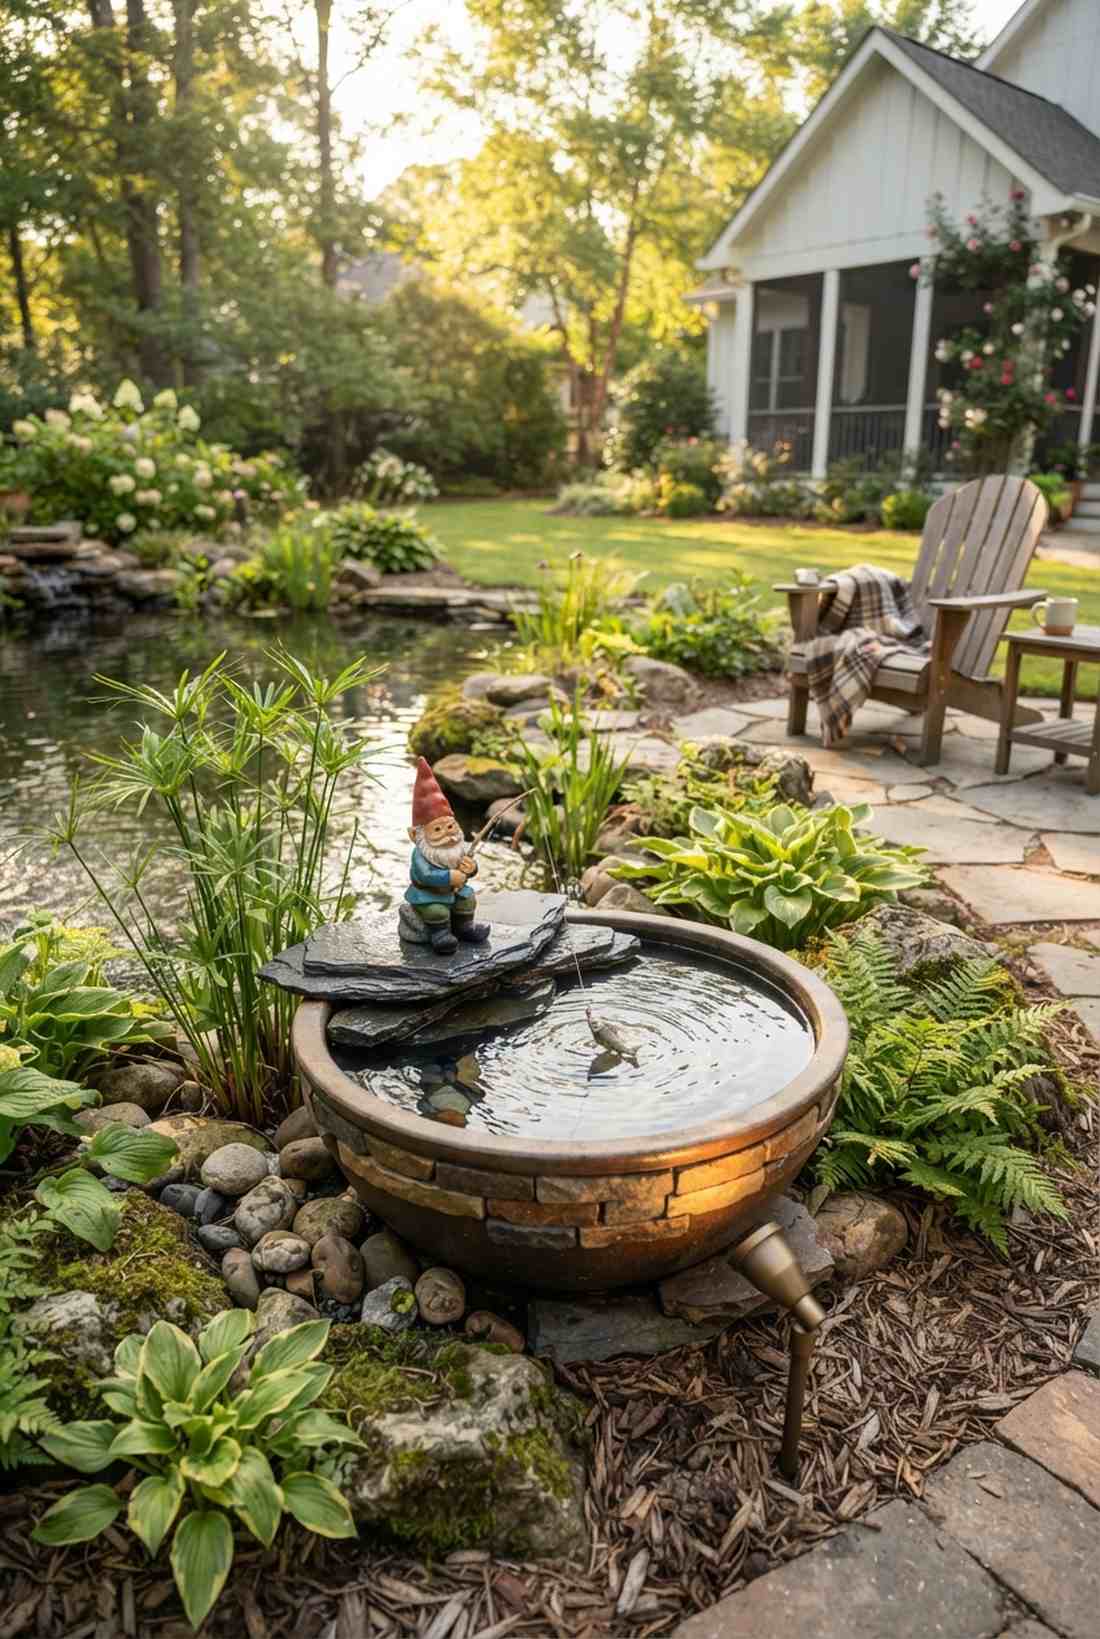
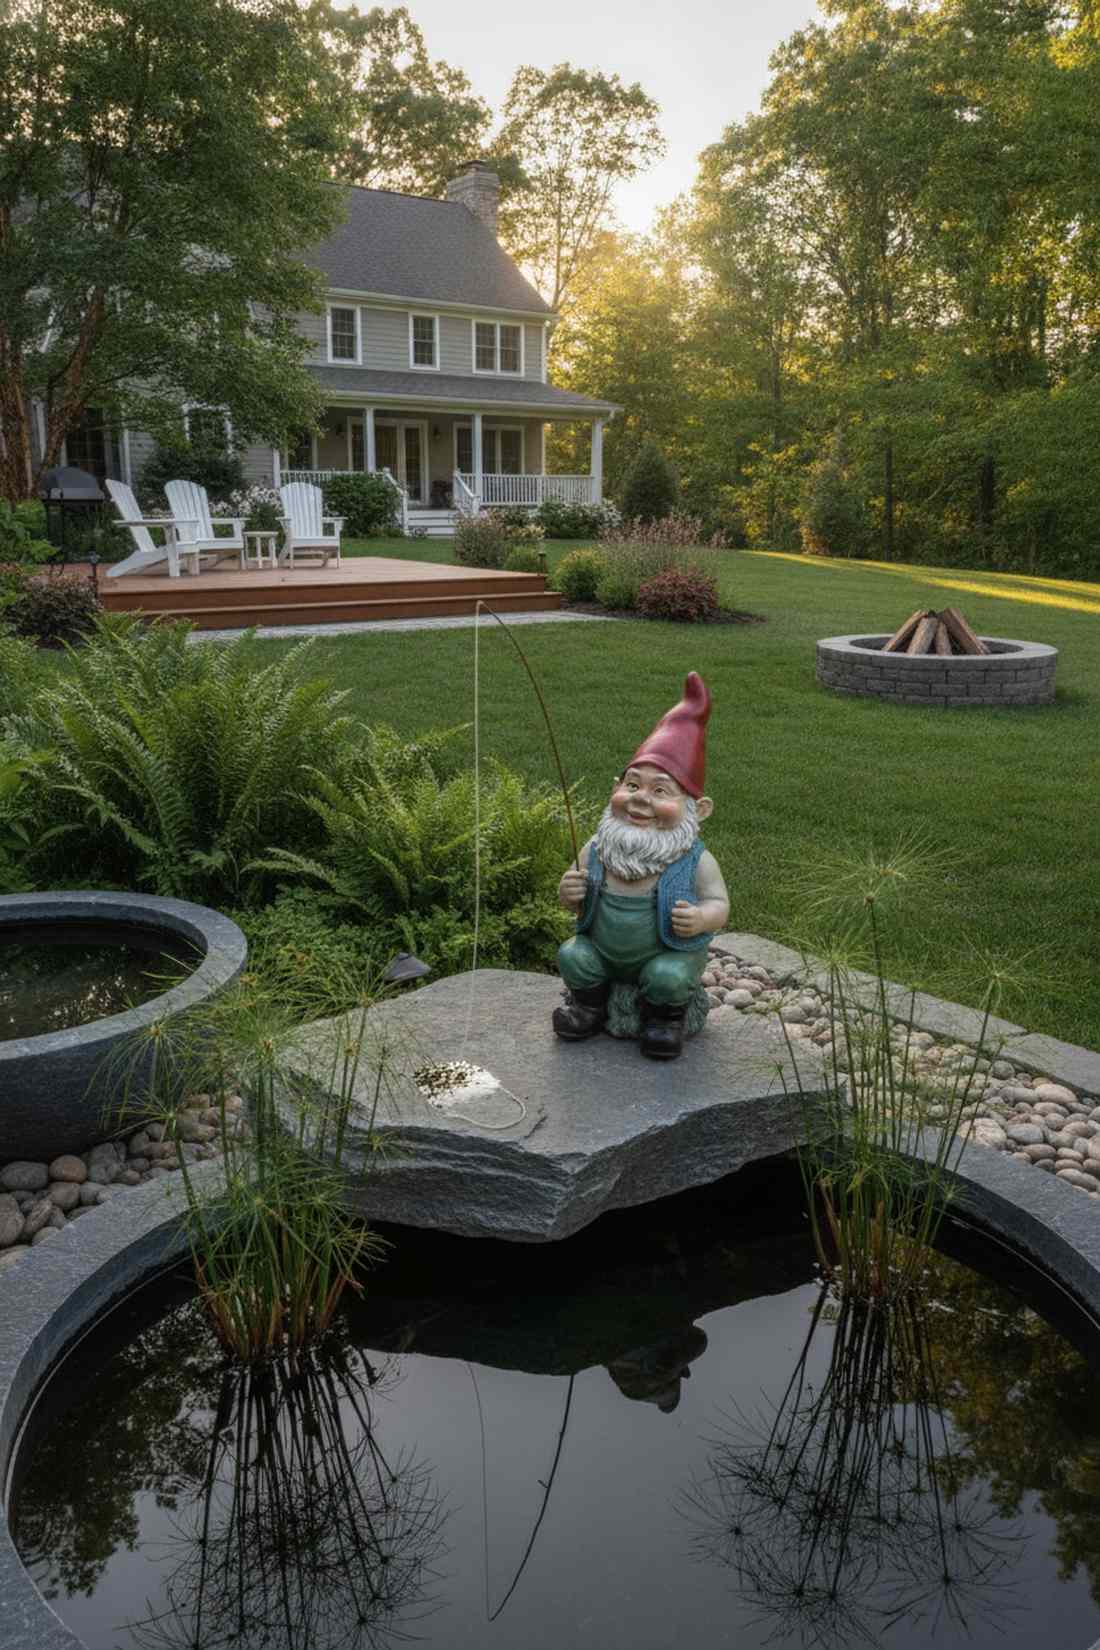

This relaxing visual gives the illusion of endless summer afternoons. A pond-side whimsical accent integrates manufactured water bowls beautifully into natural landscaping.
Most people just drop statues randomly, but elevating a fishing figure on a flat slate rock prevents water damage and adds dramatic reflection. Upgrading to specialized miniature garden supplies designed for moisture prevents the paint from peeling off into your fountain.
You can achieve this tranquil setup for roughly $20–$35. It’s an easy trick that makes a basic patio fountain feel highly custom.
- Key Materials: Fishing gnome, flat shoreline rock, dwarf papyrus.
- Vibe / Style: Relaxing aquatic humor.
- Difficulty: Easy placement.
- Budget Breakdown: Fishing Figure: $20 | Slate Rock: $5.
- Creator’s Tip: Position a small, low-voltage spotlight to illuminate the fishing line at night.
- Smart Sourcing: water-resistant miniature fishing kits and pre-cut natural slate stones.
17. Kids’ Digging Zone Gnome Crew
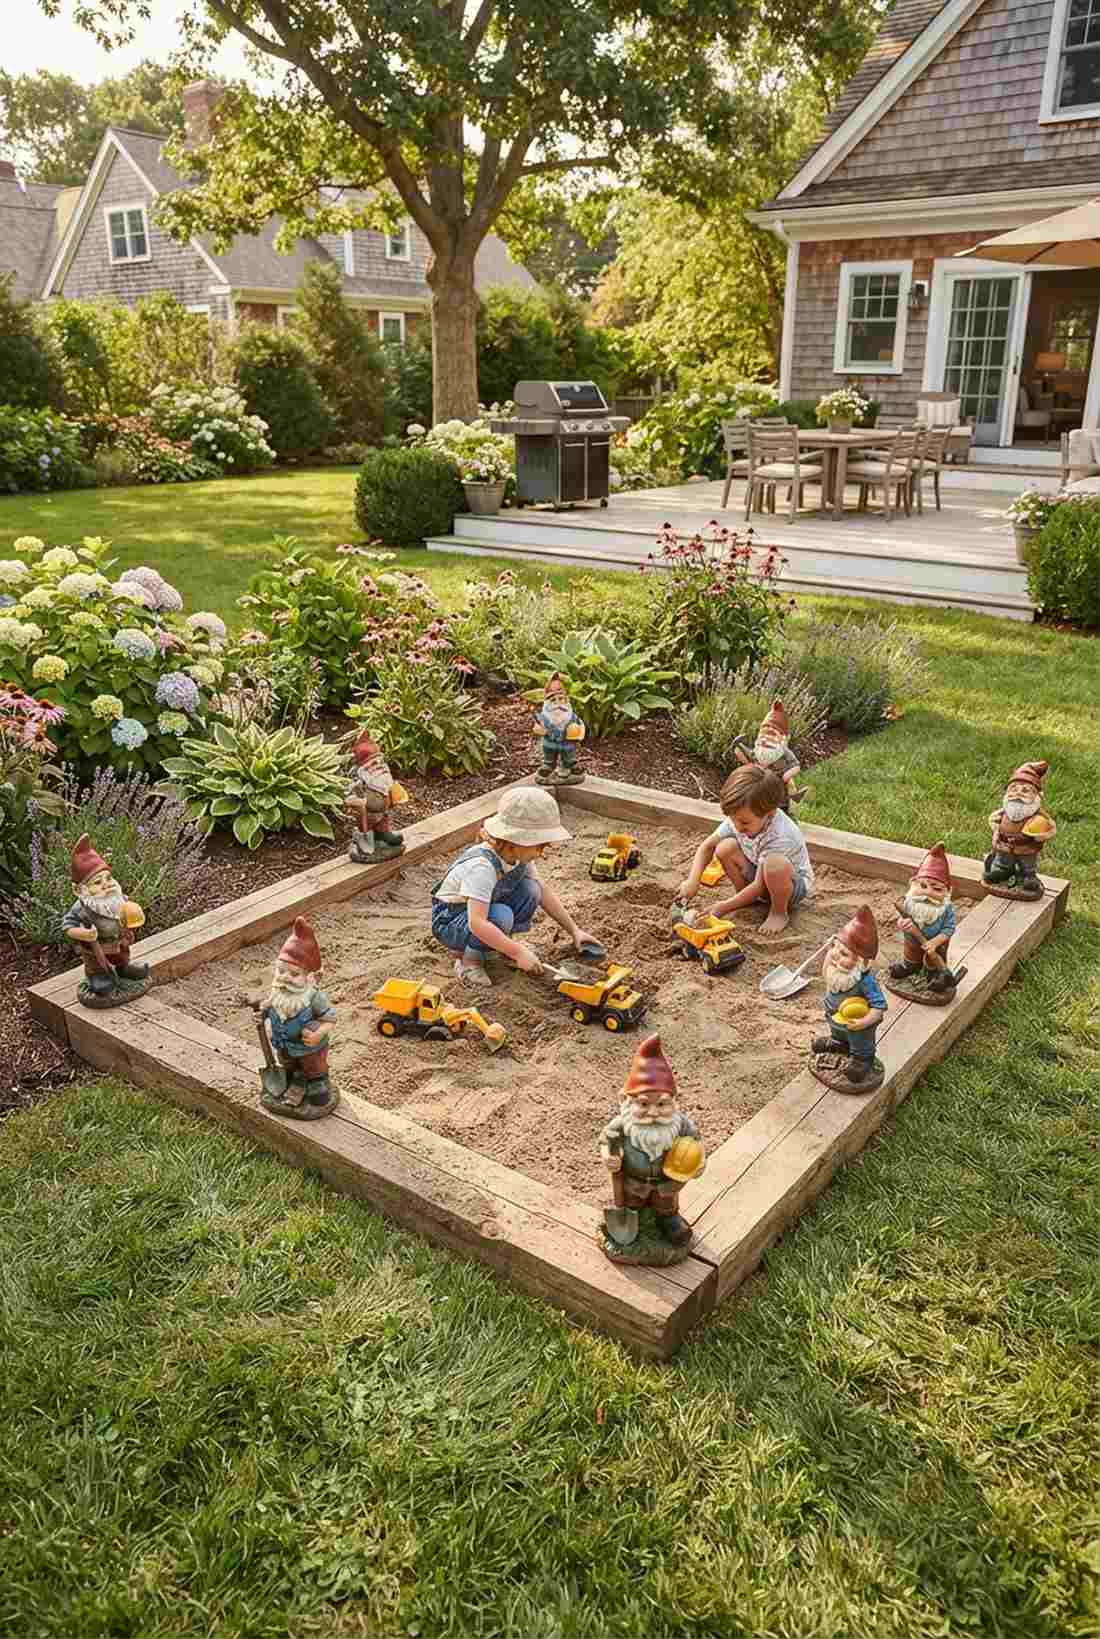
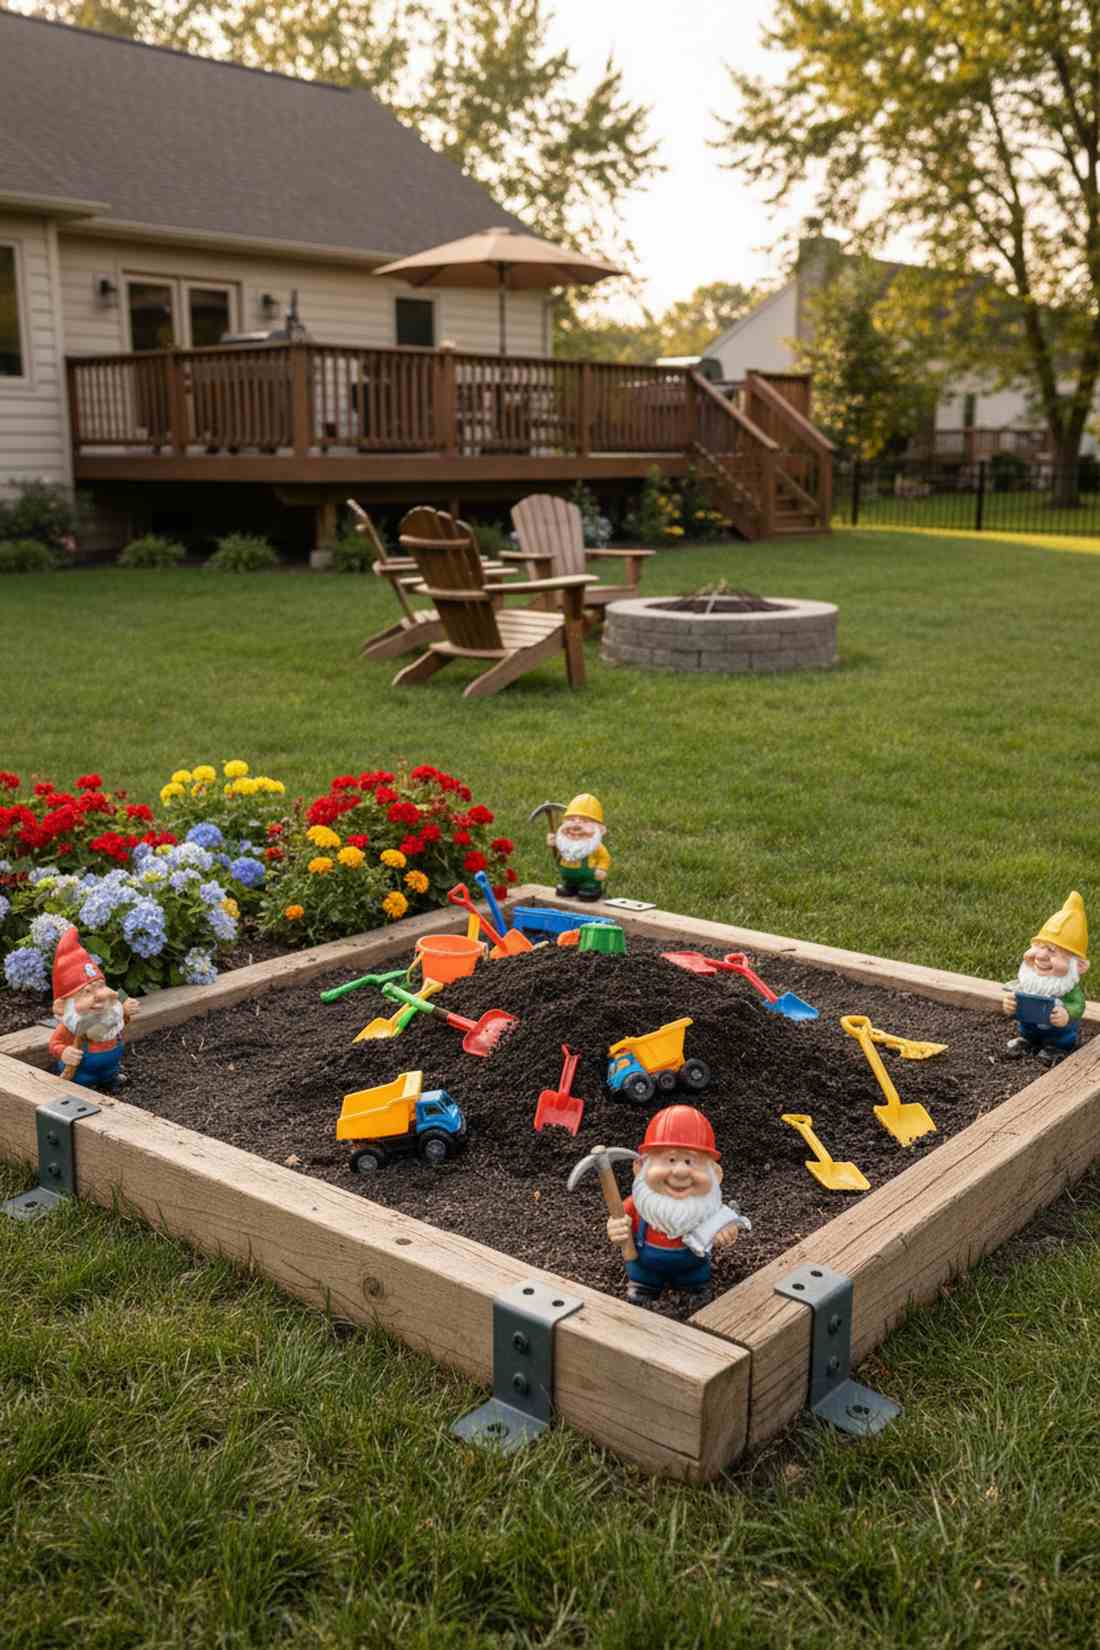
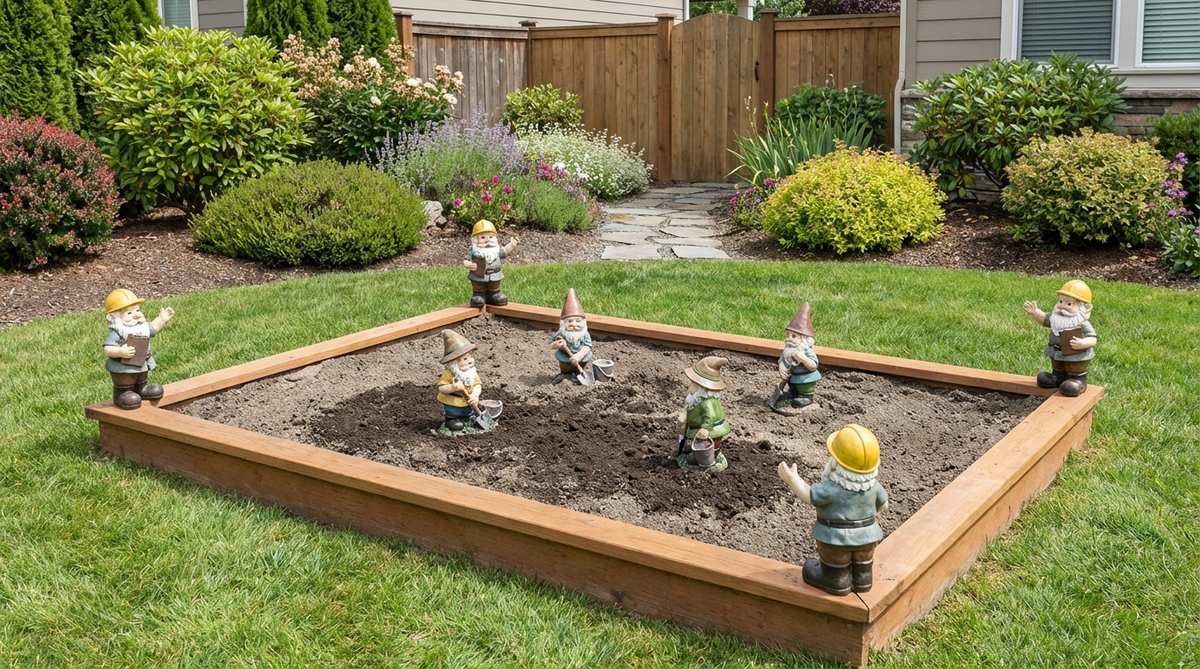
This setup channels chaotic play energy into one perfectly themed sandbox. Creating a sandbox construction boundary protects your delicate flowers while encouraging hands-on dirt play.
Skip the cheap plastic look by using heavily weighted, rugged figures as literal boundary markers for the play zone. Incorporating durable fairy garden kits explicitly designed for rough environments ensures the “foremen” survive toddler handling.
Protecting your yard this way costs around $25–$40. Pin this genius parenting hack to keep your ornamental beds safe this summer.
- Key Materials: Rugged gnomes, low timber edging, kid-safe digging soil.
- Vibe / Style: Active and inviting.
- Difficulty: Moderate building effort.
- Budget Breakdown: Durable Gnomes: $30 | Edging: $10.
- Creator’s Tip: Sink the figures slightly into the soil so they aren’t easily knocked over by stray shovels.
- Smart Sourcing: shatterproof resin gnome crews (multi-pack) and heavy-duty landscaping timber brackets.
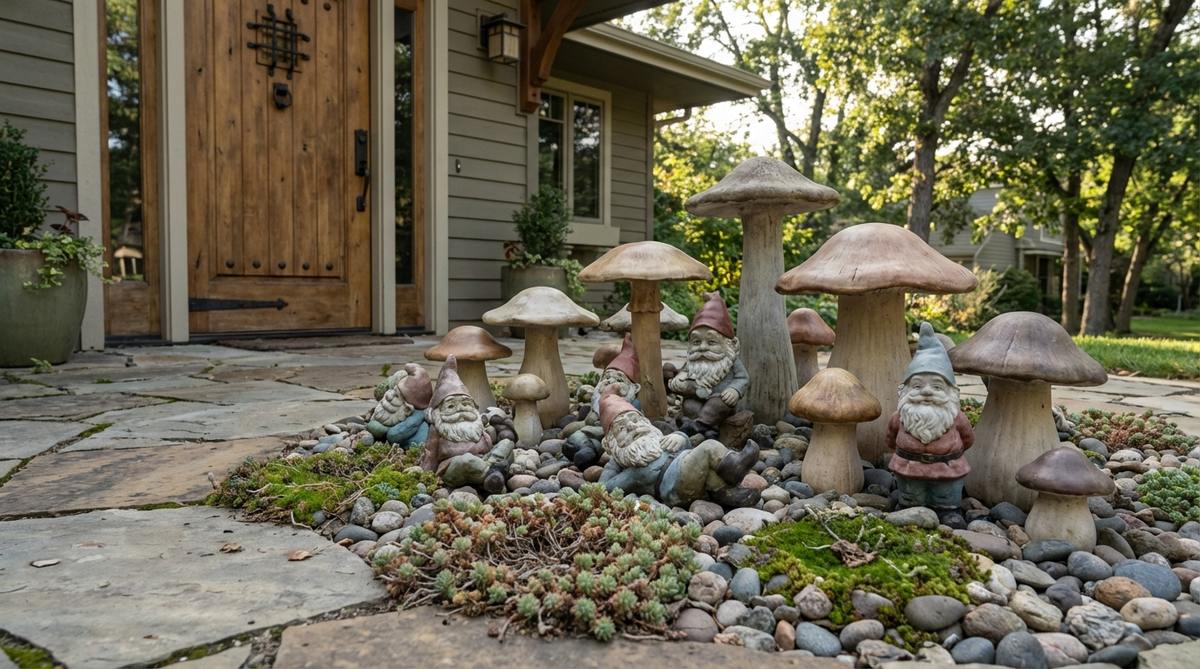
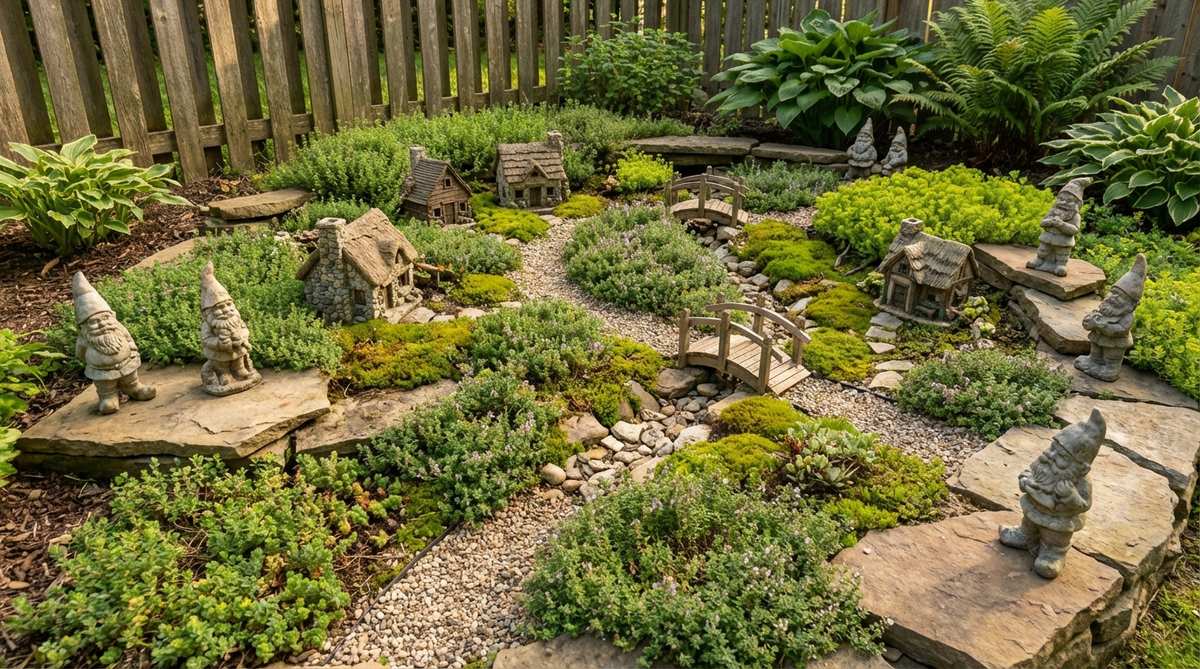
18. Tree Base Gnome Hamlet
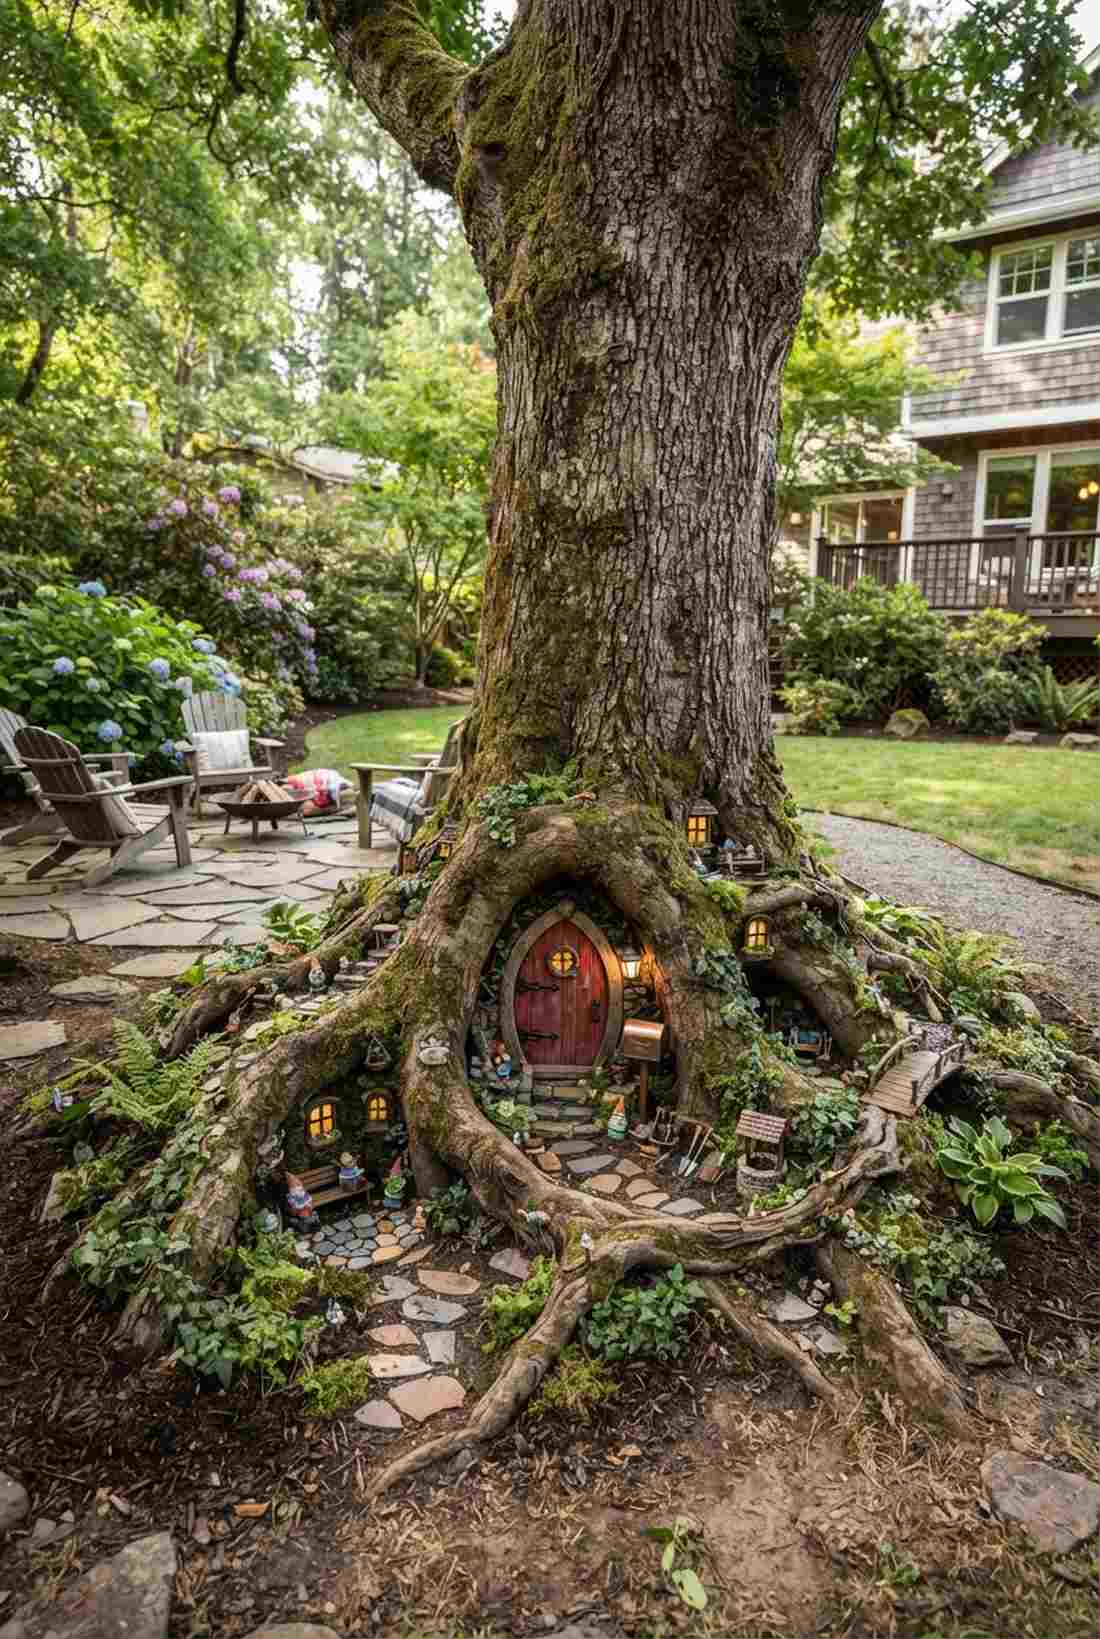
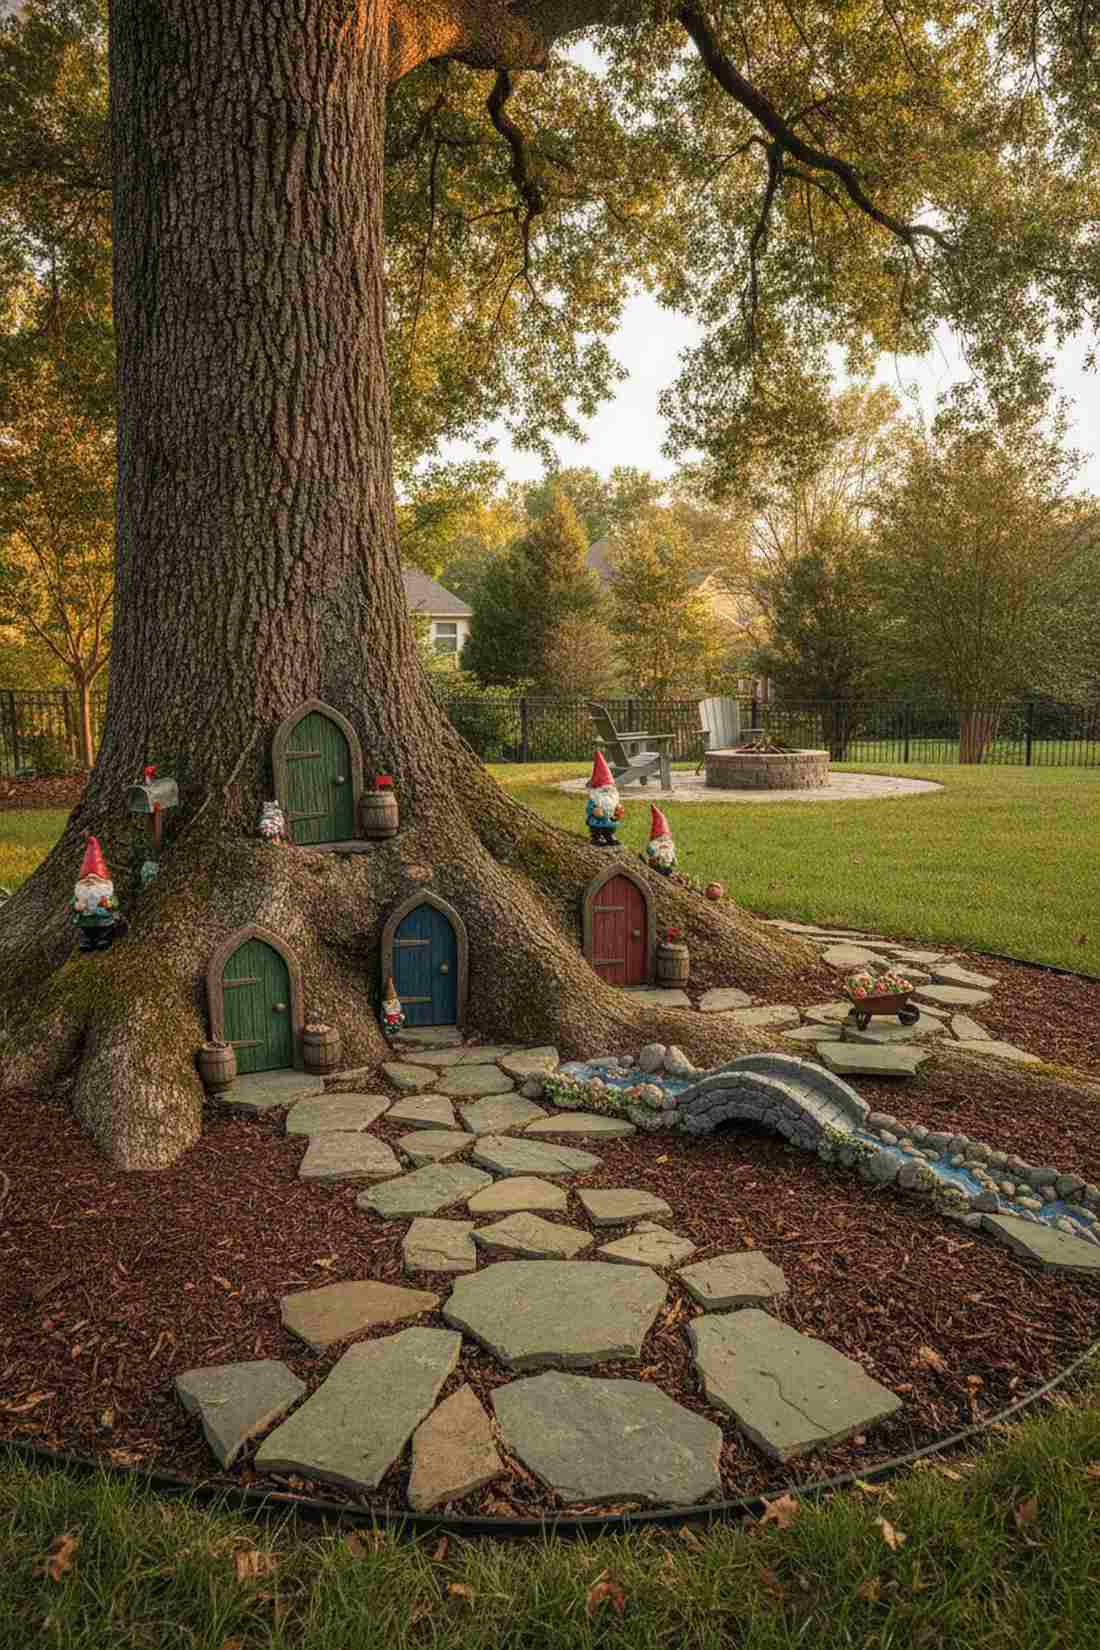
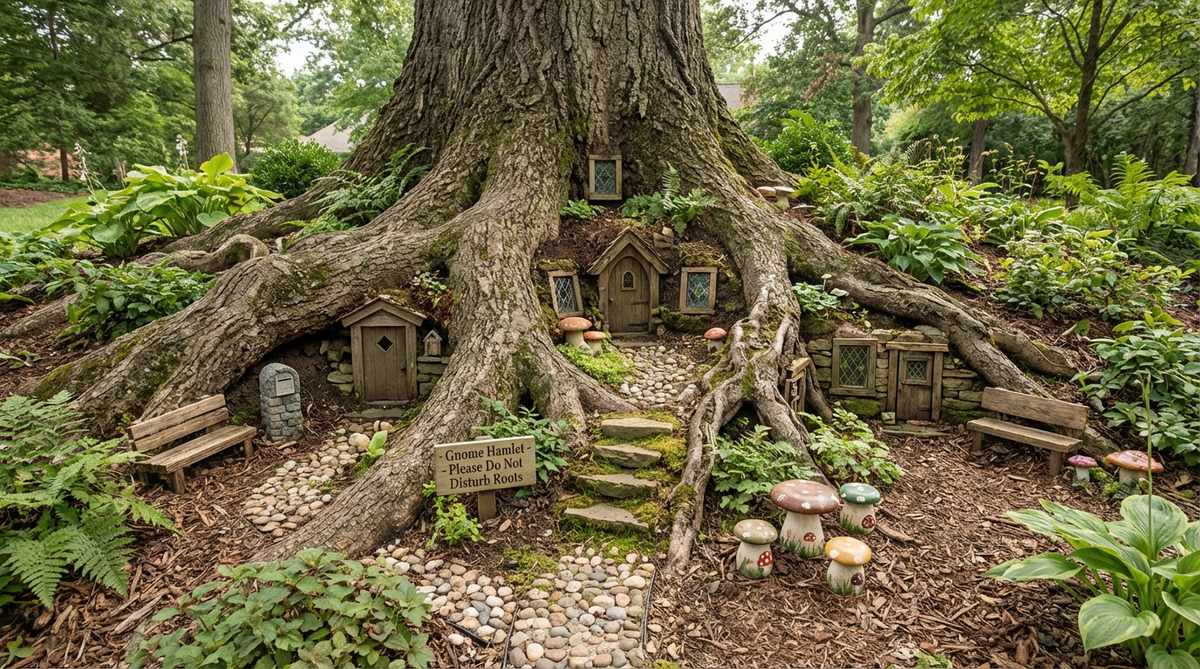
Peeking between the roots feels like unearthing a secret subterranean world. A mature tree base display brilliantly utilizes those tricky dry-shade zones where grass refuses to grow.
Instead of flat, boring rows of mulch, tucking tiny doors and mailboxes into natural root curves delivers a surprisingly premium look. Using high-quality terrarium accessories prevents the acidic tree debris from eating away at the paint.
You can build this hidden hamlet for about $30–$55. Highly recommended for adding massive character to old, established oaks or maples.
- Key Materials: Gnome hamlet set, tiny doors, flat stones.
- Vibe / Style: Hidden woodland mystery.
- Difficulty: Creative nestling.
- Budget Breakdown: Hamlet Accessories: $40 | Base Stones: $10.
- Creator’s Tip: Never pile extra soil against the tree trunk; simply rest items on the existing grade.
- Smart Sourcing: weatherproof miniature tree doors (kit) and UV-coated resin village accessories.
19. Herb Spiral Chef Gnome
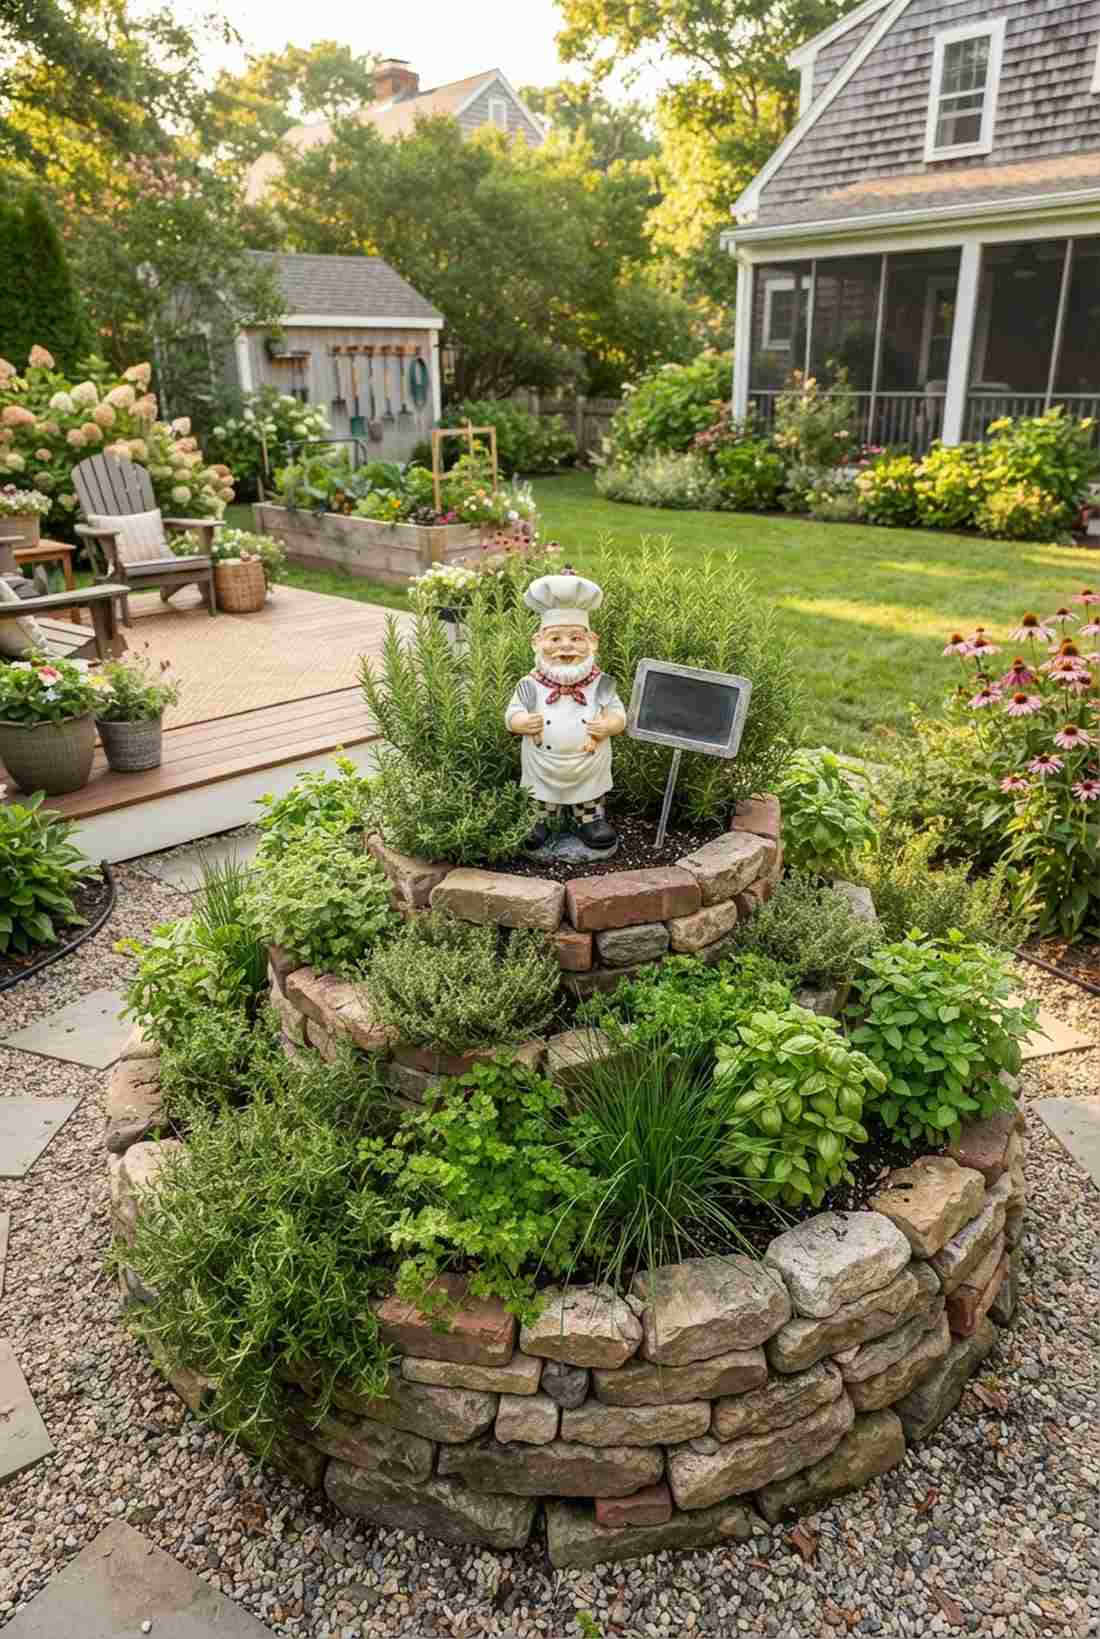
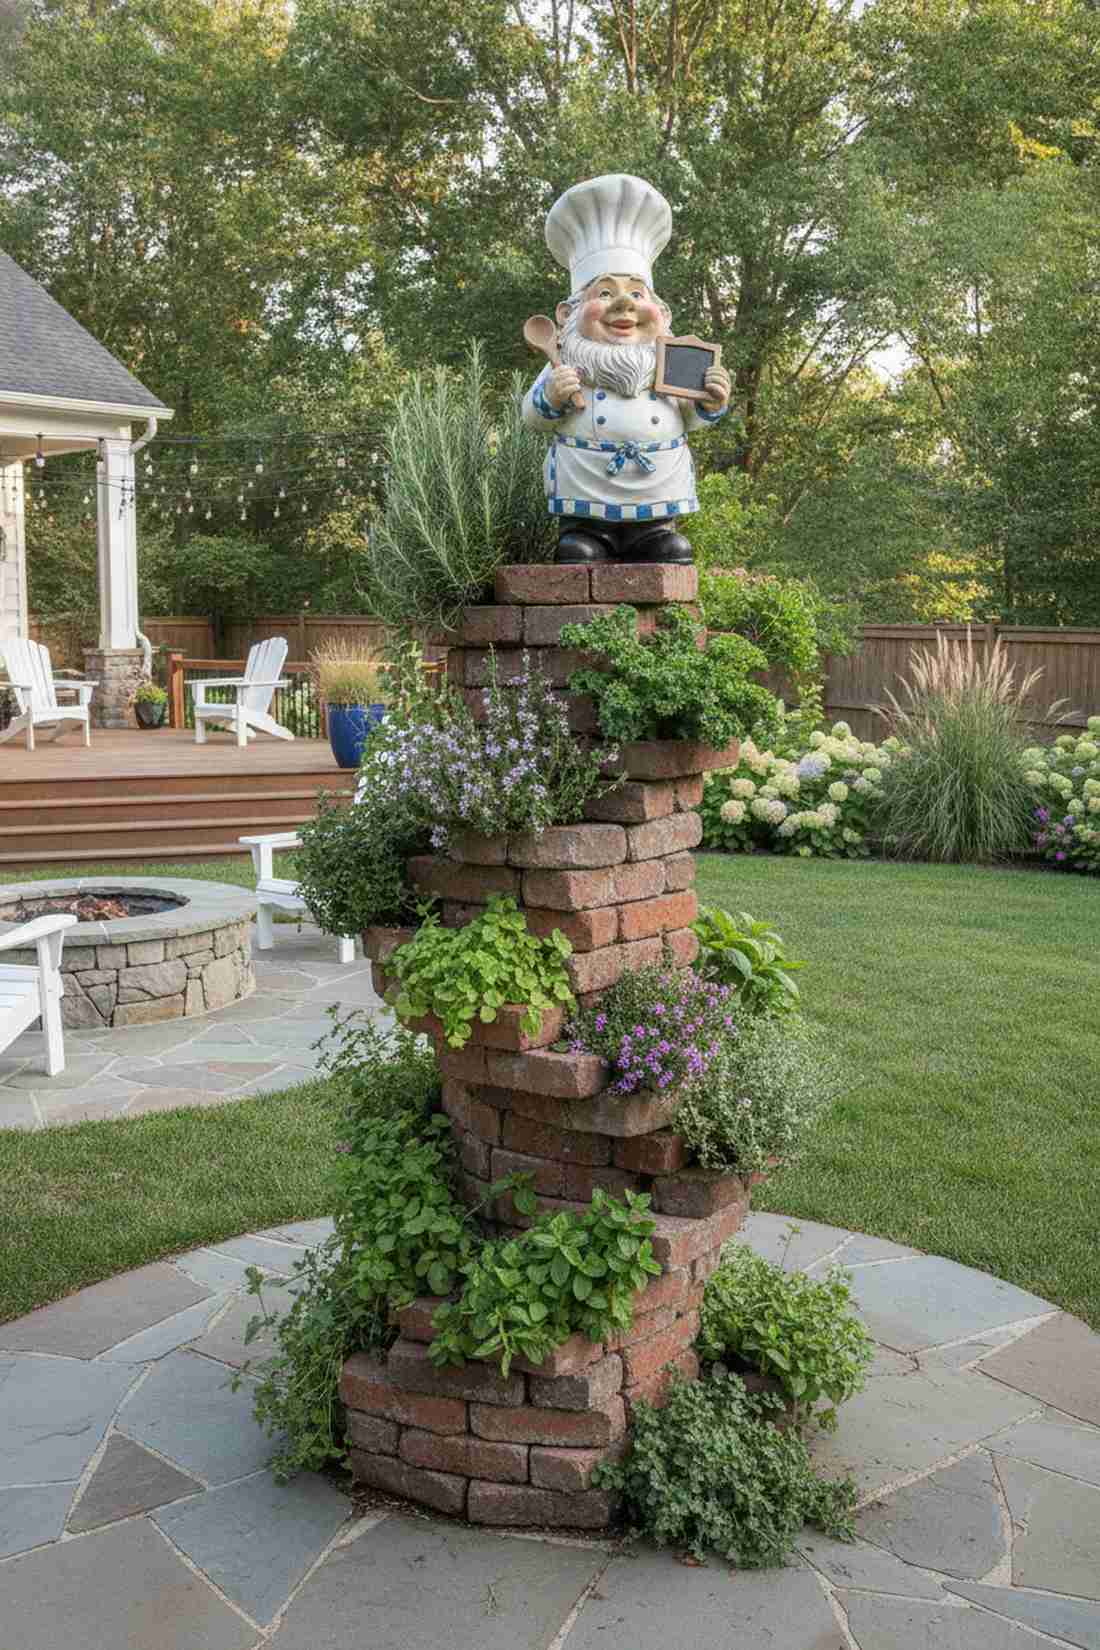
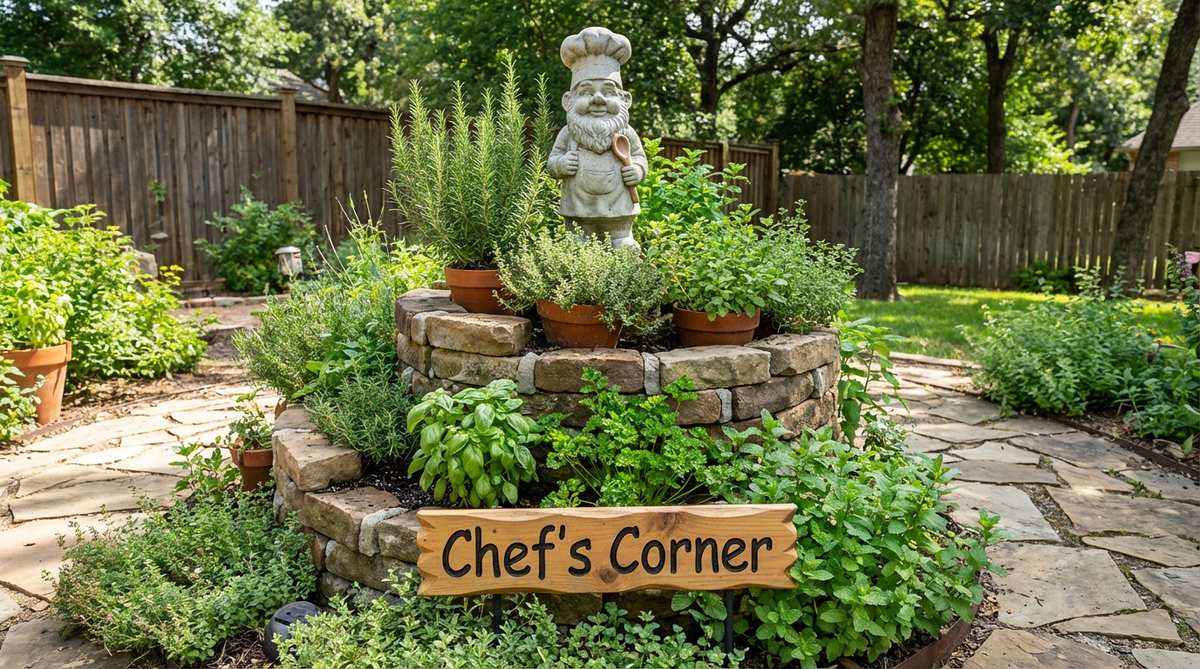
This edible arrangement gives off major countryside culinary vibes. Topping an herb garden vertical planter with a themed figure makes harvesting dinner ingredients incredibly charming.
While some find yard art tacky, utilizing a tasteful chef-themed figure acts as a practical landmark for guests navigating the garden. Sourcing premium culinary miniature garden supplies guarantees your setup withstands the constant heat and watering of a kitchen garden.
Adding the decorative touch to your spiral costs around $15–$25. Save this to your homesteader board for a functional aesthetic upgrade.
- Key Materials: Chef gnome, cascading herbs, brick/stone spiral.
- Vibe / Style: Practical culinary whimsy.
- Difficulty: Easy decor addition.
- Budget Breakdown: Chef Figure: $18 | Mini Signage: $5.
- Creator’s Tip: Place the gnome at the very peak so it remains visible even as the rosemary bushes explode in size.
- Smart Sourcing: premium themed chef garden gnomes and weatherproof mini chalkboards (bulk pack).
If you thought the previous ideas were cute, this next designer secret will blow your mind.
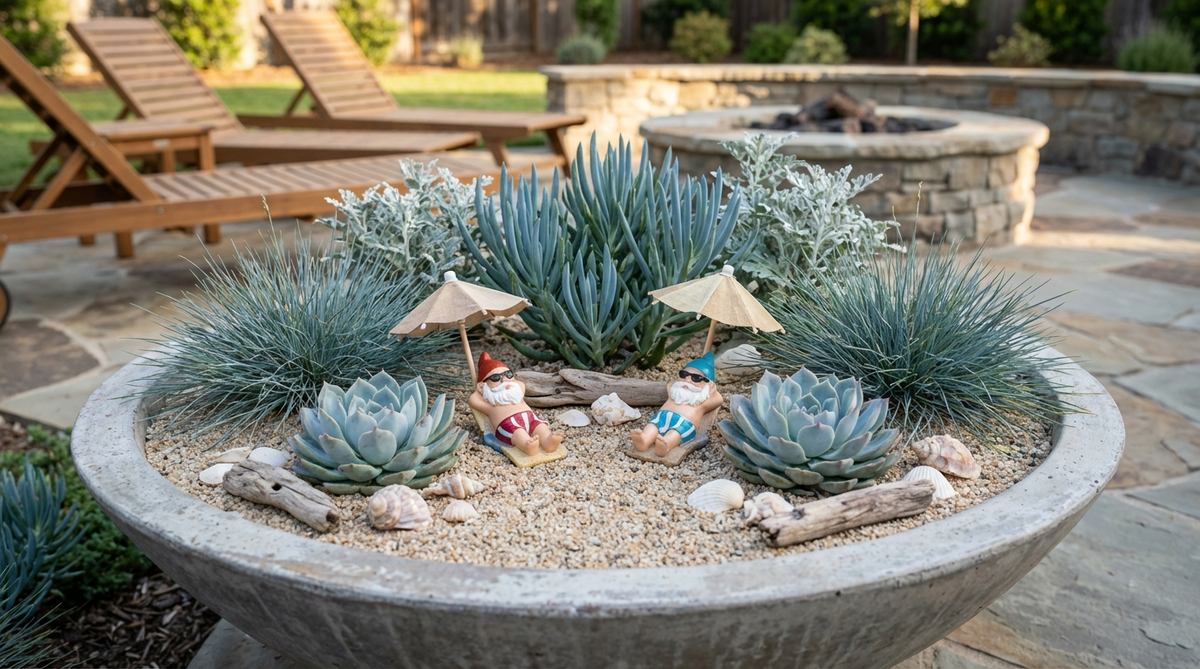
20. Cactus and Succulent Desert Gnomes
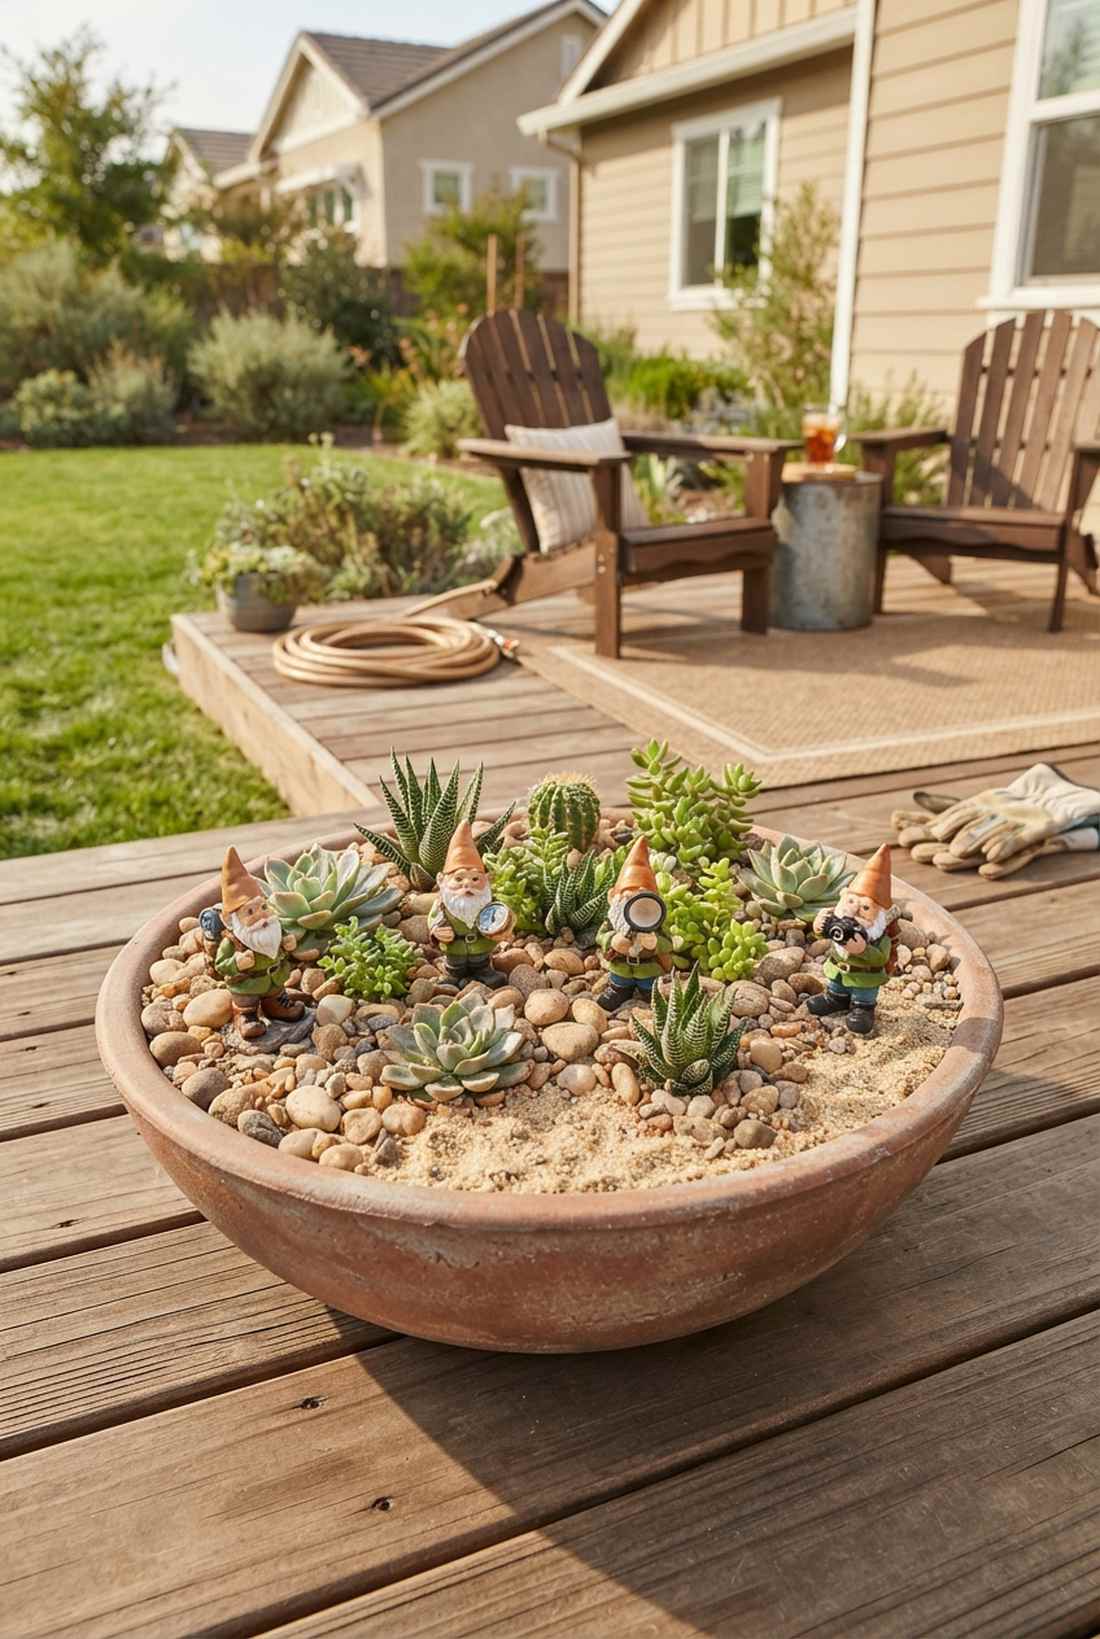
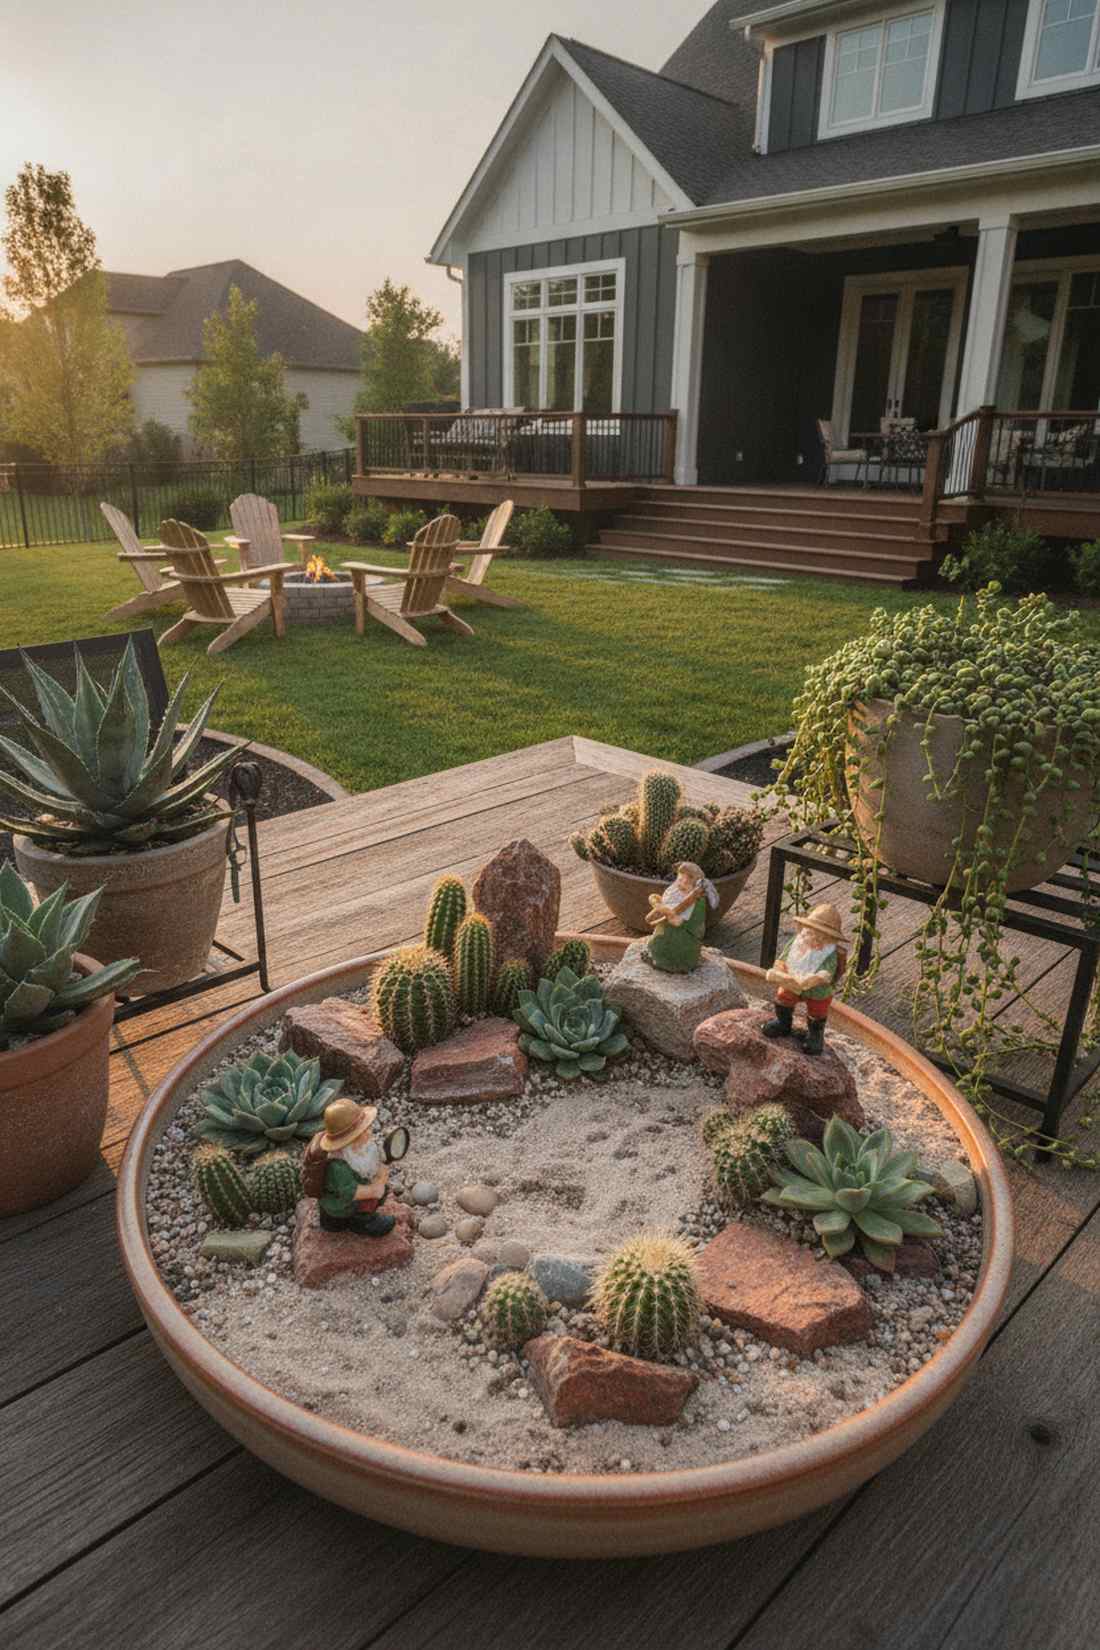
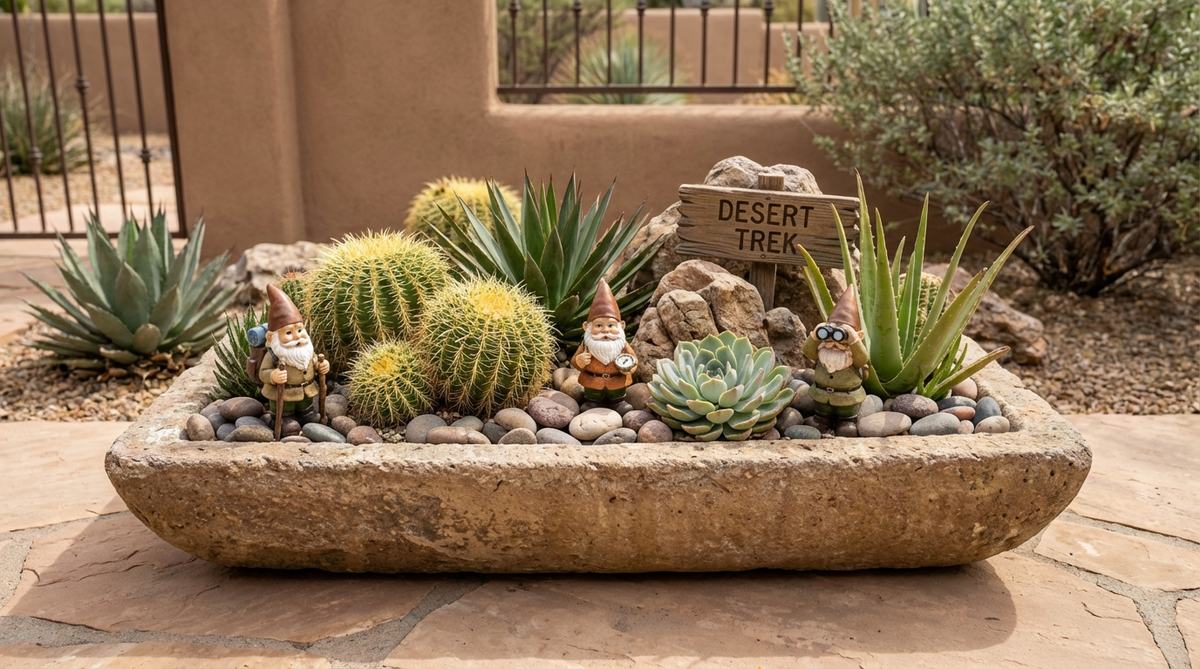
This arid micro-landscape feels like a tiny, quirky desert expedition. A succulent bowl miniature scene is an absolute game-changer for hot patios and low-maintenance balcony owners.
The secret to making this look expensive is mastering negative space by using coarse sand and chunky rocks instead of dark potting soil. By implementing high-drainage terrarium accessories, your drought-tolerant setup will thrive without ever looking messy.
You can build this water-saving masterpiece for roughly $25–$45. Pin this if you want an indestructible, modern take on traditional yard art.
- Key Materials: Adventurer gnomes, coarse sand, low succulents.
- Vibe / Style: Arid, quirky exploration.
- Difficulty: Simple potting.
- Budget Breakdown: Succulents & Sand: $20 | Figures: $15.
- Creator’s Tip: Use tweezers to place the tiny rocks around the base for a hyper-realistic, clean finish.
- Smart Sourcing: pre-mixed coarse succulent soil (bulk bag) and UV-resistant mini desert gnomes.
21. Mini Camping Gnome Campsite
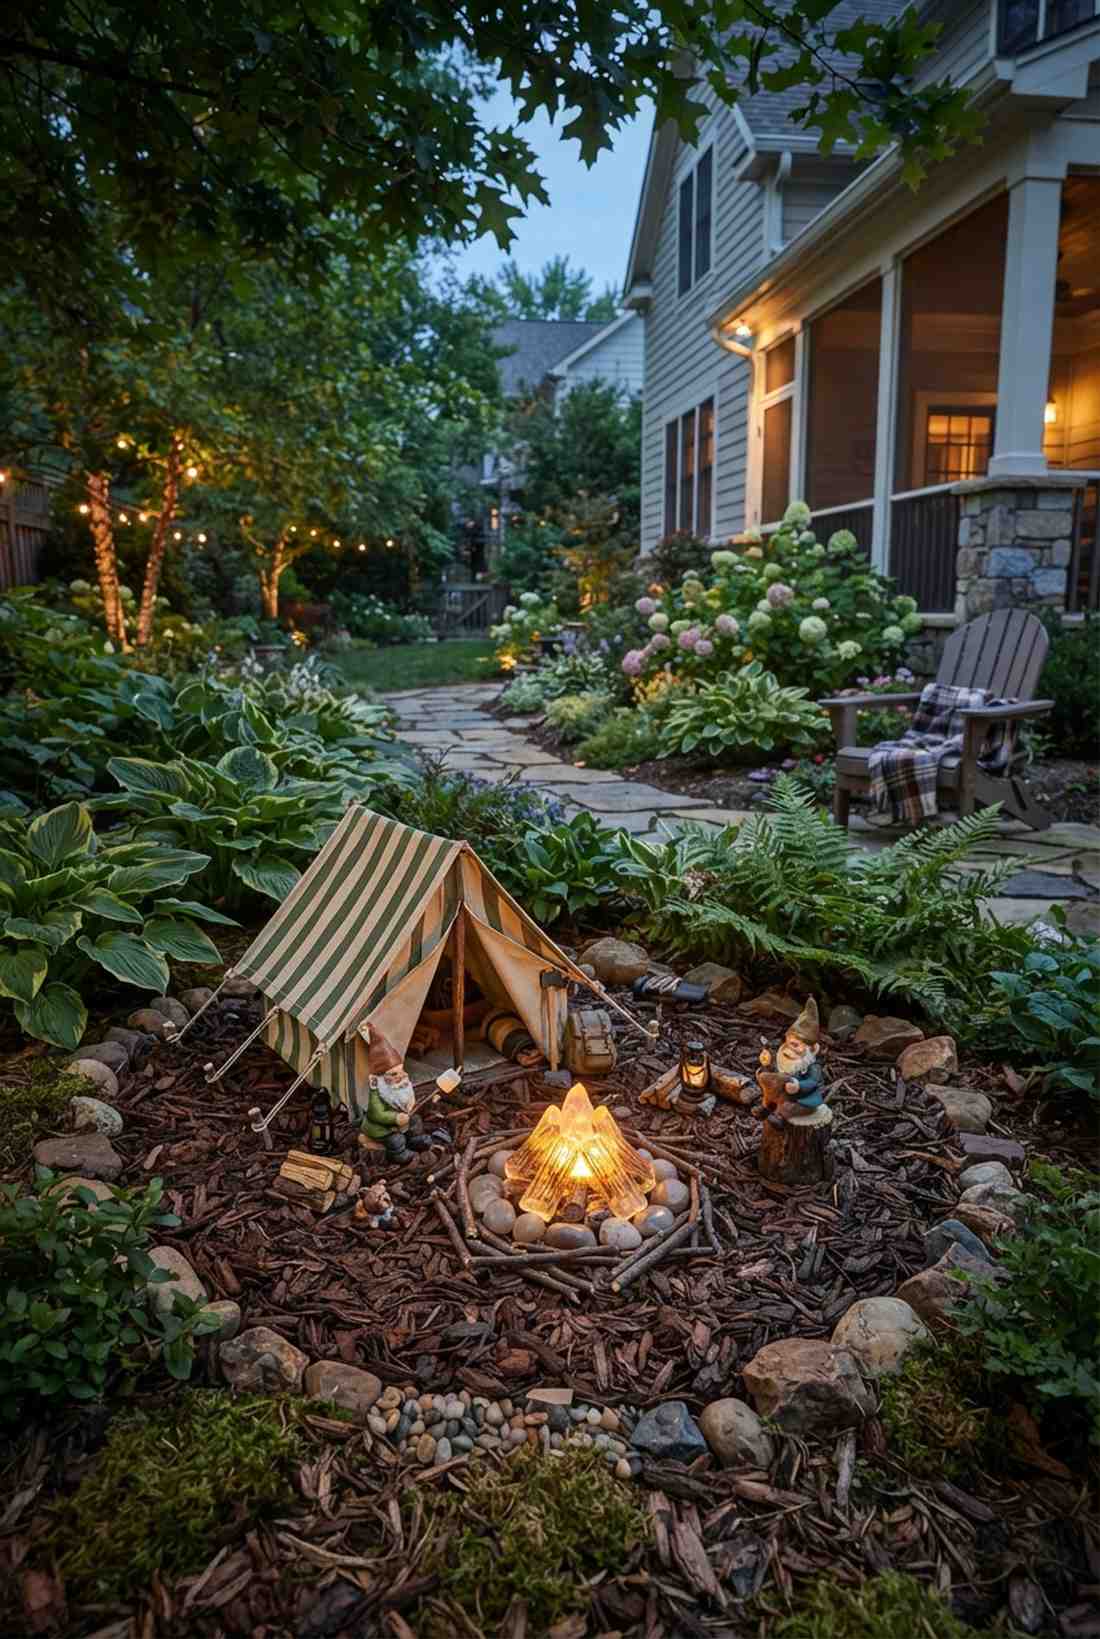
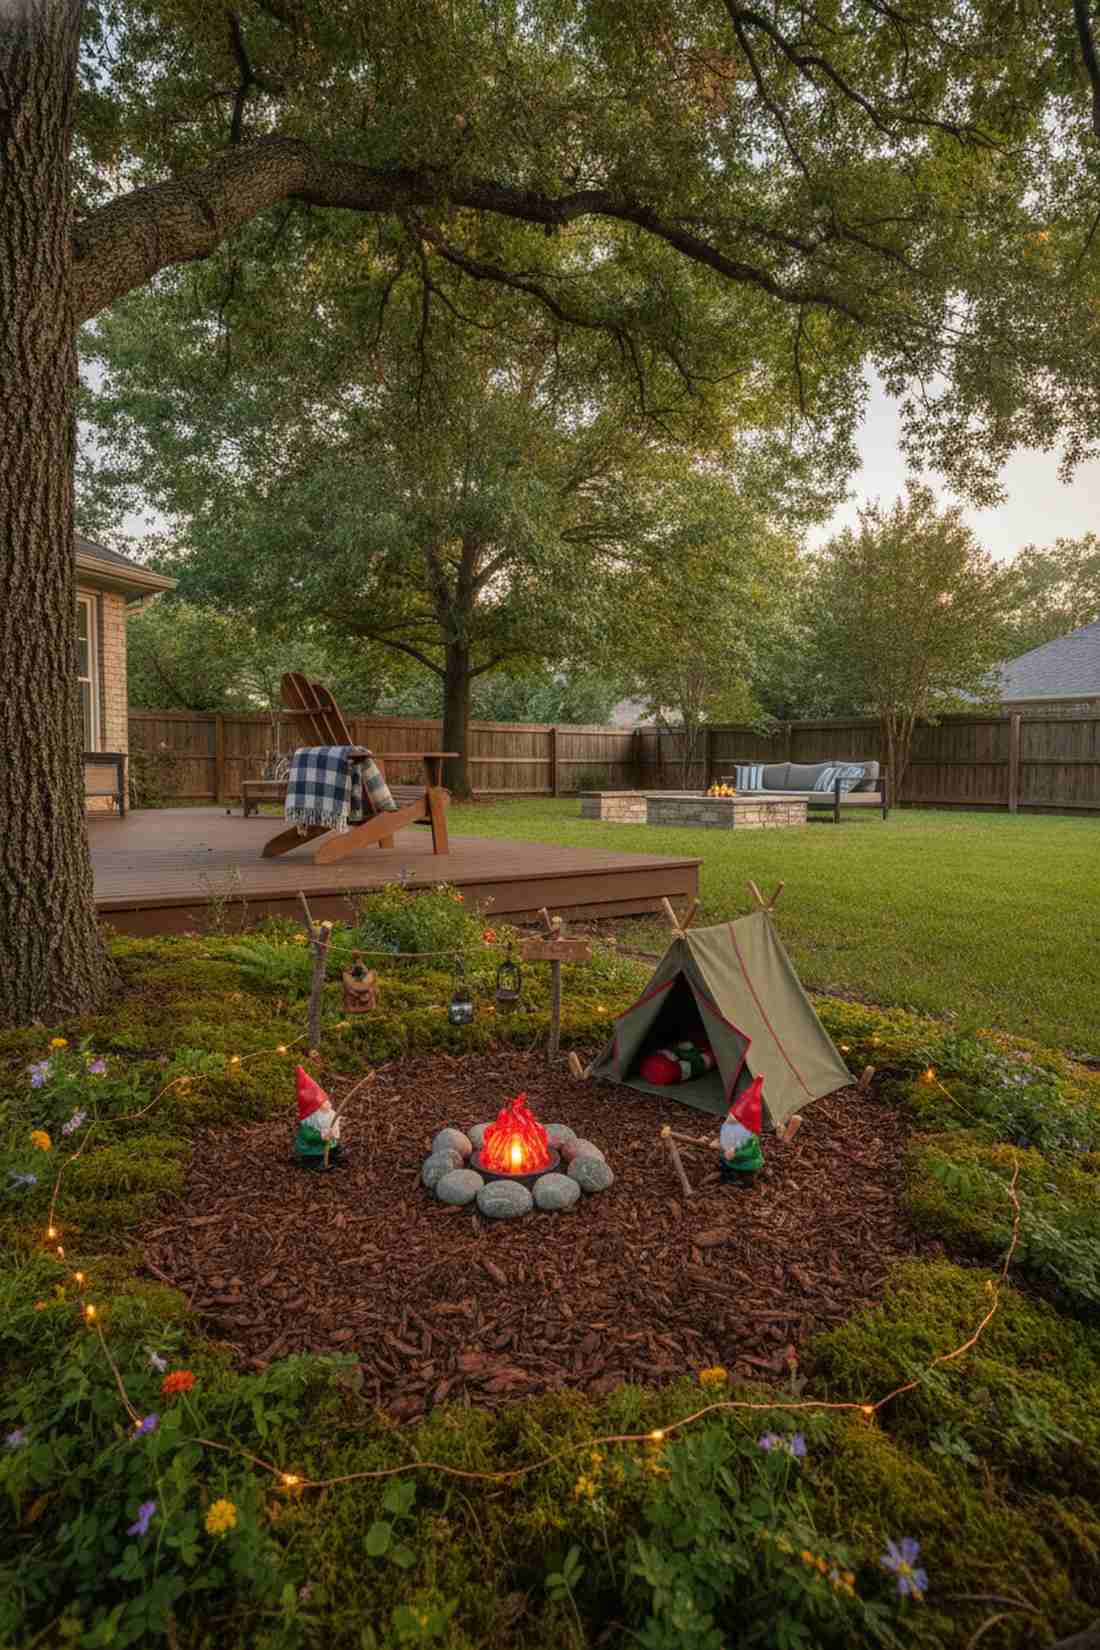
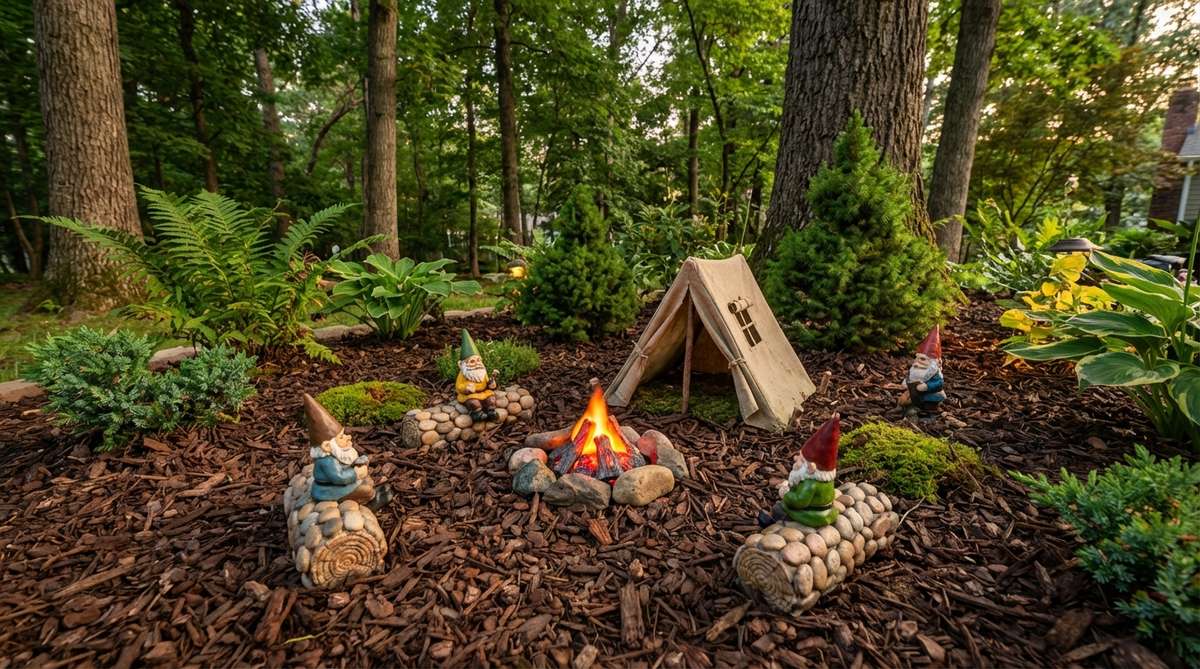
This layout delivers a heavy dose of nostalgic summer camp energy. A woodland campsite miniature display turns a forgotten shady corner into a brilliant storytelling station.
Most people get this completely wrong by crowding the items, but establishing a clear “clearing” with bark mulch gives a designer-level finish. Integrating subtle battery-powered fairy garden kits to simulate a glowing fire at night is a high-CPC trick that stops scrollers dead.
Expect to spend about $30–$50 for the full camping suite. It’s a fast upgrade that completely changes the vibe of your outdoor evenings.
- Key Materials: Mini tent, faux campfire, pebble “logs.”
- Vibe / Style: Adventurous and cozy.
- Difficulty: Moderate detail work.
- Budget Breakdown: Camp Kit: $35 | Bark Mulch: $5.
- Creator’s Tip: Hide a tiny solar LED underneath the translucent plastic campfire for an automatic evening glow.
- Smart Sourcing: solar-powered micro LED fire pits and premium miniature camping gear kits.
22. Tea Party Tabletop Gnome Scene
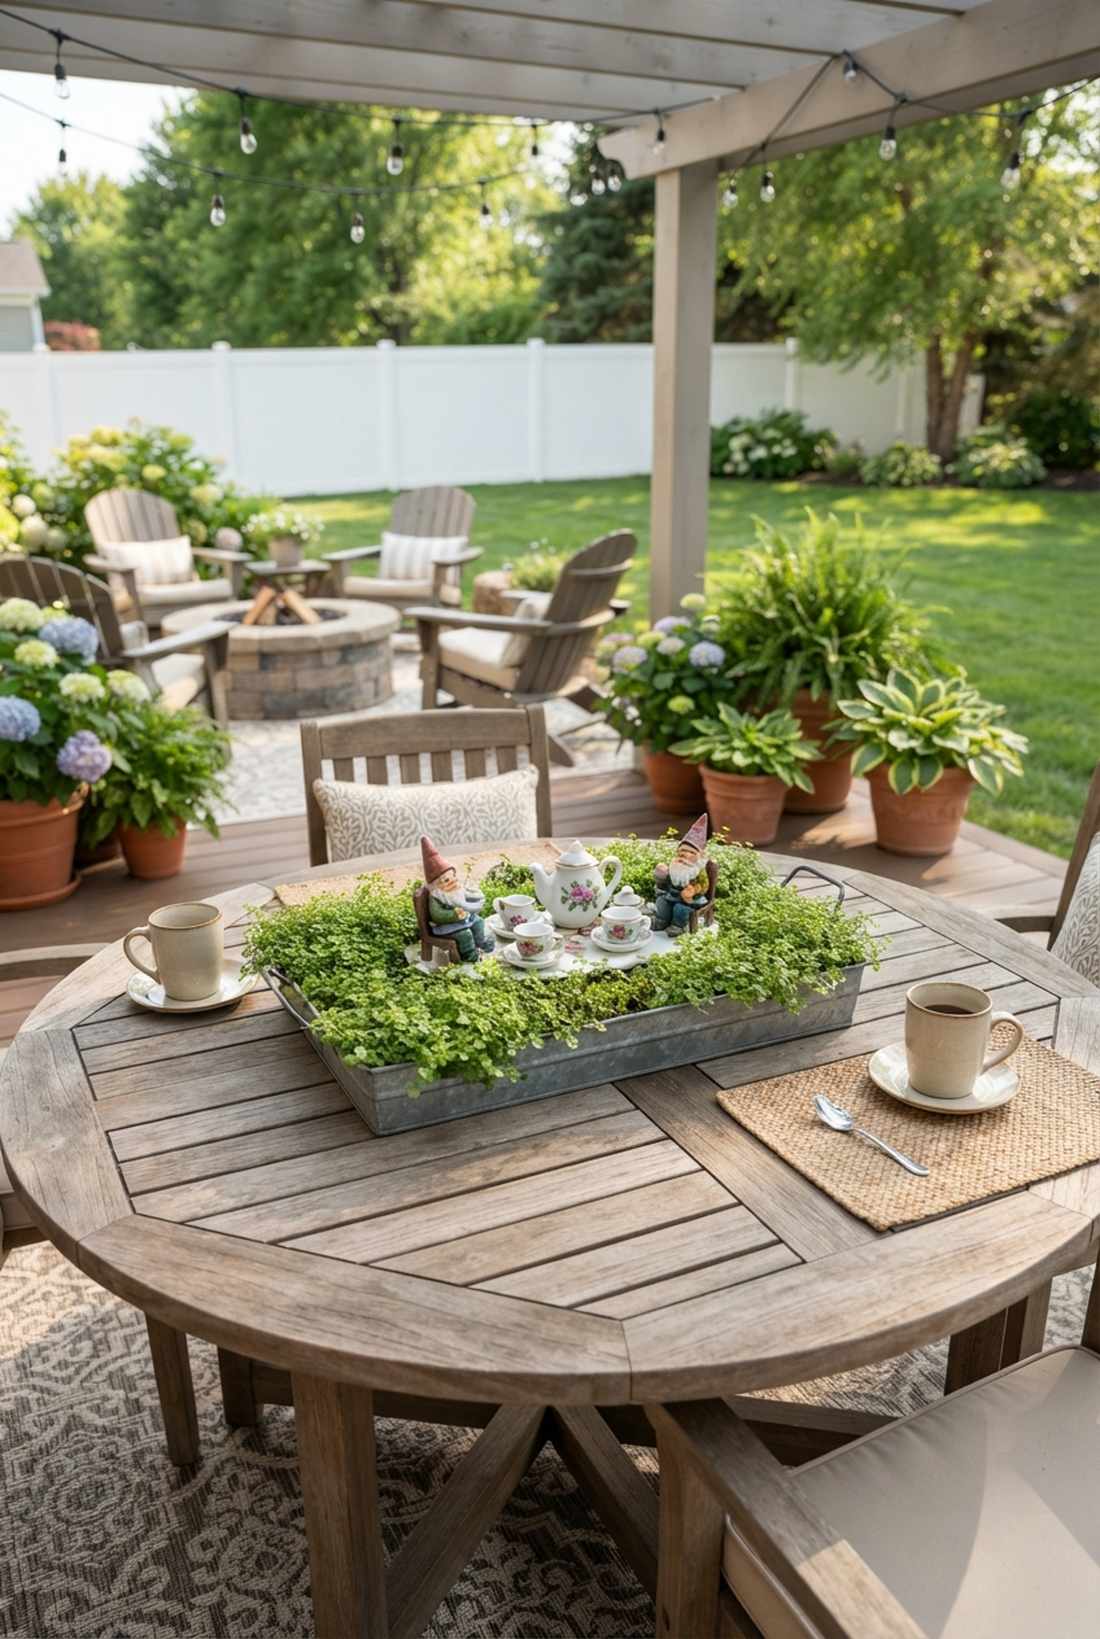
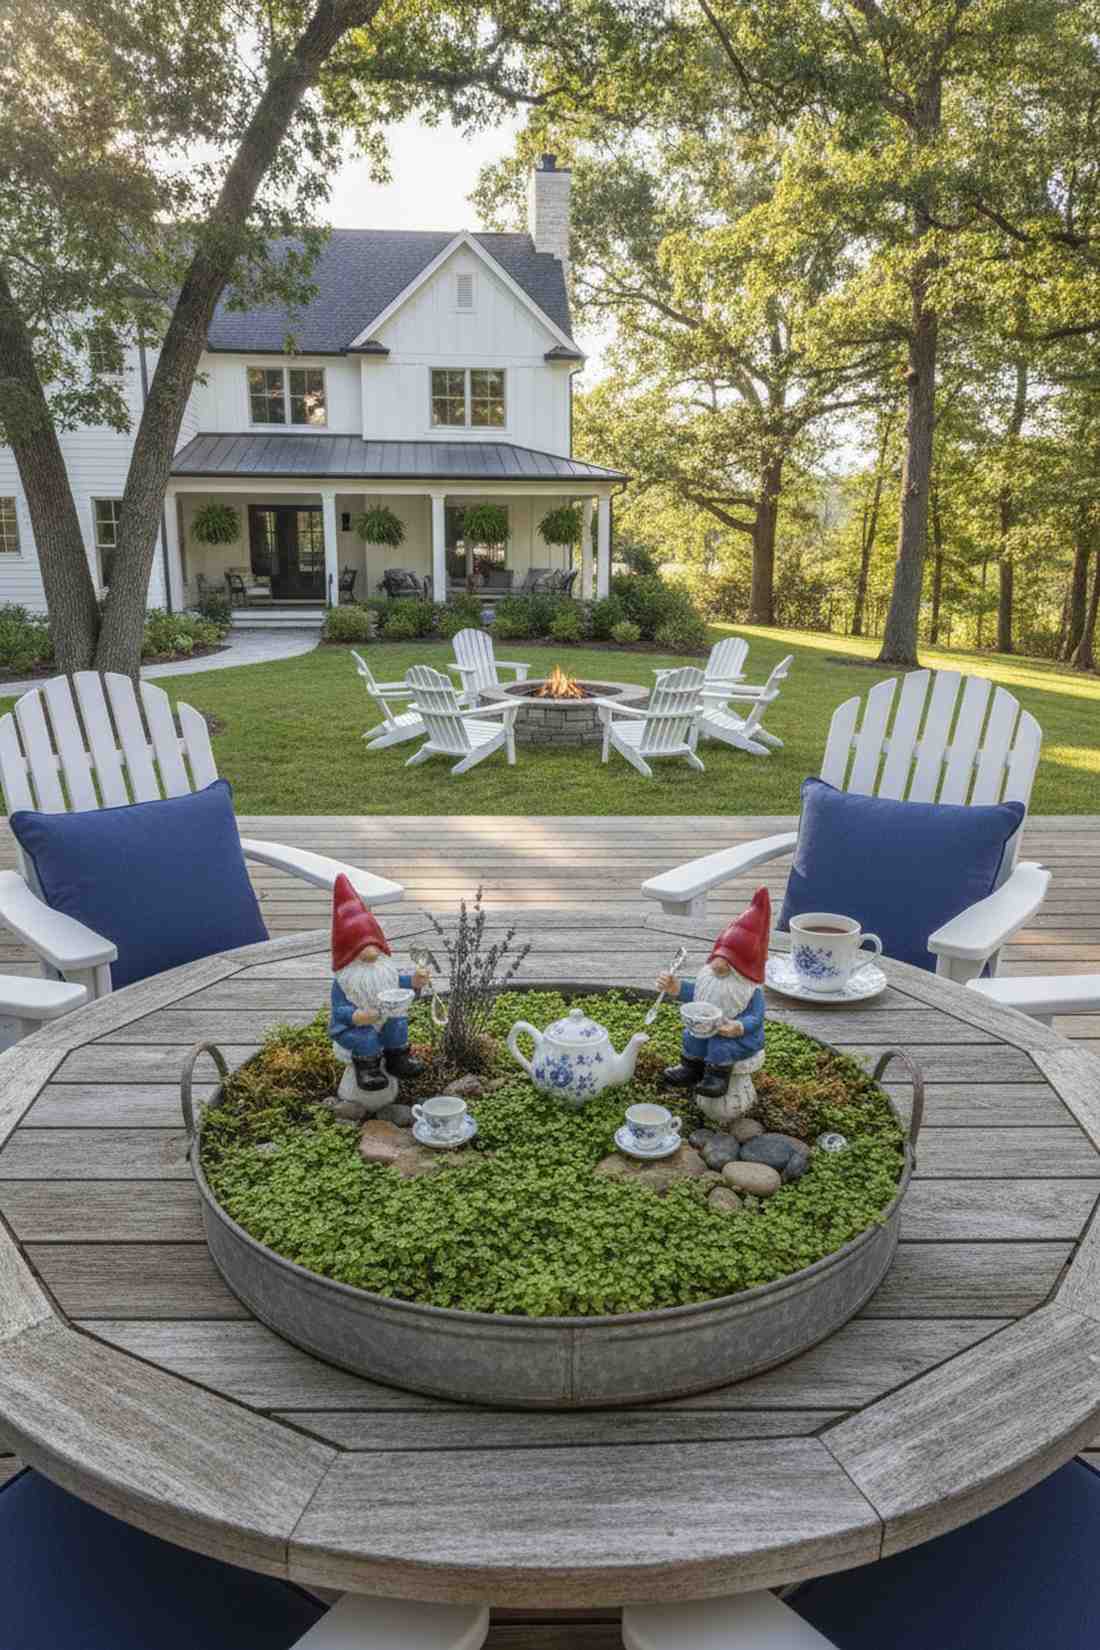
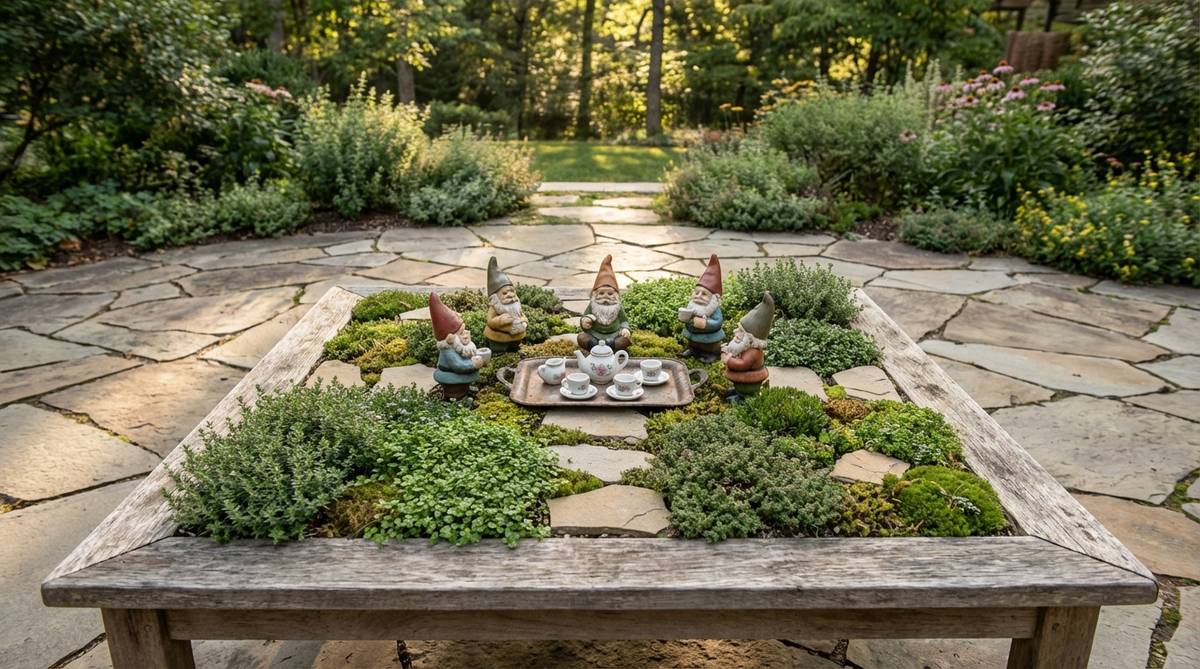
This tabletop arrangement feels like an elegant, microscopic garden party. Designing a patio table tray garden introduces interactive whimsy right at adult eye-level during morning coffee.
Skip the generic scattered look by containing the scene within a shallow, premium zinc or ceramic tray so it looks intentional. Leveraging high-end terrarium accessories like tiny porcelain sets makes the display feel incredibly bespoke rather than toy-like.
Creating this centerpiece costs roughly $25–$40. Pin this if you love hosting and want a stunning conversational piece for your outdoor dining table.
- Key Materials: Shallow tray, baby’s tears plant, miniature tea set.
- Vibe / Style: Refined, playful centerpiece.
- Difficulty: Easy assembly.
- Budget Breakdown: Tray & Plants: $20 | Miniatures: $15.
- Creator’s Tip: Keep the tray lightweight so you can quickly move it indoors during severe summer storms.
- Smart Sourcing: rust-proof shallow zinc planters and premium miniature porcelain tea sets.
23. Ladder Shelf Tiered Gnome Garden
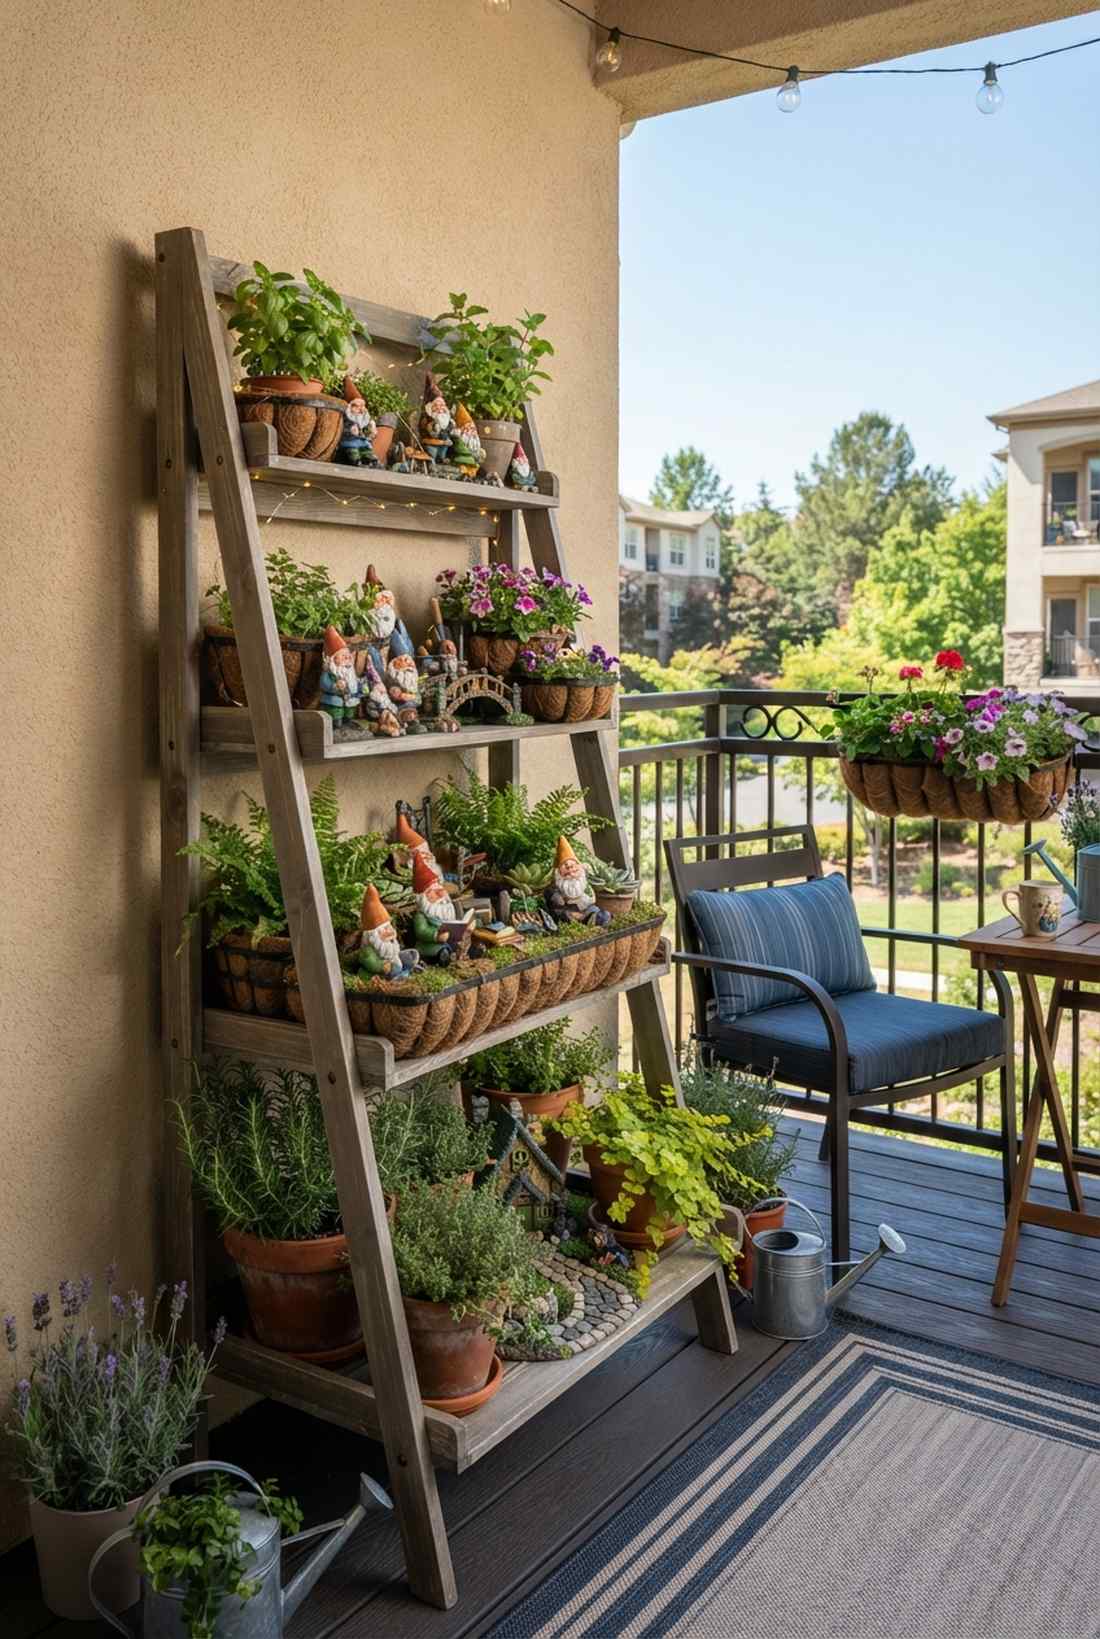
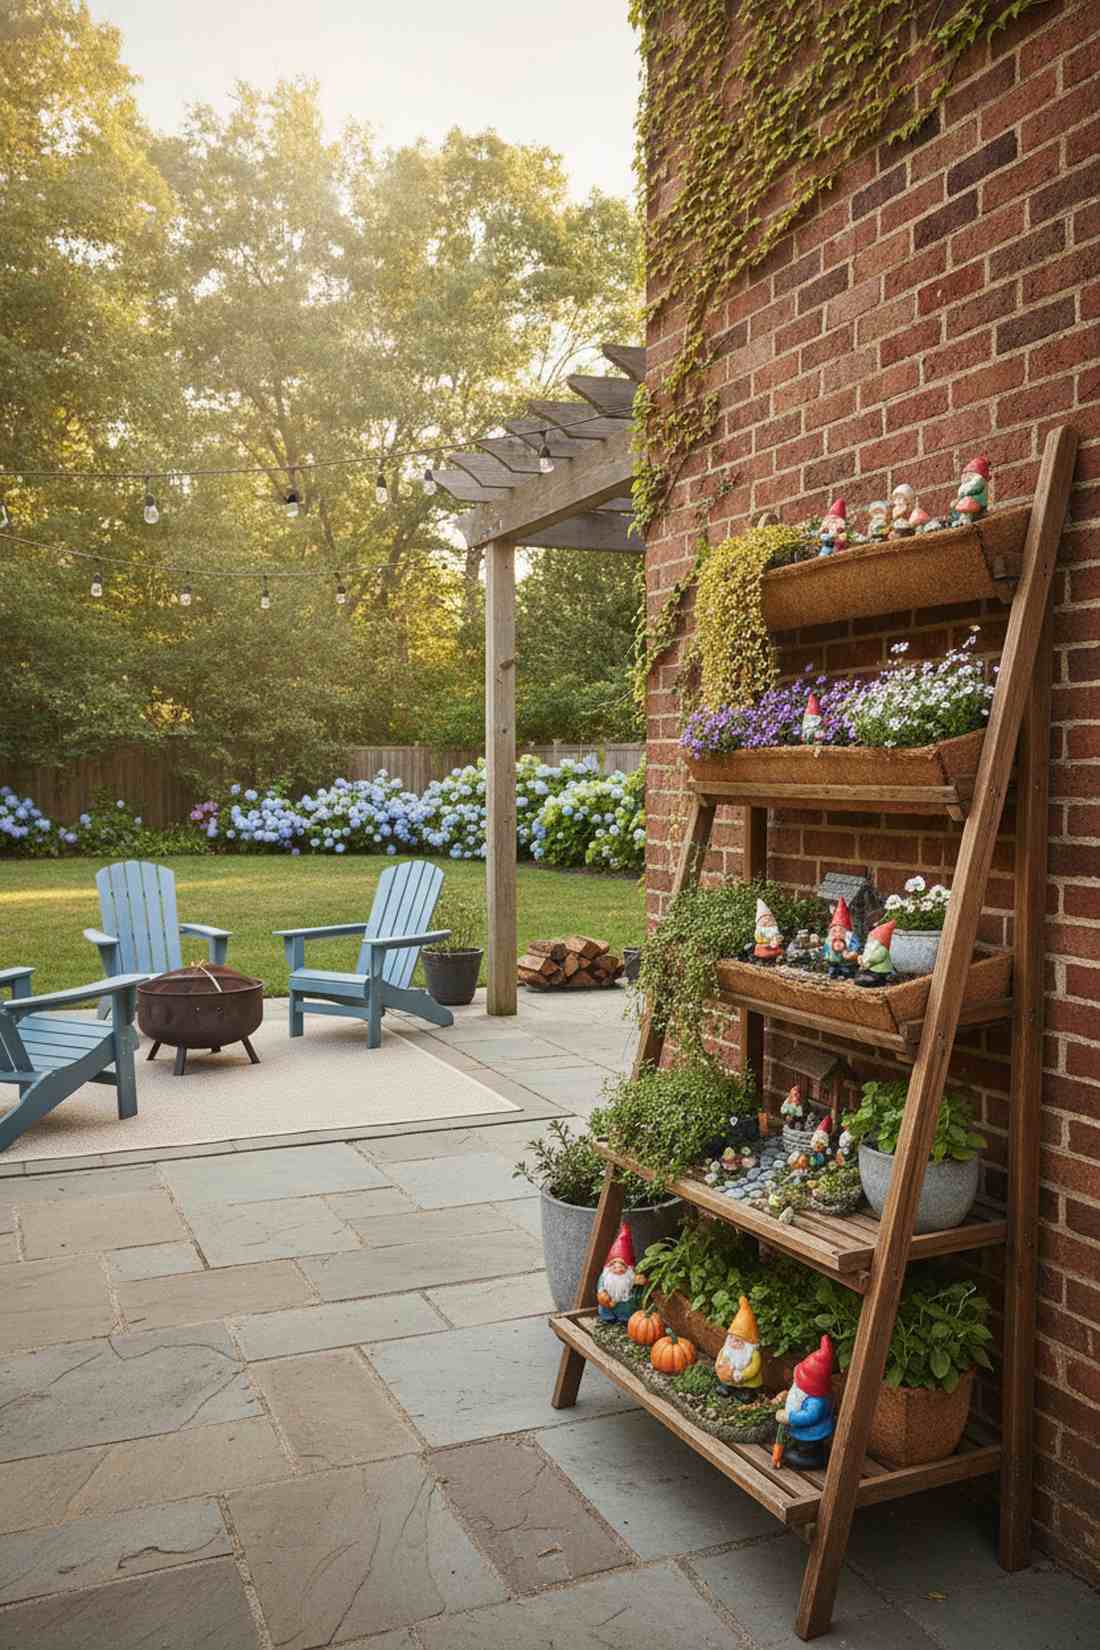
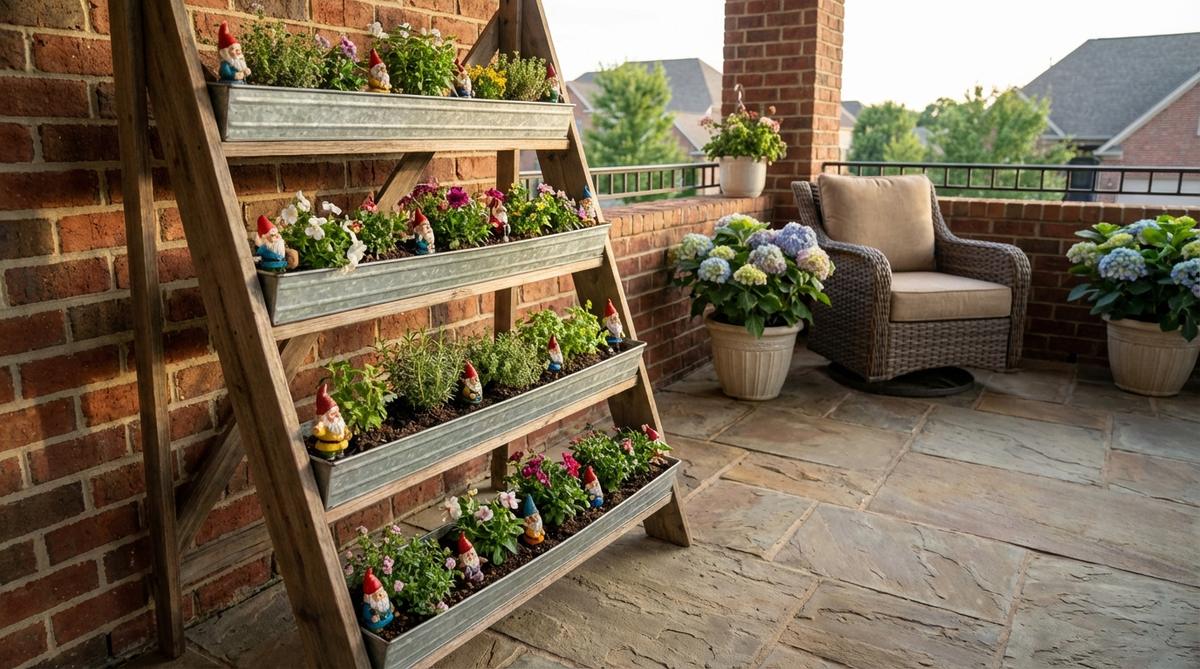
This multi-level setup mimics a bustling apartment complex for your magical residents. A tiered leaning shelf garden is the ultimate hack for tiny balconies craving massive vertical impact.
Amateur decorators often ignore scale, but assigning a strict color palette to each shelf delivers a surprisingly premium look. By utilizing pre-cut moss liners and modular miniature garden supplies, you keep watering clean and maintenance incredibly low.
A fully loaded ladder setup runs about $60–$90 depending on the shelving unit. Save this to your small patio board for an instant vertical transformation.
- Key Materials: Wooden ladder shelf, varied gnomes, trailing herbs.
- Vibe / Style: Organized vertical storytelling.
- Difficulty: Requires sturdy shelving.
- Budget Breakdown: Shelves: $45 | Miniatures: $30.
- Creator’s Tip: Put the heaviest, wettest pots on the bottom tier to ensure the ladder stays structurally sound in the wind.
- Smart Sourcing: weather-treated wooden ladder planters and pre-cut coco coir planter liners (bulk pack).
24. Broken Pot Gnome Cascade
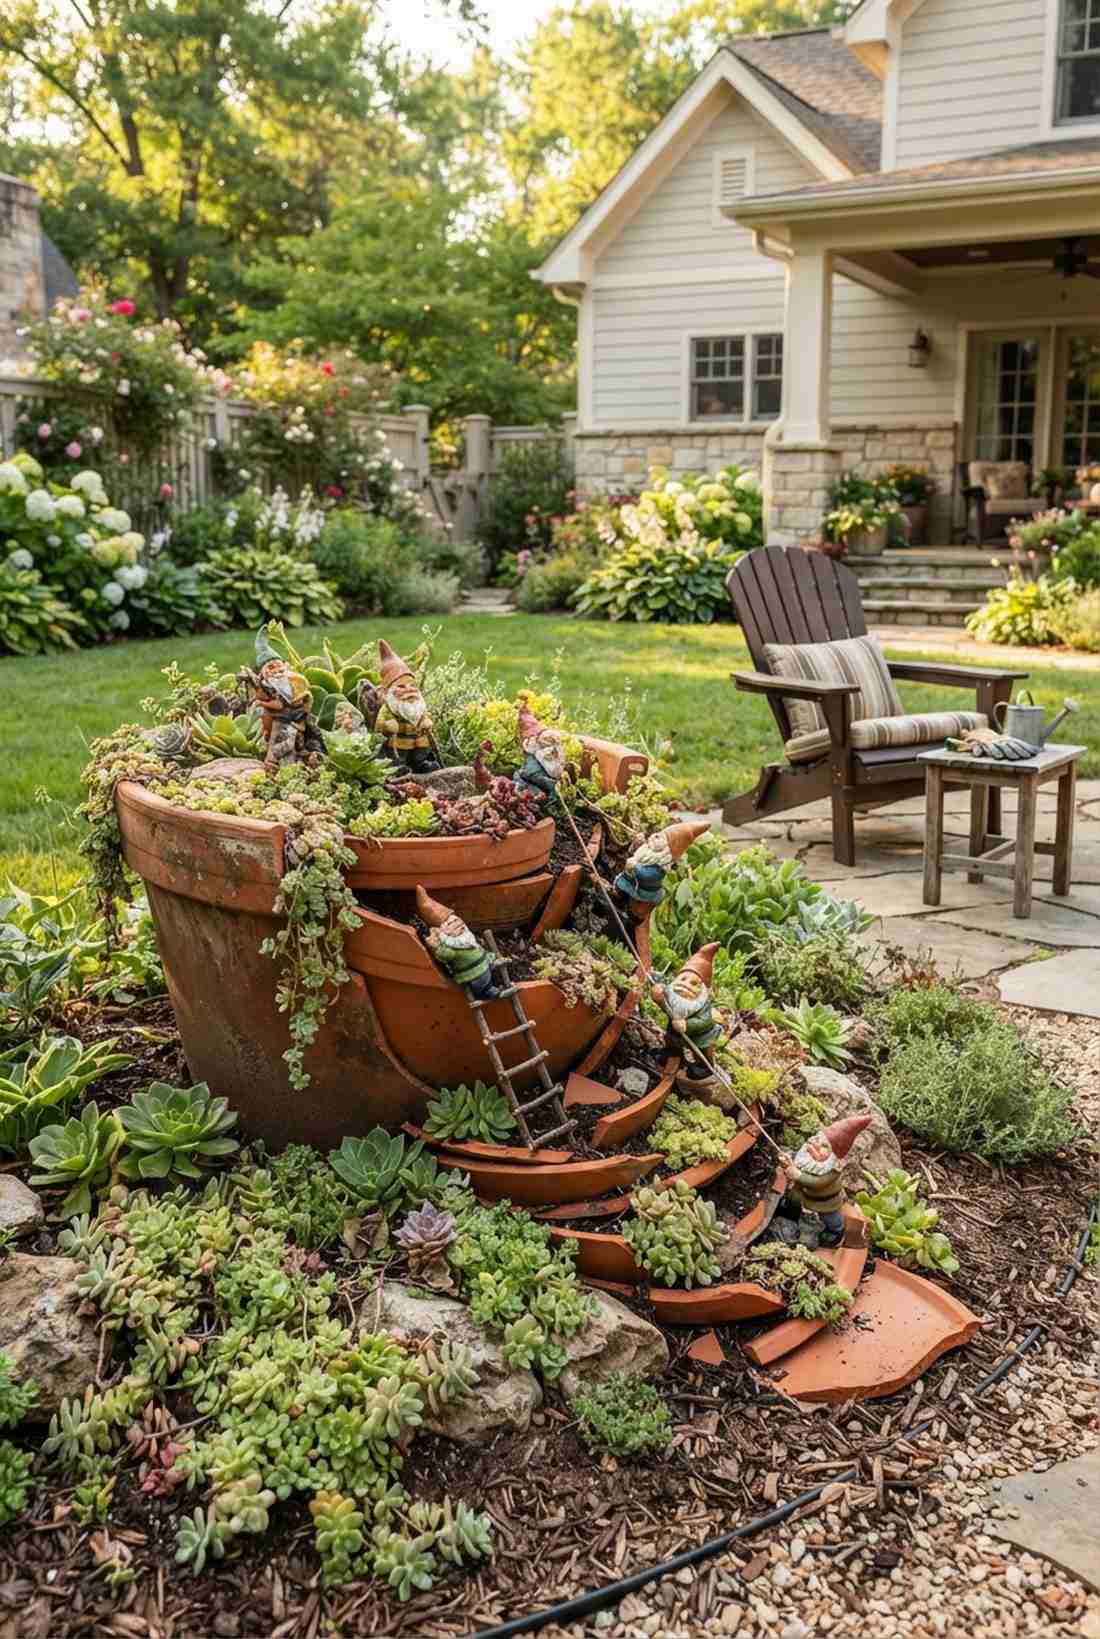
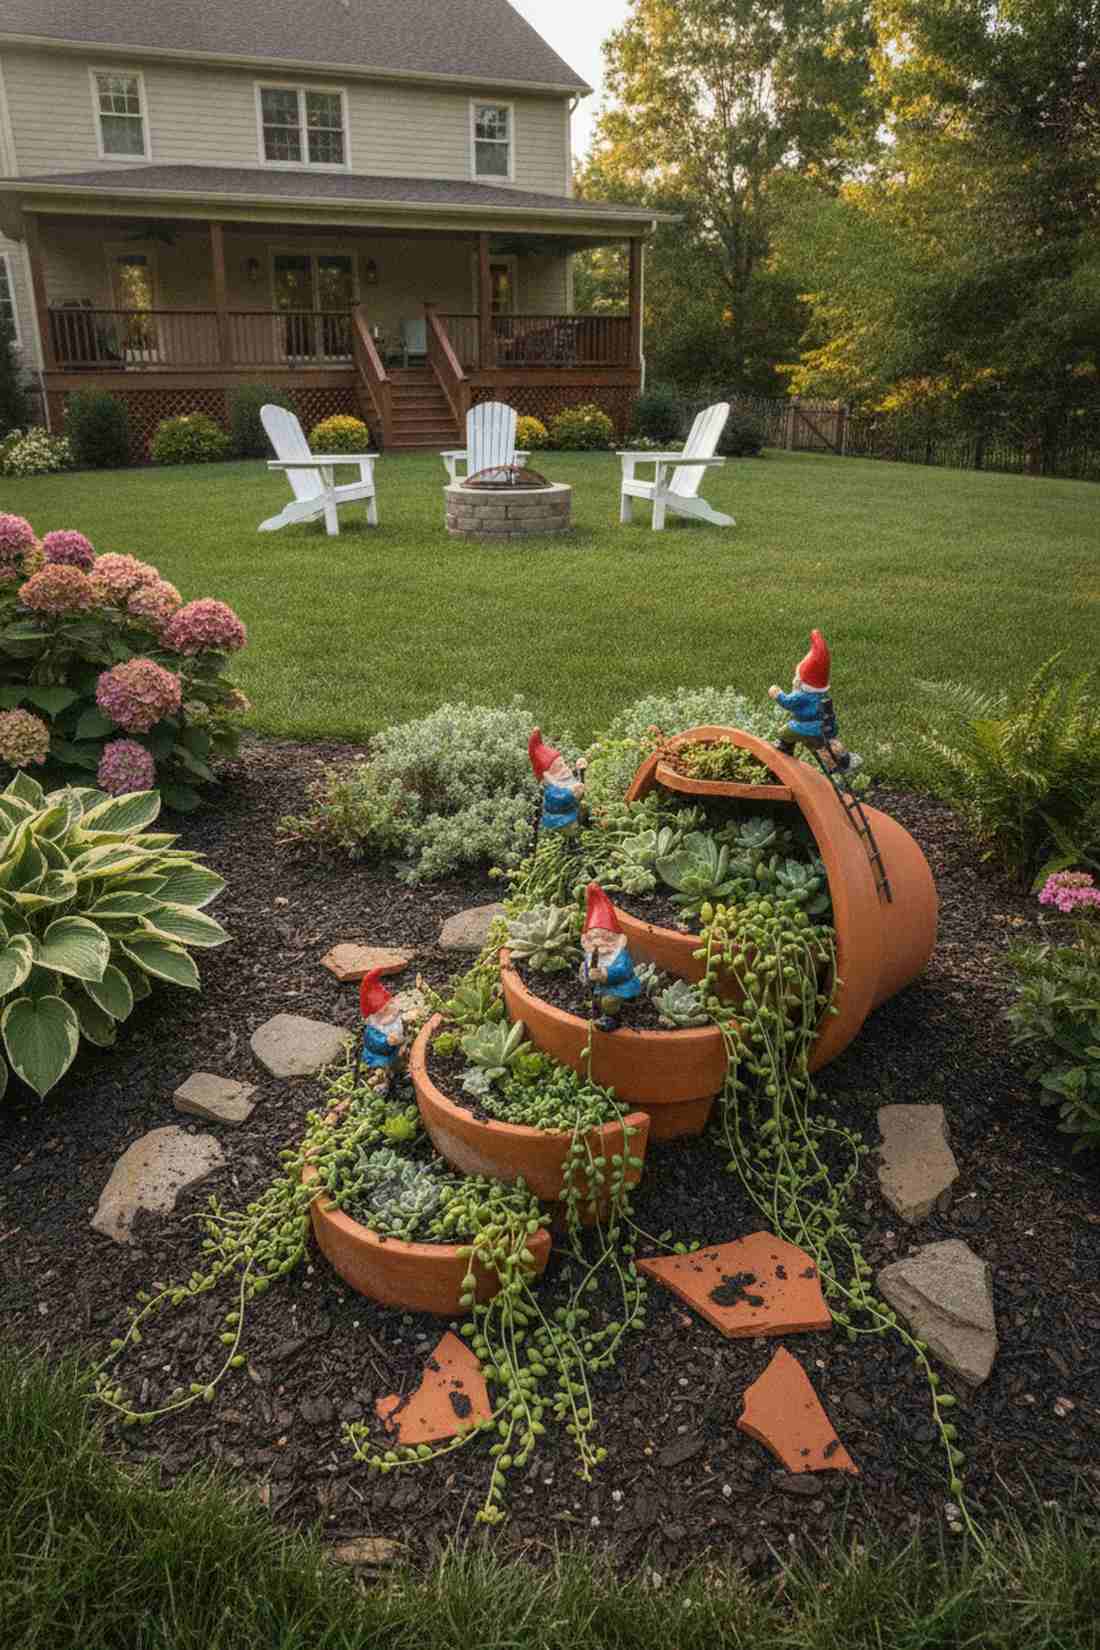
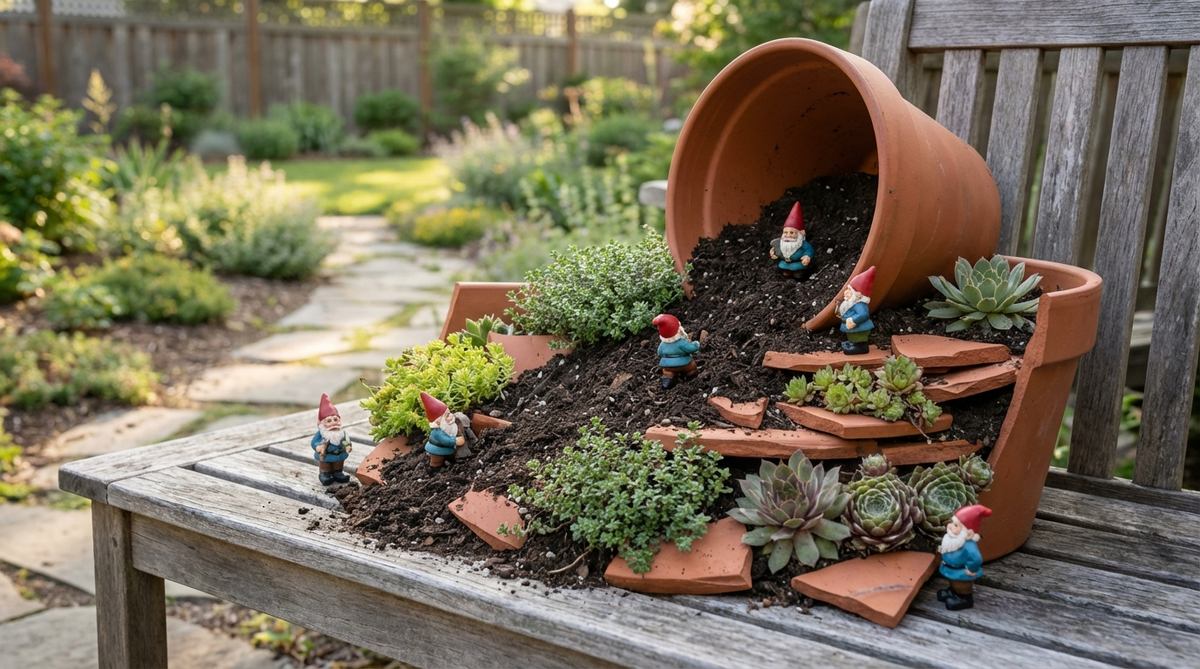
This dramatic layout turns garden trash into an absolute landscaping treasure. Crafting a spilled terracotta cascade display provides a dynamic, hillside illusion in a very tight footprint.
Most yards leave these spots empty, but stacking broken shards to form climbing terraces gives a designer-level finish out of literal garbage. Integrating specialized fairy garden kits designed for steep angles ensures your characters don’t slide down into the mud.
Since the pot is recycled, you’ll only spend $15–$25 on soil and accents. Highly recommended for a stunning, eco-friendly weekend project.
- Key Materials: Broken terracotta pot, trailing succulents, climbing gnomes.
- Vibe / Style: Dramatic, upcycled hillside.
- Difficulty: Moderate artistic stacking.
- Budget Breakdown: Upcycled Pot: $0 | Plants/Gnomes: $20.
- Creator’s Tip: Partially bury the bottom half of the broken pot so the dirt hillside looks organically integrated into the ground.
- Smart Sourcing: heavy-duty climbing garden gnomes and premium succulent potting mix (fast-draining).
Material Guide: Cheap vs. Premium Aesthetic
Knowing exactly where to save and where to spend makes all the difference in achieving that “looks expensive but isn’t” vibe.
- Standard vs. UV-Resistant/Premium: Upgrading to UV-coated resin prevents that chalky, faded look that makes yard art look cheap after just one summer.
- Pre-made Kits vs. Sourcing Locally: Buying commercial starter kits often saves money because the pieces are pre-scaled to match, avoiding awkward, mismatched proportions.
Do not skip this next one if you want maximum visual impact on a tiny budget.
Seasonal and indoor mini garden gnomes displays
Mini garden gnomes work year-round, shifting easily from flowerbeds to mantels and desks with the seasons. These ideas show how to rotate scenes so figures feel fresh rather than permanent fixtures.
25. Spring Bulb Gnome Ring
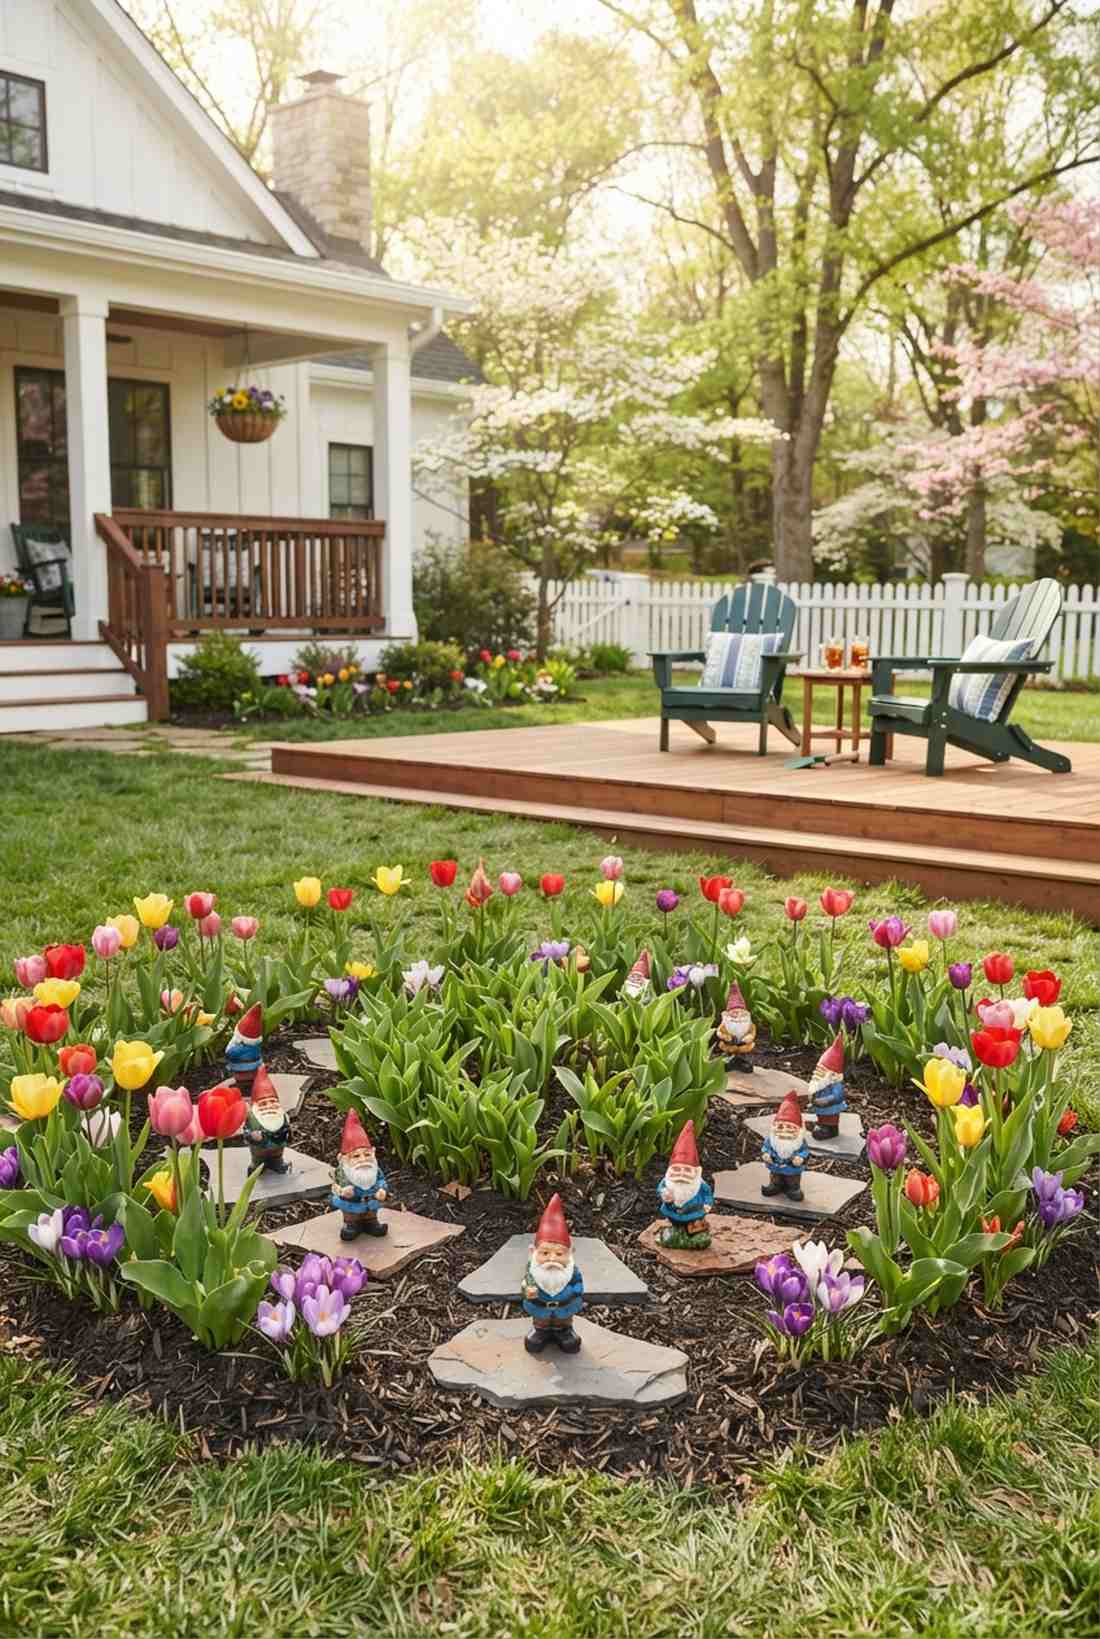
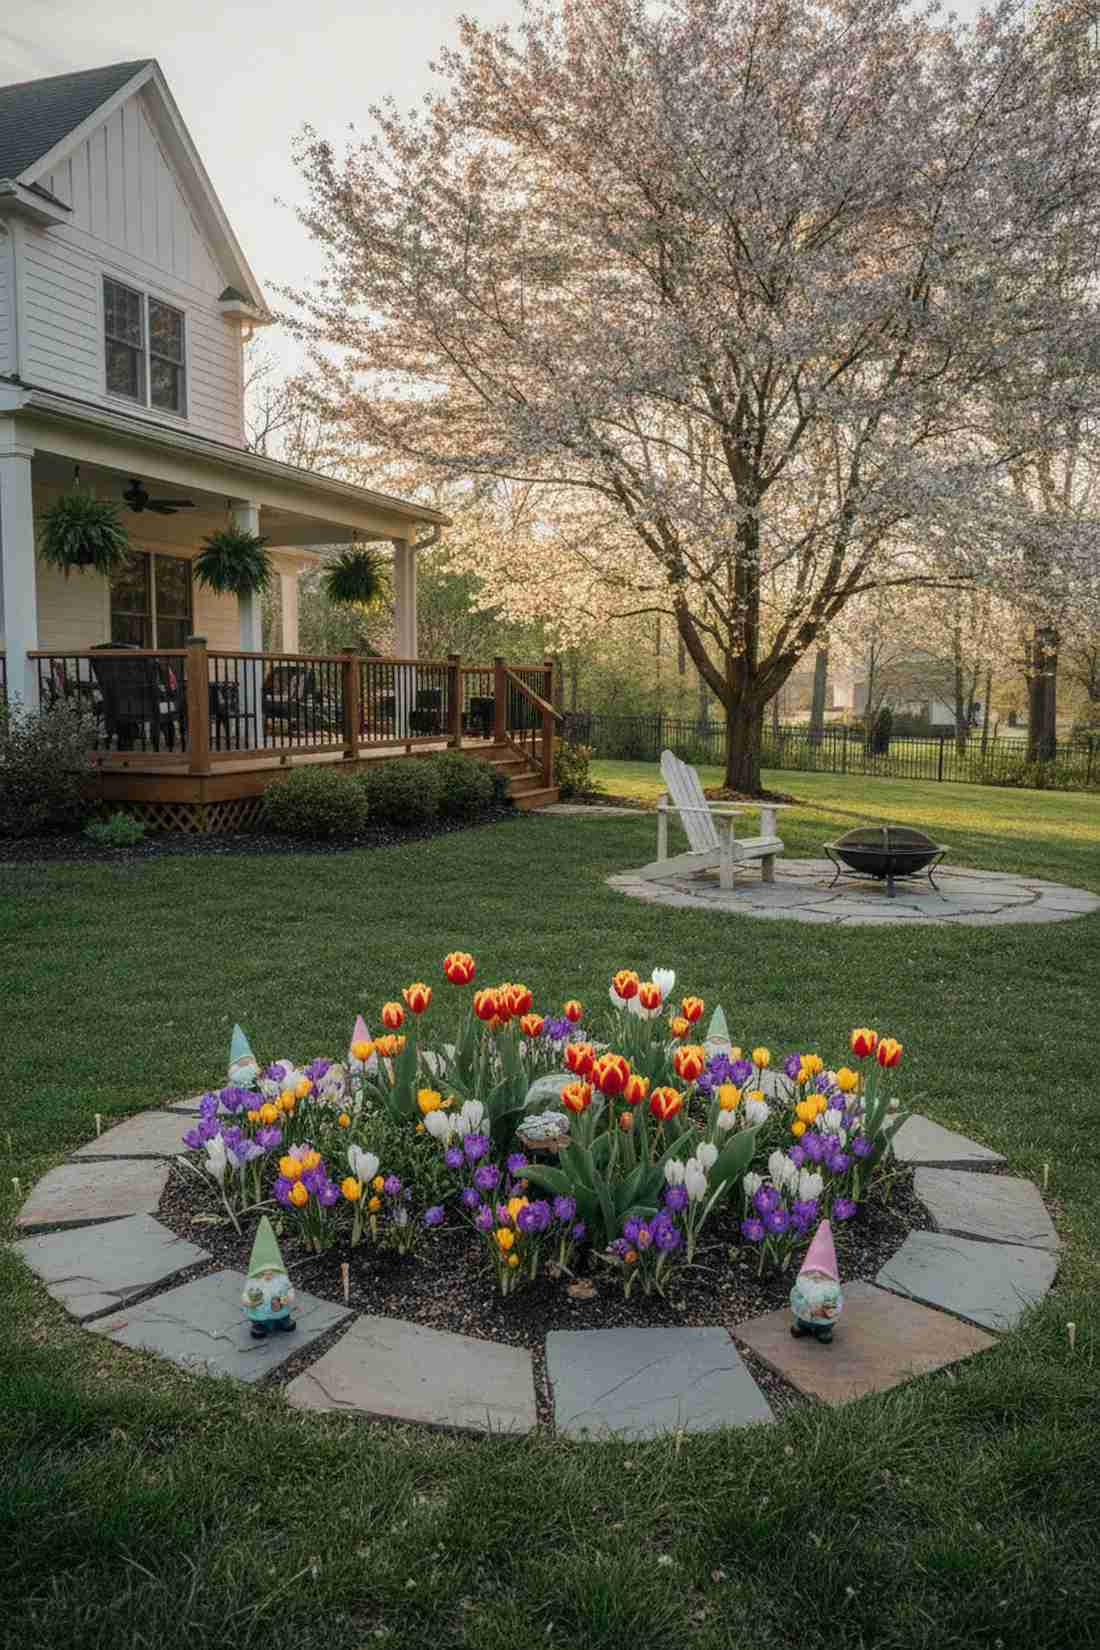
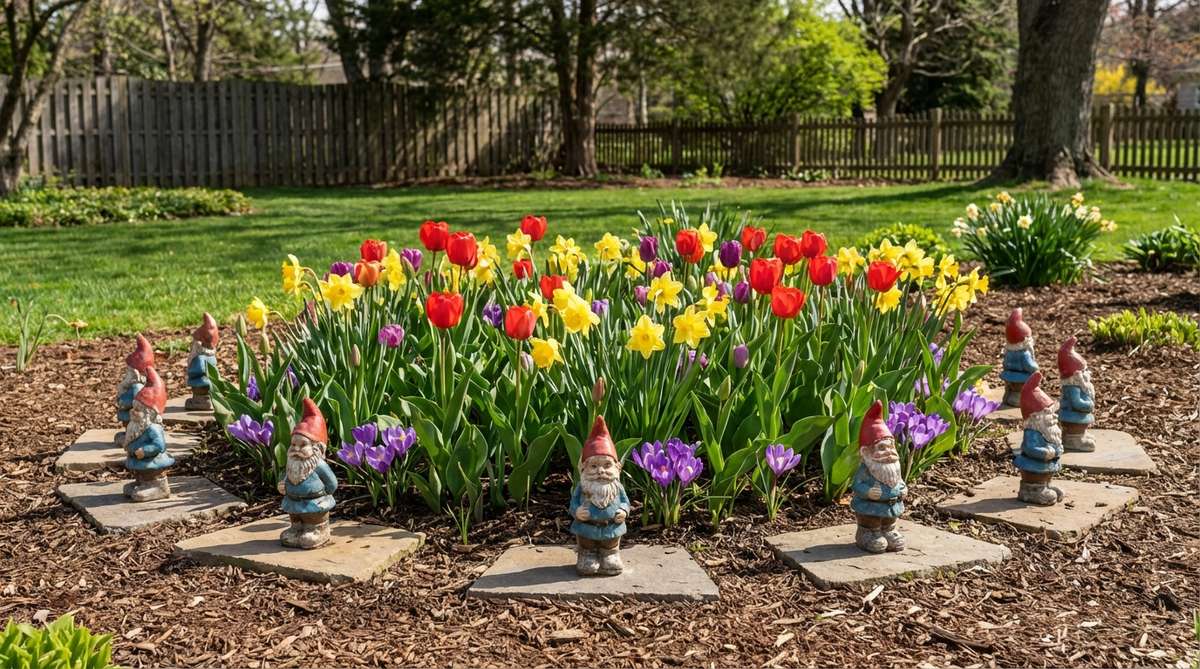
This arrangement feels like a joyous awakening festival after a long winter. Creating a spring bulb ring boundary highlights ephemeral flowers like tulips and crocus beautifully.
It’s a common mistake to hide figures deep in tall stems, yet offsetting them slightly on flat stones frames the blooms and delivers a surprisingly premium look. Leveraging modular miniature garden supplies allows you to easily move the ring once the spring foliage dies back.
You can execute this seasonal pop for roughly $15–$25. Pin this if you want to make your short-lived spring garden feel like a major event.
- Key Materials: Gnome ring, flat stones, emerging bulbs.
- Vibe / Style: Celebratory spring awakening.
- Difficulty: Quick seasonal setup.
- Budget Breakdown: Gnome Set: $20 | Stones: $5.
- Creator’s Tip: Mark the bulb cluster with golf tees in the fall so you know exactly where to place the gnomes in early spring.
- Smart Sourcing: pre-cut flat slate stepping stones and UV-resistant mini gnome sets (bulk pack).
26. Summer Beach-Themed Gnome Planter
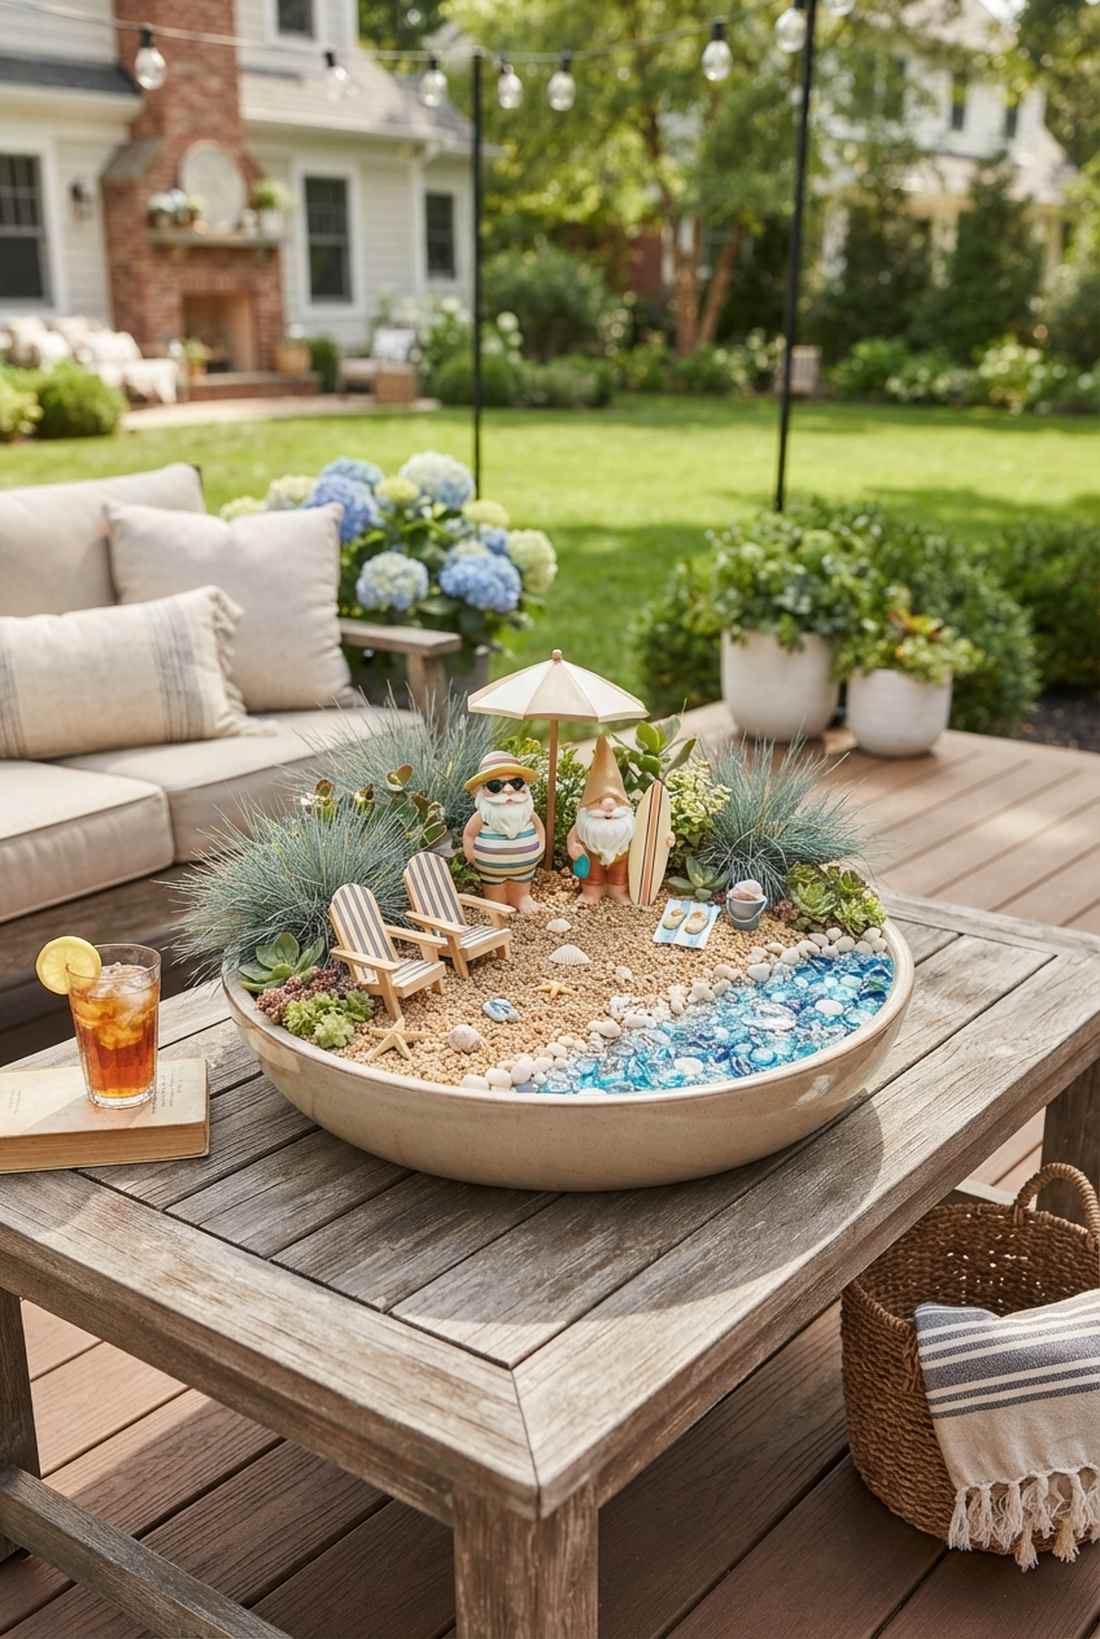
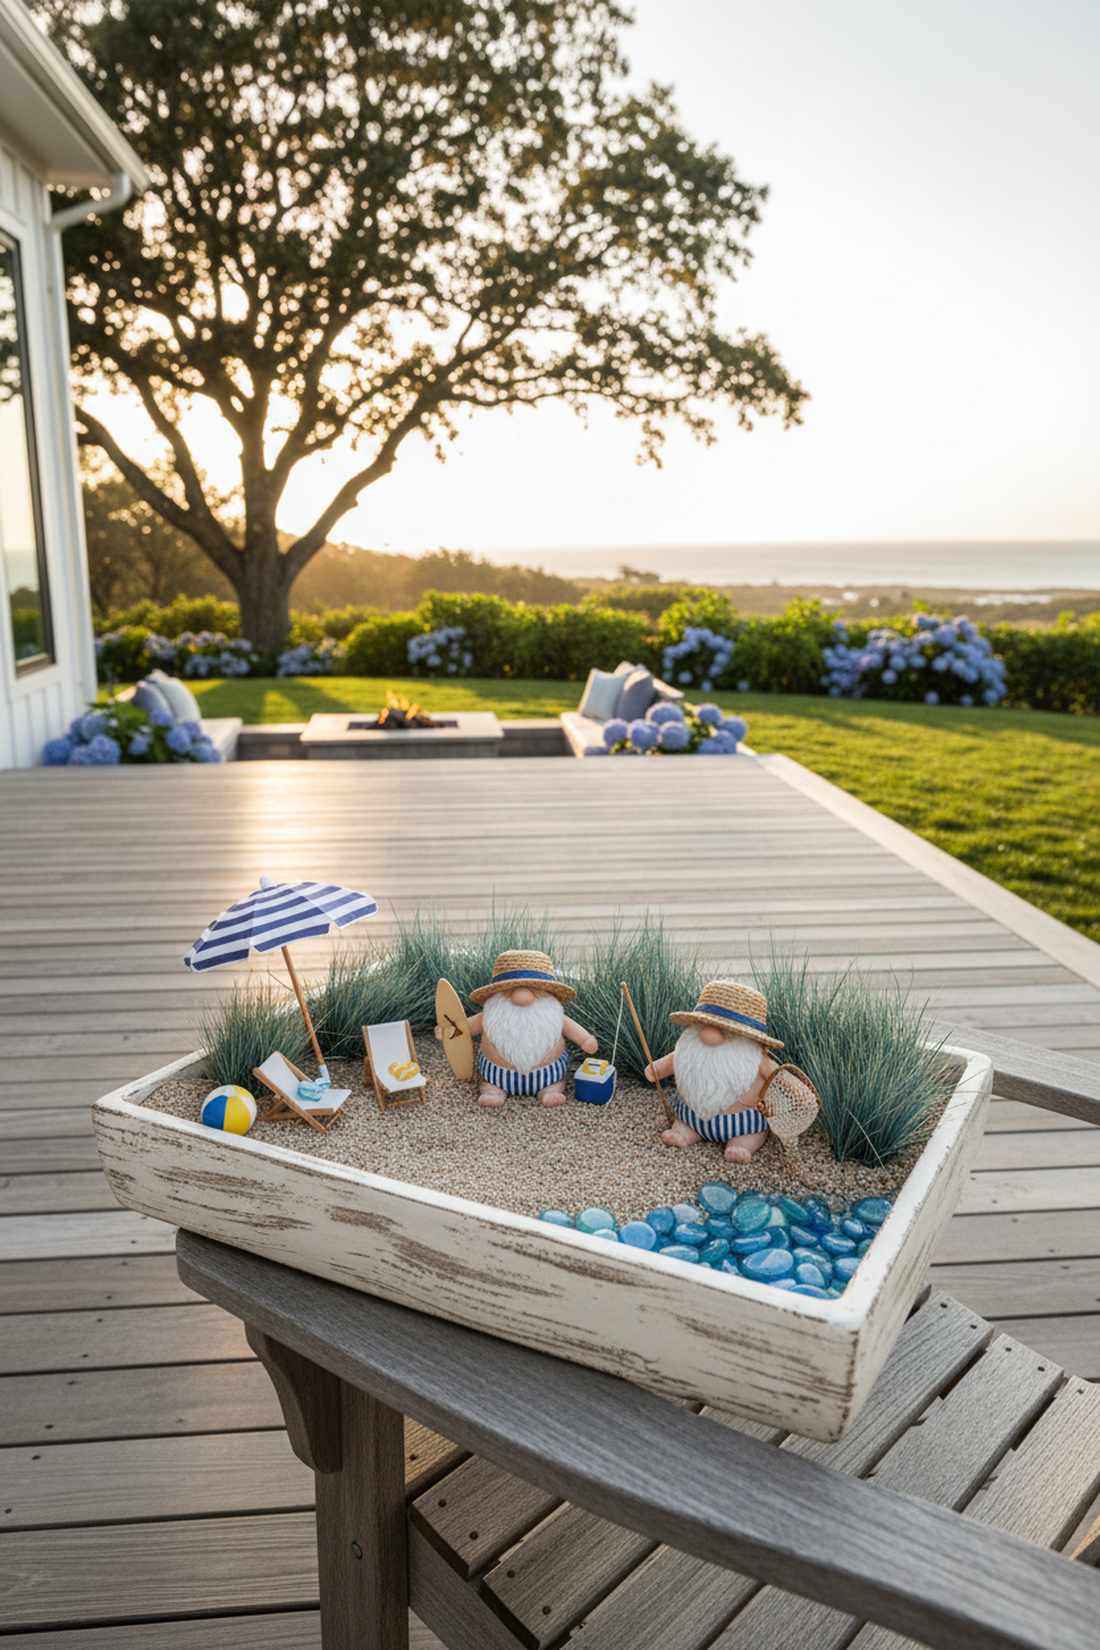
Looking at this setup instantly lowers your blood pressure with coastal vacation vibes. A beach-themed shallow planter brings major oceanic energy to inland patios and hot concrete balconies.
The trick to avoiding a cheap aesthetic is using realistic sand-colored gravel and blue-toned fescue grass instead of tacky blue dyed mulch. Sourcing specialized terrarium accessories like tiny umbrellas and lounge chairs makes the display look like a high-end diorama.
Building this summer getaway costs about $25–$45. Save this to your seasonal decor board for a foolproof July patio upgrade.
- Key Materials: Beach gnomes, sand-colored gravel, blue fescue grass.
- Vibe / Style: Relaxed coastal vacation.
- Difficulty: Easy and drought-tolerant.
- Budget Breakdown: Gravel/Plants: $15 | Beach Miniatures: $20.
- Creator’s Tip: Use blue glass pebbles clustered in one corner to create a stunning faux-water feature.
- Smart Sourcing: bulk pack blue crushed glass (faux water) and premium miniature beach accessories kits.
27. Harvest Crate Autumn Gnomes
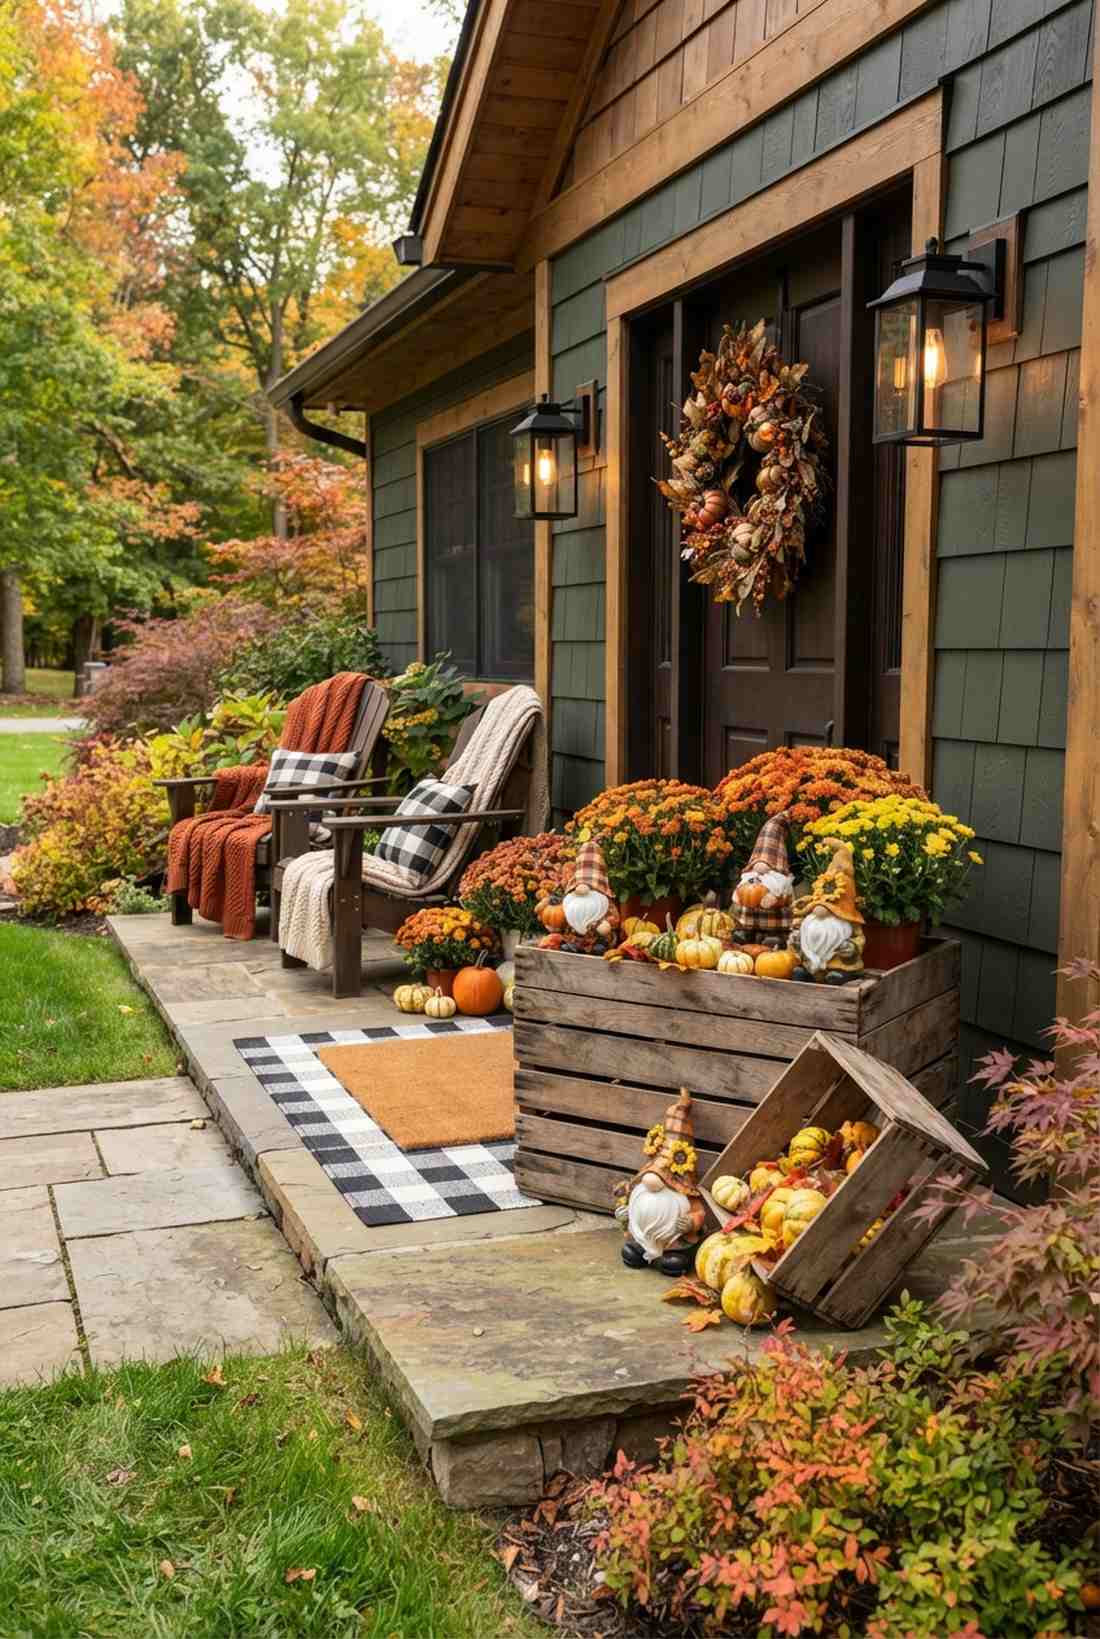
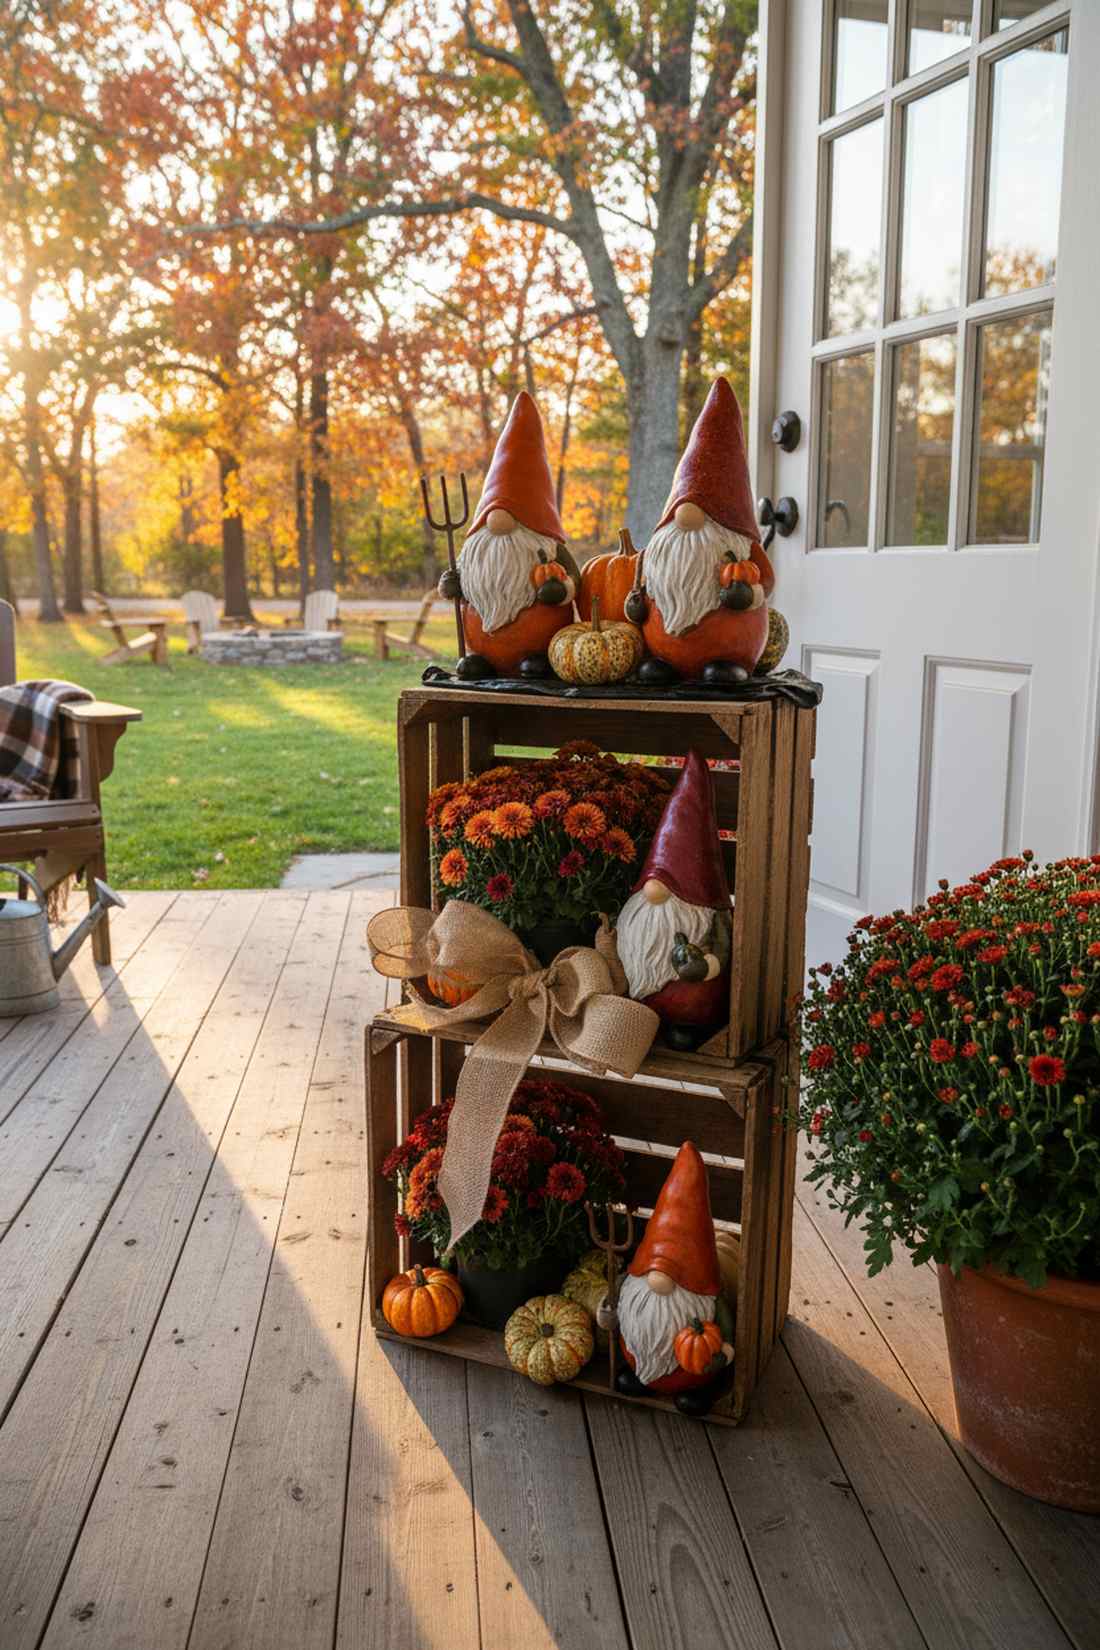
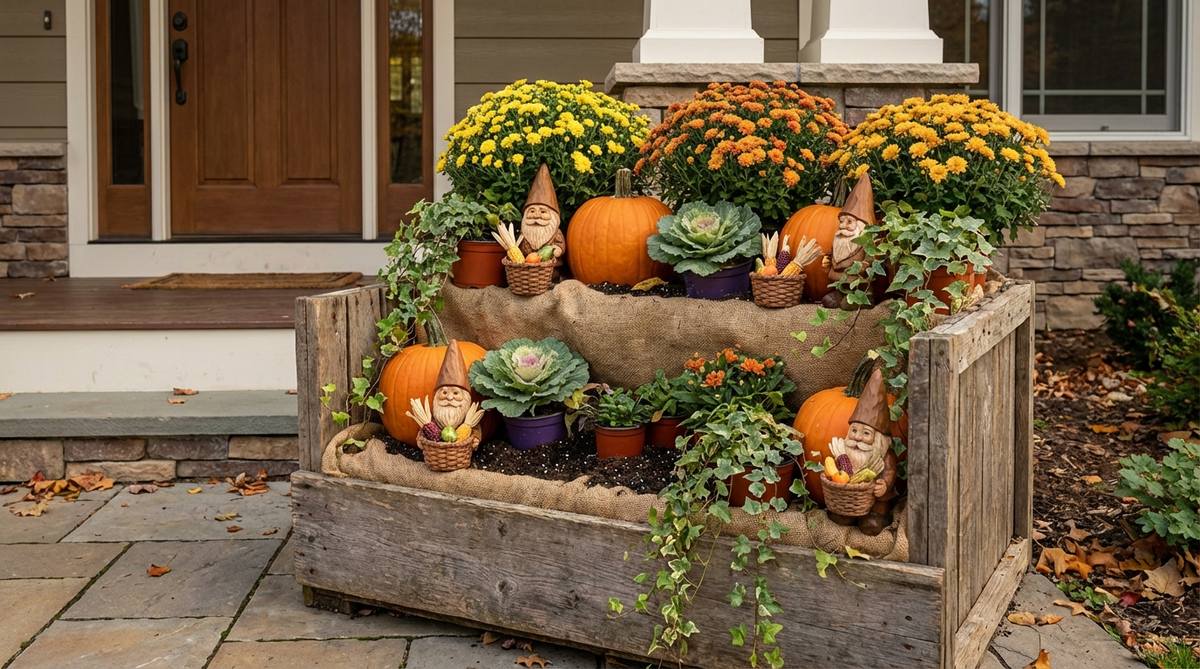
This rustic setup delivers an incredibly warm, farmhouse-chic welcome for fall. An autumn harvest crate display is the ultimate photogenic stage for front porches or barn doors.
Instead of flat, boring rows of pumpkins, utilizing height changes within a wooden crate gives a designer-level finish. By investing in heavy-duty miniature garden supplies, you create a reusable stage that you can pull out of storage year after year.
You can build this autumnal masterpiece for roughly $40–$65. Highly recommended for instantly elevating your seasonal curb appeal.
- Key Materials: Wooden crate, harvest gnomes, mums, mini gourds.
- Vibe / Style: Warm rustic farmhouse.
- Difficulty: Simple layering.
- Budget Breakdown: Crate & Decor: $35 | Live Mums: $20.
- Creator’s Tip: Line the crate with a heavy plastic trash bag before adding pots to prevent water rot on the wood.
- Smart Sourcing: weather-treated wooden apple crates and harvest-themed resin garden gnomes.
28. Winter Lantern and Evergreen Gnomes
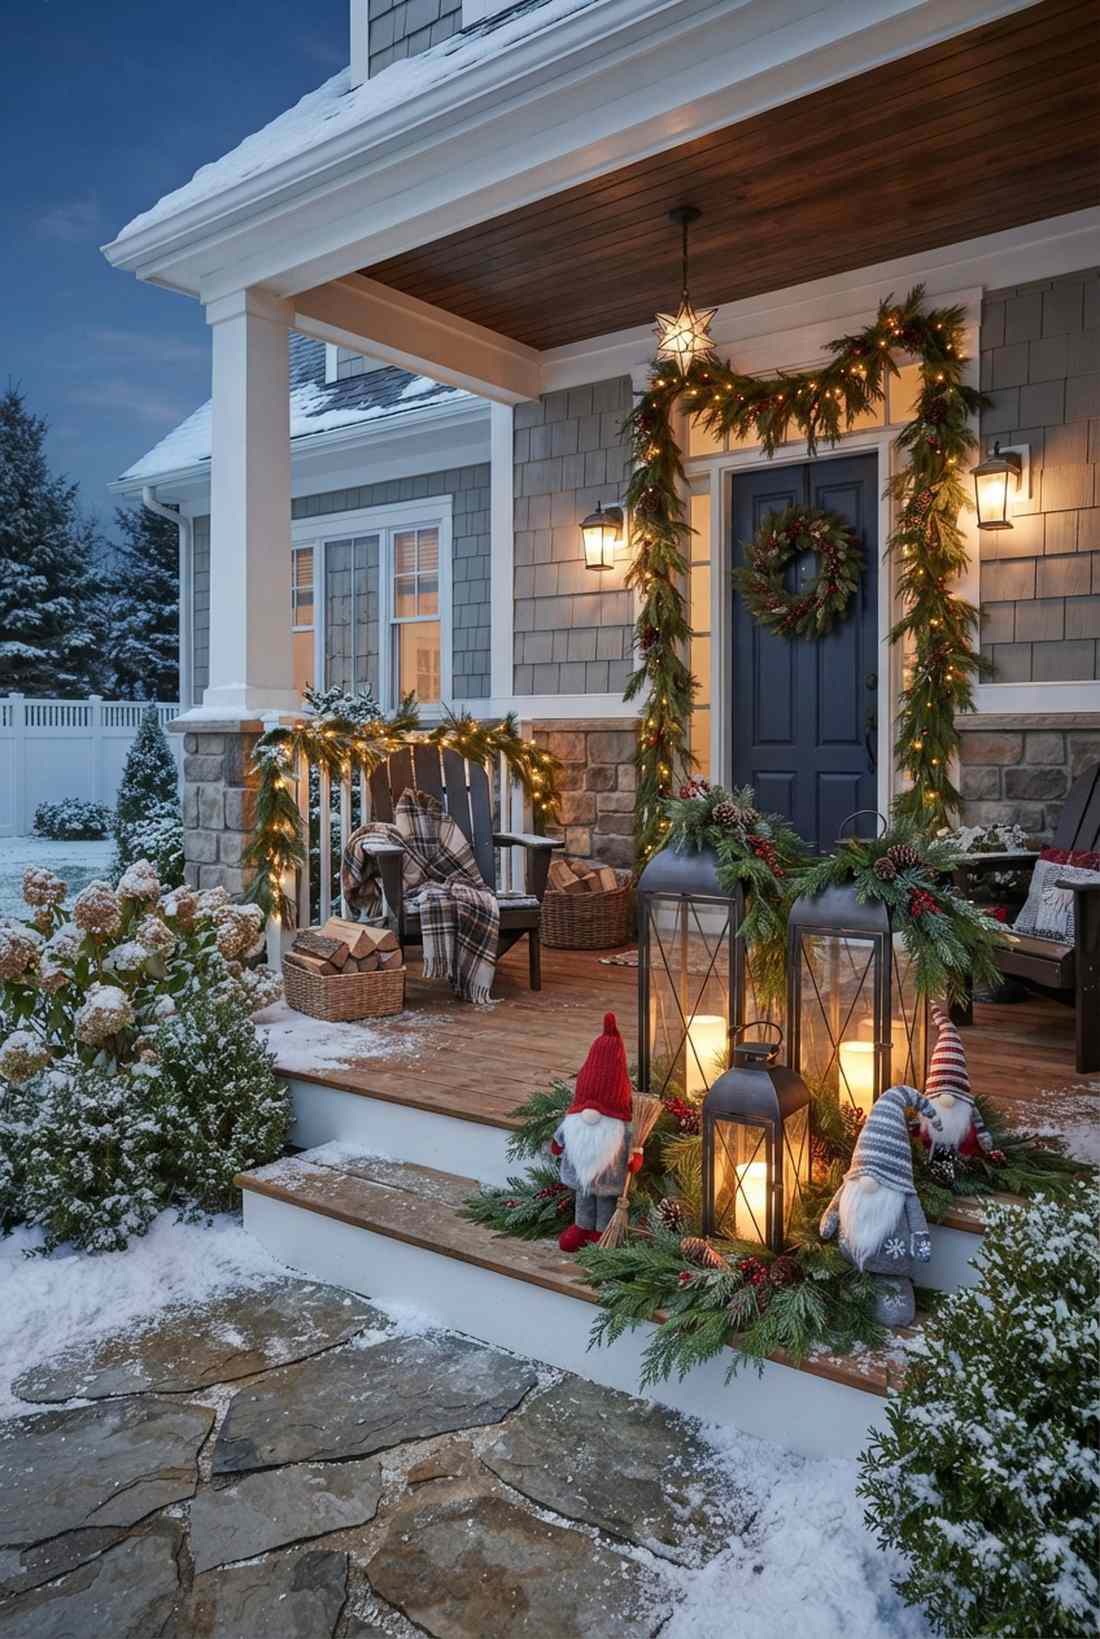
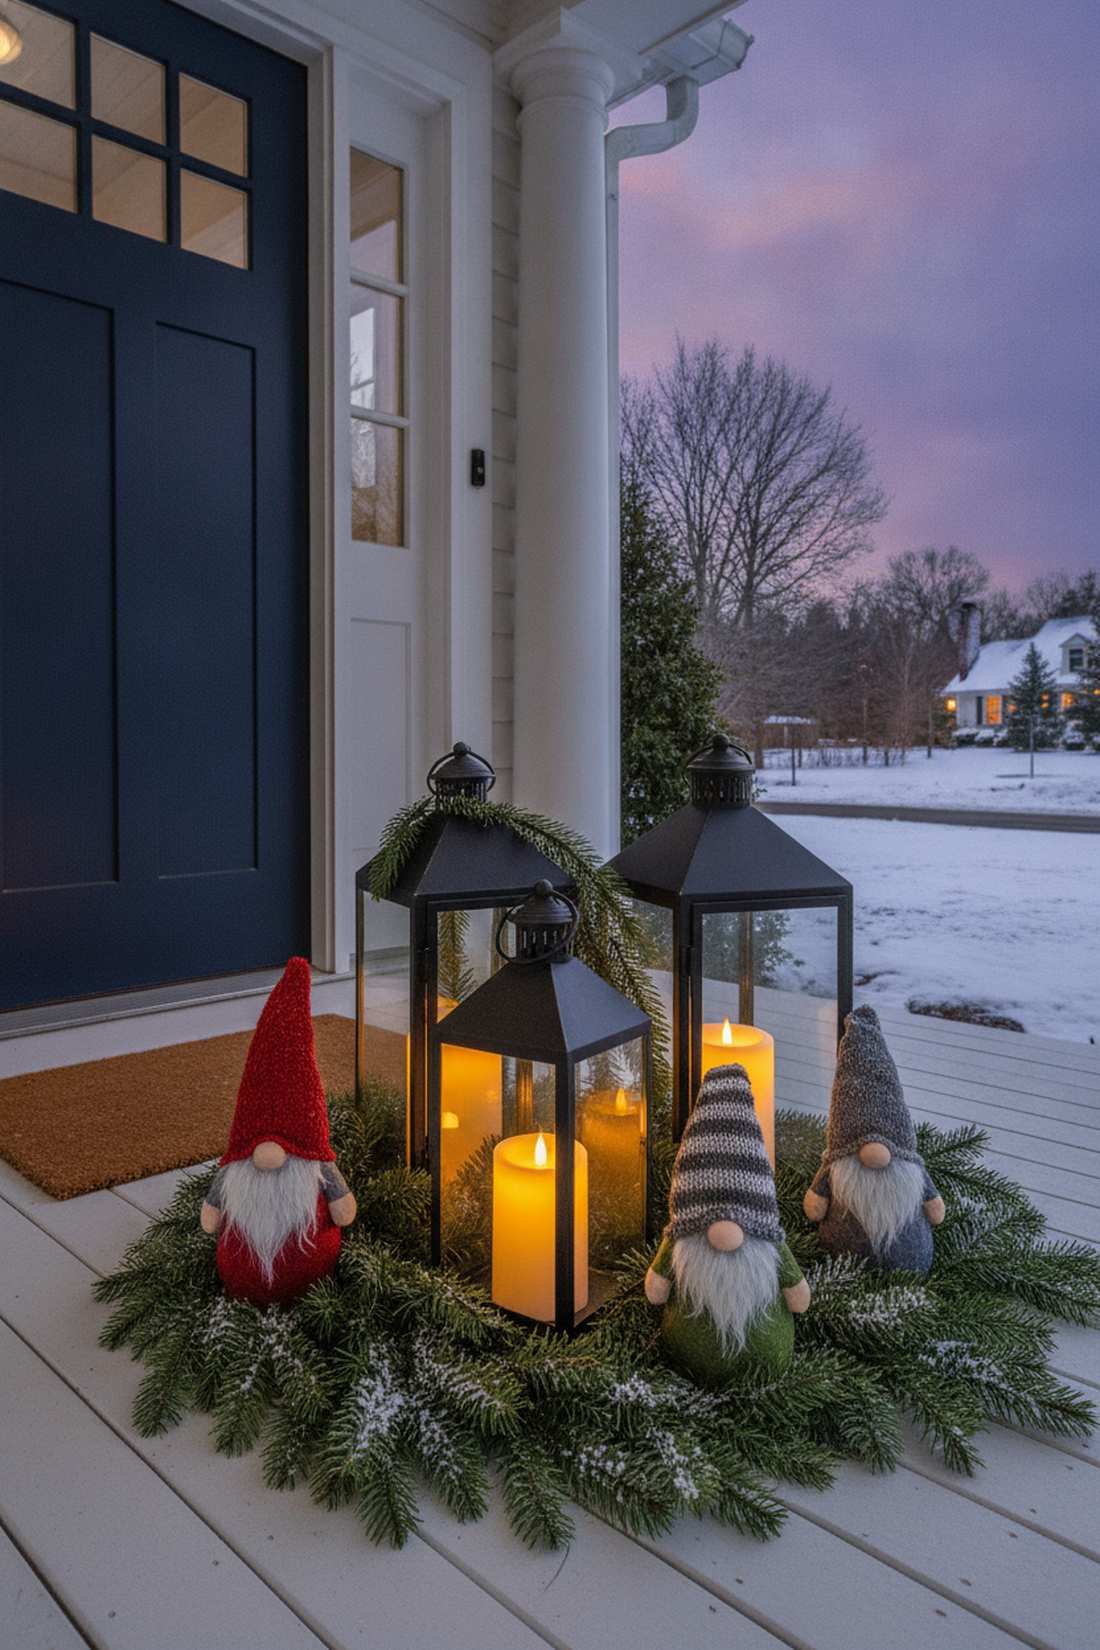
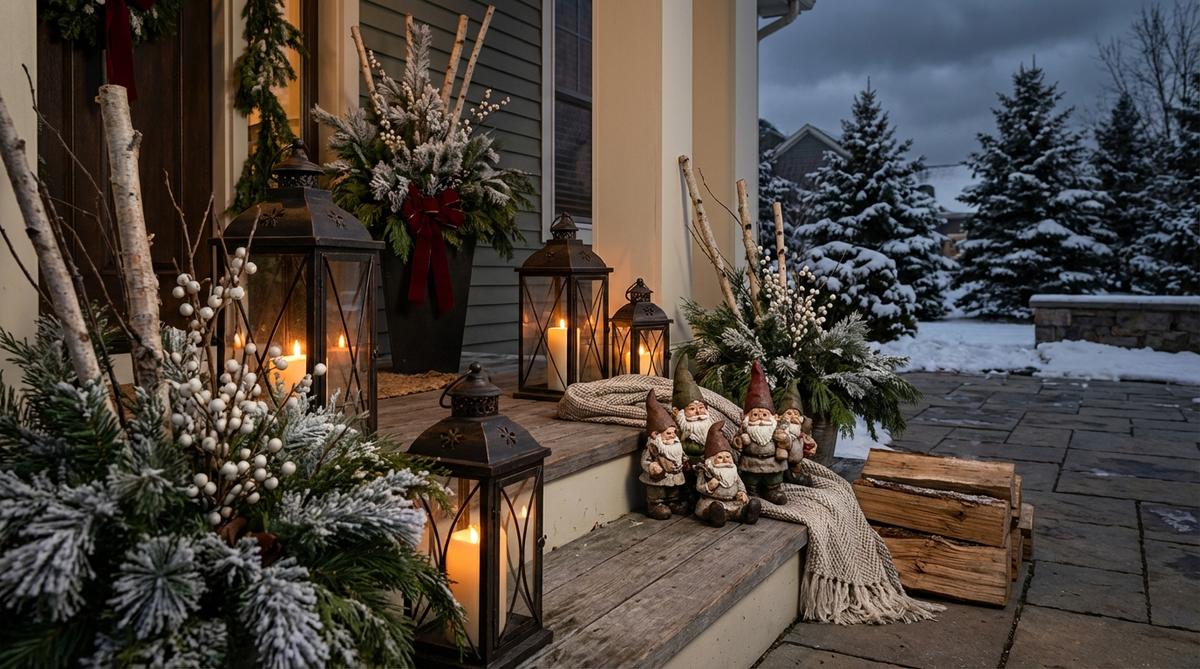
This glowing arrangement makes dark, freezing evenings feel incredibly cozy and inviting. A winter porch lantern cluster keeps your entrance feeling alive even when the ground is frozen solid.
Most homeowners just drop statues randomly, but weaving real evergreen boughs around varied lantern heights delivers a surprisingly premium look. Utilizing commercial-grade LED fairy garden kits ensures the batteries won’t die instantly when the temperature plummets.
Expect to invest about $45–$75 for high-quality weather-safe lanterns. Pin this to keep your exterior looking lavish all winter long.
- Key Materials: Metal lanterns, winter-themed gnomes, cut evergreen boughs.
- Vibe / Style: Cozy winter glow.
- Difficulty: Easy winter staging.
- Budget Breakdown: Lanterns: $40 | Figures: $20.
- Creator’s Tip: Spritz the cut evergreens with an anti-desiccant spray so they stay green and needle-heavy for months.
- Smart Sourcing: weatherproof outdoor metal lanterns and commercial-grade LED pillar candles.
29. Holiday Mantel Indoor Gnome Forest
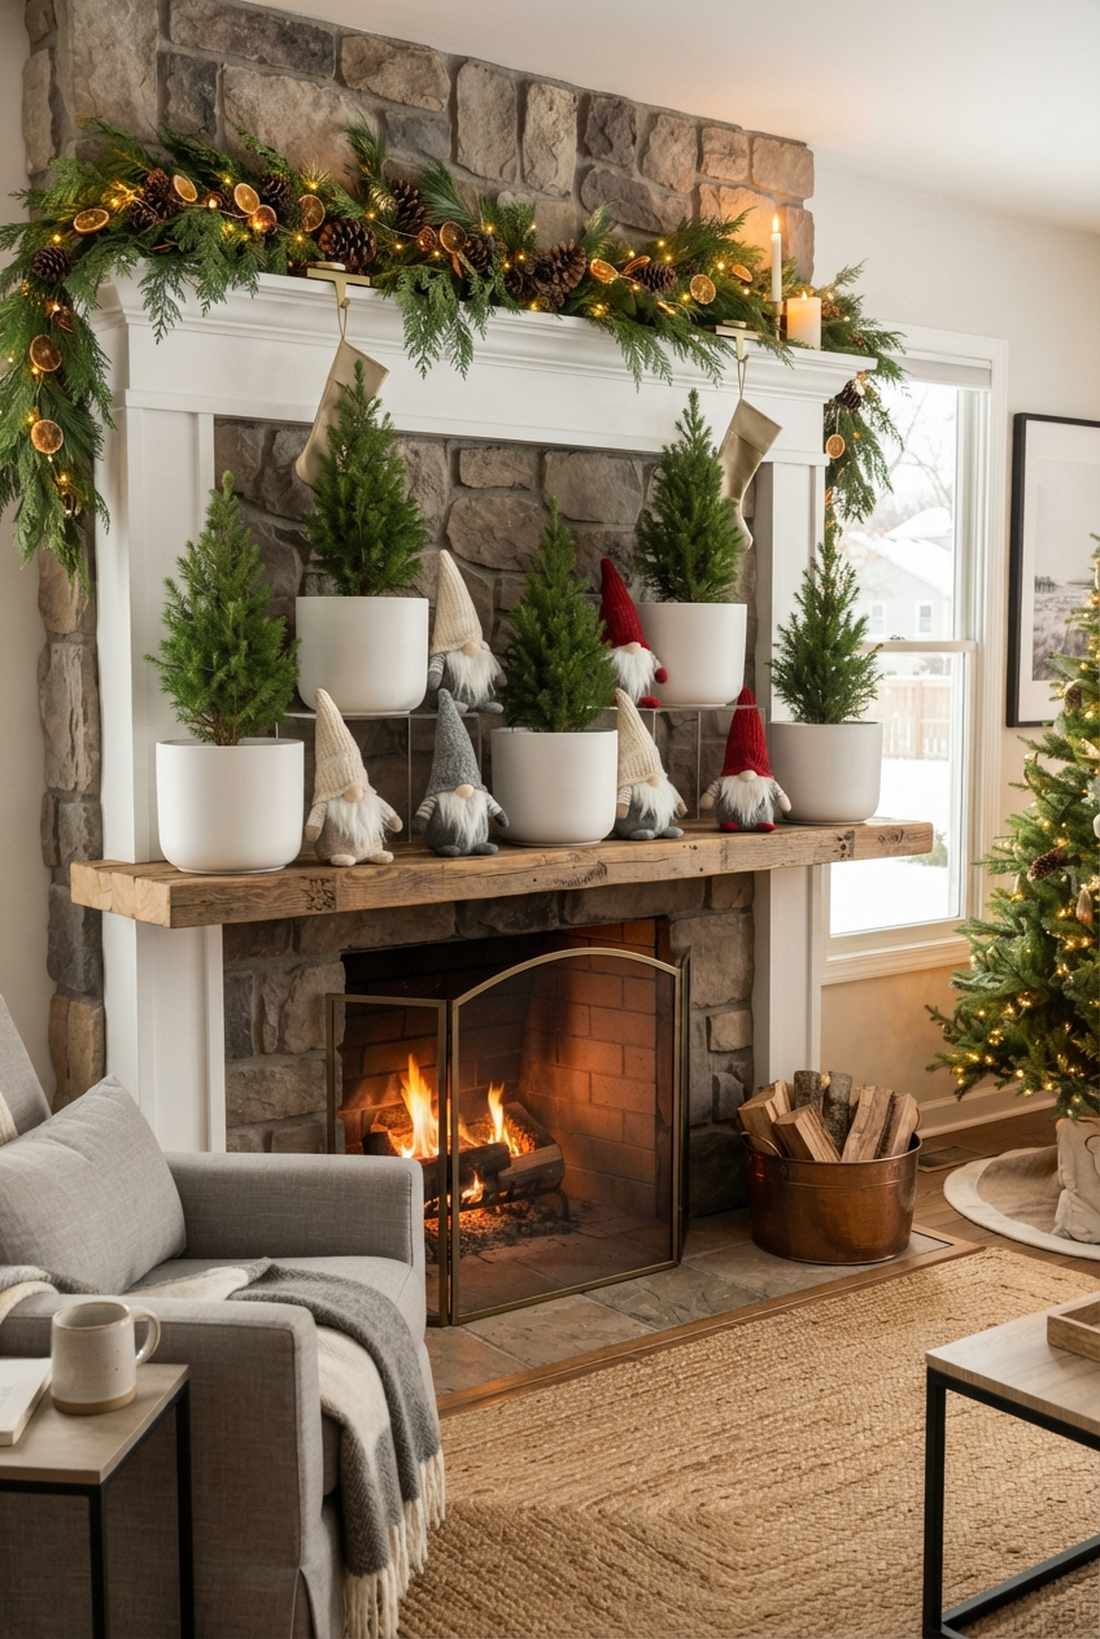
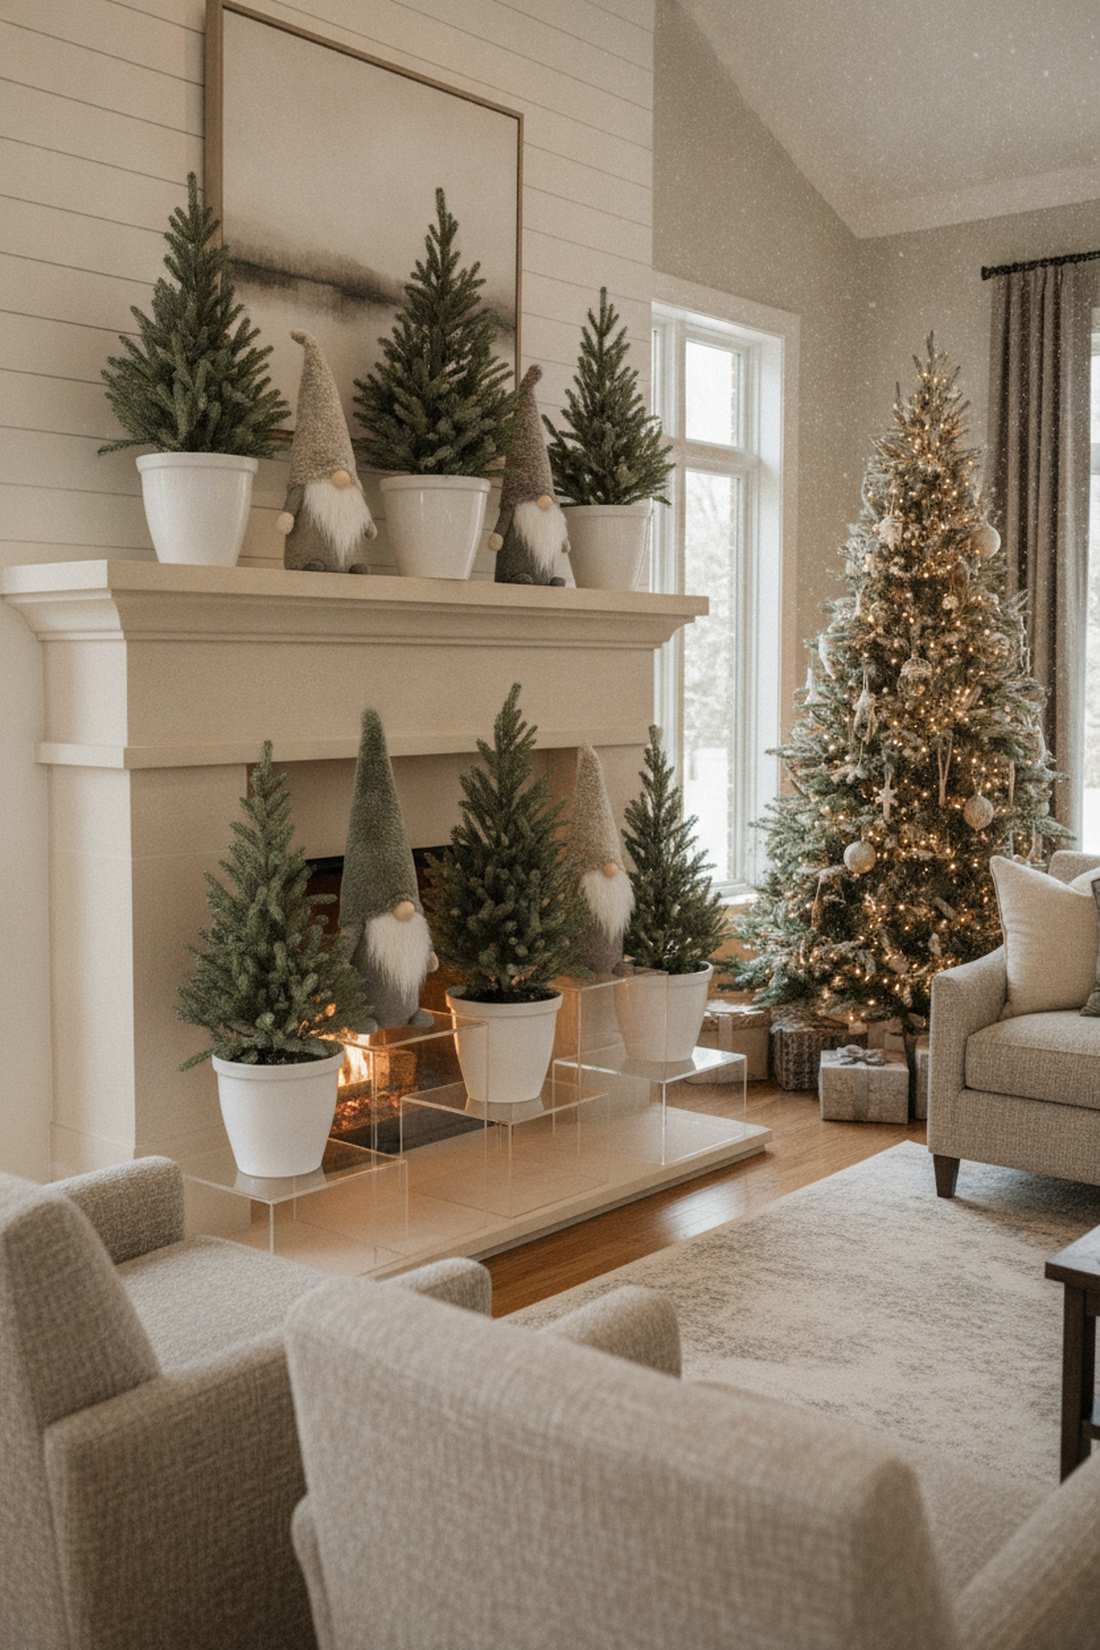
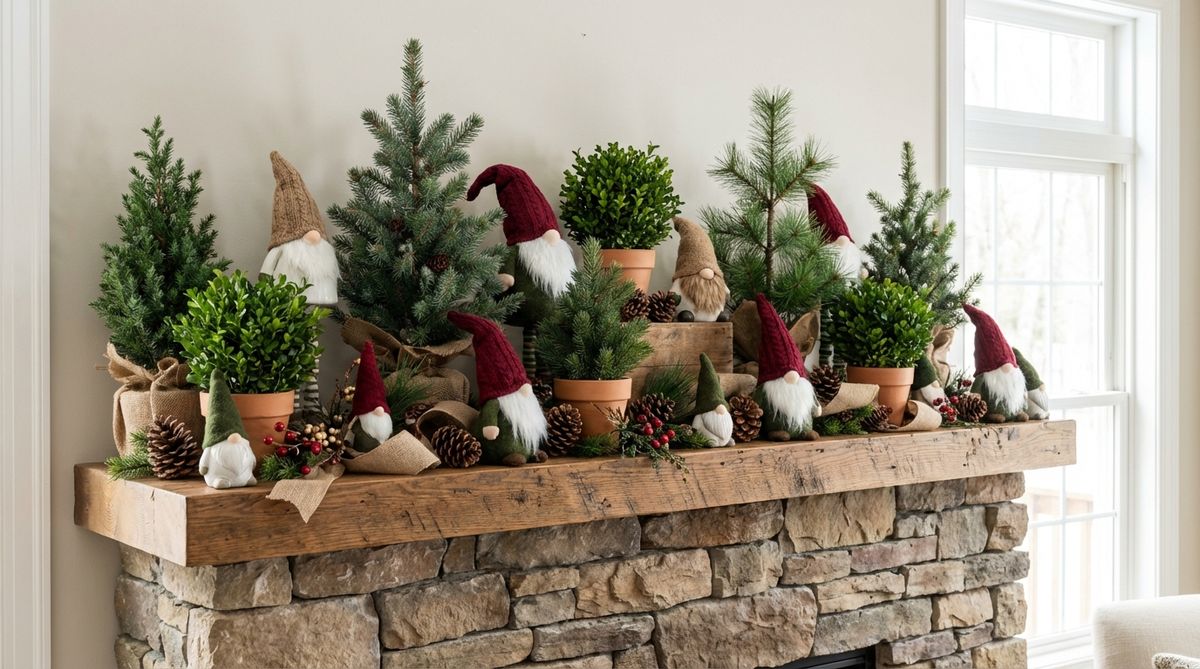
This layout transforms your fireplace into a sophisticated, natural winter wonderland. Creating an indoor mantel miniature forest replaces cheap, disposable tinsel with a living, breathing aesthetic.
Skip the generic scattered look by relying on strict rhythm—repeating identical pot styles and heights looks far more expensive than it is. Sourcing premium terrarium accessories ensures your indoor forest doesn’t look like a messy toy shelf.
This elegant holiday display runs roughly $35–$60. Save this to your interior styling board for an elevated, natural Christmas vibe.
- Key Materials: Potted mini evergreens, winter gnomes, pot risers.
- Vibe / Style: Sophisticated living holiday decor.
- Difficulty: Moderate balancing on a narrow ledge.
- Budget Breakdown: Mini Trees: $30 | Holiday Gnomes: $20.
- Creator’s Tip: Use sturdy wooden blocks painted to match your mantel to create stable, invisible risers for the back row.
- Smart Sourcing: pre-cut acrylic display risers and premium indoor ceramic plant pots (set of 5).
This upcoming hack is what professional landscapers charge hundreds to install…
30. Kitchen Counter Herb Gnome Trio

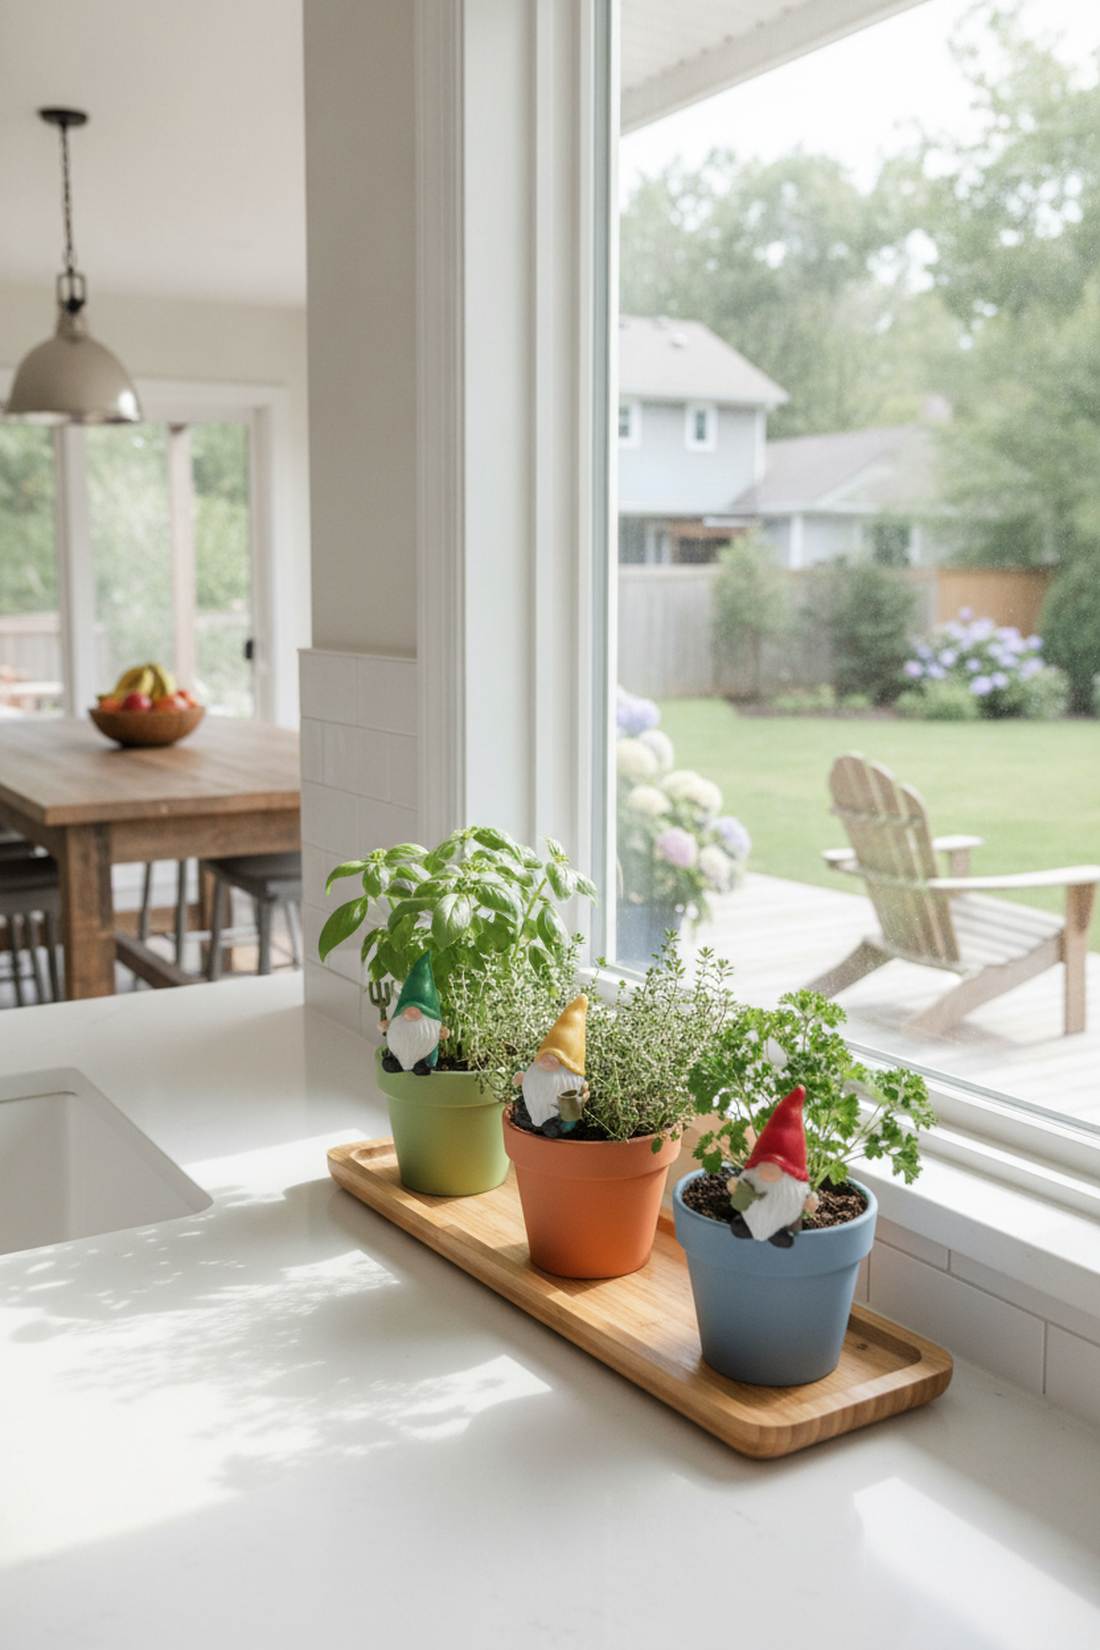
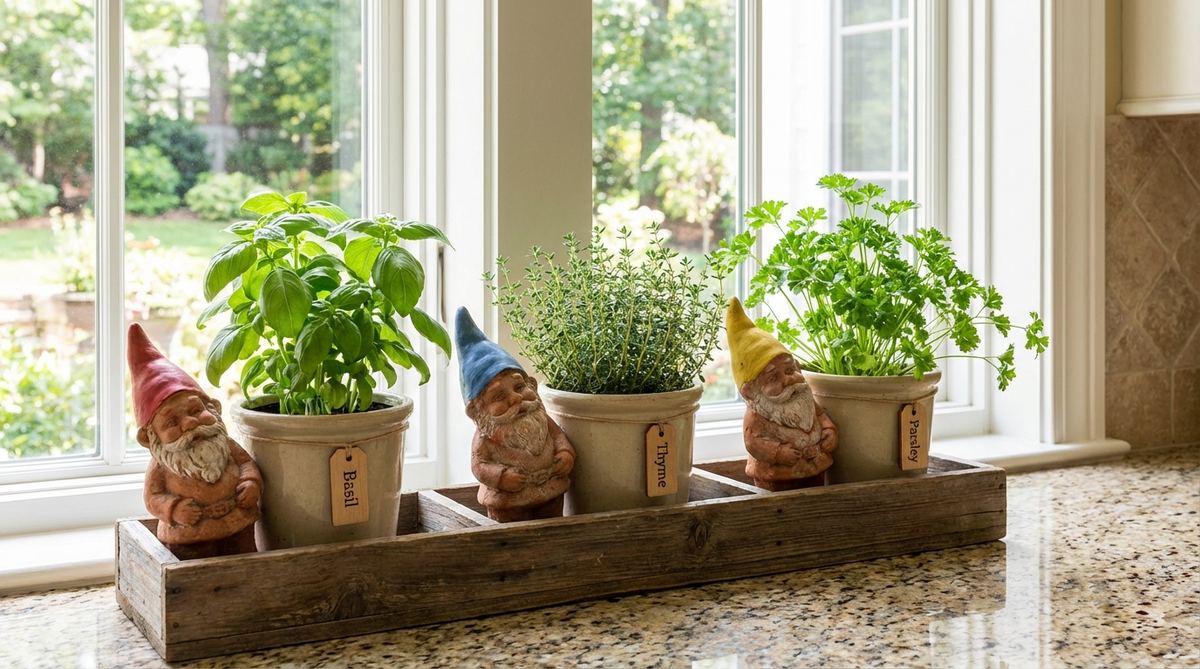
This bright setup makes daily meal prep feel like interacting with a tiny, helpful farm. A kitchen windowsill herb display brilliantly merges practical cooking needs with cheerful morning decor.
The secret to making this look expensive is unifying the pots with a custom drain tray, which keeps the counter immaculate. Using high-quality miniature garden supplies to color-code your basil, thyme, and parsley delivers a surprisingly premium labeling system.
You can set up this culinary trio for just $15–$25. It’s a fast upgrade that completely changes the vibe of your cooking space.
- Key Materials: Compact herbs, matching pots, trio of small gnomes.
- Vibe / Style: Cheerful and practical.
- Difficulty: Very easy.
- Budget Breakdown: Herb Pots: $12 | Micro Gnomes: $10.
- Creator’s Tip: Use a long, narrow bamboo tray underneath to catch water drips while maintaining a high-end spa aesthetic.
- Smart Sourcing: waterproof bamboo plant saucer trays (narrow) and color-coded micro garden gnomes.
31. Bathroom Shelf Spa Gnome Accent
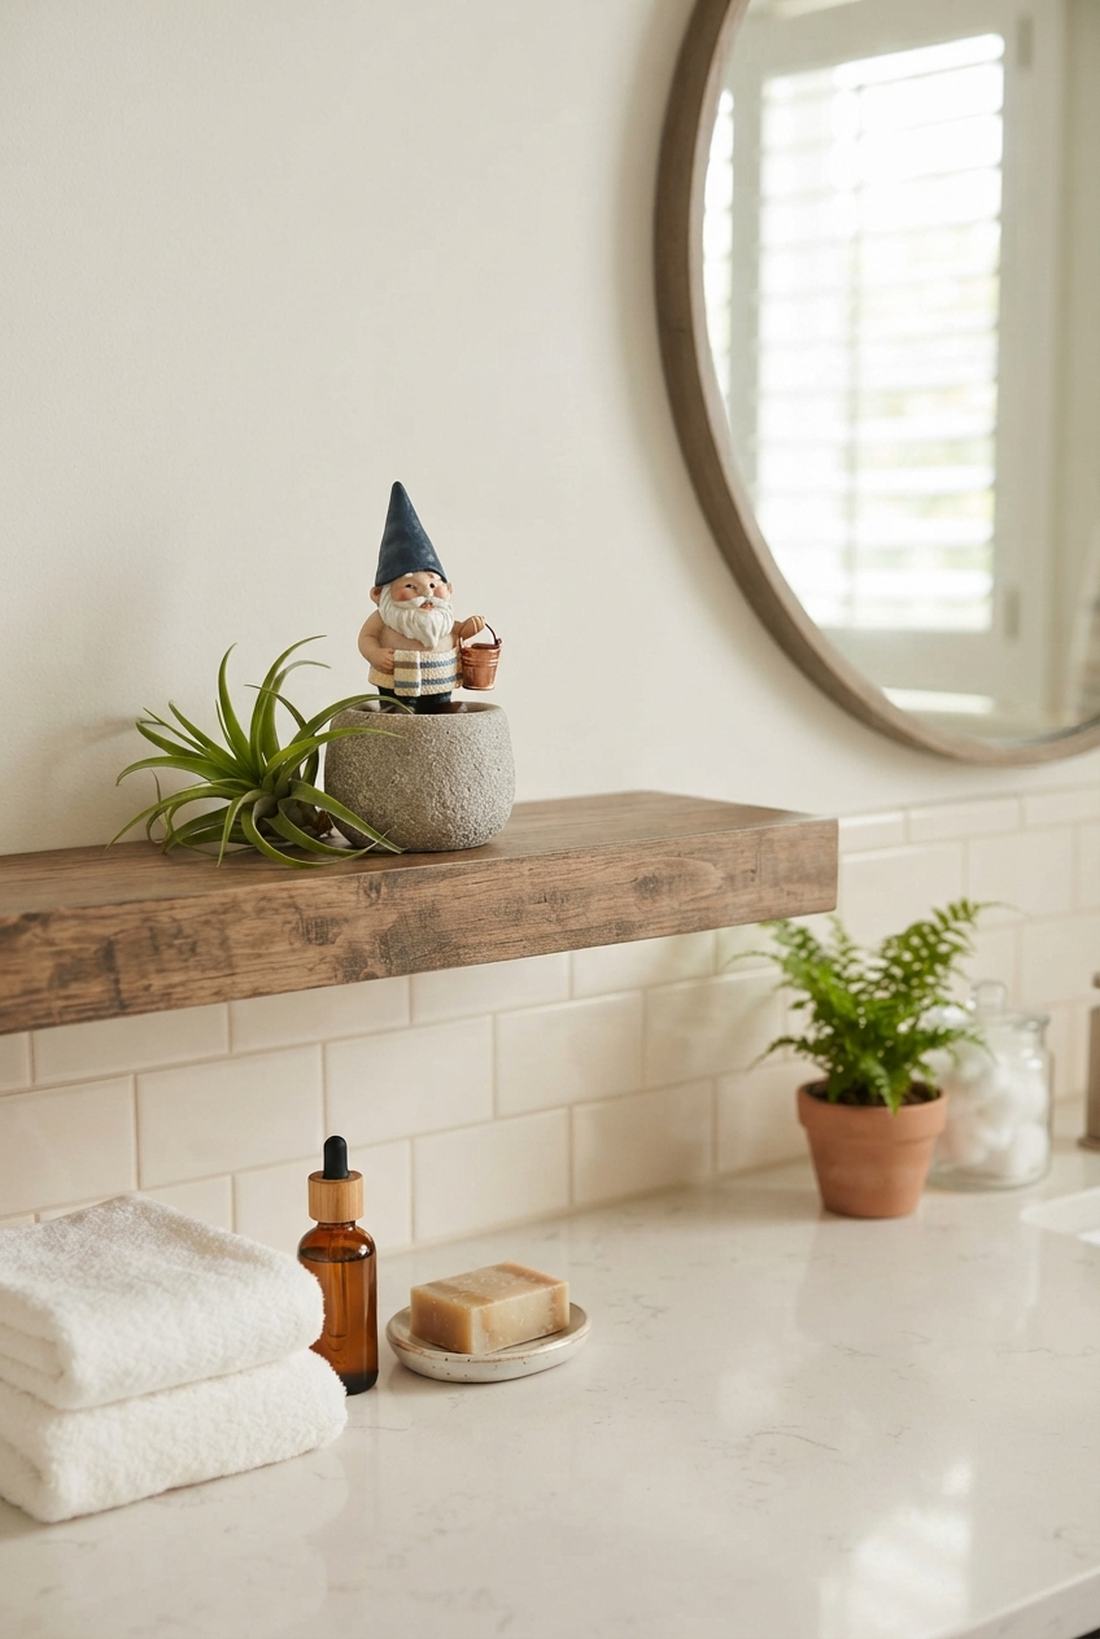
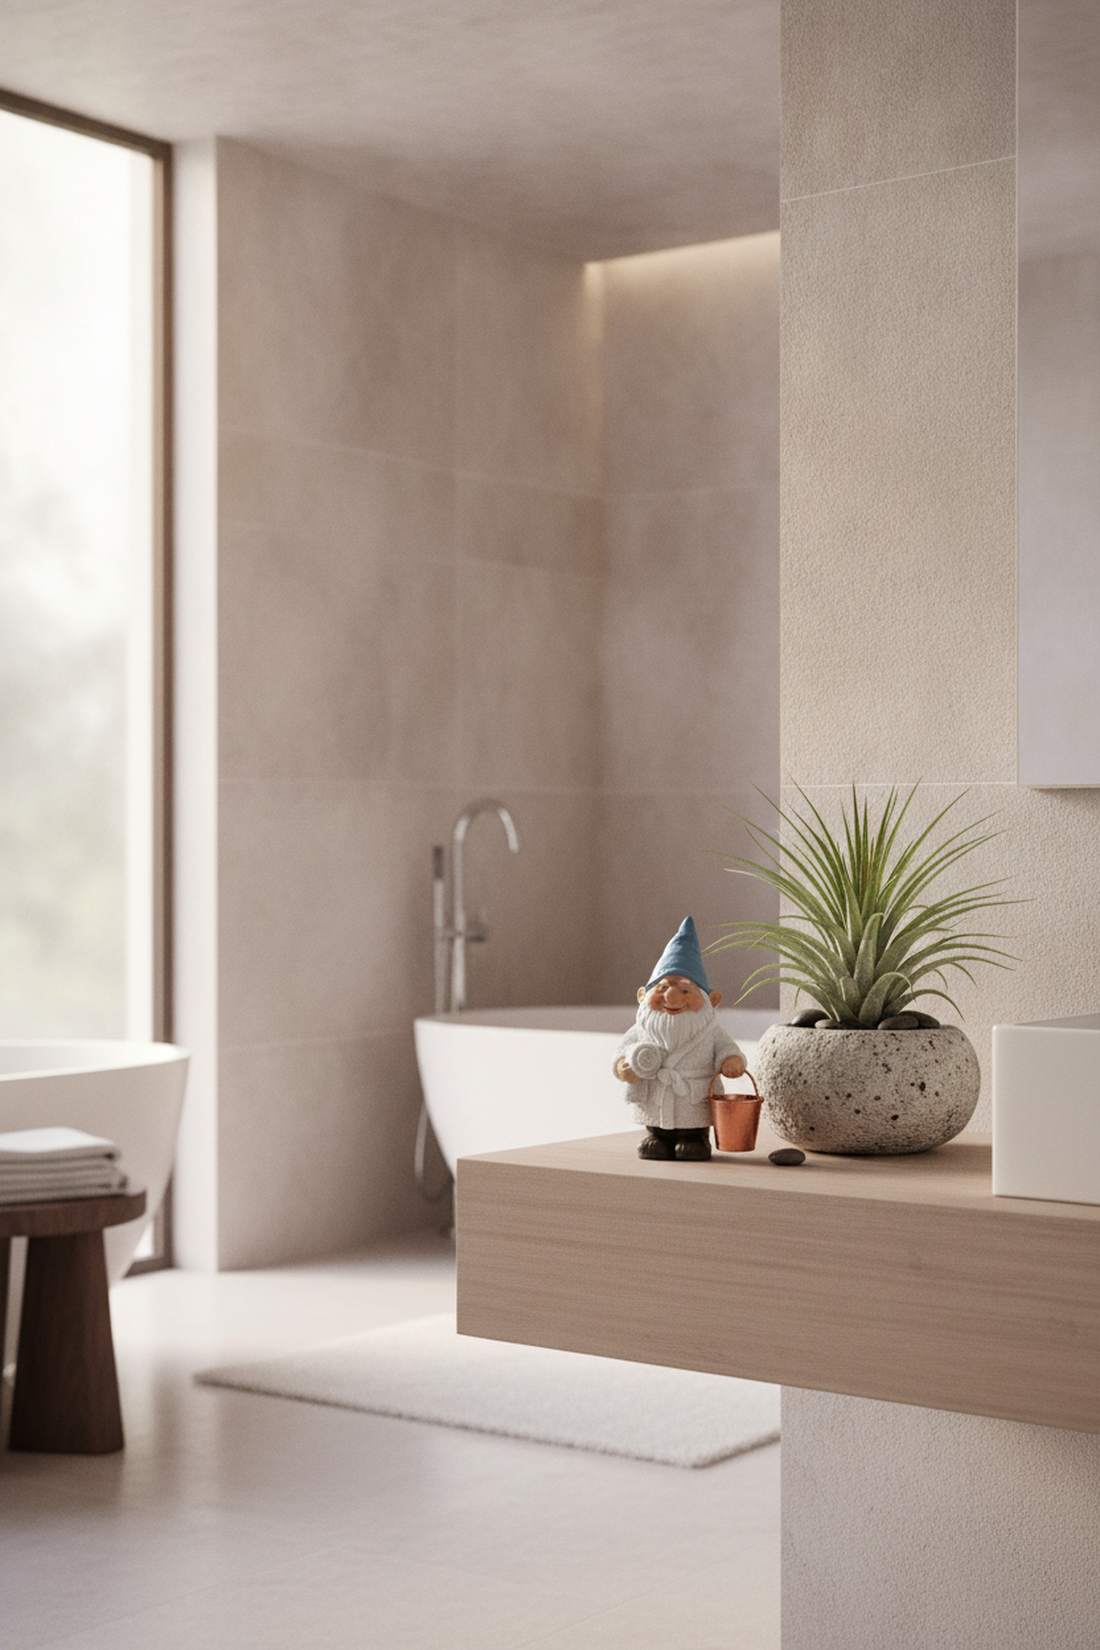
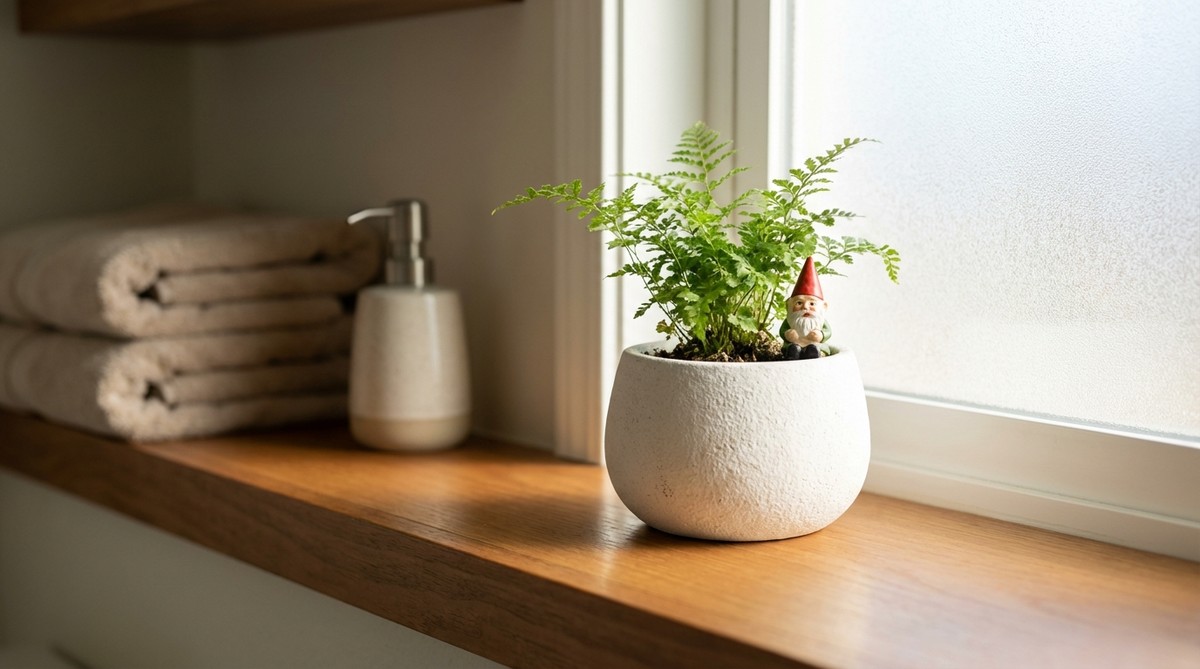
This subtle touch adds a brilliant punch of humor to a traditionally sterile room. A humidity-loving bathroom accent breathes life into floating shelves or vanity corners.
Amateur decorators often ignore scale, but pairing one tiny figure with a sleek air plant delivers a designer-level finish without cluttering the counter. Snagging premium terrarium accessories ensures the moisture won’t rust or degrade the decor over time.
This minimalist micro-scene costs barely $10–$15. Pin this if you want a low-maintenance way to introduce greenery into windowless bathrooms.
- Key Materials: Air plant or fern, single small gnome, stone-textured pot.
- Vibe / Style: Humorous spa minimalism.
- Difficulty: Zero effort required.
- Budget Breakdown: Air Plant: $5 | Figure & Pot: $8.
- Creator’s Tip: Choose figures holding “water buckets” or “towels” to lean into the wet-room theme perfectly.
- Smart Sourcing: live air plants (bulk starter pack) and rust-proof sealed micro gnomes.
32. Office Desk Planter Gnome
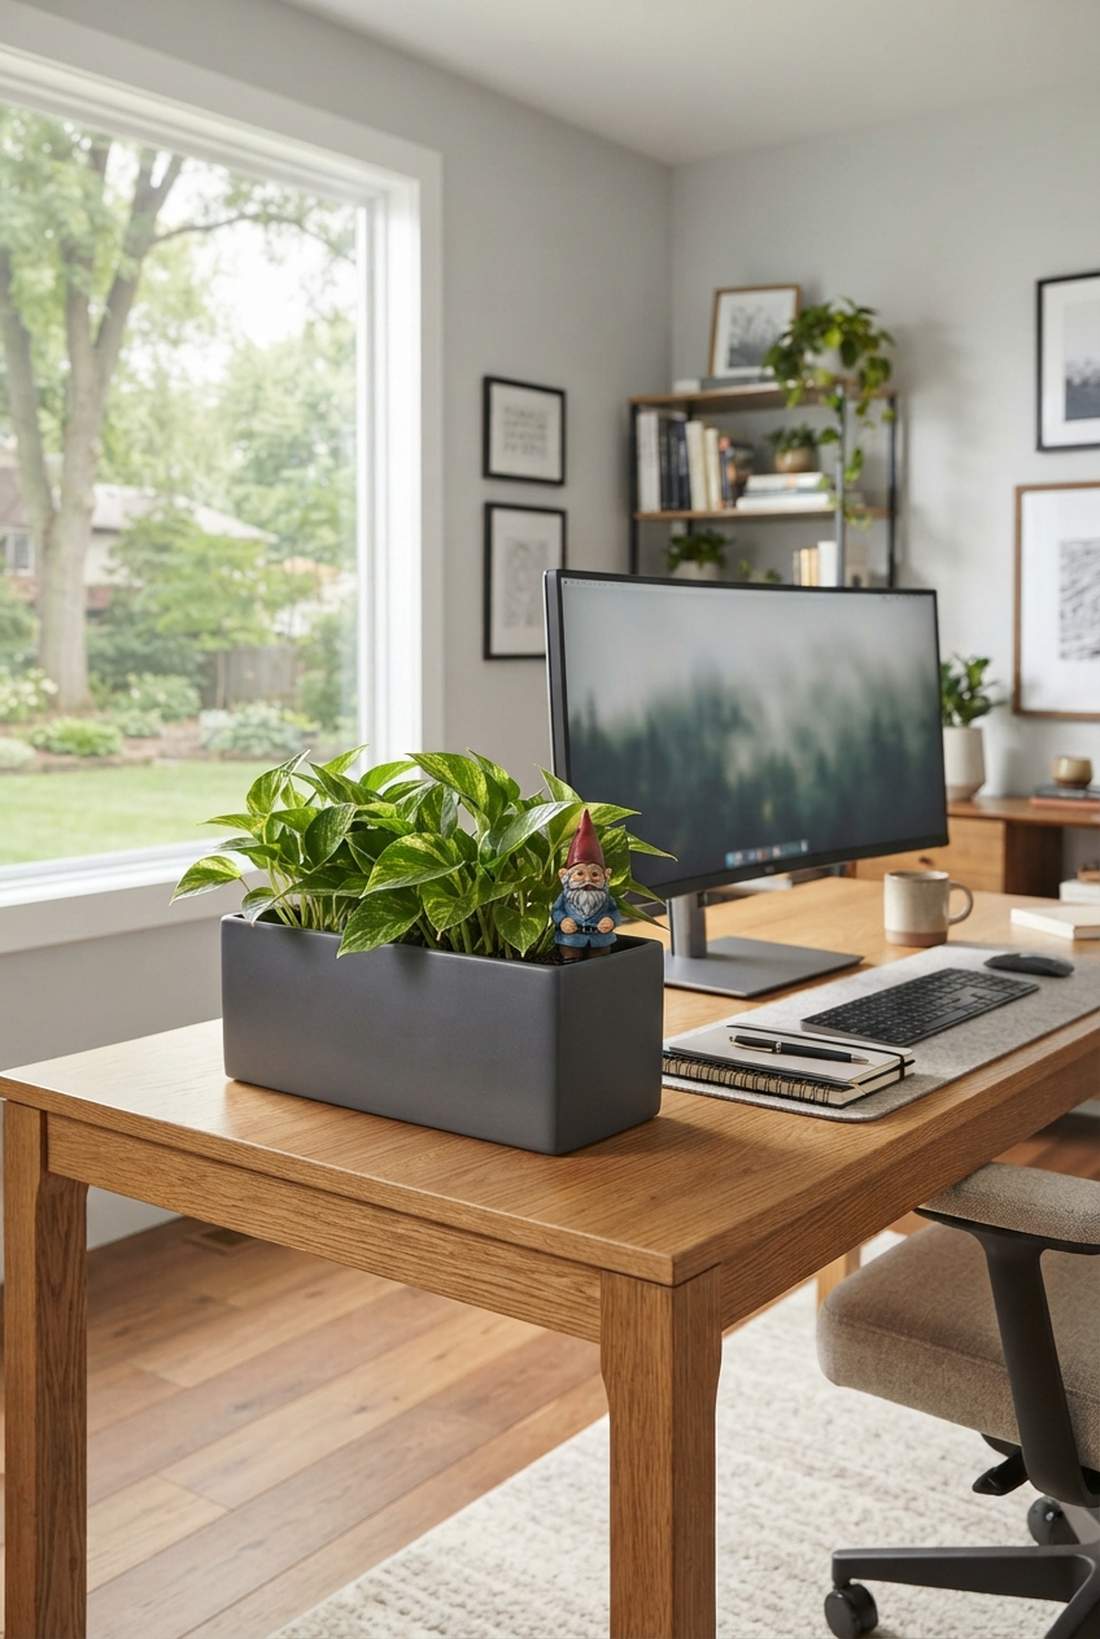
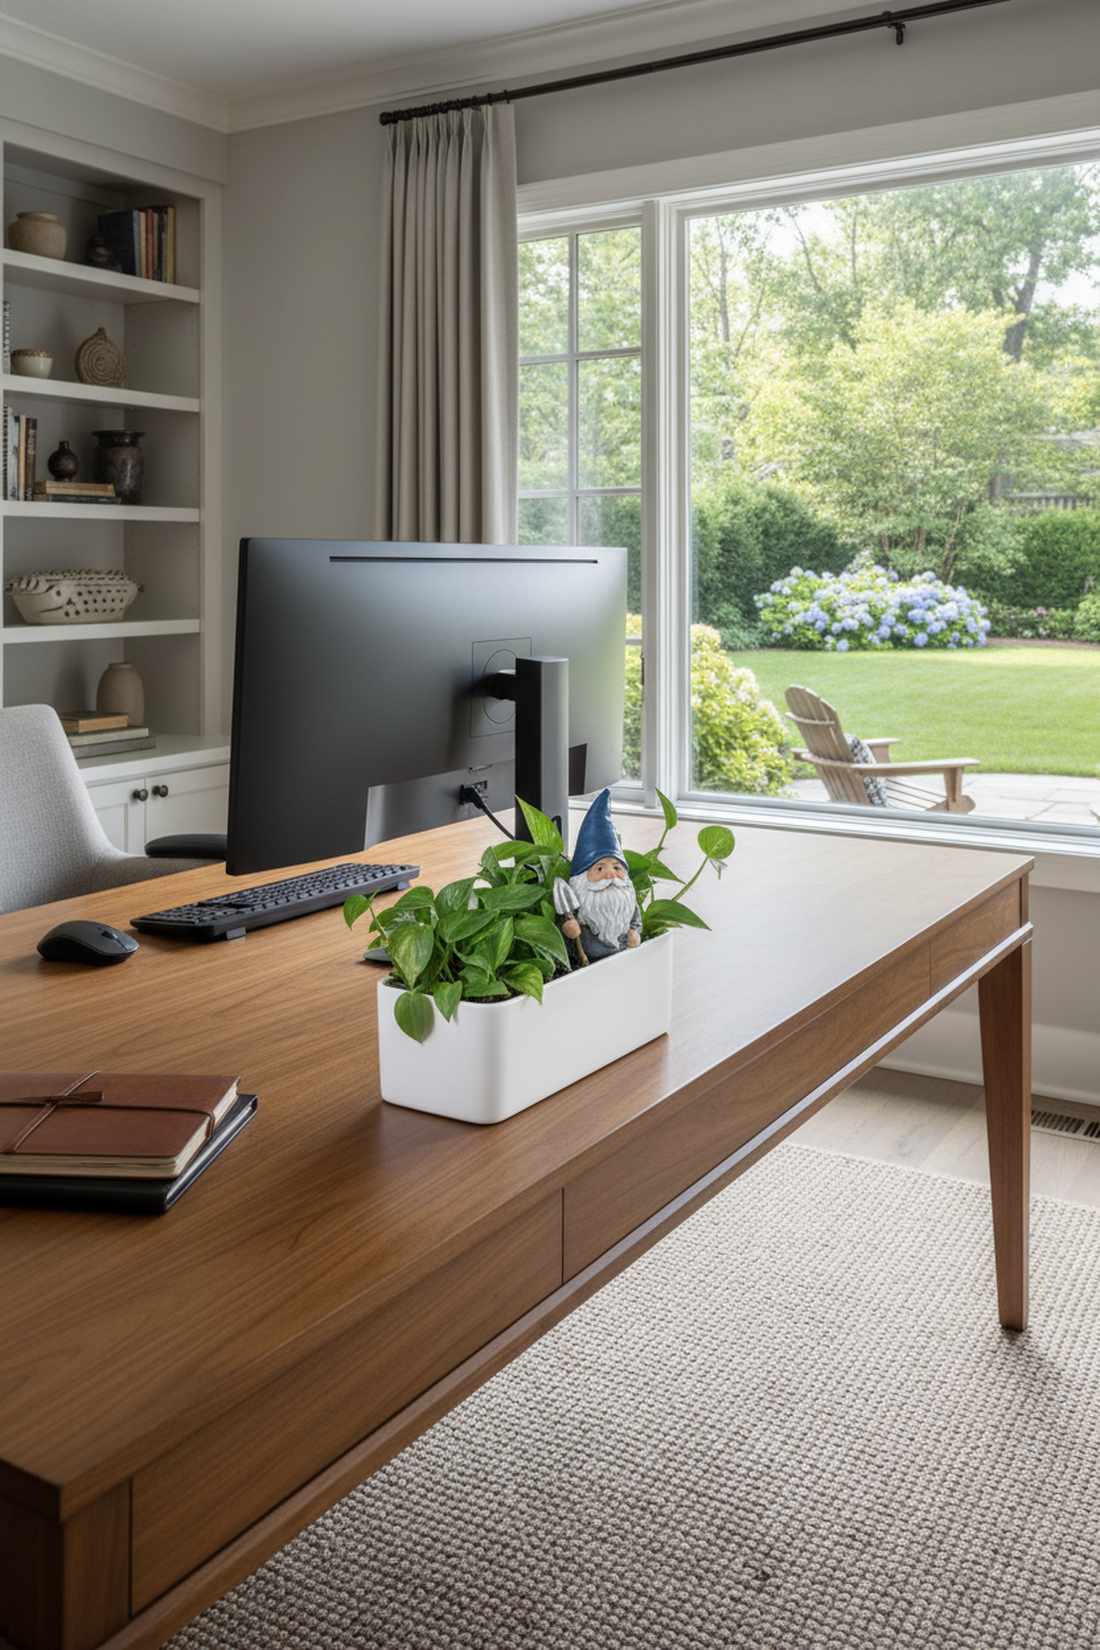
Glancing at this setup provides a massive mental reset during stressful workdays. A desktop micro planter acts as a brilliant, silent companion right next to your monitor.
While some find yard art tacky, utilizing a sleek rectangular planter with one quiet observer gives a highly professional, modern look. Relying on high-CPC miniature garden supplies means the figure won’t look like a cheap plastic toy in a corporate environment.
Creating this desk buddy costs roughly $15–$30. Save this to your office aesthetic board to bring some personality to the daily grind.
- Key Materials: Rectangular desk planter, pothos, single observer gnome.
- Vibe / Style: Professional yet playful.
- Difficulty: Easy office setup.
- Budget Breakdown: Desk Planter: $15 | Figure: $10.
- Creator’s Tip: Keep the plant foliage low and compact so it never obstructs your view of the computer screen.
- Smart Sourcing: leak-proof modern desk planters and premium painted resin micro figures.
33. Balcony Rail Planter Gnome Line
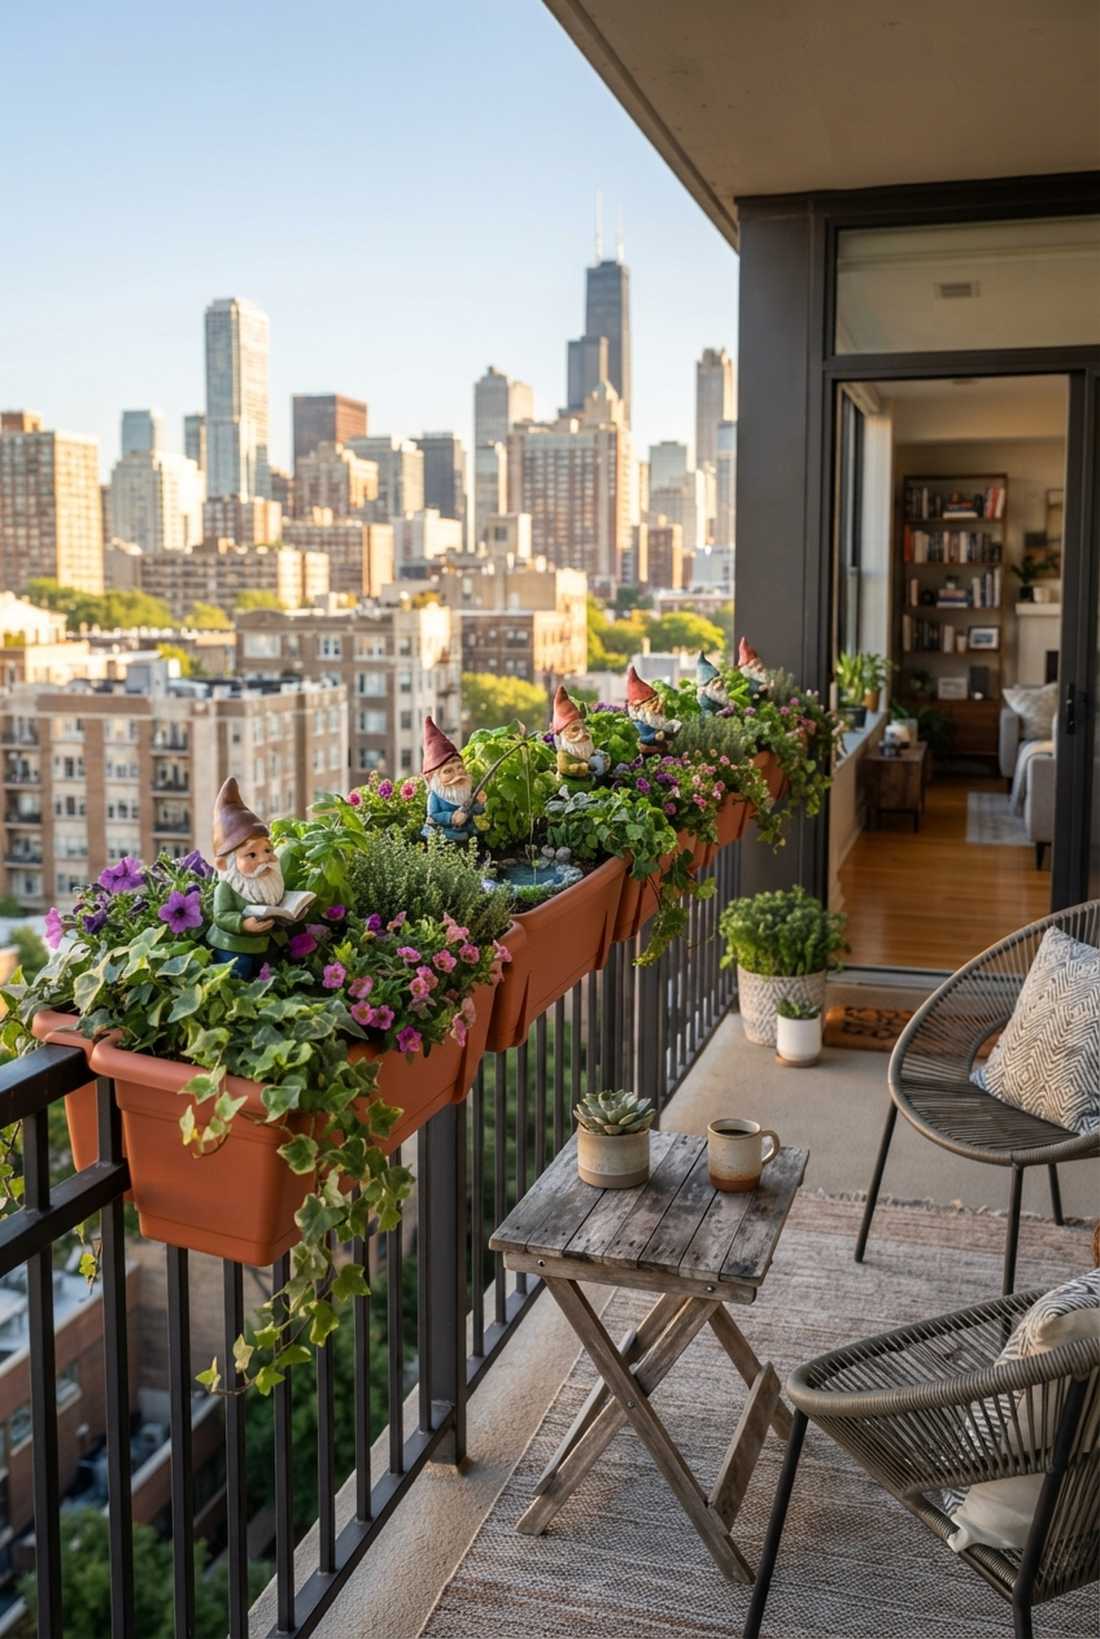
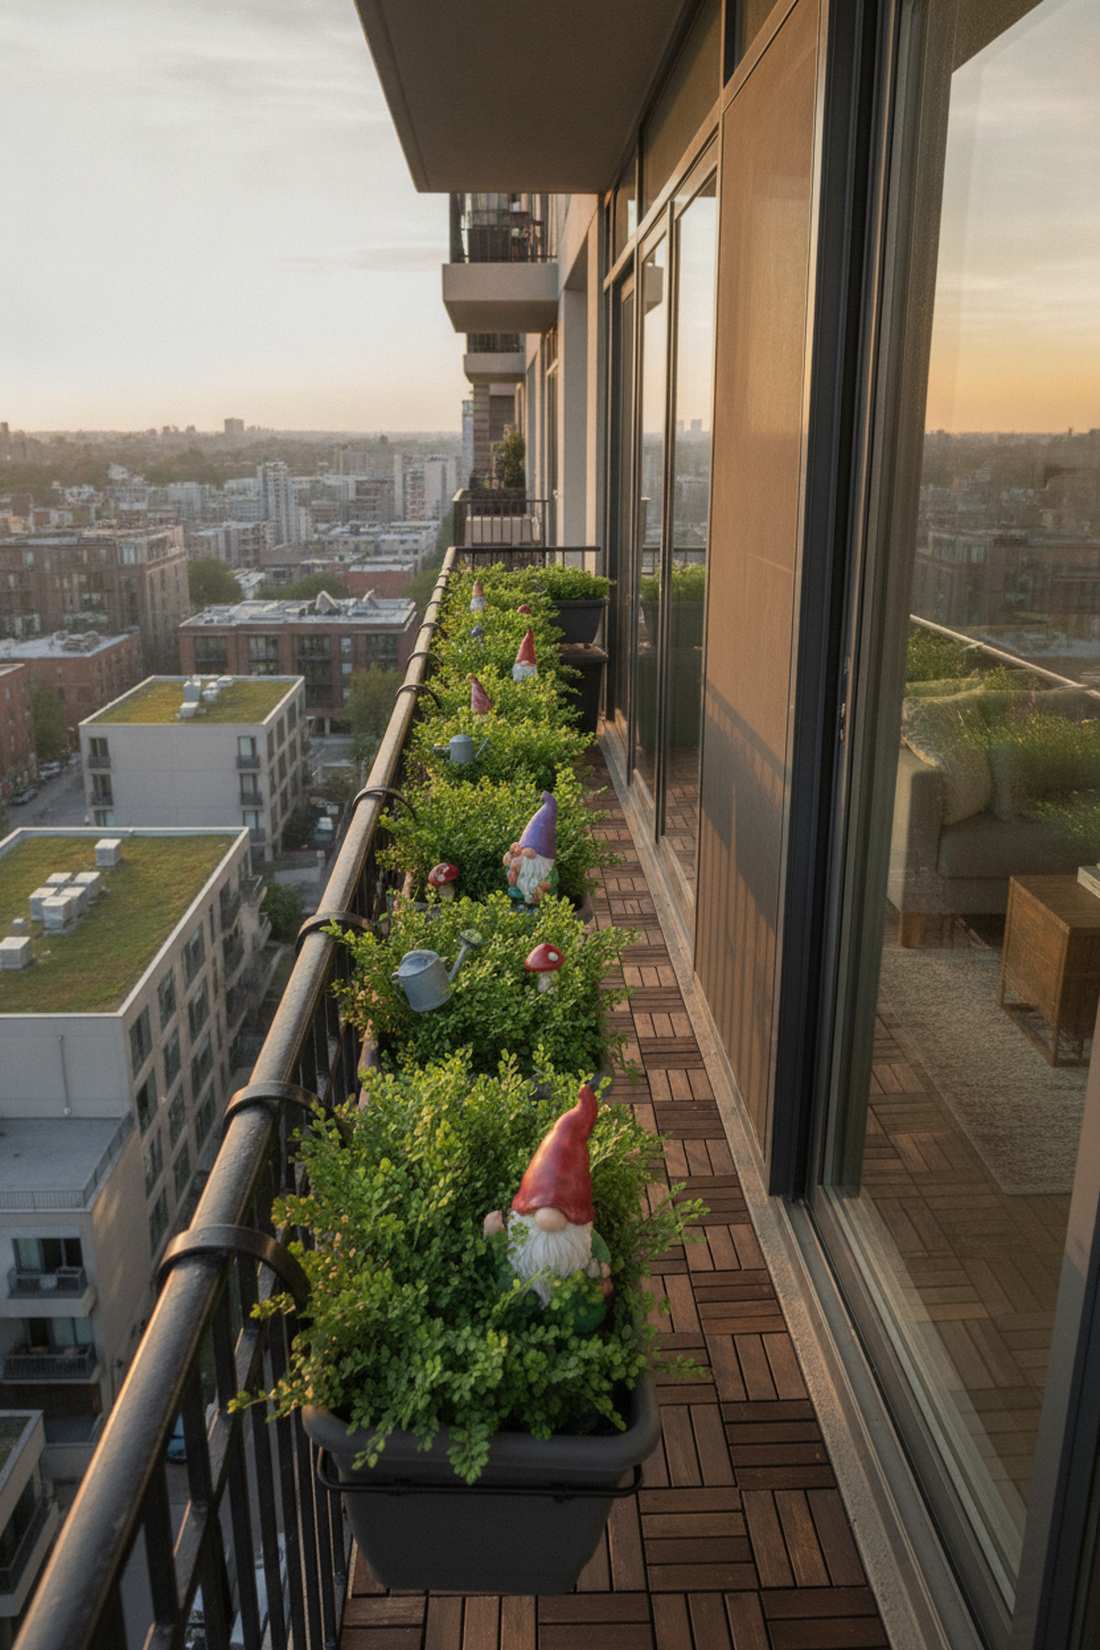

This linear arrangement maximizes joy in the absolute tightest of urban spaces. A balcony rail planter sequence is the holy grail for apartment renters wanting a full garden feel.
Most people get this completely wrong by mixing too many plant types, but unifying the greenery while varying the figures looks far more expensive than it is. Using heavy-duty fairy garden kits ensures your setup survives high-rise wind tunnels securely.
You can outfit your railing for about $40–$70. Pin this genius layout if you are strictly limited to balcony gardening this season.
- Key Materials: Rail planters, repeating foliage, varied gnomes.
- Vibe / Style: Uplifting urban sequence.
- Difficulty: Moderate secure installation.
- Budget Breakdown: Planters: $35 | Figures/Soil: $25.
- Creator’s Tip: Face the gnomes inward toward your living room window so you get the best view, not the neighbors.
- Smart Sourcing: heavy-duty adjustable railing planters and wind-resistant weighted garden gnomes.
34. Tiny Terrarium Gnome World
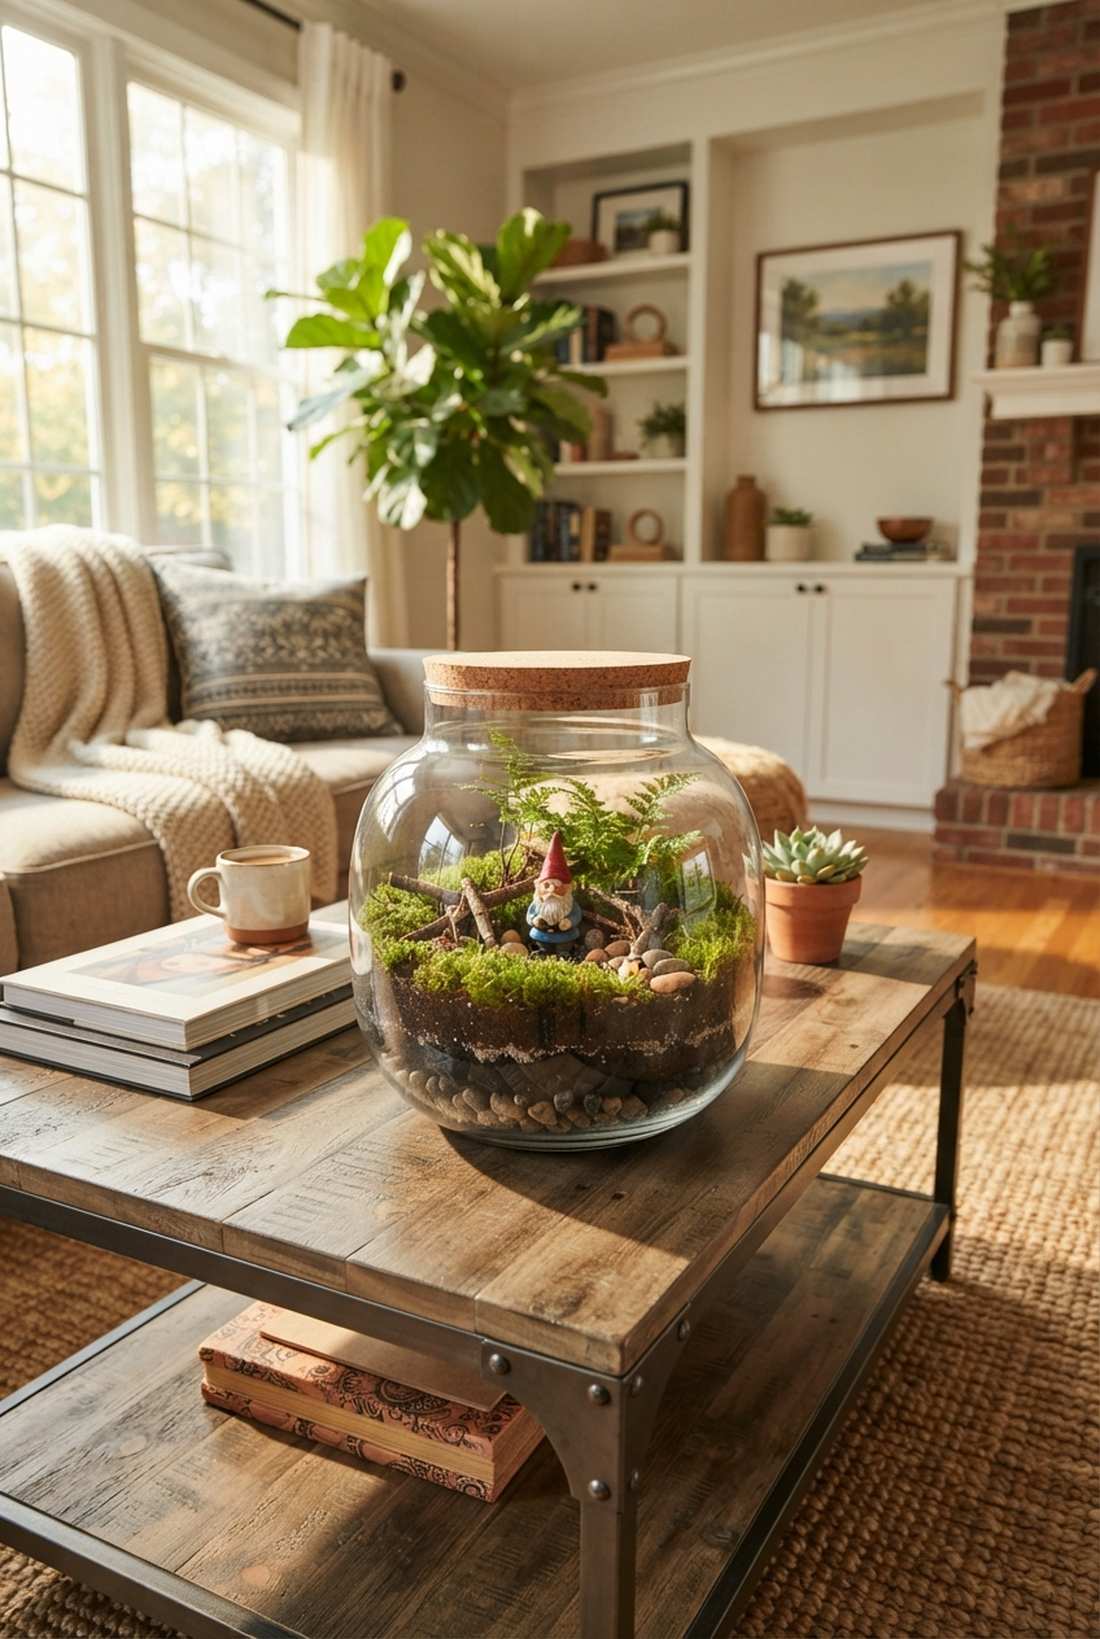
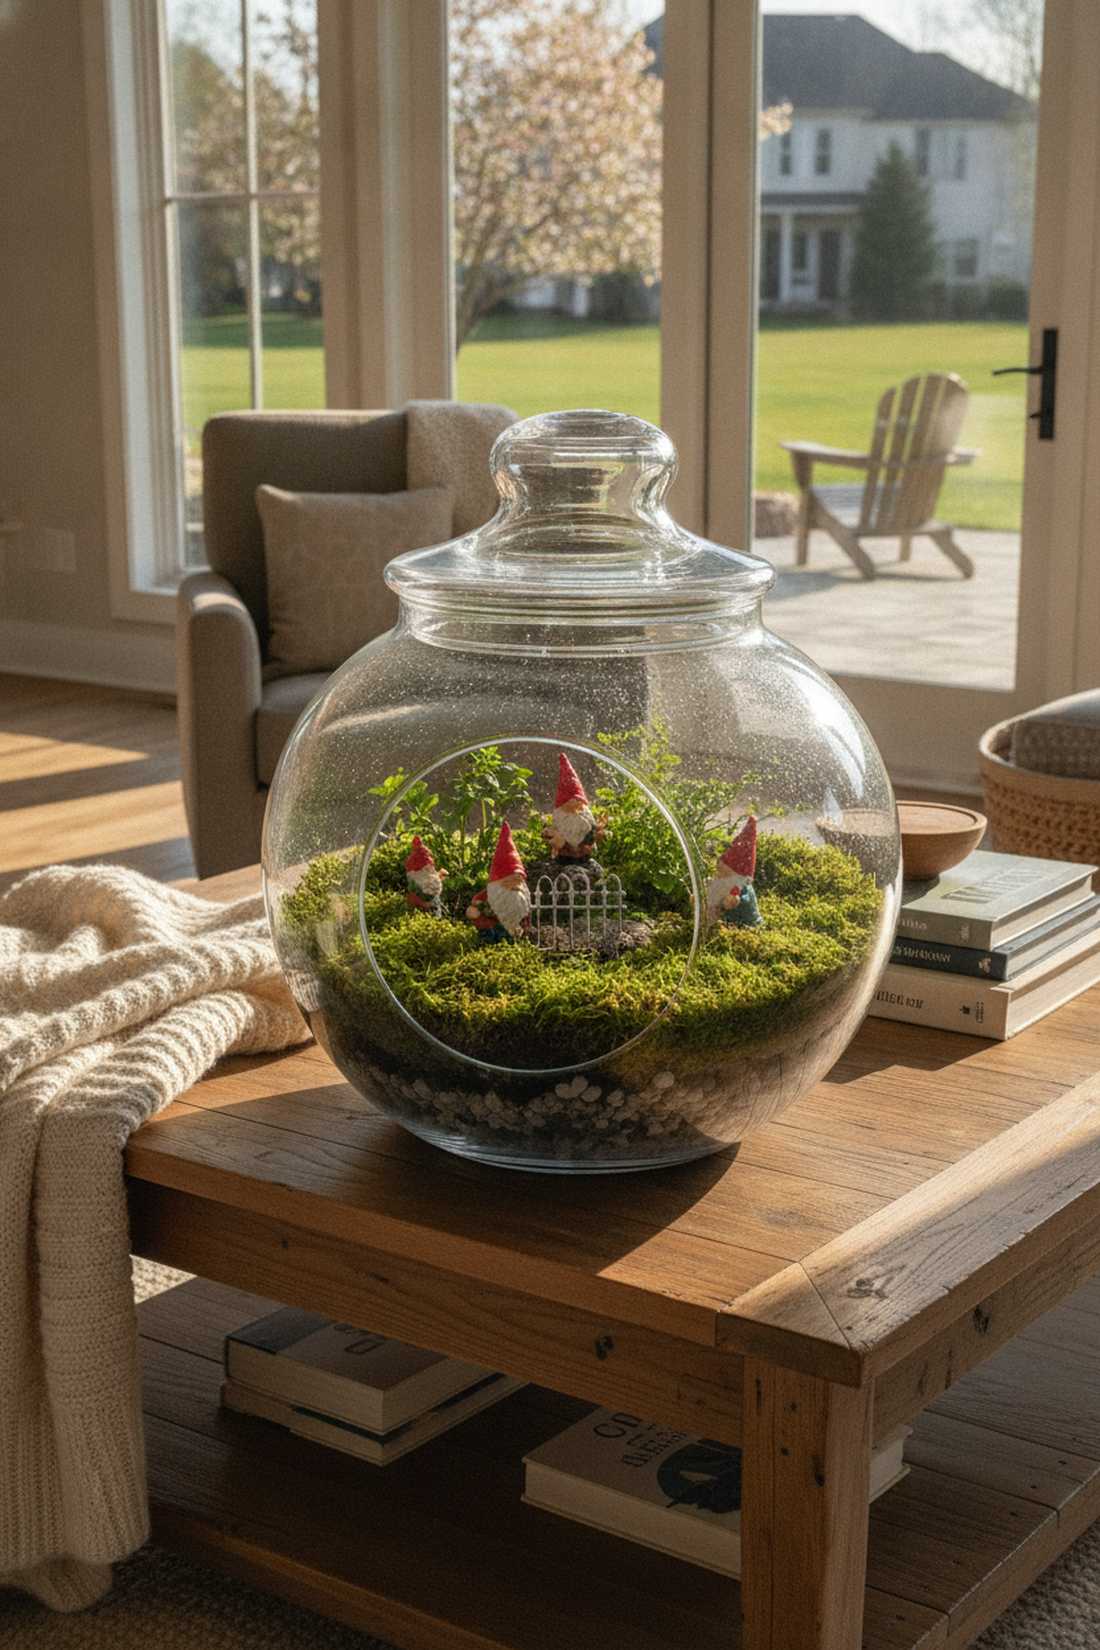
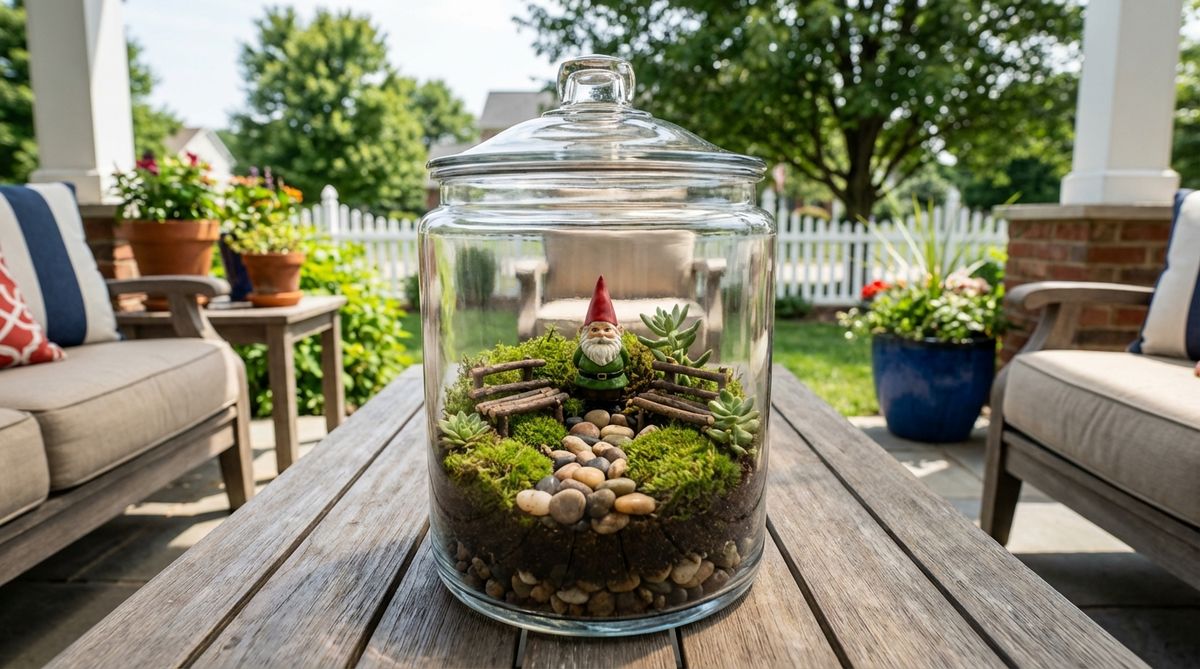
Staring into this glass vessel feels like discovering a captured universe on your coffee table. A glass jar terrarium display is the ultimate enclosed, self-sustaining magical environment.
The trick to avoiding a cheap aesthetic is rigorously layering drainage stones and activated charcoal beneath the moss. By implementing specialized terrarium accessories that won’t mold in high humidity, the ecosystem thrives for years with almost zero effort.
Building this tiny world costs roughly $20–$35. Highly recommended for a stunning DIY project that requires zero outdoor space.
- Key Materials: Glass bowl, live moss, miniature gnome, charcoal base.
- Vibe / Style: Contemplative closed ecosystem.
- Difficulty: Detailed layering required.
- Budget Breakdown: Glass/Layers: $15 | Moss/Figure: $15.
- Creator’s Tip: Never overwater; a light misting once every few weeks is all a closed terrarium needs to thrive.
- Smart Sourcing: pre-mixed terrarium substrate kits (with charcoal) and mold-resistant micro terrarium figures.
We saved the absolute most magical micro-setup for the very end…
35. Bookshelf Shadowbox Gnome Vignette
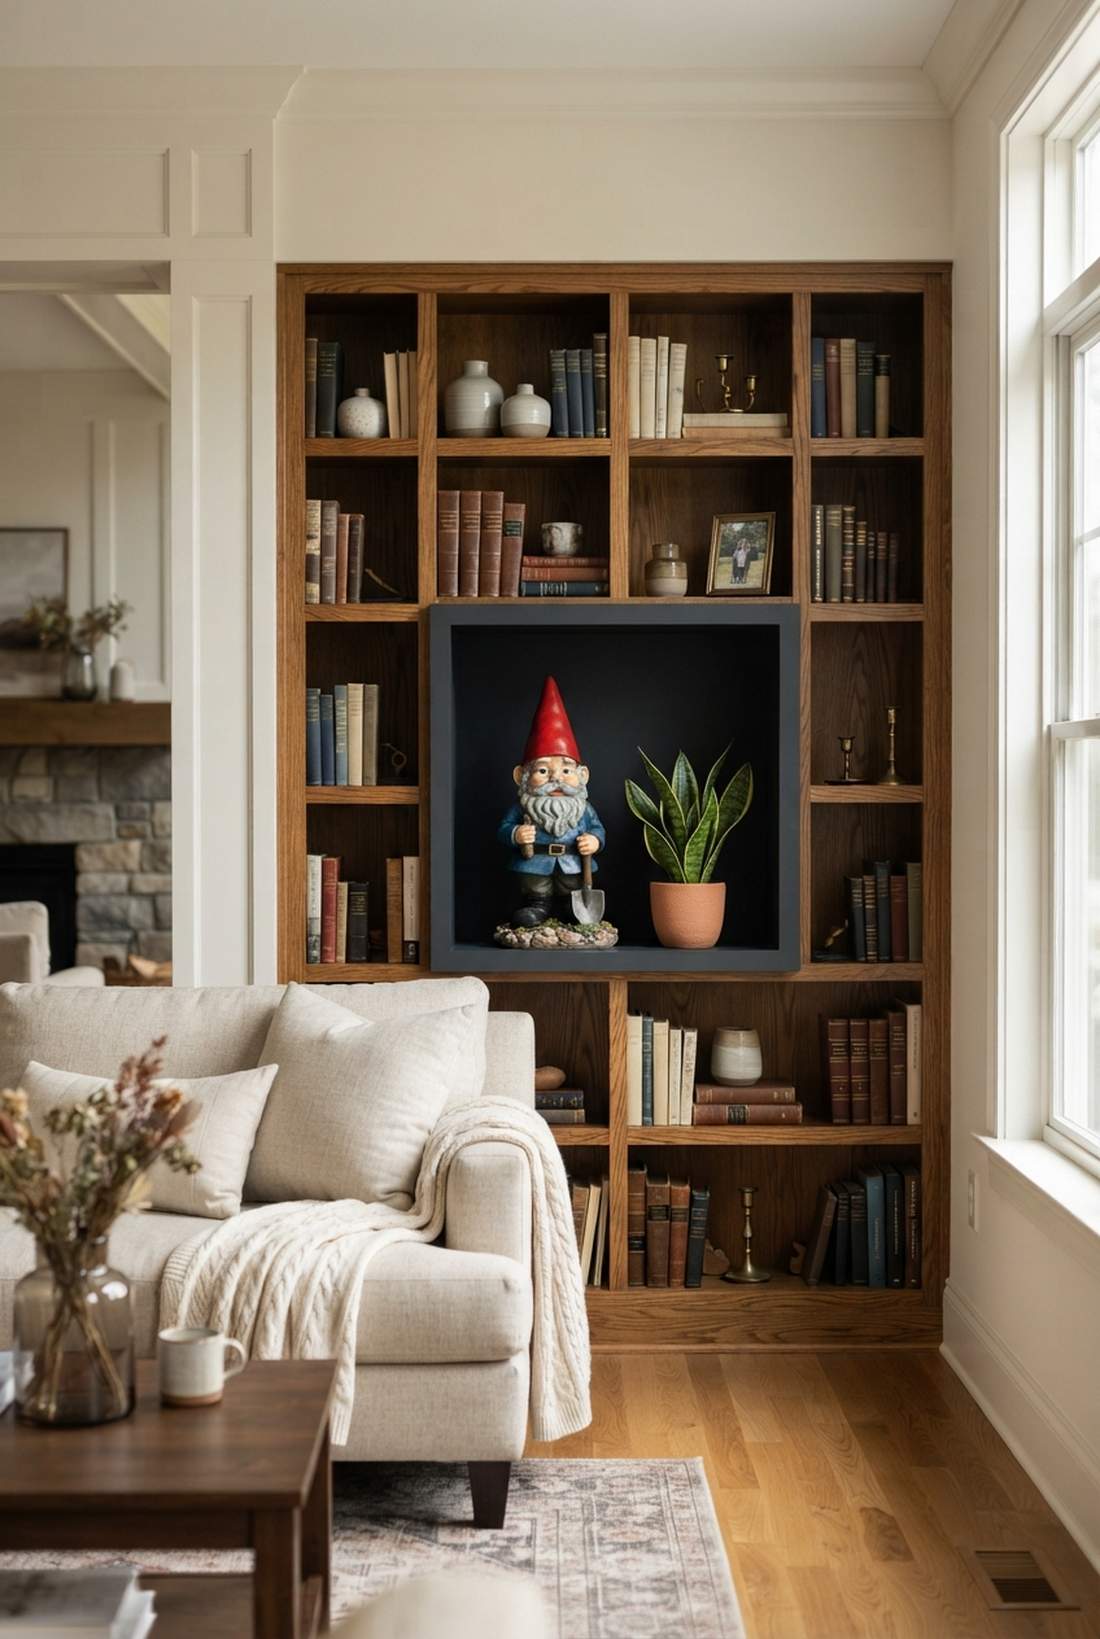
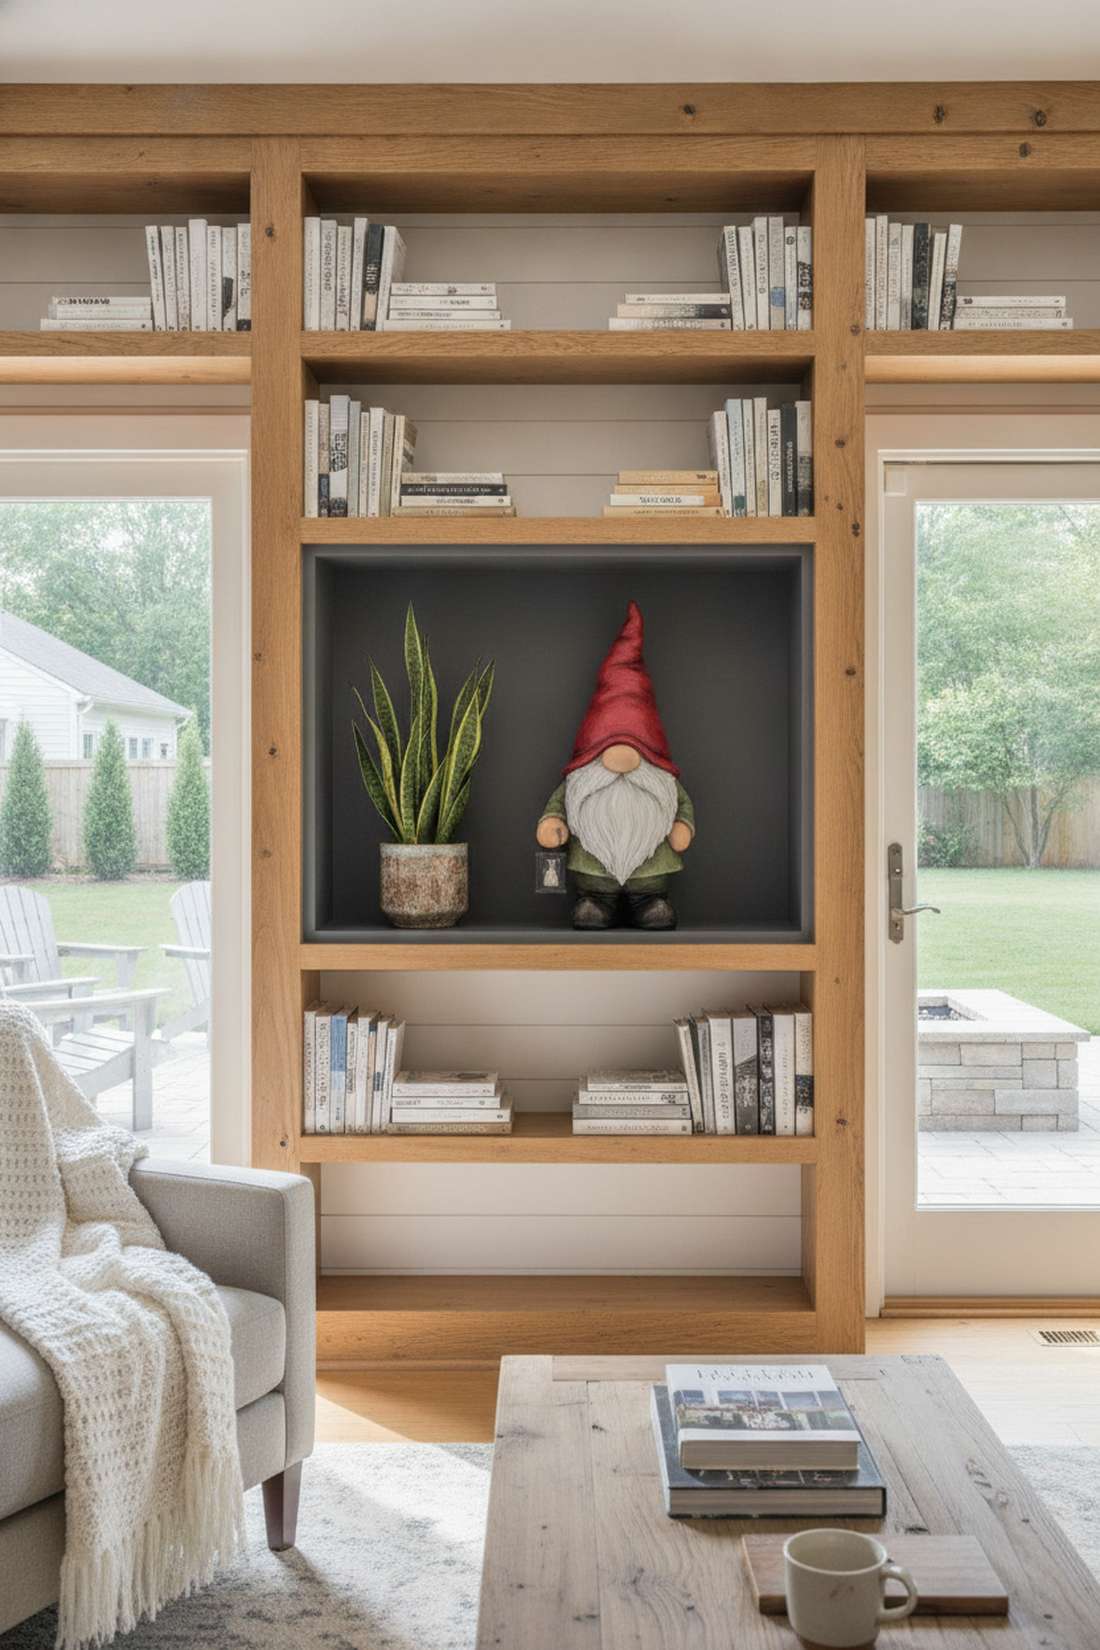
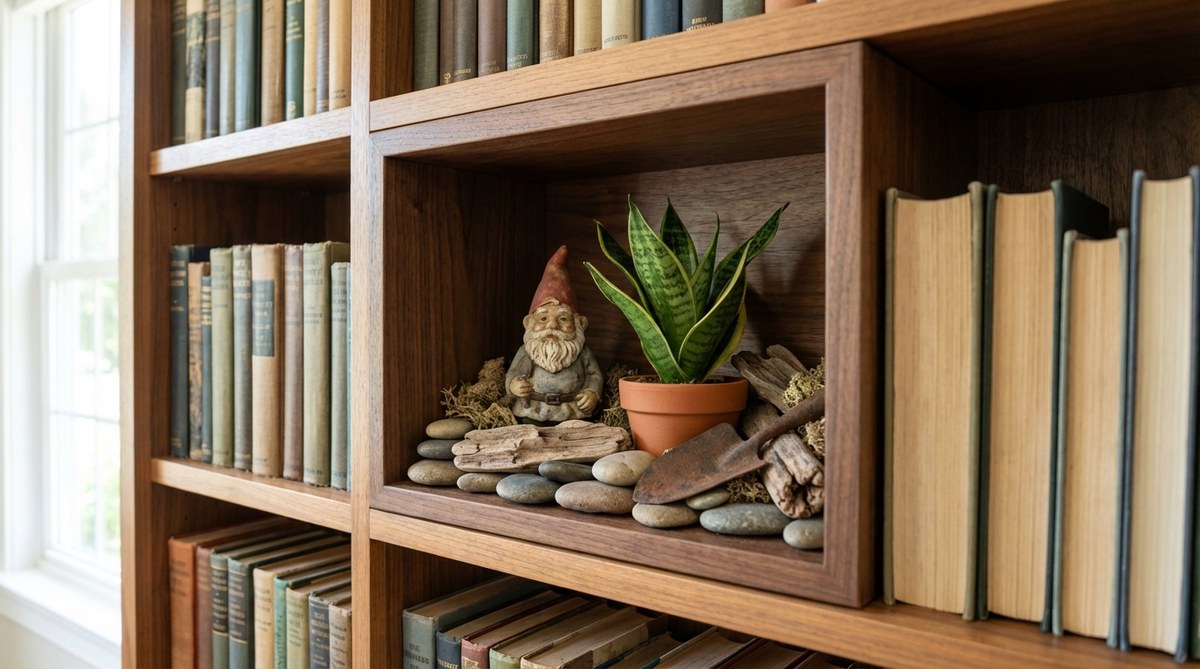
This layout transforms a boring book row into a captivating, curated art installation. Utilizing a bookshelf shadowbox cubby breaks up heavy volumes with a brilliant pop of living texture.
Amateur decorators often ignore scale, but layering a low-care plant with a high-quality figure creates real dimension in a shallow space. Sourcing premium miniature garden supplies prevents the display from looking like discarded children’s toys on a luxury shelf.
You can execute this chic vignette for just $15–$25. Save this to your interior design board to instantly upgrade your living room storage.
- Key Materials: Small sansevieria, single focal gnome, dark cubby backdrop.
- Vibe / Style: Intimate, curated library art.
- Difficulty: Extremely easy styling.
- Budget Breakdown: Plant/Pot: $12 | Figure: $10.
- Creator’s Tip: Paint the back wall of the cubby a dark, moody color so the bright gnome hat pops aggressively.
- Smart Sourcing: low-light indoor starter plants (live) and premium painted resin display gnomes.
Bringing your mini garden gnomes to life
Thoughtfully staging mini garden gnomes transforms ordinary corners, beds, and shelves into high-end, visual stories that command attention. Start with one or two of these exact 35 premium blueprints, investing in UV-coated materials and bulk starter kits, then revisit Fresh Garden Ideas on freshgardenideas.com to continuously optimize your outdoor aesthetic.
Frequently Asked Questions
How many mini garden gnomes should I group together in one area?
Most landscape designers recommend odd-numbered clusters (three to five figures) to ensure the scene looks like a deliberate, premium vignette rather than a cluttered mess. If you are working with large yards, rely on pre-cut moss panels and high-quality fairy garden kits to bridge the gaps without overcrowding the aesthetic.
Will mini garden gnomes damage my plants or soil?
Not if staged correctly. Utilizing heavy-duty acrylic risers or bulk pack stepping stones beneath your mini garden gnomes prevents heavy resin from compressing delicate root systems. When using weatherproof outdoor kits, simply lift the base stones seasonally to refresh mulch and maintain optimal plant health.