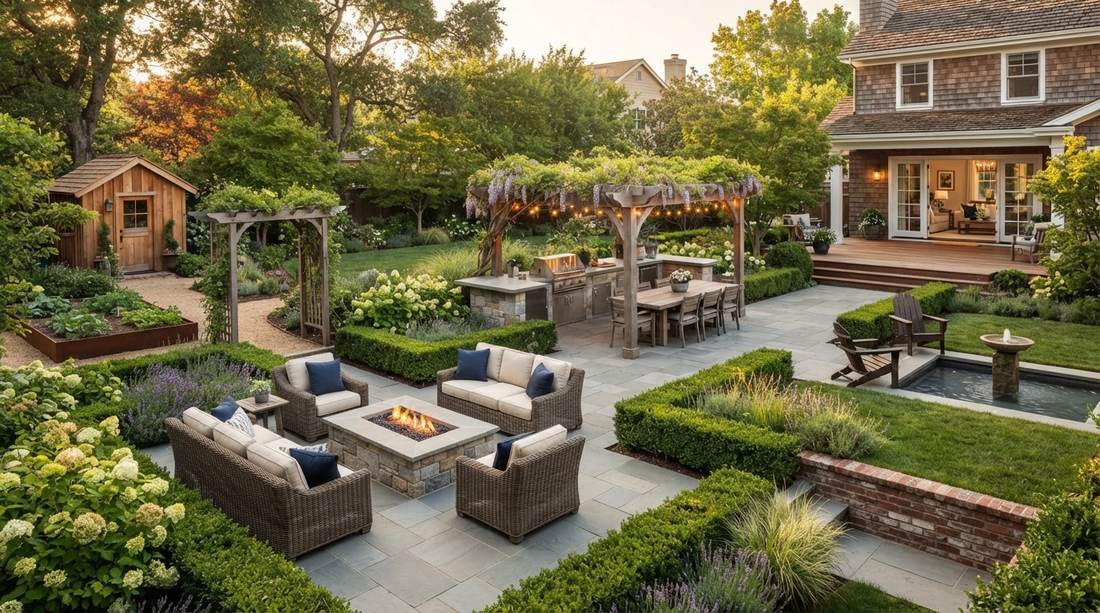
Professional luxury gardens demand exact precision rather than unlimited budgets. Discover clever methods to source premium materials and build high-end layouts affordably. Upgrade your outdoor sanctuary immediately with these proven architectural blueprints.
Design Snapshot: High-CPC Sourcing & Principles
- Precision Maintenance: Use commercial-grade shears and pre-measured templates for architectural topiary definition.
- Premium Materials: Source bulk-pack natural stone and UV-treated synthetic alternatives for uncompromised durability.
- Layered Design: Strategically employ pre-cut landscape fabrics to define distinct, weed-free garden zones.
- Year-Round Appeal: Invest in heavy-duty LED starter kits for ambiance that outlasts seasonal changes.
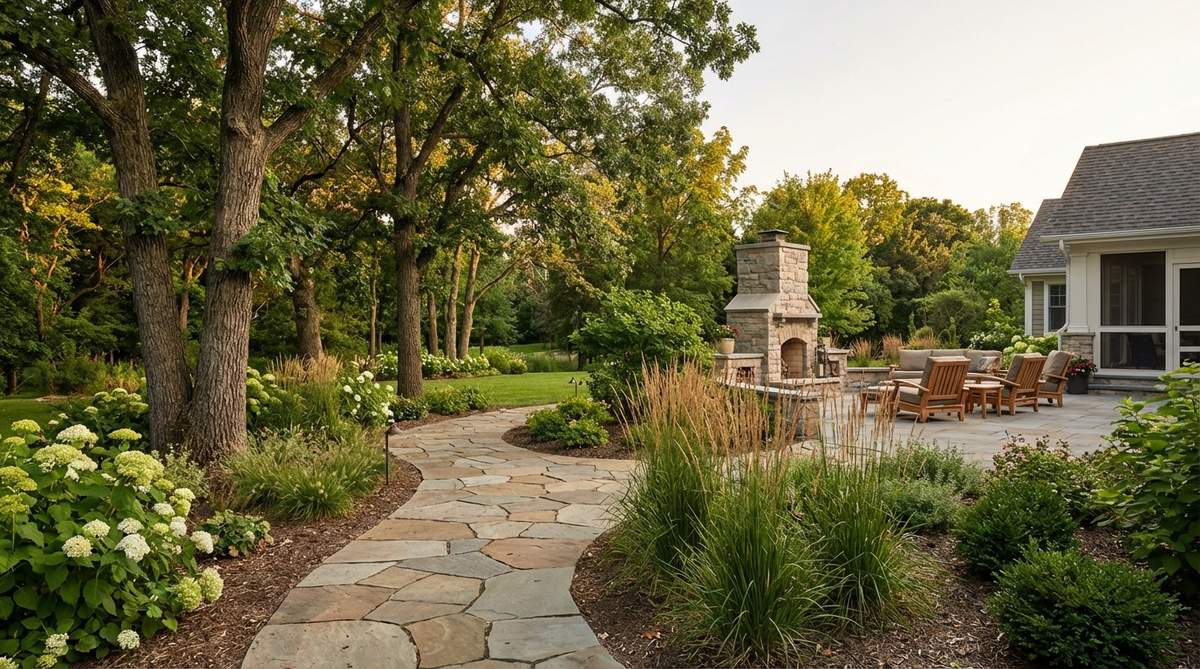
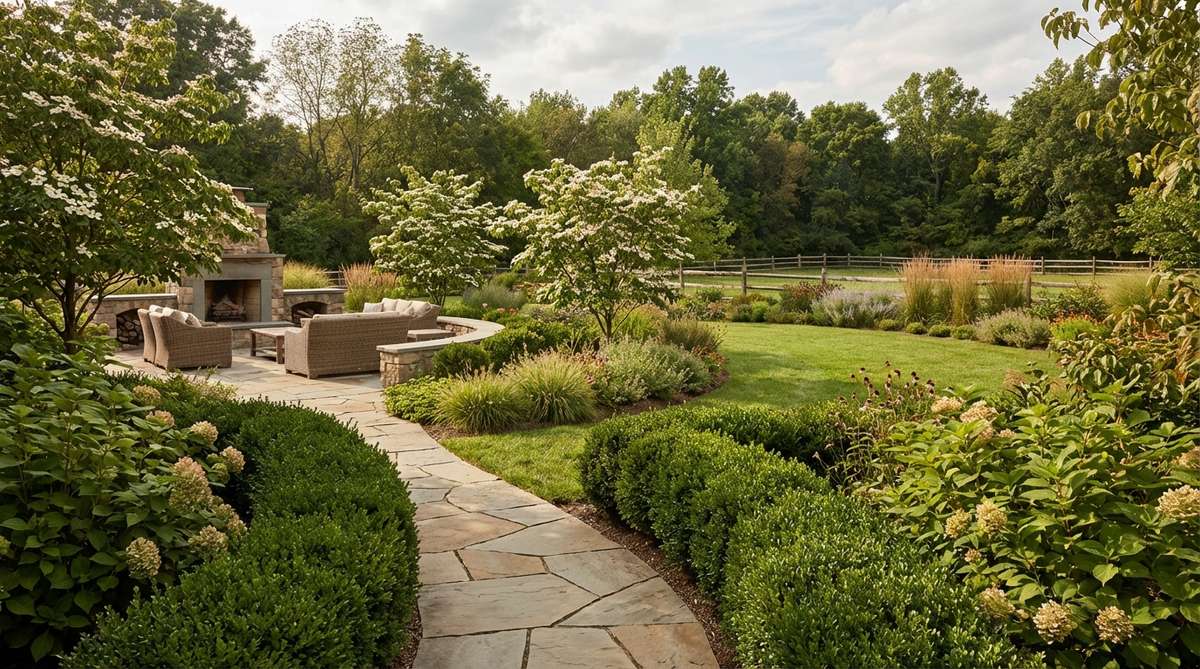
Formal Structures and Manicured Hedges: The Foundation of Luxury Garden Design
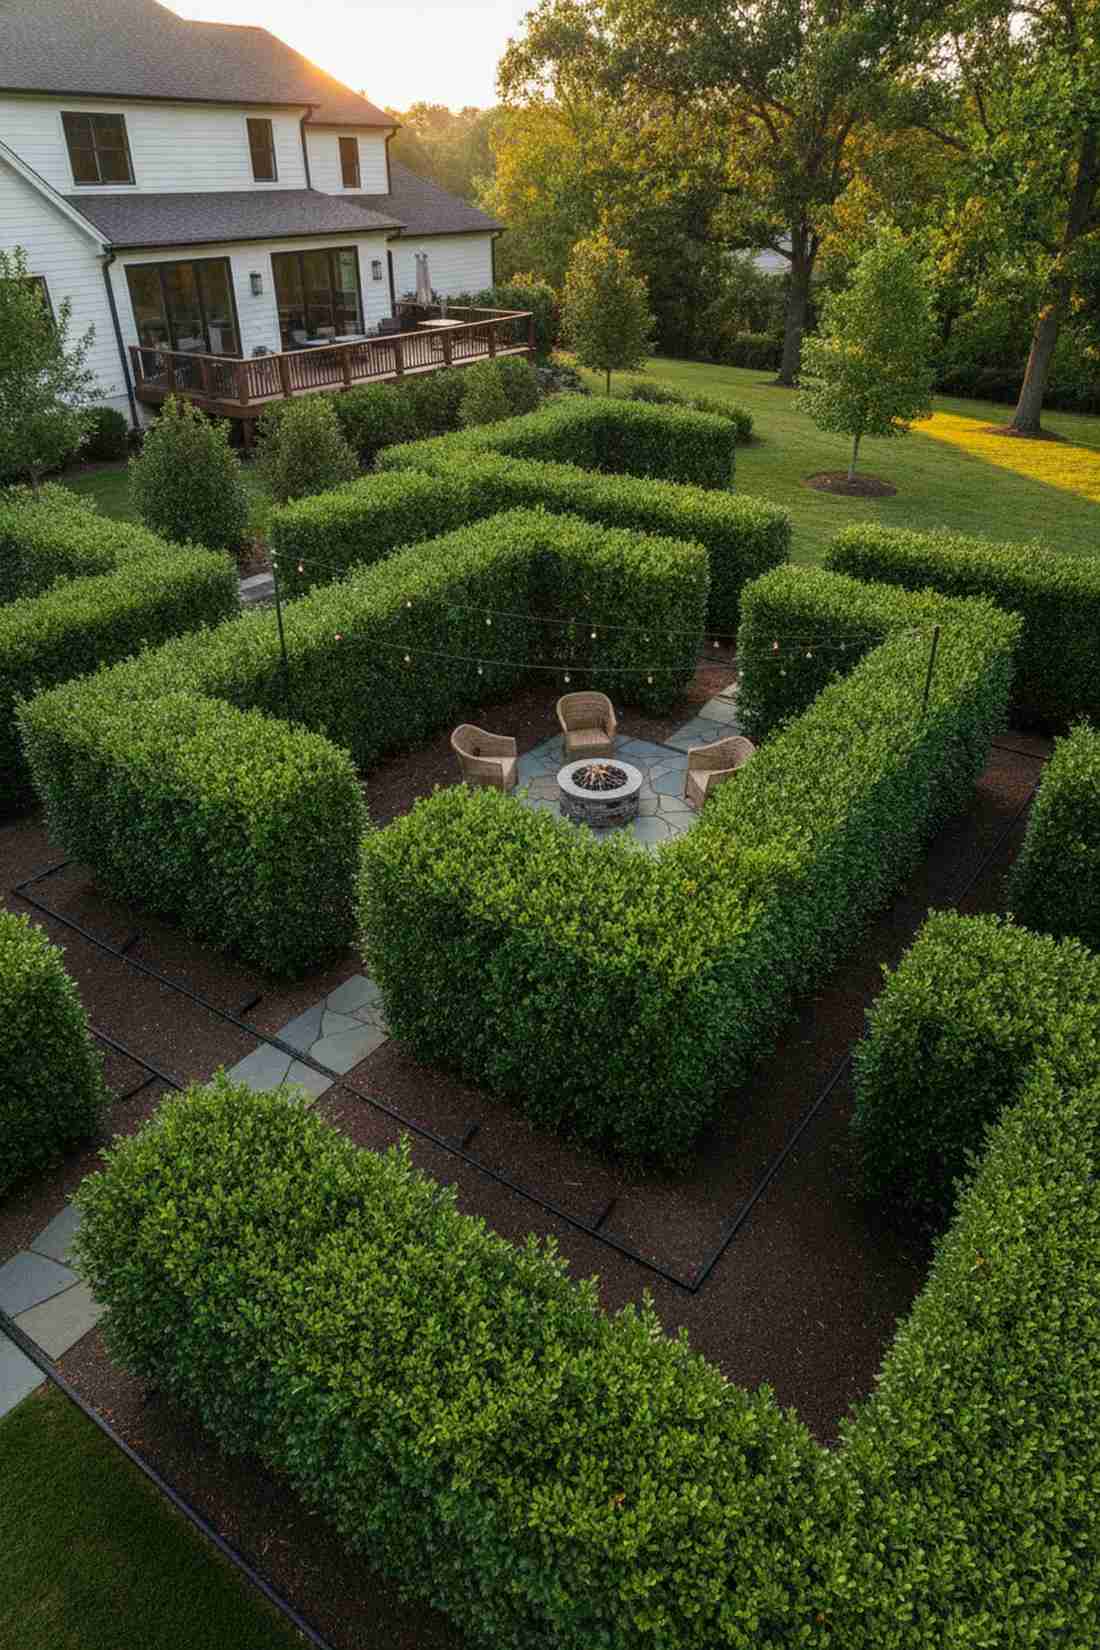
1. Geometric Boxwood Parterre Gardens
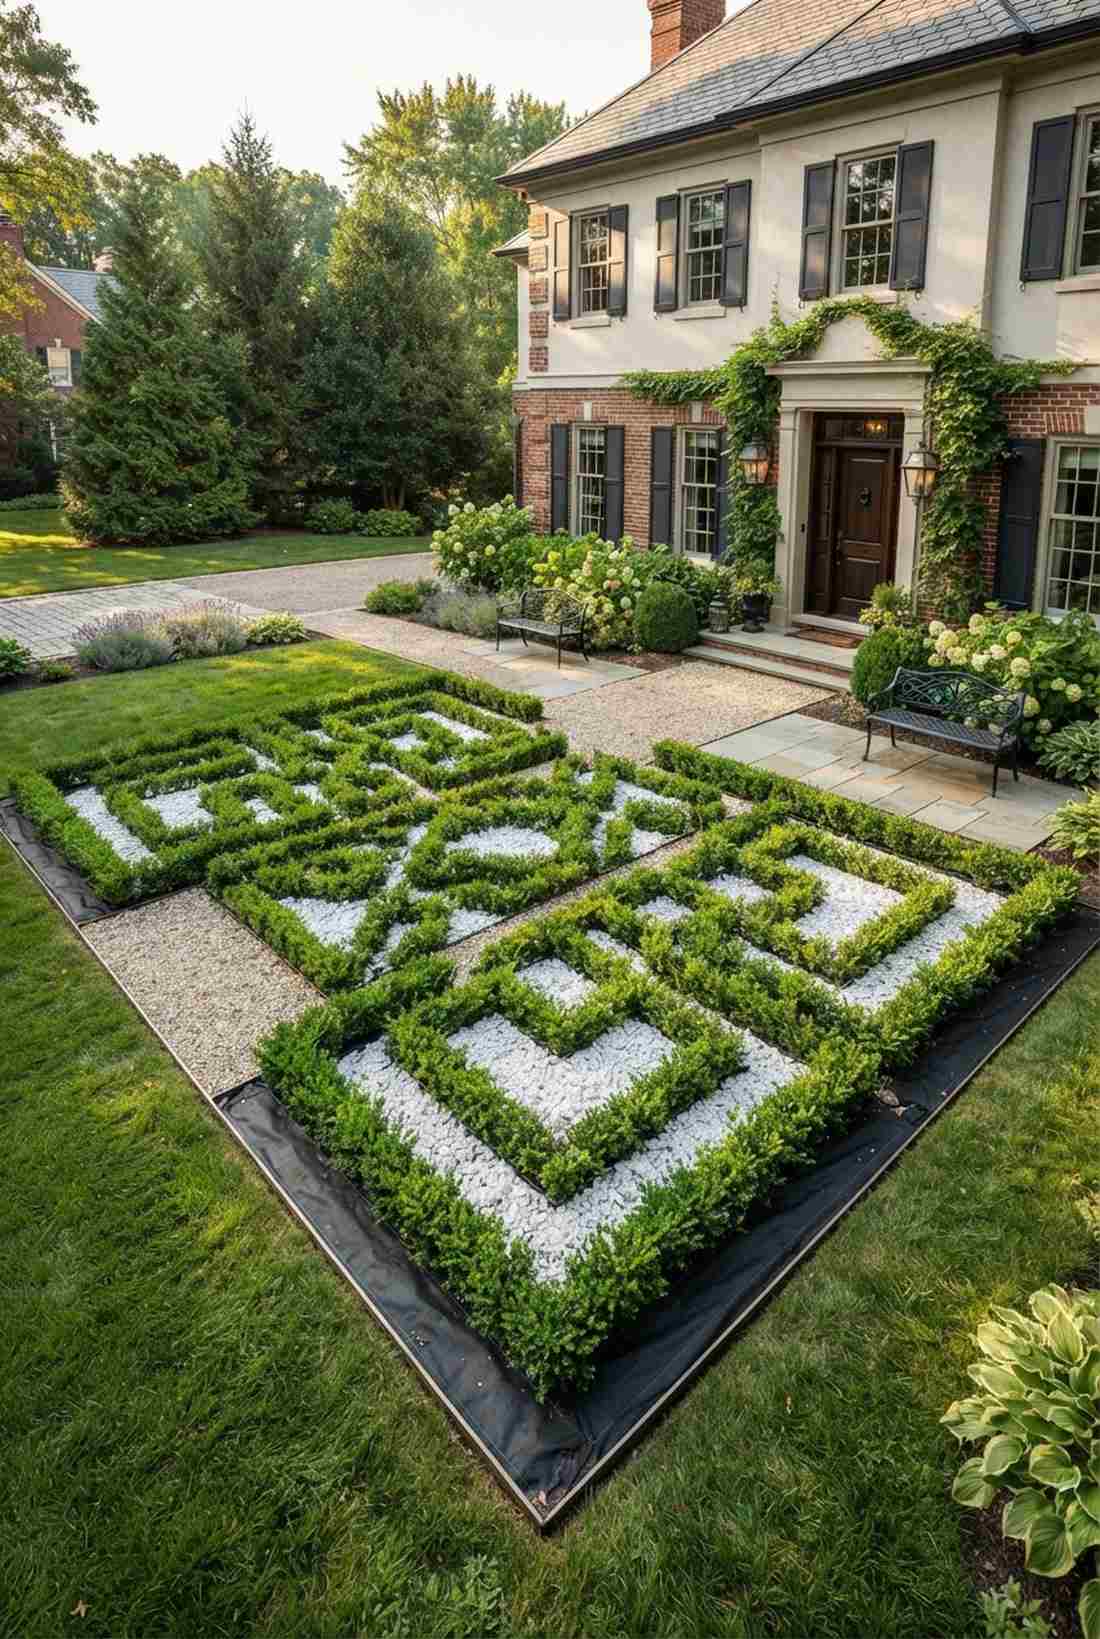
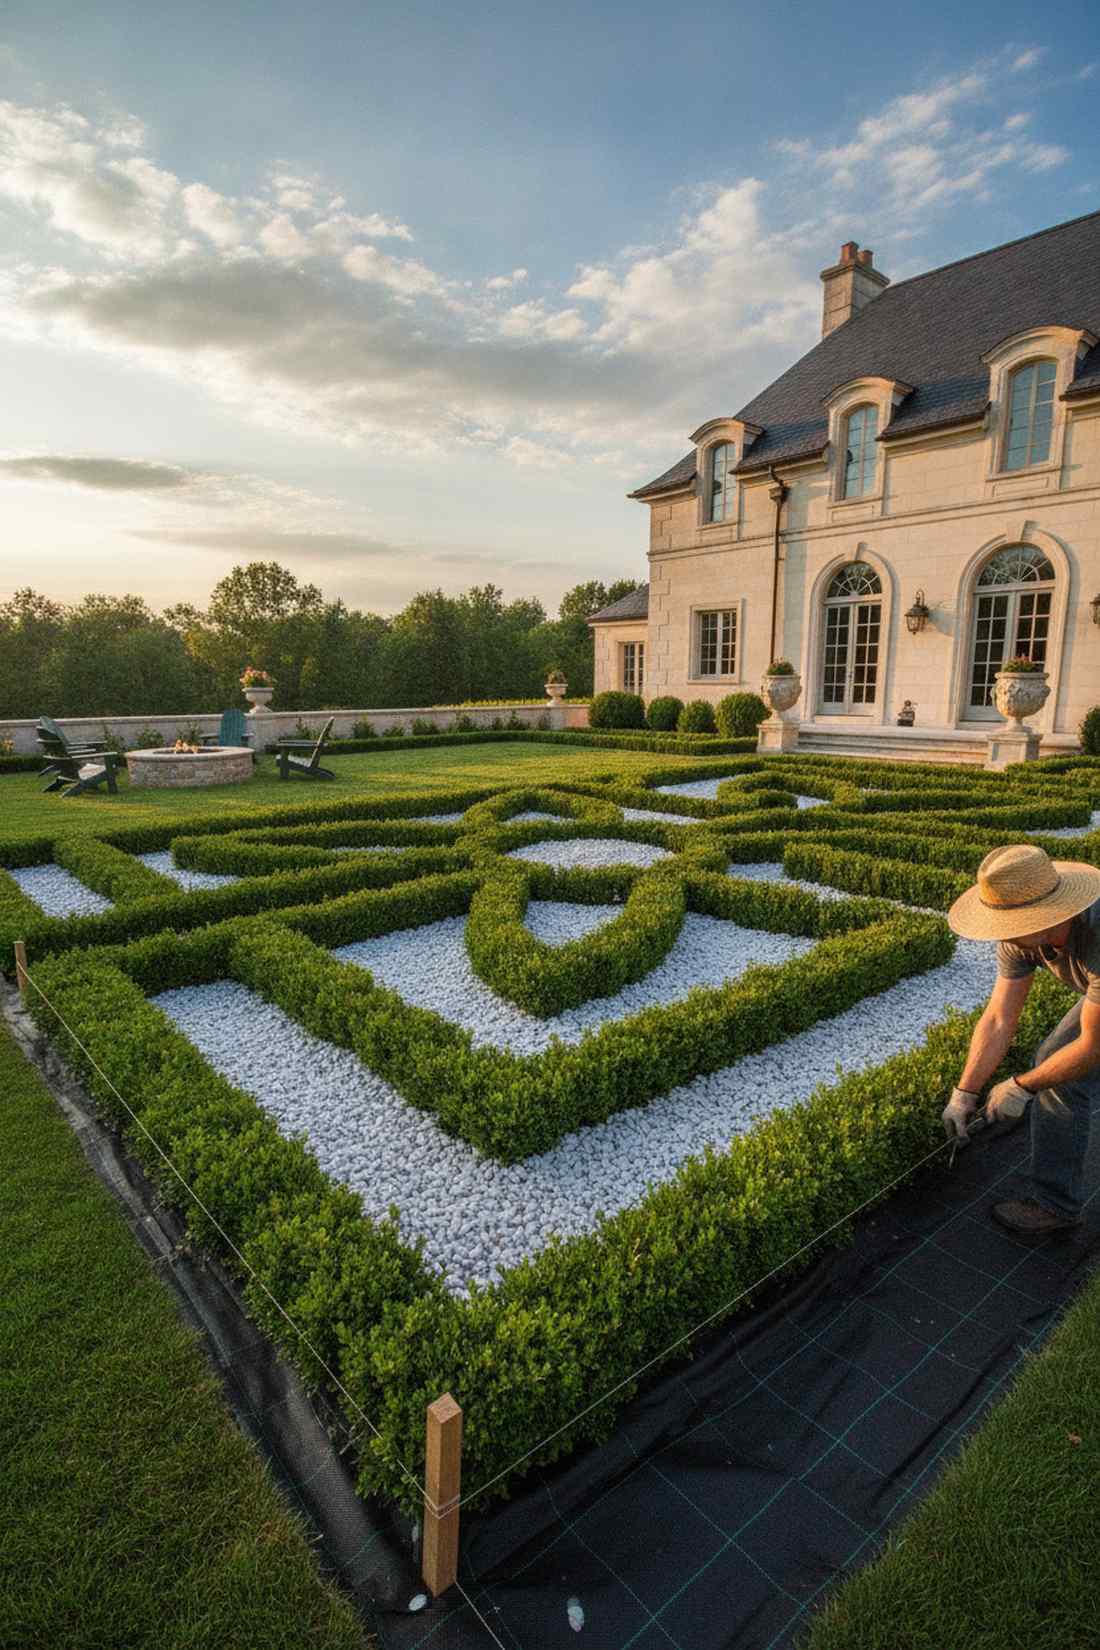
This setup feels exactly like a hidden royal estate you accidentally discovered. A formal geometric parterre layout works exceptionally well for defining a flat front courtyard with architectural authority.
Most novices overcomplicate the trimming, but establishing a grid with juvenile shrubs delivers a surprisingly premium look almost instantly. Integrating heavy-duty landscape fabric beneath UV-coated white marble chips guarantees a weed-free, high-contrast finish.
You can easily pull off a starter grid for around $150. Save this to your weekend curb-appeal board!
- Key Materials: Juvenile dwarf boxwoods, white marble chips
- Vibe / Style: European chateau elegance
- Difficulty: Moderate weekend project
- Budget Breakdown: Shrubs: $90 | Gravel & Fabric: $60
- Creator’s Tip: Use string lines and wooden stakes before digging to ensure perfectly symmetrical edges.
- Smart Sourcing: Pre-cut commercial weed barrier rolls and bulk pack dwarf boxwood plugs.
2. Tall Privacy Hedge Walls
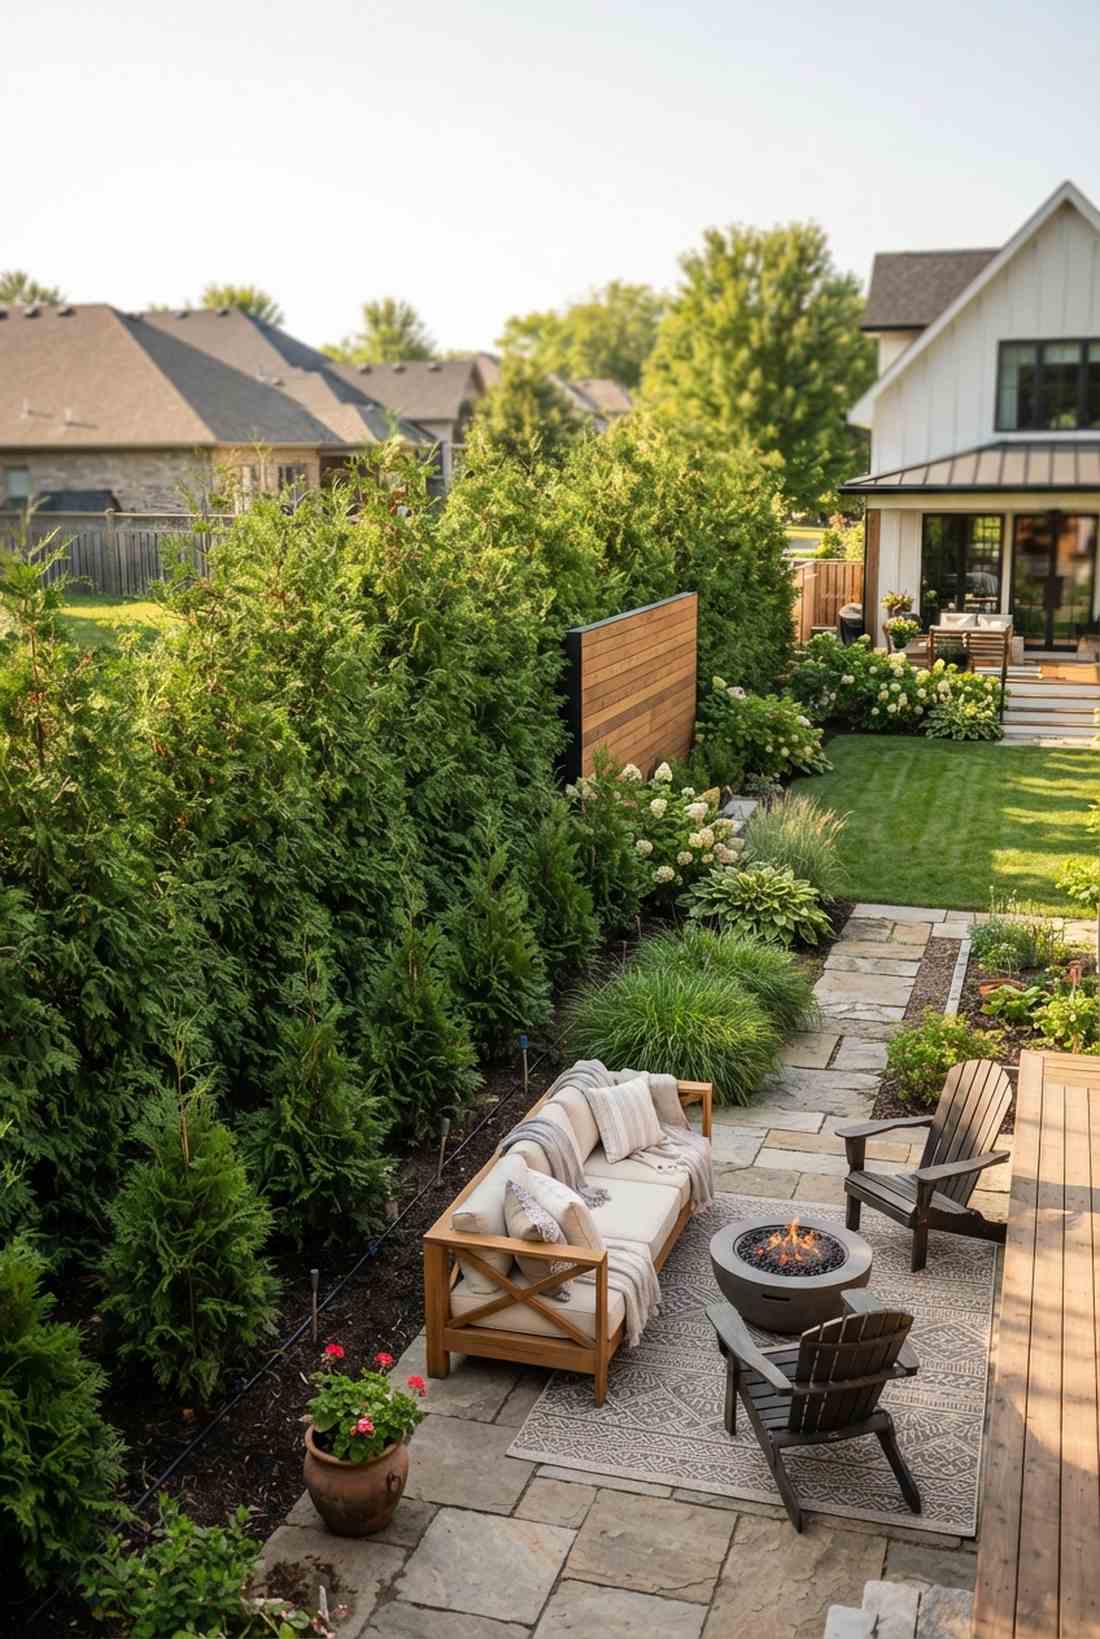
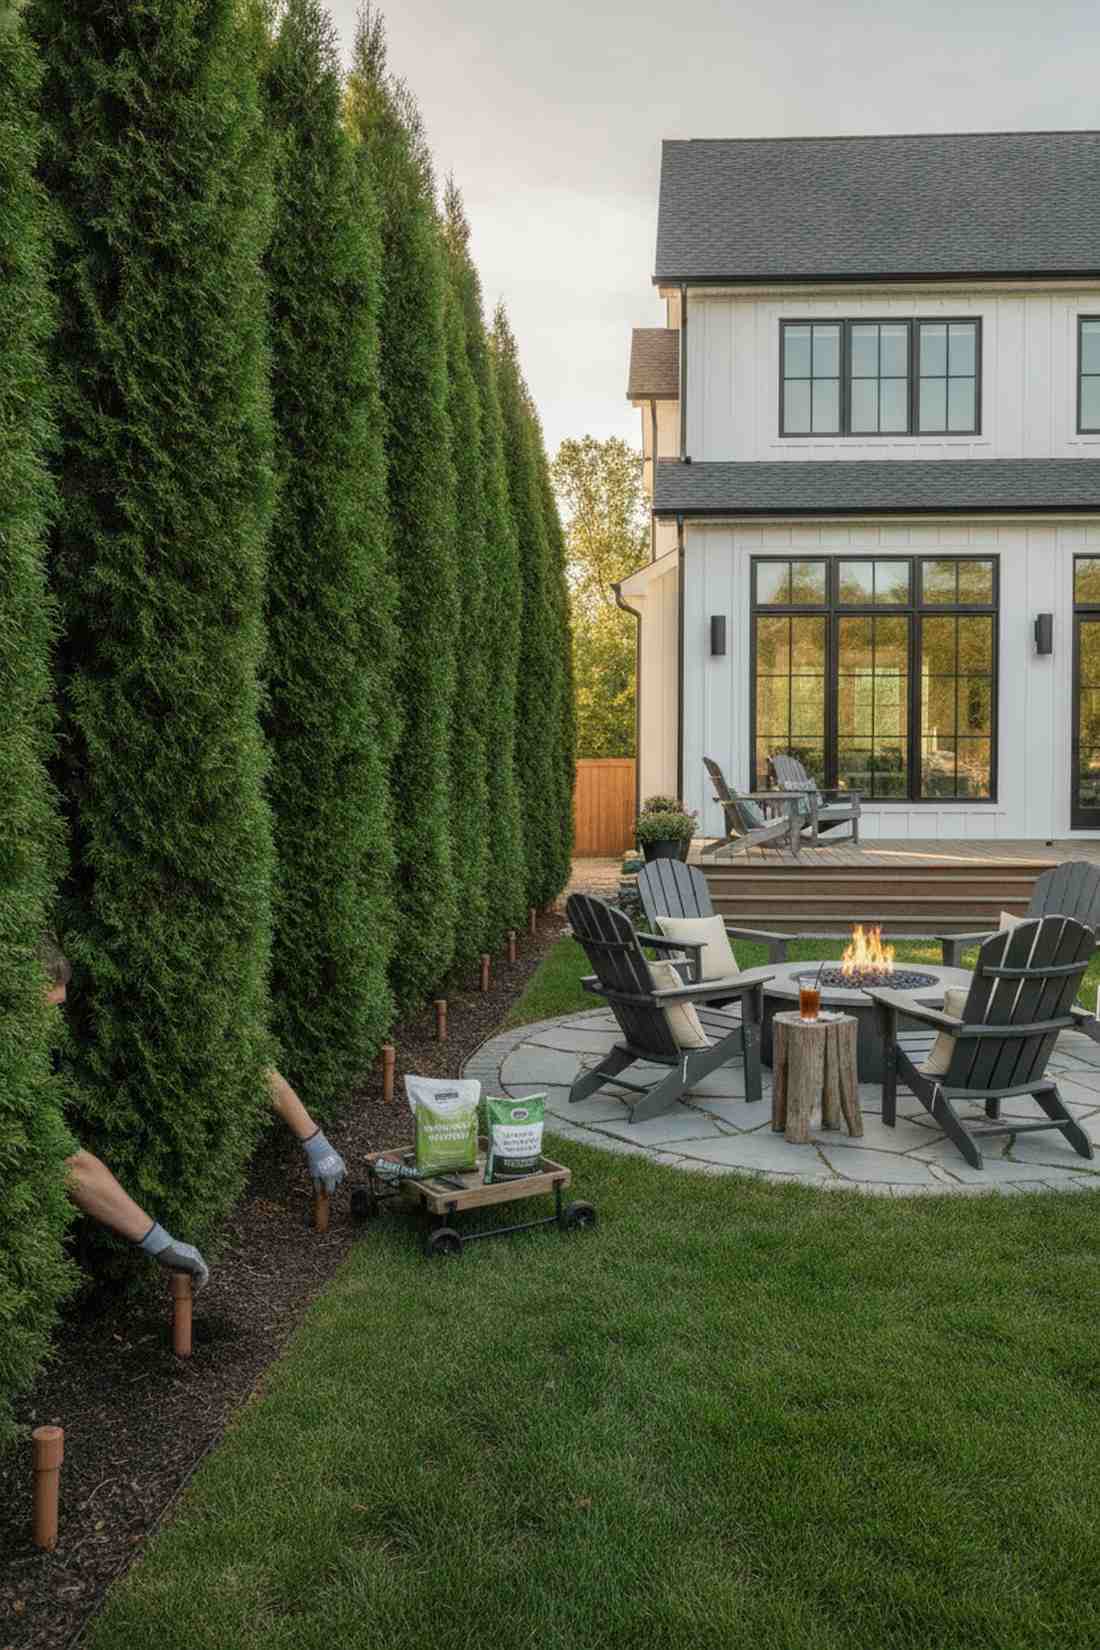
Stepping into this space feels like entering an exclusive, secluded celebrity compound. An evergreen privacy barrier is perfect for blocking nosy neighbors along a busy side property line.
Contractors often quote thousands for mature trees, yet planting fast-growing varieties closer together achieves a high-end estate vibe at a fraction of the cost. Utilizing slow-release arborvitae fertilizer stakes ensures dense, gap-free foliage year-round.
A 20-foot stretch can be established for under $250. Highly recommended for a quick property value win.
- Key Materials: Leyland cypress or Arborvitae saplings
- Vibe / Style: Ultra-private modern sanctuary
- Difficulty: Easy beginner planting
- Budget Breakdown: Saplings: $200 | Fertilizer: $50
- Creator’s Tip: Prune the top early to encourage thicker side growth from the base up.
- Smart Sourcing: Multi-pack slow-release fertilizer spikes and heavy-duty root stimulator mix.
3. Spiral Topiary Collections
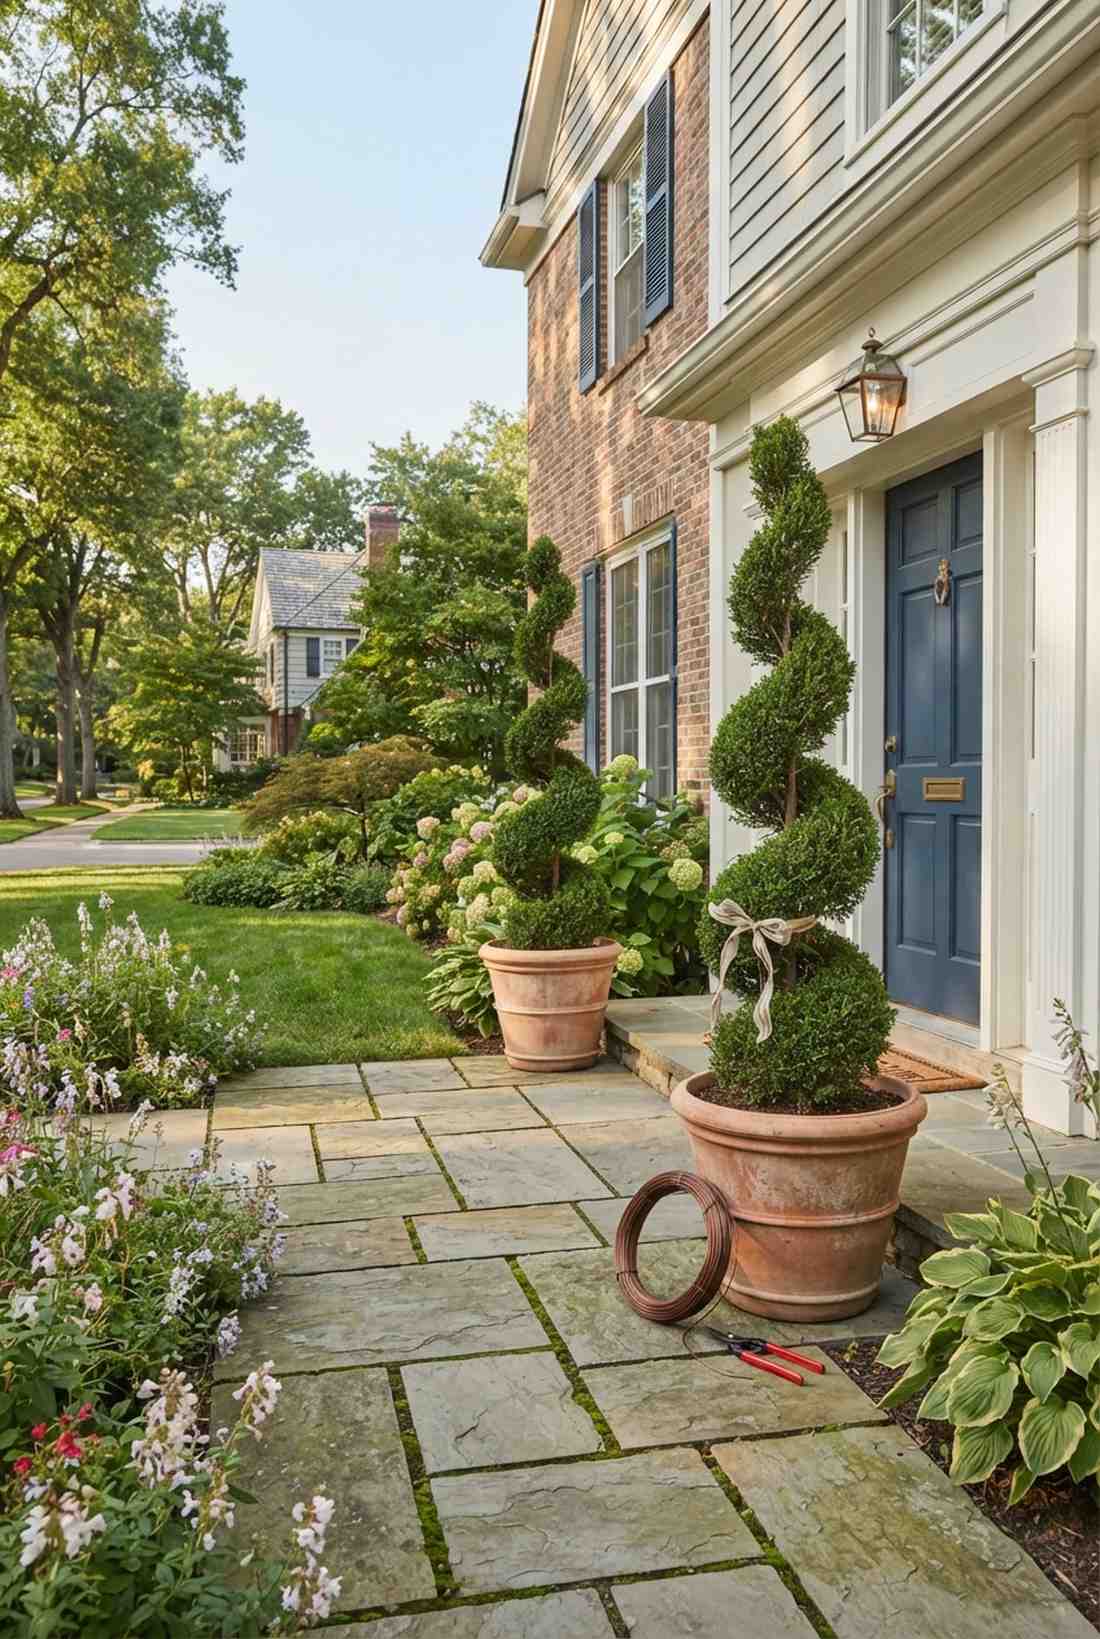
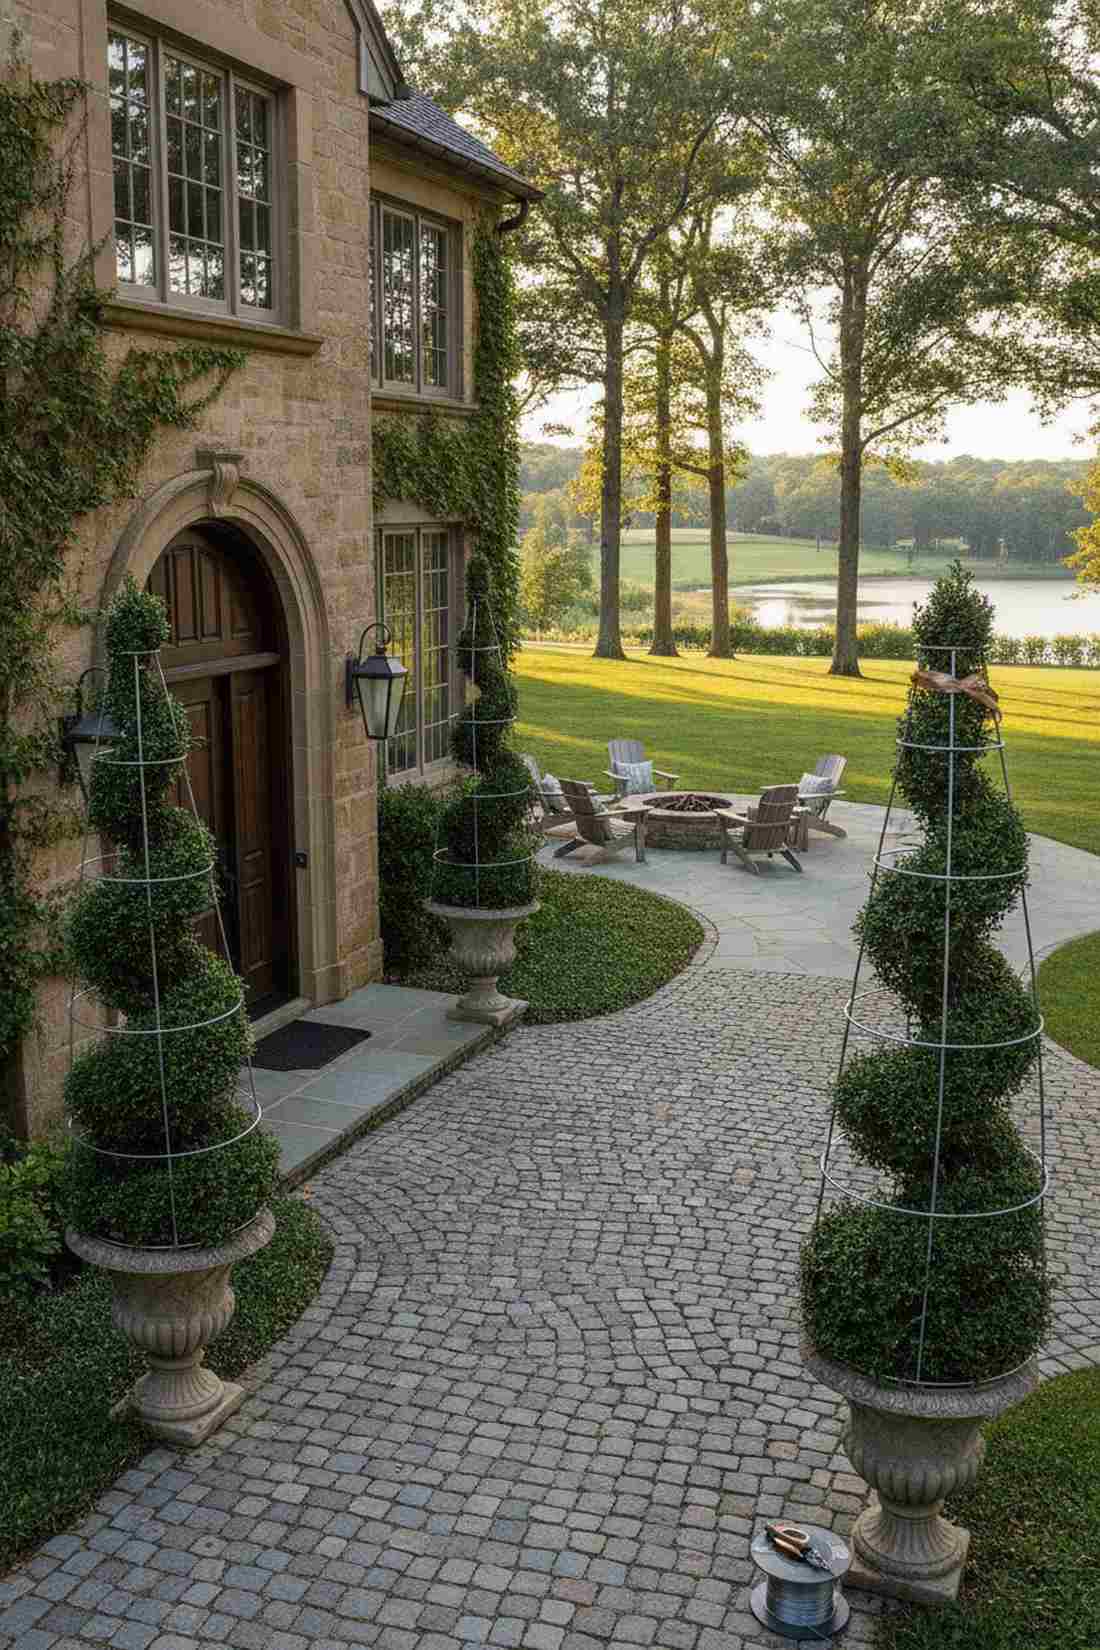
This installation looks straight out of an elite country club entryway. Adding a sculptural spiral evergreen works brilliantly to frame a front door or anchor a stone pathway.
Buying pre-shaped topiaries drains your wallet, but training juvenile junipers yourself looks far more expensive than it is. Grab an adjustable aluminum topiary frame to effortlessly guide the growth without complex measuring.
You can start shaping your own pair for roughly $60. Pin this if you’re planning an entryway upgrade.
- Key Materials: Upright junipers, aluminum training wire
- Vibe / Style: Classic sculptural sophistication
- Difficulty: Requires patient pruning
- Budget Breakdown: Plants: $40 | Wire/Frames: $20
- Creator’s Tip: Wrap ribbon around the plant first to visualize the spiral before making any cuts.
- Smart Sourcing: Rust-proof aluminum bonsai wire and precision micro-tip pruning shears.
4. Cloud-Pruned Evergreens
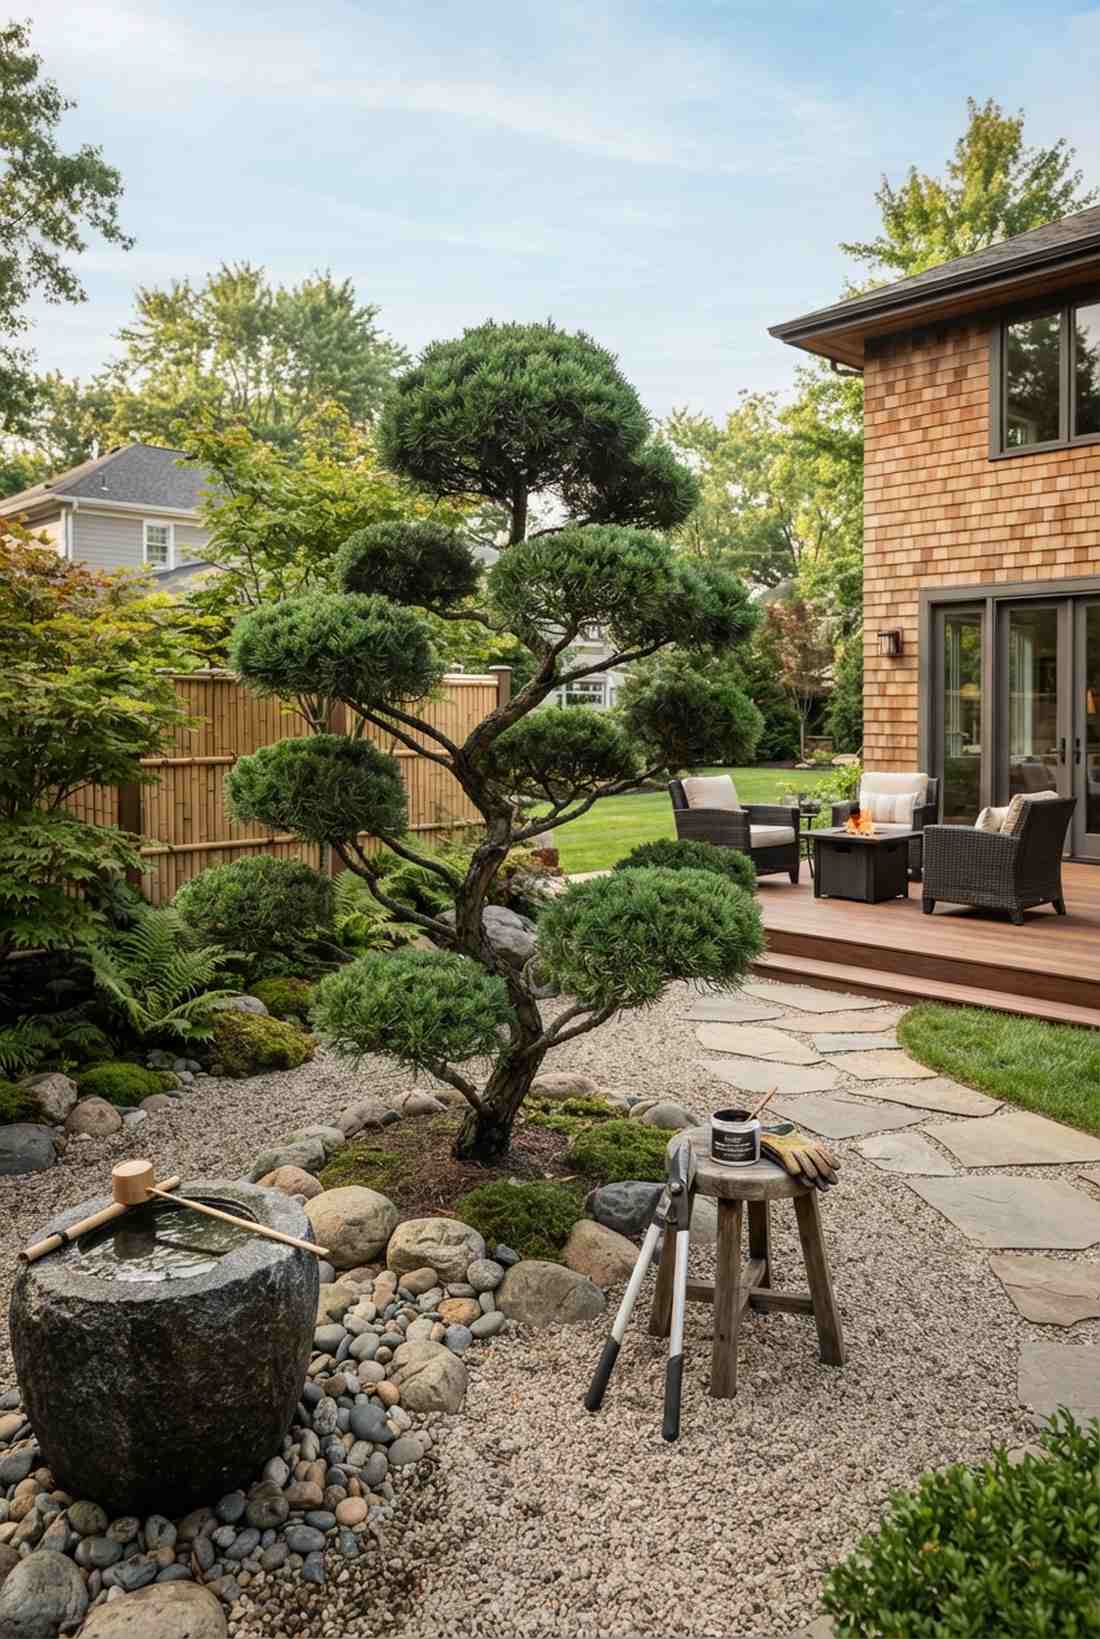
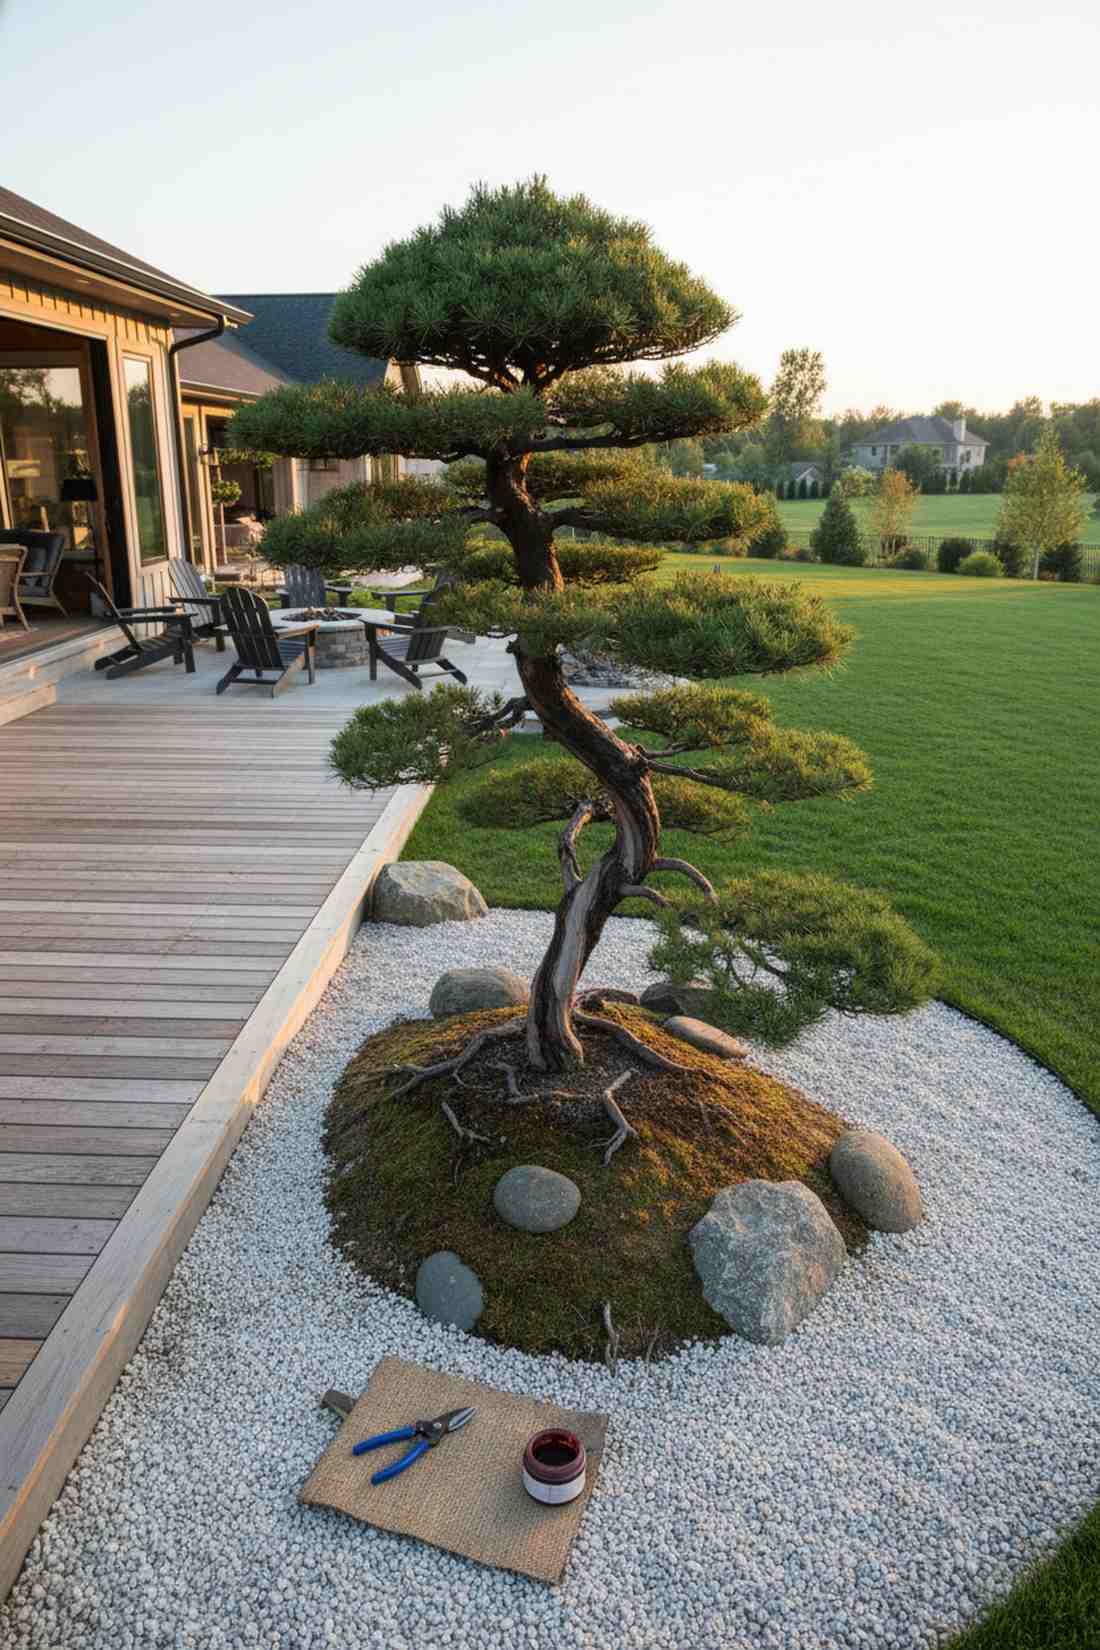
This organic design feels like a meditative Zen retreat hidden in plain sight. A Japanese-inspired cloud tree creates an unbeatable focal point for a minimalist rock garden.
Many assume you need decades of mastery to achieve this, but selective branch stripping gives a designer-level finish using standard nursery stock. Applying a premium waterproof wound sealant protects the exposed trunk while enhancing the aged aesthetic.
Transforming a standard shrub costs zero dollars if you already own the tools. It’s a fast upgrade that completely changes the vibe.
- Key Materials: Existing evergreen shrub, wound paste
- Vibe / Style: High-end botanical artistry
- Difficulty: Advanced styling technique
- Budget Breakdown: Pruning tools: $35 | Paste: $15
- Creator’s Tip: Remove downward-facing branches first to instantly reveal the cloud-like structure.
- Smart Sourcing: Carbon steel bypass loppers and weatherproof bonsai wound sealant.
Most people get their structural privacy completely wrong… until they try the exact living wall layout coming up next.
5. Pleached Tree Allées
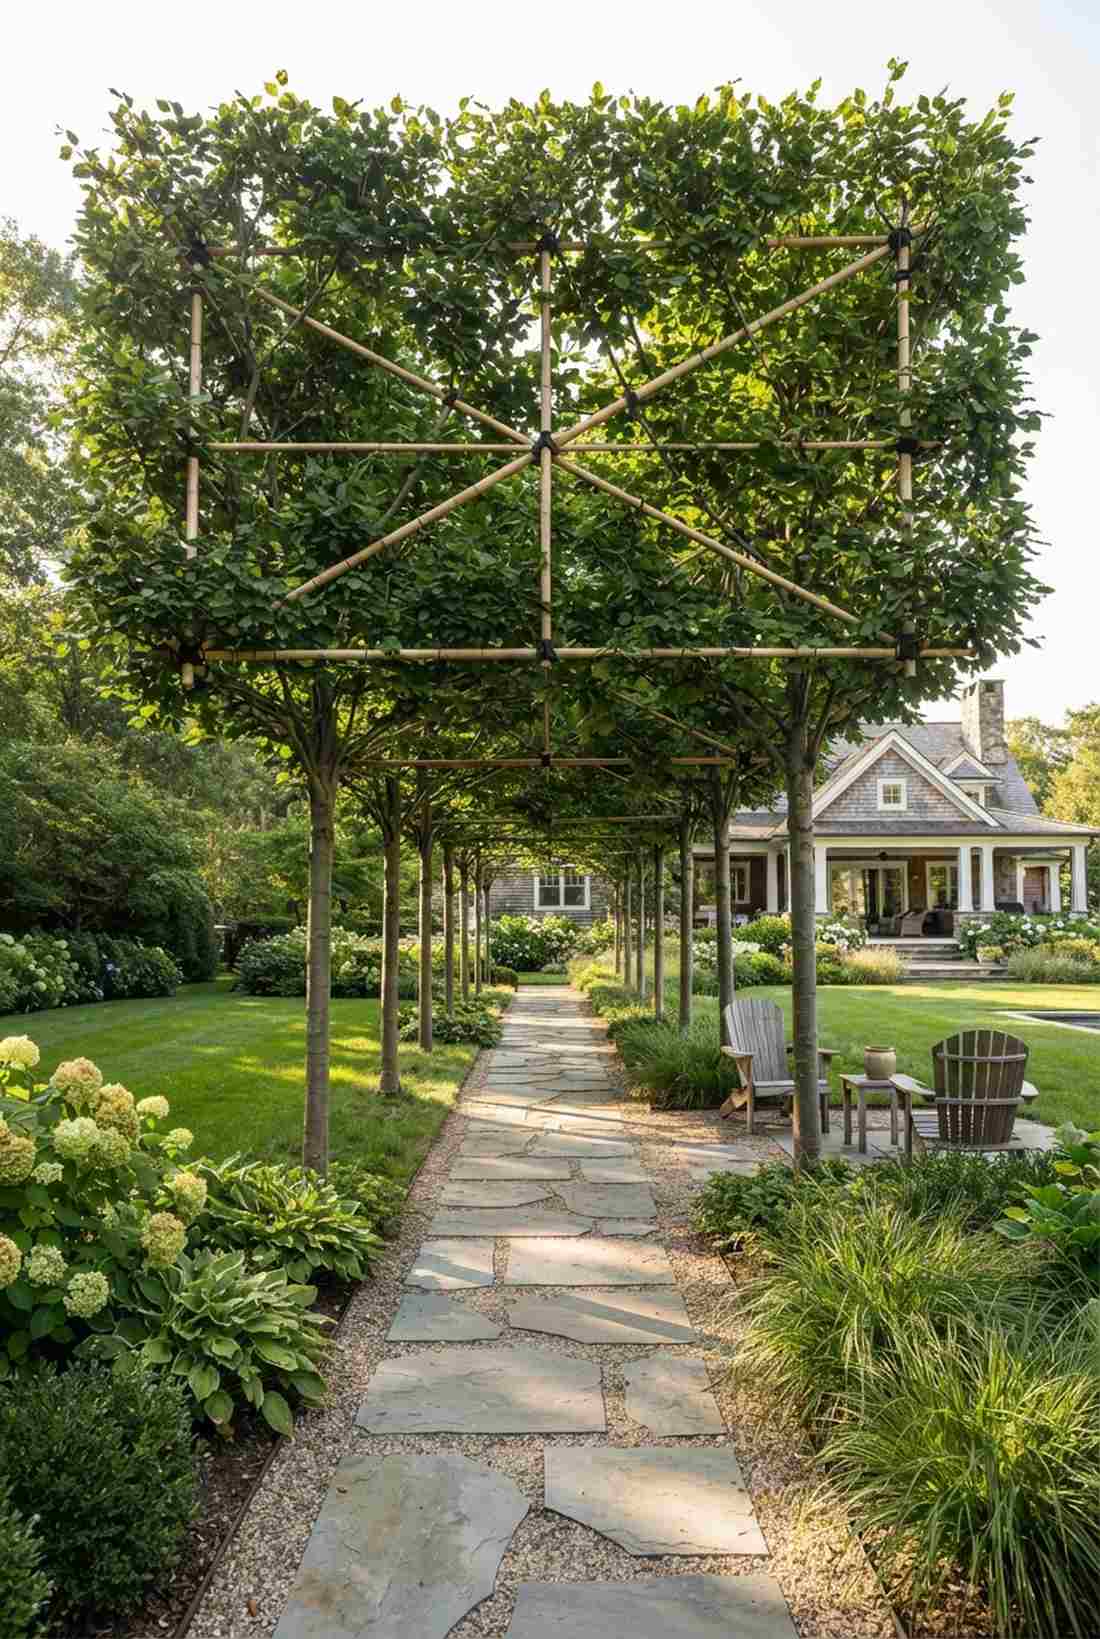
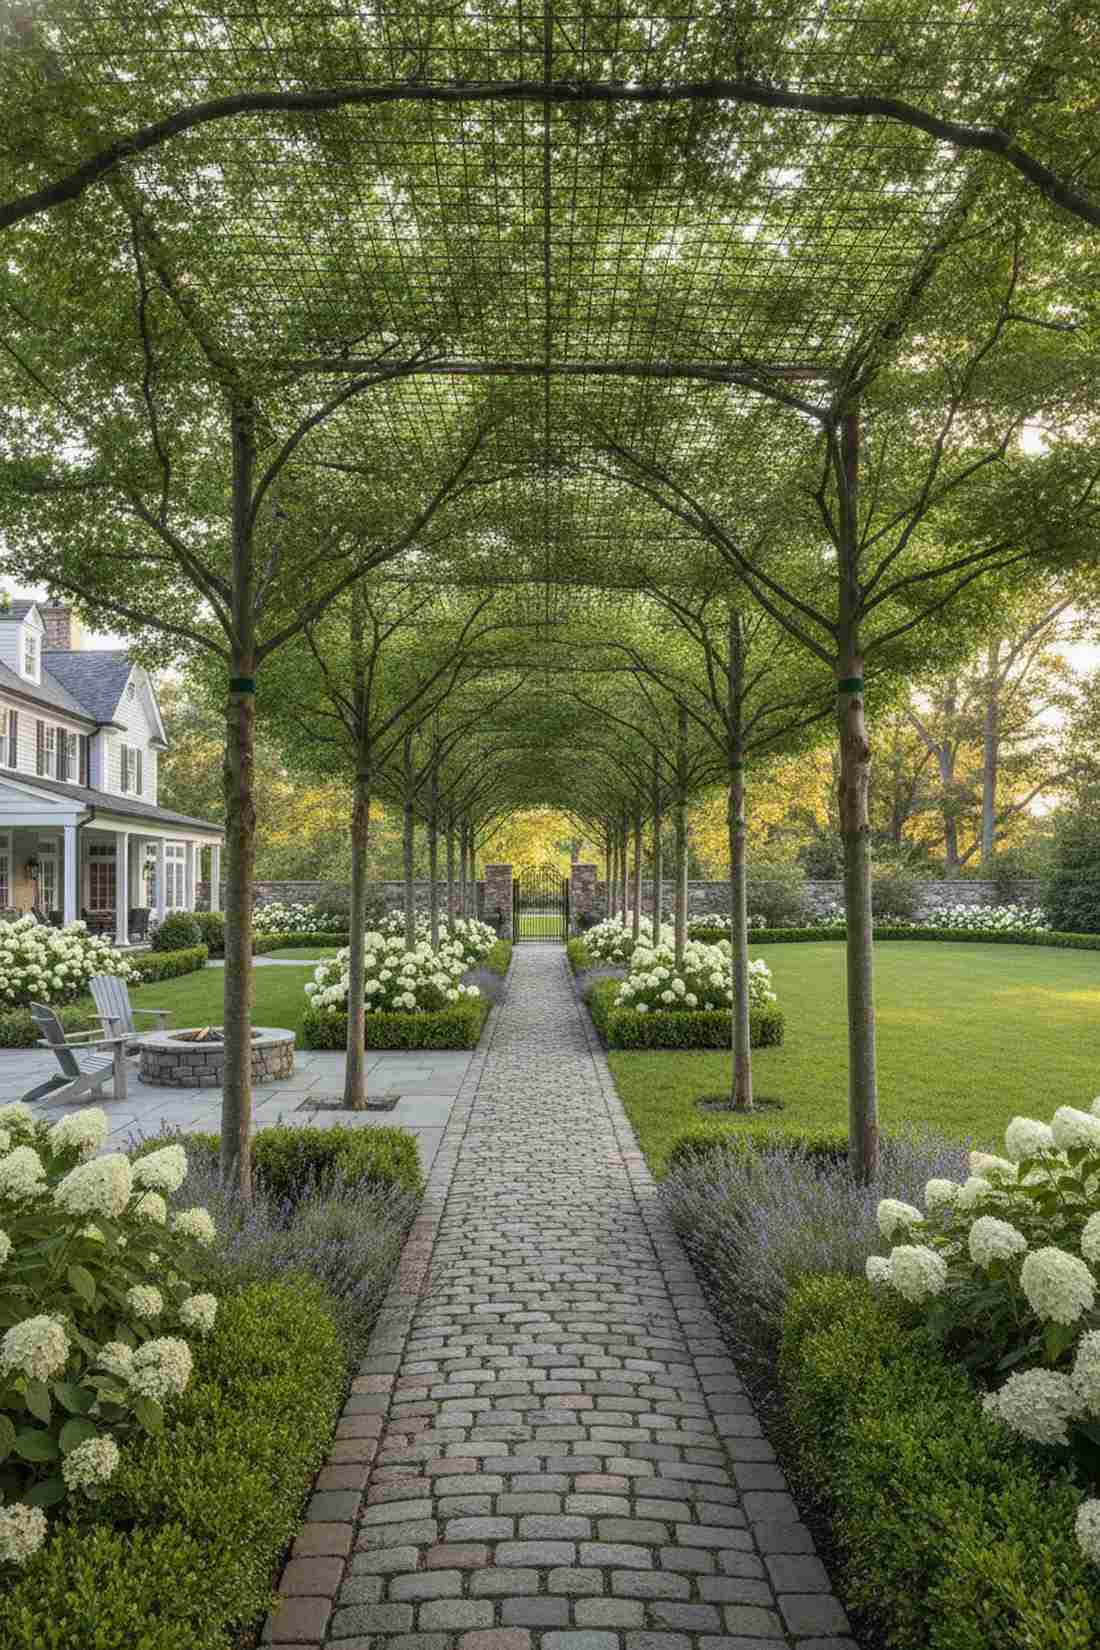
Walking underneath feels like strolling through a shaded cathedral of living architecture. A raised foliage canopy walk is the ultimate solution for adding height and drama above a standard garden path.
While traditional stilt hedges seem intimidating, weaving branches along a bamboo grid radically simplifies the process. Securing them with UV-resistant tree training ties ensures the structure holds tight against strong winds without girdling the bark.
Setting up the structural framework runs about $120 plus the cost of trees. Save this layout for your dream backyard blueprint!
- Key Materials: Hornbeam trees, bamboo canes
- Vibe / Style: Grand European estate walkway
- Difficulty: Time-intensive structural setup
- Budget Breakdown: Framework: $70 | Ties: $50
- Creator’s Tip: Keep the lower trunks completely stripped of buds to maintain the illusion of floating walls.
- Smart Sourcing: Commercial-grade bamboo poles (bulk) and adjustable UV-resistant tree ties.
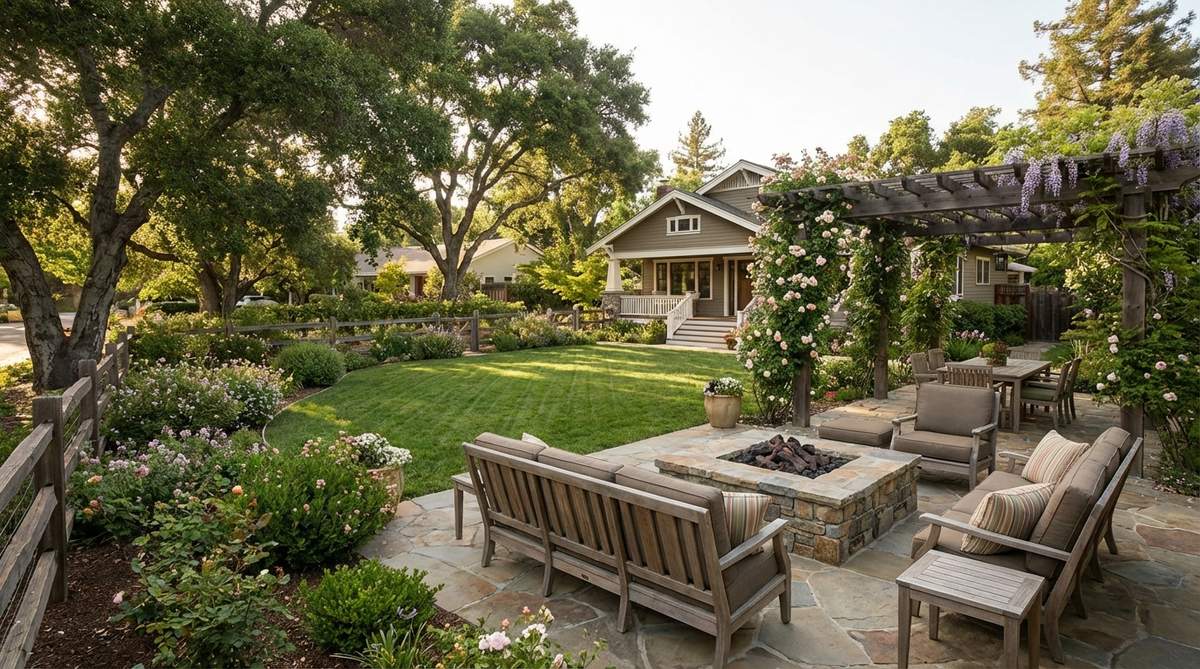
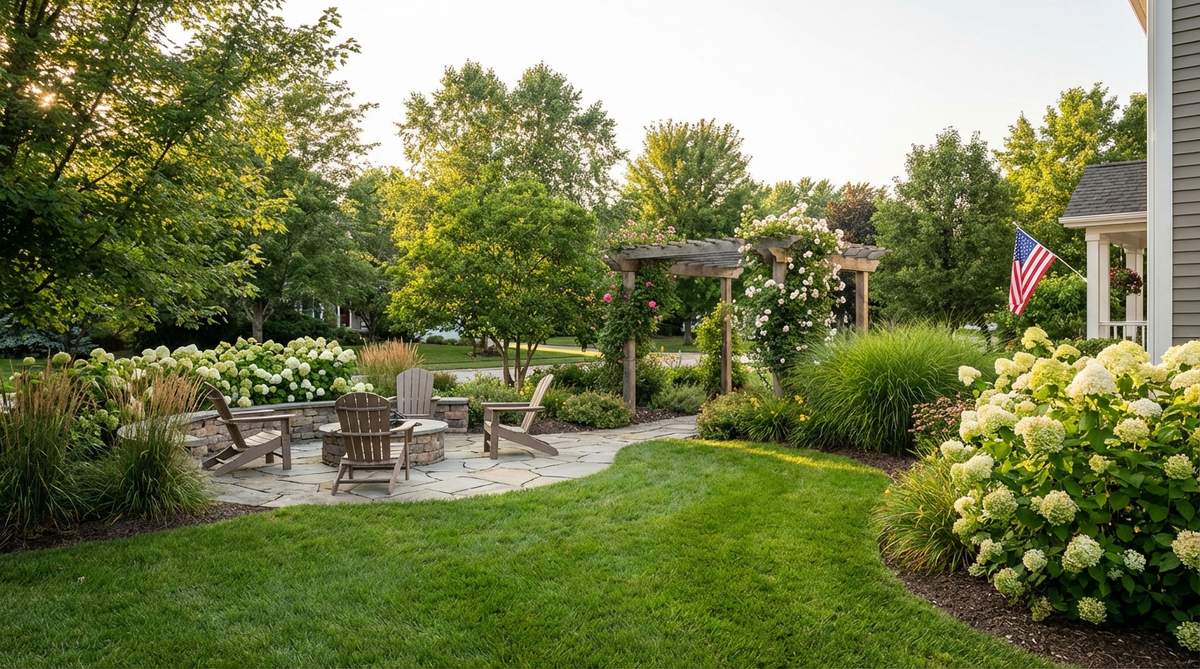
6. Formal Rose Pillars
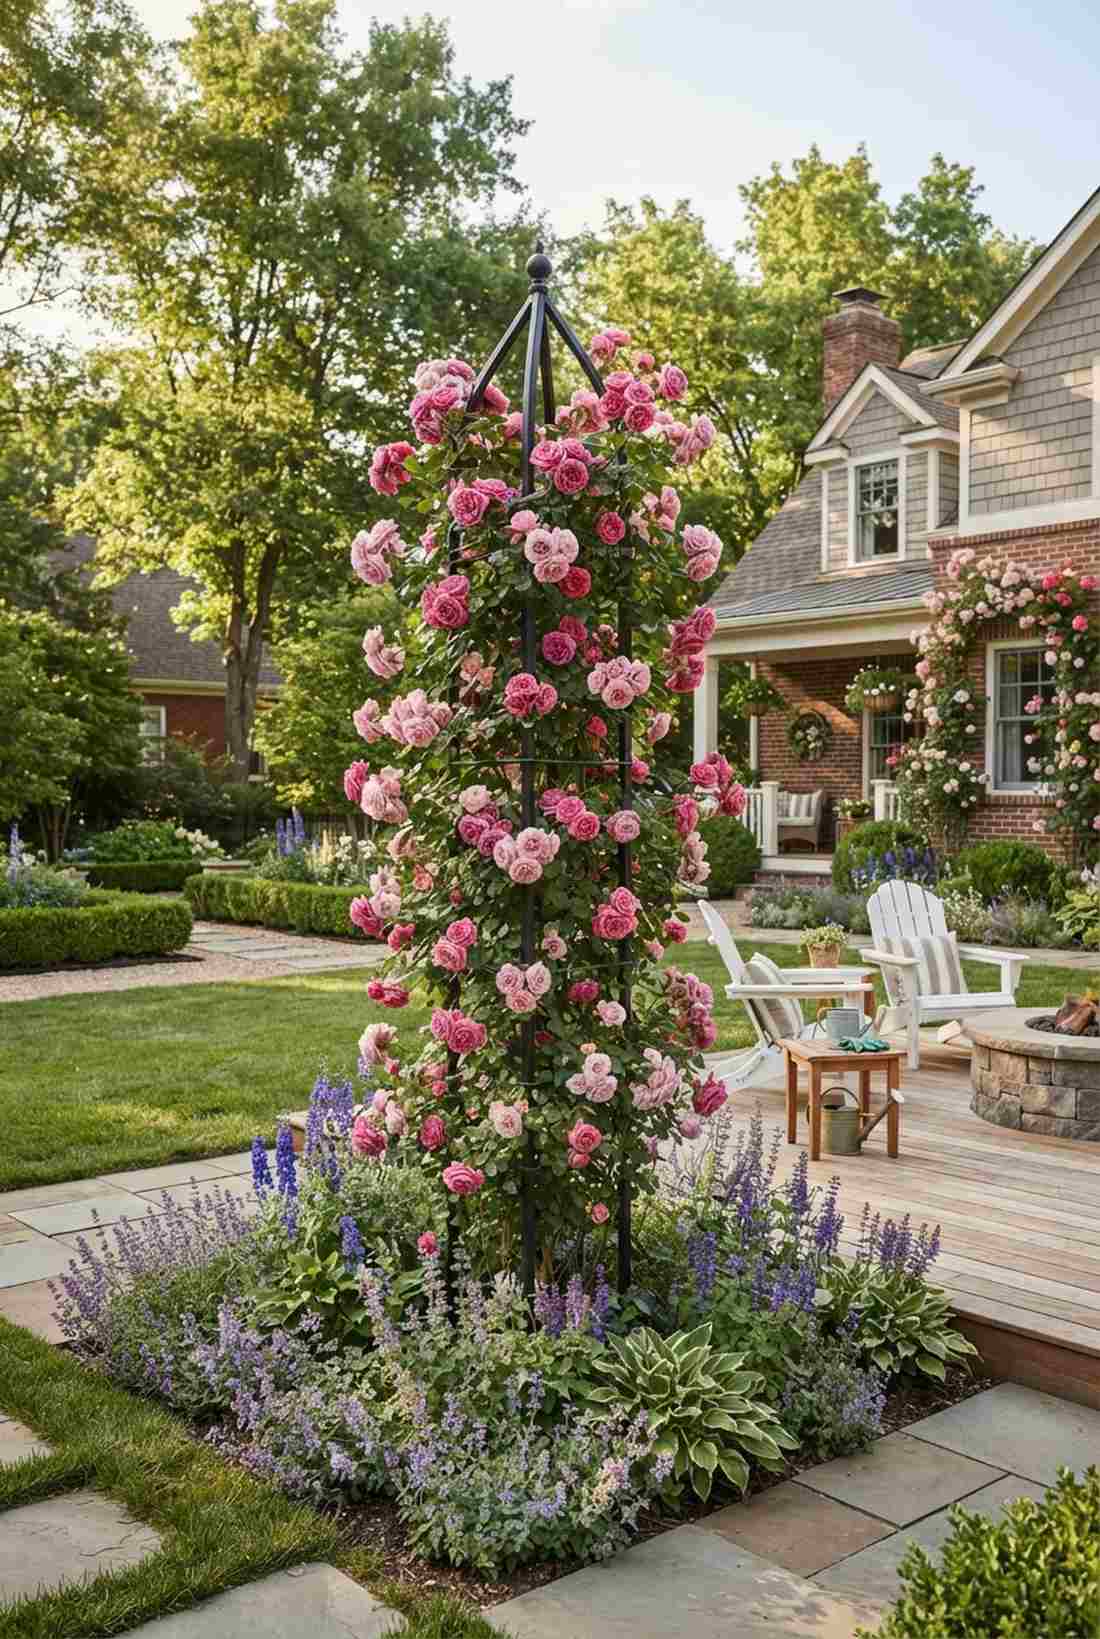
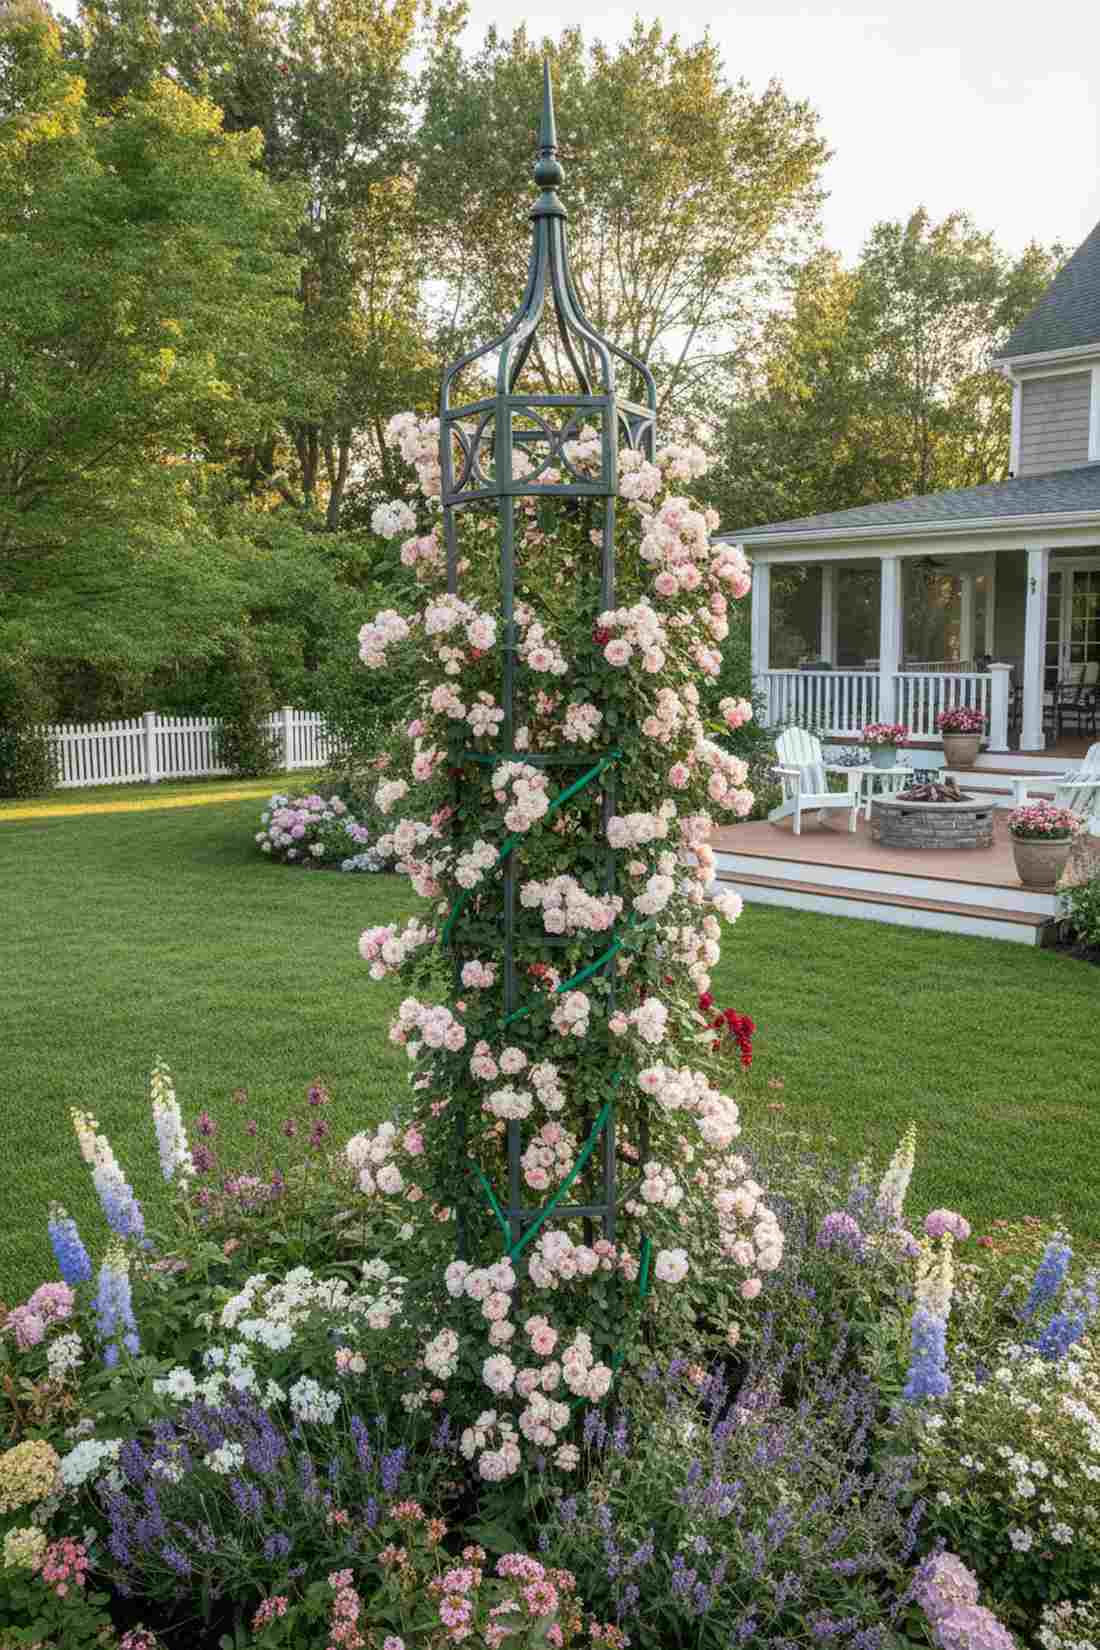
This floral focal point brings a fairy-tale courtyard directly to your backyard. Using an elevated rose obelisk is ideal for injecting vertical color into flat, uninspired flowerbeds.
Cheap plastic trellises snap in the wind, but investing in a solid structure screams custom architecture while supporting heavy blooms. Twining canes horizontally using soft-coated garden wire forces maximum flower production from base to tip.
A heavy-duty setup will run you around $80 to $120. Pin this to your vertical gardening board.
- Key Materials: Steel obelisk, climbing rose variety
- Vibe / Style: Romantic English manor
- Difficulty: Easy installation and training
- Budget Breakdown: Metal Pillar: $80 | Rose/Wire: $40
- Creator’s Tip: Never cut the main leader cane; always wrap it in a spiral to stimulate lateral blooming shoots.
- Smart Sourcing: Powder-coated steel obelisk kits and foam-coated gentle plant ties.
7. Espalier Fruit Trees
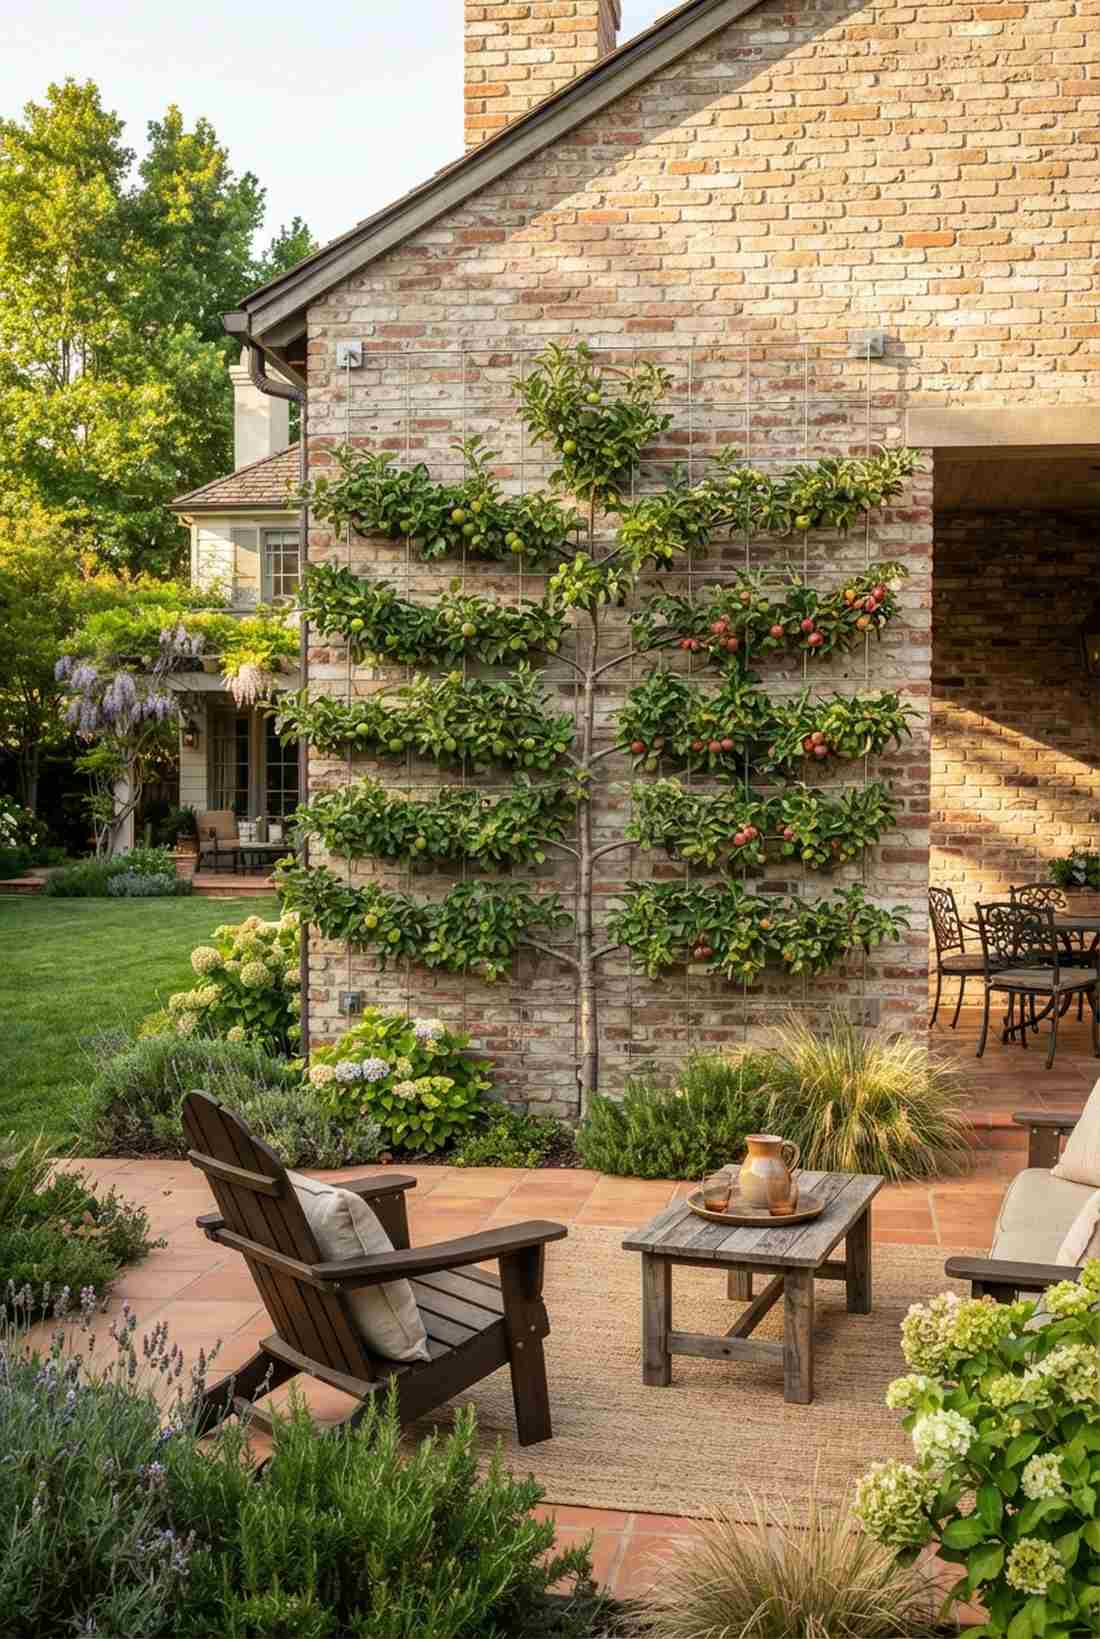
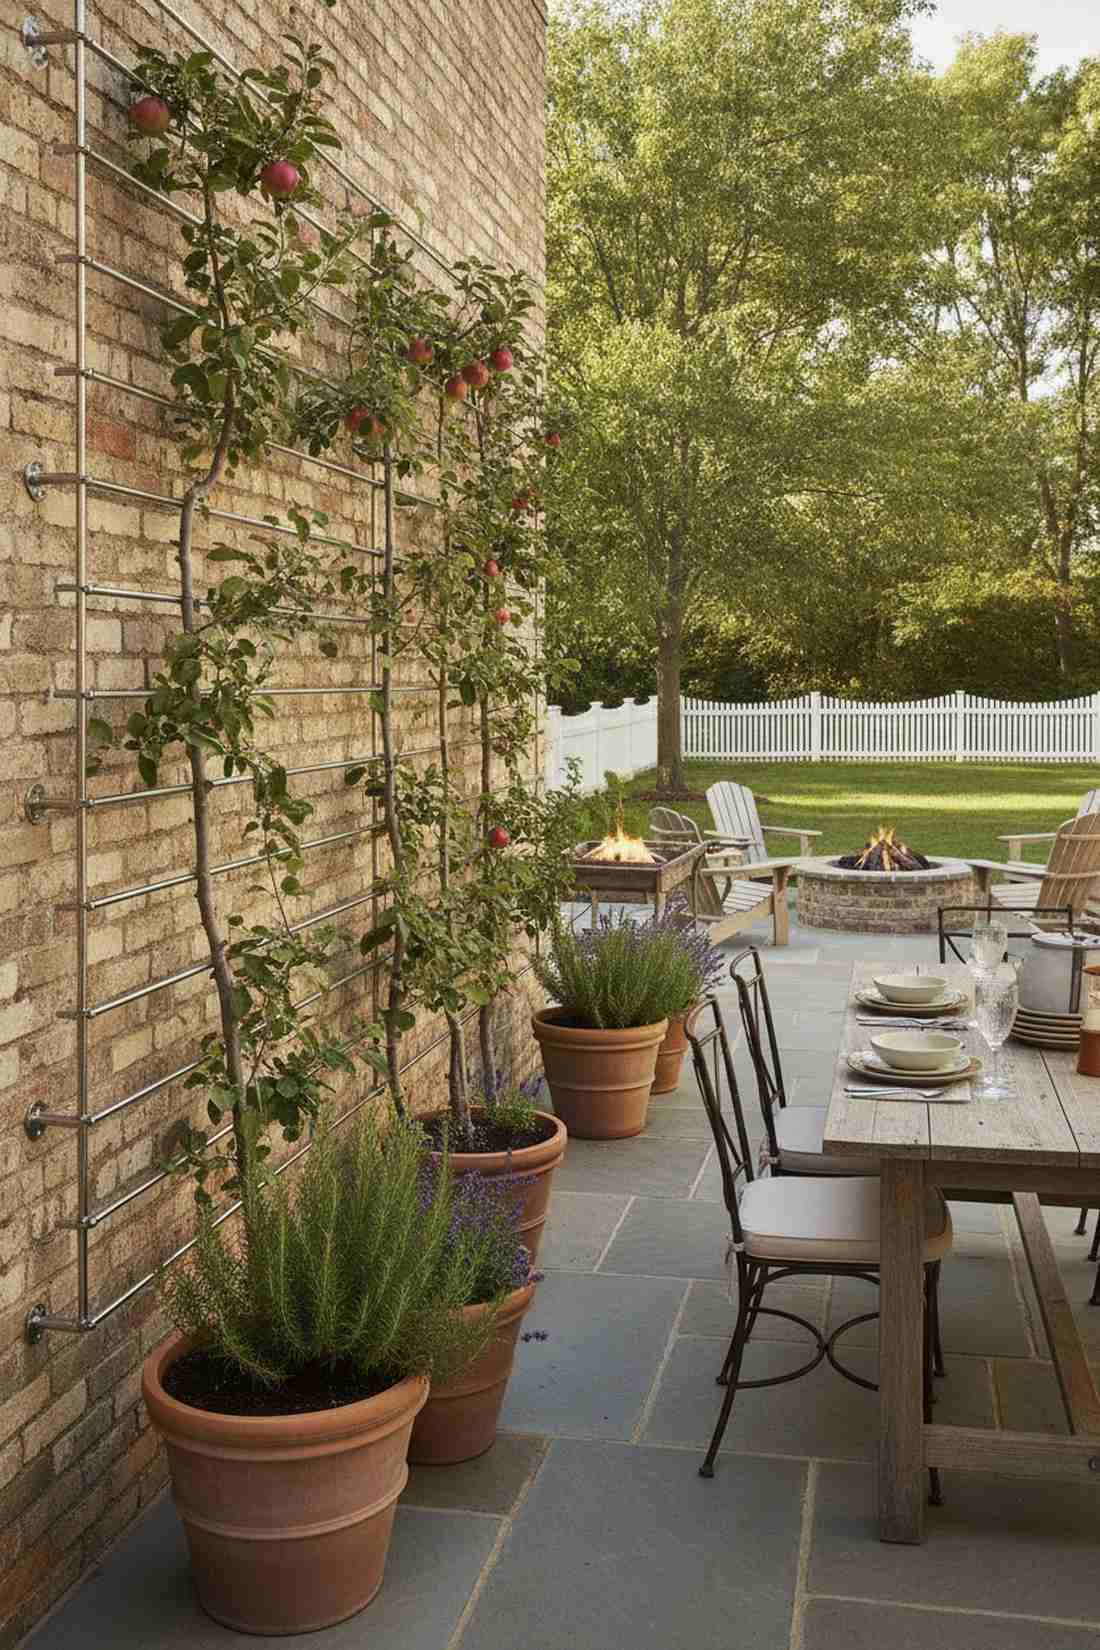
This living wall design feels like a sun-drenched Mediterranean orchard right on your patio. A flat-trained fruit lattice works brilliantly to mask ugly brick walls or barren wooden fences.
Instead of sprawling messy branches, coaxing apples or pears flat against a wire grid outperforms expensive contractor screening quotes. You’ll need a stainless steel masonry wire kit to prevent the grid from sagging under the weight of autumn fruit.
The foundational wire grid costs merely $40 to install. It’s a genius way to blend aesthetics with edibles.
- Key Materials: Dwarf fruit tree, masonry anchors, steel wire
- Vibe / Style: Rustic yet highly controlled elegance
- Difficulty: Strategic ongoing maintenance
- Budget Breakdown: Wire System: $40 | Tree: $60
- Creator’s Tip: Space your horizontal support wires exactly 18 inches apart for optimal light penetration.
- Smart Sourcing: Heavy-duty stainless steel trellis kits and masonry drill bit starter packs.
8. Clipped Sphere Entrance Markers
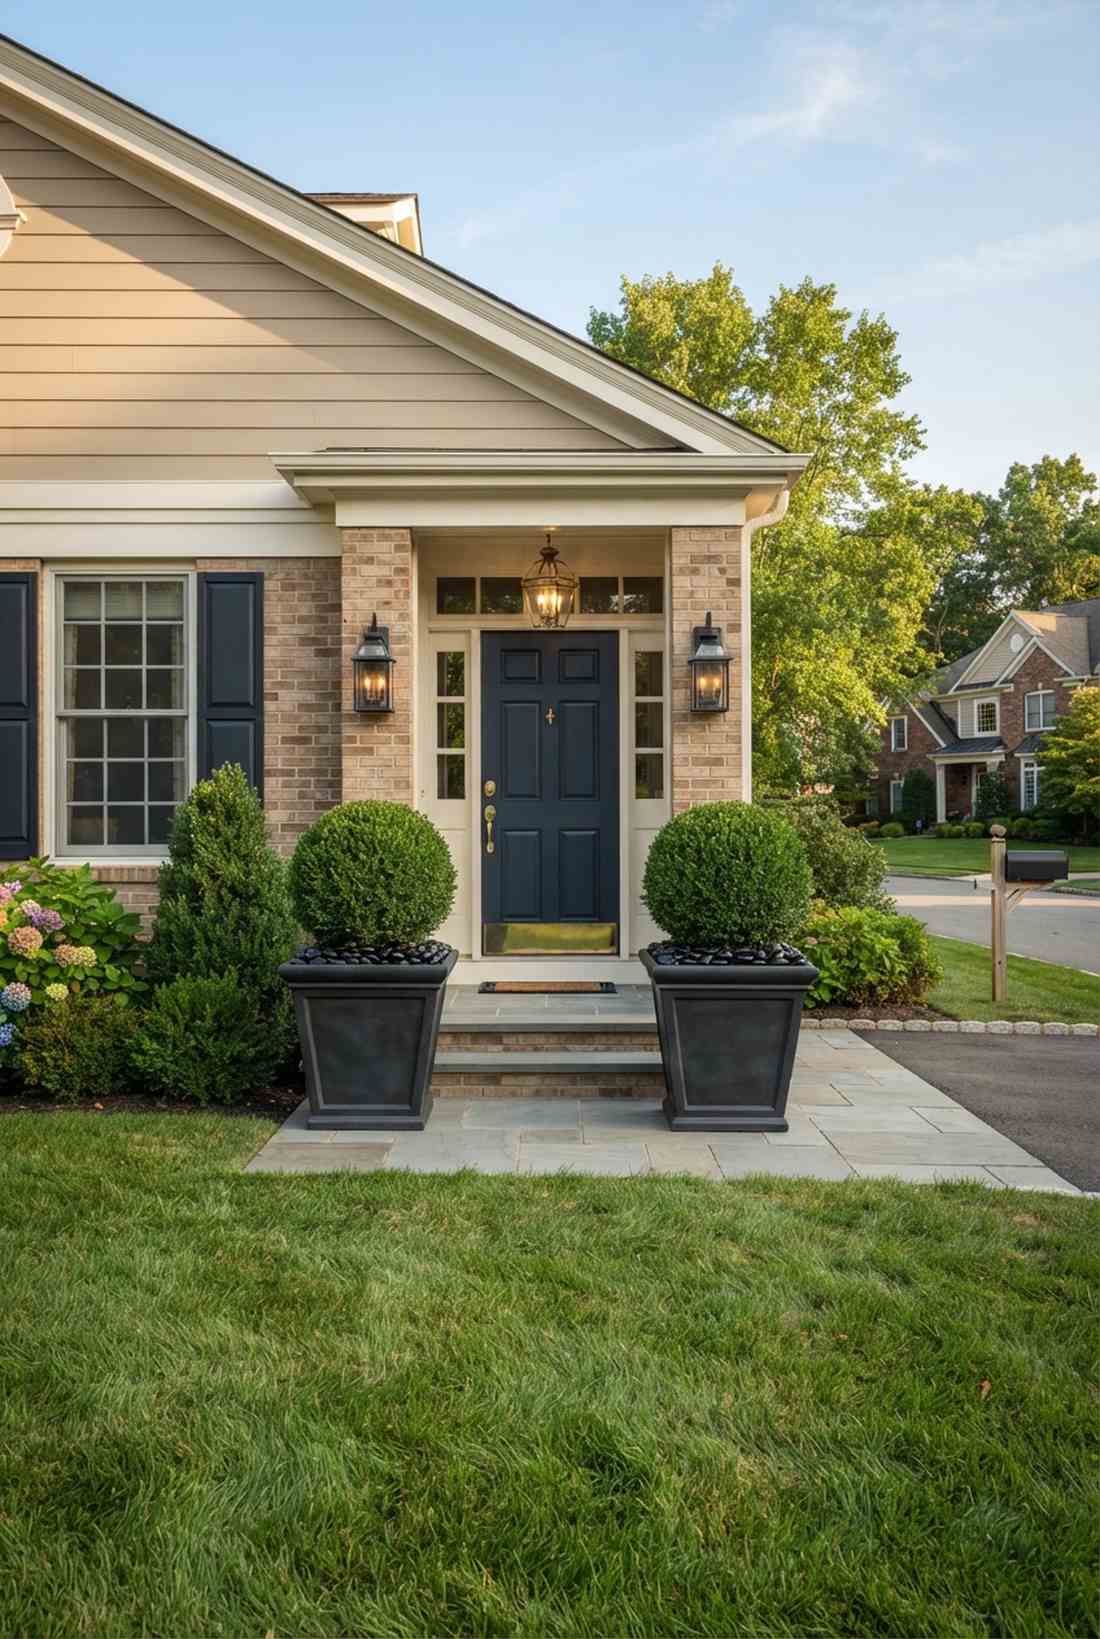
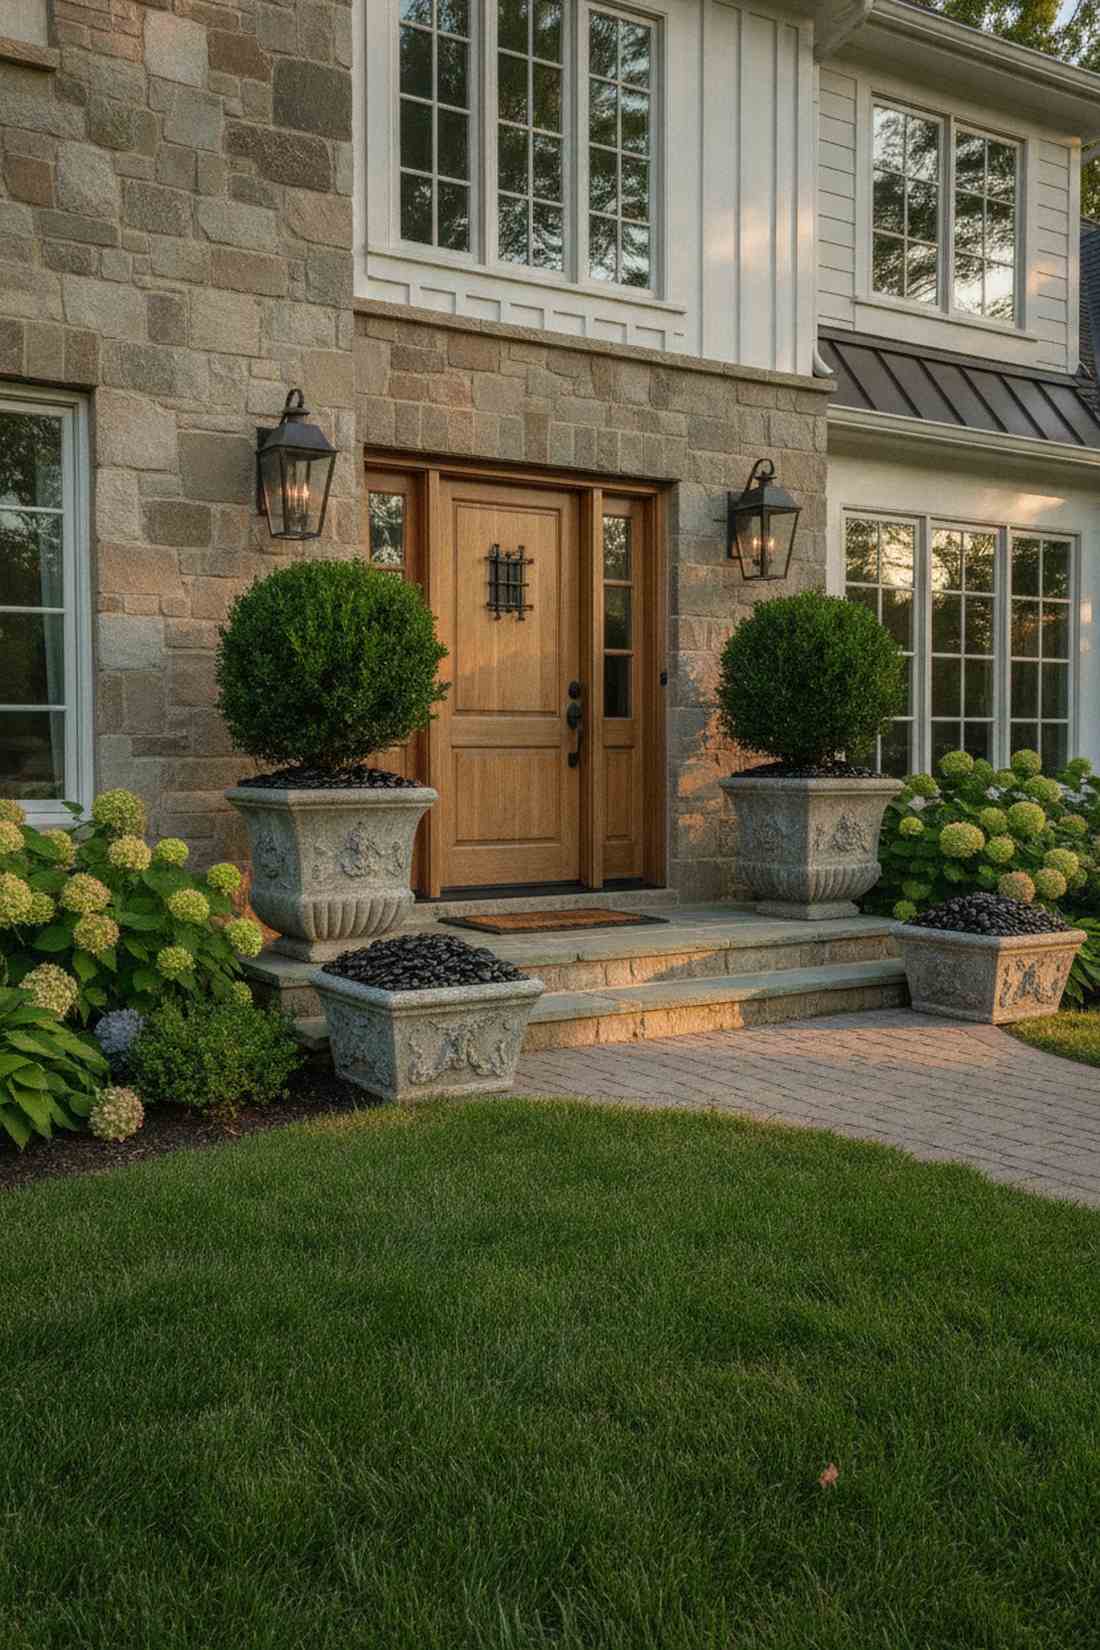
This symmetrical styling instantly makes any home feel like a multimillion-dollar property. Placing a pair of globe-shaped container shrubs is the perfect upgrade for a lackluster front porch.
Many settle for flimsy plastic pots, but dropping your shrubs into heavy cast-stone vessels completely elevates the aesthetic. Incorporate a layer of polished black river rocks over the soil to hide dirt and reflect luxury detailing.
You can recreate this premium entrance for about $150 total. Save this for an instant curb appeal boost!
- Key Materials: Boxwood spheres, premium planters
- Vibe / Style: Refined, symmetrical entrance
- Difficulty: Quick afternoon assembly
- Budget Breakdown: Planters: $100 | Shrubs & Topper: $50
- Creator’s Tip: Rotate your containers 90 degrees every month to ensure the foliage grows evenly on all sides.
- Smart Sourcing: Faux-lead lightweight resin planters and bulk polished river rocks.
9. Tiered Hedge Garden Rooms
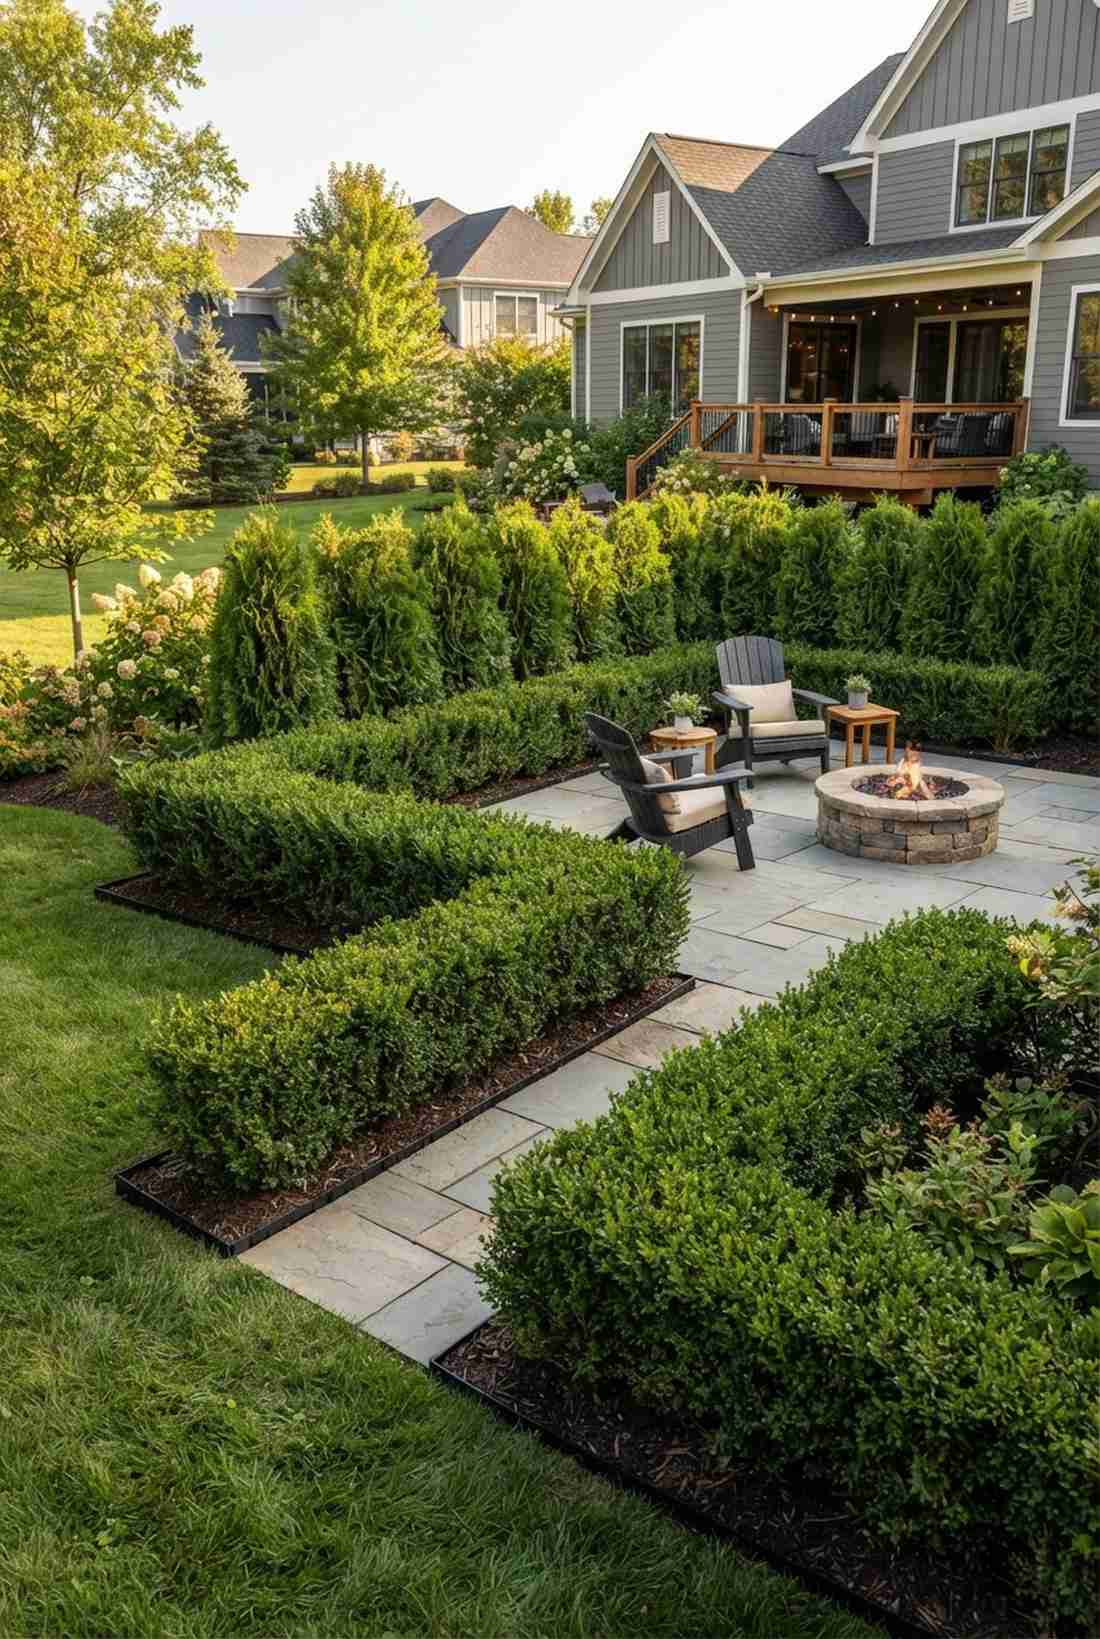
This layered layout feels like a mysterious maze leading to a secret outdoor lounge. Constructing graduated living partitions is excellent for breaking up a boring, flat rectangular yard into usable zones.
Staggering plant heights creates depth that visually expands the space, making the property feel double its actual size. Using commercial-grade root barrier panels between rows prevents aggressive species from choking each other out.
The structural planting costs around $300 for a medium-sized zone. Pin this if you want to partition your backyard like a pro.
- Key Materials: Mixed evergreen species, edging barriers
- Vibe / Style: Structured architectural depth
- Difficulty: Moderate landscaping effort
- Budget Breakdown: Plants: $200 | Root Barriers: $100
- Creator’s Tip: Keep the shortest hedges closest to your primary viewing angle to force perspective.
- Smart Sourcing: Heavy-duty HDPE root barrier rolls and pre-mixed structural planting soil.
💡 Must-Have Supplies for High-End Setups
To build these setups faster and ensure they last, skip the generic craft aisles and invest in the right foundational kits.
- Base & Support: Commercial-grade weed barrier fabrics
- Setup Tools: Precision laser-level starter kits
- Weather/Durability Protection: UV-coated clear protective stone sealants
Elegant Water Features: Bringing Movement and Serenity to Luxury Garden Decor
10. Infinity Edge Swimming Pools
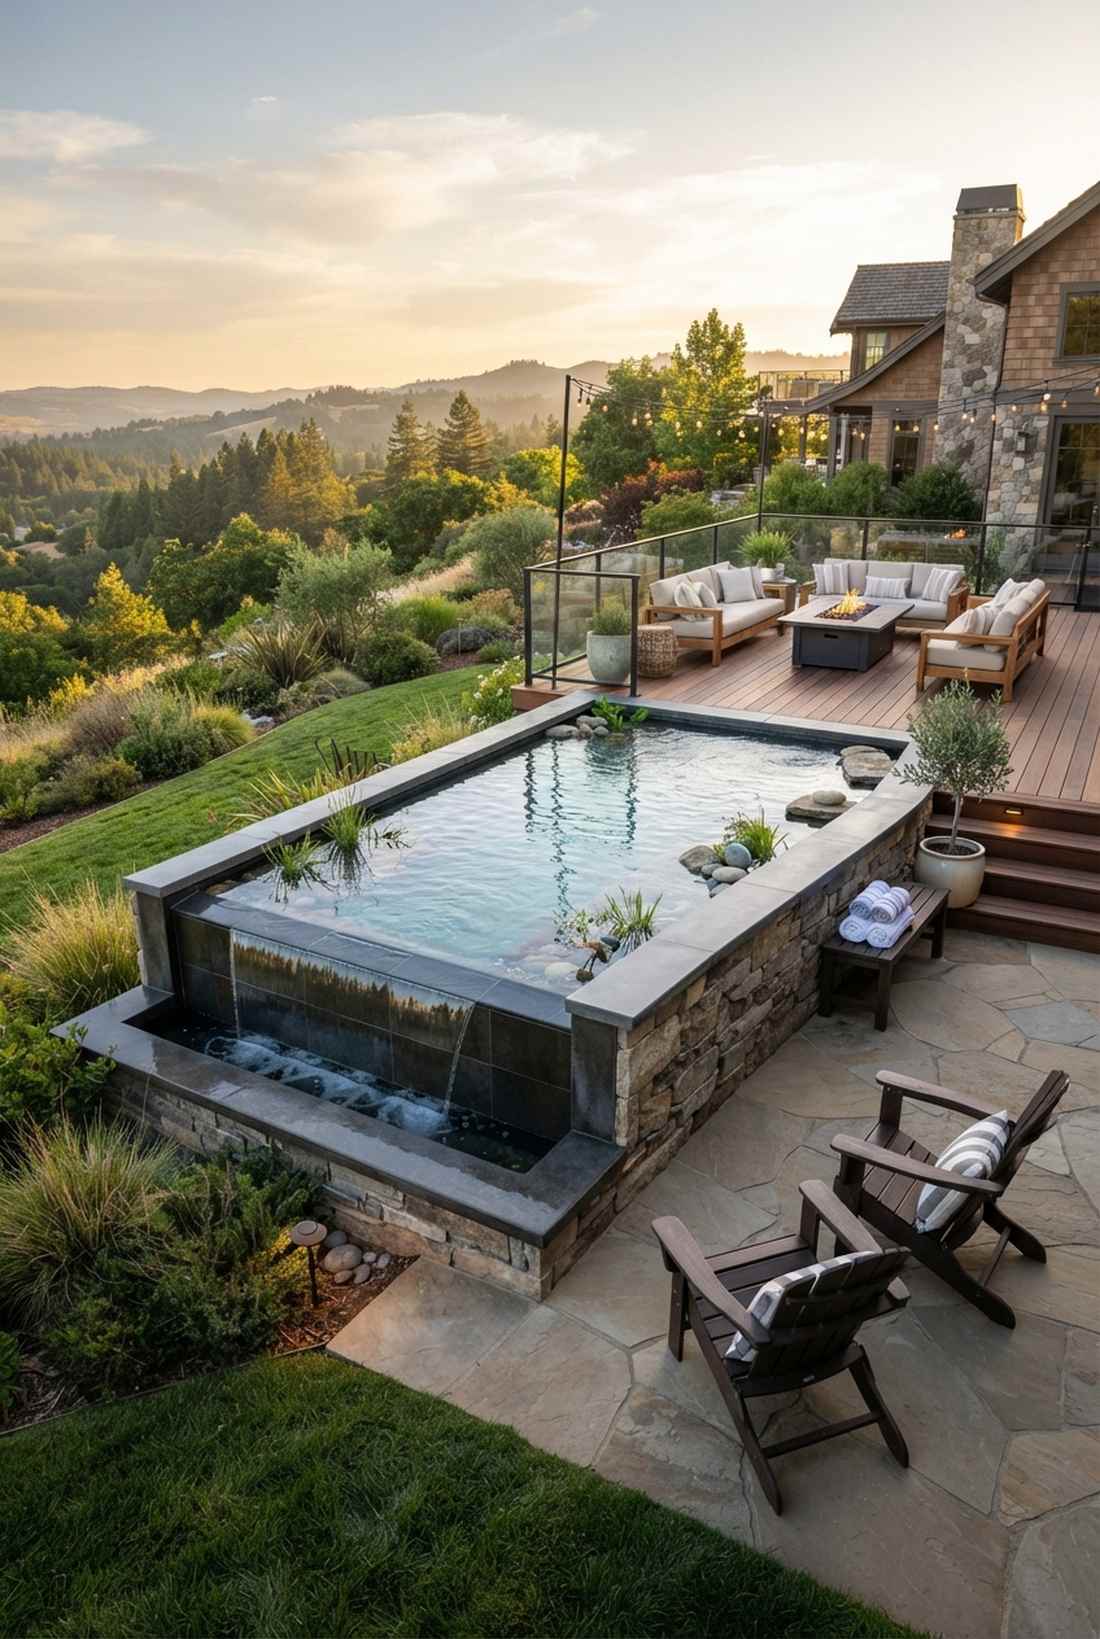

This breathtaking setup feels like your private resort merging seamlessly with the horizon. A vanishing-edge water basin is the absolute pinnacle of luxury for properties with a sweeping hillside view.
While full-scale pools require contractors, clever DIYers are recreating the aesthetic using above-ground vanishing trough systems that scream custom architecture. Employing marine-grade waterproof epoxies ensures the hidden catch basin never leaks under continuous flow.
A smaller scale DIY infinity pond runs about $800. It’s a massive upgrade that redefines your entire property.
- Key Materials: Catch basin, high-capacity pump
- Vibe / Style: Five-star resort luxury
- Difficulty: Advanced plumbing and leveling
- Budget Breakdown: Pump System: $400 | Basin & Sealant: $400
- Creator’s Tip: The overflow edge must be laser-leveled to a tolerance of 1/16th of an inch for the sheet effect to work.
- Smart Sourcing: Heavy-duty submersible pond pumps and marine-grade clear epoxy kits.
11. Formal Reflecting Pools
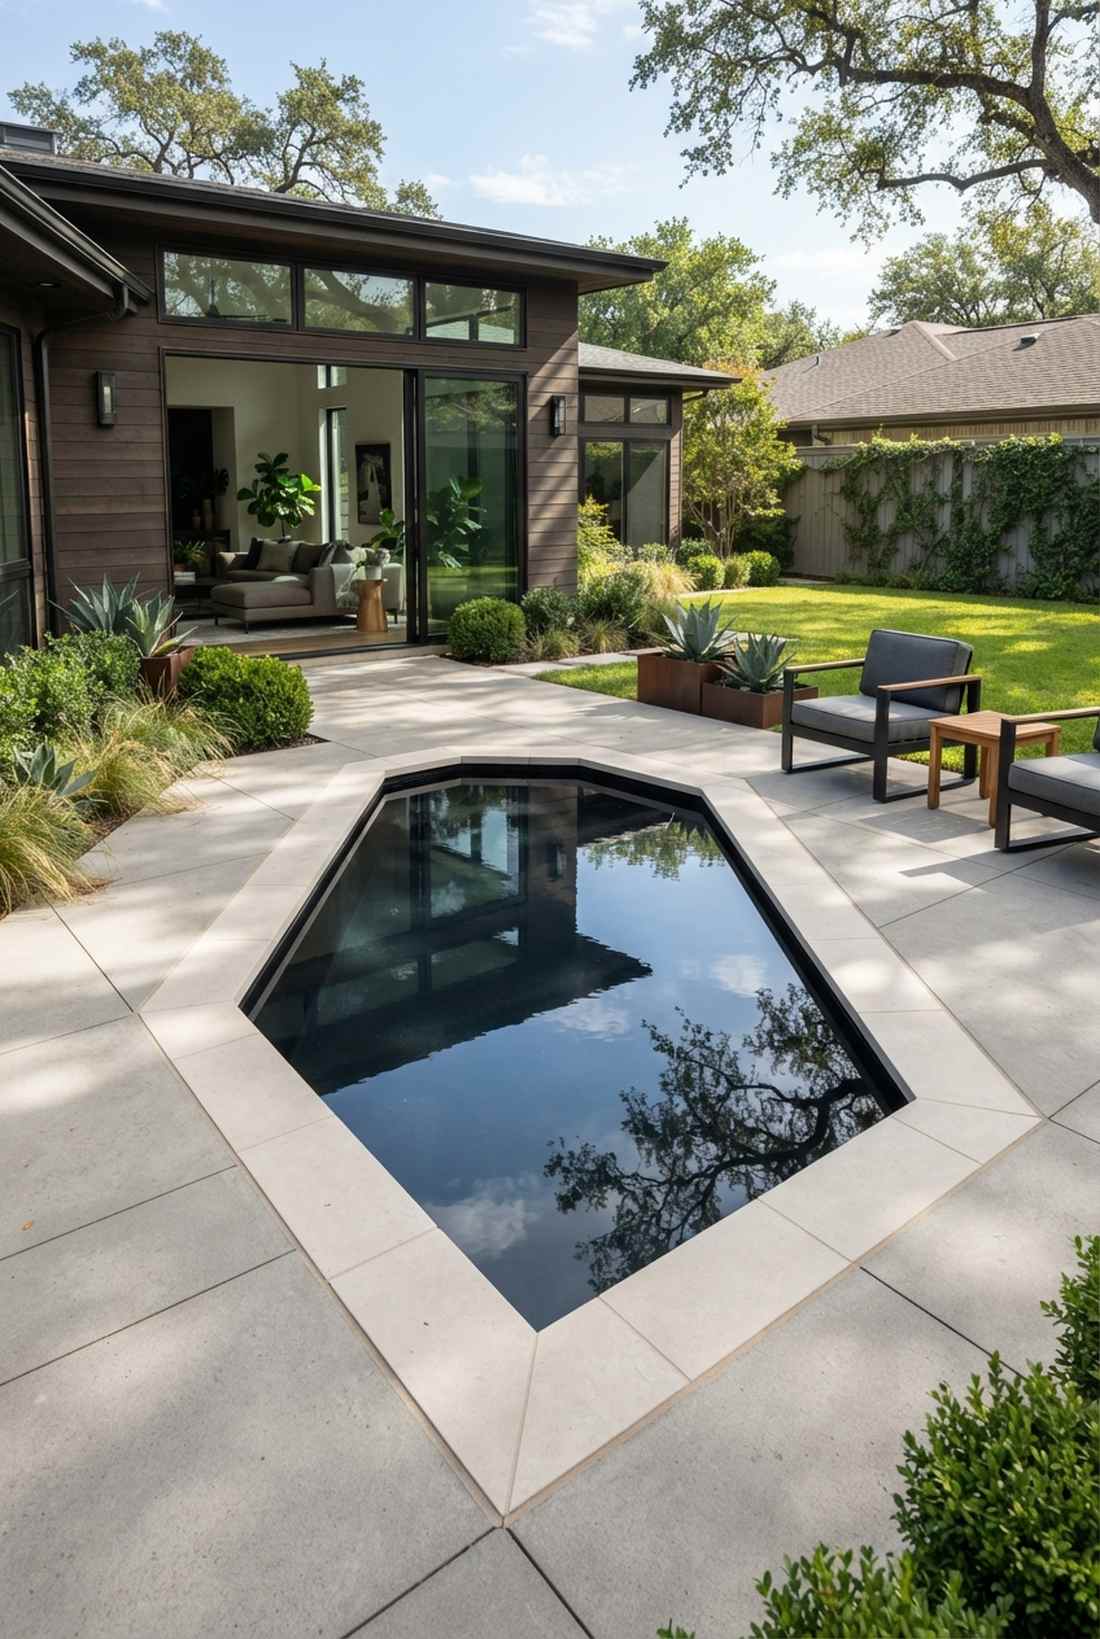
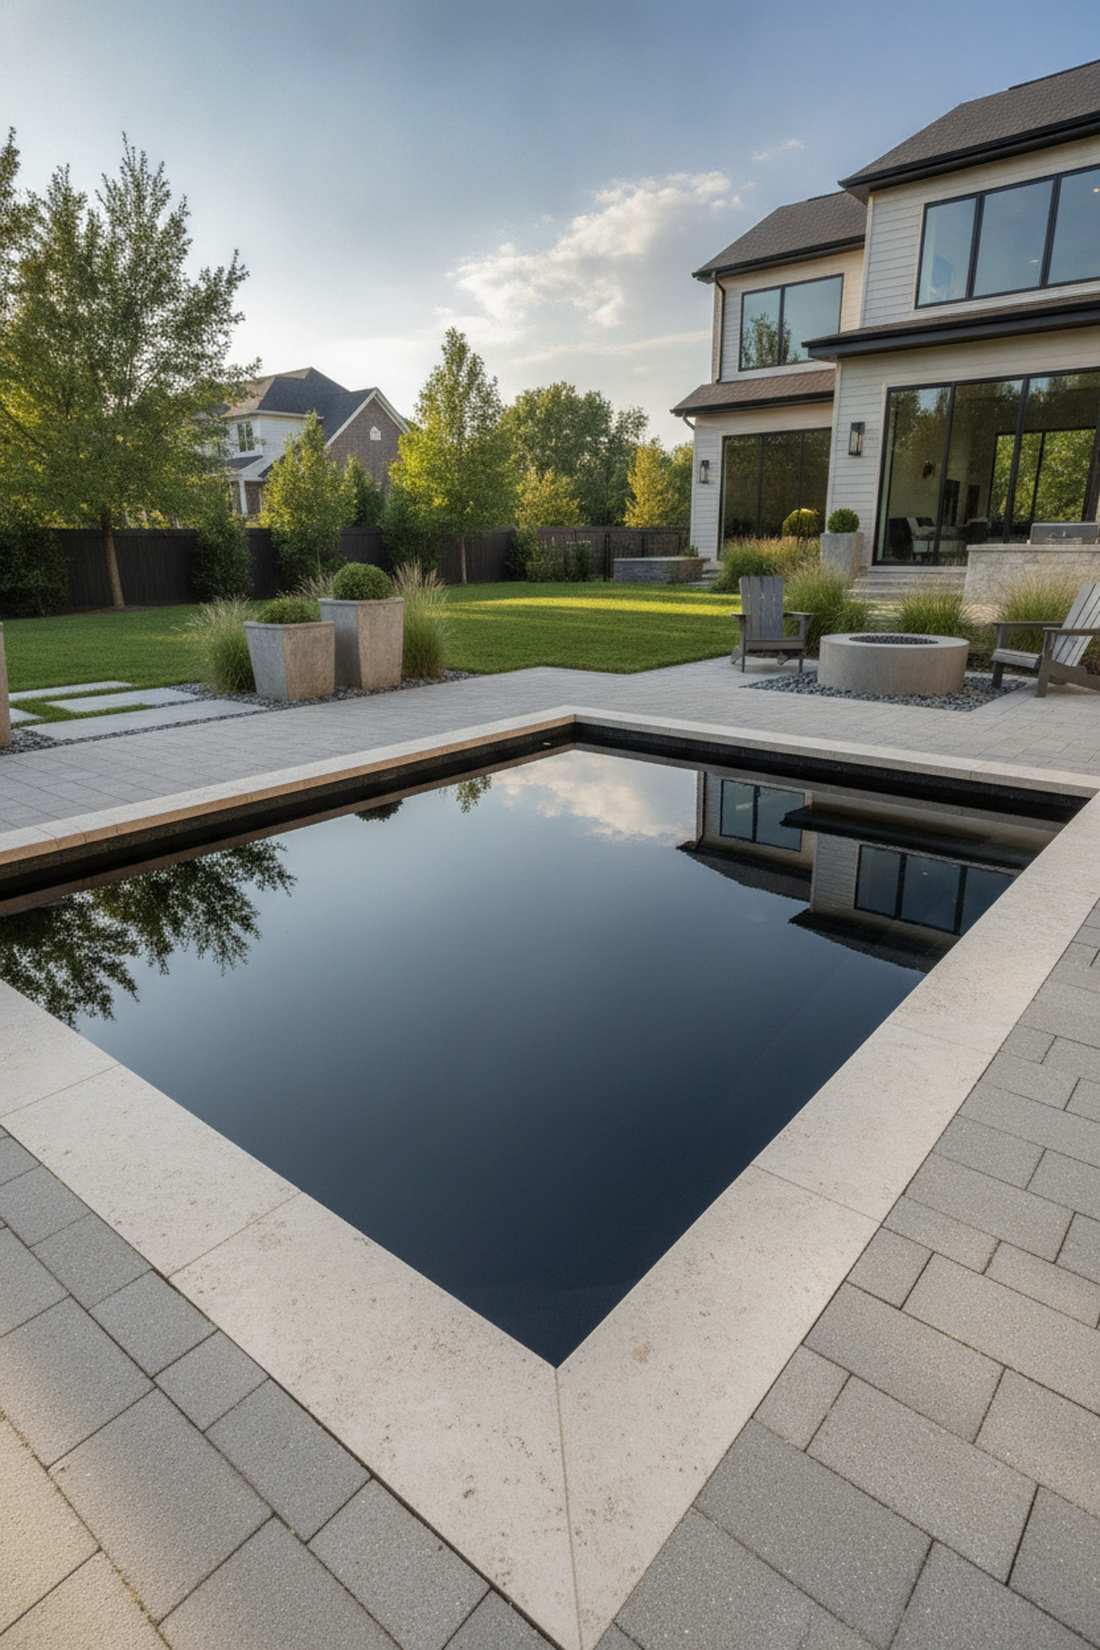
Staring into this water feature feels like peering into a dark, mirror-like void of total tranquility. A shallow geometric mirror pond works exceptionally well to anchor the center of a paved courtyard.
Instead of expensive tiling, painting the interior pitch black gives a designer-level finish that maximizes sharp sky reflections. Securing the edges with pre-cut limestone coping tiles hides the liner and delivers structural elegance.
You can build a stunning 4×8 reflecting pool for around $300. Save this to your modern outdoor architecture board!
- Key Materials: Pond liner, black pond dye/paint, stone coping
- Vibe / Style: Minimalist contemporary peace
- Difficulty: Moderate excavation project
- Budget Breakdown: Liner/Dye: $100 | Coping Stone: $200
- Creator’s Tip: Keep the water depth strictly under 8 inches to minimize ripples and enhance the mirror effect.
- Smart Sourcing: UV-resistant black pond dye and reinforced EPDM rubber liners.
12. Three-Tier Fountain Centerpieces
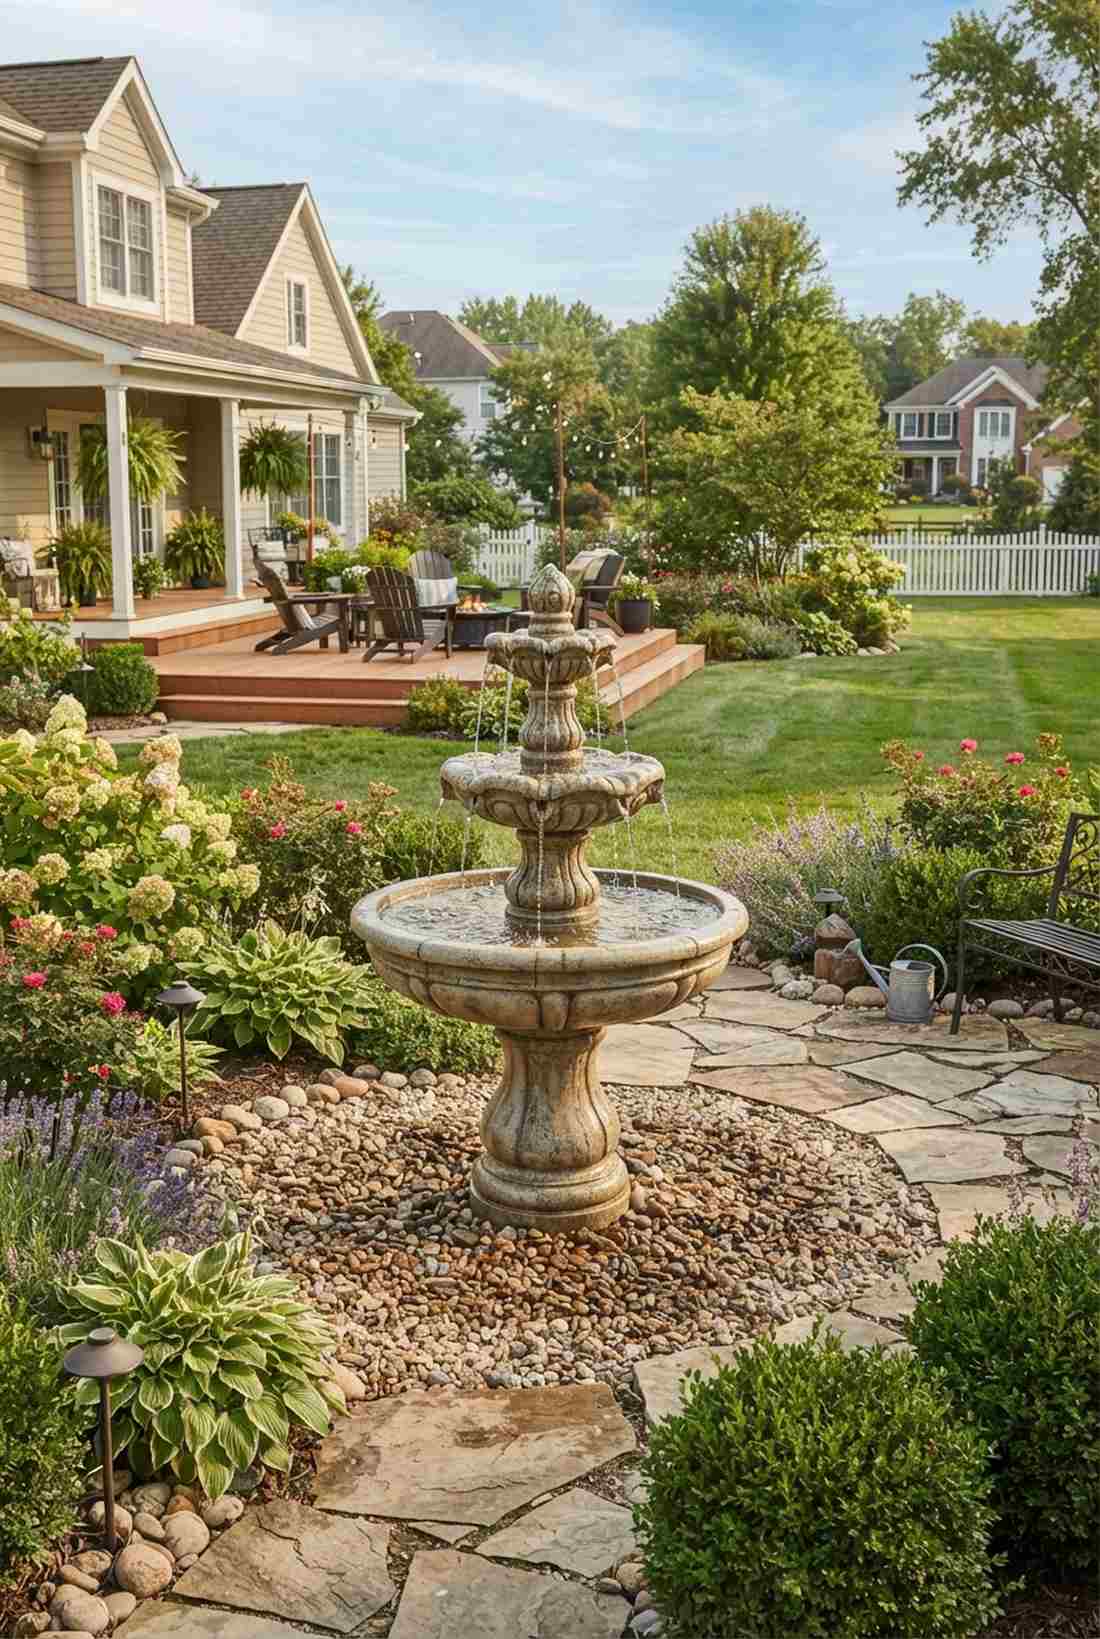
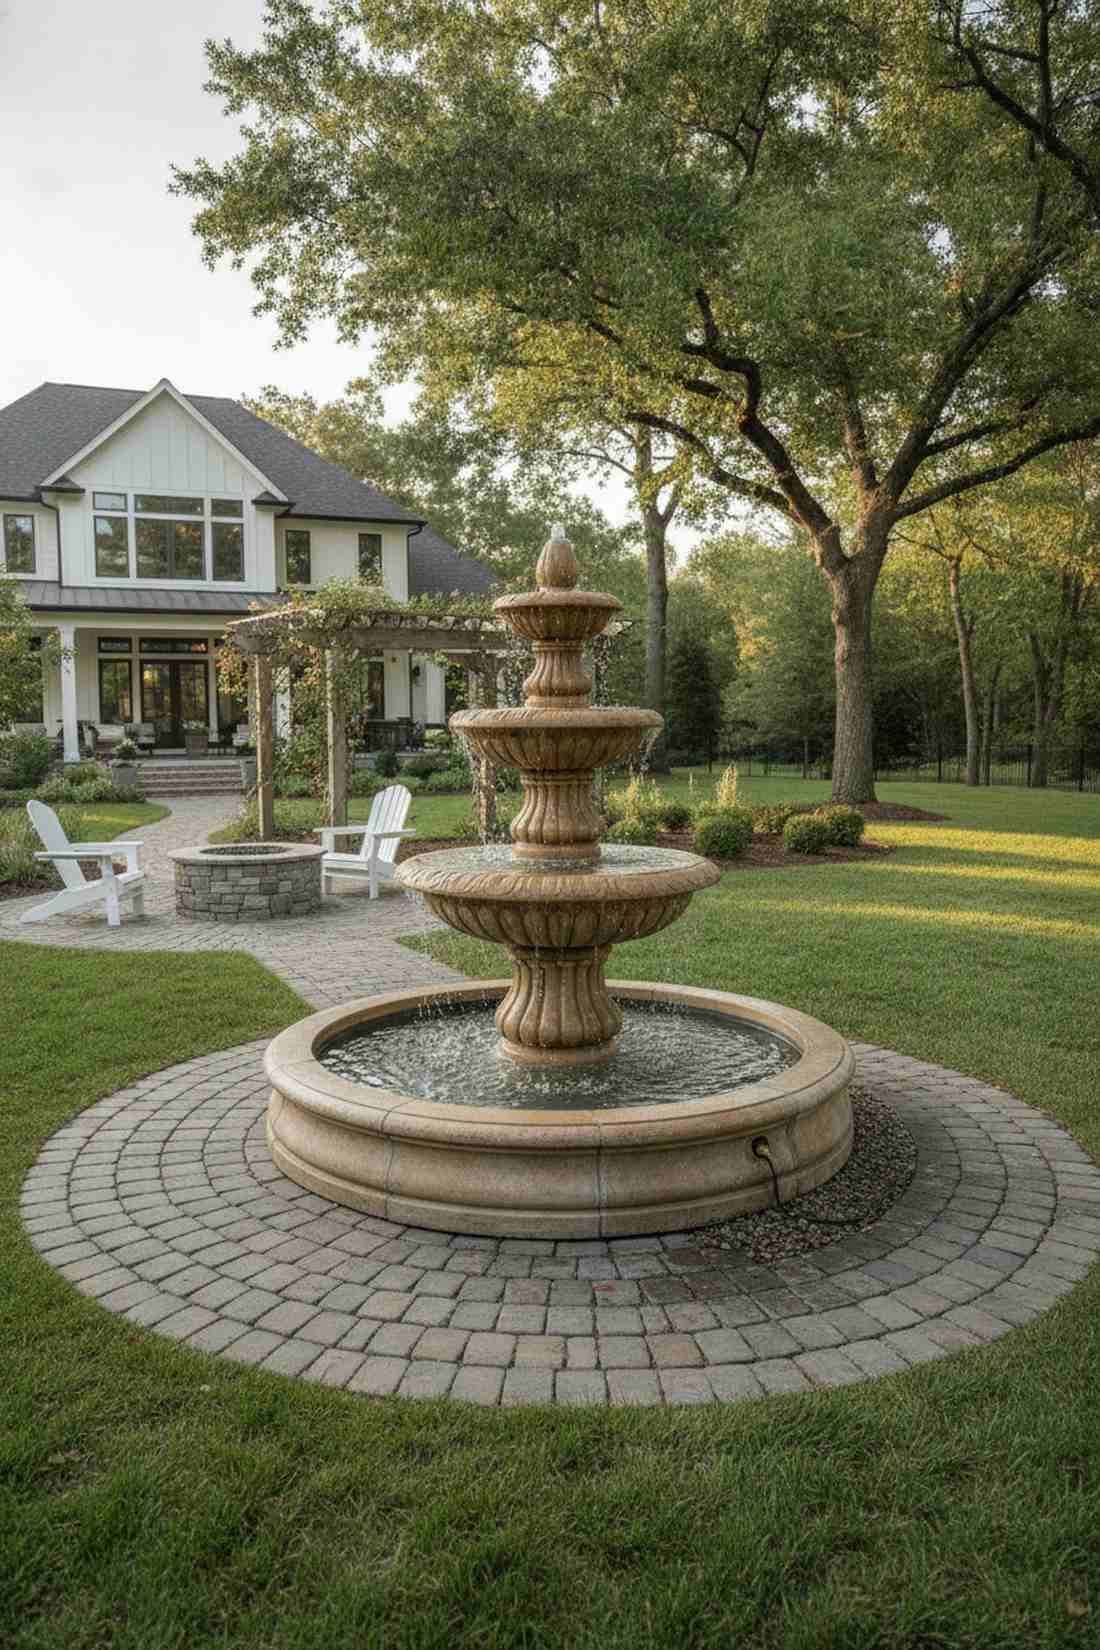

This cascading focal point feels like a historic Italian piazza brought straight to your lawn. A classic tiered stone fountain is perfect for drowning out annoying street traffic with soothing acoustics.
Many homeowners overpay for massive cast stone, but modern fiberglass-reinforced alternatives deliver a surprisingly premium look at a fraction of the weight. Utilizing an auto-fill float valve kit ensures the pump never runs dry during hot summer weeks.
A high-quality composite setup costs roughly $400. Pin this if you need elegant noise cancellation!
- Key Materials: Tiered fountain unit, recirculating pump
- Vibe / Style: Classical Mediterranean grandeur
- Difficulty: Easy plug-and-play assembly
- Budget Breakdown: Fountain Kit: $350 | Auto-fill Valve: $50
- Creator’s Tip: Bury the electrical cord inside a PVC pipe under the gravel to keep the look completely wireless and clean.
- Smart Sourcing: Lightweight resin fountain kits and brass automatic float valves.
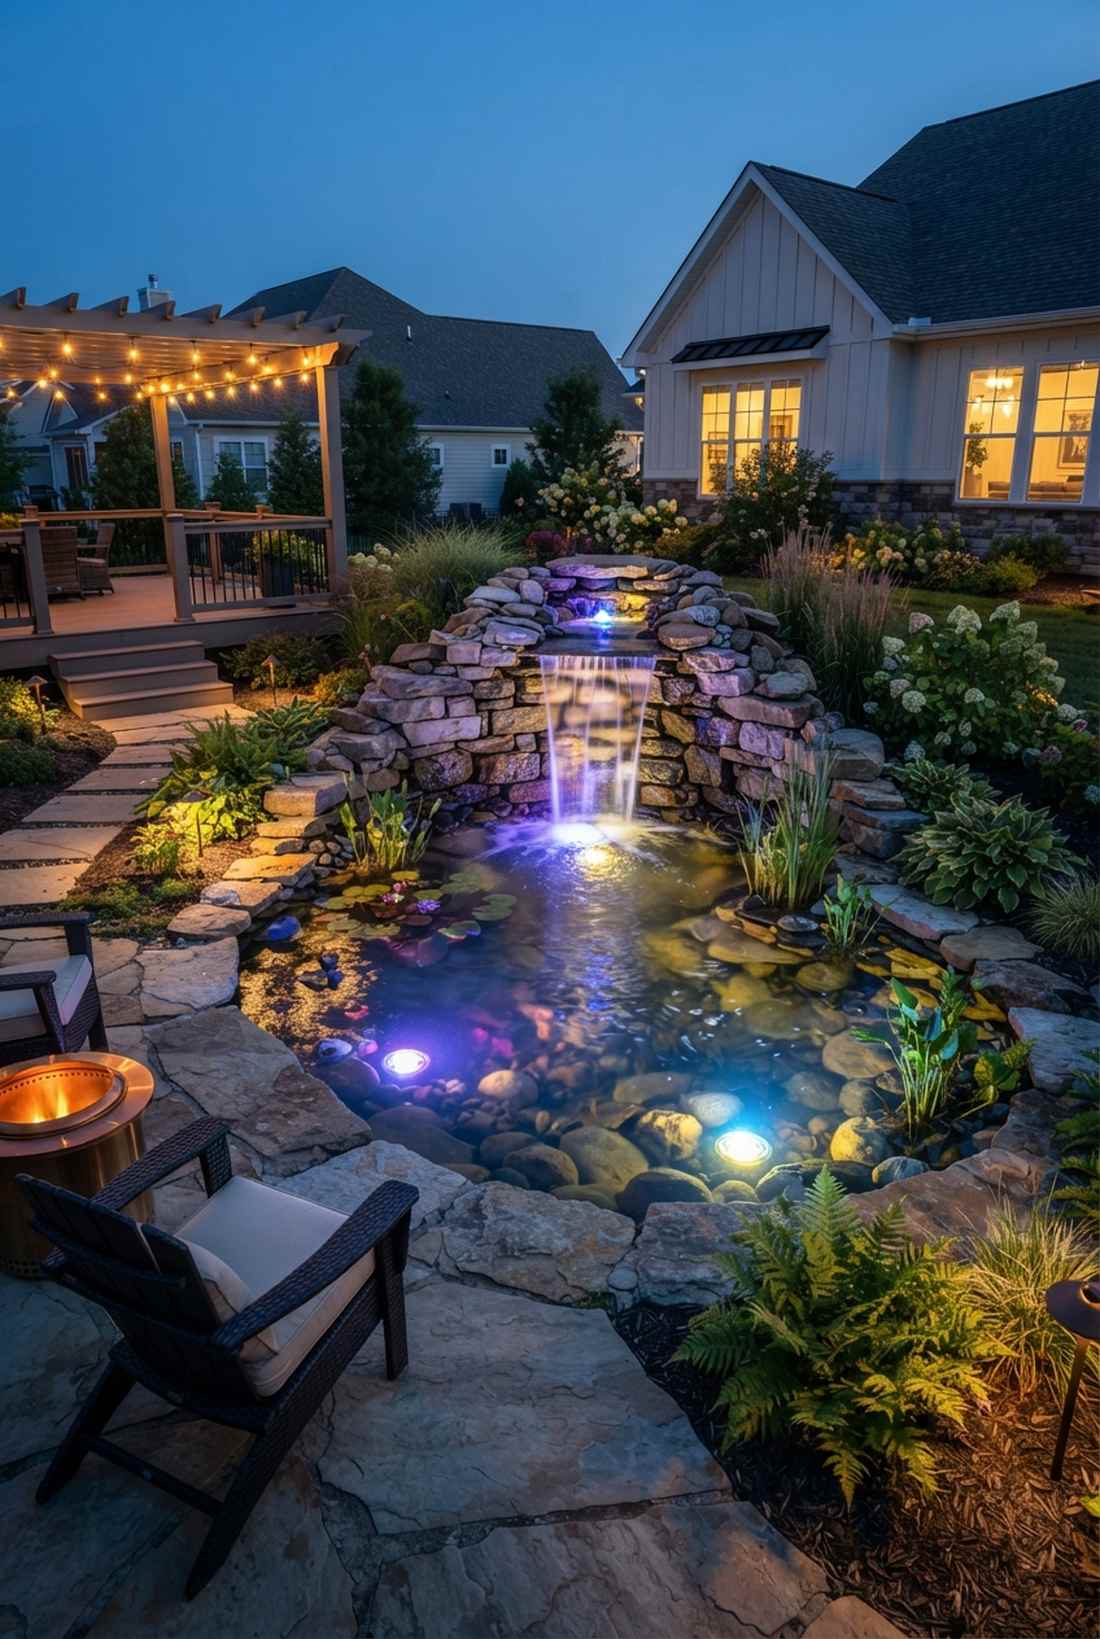
13. Natural Boulder Waterfalls
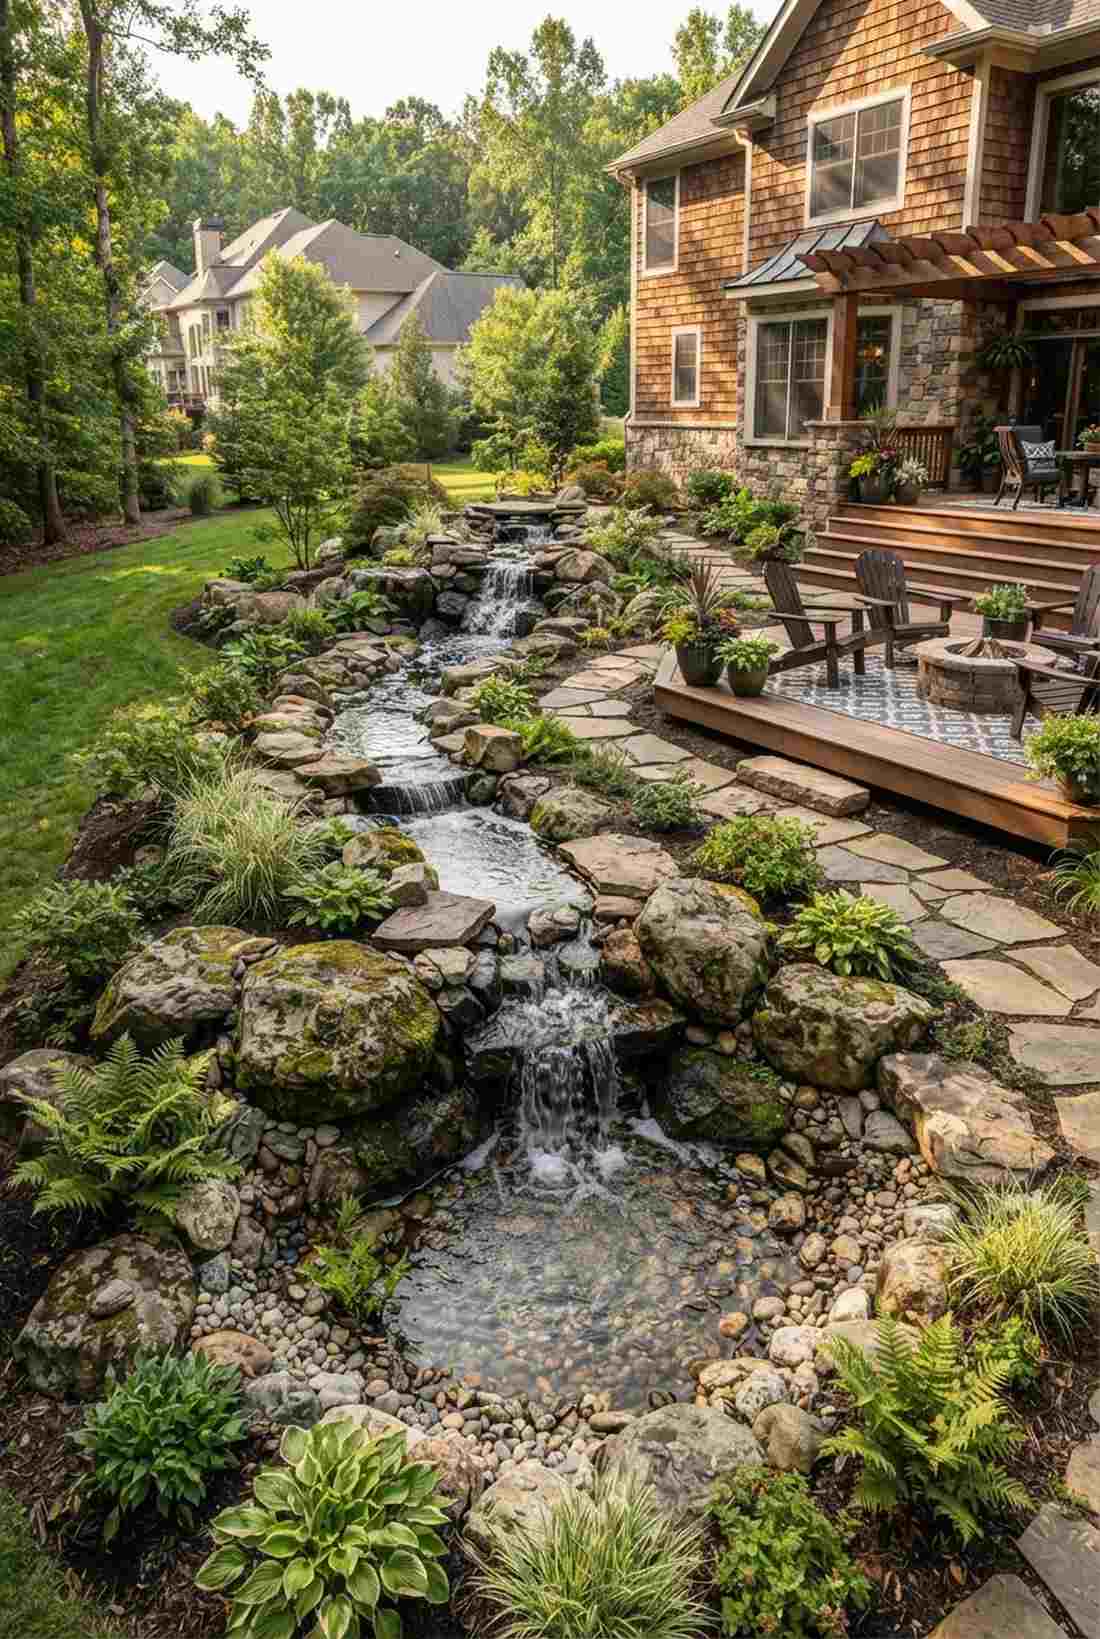
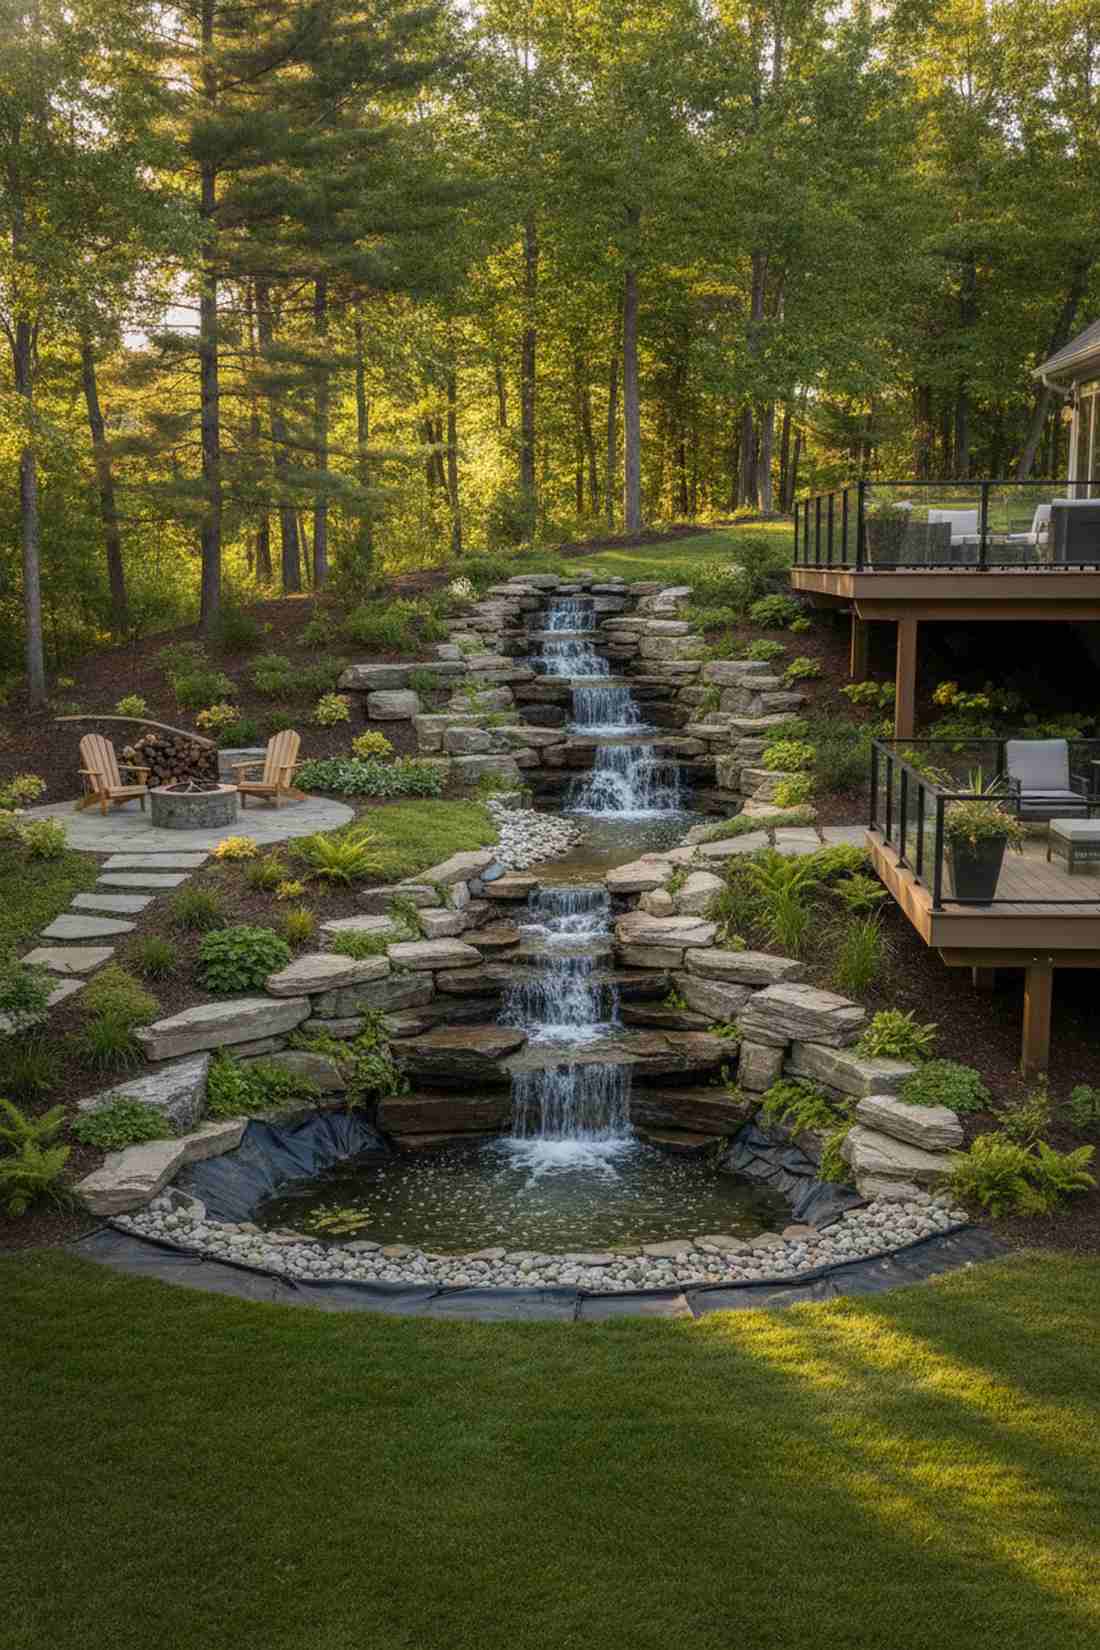
Listening to this setup feels like you’ve hiked into a private, pristine mountain lagoon. A cascading rock stream is the best way to utilize a sloped backyard that is otherwise hard to mow.
Piling random rocks looks messy, but interlocking flat spillway stones achieves a high-end naturalistic flow. Sealing the gaps behind the rocks with black expanding waterfall foam forces water over the stones instead of losing it underneath.
Building a basic 10-foot cascade will cost around $500. It transforms an awkward hill into a masterpiece.
- Key Materials: Spillway boulders, pond liner, waterfall foam
- Vibe / Style: Rugged wilderness oasis
- Difficulty: Heavy lifting required
- Budget Breakdown: Pump/Liner: $300 | Foam & Rocks: $200
- Creator’s Tip: Always step your waterfall drops in odd numbers (1, 3, or 5 cascades) for the most natural visual rhythm.
- Smart Sourcing: Black expanding waterfall foam (bulk pack) and heavy-duty pond underlayment fabric.
14. Sleek Water Blade Features

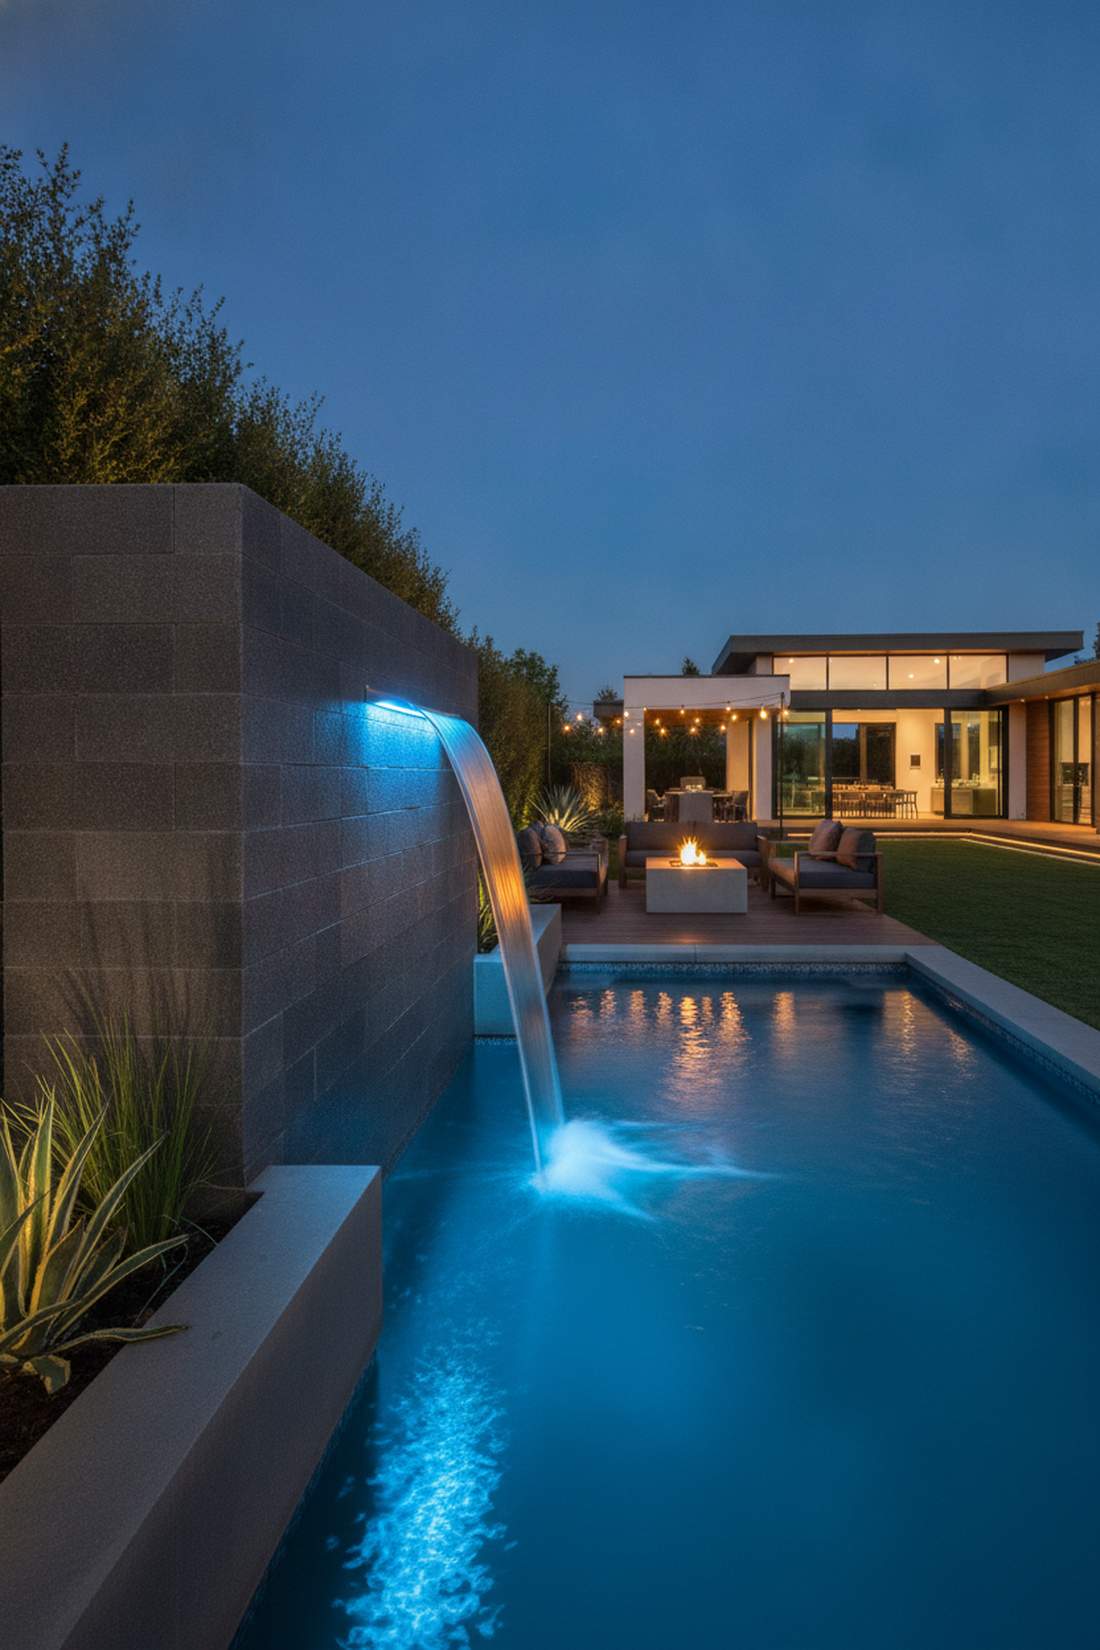
This ultra-modern installation feels like a high-tech art gallery exhibit. Integrating an acrylic sheer descent spillway works flawlessly to add motion to a blank retaining wall or pool edge.
Exposed plumbing ruins the sleek aesthetic, so concealing the blade within the masonry looks far more expensive than it is. Pairing the spillway with waterproof LED strip lighting makes the transparent water sheet glow dramatically at night.
You can retrofit a retaining wall with this feature for roughly $250. Save this to your contemporary landscape board.
- Key Materials: Stainless/acrylic spillway, masonry blocks
- Vibe / Style: Sleek architectural modernity
- Difficulty: Moderate blockwork integration
- Budget Breakdown: Spillway Blade: $150 | LED Kit & Tubing: $100
- Creator’s Tip: Plumb a ball valve directly behind the spillway so you can micro-adjust the water sheet’s thickness.
- Smart Sourcing: Acrylic sheer descent spillway kits and waterproof submersible LED strips.
This next setup is ridiculously cheap but looks like a $1,000 custom display when the sun goes down…
15. Koi Ponds with Natural Stone Borders
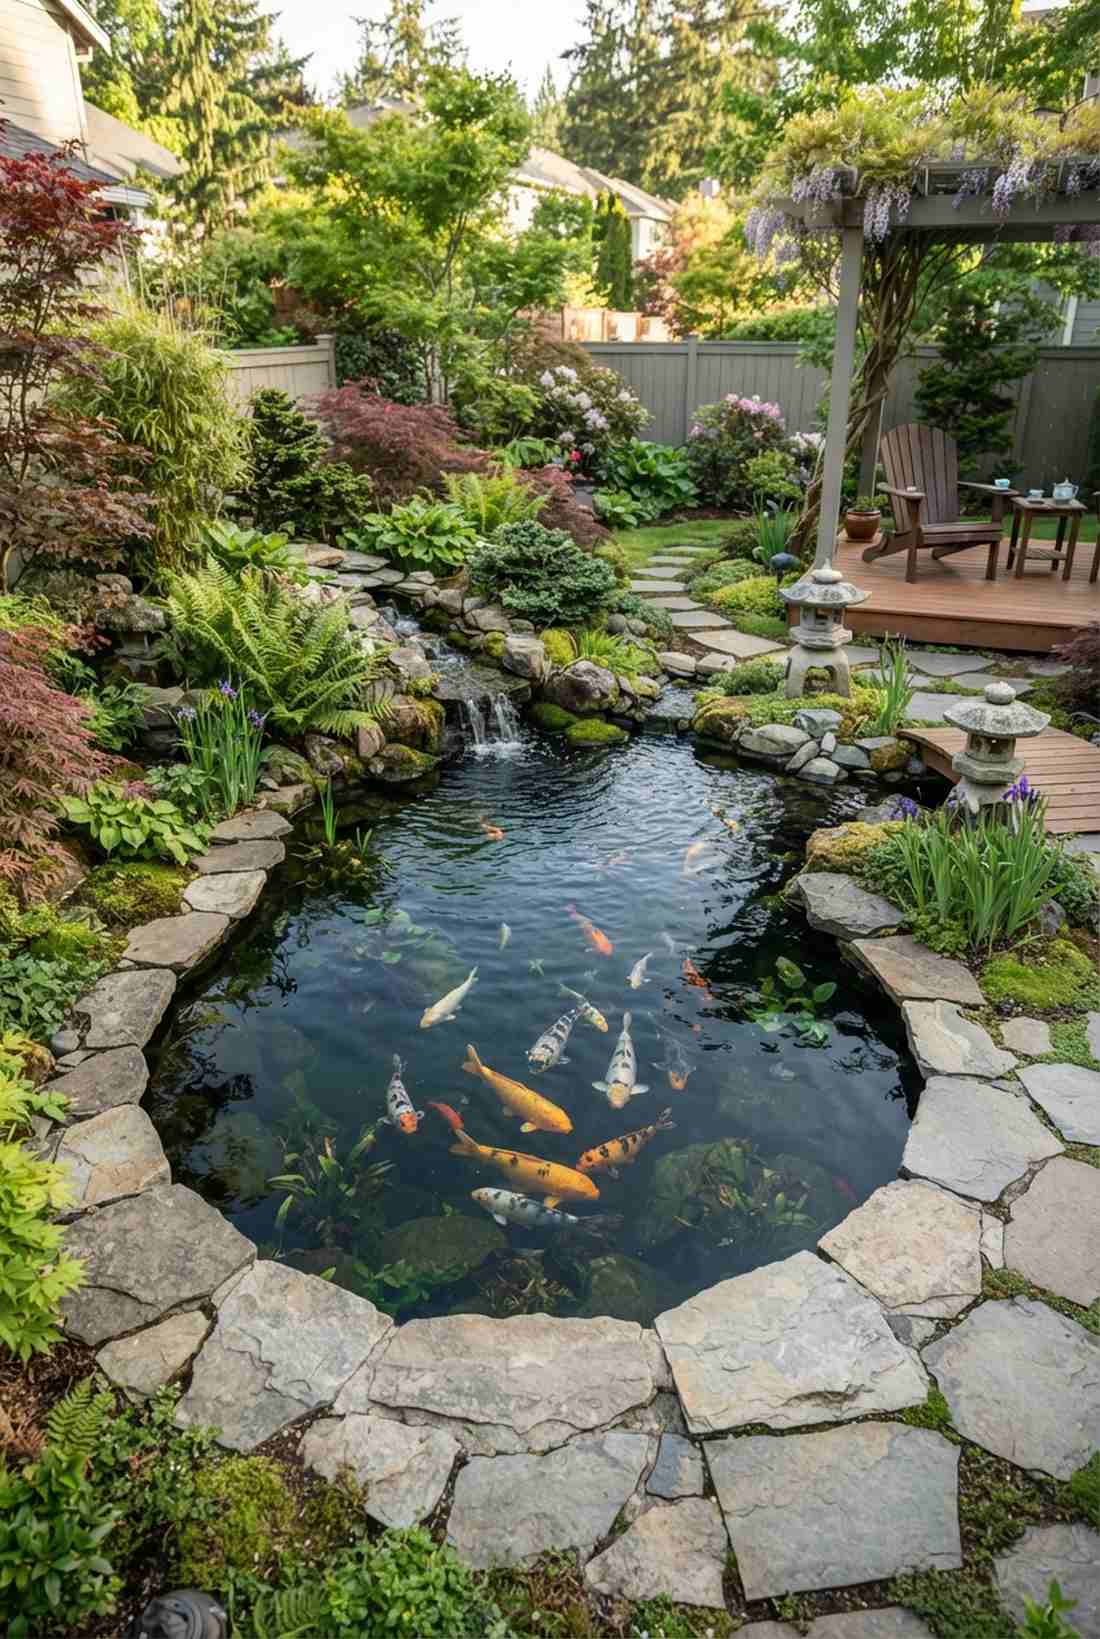
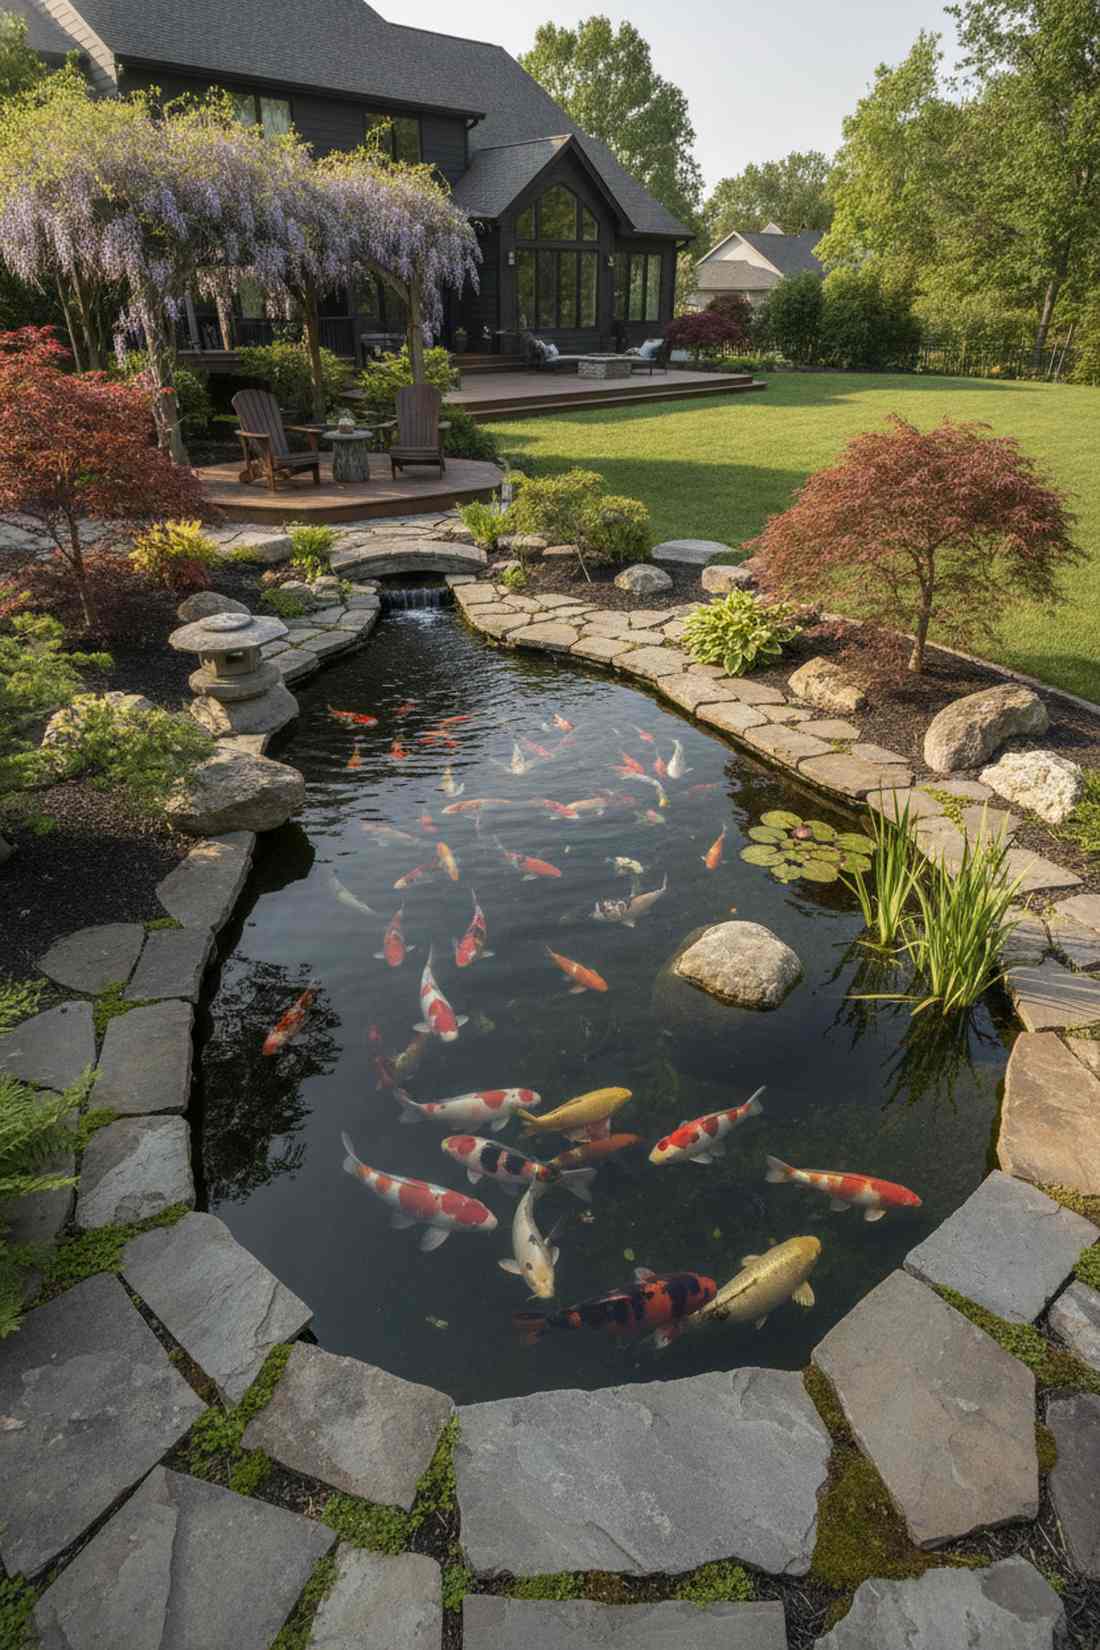
Gazing into this water feature feels like peering into an ancient, living jewel box. A naturalistic aquatic habitat is an incredible way to introduce vibrant, interactive wildlife into a secluded garden corner.
Poor filtration leads to murky swamps, but installing an oversized biological filter gives a designer-level finish with crystal clear viewing. Edging the perimeter with pre-cut flagstone pavers hides the mechanics while blending perfectly into the earth.
A well-filtered starter pond can be built for about $600. Pin this if you dream of a vibrant aquatic sanctuary.
- Key Materials: Heavy liner, bio-filter system, flagstone
- Vibe / Style: Serene Asian-inspired garden
- Difficulty: Advanced digging and filtration setup
- Budget Breakdown: Filter/Pump: $350 | Liner & Stone: $250
- Creator’s Tip: Dig the pond at least 3 feet deep to protect fish from predators and winter freezes.
- Smart Sourcing: Pressurized biological pond filter starter kits and heavy-duty EPDM liners.
16. Wall-Mounted Fountain Sculptures
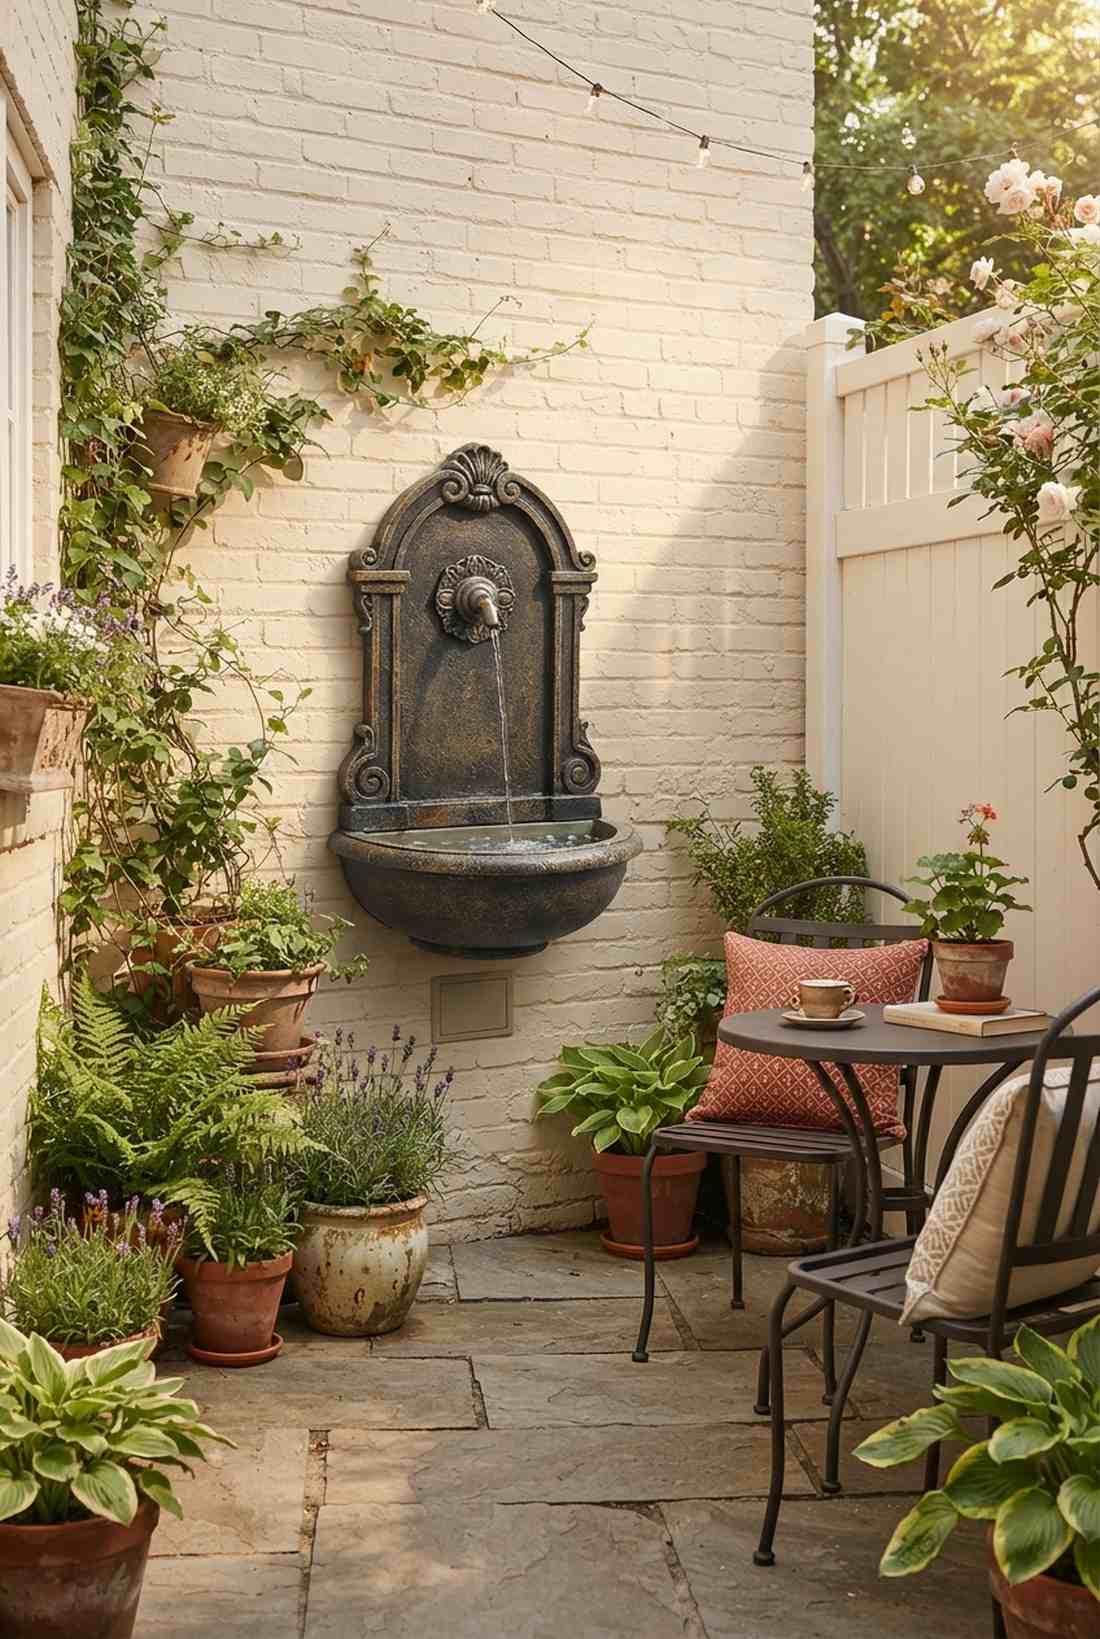
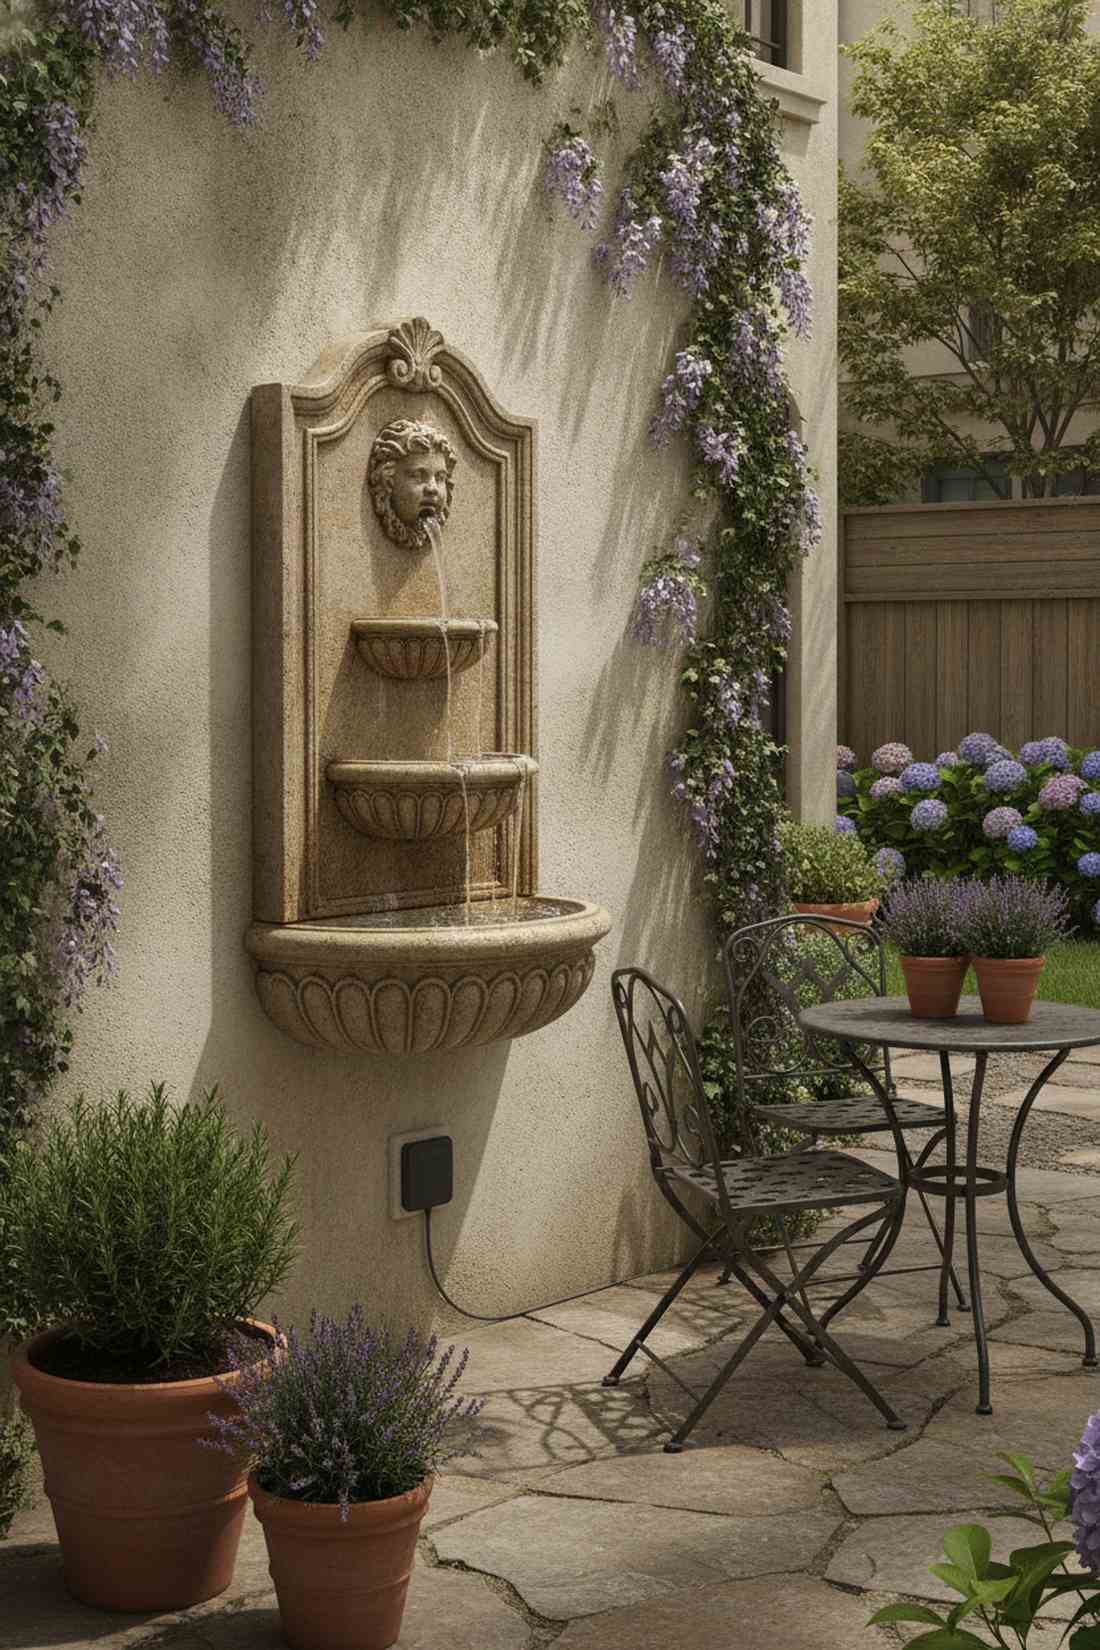
This space-saving trick feels like sipping espresso in a hidden Roman alleyway. A vertical spout fountain is the absolute perfect addition for a cramped townhouse patio or narrow side yard.
Tearing down walls for plumbing is overkill; using a self-contained recirculating backing achieves a high-end estate vibe with zero demolition. Coating the basin interior with clear UV-resistant sealant prevents unsightly algae stains on the decorative finish.
You can hang one of these beauties for under $150. Highly recommended for a quick weekend win.
- Key Materials: Wall fountain unit, mounting hardware
- Vibe / Style: Old-world courtyard charm
- Difficulty: Easy drill-and-hang installation
- Budget Breakdown: Fountain Kit: $120 | Sealant: $30
- Creator’s Tip: Mount the fountain directly over a waterproof outdoor outlet cover to completely hide the power cord.
- Smart Sourcing: Lightweight resin wall fountain units and UV-coated clear concrete sealant.
17. Rill Water Channels

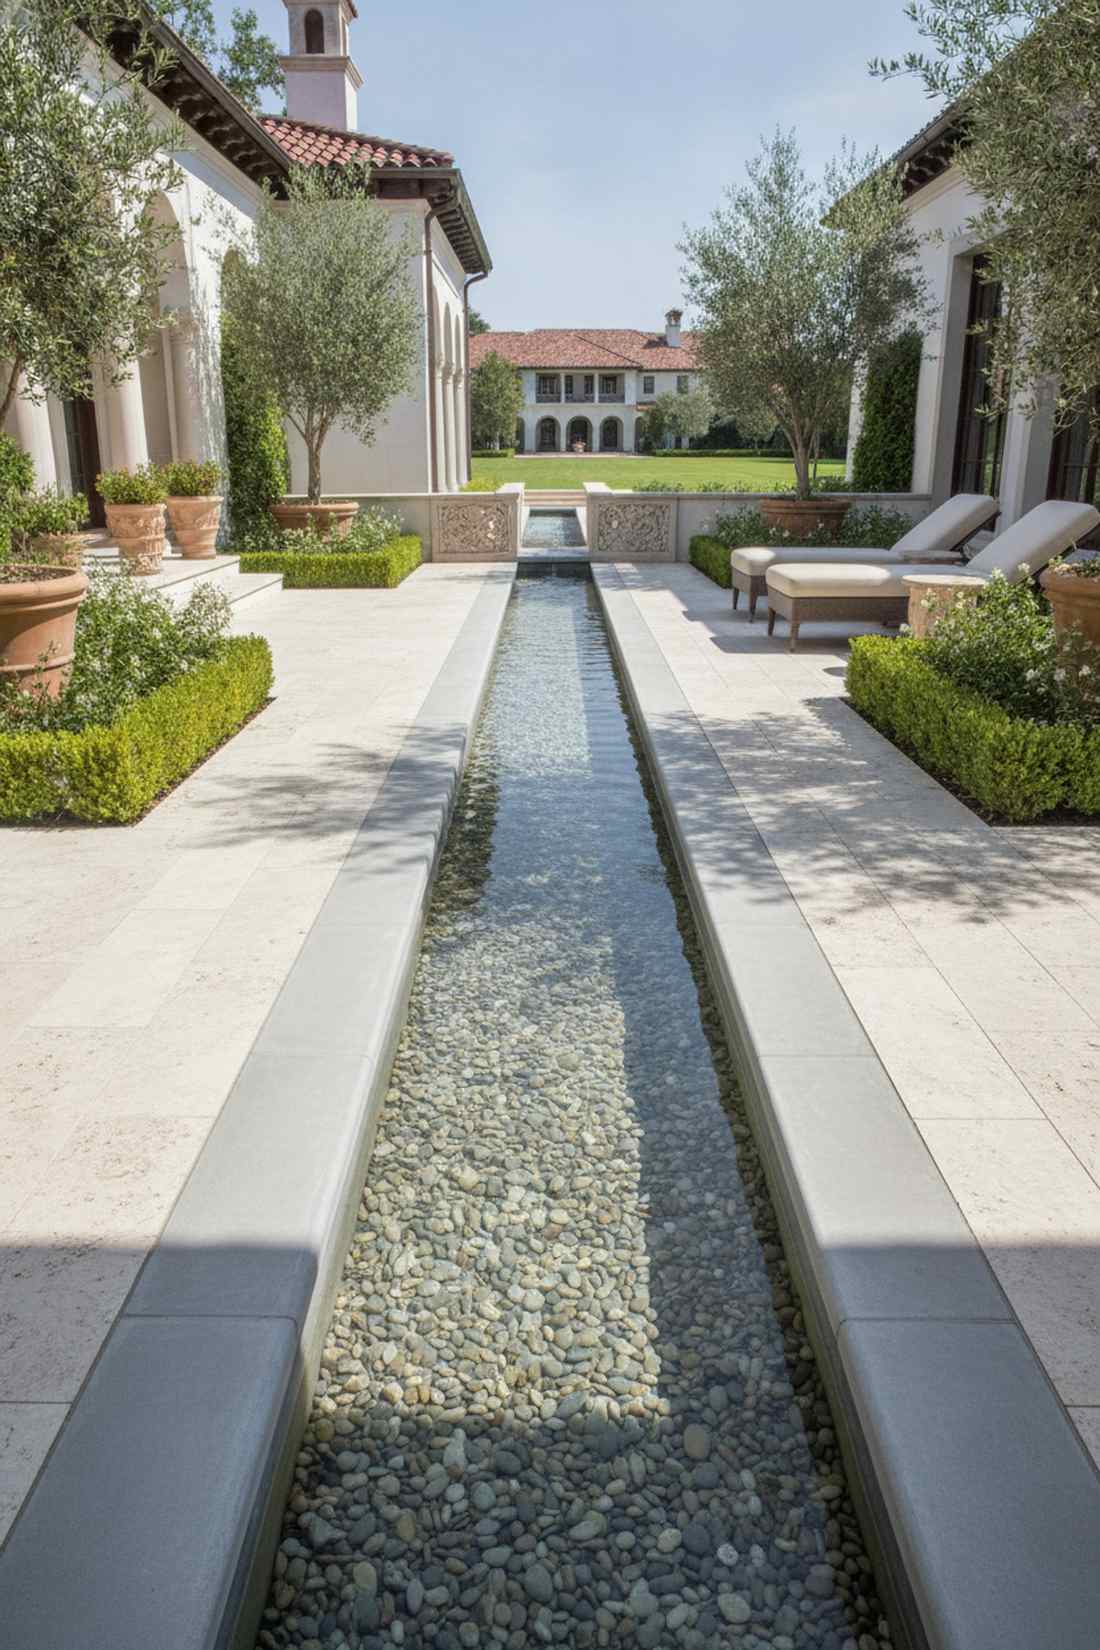
Walking alongside this feature feels like following a silver ribbon through a royal estate. A linear shallow water channel is brilliant for connecting different garden zones and guiding foot traffic.
Digging a massive trench is exhausting, but using pre-formed concrete channels delivers a surprisingly premium look with perfect gradients. Lining the bottom with bulk pack polished river pebbles creates a mesmerizing, textured water ripple effect.
A 15-foot custom rill setup costs around $400. Save this to your landscape architecture inspiration board!
- Key Materials: Pre-formed channels, river pebbles, inline pump
- Vibe / Style: Moorish architectural elegance
- Difficulty: Requires precise grading
- Budget Breakdown: Channels/Pump: $300 | Pebbles: $100
- Creator’s Tip: Ensure a drop of exactly one inch per ten feet of channel for the perfect slow-moving trickle.
- Smart Sourcing: Inline variable-speed water pumps and bulk pack polished river stones.
18. Bubbling Urn Fountains

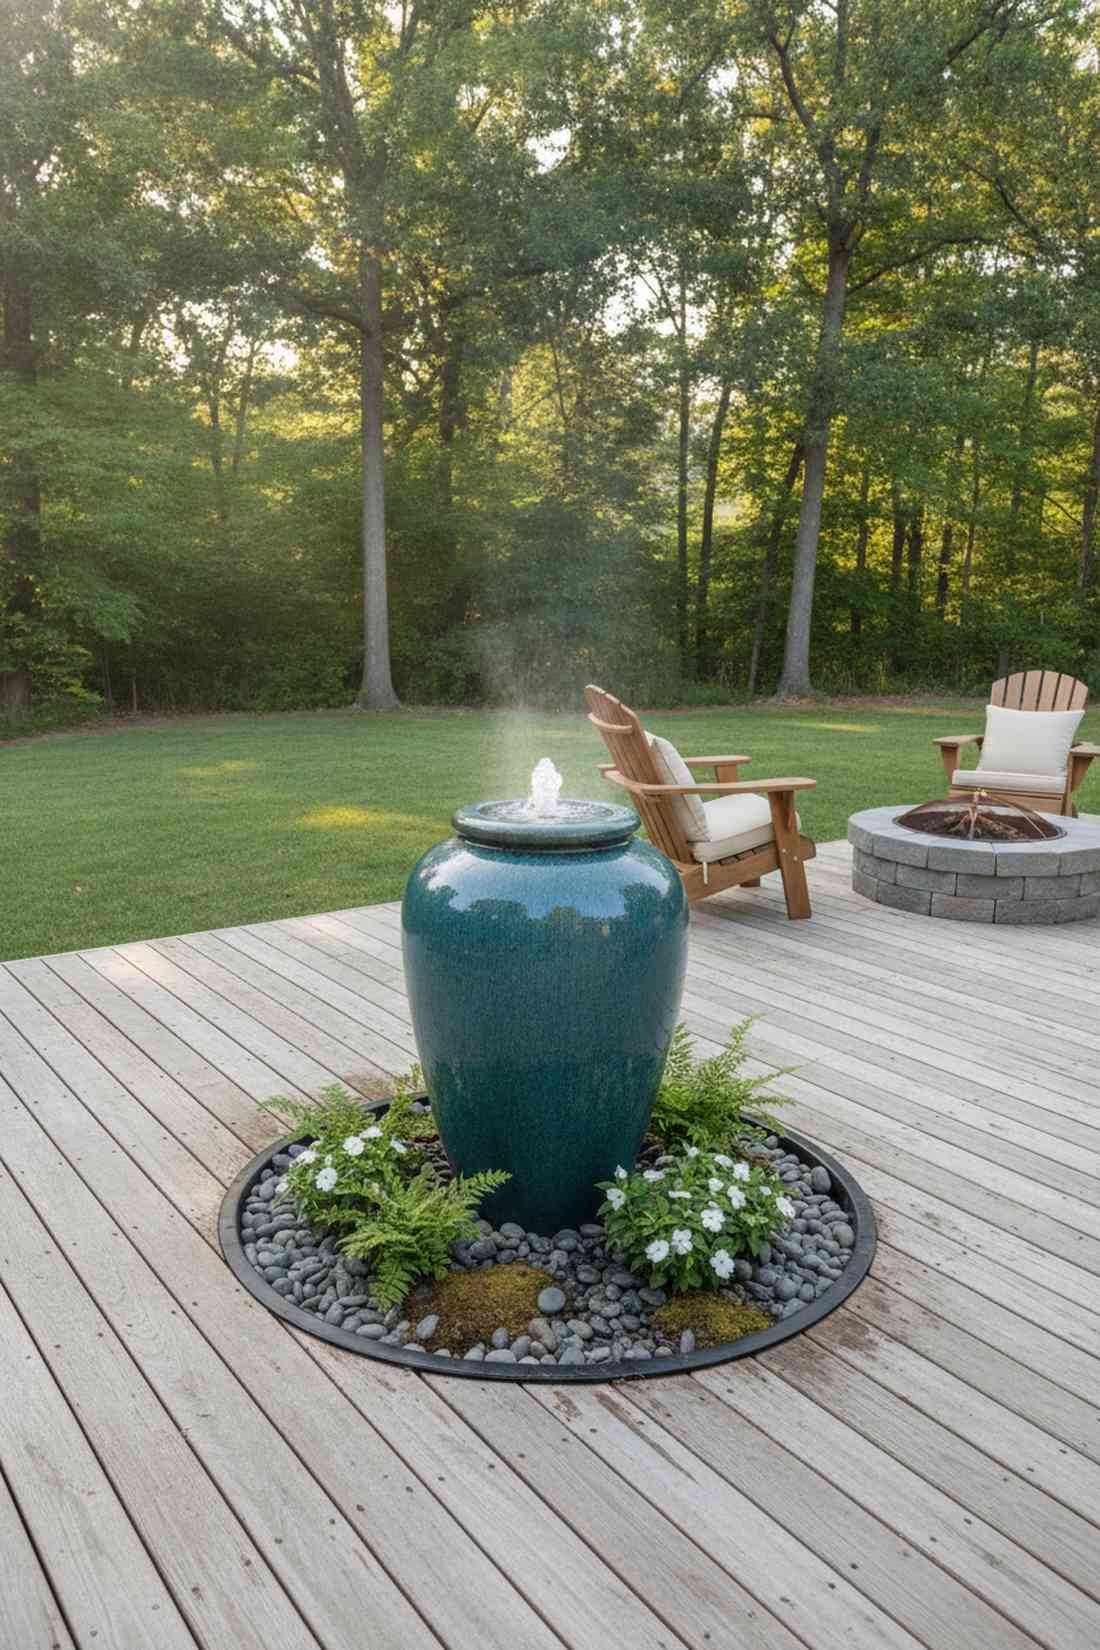
This gentle bubbling sound feels like an expensive day spa right on your back deck. A self-contained overflowing ceramic jar is perfect for tucking into a small flowerbed without dominating the space.
Buying expensive pre-drilled pottery is a trap; drilling a standard glazed planter yourself looks far more expensive than it is. Placing it over a hidden reinforced underground catch basin completely eliminates standing water and mosquito issues.
You can DIY this custom urn setup for about $120. It’s a fast upgrade that completely changes the vibe.
- Key Materials: Tall ceramic urn, underground basin kit
- Vibe / Style: Understated contemporary zen
- Difficulty: Easy beginner project
- Budget Breakdown: Urn & Diamond Bit: $70 | Basin/Pump: $50
- Creator’s Tip: Stuff a piece of coarse filter sponge into the urn’s opening to quiet the splash and spread the water evenly.
- Smart Sourcing: Heavy-duty underground fountain basin kits and diamond-tipped ceramic drill bits.
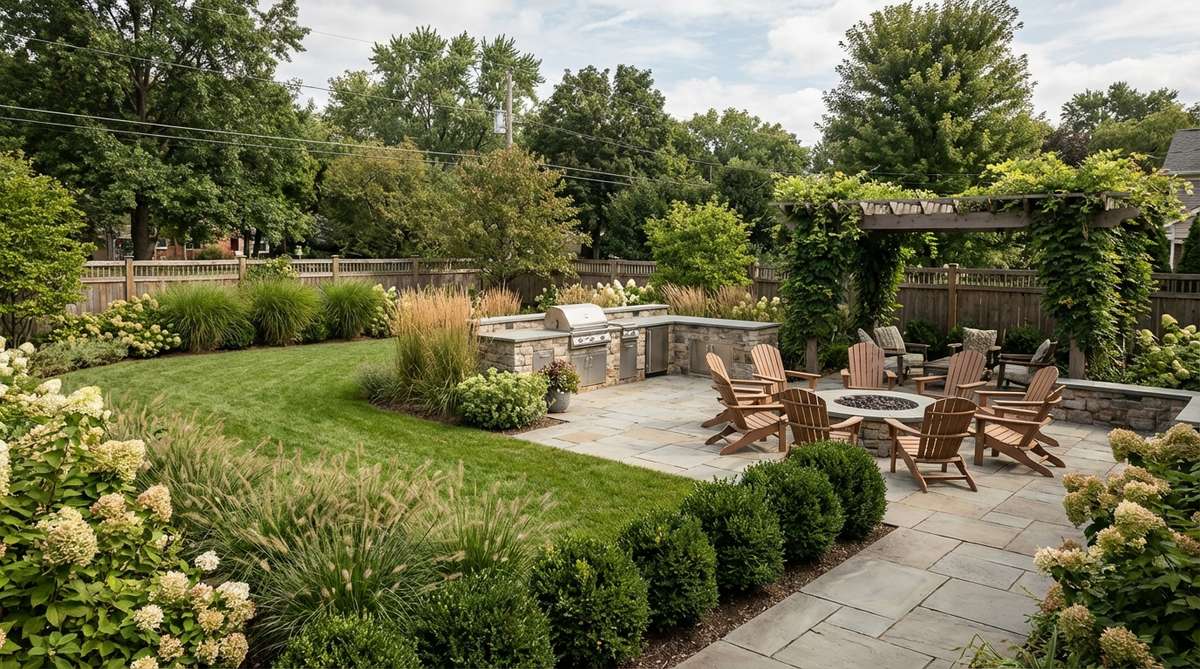
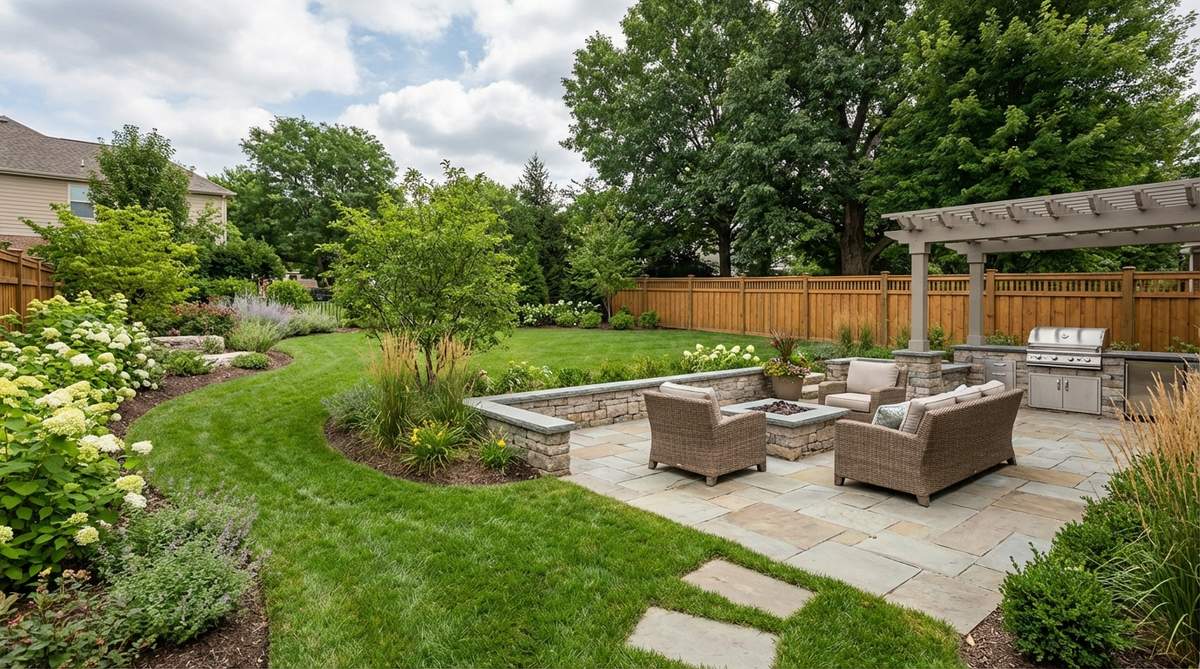
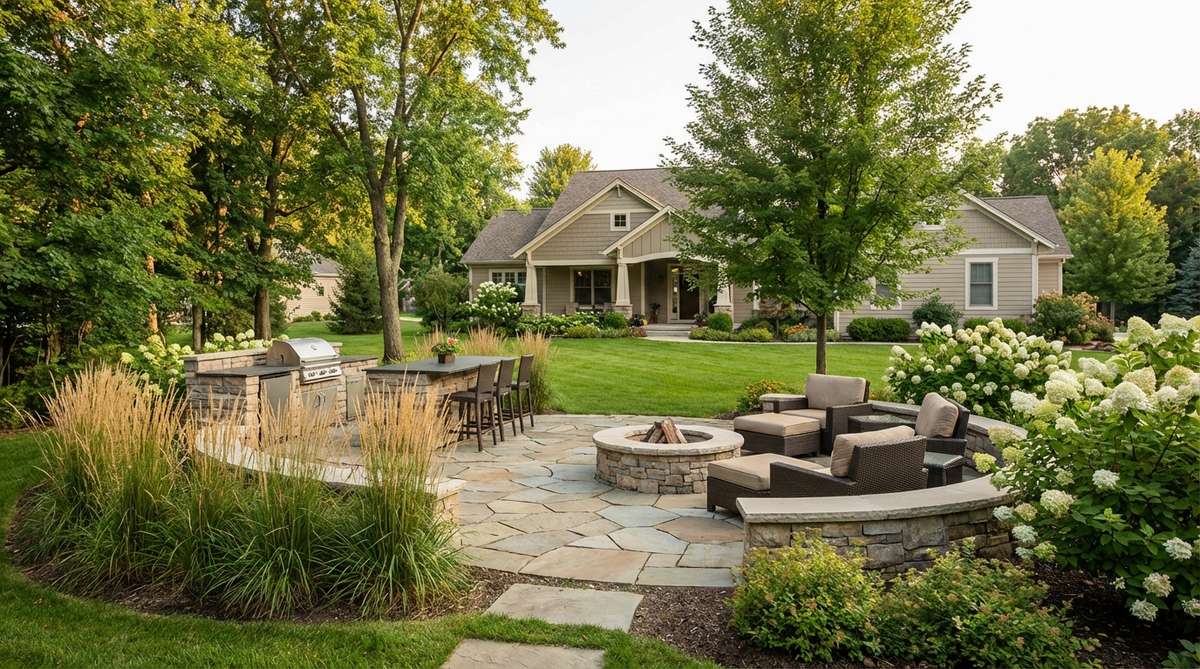
19. Covered Outdoor Kitchen Pavilions
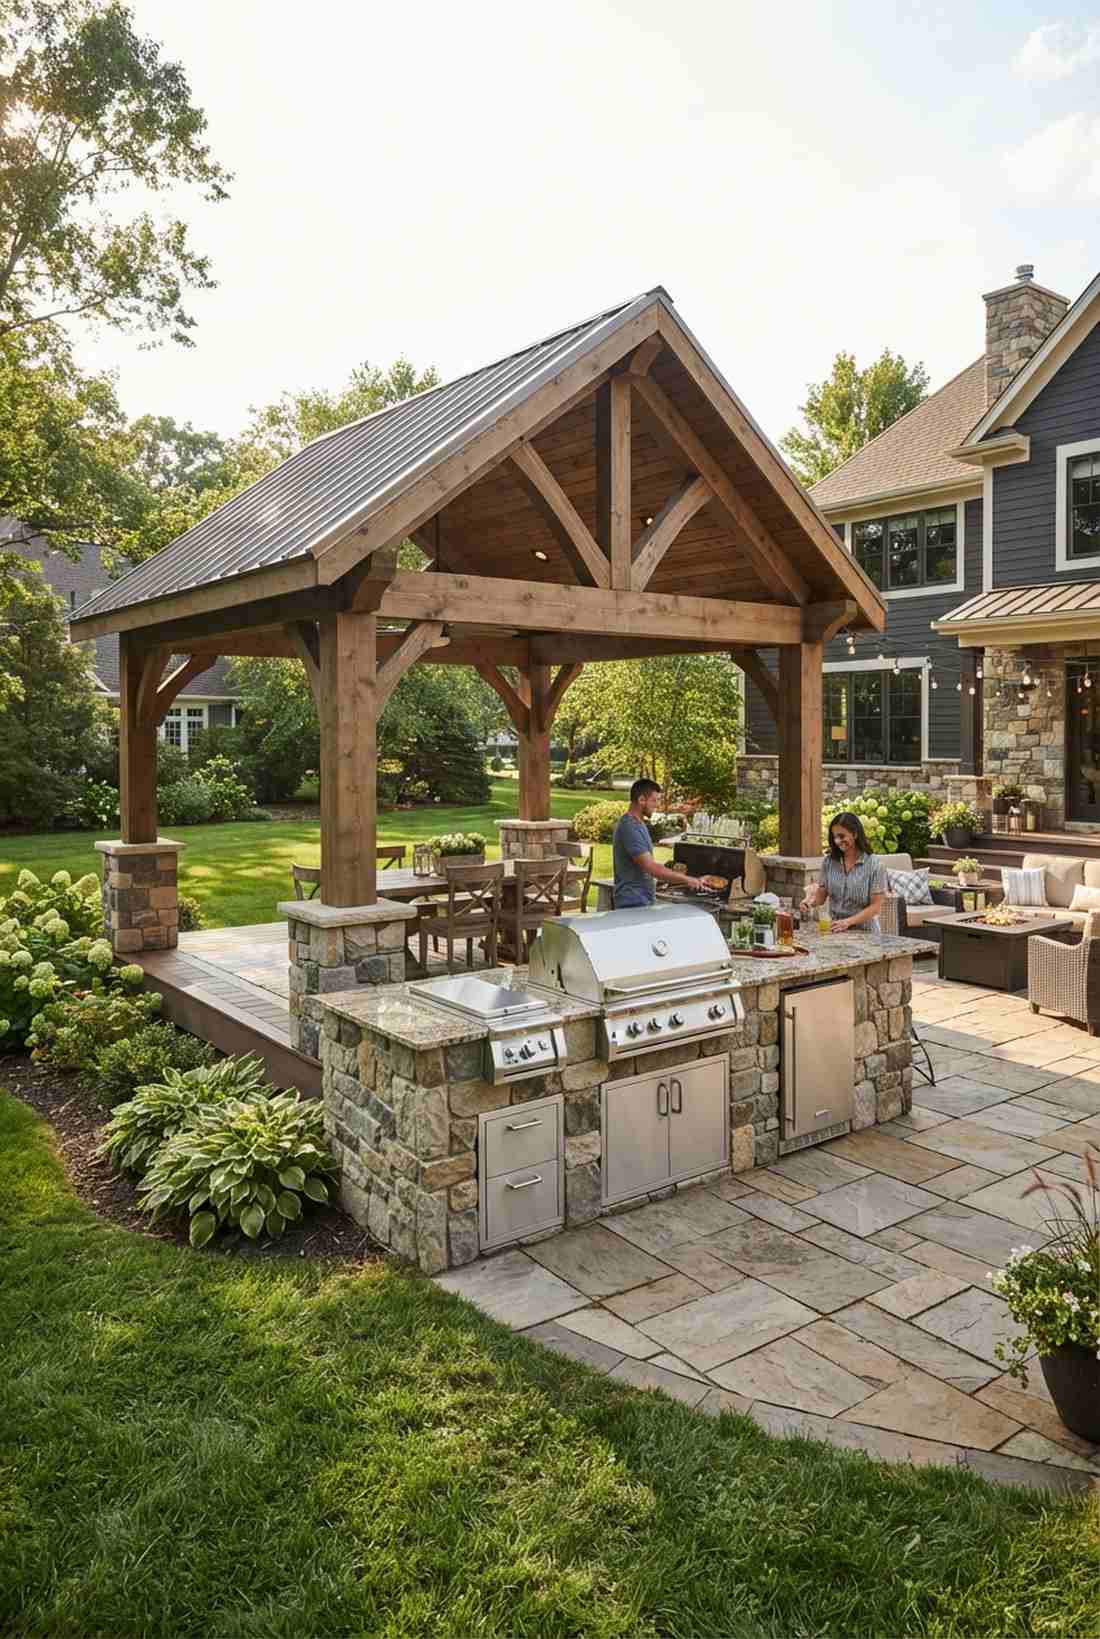

Entertaining here feels like hosting a private cooking show at a five-star resort. An all-weather culinary canopy works exceptionally well to transform a basic patio into a year-round dining destination.
Custom masonry islands are notoriously pricey, but wrapping modular steel frames in stone veneer screams custom architecture for thousands less. Upgrading to commercial-grade outdoor stainless steel access doors instantly elevates the premium built-in aesthetic.
You can frame and veneer a beautiful prep island for around $800. Pin this if you’re planning the ultimate backyard BBQ setup.
- Key Materials: Steel framing kits, stone veneer, stainless doors
- Vibe / Style: Ultimate alfresco entertainer
- Difficulty: Moderate construction skills needed
- Budget Breakdown: Frame/Veneer: $500 | Hardware/Doors: $300
- Creator’s Tip: Plan your pavilion layout with the grill positioned downwind from the primary seating area to avoid smoking out guests.
- Smart Sourcing: Modular outdoor kitchen frame kits and weatherproof stainless steel BBQ access doors.
Most DIYers throw their money away on flimsy decor… until they see how cheap it is to build this next permanent feature.
20. Pizza Oven Courtyards
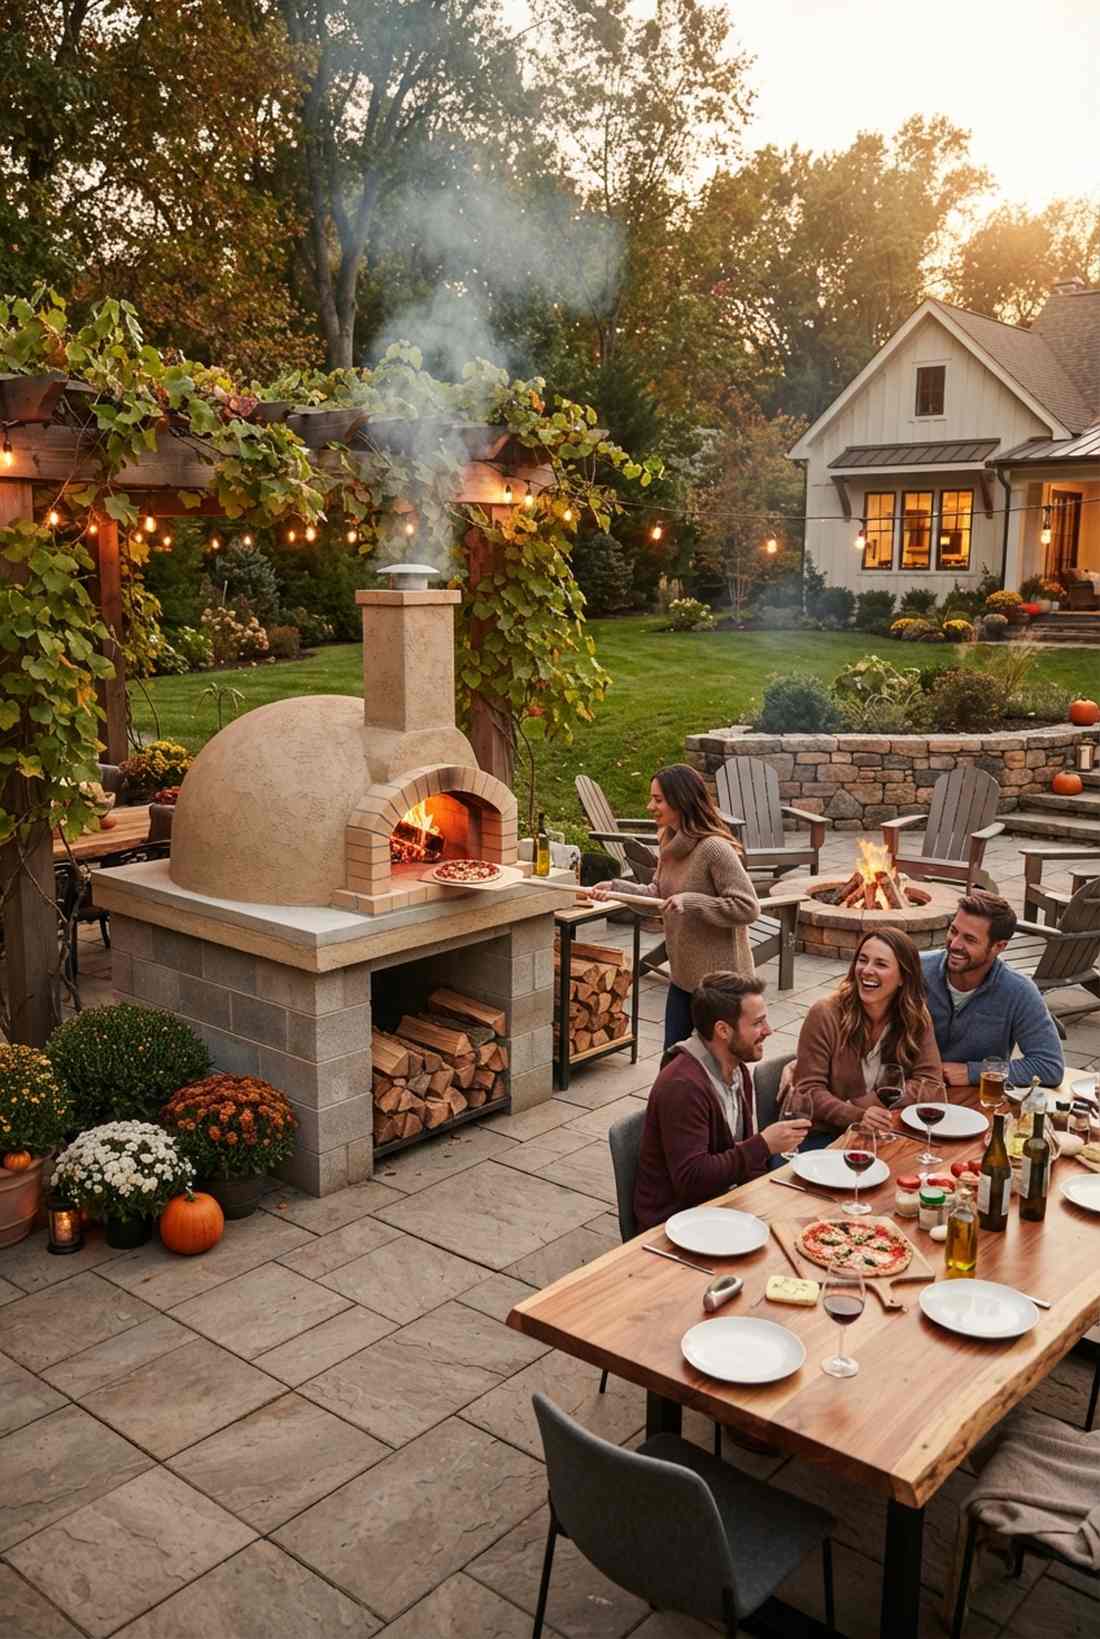
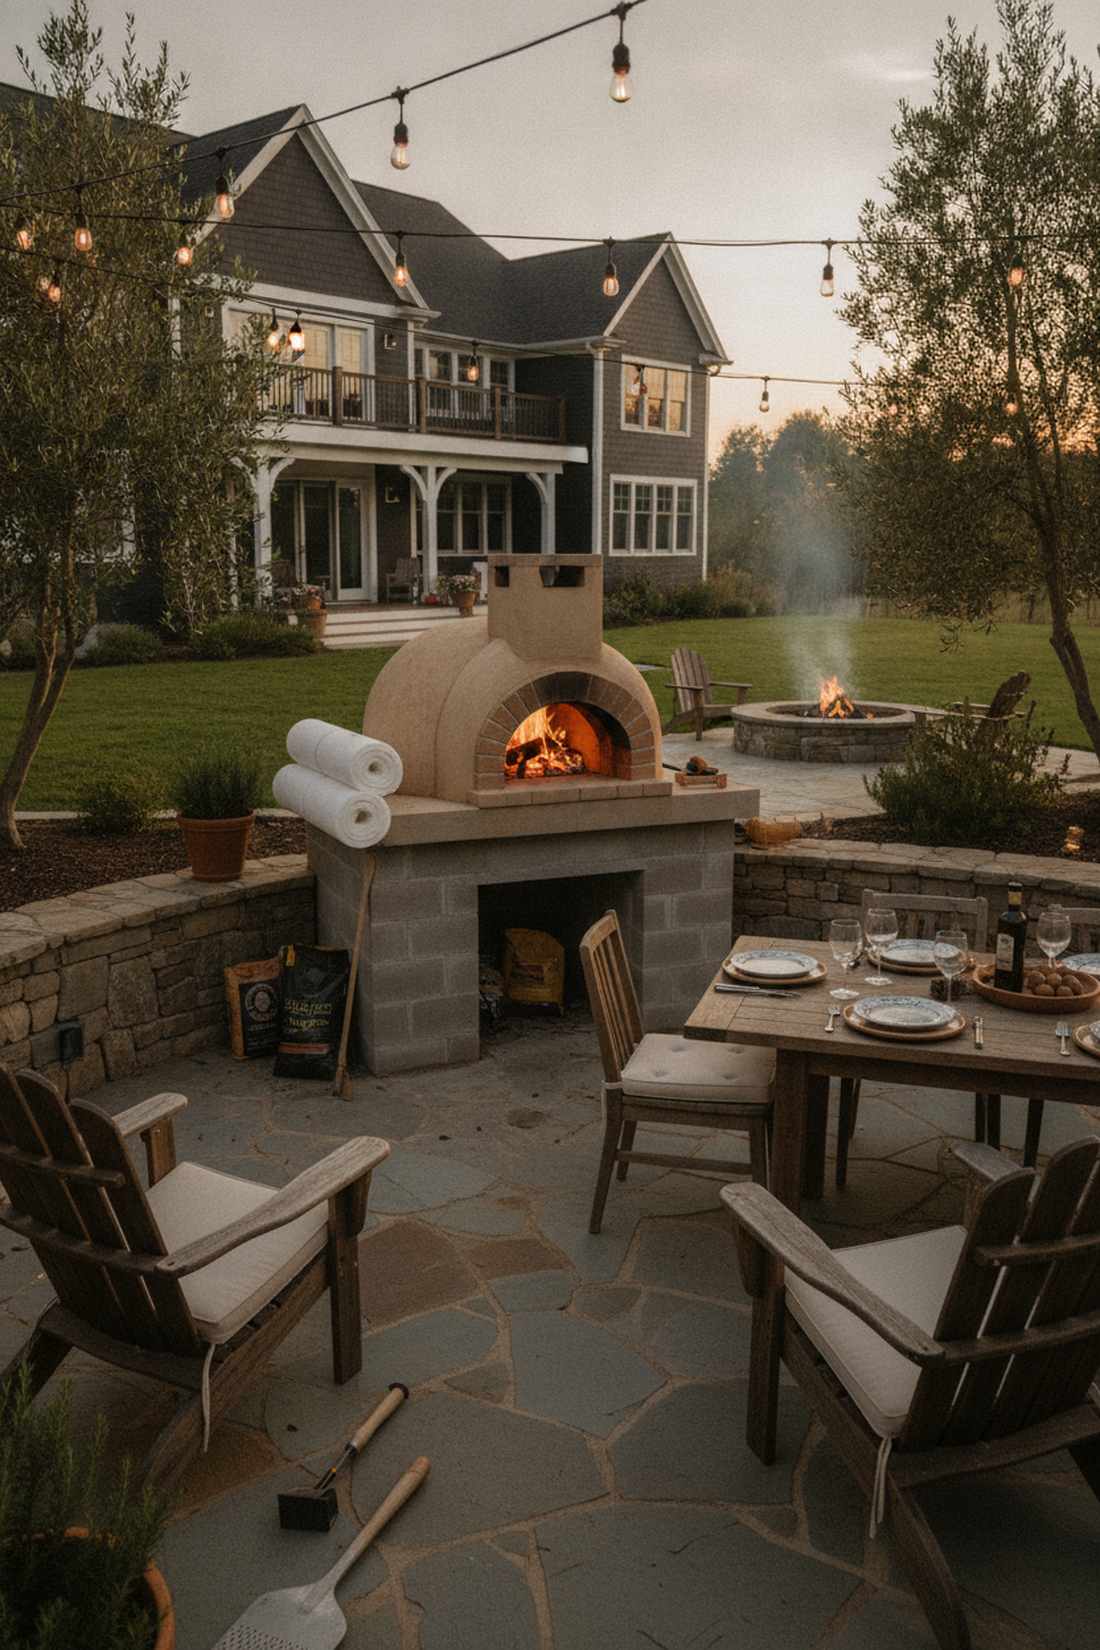

Standing near this roaring fire feels like a rustic vacation to the Italian countryside. A wood-fired masonry cooking zone creates an unbeatable social hub for autumn evening gatherings.
Building a brick dome from scratch is a nightmare, but dropping a pre-cast refractory core onto a cinderblock base achieves a high-end estate vibe effortlessly. Insulating the dome with ceramic fiber thermal blankets ensures it hits that magical 800-degree Neapolitan temperature.
A core kit and block base can be assembled for roughly $600. Save this to your ultimate outdoor living board!
- Key Materials: Pre-cast oven core, cinderblocks, insulation
- Vibe / Style: Authentic rustic gastronomy
- Difficulty: Heavy lifting and mortar work
- Budget Breakdown: Oven Core: $400 | Block & Insulation: $200
- Creator’s Tip: Finish the exterior with a high-heat waterproof stucco to prevent the dome from cracking during winter freezes.
- Smart Sourcing: High-heat ceramic fiber insulation blankets and pre-cast modular pizza oven kits.
Premium Outdoor Living Spaces: Upscale Garden Decor for Entertainment
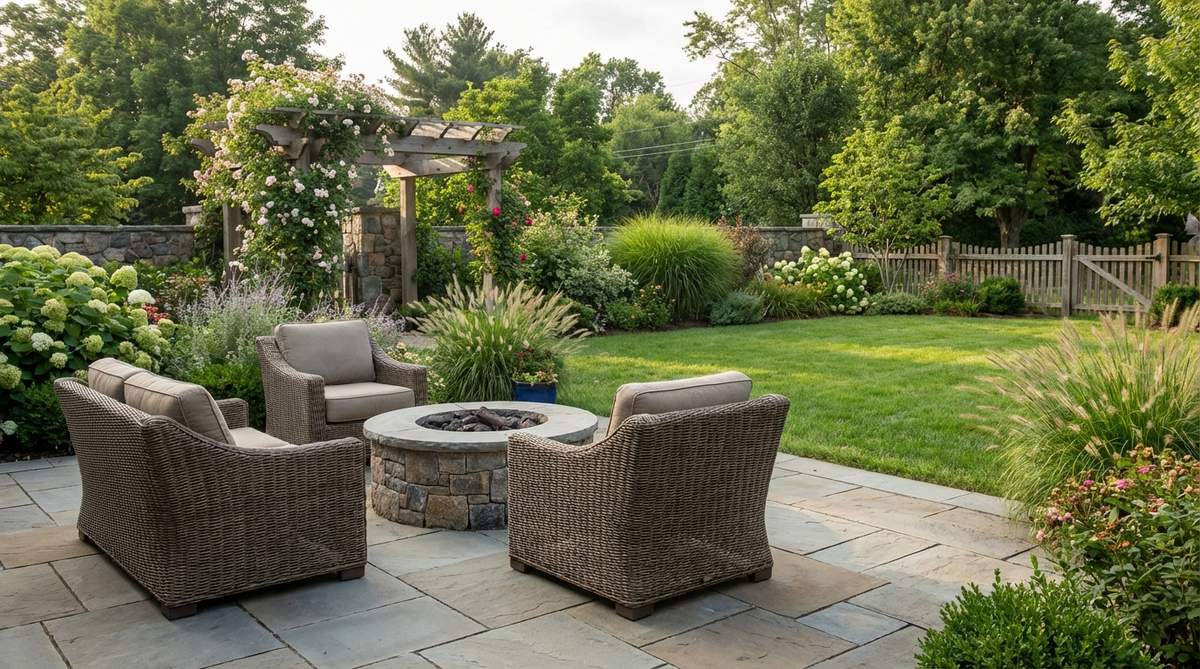
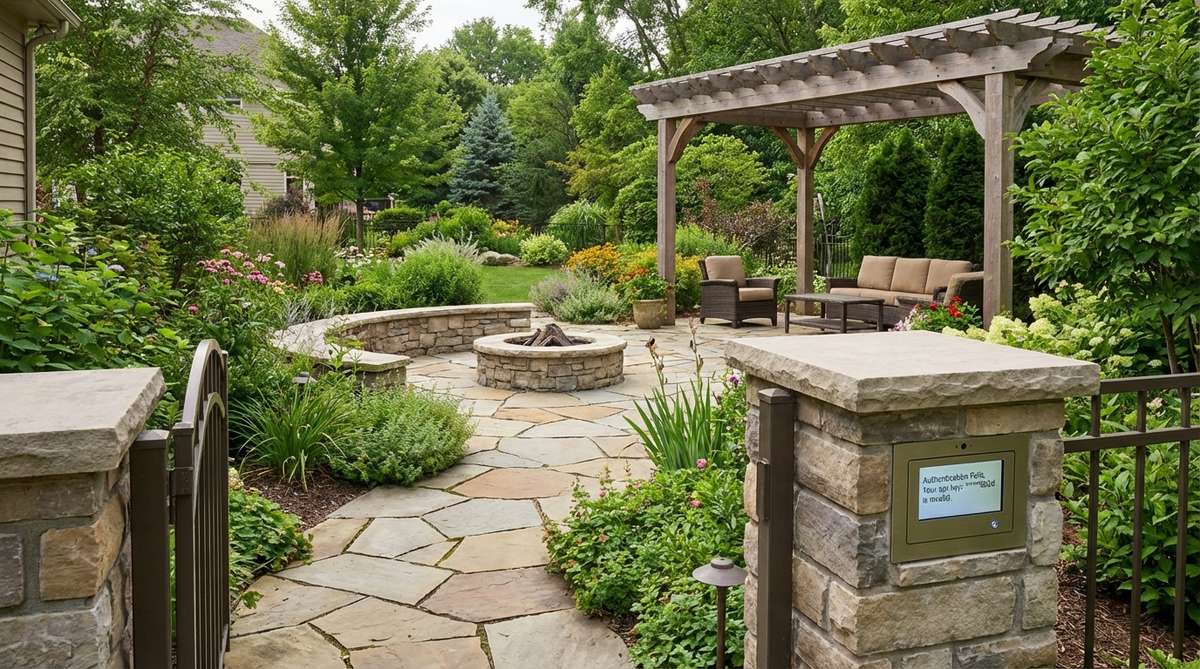
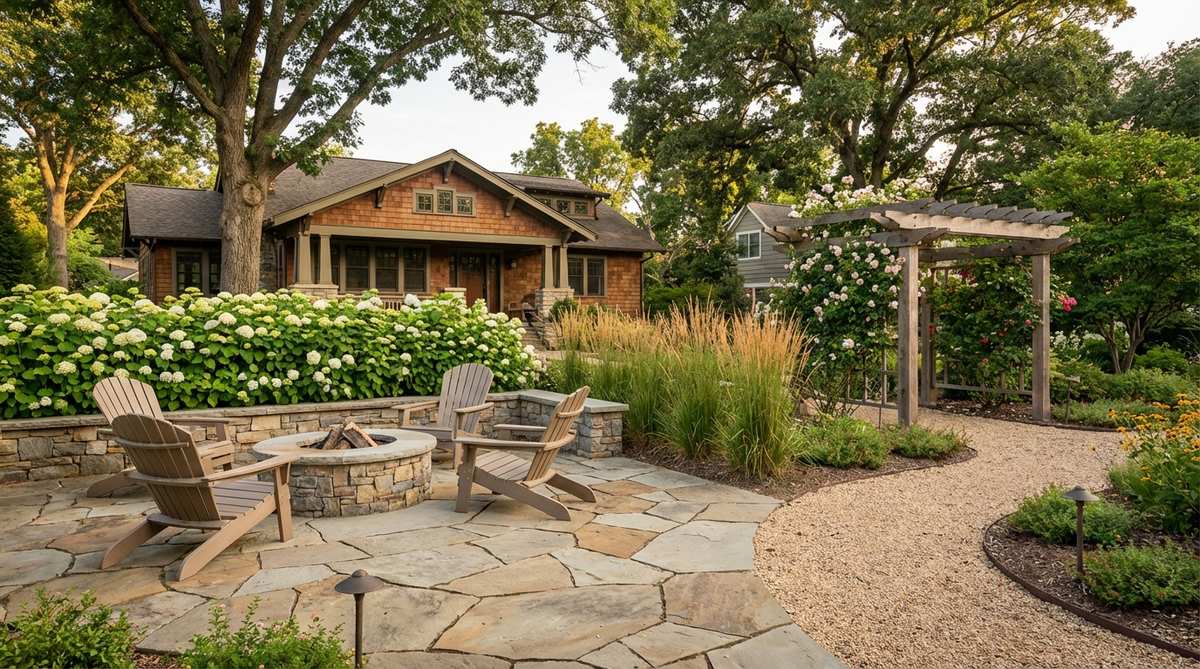
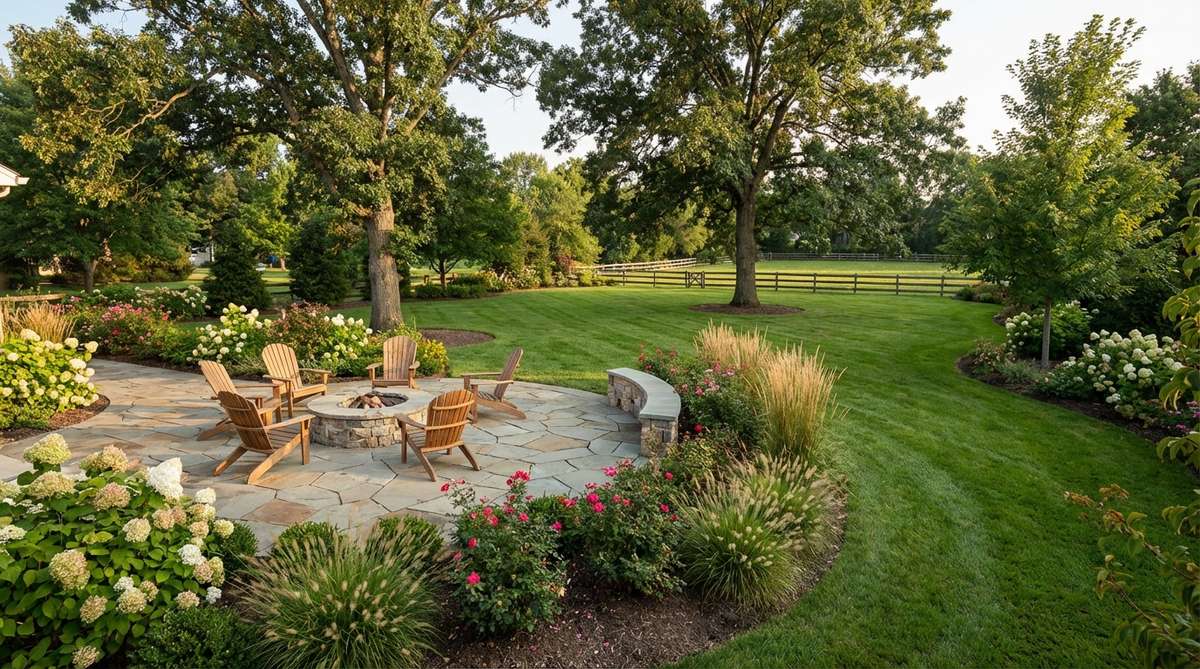
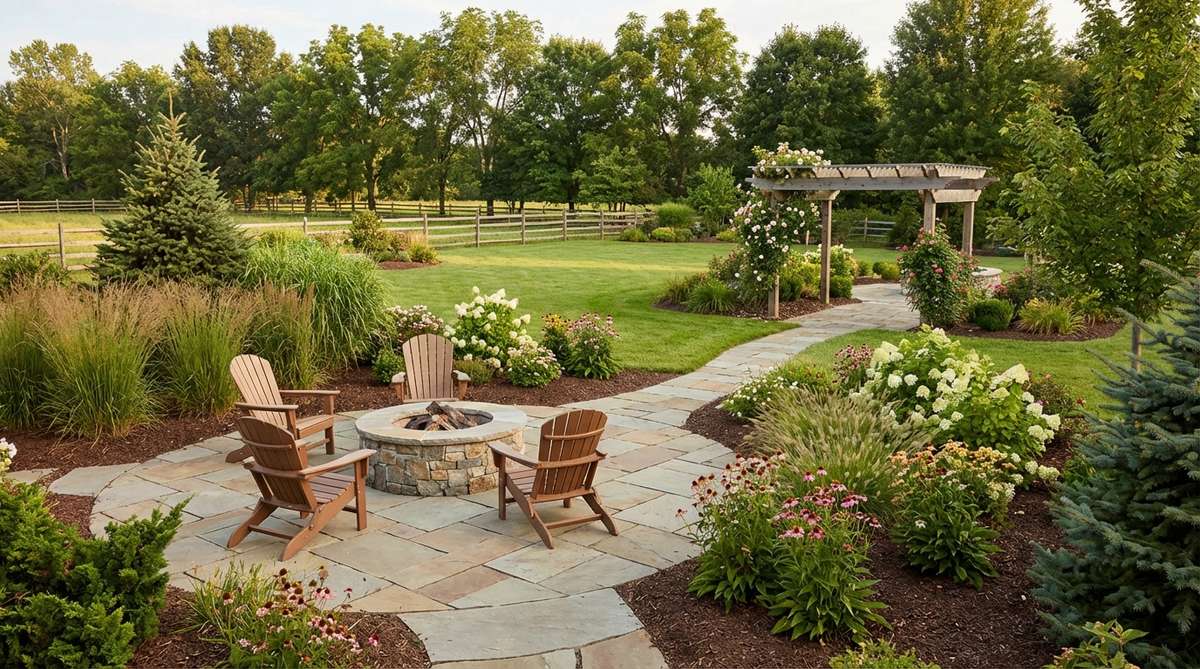
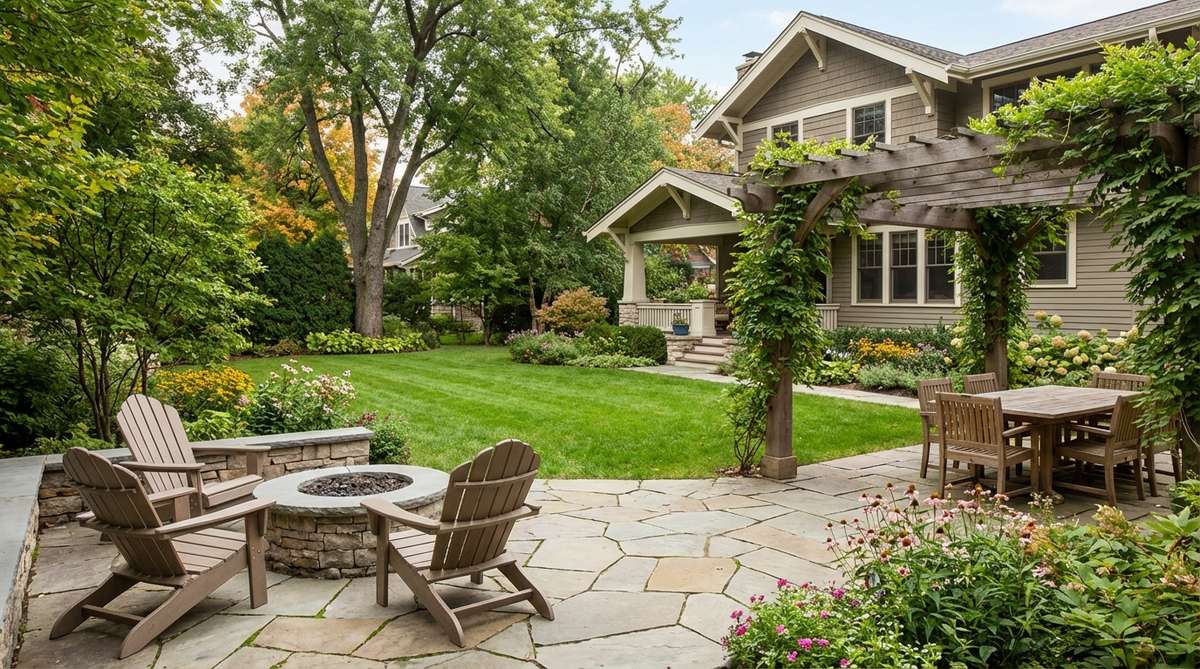
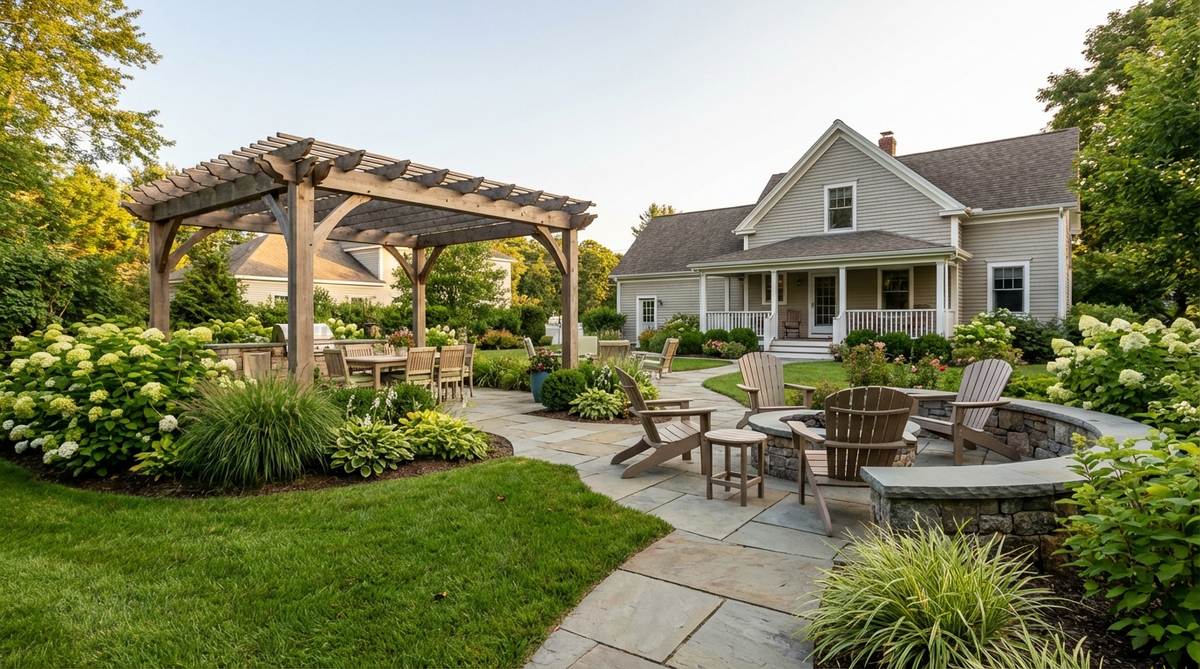
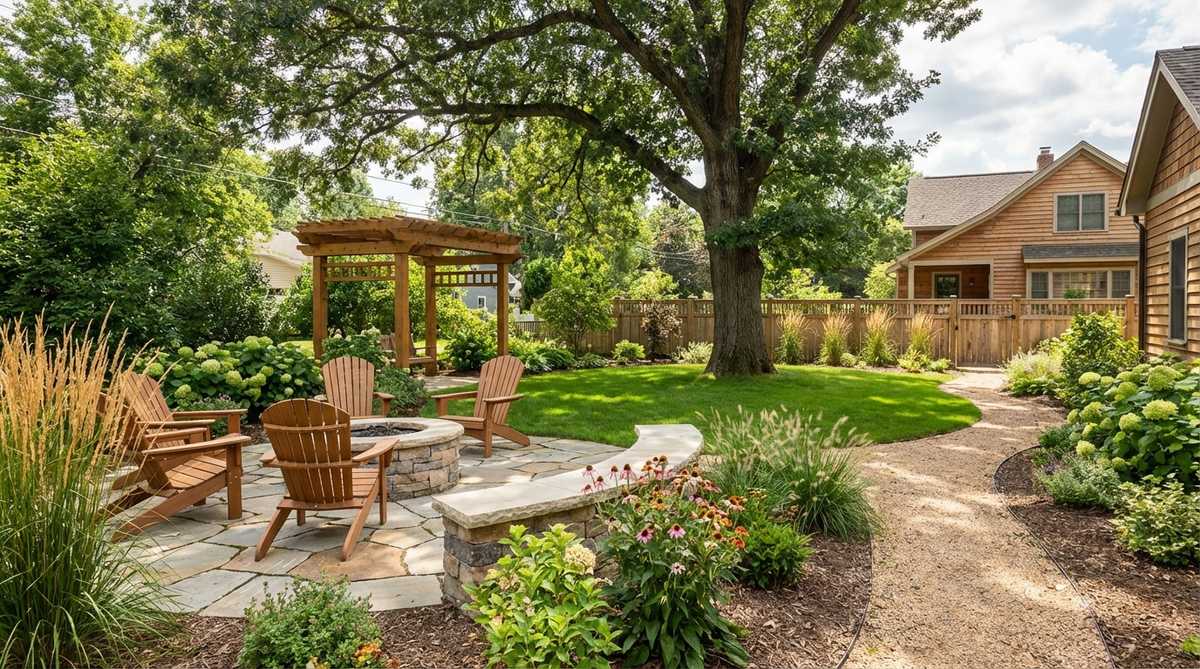
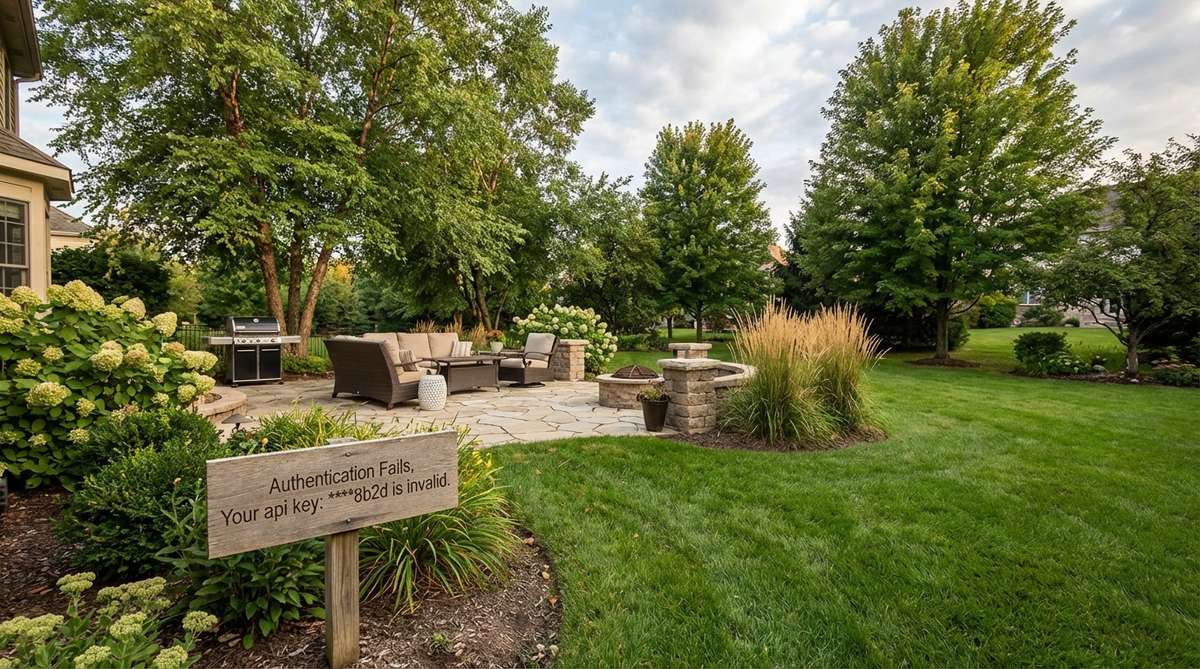
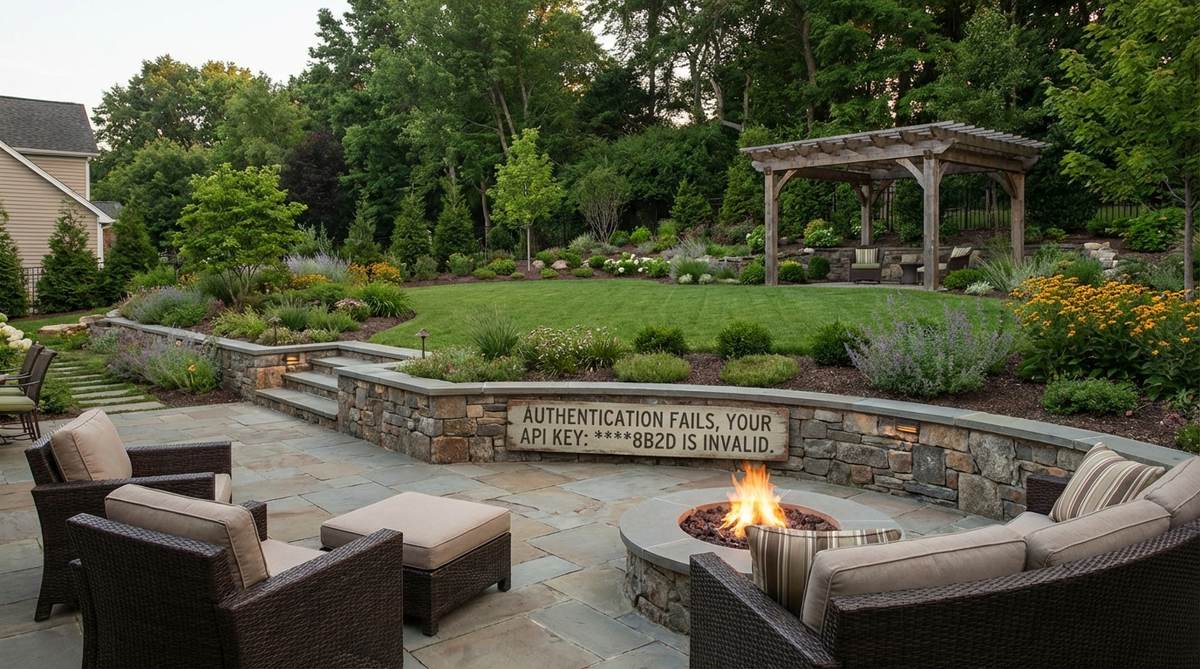
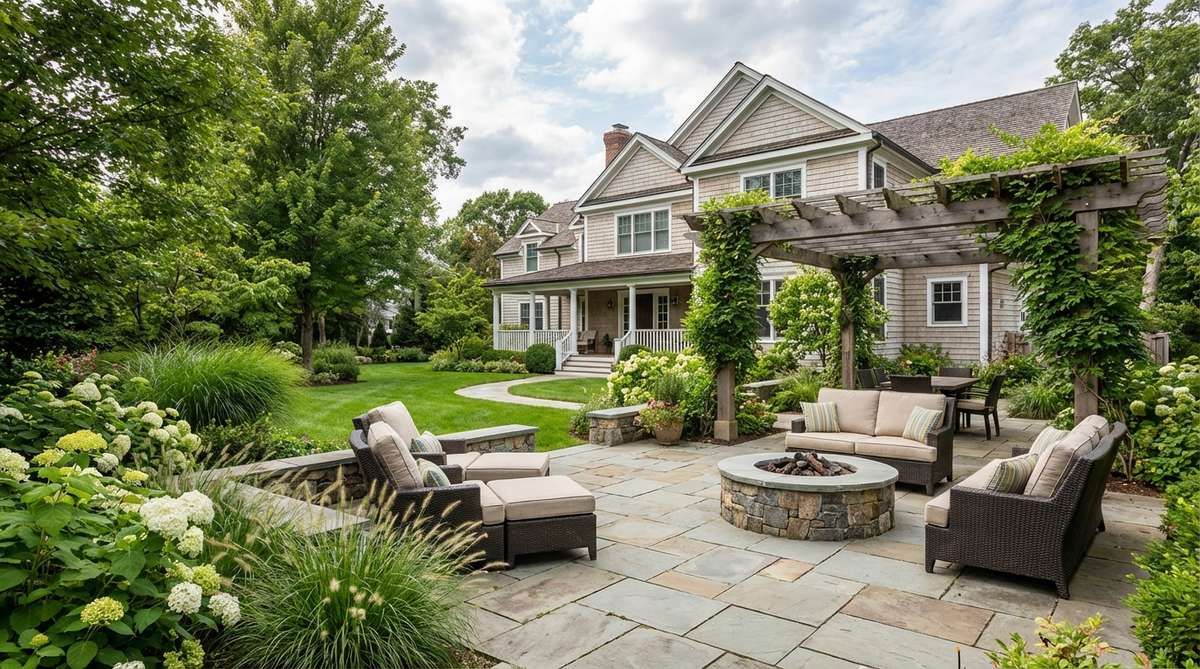
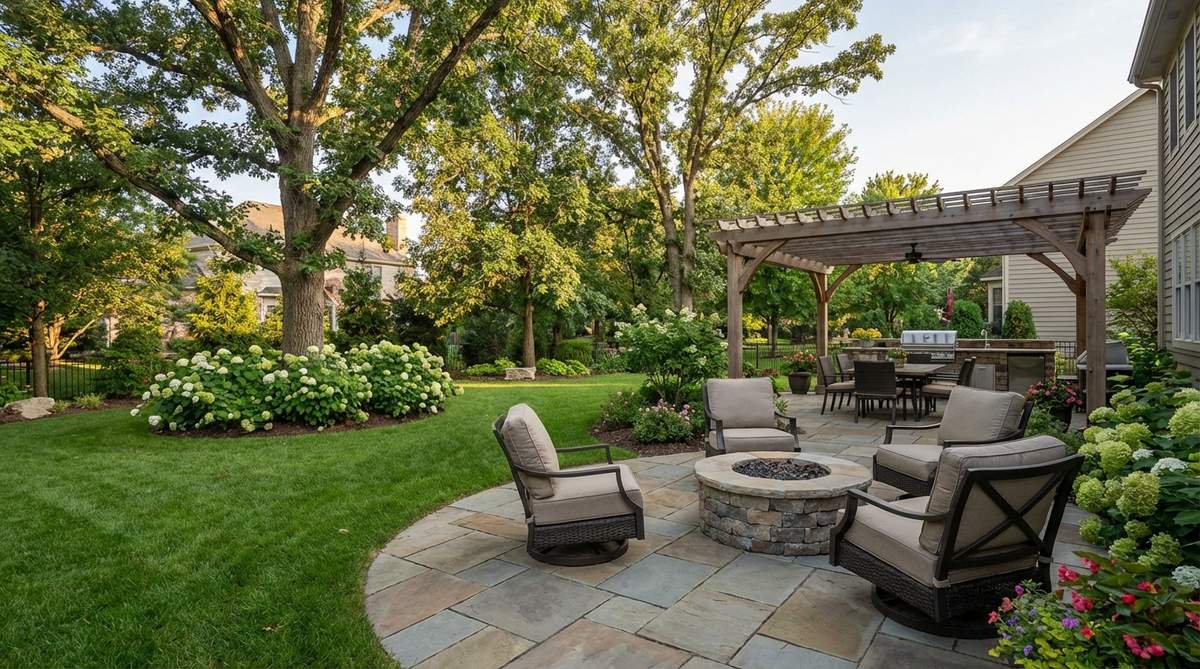
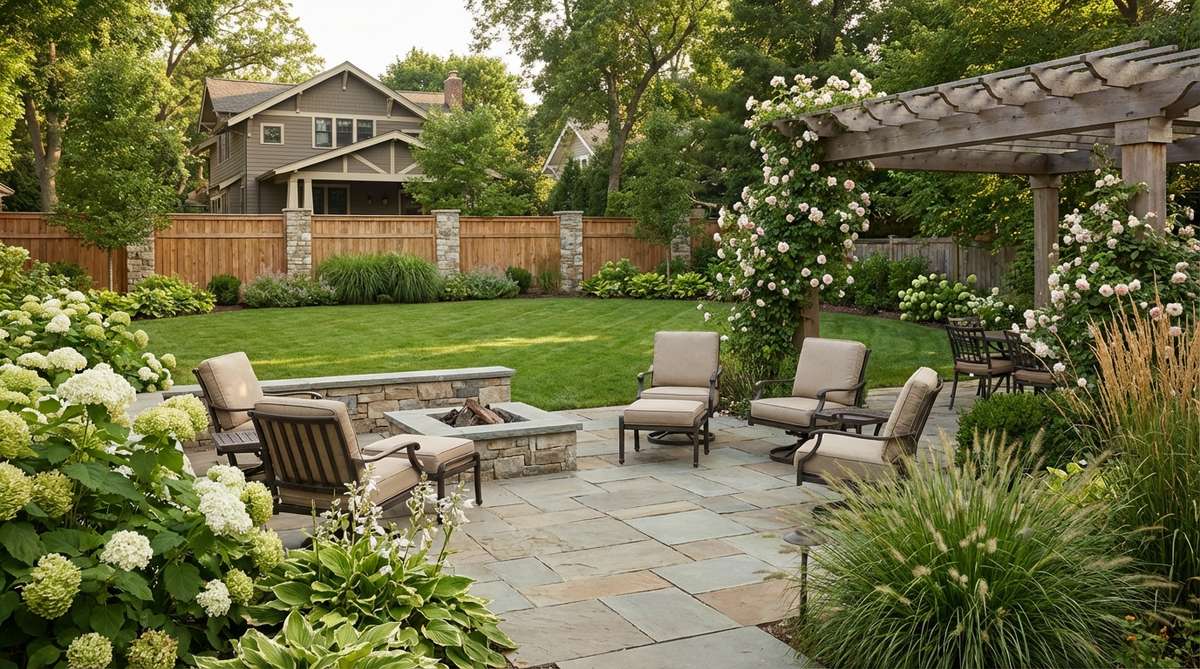
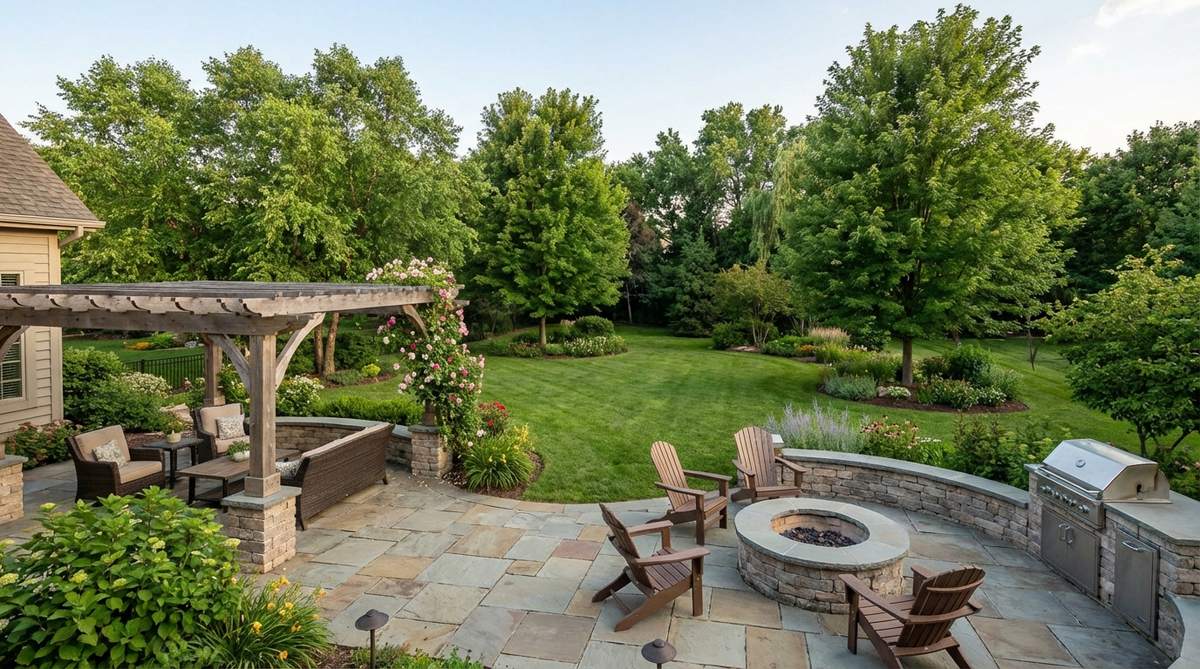
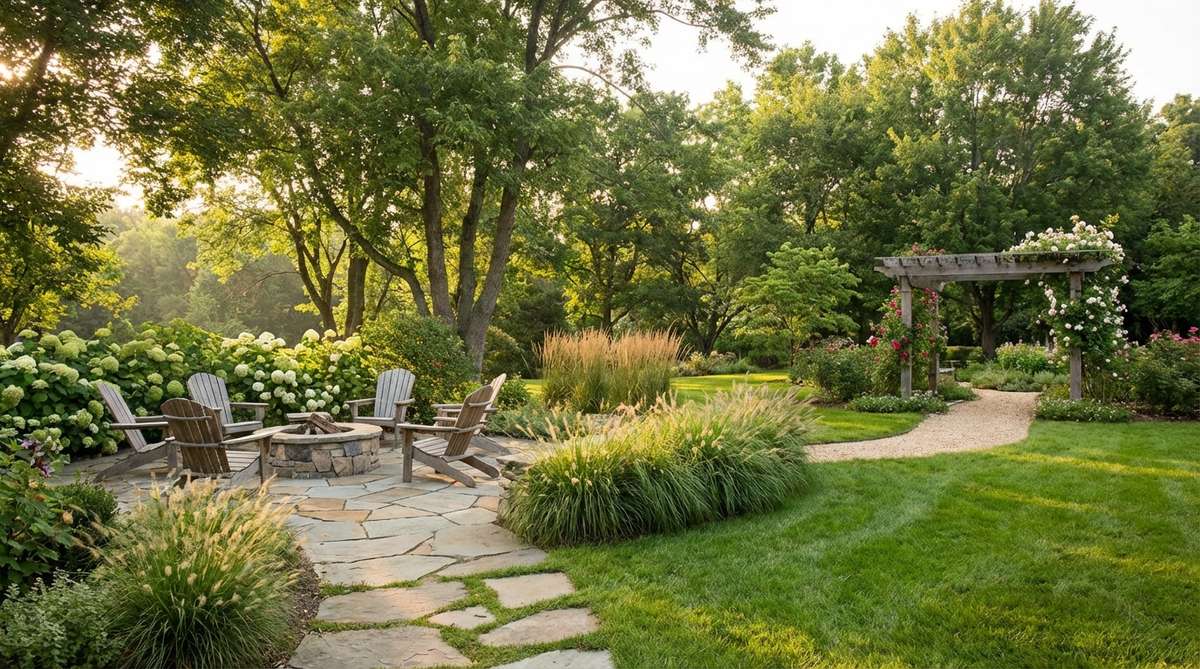
21. Sunken Fire Pit Lounges
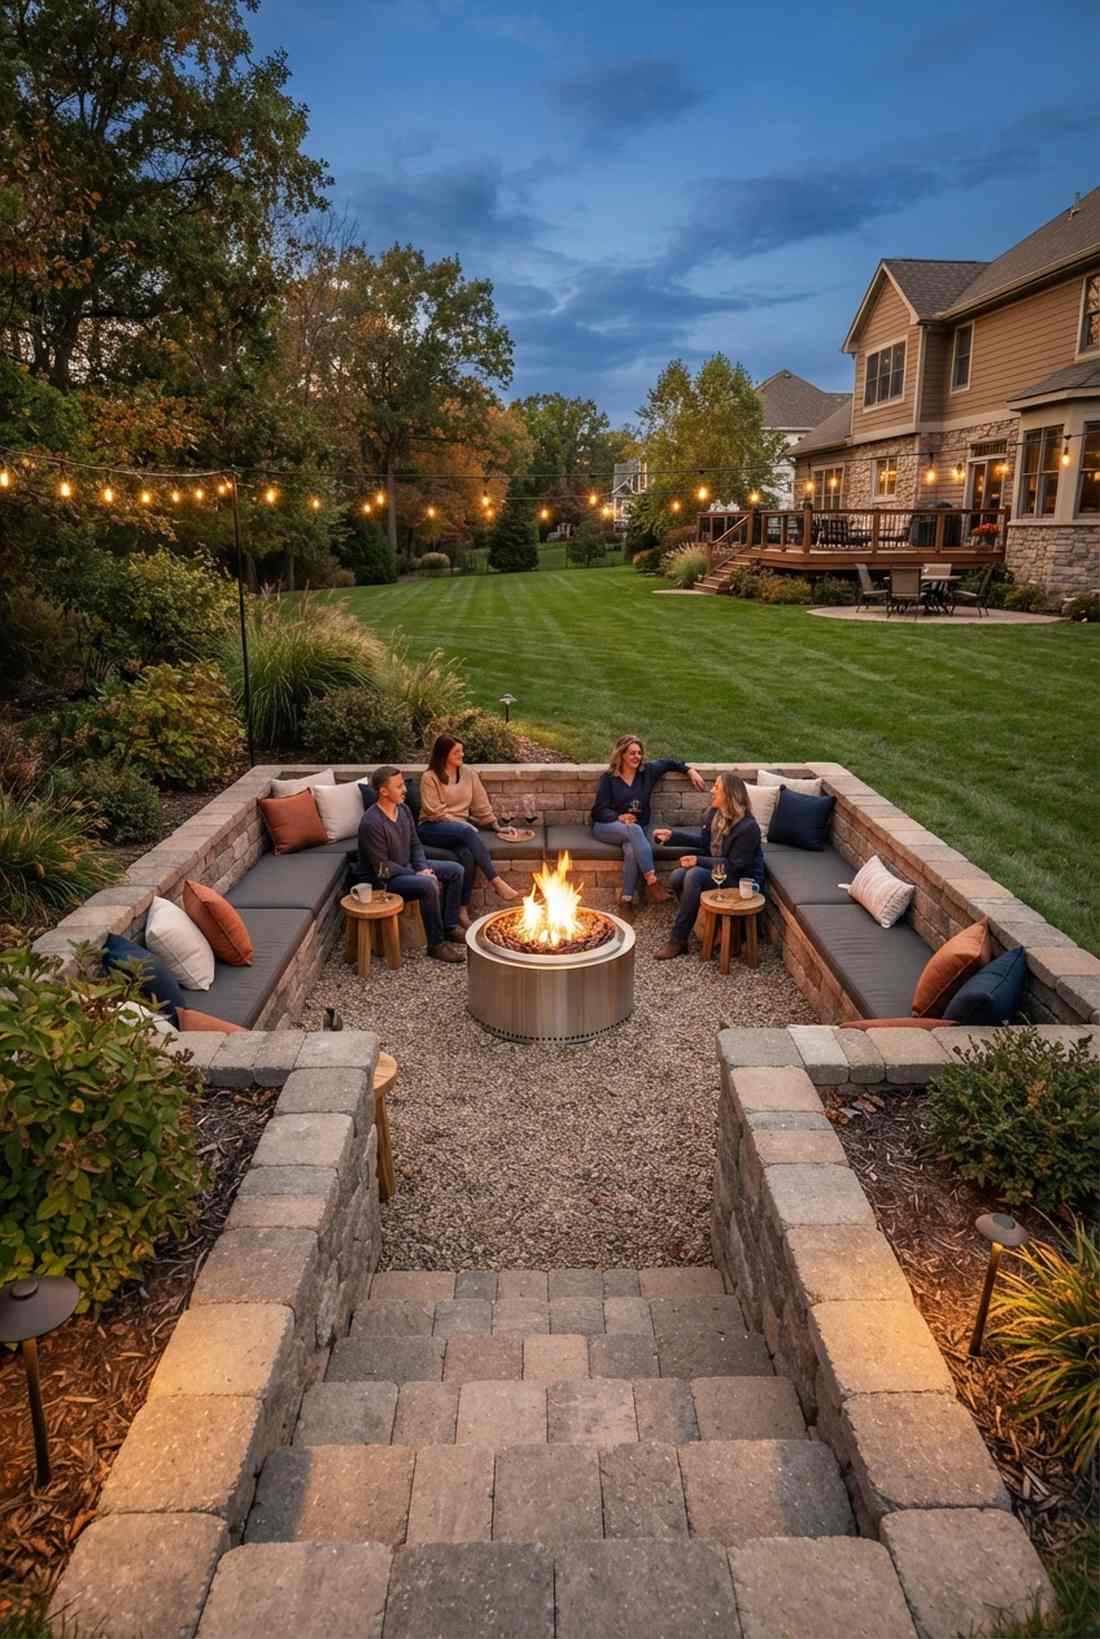

This cozy setup feels like a VIP conversation pit at an exclusive boutique hotel. A recessed conversation perimeter is perfect for adding intimate, wind-protected seating to a large, flat lawn.
Digging a massive hole sounds exhausting, but using interlocking retaining wall blocks to build a semi-sunken rim delivers a surprisingly premium look with half the excavation. Using a smokeless stainless fire pit insert ensures guests leave without smelling like a campfire.
You can create this custom built-in look for around $400. Pin this for your fall backyard makeover.
- Key Materials: Retaining blocks, gravel base, fire insert
- Vibe / Style: Modern architectural coziness
- Difficulty: Labor-intensive digging
- Budget Breakdown: Blocks & Gravel: $200 | Smokeless Insert: $200
- Creator’s Tip: Install a French drain pipe beneath the gravel base so your sunken lounge doesn’t turn into a pond during rainstorms.
- Smart Sourcing: Stainless steel smokeless fire pit inserts and heavy-duty landscaping block adhesive.
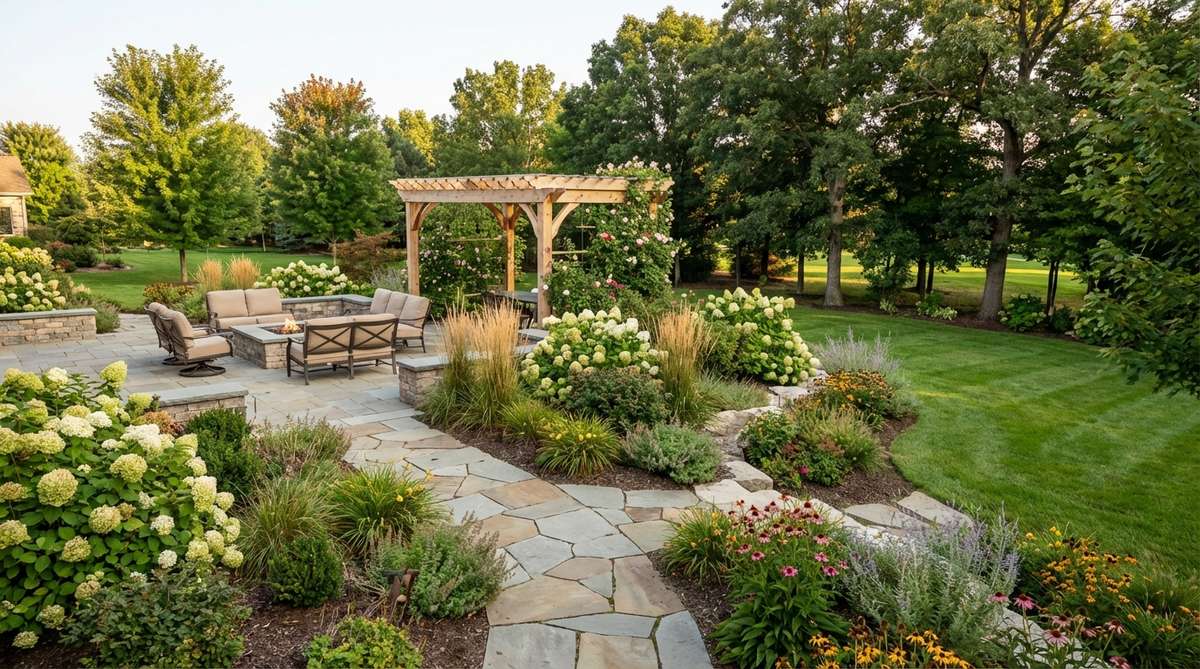
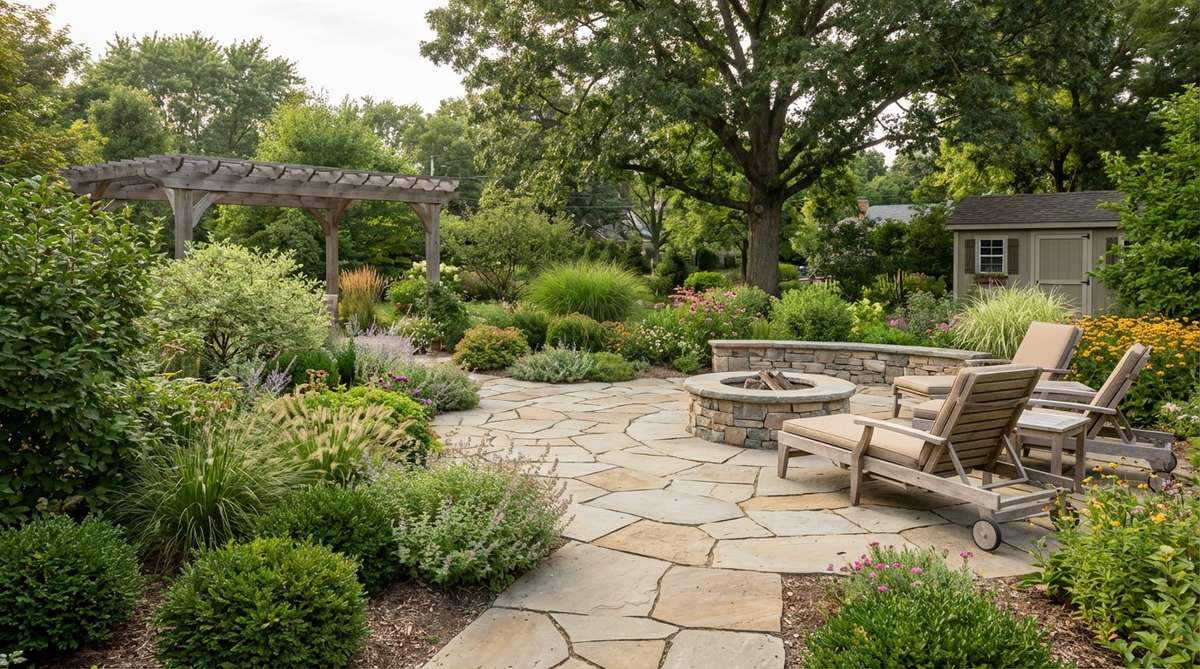
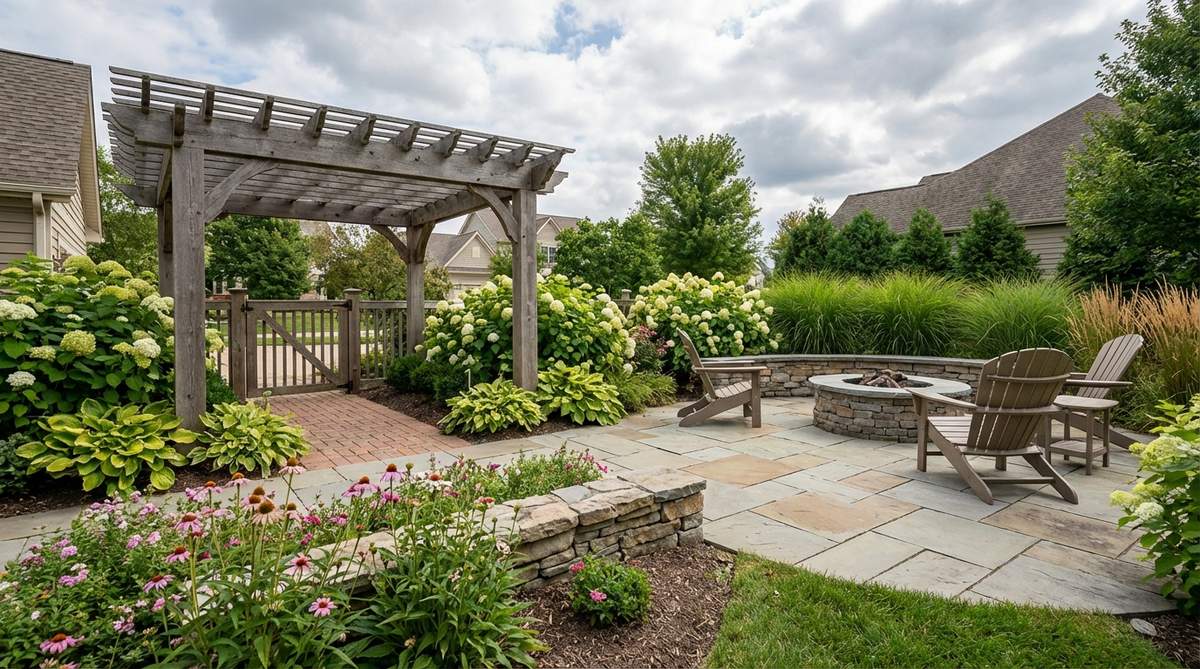
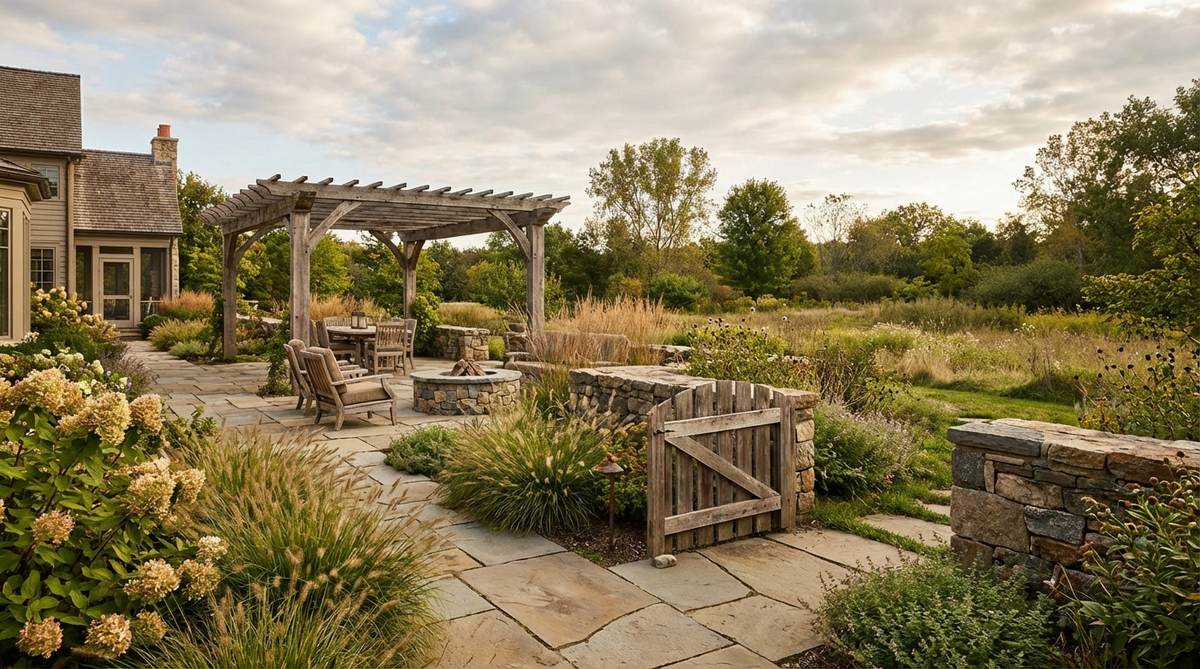
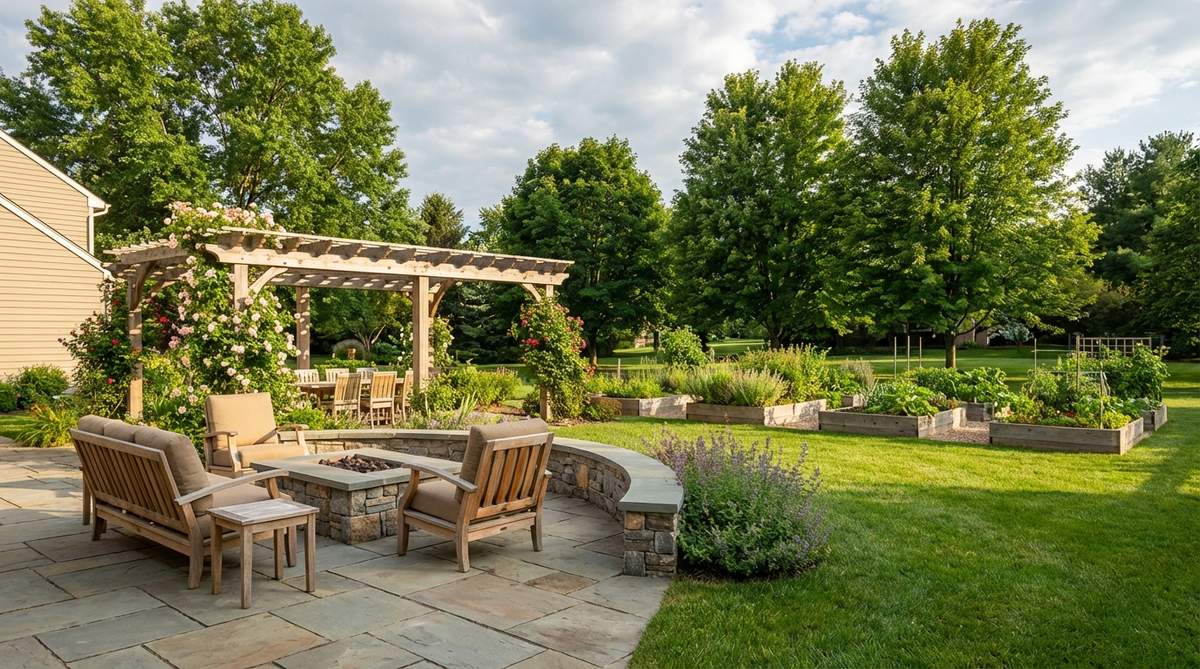
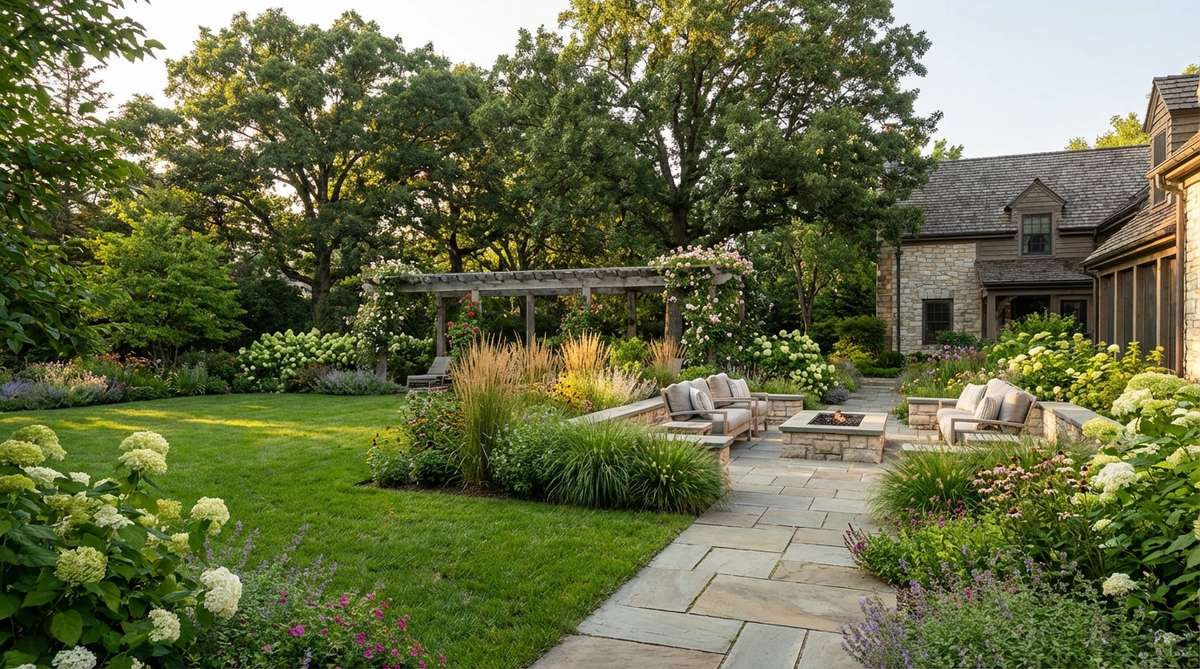
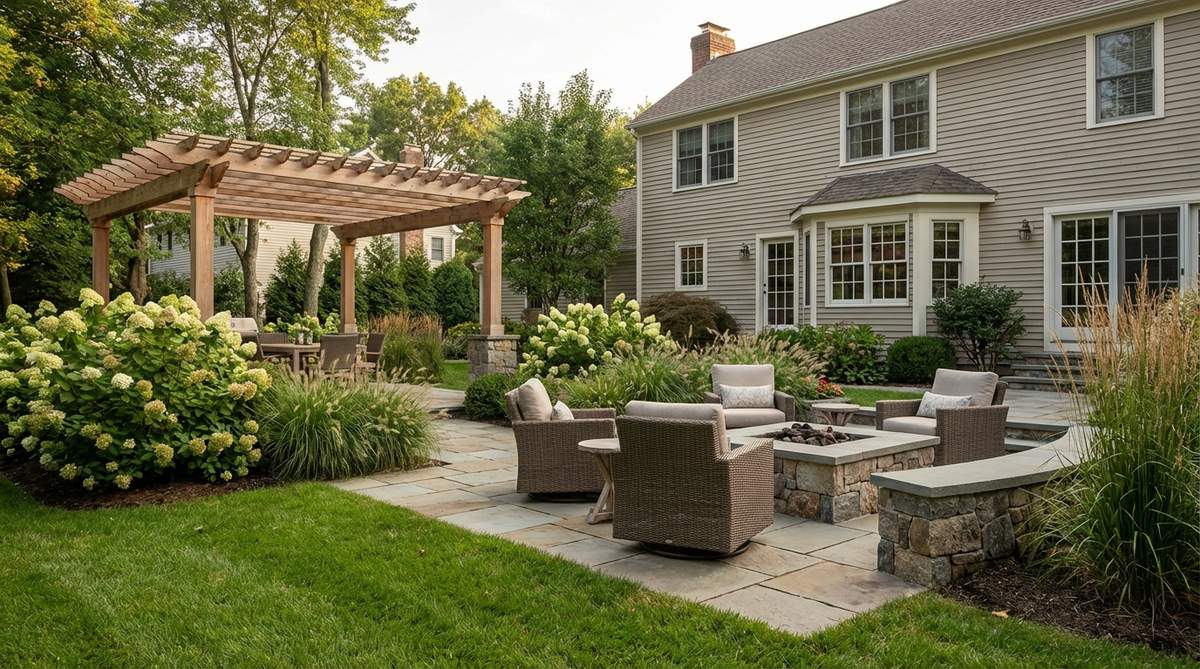
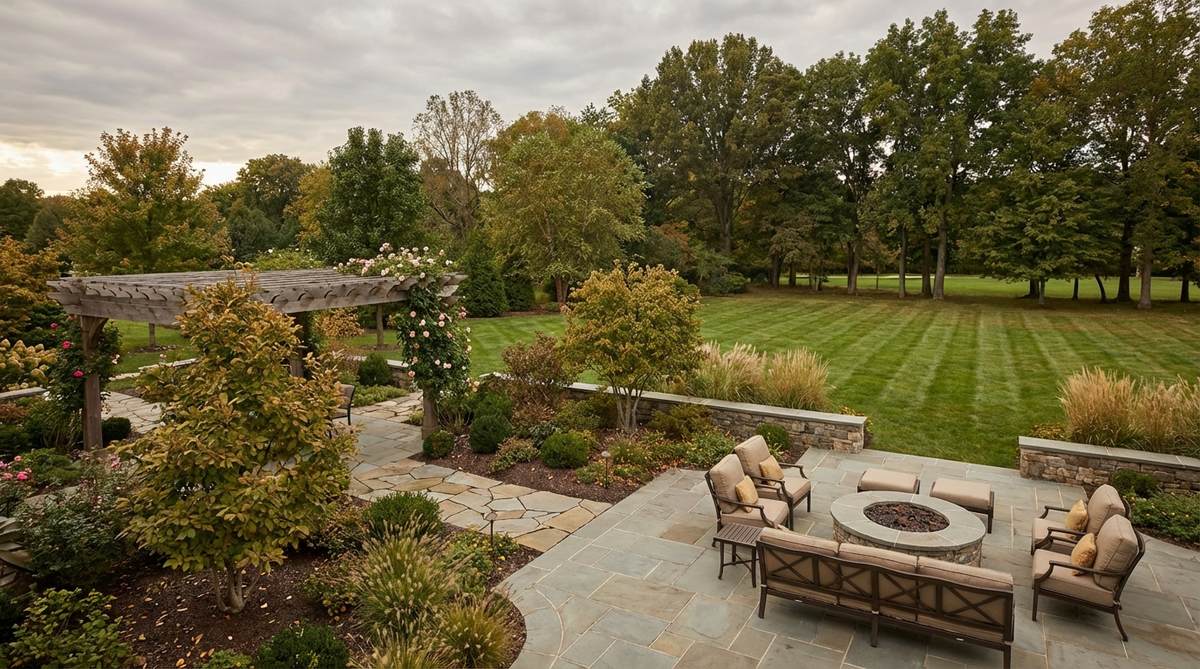
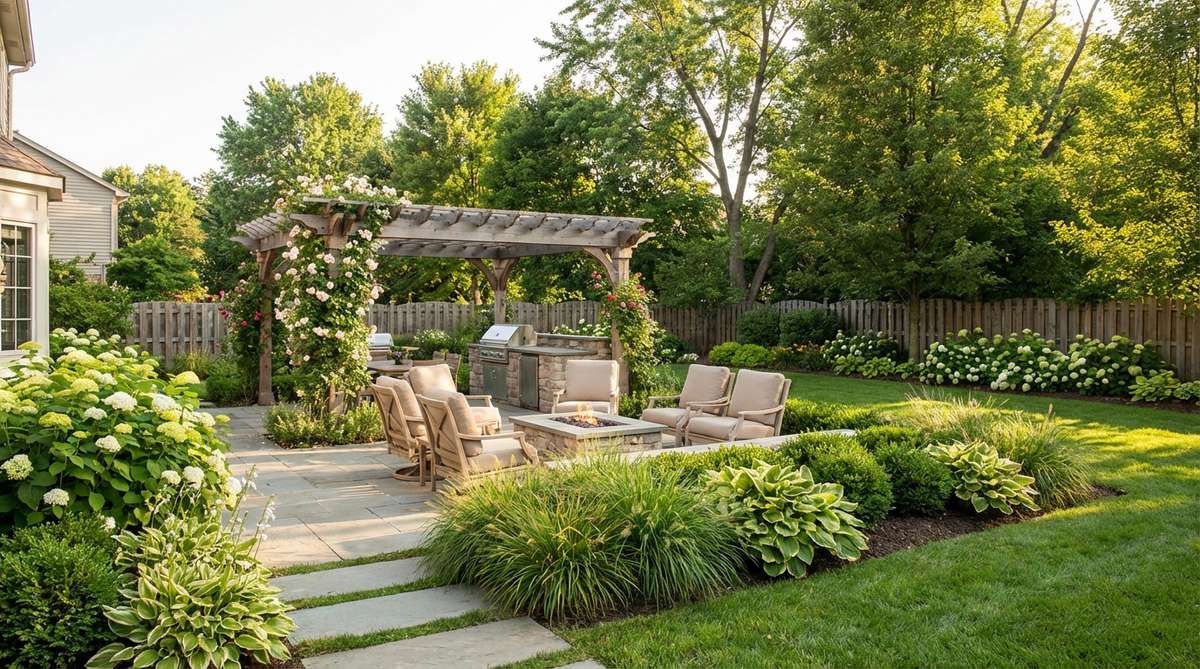
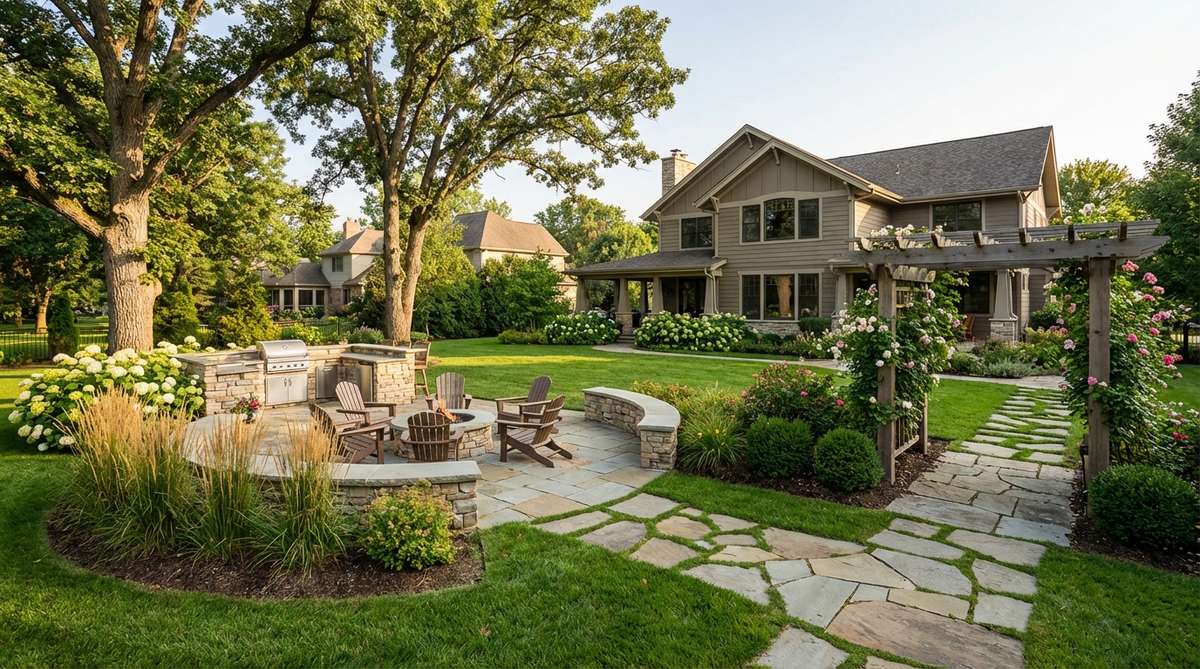
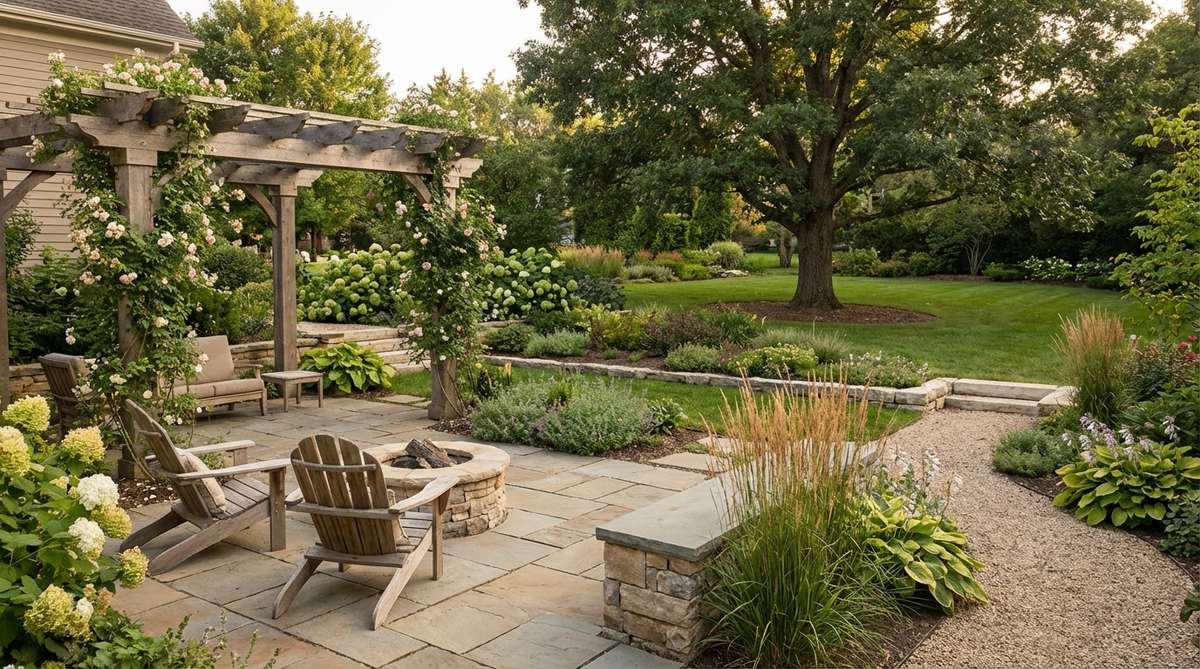
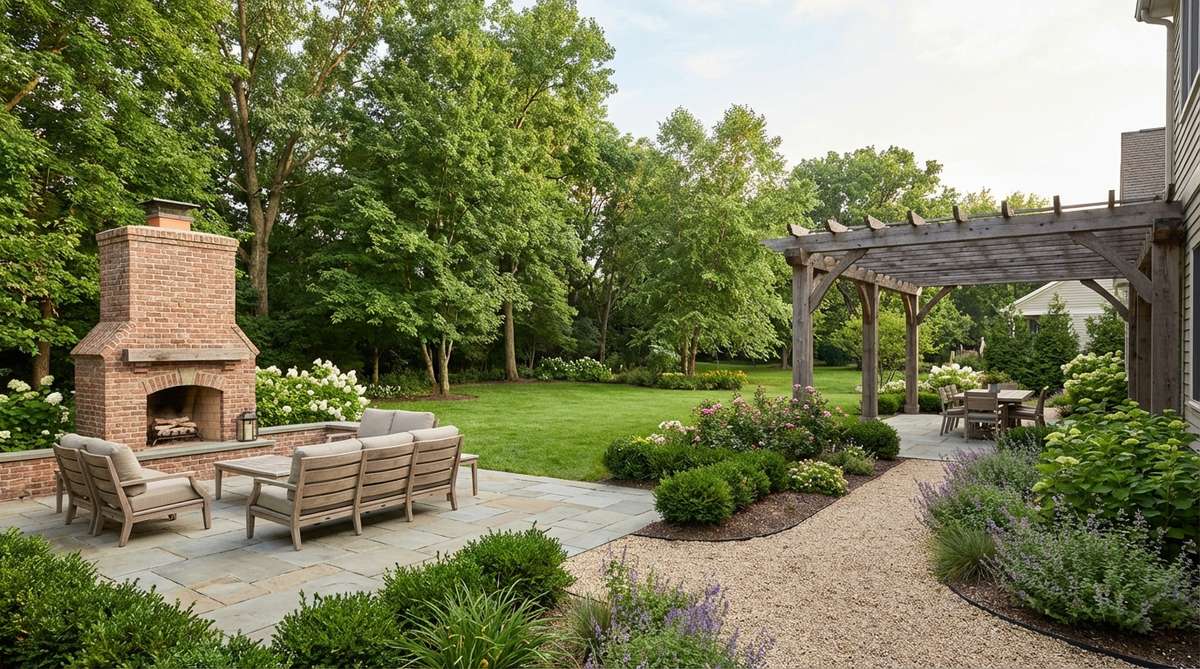
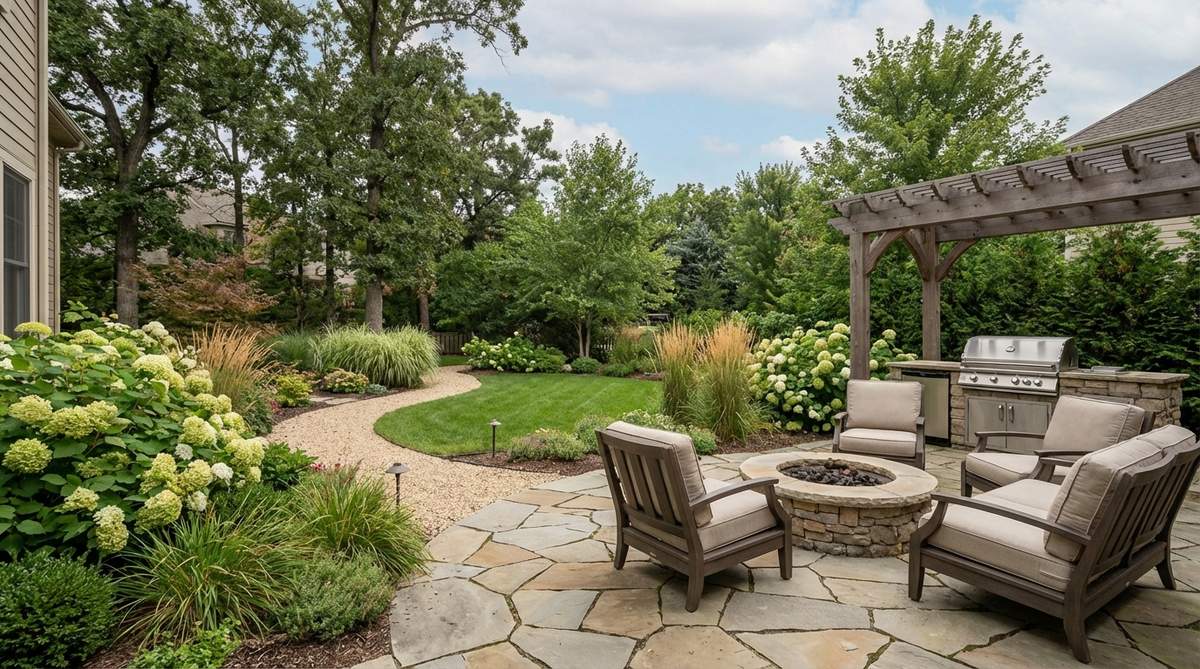
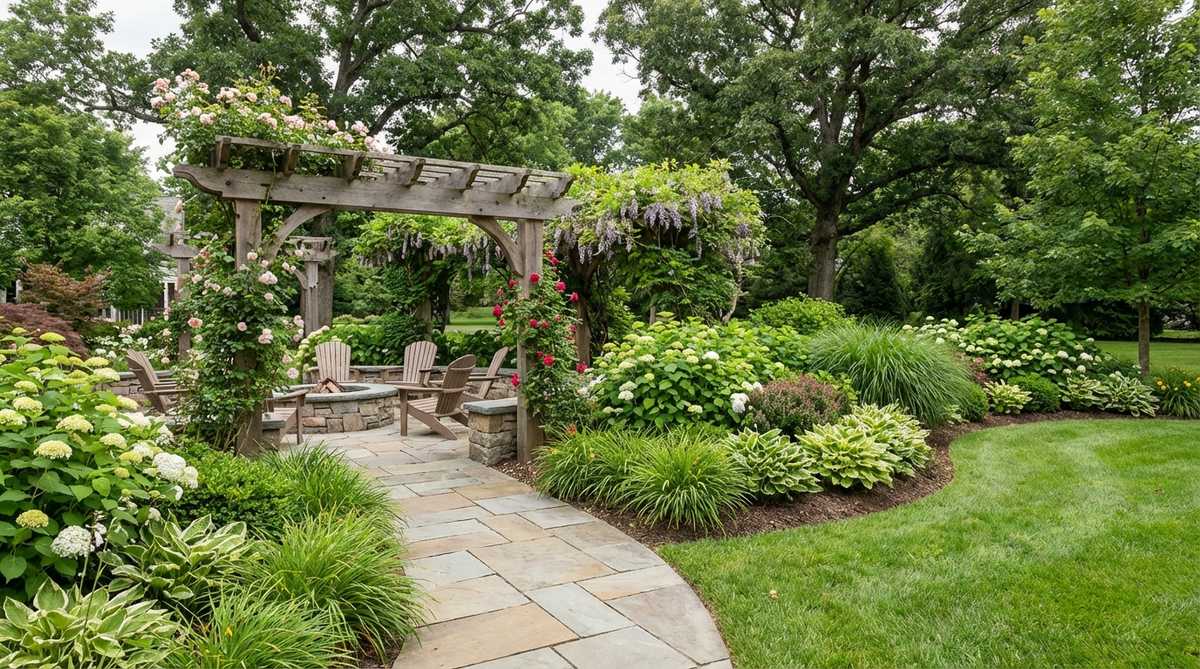
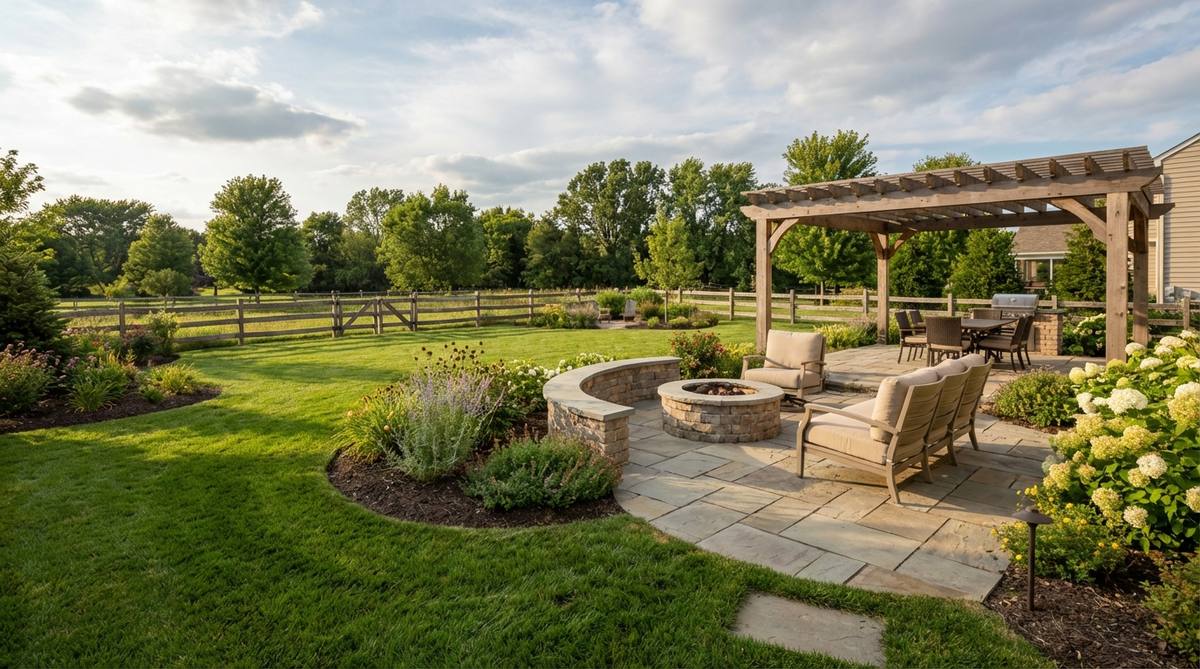
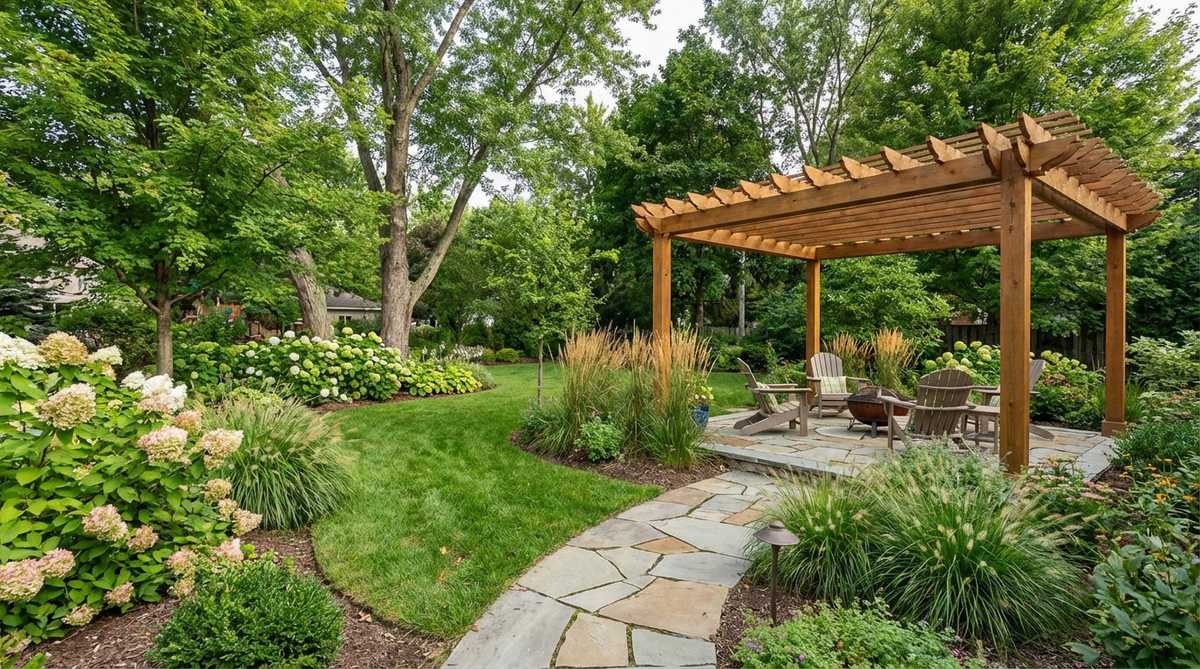
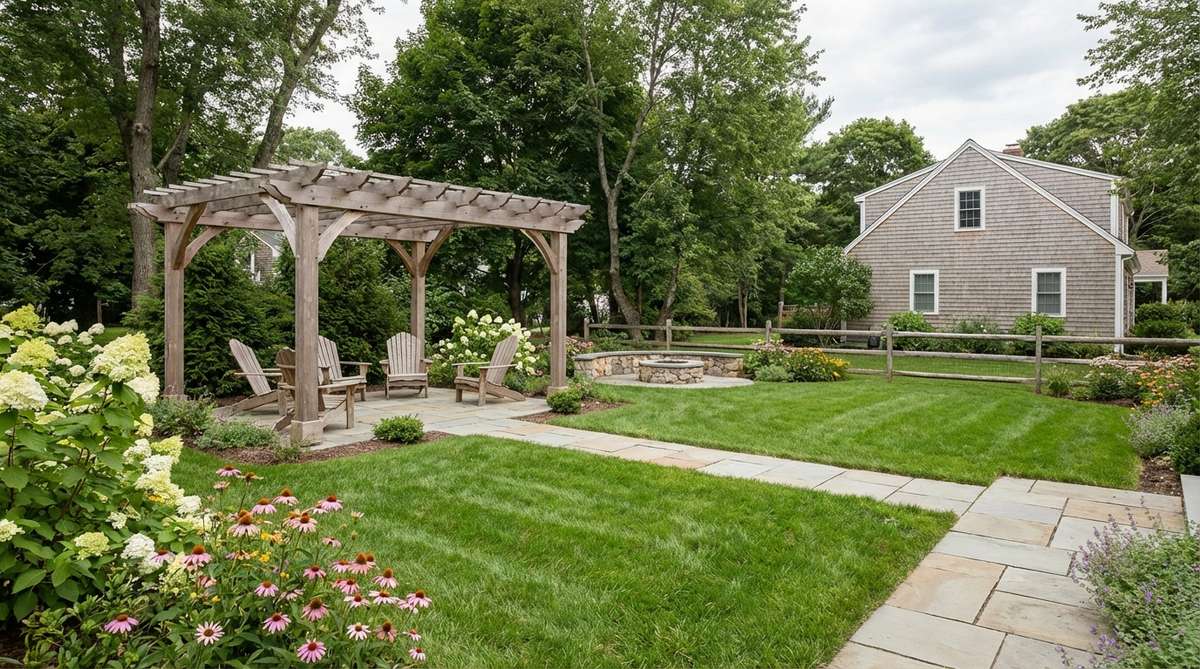
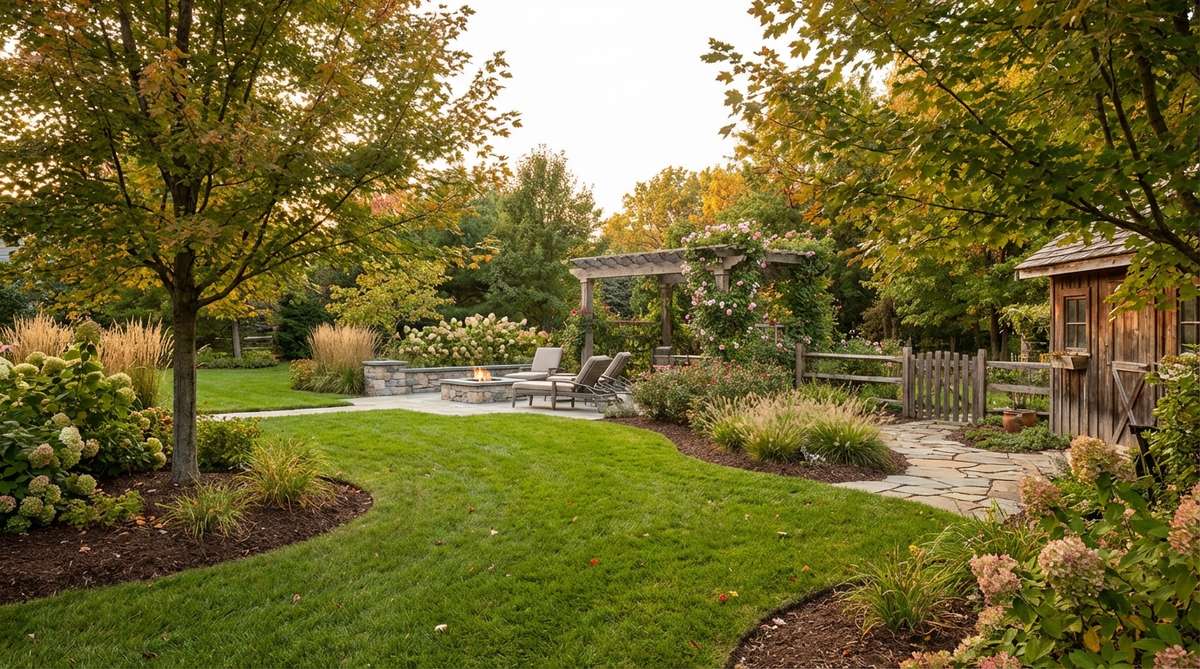
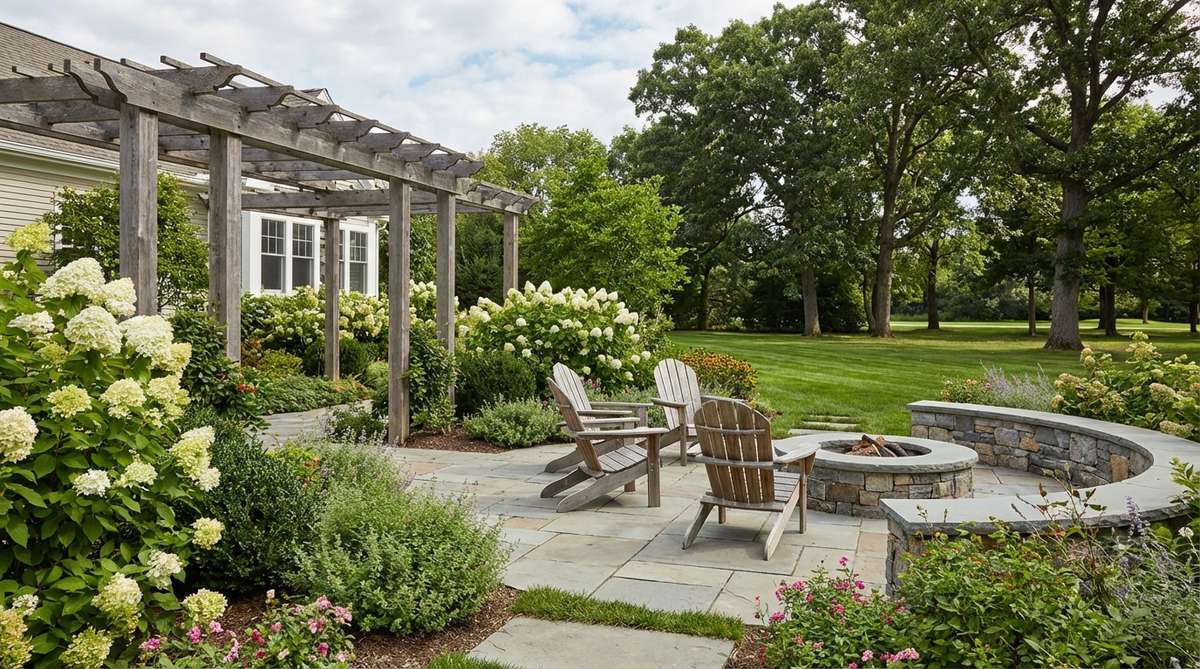
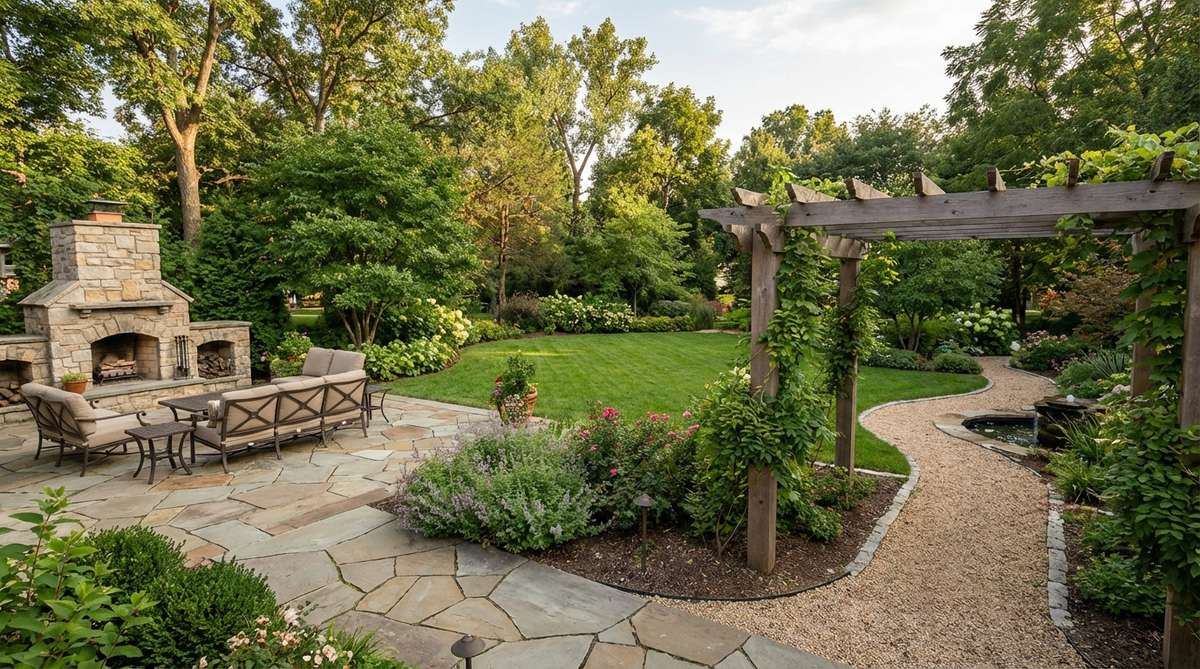
22. Pergola-Covered Dining Terraces
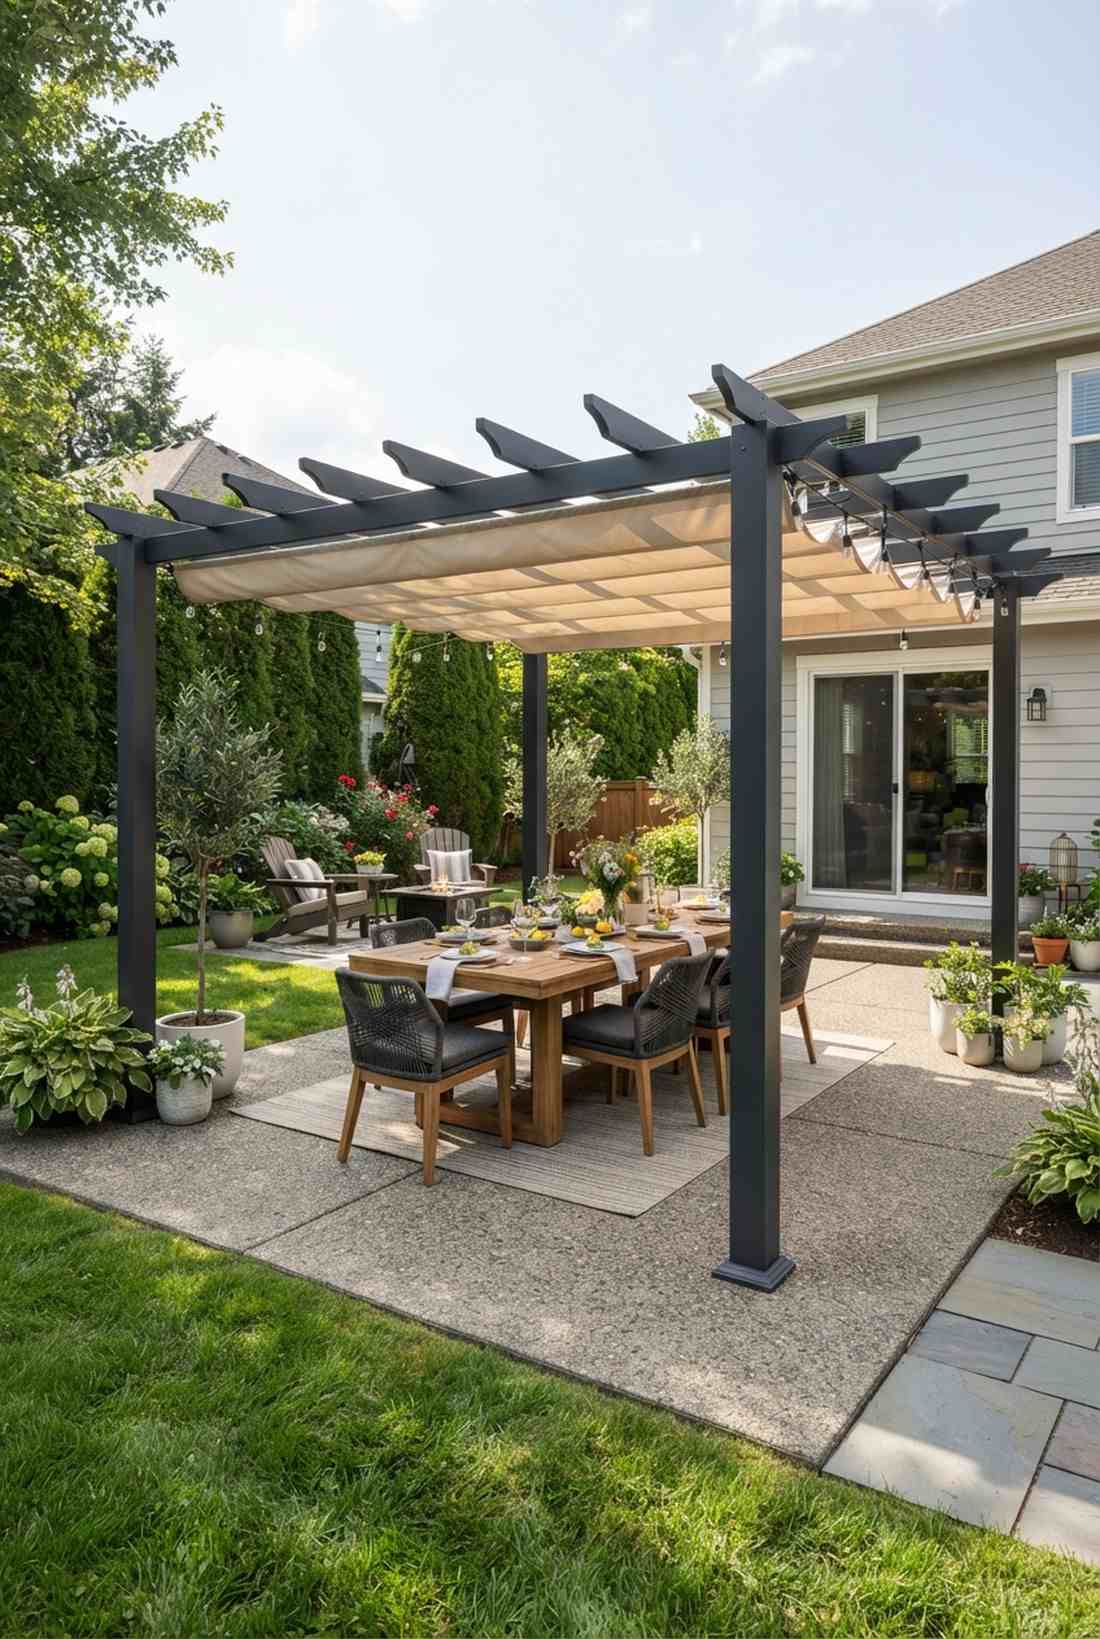
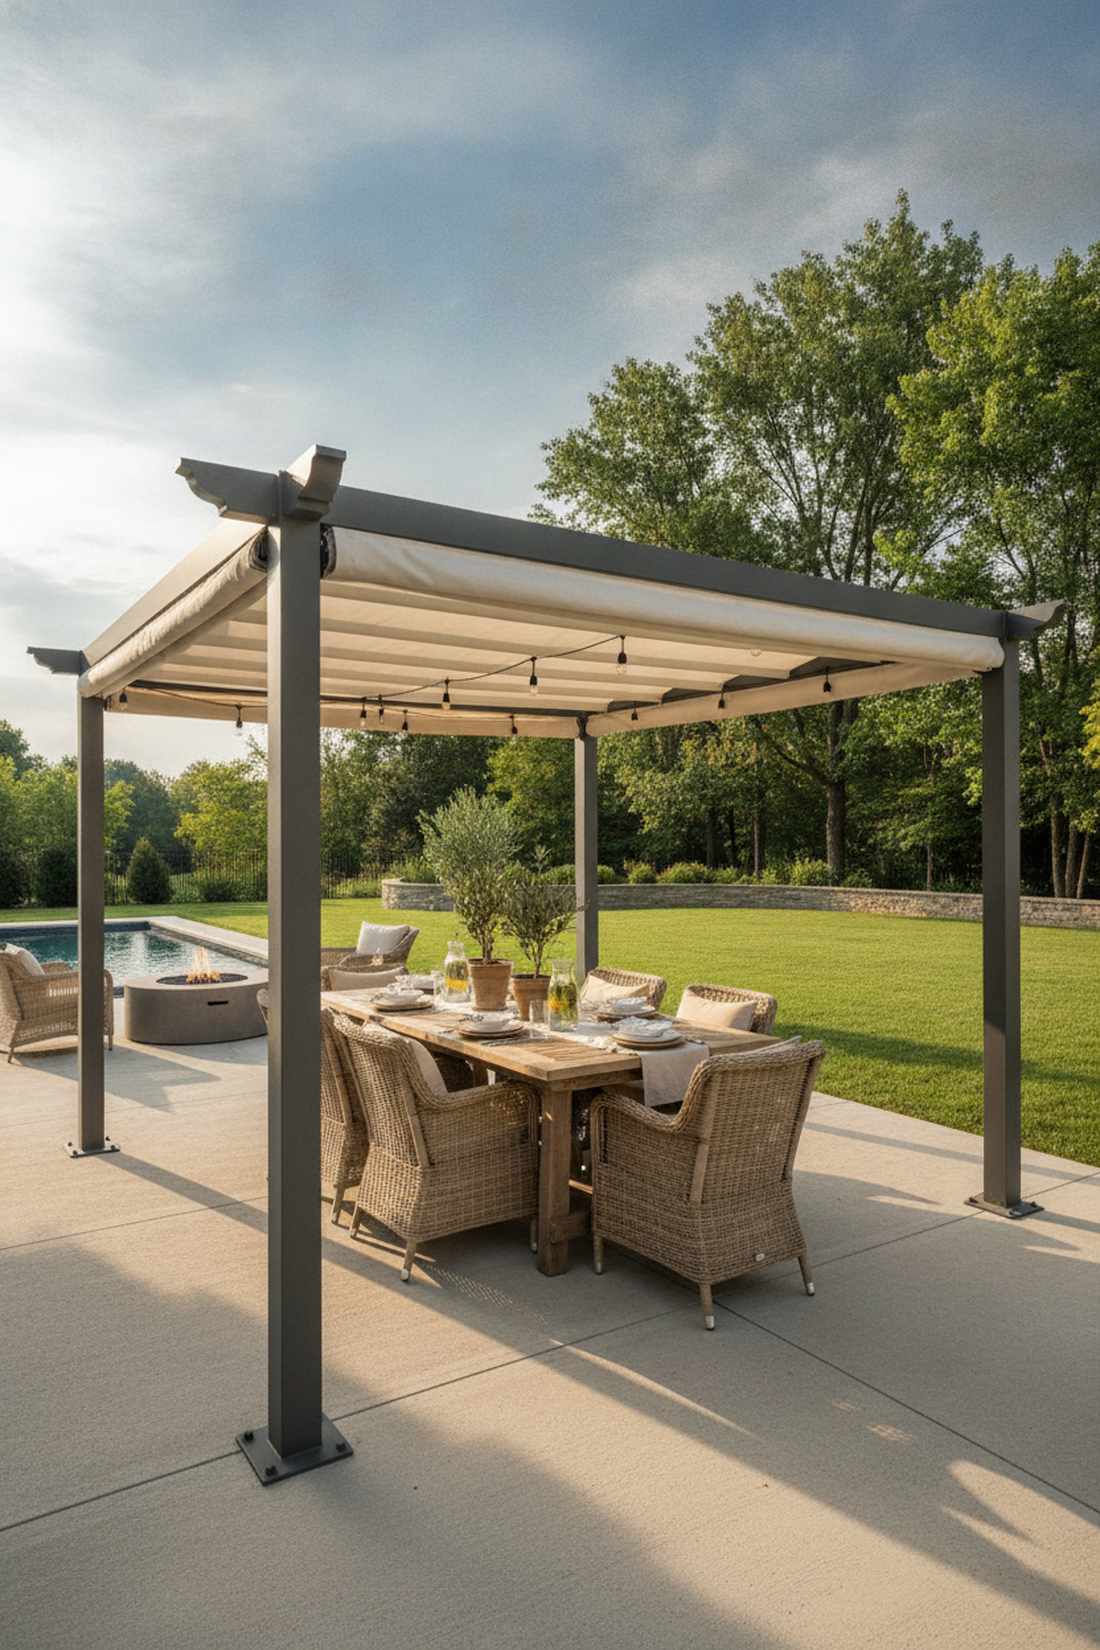
Dining under this structure feels like an upscale brunch in a shaded Mediterranean vineyard. An open-beam architectural canopy works exceptionally well to define an outdoor dining room without completely blocking the sky.
Custom timber framing costs a fortune, but assembling a powder-coated aluminum kit looks far more expensive than it is and requires zero maintenance. Adding a retractable UV-blocking shade canopy allows you to control the exact amount of sunlight hitting the table.
A high-quality aluminum kit runs about $500–$800. Highly recommended for instantly upgrading a bare concrete slab.
- Key Materials: Aluminum pergola kit, shade fabric
- Vibe / Style: Effortless contemporary alfresco
- Difficulty: Requires two people to assemble
- Budget Breakdown: Structure Kit: $600 | Shade Canopy: $150
- Creator’s Tip: Bolt the base plates directly into the concrete using wedge anchors to ensure it withstands heavy storm winds.
- Smart Sourcing: Powder-coated aluminum pergola starter kits and custom-fit UV-resistant shade sails.
23. Outdoor Bar Stations
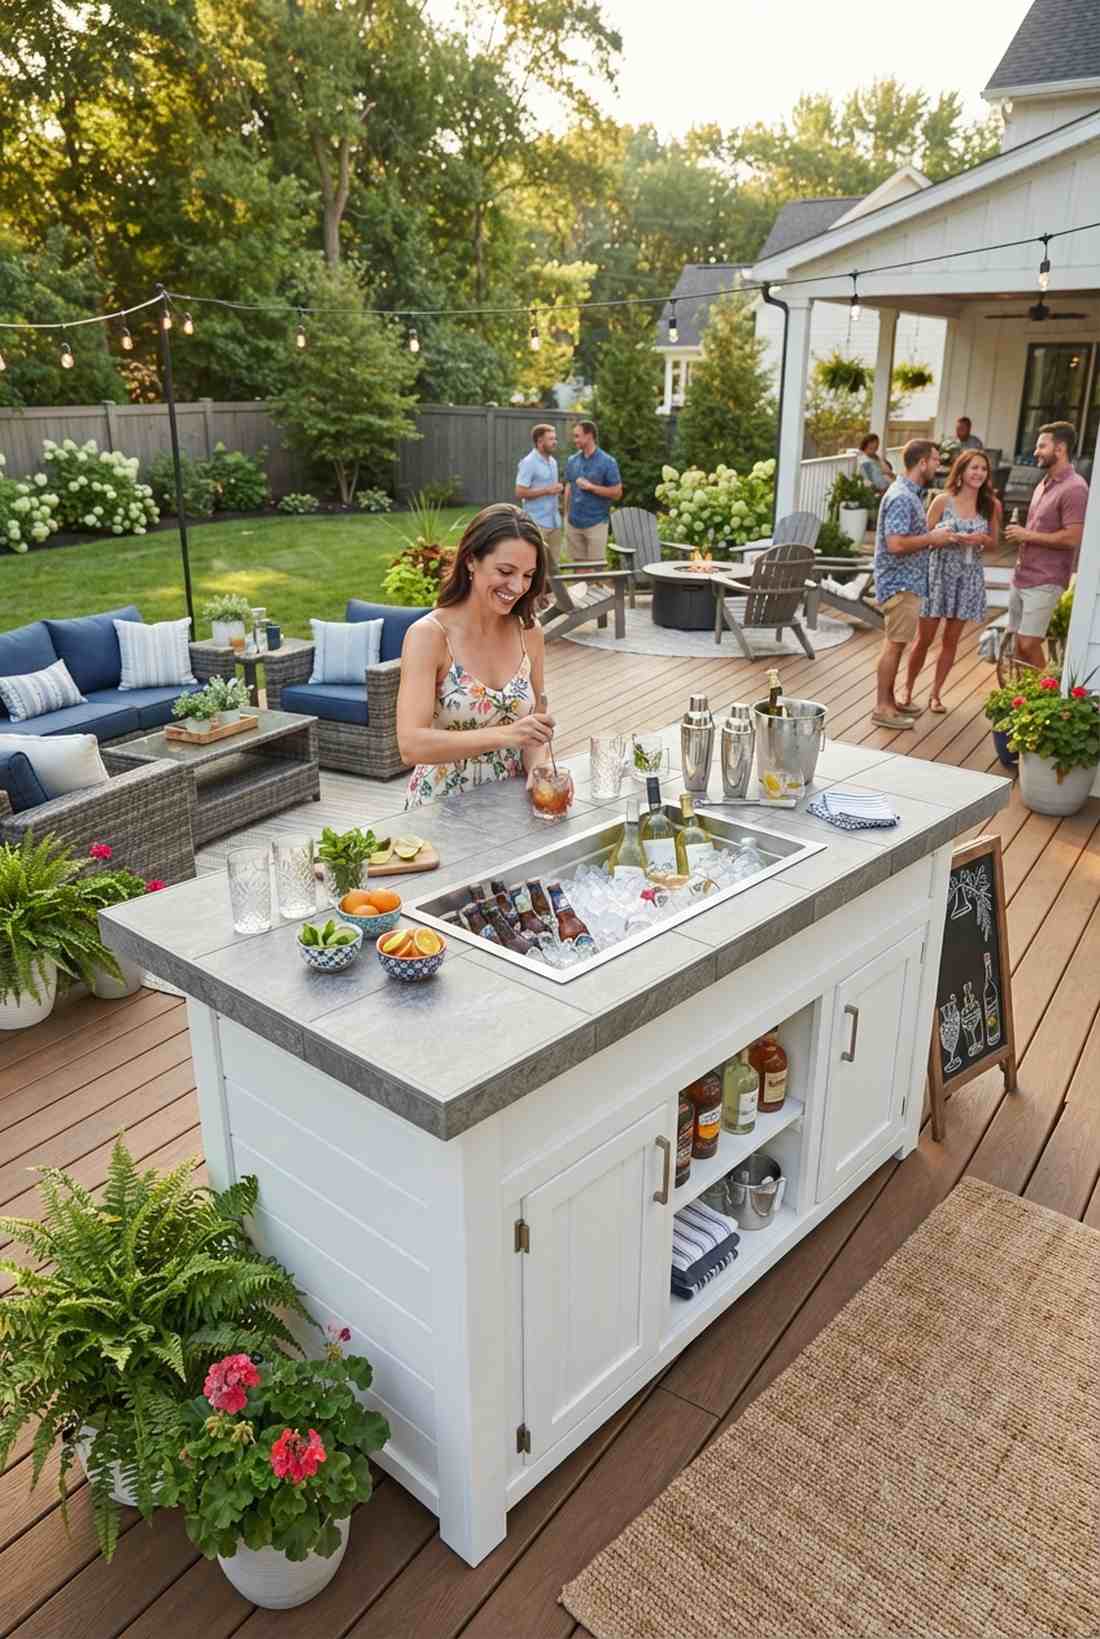
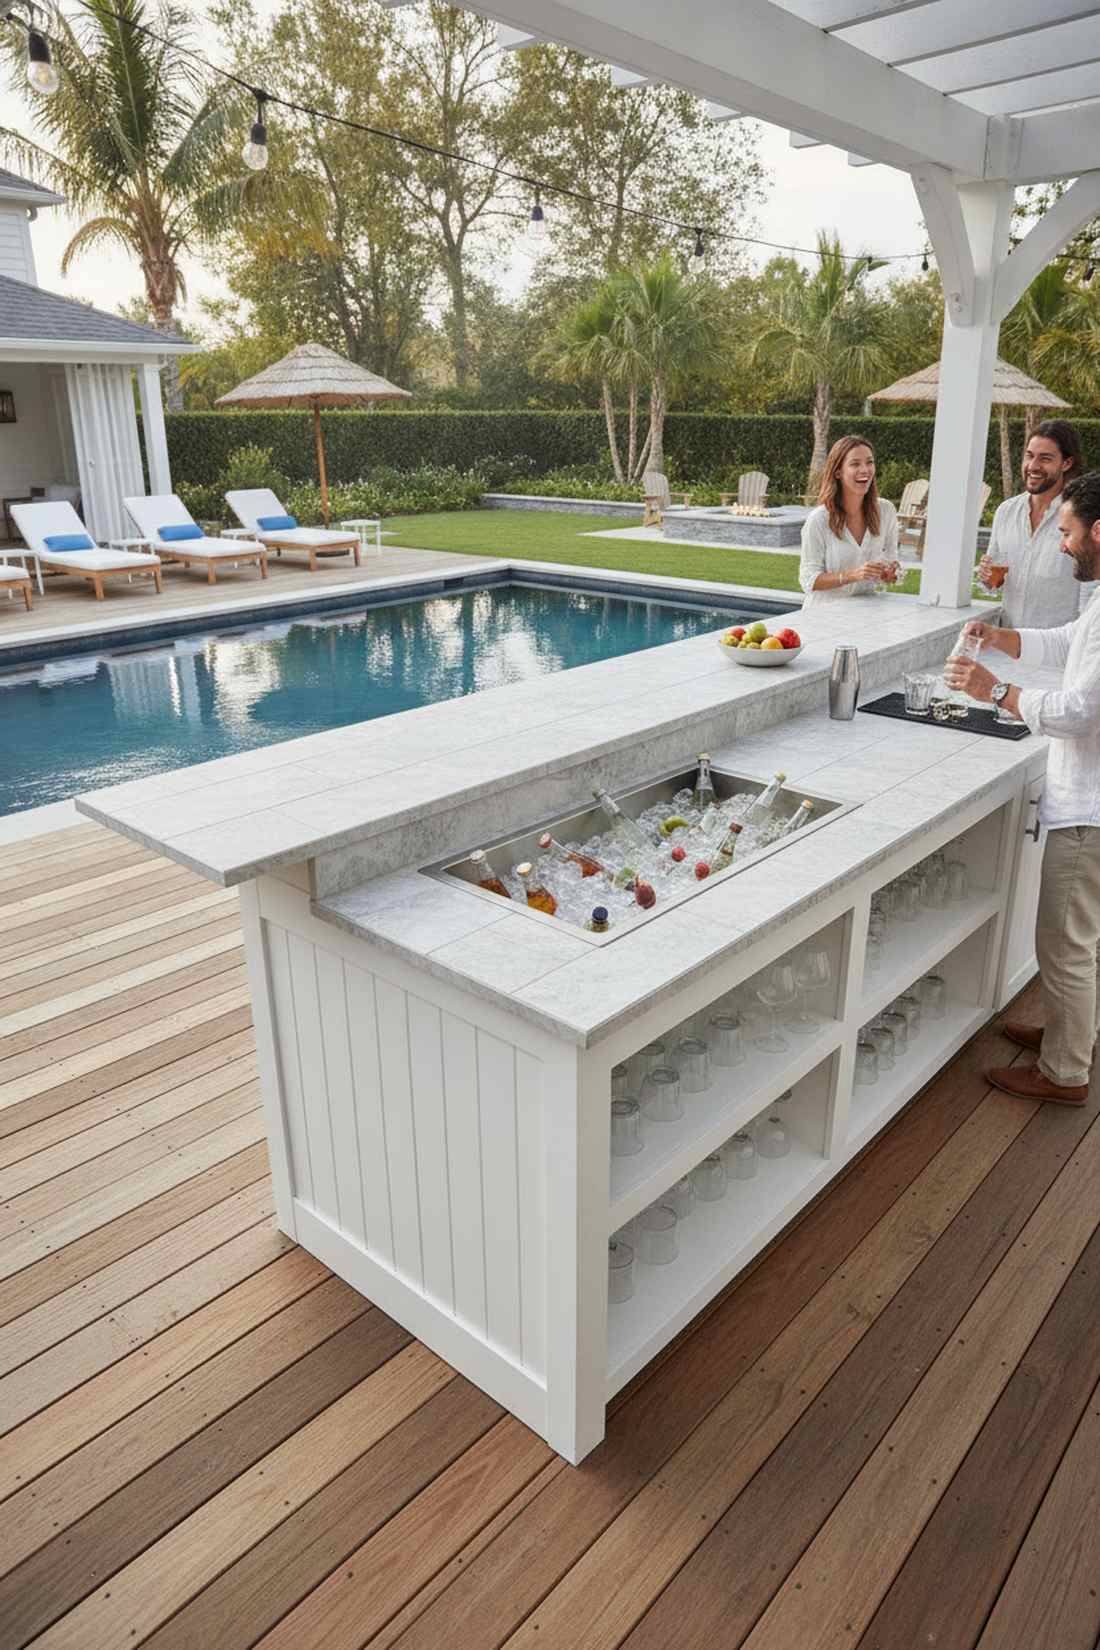
Serving drinks here feels like you’ve rented out a private cabana at a luxury beach club. A dedicated beverage prep counter is the ultimate solution for keeping guests out of your kitchen while entertaining.
Building custom cabinetry outdoors rots quickly, but using weather-resistant PVC panels gives a designer-level finish that ignores moisture completely. Dropping in a stainless drop-in ice chest cooler creates a professional bartending vibe without needing complex electrical wiring.
You can assemble a stunning weather-proof bar for around $350. Save this to your summer party planning board!
- Key Materials: PVC boards, stainless drop-in cooler, bar top
- Vibe / Style: Chic resort-style entertaining
- Difficulty: Basic carpentry skills needed
- Budget Breakdown: Lumber/PVC: $200 | Drop-in Cooler: $150
- Creator’s Tip: Use an oversized ceramic tile for the countertop—it’s cheaper than granite and completely weatherproof.
- Smart Sourcing: Stainless steel insulated drop-in ice chests and weatherproof PVC exterior trim boards (bulk).
24. Daybed Garden Retreats
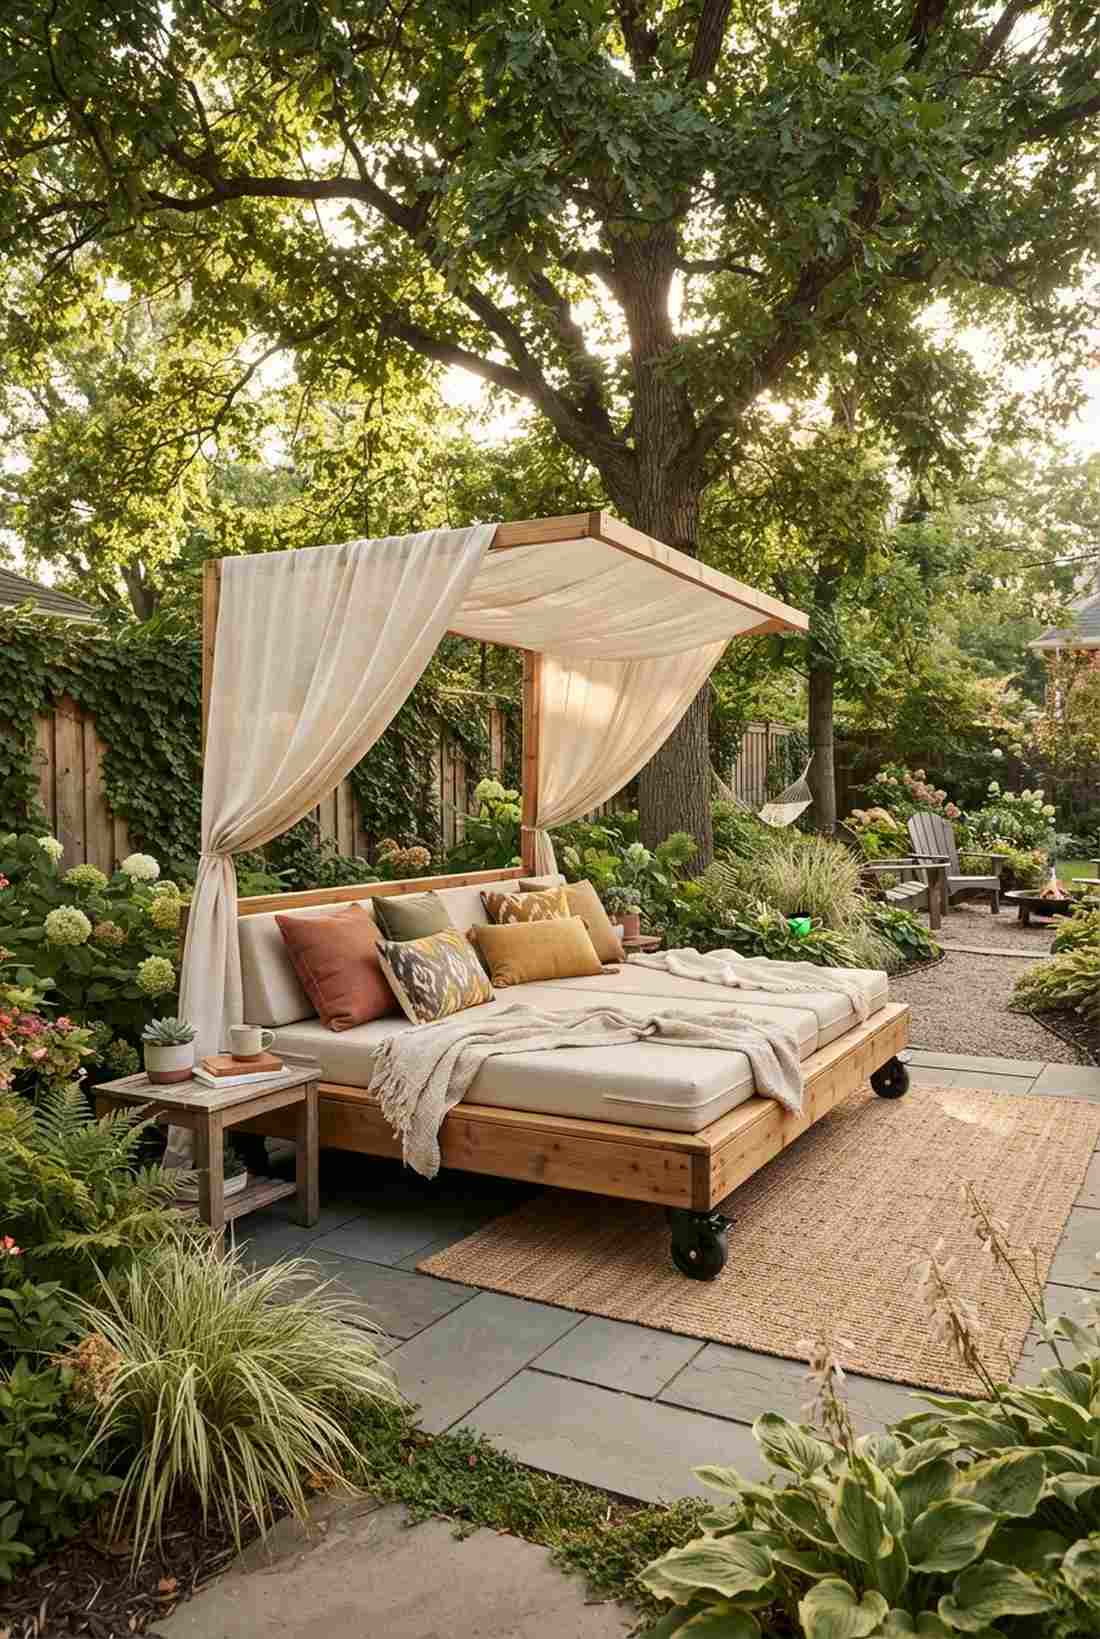
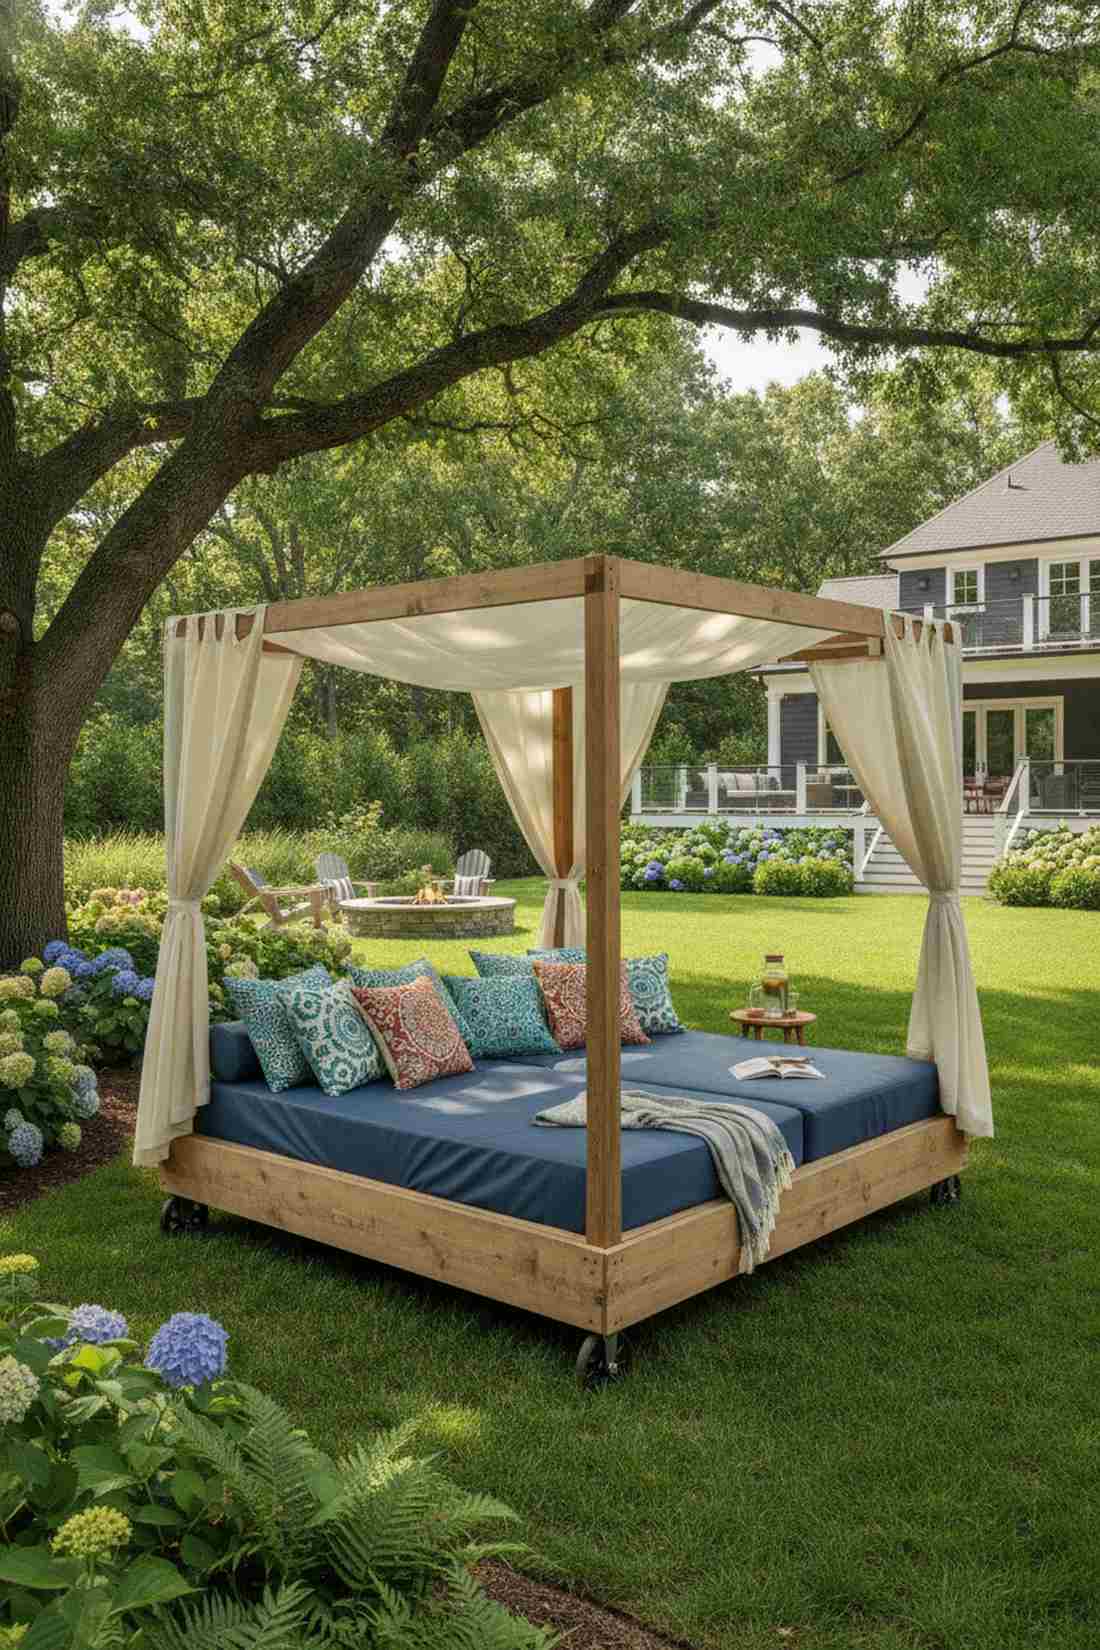
Lounging in this space feels like indulging in a lazy afternoon at a Balinese spa. A canopied oversized lounge platform works perfectly tucked under a mature shade tree for a secluded reading nook.
Buying designer outdoor furniture sets is wildly expensive, but building a platform from treated lumber screams custom architecture for pennies. Wrapping standard mattresses in waterproof marine-grade vinyl covers lets you leave the cushions out all summer without stress.
Building the frame and covering the cushions costs roughly $250. It’s a fast upgrade that completely changes the vibe.
- Key Materials: Treated lumber, memory foam, waterproof fabric
- Vibe / Style: Bohemian resort relaxation
- Difficulty: Easy weekend build
- Budget Breakdown: Lumber: $100 | Mattress & Cover: $150
- Creator’s Tip: Build the platform on heavy-duty casters so you can easily chase the shade or sun across your patio.
- Smart Sourcing: Marine-grade waterproof upholstery vinyl and heavy-duty locking caster wheels.
Stop wasting money on flimsy seasonal items. This next structural upgrade adds permanent, hard equity to your home.
25. Pool Pavilions with Summer Kitchens
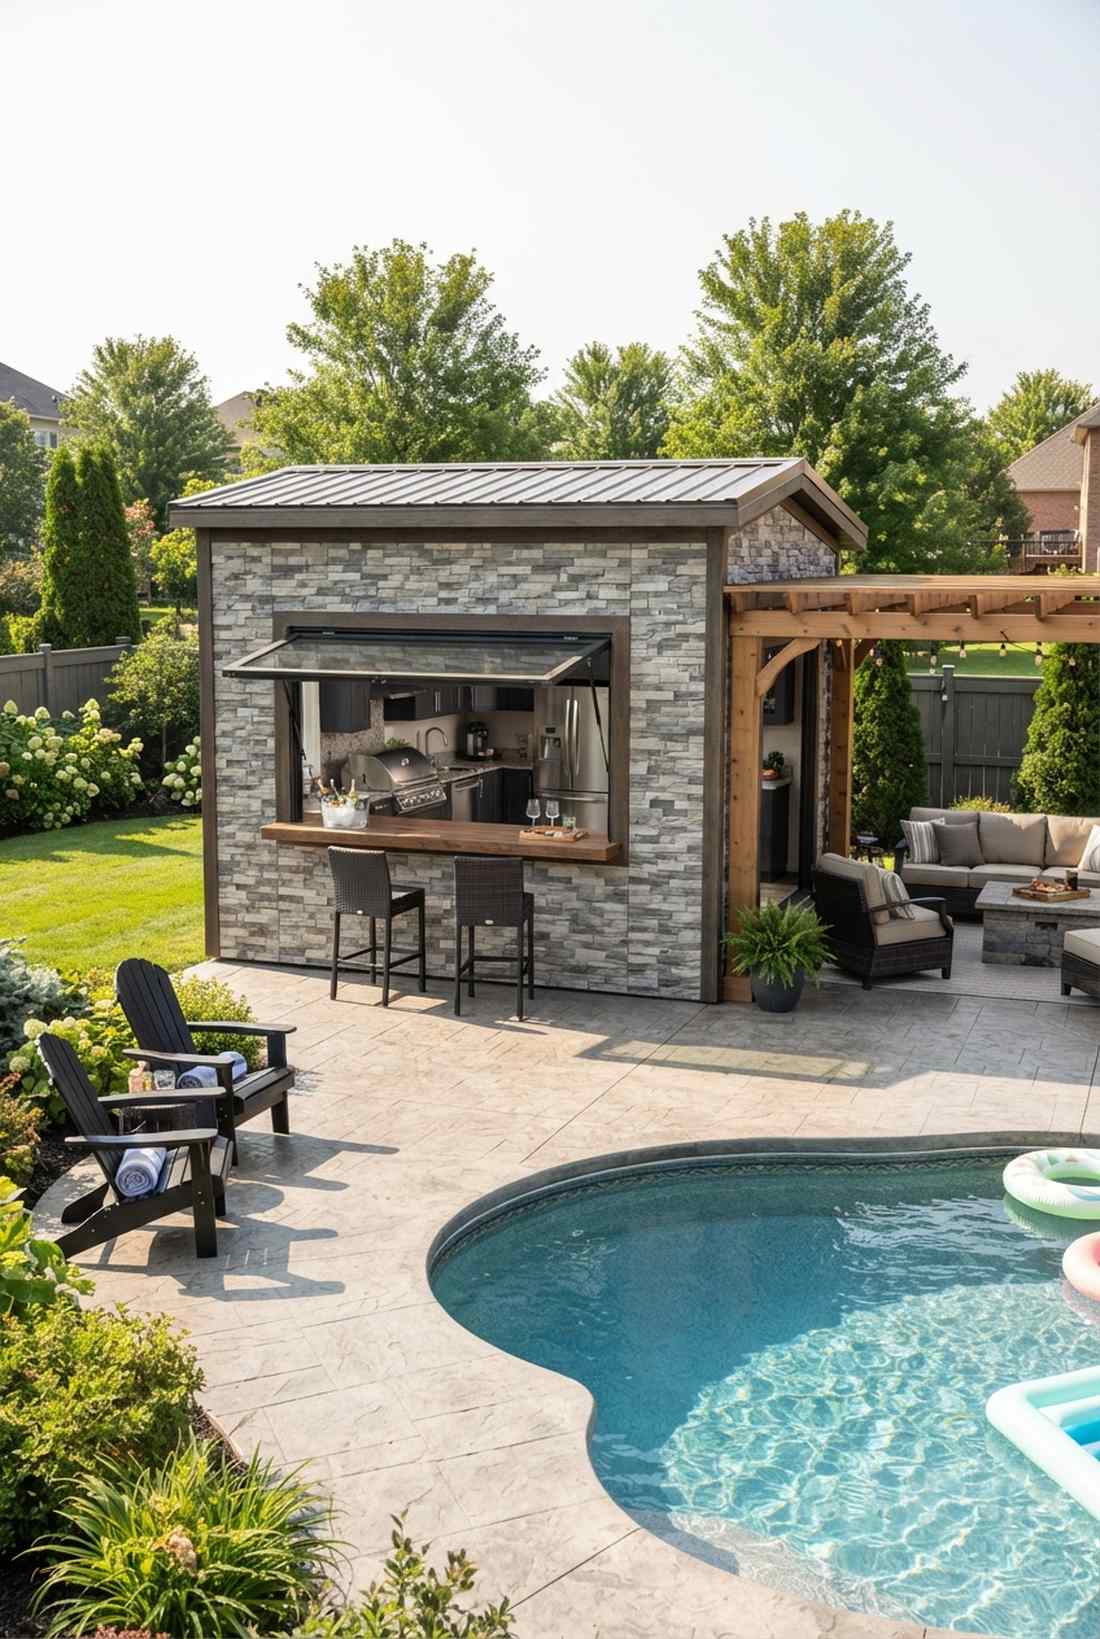
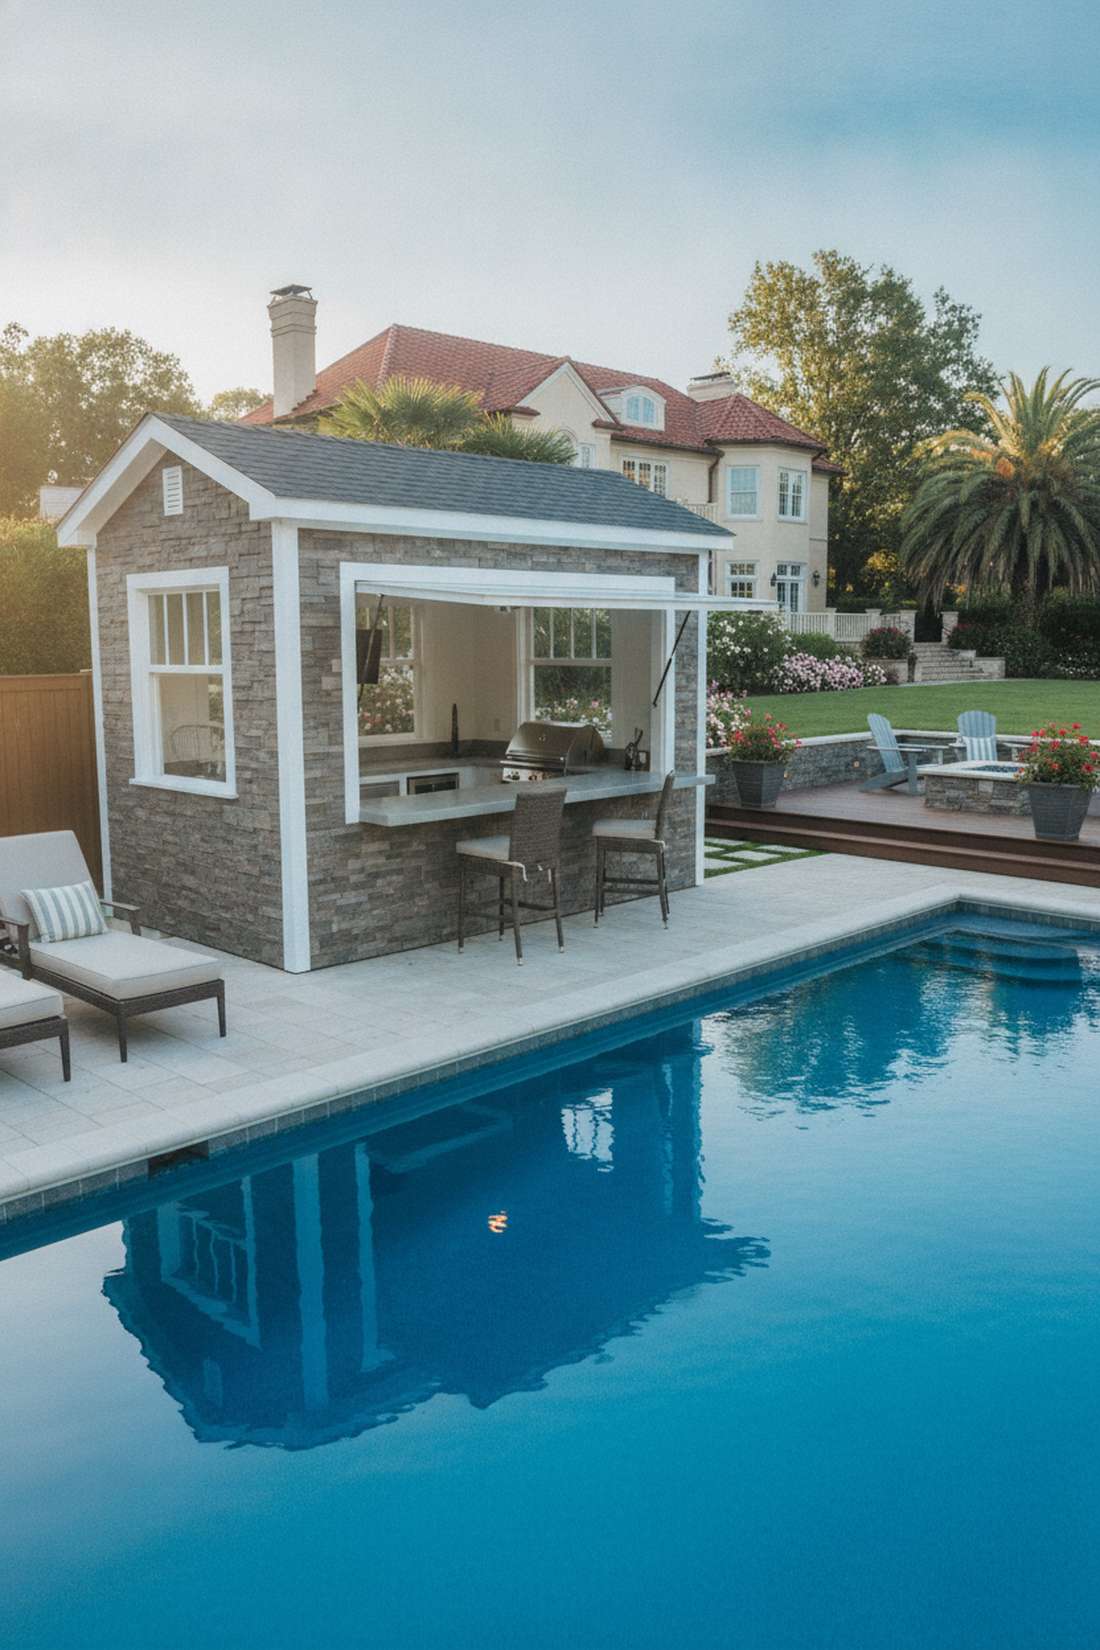
This layout feels like a multi-million dollar estate’s exclusive guest house. A standalone poolside entertaining suite is ideal for keeping wet swimsuits and messy snacks completely out of your main house.
Erecting a full stick-built structure requires permits, but modifying a premium prefabricated shed kit achieves a high-end estate vibe with significantly less red tape. Upgrading the facade with peel-and-stick exterior stone veneer instantly disguises its humble origins.
A customized premium shed conversion runs about $2,000. Pin this to your ultimate pool makeover board!
- Key Materials: Prefab shed kit, faux stone veneer, bar window
- Vibe / Style: Elite country club amenities
- Difficulty: Advanced multi-weekend project
- Budget Breakdown: Shed Kit: $1,200 | Veneer & Trim: $800
- Creator’s Tip: Cut a large opening on the side facing the pool and install a gas-strut awning window to create an instant pass-through bar.
- Smart Sourcing: Pre-cut exterior faux stone veneer panels and heavy-duty gas struts for awning windows.
26. Greenhouse Garden Rooms
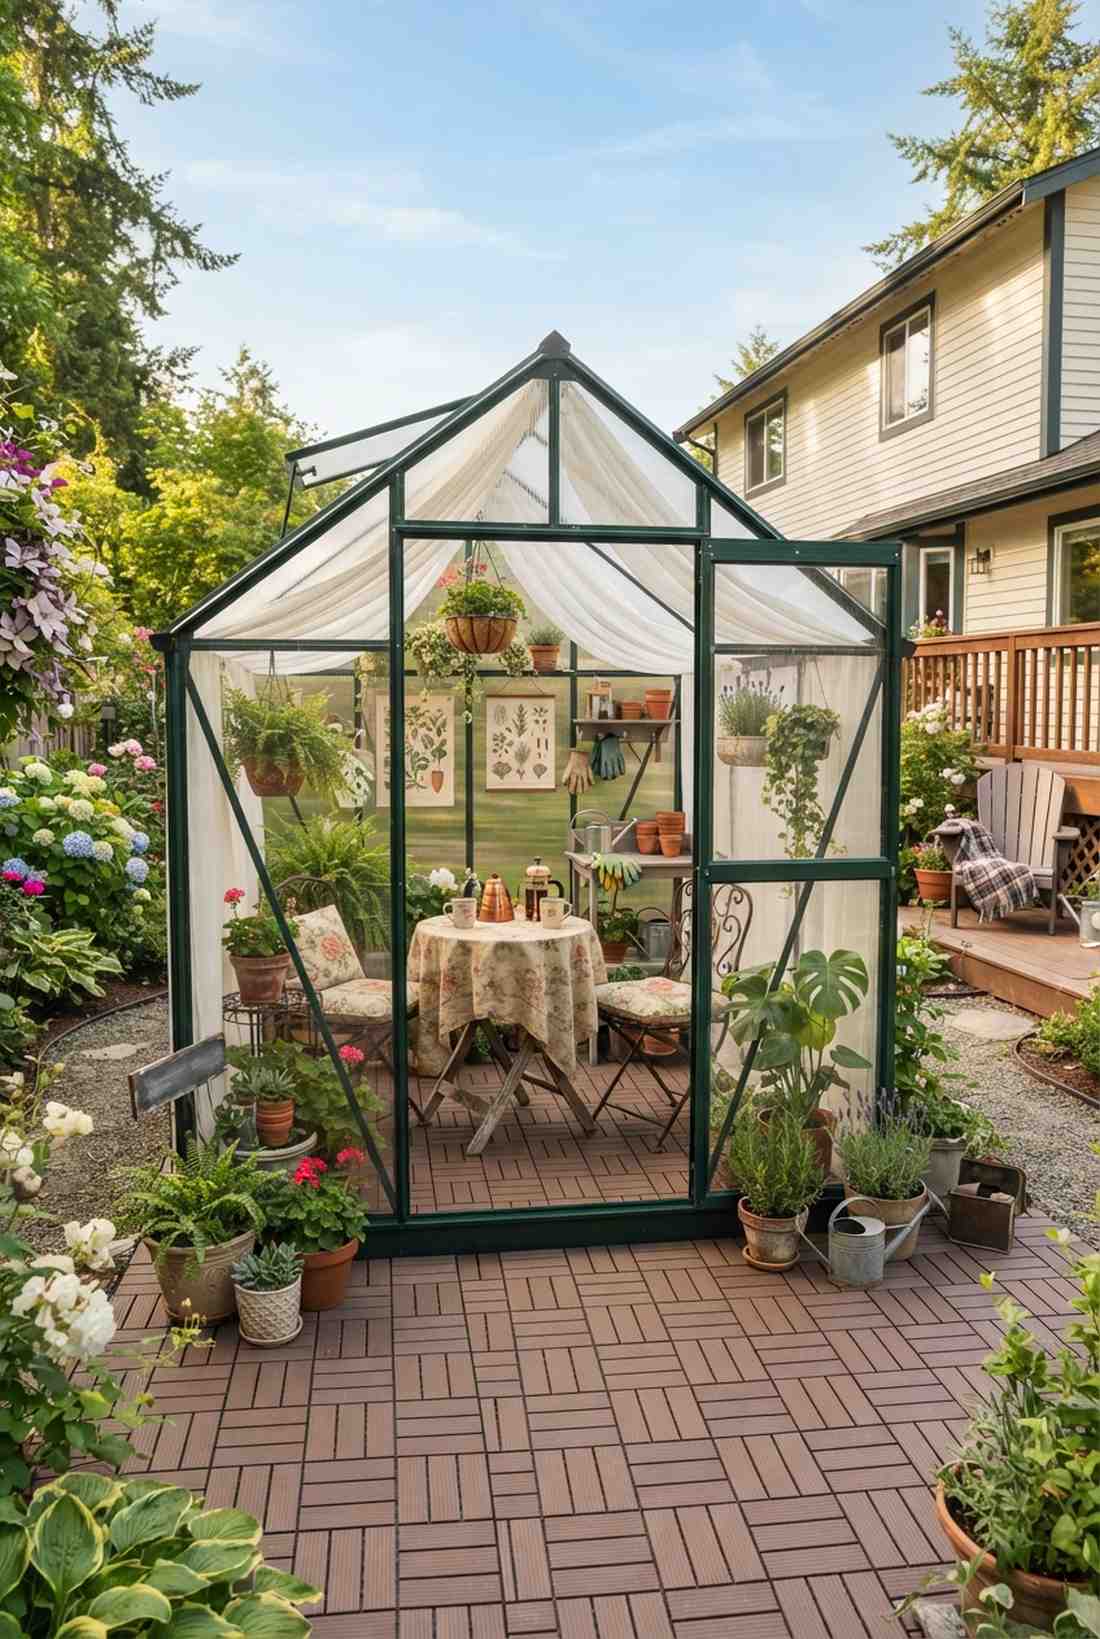
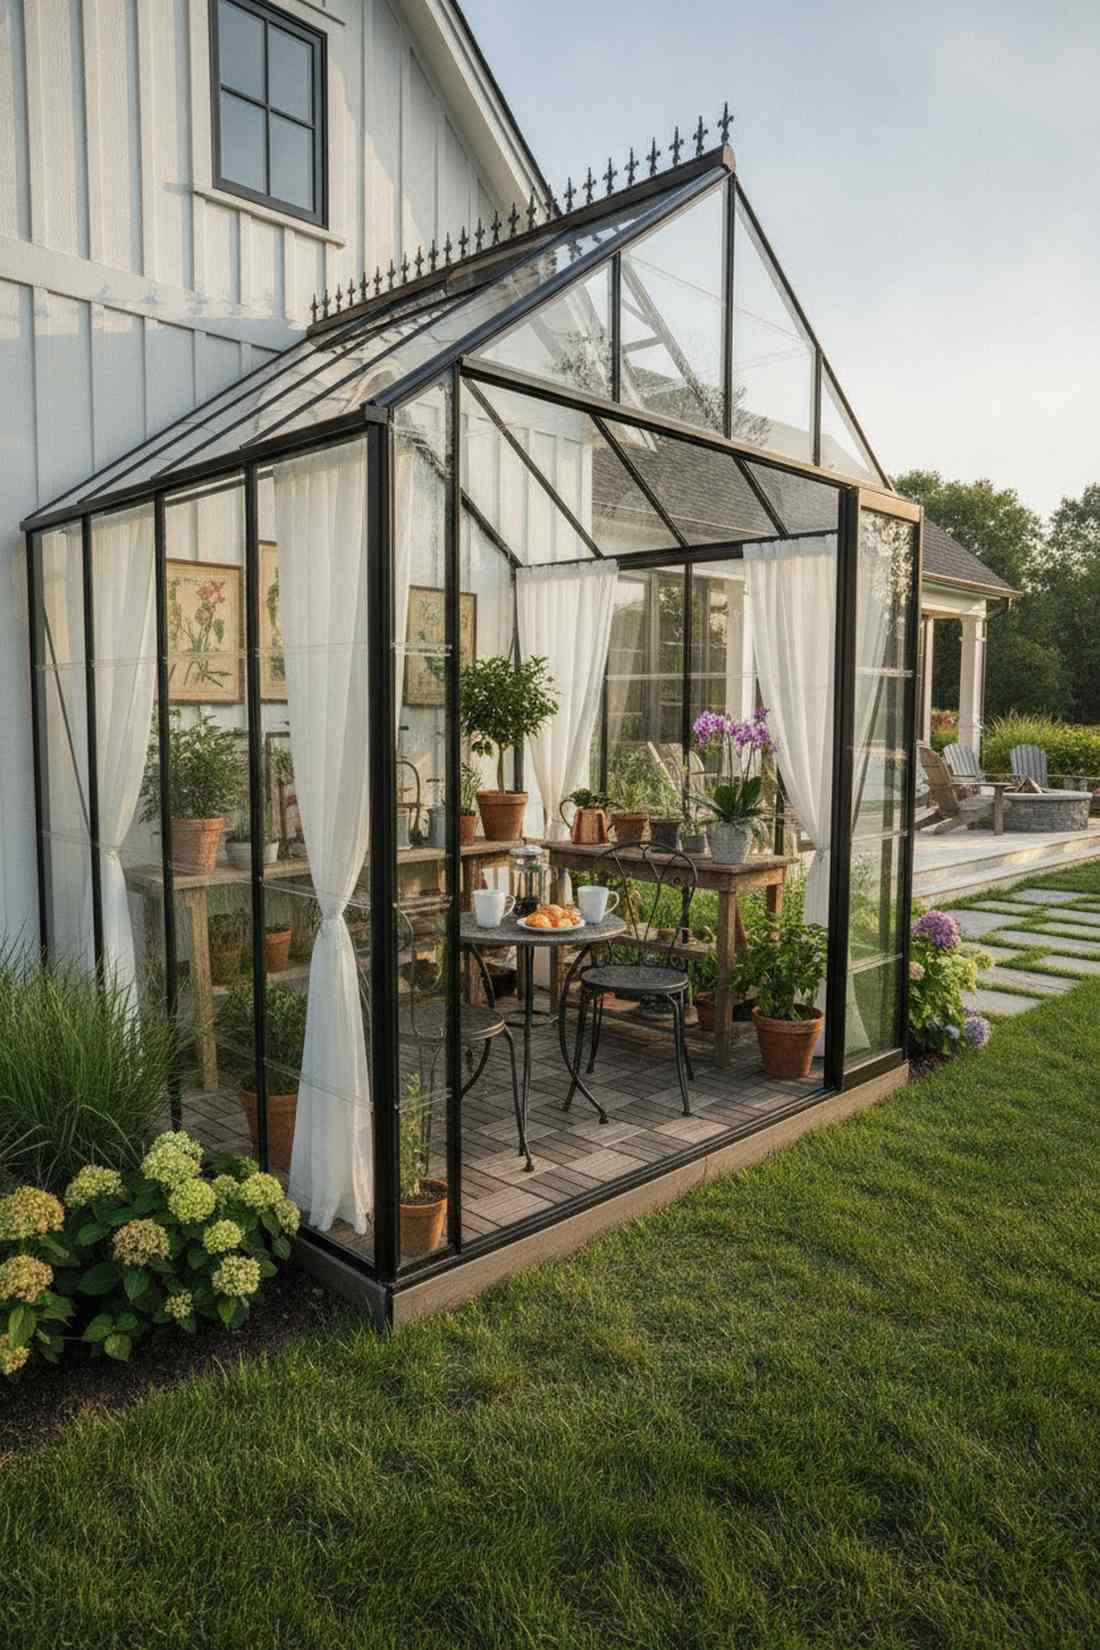
Stepping inside feels like entering a Victorian botanist’s private sanctuary. A glass-enclosed conservatory space works brilliantly to extend your growing season while doubling as a sunlit morning coffee room.
Custom glass additions are a fortune, but bolting together a polycarbonate hobby kit delivers a surprisingly premium look when styled correctly. Laying down a floor of interlocking composite deck tiles hides the dirt and elevates it from a workspace to a living space.
You can set up and style a 6×8 glasshouse for roughly $600. Save this for your aesthetic gardening inspiration.
- Key Materials: Polycarbonate greenhouse kit, deck tiles
- Vibe / Style: Romantic vintage conservatory
- Difficulty: Tedious but simple assembly
- Budget Breakdown: Kit: $450 | Flooring: $150
- Creator’s Tip: Hang sheer outdoor curtains inside to diffuse the harsh summer sun and give it an ethereal, cozy aesthetic.
- Smart Sourcing: Polycarbonate twin-wall greenhouse starter kits and snap-together composite deck floor tiles.
Upscale Planting Schemes: Premium Garden Design Through Plant Selection
27. Climbing Rose-Covered Trellises
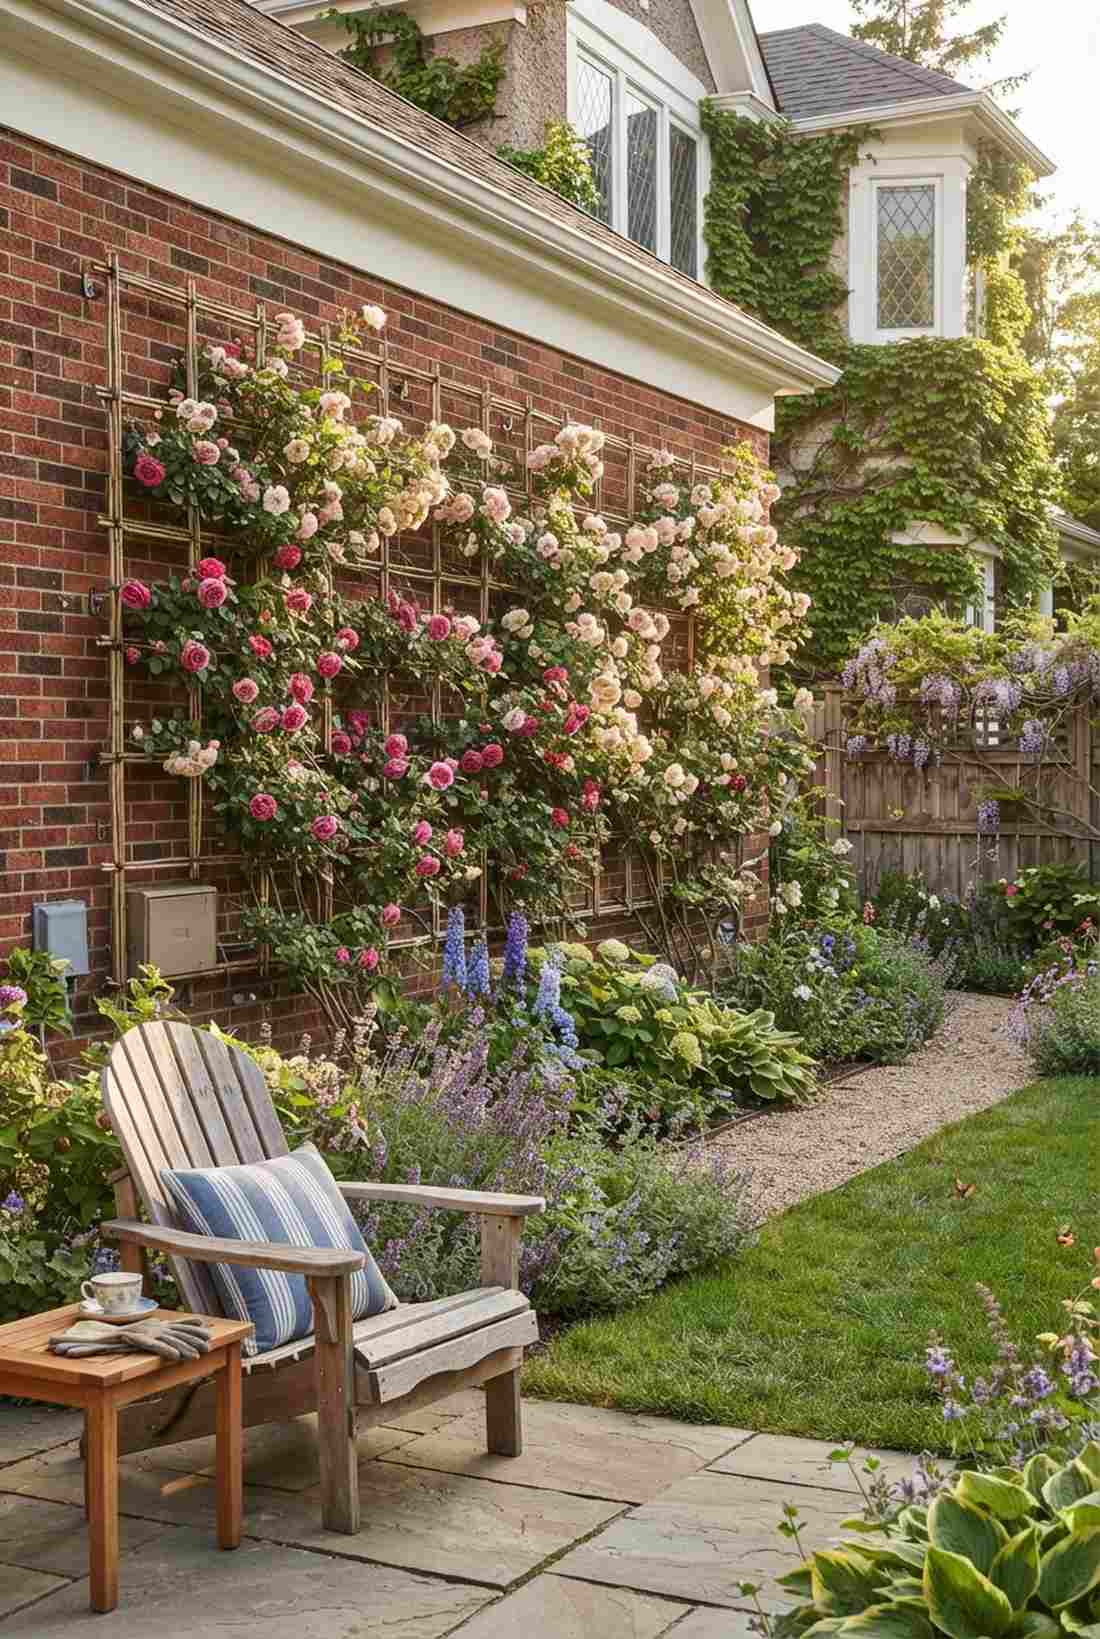
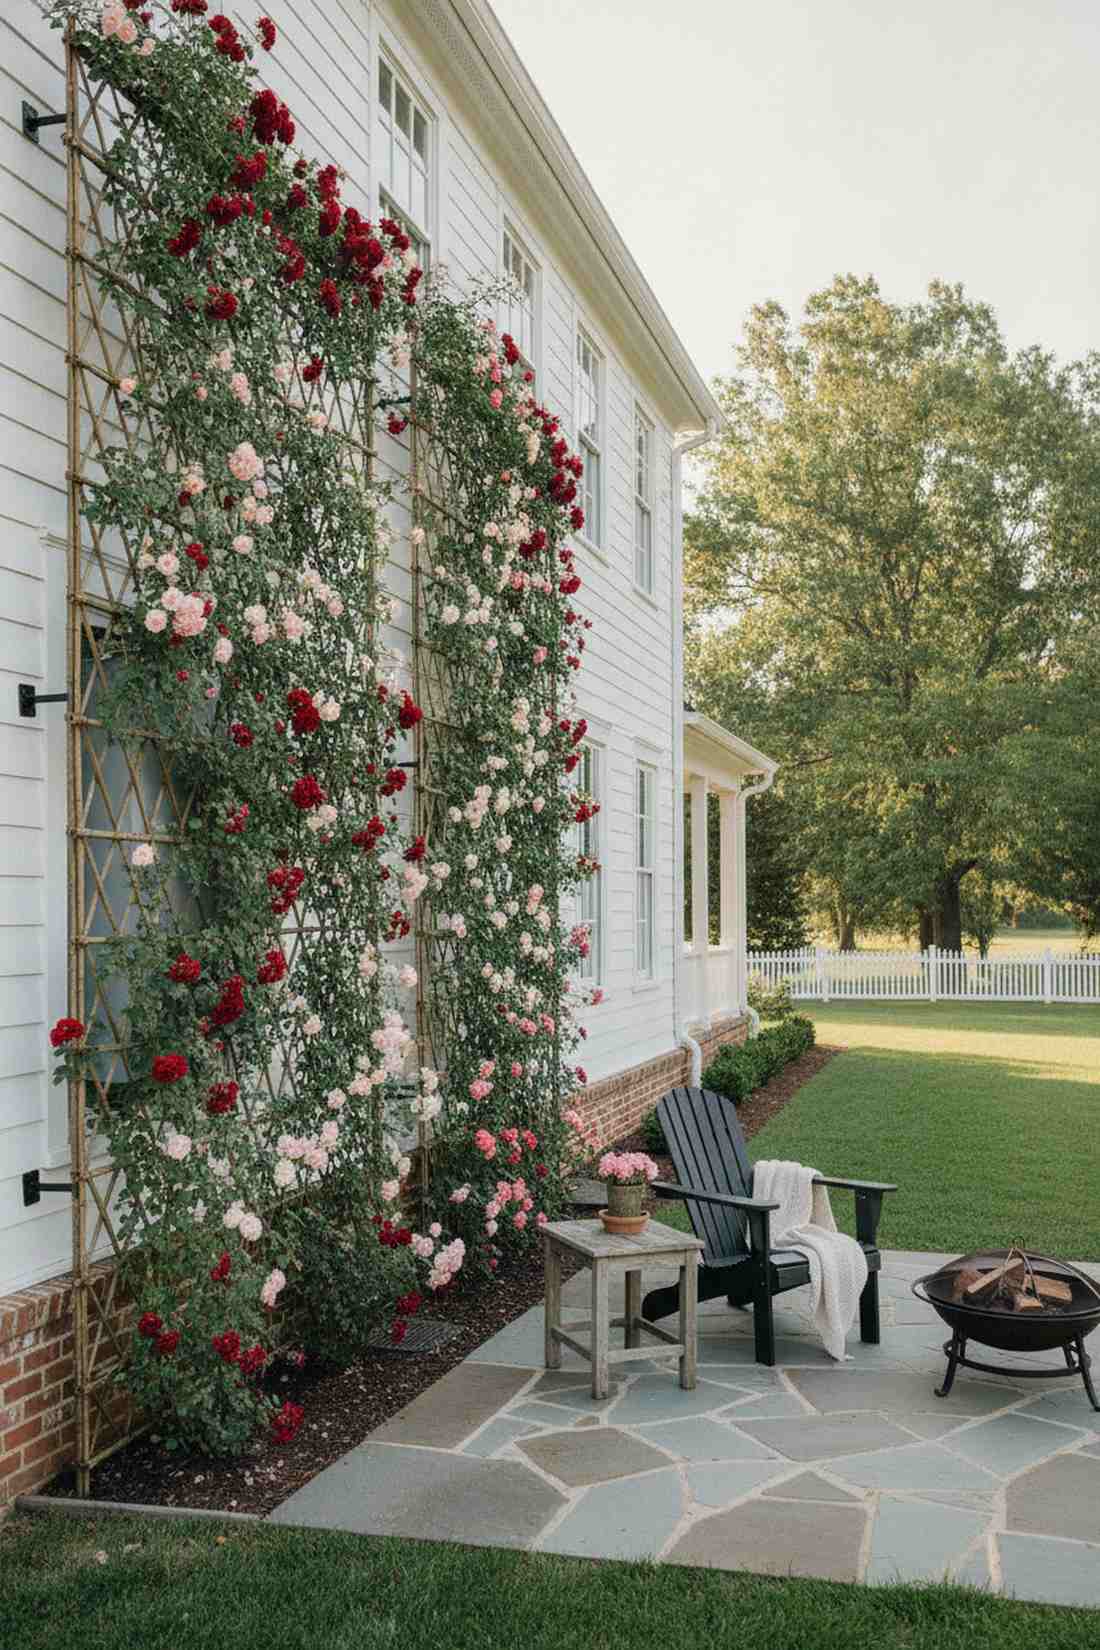
This floral wall feels like a romantic scene pulled from an old English novel. A vertical blooming lattice is the absolute best way to disguise ugly utility boxes or bare siding.
Flimsy plastic netting looks cheap, but mounting a sturdy cedar grid looks far more expensive than it is while supporting massive blooms. Using expandable willow trellis panels allows you to stretch the grid to perfectly fit odd-shaped gaps on your wall.
You can create a massive wall of roses for under $100. Highly recommended for a quick visual transformation.
- Key Materials: Willow trellis, climbing roses, wall hooks
- Vibe / Style: Lush cottagecore romance
- Difficulty: Easy installation, ongoing tying
- Budget Breakdown: Trellis: $40 | Roses/Hardware: $60
- Creator’s Tip: Train the main canes as horizontally as possible; this tricks the plant into sending up dozens of vertical blooming shoots.
- Smart Sourcing: Expandable natural willow trellis panels and heavy-duty brick wall anchor hooks.
28. Dwarf Citrus Container Groves
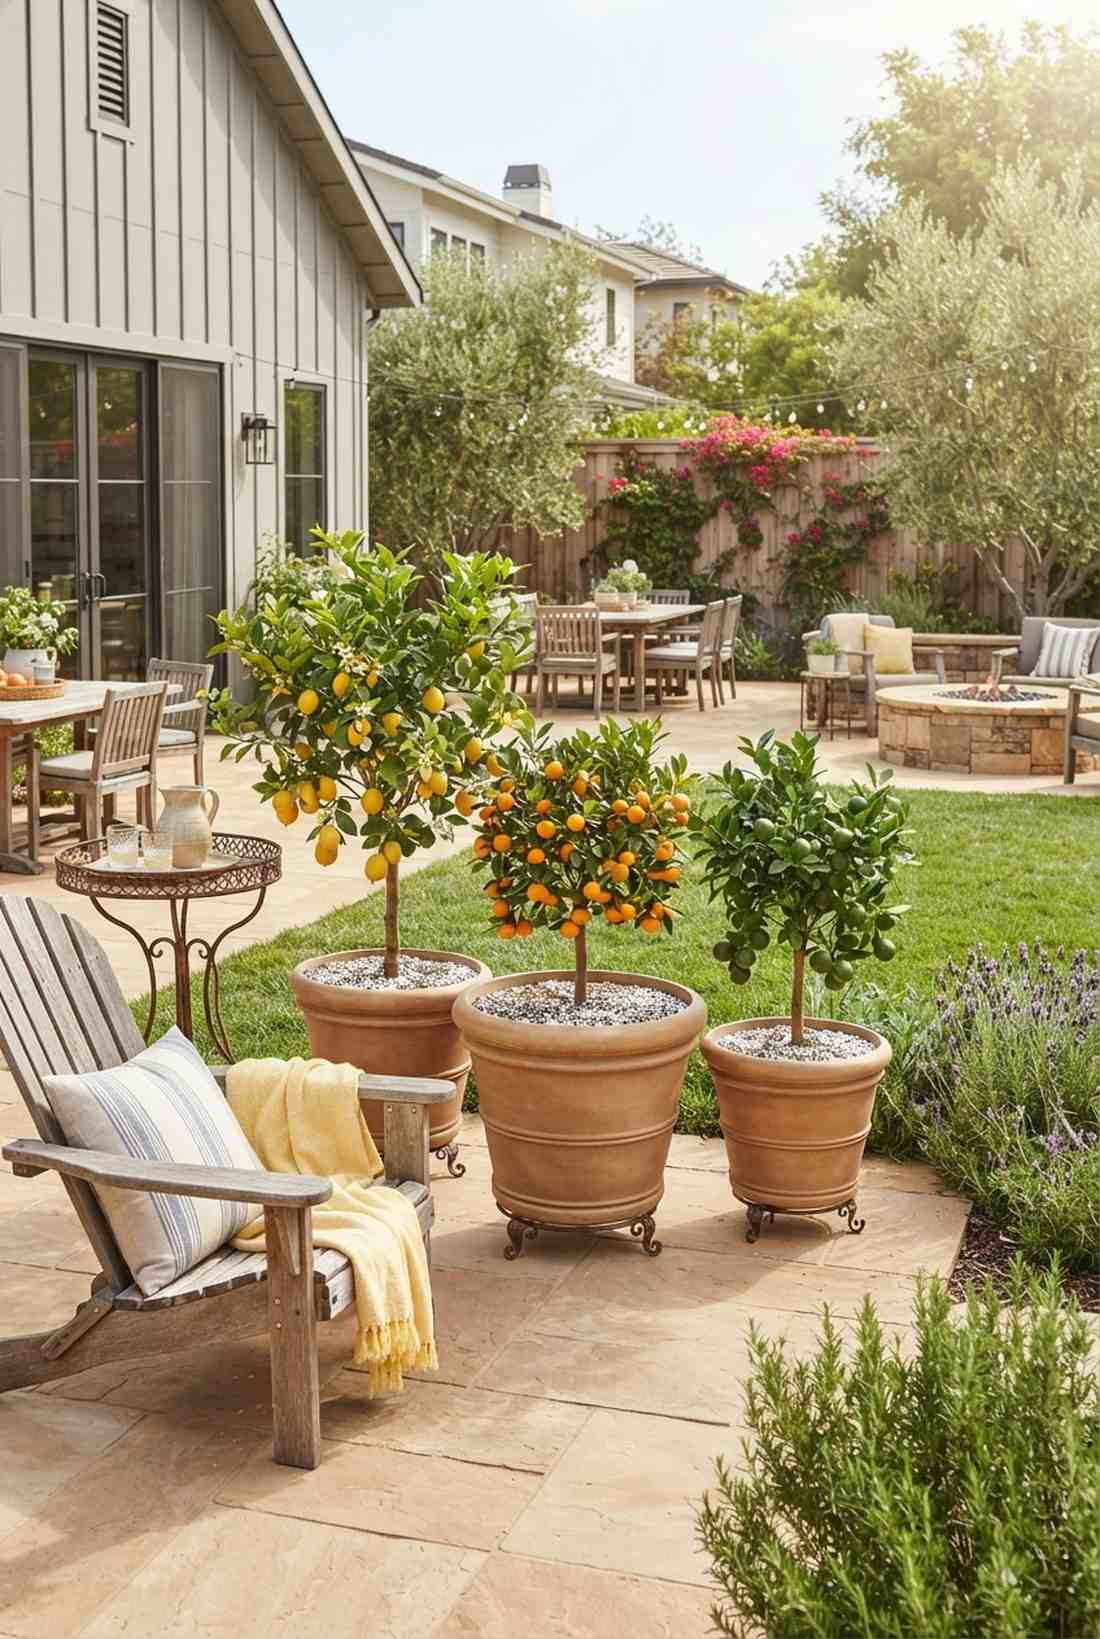

Surrounding yourself with these plants feels like stepping onto a sun-baked terrace in the Amalfi Coast. A potted fruit tree collection works perfectly to bring bright colors and sweet fragrances to a sterile concrete patio.
Buying massive terracotta planters drains your budget, but using lightweight resin pots screams custom architecture while being easy to move indoors for winter. Filling the bases with chunky horticultural perlite ensures the aggressive drainage citrus trees demand without making the pot too heavy to lift.
A cluster of three fruiting trees costs around $180 to establish. Pin this to your edible landscaping board!
- Key Materials: Dwarf citrus, resin pots, citrus soil mix
- Vibe / Style: Zesty Mediterranean luxury
- Difficulty: Needs strict watering routine
- Budget Breakdown: Trees: $90 | Pots & Soil: $90
- Creator’s Tip: Elevate the pots slightly using decorative “pot feet” to prevent water from pooling underneath and rotting the roots.
- Smart Sourcing: Lightweight faux-terracotta resin planters and coarse horticultural perlite (bulk pack).
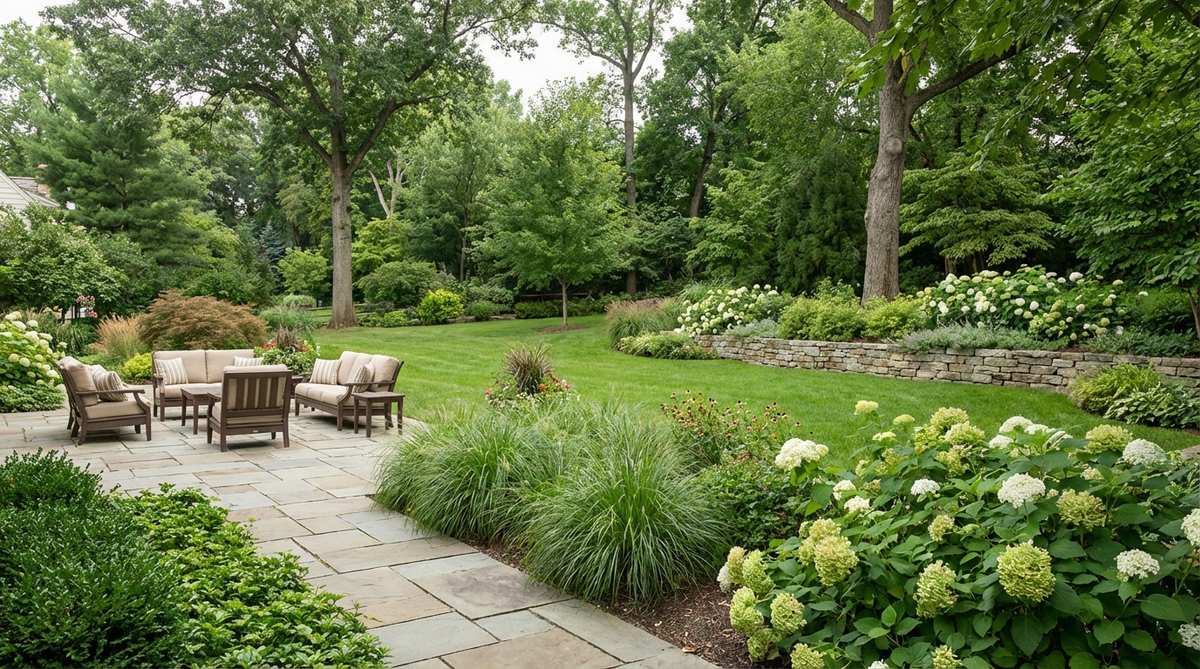
29. Ornamental Grass Borders
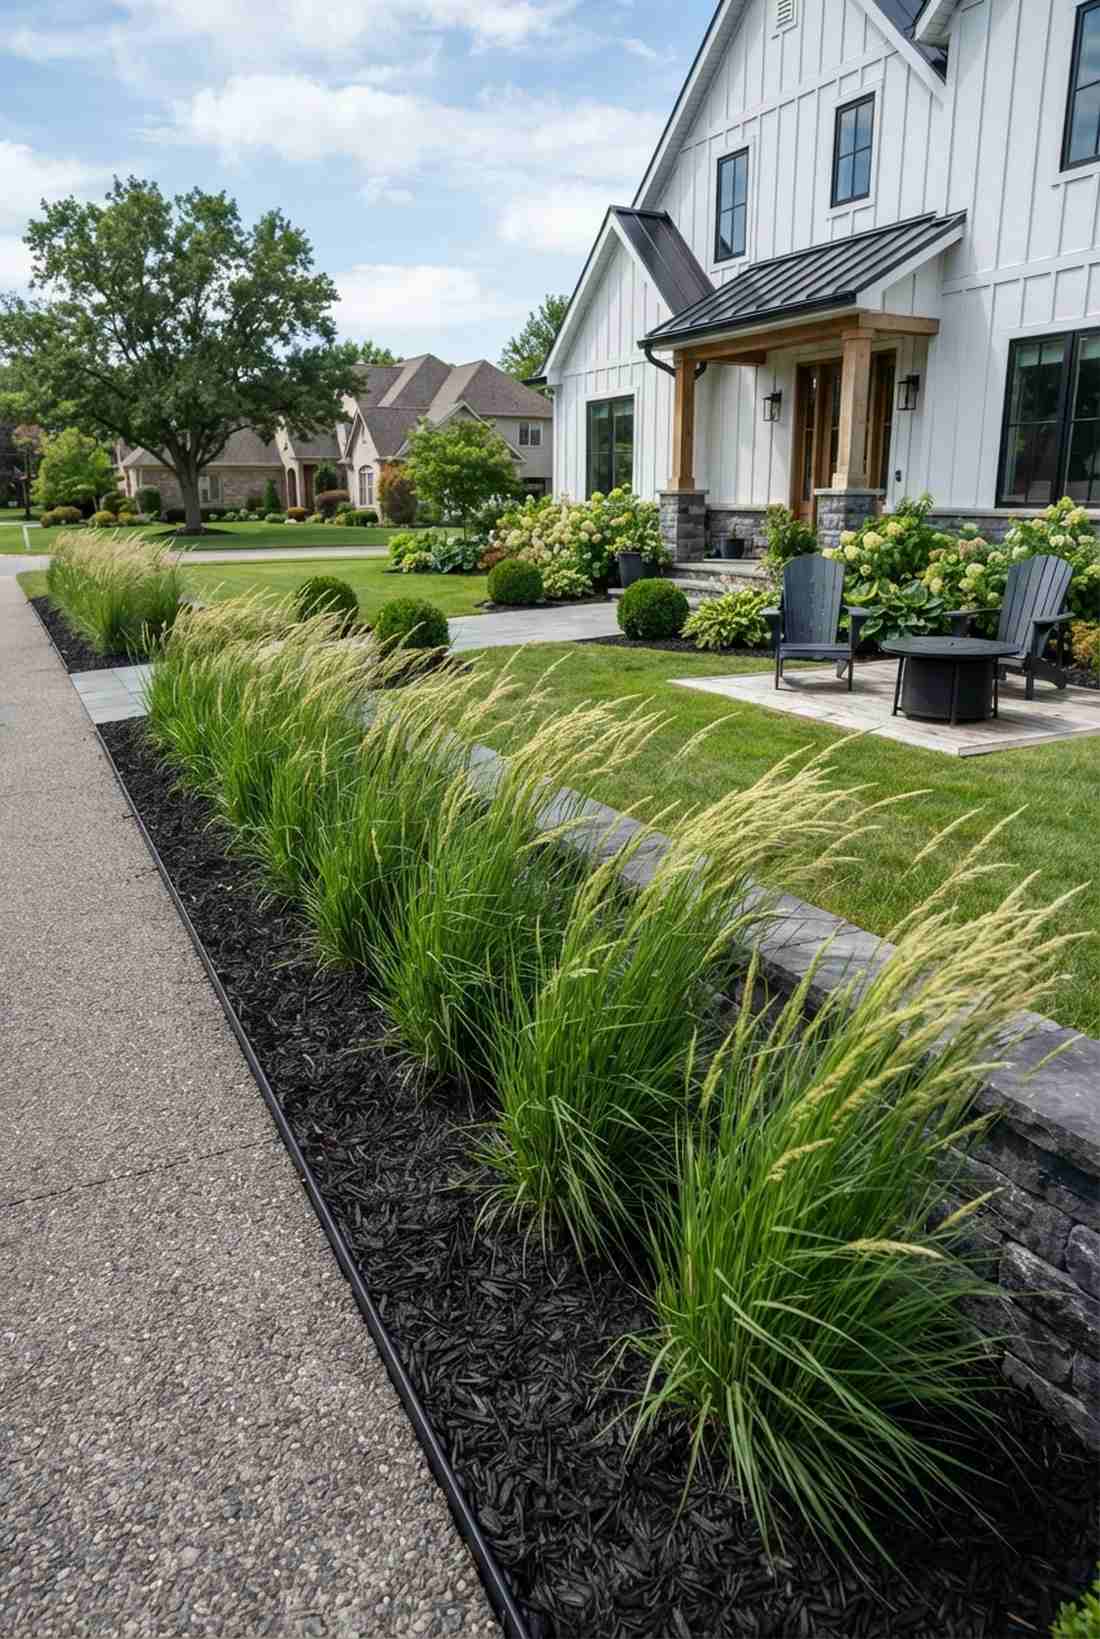
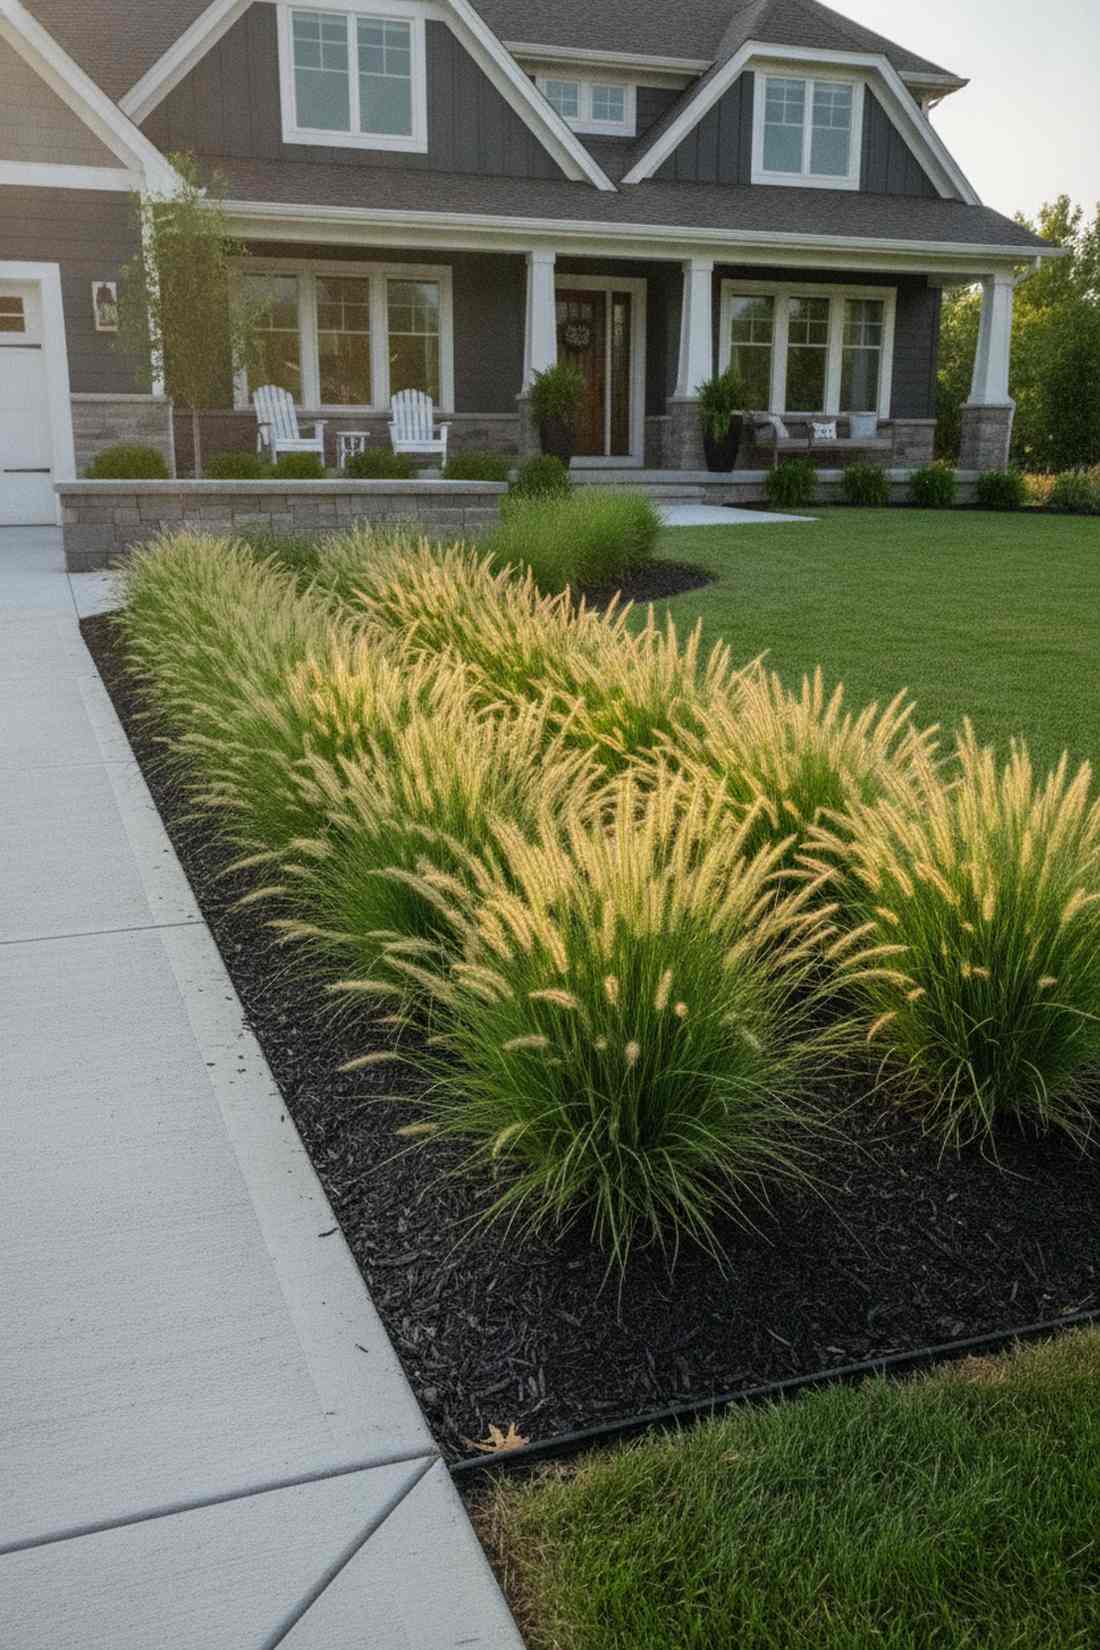
Watching this landscape move in the wind feels like a mesmerizing, high-end commercial property display. A swaying textured perennial edge is the ultimate low-maintenance solution for softening rigid driveways or retaining walls.
Planting a mix of random flowers looks chaotic, but mass-planting a single variety of feather reed grass gives a designer-level finish that requires almost zero water. Applying a thick layer of premium black dyed wood mulch makes the bright green blades pop with aggressive modern contrast.
A 20-foot modern border can be planted for roughly $120. It’s a fast upgrade that completely changes the vibe.
- Key Materials: Karl Foerster grass plugs, black mulch
- Vibe / Style: Sleek contemporary movement
- Difficulty: Dig and drop simple
- Budget Breakdown: Grass Plugs: $80 | Mulch: $40
- Creator’s Tip: Plant them in a zig-zag pattern rather than a straight line to create instant, thick volume without waiting years for them to spread.
- Smart Sourcing: Ornamental grass starter plugs (bulk pack) and heavy-duty landscaping edging rolls.
Most beginners ruin their garden’s flow with mismatched colors. The exact layout coming up next forces a cohesive, expensive aesthetic automatically.
30. Lavender Field Walkways
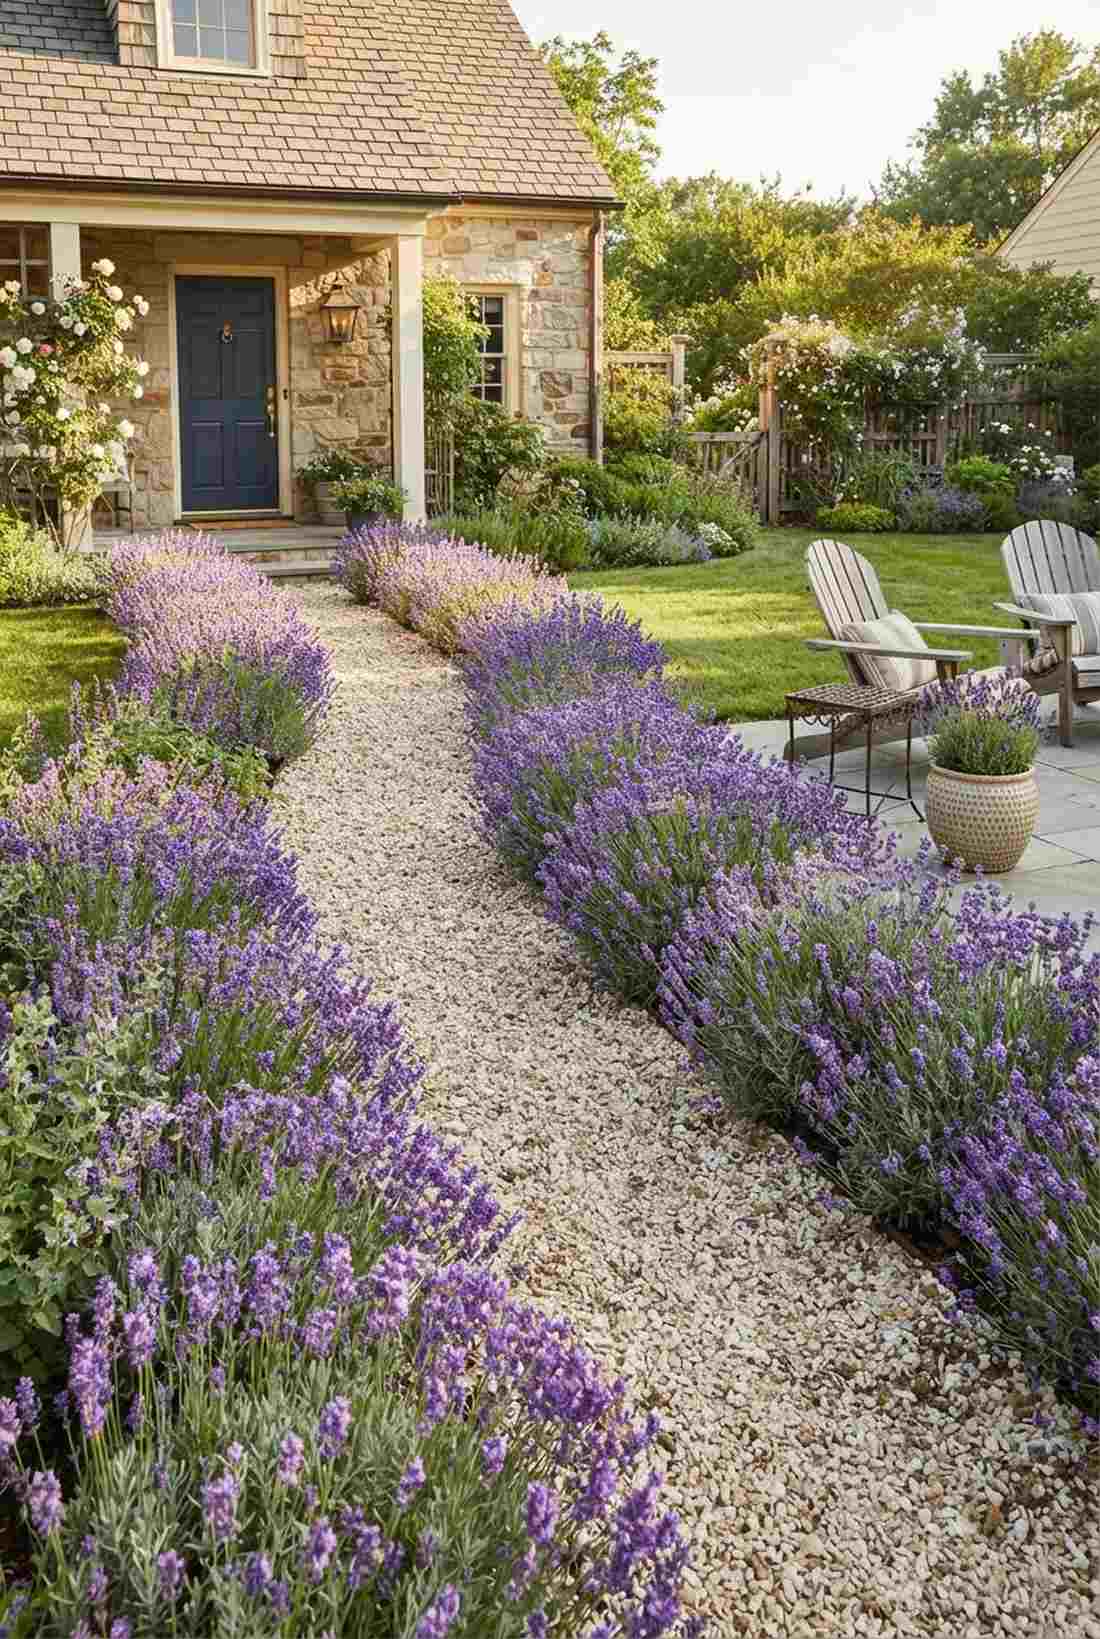
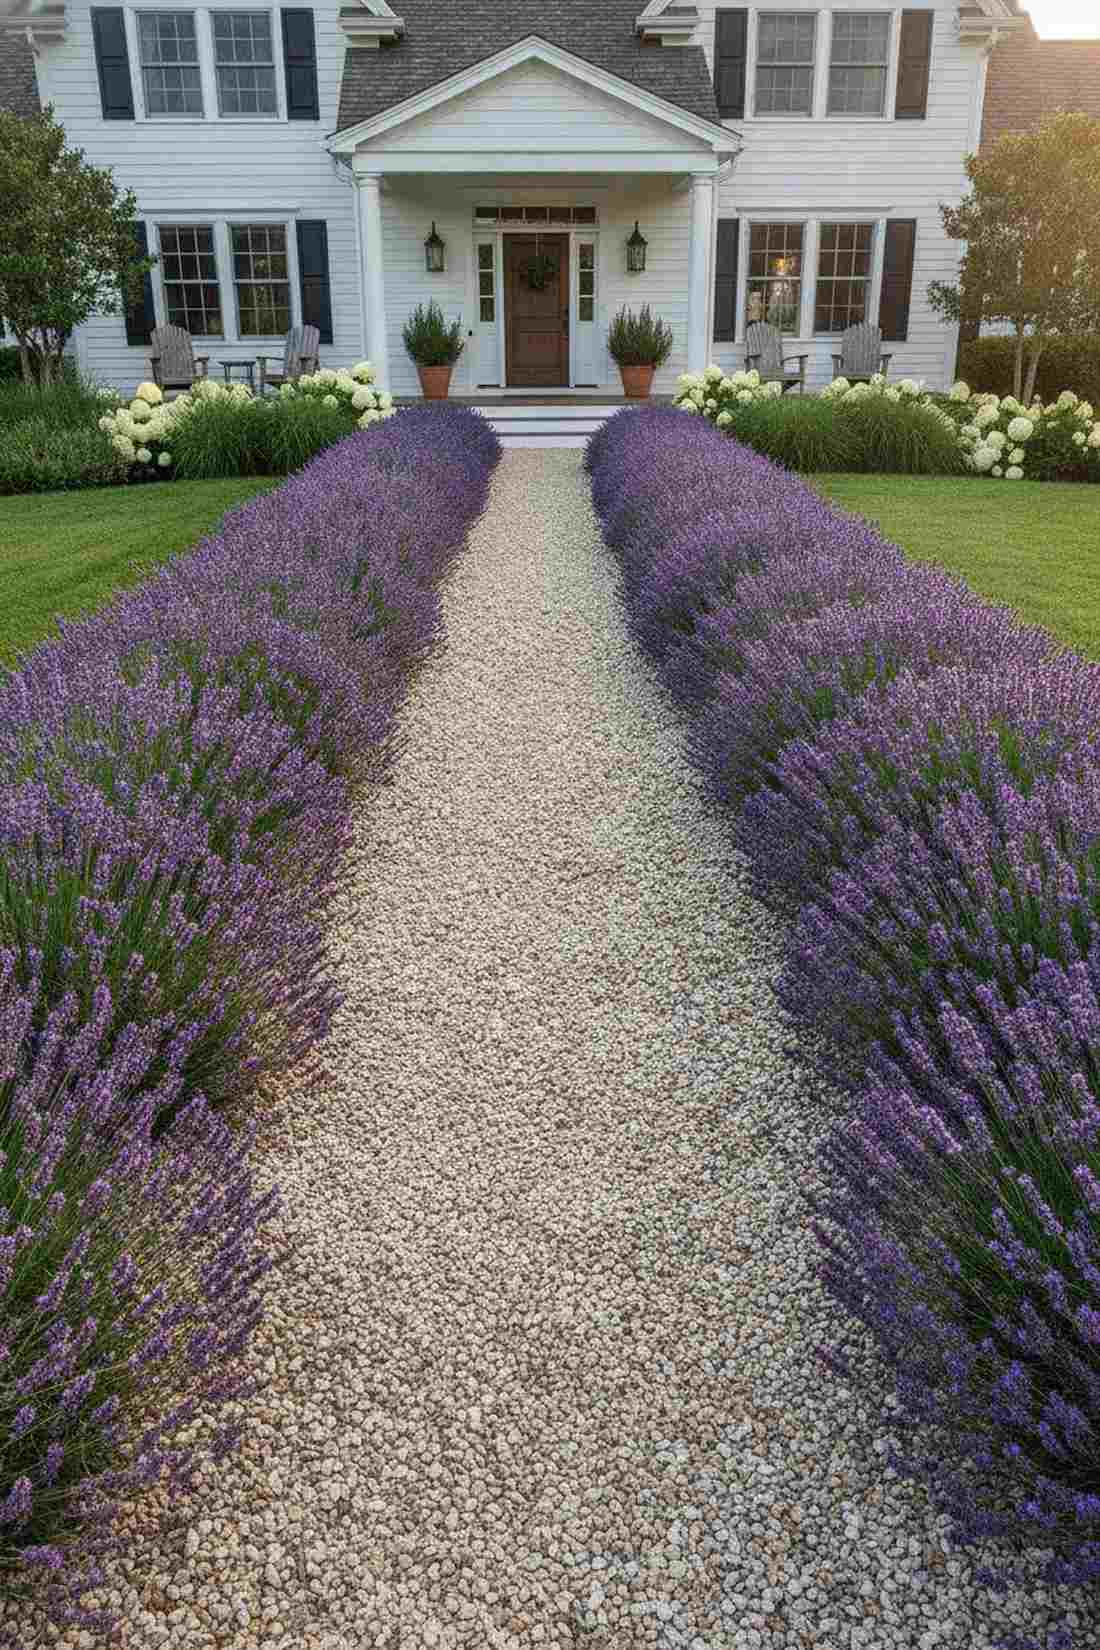
Walking this path feels like wandering through the fragrant hills of Provence. A purple herbaceous pathway border is perfect for drawing pollinators and intoxicating scents toward your front door.
Standard soil suffocates these plants, but amending your beds with coarse grit achieves a high-end estate vibe with massive, healthy blooms. Utilizing bulk pack limestone gravel as a top dressing reflects sunlight into the plant’s center, keeping the foliage dry and fungus-free.
You can line an entire walkway for around $90 using small starter plants. Save this for your sensory garden ideas!
- Key Materials: Lavender plugs, horticultural grit, limestone
- Vibe / Style: Fragrant French countryside
- Difficulty: Requires meticulous soil prep
- Budget Breakdown: Plants: $50 | Grit/Gravel: $40
- Creator’s Tip: Never use wood mulch around lavender; it holds too much moisture and will cause crown rot within weeks.
- Smart Sourcing: English lavender starter plugs and bulk horticultural pumice grit.
31. Specimen Japanese Maple Focal Points
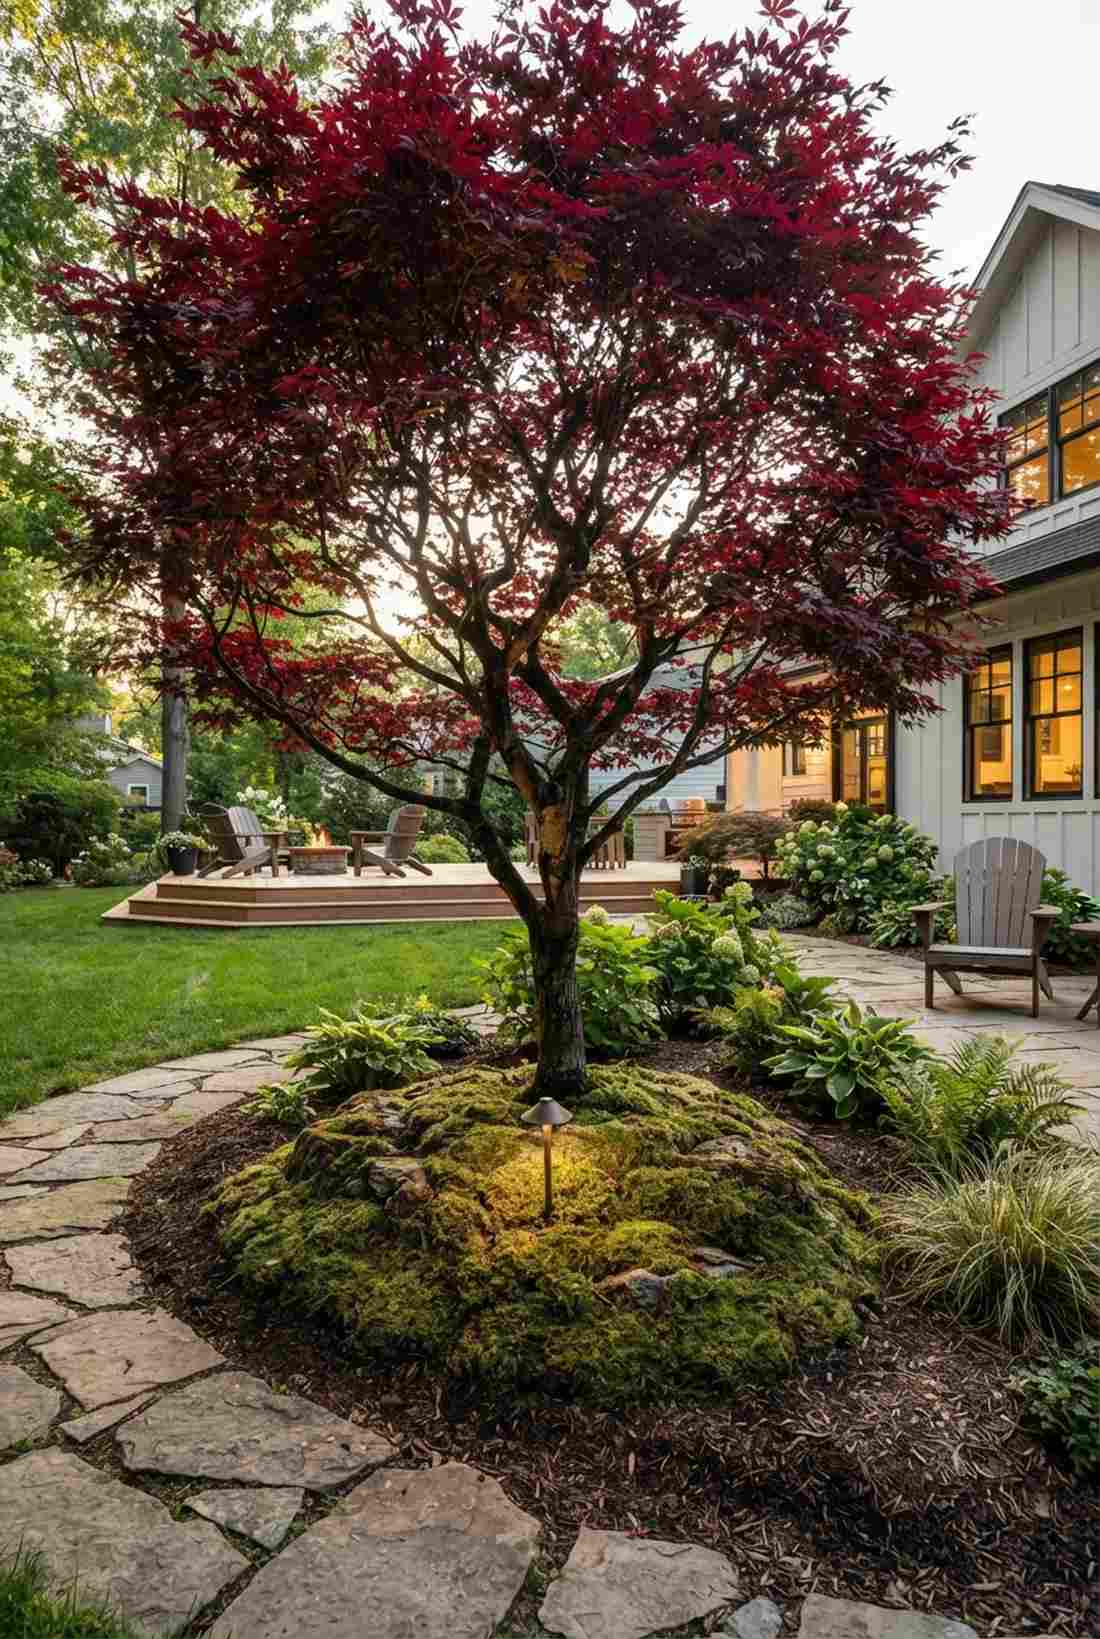
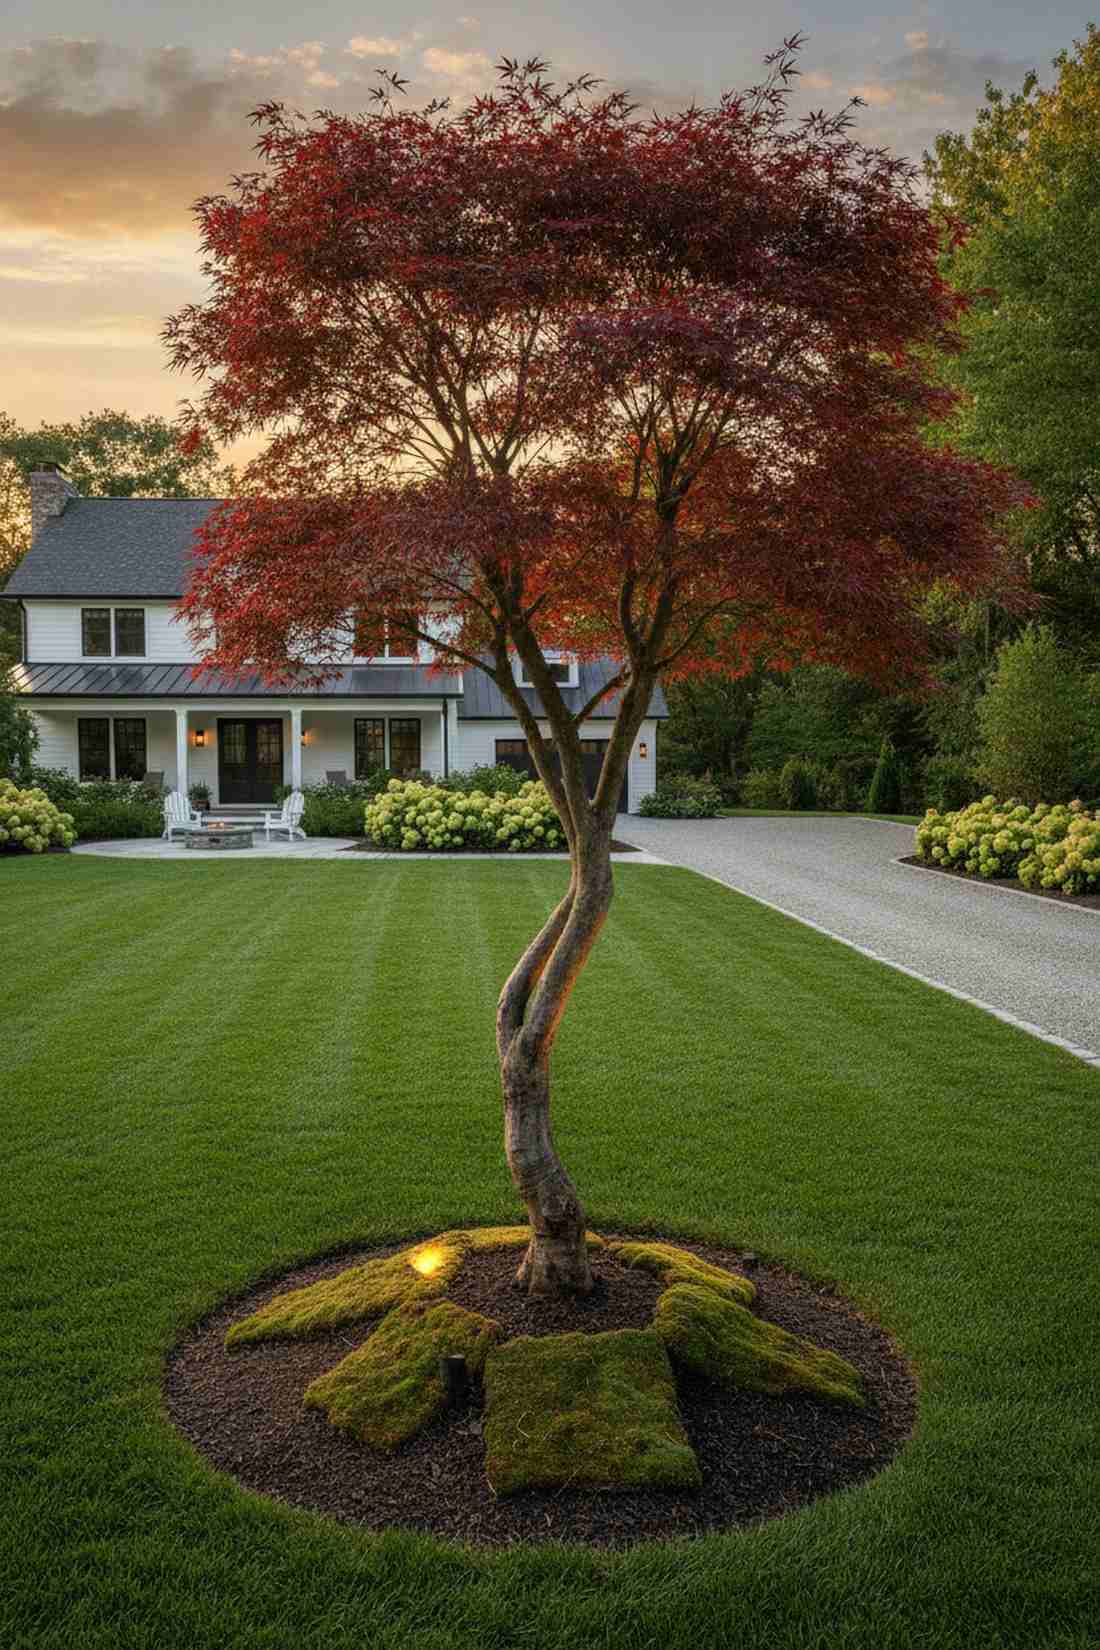
This striking addition feels like installing a priceless living sculpture in your yard. A crimson canopy focal tree works brilliantly to anchor an empty lawn or highlight the curve of a driveway.
Mature maples cost thousands, but buying a smaller grafted tree looks far more expensive than it is when you selectively prune the lower canopy to expose the architectural trunk. Surrounding the base with pre-cut moss panels gives it an ancient, established look immediately.
A beautiful 4-foot starter tree and moss base costs about $150. Pin this to your high-impact landscaping board.
- Key Materials: Japanese maple, moss, low-voltage uplight
- Vibe / Style: Refined architectural grace
- Difficulty: Easy planting, careful pruning
- Budget Breakdown: Tree: $120 | Moss & Soil: $30
- Creator’s Tip: Plant it slightly elevated on a mound to ensure the root flare stays dry and visible—this prevents rot and looks professional.
- Smart Sourcing: Pre-cut preserved moss sheets (bulk pack) and mycorrhizal root stimulator powder.
32. Hydrangea Border Hedges
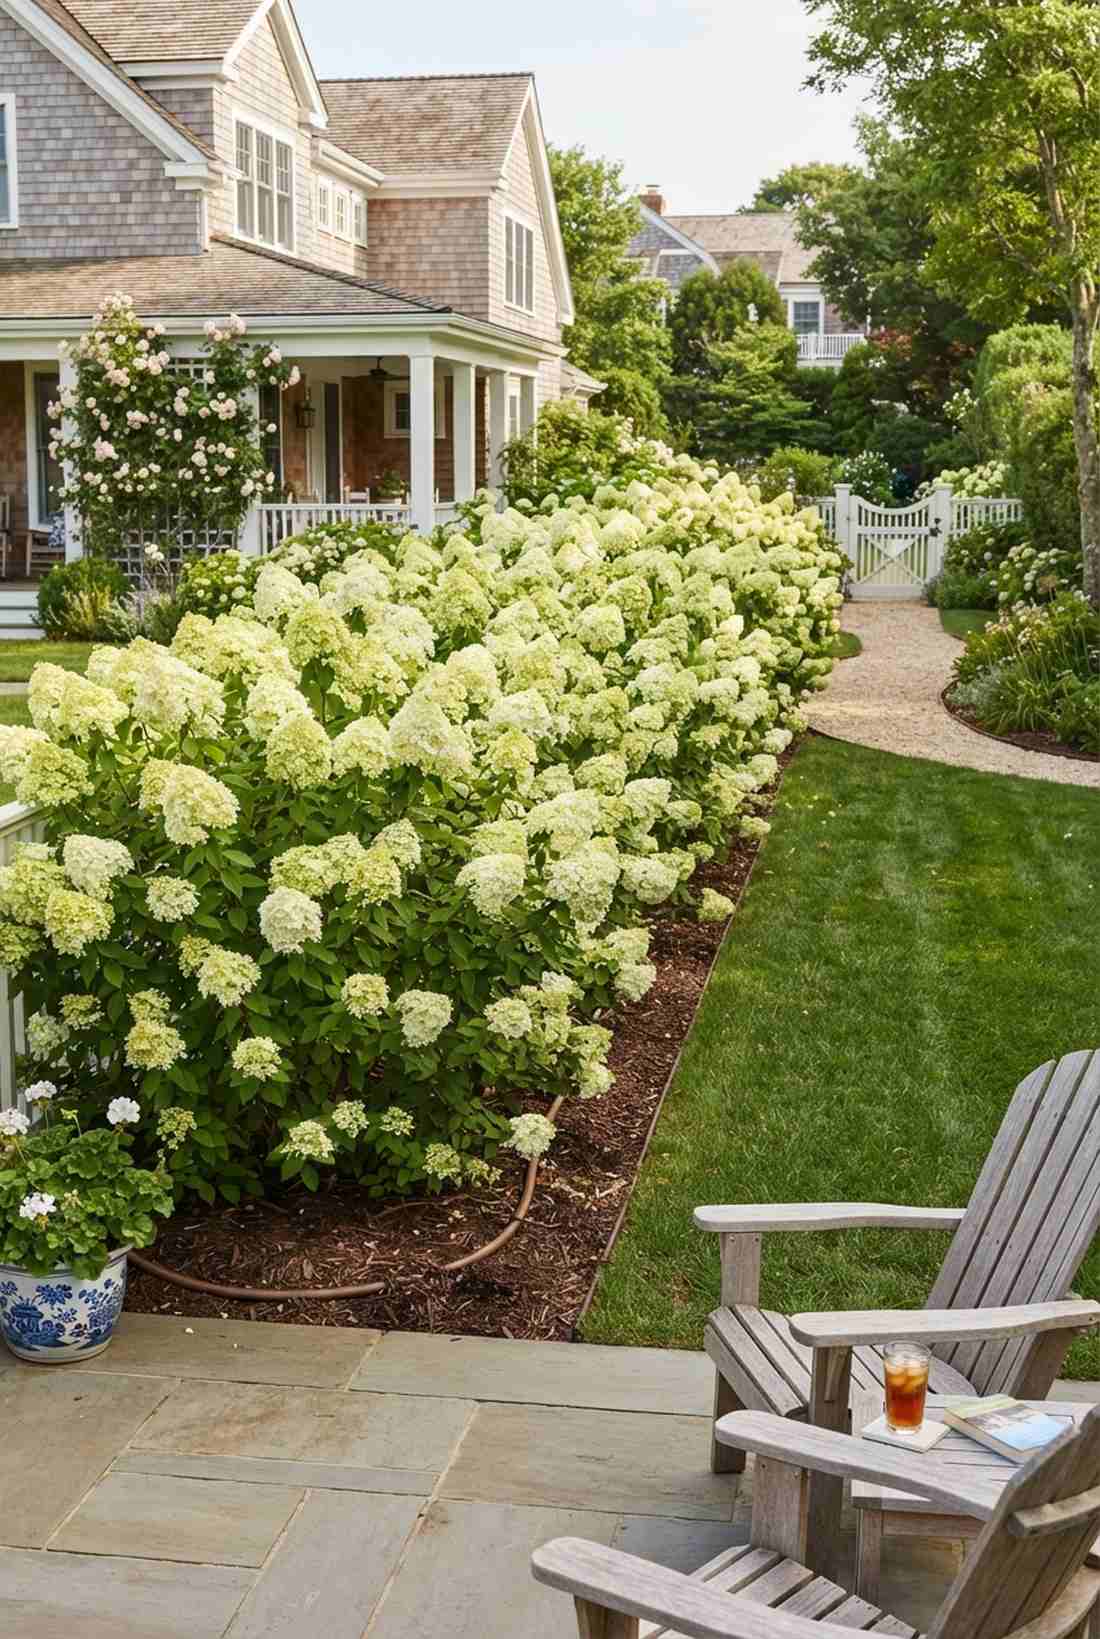

This massive bloom display feels like a luxurious summer wedding venue in the Hamptons. A flowering deciduous boundary is the perfect way to divide property lines with an explosion of seasonal color.
Using rare, finicky varieties is a headache, but mass-planting hardy ‘Limelight’ varieties delivers a surprisingly premium look that thrives on neglect. Installing a soaker hose irrigation kit under the mulch guarantees the massive blooms never wilt during August heatwaves.
You can establish a 15-foot blooming hedge for roughly $180. Highly recommended for explosive curb appeal.
- Key Materials: Panicle hydrangeas, soaker hose, mulch
- Vibe / Style: Abundant East Coast elegance
- Difficulty: Digging required, low maintenance after
- Budget Breakdown: Shrubs: $150 | Irrigation Kit: $30
- Creator’s Tip: Leave the dried, brown flower heads on the bushes through winter—they catch the snow beautifully and provide off-season architectural interest.
- Smart Sourcing: Heavy-duty flat soaker hose kits and slow-release shrub fertilizer spikes.
33. Formal Herb Knot Gardens
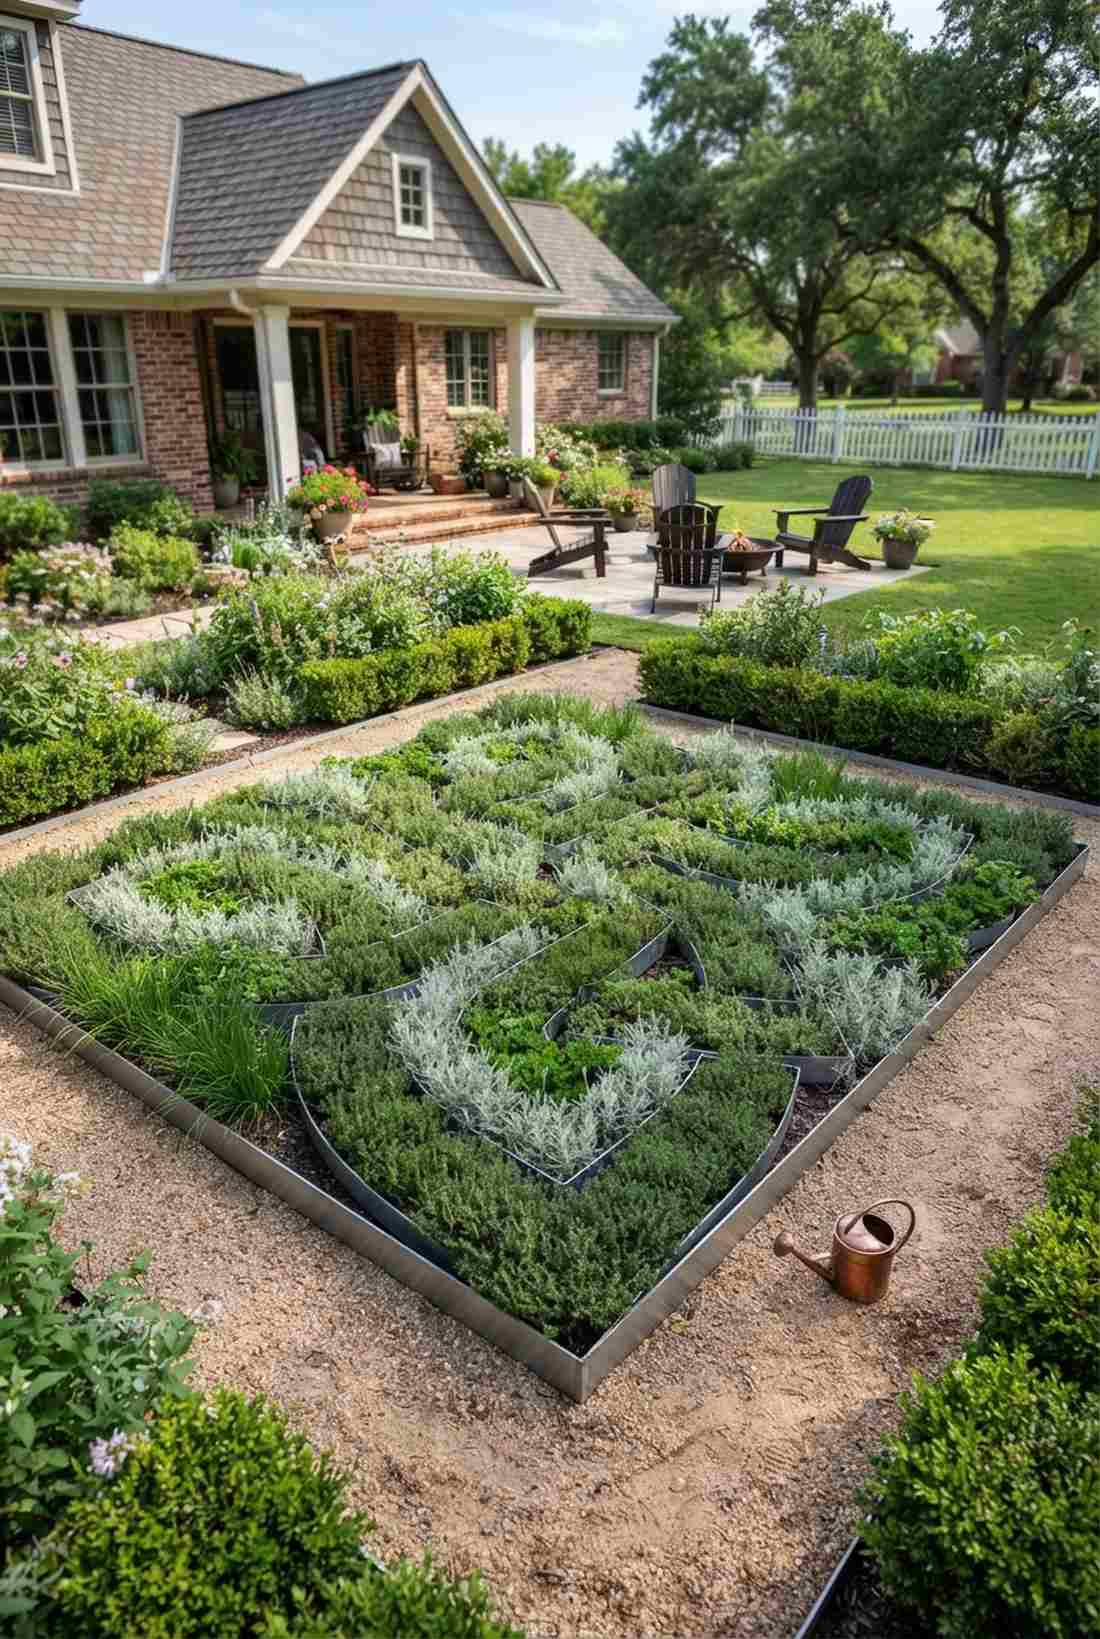
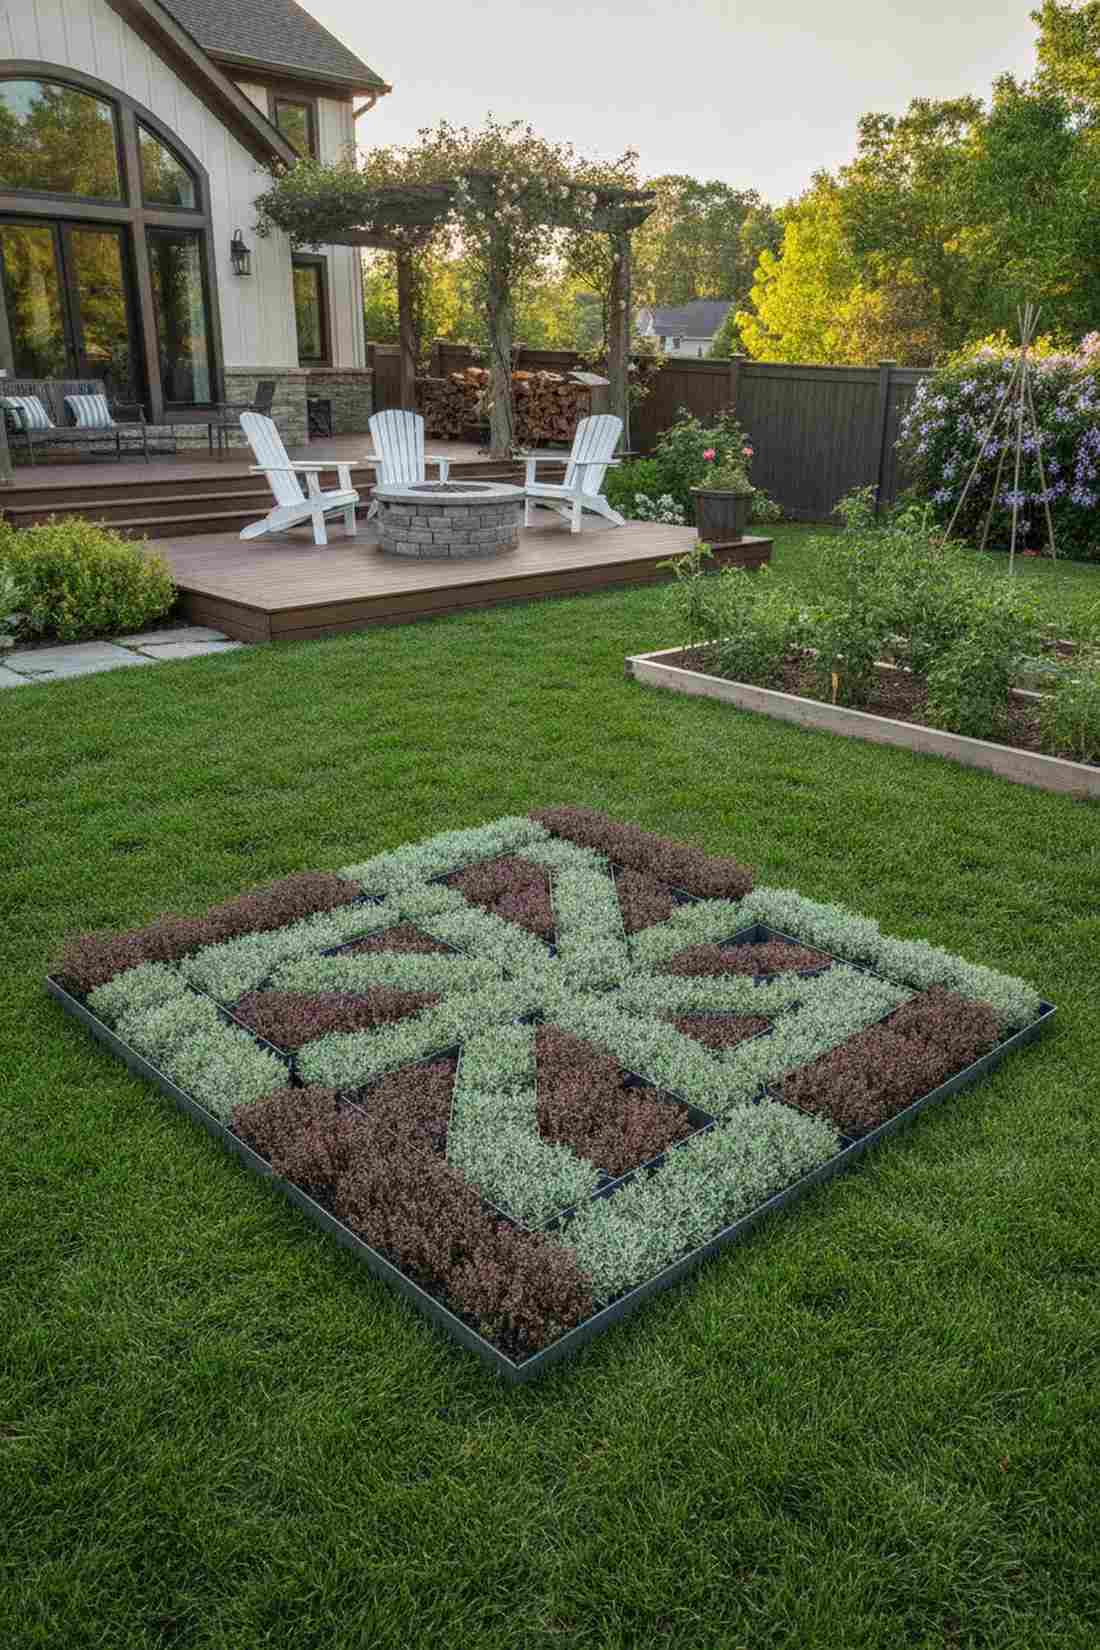
This intricate pattern feels like a miniature royal palace grounds mapped out just for you. A geometric culinary planting bed works exceptionally well to transform a boring flat backyard into a highly functional visual centerpiece.
Most people think knot gardens are too complex, but using contrasting colors of thyme and santolina screams custom architecture with minimal effort. Using a flexible steel edging roll keeps the complex interlocking shapes perfectly crisp and prevents the herbs from bleeding together.
You can design a 6×6 foot intricate knot for around $100. Save this to your edible landscape blueprint board!
- Key Materials: Assorted herbs, steel edging, string line
- Vibe / Style: Tudor-era precision
- Difficulty: Requires frequent clipping
- Budget Breakdown: Herb Plugs: $60 | Edging: $40
- Creator’s Tip: Draw the pattern in the dirt with flour or spray paint before planting a single plug to ensure perfect symmetry.
- Smart Sourcing: Flexible galvanized steel landscape edging and bulk pack culinary herb starter plugs.
34. Tropical Plant Collections
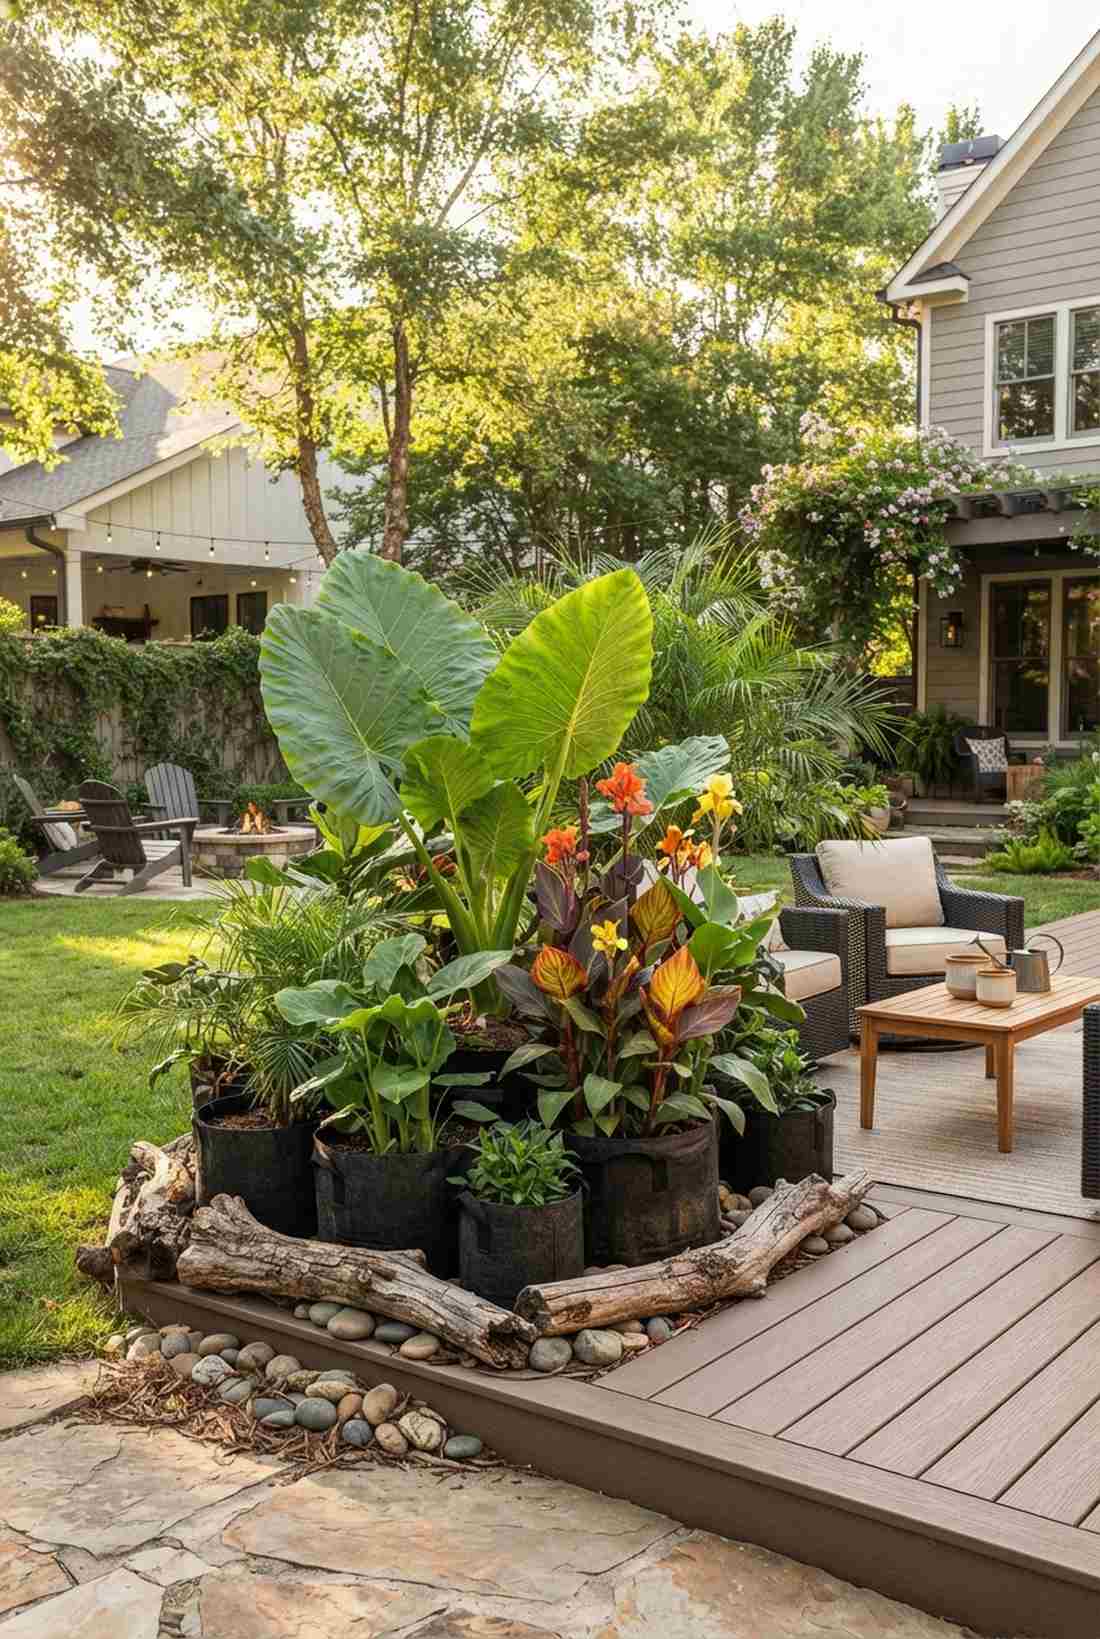
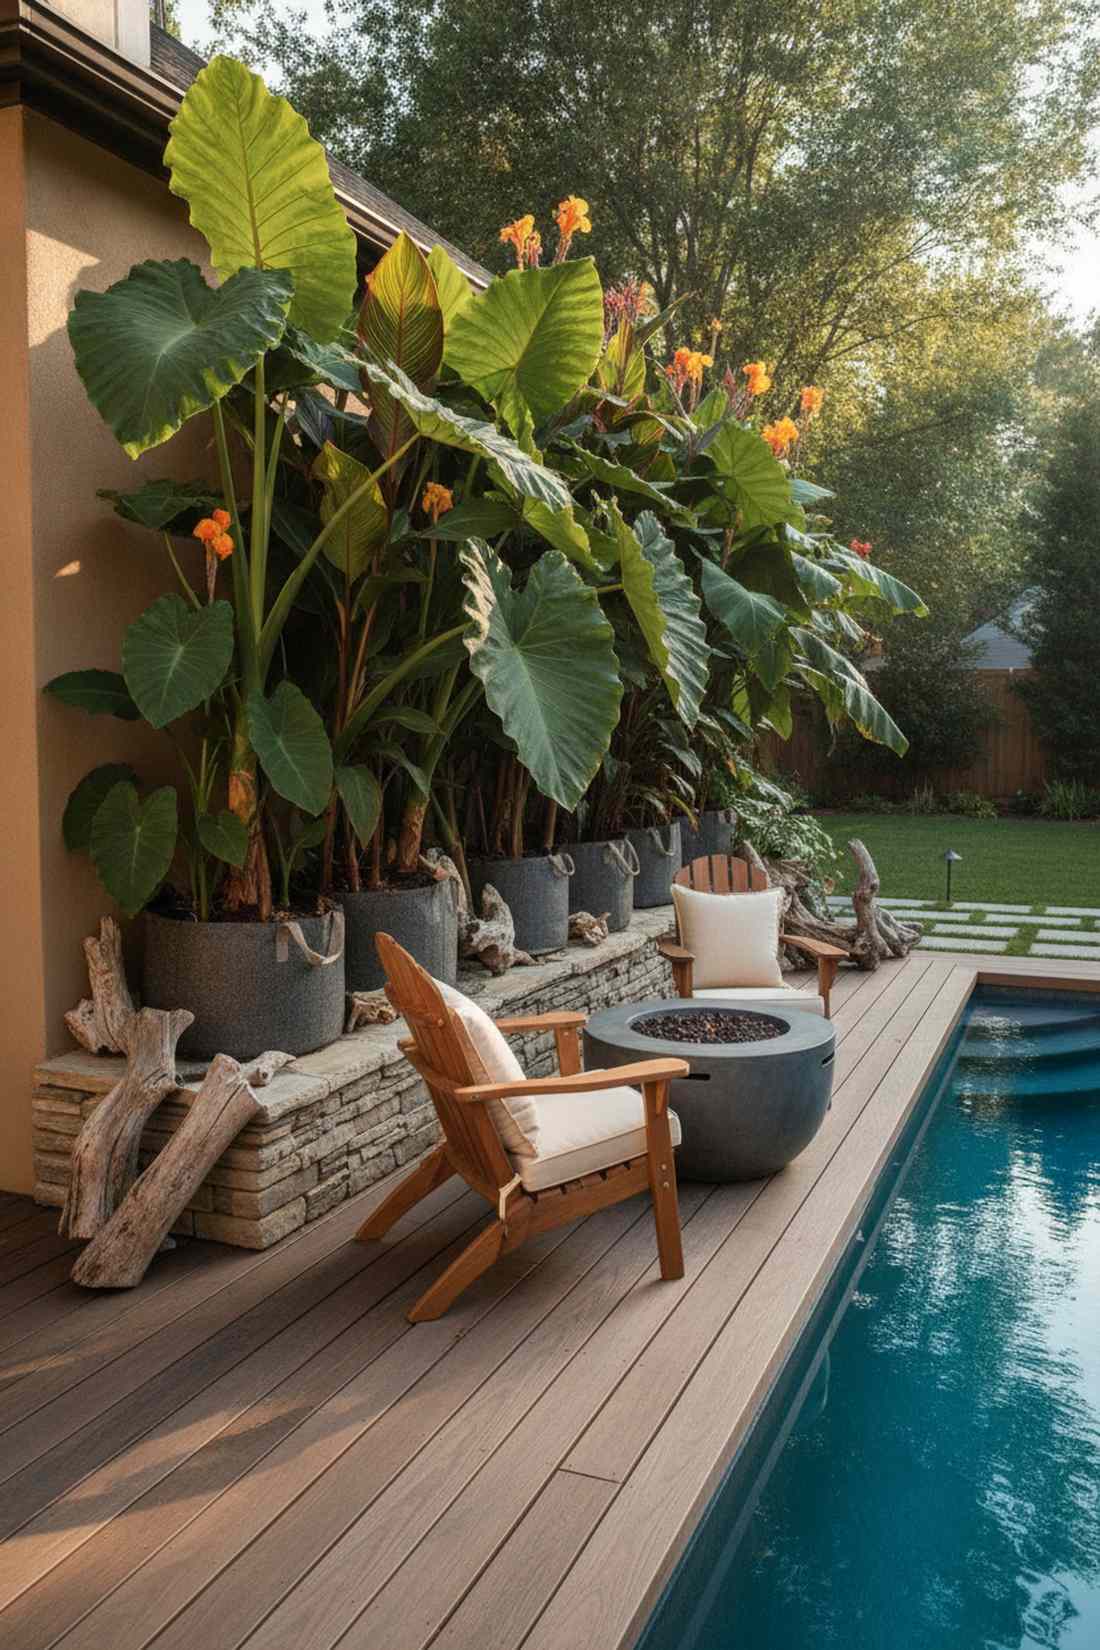
Being surrounded by these massive leaves feels like you’ve been transported to a high-end jungle resort. A bold foliage oasis cluster is the absolute best trick for making a standard suburban patio feel lush and exotic.
Buying mature palms is insanely expensive, but clustering fast-growing Elephant Ears and Cannas gives a designer-level finish in just one summer. Utilizing oversized fabric grow bags hidden behind decorative logs gives roots massive space to explode with growth while keeping costs invisible.
You can create a dense jungle corner for under $80 using bulbs. It’s a fast upgrade that completely changes the vibe.
- Key Materials: Elephant ear bulbs, canna rhizomes, grow bags
- Vibe / Style: Lush resort escapism
- Difficulty: Very easy, fast-growing
- Budget Breakdown: Bulbs: $50 | Grow Bags & Soil: $30
- Creator’s Tip: Feed these heavy drinkers with a water-soluble nitrogen fertilizer every two weeks to force gargantuan leaf sizes.
- Smart Sourcing: Heavy-duty aeration fabric grow bags (bulk pack) and jumbo elephant ear starter bulbs.
This next visual trick is the exact reason professional landscape designers charge thousands for “contemporary” styling…
35. Flowering Perennial Color Drifts
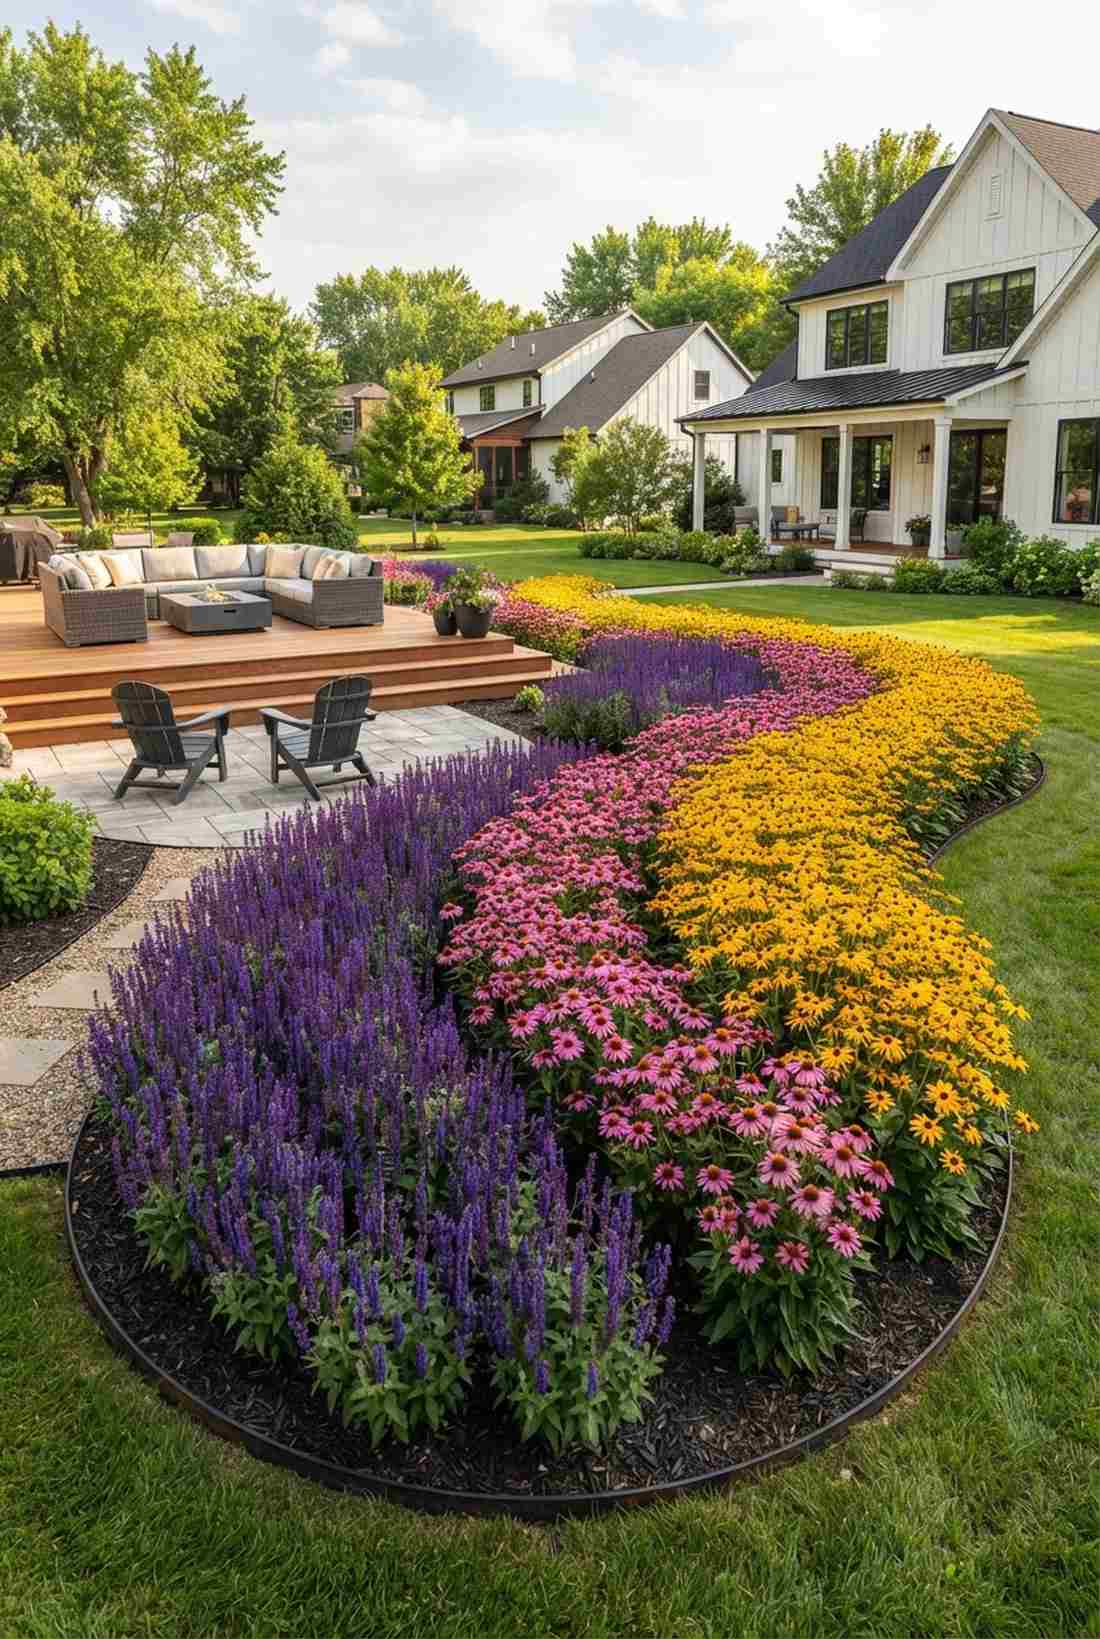
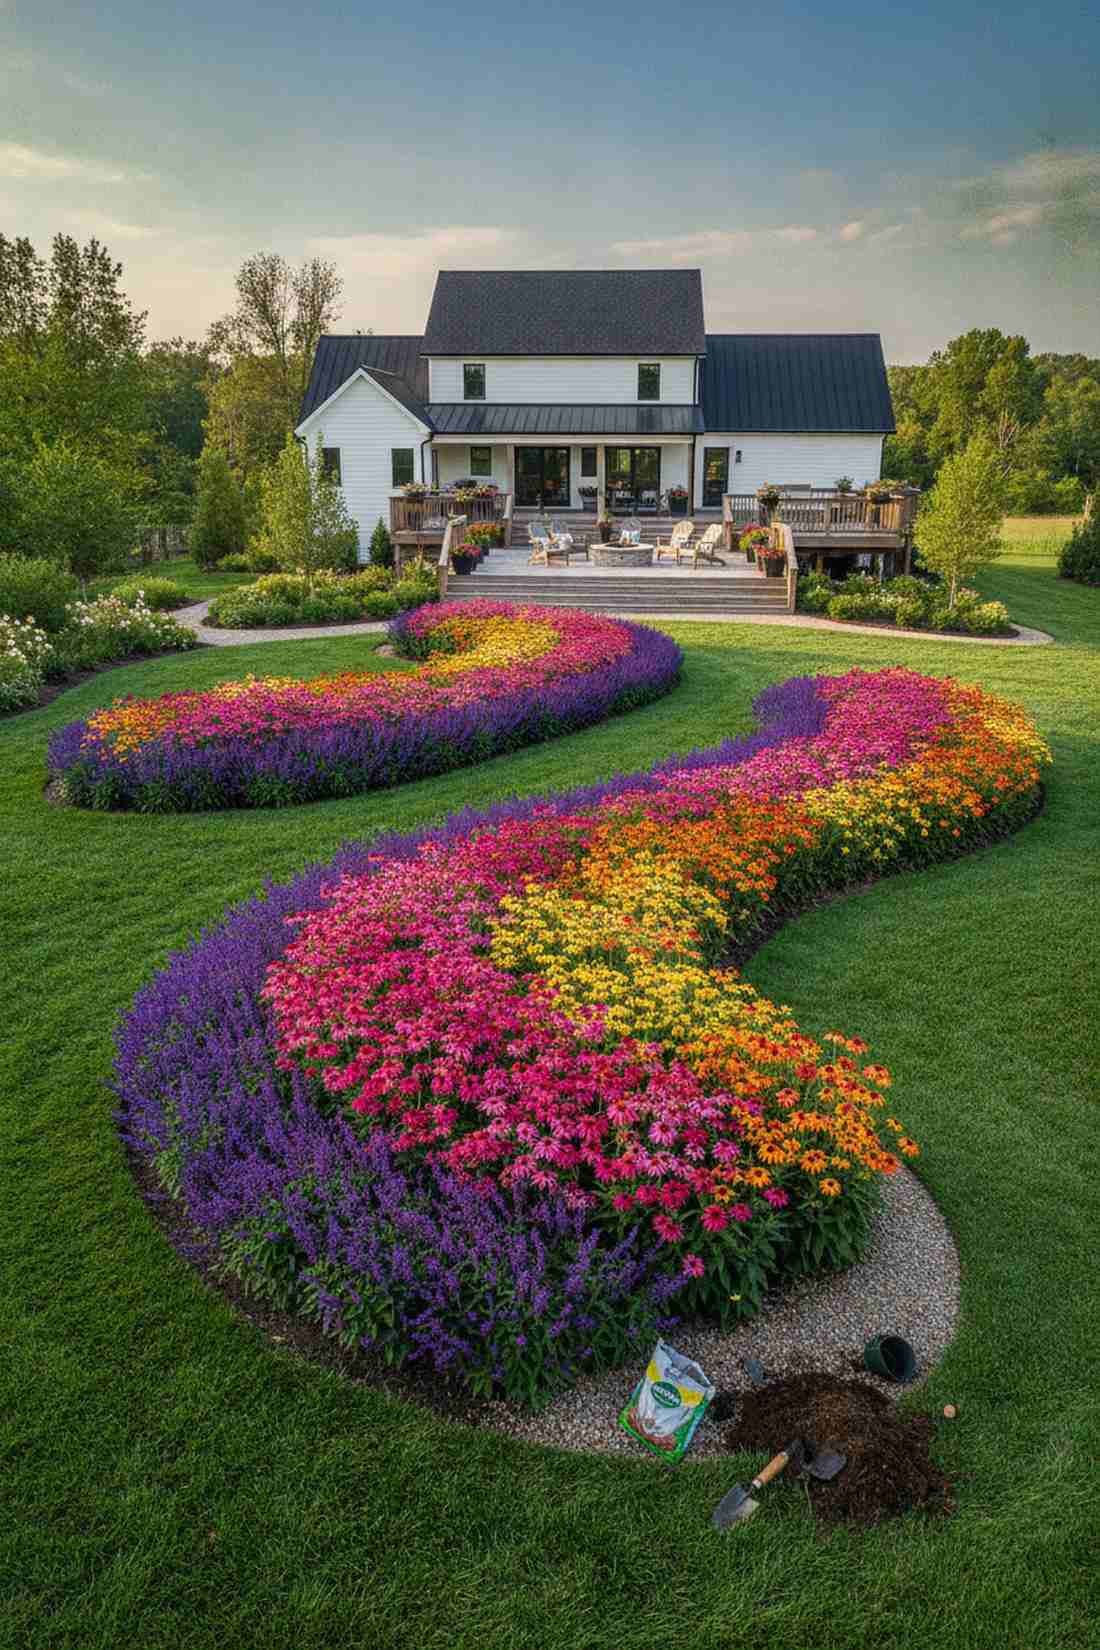
This sweeping color layout feels like a modern art painting brought to life in nature. A massed color-block flower bed works flawlessly to modernize an outdated, cluttered, messy garden.
The “one of everything” planting style looks cheap, but planting bold swaths of 15 identical perennials looks far more expensive than it is. Applying a pre-emergent weed barrier granule guarantees your pristine color blocks aren’t ruined by invasive dandelions.
You can plant a massive, striking color drift for about $150. Pin this if you want to modernize your landscape instantly.
- Key Materials: Coneflowers or Salvia, pre-emergent, compost
- Vibe / Style: Bold contemporary gallery
- Difficulty: Requires bulk planting
- Budget Breakdown: Plant flats: $120 | Pre-emergent: $30
- Creator’s Tip: Shape your drifts like teardrops or rivers, never perfect squares, so the color visually “flows” through the yard.
- Smart Sourcing: Pre-emergent weed preventer granules and bare-root perennial starter kits.
Architectural Hardscaping: Building Structure into Luxury Garden Design
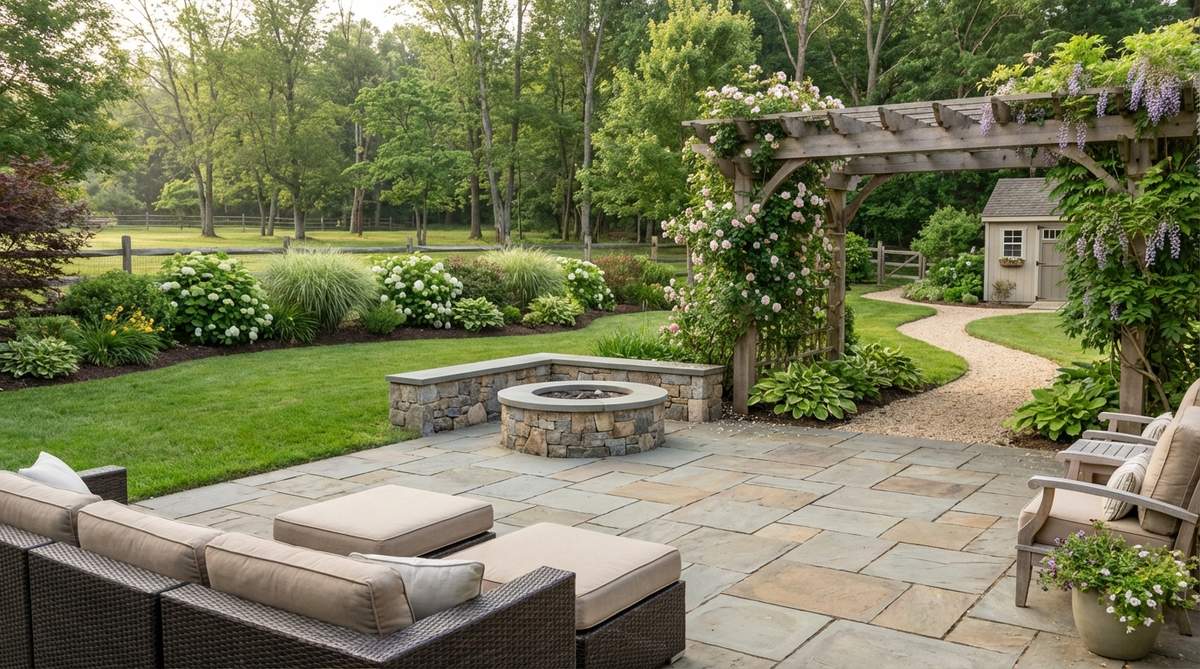
36. Bluestone Paver Terraces
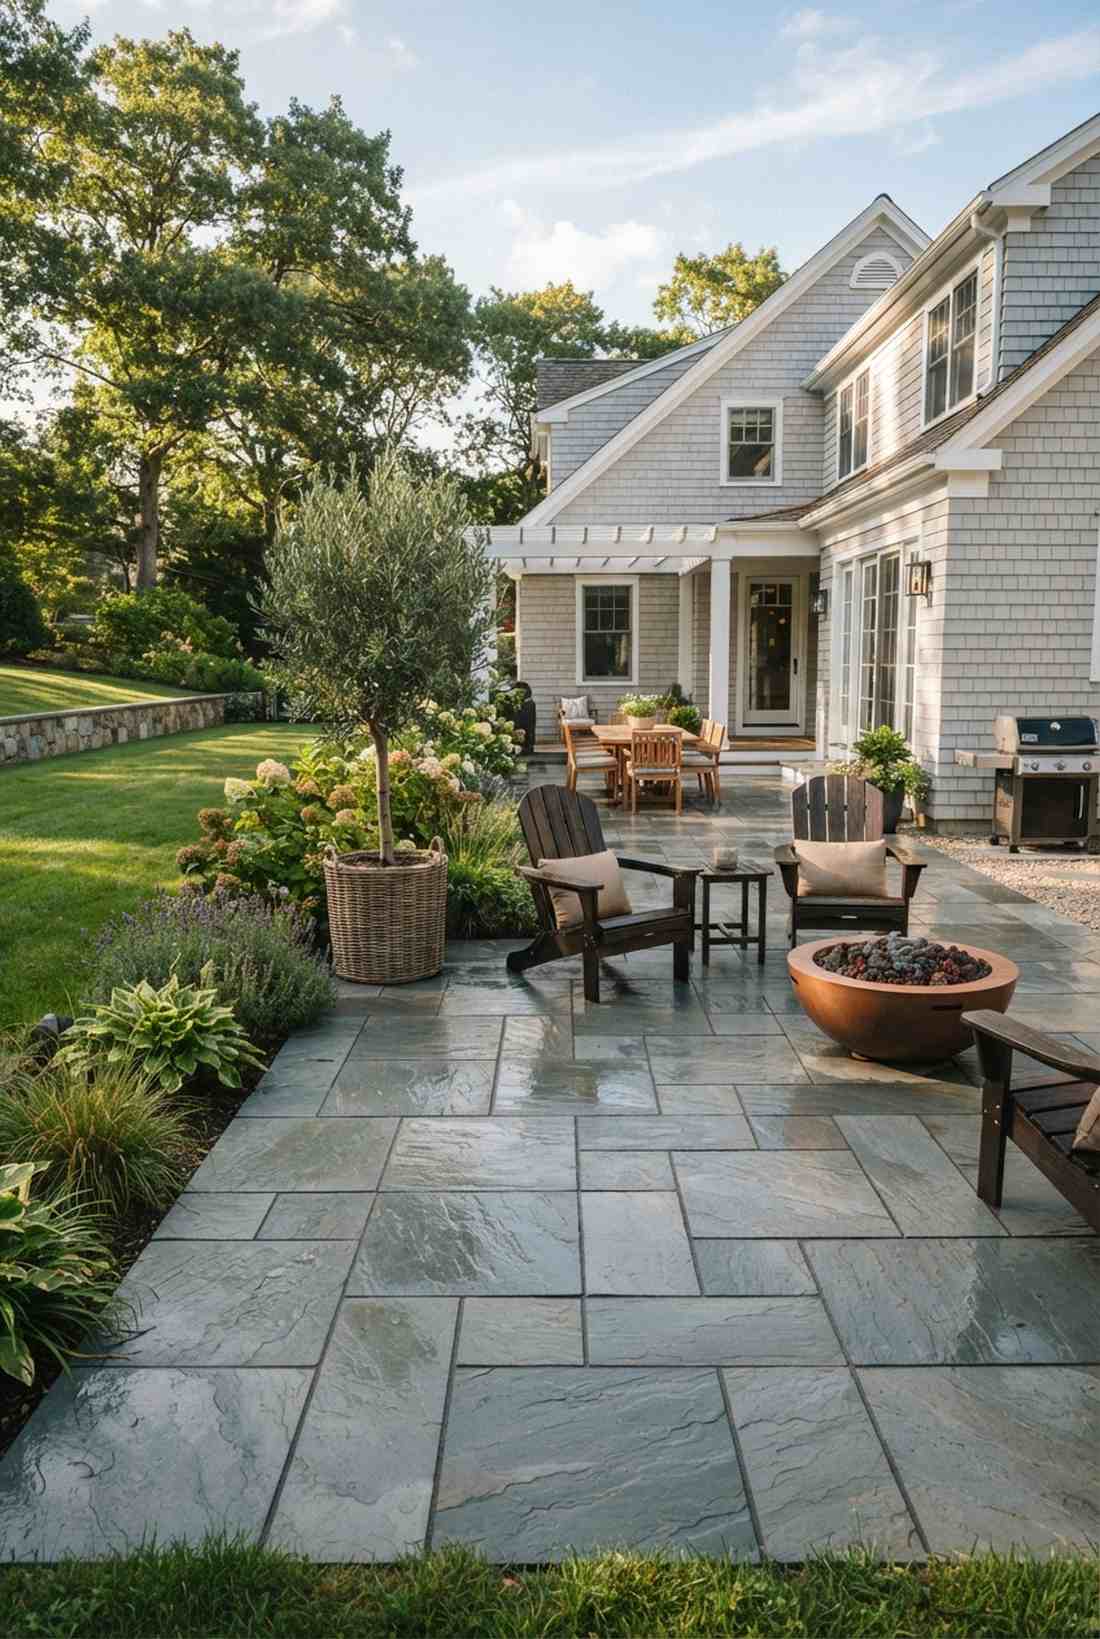
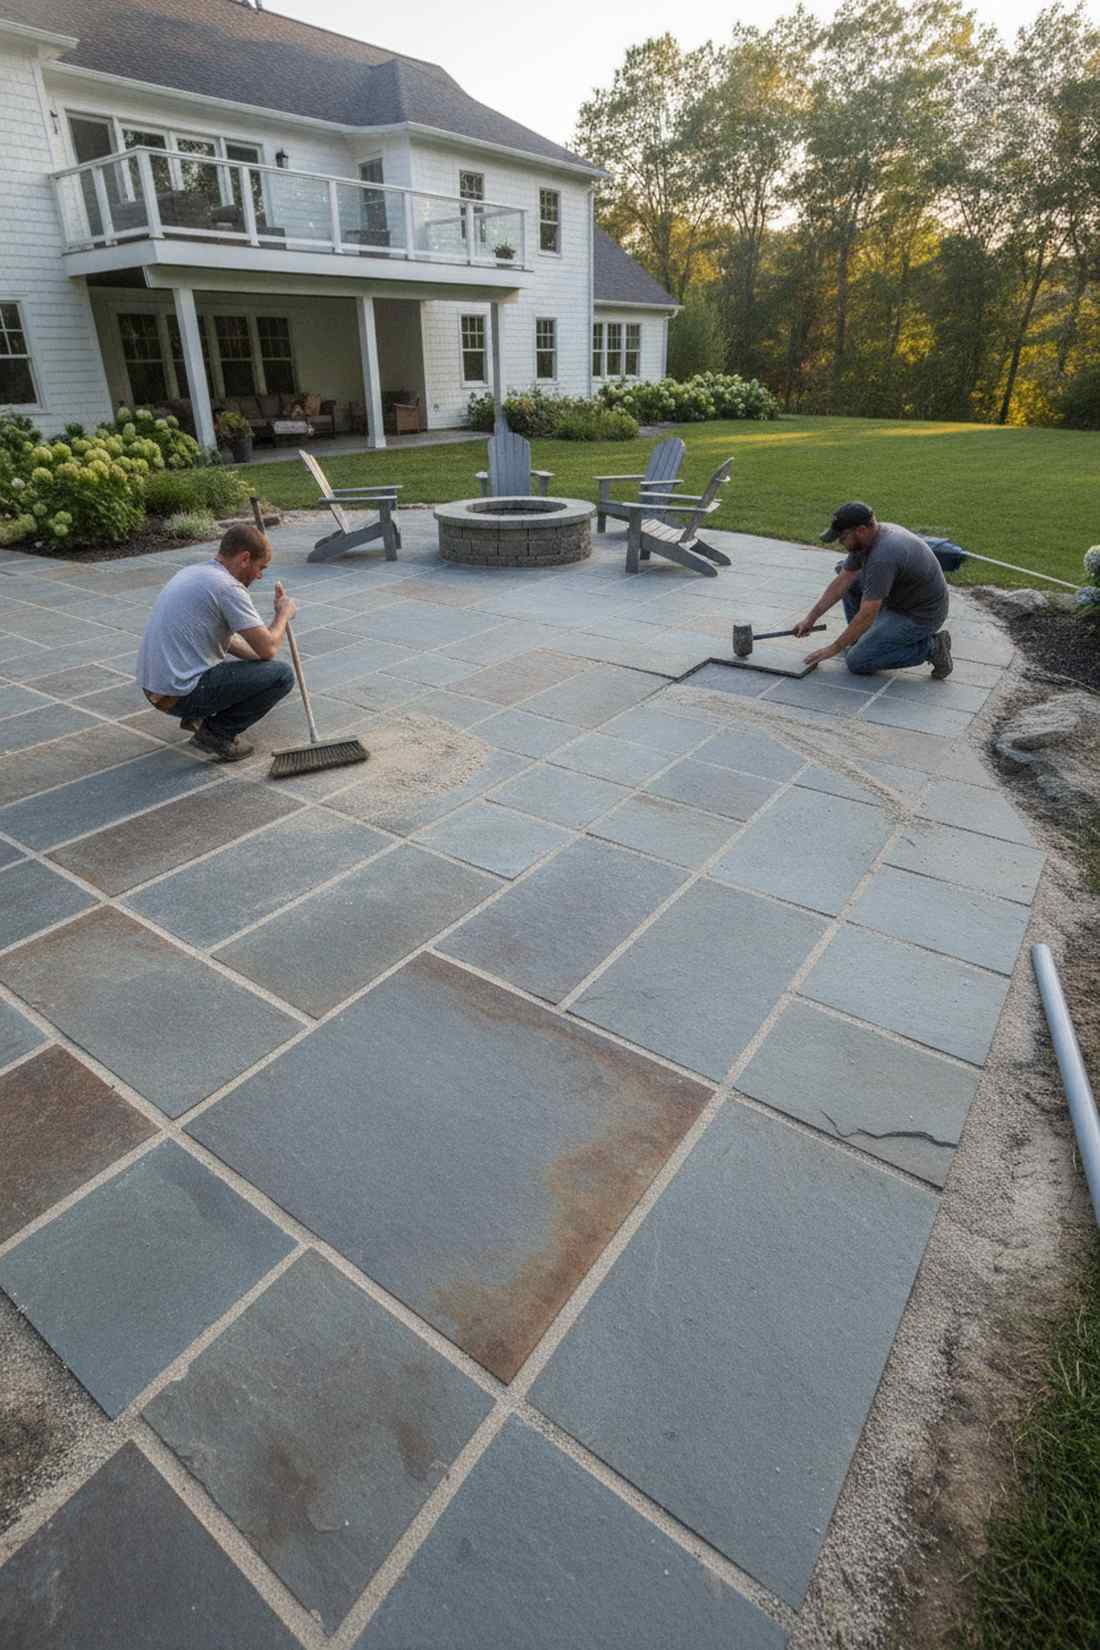
Walking across this surface feels like entering the courtyard of an established historic estate. A thermal-finish natural stone patio is the ultimate foundational upgrade to replace a cracked, ugly concrete slab.
Hiring masons for wet-laid stone is notoriously expensive, but dry-laying large format pavers over sand achieves a high-end estate vibe that you can do yourself. Sweeping polymeric jointing sand into the gaps locking everything together permanently while stopping weeds dead.
A 10×10 patio space runs around $600 in raw materials. Save this to your heavy-duty backyard renovations board!
- Key Materials: Bluestone pavers, leveling sand, polymeric sand
- Vibe / Style: Timeless upscale durability
- Difficulty: Heavy lifting and precise leveling
- Budget Breakdown: Pavers: $500 | Sand/Base: $100
- Creator’s Tip: Use two PVC pipes laid parallel in the dirt to quickly and perfectly screed your leveling sand before dropping stones.
- Smart Sourcing: Commercial-grade polymeric jointing sand and heavy-duty rubber deadblow mallets.
37. Travertine Pool Decking
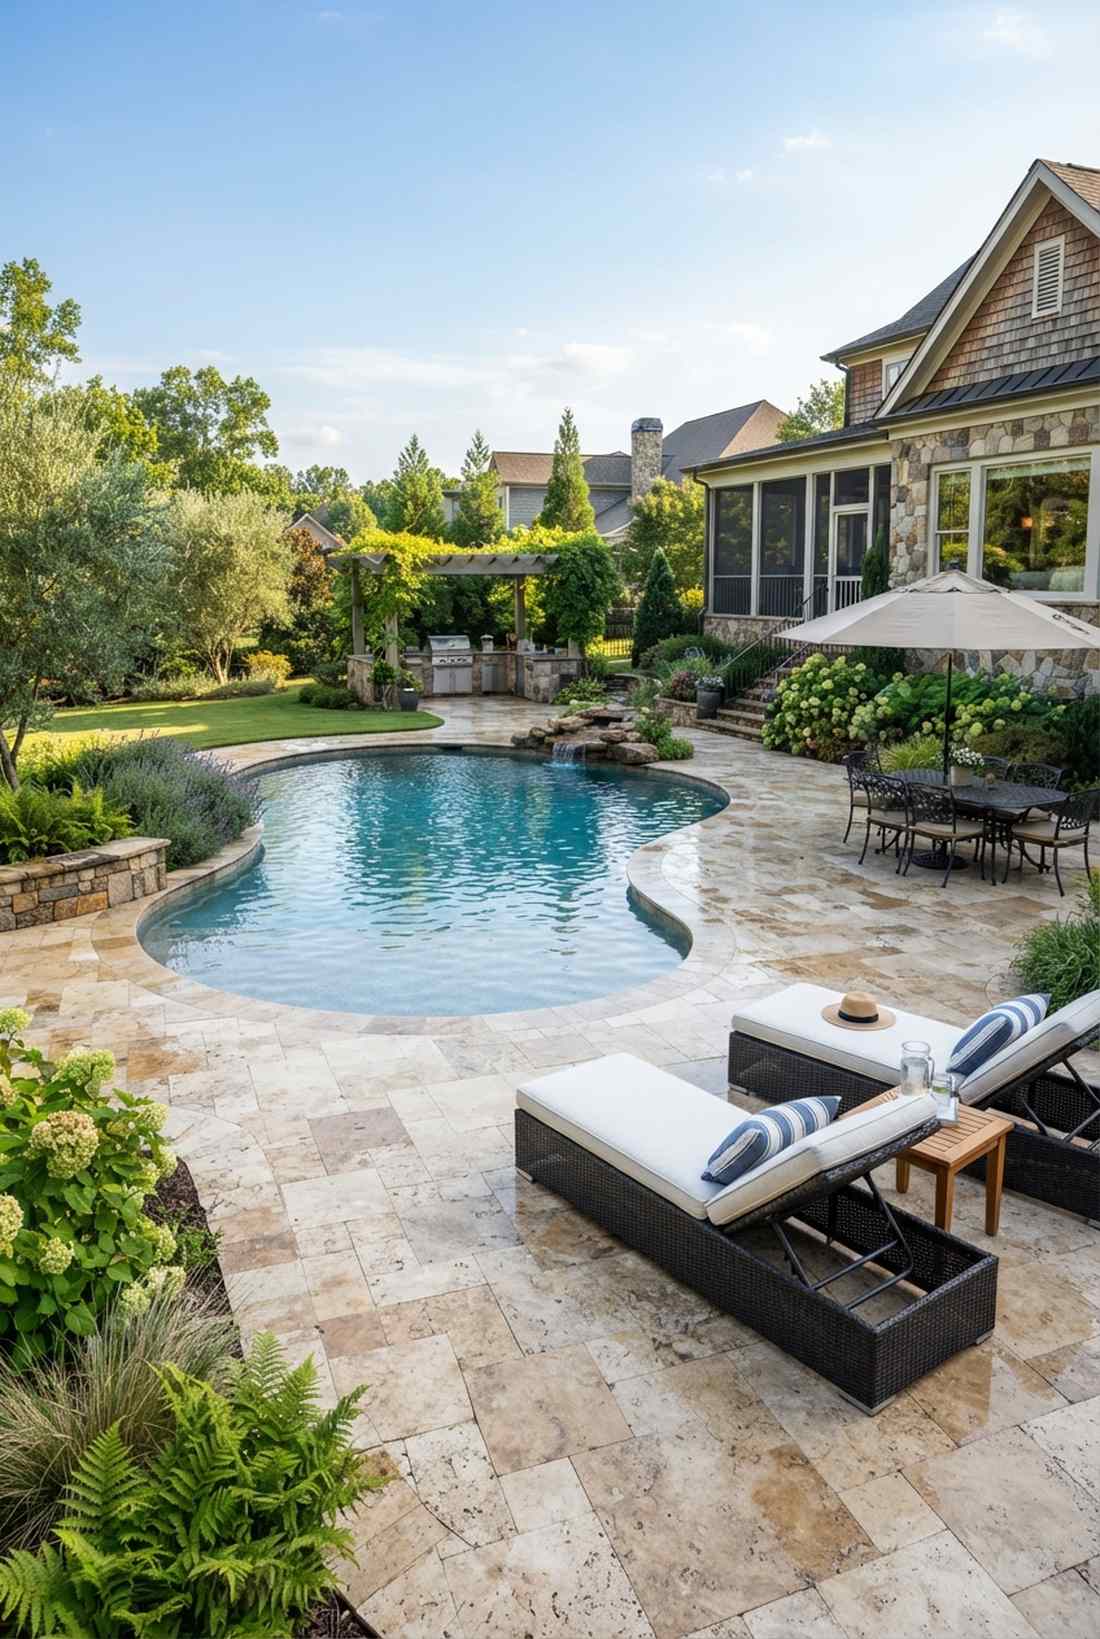
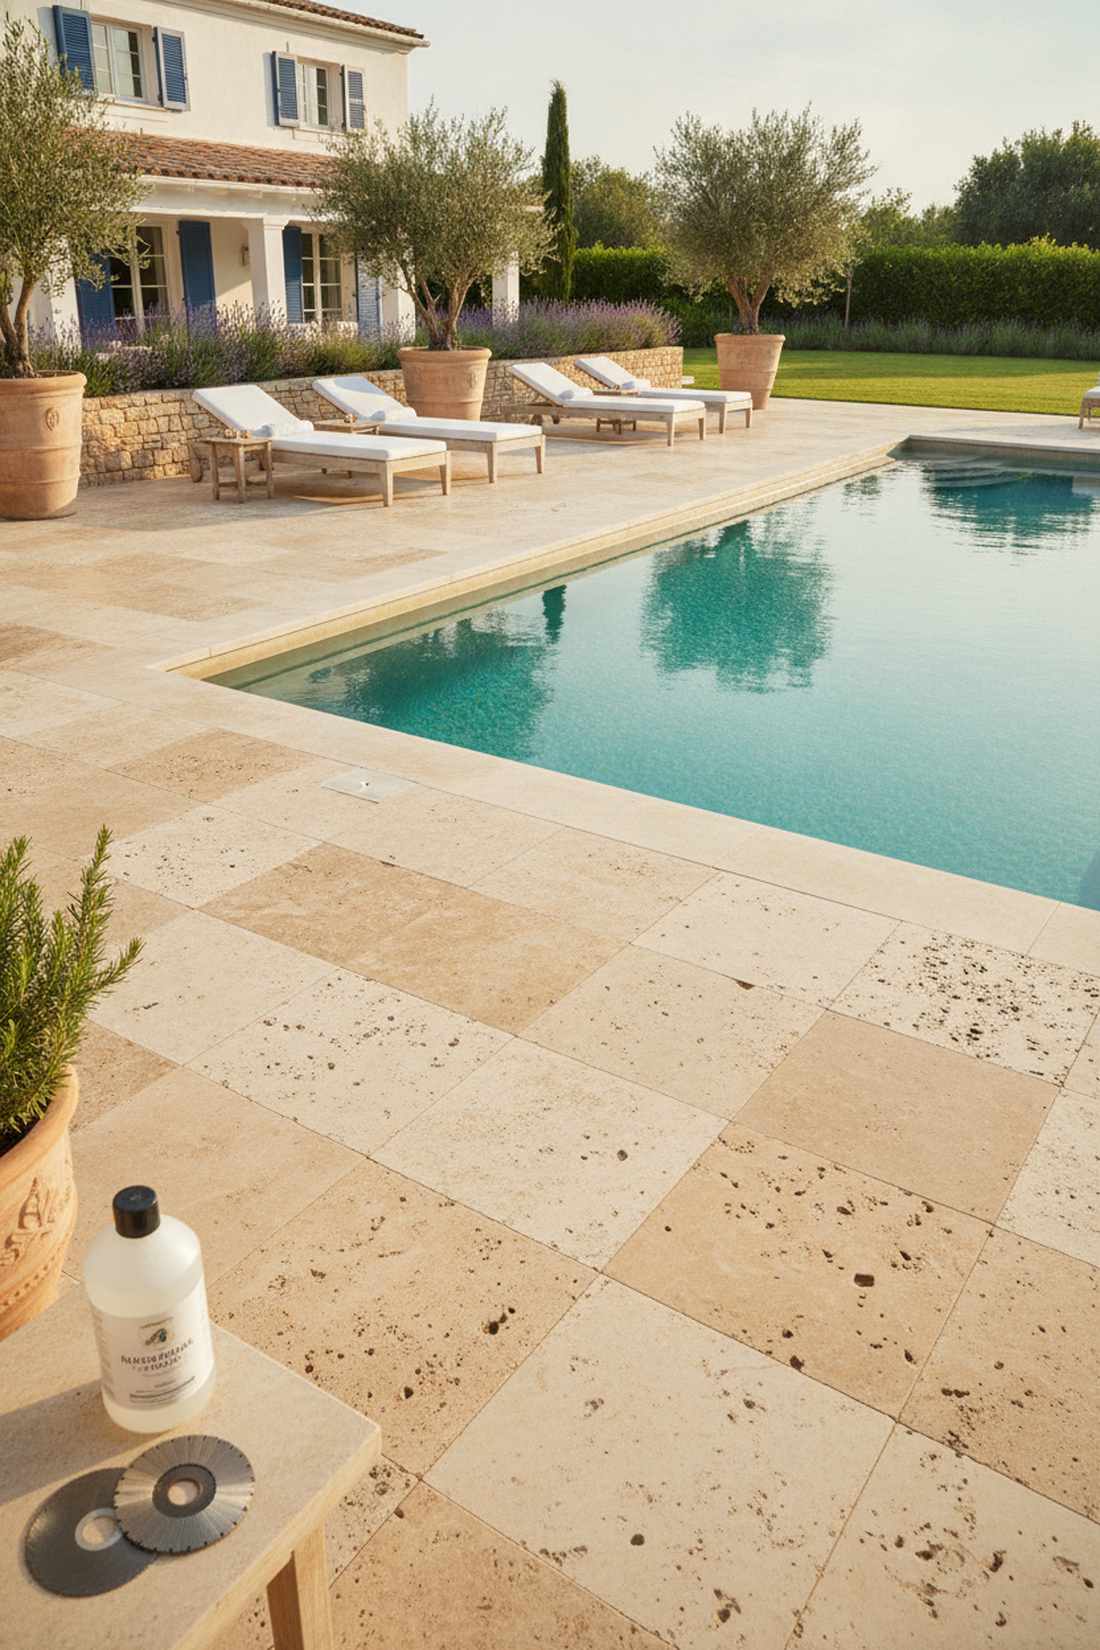
This bright, cool surface feels like stepping out of the water at a luxury Grecian villa. A honed limestone pool surround works exceptionally well for bare feet because it never gets dangerously hot in the sun.
Basic concrete gets slippery and cracks, but French-patterned travertine screams custom architecture and offers natural slip resistance. Sealing the pores with a premium penetrating stone sealer stops chlorine and sunscreen from staining the pristine finish.
Material costs hover around $6 to $9 per square foot. Highly recommended for a massive pool area facelift.
- Key Materials: Travertine tiles, crushed stone base, sealer
- Vibe / Style: Sun-drenched Mediterranean luxury
- Difficulty: Advanced hardscaping project
- Budget Breakdown: Stone: $400 (varies) | Sealer: $60
- Creator’s Tip: Do not fill the natural holes in the travertine with grout; leaving them open is what provides the crucial non-slip grip.
- Smart Sourcing: Clear penetrating natural stone sealer and diamond-grit angle grinder blades.
38. Permeable Gravel Pathways
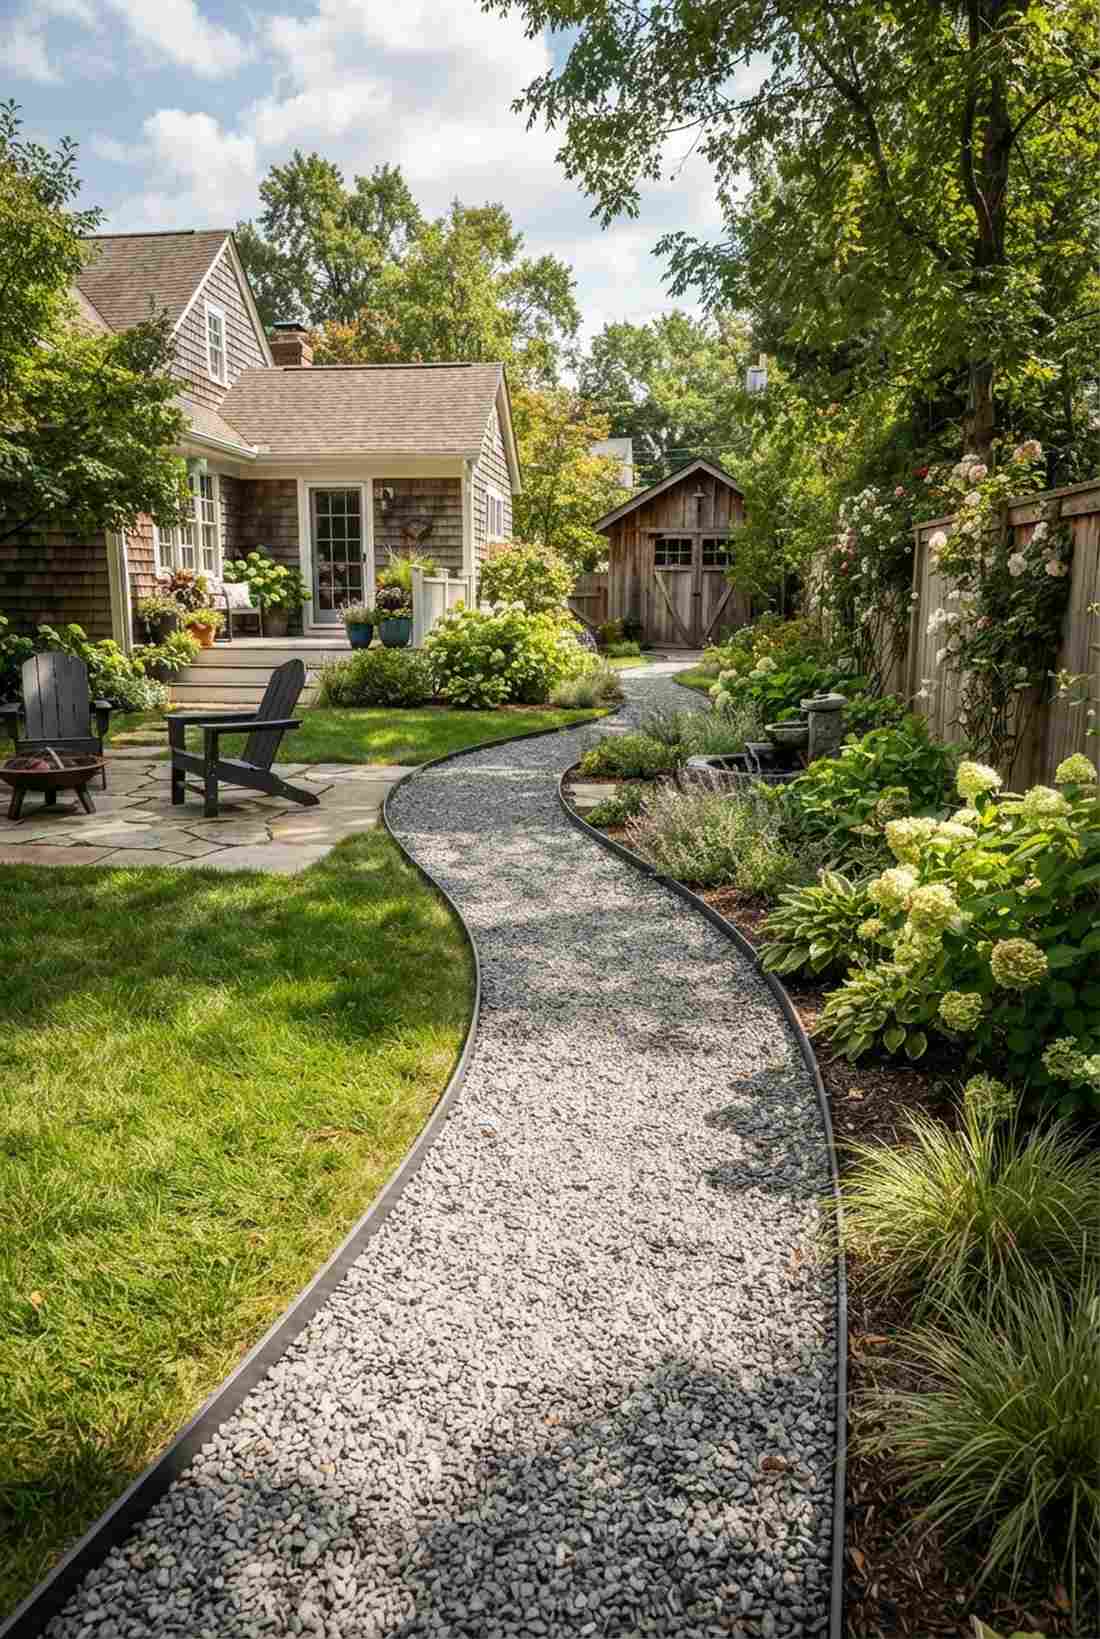
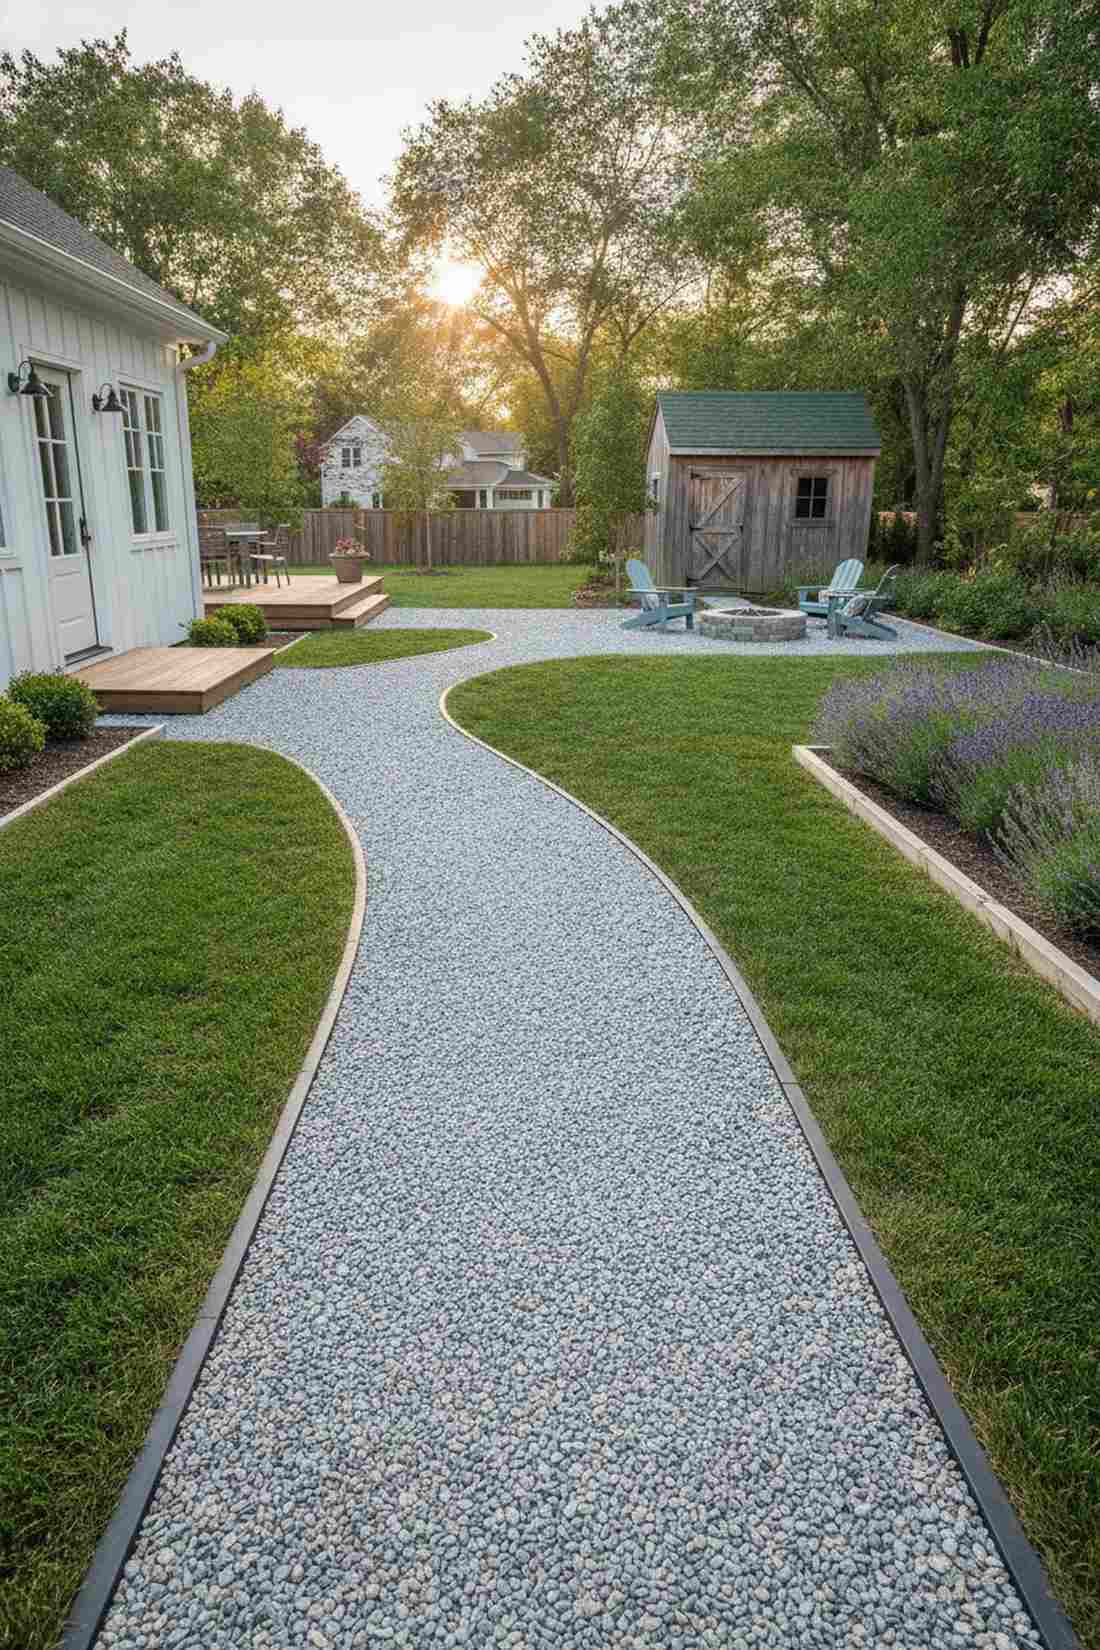
The crunch underfoot feels like walking up the driveway of a charming French country house. A crushed stone meandering trail is the absolute perfect, budget-friendly way to connect a back door to a garden shed.
Loose rocks kick everywhere and look messy, but utilizing a hidden honeycomb grid delivers a surprisingly premium look that keeps gravel perfectly locked in place. Edging the path with powder-coated aluminum border strips creates a razor-sharp, modern line between the stone and grass.
You can lay a 20-foot professional path for under $200. Pin this for a fast, elegant weekend upgrade.
- Key Materials: Pea gravel, honeycomb grid, metal edging
- Vibe / Style: Crisp transitional elegance
- Difficulty: Easy leveling and filling
- Budget Breakdown: Grids/Edging: $120 | Gravel: $80
- Creator’s Tip: Use crushed angular stone rather than smooth river pebbles; the sharp edges lock together so you don’t sink when walking.
- Smart Sourcing: Permeable gravel stabilizer grids (bulk pack) and heavy-duty aluminum landscape edging.
39. Dry-Stack Stone Retaining Walls
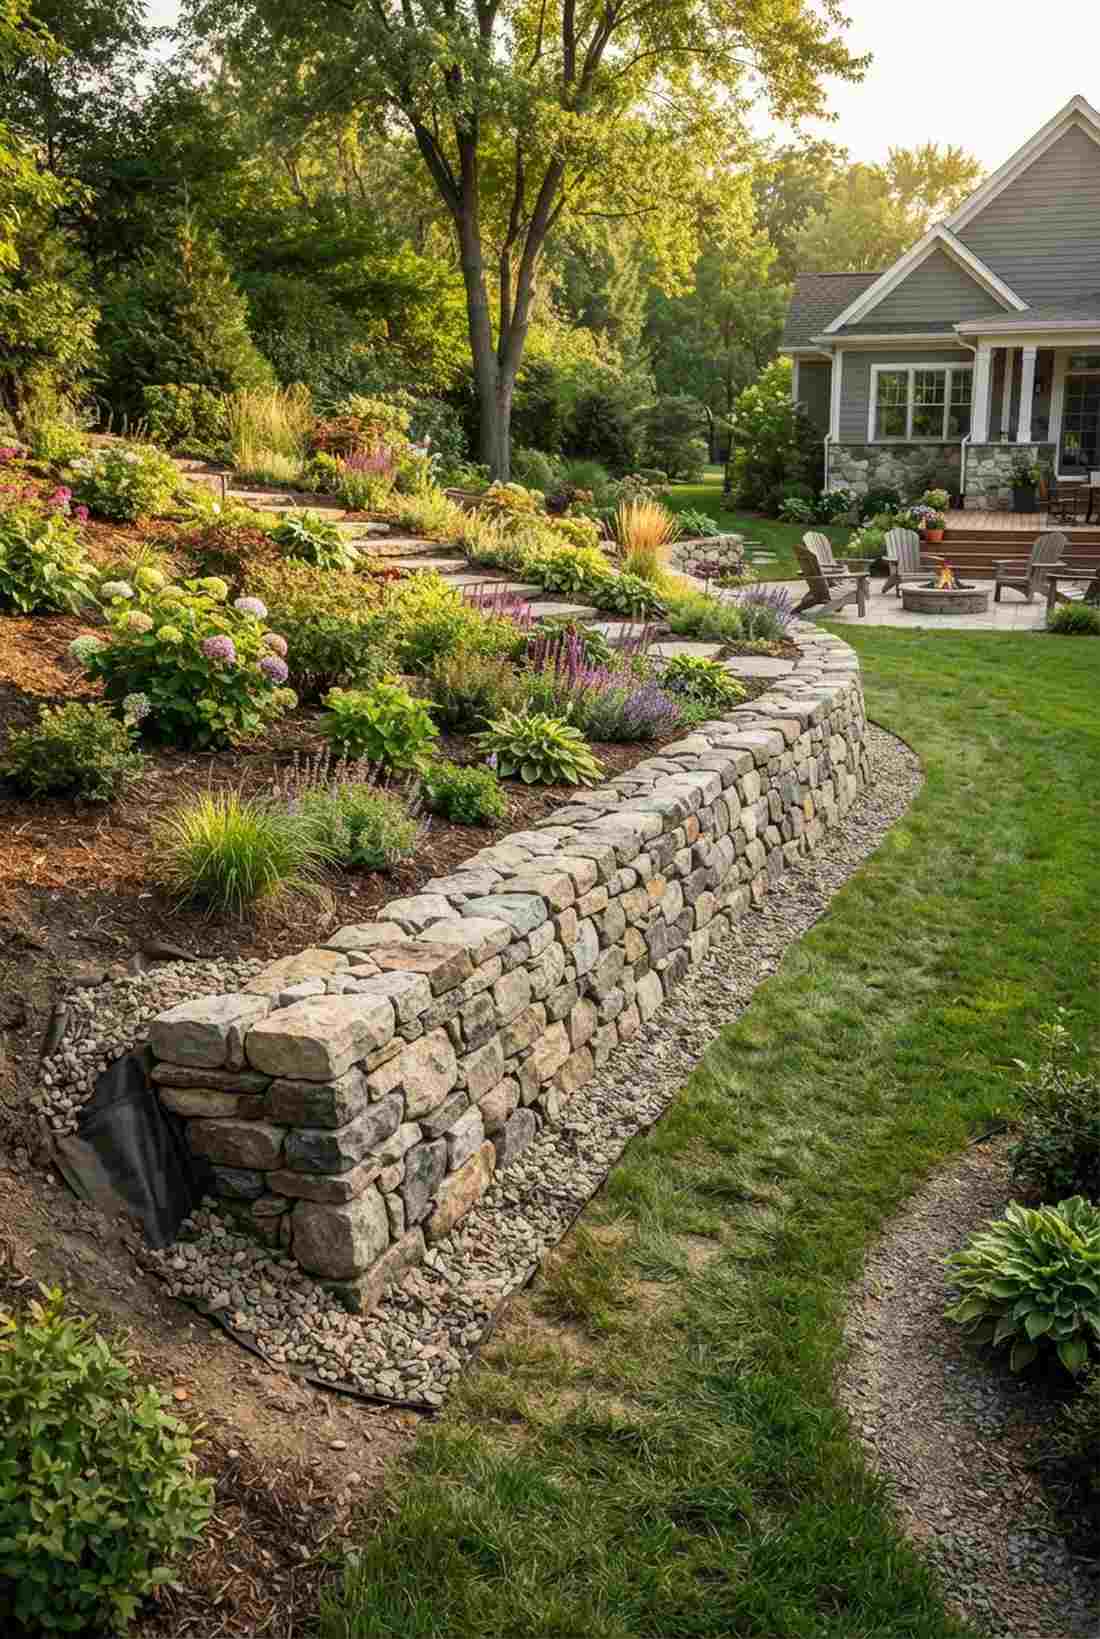
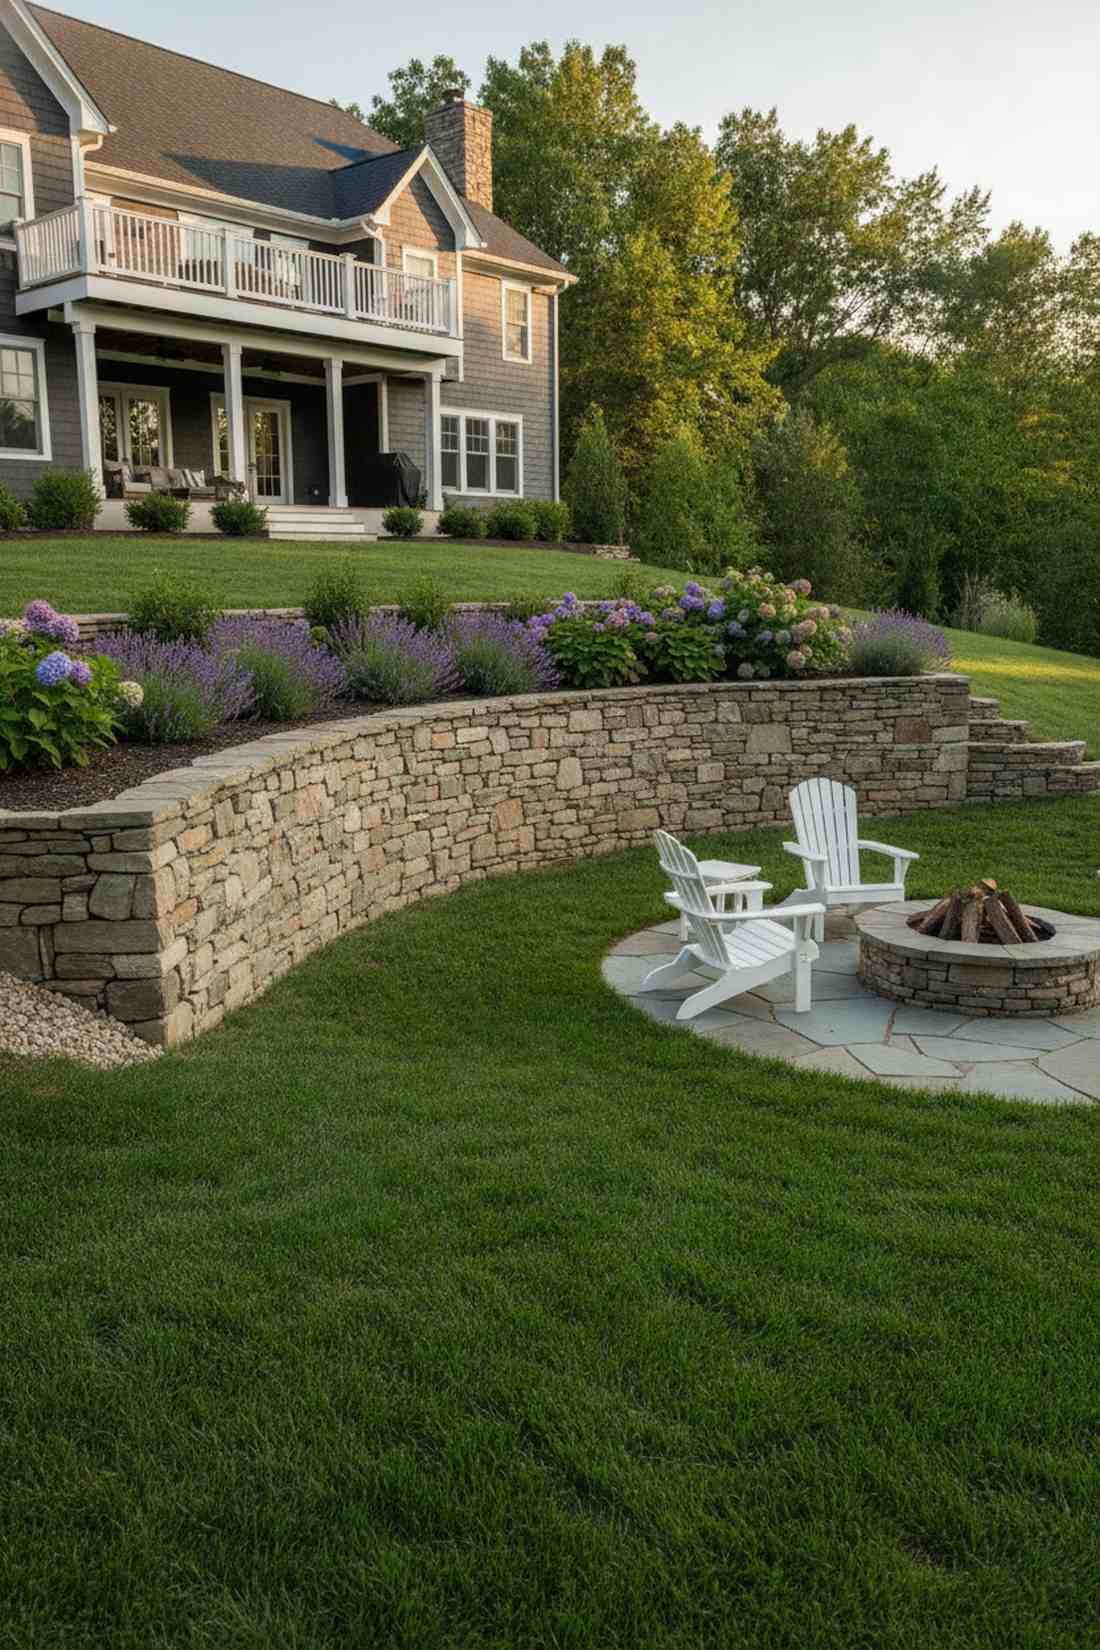
This rugged barrier feels like an ancient boundary wall discovered in the Scottish highlands. A mortarless gravity rock wall works brilliantly to instantly level out an annoying sloped flower bed.
Using concrete blocks looks extremely cheap, but hand-stacking natural fieldstone looks far more expensive than it is and requires zero messy mortar. Stuffing the hidden rear gaps with commercial drainage fabric and gravel ensures hydraulic pressure never blows the wall out.
A short garden wall costs about $150 in stone. It’s a fast upgrade that completely changes the vibe.
- Key Materials: Flat fieldstones, drainage gravel, fabric
- Vibe / Style: Rustic historic endurance
- Difficulty: Like a heavy 3D puzzle
- Budget Breakdown: Stone: $120 | Fabric/Gravel: $30
- Creator’s Tip: Always lean the wall slightly backward into the hill (the “batter”) by about 1 inch for every foot of height for maximum strength.
- Smart Sourcing: Heavy-duty non-woven geotextile fabric and professional masonry chisels.
Most DIYers ruin their hardscaping by using wood that rots in two years. The next upgrade uses materials that literally last a lifetime.
40. Custom Metal Arbors
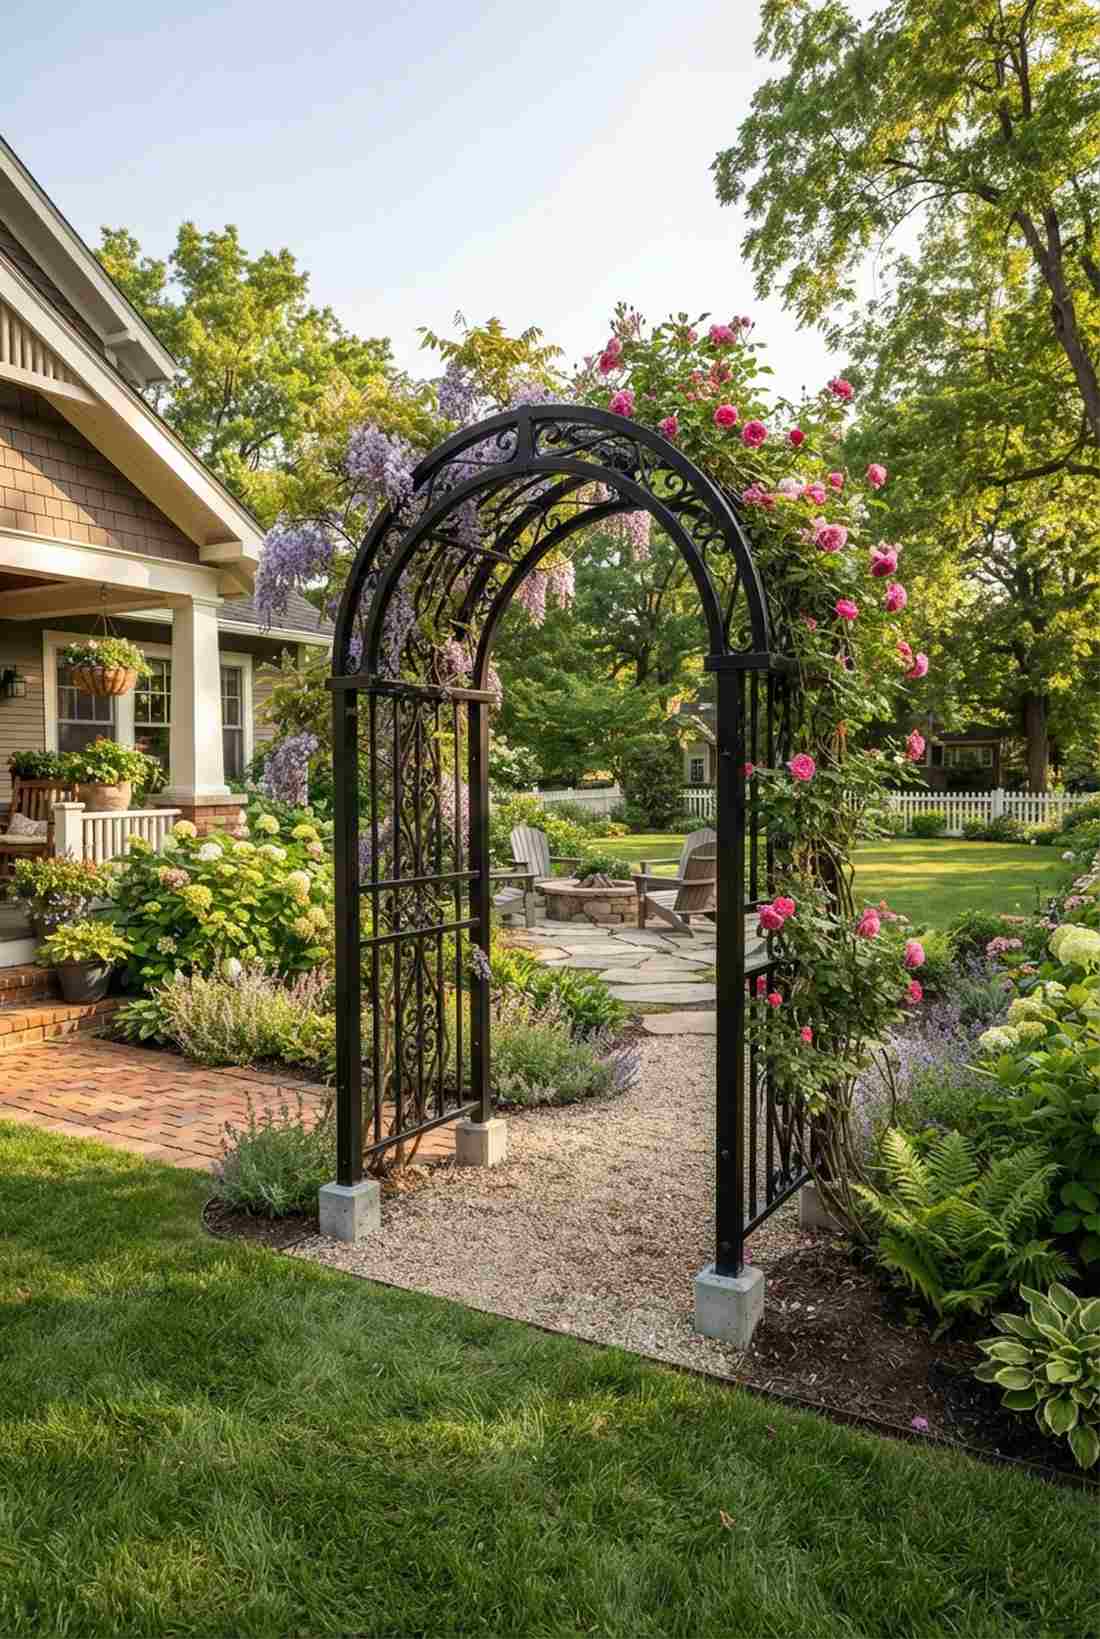
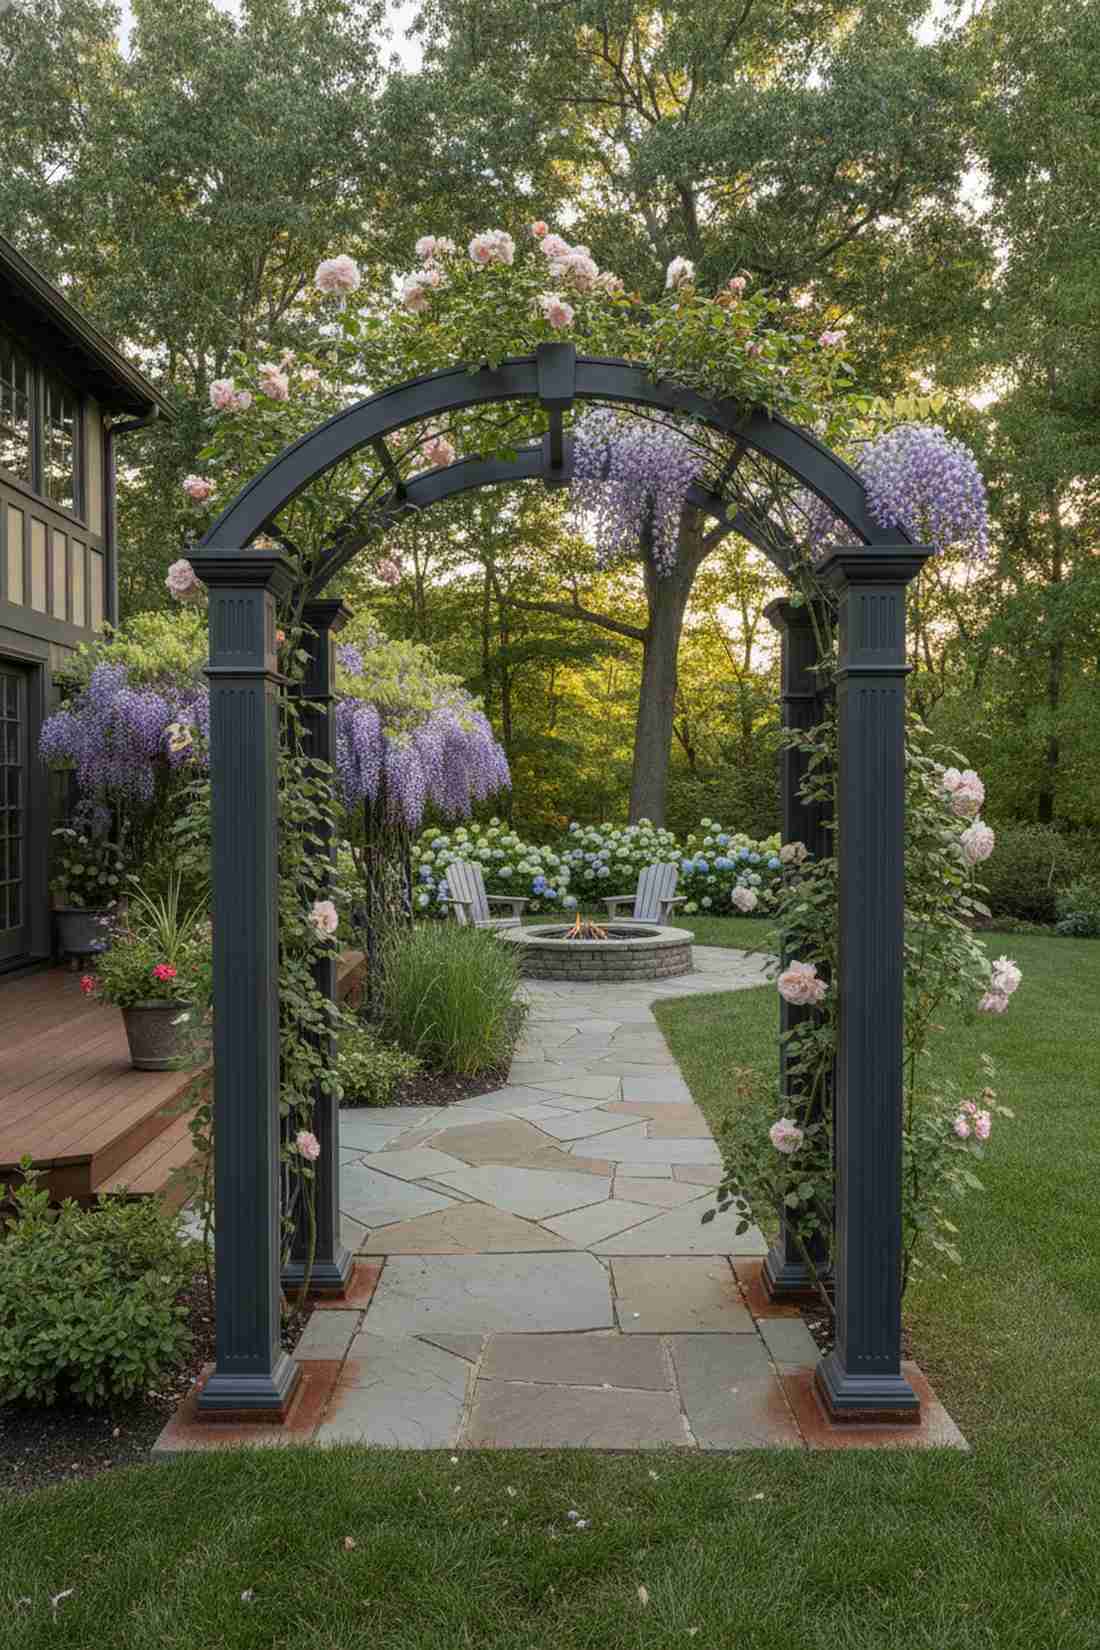

Walking through this gateway feels like entering a secret botanical garden. A fabricated iron architectural arch is the ultimate focal point for transitioning between a front yard and a private backyard.
Wooden trellises snap under the weight of mature vines, but a heavy steel frame gives a designer-level finish that laughs at hurricane winds. Coating the base legs in rust-converter enamel spray before burying them ensures the metal never corrodes under the wet soil.
A premium metal arch kit runs roughly $200. Save this to your garden entrance inspiration board!
- Key Materials: Metal arbor kit, anti-rust spray, concrete footings
- Vibe / Style: Majestic structural entryway
- Difficulty: Easy bolt-together assembly
- Budget Breakdown: Arbor Kit: $180 | Spray/Concrete: $20
- Creator’s Tip: Dig the footing holes 18 inches deep and fill them with fast-setting concrete to ensure the arch never leans over time.
- Smart Sourcing: Powder-coated steel garden arbor kits and industrial rust-converter enamel spray.
Material Guide: Cheap vs. Premium Aesthetic
Knowing exactly where to save and where to spend makes all the difference in achieving that “looks expensive but isn’t” vibe.
- Standard Wood vs. Powder-Coated Aluminum: Wood rots and warps requiring annual staining. Pre-coated aluminum costs 20% more upfront but lasts decades with zero maintenance, saving you massive replacement costs.
- Pre-made Kits vs. Sourcing Locally: Buying individual pieces locally often results in mismatched hardware. Using starter kits ensures all structural components align perfectly, drastically reducing your labor time and avoiding the “DIY-look”.
41. Brick Herringbone Courtyards
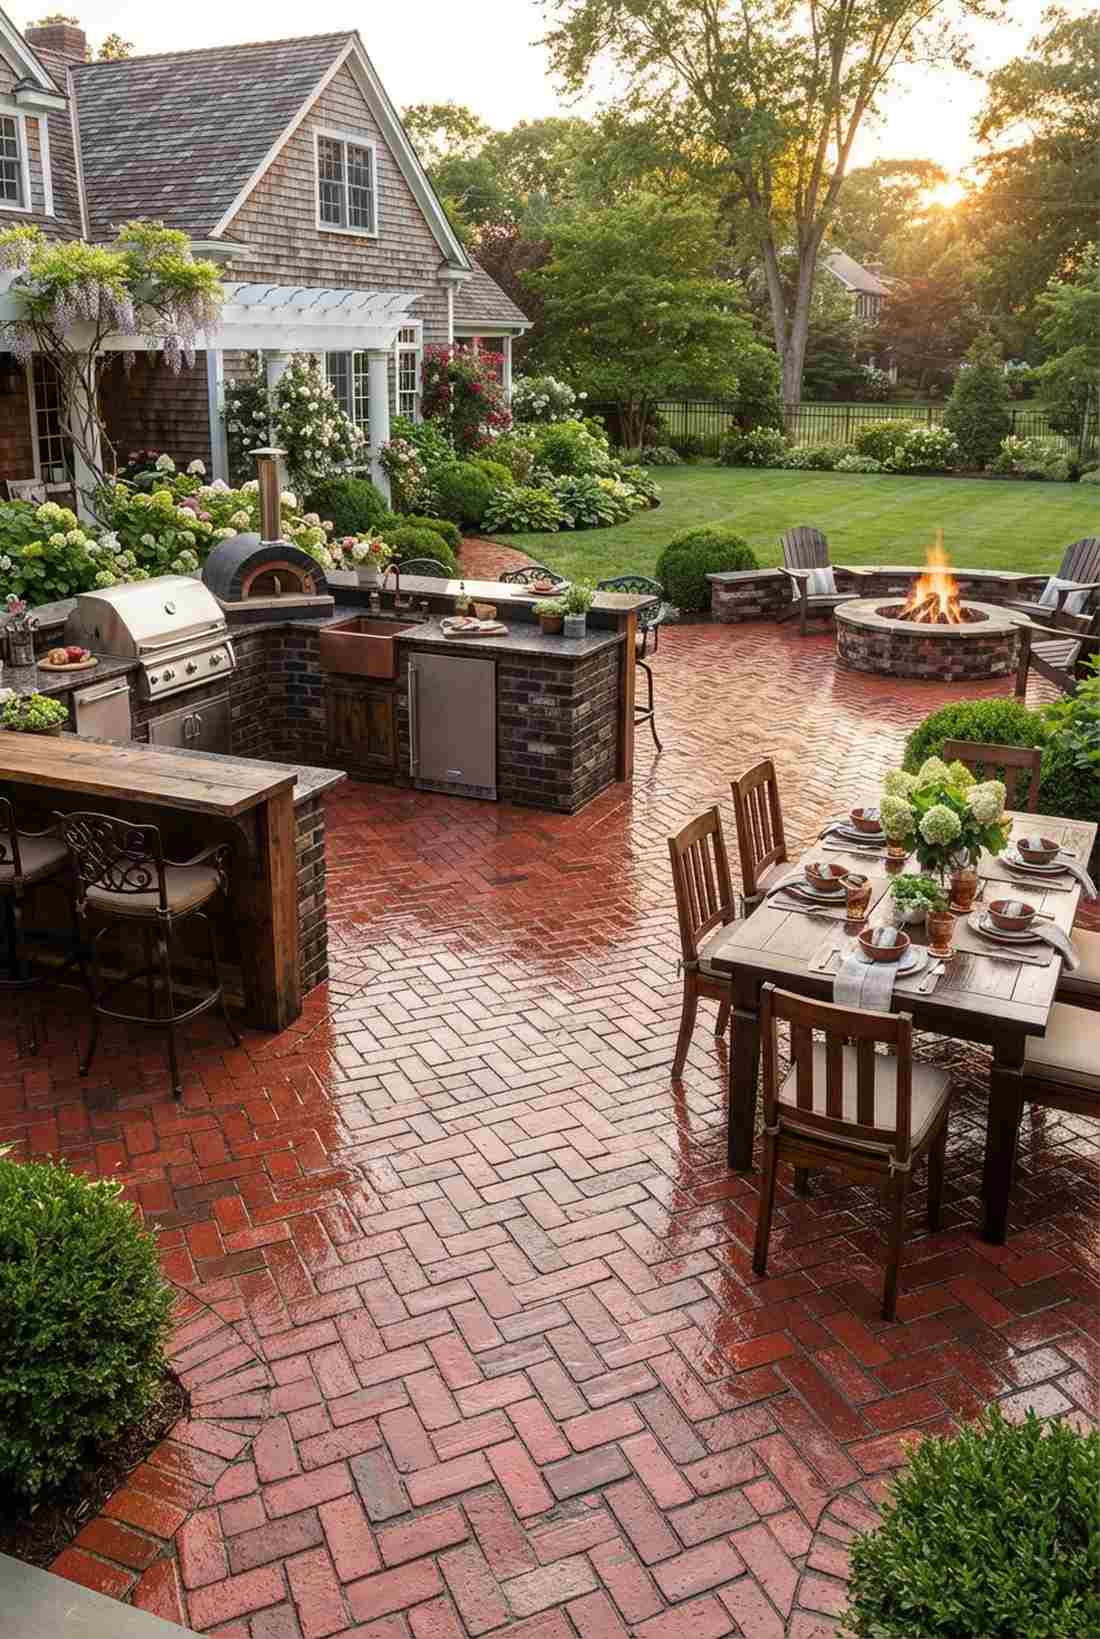
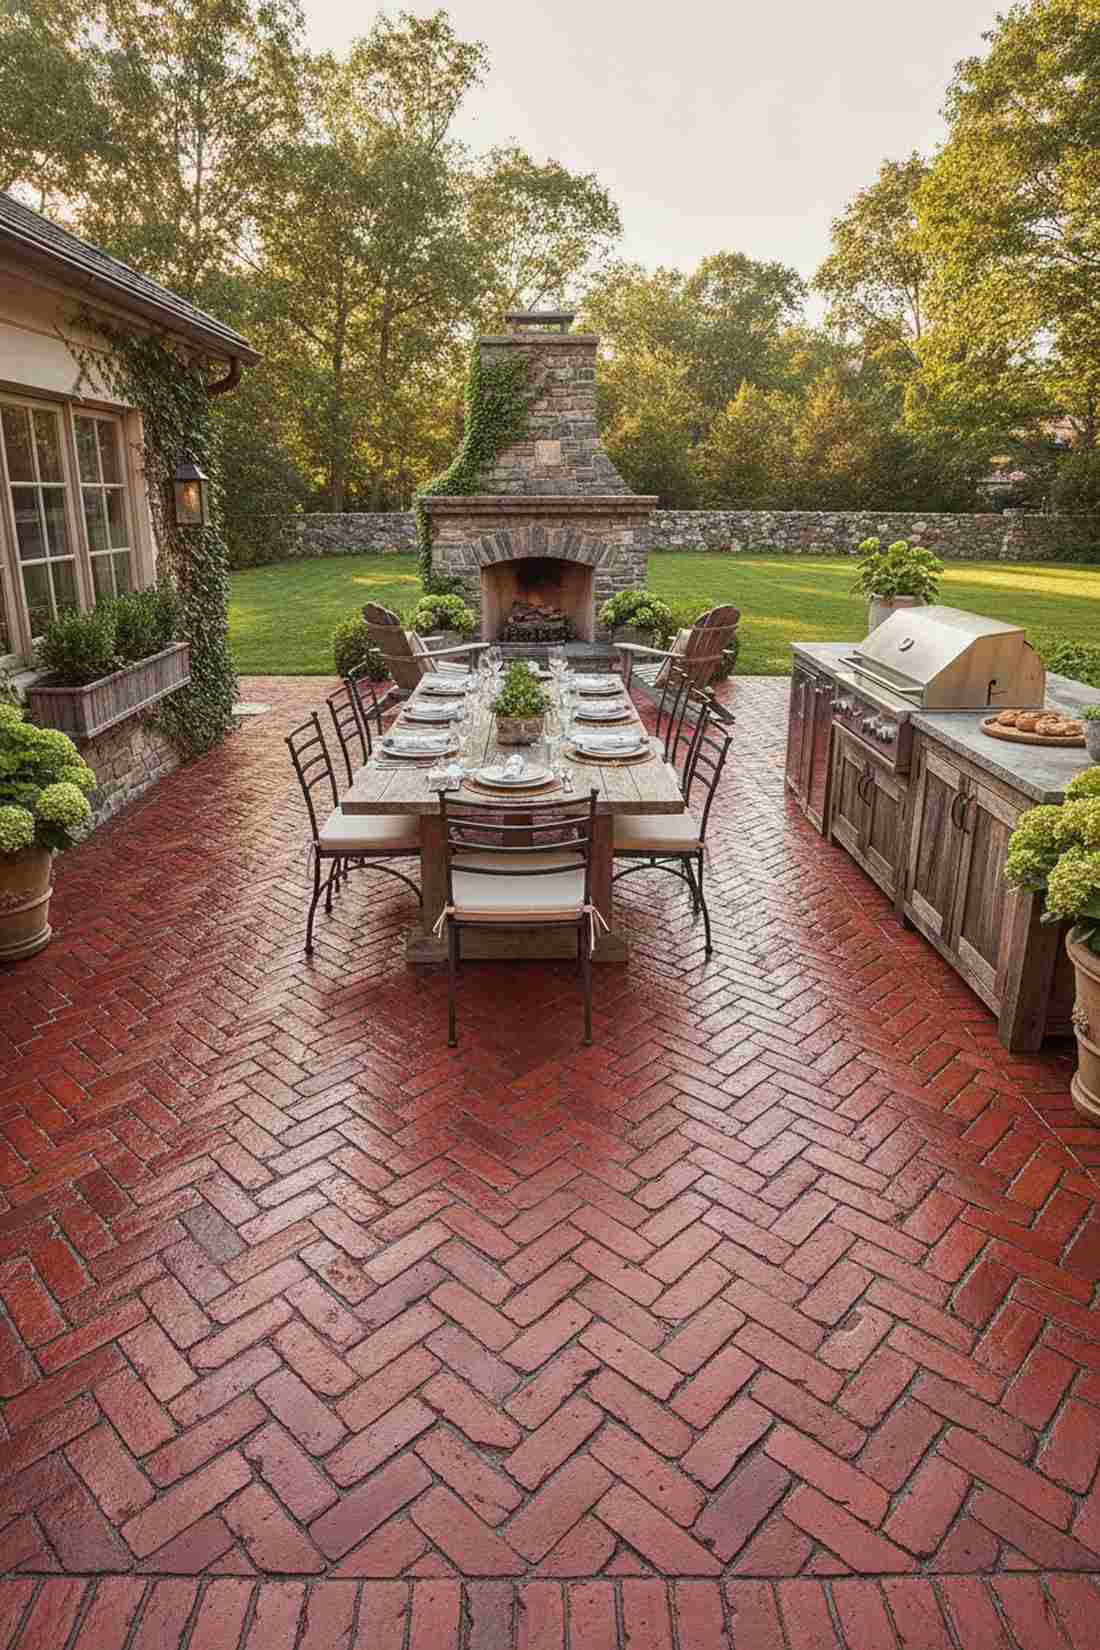
This intricate paving feels like you’re dining in a historic Boston courtyard. A zigzag interlocking brick surface is perfect for creating a highly durable, visually stunning ground cover for an outdoor kitchen.
Standard running brick patterns look basic, but taking the time to lay a 45-degree herringbone screams custom architecture and offers the strongest load-bearing interlock. Sealing the final layout with a wet-look brick enhancer makes the red clay colors pop vibrantly even when bone dry.
The brick and sand for a small area will cost around $350. Pin this if you love timeless masonry designs.
- Key Materials: Clay pavers, masonry sand, wet-look sealer
- Vibe / Style: Historic colonial craftsmanship
- Difficulty: Time-consuming precision cutting
- Budget Breakdown: Bricks: $250 | Sand/Sealer: $100
- Creator’s Tip: You will need an angle grinder; marking the corner cuts with chalk before cutting saves you from wasting expensive bricks.
- Smart Sourcing: Wet-look high-gloss masonry sealer and diamond masonry angle grinder blades.
42. Cut Stone Stair Cascades
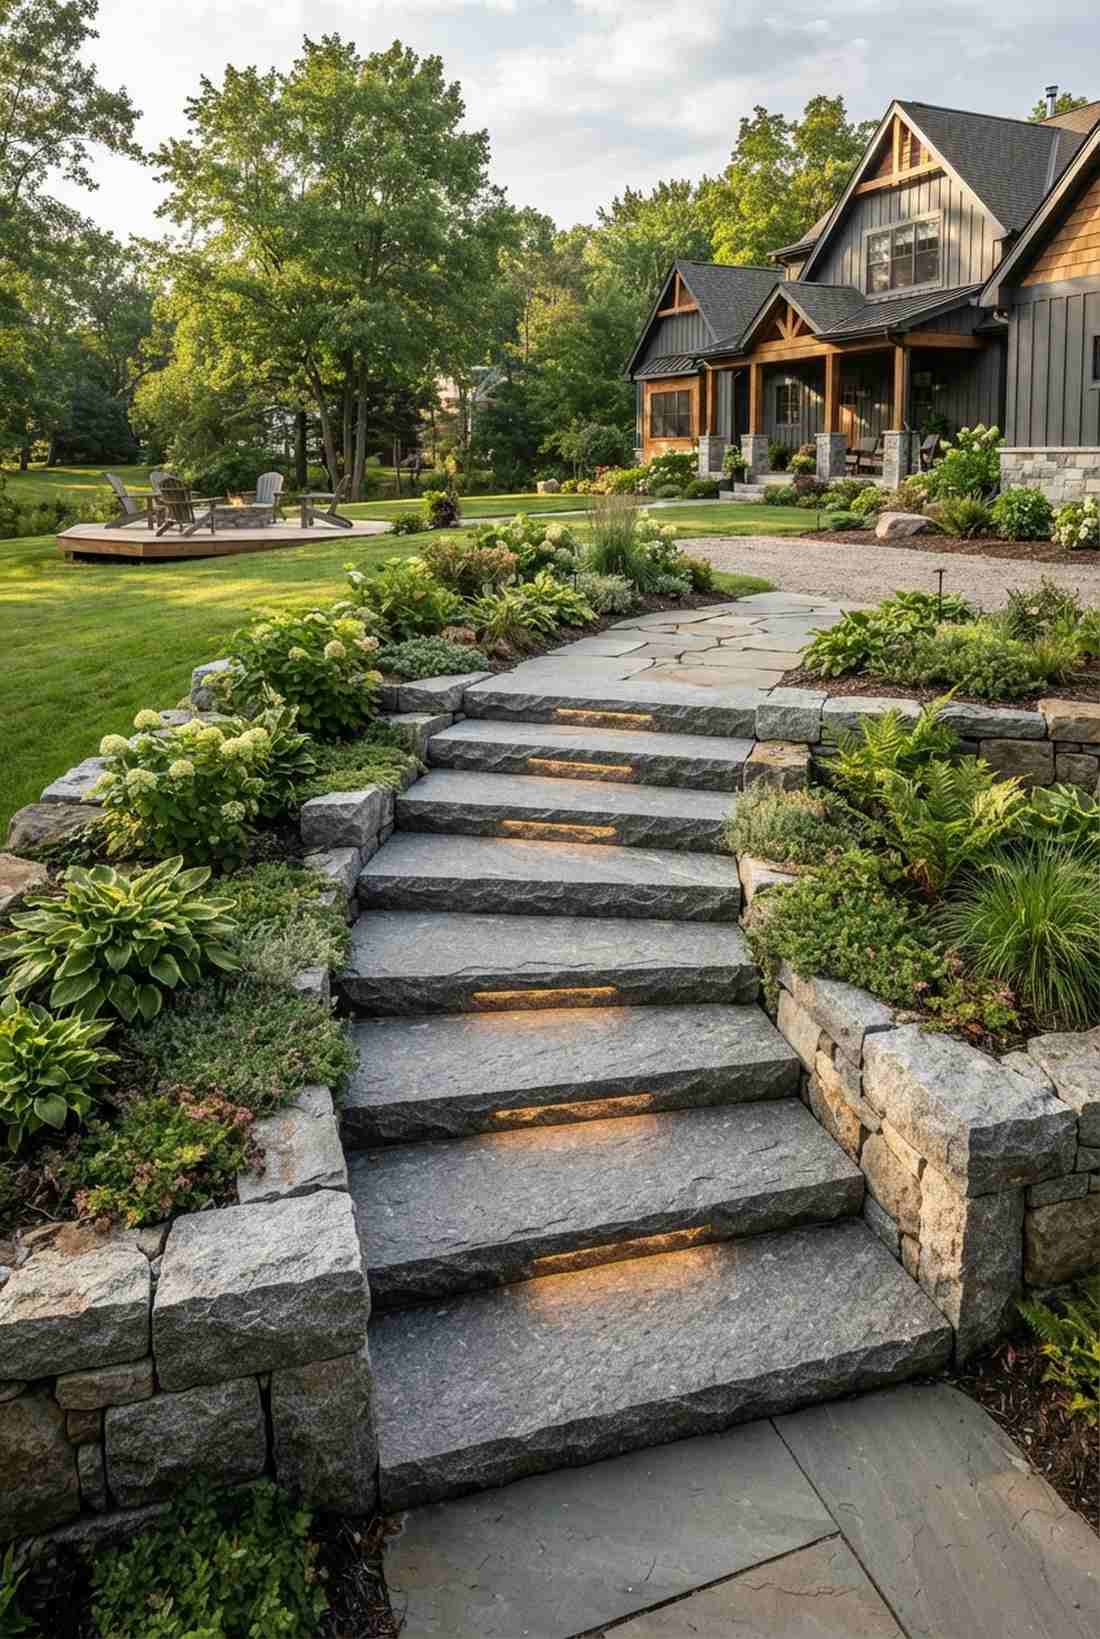
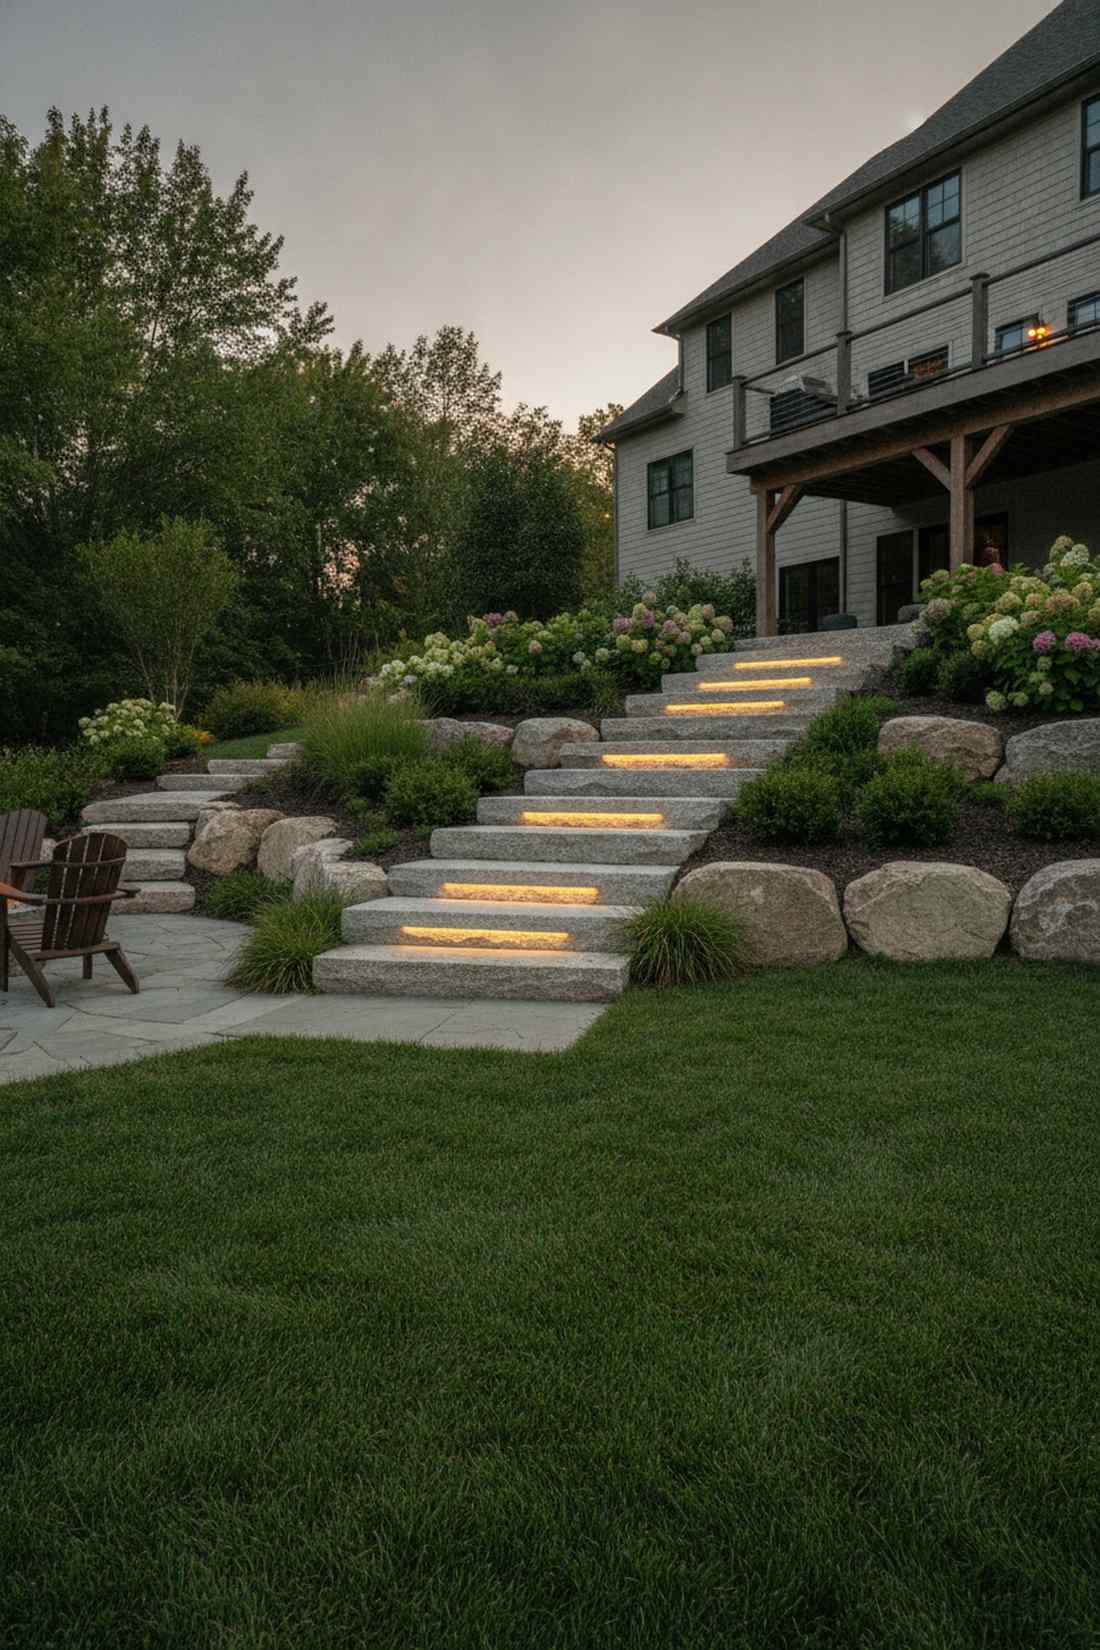

Ascending these steps feels like walking up to a grand civic monument. A solid granite architectural staircase works exceptionally well for replacing dangerous, rotting wooden steps on a steep hill.
Pouring concrete forms is a massive headache, but stacking pre-cut stone treads achieves a high-end estate vibe that outlasts the house itself. Embedding low-voltage LED hardscape lights right under the lip of each tread provides invisible daytime safety and gorgeous night ambiance.
A set of five massive stone steps costs roughly $600. It’s a fast upgrade that completely changes the vibe.
- Key Materials: Granite treads, crushed base, LED lights
- Vibe / Style: Monumental lasting grandeur
- Difficulty: Extreme heavy lifting (requires machinery or multiple people)
- Budget Breakdown: Stone Treads: $450 | Lighting Kit: $150
- Creator’s Tip: Pitch every single step forward by exactly 1/8th of an inch so rain water naturally rolls off instead of forming ice patches.
- Smart Sourcing: Low-voltage LED hardscape lighting kits and heavy-duty construction adhesive for stone.
43. Decorative Metal Fencing
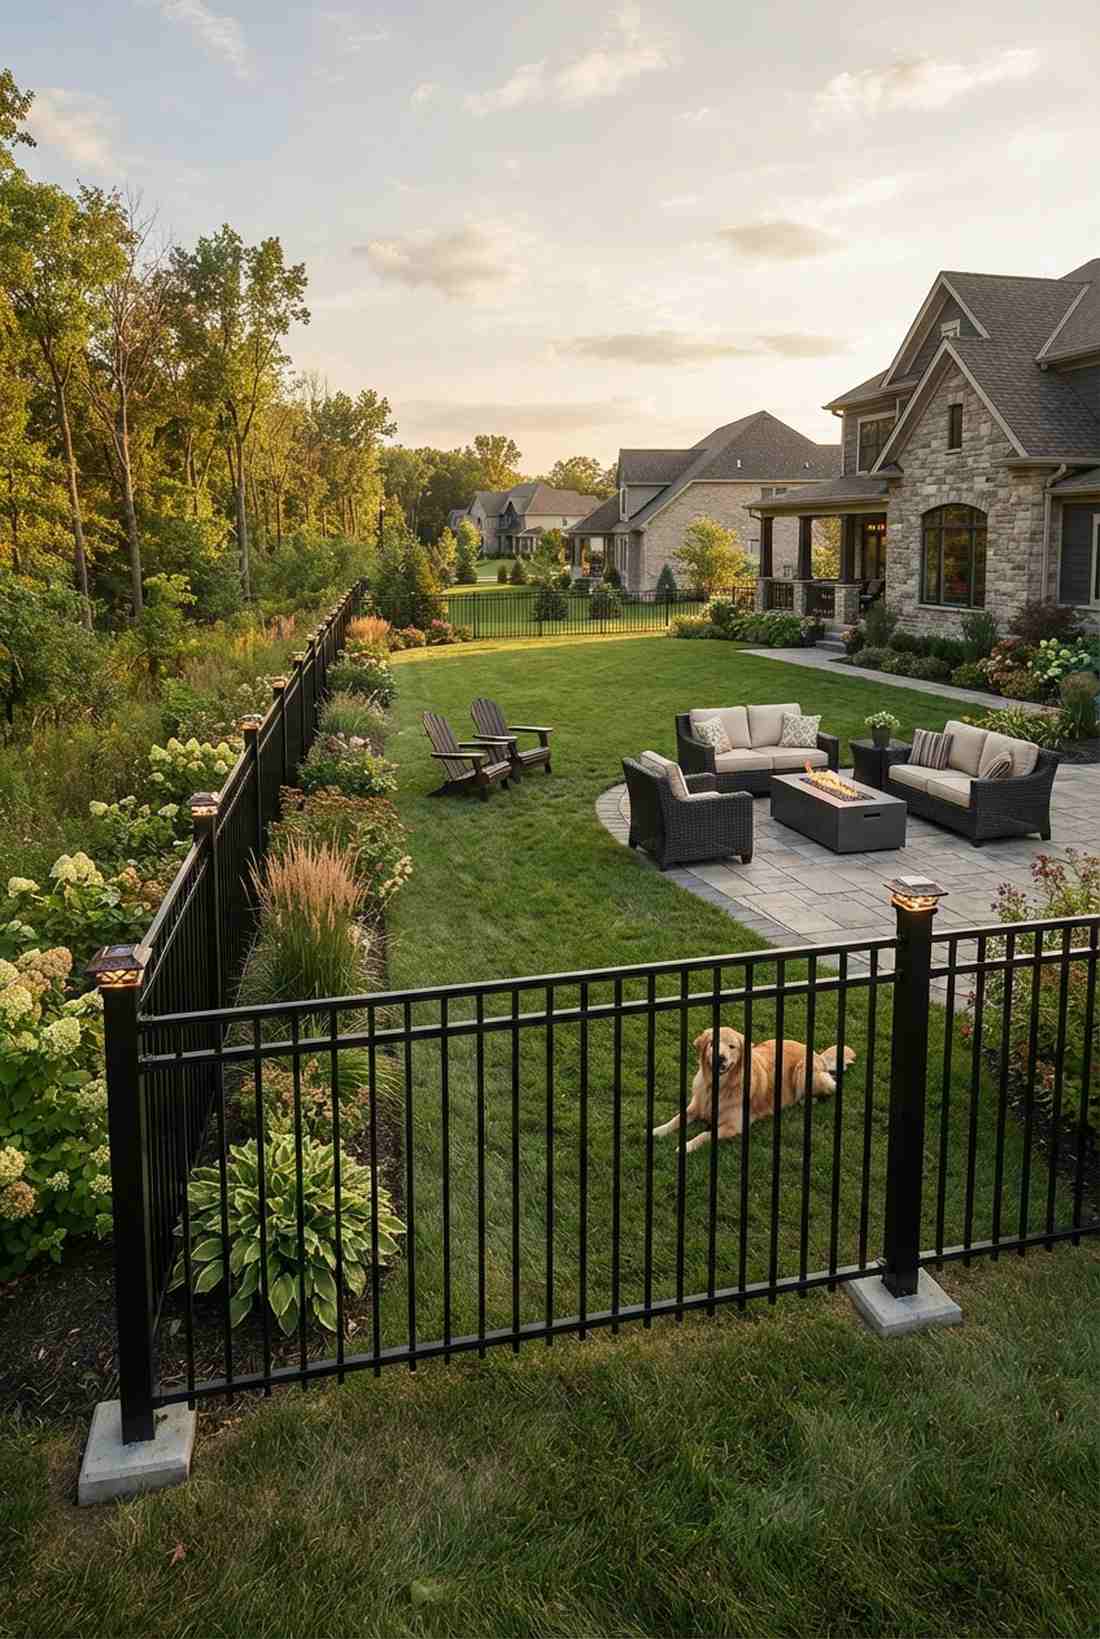
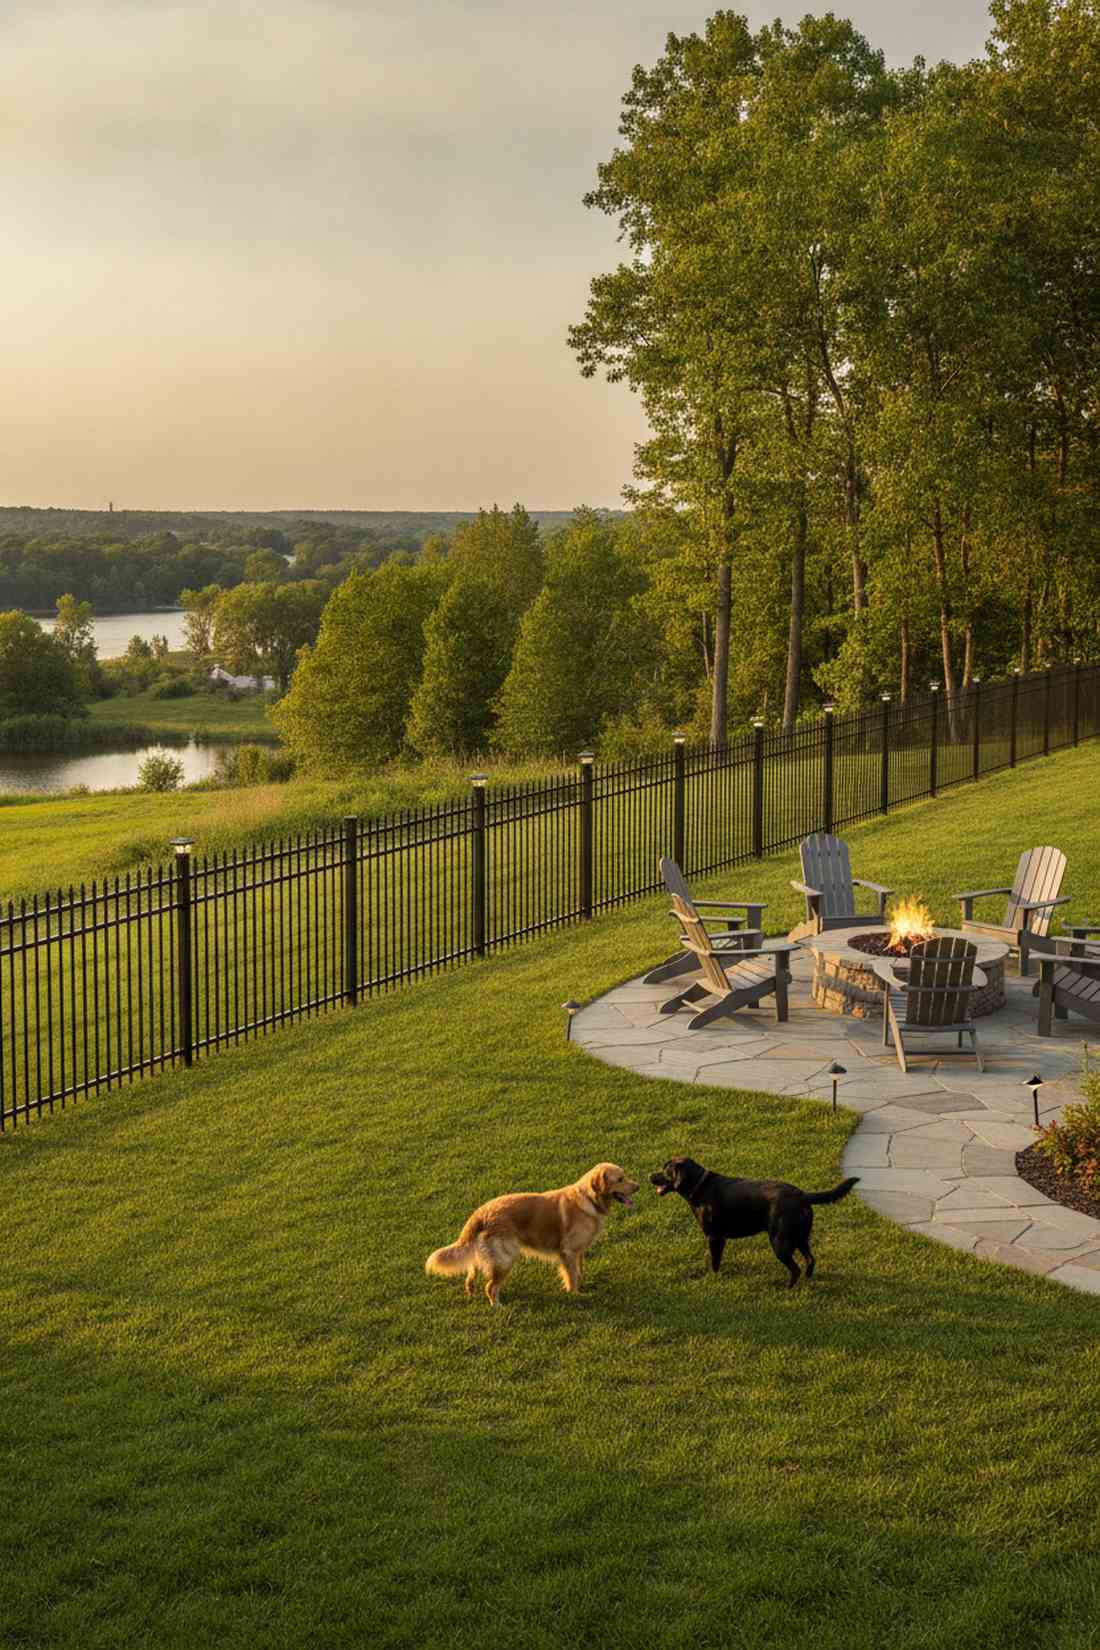
This property border feels like the secure perimeter of an elite gated community. A wrought-iron style perimeter barrier is the absolute best way to keep dogs in while maintaining a completely unobstructed view of your landscape.
Actual wrought iron requires constant painting, but tubular aluminum panels give a designer-level finish that never rusts or flakes. Upgrading the posts with solar-powered cast aluminum caps eliminates the need for expensive electrical trenching while adding nighttime elegance.
Aluminum panels run about $80 per section. Save this to your home security and aesthetic board!
- Key Materials: Aluminum fence panels, post concrete, solar caps
- Vibe / Style: Elite secure transparency
- Difficulty: Moderate post-hole digging
- Budget Breakdown: Panels/Posts: $400 (per 50ft) | Caps: $100
- Creator’s Tip: Run a string line tight across the tops of the posts before pouring concrete to guarantee a perfectly laser-straight fence line.
- Smart Sourcing: Pre-assembled aluminum fence panels and cast-aluminum solar post cap lights.
Lighting and Ambiance: Extending Luxury Gardens into Evening Hours
44. Uplighting for Specimen Trees
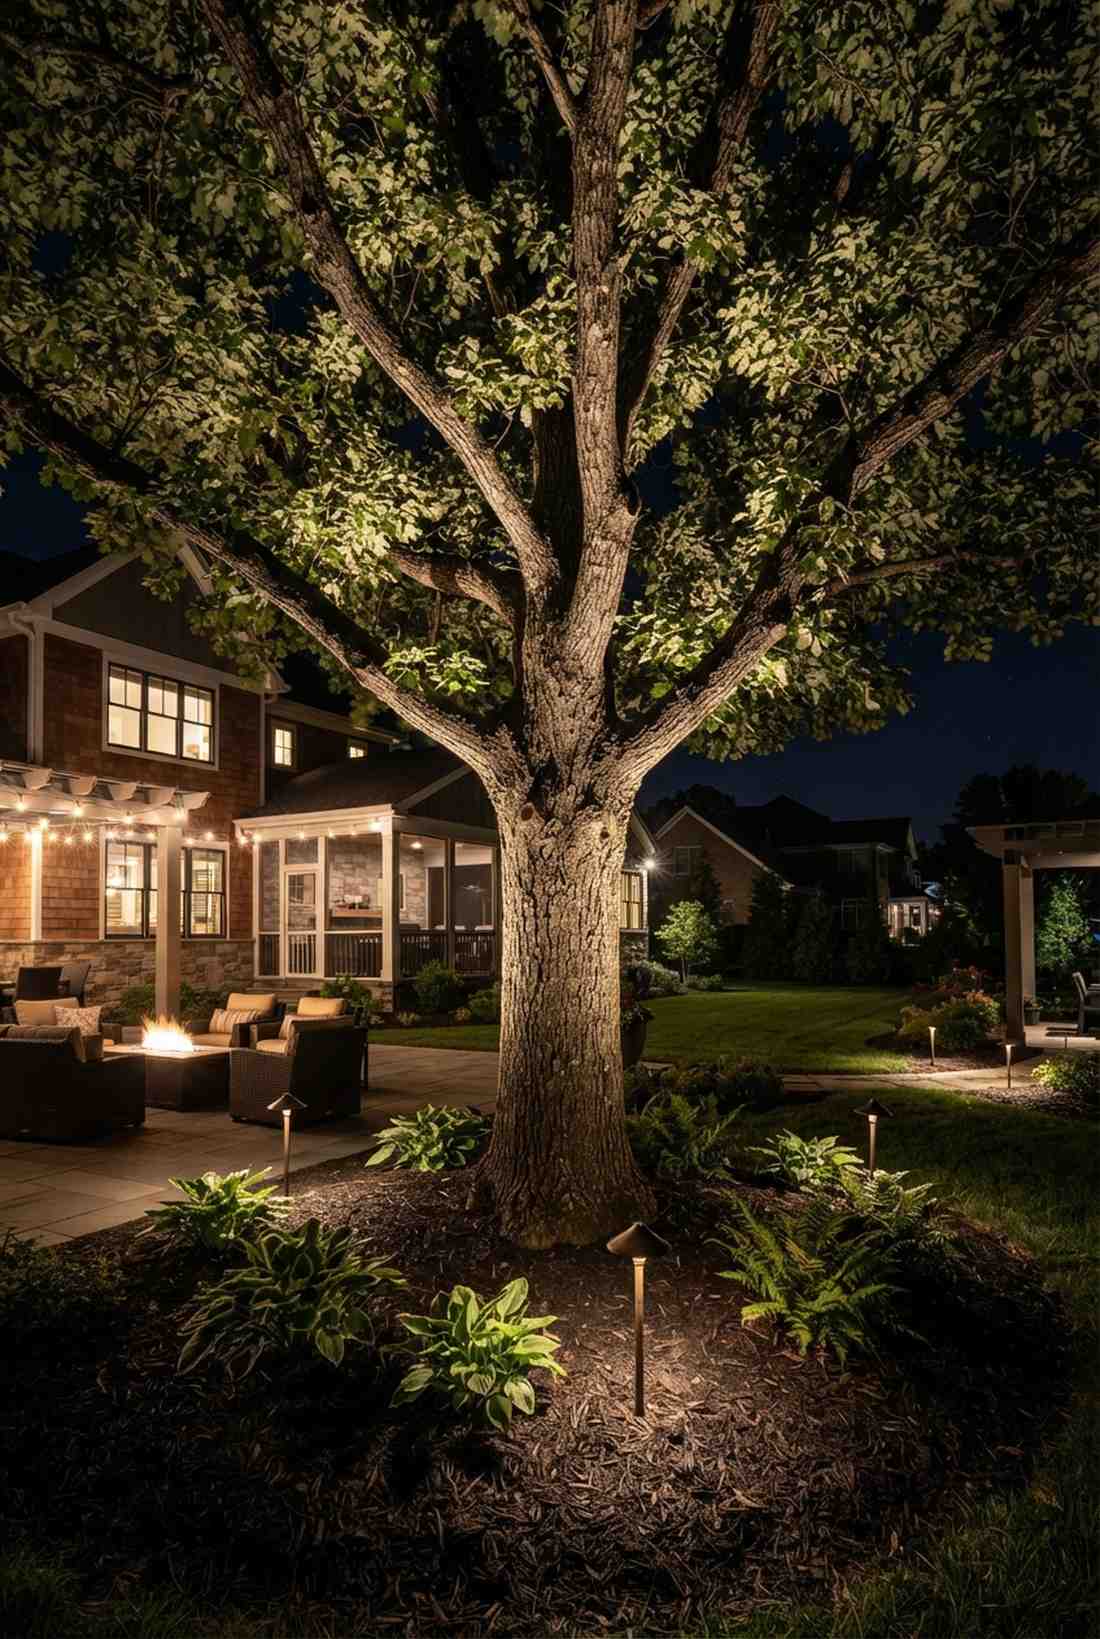
Flipping the switch on this setup feels like illuminating a dramatic theatrical stage. A base-mounted canopy spotlight works exceptionally well to turn an ordinary oak tree into a towering nighttime masterpiece.
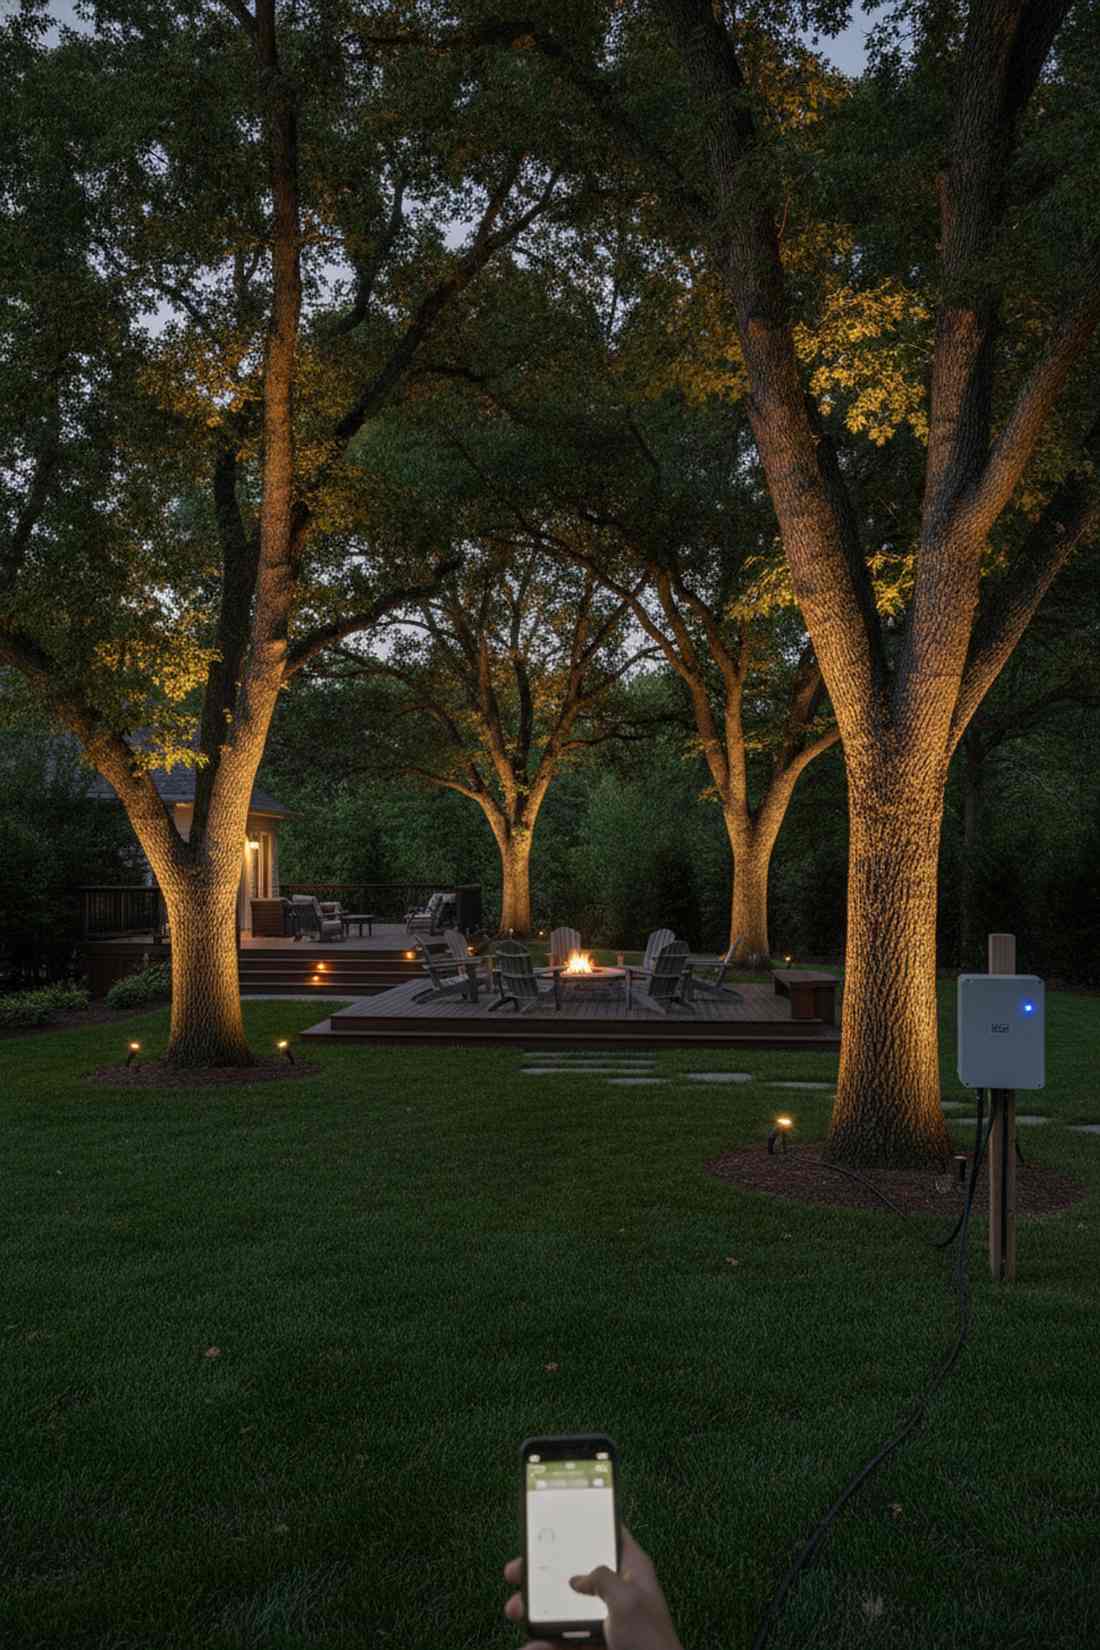
Solar spikes from the hardware store barely glow, but wiring a low-voltage brass fixture looks far more expensive than it is and pierces the darkest foliage. Using a smart-enabled outdoor transformer lets you control the exact dimness and schedule directly from your phone.
You can wire up three massive trees for under $150. Pin this if you want to double your property’s visual footprint at night.
- Key Materials: Brass uplights, 12V wire, smart transformer
- Vibe / Style: Dramatic architectural highlighting
- Difficulty: Easy low-voltage wiring
- Budget Breakdown: Lights & Wire: $90 | Smart Hub: $60
- Creator’s Tip: Place the fixture about half the distance from the trunk to the edge of the canopy, pointing slightly inward for maximum branch contrast.
- Smart Sourcing: Cast-brass low-voltage uplight kits and Wi-Fi enabled outdoor landscape transformers.
Most lighting designs make a yard look like an airport runway. The next technique is the secret to subtle, expensive ambiance.
45. Pathway Bollard Lighting
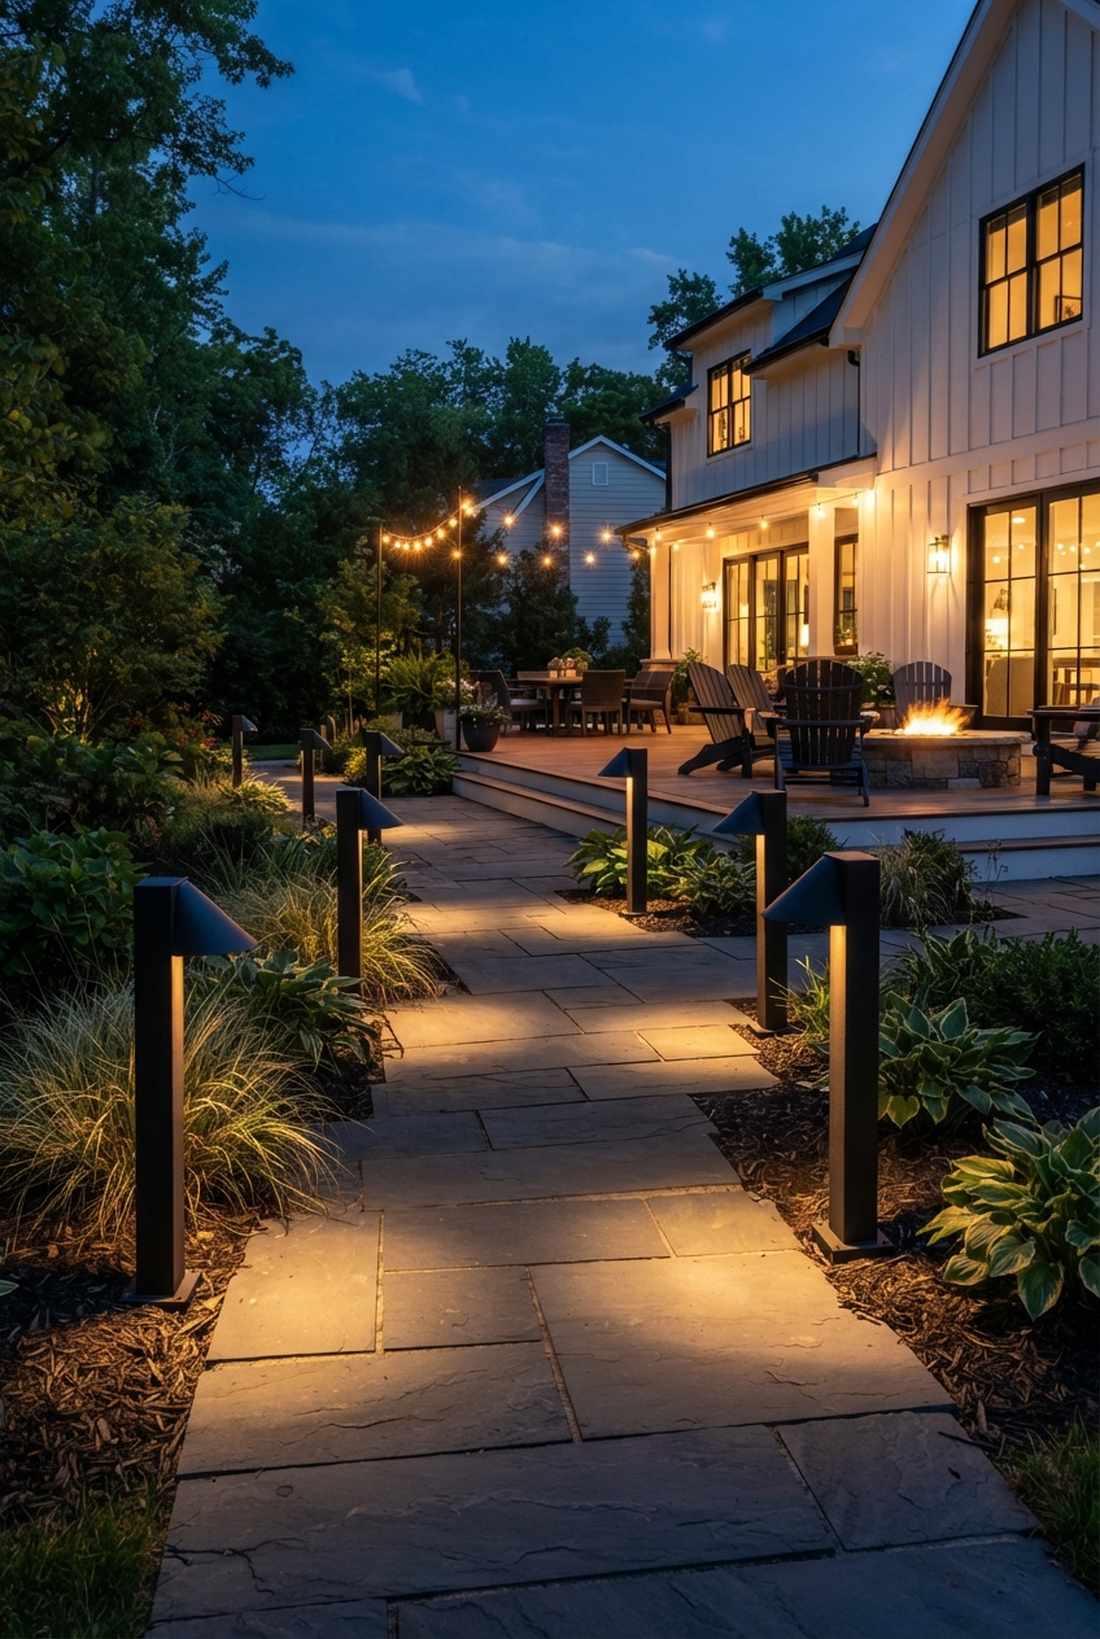
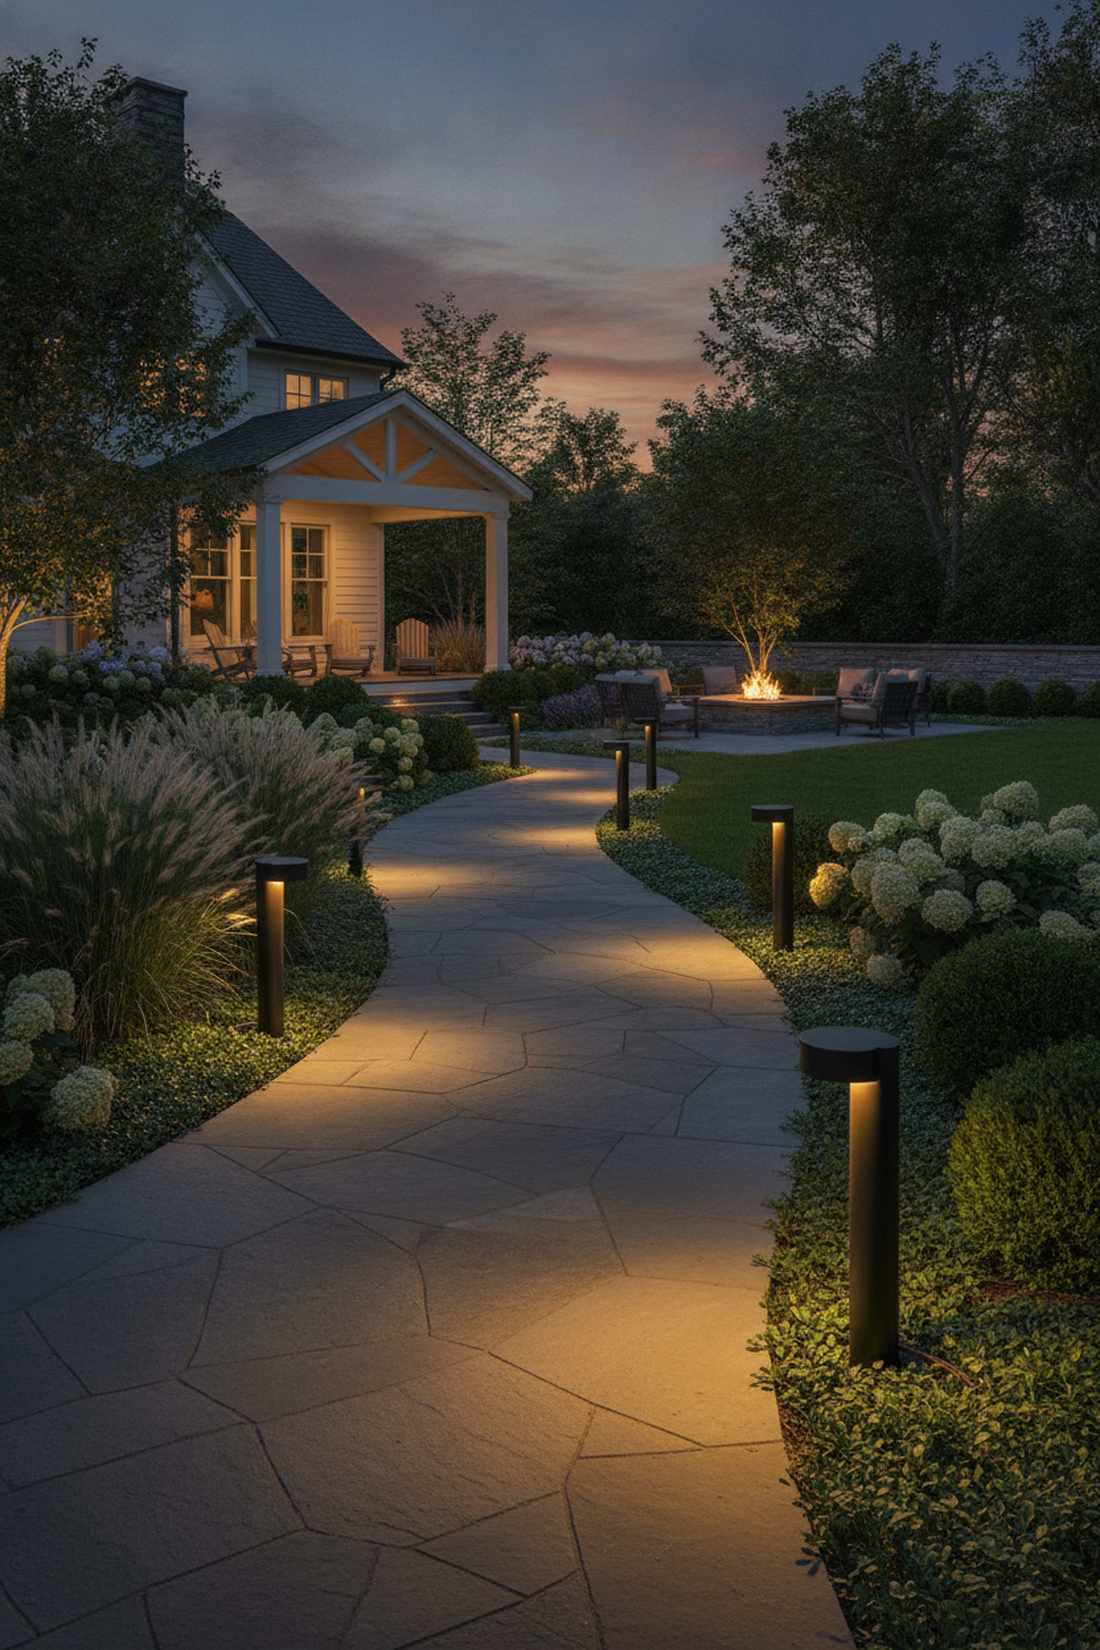
Walking this illuminated path feels like strolling through a high-end modern art museum at midnight. A downward-casting architectural bollard is perfect for guiding foot traffic without blinding your guests with glare.
Flimsy plastic path lights get kicked and broken instantly, but sinking thick aluminum fixtures achieves a high-end estate vibe that withstands weed whackers. Selecting fixtures with warm 2700K LED bulbs ensures the light feels like cozy candlelight rather than a sterile hospital.
A set of six premium bollards costs roughly $200. Highly recommended for a sleek safety upgrade.
- Key Materials: Aluminum bollard lights, waterproof wire nuts
- Vibe / Style: Sleek navigational safety
- Difficulty: Simple trenching and splicing
- Budget Breakdown: Light Kit: $180 | Wire Nuts: $20
- Creator’s Tip: Stagger the lights in a zig-zag pattern on opposite sides of the path rather than a straight runway line for a more organic feel.
- Smart Sourcing: Commercial-grade aluminum path light kits and gel-filled waterproof wire connectors.
46. Moonlighting Through Tree Canopies
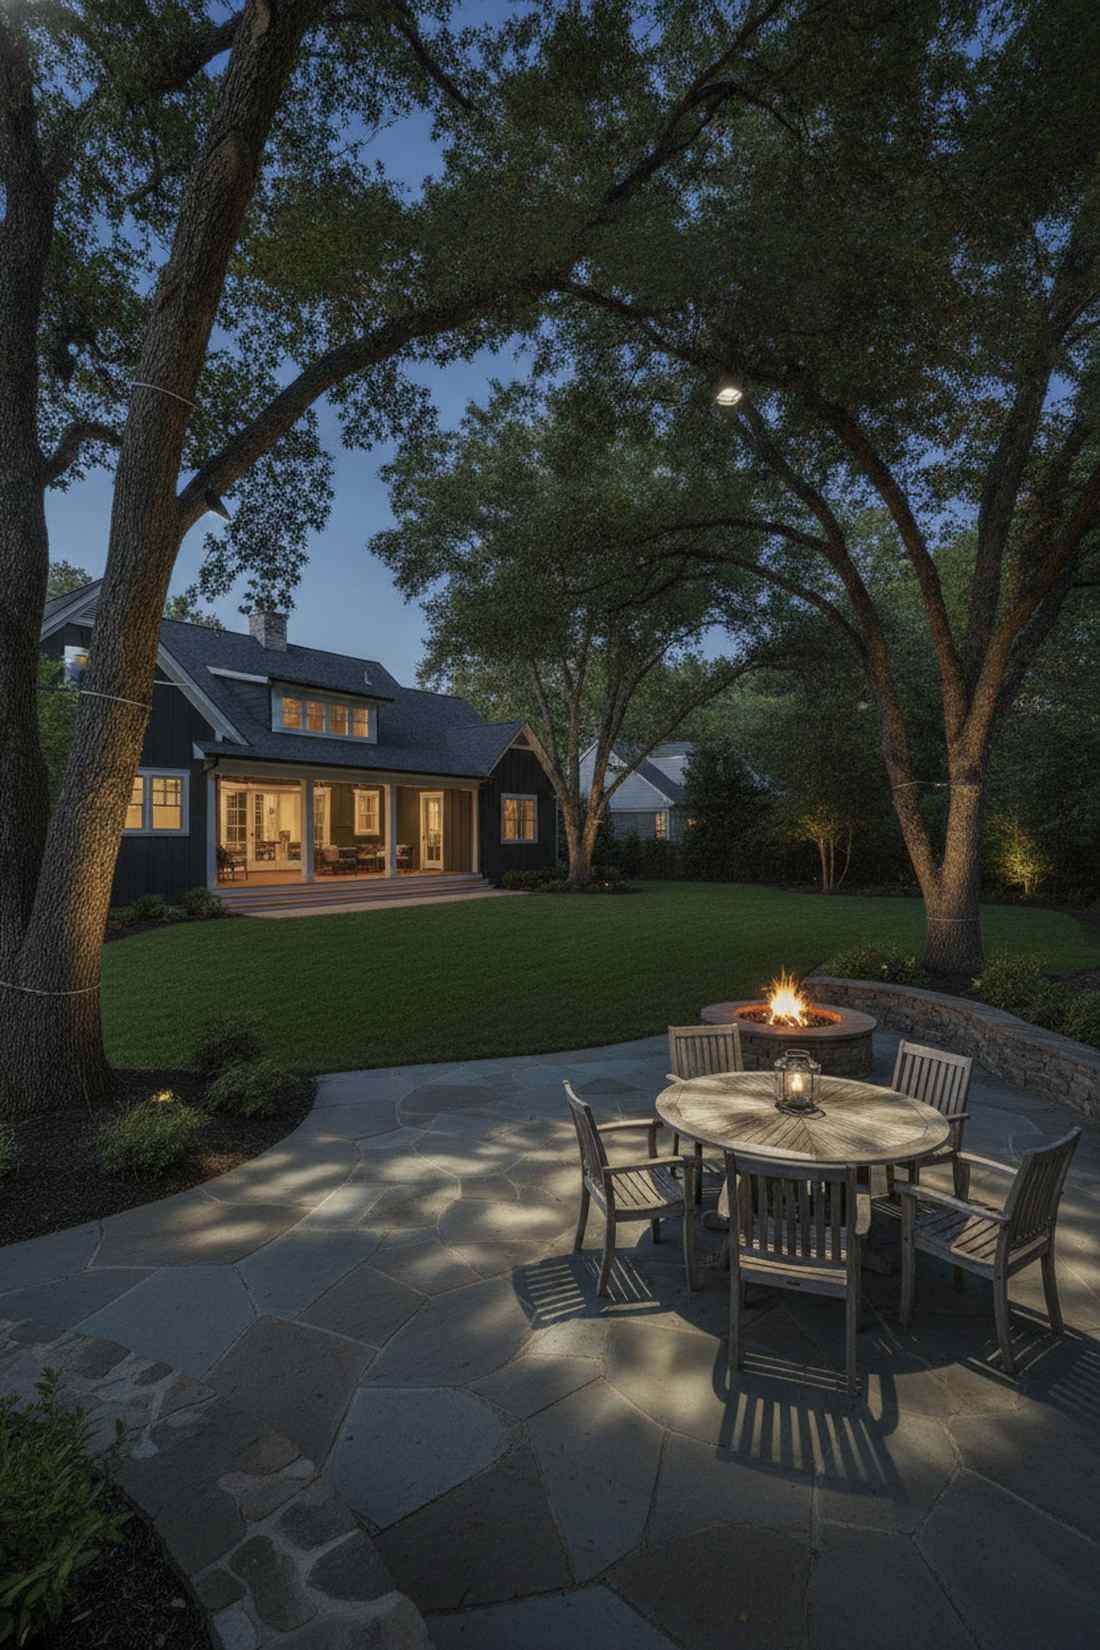
Sitting under this glow feels like enjoying a perfectly clear, full-moon night every single evening. A downward-facing canopy light works brilliantly to cast dancing, dappled shadows across a massive lawn or patio.
Blasting a floodlight at the house looks aggressive, but hiding fixtures 20 feet up in the branches gives a designer-level finish that hides the light source completely. Securing the wire to the trunk with stainless steel standoff clips prevents the tree from swallowing the wire as it grows.
You can create this magical effect for about $120 per tree. Save this to your atmospheric outdoor dining board!
- Key Materials: Downlight fixtures, hex baffles, tree clips
- Vibe / Style: Ethereal romantic moonlight
- Difficulty: Requires a tall ladder and caution
- Budget Breakdown: Fixture/Bulb: $90 | Mounts: $30
- Creator’s Tip: Always install a “hex louver” (a honeycomb grid) inside the fixture to completely eliminate side-glare so you never see the bulb.
- Smart Sourcing: Directional landscape downlight fixtures and stainless steel tree-safe wire standoffs.
47. Underwater Pool and Fountain Lighting
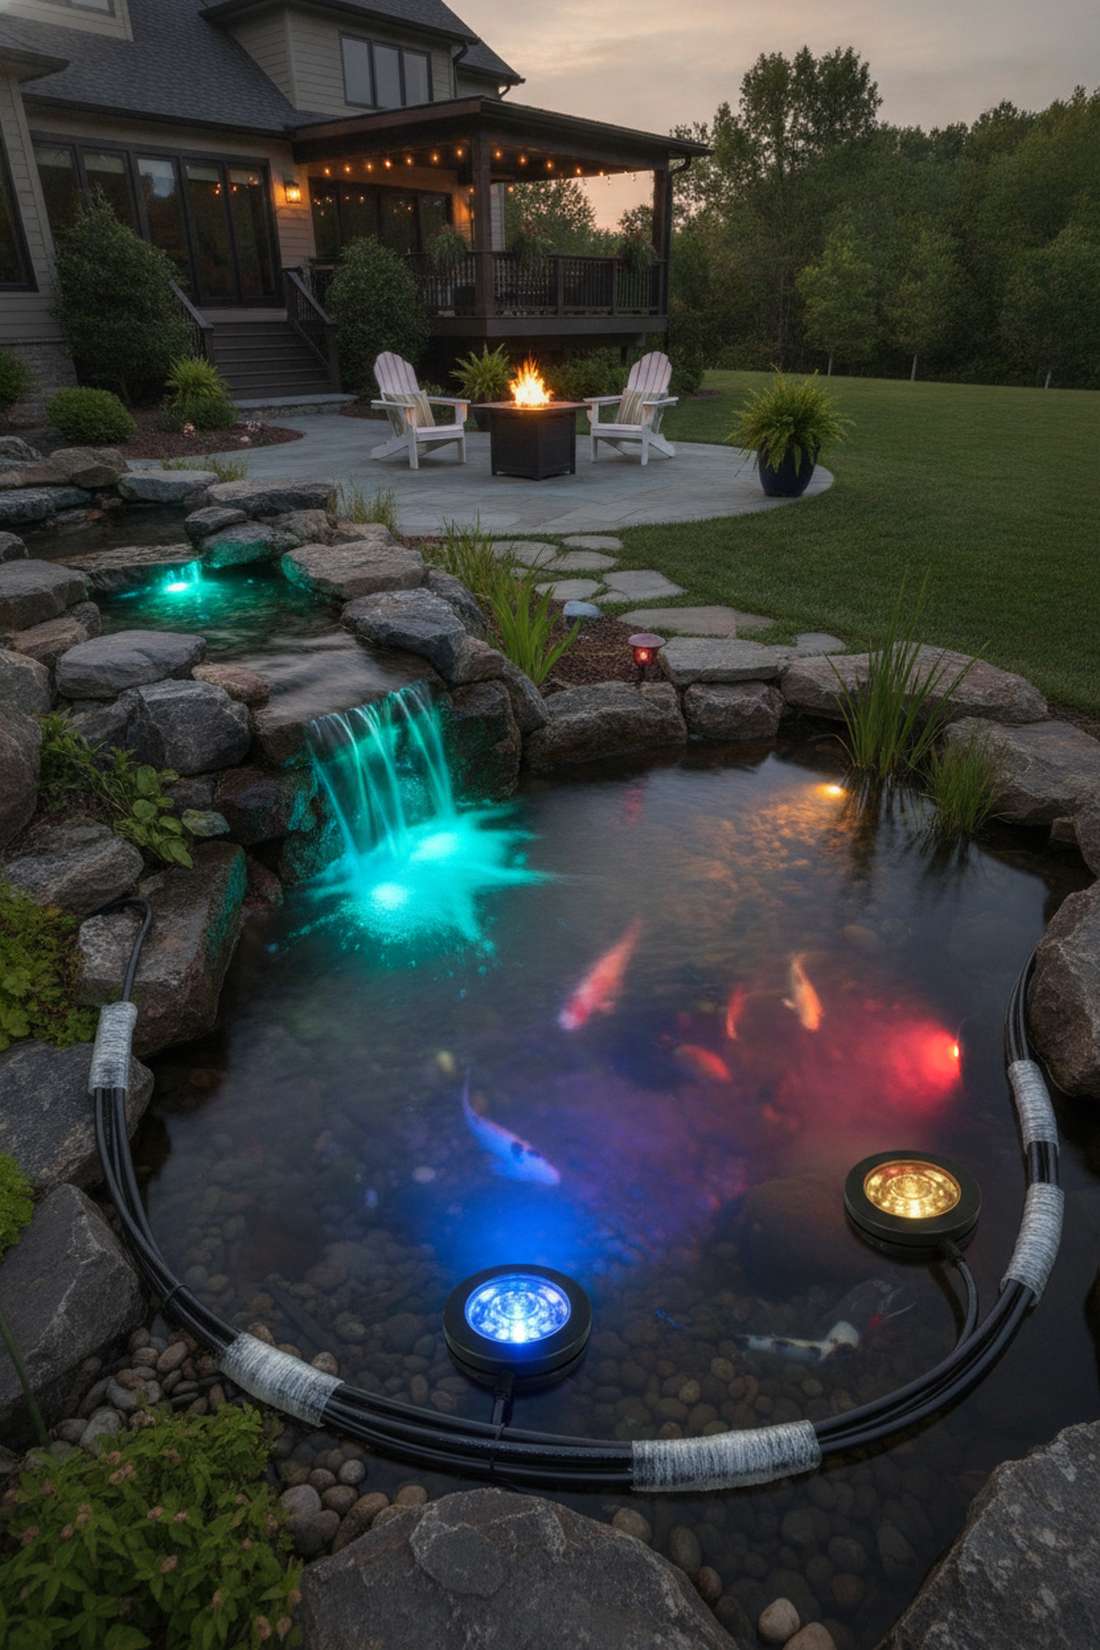
Looking into this illuminated water feels like discovering a glowing, magical lagoon. A submersible color-changing LED is the absolute best way to turn a dark, scary night pond into a mesmerizing focal point.
Old halogen bulbs overheat and burn out constantly, but dropping in weighted LED pucks screams custom architecture with zero maintenance required. Wrapping the underwater cord connections in self-fusing silicone tape guarantees the system never shorts out.
A brilliant three-light submersible kit costs around $80. It’s a fast upgrade that completely changes the vibe.
- Key Materials: Weighted submersible LEDs, silicone tape
- Vibe / Style: Vibrant aquatic resort
- Difficulty: Incredibly easy plug-in
- Budget Breakdown: Light Kit: $60 | Silicone Tape: $20
- Creator’s Tip: Aim the lights directly at the waterfall cascade—moving water catching the light creates an incredible shimmering effect.
- Smart Sourcing: Weighted submersible LED pond light kits and marine-grade self-fusing silicone tape.
48. Step-Integrated Riser Lights
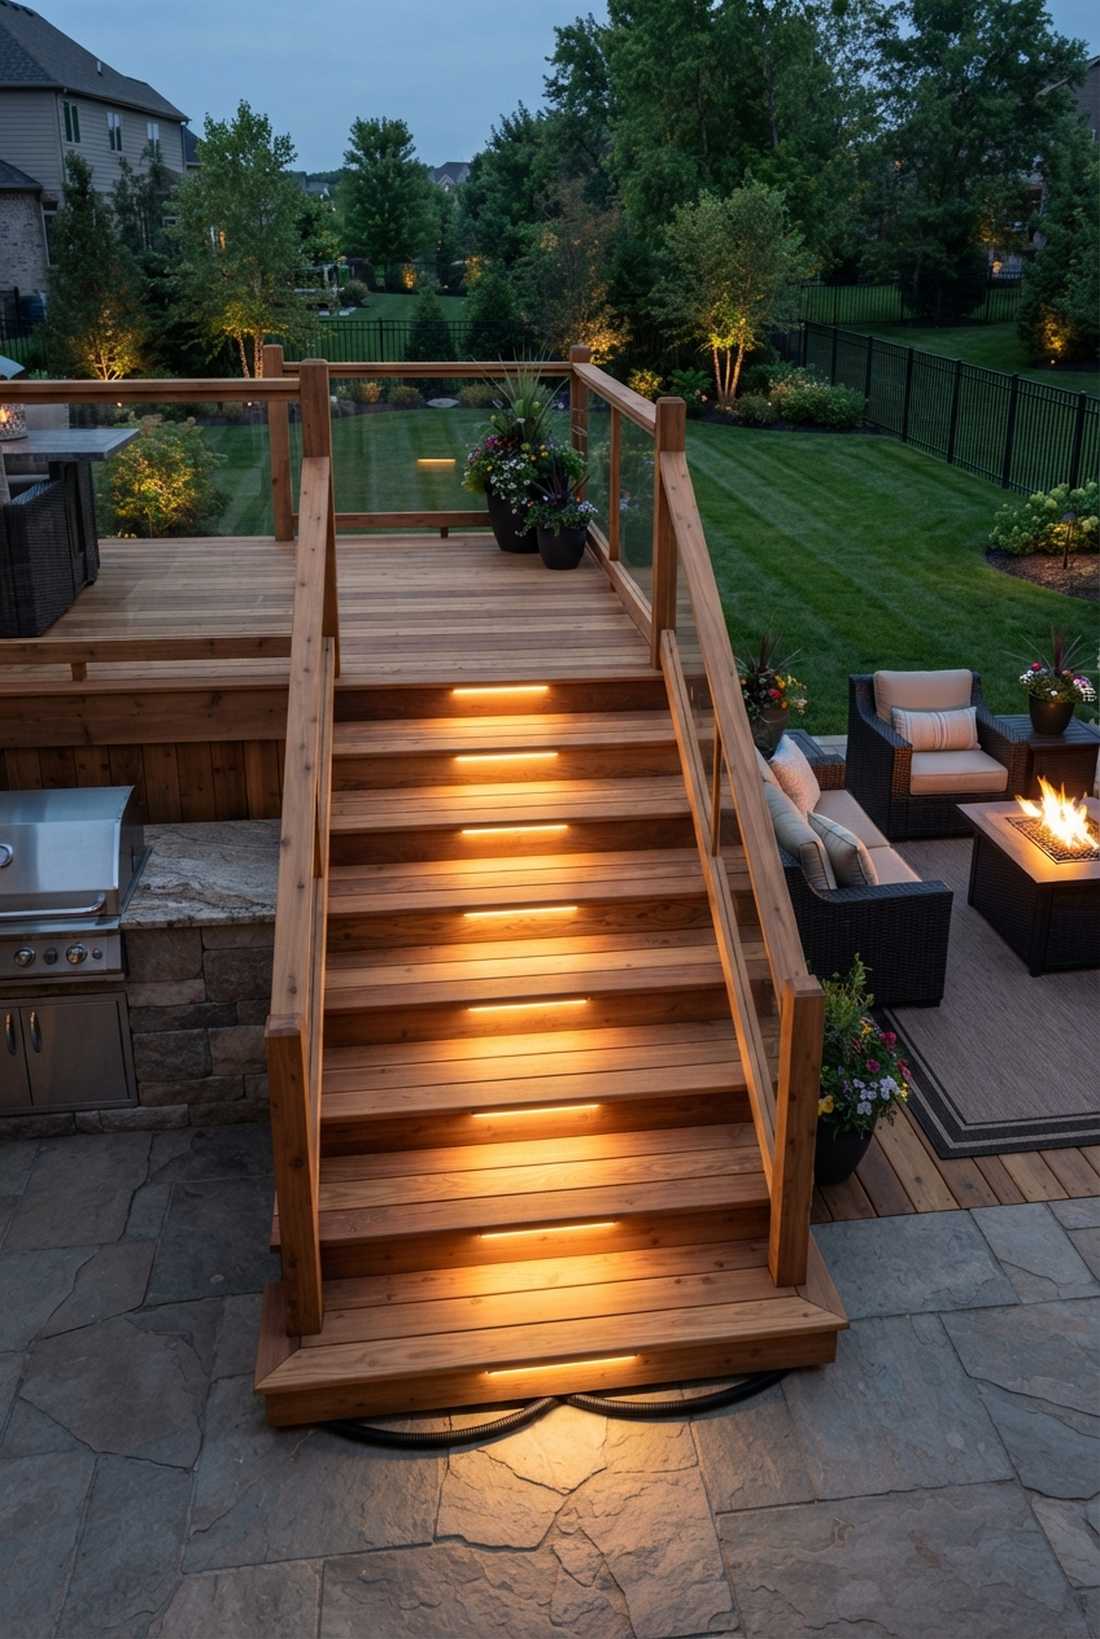
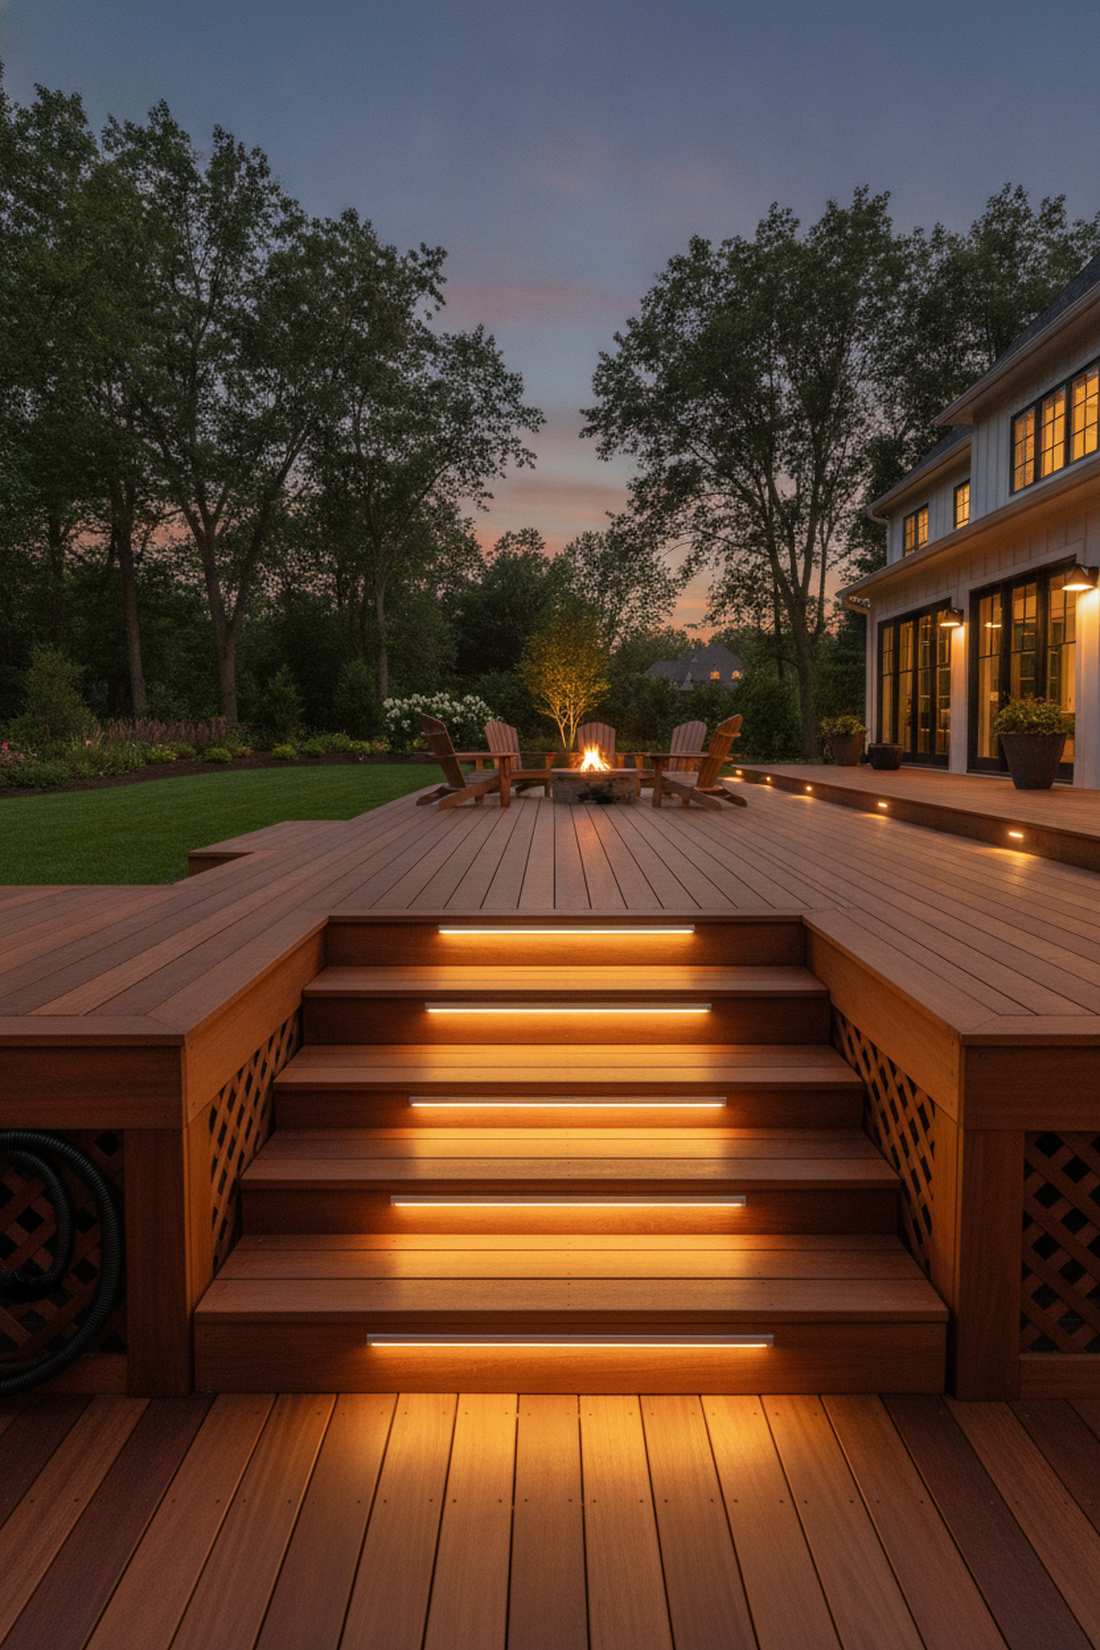
Walking up these stairs feels like boarding a luxury yacht at dusk. An invisible flush-mounted step light is perfect for adding critical safety to dark deck stairs without ruining the daytime wood aesthetic.
Bulky wall-mounted lights catch your ankles, but slipping a slim metal bracket directly under the stair lip delivers a surprisingly premium look that is virtually invisible until turned on. Routing the cables through flexible split-loom tubing protects the wires from chewing rodents under the deck.
You can illuminate a whole staircase for about $100. Pin this for your next deck renovation!
- Key Materials: LED lip lights, low-voltage wire, conduit
- Vibe / Style: Seamless integrated luxury
- Difficulty: Requires drilling through wood
- Budget Breakdown: Light Kit: $80 | Tubing: $20
- Creator’s Tip: Center the lights exactly on the risers, and test them at night with tape before screwing them in to check for weird shadows.
- Smart Sourcing: Ultra-slim LED hardscape step lights and flexible protective wire loom tubing.
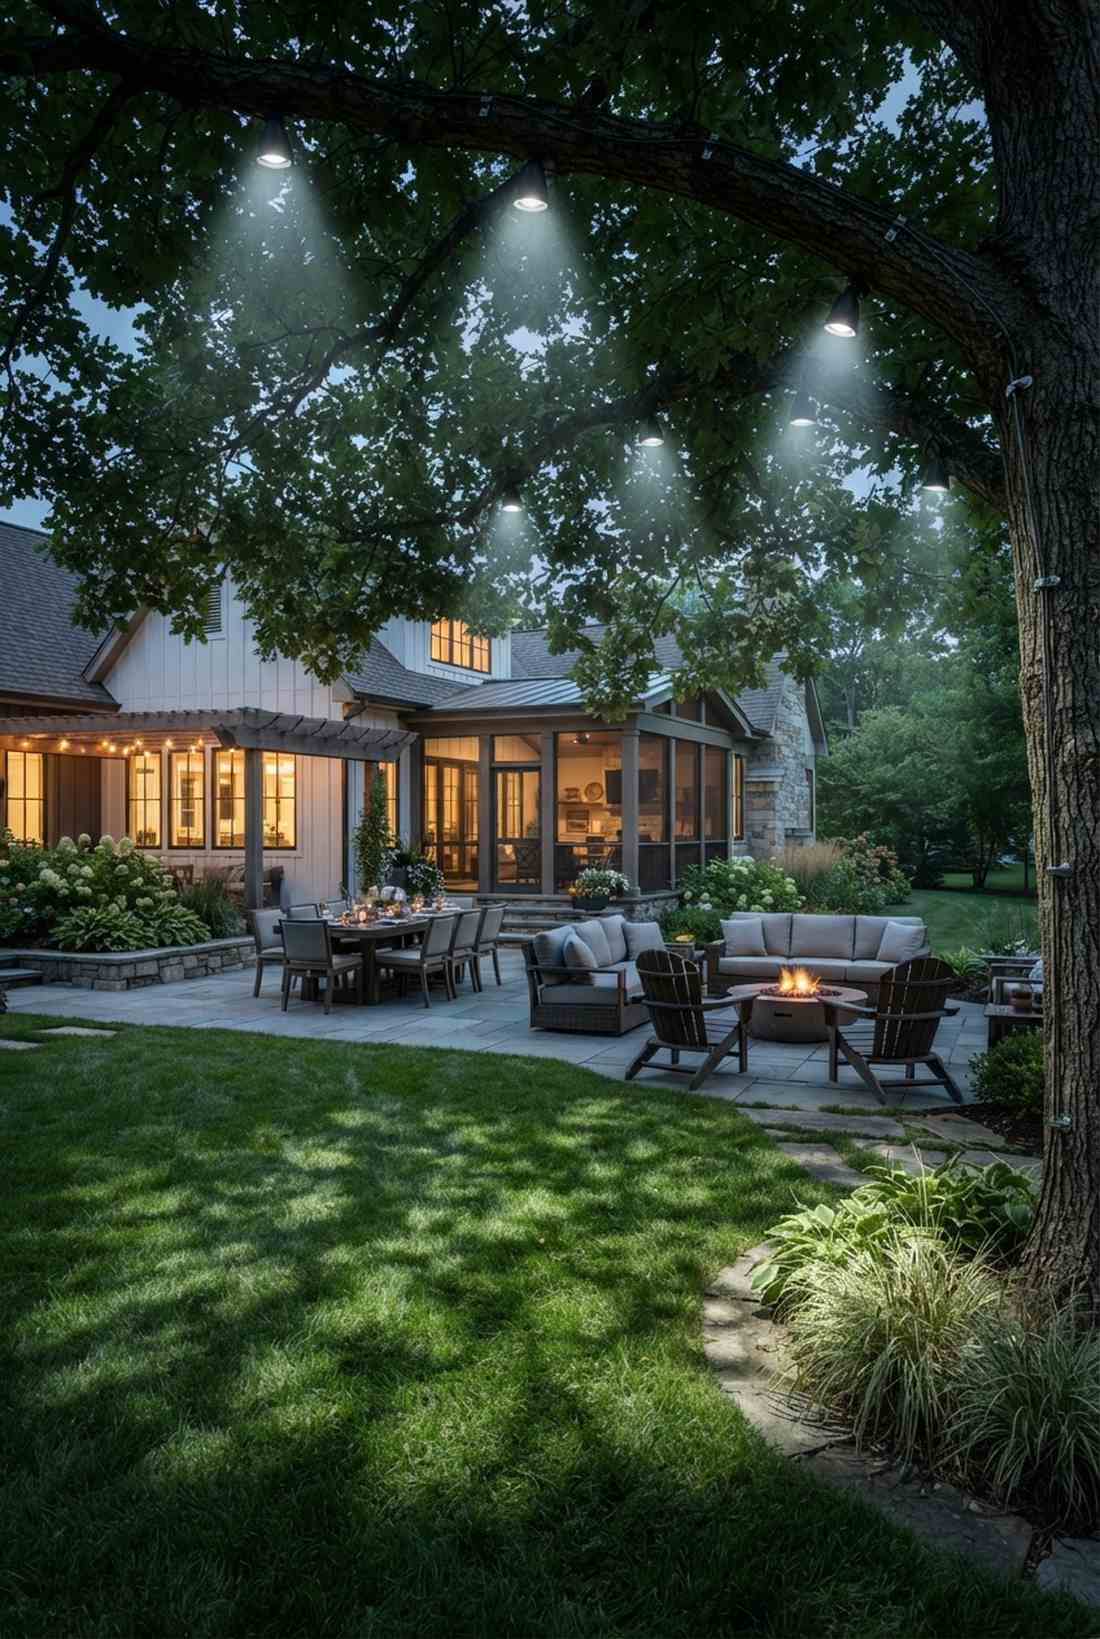
49. Pergola String Lighting
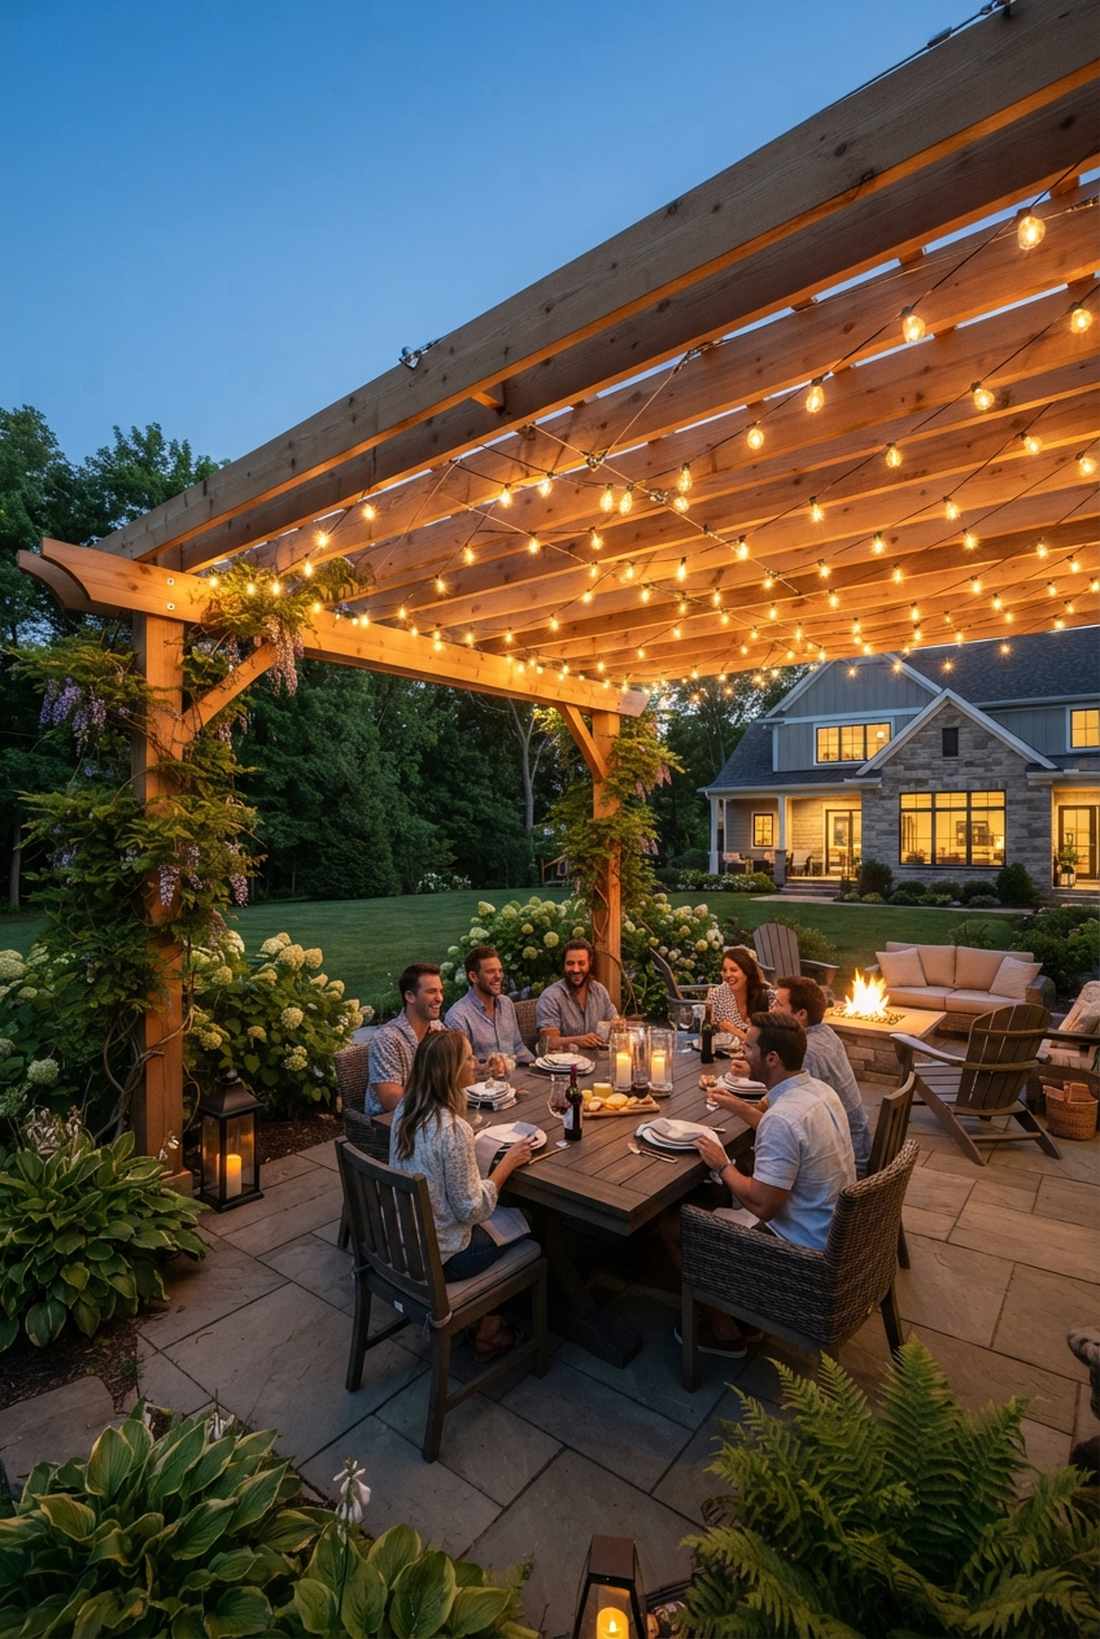

Sitting under these lights feels like drinking wine at a festive, bustling Italian street cafe. A suspended Edison bulb canopy works flawlessly to create a lowered, intimate ceiling over an open-air patio.
Cheap Christmas lights shatter in the wind, but hanging thick, rubberized cafe lights achieves a high-end estate vibe that survives winter blizzards. Running a steel tension guide wire first, and clipping the lights to it, prevents the heavy string from sagging over the dining table.
A heavy-duty 50-foot run with a wire kit costs roughly $90. Save this to your outdoor party styling board!
- Key Materials: Commercial string lights, steel cable kit, carabiners
- Vibe / Style: Festive bistro ambiance
- Difficulty: Easy aerial hanging
- Budget Breakdown: Lights: $60 | Cable Kit: $30
- Creator’s Tip: Always install an outdoor-rated dimmer dial; full brightness is usually too harsh for relaxed late-night dining.
- Smart Sourcing: Commercial-grade shatterproof LED string lights and stainless steel string light suspension kits.
Lighting is only half the battle. This next technique uses light to turn ordinary plants into massive outdoor art pieces.
50. Silhouette Wall Washing

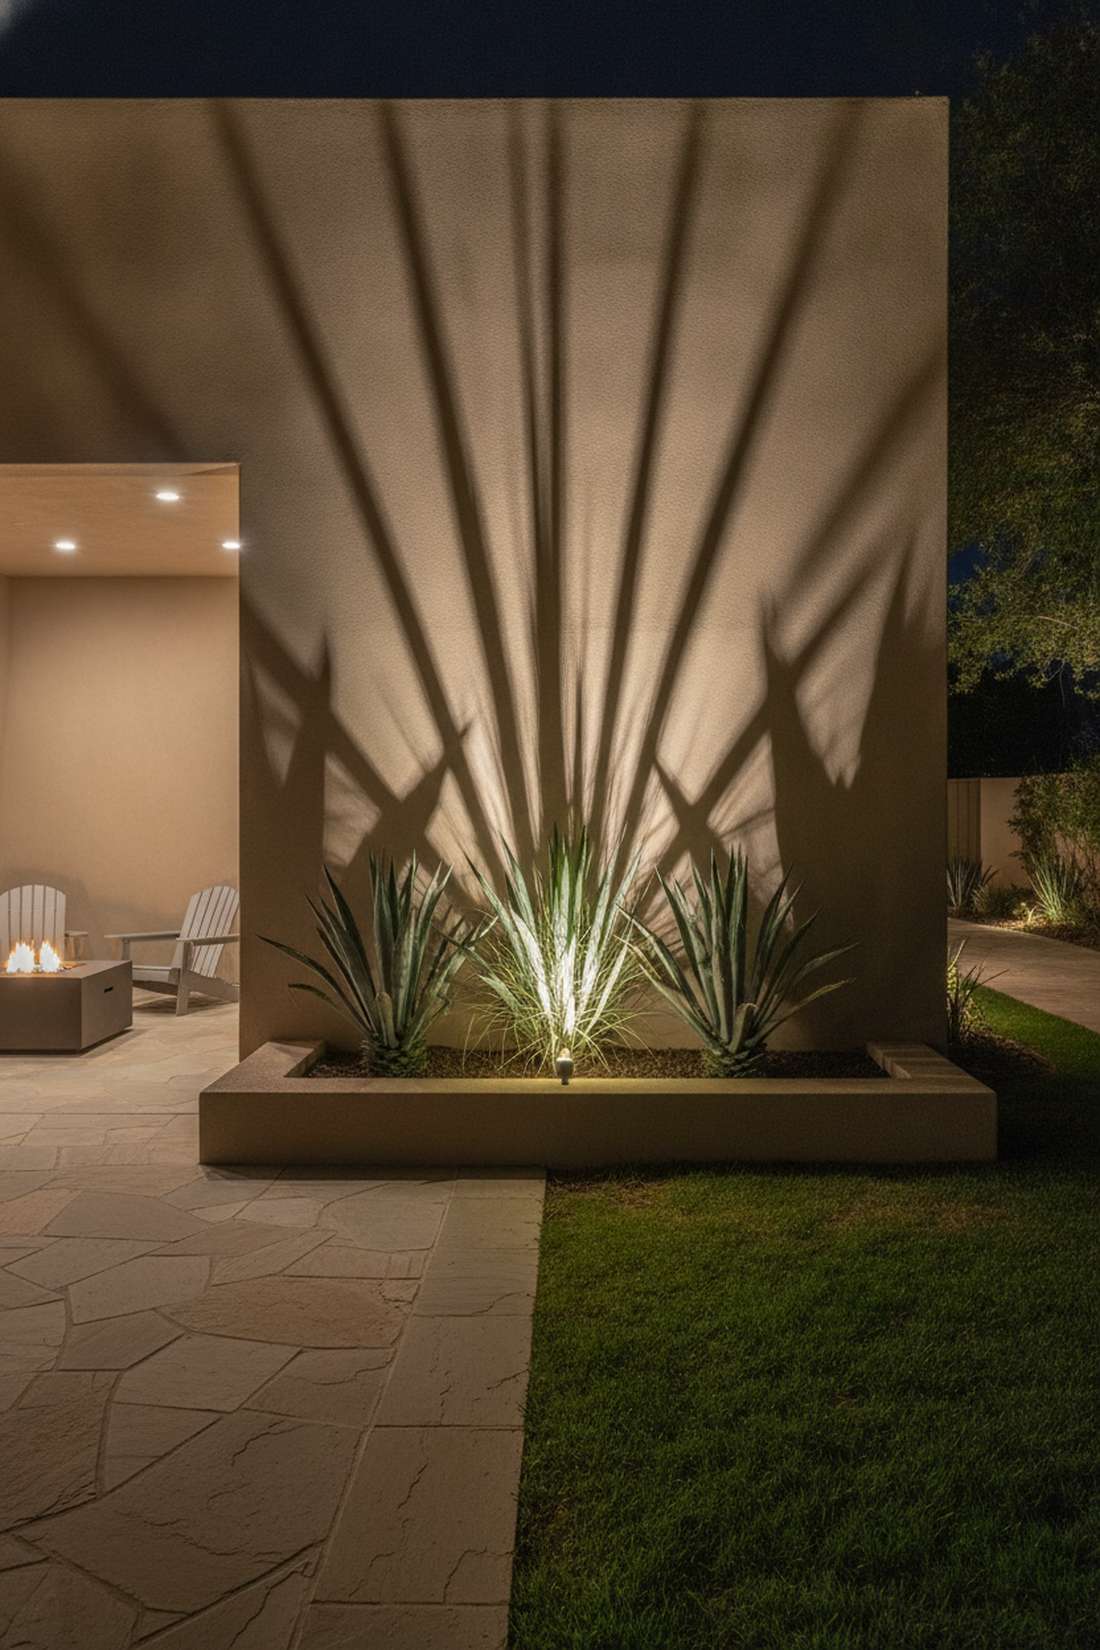
This lighting trick feels like projecting a living shadow puppet show against your house. A backlit architectural plant display is the ultimate way to utilize a blank, boring stucco or brick wall at night.
Most point the light directly at the plant, but placing a wide-angle light directly behind the plant looks far more expensive than it is by casting sharp, dramatic shadows. Using a frosted spread lens cover on the fixture softens the beam to cover the entire wall evenly.
You can create this massive art piece for the cost of one $40 fixture. It’s a fast upgrade that completely changes the vibe.
- Key Materials: Wide-angle wash light, spread lens
- Vibe / Style: Dramatic contemporary gallery
- Difficulty: Simple positioning trick
- Budget Breakdown: Fixture & Lens: $40 | Bulb: $10
- Creator’s Tip: Spiky plants like Agave, Yucca, or tall ornamental grasses cast the most striking and dramatic shadow patterns.
- Smart Sourcing: Low-voltage LED wall wash fixtures and frosted glass spread lenses.
51. Accent Lighting for Garden Sculpture
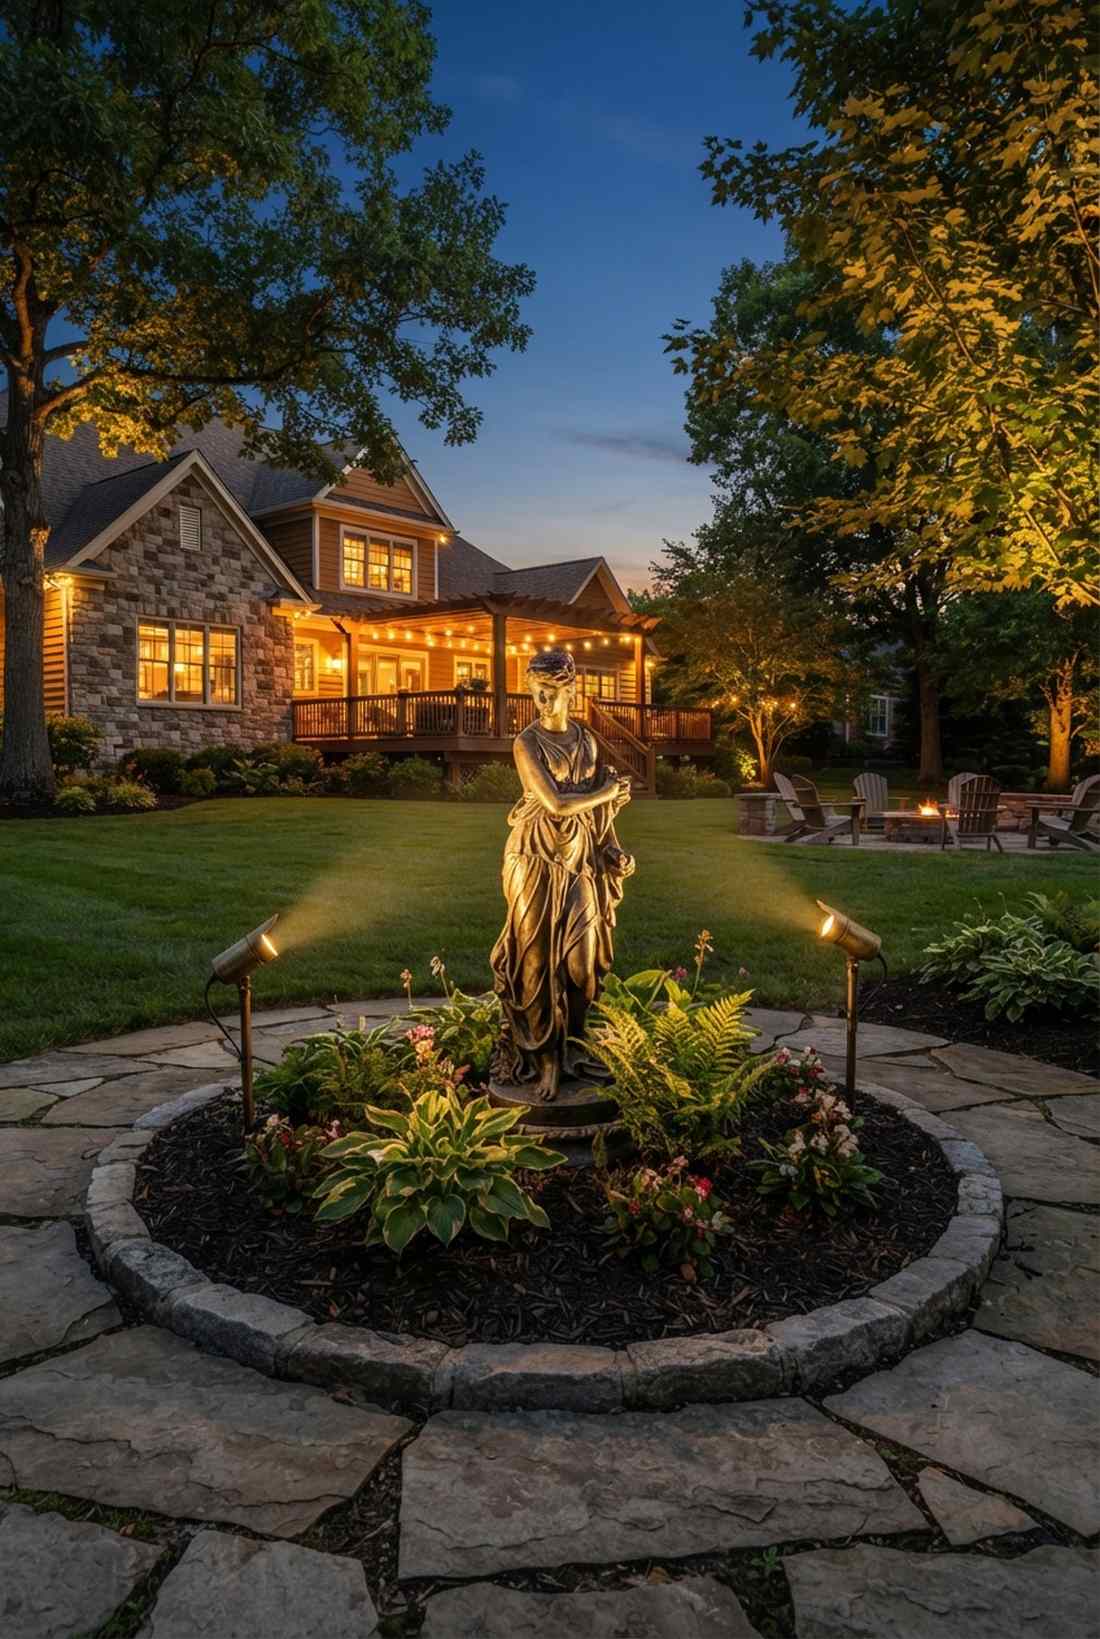
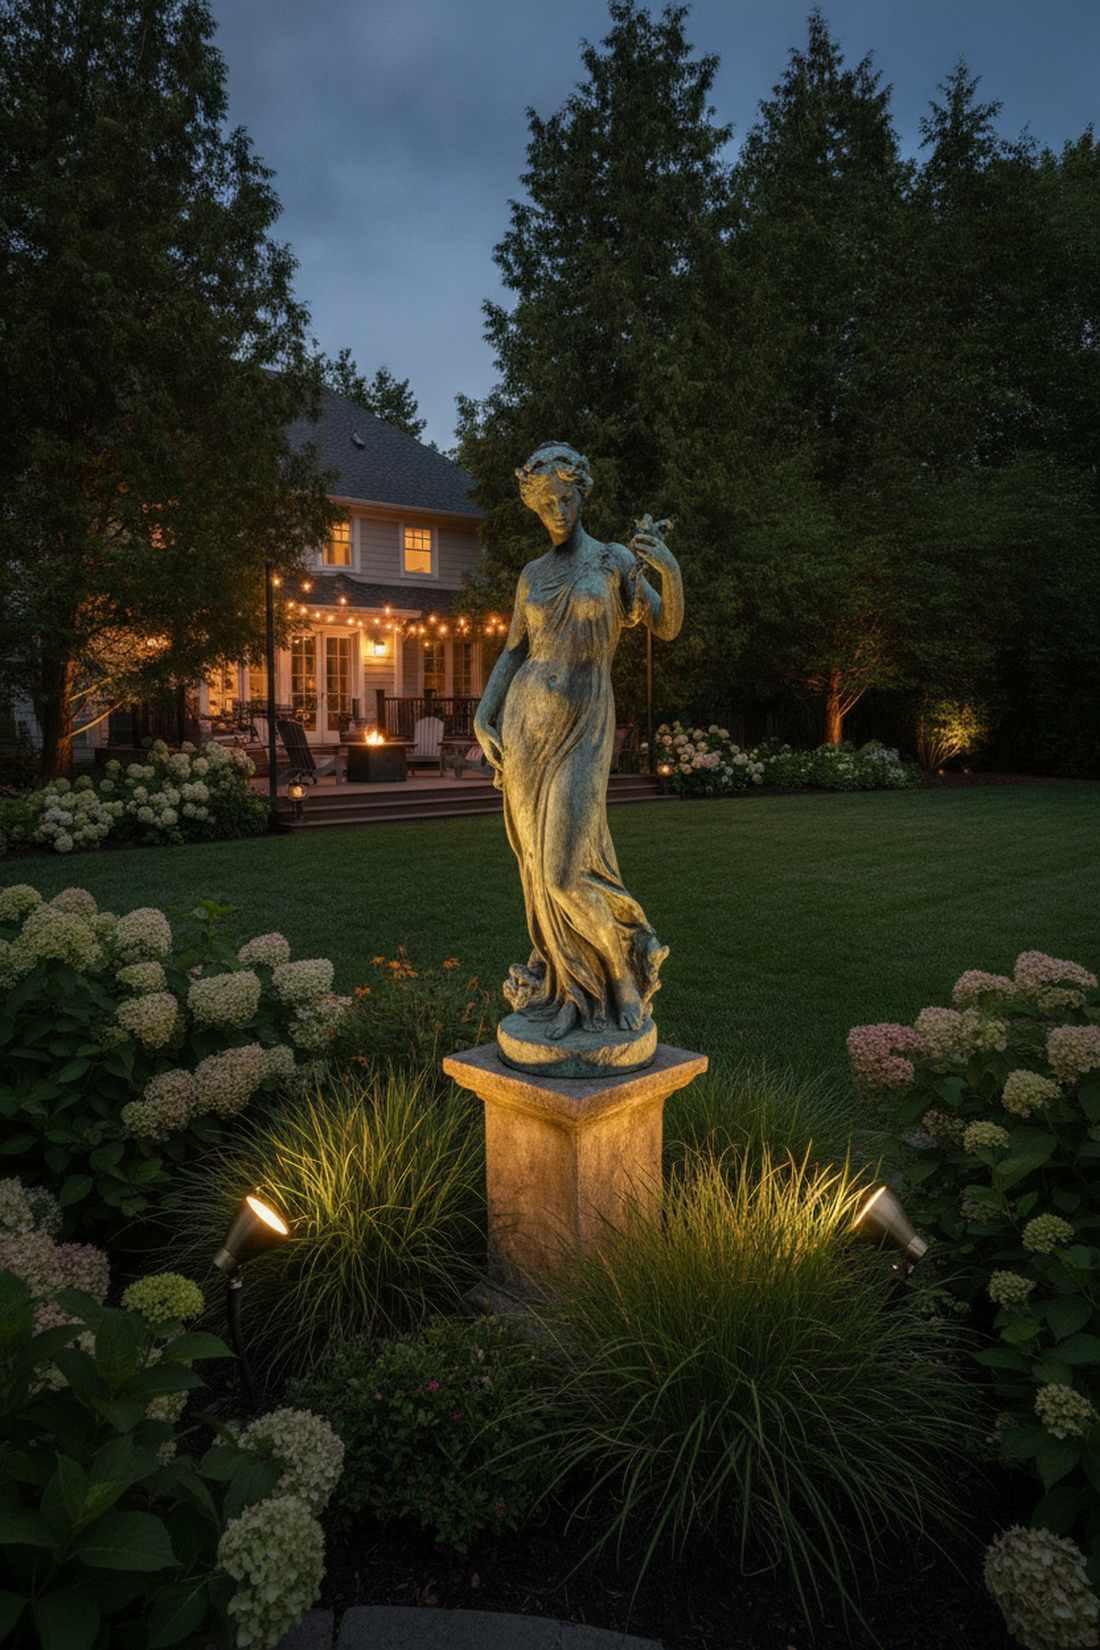
Highlighting this piece feels like admiring a priceless artifact in a private museum exhibit. A narrow-beam focal spotlight works brilliantly to draw the eye to a water fountain, statue, or unique urn.
Washing the whole area in light ruins the drama, but crossing two narrow beams from different angles gives a designer-level finish that highlights 3D textures perfectly. Equipping the fixtures with extended anti-glare glare shields ensures the light hits the art, not your eyes.
A dual-light focal kit costs about $80. Pin this if you want to showcase your best garden features!
- Key Materials: Narrow spot fixtures, glare shields
- Vibe / Style: Curated museum perfection
- Difficulty: Easy fine-tuning and aiming
- Budget Breakdown: Spotlights: $60 | Shields: $20
- Creator’s Tip: Place one light slightly lower and brighter than the other; this creates intentional shadows that make the sculpture pop in 3D.
- Smart Sourcing: Narrow-beam LED landscape spotlights and brass extended glare shields.
Specialty Luxury Features: Distinctive Elements in Premium Garden Design
52. Outdoor Garden Sculpture Galleries
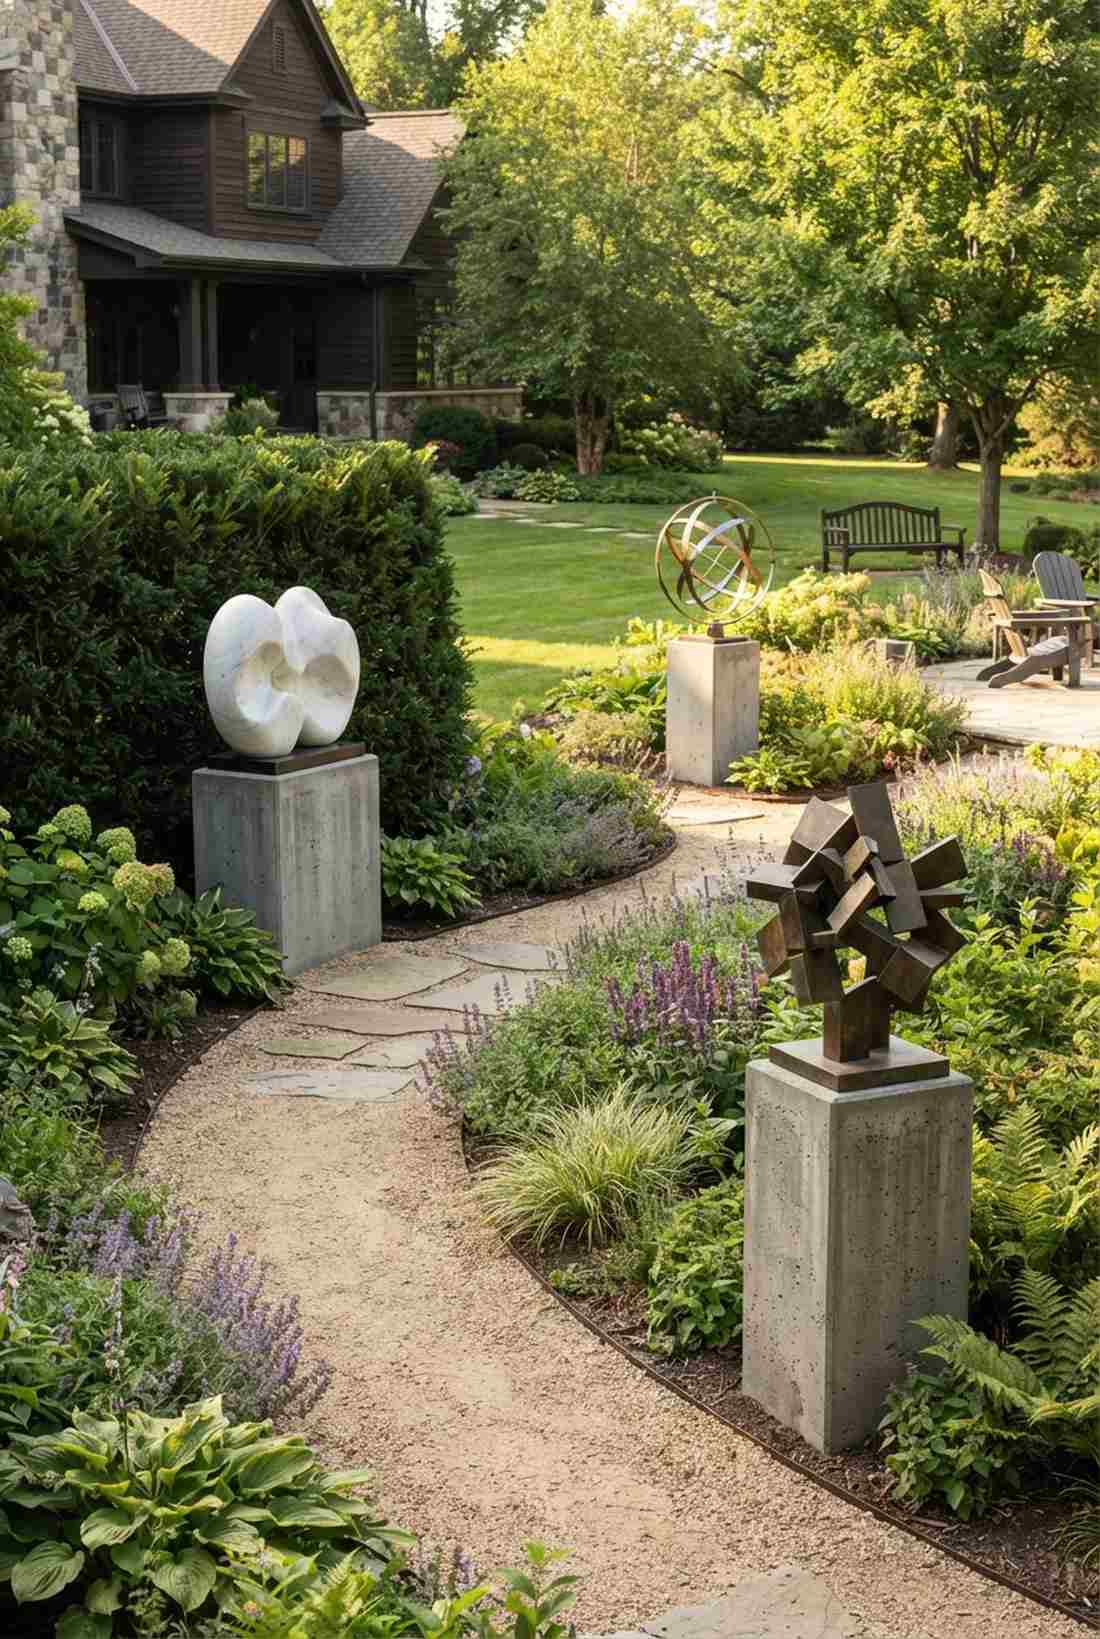
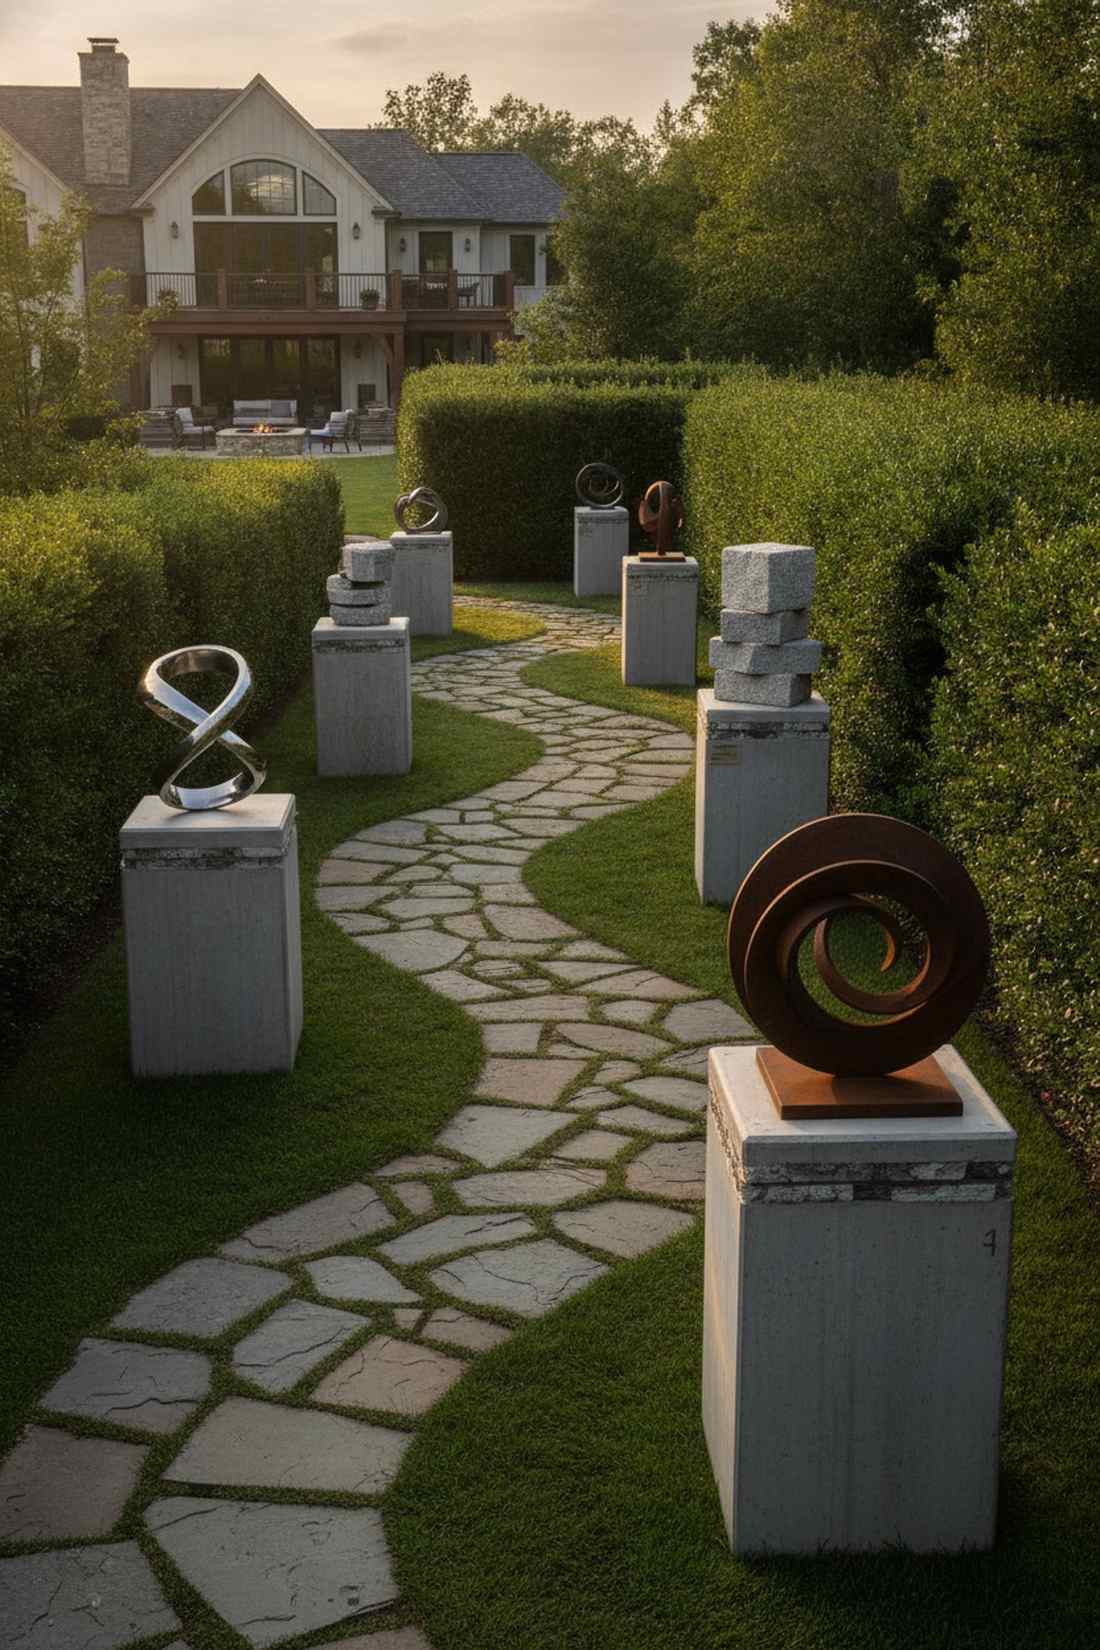
Wandering this path feels like securing a private ticket to an elite botanical art exhibit. A curated open-air art walk is the absolute perfect way to add personality to long, winding garden paths.
Scattering cheap lawn ornaments looks tacky, but mounting geometric metal or stone pieces on heavy pedestals screams custom architecture and commands respect. Sinking a pre-cast concrete mounting base into the dirt ensures heavy art pieces never tip over in the wind.
You can set up a professional pedestal for about $60 plus the art. Save this to your high-end landscape styling board.
- Key Materials: Art pieces, concrete pedestals, construction adhesive
- Vibe / Style: Avant-garde cultural estate
- Difficulty: Heavy lifting for pedestals
- Budget Breakdown: Pedestals: $40 | Adhesive: $20
- Creator’s Tip: Frame your sculptures with a solid dark green hedge behind them; the solid background makes the art pop ten times harder.
- Smart Sourcing: Pre-cast concrete display pedestals and exterior-grade stone construction adhesive.
53. Bocce Ball Courts
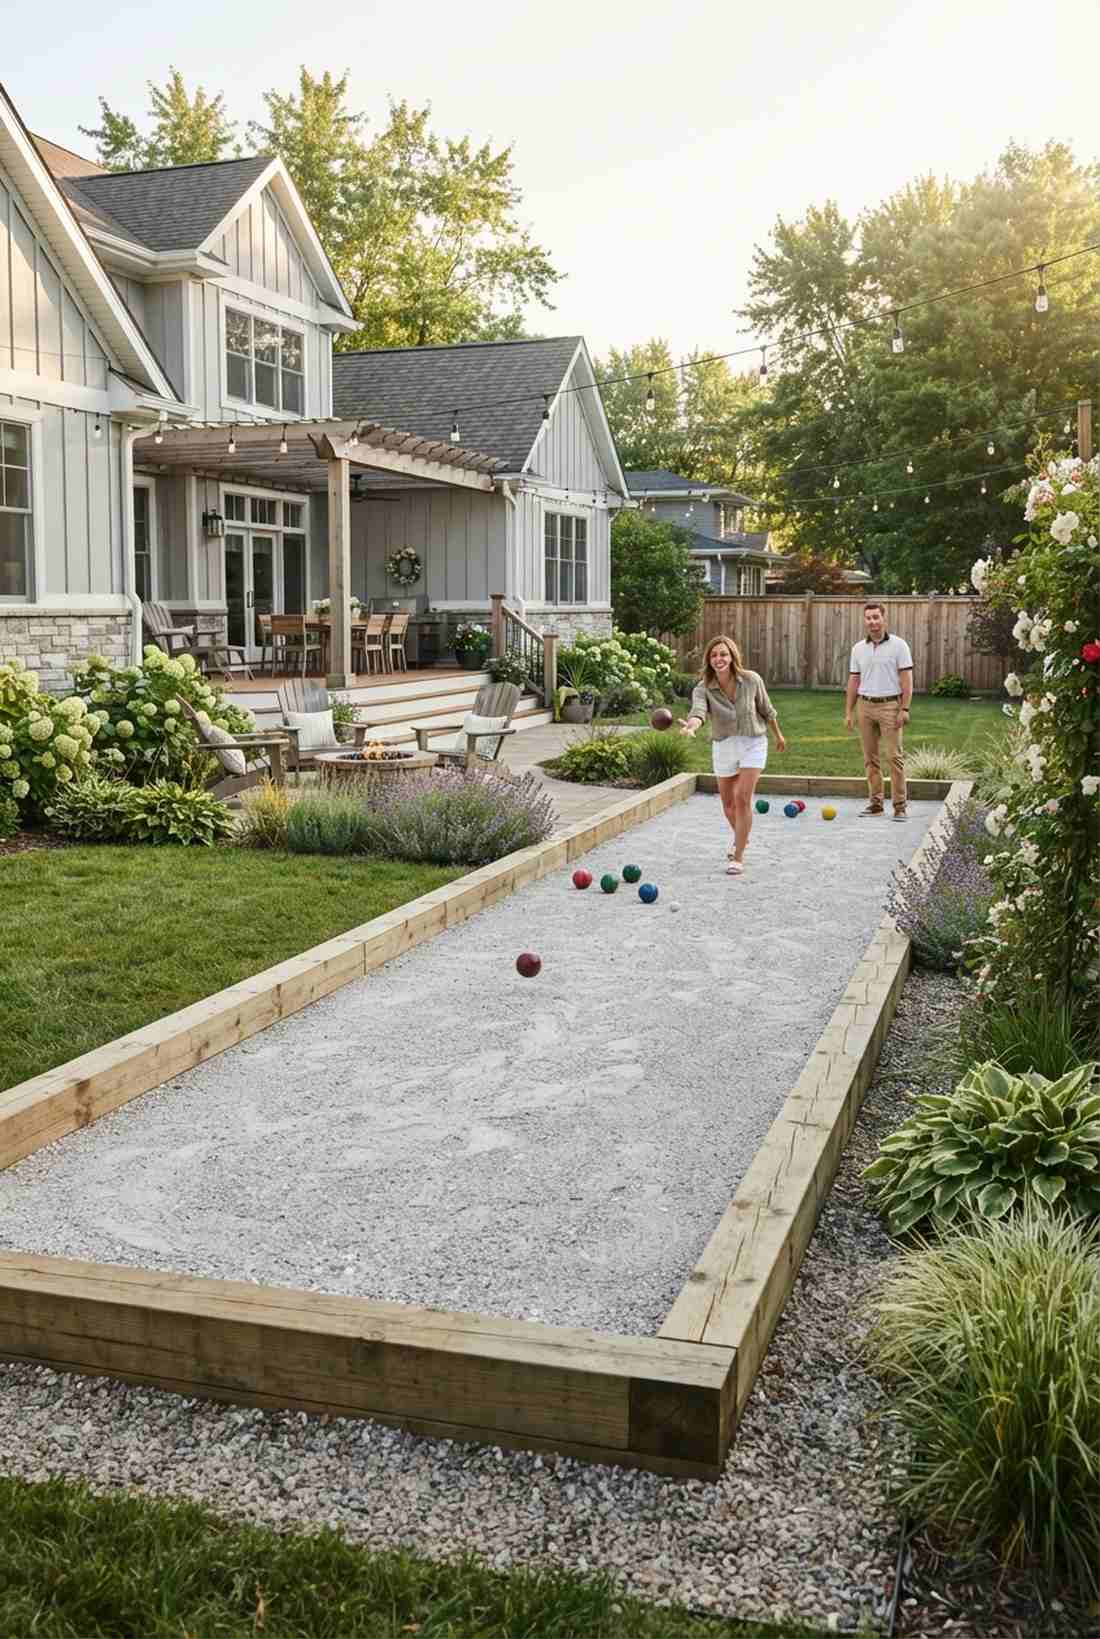
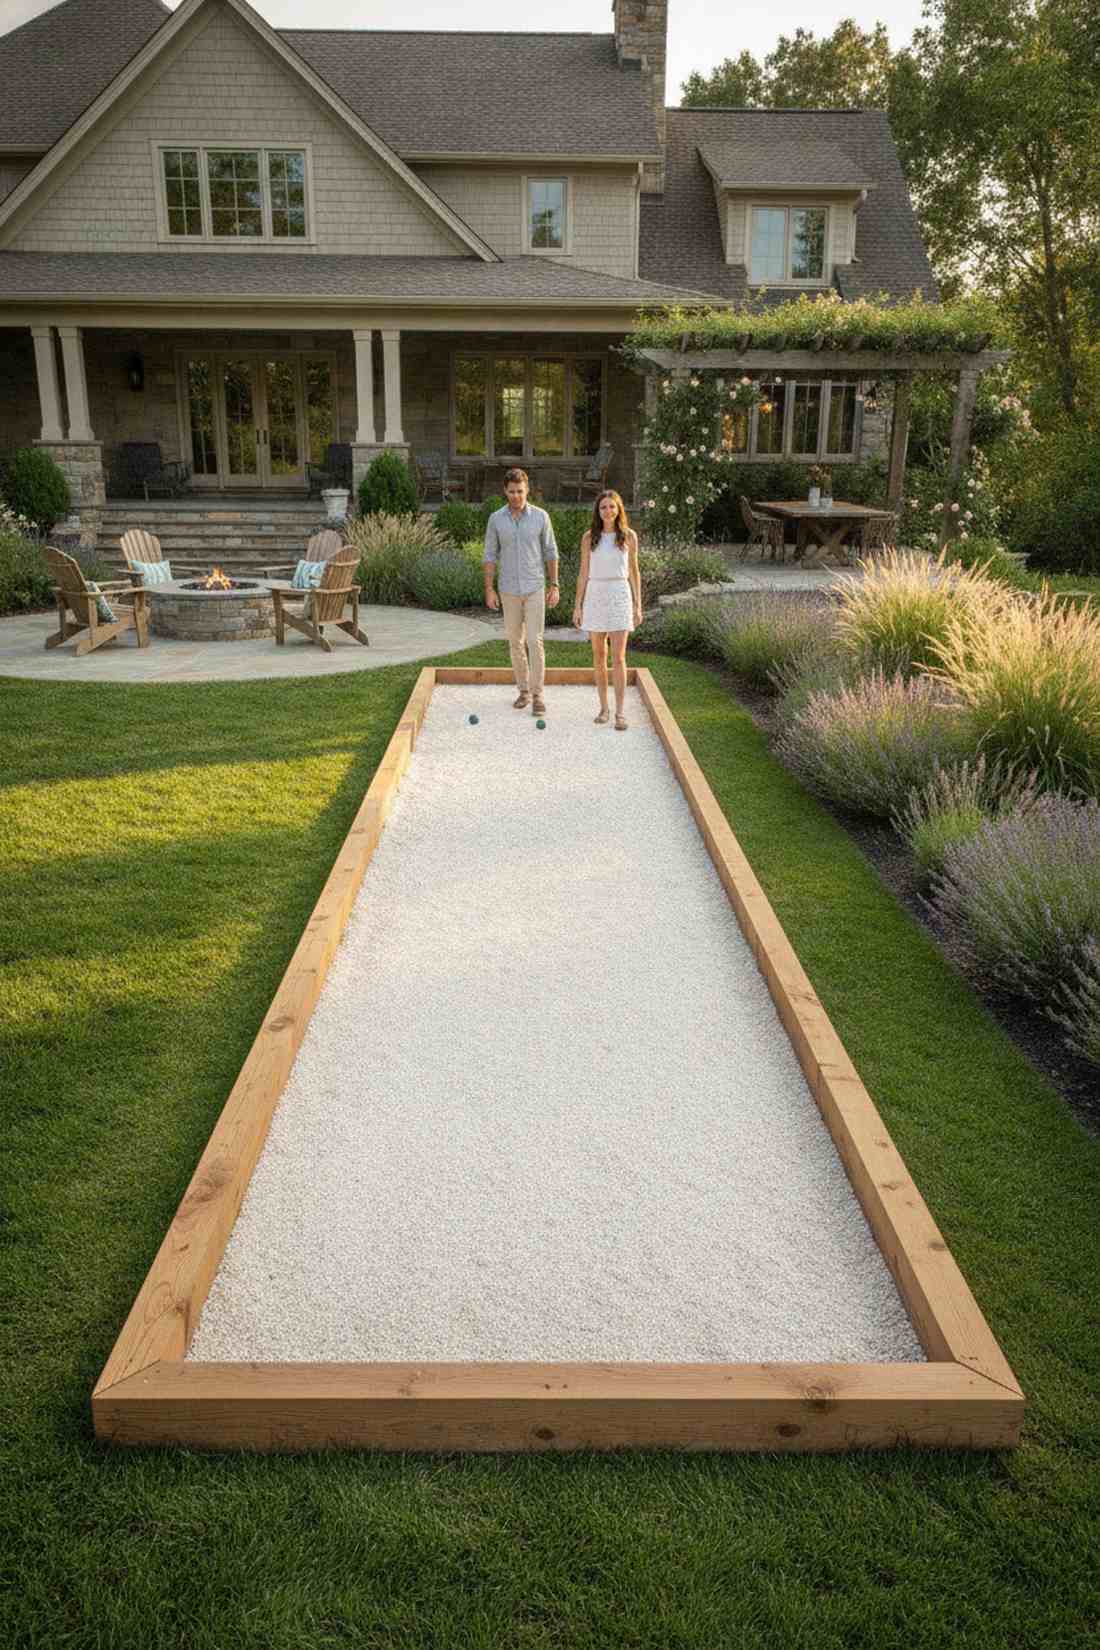
Playing a game here feels like a leisurely summer afternoon at an exclusive Italian vineyard. A crushed oyster shell gaming lane works exceptionally well for transforming a dead, useless side yard into an entertainment hub.
Pouring a concrete pad is overkill, but framing a trench with pressure-treated lumber delivers a surprisingly premium look that drains perfectly. Topping the court with bulk pulverized oyster shells gives the balls that authentic, satisfyingly smooth roll.
You can build a stunning regulation or half-court for roughly $400. Pin this for the ultimate backyard party feature!
- Key Materials: Treated lumber, crushed stone base, oyster shells
- Vibe / Style: Upscale recreational leisure
- Difficulty: Lots of digging and leveling
- Budget Breakdown: Lumber: $150 | Base/Shells: $250
- Creator’s Tip: Install French drains under the crushed stone base; a flooded court ruins the oyster shell dust layer instantly.
- Smart Sourcing: Pulverized oyster shell court topping (bulk pack) and heavy-duty timber framing screws.
Most backyard entertainment setups involve dragging a TV outside. This next feature creates an actual cinematic event.
54. Outdoor Cinema Projection Walls
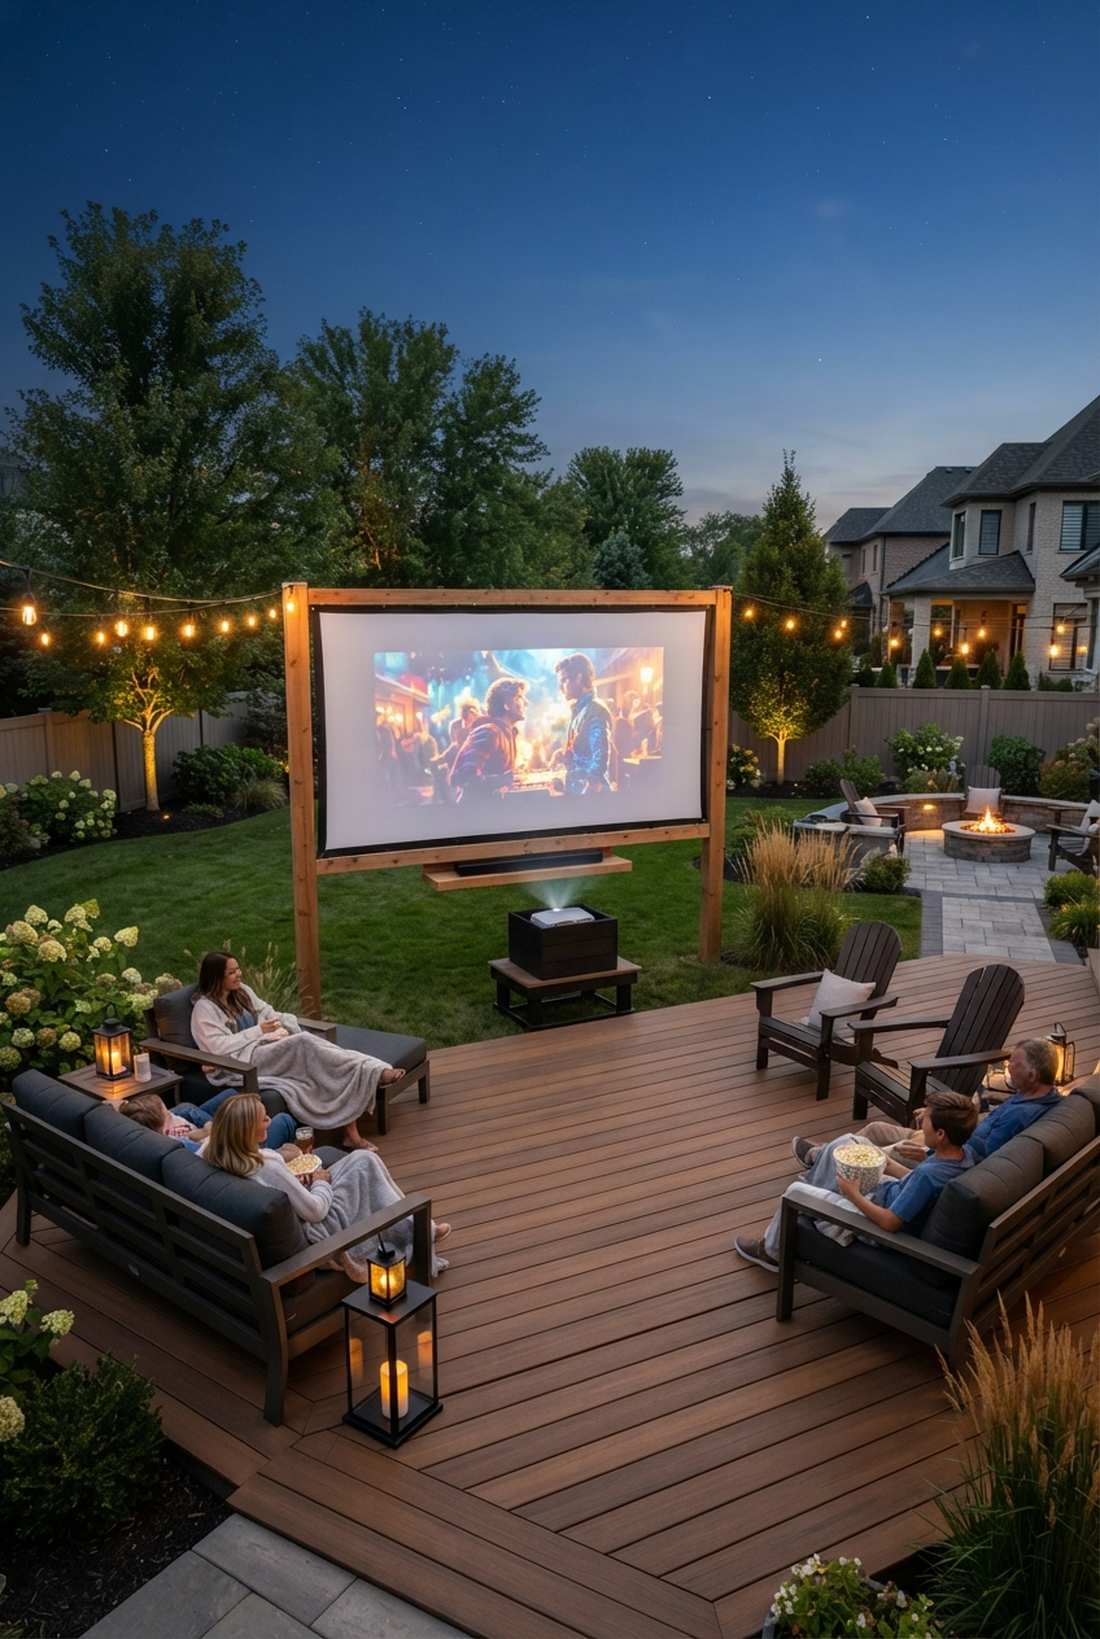
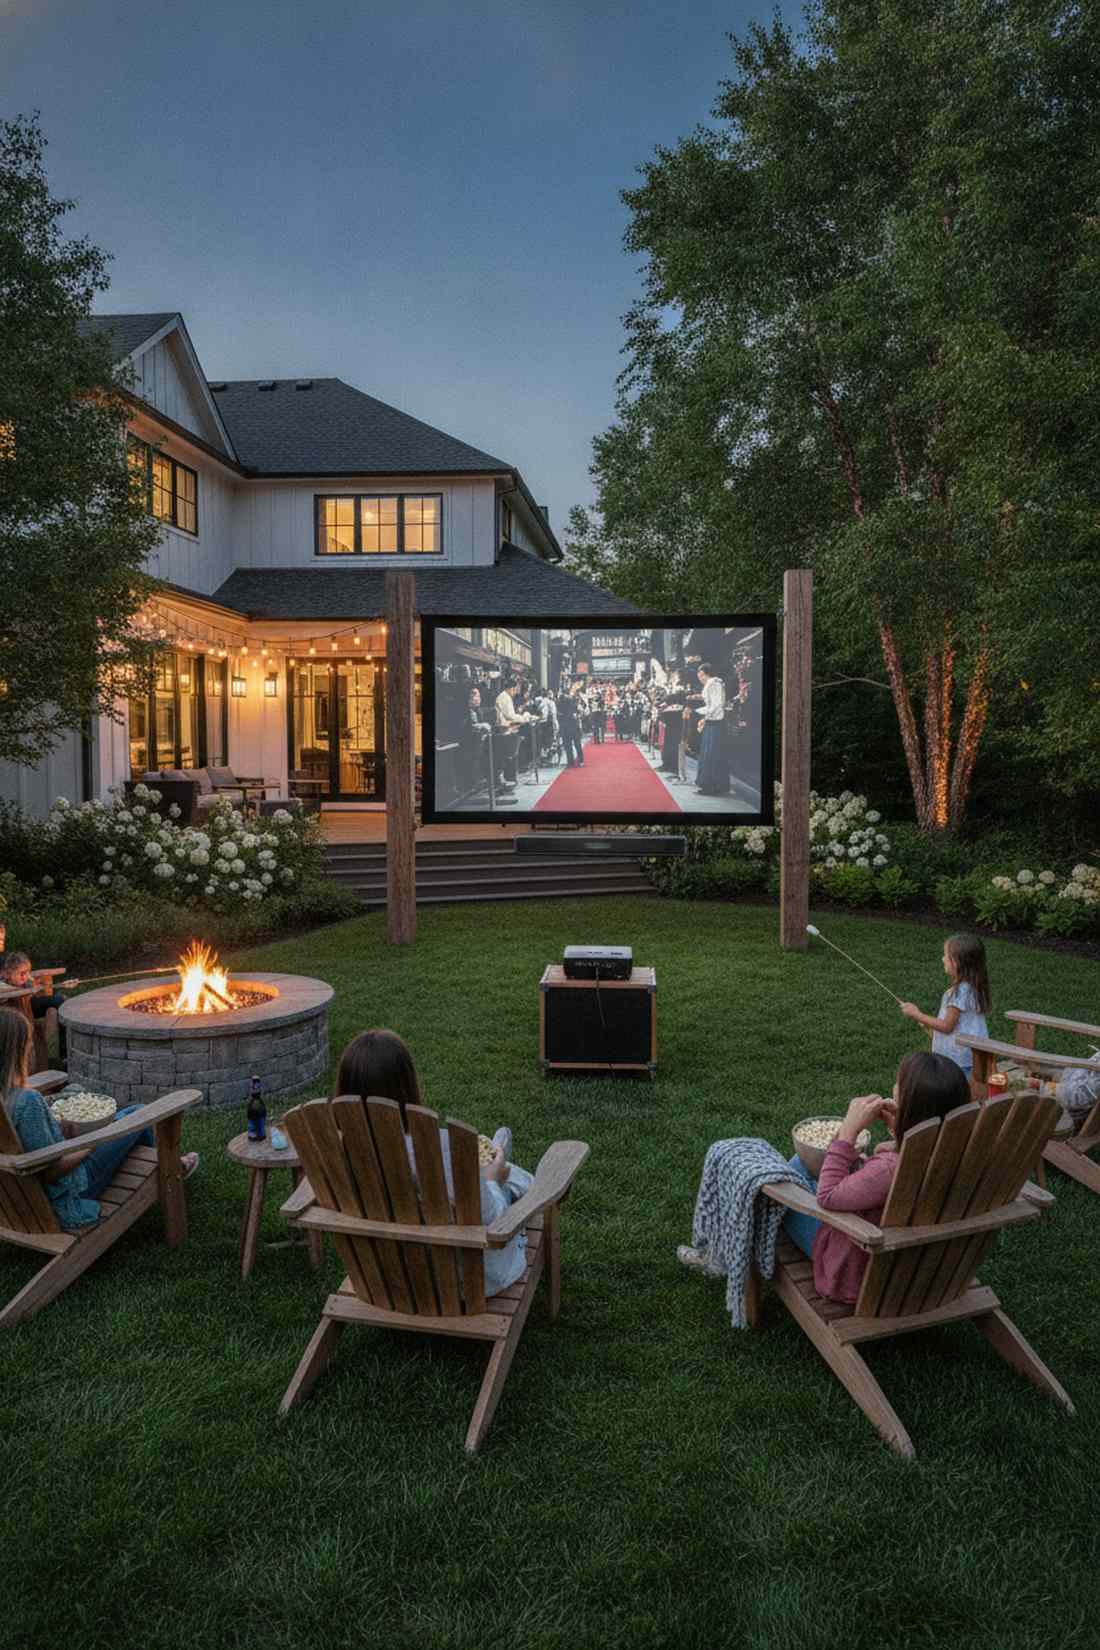
Watching a movie here feels like attending an exclusive Hollywood premiere under the stars. A massive backyard theater screen is the absolute best feature for dominating summer nights with friends and family.
Hanging a wrinkled bedsheet ruins the movie, but tensioning a proper PVC screen between two wooden posts achieves a high-end estate vibe with zero ripples. Pairing it with a weatherproof Bluetooth soundbar means you get booming cinema audio without dragging messy cables across the grass.
You can set up a massive cinematic experience for under $250. It’s a fast upgrade that completely changes the vibe.
- Key Materials: Wrinkle-free screen, tension bungees, projector
- Vibe / Style: Epic alfresco entertainment
- Difficulty: Easy tech setup
- Budget Breakdown: Screen/Bungees: $100 | Soundbar: $150
- Creator’s Tip: Build a small wooden box painted black to house the projector; it hides the glowing lights of the machine and protects it from dew.
- Smart Sourcing: Tension-mounted PVC outdoor projector screens and weatherproof outdoor Bluetooth soundbars.
55. Glass-Roofed Conservatories
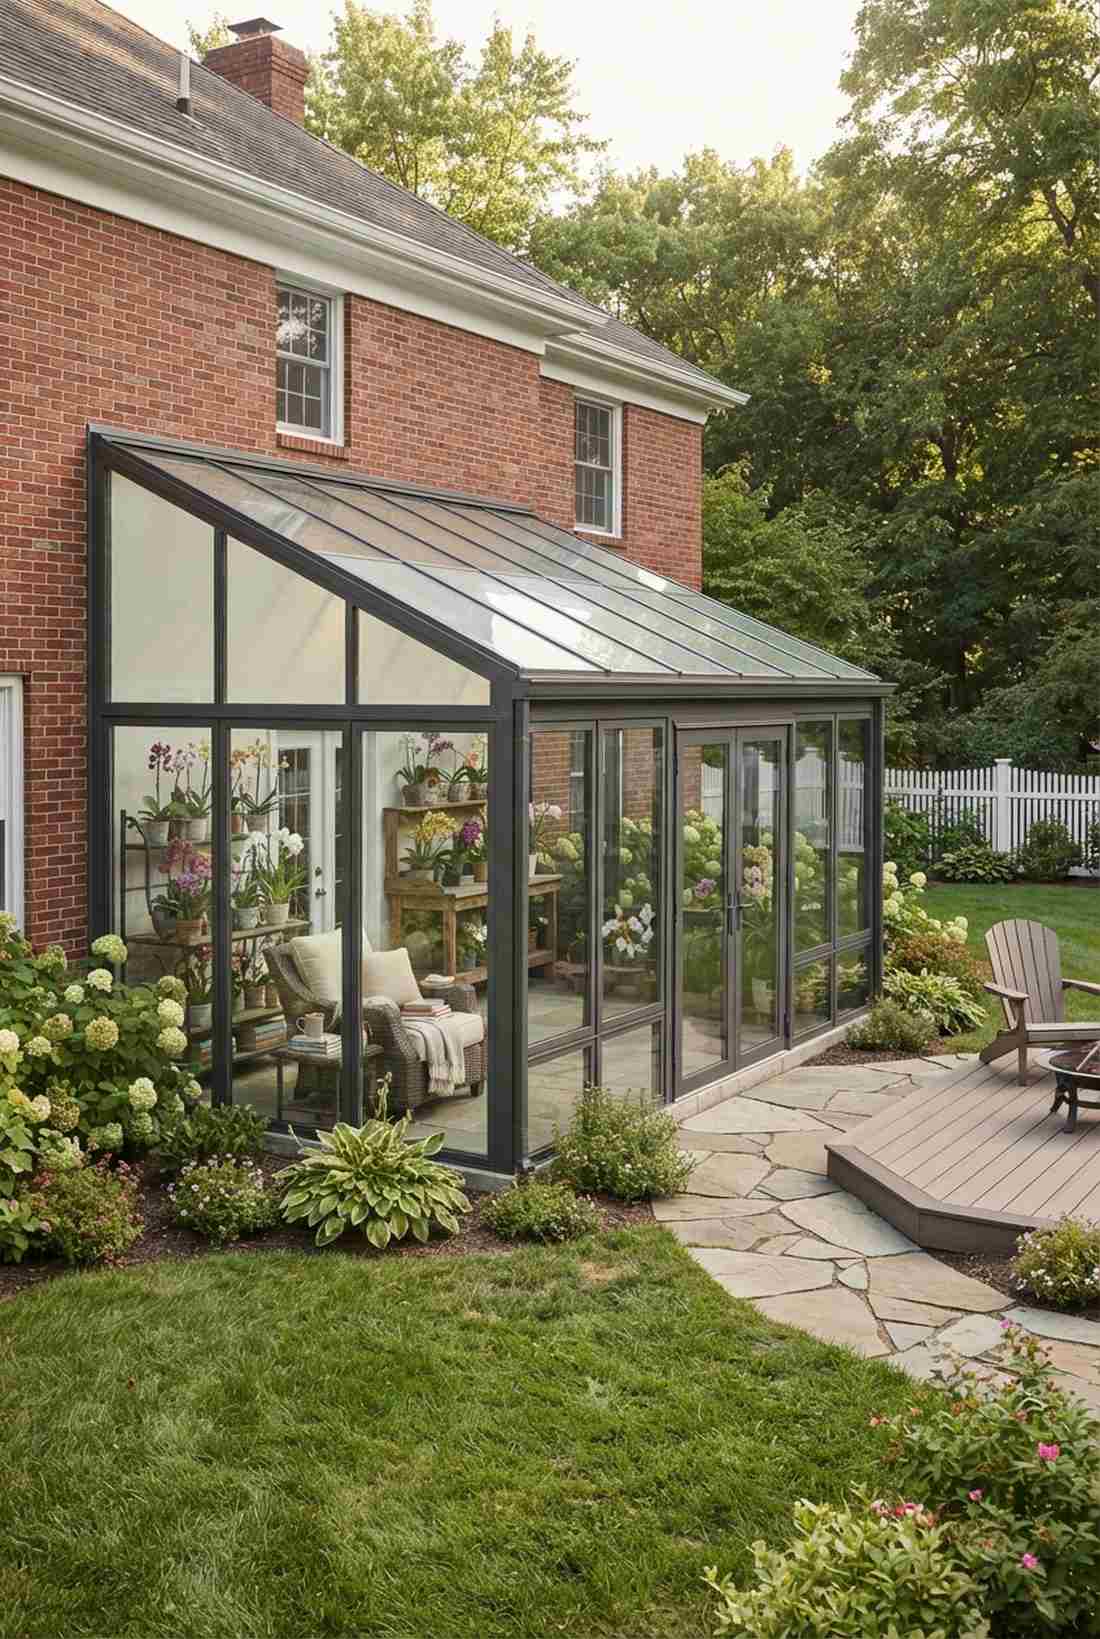

Relaxing inside feels like you are immune to the weather in a luxury eco-pod. A climate-controlled glass sunroom is perfect for reading during a thunderstorm or growing orchids in the winter.
Full room additions cost tens of thousands, but attaching a lean-to glass kit to your back door looks far more expensive than it is and requires minimal framing. Using solar-reflective window film on the roof panels stops the room from turning into a deadly sauna in July.
A mid-sized lean-to kit runs about $1,200. Save this to your ultimate home extension board!
- Key Materials: Lean-to glass kit, solar film, flashing
- Vibe / Style: Elite botanical living
- Difficulty: Requires flashing against the house
- Budget Breakdown: Kit: $1,000 | Solar Film: $200
- Creator’s Tip: Install an automated heat-sensitive roof vent; it opens mechanically when it gets too hot even if the power goes out.
- Smart Sourcing: Aluminum lean-to sunroom kits and heat-blocking solar window film rolls.
56. Outdoor Shower Gardens
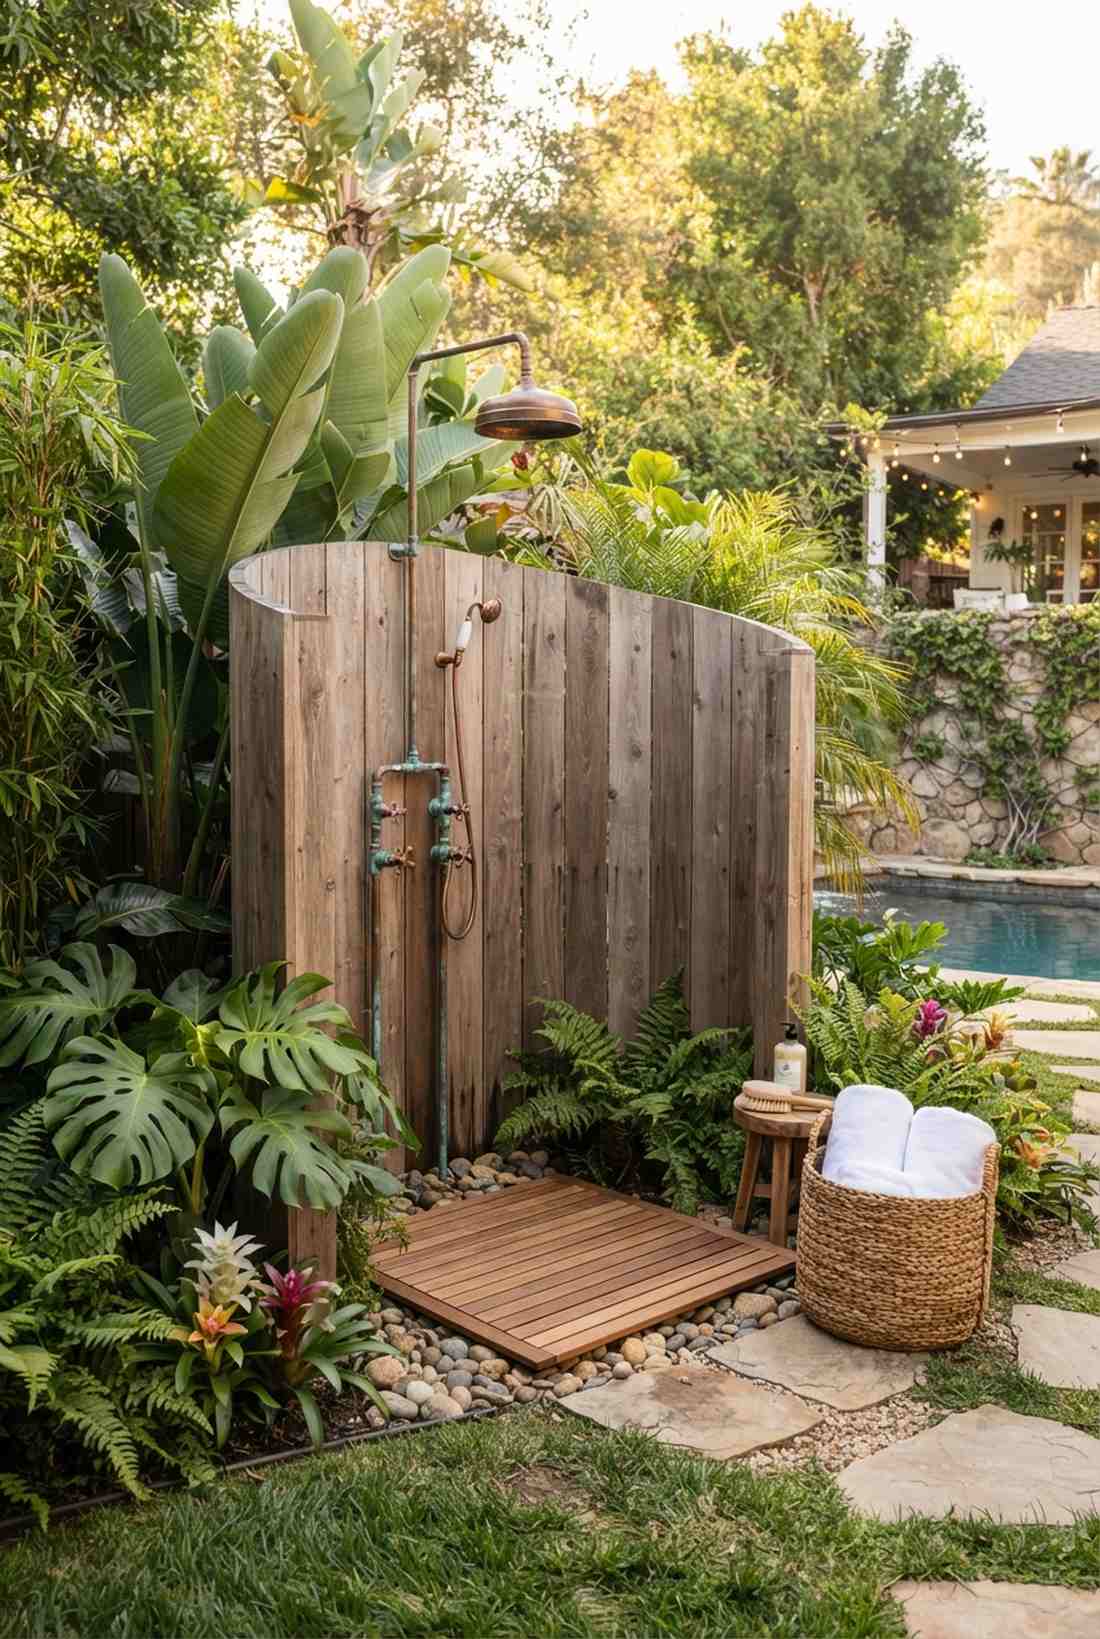
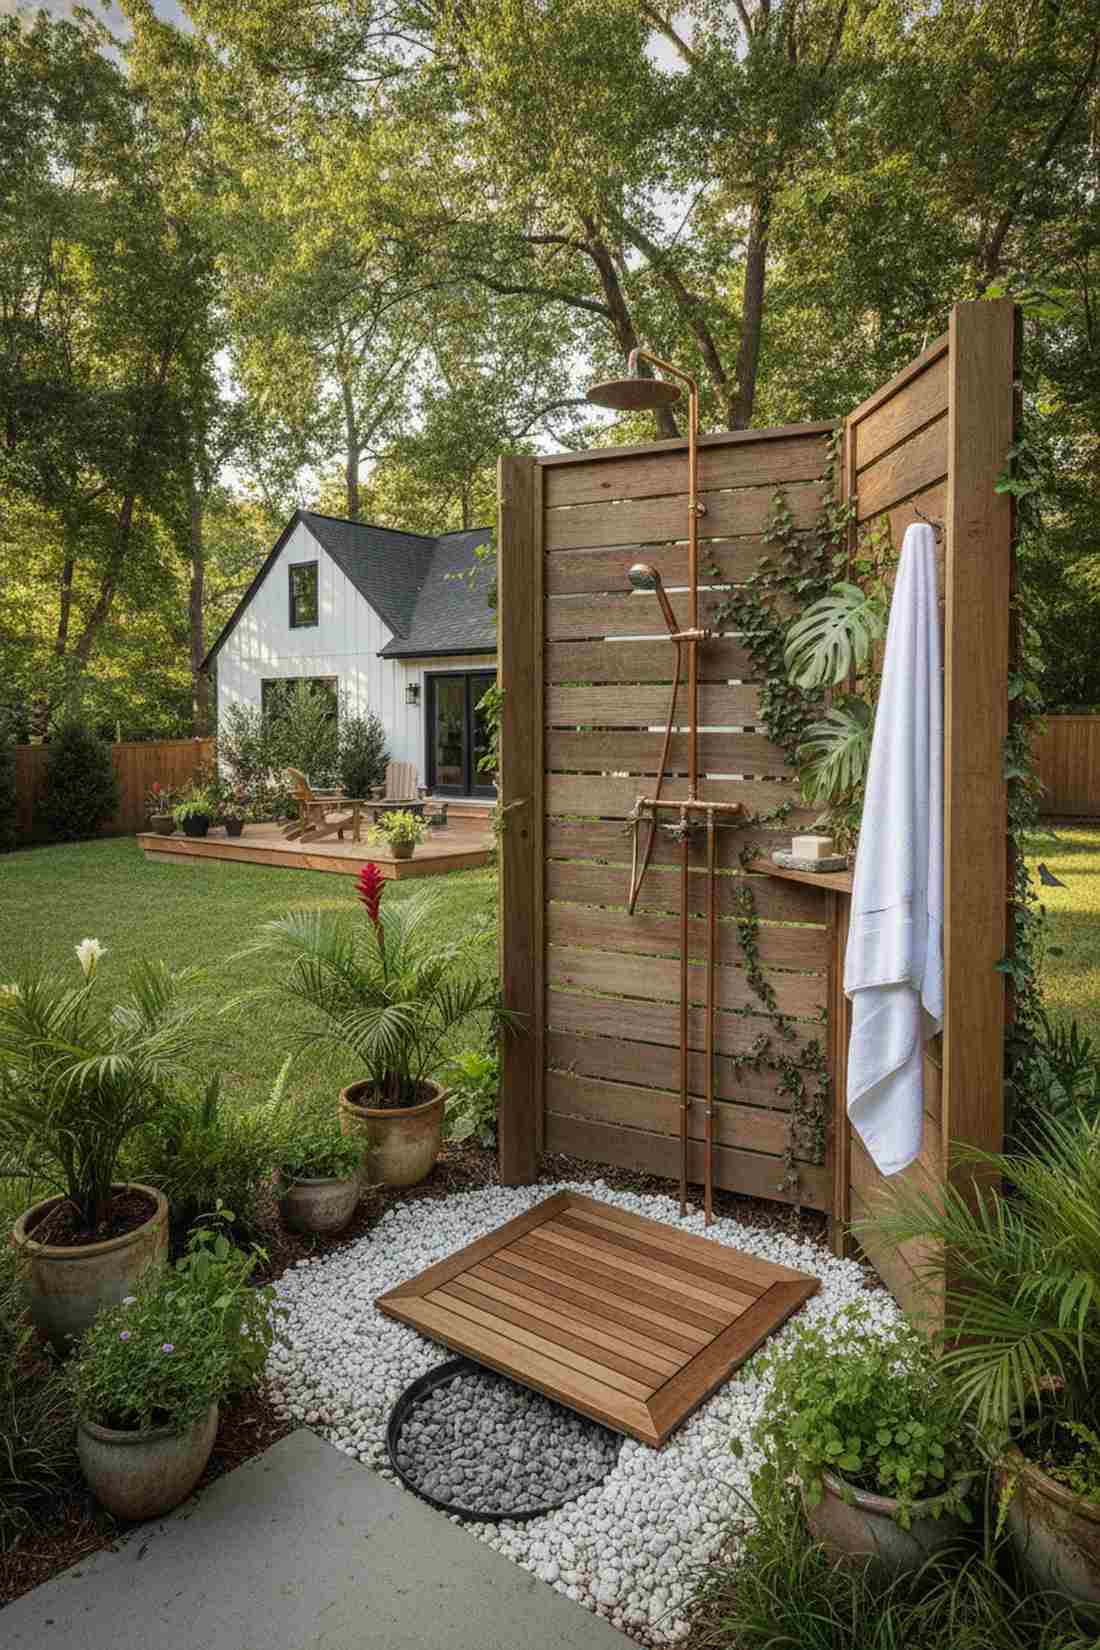
Rinsing off here feels like a cleansing ritual at a hidden tropical wellness retreat. A secluded open-air bathing stall works exceptionally well for washing off pool chlorine or beach sand before entering the house.
Exposing ugly PVC pipes is a massive mistake, but running exposed copper plumbing screams custom architecture and develops a gorgeous green patina over time. Laying down a slatted teak floor mat keeps your feet out of the mud and resists rotting naturally.
You can build a stunning plumbing setup and floor for around $250. Pin this for a spa-level backyard upgrade.
- Key Materials: Copper pipe/fittings, teak mat, privacy screen
- Vibe / Style: Rustic tropical wellness
- Difficulty: Basic pipe soldering
- Budget Breakdown: Copper Hardware: $150 | Teak Mat: $100
- Creator’s Tip: Dig a 3-foot deep hole under the teak mat and fill it with coarse gravel to act as an invisible, instant dry-well for the soapy water.
- Smart Sourcing: Exposed copper outdoor shower fixtures and naturally rot-resistant slatted teak bath mats.
57. Meditation Pavilions
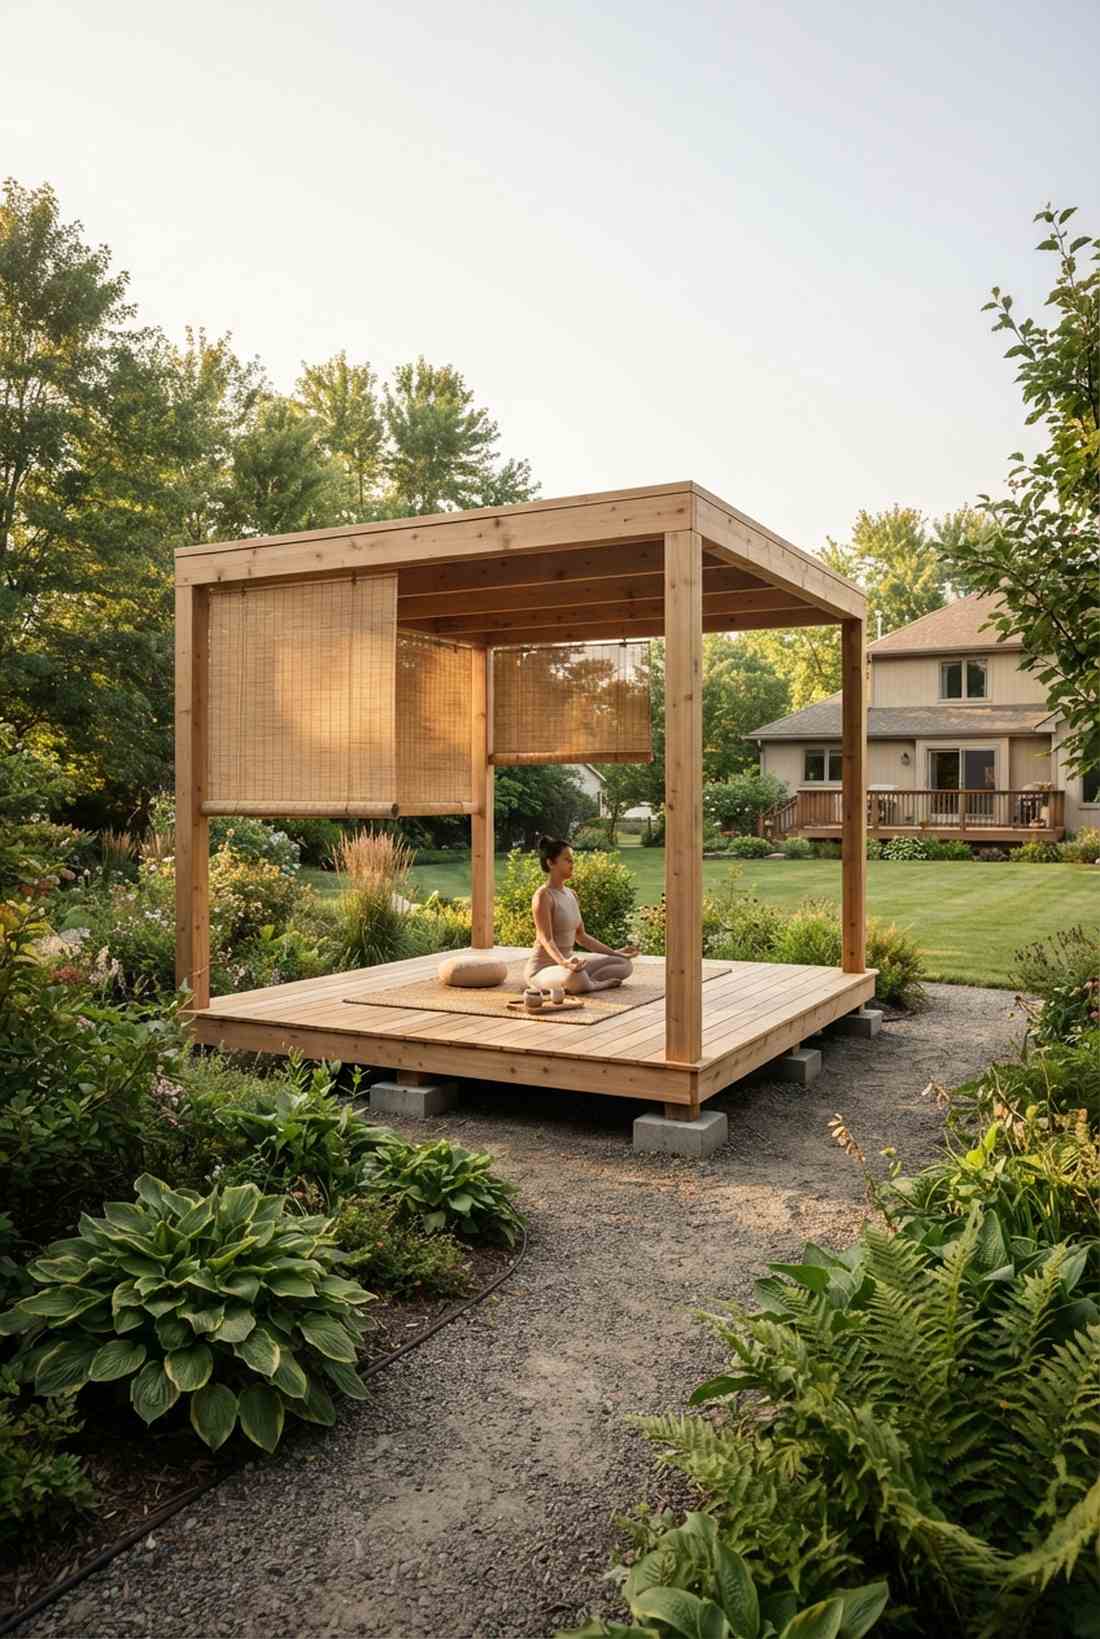
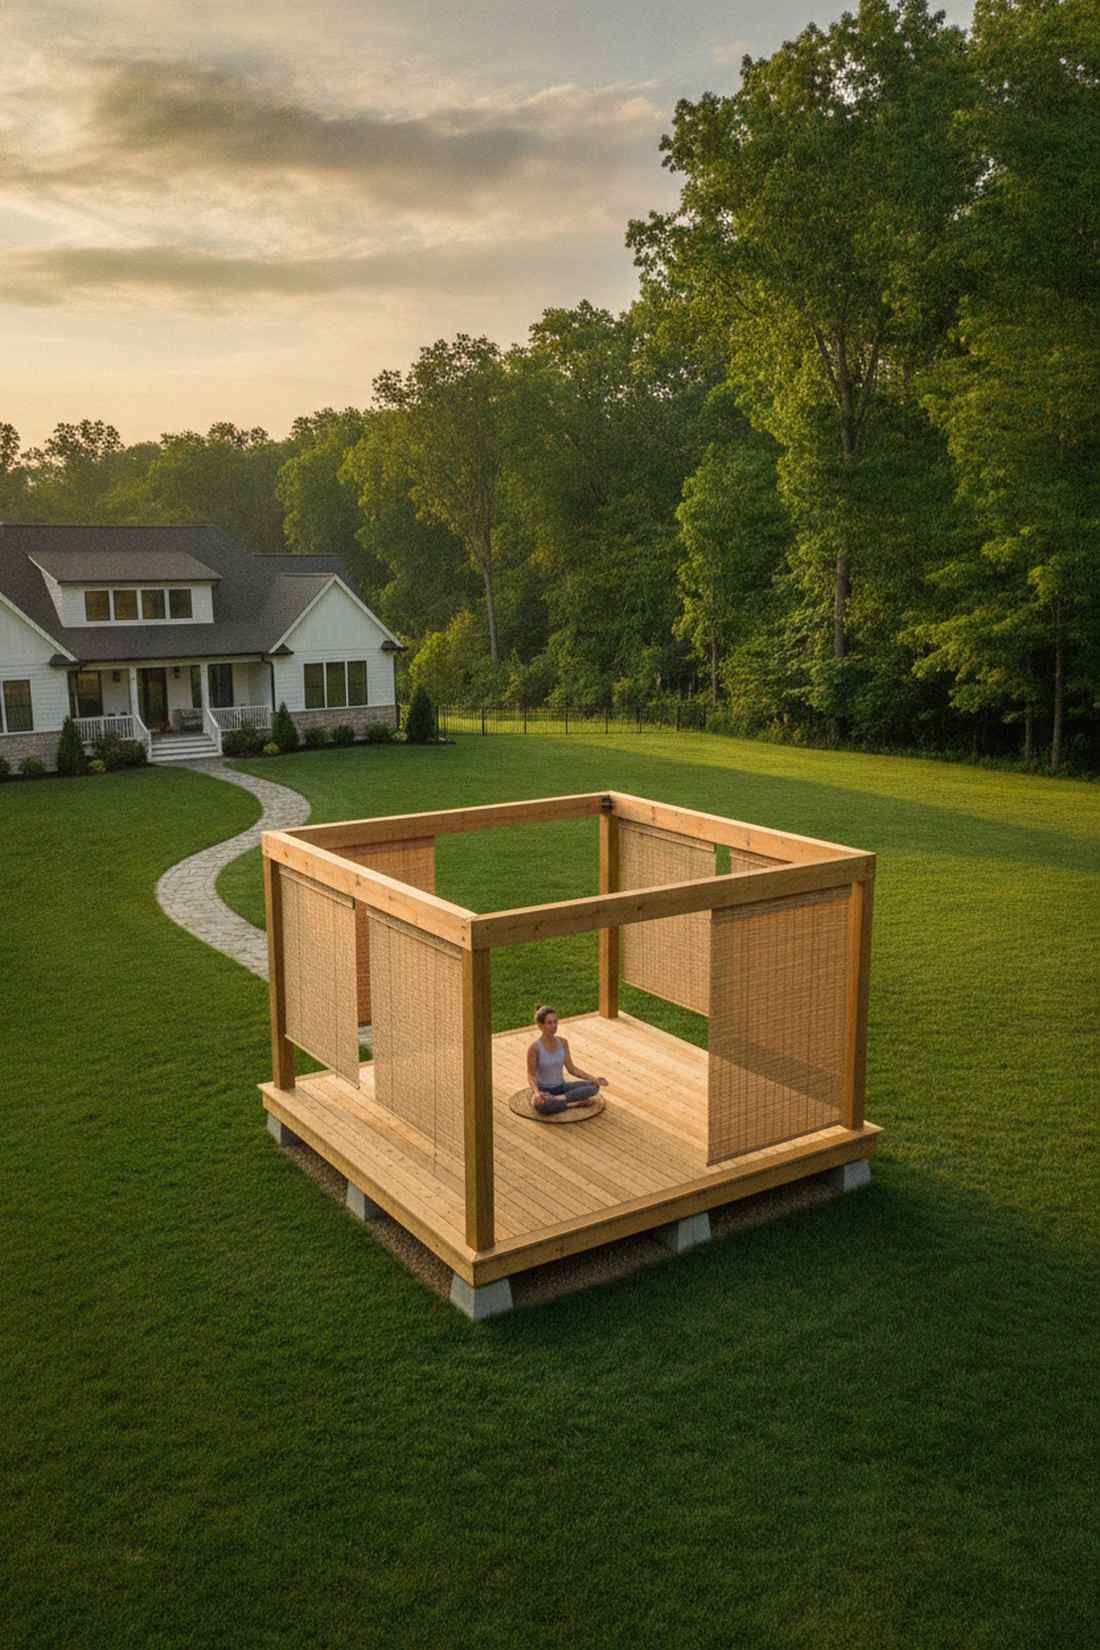
Sitting cross-legged here feels like floating in a serene temple above the chaotic world. A minimalist raised wooden platform is the absolute perfect destination for morning yoga at the far edge of your property.
Building massive walls closes off the space, but leaving it as an open-air timber frame delivers a surprisingly premium look that connects you entirely with nature. Hanging weatherproof bamboo roll-up blinds on the sides allows you to instantly block out the blinding sunrise glare.
You can frame out a simple 8×8 platform for roughly $350. Save this to your mental wellness sanctuary board!
- Key Materials: Deck blocks, timber frame, bamboo blinds
- Vibe / Style: Zen minimalist clarity
- Difficulty: Basic deck framing
- Budget Breakdown: Lumber: $250 | Blinds/Hardware: $100
- Creator’s Tip: Float the structure on concrete deck blocks rather than pouring footings; it saves days of labor and makes the pavilion technically “temporary” for permit purposes.
- Smart Sourcing: Pre-cast concrete deck footings and weatherproof outdoor bamboo roller shades.
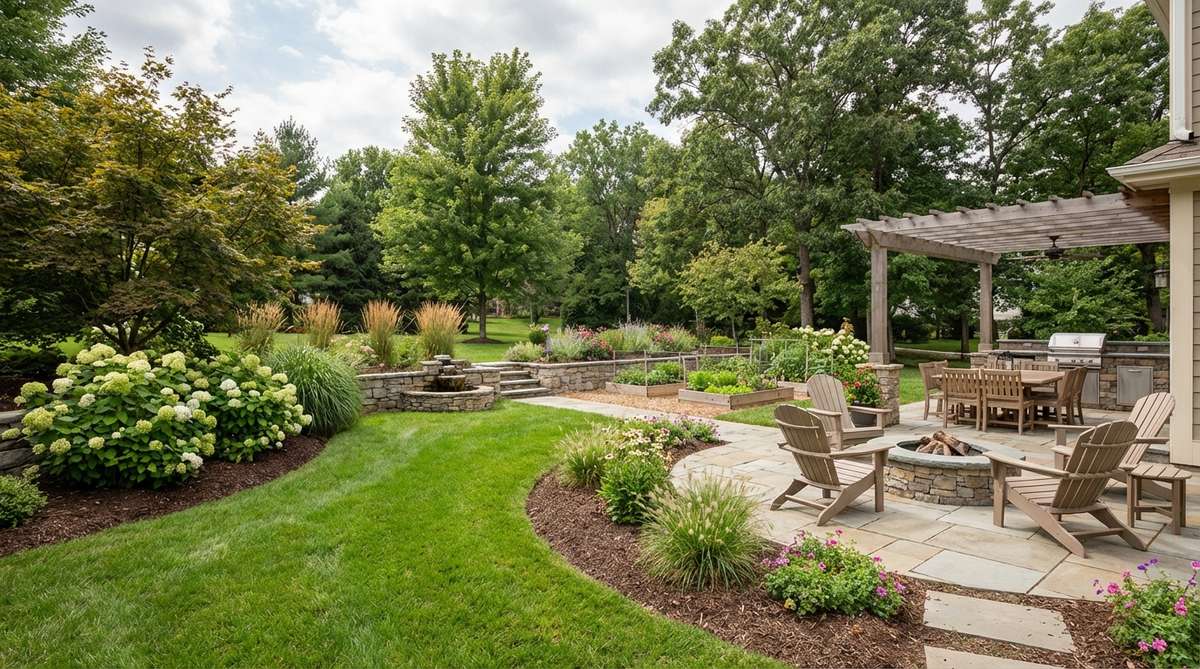
58. Chef Garden Potagers
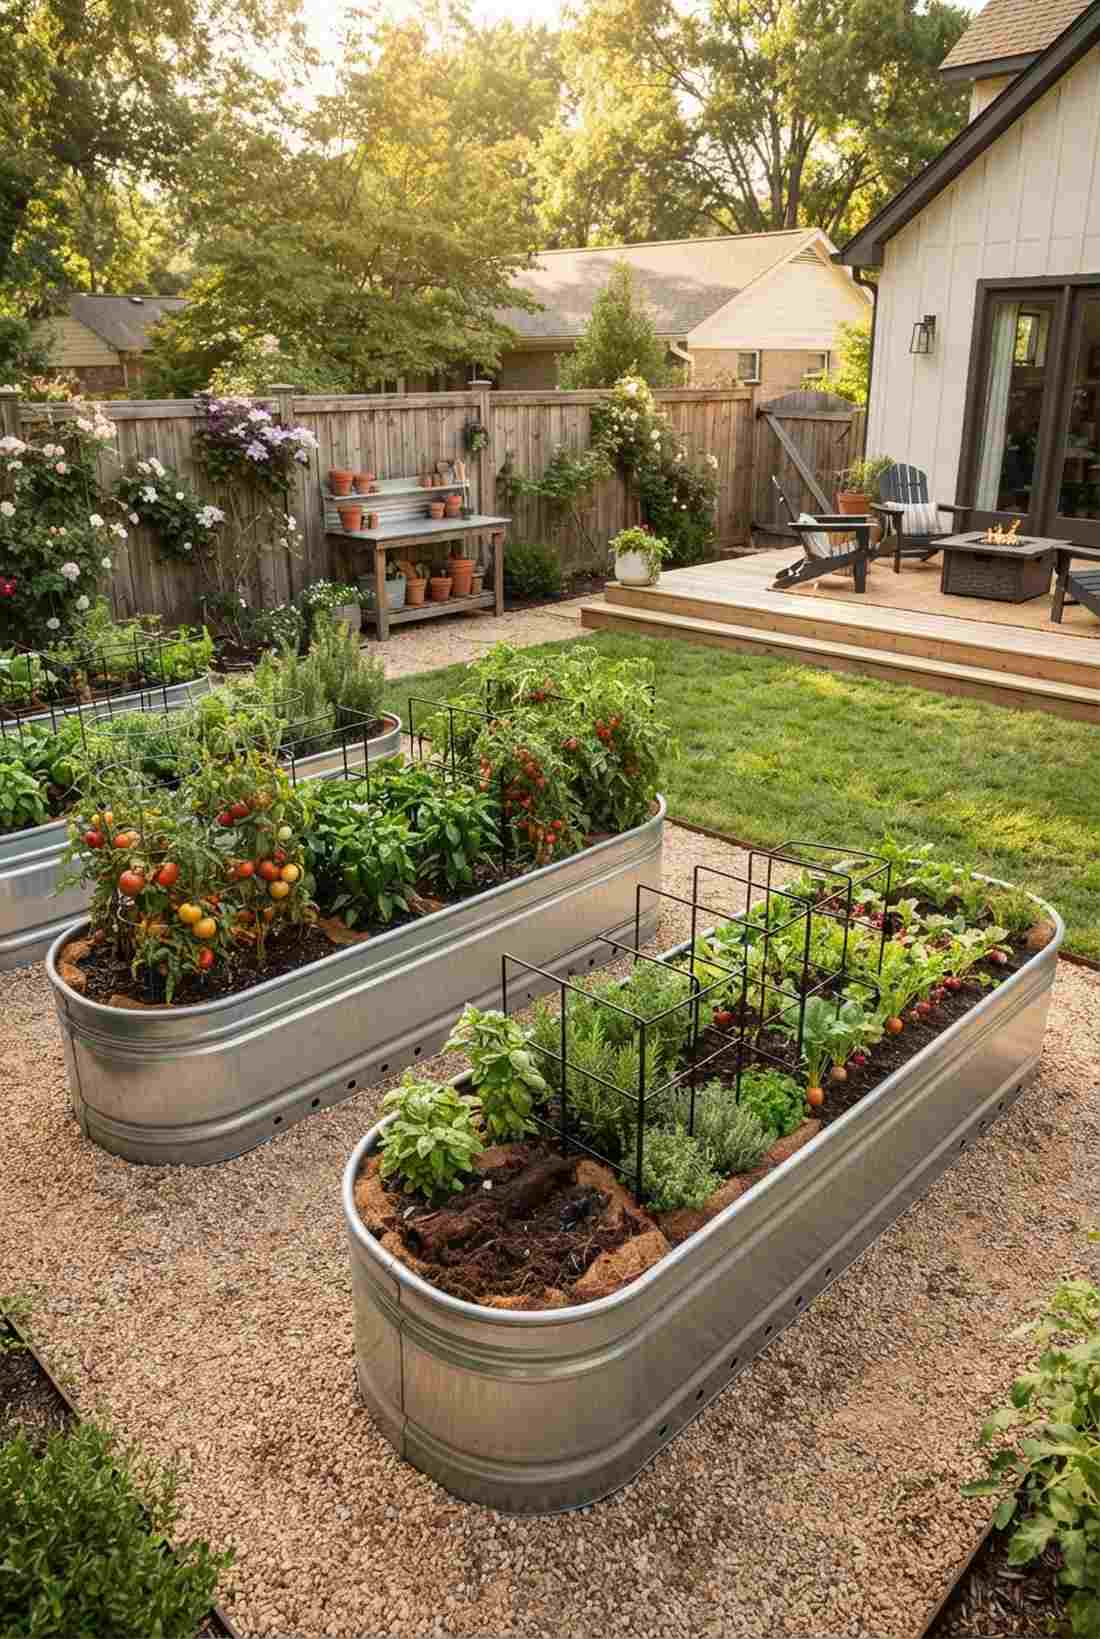
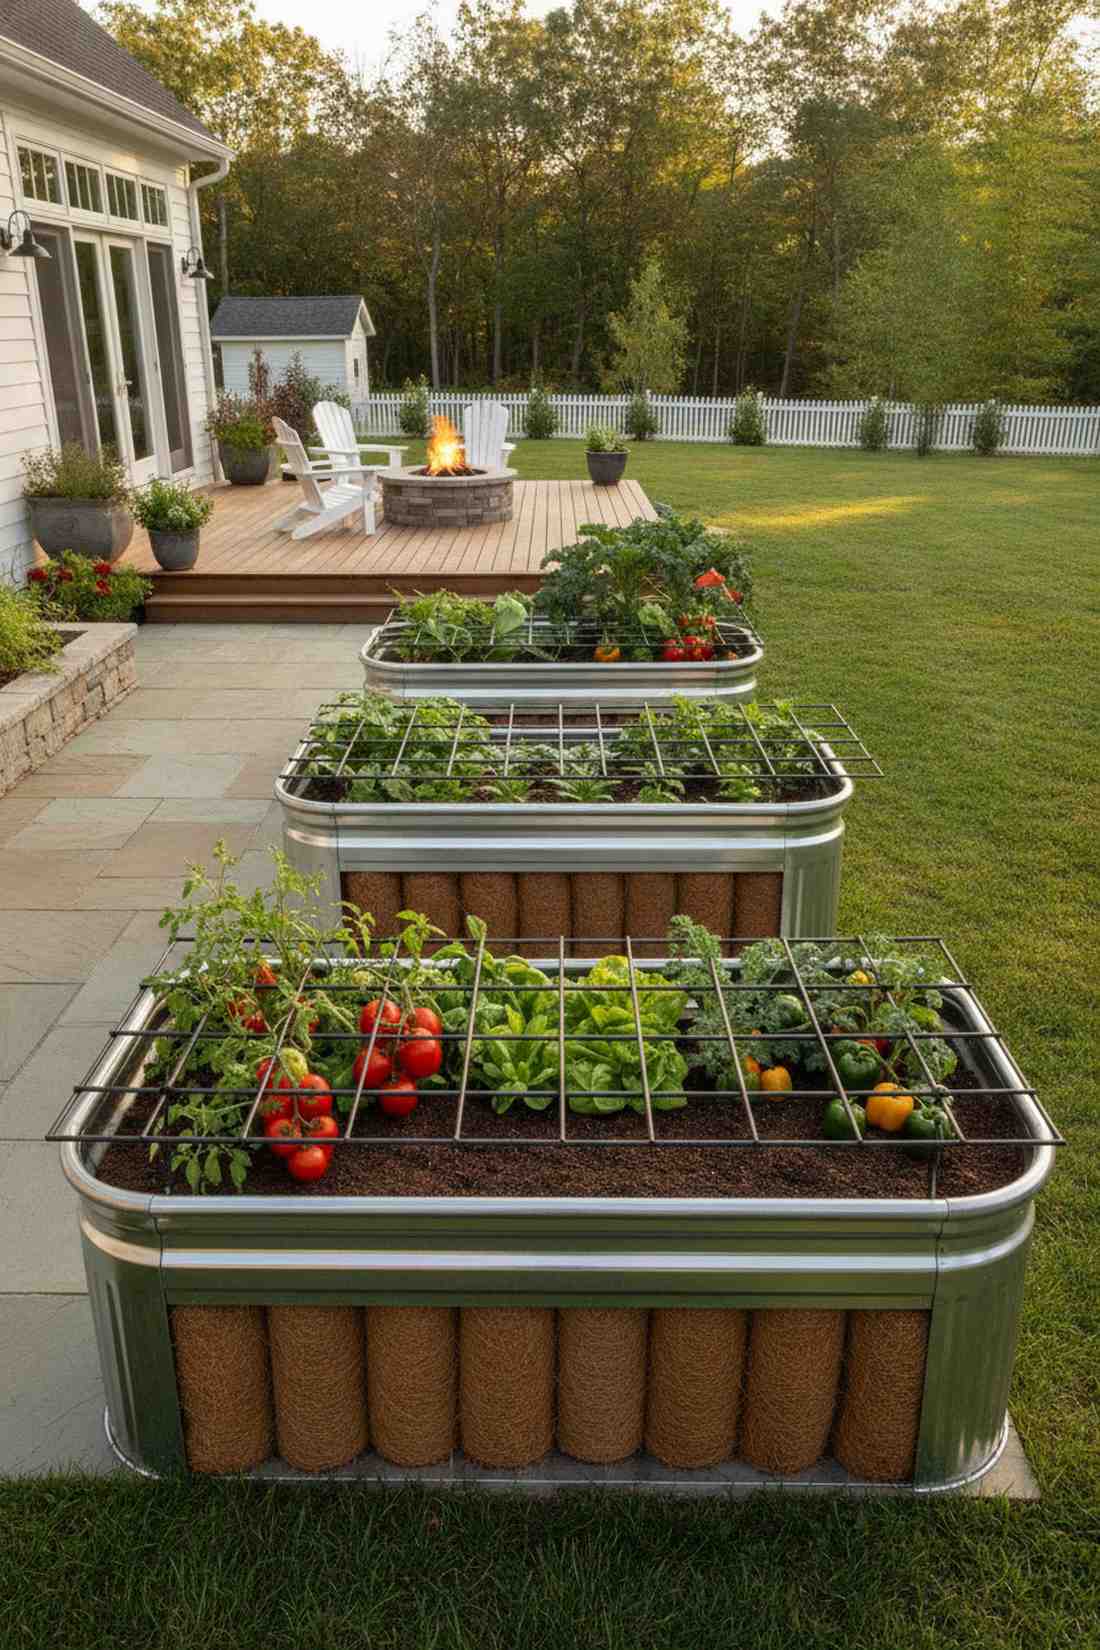
Harvesting tomatoes here feels like pulling fresh ingredients at a Michelin-star farm-to-table restaurant. An ornamental raised vegetable grid works flawlessly to make growing food look like high-end landscaping.
Rotting wooden boxes look terrible after one season, but using galvanized steel troughs gives a designer-level finish that lasts for decades and blocks burrowing pests. Filling the bottom half with bulk organic coco coir logs saves you a fortune on premium topsoil while retaining massive moisture.
You can set up three massive steel beds for about $300. Pin this if you want to elevate your homesteading game.
- Key Materials: Galvanized troughs, coco coir, premium compost
- Vibe / Style: Chic agrarian utility
- Difficulty: Very easy assembly
- Budget Breakdown: Steel Beds: $200 | Coir/Soil: $100
- Creator’s Tip: Drill at least twenty 1/2-inch holes in the bottom of the steel troughs before adding soil, or you will accidentally create a swamp.
- Smart Sourcing: Galvanized steel raised garden beds and compressed organic coco coir bricks (bulk pack).
59. Fire and Water Combination Features
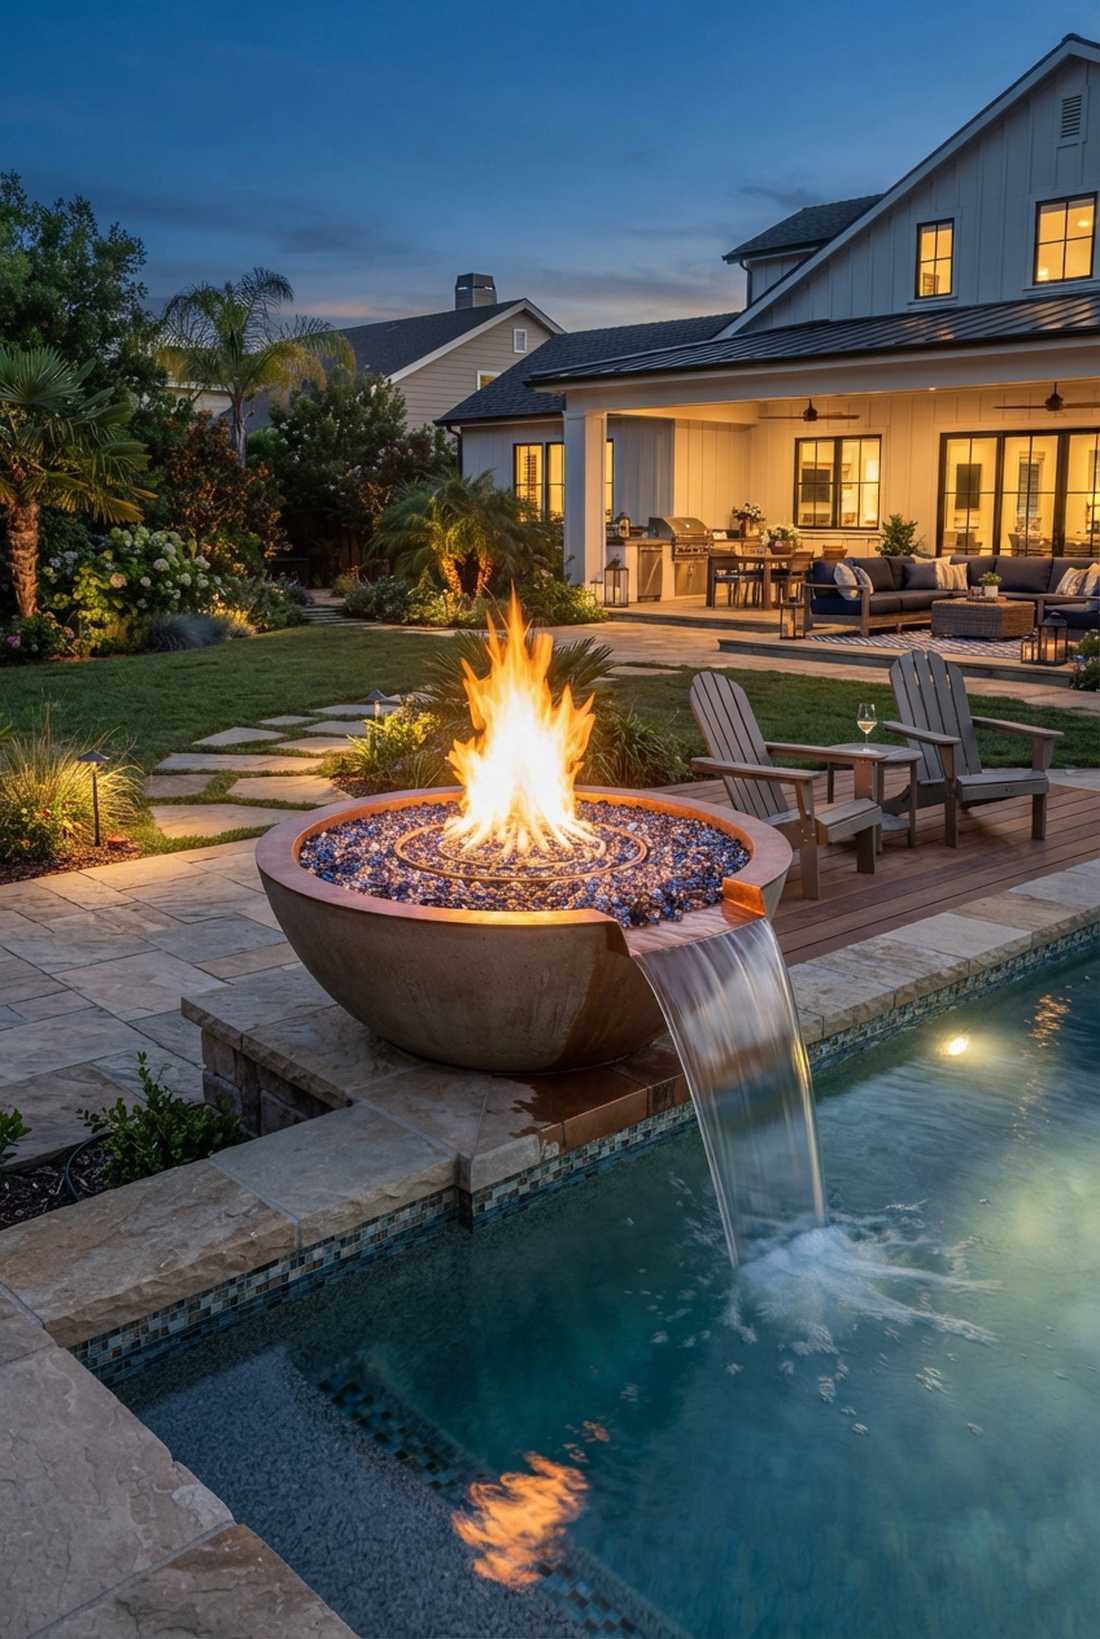
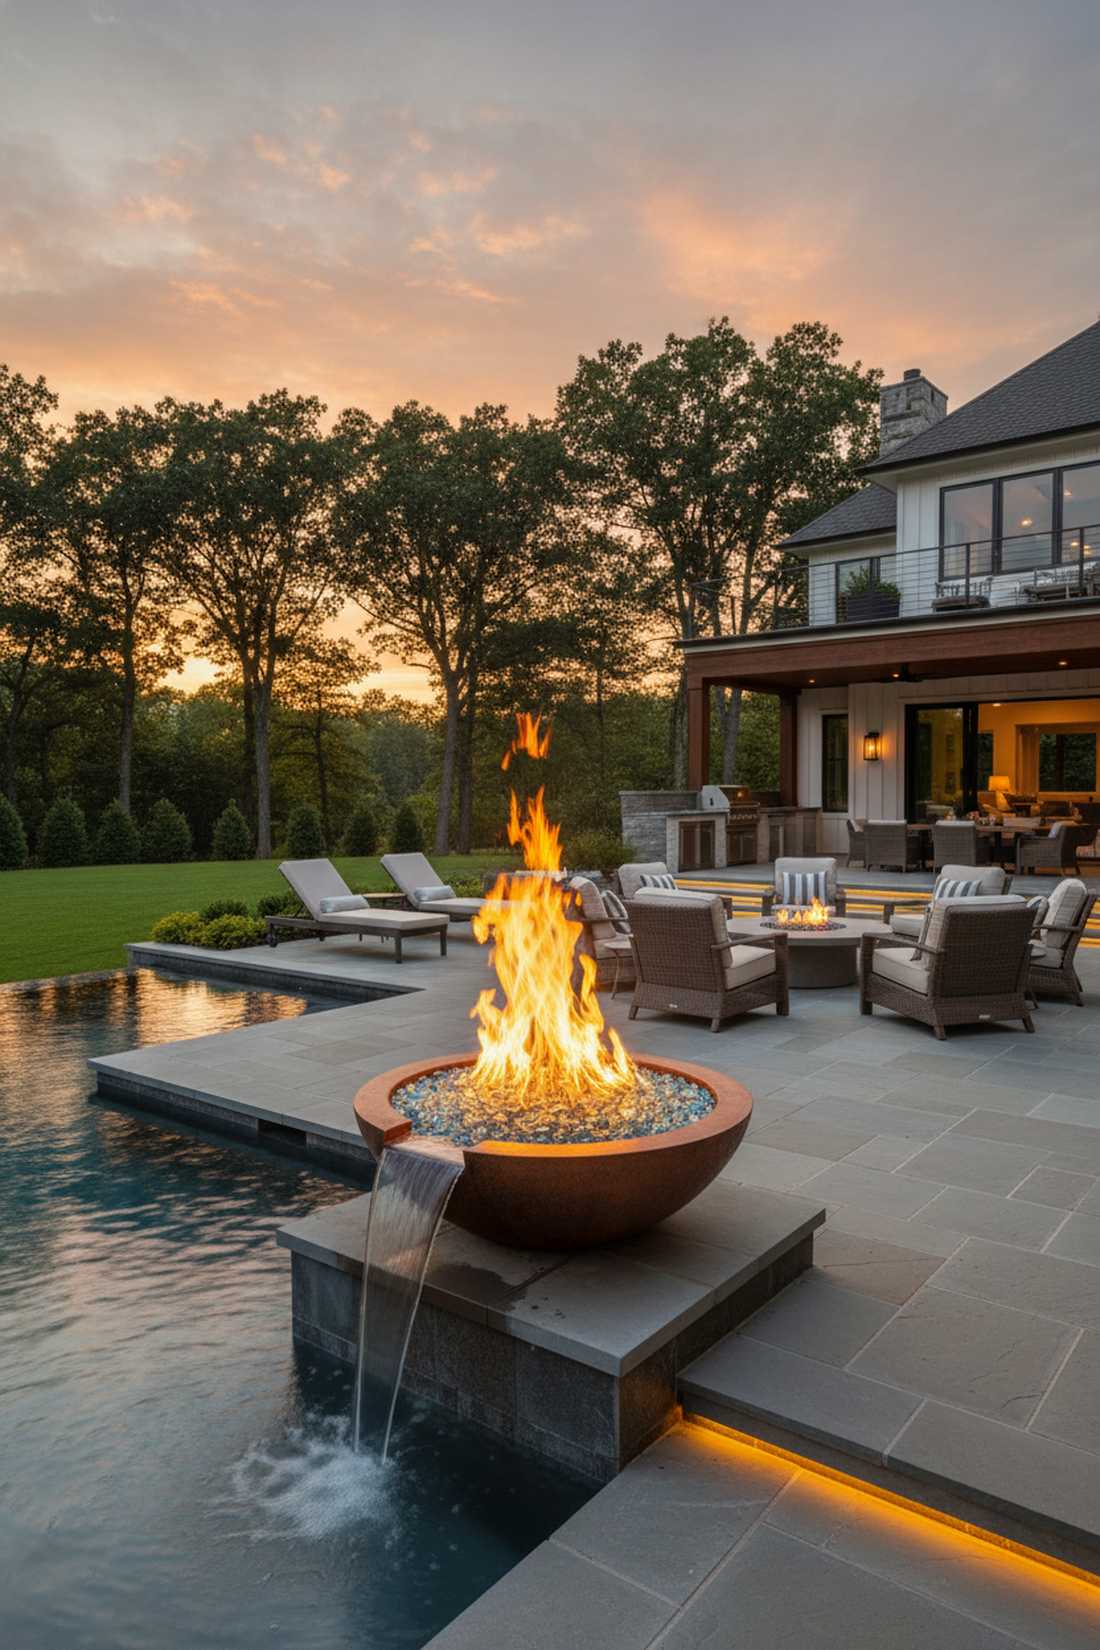
Igniting this feature feels like controlling the elements at a futuristic luxury mega-mansion. A flaming spillway bowl is the ultimate jaw-dropping centerpiece to install on the edge of a pool or patio.
Trying to hack gas lines and water lines together is incredibly dangerous, but buying a certified two-in-one brass burner kit achieves a high-end estate vibe safely. Filling the bowl with reflective tempered fire glass hides the gas ring and makes the flames reflect off the splashing water.
A certified combo feature costs around $600 to piece together. It’s the ultimate show-stopping property upgrade.
- Key Materials: Copper/concrete bowl, combo burner, fire glass
- Vibe / Style: Elemental sensory drama
- Difficulty: Requires professional gas/plumbing connection
- Budget Breakdown: Bowl/Burner: $500 | Fire Glass: $100
- Creator’s Tip: Always use a certified automated shut-off valve so if the splashing water extinguishes the flame, the gas cuts off instantly.
- Smart Sourcing: Certified fire and water combo burner kits and reflective tempered fire glass drops (bulk pack).
Bringing Your Luxury Garden Vision to Life
These 59 luxury garden concepts prove that high-end outdoor architecture is about clever sourcing, smart materials, and exact layouts—not just throwing money at contractors. Whether you are installing a high-CPC UV-coated fountain setup, laying a commercial-grade bluestone terrace, or framing an aluminum pergola, the secret is investing in premium foundational starter kits. Stop settling for cheap seasonal decor that breaks. Pick one of these exact blueprints, source the right bulk materials, and permanently elevate your property’s value into a five-star sanctuary.
Frequently Asked Questions
What defines a luxury garden versus a standard landscape?
A true luxury garden uses architectural geometry, durable premium materials, and permanent structures rather than scattered seasonal plants. The difference is in the sourcing—using items like UV-coated sealants, commercial-grade edging kits, and smart-enabled low voltage transformers elevates a basic yard into a high-end, low-maintenance estate. Premium garden design relies heavily on smart starter kits that ensure precision.
How much maintenance do manicured luxury gardens require?
If you source cheap materials, maintenance is endless. However, by utilizing heavy-duty landscape fabrics, pre-emergent weed granules, and automatic drip irrigation kits, you can cut maintenance by 80%. Formal topiaries require occasional trimming with precision shears, but investing in bulk-pack slow-release fertilizers and automated tech makes upscale garden decor surprisingly hands-off.
Can luxury garden features work in small outdoor spaces?
Absolutely. Small spaces actually benefit the most from luxury garden design because you can afford higher-quality materials for a smaller footprint. Wall-mounted acrylic water blades, vertical climbing rose trellises, and compact fire-bowl kits deliver massive visual impact without taking up floor space. Sourcing a premium starter kit for a small footprint often costs less than a generic overhaul of a massive yard.
What are the best plants for formal manicured garden designs?
For structural perfection, dwarf boxwoods, junipers, and hornbeams are the undisputed champions. To make them look expensive instantly, always use mycorrhizal root stimulator powder when planting and dress the beds with bulk-pack white marble chips or black dyed mulch. This high-contrast aesthetic is the secret weapon of upscale garden decor.
How do I integrate smart technology into luxury garden design?
Skip the cheap solar lights and invest in Wi-Fi enabled landscape transformers and commercial-grade LED starter kits. You can control your entire yard’s ambiance, fountain pumps, and irrigation systems directly from your smartphone. Proper integration involves running burial-grade wire in protective loom tubing so the technology remains entirely invisible while delivering high-end functionality.
What is the typical investment range for luxury garden installations?
If you hire a firm, expect to pay $50,000 to $200,000+. However, by acting as your own project manager and buying commercial starter kits, bulk-pack hardscaping, and pre-cut materials online, you can achieve a $50k aesthetic for under $10k. A luxury outdoor kitchen frame kit might cost $600 compared to a mason’s $6,000 quote, proving that smart sourcing is the ultimate landscaping hack.