Nailing the perfect outdoor lighting gazebo setup instantly elevates your backyard from basic to resort-quality. By leveraging smart structural integration, you conceal messy wires and maximize high-end ambiance on a practical budget. The secret lies in sourcing commercial-grade components that weather the elements while delivering flawless illumination.
Design Snapshot Key Principles
- Concealed Wiring: Route cables through beam chases, post interiors, and roofline channels to eliminate visible cords
- Layered Zones: Combine overhead, perimeter, and task lighting for functional depth and visual interest
- Weatherproof Components: Specify IP65-rated fixtures and junction boxes to withstand moisture and UV exposure
- Strategic Placement: Position lights to highlight structural lines while avoiding glare and maximizing coverage
Integrated Gazebo Roof Systems That Blend Form and Function
Roof-mounted lighting for gazebos requires precise planning during construction or renovation to achieve seamless integration. The following methods embed fixtures within structural elements, creating clean profiles that enhance architecture rather than compete with it.
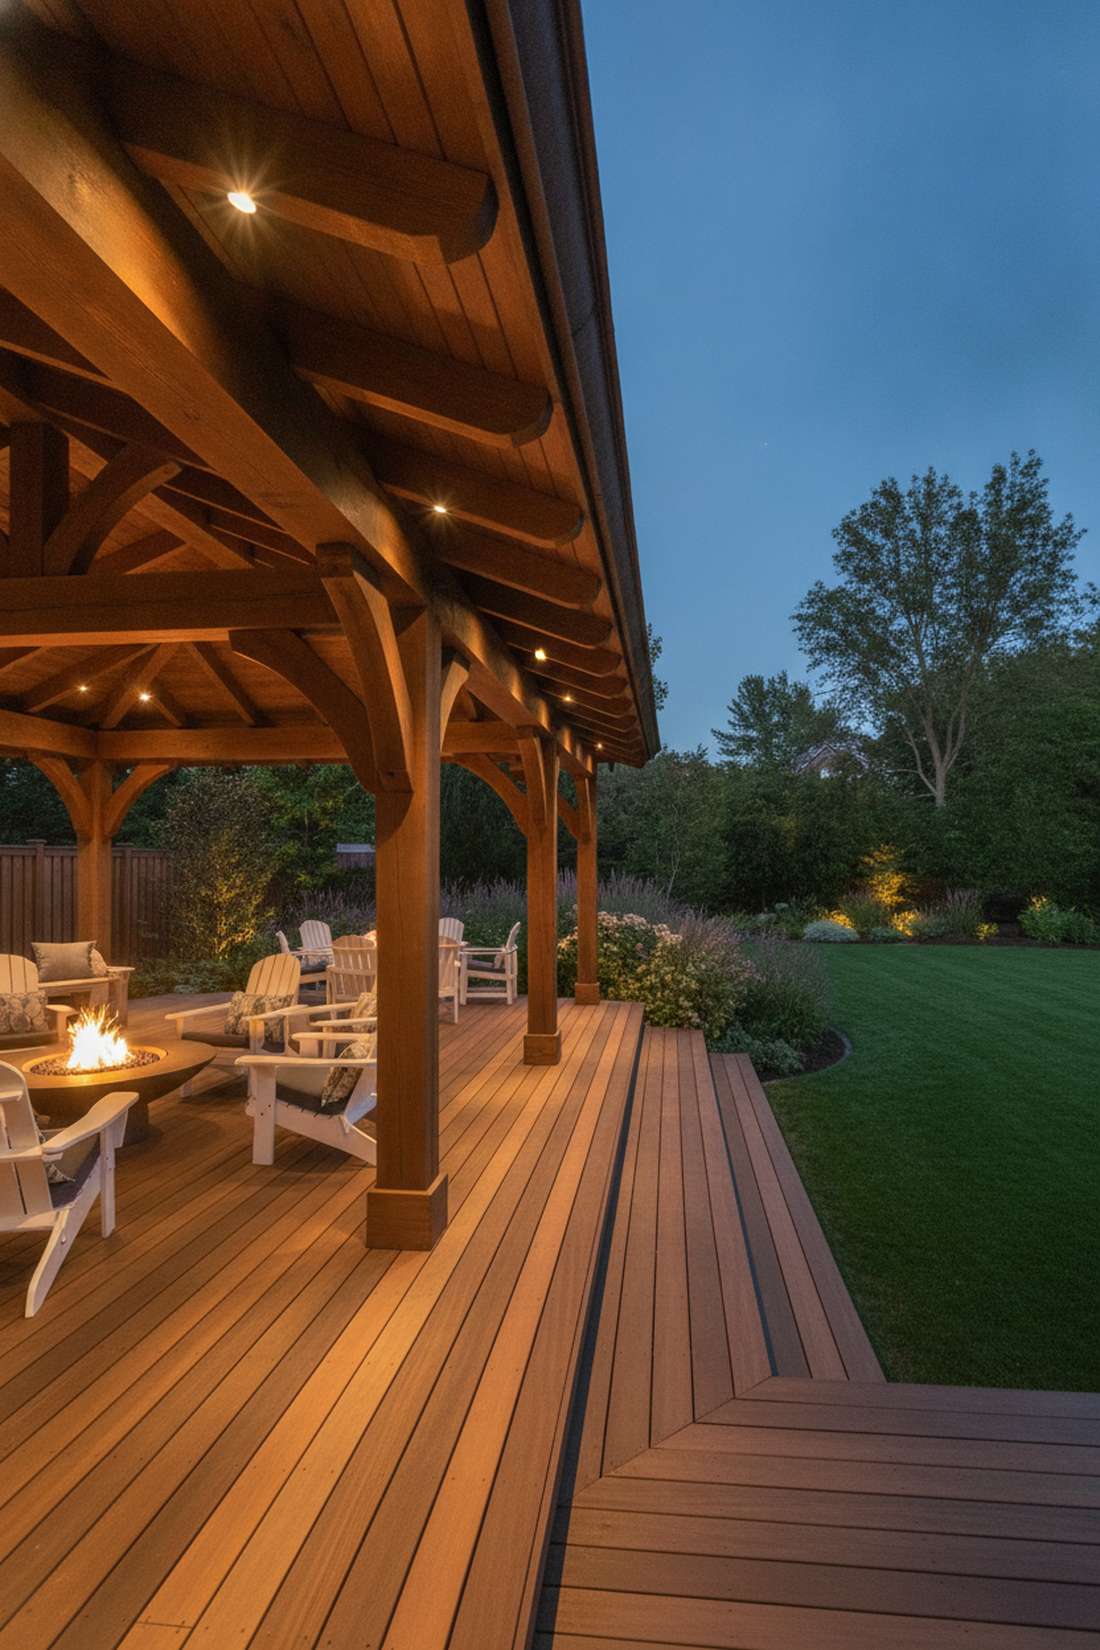
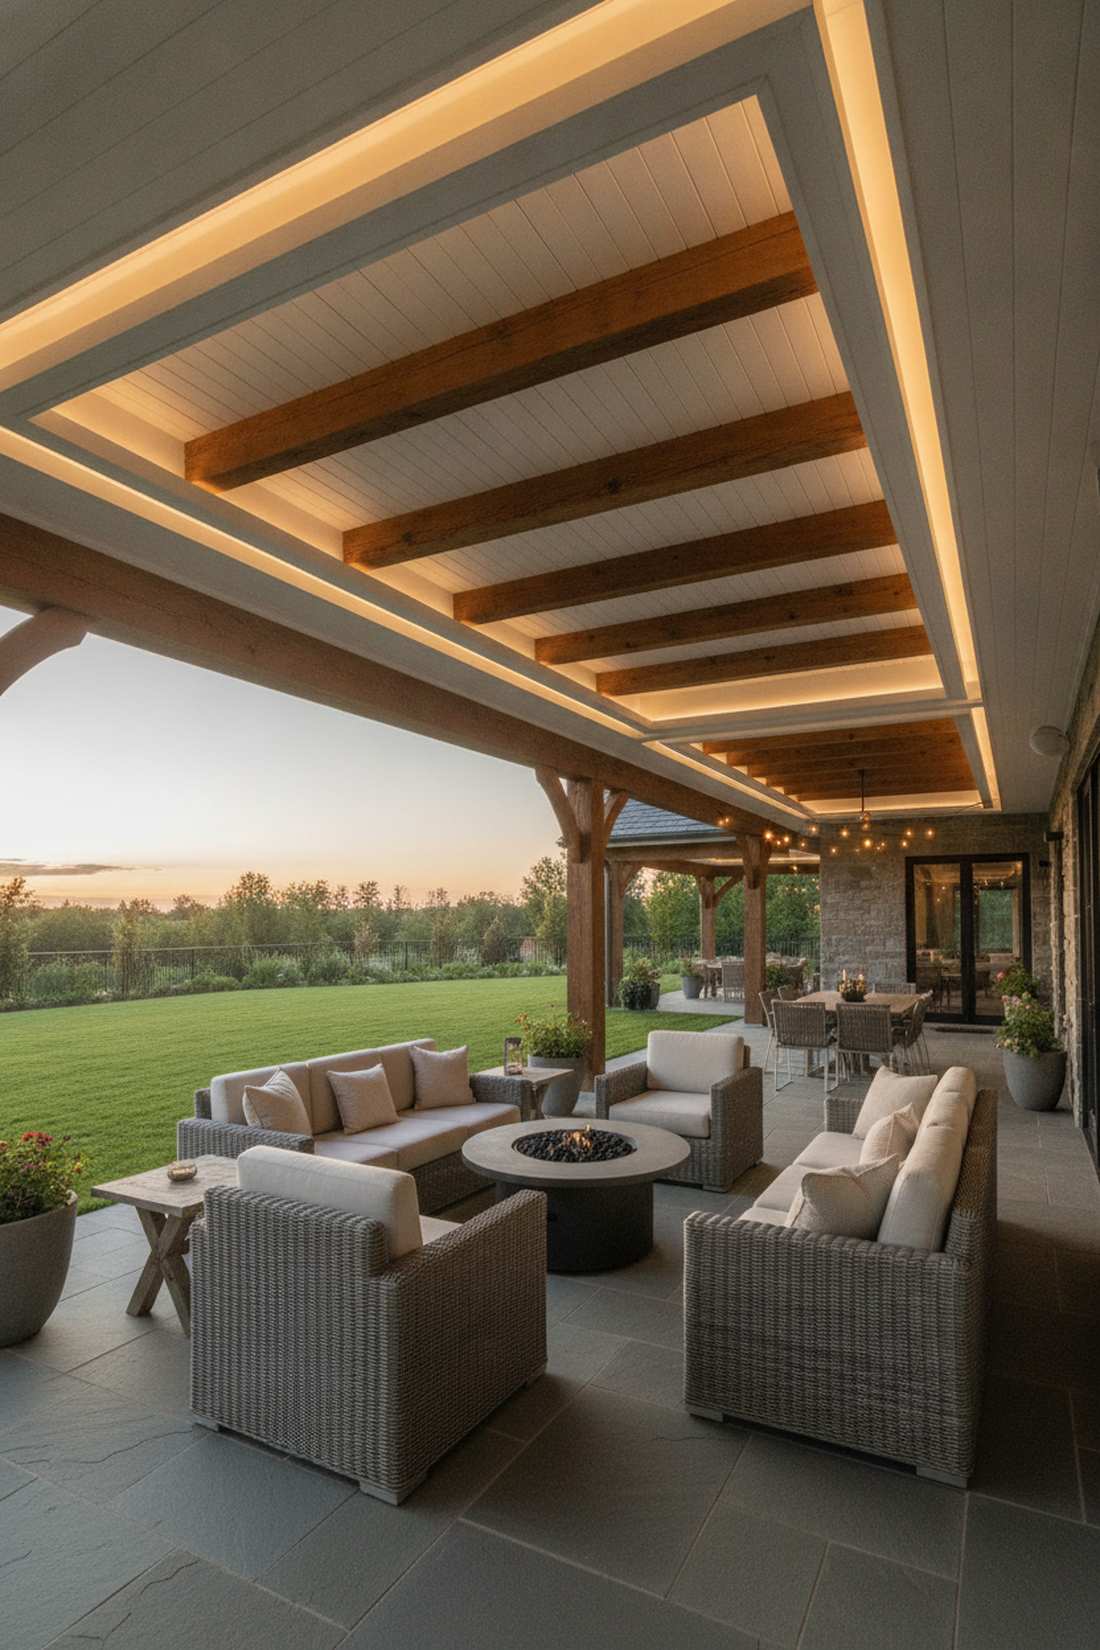
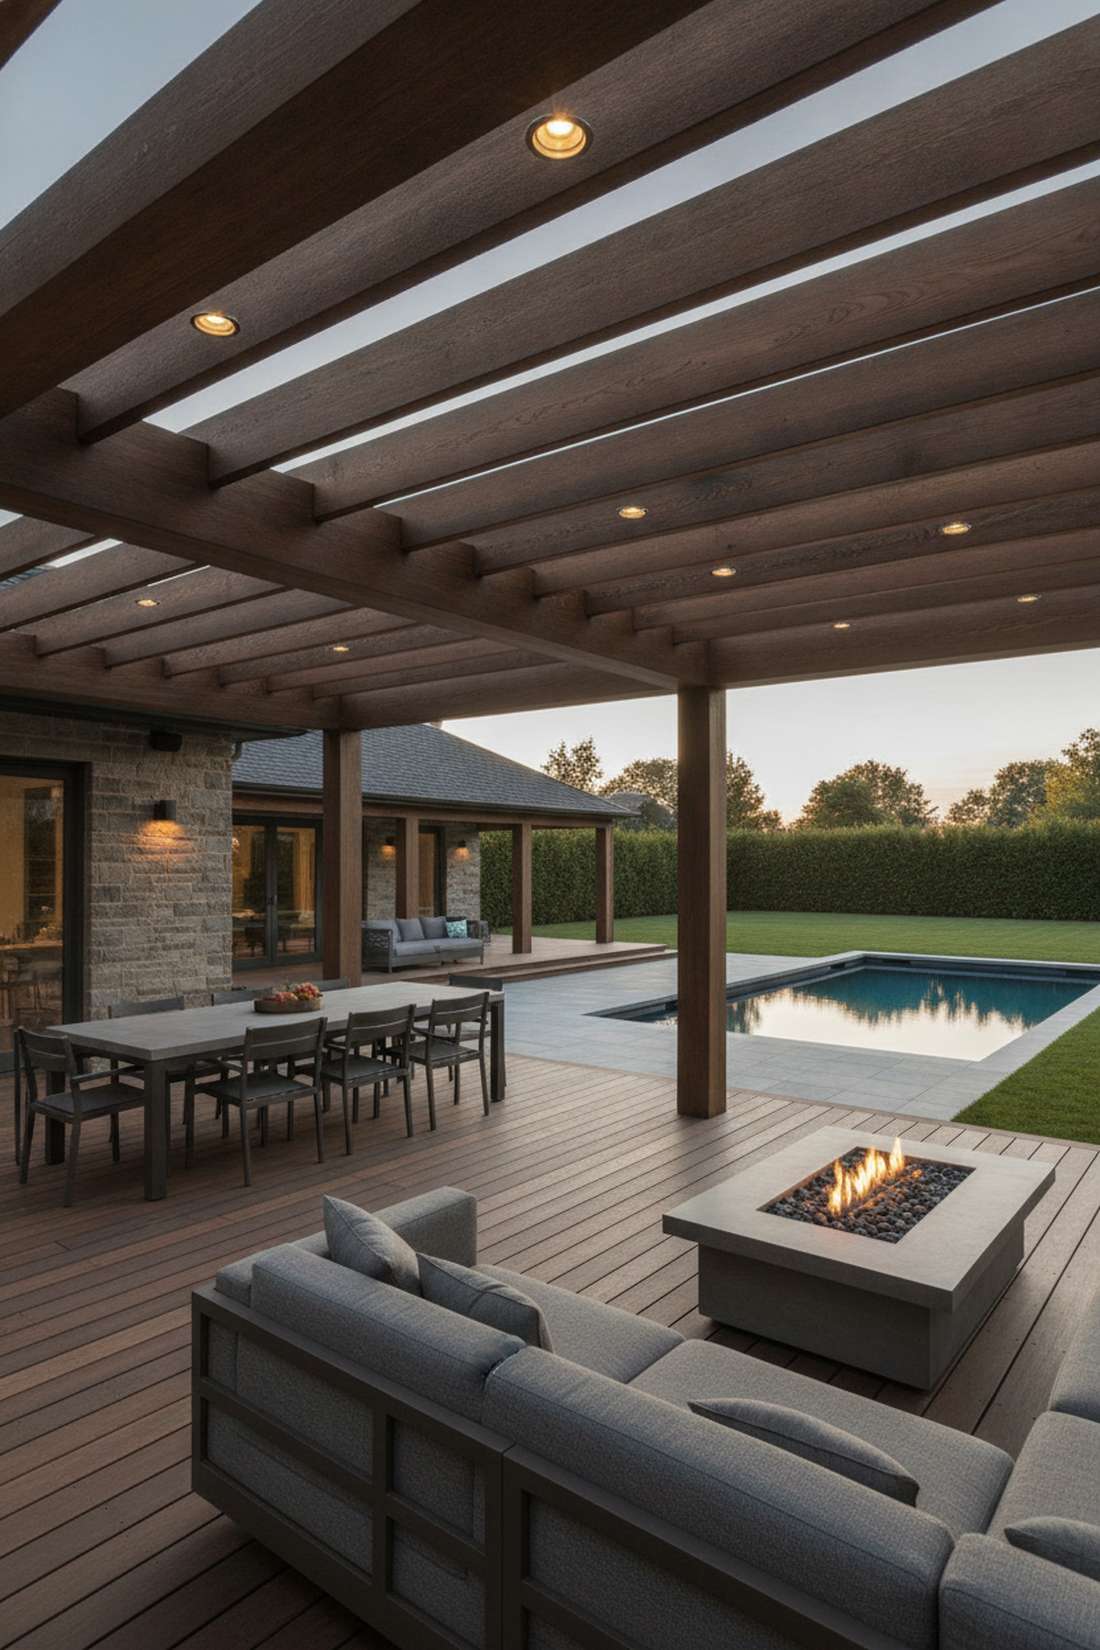
1. Recessed Rafter Channel Lighting
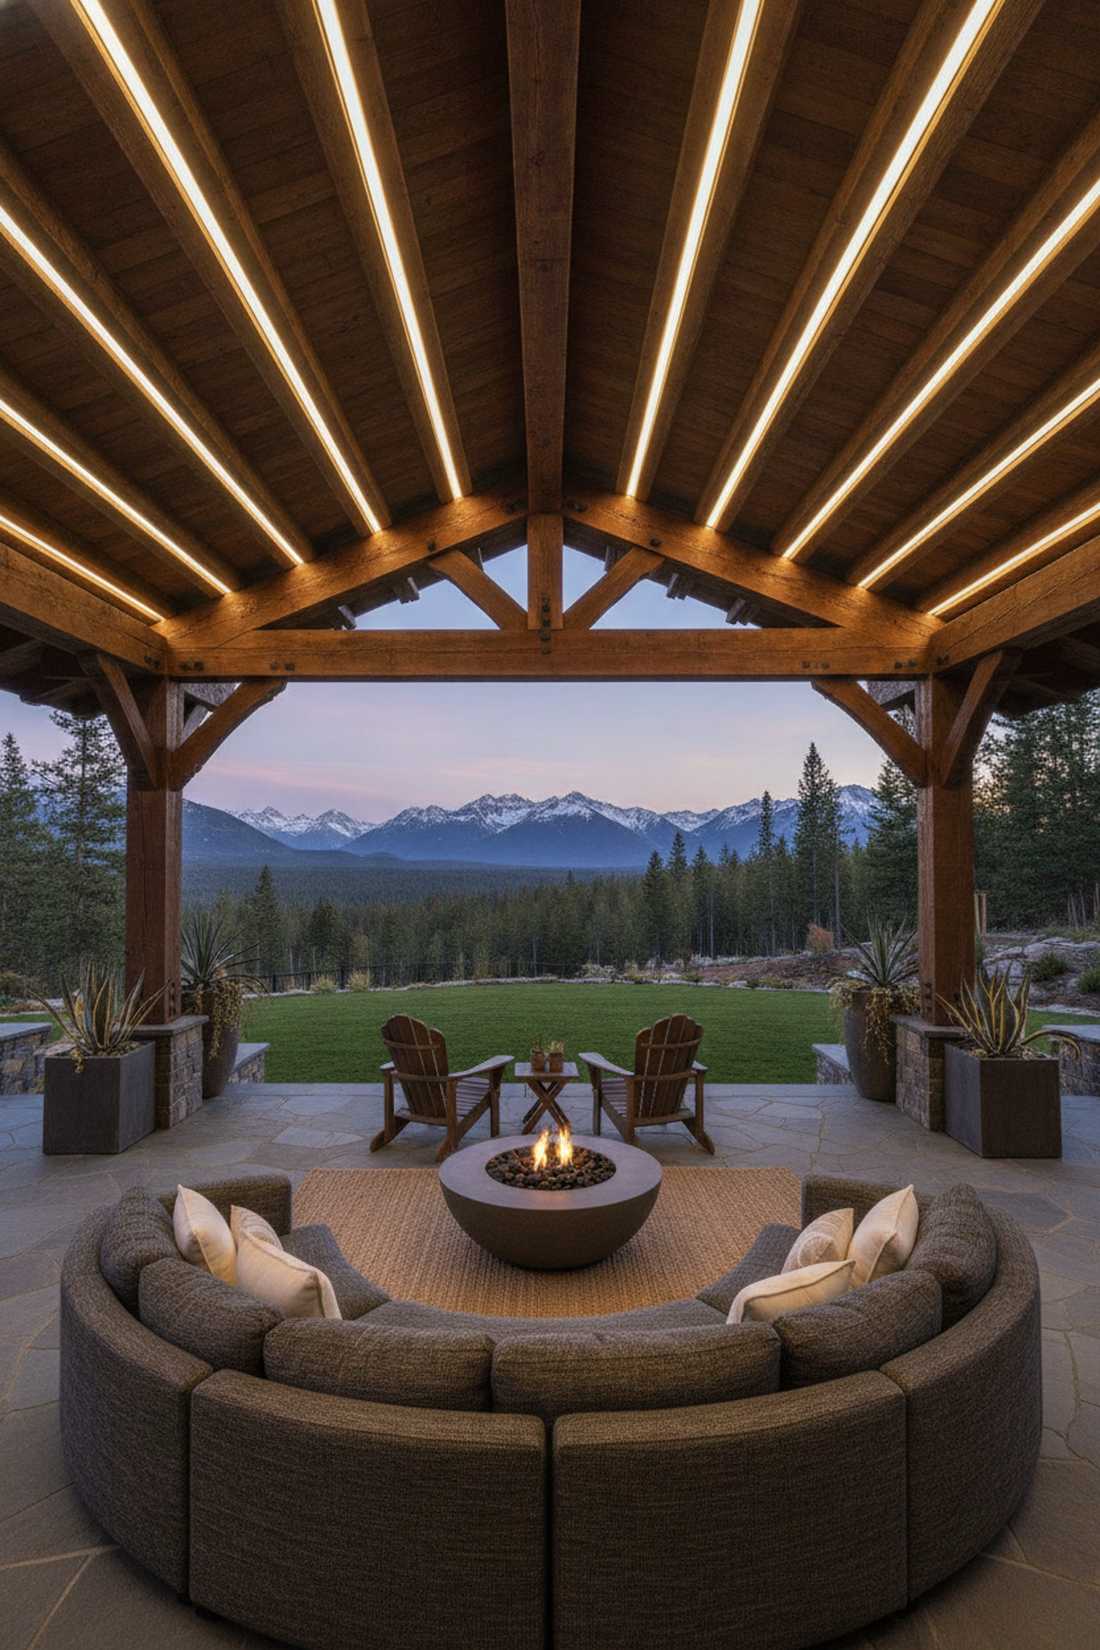
Feels like a luxury mountain resort patio. Concealed rafter lighting channels are perfect for illuminating the seating area underneath wooden pavilions without exposed fixtures.
While many homeowners just staple cheap string lights up top, routing an aluminum track into the wood delivers a surprisingly premium look. Utilizing proper outdoor lighting roof components completely transforms the overhead architecture into a seamless glowing canopy.
You can easily pull this off for around $40–$70 per beam. Save this to your DIY weekend backyard board for later!
- Key Materials: Waterproof aluminum extrusion profiles, low-voltage tape lights
- Vibe / Style: Modern architectural luxury
- Difficulty: Intermediate carpentry required
- Budget Breakdown: Tracks: $35 | Light Strips: $25.
- Creator’s Tip: Use frosted diffusers to eliminate harsh LED dot reflections on the floor below.
- Smart Sourcing: Grab UV-coated outdoor LED channel systems (bulk pack) and pre-cut weatherproof connectors to save assembly time.
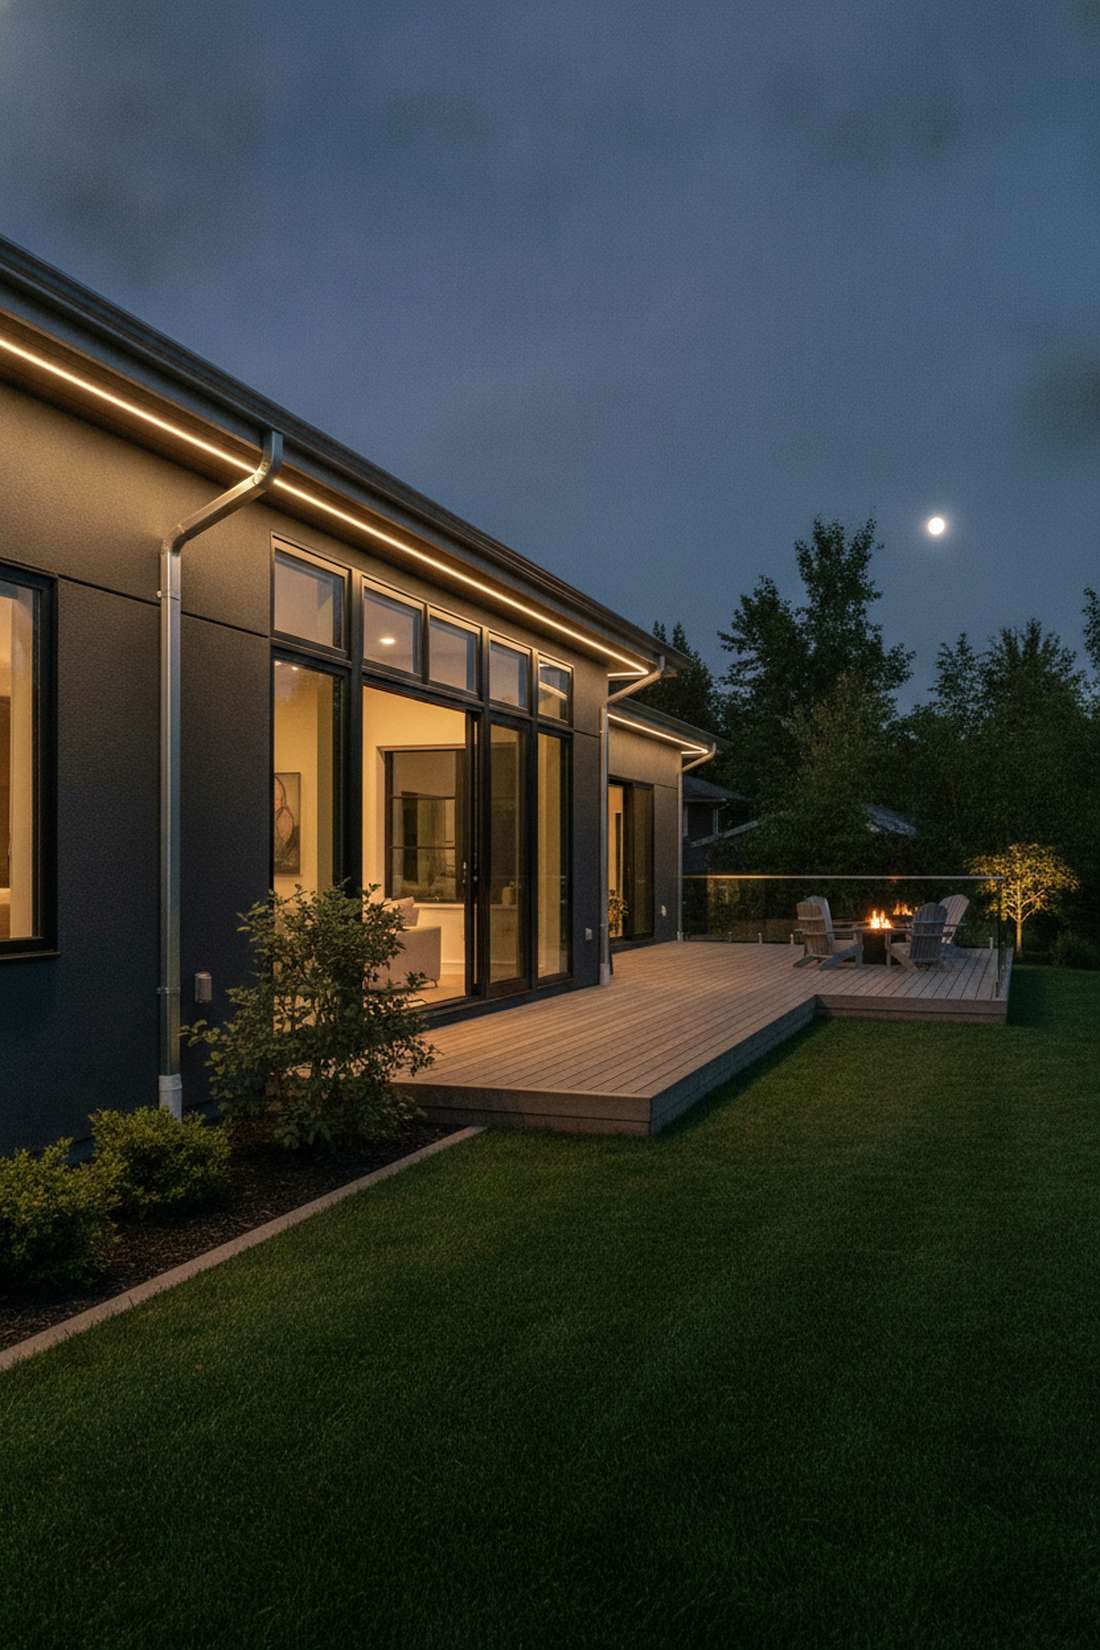
2. Perimeter Crown Molding Uplights
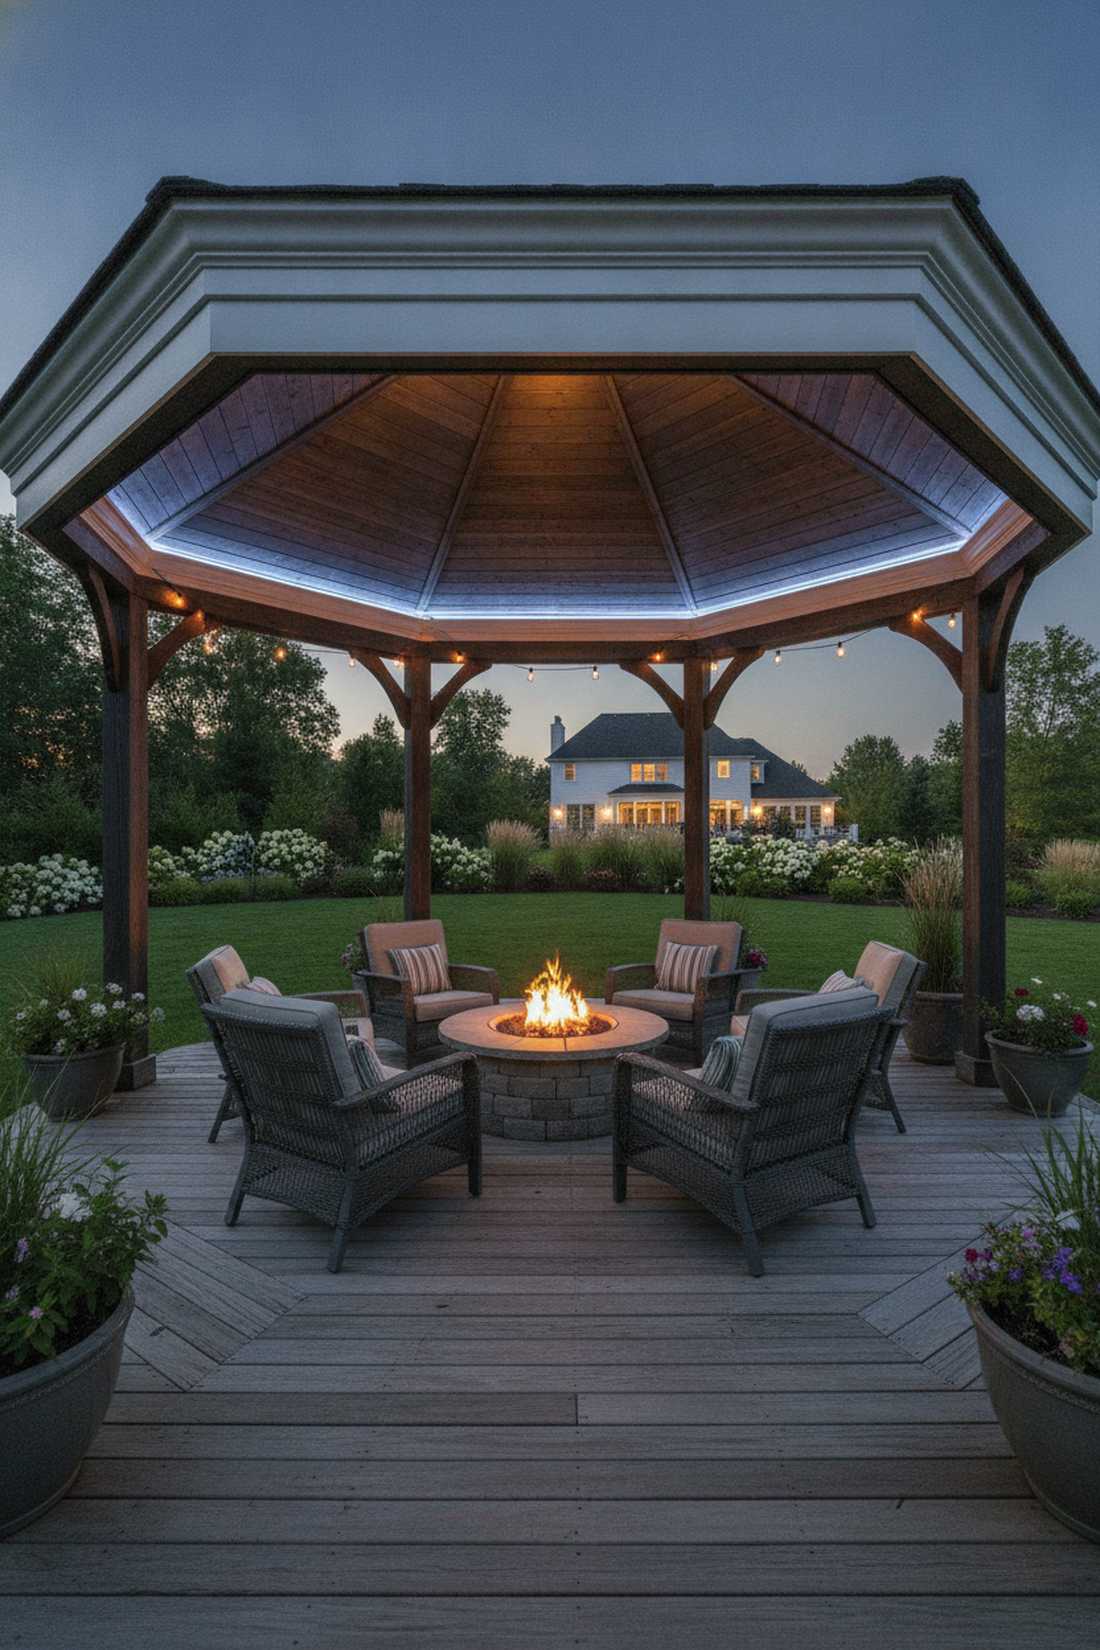
Creates a floating, ethereal glow that feels almost magical above your head. Perimeter indirect roof uplighting works exceptionally well for octagonal and hexagonal backyard retreats.
A heavily debated trick is using interior trim outdoors, but heavily sealing a robust crown molding gives a designer-level finish for pennies. Slipping premium smart LED kits behind the setback tricks the eye into thinking the roof is floating.
This layout usually costs between $80 and $120 total. It’s a highly recommended hack for adding vertical depth to squat structures.
- Key Materials: PVC outdoor-rated crown molding, exterior-grade adhesive
- Vibe / Style: Elegant evening sanctuary
- Difficulty: Beginner-friendly trim work
- Budget Breakdown: Trim: $50 | Lighting: $40.
- Creator’s Tip: Cap the top gap with clear silicone to completely block out nesting insects.
- Smart Sourcing: Pick up a smart RGBW exterior light ribbon (starter kit) and marine-grade clear sealant.
3. Structural Beam Chase Integration
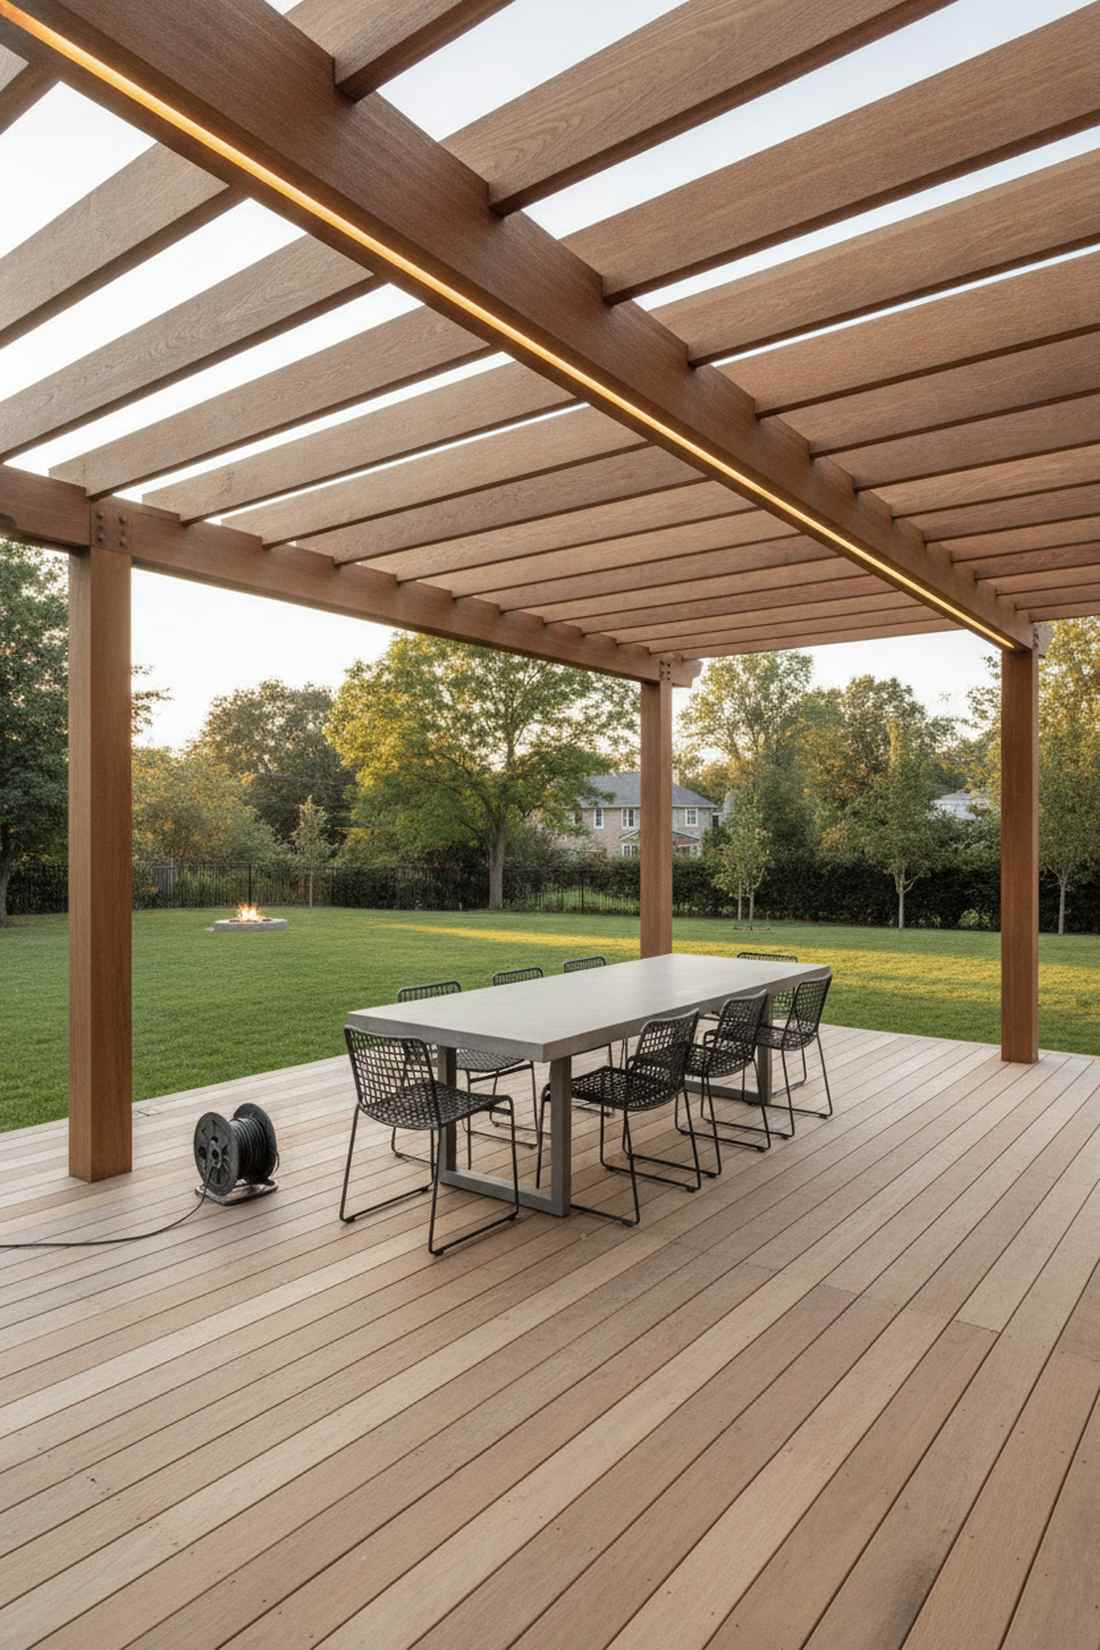
Straight out of a high-end architectural digest magazine. Hidden structural beam lighting is the ultimate flex for minimalist outdoor dining spaces.
Instead of ugly plastic conduits, hiding the landscape lighting transformers and wires inside milled hollows looks far more expensive than it is. It creates completely uninterrupted sightlines that high-end contractors usually charge thousands to achieve.
Expect to spend roughly $100 in specialized router bits and wiring. Pin this if you’re planning a from-scratch pergola build.
- Key Materials: Wood router, low-voltage cabling, quick-connect terminals
- Vibe / Style: Ultra-clean contemporary
- Difficulty: Advanced fabrication
- Budget Breakdown: Wiring: $30 | Connectors: $25 | Router bit: $45.
- Creator’s Tip: Always install weather-tight quick disconnects at the joints so you can disassemble the structure later if needed.
- Smart Sourcing: Use heavy-duty direct burial landscape wire (spool) and waterproof quick-splice wire nuts.
4. Cupola Lantern Conversion
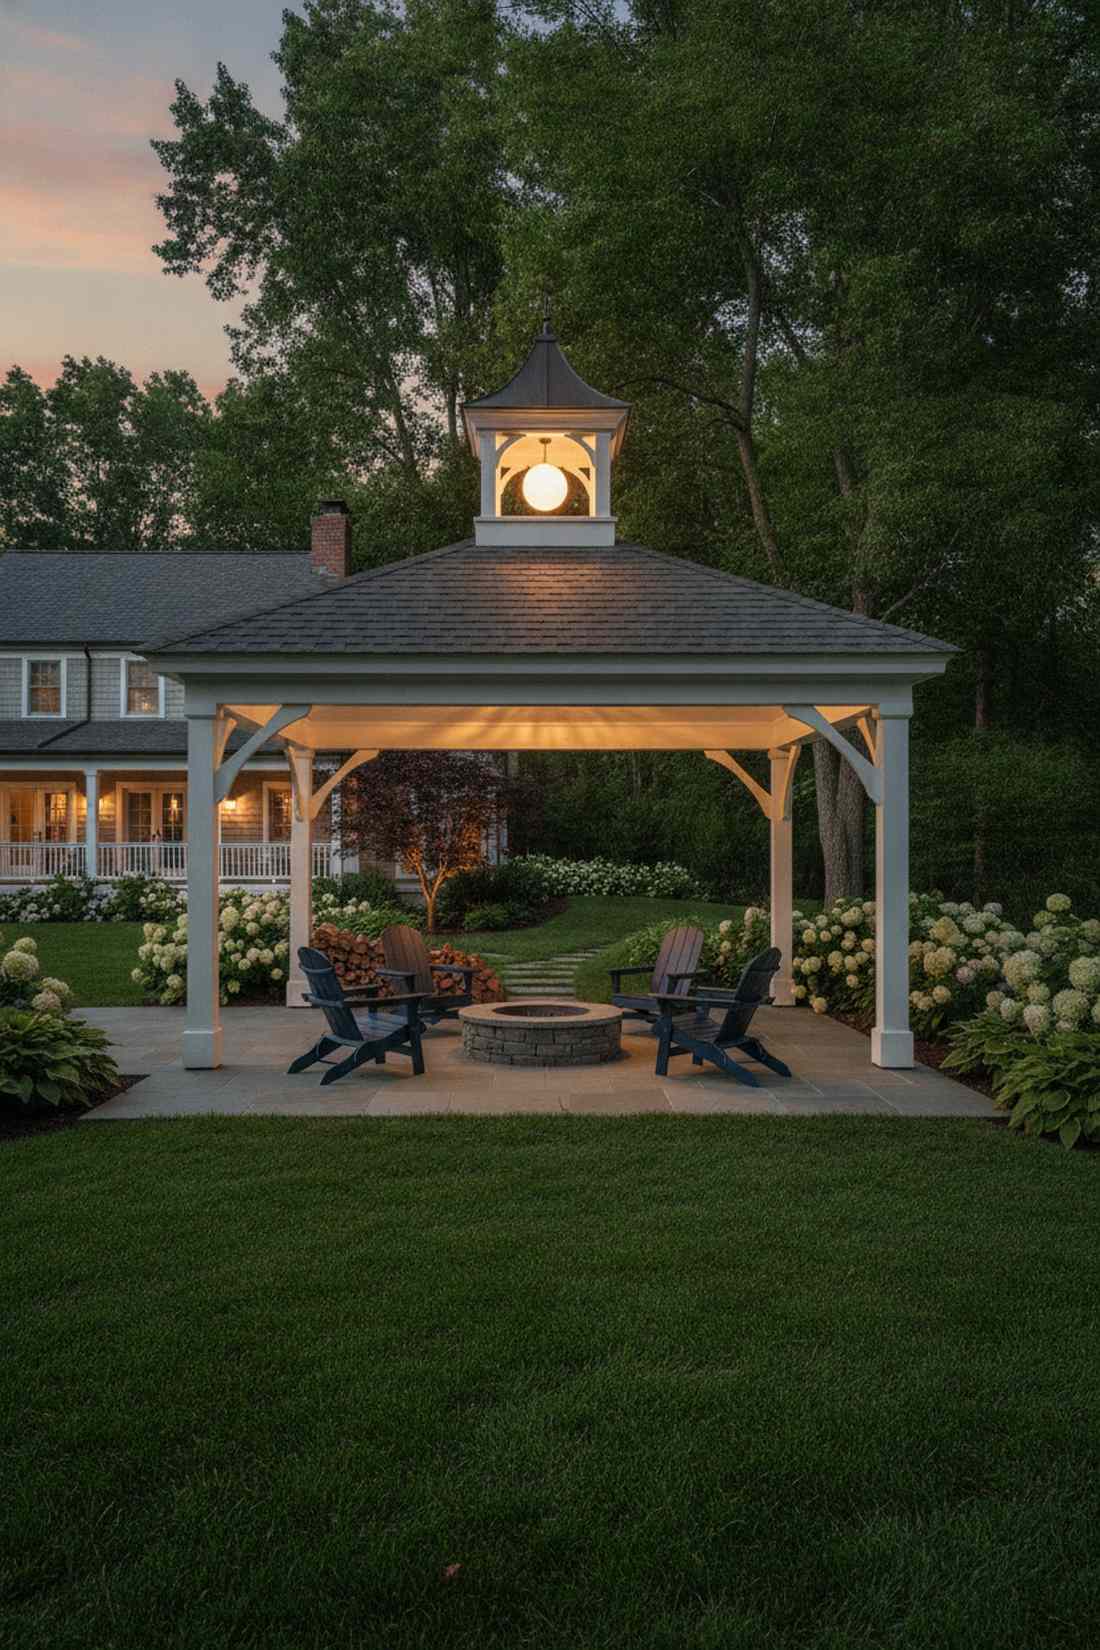
Radiates warmth like a historic lighthouse welcoming you home. A central cupola lantern installation anchors the entire space and is perfect for traditional backyard pavilions.
Most overlook the vented top section entirely, but dropping a high-output fixture inside creates an optical illusion of a massive glowing lantern. Hardwiring a frosted outdoor pendant kit inside masks the bulb while throwing brilliant radial shadows across the lawn.
Hardware and fixtures will run you about $150–$200.
- Key Materials: Damp-rated pendant canopy, frosted globe, rigid conduit
- Vibe / Style: Classic estate charm
- Difficulty: Professional electrical routing
- Budget Breakdown: Fixture: $110 | Wiring/Box: $40.
- Creator’s Tip: Use a high-lumen warm white LED (2700K) to replicate the cozy feel of old incandescent bulbs.
- Smart Sourcing: Source a damp-rated exterior pendant housing and an LED filament bulb (shatterproof pack).
Most people get this completely wrong and leave their structures pitch black… until they try the exact glowing geometry coming up next.
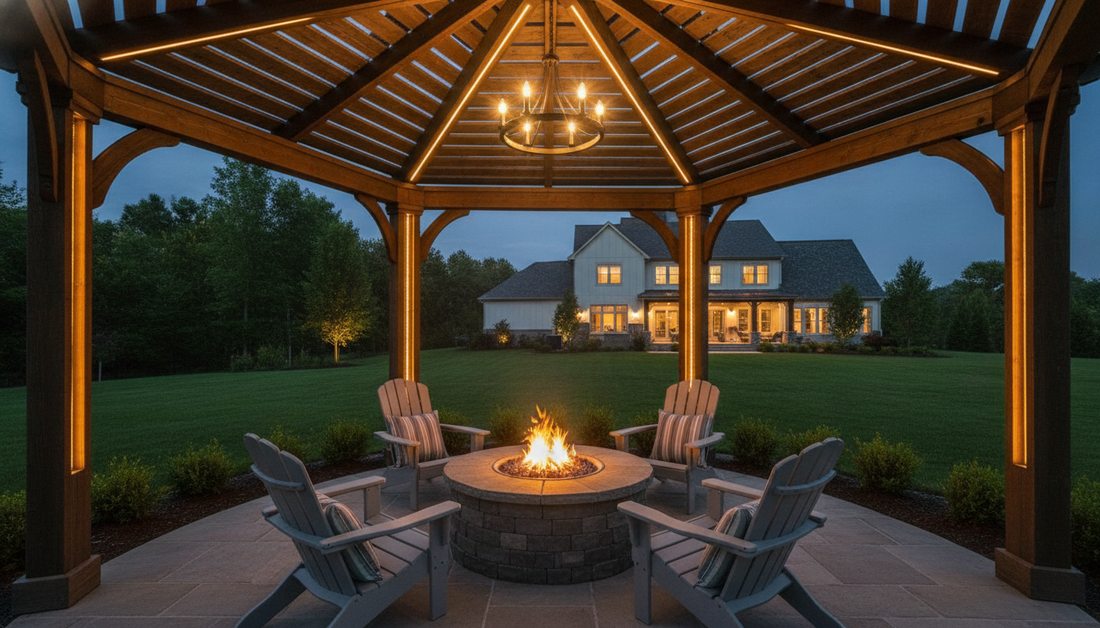
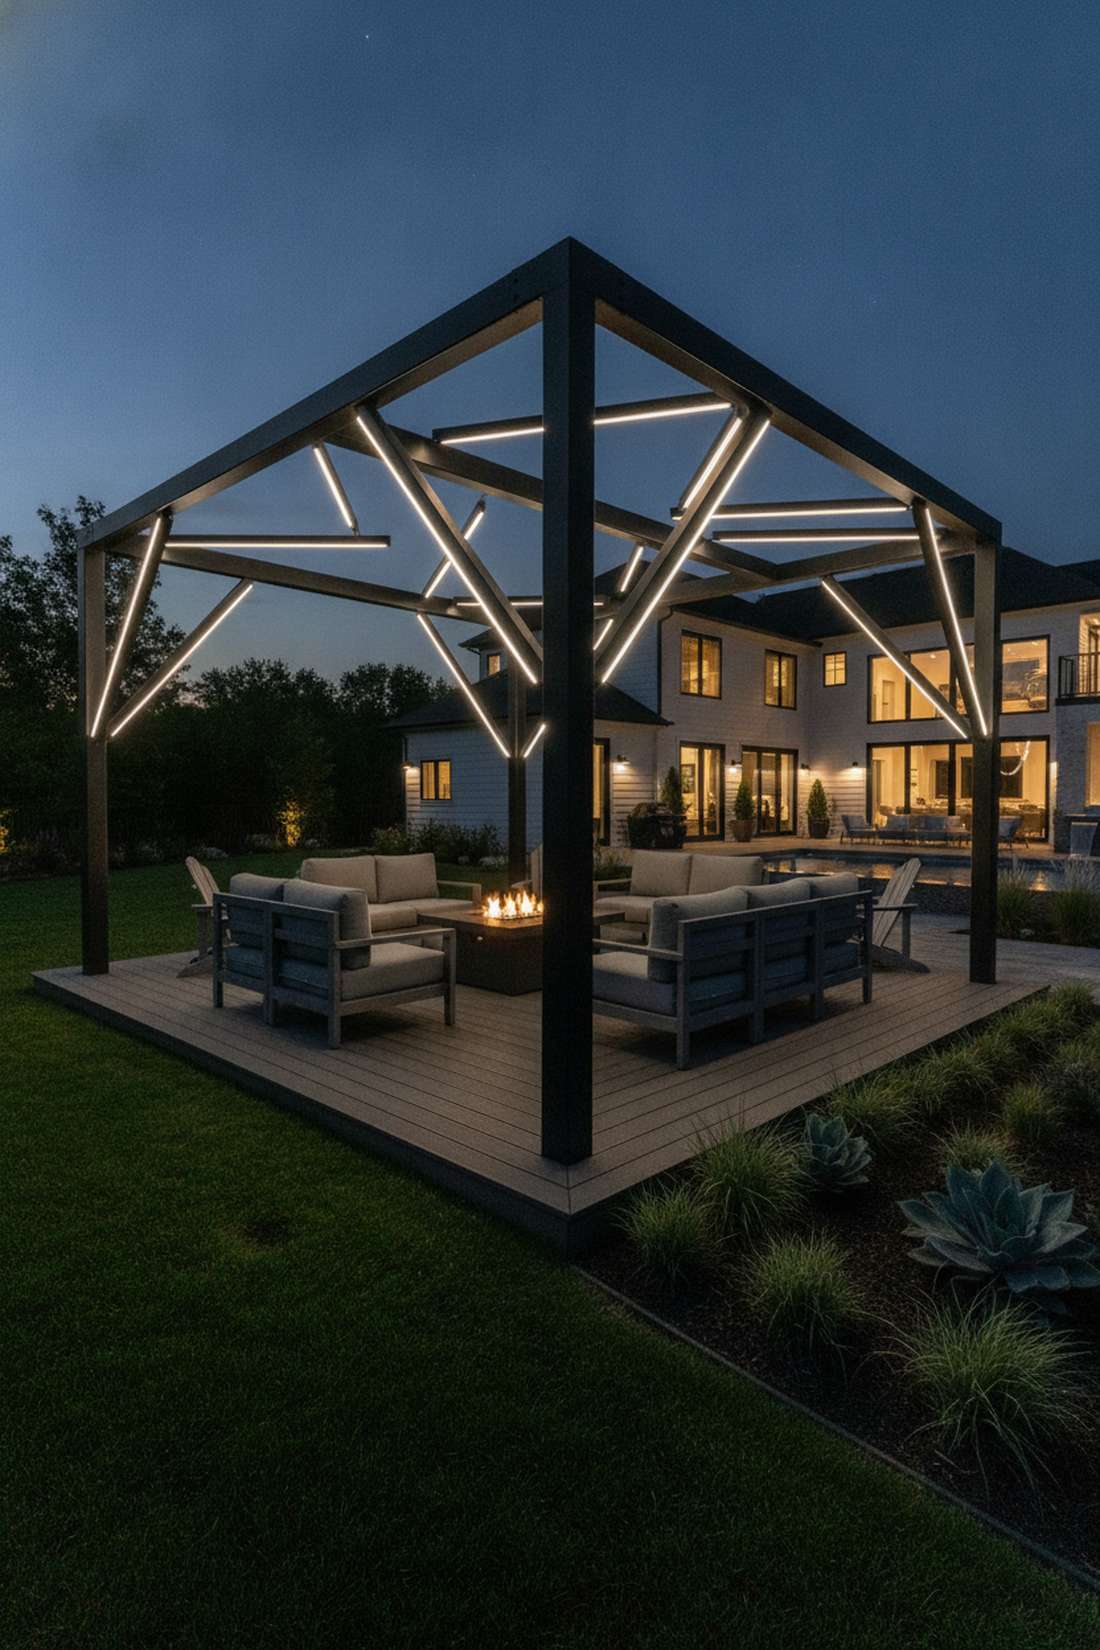
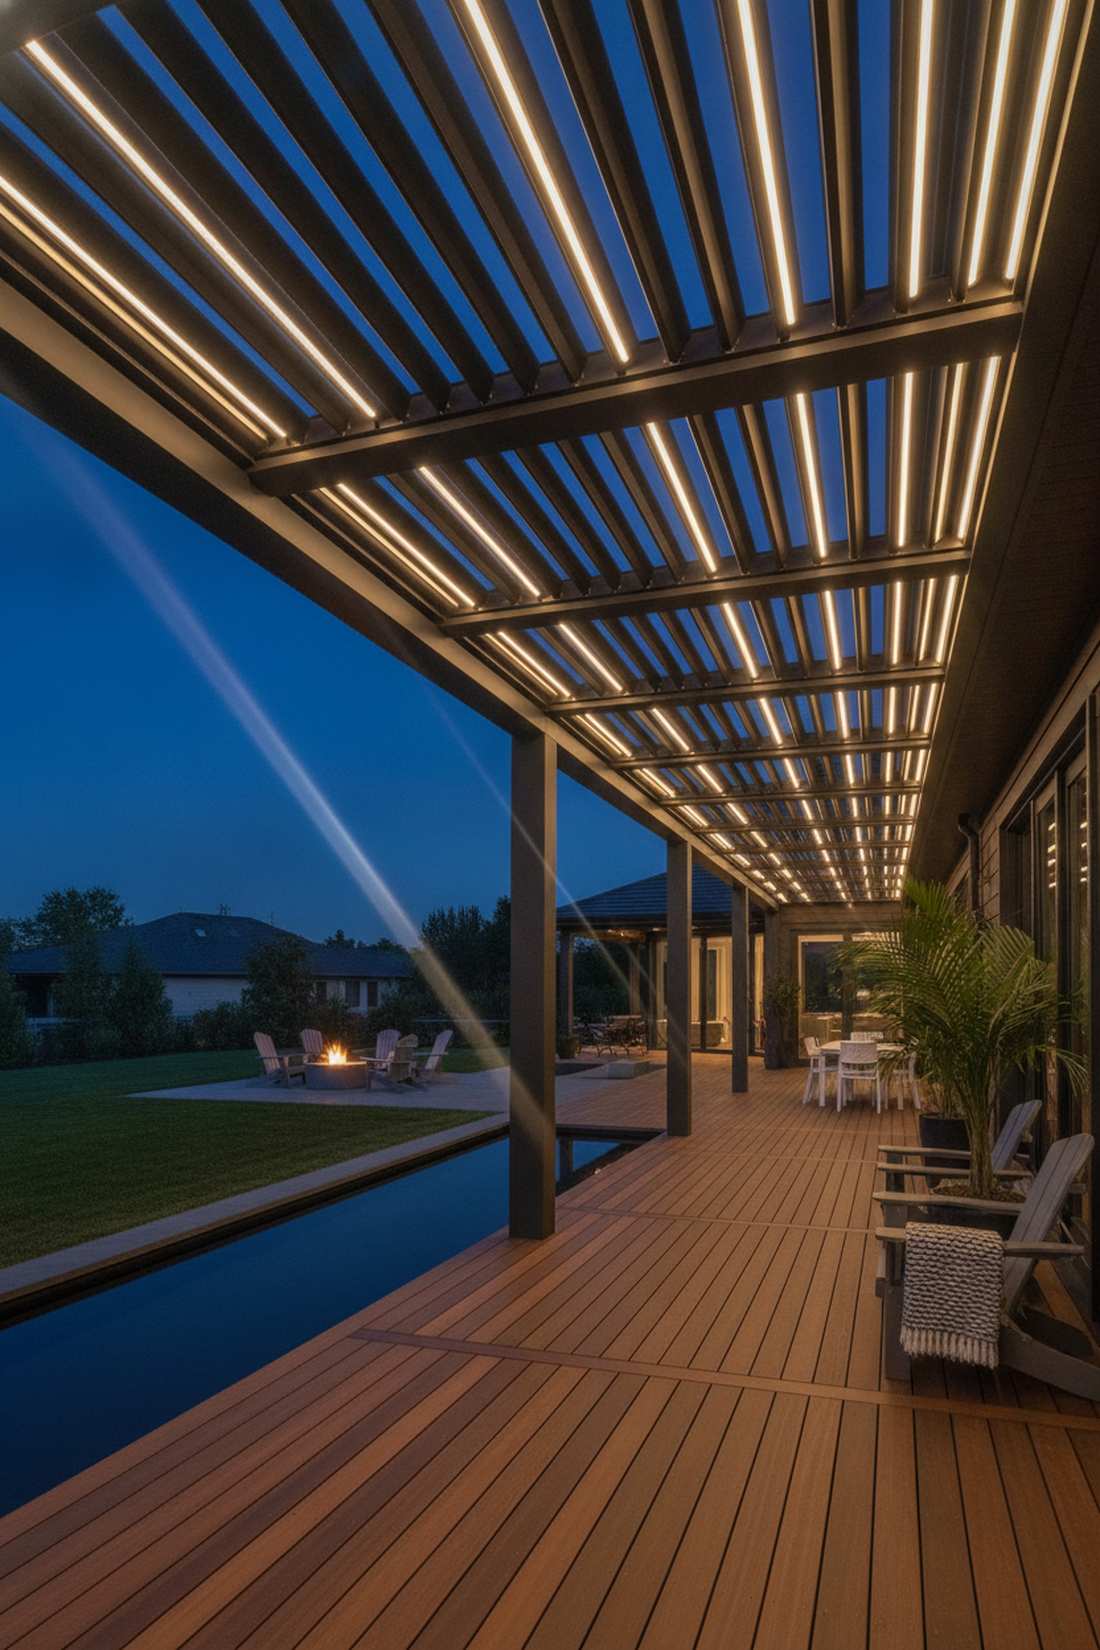
5. Radial Spoke Downlighting
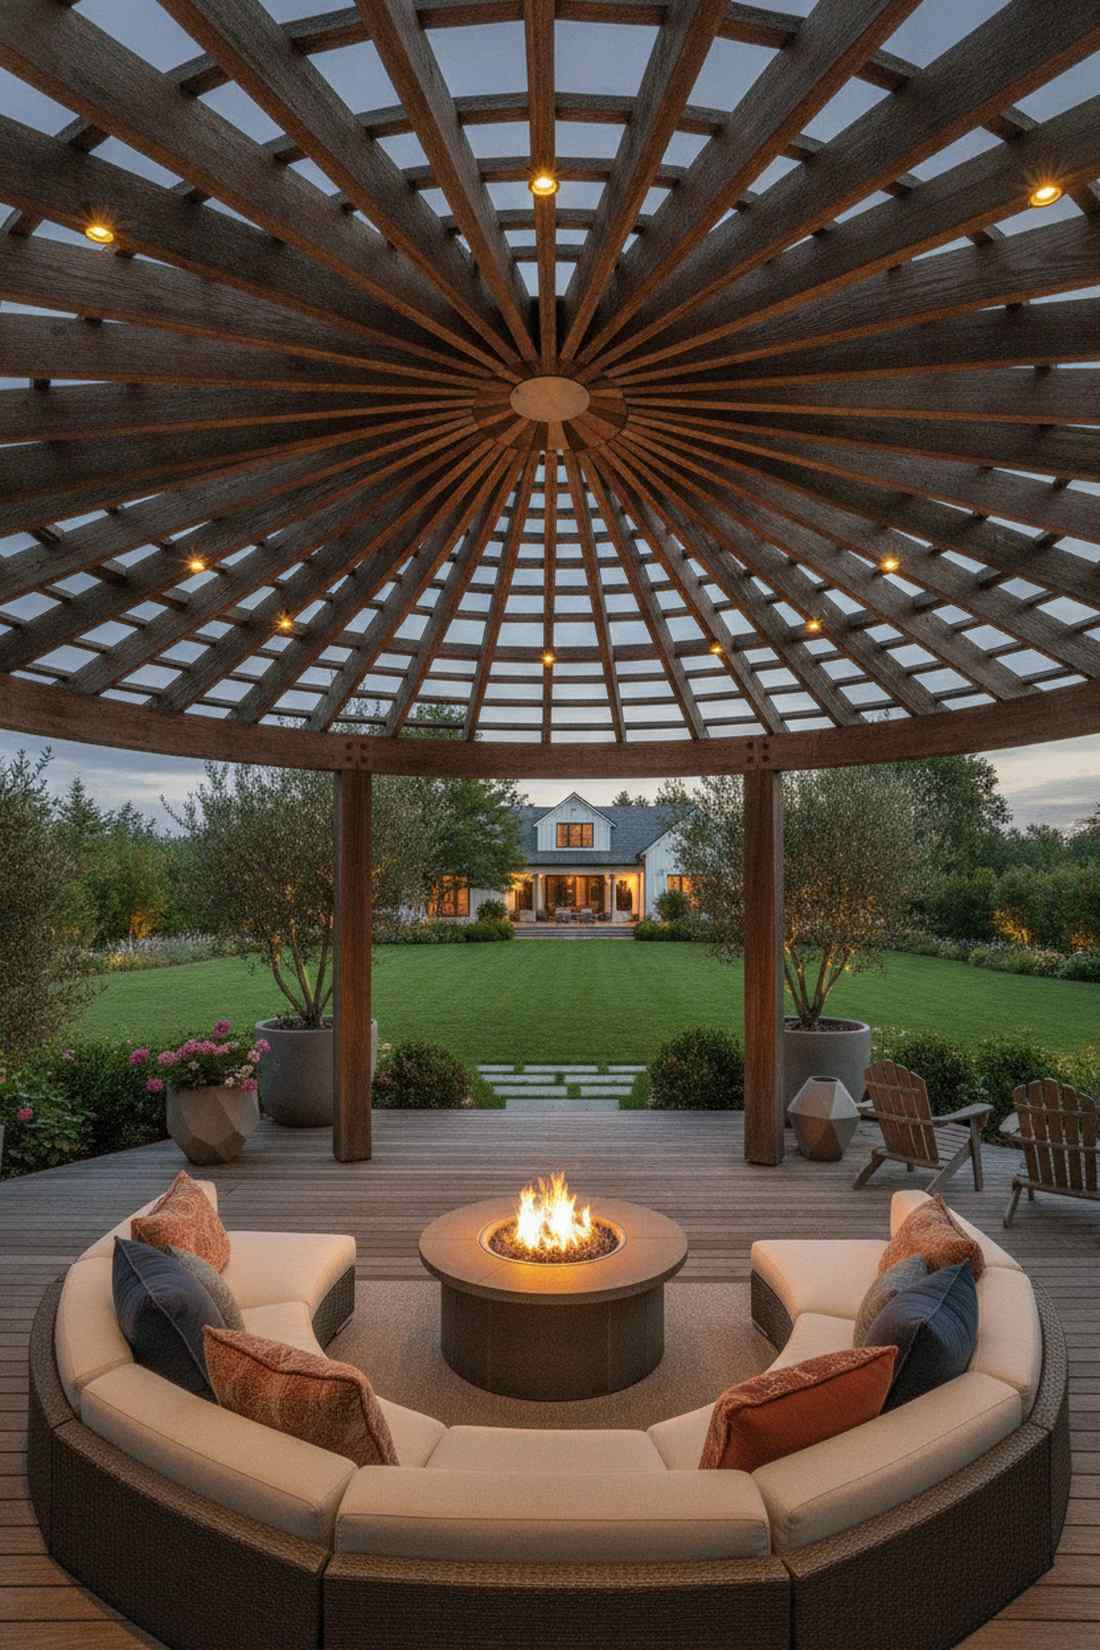
Feels like sitting beneath an illuminated geometric spiderweb. Architectural spoke downlighting is visually striking and serves as brilliant task lighting for circular seating arrangements.
While a central chandelier is standard, mounting compact LED hardscape lights along every rafter delivers a dynamic, 360-degree theater effect. It instantly upgrades the basic structural skeleton into the main focal point of the yard.
You can achieve this complex look for around $120–$180. Save this concept to your outdoor entertaining board!
- Key Materials: 3-watt LED puck lights, central multi-tap transformer
- Vibe / Style: High-end custom resort
- Difficulty: Moderate wiring patience
- Budget Breakdown: Pucks: $90 | Hub/Wiring: $45.
- Creator’s Tip: Angle the pucks slightly off-center to wash the wood grain rather than pointing them straight down into guests’ eyes.
- Smart Sourcing: Buy low-voltage brass deck pucks (multi-pack) and a weatherproof central hub splitter.
6. Solar Panel Roof Integration
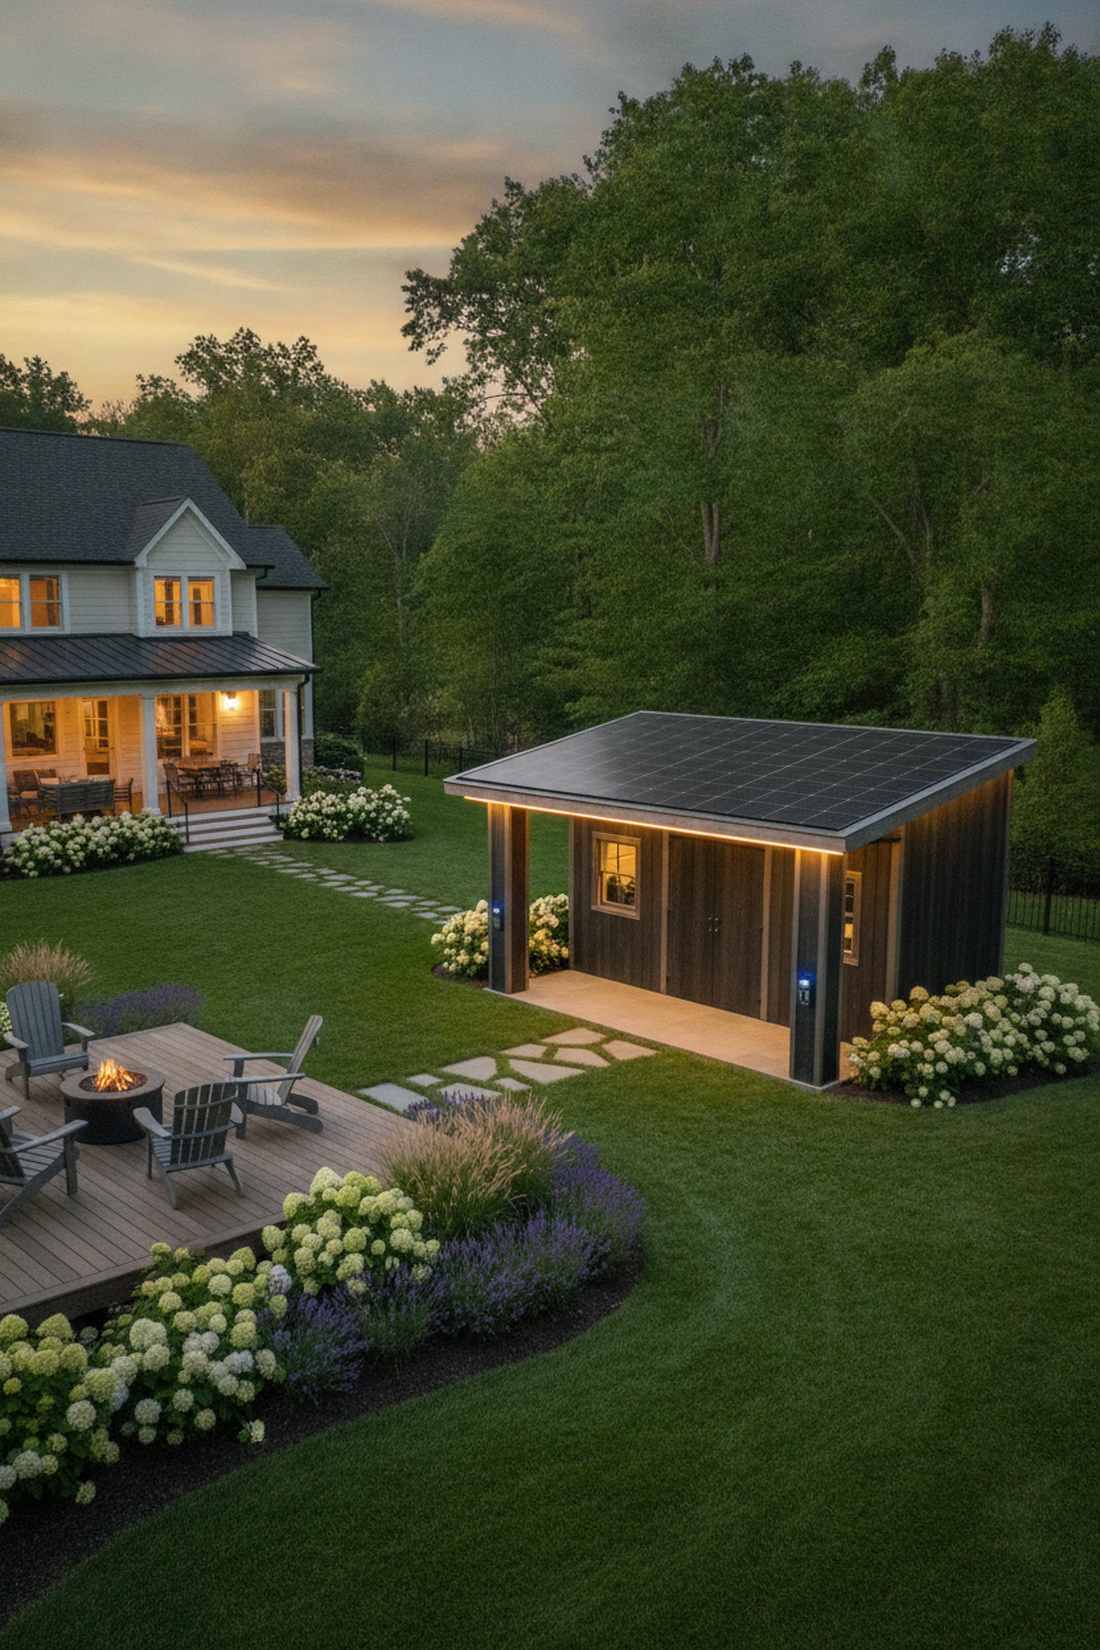
Total off-grid wizardry that feels incredibly futuristic. Thin-film solar roof lighting is the ultimate solution for remote garden structures placed far from main house power lines.
Trenching electrical lines can destroy a yard, but utilizing modern thin-film technology completely skips the landscaping nightmare. Hiding high-capacity lithium battery banks inside the hollow support columns ensures you have commercial-level brightness without the ugly commercial panels.
A full solar kit integration will cost roughly $200–$350.
- Key Materials: Flexible solar panels, charge controller, deep cycle battery
- Vibe / Style: Eco-modern stealth
- Difficulty: Intermediate electronics
- Budget Breakdown: Panels: $150 | Controller/Battery: $120.
- Creator’s Tip: Always over-size your battery capacity by 20% to account for cloudy winter days.
- Smart Sourcing: Look for flexible monocrystalline solar panels (adhesive back) and an IP68-rated solar charge controller kit.
Pergola Beam and Post Lighting Techniques for Layered Ambiance
Designers leverage outdoor lighting pergola structures as vertical and horizontal planes for strategic fixture placement. These methods balance architectural emphasis with practical illumination needs.
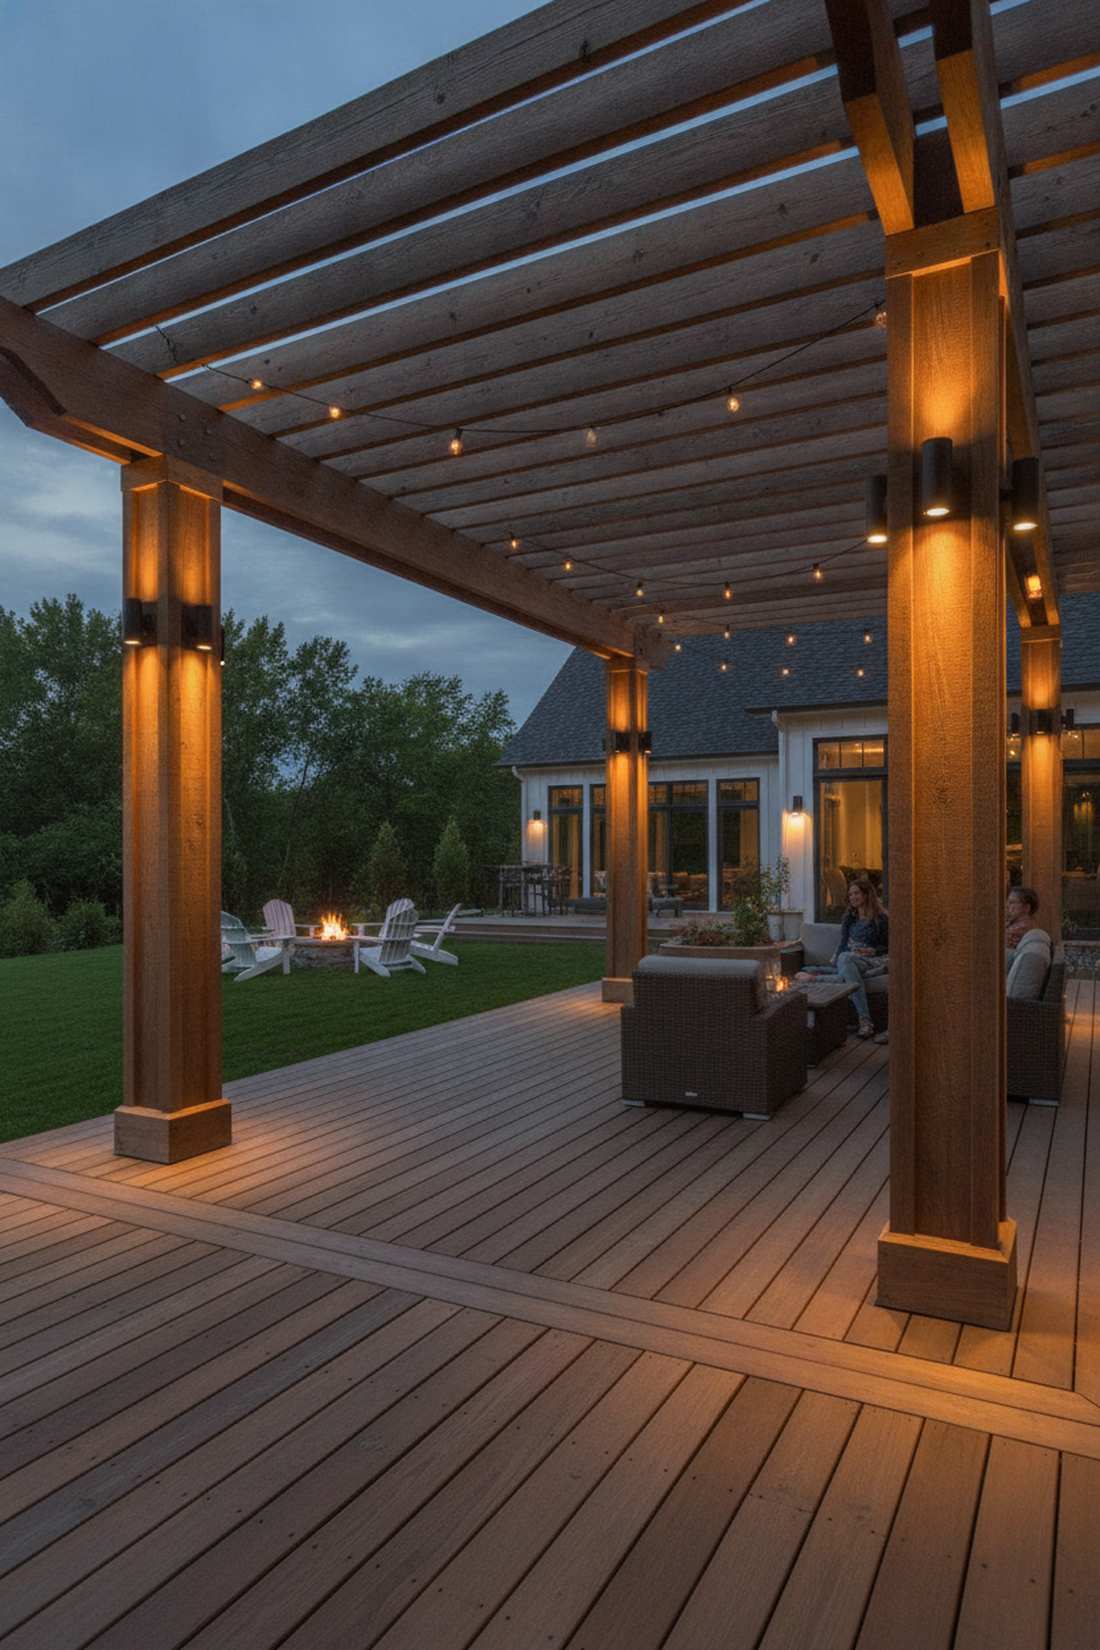
7. Hollow Post Uplight Installation
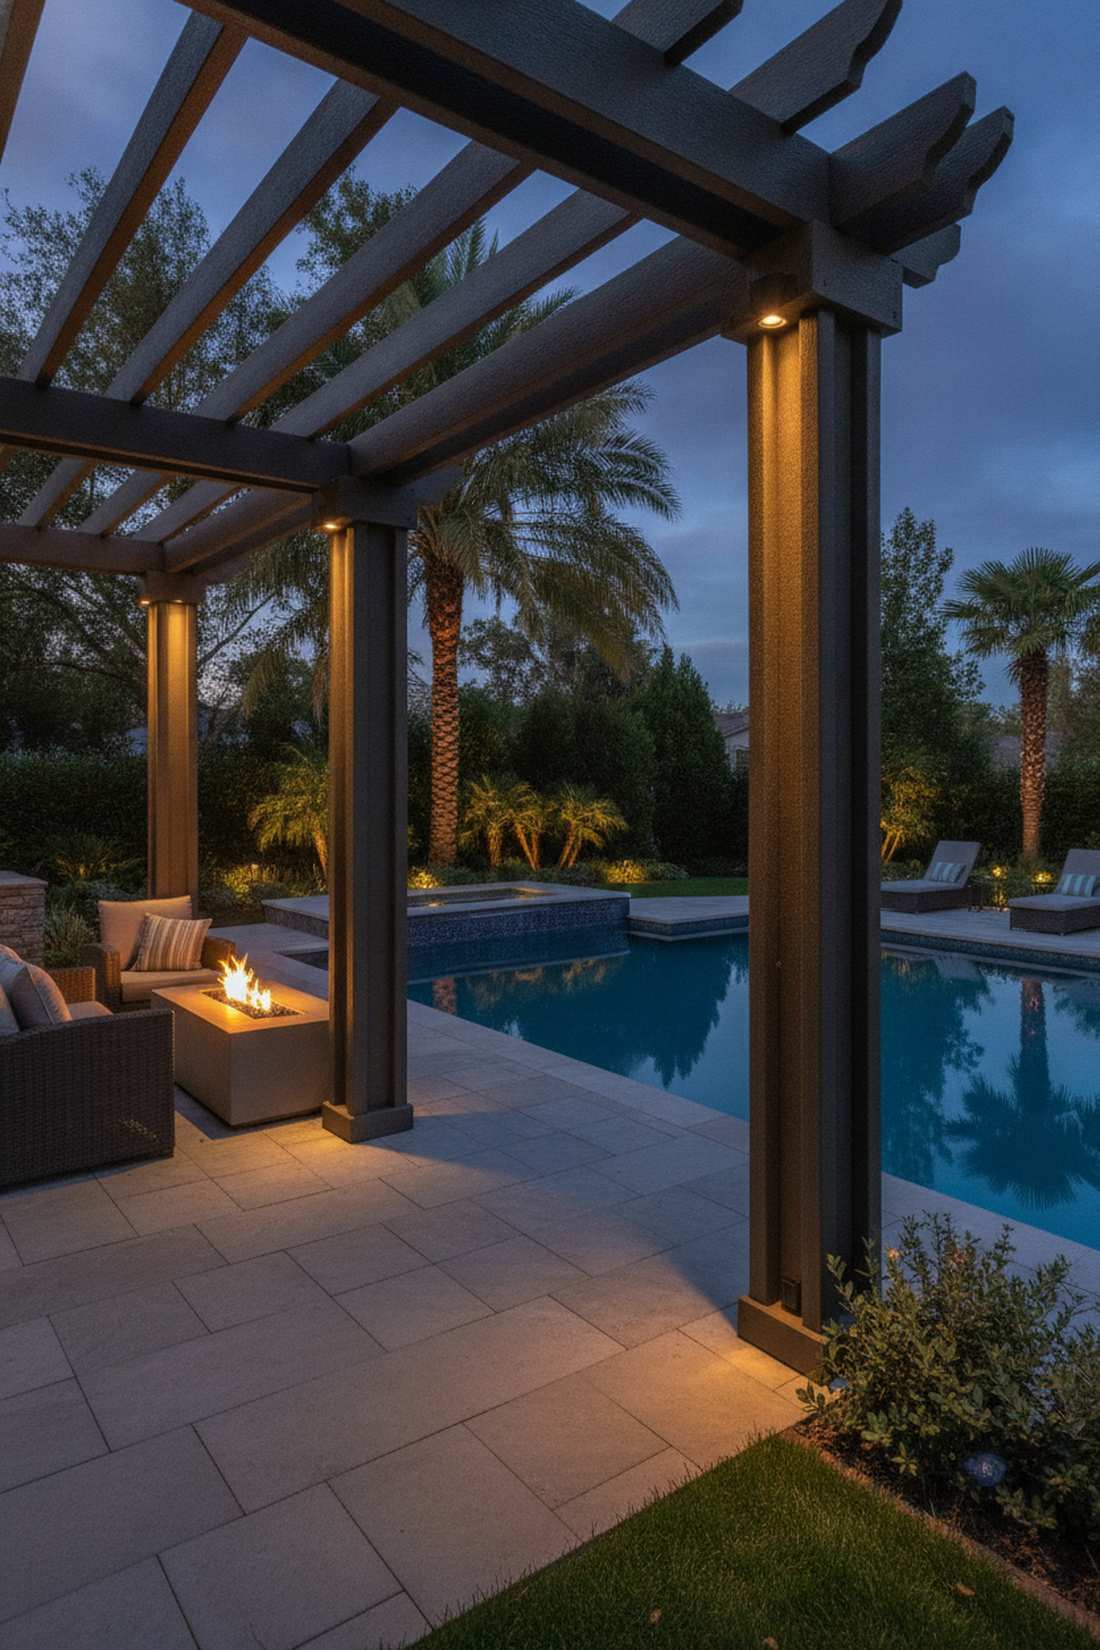
Feels like ancient Roman pillars glowing from within. Concealed post base uplighting works magic on composite or hollow metal pergolas guarding a luxury pool deck.
Surface mounting lights ruins clean lines, yet slipping narrow-beam fixtures directly inside the post cavity creates an optical illusion of extreme height. This outdoor lighting pergola trick forces the eye upward, celebrating the overhead crossbeams while keeping the light source totally hidden.
This layout is super cost-effective at about $60 per post. Pin this if you love a dramatic evening aesthetic!
- Key Materials: 10-watt narrow beam uplights, hole saw kit
- Vibe / Style: Dramatic architectural
- Difficulty: Easy modification
- Budget Breakdown: Uplights: $45 | Cabling: $15.
- Creator’s Tip: Drill a small weep hole at the very bottom of the post to ensure rainwater doesn’t pool around the light fixture.
- Smart Sourcing: Grab compact LED well lights (sealed units) and a low-voltage landscape transformer kit.
8. Crossbeam Track Lighting Channels

Brings indoor studio flexibility straight to the patio. Modular exterior track lighting is the ultimate solution for spaces where the outdoor dining table frequently changes position.
Fixed lighting often leaves people sitting in the dark during large parties, but installing an inverted T-slot system solves this instantly. Simply twisting and sliding the waterproof track heads gives you a designer-level finish that adapts to your hosting needs.
Expect to invest about $200–$300 for a quality track layout.
- Key Materials: Outdoor-rated track rails, 30-degree track heads
- Vibe / Style: Industrial modern flexibility
- Difficulty: Intermediate structural
- Budget Breakdown: Tracks: $120 | Fixtures: $150.
- Creator’s Tip: Use dielectric grease on the quarter-turn connectors to prevent corrosion from morning dew.
- Smart Sourcing: Invest in a weatherproof architectural track kit and high-CRI outdoor spotlight heads.
This next setup completely changes the vibe of generic posts and is ridiculously cheap to implement over a weekend.
9. Post Cap Downlight Integration
Like glowing beacons marking the boundary of your oasis. Custom LED post cap lights are flawless for highlighting the perimeter boundaries of deck-mounted pergolas.
Standard solar caps usually die after a year and look incredibly cheap, but hardwiring custom-fabricated downward-facing caps elevates the whole structure. The focused 120-degree cone washes the support columns in light while making the surrounding deck safe to navigate.
You can retrofit your entire perimeter for around $150. Save this for your deck makeover plans!
- Key Materials: Marine-grade stainless steel caps, low-voltage wire
- Vibe / Style: Sophisticated boundary marking
- Difficulty: Easy retrofit
- Budget Breakdown: Hardwired Caps: $120 | Wiring: $30.
- Creator’s Tip: Drop a heavy metal chain down the hollow post first to easily pull your low-voltage wires up to the cap.
- Smart Sourcing: Use heavy-duty cast aluminum LED post caps and a 14/2 low-voltage wire spool.
💡 Must-Have Supplies for High-End Setups
To build these setups faster and ensure they last, skip the generic craft aisles and invest in the right foundational kits.
- Base & Support: heavy-duty aluminum LED channel extrusions (bulk box)
- Setup Tools: low-voltage landscape wire crimper starter kits
- Weather/Durability Protection: marine-grade dielectric grease and heat shrink tubing
10. Beam Side Strip Accent Lighting
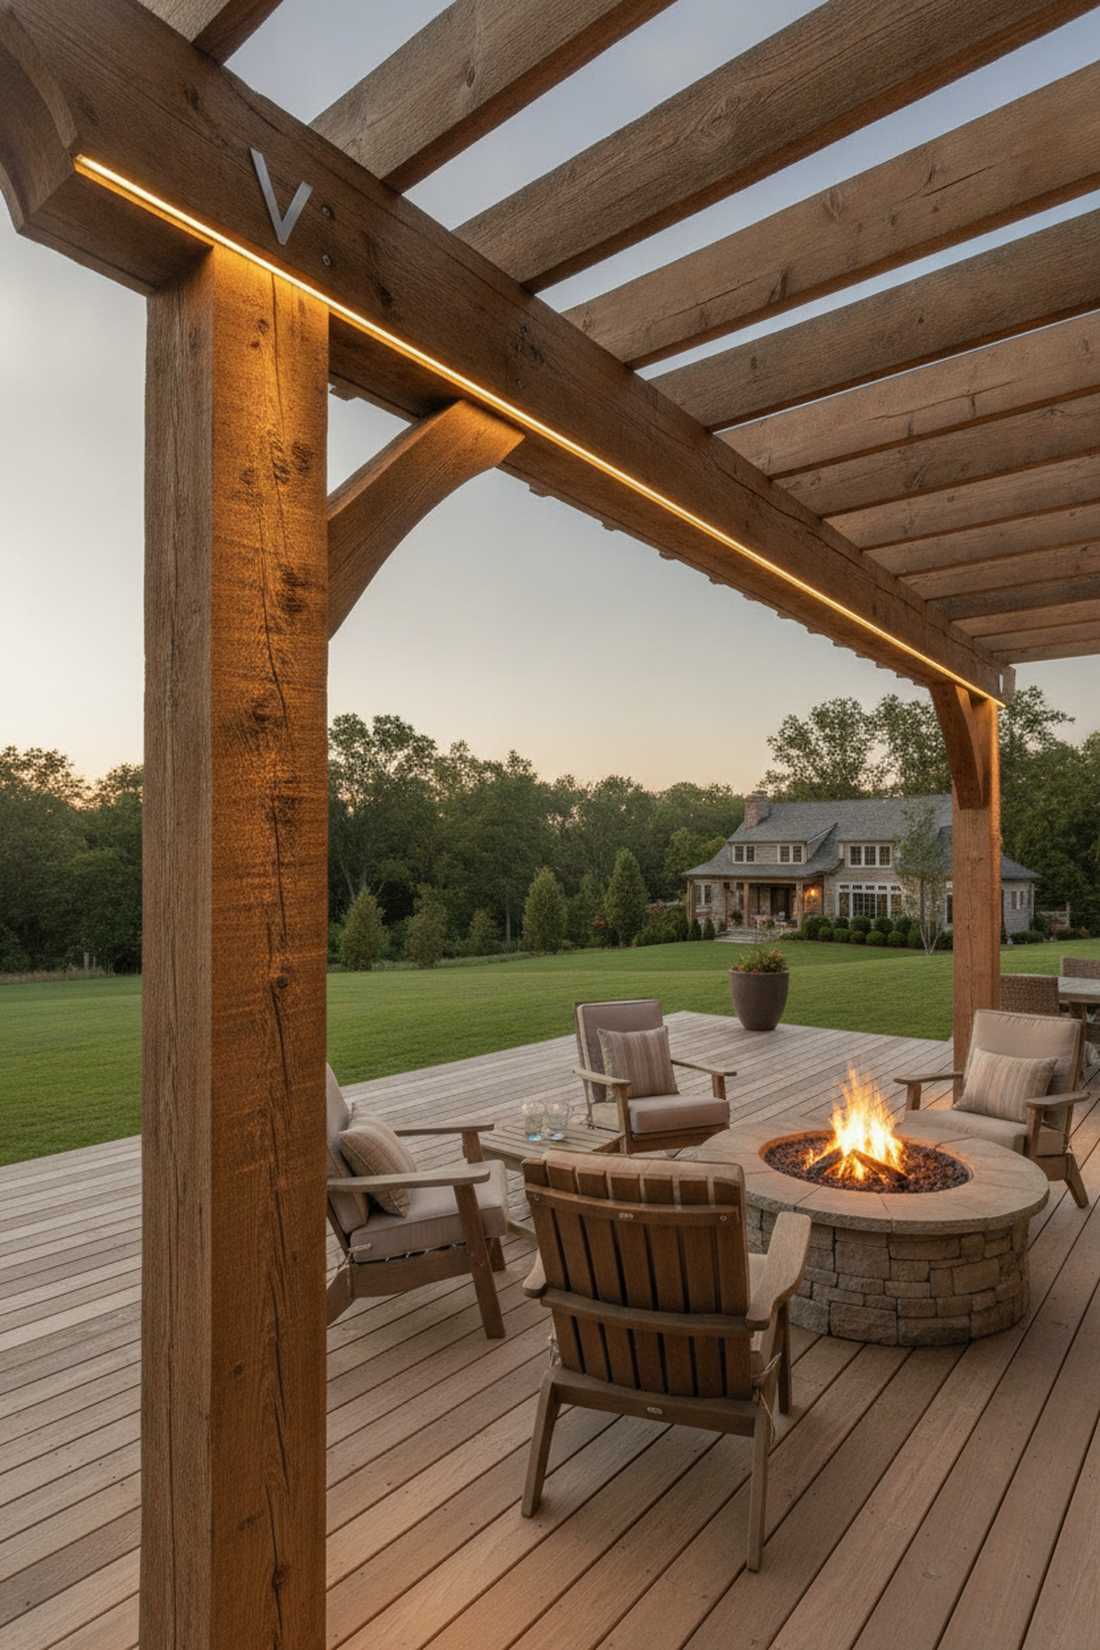
Accentuates natural textures to feel like an expensive alpine lodge. Side-mounted grazing lights are incredible for rough-hewn timber or cedar pergolas where the wood grain is the star.
Aiming light straight down flattens out beautiful wood textures, but hiding a sleek right-angle channel on the beam’s side creates stunning shadow play. This subtle outdoor lighting pergola technique highlights natural imperfections and gives a rich, layered ambiance.
You can pull this texturizing trick off for about $80.
- Key Materials: Right-angle aluminum extrusions, 2700K tape lights
- Vibe / Style: Rustic luxury
- Difficulty: Easy peel-and-stick
- Budget Breakdown: Angles: $40 | Lights: $30.
- Creator’s Tip: Always use a tack cloth to remove sawdust from the beam side before applying the VHB mounting tape.
- Smart Sourcing: Source V-shape corner LED aluminum profiles and high-adhesion IP65 LED light strips.
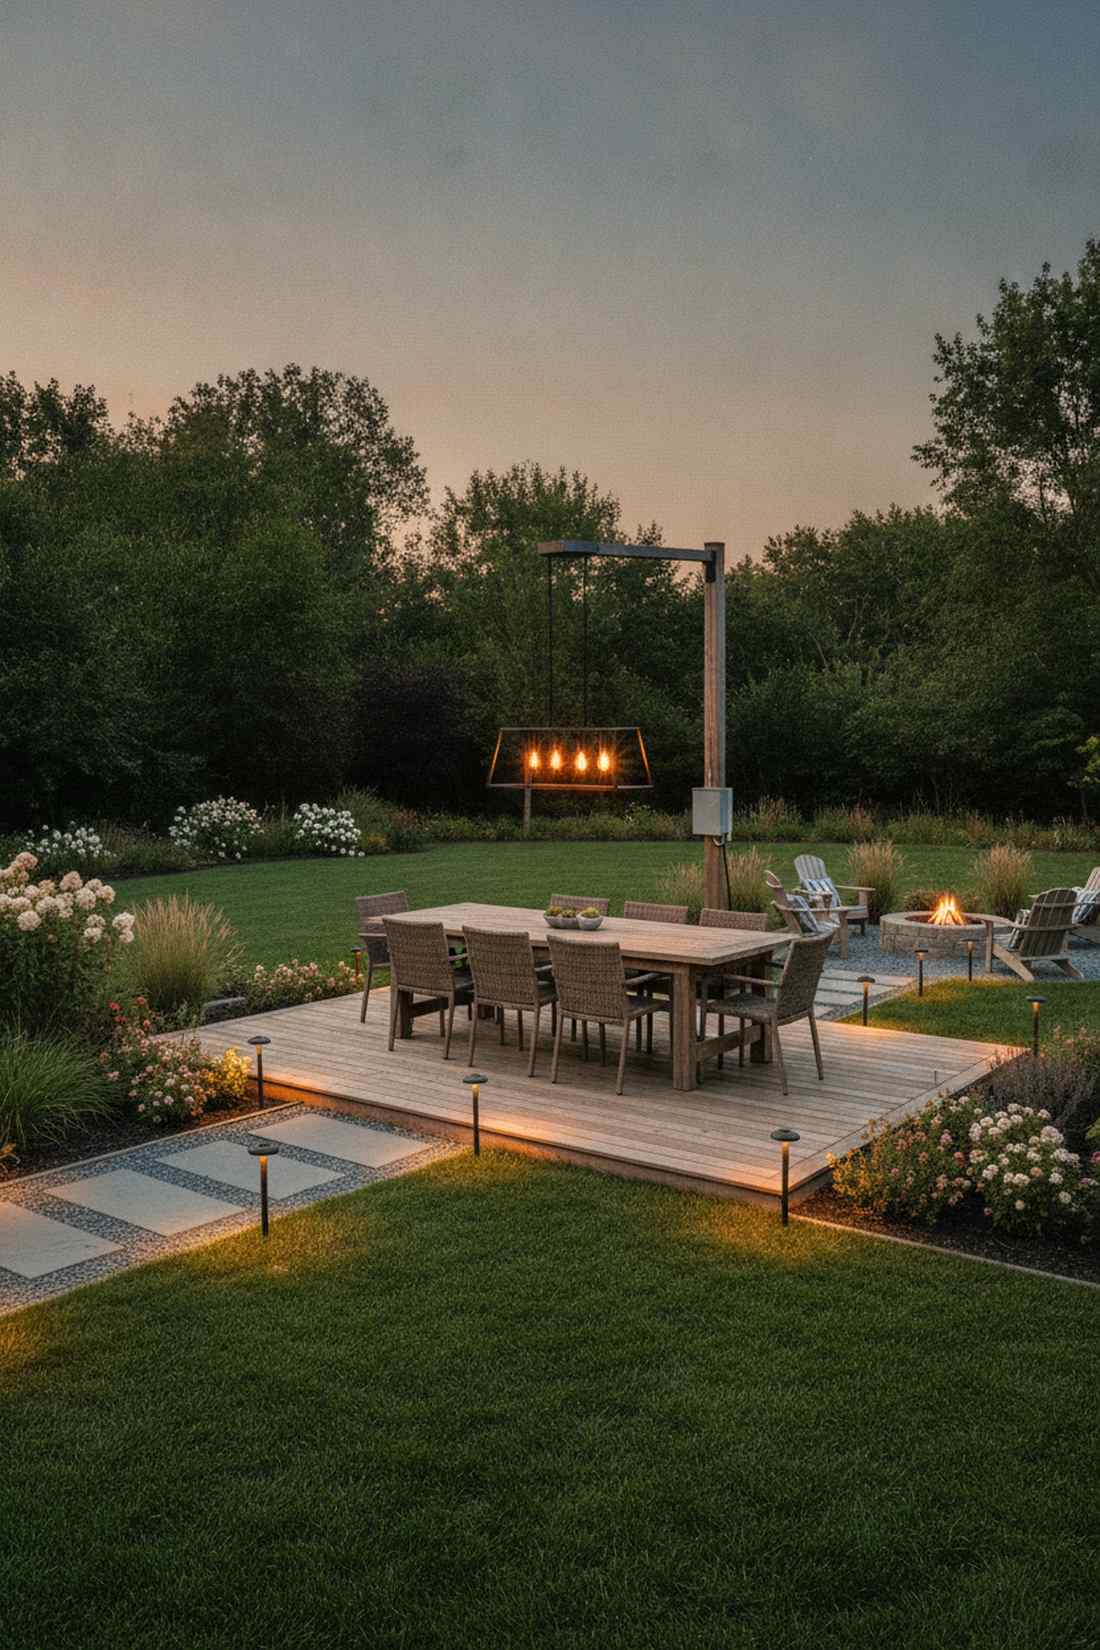
11. Notched Beam Pendant Drops
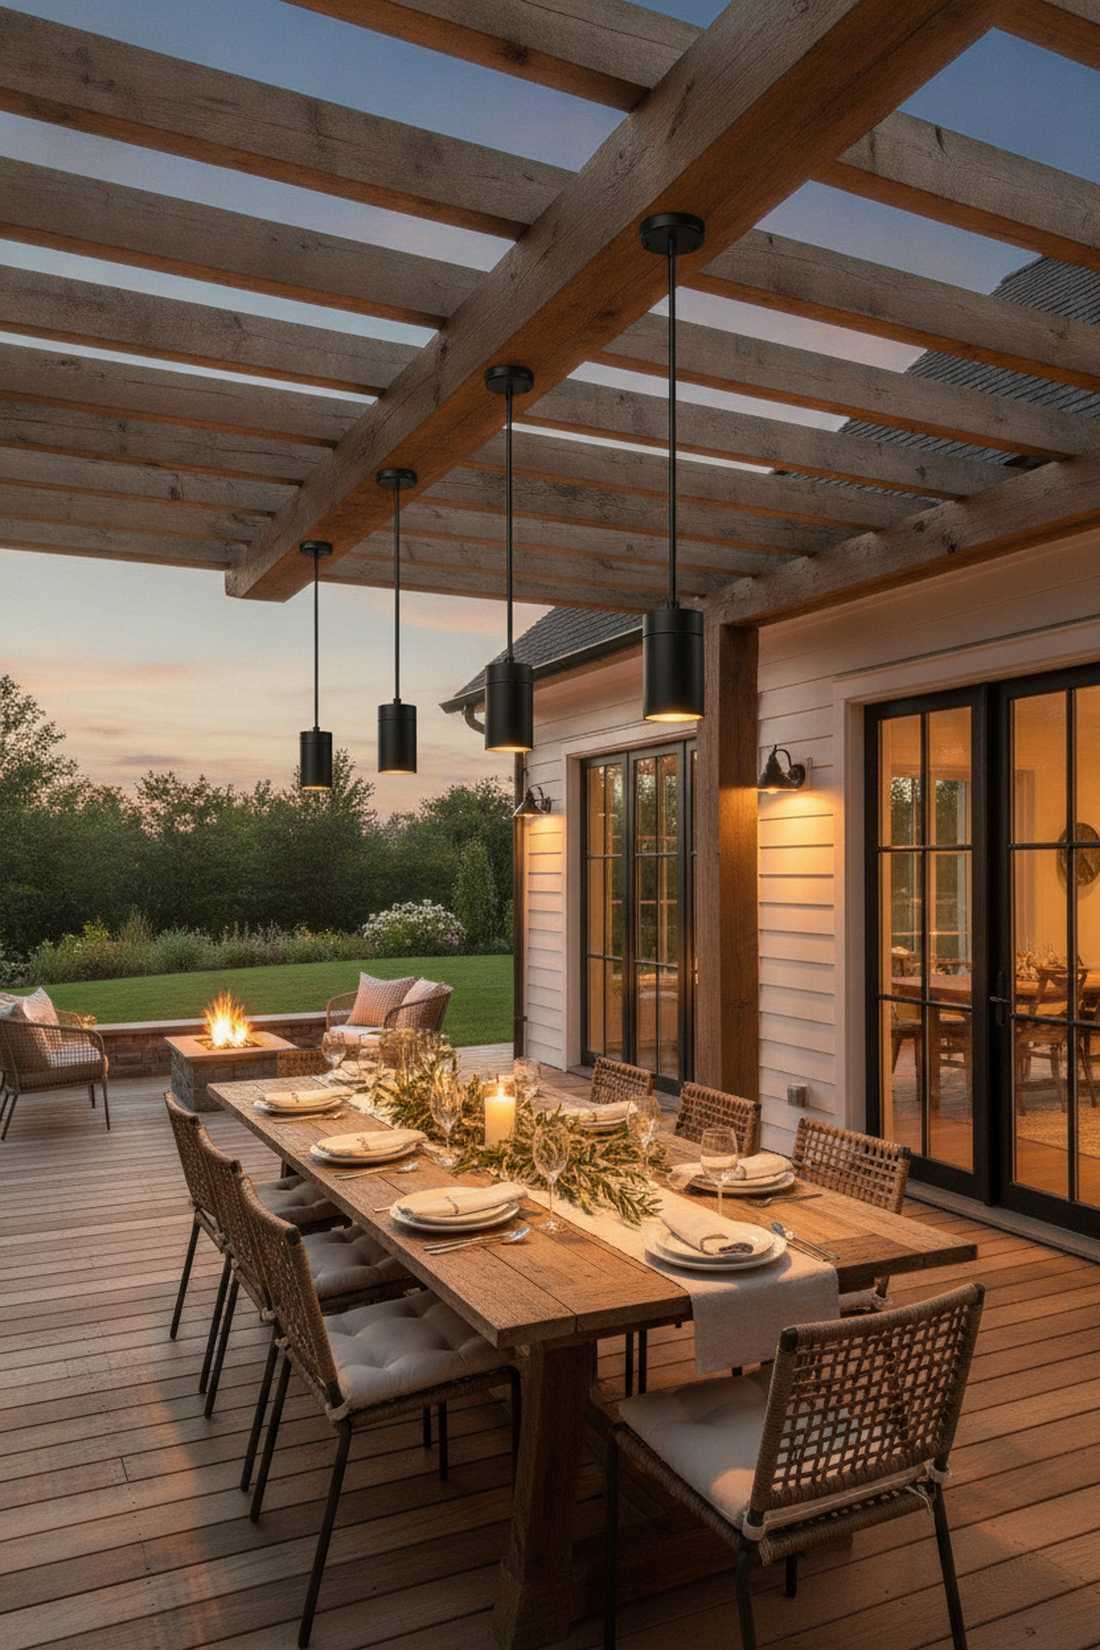
Brings a trendy European cafe atmosphere right to your patio. Suspended notched pendants offer a gorgeous human-scale illumination over long dining tables or bar tops.
Sloppy installations usually feature wires wrapped around beams, but cutting shallow mortises totally hides the hardware and delivers a surprisingly premium look. Hanging them precisely 24 inches below the beam provides intense task light without blinding your seated guests.
This designer-level detail costs around $100 per pendant station. Pin this if you love hosting dinner parties!
- Key Materials: Threaded rods, exterior pendant housings, chisel/router
- Vibe / Style: Cozy bistro elegance
- Difficulty: Intermediate carpentry
- Budget Breakdown: Pendants: $70 | Hardware: $25.
- Creator’s Tip: Spray paint the threaded rods flat black to match the pendant cords for a totally seamless, floating visual.
- Smart Sourcing: Look for weather-sealed outdoor drop pendants and rust-proof threaded mounting hardware.
12. Pergola Screen Track LED Integration
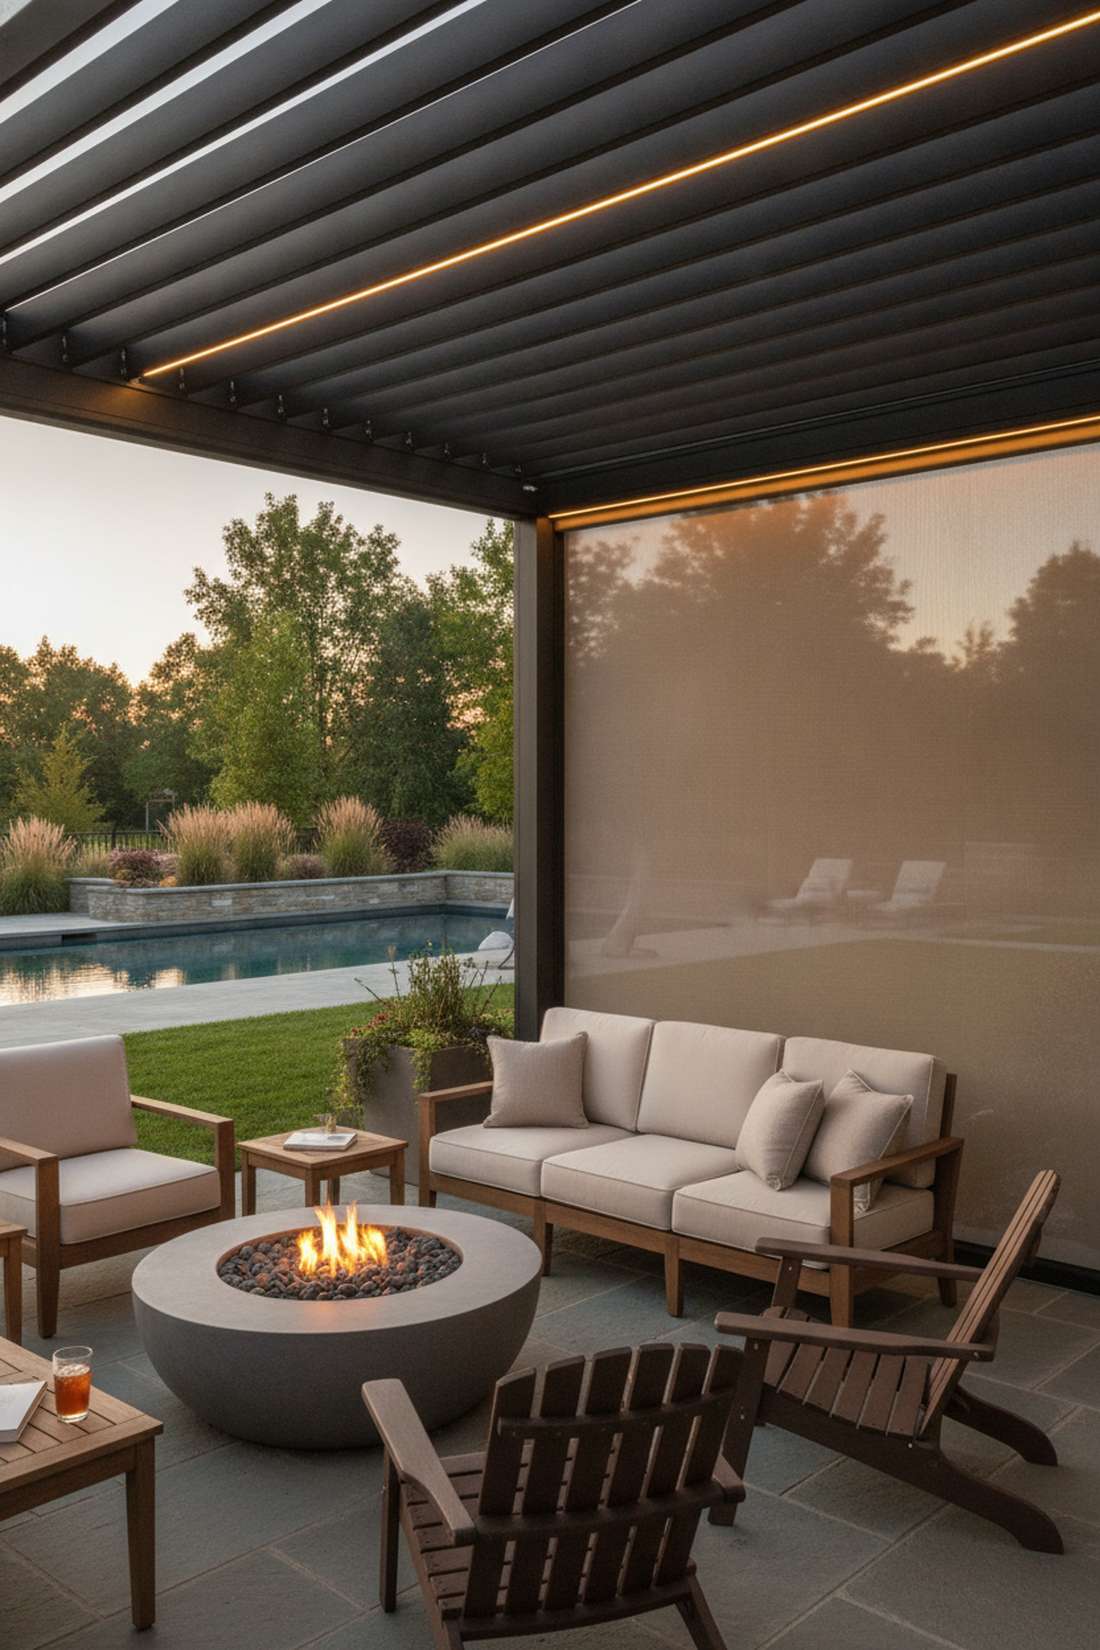
Feels like high-tech resort automation in your own backyard. Dual-purpose screen track lighting is brilliant for motorized louvered pergolas equipped with drop-down privacy shades.
Most don’t realize that the interior channel of a screen track has extra room, and slipping a micro-LED strip in there is a genius infrastructure hack. It guarantees a soft perimeter glow regardless of whether the bug screens are rolled up or deployed.
You can upgrade your track system for under $60.
- Key Materials: 5mm ultra-slim LED strips, existing screen tracks
- Vibe / Style: Seamless high-tech luxury
- Difficulty: Easy plug-and-play
- Budget Breakdown: Slim Strips: $40 | Wire taps: $15.
- Creator’s Tip: Tap directly into the 12V power supply used for the screen motors so you don’t have to run secondary power lines.
- Smart Sourcing: Grab ultra-narrow 5mm waterproof LED tape (starter kit) and low-voltage splice connectors.
13. X-Brace Crosslight Pattern
Turns structural necessities into stunning nighttime art. Diagonal X-brace crosslighting looks phenomenal on contemporary steel or heavy timber structures with exposed corner bracing.
Standard layouts ignore diagonal lines completely, but outlining these braces with continuous light creates an optical illusion of architectural rigidity. Matching a cool white LED against a powder-coated black frame gives a fierce, designer-level finish.
Expect this geometric upgrade to cost around $75. Save this idea if you have a modern-style yard.
- Key Materials: Neon-flex LED rope, discrete mounting clips
- Vibe / Style: Edgy contemporary geometry
- Difficulty: Beginner-friendly
- Budget Breakdown: Neon-flex: $55 | Clips: $15.
- Creator’s Tip: Use outdoor-rated zip ties during the mock-up phase to perfect the tension before permanently screwing in the mounting clips.
- Smart Sourcing: Use silicone exterior neon rope lights (bulk pack) and clear UV-resistant mounting brackets.
If you have an attached structure, ignoring the transition zone is a massive mistake. The next layout bridges the gap flawlessly.
Under Eave and Soffit Lighting for Covered Structures
Installing outdoor lighting under eaves extends illumination from the main structure to adjacent outdoor rooms. These methods protect fixtures from direct weather while maximizing coverage.
14. Soffit Recessed Canister Array
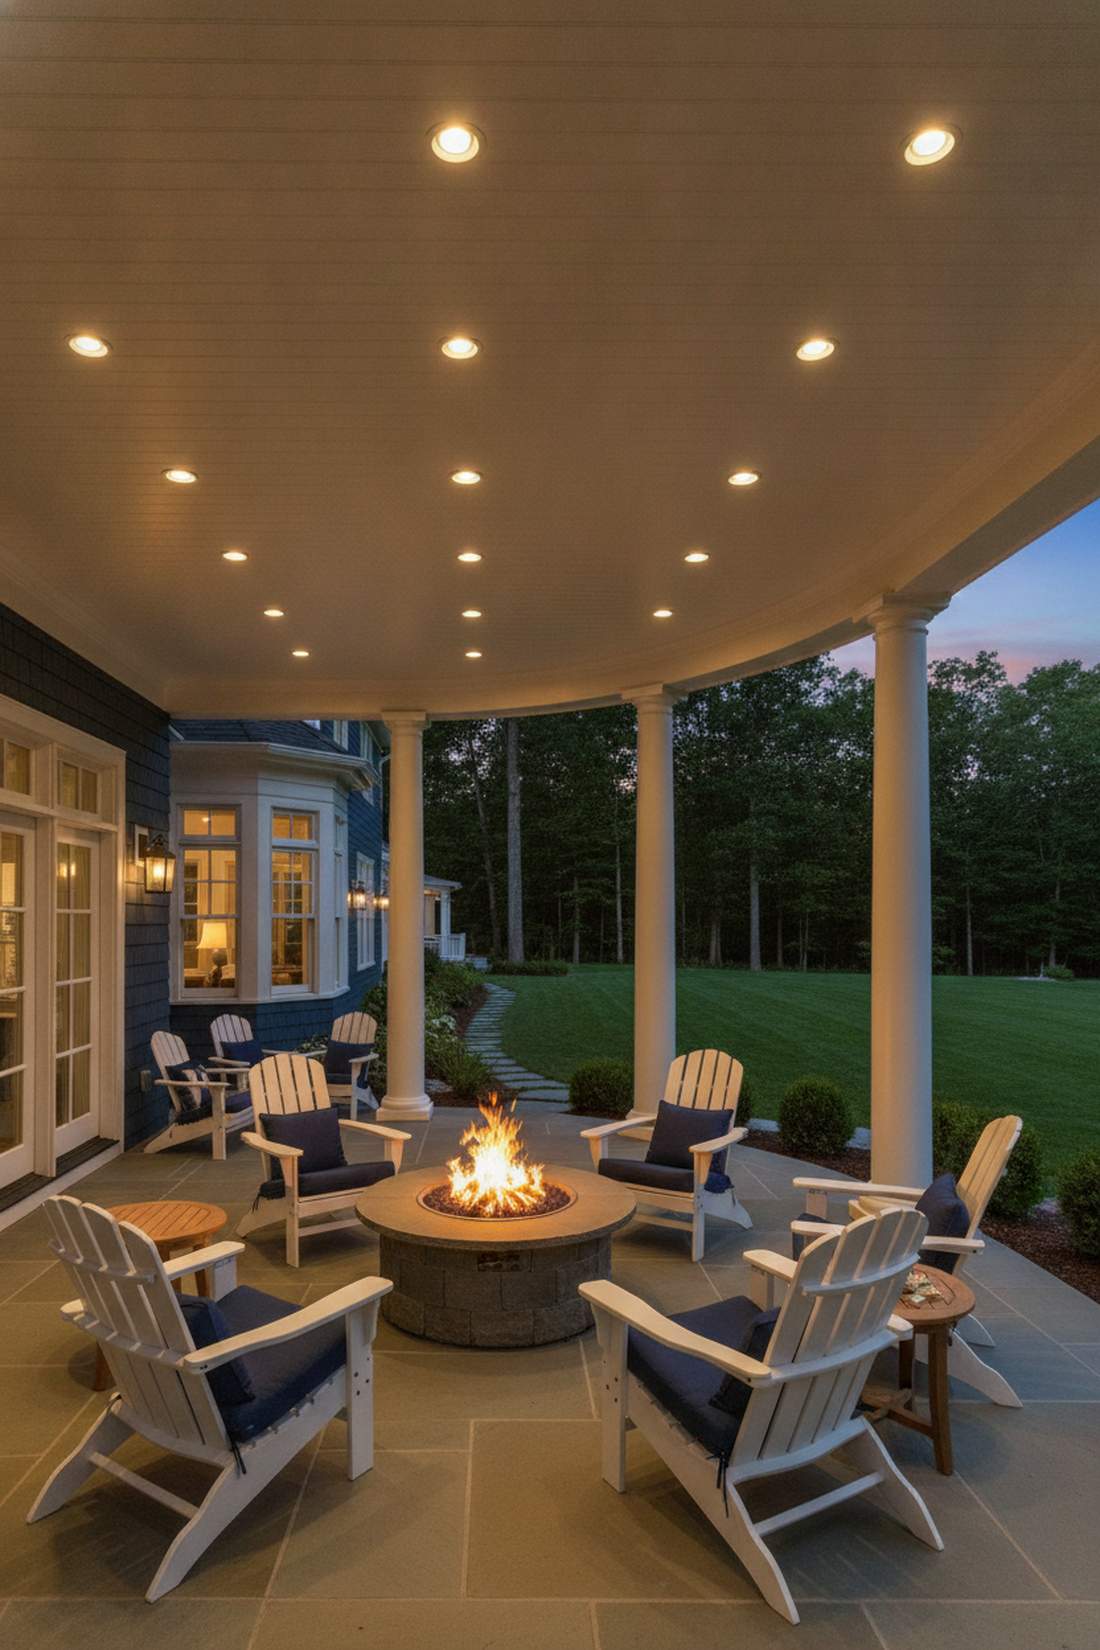
Feels like stepping onto the wrap-around porch of a luxury estate. A flush-mount soffit canister array is the most professional way to push light downward over seating zones attached to the main house.
Avoiding harsh glare is difficult with wall sconces, but a tight grid of recessed outdoor lighting under eaves delivers incredibly even task lighting. Specifying IC-rated, bug-proof housings ensures the attic space stays insulated and critter-free all year round.
This layout will run about $50 per canister installed.
- Key Materials: 4-inch IC-rated exterior cans, sealed LED trim rings
- Vibe / Style: Clean traditional elegance
- Difficulty: Advanced electrical/drywall
- Budget Breakdown: Housings: $30 | LED Baffles: $20.
- Creator’s Tip: Space them exactly 4 to 6 feet apart to prevent dark spots and overlapping “hot spots” on the patio floor.
- Smart Sourcing: Purchase wet-rated recessed lighting kits (contractor pack) and a heavy-duty drywall hole saw.
15. Fascia Board Strip Mounting
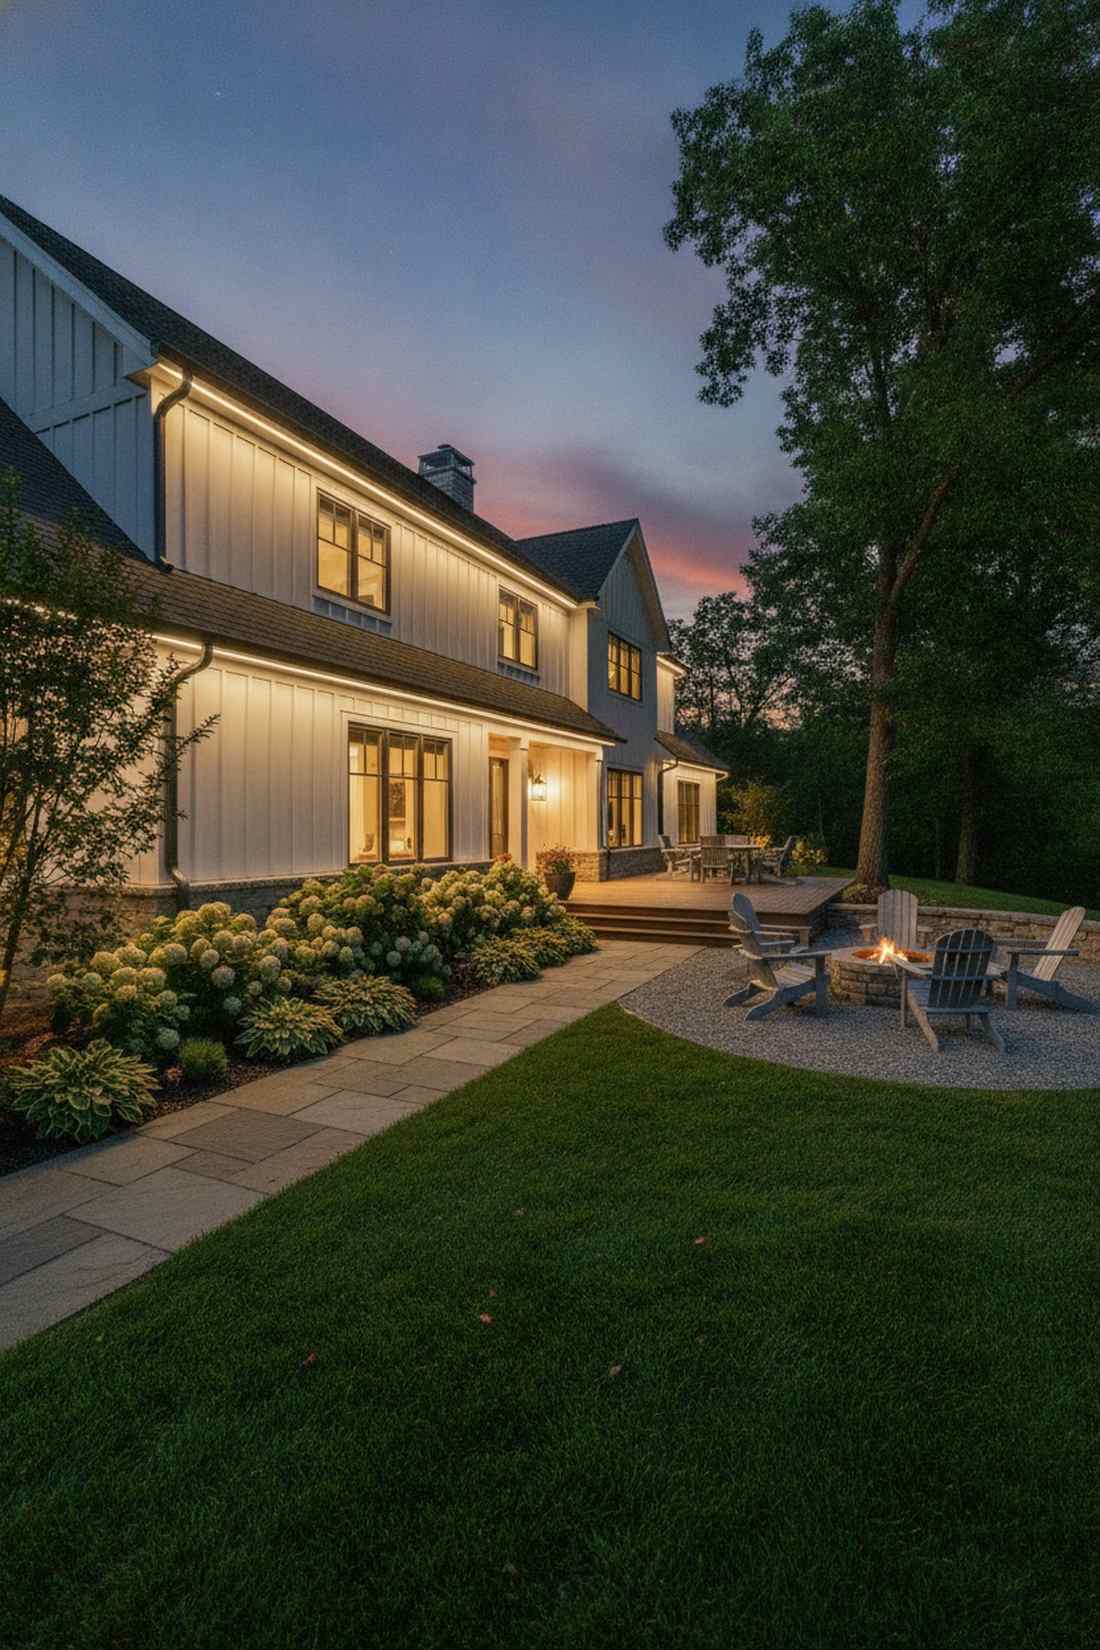
Creates a razor-sharp glowing perimeter that highlights your home’s roofline. Vertical fascia downlighting is excellent for cascading light down onto walkway transitions and flower beds.
Floodlights can blind your neighbors, but tucking a linear strip behind the drip edge looks far more expensive than it is. It subtly extends the perceived footprint of the property at night while staying completely shielded from harsh rain.
A 30-foot run typically costs around $90. Pin this to your exterior home renovation board!
- Key Materials: Adhesive outdoor light strips, screw-in support clips
- Vibe / Style: Sleek architectural border
- Difficulty: Easy ladder work
- Budget Breakdown: Heavy-duty strips: $70 | Clips: $15.
- Creator’s Tip: Never rely on the adhesive backing alone outdoors; always use physical screw clips every 12 inches to prevent heat sagging.
- Smart Sourcing: Pick up IP67 waterproof light ribbons (long run spool) and silicone mounting clips.
16. Eave Return Corner Accents
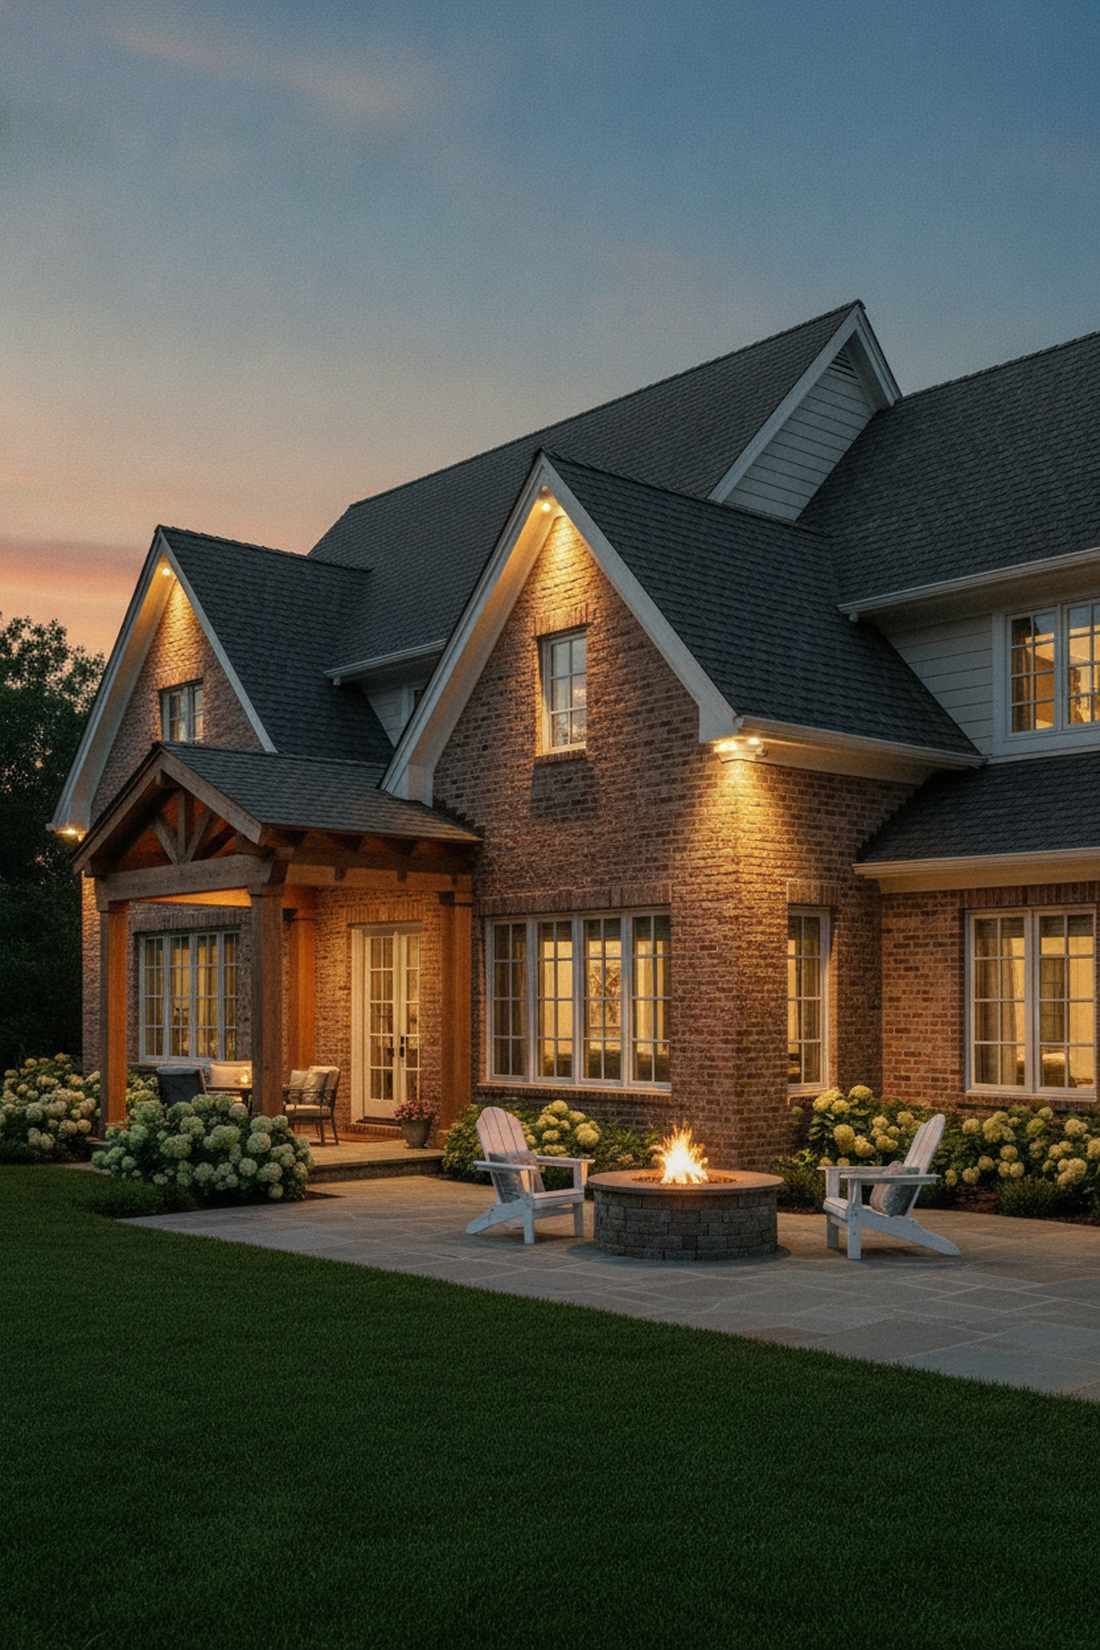
Adds intense dramatic flair to complex roof geometries. Eave corner accent lighting is perfect for homes with multiple intersecting rooflines bridging out to a covered pergola.
Washing an entire wall with light is often overkill, but placing compact wall-washers right at the architectural transitions creates highly defined pools of light. Tying this into a photocell for dusk-to-dawn automation gives a designer-level finish with zero daily effort.
Hardware and sensors cost around $120.
- Key Materials: Surface-mount LED cylinders, dusk-to-dawn photocell
- Vibe / Style: High-drama architectural wash
- Difficulty: Intermediate wiring
- Budget Breakdown: Cylinders: $90 | Sensor: $25.
- Creator’s Tip: Aim the adjustable heads slightly back toward the house siding to graze the brick or siding texture.
- Smart Sourcing: Invest in directional outdoor wall sconces and a hardwired photocell sensor switch.
17. Gutter Integrated LED Channels
The ultimate stealth application for modern exterior facades. Dual-function illuminated gutters combine critical water management with high-end perimeter aesthetics.
Mounting separate light tracks can clutter the fascia board, yet utilizing aluminum gutters with a factory-built LED lip delivers a surprisingly premium look. Dropping the low-voltage wires straight down inside the downspouts totally hides the electrical infrastructure from view.
Expect to add $5–$8 per linear foot during a gutter replacement.
- Key Materials: Custom LED-channel gutters, warm white tape lights
- Vibe / Style: Invisible stealth modernism
- Difficulty: Professional installation
- Budget Breakdown: Lighting insert: $45 | Transformers: $60.
- Creator’s Tip: Make sure to seal the ends of the LED strips with shrink tubing before dropping them into the gutter channel to prevent rot.
- Smart Sourcing: Use heavy-duty waterproof LED tape and marine heat shrink tubing (bulk pack).
Most DIYers ruin their aesthetic with bulky floodlights… until they see how subtle and impactful the next beam treatment is.
18. Beam End Accent Spotlights
Puts a literal spotlight on high-quality carpentry. Exposed beam end highlighting is a stunning way to show off the crafted tails of a heavy timber pavilion.
Leaving the edge of a structure dark shrinks the space visually, but grazing the wood grain with tiny 15-degree optic bullets creates an optical illusion of wealth. Chaining these micro-fixtures along the eave line establishes a beautiful rhythm of shadows.
This artisanal lighting trick costs about $35 per beam end. Pin this if you love craftsman-style architecture!
- Key Materials: 3-watt micro bullet lights, concealed wiring staples
- Vibe / Style: Artisan craftsman showcase
- Difficulty: Intermediate routing
- Budget Breakdown: Bullets: $25 | Staples/Wire: $10.
- Creator’s Tip: Mount the fixture 6 inches back from the end so the beam angle has space to flare out and cover the whole wood surface.
- Smart Sourcing: Source micro brass landscape spotlights and black insulated cable staples.
Material Guide: Cheap vs. Premium Aesthetic
Knowing exactly where to save and where to spend makes all the difference in achieving that “looks expensive but isn’t” vibe.
- Standard vs. UV-Resistant/Premium: Cheap plastic channels yellow and crack within a year under the sun, destroying your light quality. Premium UV-coated aluminum dissipates LED heat and survives extreme weather.
- Pre-made Kits vs. Sourcing Locally: Buying individual pieces at a big box store guarantees mismatched color temperatures. Waterproof starter kits ensure your transformers, wires, and diodes all communicate flawlessly.
Advanced Structural Integration for Custom Installations
Professional installations often combine multiple lighting types within outdoor lighting roof structures. These sophisticated approaches require coordination during the design phase but deliver exceptional results.
19. Multi-Zone Dimming Systems
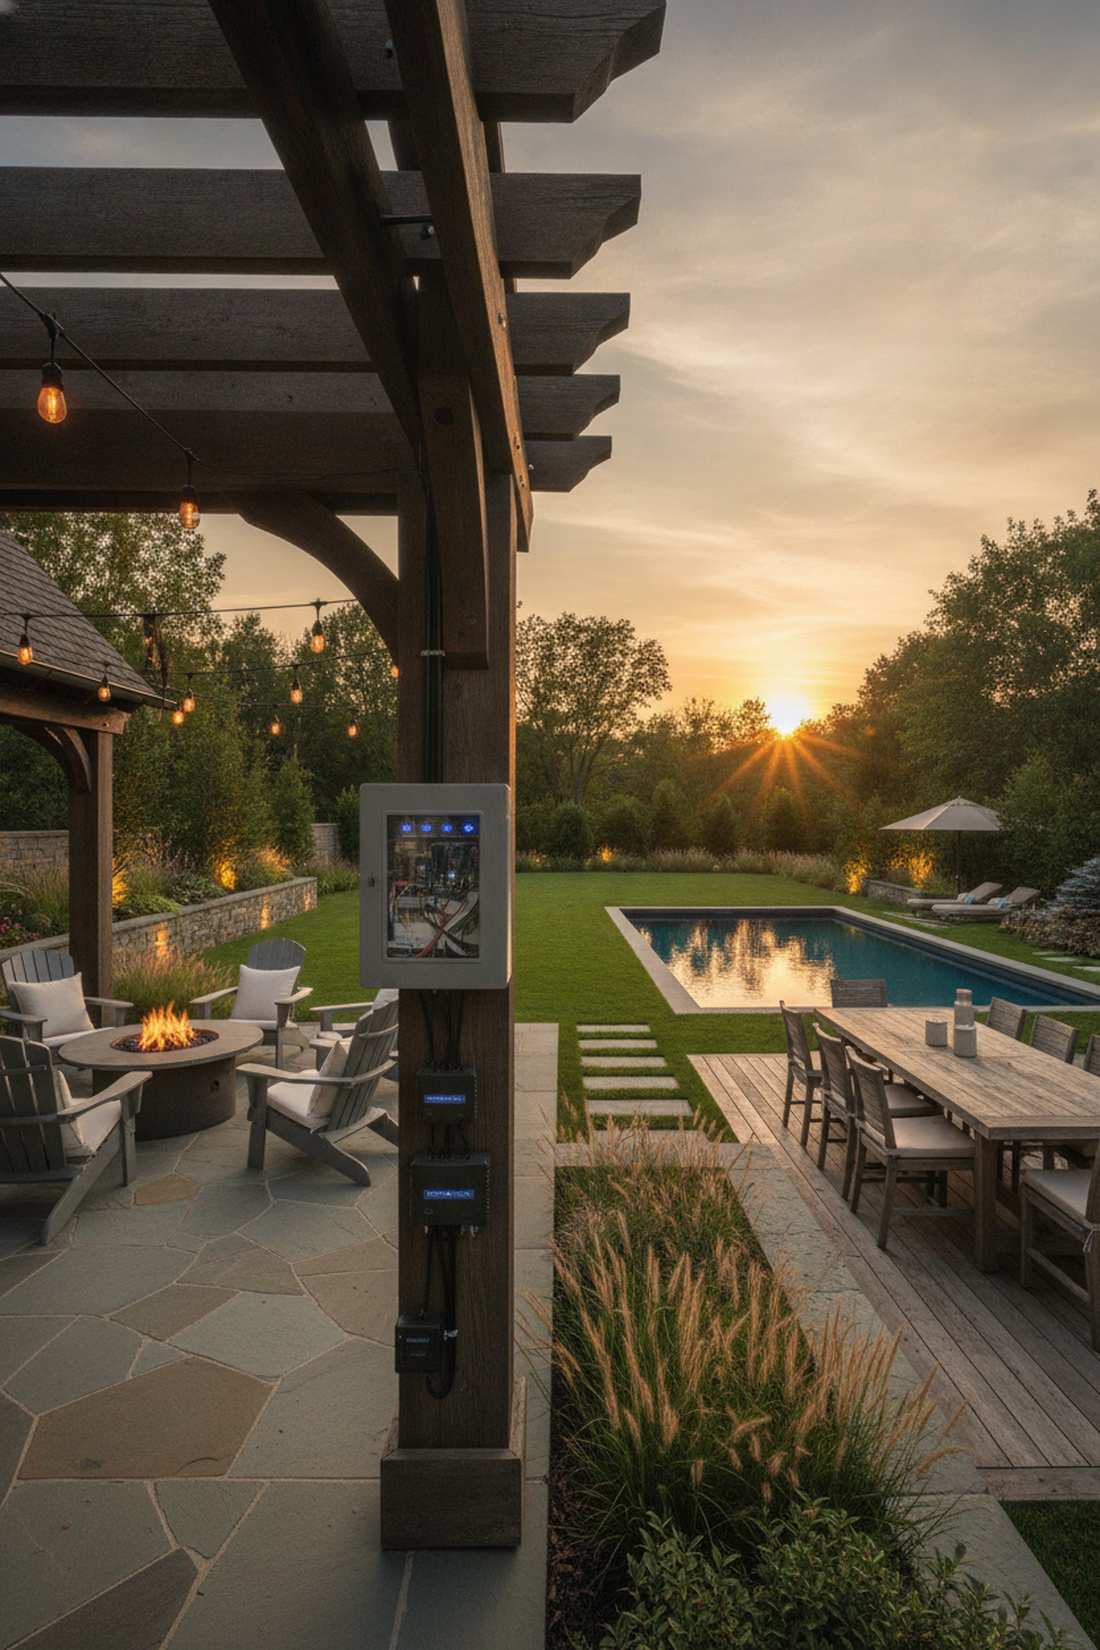
Feels like having a professional soundboard for your backyard vibe. A centralized multi-zone dimming controller is vital for massive structures that host multiple activities.
Hooking everything to a single switch is a rookie mistake, but separating task, ambient, and accent lights onto a smart home platform gives a designer-level finish. Being able to dim the dining overheads while boosting the perimeter glow creates dynamic, restaurant-quality mood changes.
Smart controllers run around $150–$250.
- Key Materials: Weatherproof zone controller, low-voltage dimmers
- Vibe / Style: Ultimate tech control
- Difficulty: Advanced electronic setup
- Budget Breakdown: Smart Hub: $150 | Relays: $80.
- Creator’s Tip: Always install the master controller box in a shaded area to prevent the Wi-Fi components from overheating in summer.
- Smart Sourcing: Invest in a smart outdoor landscape transformer and waterproof Wi-Fi relay switches.
20. Color-Changing RGB Integration
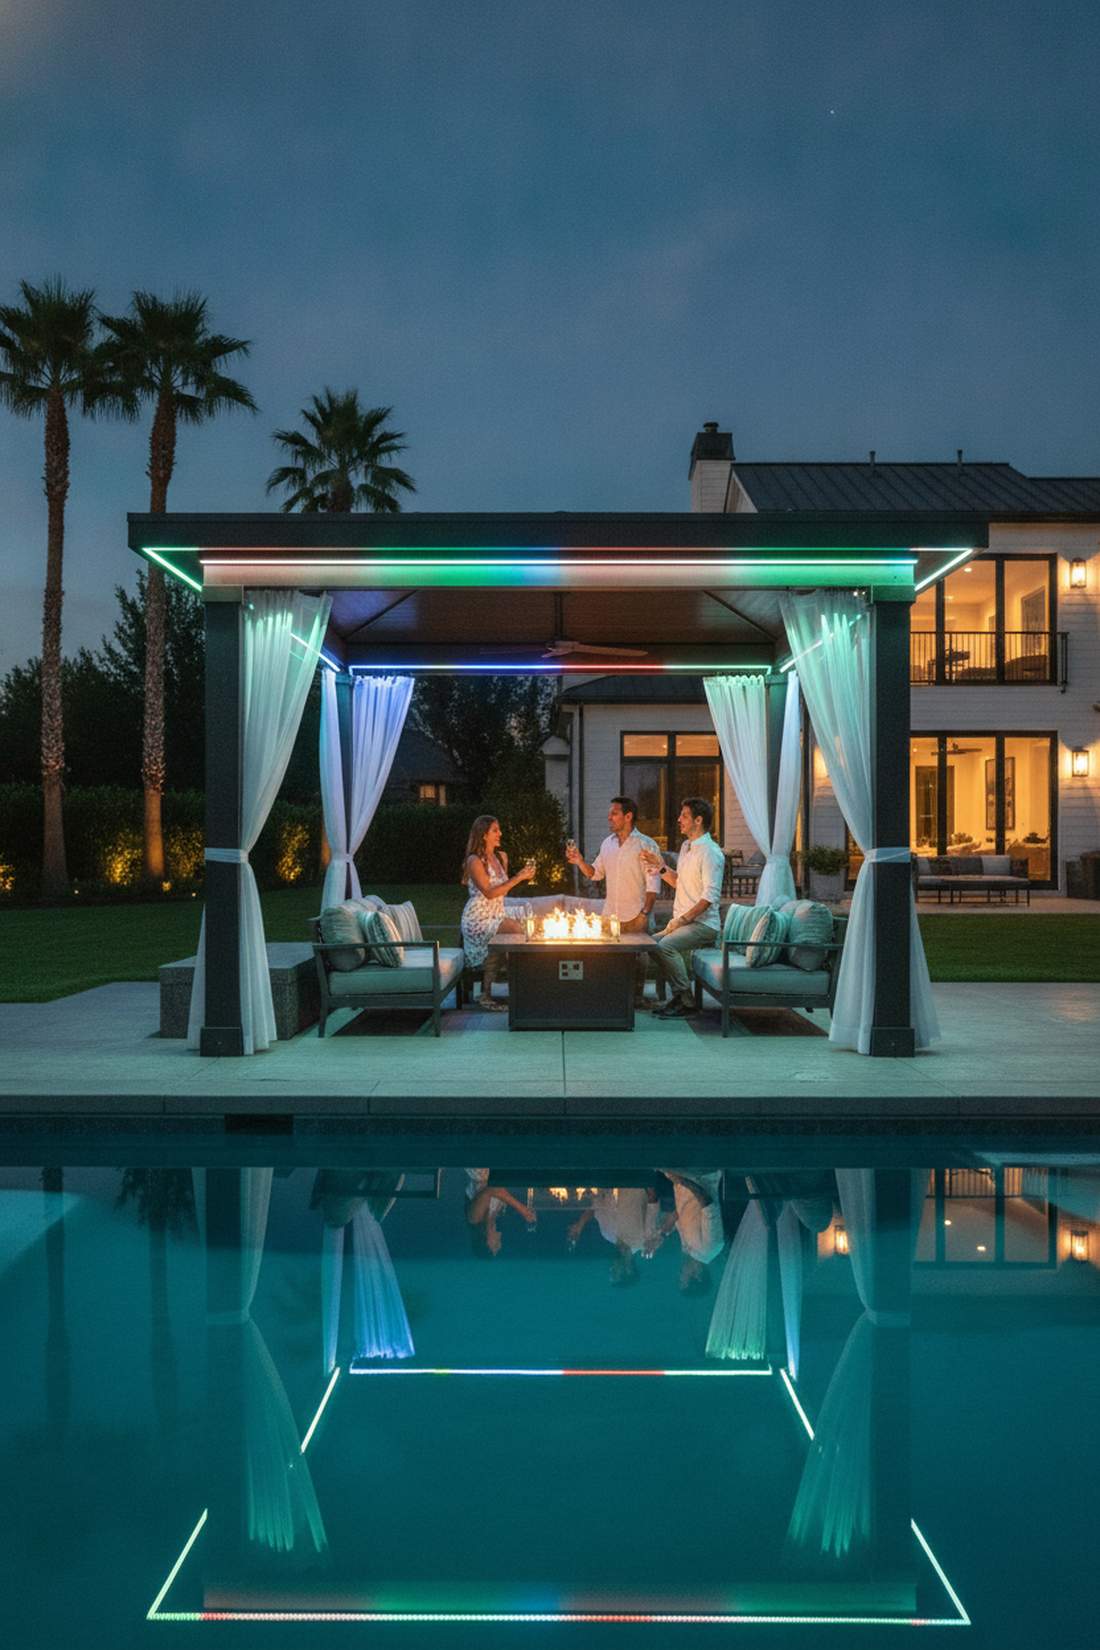
Transforms a calm oasis into a high-energy party zone instantly. Architectural RGBW color integration is a must-have for poolside gazebos and entertainment hubs.
Standard RGB strips look terrible when trying to produce white light, but sourcing dedicated RGBW (with an extra white diode) looks far more expensive than it is. You get pristine, gallery-quality white for daily use, with the ability to blast holiday colors when hosting.
A full color kit will cost roughly $180. Save this idea for your ultimate party patio board!
- Key Materials: IP67 RGBW light strips, digital DMX or smart controller
- Vibe / Style: Dynamic entertainment lounge
- Difficulty: Easy plug-and-play
- Budget Breakdown: RGBW Strips: $120 | Controller: $50.
- Creator’s Tip: Don’t mix brands; buy your controller and strips from the same manufacturer to avoid syncing issues.
- Smart Sourcing: Grab an RGBW outdoor strip kit (smart sync) and heavy-duty mounting tracks.
21. Architectural Cove Lighting
Creates an optical illusion that the heavy roof is floating in mid-air. Raised beam cove lighting adds massive three-dimensional depth to utilitarian shade structures.
Nailing lights directly to beams looks cluttered, yet building a raised 4-inch lip to hide upward-facing strips delivers a surprisingly premium look. Painting the inside of the cove matte white bounces maximum soft light down onto the patio furniture without any harsh glare.
Lumber and lighting will cost around $140.
- Key Materials: 2×4 framing lumber, high-output LED tape, matte paint
- Vibe / Style: Dramatic architectural illusion
- Difficulty: Intermediate carpentry
- Budget Breakdown: Lumber: $60 | High-output LEDs: $70.
- Creator’s Tip: Angle the strips exactly 45 degrees inside the cove to push light toward the center of the ceiling rather than straight up.
- Smart Sourcing: Use aluminum 45-degree LED corner channels and COB continuous light strips.
22. Louvered Roof Blade Lighting
Feels like being aboard a luxury yacht. Dynamic louvered blade lighting links illumination directly to the mechanical roof, shifting the ambiance as the blades open and close.
Retrofitting mechanical roofs usually voids the warranty, but coordinating directly with the manufacturer for pre-milled LED channels creates an optical illusion of wealth. When closed, it’s a contained glow; when cracked open, it shoots dramatic beams into the night sky.
Custom extrusions typically add $300–$500 to a premium build.
- Key Materials: Custom IP67 blade extrusions, flexible wire looms
- Vibe / Style: Ultra-luxury kinetic architecture
- Difficulty: Professional custom order
- Budget Breakdown: Factory upgrade: $400+.
- Creator’s Tip: Ensure the installer uses braided wire looms at the pivot points so the cables don’t snap from repeated opening and closing.
- Smart Sourcing: Always request IP67-rated waterproof LEDs and marine-grade wire shielding.
Most off-grid enthusiasts settle for terrible dim lighting… until they discover how to hybridize their power supply like this.
23. Hybrid Solar-Hardwired Systems
The ultimate fail-safe for flawless outdoor living. A redundant hybrid lighting network mixes the brute force of hardwiring with the eco-stealth of perimeter solar accents.
Relying 100% on either system creates vulnerabilities, but blending solar path markers with a hardwired dining chandelier looks far more expensive than it is. This drastically lowers electrical trenching costs while guaranteeing you always have base-level illumination during power outages.
This dual-system approach costs about $250 to set up. Pin this for smart off-grid landscaping!
- Key Materials: High-end solar path lights, 120V hardwired pendant
- Vibe / Style: Bulletproof eco-resilience
- Difficulty: Intermediate planning
- Budget Breakdown: Solar accents: $100 | Hardwire line: $150.
- Creator’s Tip: Use the same color temperature (e.g., 3000K) for both the solar and hardwired bulbs so the yard looks cohesive.
- Smart Sourcing: Buy commercial-grade solar uplights and a weatherproof hardwire junction kit.
24. Structural Column Uplighting
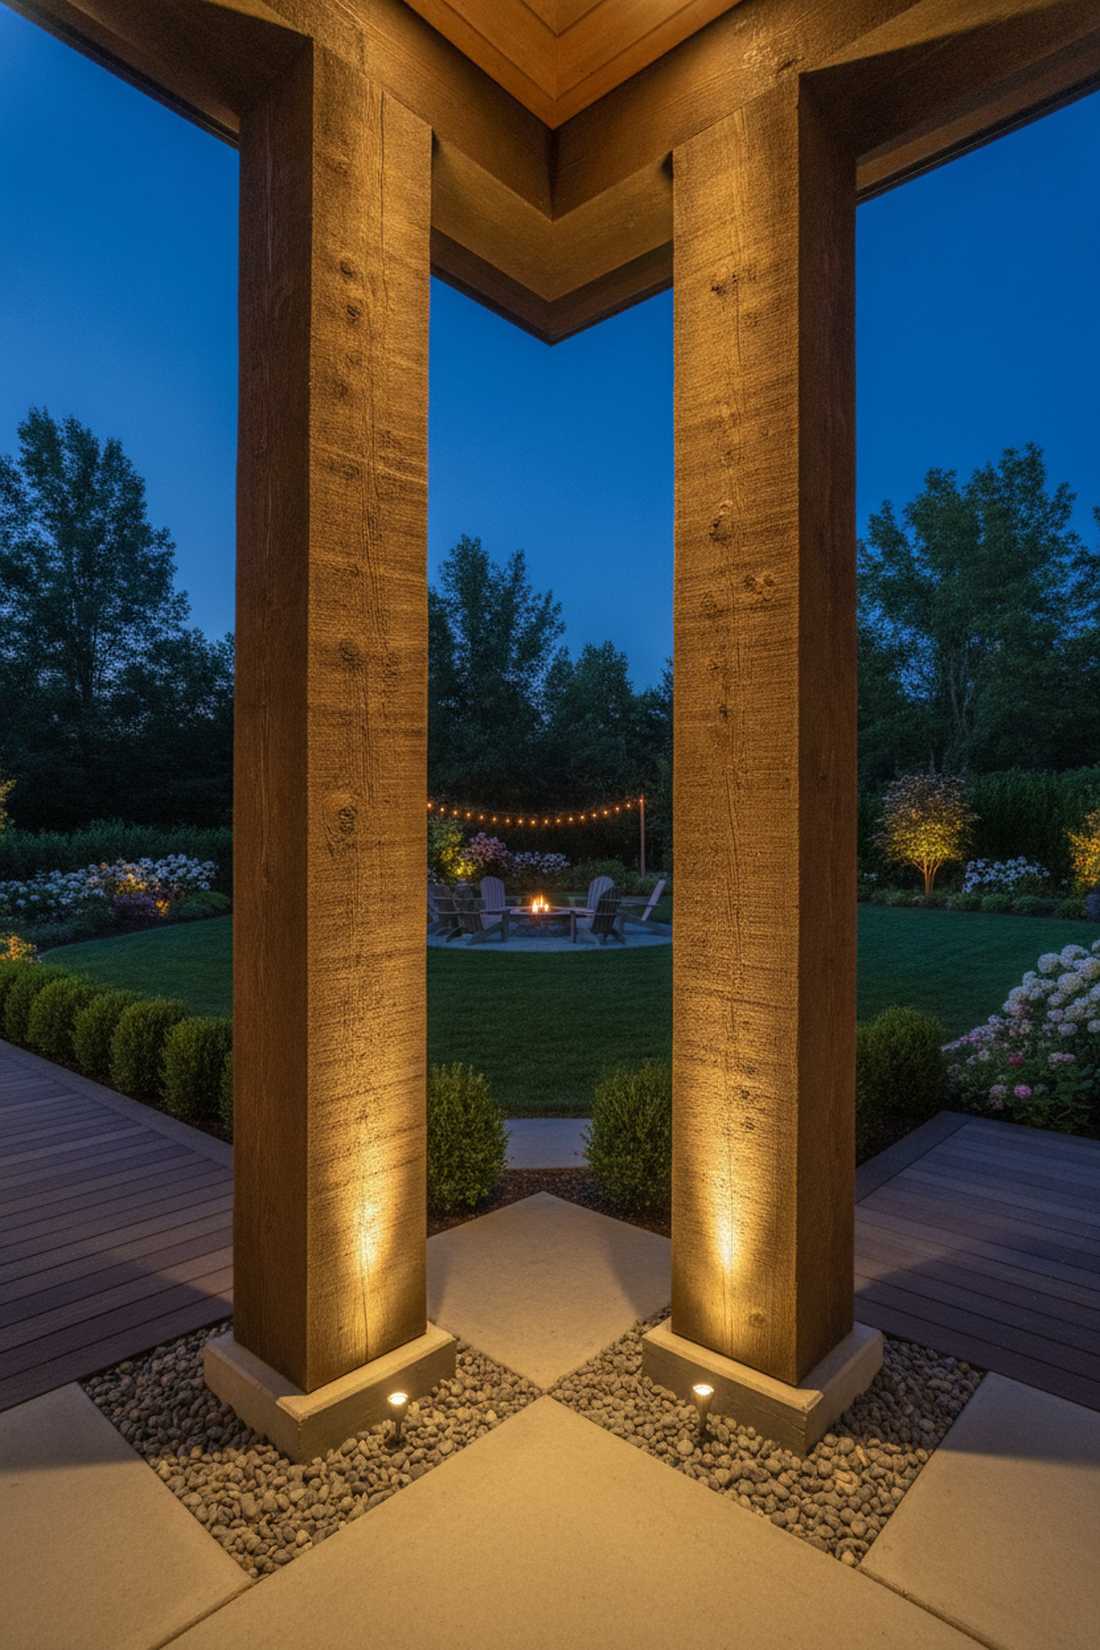
Turns massive support pillars into glowing monuments. Recessed base well lighting is vital for grounding heavy timber or stone columns into the landscape.
Strapping cheap fixtures to thick columns looks tacky, yet sinking heavy-duty well lights right into the concrete footings delivers a surprisingly premium look. Narrow-beam optics shave the vertical faces, emphasizing texture and casting elongated, dramatic shadows across the overhead canopy.
Installing these during a fresh pour costs about $80 per column.
- Key Materials: Brass in-ground well lights, PVC conduit
- Vibe / Style: Monumental estate grandeur
- Difficulty: Advanced hardscaping
- Budget Breakdown: Brass fixtures: $65 | Conduit: $15.
- Creator’s Tip: Set the fixture slightly above grade and surround it with gravel to ensure heavy rains drain away from the lens.
- Smart Sourcing: Use heavy-duty brass well lights (drive-over rated) and watertight direct burial wire nuts.
25. Cable Suspension Pendant System

Brings a gritty, trendy brewery aesthetic right to your patio. A tensioned aircraft cable canopy allows you to float lights exactly where you need them without drilling into beautiful beams.
Penetrating structural timbers can weaken older builds, but stringing stainless cables with adjustable grippers looks far more expensive than it is. Zip-tying a commercial festoon string across the tension lines gives a flawless, industrial-chic drape that refuses to sag.
You can set up a massive cable grid for under $120. Save this for a no-drill patio makeover!
- Key Materials: 1/8″ stainless aircraft cable, turnbuckles, festoon lights
- Vibe / Style: Industrial brewery chic
- Difficulty: Intermediate rigging
- Budget Breakdown: Rigging kit: $45 | String lights: $70.
- Creator’s Tip: Use clear, UV-resistant zip ties to secure the power cords to the steel cable so they vanish against the night sky.
- Smart Sourcing: Grab a stainless steel wire rope suspension kit and commercial grade shatterproof festoon lights.
26. Thermal Break Junction Boxes
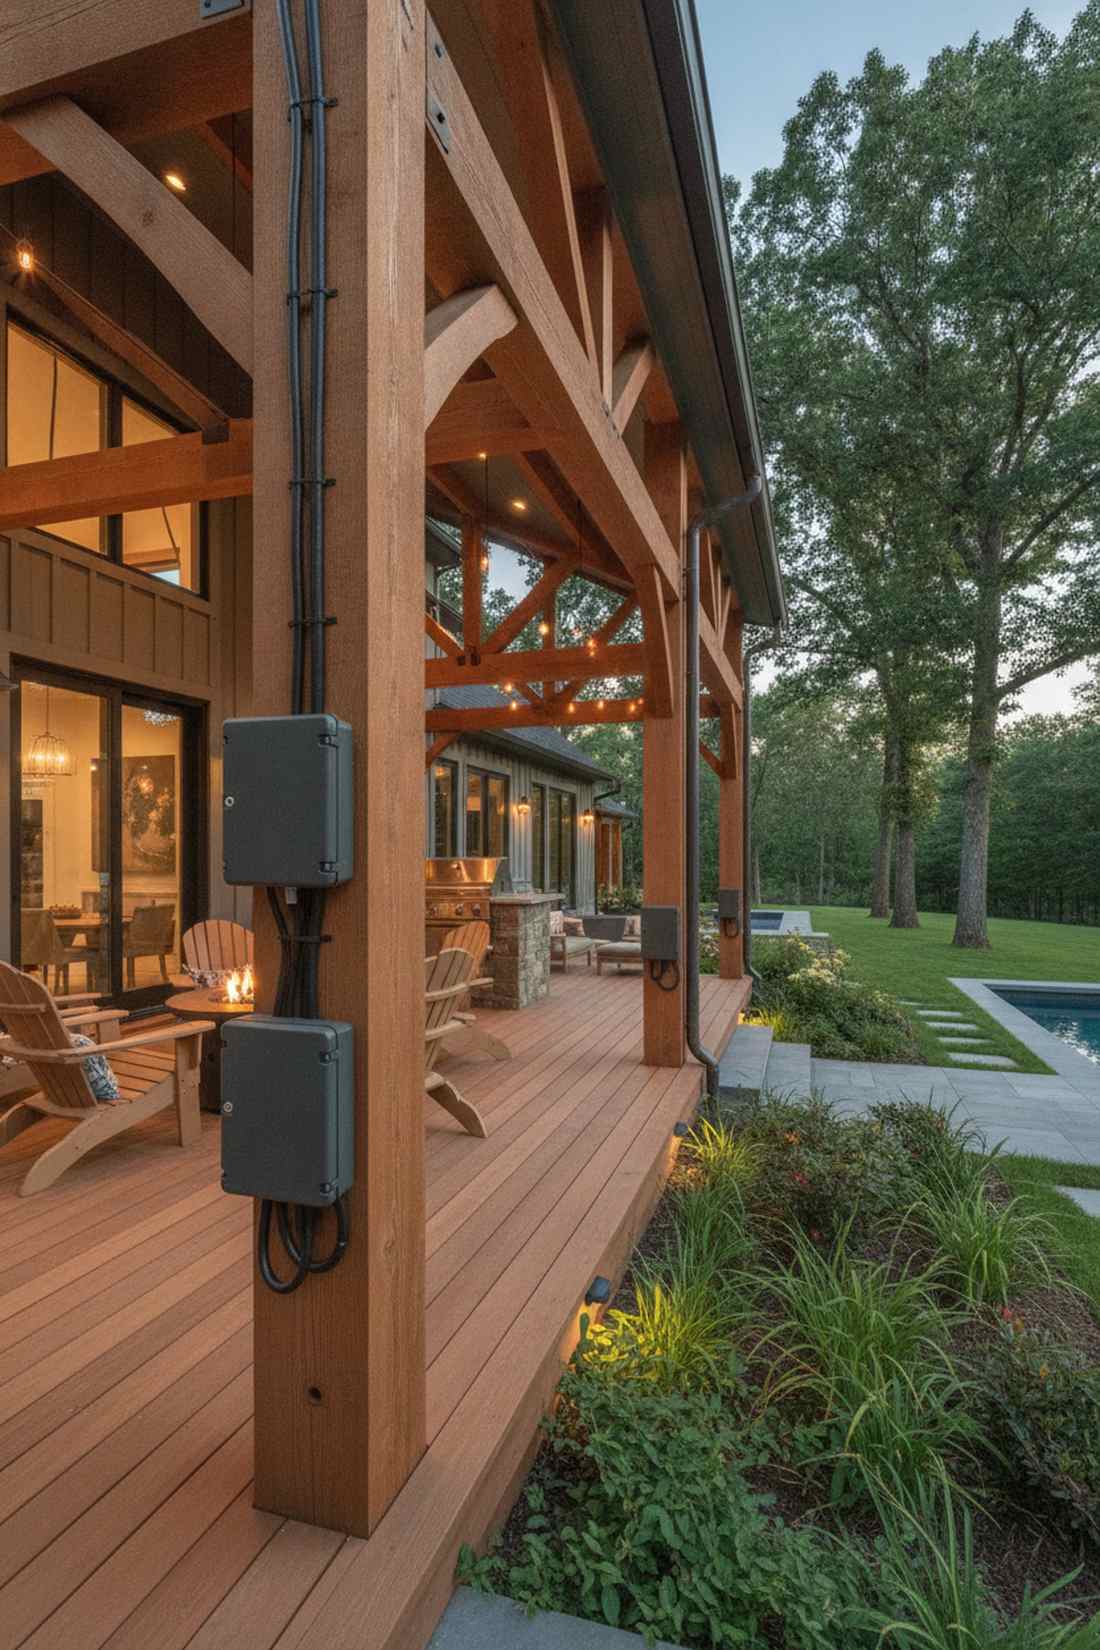
The secret weapon every master electrician uses to stop outdoor rot. Insulated architectural junction boxes are mandatory for safely managing massive wire intersections in timber structures.
Amateurs just shove wires into a void, which creates condensation and eventual fire hazards, but mounting gasket-sealed boxes gives a designer-level finish for code compliance. Using thermal breaks prevents temperature swings from sweating inside the box and destroying your expensive LED drivers.
These specialized boxes run about $25 a piece.
- Key Materials: IP65 gasketed junction boxes, threaded sealing plugs
- Vibe / Style: Professional utility stealth
- Difficulty: Intermediate electrical
- Budget Breakdown: Pro Box: $20 | Glands/Plugs: $10.
- Creator’s Tip: Always mount the box with the weep hole facing down so that any accidental moisture can easily drain out.
- Smart Sourcing: Source IP66 waterproof electrical junction enclosures and nylon cable gland connectors.
27. Beam Pocket Spotlights
The ultimate stealth maneuver for modern wooden structures. Flush-mount beam pocketing hides the entire body of a spotlight, leaving only a tiny adjustable lens visible.
Bulky floodlights completely ruin the silhouette of a minimal pergola, yet routing out a 2-inch shallow pocket for a micro-gimbal creates an optical illusion of wealth. You get fully adjustable directional lighting without any of the ugly, spider-like hardware protruding.
Creating these custom pockets costs around $40 per light. Pin this for a hyper-modern aesthetic!
- Key Materials: 2-inch LED gimbal lights, Forstner drill bits
- Vibe / Style: Hyper-minimalist modern
- Difficulty: Advanced precision drilling
- Budget Breakdown: Micro-gimbals: $30 | Bits: $15.
- Creator’s Tip: Use a Forstner bit rather than a standard hole saw to create a perfectly flat bottom inside the beam pocket for the fixture to sit against.
- Smart Sourcing: Pick up mini recessed LED gimbal spotlights (bulk pack) and a high-carbon steel Forstner bit set.
Bringing Structure and Light Together
Executing these 27+ outdoor lighting gazebo blueprints demands attention to weatherproofing, concealed wiring, and strategic placement that elevates your property’s value. The premium techniques outlined above prioritize high-end aesthetics, smart material sourcing, and commercial-level durability. Skip the cheap big-box kits and invest in UV-resistant structural integrations. Start by mapping your lighting zones, then aggressively source the exact productized components needed to deliver that high-end resort finish on a DIY budget.
Frequently Asked Questions
What voltage should I use for integrated gazebo lighting?
Most contractors specify 12V DC systems using a low voltage landscape transformer for gazebo and pergola lighting to eliminate shock risks and hide thinner wires inside tight aluminum LED channels. Hardwiring 120V is overkill and ugly, whereas low-voltage starter kits easily integrate with smart outdoor dimmers to achieve that premium, expensive look on a budget.
How do I prevent moisture damage in beam-integrated wiring?
Always route wiring through the top surfaces of beams and seal every gap with marine-grade silicone or waterproof wire nuts. Invest in IP65 or IP67-rated weatherproof junction boxes and bulk packs of UV-resistant cable sleeves to stop the sun and rain from degrading your commercial-grade festoon lights over time.
Can I retrofit lighting into an existing pergola structure?
Yes, utilizing pre-cut heavy-duty aluminum LED channel extrusions and smart RGBW exterior light ribbons allows for a massive aesthetic upgrade without tearing the wood apart. Retrofitting with low-voltage surface mounts and wireless relays gives a designer-level finish for under $150 in materials.
What color temperature works best for outdoor structure lighting?
Always source warm white LEDs between 2700K and 3000K to achieve a cozy, expensive resort vibe that highlights natural wood grains. Avoid cheap 5000K kits at all costs—they create a harsh, cheap hospital glare; instead, opt for high-CRI outdoor spotlight heads to make architectural details pop.
How much lighting do I need for a standard 12×12 gazebo?
Target roughly 150 to 300 lumens per square foot, utilizing a blend of high-output COB continuous light strips and subtle recessed beam downlights. Buying a bulk pack of micro brass landscape spotlights allows you to layer the brightness effectively without creating harsh shadows or blinding your guests.