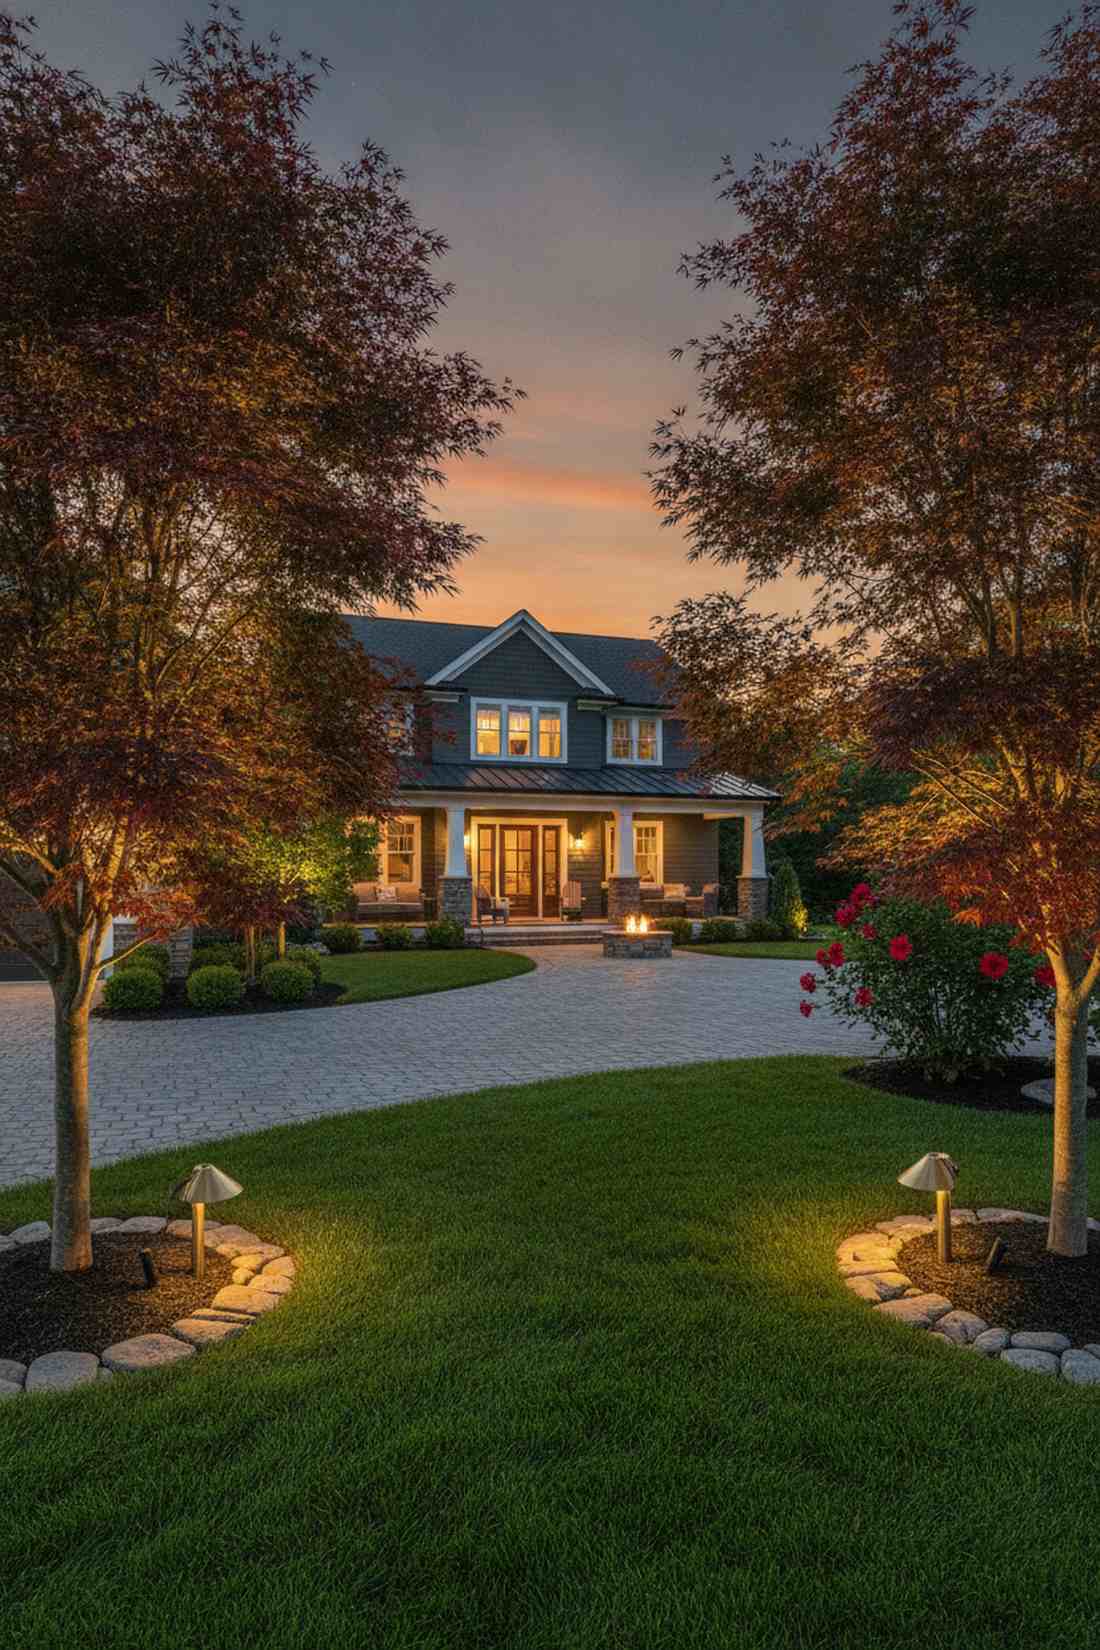
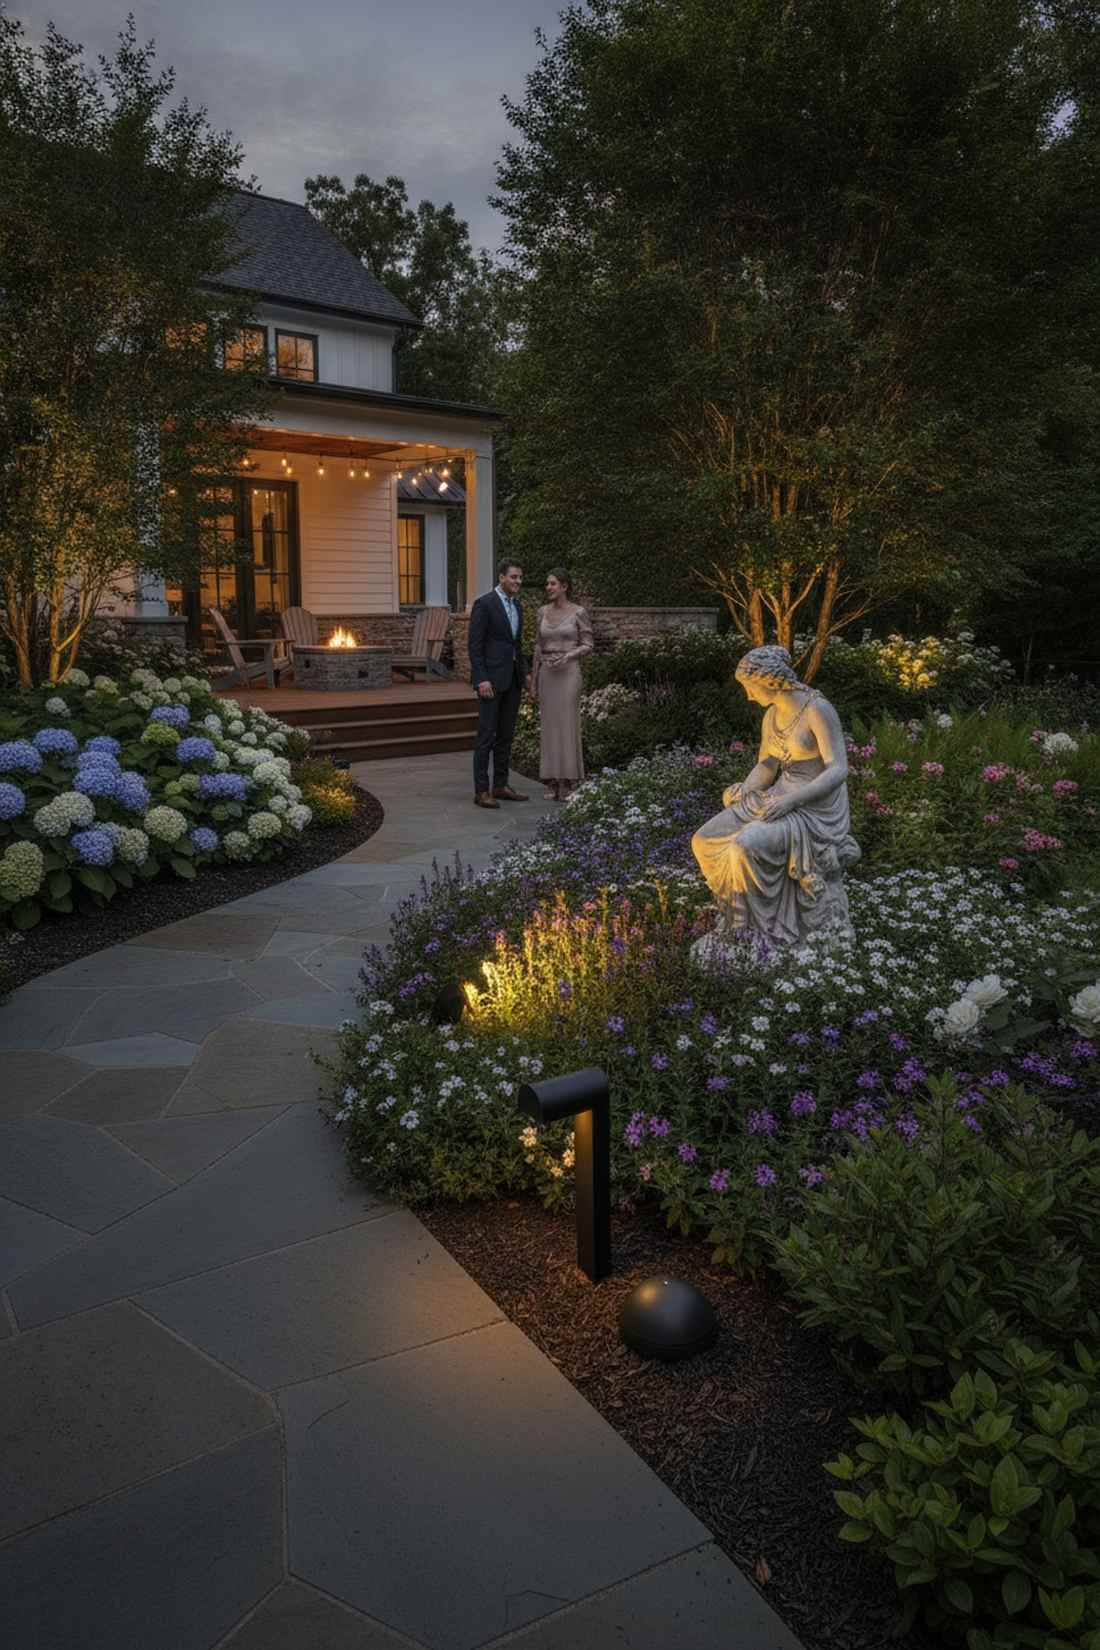
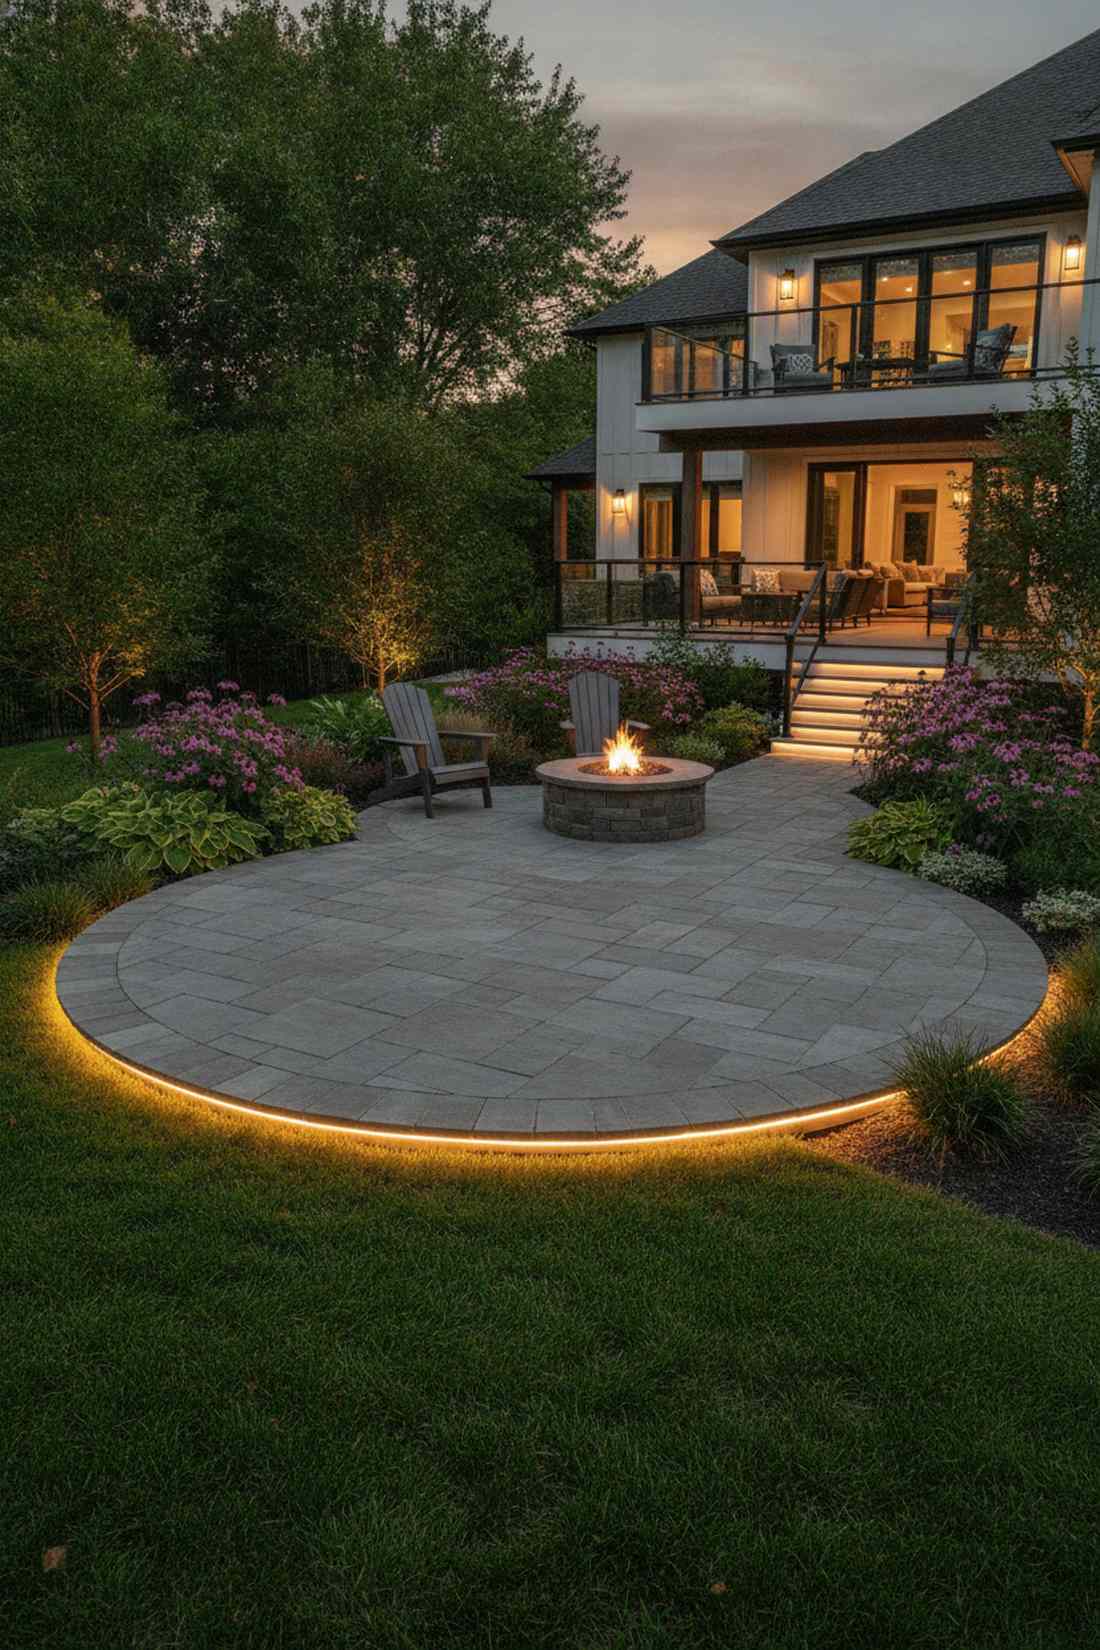
Elevating your landscape requires strategic outdoor lighting garden techniques that reveal hidden textures. Premium low-voltage materials guarantee a designer-level aesthetic without the shocking contractor fees. Master these specific layouts to transform basic flower beds instantly.
Design Snapshot Key Principles
- Layer Your Light: Combine ambient, task, and accent lighting at different heights to create depth and visual interest throughout planting beds
- Temperature Matters: Warm white (2700-3000K) enhances reds and oranges while cool white (4000-5000K) makes blues and purples more vibrant
- Consider Beam Angles: Narrow spots (15-25°) highlight individual specimens; wide floods (40-60°) wash entire flower beds with gentle illumination
- Plan for Growth: Position fixtures with adjustable heads to accommodate plant maturity and seasonal changes in your garden layout
Dramatic Uplighting Techniques for Garden Flowers
1. Bullet Uplights for Specimen Plants
This layout feels like a midnight sanctuary you accidentally stumbled upon. Modern front yard uplighting is an absolute game-changer when positioned near a majestic Japanese maple or blooming hibiscus. It works exceptionally well for showcasing standalone architectural trees near your driveway.
Most beginners make the mistake of blasting the entire trunk, but utilizing a tight 15-degree angle delivers a surprisingly premium look. By securing heavy-duty weatherproof landscape lighting supplies, the focused beam travels beautifully through the canopy without blinding your neighbors.
You can easily pull this off for around $35–$50 per tree. Pin this if you want a high-end curb appeal upgrade this weekend.
- Key Materials: Cast brass bullet fixtures, silicone-filled wire nuts
- Vibe / Style: Five-star resort entrance
- Difficulty: Beginner-friendly wiring
- Budget Breakdown: Fixture: $25 | LED Bulb: $10 | Wiring: $5.
- Creator’s Tip: Use an extended glare shield to hide the physical bulb from the street view completely.
- Smart Sourcing: pre-wired brass bullet uplights (starter kit) and UV-coated 12-gauge landscape wire (bulk roll).
2. Dual-Angle Uplighting for Wide-Canopy Flowers
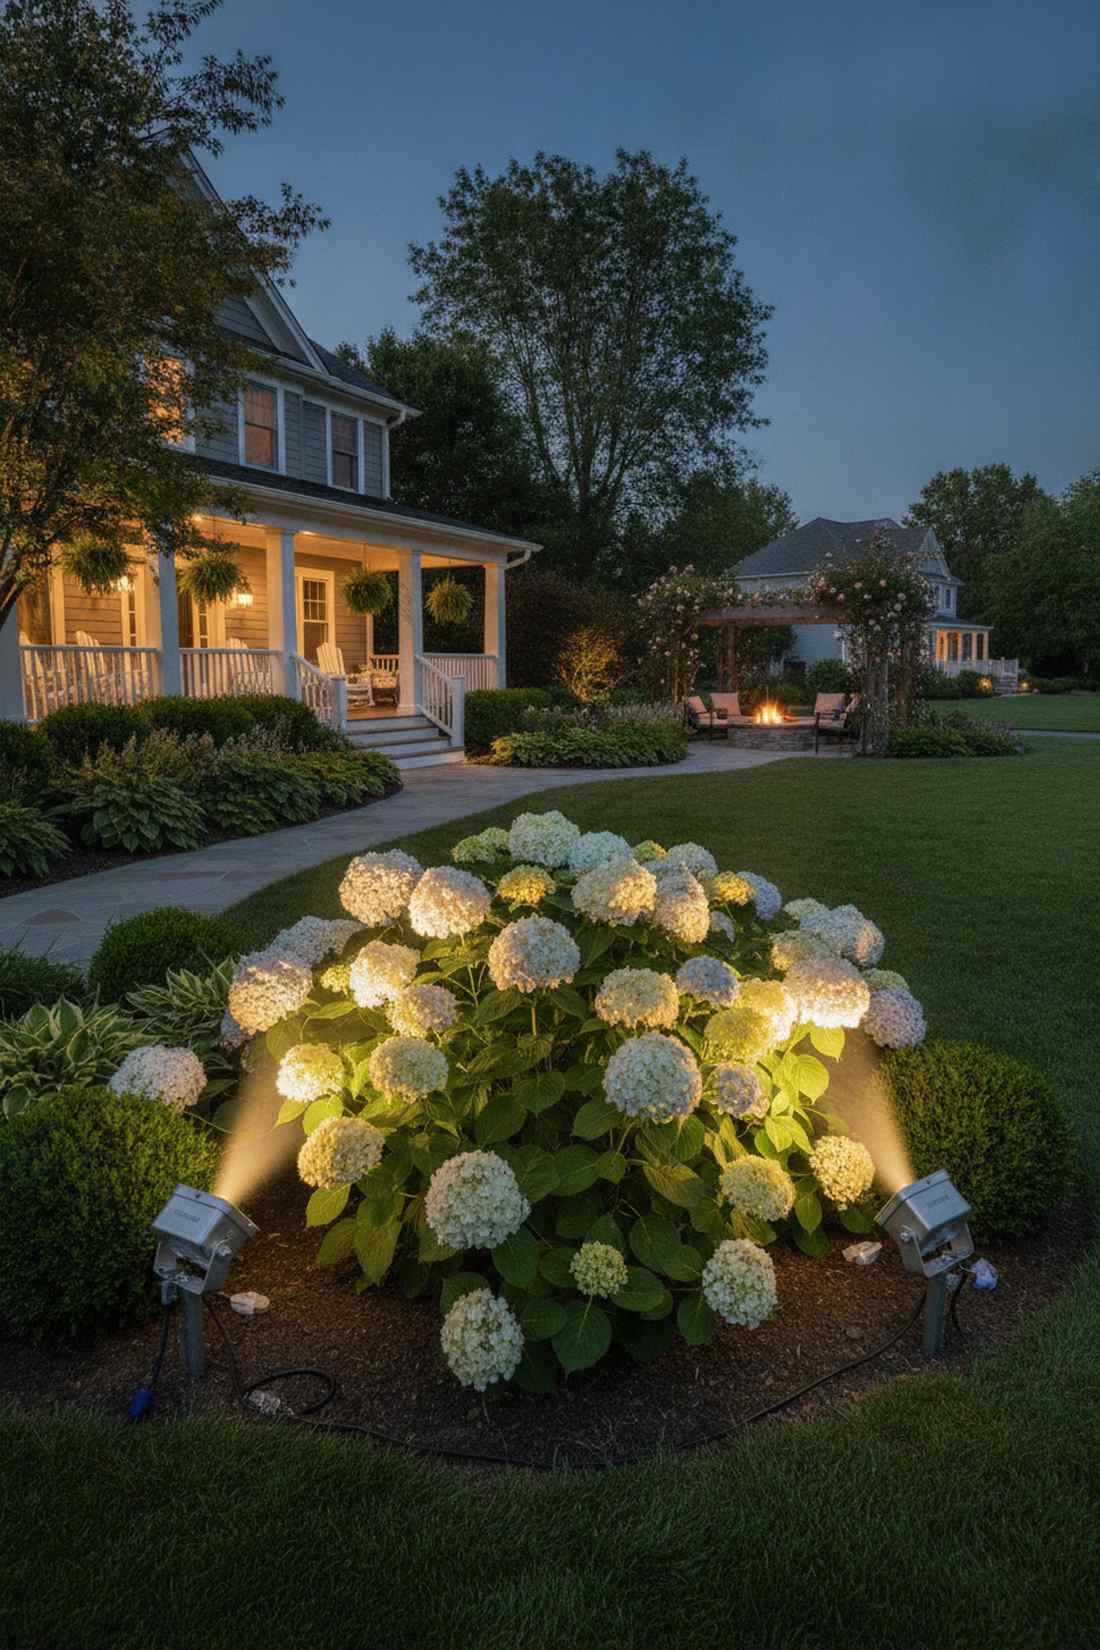
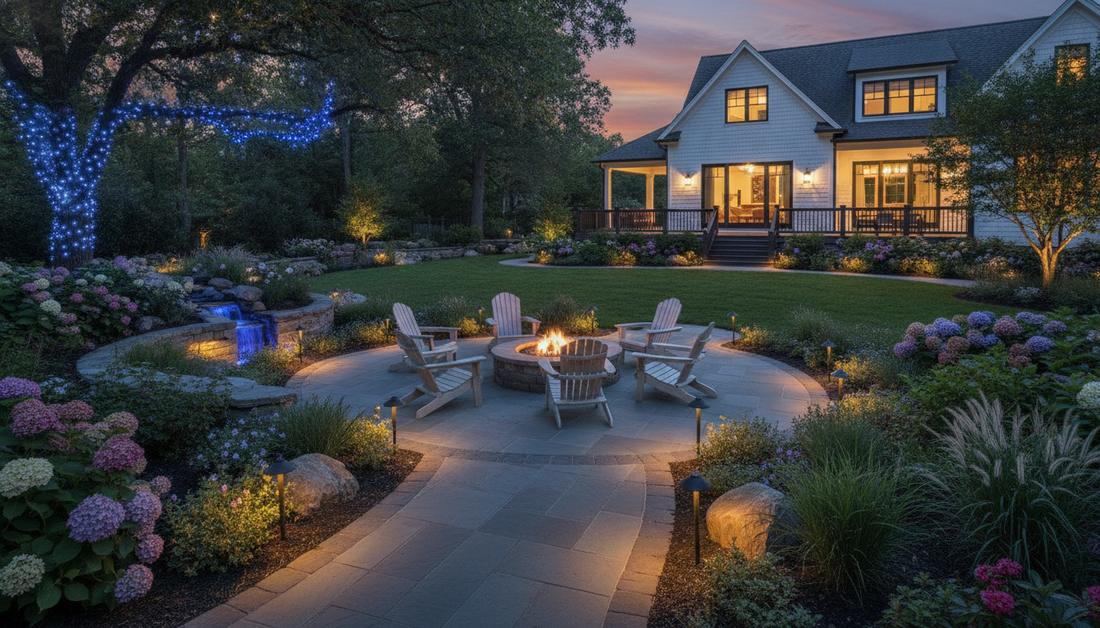
There is something deeply romantic about lush blooms glowing warmly in the dark. Utilizing wide-canopy shrub illumination creates an immersive ambiance perfect for large hydrangea bushes. It is an ideal layout for corner lot gardens wanting maximum evening impact.
Homeowners often try to light a massive bush with just one bulb, leaving half of it in awkward shadows. Crossing two beams from opposite angles eliminates dark spots and gives a designer-level finish. Integrating commercial-grade outdoor lighting for garden layouts ensures the glow remains perfectly balanced.
Expect to spend about $60 total to perfectly wrap a wide plant in light.
- Key Materials: Twin adjustable floodlights, heavy-duty mounting stakes
- Vibe / Style: Luxurious botanical garden
- Difficulty: Easy Saturday project
- Budget Breakdown: 2x Fixtures: $45 | Connectors: $15.
- Creator’s Tip: Set the fixtures exactly 90 degrees apart to overlap beams flawlessly.
- Smart Sourcing: aluminum wide-angle flood fixtures (2-pack) and waterproof quick-connect terminals.
3. Grazing Light for Climbing Roses
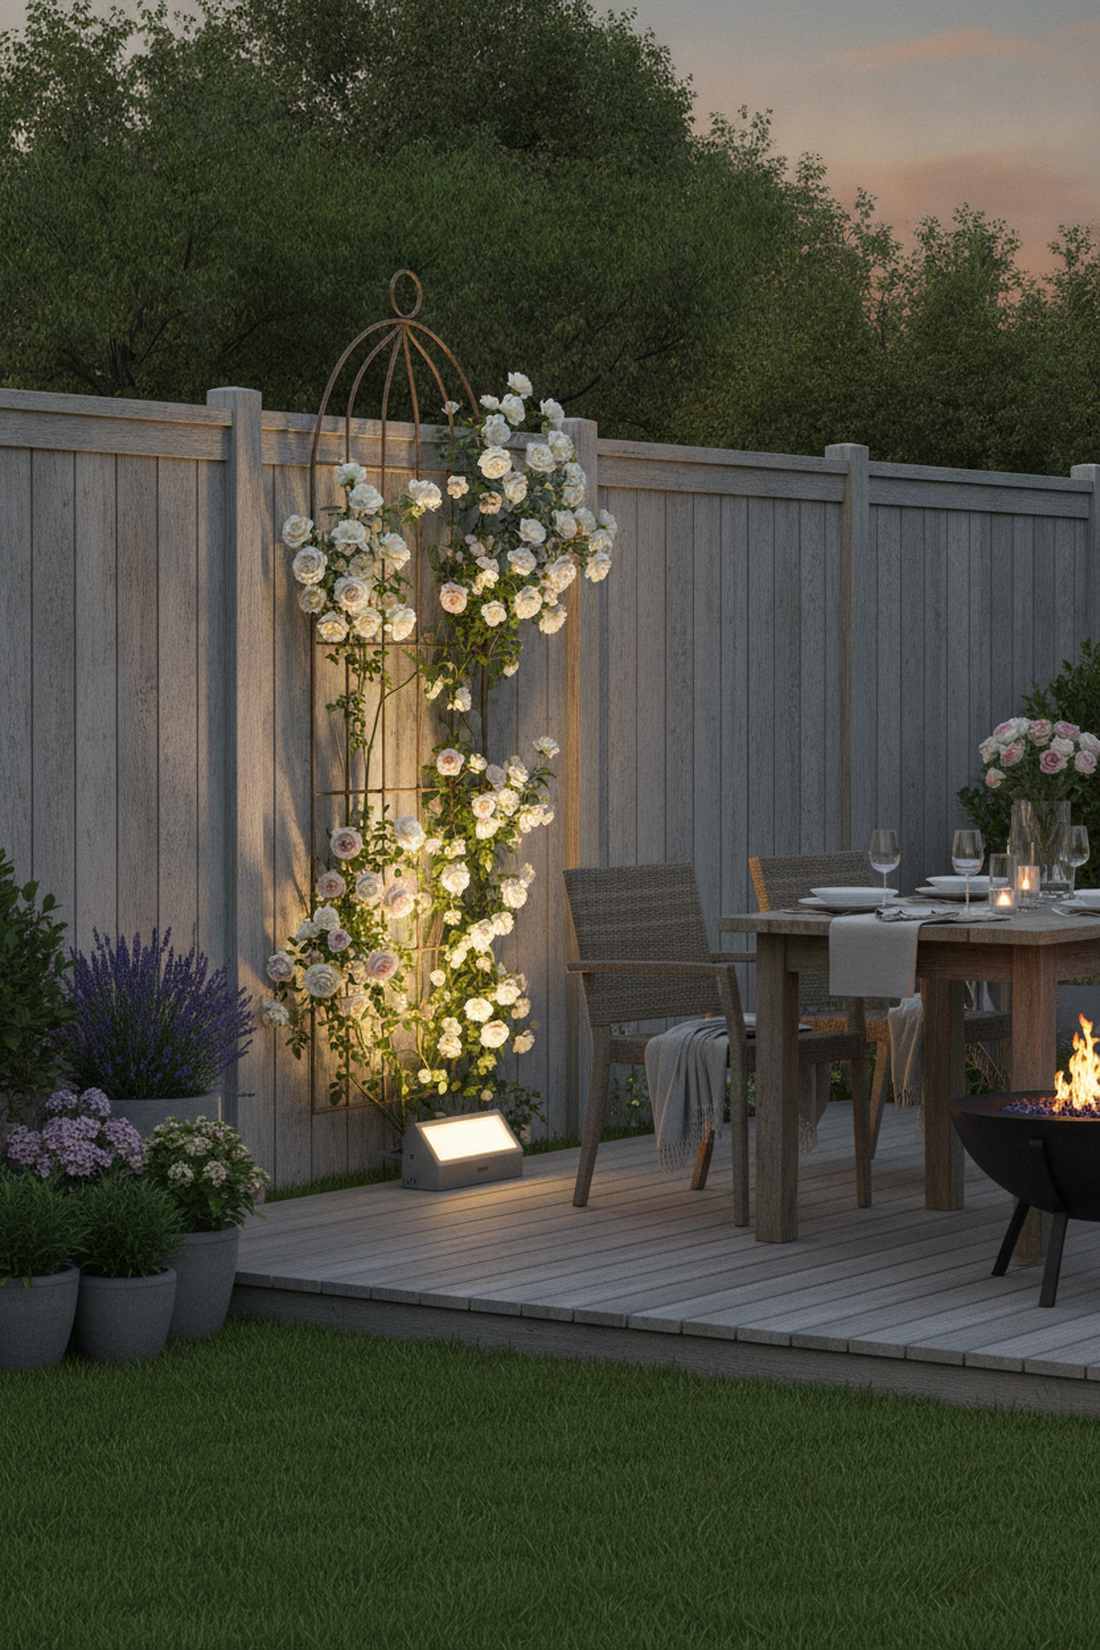
This creates a texture that looks straight out of an old-world European cottage. Vertical trellis grazing makes every single rose petal and leaf vein pop with dramatic contrast. Placed against a backyard privacy fence, it creates an unforgettable dining backdrop.
Shooting light directly at a flat wall washes out all the beautiful floral details. By mounting the fixture inches away and shooting straight up, the grazing technique looks far more expensive than it is. Opting for a frosted lens softens the hot spots for a flawless gradient.
This subtle, highly textural upgrade costs roughly $40 to execute.
- Key Materials: Low-profile wash light, frosted glass lens
- Vibe / Style: Romantic cottage evening
- Difficulty: Intermediate mounting
- Budget Breakdown: Fixture: $30 | Mounting Hardware: $10.
- Creator’s Tip: Mount the fixture slightly offset from the main trunk so it catches the leaves diagonally.
- Smart Sourcing: surface-mount LED grazers (commercial grade) and rust-proof masonry screws.
4. Wash Lights for Perennial Borders
Washing a massive flower bed feels like giving your entire yard a gentle, glowing hug. Soft border illumination wraps diverse perennials in a seamless sheet of warm light. This setup is exceptional for softening the hard edges along a concrete walkway.
Using standard spotlights here creates harsh, ugly zebra stripes across your delicate blooms. A proper diffused wash light seamlessly blends the light pools together, instantly upgrading the perceived value of your landscaping. Investing in bulk premium miniature garden supplies ensures consistent color temperature.
Budget around $25 per fixture spacing every six feet. Save this layout for your spring garden planning board!
- Key Materials: 60-degree frosted floodlights, low-voltage hub
- Vibe / Style: Sophisticated modern estate
- Difficulty: Moderate trenching required
- Budget Breakdown: Fixtures (each): $20 | Bulbs: $5.
- Creator’s Tip: Alternate the height of the stakes slightly if your ground is uneven to maintain a flat light line.
- Smart Sourcing: frosted 60-degree LED wash kits (4-pack) and heavy-duty grounding stakes.
This next setup is ridiculously cheap but looks like a custom $1,000 holiday display…
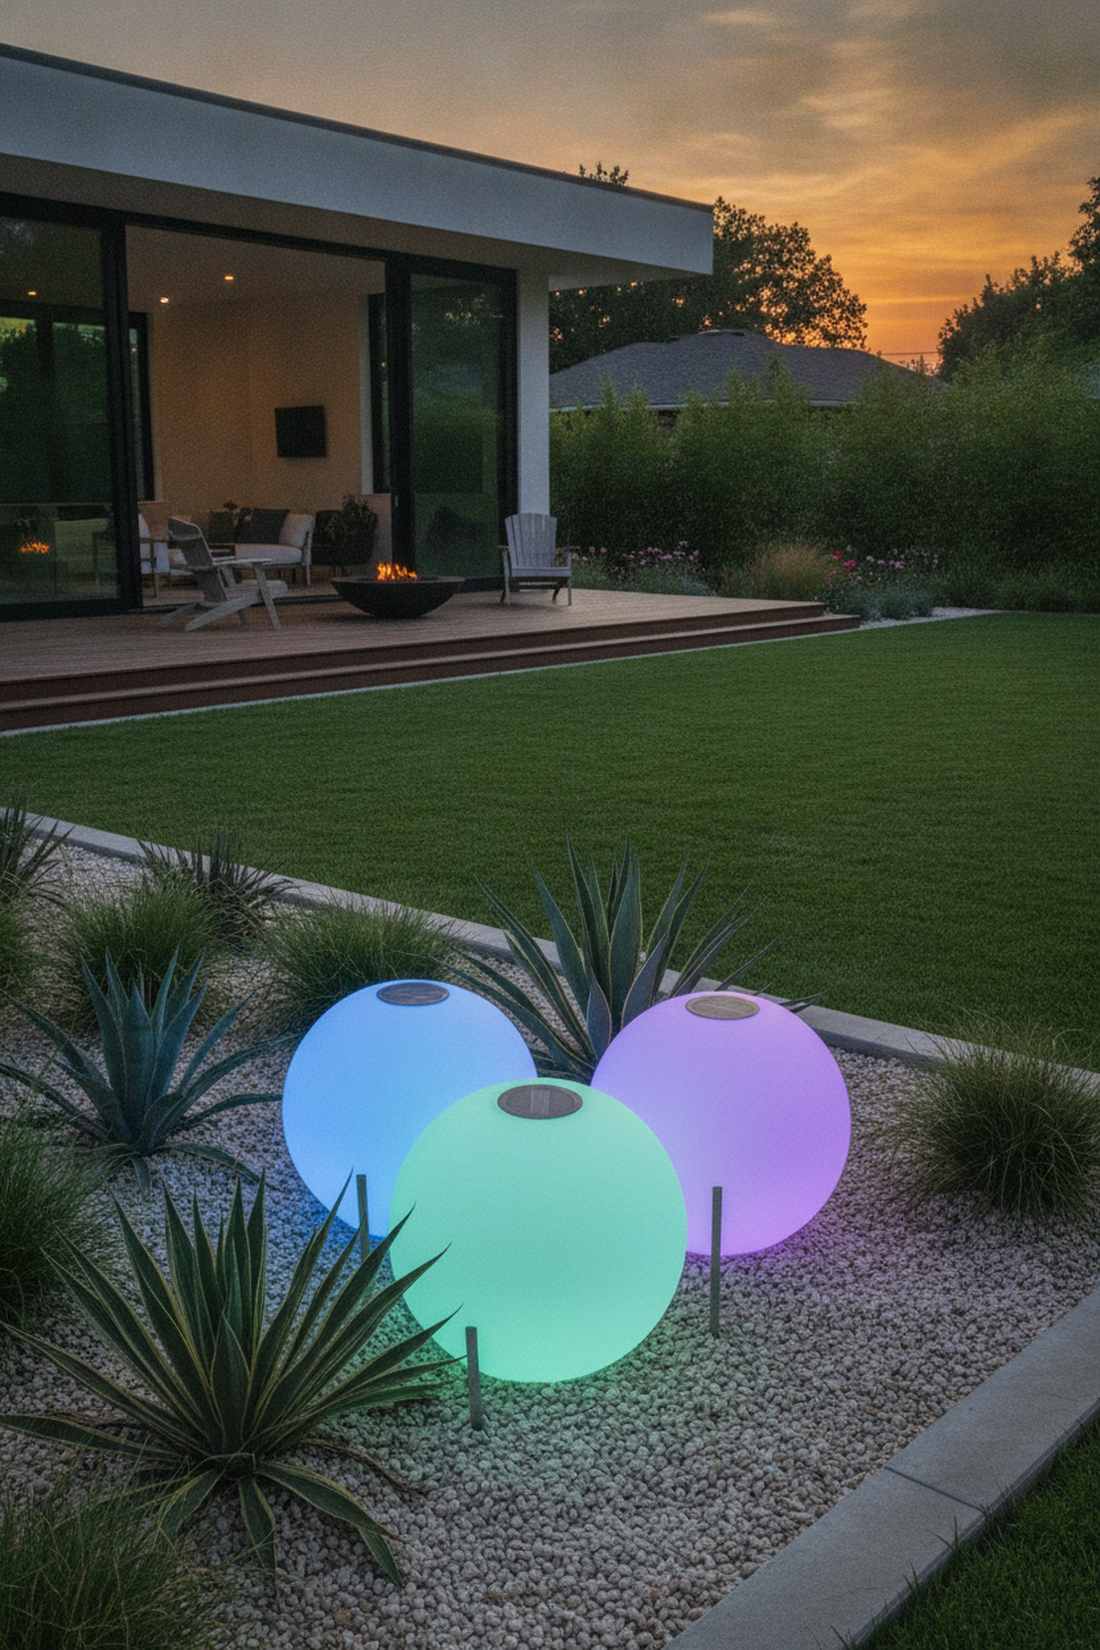
5. Colorwash Accent for Seasonal Displays
Imagine your garden shifting moods with the seasons at the push of a button. Smart RGB garden accents allow you to paint tulips pink in spring and mums amber in autumn. Perfect for those who love throwing themed backyard dinner parties.
Generic colored bulbs often look tacky and overpower the natural beauty of the plants. Dialing the saturation down to a subtle 30% delivers a shockingly high-end wash that complements rather than competes. Smart outdoor lighting for garden controllers let you fine-tune these hues right from your phone.
A smart RGB fixture runs about $60 but replaces the need to buy different seasonal bulbs.
- Key Materials: Wi-Fi enabled RGBW fixtures, smart bridge
- Vibe / Style: Dynamic contemporary chic
- Difficulty: Tech-focused setup
- Budget Breakdown: Smart Fixture: $50 | Wi-Fi Controller: $10 (apportioned).
- Creator’s Tip: Never use pure green light on plants—it makes natural foliage look artificial and plastic.
- Smart Sourcing: app-controlled RGBW landscape lights (starter bundle) and weatherproof smart timers.
6. Shadowing Technique for Architectural Plants
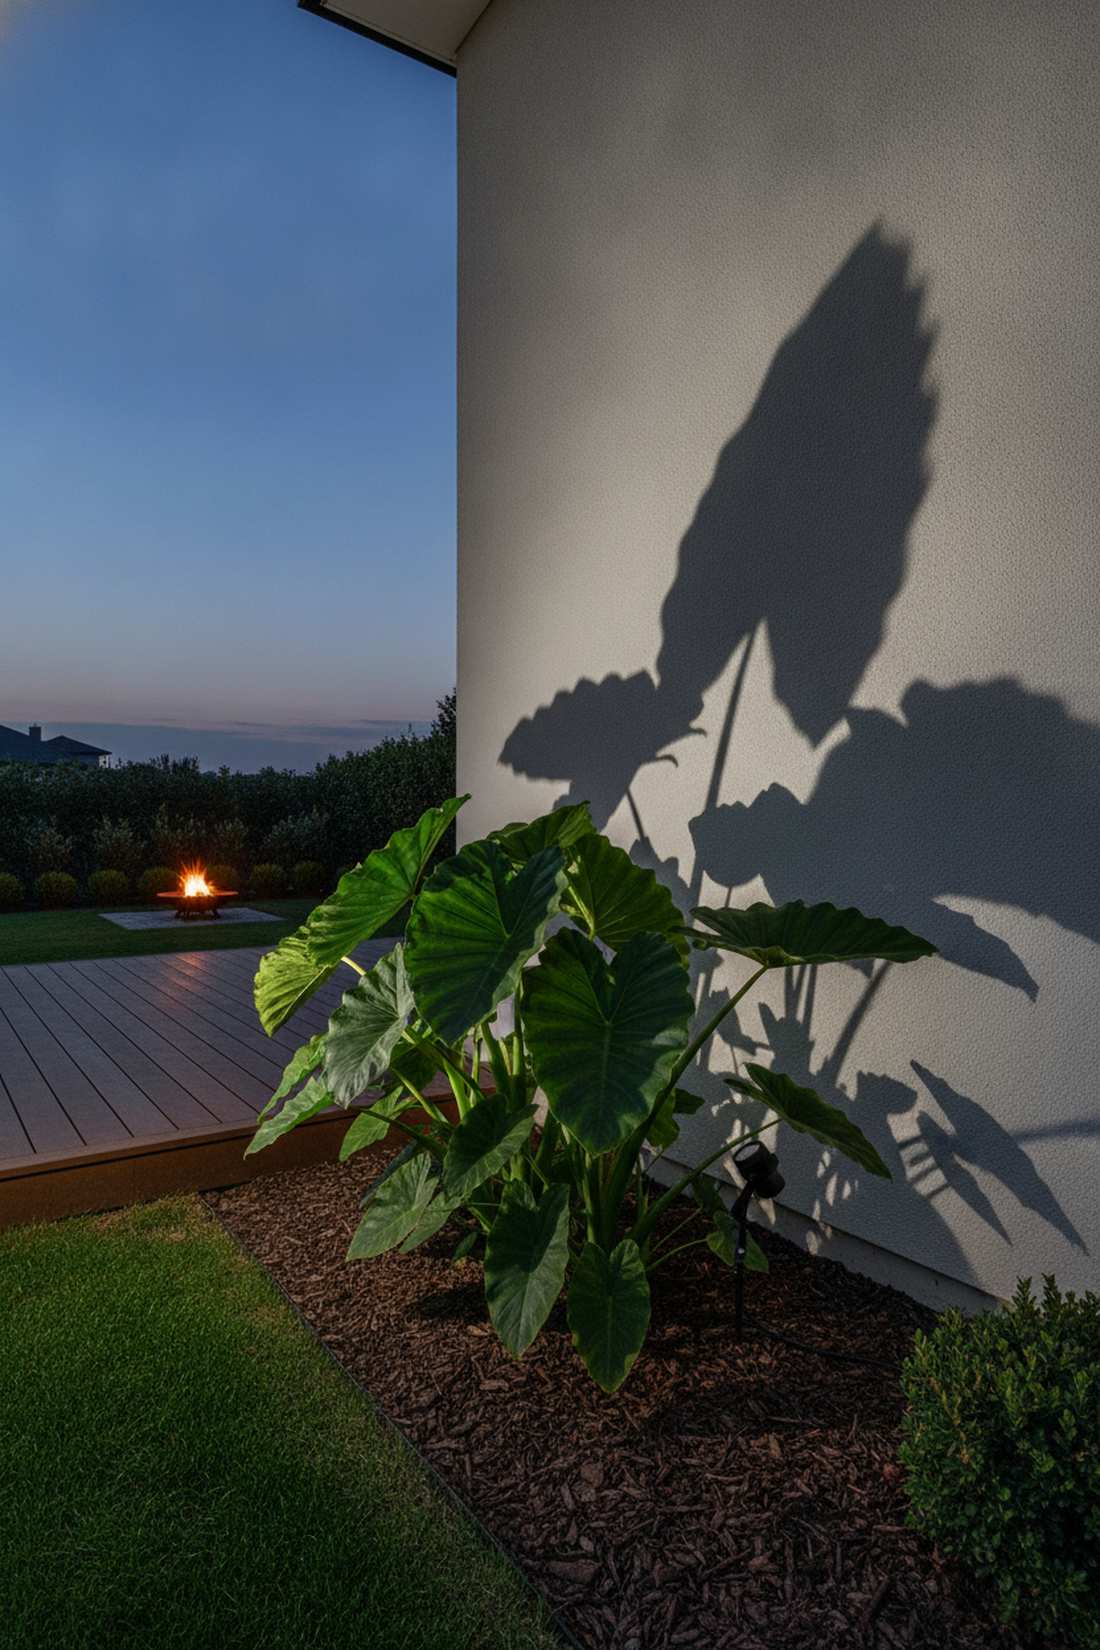
This casts a silhouette that feels like bold, modern graphic art painted onto your house. Plant shadowing against walls leverages large foliage like elephant ears to create mesmerizing nighttime shapes. Put this in front of a blank stucco wall to eliminate boring dead zones.
If you place the light in front of the plant, you lose the theatrical magic. Tucking a narrow spotlight directly behind the stems projects a massive, razor-sharp shadow that completely changes the architectural vibe. Using acrylic weather seals ensures your hidden fixtures survive aggressive watering routines.
You can achieve this jaw-dropping art effect for just $20. Pin this if you love moody, artistic spaces.
- Key Materials: Micro-spotlight, blank backdrop wall
- Vibe / Style: Moody modern gallery
- Difficulty: Quick positioning
- Budget Breakdown: Micro-Fixture: $15 | Hardware: $5.
- Creator’s Tip: Move the fixture closer to the plant to make the shadow aggressively large and imposing.
- Smart Sourcing: miniature 15-degree LED spot (pre-cut wiring) and UV-resistant mounting spikes.
Natural Downlighting & Moonlighting Effects for Outdoor Garden Lighting
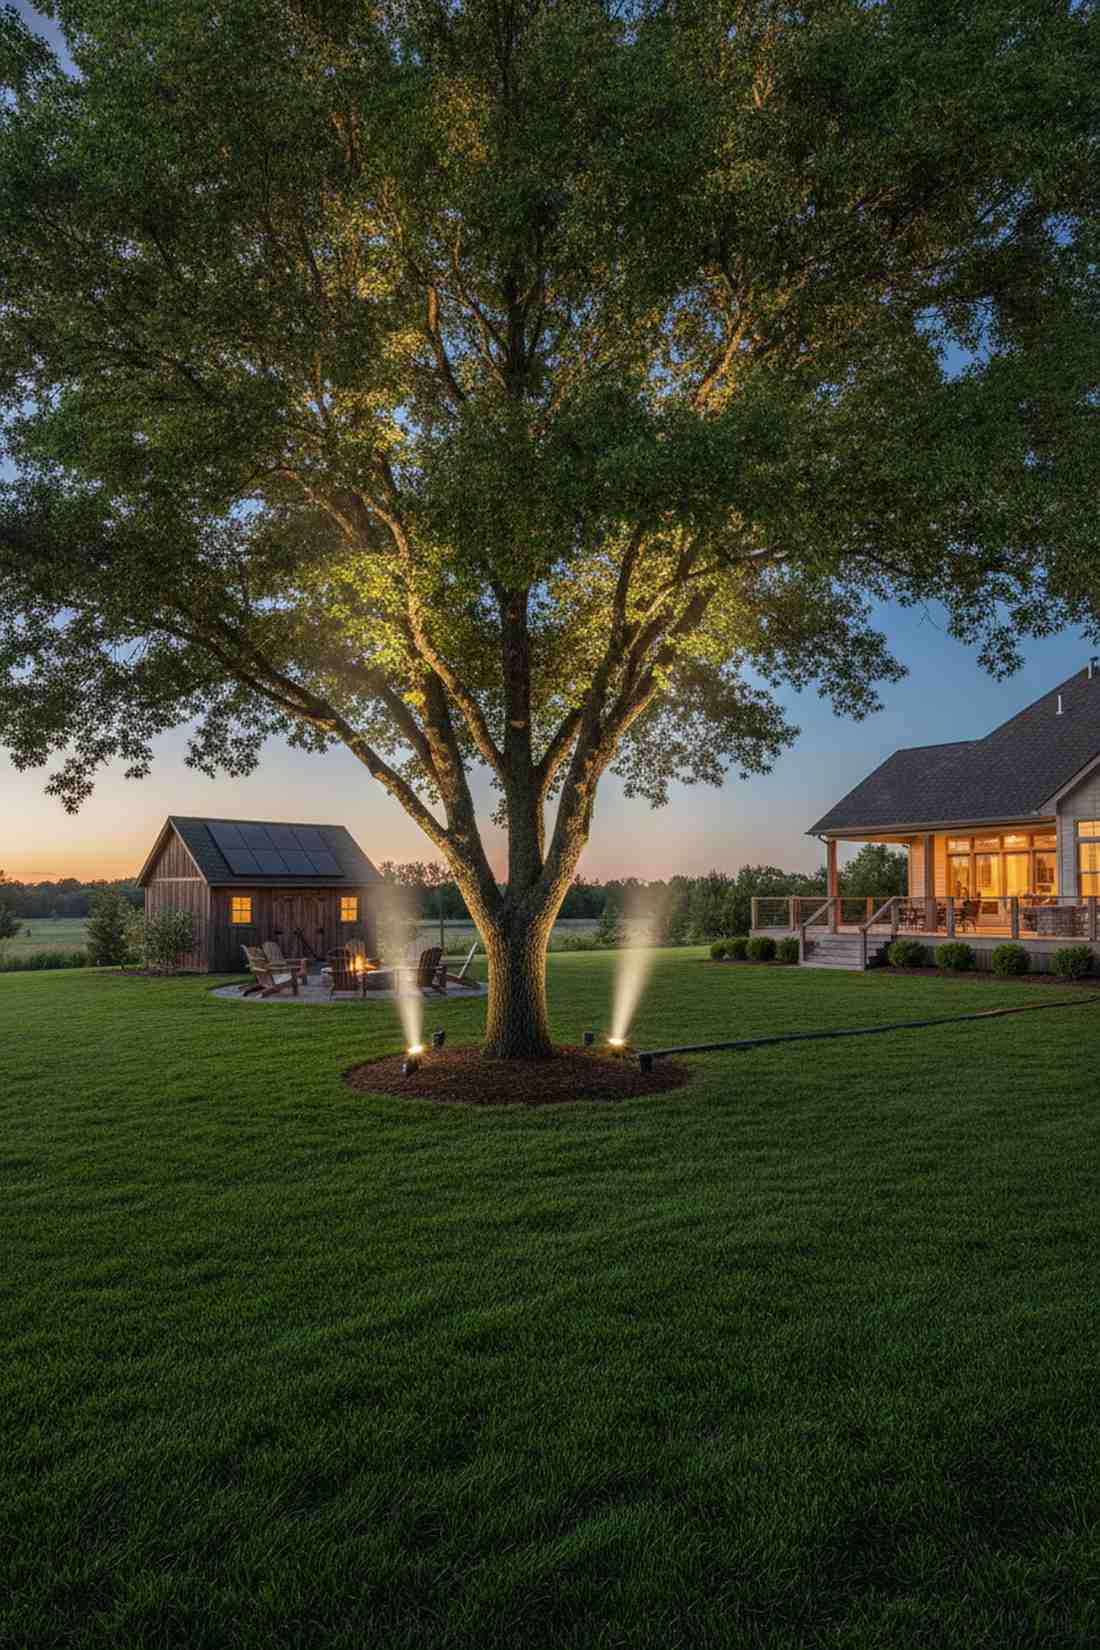
7. Tree-Mounted Moonlighting Over Flower Beds
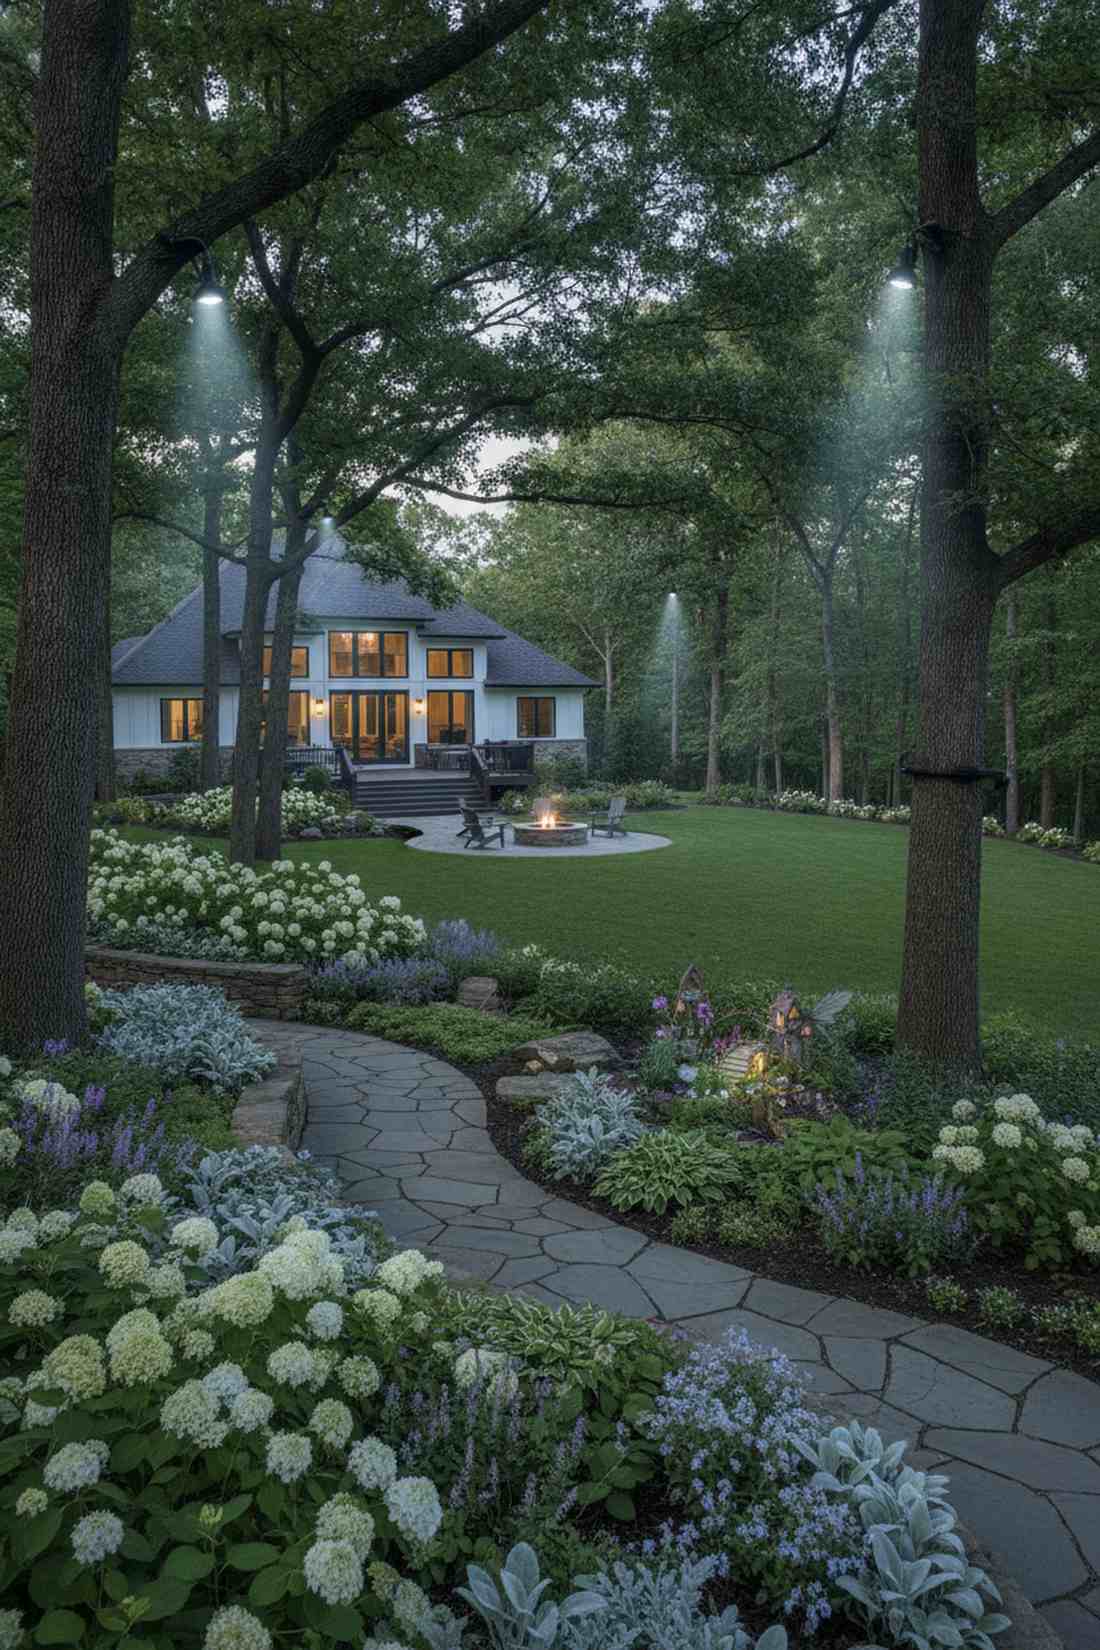
There is nothing quite as magical as dappled light filtering softly through rustling leaves. Tree canopy moonlighting mimics a full moon every single night, washing the flower beds below. It is the ultimate trick for heavily wooded lots where ground lights get buried.
Standard uplighting can blind you when you are walking under a tree canopy. Mounting fixtures 20 feet up to shoot downward completely hides the source while creating organic, shifting shadow patterns on your path. High-end fairy garden kits often rely on this exact ambient overhead glow.
This requires a taller ladder and about $70 in materials, but the payoff is immense.
- Key Materials: Tree-mount canopy fixtures, 4000K LED bulbs
- Vibe / Style: Enchanted woodland walk
- Difficulty: Advanced climbing/mounting
- Budget Breakdown: Mount: $20 | Fixture: $40 | Wire Hiders: $10.
- Creator’s Tip: Use a slightly cooler 4000K bulb to authentically replicate the silvery tone of real moonlight.
- Smart Sourcing: adjustable tree-mount downlights (heavy-duty) and tree-safe standoff mounting bolts.
8. Pergola Strip Lighting for Hanging Baskets

This layout gives your outdoor dining space a gentle, floating crown of floral light. Overhead structural strip lighting bathes hanging fuchsias perfectly without creating harsh shadows. It completely transforms a basic wooden pergola into a luxurious evening destination.
Most folks try hanging bulky lanterns that bump heads and cast weird shadows on the table. Routing a hidden channel for a continuous LED ribbon looks far more expensive than it is and provides perfectly even illumination. Snagging waterproof outdoor garden solar lighting strips makes this a breeze to install.
You can execute this seamless overhead glow for roughly $35–$50.
- Key Materials: IP65 LED strips, aluminum diffuser channels
- Vibe / Style: High-end patio dining
- Difficulty: Basic woodworking
- Budget Breakdown: Strip Kit: $25 | Aluminum Track: $20.
- Creator’s Tip: Always use an opal diffuser cover over the aluminum track to eliminate the cheap “dotted” LED look.
- Smart Sourcing: IP65 warm-white LED tape (bulk spool) and frosted aluminum mounting channels (pre-cut).
9. Adjustable Downlights for Container Gardens
Spotlighting specific pots feels like placing your beautiful blooms on a theater stage. Post-mounted container lighting lets you highlight seasonal arrangements right on your deck. It works miracles for tight balcony spaces where ground fixtures would just be tripped over.
Containers change size and shape drastically throughout the summer months. Hard-mounting a swiveling mini-spotlight overhead allows you to adapt the beam instantly, which delivers a surprisingly premium look with zero fuss. This is a brilliant way to utilize premium landscape lighting accessories.
A pair of these flexible deck lights will run you about $40.
- Key Materials: Swivel-head micro spots, deck post mounts
- Vibe / Style: Curated gallery display
- Difficulty: Easy drill-and-mount
- Budget Breakdown: Swivel Fixture: $30 | Wire Concealers: $10.
- Creator’s Tip: Mount these exactly 6 feet high so the light hits the plants but stays out of the eyes of seated guests.
- Smart Sourcing: swivel-neck architectural downlights (compact) and color-matched wire raceways.
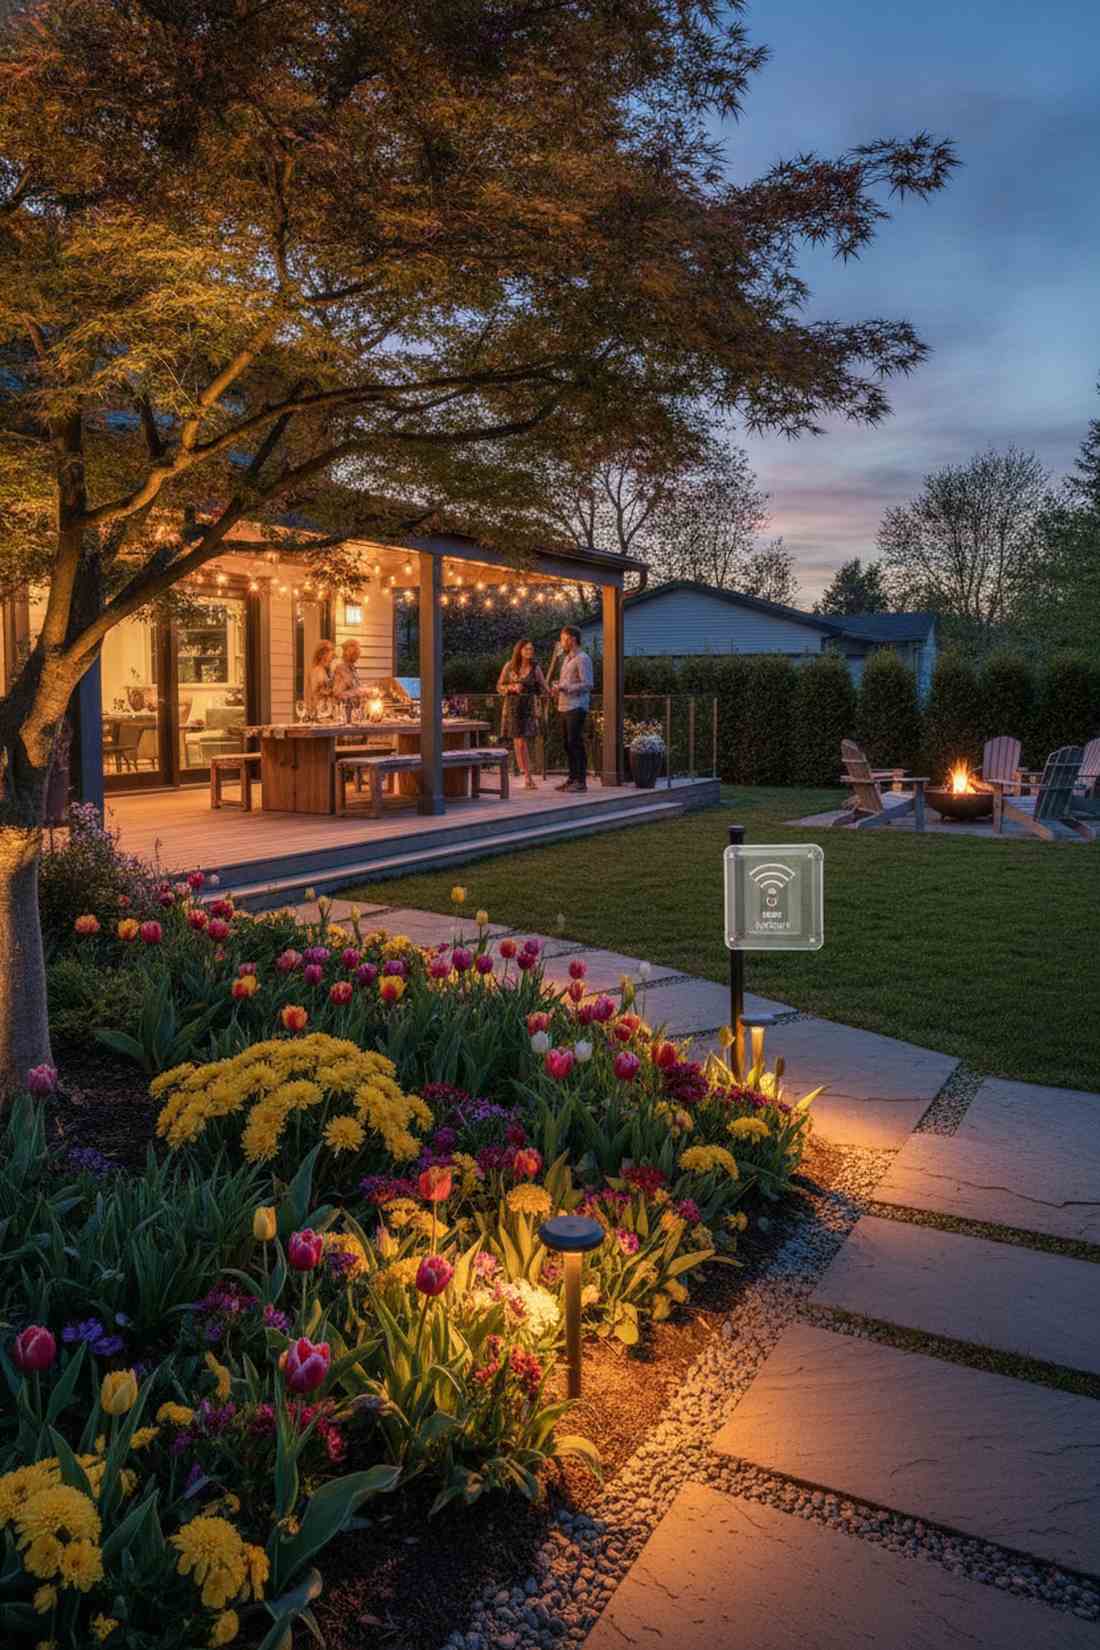
Stop scrolling if your front yard feels too dark—what comes next fixes that instantly.
💡 Must-Have Supplies for High-End Setups
To build these setups faster and ensure they last, skip the generic craft aisles and invest in the right foundational kits.
- Base & Support: commercial-grade multi-tap low-voltage transformers
- Setup Tools: professional wire stripping and waterproof splicing kits
- Weather/Durability Protection: marine-grade dielectric grease tubes
10. Soffit Lighting for Foundation Plantings
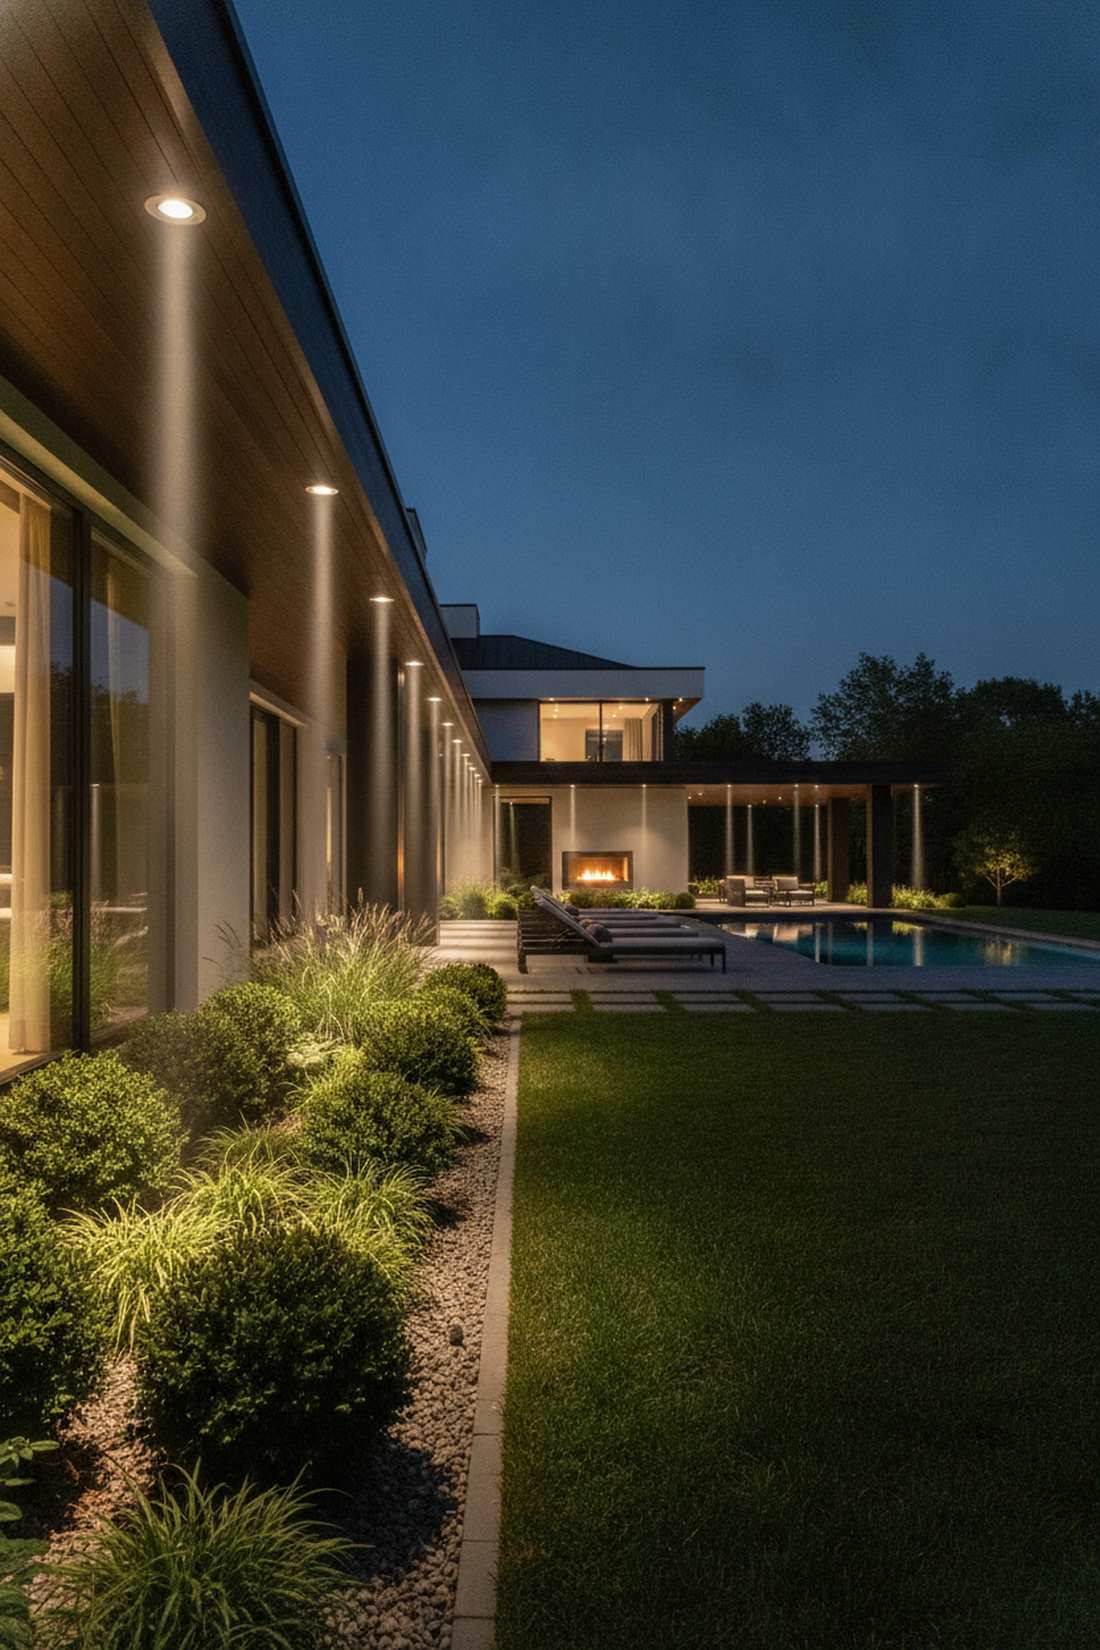
This layout creates a luminous curtain that makes your house look incredibly majestic. Recessed architectural downlighting highlights dense foundation shrubs without cluttering the mulch with fixtures. It is the perfect sleek solution for modern minimalist home exteriors.
Trenching wires through thick foundation roots is a nightmare nobody wants to deal with. Dropping light straight down from the roof eaves gives a designer-level finish while completely avoiding the dirt. Utilizing proper outdoor lighting for garden techniques here expands your home’s visual footprint at night.
Adding a few soffit cans costs around $50 a pop, but entirely replaces ground lighting.
- Key Materials: Recessed LED cans, narrow beam bulbs
- Vibe / Style: Ultra-clean modern estate
- Difficulty: Advanced electrical
- Budget Breakdown: Housing: $25 | LED Trim: $25.
- Creator’s Tip: Ensure the bulbs are rated for enclosed fixtures, otherwise, they will overheat and burn out quickly in the roof space.
- Smart Sourcing: outdoor-rated recessed LED trims (gasket sealed) and narrow-flood 40-degree bulbs.
Pathway & Border Illumination with Outdoor Lighting for Garden Edges
11. Mushroom Path Lights for Flower-Lined Walks
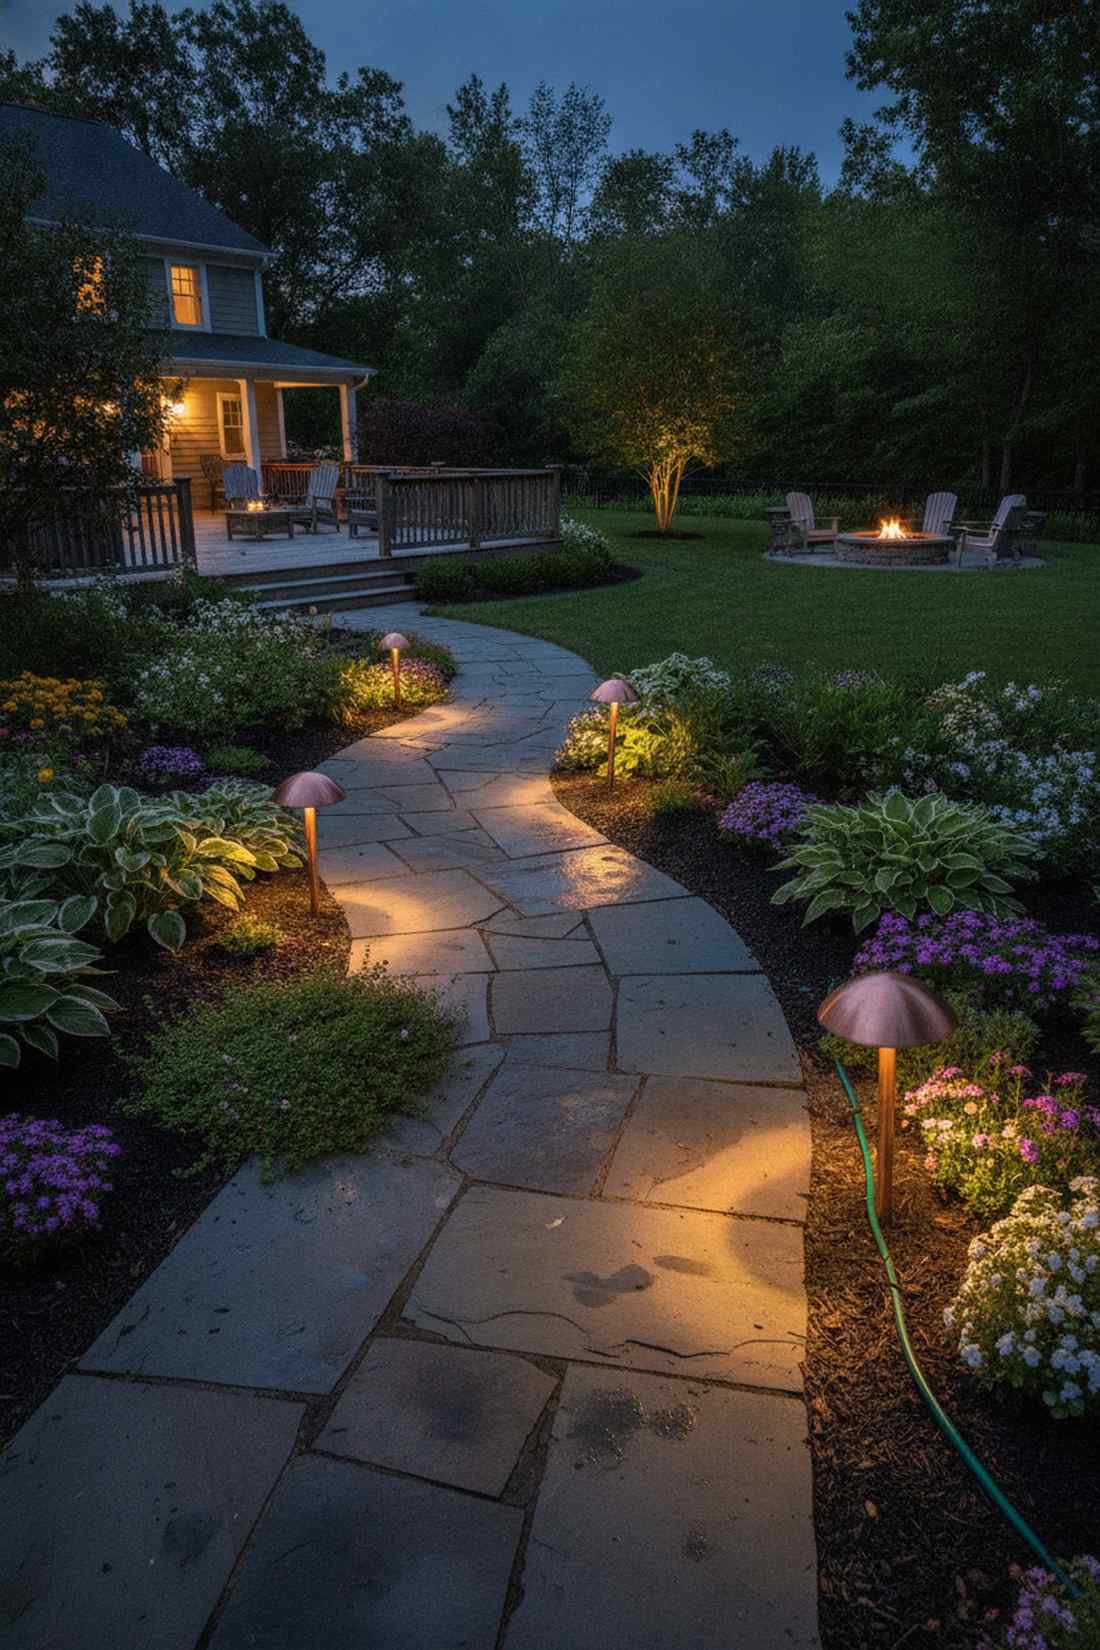
Walking down this glowing path feels like being guided into a secret fairy realm. Classic mushroom pathway lighting throws a perfect 360-degree circle of warm light over creeping thyme and border hostas. It is universally flattering for curving stone walkways.
Too many people install these runway-style in perfectly straight lines, making the yard look like an airport strip. Staggering them left and right within the flowers looks far more expensive than it is and creates an inviting rhythm. Snagging high-quality miniature garden supplies ensures the metal won’t bend when bumped.
You can line a 20-foot path beautifully for around $120. Save this to your DIY weekend garden board!
- Key Materials: Copper mushroom fixtures, 12V cable
- Vibe / Style: Classic botanical garden
- Difficulty: Easy trenching
- Budget Breakdown: Fixtures (each): $25 | Base wiring: $20.
- Creator’s Tip: Set the fixture head exactly 14 inches above the mulch to get the perfect pool of light without causing glare.
- Smart Sourcing: spun-copper mushroom path lights (kit) and UV-coated direct burial cable.
12. Bollard Lights with Planter Integration
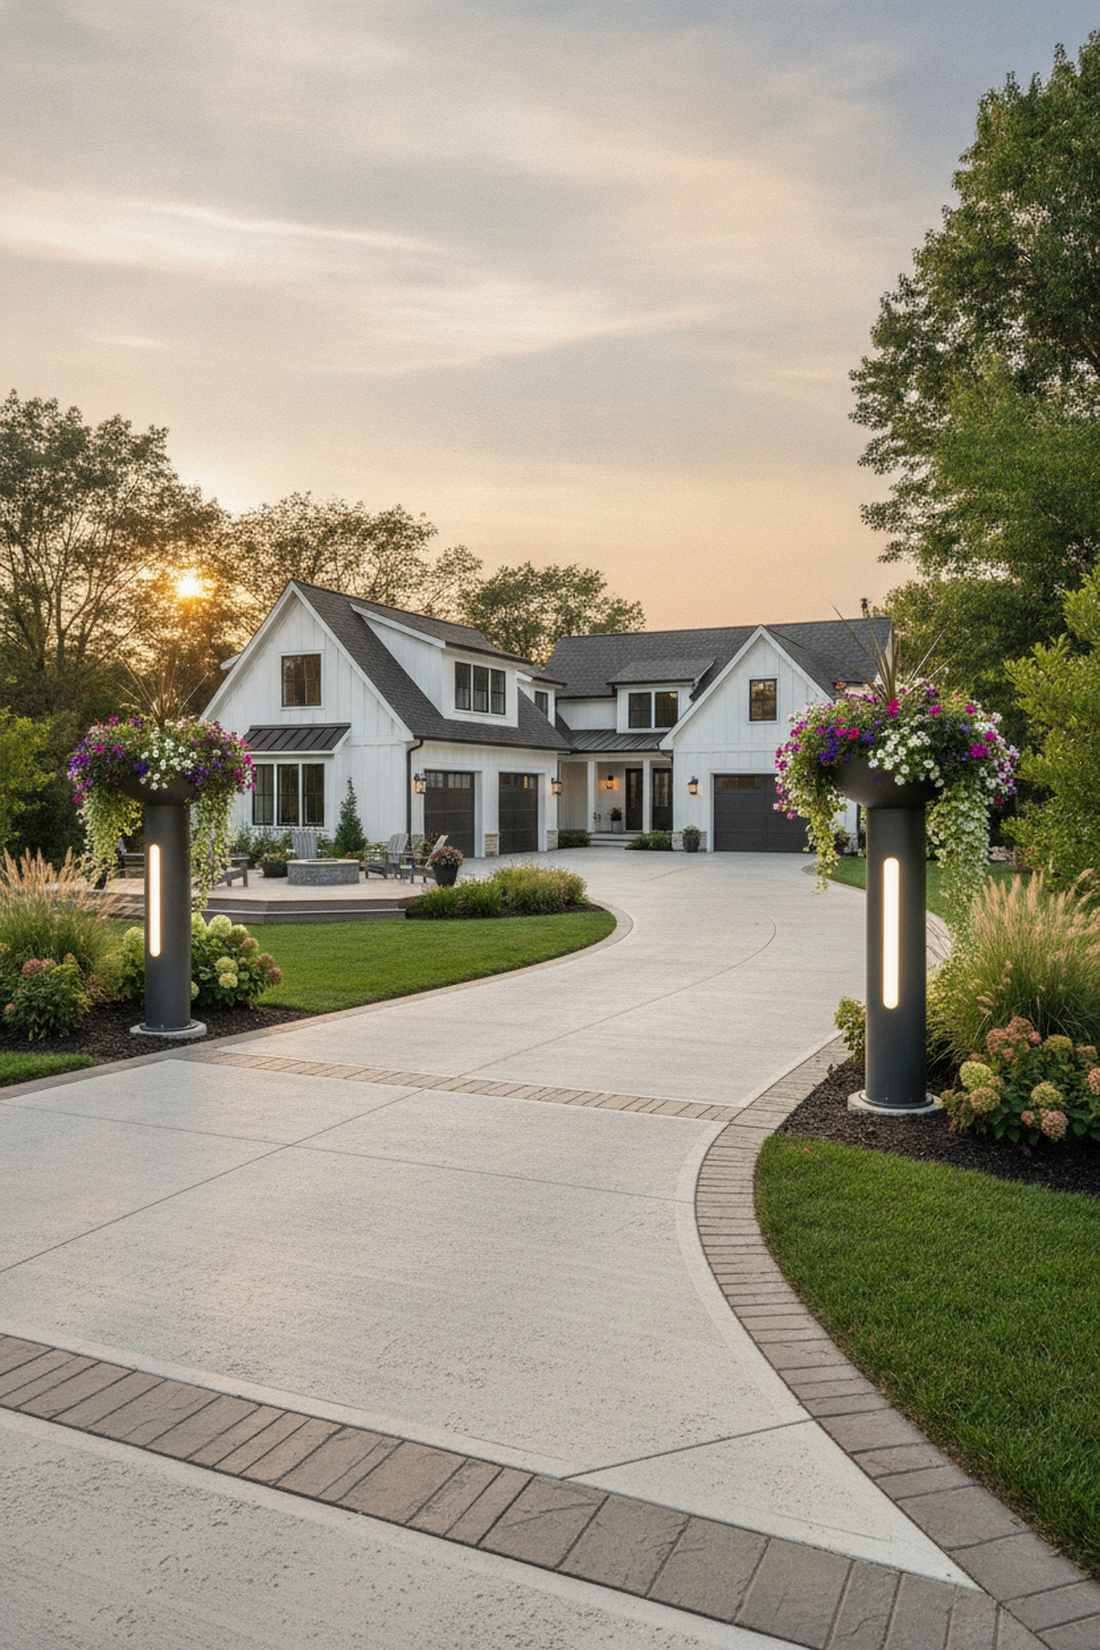
This towering modern fixture doubles as a stunning pedestal for trailing vines. Integrated planter bollards seamlessly merge hardcore architectural lighting with soft floral displays. It is a striking structural addition perfectly suited for framing wide driveway entrances.
Buying separate giant planters and lighting fixtures clutters the pathway quickly. An all-in-one glowing column delivers a surprisingly premium look that screams luxury landscape architecture. Selecting commercial outdoor lighting for garden builds ensures these heavy units stay perfectly plumb.
Expect to spend about $85 per unit for this massive aesthetic double-duty upgrade.
- Key Materials: Hollow illuminated bollards, trailing annuals
- Vibe / Style: High-end commercial plaza
- Difficulty: Intermediate concrete anchoring
- Budget Breakdown: Bollard shell: $65 | Internal LED: $20.
- Creator’s Tip: Use a lightweight potting mix heavily perlite-based so the top doesn’t become too top-heavy and tip the fixture.
- Smart Sourcing: commercial-grade aluminum bollard kits (pre-drilled) and high-output LED tower bulbs.
13. Recessed Step Lights for Tiered Gardens
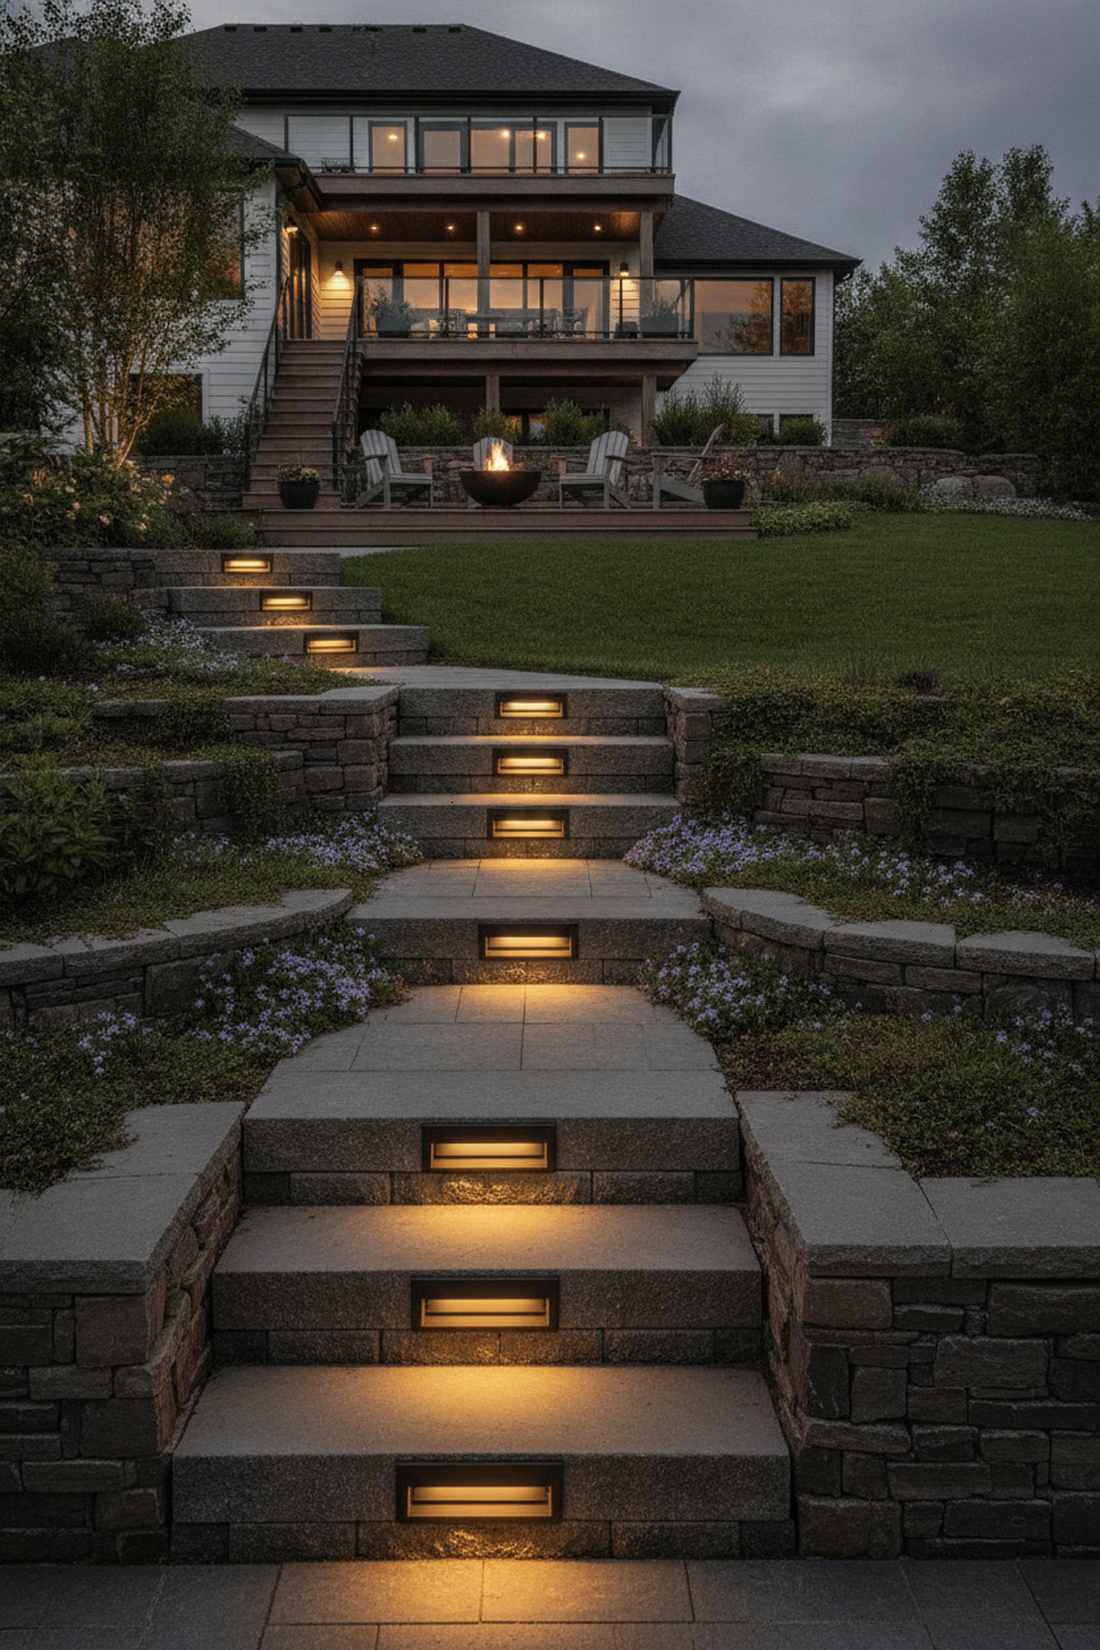
This layout ensures your cascading rock garden glows softly without a single visible bulb. Under-tread step lighting washes down over creeping phlox while making every staircase completely safe at night. Indispensable for steeply sloped backyards with multiple retaining walls.
Sticking bulky path lights on stairs is a major tripping hazard that ruins the clean lines. Recessing tiny louvers directly into the vertical risers gives a designer-level finish that looks built-in from day one. Utilizing slim terrarium accessories or micro-LEDs helps fit into tight stone crevices.
A set of four recessed step lights can be installed for around $90.
- Key Materials: Louvered step lights, masonry drill bits
- Vibe / Style: Sleek luxury hardscape
- Difficulty: Hardcore masonry work
- Budget Breakdown: Step fixture: $15 | Diamond bit: $15.
- Creator’s Tip: Angle the internal baffle slightly downward so no light escapes upward into the eyes of someone walking up the stairs.
- Smart Sourcing: recessed louvered deck lights (waterproof) and pre-cut low voltage masonry sleeves.
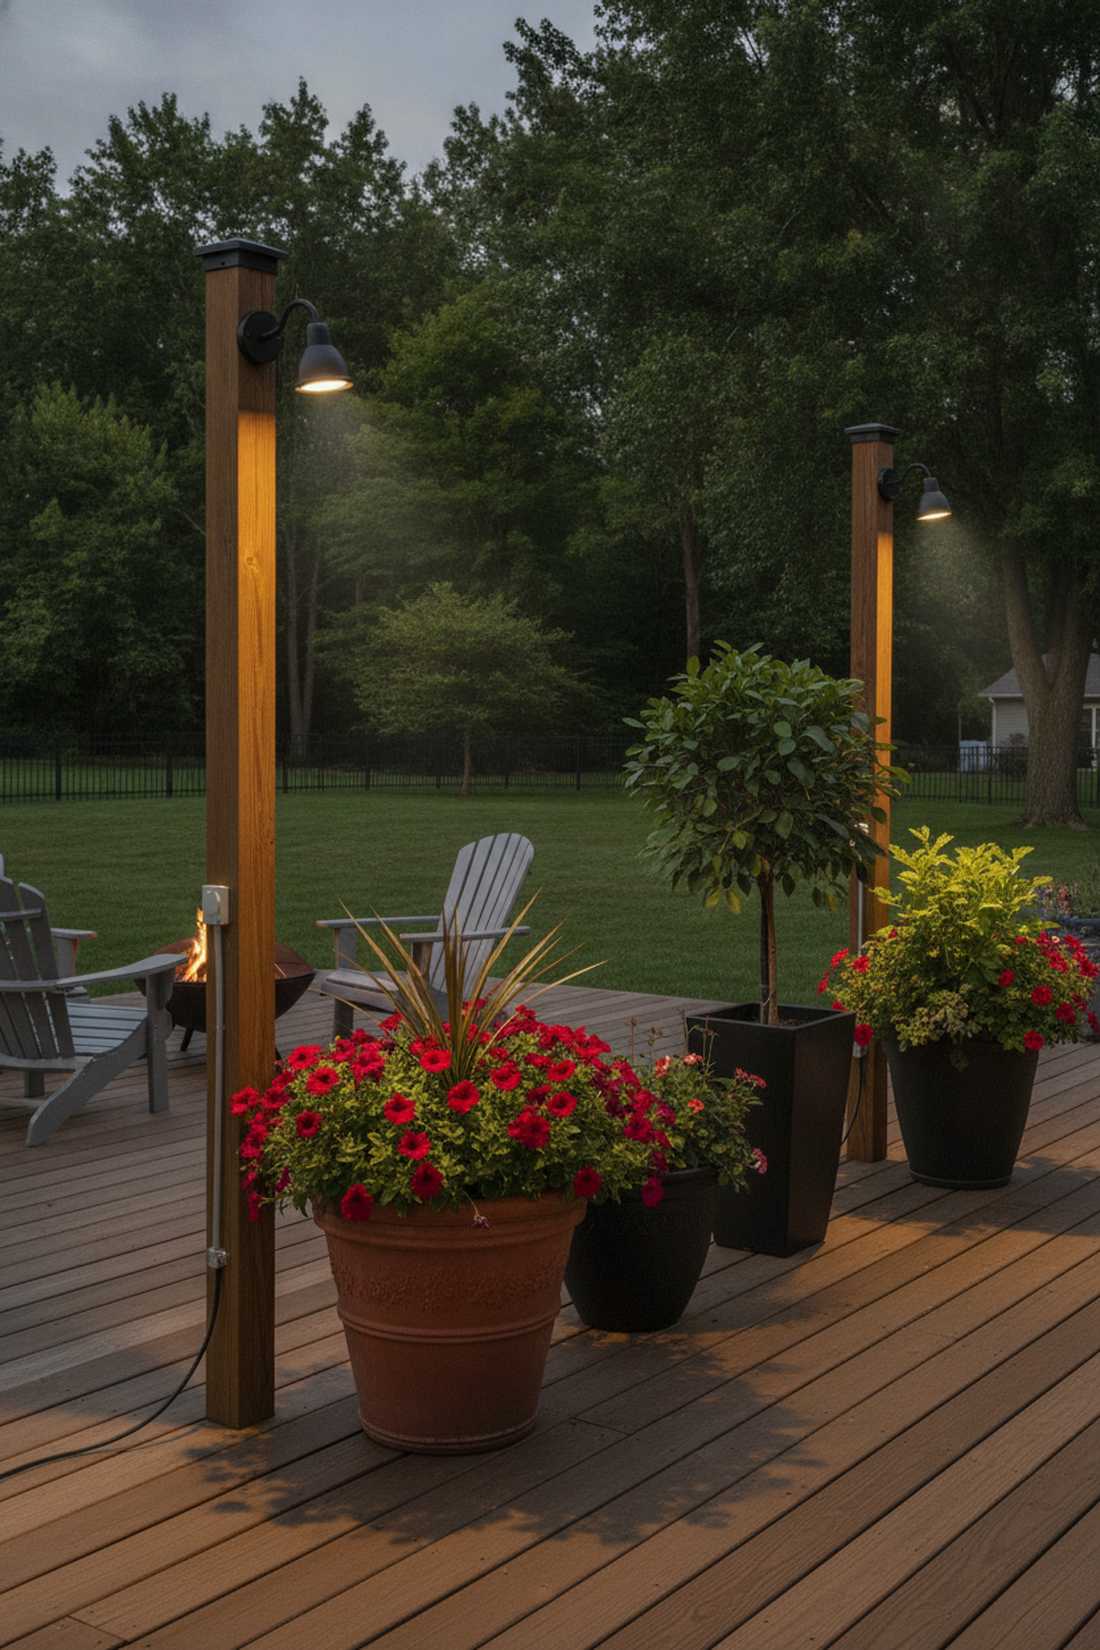
14. Deck Rail Lights for Elevated Planters
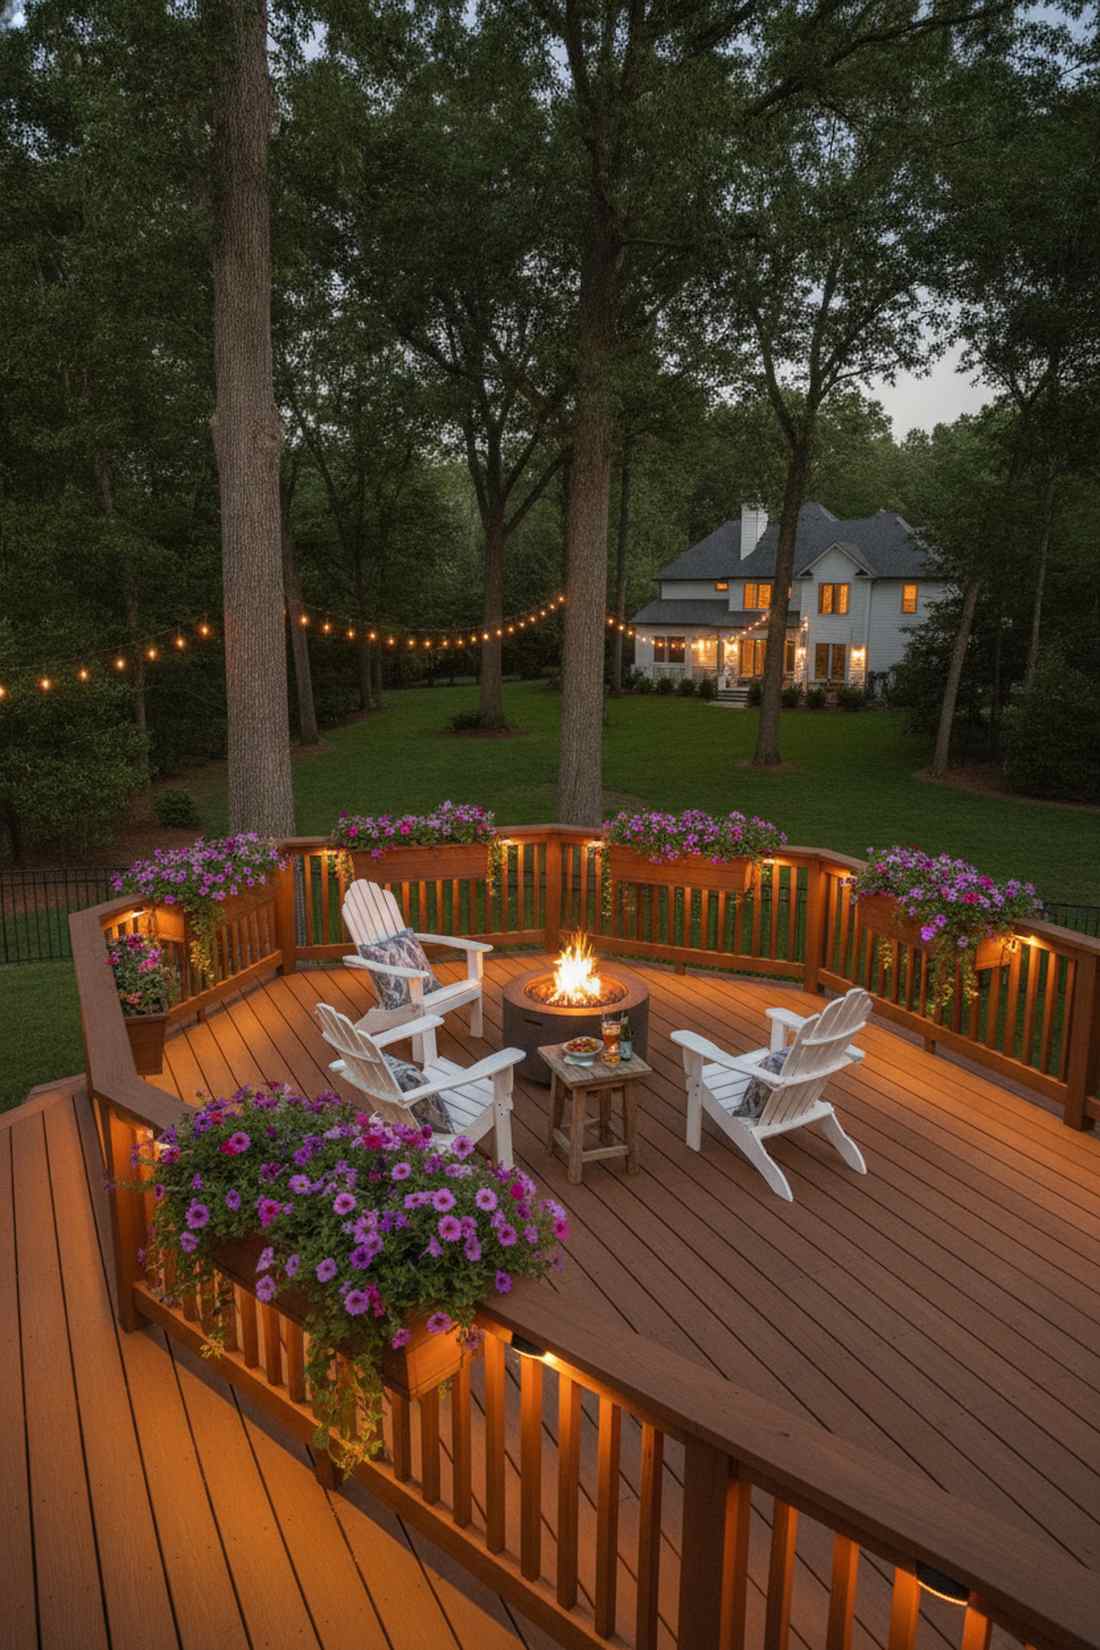
Turning your railing into a floating ring of light makes nighttime entertaining incredible. Under-rail accent lighting pushes a gorgeous ambient glow right into your elevated petunia boxes. It creates a highly social, cozy border for second-story wooden decks.
Huge spotlights mounted on your siding blind your guests while they try to eat. Tucking tiny half-moon fixtures under the handrail completely hides the ugly hardware and looks far more expensive than it is. It is the smartest way to leverage miniature outdoor lighting garden techniques up high.
You can illuminate four railing planter boxes for just $45. Highly recommended for a quick weekend win.
- Key Materials: Half-moon surface fixtures, zip wire
- Vibe / Style: Cozy elevated patio
- Difficulty: Beginner screw-in
- Budget Breakdown: Fixtures (4-pack): $35 | Wire tacks: $10.
- Creator’s Tip: Paint the exposed wire track the exact same color as your deck railing so it disappears completely during the day.
- Smart Sourcing: half-moon hardscape LEDs (surface mount) and color-matched wiring staples.
You’ve probably seen this next ultra-modern trick at high-end resorts, but it takes less than an hour to DIY…
15. Path-Integrated Strip Lighting
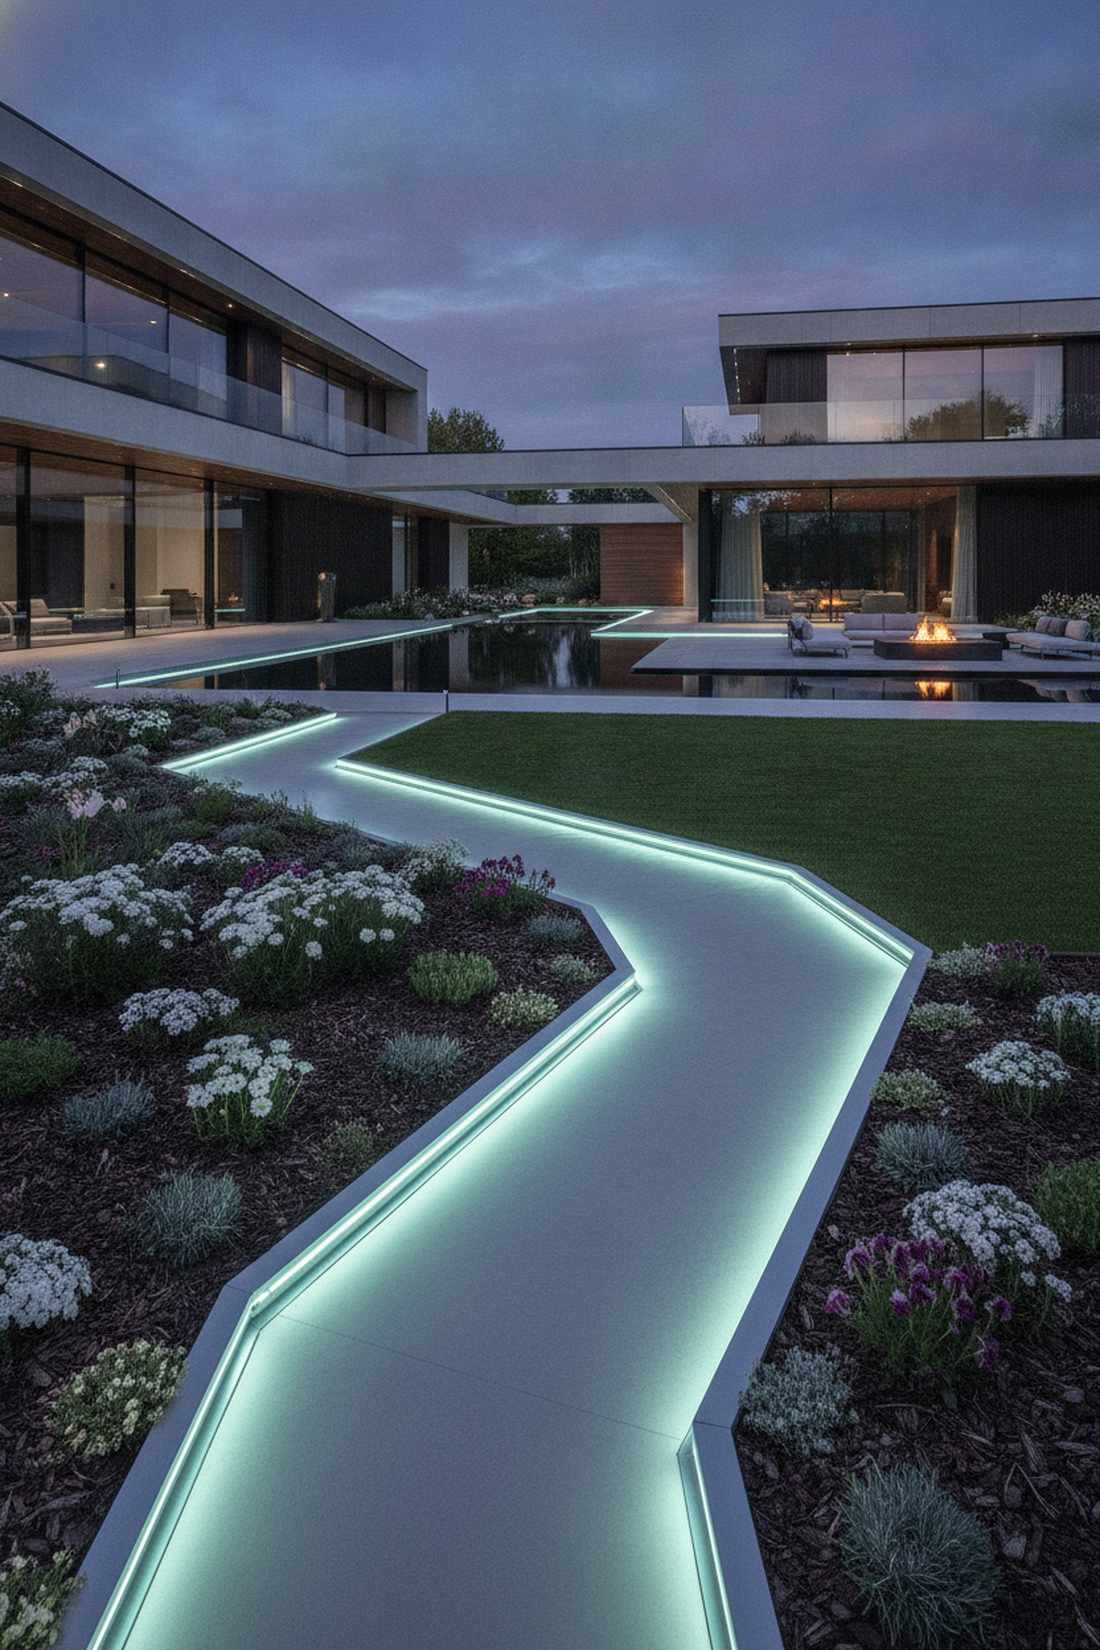
This creates a glowing ribbon that looks like a futuristic neon stream cutting through your flowers. Flush-mount pathway ribbons define the hard edges of your concrete walkway while bleeding soft light into the mulch. Extremely popular for stark, modern geometric homes.
Traditional stake lights can look clunky and outdated if your architecture is ultra-modern. Burying an extruded channel flush with the pavers gives a designer-level finish that lawnmowers can literally drive right over. Integrating a heavy-duty silicone coating protects against standing puddles.
A 16-foot continuous light channel will cost around $80 to complete.
- Key Materials: Neon-flex LED rope, aluminum ground channel
- Vibe / Style: Futuristic luxury estate
- Difficulty: Moderate trenching
- Budget Breakdown: Neon Flex: $50 | Ground Track: $30.
- Creator’s Tip: Dig the trench a half-inch deeper than needed and fill it with sand so you can level the track perfectly flush.
- Smart Sourcing: silicone neon-flex outdoor strips (cut-to-length) and heavy-duty drive-over aluminum profiles.
Eco-Friendly Outdoor Garden Solar Lighting Solutions
16. Solar Stake Lights for Flower Beds
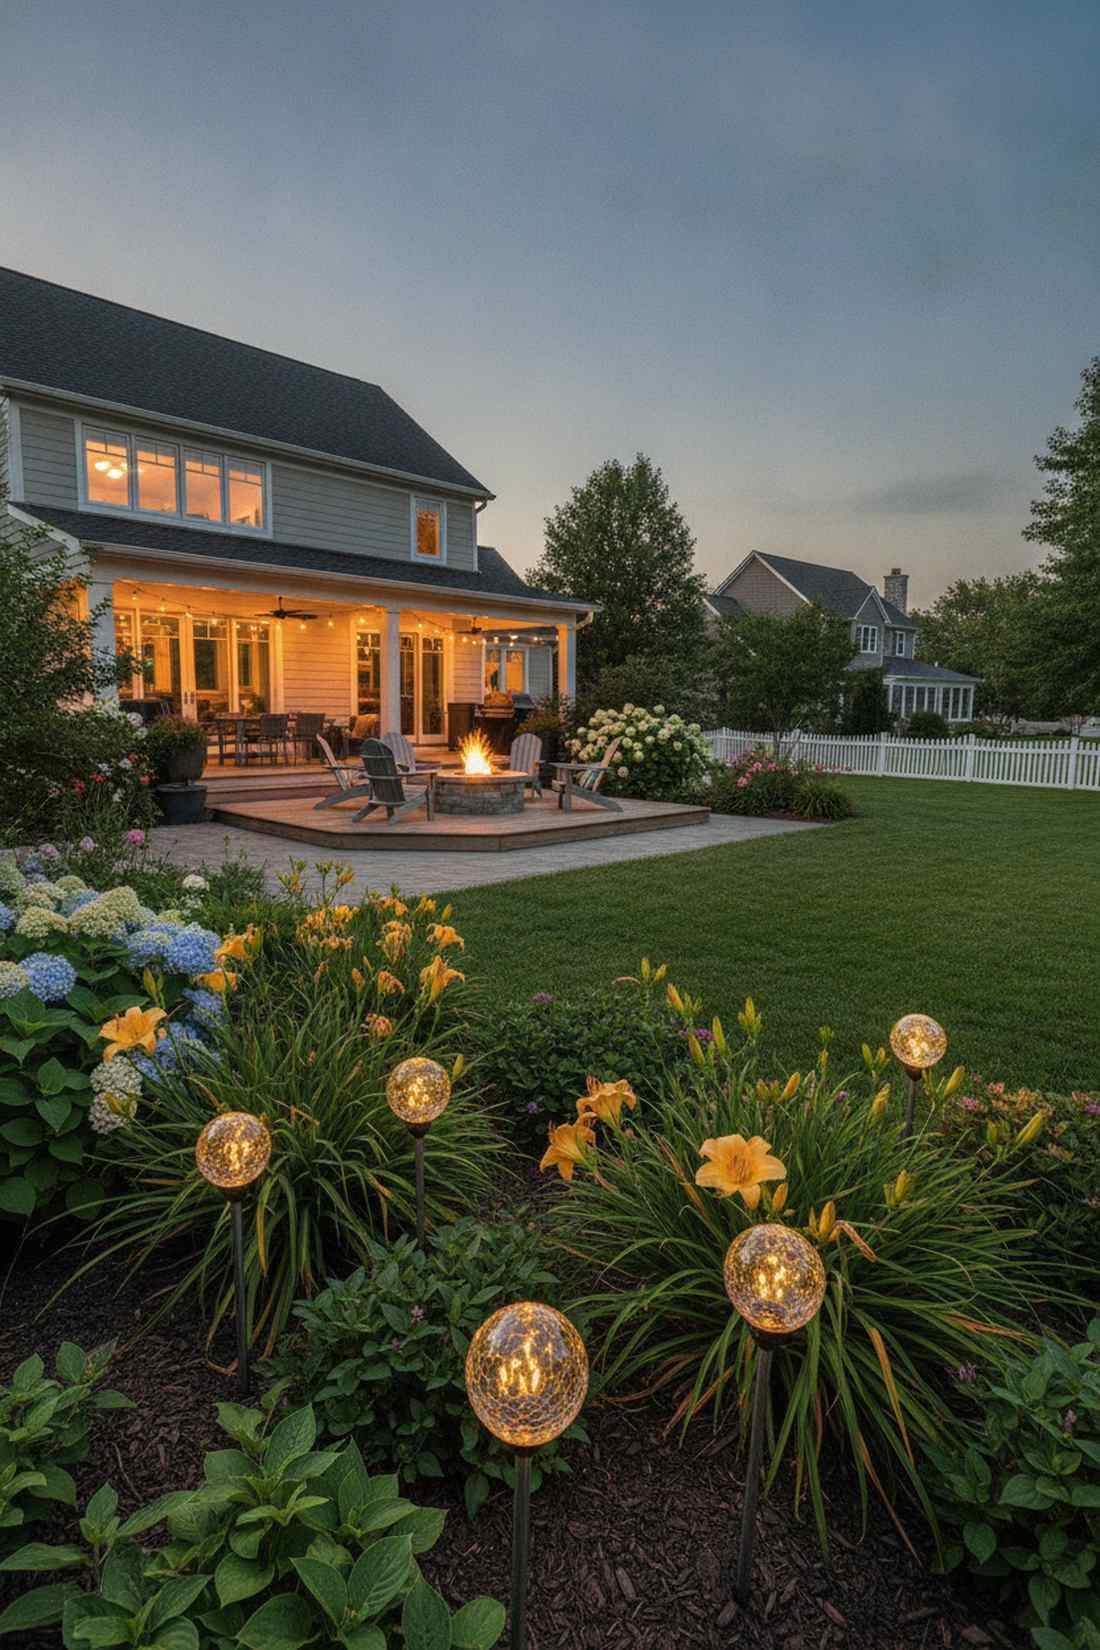
This zero-wiring setup creates tiny floating fireflies suspended directly inside your flower patches. Standalone solar garden stakes allow you to inject instant warm light right into the densest clumps of daylilies. It is the ultimate renter-friendly layout that takes five minutes.
Avoid the cheap plastic units that crack and turn yellow after one summer of UV exposure. Stepping up to glass and metal housings delivers a surprisingly premium look while harnessing incredible outdoor garden solar lighting technology. The lack of wires means you can rearrange them every single day.
A premium pack of six metal stakes costs roughly $40. Pin this if you hate dealing with electrical cords!
- Key Materials: Glass-lens solar stakes, high-capacity batteries
- Vibe / Style: Cheerful instant garden
- Difficulty: Effortless push-in
- Budget Breakdown: Metal stake kit (6-pack): $40 | Zero wiring cost: $0.
- Creator’s Tip: Wipe the solar panels with a damp cloth once a month to keep the charging efficiency at absolute maximum.
- Smart Sourcing: cracked-glass solar pathway markers (metal body) and replacement NiMH solar batteries (bulk pack).
17. Solar String Lights Through Climbing Plants
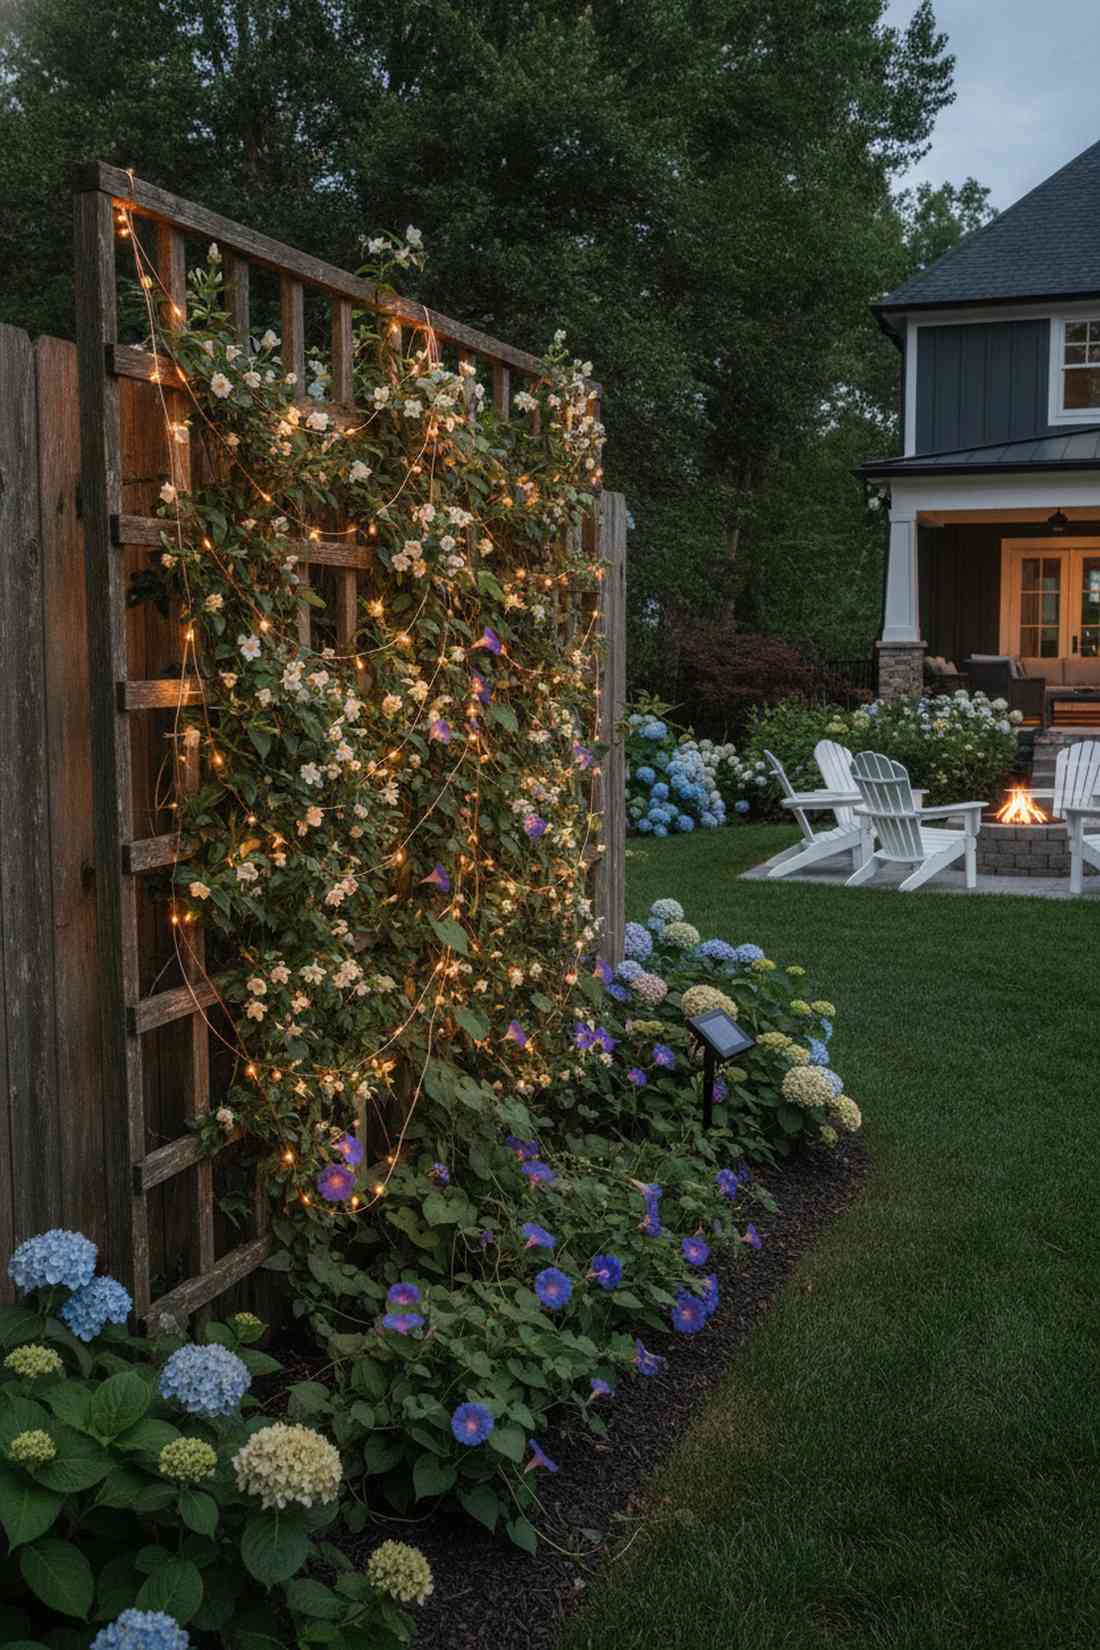
Weaving this through a trellis feels like capturing a constellation of stars in your vines. Foliage-integrated fairy strings add a delicate, whimsical twinkle to heavy climbing jasmine or morning glories. Unbeatable for turning a boring fence panel into a focal point.
Wrapping lights tightly around stems often strangles the plant as it grows thicker in the summer. Loosely draping the wires in gentle swags looks far more expensive than it is and gives the blooms room to breathe. High-end fairy garden kits always utilize this gentle draping method.
You can cover a massive 10-foot trellis for literally $20.
- Key Materials: Copper wire solar strings, remote panel spike
- Vibe / Style: Whimsical twilight magic
- Difficulty: Gentle hand-weaving
- Budget Breakdown: Solar string kit: $20.
- Creator’s Tip: Make sure to buy strings with a detachable or remote solar panel so you can weave in the shade but place the panel in the sun.
- Smart Sourcing: copper-wire solar micro-LED strings (2-pack) and UV-coated zip ties.
18. Solar Spotlights for Feature Plants
Punching a bright beam into the far corners of your yard makes the entire property feel massive. High-lumen remote solar spots bring dramatic focus to distant oak trees where running a wire is impossible. Excellent for illuminating the back edges of deep acreage.
People assume solar lights are too dim to properly wash a large specimen plant. Utilizing units with separated, oversized solar panels completely bypasses the battery limitations, giving a designer-level finish. This breakthrough in outdoor garden solar lighting rivals traditional hardwired brightness.
A dual-head premium solar spot system will cost about $55.
- Key Materials: Dual-head solar floods, massive remote panel
- Vibe / Style: Bold expansive estate
- Difficulty: Simple aiming
- Budget Breakdown: Spotlight System: $45 | Extension Cable: $10.
- Creator’s Tip: Mount the oversized solar panel on the roof of a shed to completely hide it from the garden sightlines.
- Smart Sourcing: high-output remote solar spotlights (adjustable) and weather-sealed solar extension cords.
19. Solar Lanterns in Flower Borders
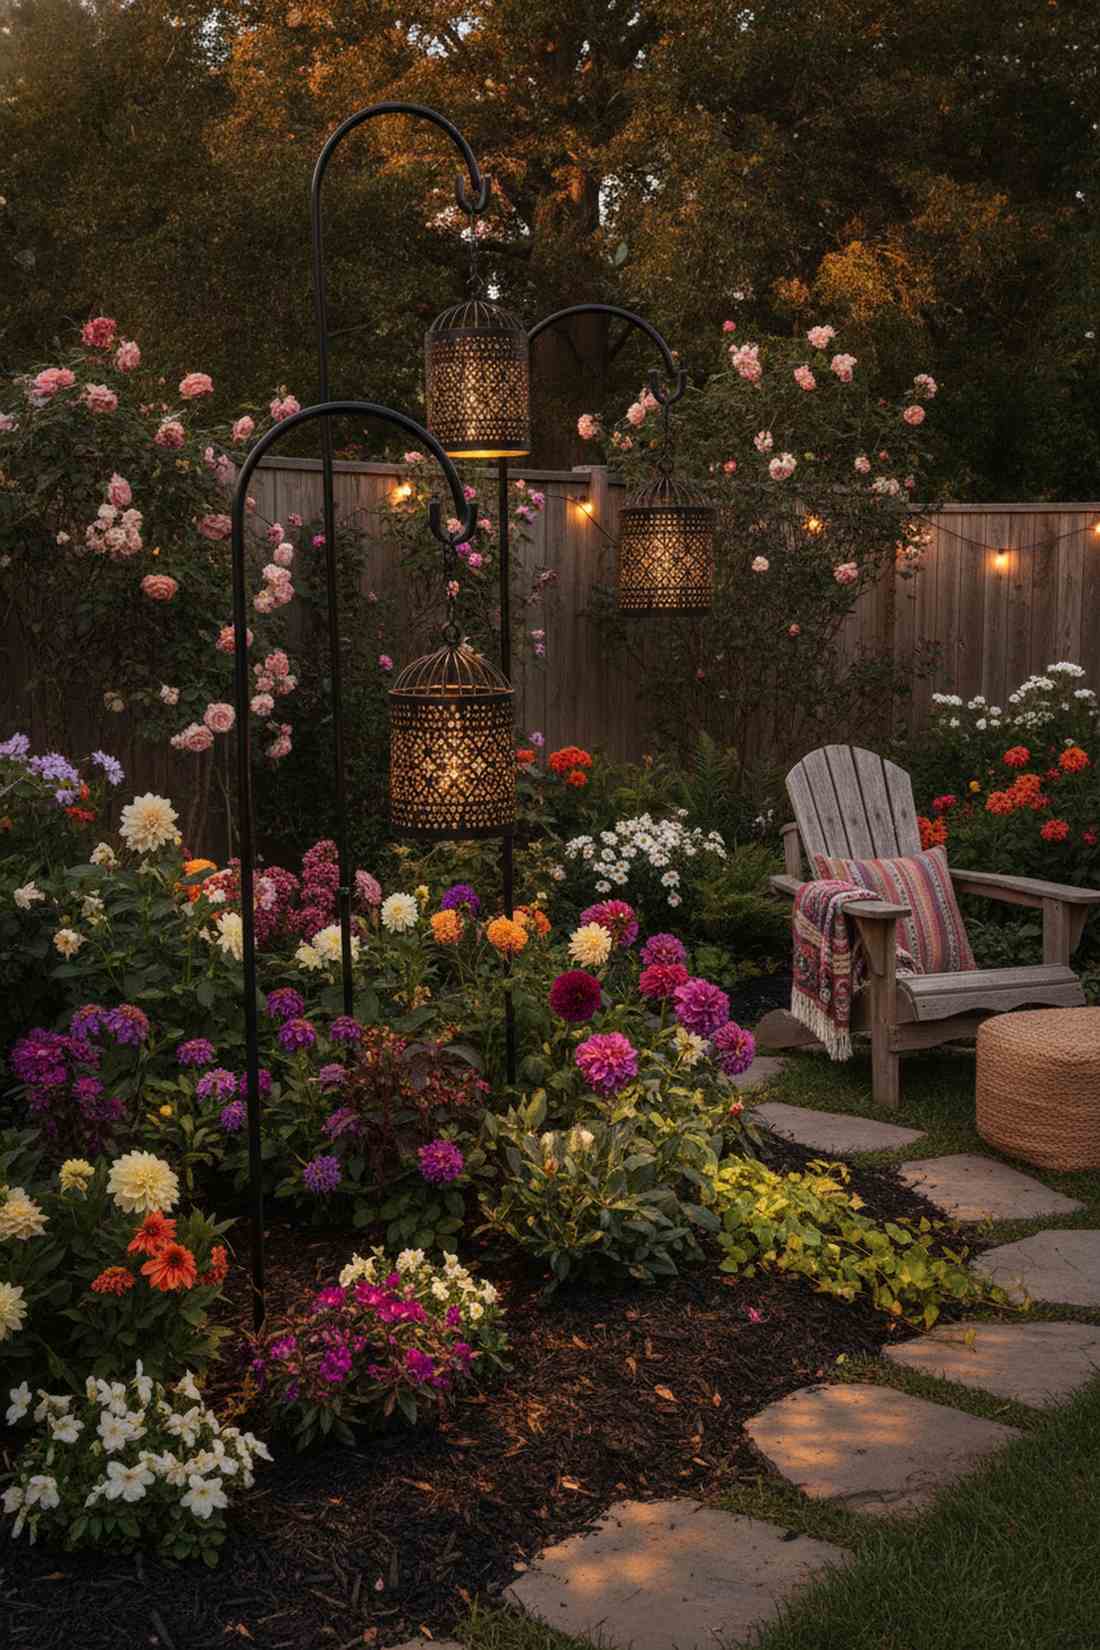
Hanging these feels like dropping little glowing birdcages into a sea of greenery. Decorative hanging solar lanterns cast intricate geometric shadow patterns across the mulch and lower leaves. It fits perfectly into bohemian or eclectic cottage garden aesthetics.
Resting lanterns directly in the mud quickly ruins the electronics via water pooling. Hanging them from staggered shepherd’s hooks looks far more expensive than it is and keeps the panels closer to the sunlight. Using oversized outdoor lighting for garden pieces acts as stunning daytime metal art.
You can create a stunning lantern trio for just $45. Save this idea for a magical patio corner!
- Key Materials: Pierced metal solar lanterns, iron shepherd’s hooks
- Vibe / Style: Boho chic sanctuary
- Difficulty: Easy ground staking
- Budget Breakdown: Lantern set: $30 | Shepherd hooks: $15.
- Creator’s Tip: Spray the iron hooks with a clear enamel coat before placing them outside to completely prevent bottom rusting.
- Smart Sourcing: punched-metal solar lanterns (waterproof) and heavy-duty double shepherd hooks.
Most solar setups fail after one season—unless you use the specific structural layout coming up next.
20. Solar Deck Post Caps with Planters
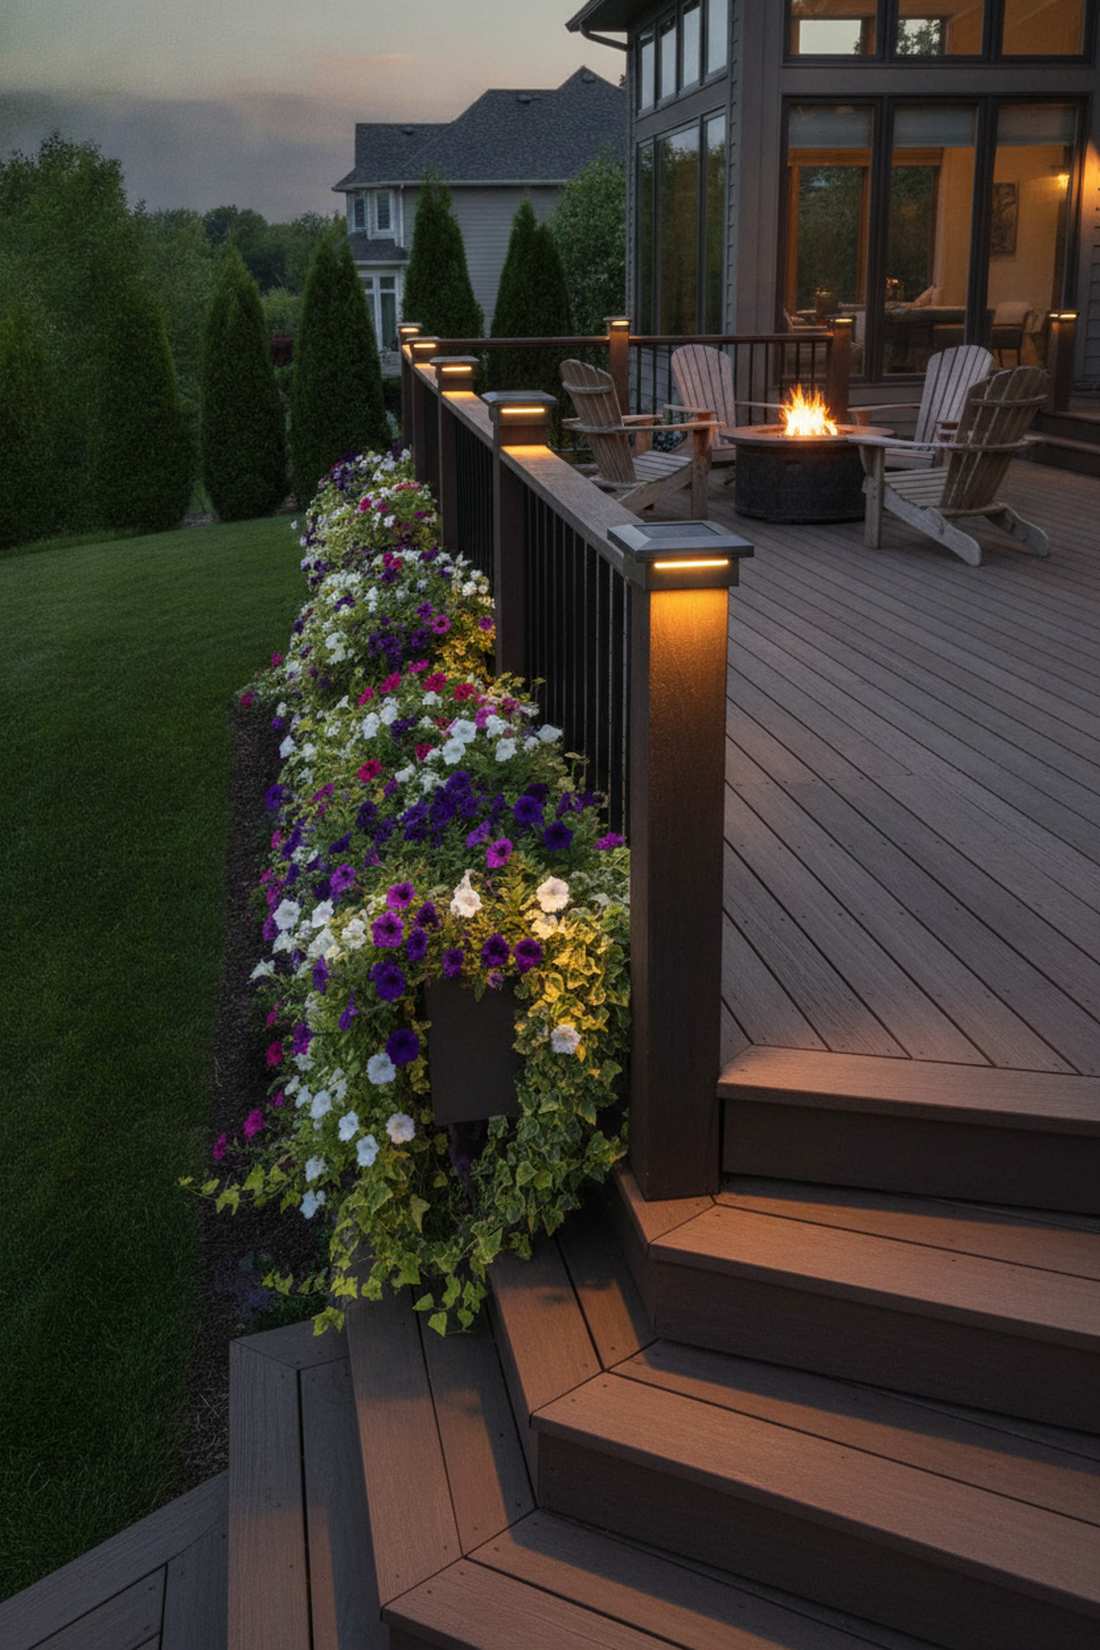
Capping your railing with these glowing squares transforms your deck into an upscale lounge. Integrated solar railing caps shoot a crisp pyramid of light downward to illuminate your perimeter blooms. Perfect for highlighting wrap-around deck landscaping safely.
Ripping apart a finished wooden deck to hide low-voltage wires is a complete nightmare. Popping a perfectly sized solar cap onto the 4×4 posts delivers a surprisingly premium look in under ten minutes. The top-down orientation ensures the solar cells catch maximum noon sunlight.
A set of four glowing caps will cost roughly $50.
- Key Materials: 4×4 solar LED caps, wood screws
- Vibe / Style: Contemporary clean deck
- Difficulty: Simple screw-on
- Budget Breakdown: Cap Set (4): $45 | Screws: $5.
- Creator’s Tip: Measure your wooden posts accurately—a standard 4×4 post is actually 3.5 x 3.5 inches, so buy the correct fitting base!
- Smart Sourcing: aluminum solar post caps (multi-size bases) and weatherproof outdoor wood screws.
21. Solar Globe Lights in Landscape Beds
Nestling these glowing orbs into the soil feels like a modern art installation landed in your ferns. Frosted ambient solar globes provide an otherworldly, diffused glow that contrasts beautifully against spiky foliage. Excellent for contemporary, minimalist gravel gardens.
Using single, tiny plastic globes often makes a space look like a cheap mini-golf course. Clustering three large 12-inch orbs together gives a designer-level finish that anchors a large planting bed perfectly. Upgrading to high-end miniature garden supplies like heavy acrylic stops them from blowing away.
You can build a stunning three-orb focal cluster for about $85.
- Key Materials: 12-inch acrylic solar globes, sand weight
- Vibe / Style: Ultra-modern art garden
- Difficulty: Simple placement
- Budget Breakdown: Orb Kit: $80 | Sand: $5.
- Creator’s Tip: Open the base and fill the bottom with a cup of playground sand to stop strong winds from rolling them out of the bed.
- Smart Sourcing: frosted acrylic solar orbs (color-changing) and pre-cut stabilizing ground spikes.
Creative Specialty Accent Methods for Garden Flowers
22. Underwater Lighting for Pond Marginals
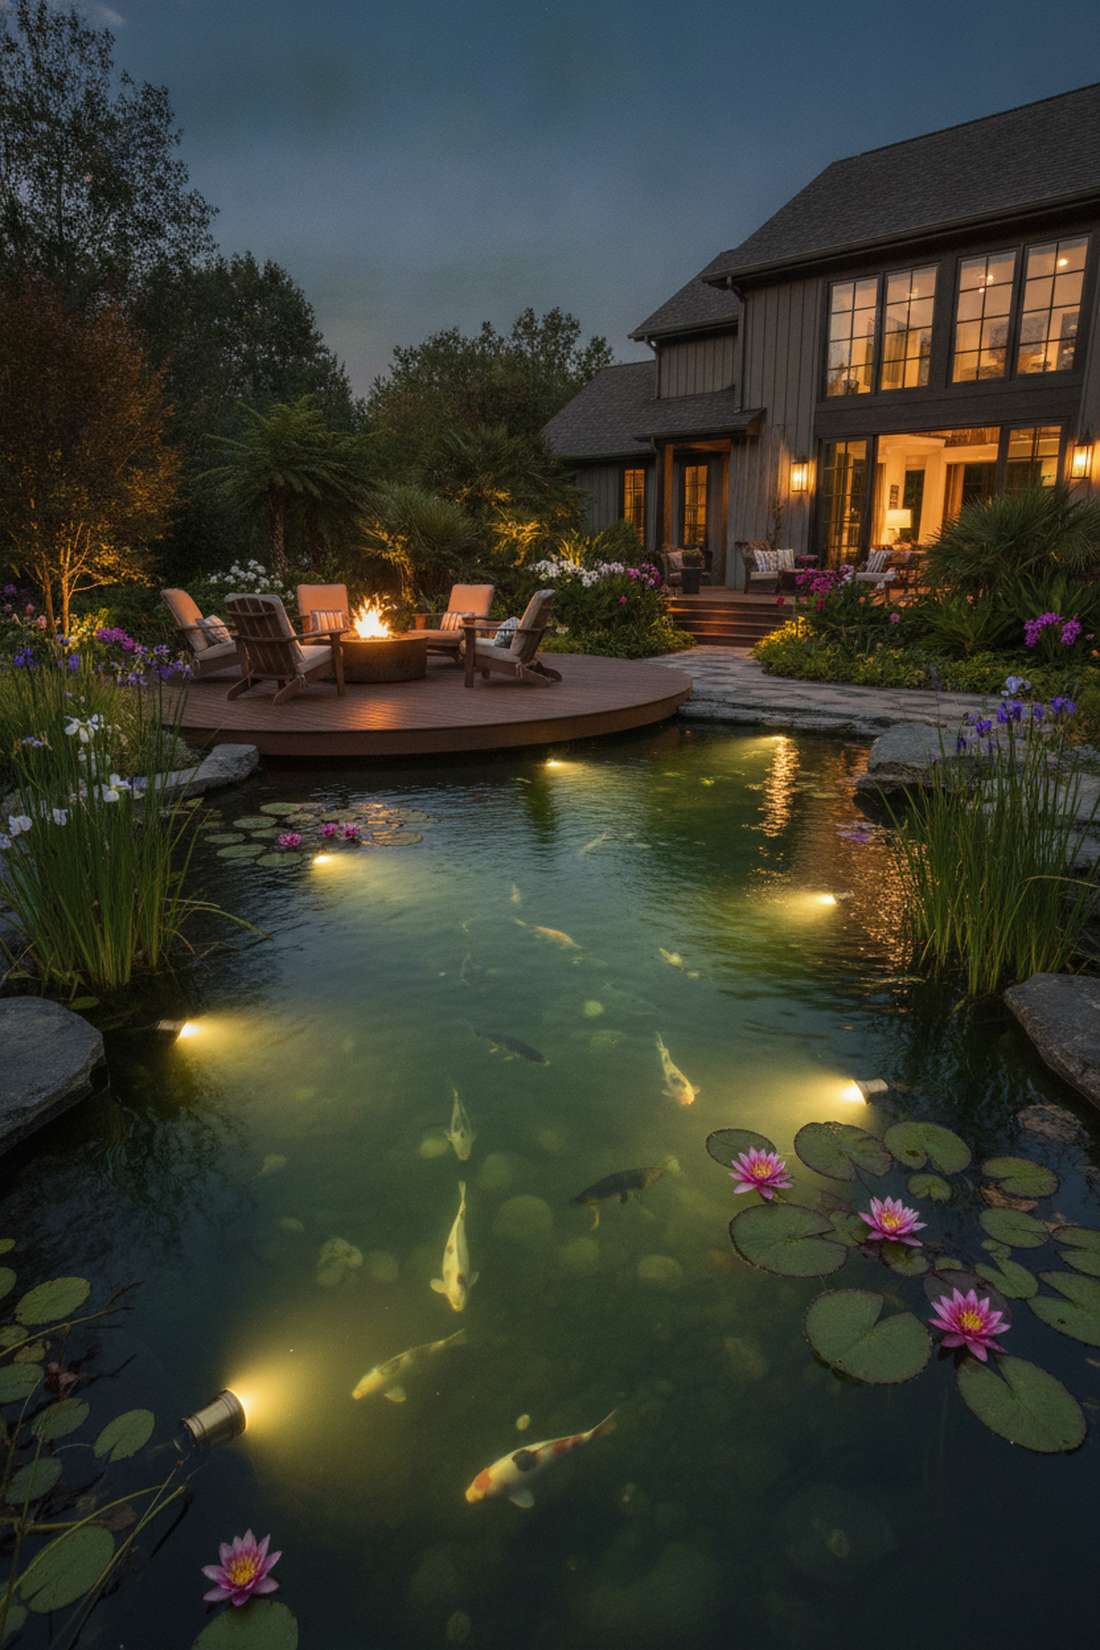
Lighting a water feature from underneath makes the entire pond look like a glowing, liquid emerald. Submersible aquatic uplighting shoots through the ripples to create dancing halos around your lotus flowers. This is the absolute peak of luxury water garden design.
Aiming a light down into the pond just creates massive glare off the surface reflection. Sinking weighted brass fixtures to the bottom looks far more expensive than it is and illuminates the fish beautifully. You must use specialized outdoor lighting for garden ponds to survive total submersion.
Achieving this magical underwater glow runs about $70 per fixture.
- Key Materials: IP68 brass submersible lights, weighted bases
- Vibe / Style: Exotic resort lagoon
- Difficulty: Intermediate waterproof wiring
- Budget Breakdown: Submersible Fixture: $50 | Marine Splice Kit: $20.
- Creator’s Tip: Leave an extra 3 feet of wire coiled underwater so you can easily pull the heavy fixture up to the surface to change bulbs.
- Smart Sourcing: heavy brass underwater uplights (starter kit) and marine-grade waterproof shrink tubing.
23. Mirror Reflection Lighting
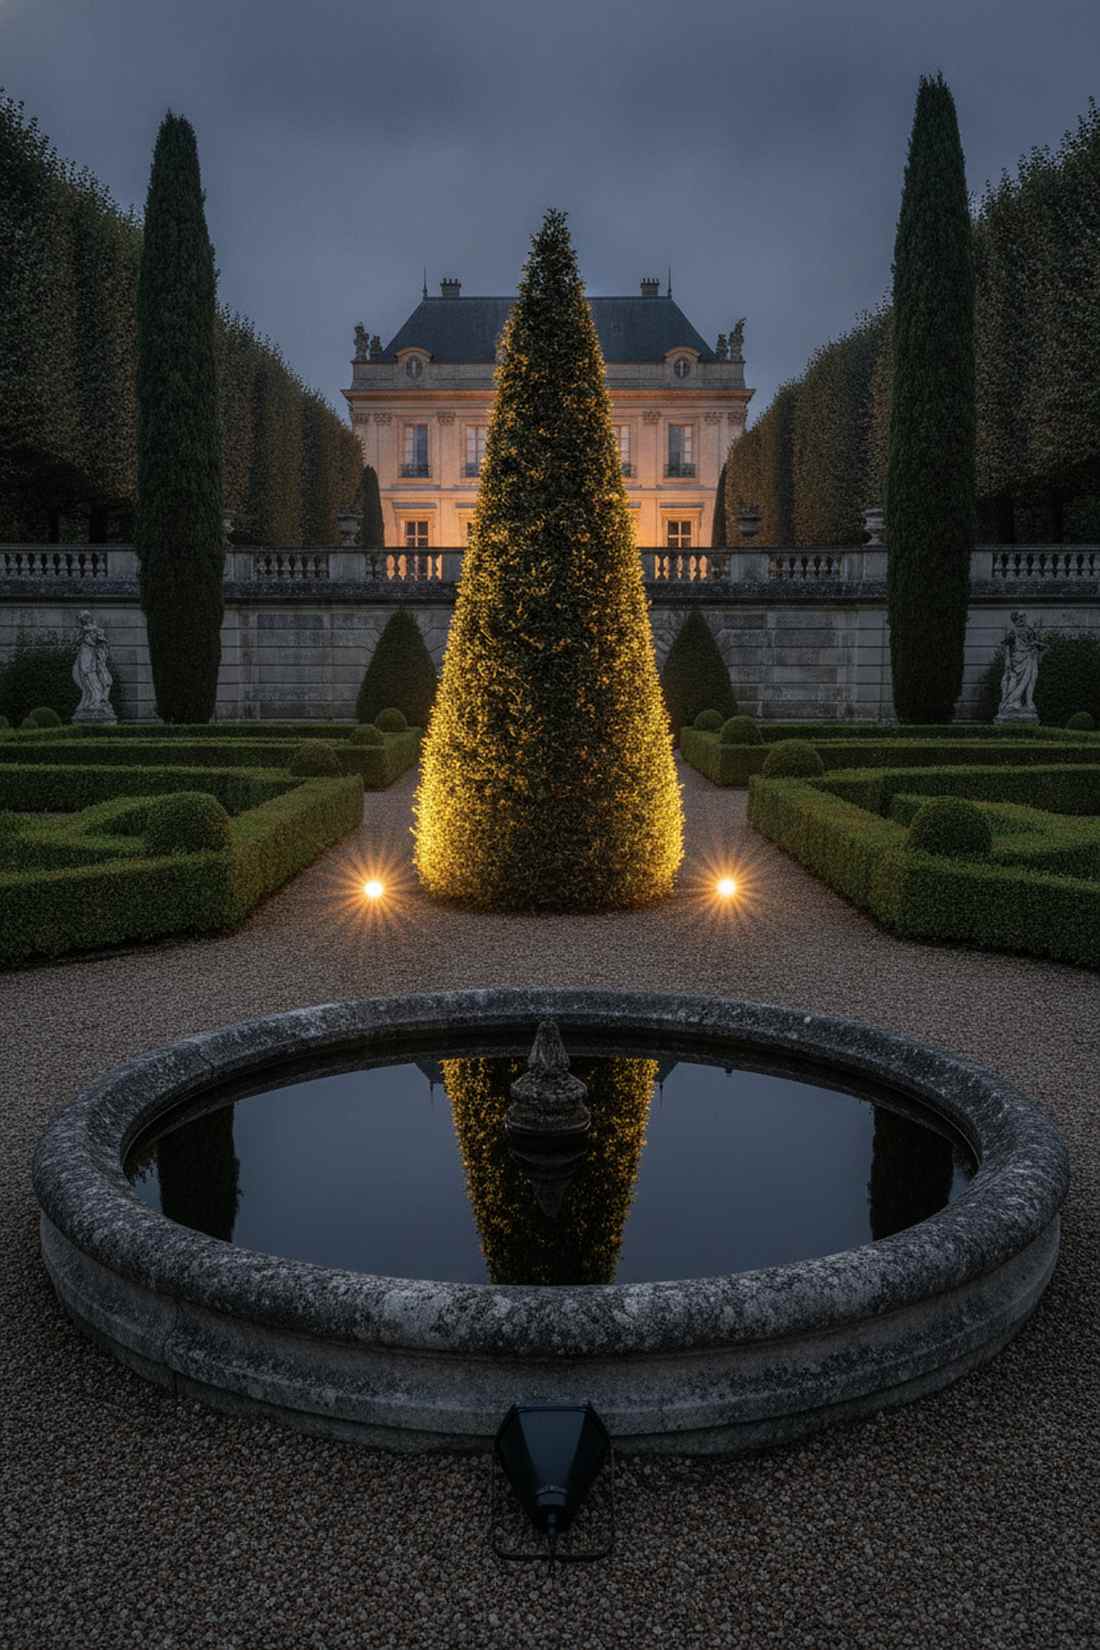
This layout doubles the visual size of your yard by turning still water into a dark mirror. Symmetrical reflection uplighting catches a bold specimen plant and its exact glowing double in a birdbath. Perfect for highly formal, symmetrical landscape architecture.
If you let any stray light hit the water’s surface, the magical mirror illusion breaks completely. Using intense barn-door shields to restrict the beam perfectly delivers a surprisingly premium look. Utilizing proper premium landscape lighting supplies ensures the beam is laser-focused on the foliage only.
You can create this mind-bending double visual for roughly $55. Pin this if you love formal garden geometry!
- Key Materials: Spotlights with barn doors, reflecting pool
- Vibe / Style: Formal historic estate
- Difficulty: Precision aiming
- Budget Breakdown: Fixture with Shield: $45 | Base: $10.
- Creator’s Tip: The water must be dyed black or naturally very dark to create the perfect reflective mirror surface at night.
- Smart Sourcing: glare-shielded directional spotlights (adjustable) and pond-safe black water dye.
24. Backlighting Translucent Flowers
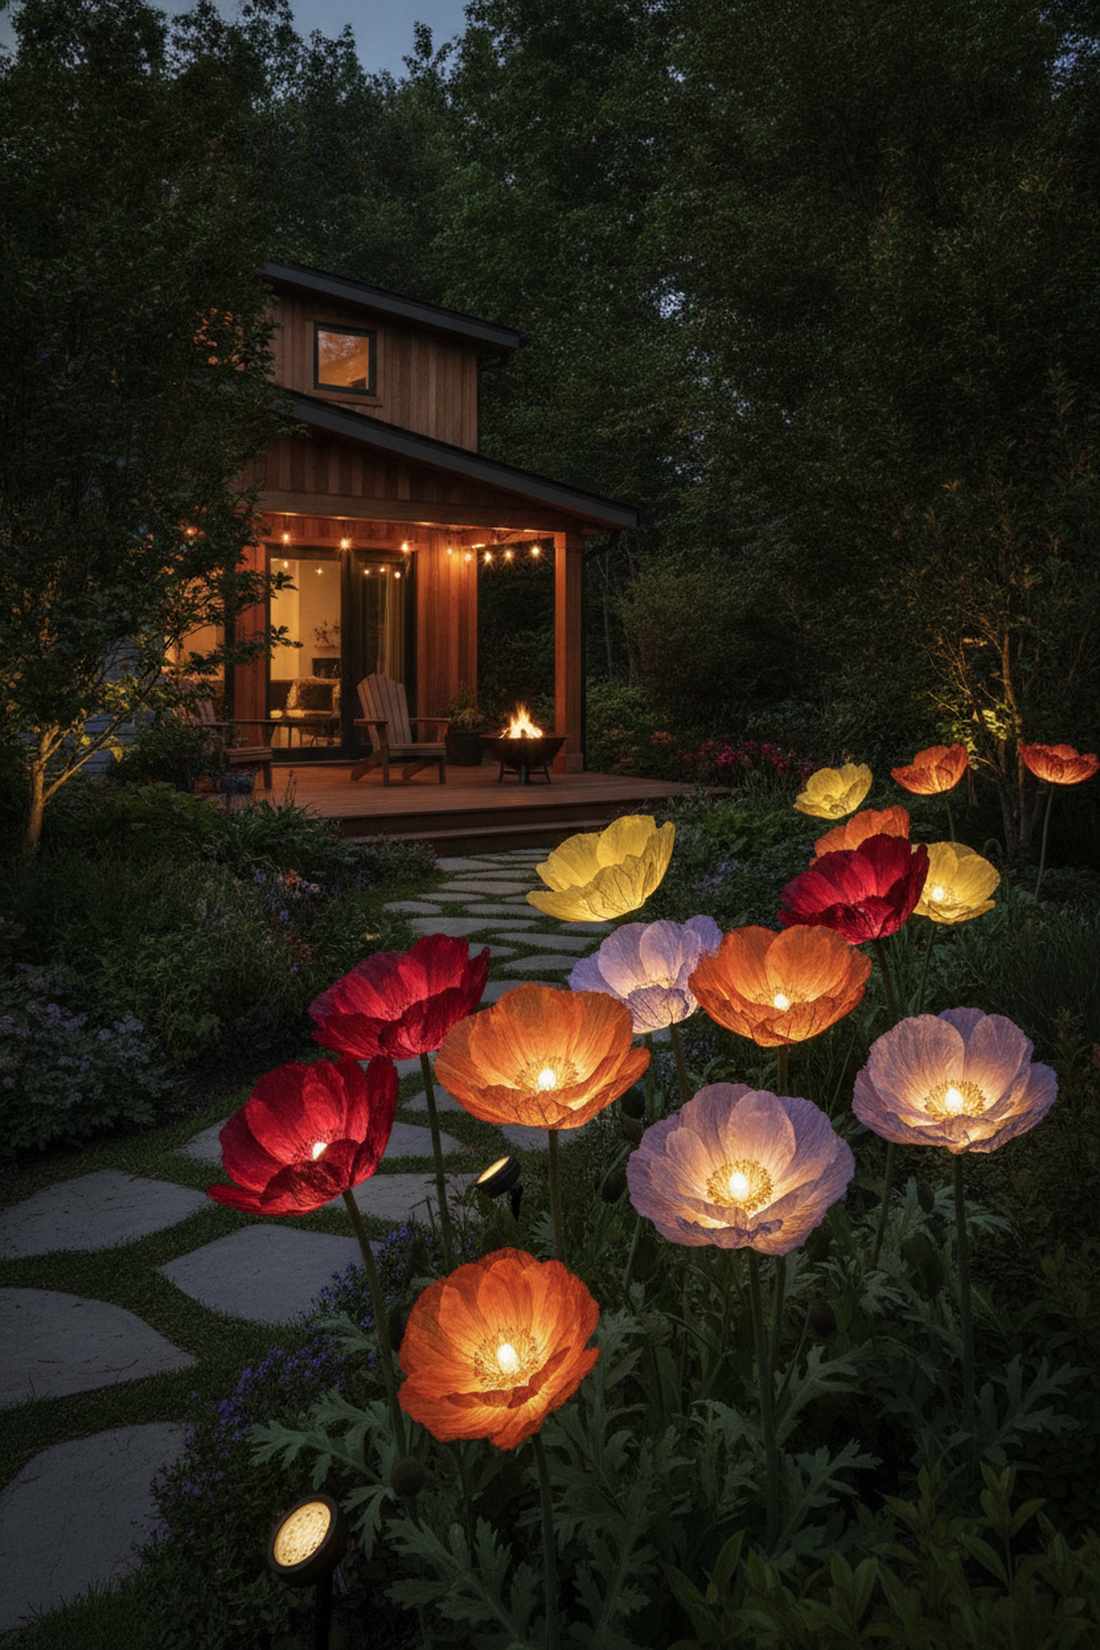
Shooting light through a thin petal makes it glow like a brilliant piece of stained glass. Floral silhouette backlighting is absolutely stunning when used behind large, papery flowers like poppies or tulips. This layout forces visitors to stop and stare at the intricate veining.
Hitting these delicate flowers from the front completely washes out their unique transparent texture. Placing a low-watt bulb closely behind the stem gives a designer-level finish that feels incredibly intimate and artistic. Securing specific miniature outdoor lighting garden bulbs ensures you don’t burn the delicate petals.
This macro-level botanical feature costs literally $20 to set up.
- Key Materials: 5W micro-floods, short ground stakes
- Vibe / Style: Intimate botanical macro-art
- Difficulty: Gentle positioning
- Budget Breakdown: Micro-flood: $15 | Soft bulb: $5.
- Creator’s Tip: Keep the fixture at least 18 inches away from the flower back to ensure heat does not wilt the bloom.
- Smart Sourcing: low-wattage micro-landscape floods (compact) and frosted LED capsule bulbs.
Want to make basic plants look incredibly expensive? This next lighting hack is a game changer.
Material Guide: Cheap vs. Premium Aesthetic
Knowing exactly where to save and where to spend makes all the difference in achieving that “looks expensive but isn’t” vibe.
- Standard vs. UV-Resistant/Premium: Standard plastic housings bleach white and crack in one summer. Upgrading to cast-brass or powder-coated aluminum ensures a permanent, heavy-duty aesthetic that withstands weed whackers.
- Pre-made Kits vs. Sourcing Locally: Buying individual pieces at the hardware store costs 40% more. Buying commercial-grade landscape bundles online guarantees matching color temperatures and heavy-duty warranties out of the box.
25. Color Temperature Mixing

Painting your yard with invisible temperatures gives the landscape massive, unexplainable 3D depth. Strategic thermal contrast lighting uses warm 2700K on tree trunks and crisp 4000K on blue spruce needles. It works brilliantly to separate dense, messy woodland borders into clear layers.
Using the exact same bulb color everywhere flattens the yard into a boring, monotonous blob. Purposefully mixing warm and cool bulbs in specific zones looks far more expensive than it is and makes purple flowers pop violently. Knowing how to source varied outdoor lighting for garden bulbs is the ultimate pro secret.
Swapping out your bulbs to create this depth contrast only costs about $30.
- Key Materials: 2700K warm bulbs, 4000K cool bulbs
- Vibe / Style: Professional landscape design
- Difficulty: Visual planning
- Budget Breakdown: Mixed Bulb Pack: $30.
- Creator’s Tip: Always use warm white on anything man-made (brick, wood) and cool white strictly on blue-green foliage.
- Smart Sourcing: multi-temperature LED MR16 bulbs (bulk pack) and ceramic heat-resistant sockets.
26. Motion-Activated Accent Lighting
Having a spectacular floral display suddenly burst out of the darkness is incredibly theatrical. Sensor-triggered focal illumination saves immense power while providing a jaw-dropping “wow” moment when guests walk by. Fantastic for isolated pathway curves or hidden garden statues.
Leaving extreme accent lights on all night washes out the drama and annoys the neighbors. Wiring a discreet PIR sensor inline delivers a surprisingly premium look that makes the garden feel alive and interactive. Integrating smart outdoor lighting garden accessories adds high-tech security benefits, too.
Adding an inline low-voltage motion trigger costs about $35.
- Key Materials: 12V motion sensor, spotlight fixture
- Vibe / Style: Interactive luxury tech
- Difficulty: Intermediate inline wiring
- Budget Breakdown: Inline Sensor: $25 | Splice blocks: $10.
- Creator’s Tip: Hide the motion sensor low in the mulch so guests trigger the lights without ever seeing the ugly plastic dome.
- Smart Sourcing: low-voltage PIR motion sensors (weatherproof) and water-tight splice boxes.
Architectural Integration of Floral Lighting Systems
27. Built-In Wall Niche Lighting
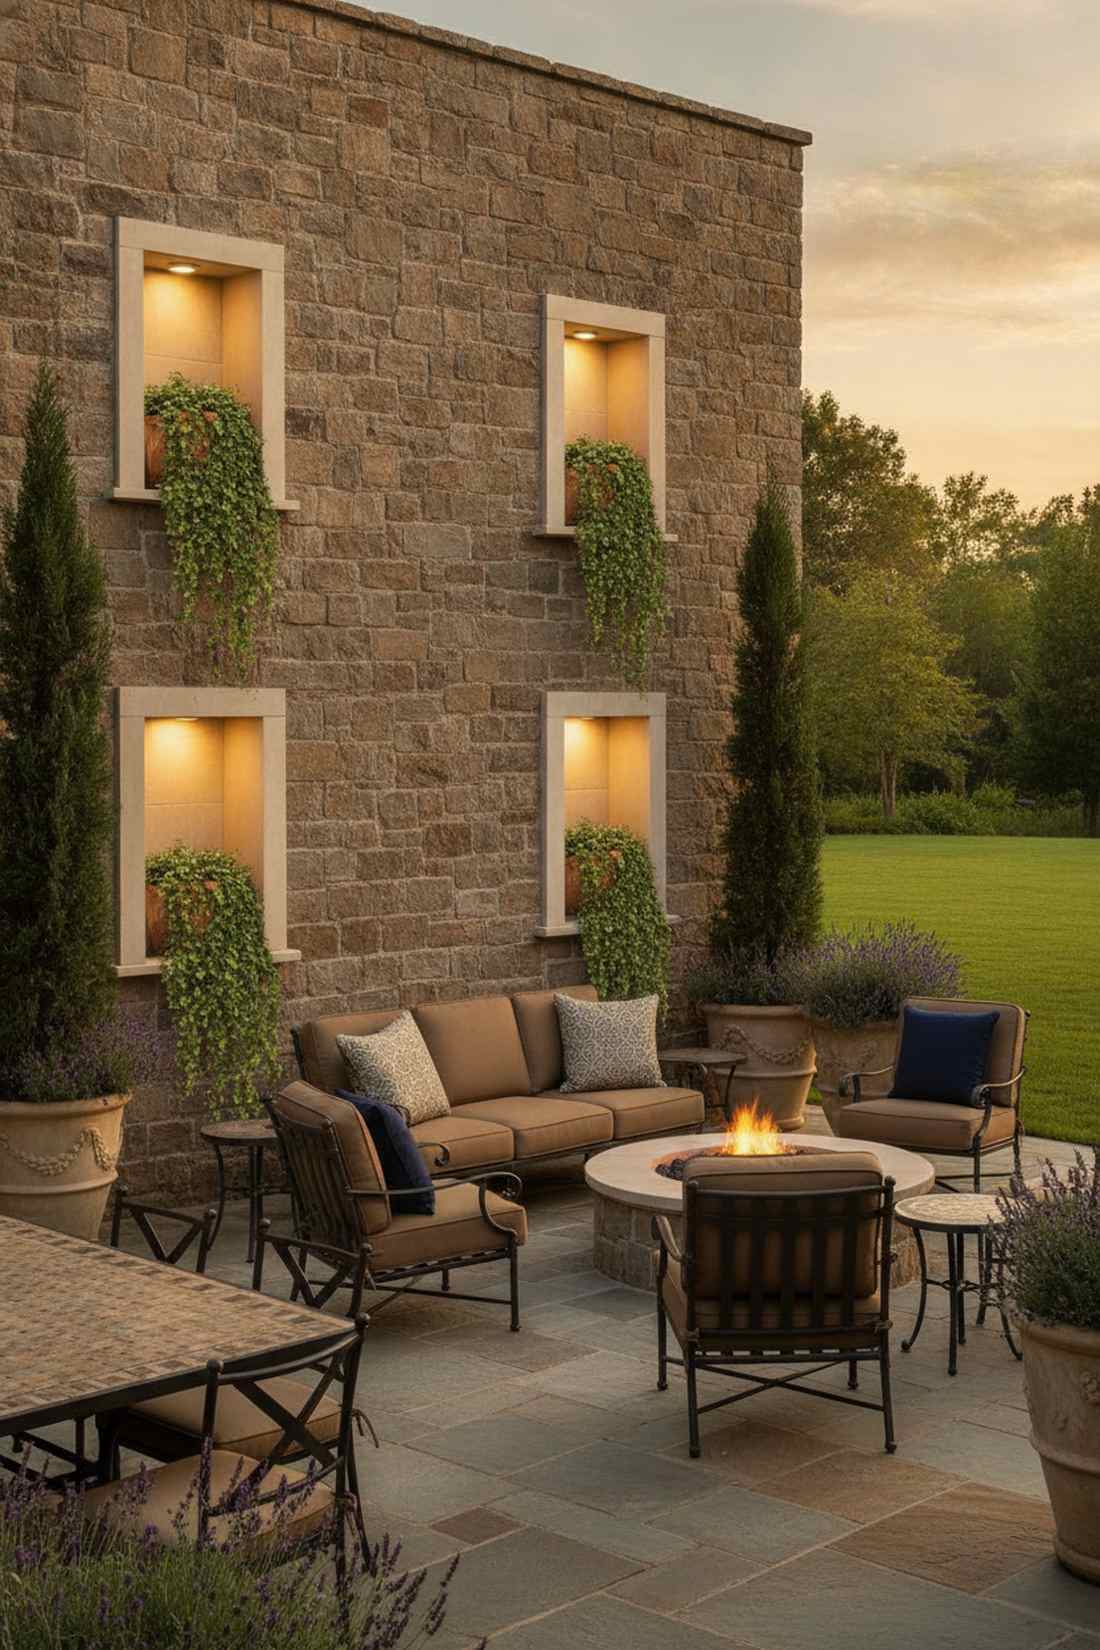
Tucking a glowing potted plant into a stone cavity feels like discovering an ancient roman artifact. Recessed hardscape niche displays isolate beautiful trailing ivy in a perfectly lit, wind-proof box. It is the absolute pinnacle of luxury masonry design for high-end patios.
Slapping a light on the outside of a wall creates horrible glare that blinds seated guests. Hiding a tiny puck light directly inside the roof of the niche gives a designer-level finish with pure, indirect ambiance. You will need premium miniature garden supplies to fit perfectly in tight stone gaps.
Installing a masonry puck light costs about $40 during a new wall build. Save this layout for your hardscape renovation!
- Key Materials: LED puck lights, masonry sleeves
- Vibe / Style: Tuscan villa courtyard
- Difficulty: Advanced masonry integration
- Budget Breakdown: Puck Light: $25 | Conduit sleeve: $15.
- Creator’s Tip: Use a frosted or opal lens puck light to ensure the glow inside the stone box is incredibly soft and buttery.
- Smart Sourcing: recessed hardscape puck lights (pre-cut) and flexible masonry conduits.
28. Pergola Beam Channeling
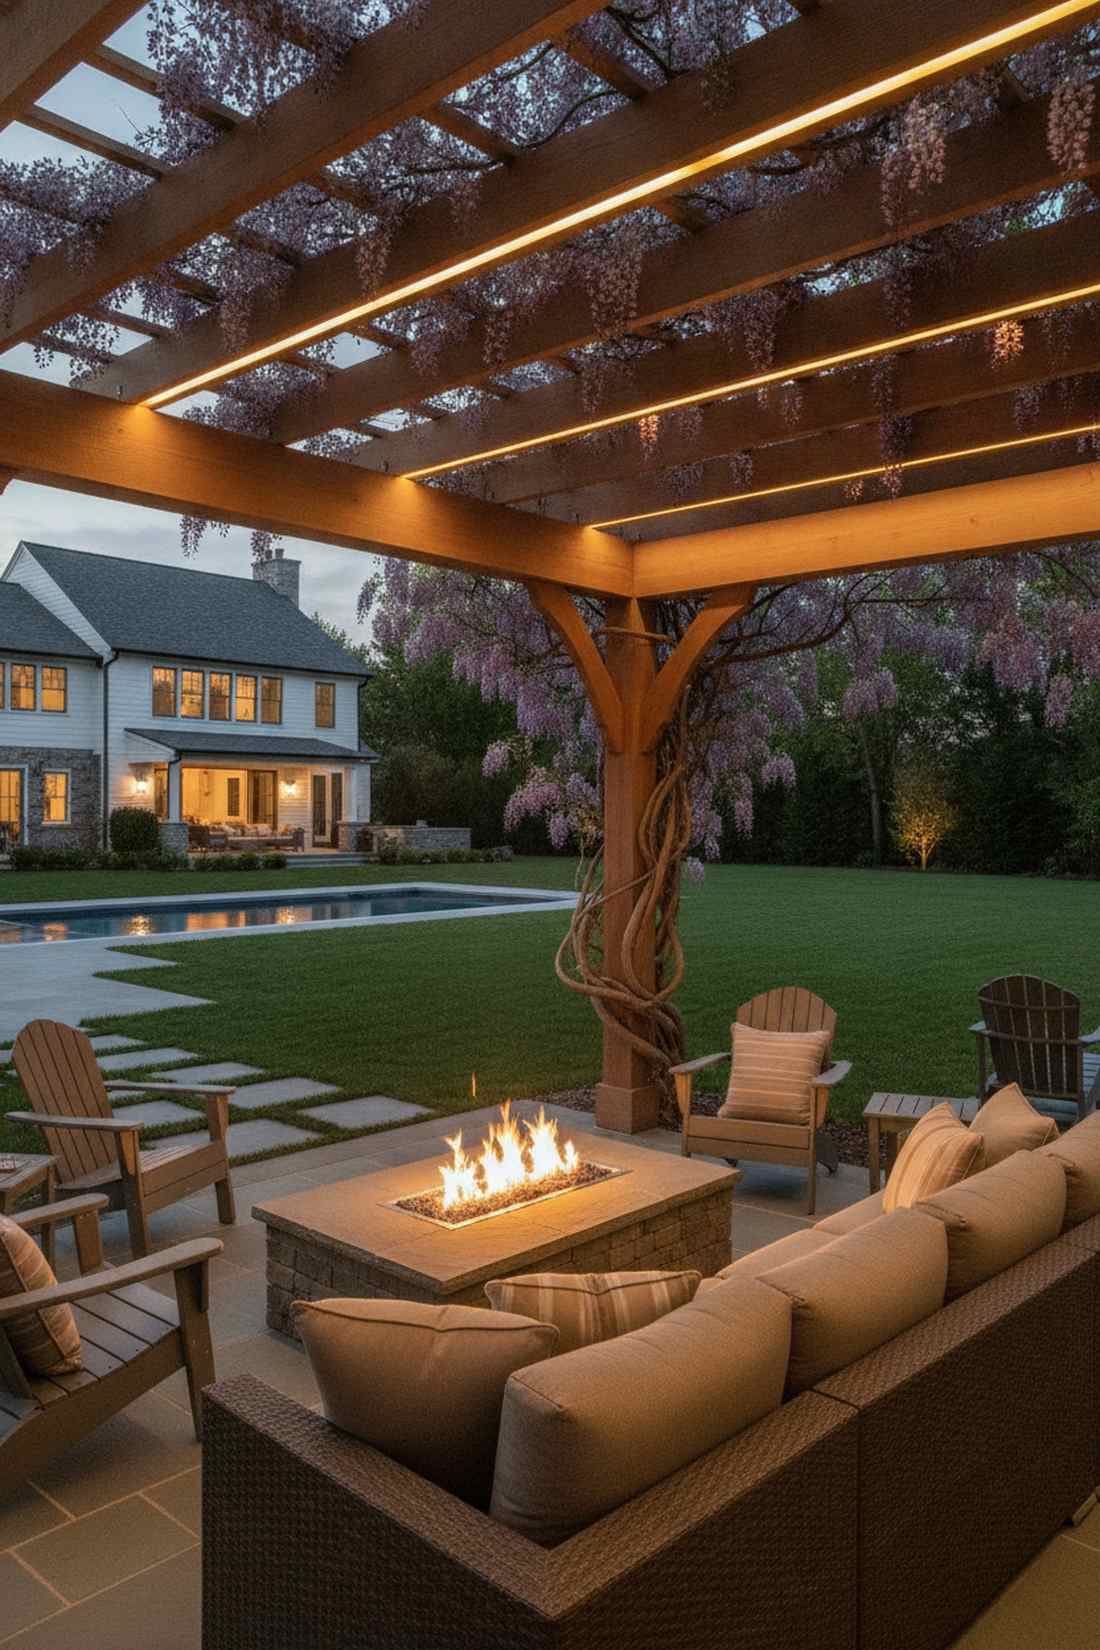
This completely invisible lighting trick makes wooden beams appear as if they naturally glow. Concealed structural wood channeling drops pure light onto your climbing wisteria without a single ugly wire showing. Ideal for minimalist timber pavilions.
Most DIYers just staple ugly brown wires along the outside of beautiful, expensive cedar beams. Routing a custom quarter-inch groove down the top of the wood looks far more expensive than it is and protects the cables from squirrels. Utilizing specific outdoor lighting for garden channels is worth the extra hour of labor.
This requires a wood router but the actual channel materials only cost $25.
- Key Materials: Wood router, slim LED extrusions
- Vibe / Style: Seamless architectural mastery
- Difficulty: Advanced woodworking
- Budget Breakdown: Aluminum track: $15 | LED insert: $10.
- Creator’s Tip: Always route the groove on the top side of the pergola rafters so the channel is totally invisible from the ground.
- Smart Sourcing: ultra-slim LED aluminum profiles (bulk pack) and high-adhesion LED tape.
This final stretch of structural setups separates standard yards from architectural masterpieces…
29. Fence-Top Rail Integration

Transforming your property line into a glowing perimeter makes your backyard feel immensely private and expansive. Continuous fence border washing drops a gentle sheet of light over your border perennials. Extremely effective for tight urban backyards trying to maximize depth.
Mounting bulky, cheap solar lights on every fence post creates an ugly, cluttered runway effect. Hiding a continuous LED strip directly under the top handrail delivers a surprisingly premium look that washes the entire wood grain evenly. Sourcing commercial outdoor garden solar lighting strips ensures the LEDs survive harsh winter freezing.
You can line a 30-foot fence section for around $90.
- Key Materials: 24V long-run LED strips, under-lip channels
- Vibe / Style: Expansive modern perimeter
- Difficulty: Intermediate linear wiring
- Budget Breakdown: 30ft LED Spool: $60 | Tracks: $30.
- Creator’s Tip: Use a 24-volt system instead of 12-volt to prevent the light from dimming at the far end of the long fence line.
- Smart Sourcing: 24V outdoor waterproof LED strips (starter kits) and angled extrusion rails.
30. Raised Bed Coping Lights

This casts a glowing ring around your vegetable boxes that makes late-night harvesting incredibly easy. Under-cap planter illumination sneaks tiny hardscape bars beneath the top lip of your stone retaining wall. It completely removes the need for annoying, muddy path lights.
Trying to hammer plastic stake lights into a dense, root-filled raised bed is a frustrating waste of time. Gluing low-profile brass bars under the stone overhang looks far more expensive than it is and withstands brutal weather. Relying on heavy-duty outdoor lighting for garden hardscapes provides indestructible longevity.
A set of four hardscape brass bars costs roughly $100. Pin this for your next garden wall build!
- Key Materials: Brass hardscape bars, masonry adhesive
- Vibe / Style: High-end chef’s garden
- Difficulty: Intermediate gluing/wiring
- Budget Breakdown: Hardscape Lights (4): $85 | Glue: $15.
- Creator’s Tip: Leave a small gap in the mortar joint behind the light to allow the hidden wires to pass through into the soil safely.
- Smart Sourcing: cast-brass hardscape LED bars (weatherproof) and polyurethane landscape block adhesive.
31. Columnar Structure Uplights
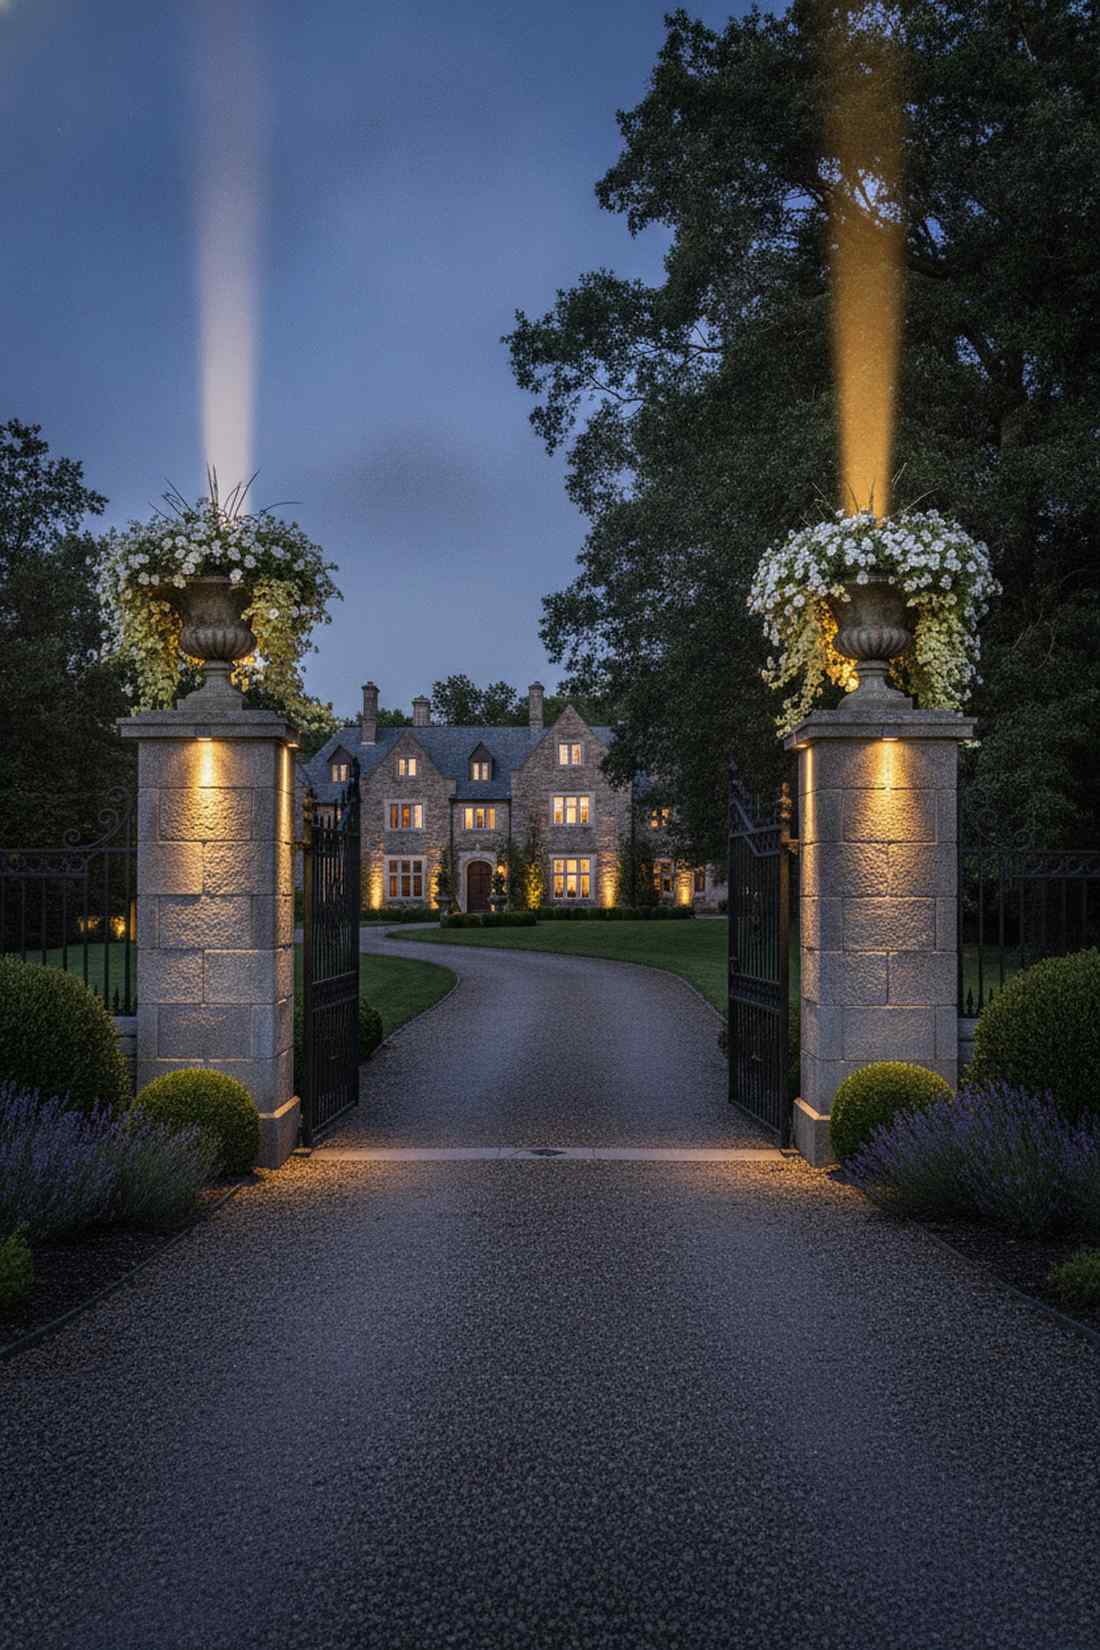
Hollowing out a pillar to shoot light straight up makes a massive architectural statement at your driveway entrance. Internal pillar beam lighting illuminates the expensive ornamental urns resting on top perfectly. A stunning addition for grand, gated entrances.
Strapping a cheap spotlight to the side of a beautiful brick column ruins the masonry aesthetic entirely. Building a hollow core to house the bulb internally gives a designer-level finish that screams luxury estate. Integrating proper miniature garden supplies inside the column prevents water pooling.
The specialized internal hardware runs about $45 per column.
- Key Materials: Core-drilled column cap, well light fixture
- Vibe / Style: Grand gated manor
- Difficulty: Heavy masonry construction
- Budget Breakdown: PVC Sleeve: $10 | Well Fixture: $35.
- Creator’s Tip: Ensure the PVC pipe housing the light runs all the way down to a gravel base to provide instant water drainage.
- Smart Sourcing: in-ground LED well lights (sealed) and drainage-ready PVC sleeves.
32. Hardscape Edge Strip Lighting
This layout outlines your patio like a glowing, levitating carpet cutting through the grass. Flush perimeter strip tracing defines the sharp boundary between your stone pavers and soft flower beds. Highly recommended for preventing trips on sunken patio drop-offs.
Most contractors just shove standard rope lights into the dirt, where they get immediately chopped by edging shears. Installing an armored aluminum ground track delivers a surprisingly premium look that lawnmowers glide effortlessly over. Upgrading to robust outdoor lighting for garden edging guarantees a crisp, straight glow line.
You can armor-edge a 20-foot patio curve for roughly $110.
- Key Materials: Armored LED extrusions, high-density LED tape
- Vibe / Style: Levitating modern patio
- Difficulty: Precision trenching
- Budget Breakdown: Armored Track: $50 | Strip Lights: $60.
- Creator’s Tip: Use a dotless COB LED strip inside the channel so the light looks like a solid neon laser beam rather than individual dots.
- Smart Sourcing: seamless COB outdoor LED strips (UV-coated) and heavy-traffic aluminum ground channels.
33. Obelisk Integrated Fixtures
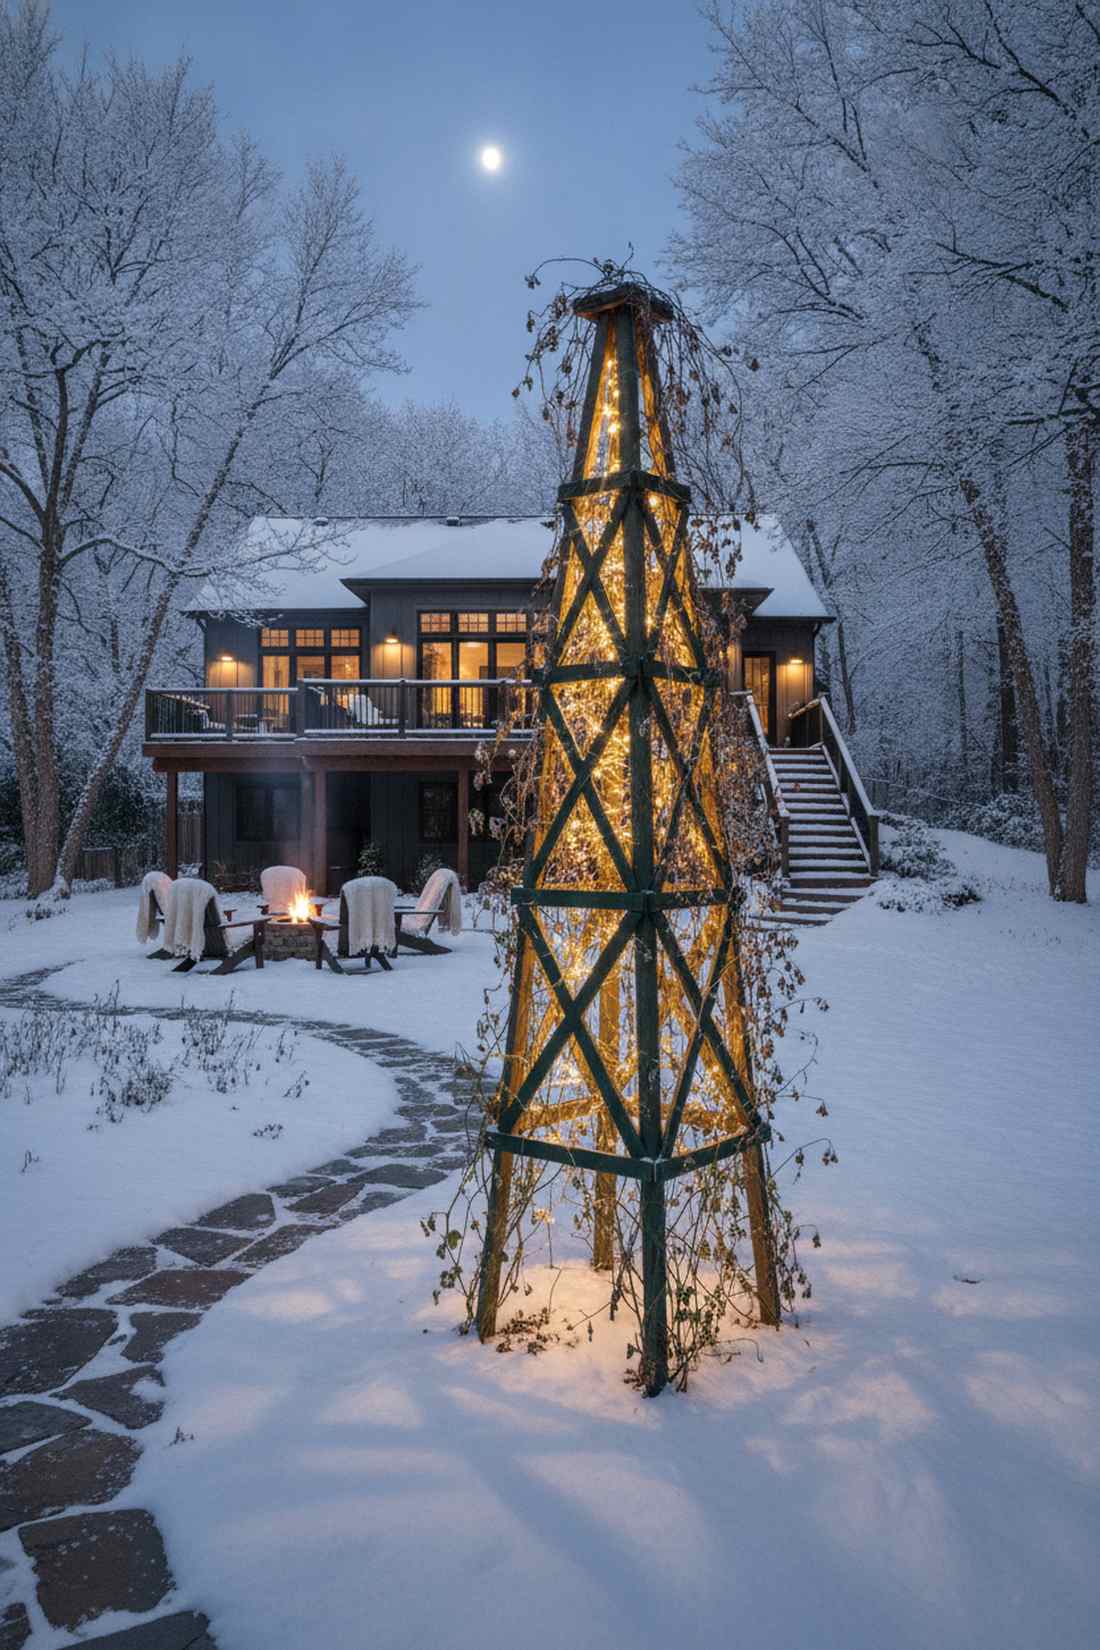
Building a glowing wooden tower in the center of your garden creates an unforgettable winter focal point. Internally illuminated garden obelisks push light outward through dense climbing sweet peas or ivy. It acts as gorgeous, structural yard art even when the plants are dead.
Pointing an external spotlight at a wooden obelisk just casts weird shadows on the fence behind it. Mounting tiny micro-lights facing outward from the interior spine looks far more expensive than it is and creates immense depth. High-end fairy garden kits often feature this exact internal-glow mechanic.
Adding internal glow hardware to an existing obelisk costs just $30. Save this for your winter garden prep!
- Key Materials: Micro LED modules, wooden obelisk frame
- Vibe / Style: Sculptural year-round art
- Difficulty: Easy wood mounting
- Budget Breakdown: LED Modules: $20 | Fasteners: $10.
- Creator’s Tip: Paint the wiring harness dark green or black so it completely vanishes against the wooden structure and foliage.
- Smart Sourcing: weatherproof micro-LED modules (pre-wired) and heavy-duty cable concealing tape.
Conclusion
Mastering these 33 distinct outdoor lighting garden blueprints completely transforms your property from a dark, flat yard into a multi-dimensional evening retreat. By aggressively layering these high-end uplighting, moonlighting, and structural techniques, you guarantee a designer-level aesthetic using surprisingly affordable, premium landscape lighting supplies. Whether you integrate commercial-grade low-voltage kits or opt for hassle-free solar components, focusing on correct beam angles and strategic placement is what separates standard yards from luxury estates. Start your upgrade by executing just one or two focal points, and gradually expand your architectural lighting layout season by season for maximum curb appeal.
Frequently Asked Questions
What color temperature works best for illuminating flowers at night?
Selecting the right temperature is critical for premium outdoor lighting for garden aesthetics. Warm white (2700-3000K) is universally recommended as it mimics expensive resort lighting and heavily enhances reds, oranges, and brickwork. However, integrating cool white (4000K) specifically on blue spruce or purple blooms provides stunning 3D contrast. To achieve this without overspending, buy bulk packs of commercial-grade MR16 LED bulbs in both temperatures to mix and match.
How far should I space path lights along flower-lined walkways?
To avoid the cheap “airport runway” look, never place lights closer than 6 to 8 feet apart. By utilizing wide-angle mushroom path light kits, you can easily stretch that spacing to 10 feet while still creating a luxurious, overlapping pool of light. Ensure you purchase heavy-duty copper or brass pathway starter kits rather than cheap plastic models to prevent the posts from leaning or snapping over time.
Can solar lights provide adequate illumination for large flower beds?
Yes, but only if you avoid the generic dollar-store stakes. High-end outdoor garden solar lighting technology has advanced massively; investing in premium remote-panel solar spotlights can easily push 300 to 400 lumens, rivaling hardwired systems. These premium solar kits are perfect for isolated beds, though you should always ensure the remote panels are placed in direct, unshaded sunlight for maximum battery charging.
Should I light every flower bed in my garden?
Absolutely not. Lighting every single inch of your yard flattens the landscape and destroys the dramatic contrast that makes it look expensive. Professional landscape designers purposefully leave dark voids between illuminated focal points. By strategically sourcing specific landscape lighting kits for just your feature trees, main pathways, and architectural corners, you save massive amounts of money while achieving a far more luxurious final look.
How do I prevent outdoor lighting from bothering neighbors?
Light trespass instantly ruins a neighborhood vibe and makes your setup look cheap. Always use fixtures equipped with deep glare shields, louvers, or barn doors to cut the beam precisely where it needs to end. When buying premium landscape lighting supplies, opt for fixtures labeled “Dark Sky Compliant” and utilize lower wattages (like 3W to 5W LEDs) that highlight the flowers beautifully without blasting light into the sky or adjacent windows.
What wattage should I use for uplighting flowering shrubs?
When using modern LEDs, you need drastically less power to achieve an expensive look. Small shrubs require only 2W to 3W LED bulbs, medium trees need 4W to 5W, and massive canopy trees require 7W to 9W. By upgrading to a high-quality commercial-grade low-voltage transformer, you can easily support dozens of these low-draw fixtures on a single line, completely eliminating the need for bulky, outdated halogen heat.