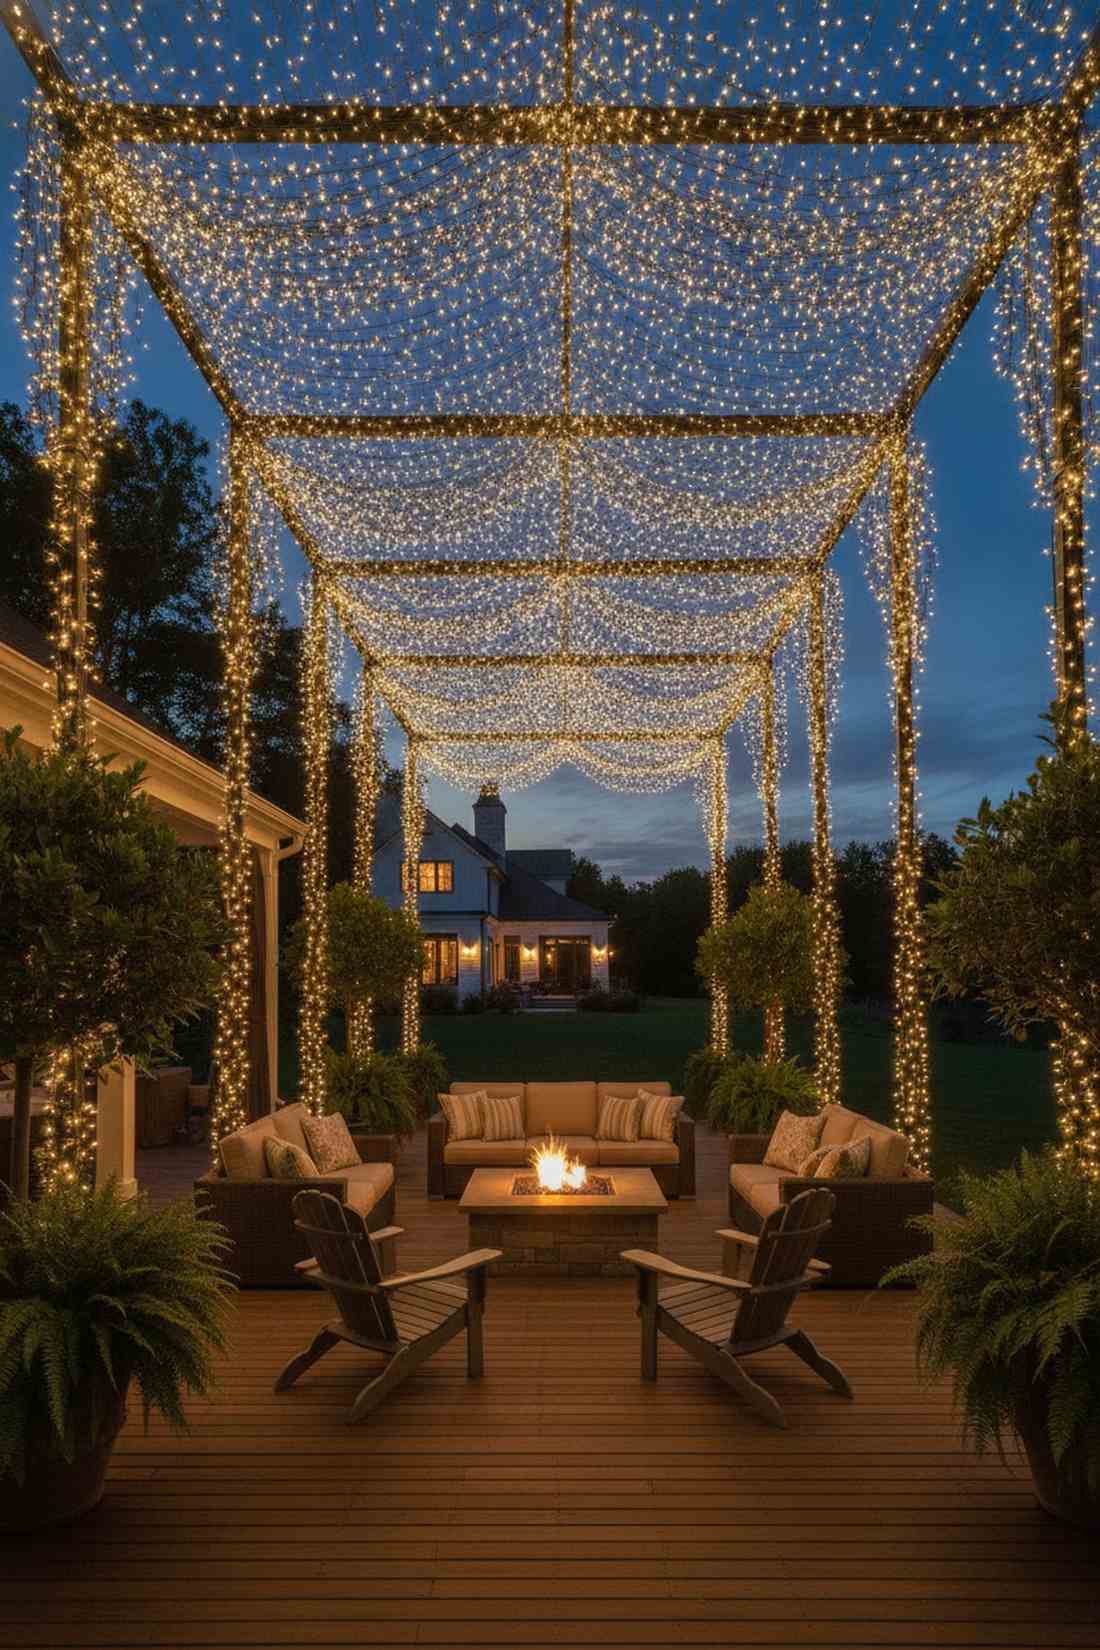
A stunning fairy lights canopy instantly transforms boring backyards into magical nighttime sanctuaries. Discover exactly how to source premium waterproof kits without wrecking your landscaping budget. These designer-level setups guarantee professional results that easily outlast harsh outdoor weather elements.
Design SnapshotKey Principles
- Layered Draping: Combine multiple light strands at varying heights to create depth and dimensional interest across your canopy space
- Anchor Strategy: Secure lights to stable structural points using weatherproof hooks, tension rods, or wrapped posts to withstand wind movement
- Power Planning: Position solar panels in direct sunlight or route electrical connections discreetly along beams before installing draping patterns
- Fabric Integration: Pair sheer textiles with micro LEDs to diffuse light beautifully while concealing wiring and enhancing the ethereal quality
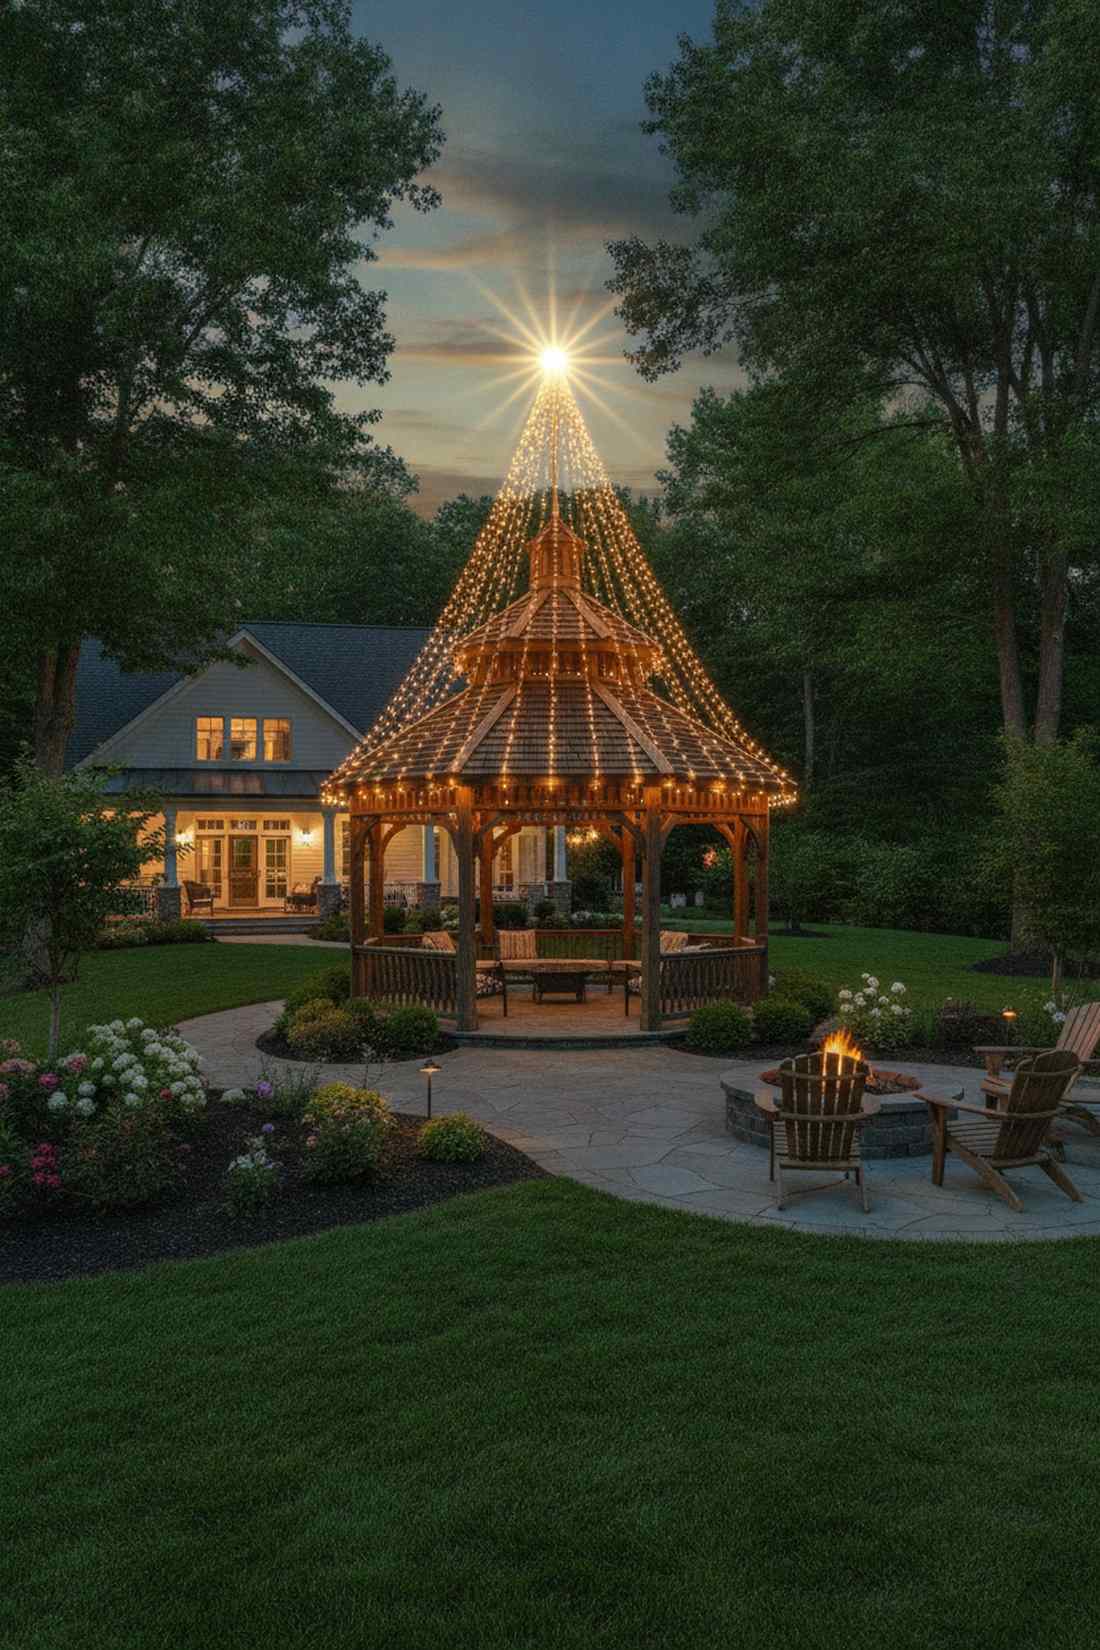
Classic Gazebo Canopy Designs
Traditional gazebo structures provide ideal frameworks for permanent nighttime illumination where radial symmetry and central focal points create balanced, high-end aesthetics. These foundational patterns work brilliantly across octagonal, hexagonal, and square architectural builds.
1. Radial Spoke Canopy
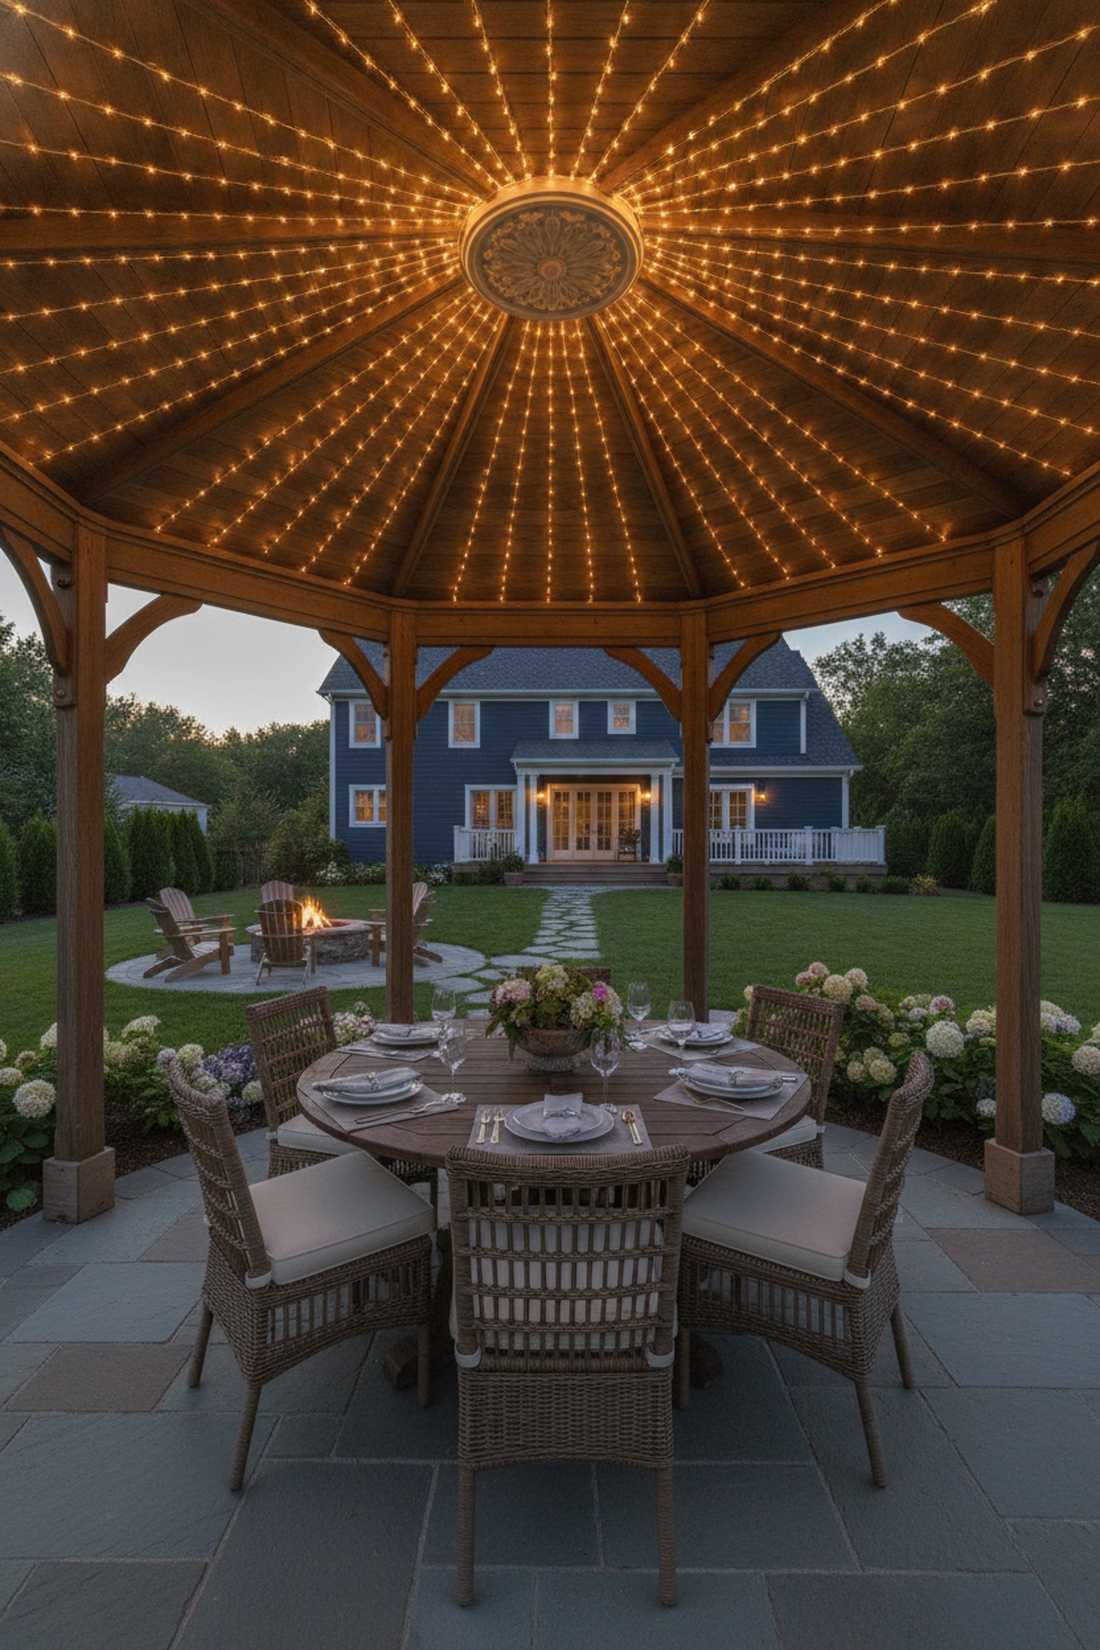
Feels like dining under a magical starlit sky every single night. This classic symmetrical patio lighting layout works absolutely perfectly for round or octagonal backyard dining gazebos.
Most DIYers overcomplicate overhead lighting, but this specific radial configuration delivers a surprisingly premium look with minimal physical effort. Snagging a heavy-duty outdoor fairy lights kit makes the installation practically foolproof against summer storms.
You can easily pull this off for around $40–$75. Save this to your DIY weekend garden board!
- Key Materials: Waterproof outdoor LED string spools, central mounting ring
- Vibe / Style: Traditional elegant courtyard
- Difficulty: Easy beginner setup
- Budget Breakdown: Materials: $45 | Base Hardware: $15
- Creator’s Tip: Use a central ceiling medallion to hide all the ugly plug connections seamlessly.
- Smart Sourcing: Pre-measured outdoor lighting bundles and a heavy-duty ceiling anchor starter kit.
2. Cascading Perimeter Drape
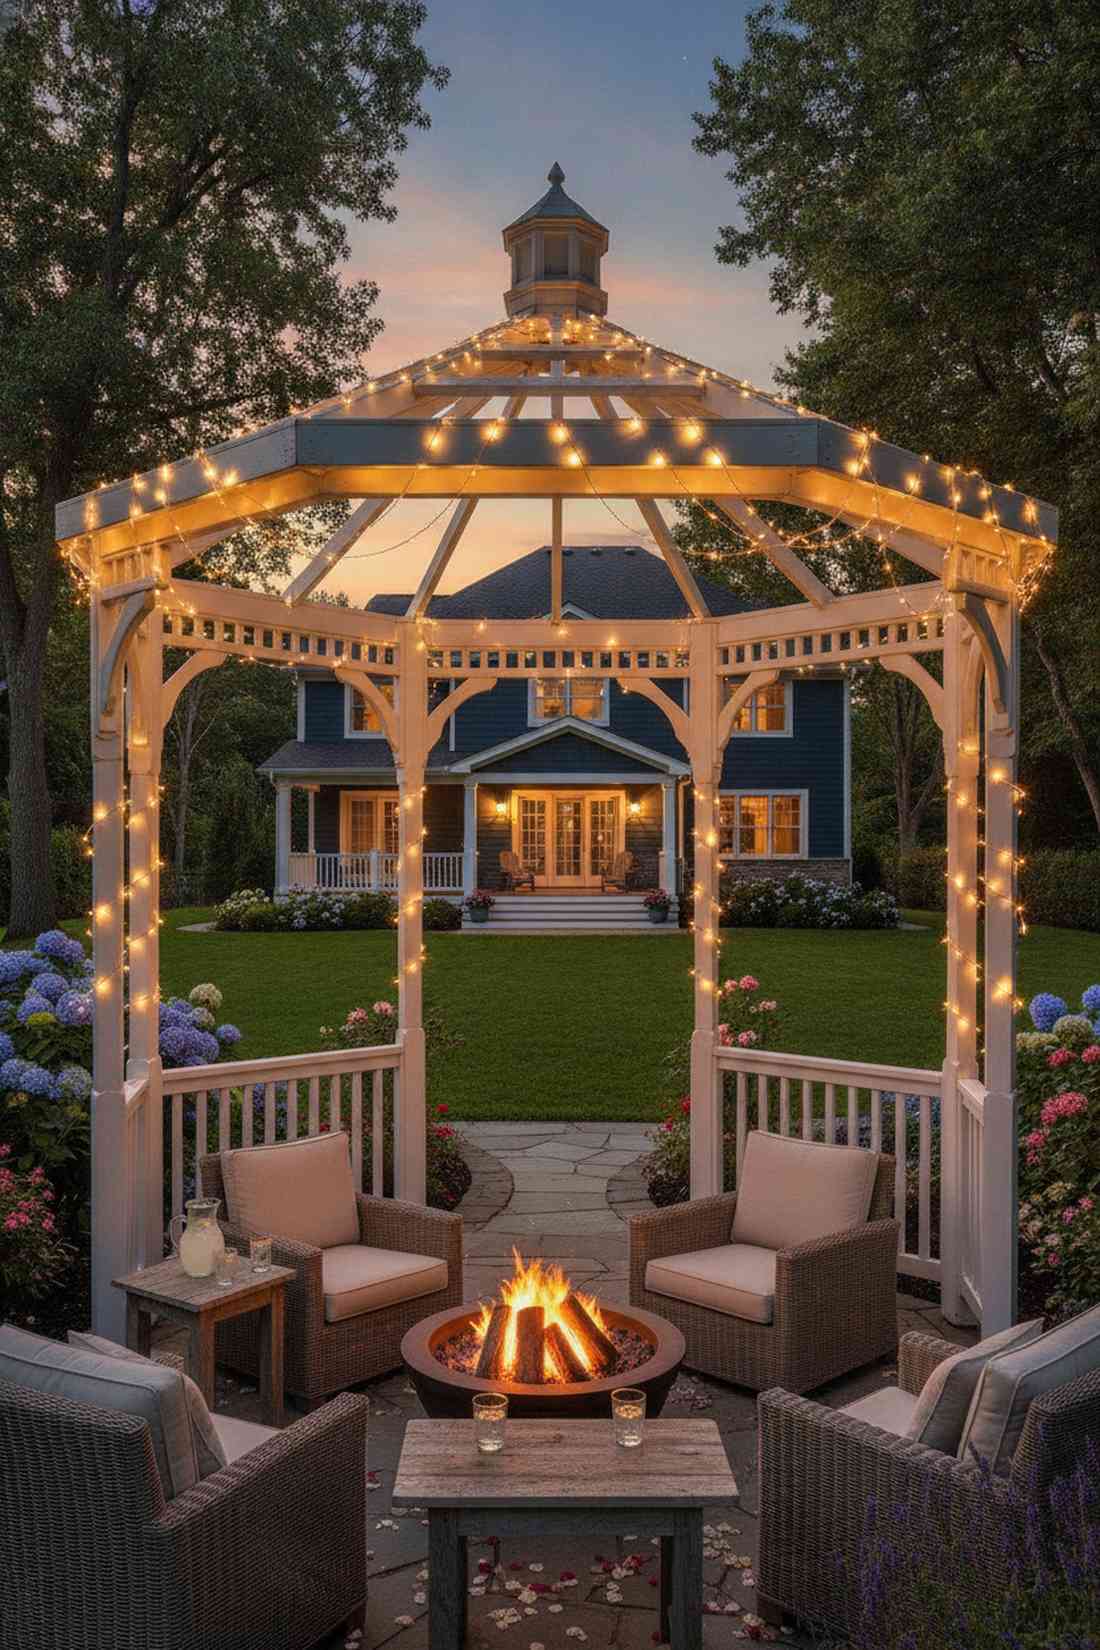
Whispers of whimsical elegance that feels straight out of a storybook. A glowing gazebo border design is incredibly effective at visually defining small outdoor entertaining spaces.
Standard straight-hanging wire often looks cheap and rigid, but introducing intentional, measured drooping creates a designer-level finish. Utilizing copper wire miniature garden supplies ensures the outline remains crisp and magical year-round.
Expect to spend about $25–$50 depending on the perimeter size. It’s a fast upgrade that completely changes the evening vibe.
- Key Materials: Copper wire micro LEDs, outdoor adhesive clips
- Vibe / Style: Whimsical storybook garden
- Difficulty: Extremely easy
- Budget Breakdown: String Lights: $20 | Clips: $10
- Creator’s Tip: Mark your droop points with chalk first so every single swoop matches perfectly.
- Smart Sourcing: UV-coated copper fairy wire (bulk pack) and weatherproof acrylic hanging clips.
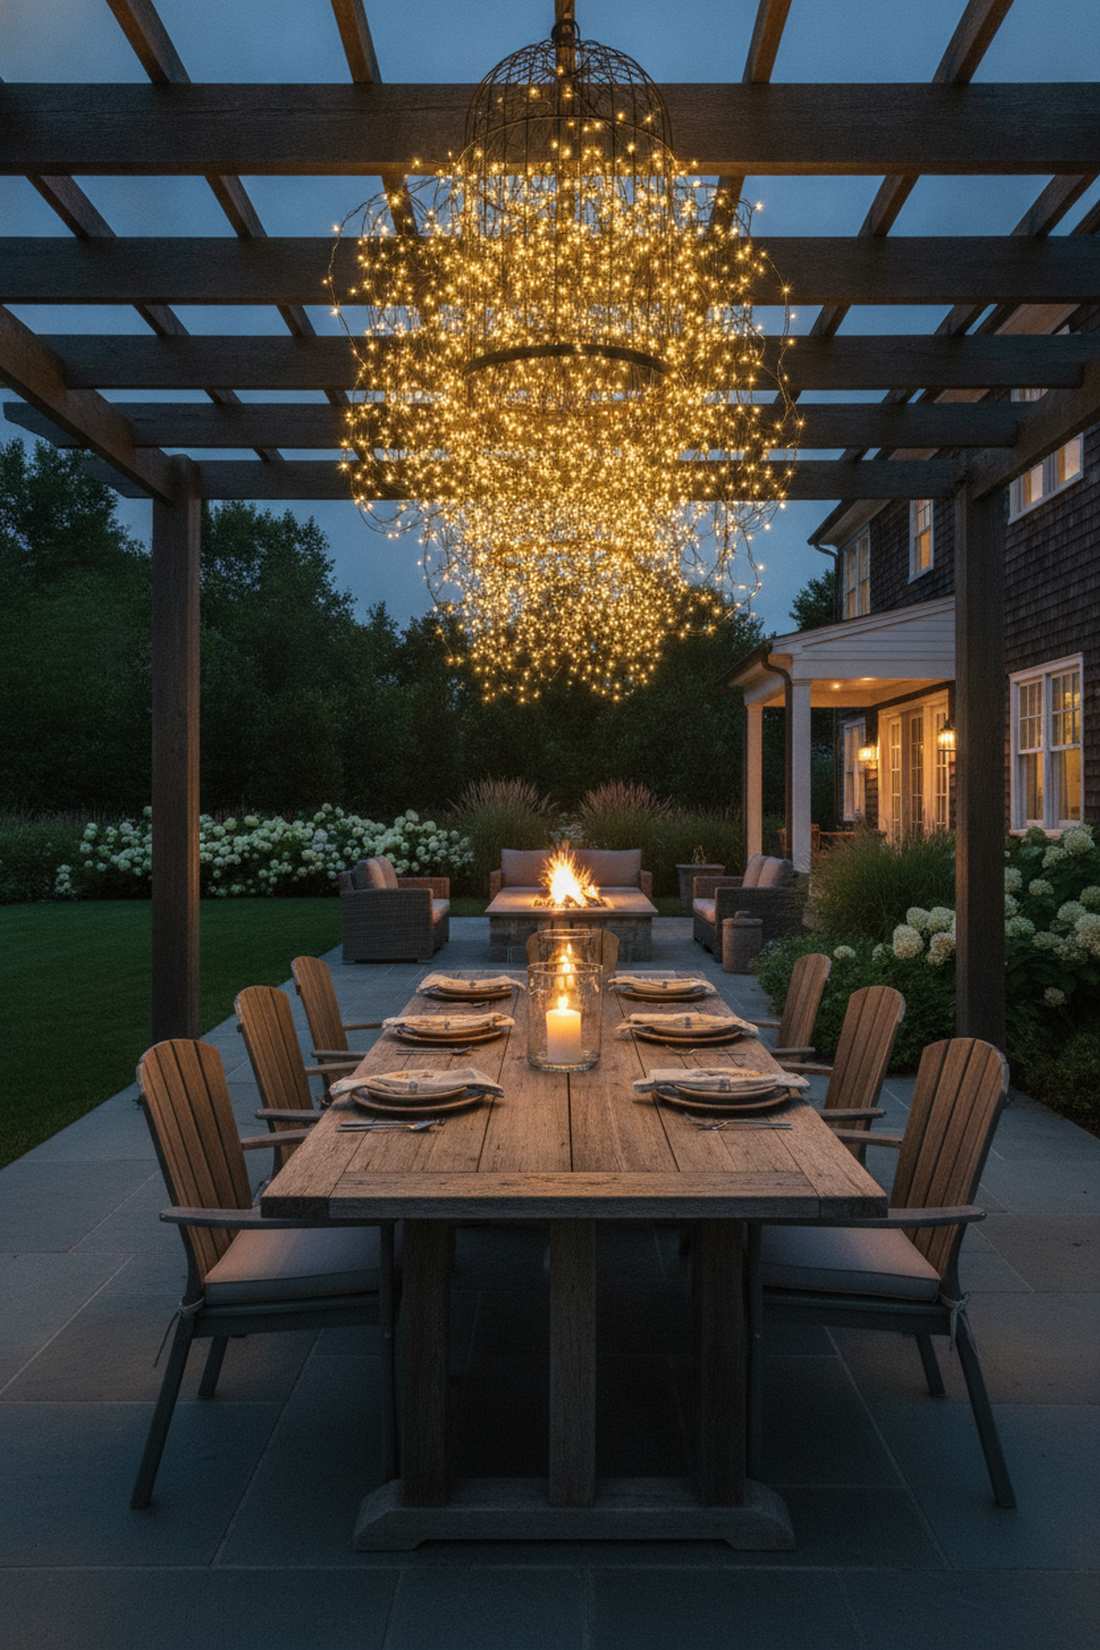
3. Double-Tier Chandelier Effect
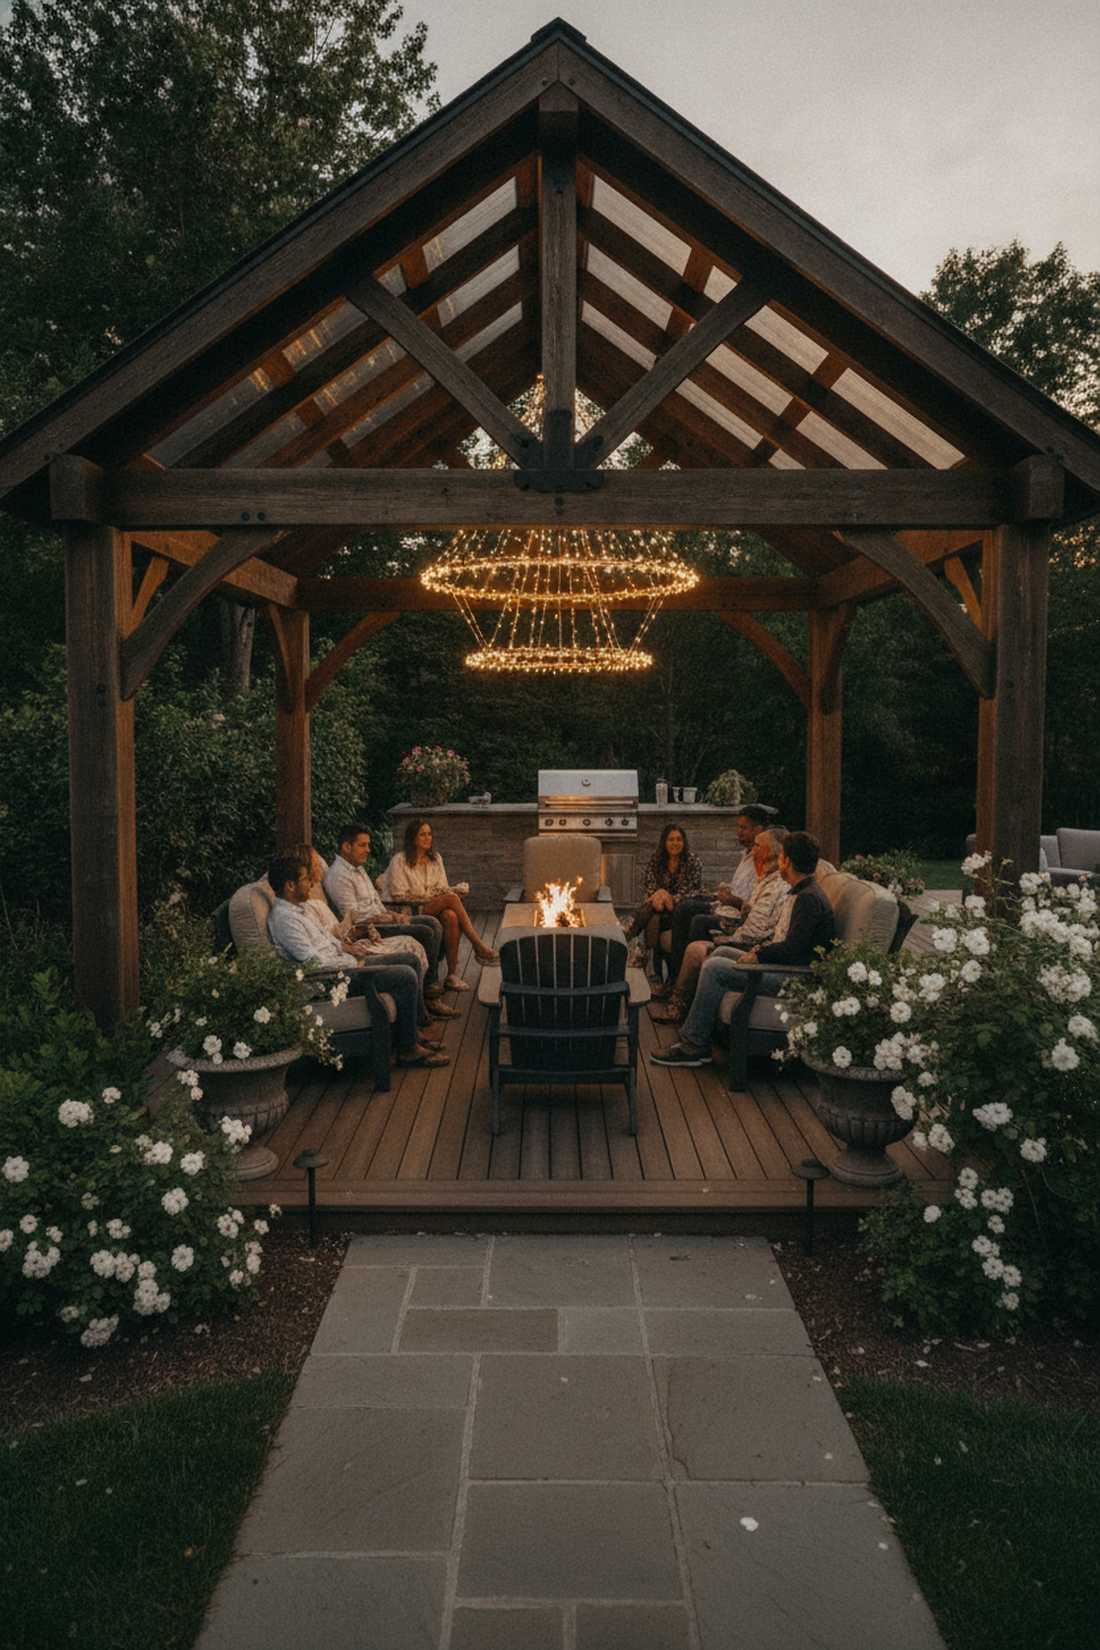
Captures the grand, romantic essence of a luxury hotel courtyard in your own home. This layered overhead focal piece is phenomenal for tall pavilion structures featuring high architectural peaks.
Skipping incredibly expensive hardwired fixtures in favor of concentric suspended circles gives a high-end illusion for absolute pennies. A reliable dual-tier fairy garden kit paired with invisible suspension line hides the structural mechanics beautifully.
This elegant optical illusion will run you roughly $35–$60. Pin this if you’re planning a sophisticated small space upgrade!
- Key Materials: Hoop frames, warm white LED strings, fishing line
- Vibe / Style: Luxury resort luxury
- Difficulty: Intermediate
- Budget Breakdown: Hoops: $15 | LED Strings: $30
- Creator’s Tip: Hang the lower tier exactly 18 inches below the top tier for the perfect visual balance.
- Smart Sourcing: Rust-proof steel craft hoops and a multi-strand chandelier starter kit.
4. Swag and Gather Draping
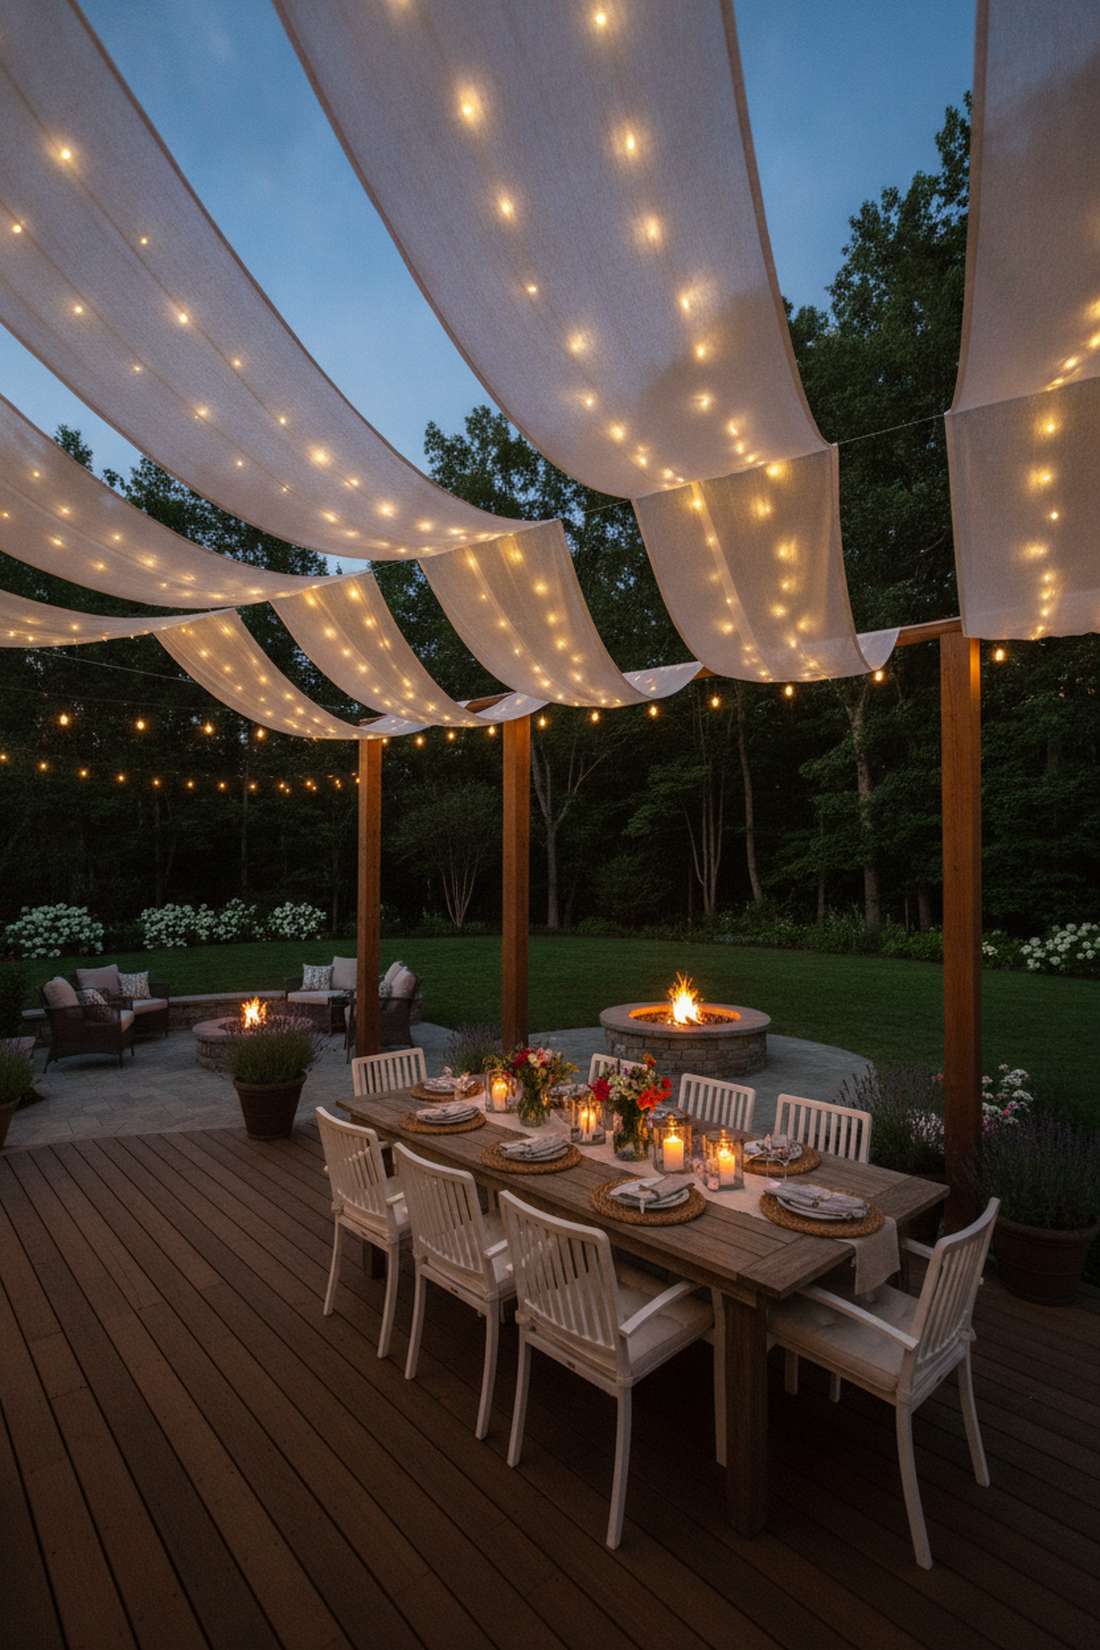
Exudes an ethereal, soft-focus ambiance reminiscent of a hidden forest gathering. Using a fabric and light fusion setup perfectly suits DIY wedding receptions or intimate patio corners.
Exposed bare bulbs can sometimes be harsh on the eyes, but diffusing them through flowing sheer textiles looks far more expensive than it actually is. Grab bulk rolls of sheer organza and weave in commercial-grade warm white strings for maximum durability and romance.
Pull this luxurious, soft-glowing look together for under $80.
- Key Materials: Sheer organza fabric, plug-in fairy lights, zip ties
- Vibe / Style: Romantic bohemian luxury
- Difficulty: Intermediate
- Budget Breakdown: Fabric Rolls: $40 | Lights: $35
- Creator’s Tip: Zip-tie the fabric to the posts before stringing the lights so the fabric bears the tension weight.
- Smart Sourcing: Fire-retardant sheer canopy fabric (bulk roll) and low-heat indoor/outdoor LED kits.
Most people get this completely wrong… until they try the exact layout coming up next.
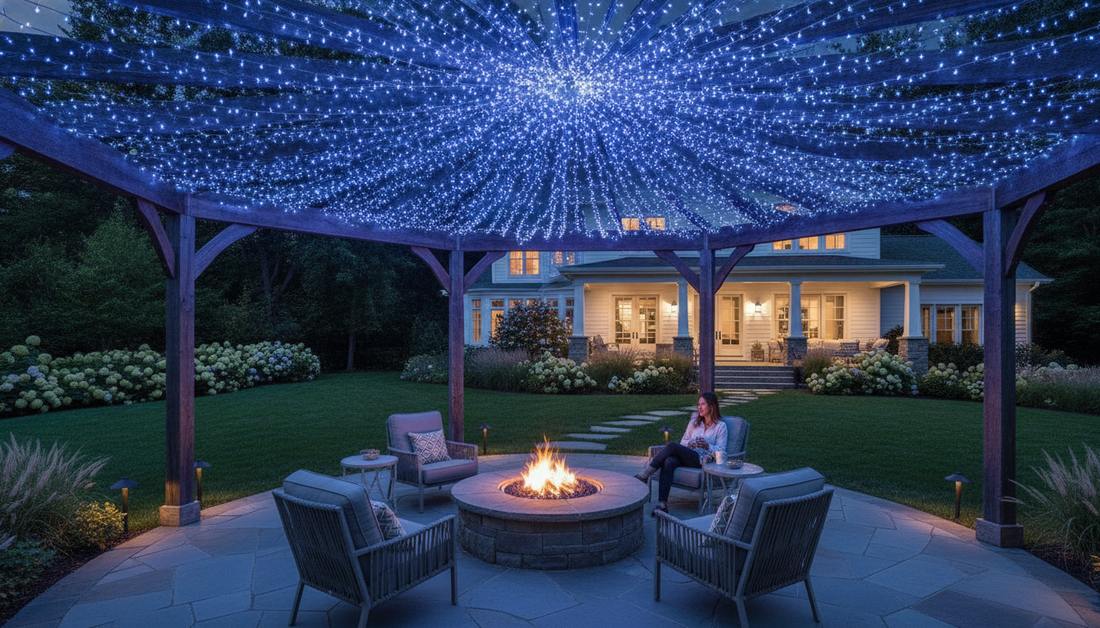
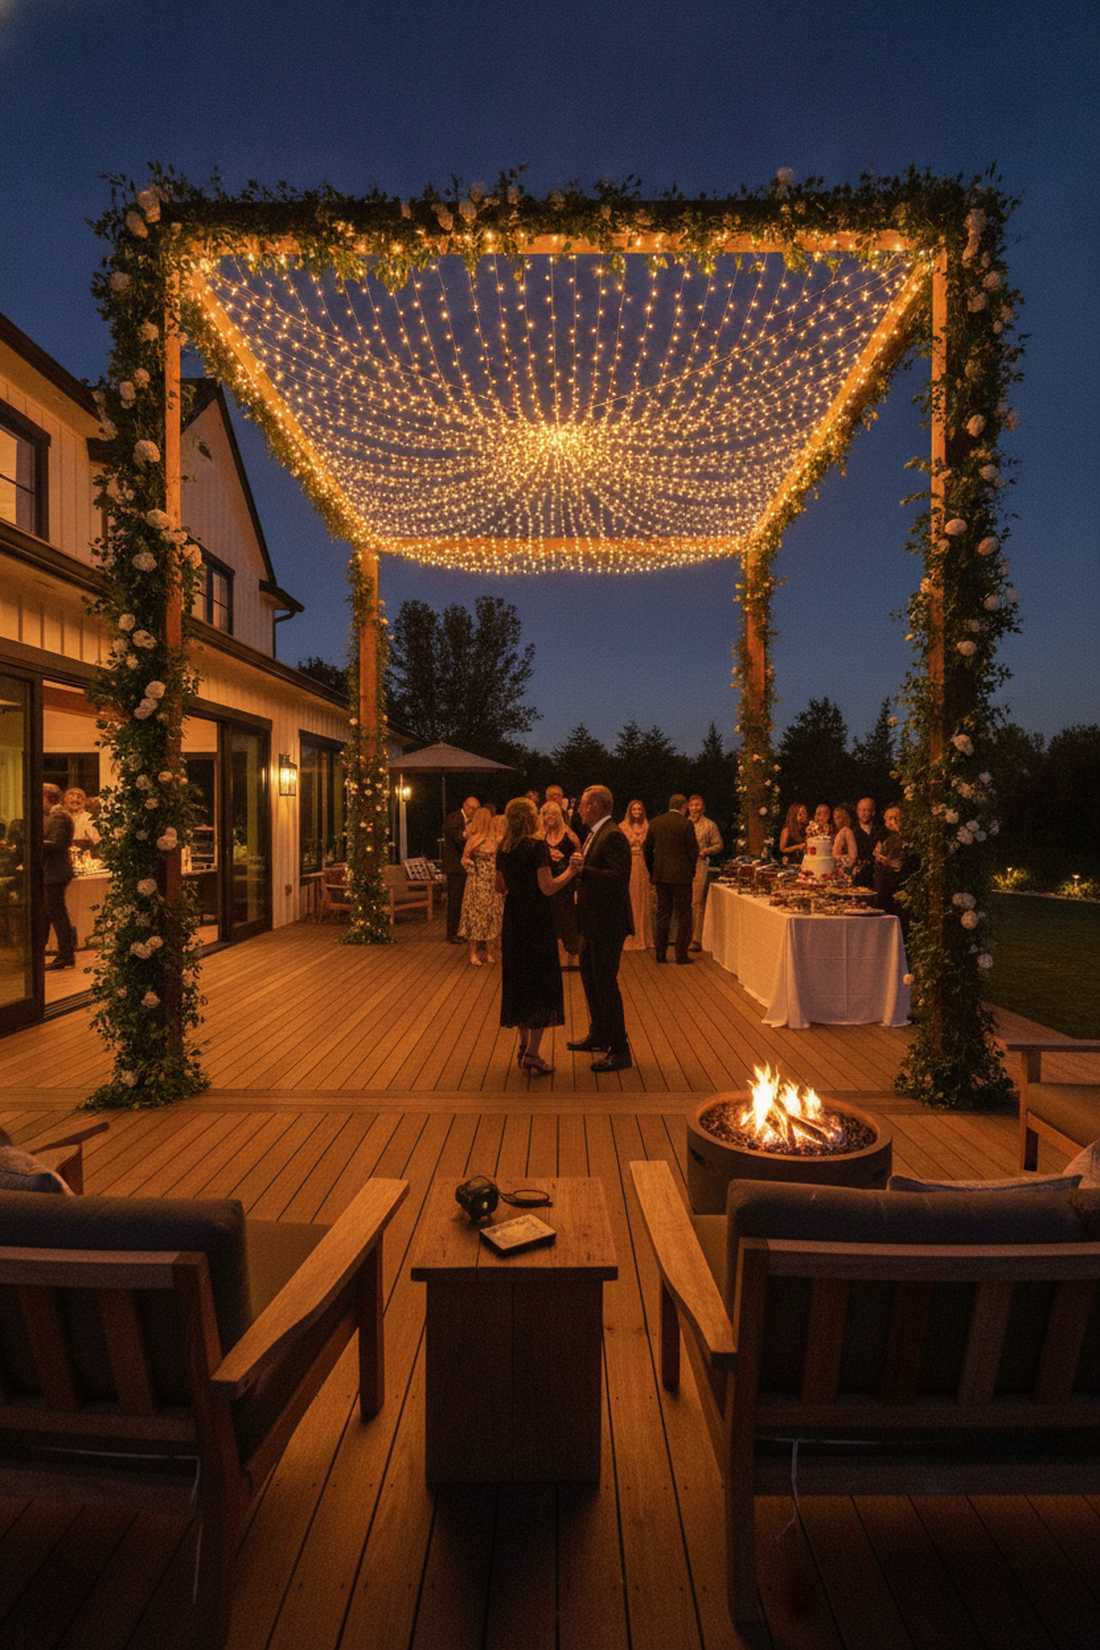
5. Starburst Ceiling Pattern
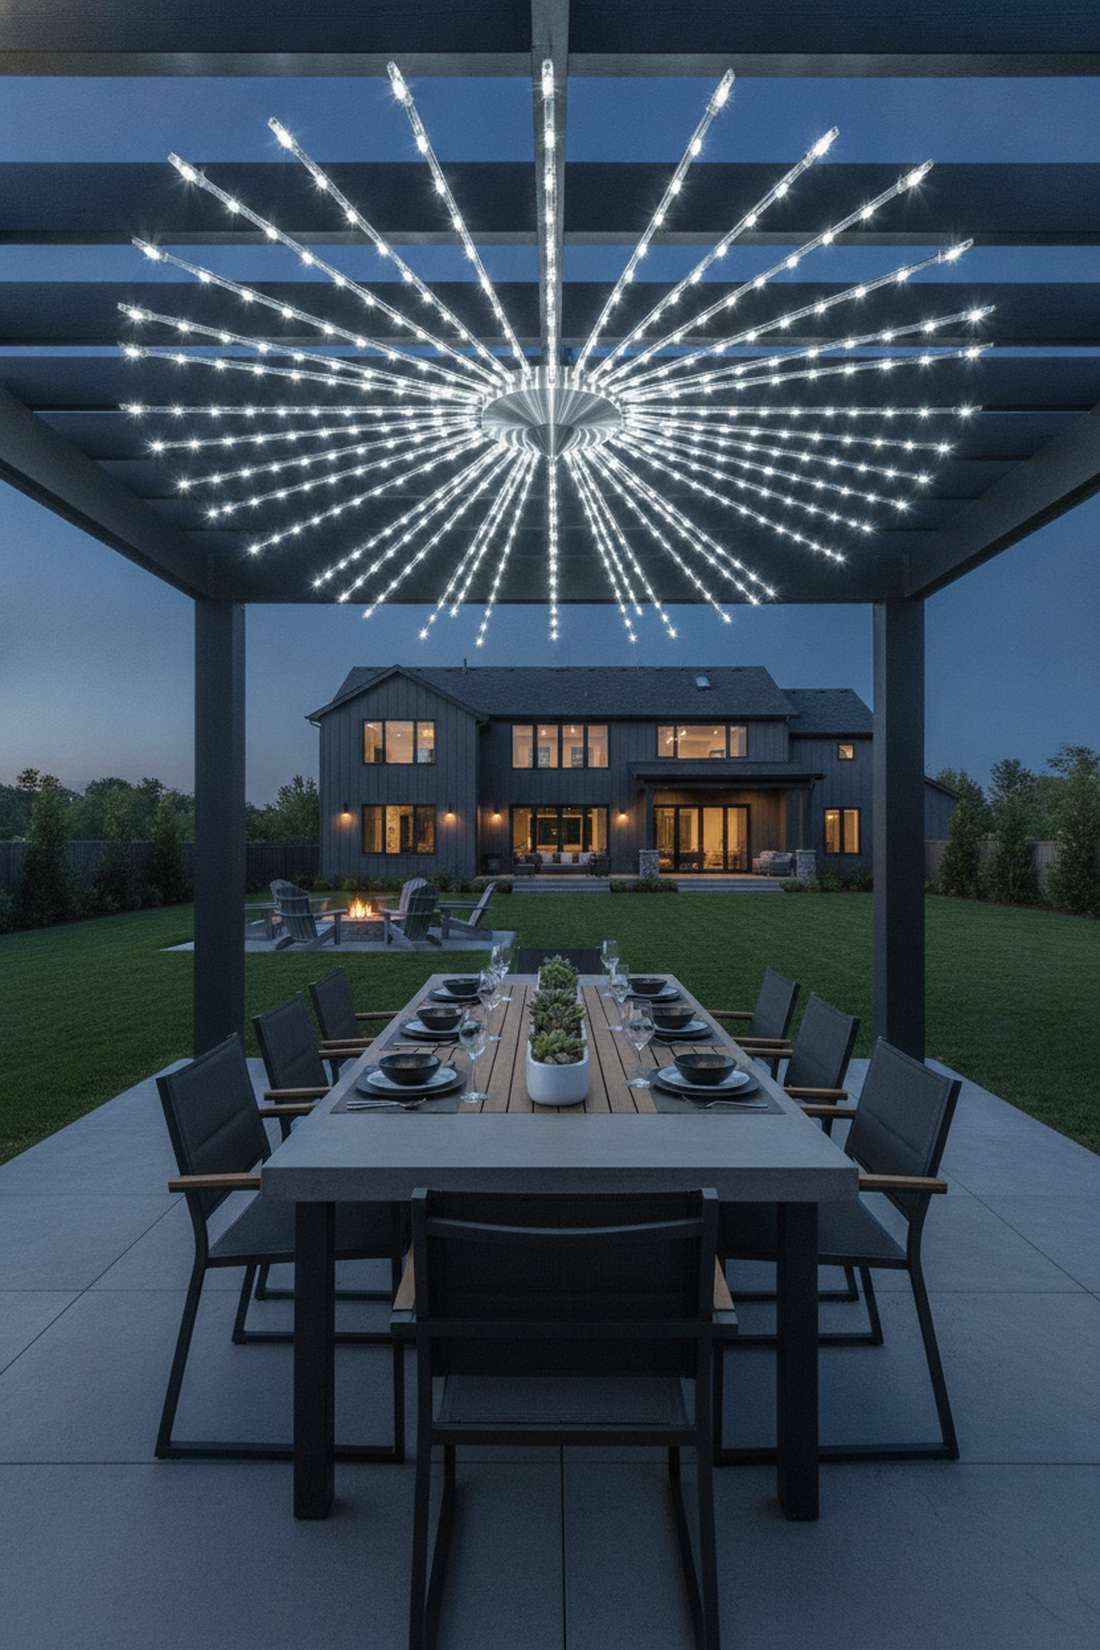
Frozen glowing fireworks bursting right above your evening dinner table. A dramatic modern ceiling array provides brilliant, even illumination for contemporary backyard entertaining spaces.
It might seem technically complex, but anchoring everything to a single center rosette is the ultimate time-saving cheat code. Sourcing pre-wired outdoor canopy bundles drastically cuts down on frustrating wire management and dangerous electrical tangles.
Recreate this explosive modern visual for $45–$90. Save this idea for your upcoming backyard renovation!
- Key Materials: Starburst multi-port hub, cool white stringers
- Vibe / Style: High-energy modern contemporary
- Difficulty: Advanced planning needed
- Budget Breakdown: Hub system: $25 | Light strands: $55
- Creator’s Tip: Use slightly different lengths for every outward strand to make it look explosive and organic.
- Smart Sourcing: Pre-wired starburst canopy hubs and heavy-duty acrylic zip ties.
6. Wrapped Column Ascent
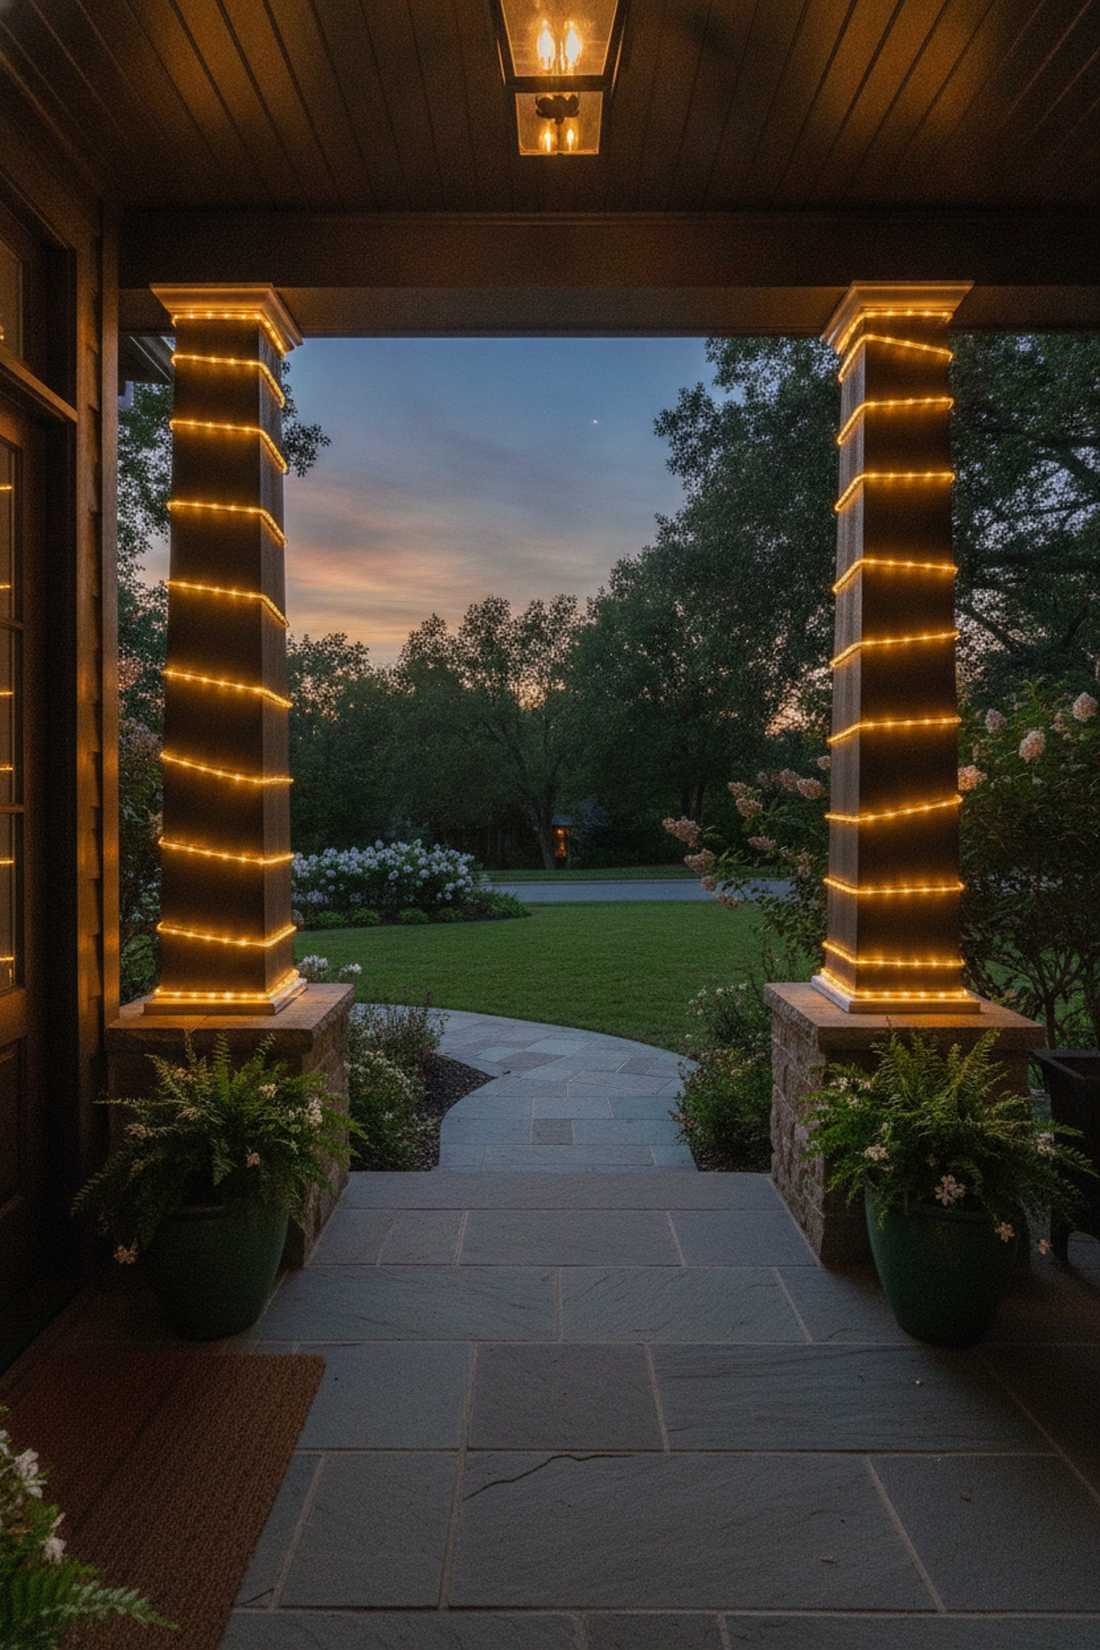
Feels exactly like entering a mystical illuminated temple at dusk. A vertical glowing pillar wrap anchors the entire visual space and works beautifully for deep-set porch entrances.
Wrapping cords too tightly destroys delicate wires, but maintaining a relaxed, measured spiral guarantees longevity and a professional glow. Heavy-duty outdoor stringers withstand freezing elements drastically better than cheap standard indoor varieties.
Grab enough durable length to finish this framing technique for around $30–$55 per pillar.
- Key Materials: Flexible outdoor rope lights or fairy bundles, clear tape
- Vibe / Style: Structured architectural elegance
- Difficulty: Easy
- Budget Breakdown: Lights per pillar: $25 | Mounting clips: $5
- Creator’s Tip: Keep exactly 4 inches of space between every wrap for a mathematically perfect visual rhythm.
- Smart Sourcing: Solar-powered flexible fairy ropes and UV-resistant clear mounting clips.
7. Criss-Cross Lattice Overlay
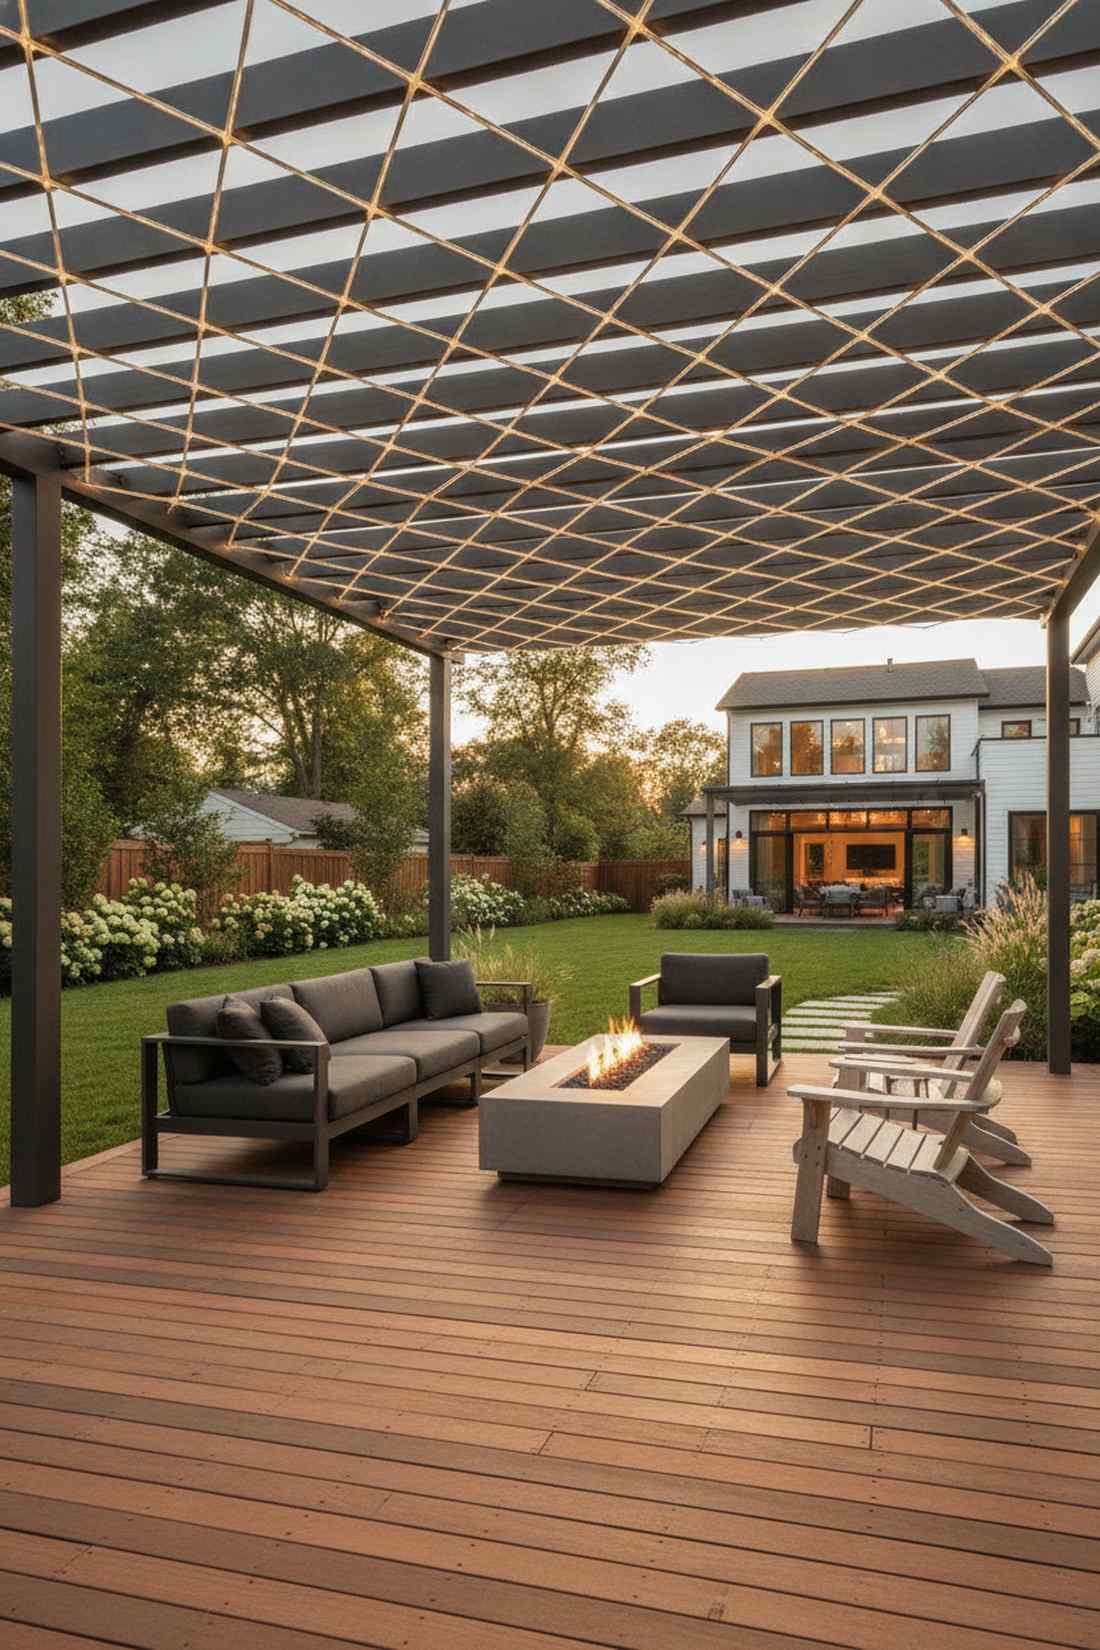
A mesmerizing geometric canopy grid that radiates sophisticated, structured energy. This intersecting modern light lattice is a flawless aesthetic match for clean-lined modern pergolas.
Messy wire intersections instantly ruin the aesthetic, yet using specialized cable management clips ensures diamond-sharp precision. Investing in acrylic-coated terrarium accessories keeps those crisp overhead lines from dangerously sagging in the summer heat.
You can achieve this structured, sharp brilliance for $50–$85.
- Key Materials: Straight-wire LEDs, crossing brackets, turnbuckles
- Vibe / Style: Ultra-modern geometric
- Difficulty: Intermediate
- Budget Breakdown: Tension hardware: $30 | LED lines: $45
- Creator’s Tip: Always install the corner-to-corner lines first to establish a perfectly square grid base.
- Smart Sourcing: Stainless steel tension starter kits and commercial-grade straight-wire LEDs.
8. Floating Cloud Clusters
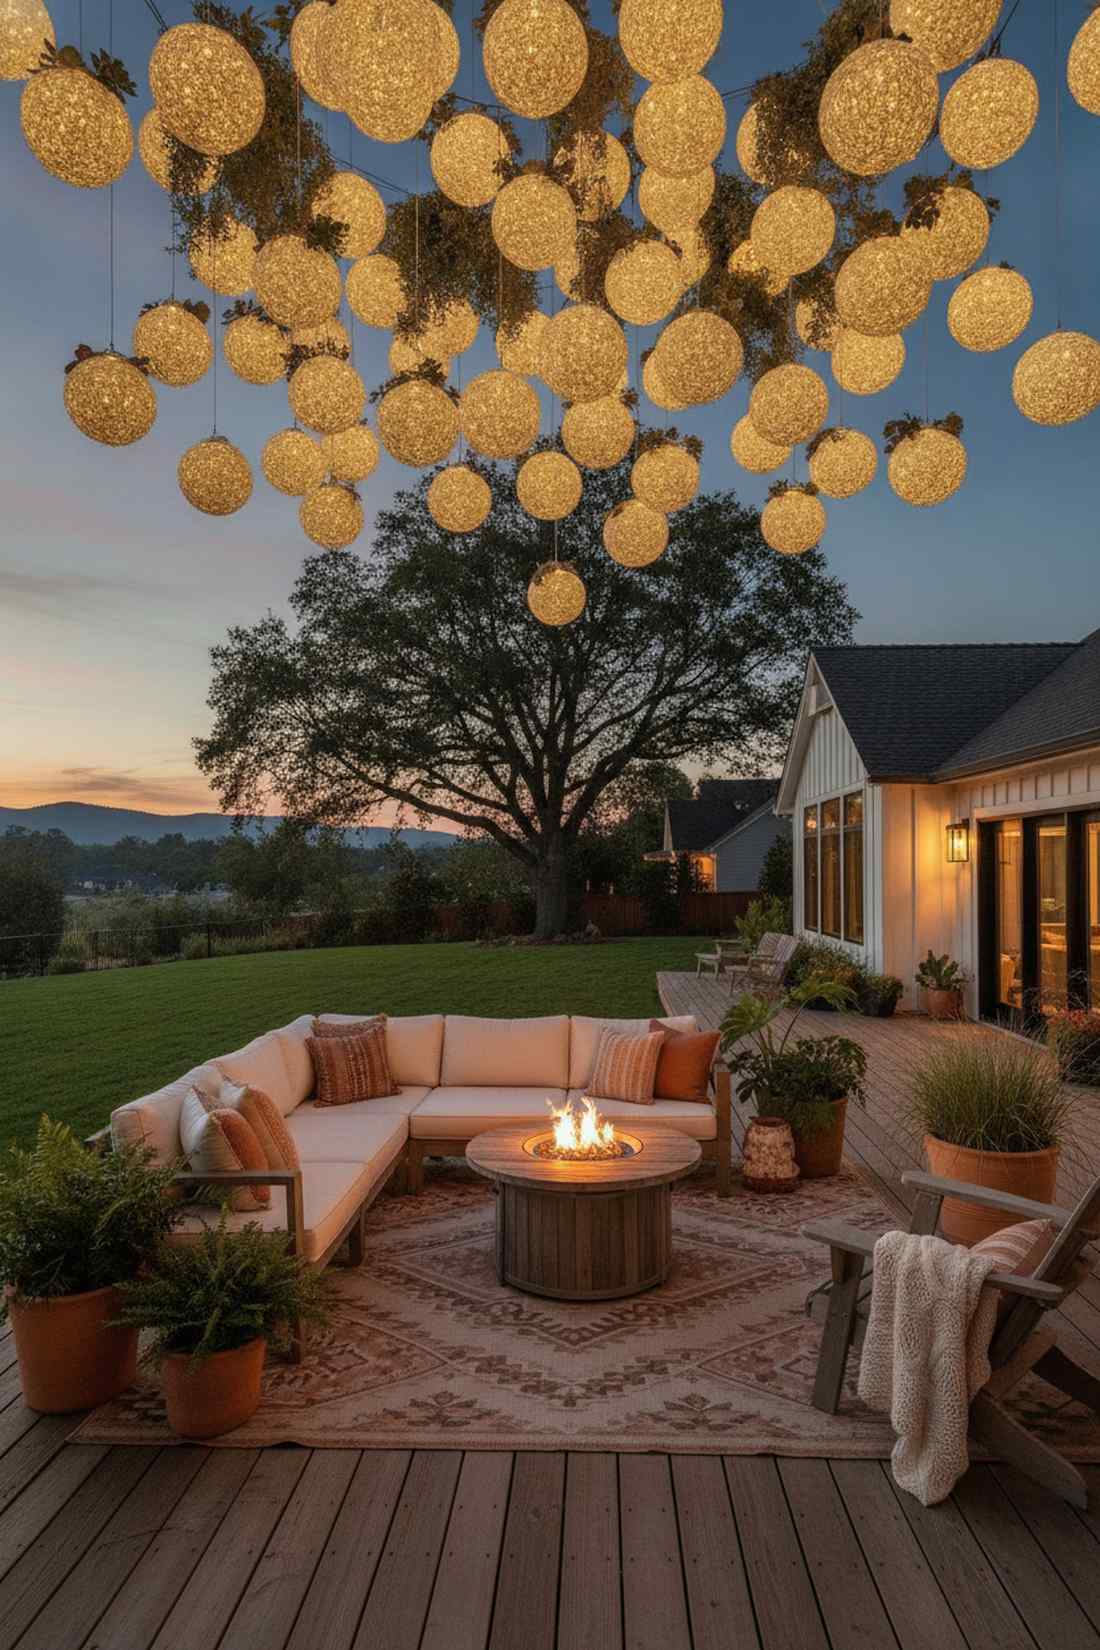
Drift away beneath a magical ceiling of luminous floating orbs. The bohemian clustered globe lighting aesthetic thrives in relaxed, eclectic outdoor lounge zones.
Perfectly symmetrical designs are predictable and boring, but irregular bunching delivers a highly coveted bespoke artistic flair. Mix battery-operated globe bundles with miniature garden supplies to maximize the textured, dimensional light output.
Budget roughly $60–$100 to build your own glowing atmospheric clouds. Pin this if you love the boho aesthetic!
- Key Materials: Globe string lights, invisible monofilament, battery packs
- Vibe / Style: Eclectic bohemian dream
- Difficulty: Easy but time-consuming
- Budget Breakdown: Globe lights: $50 | Suspension line: $10
- Creator’s Tip: Cluster odd numbers (3 or 5) together. The human eye finds odd groupings much more organic.
- Smart Sourcing: Shatterproof LED globe kits and high-tensile invisible suspension line.
💡 Must-Have Supplies for High-End Setups
To build these setups faster and ensure they last, skip the generic craft aisles and invest in the right foundational kits.
- Base & Support: Pre-measured stainless steel canopy wire kits
- Setup Tools: Professional outdoor lighting suspension starter kits
- Weather/Durability Protection: UV-coated commercial-grade waterproof fairy bundles
Tent-Style Draping Techniques For Fairy Light Tents
Temporary structures demand specific lighting strategies that balance rapid setup with jaw-dropping impact. These methods adapt brilliantly to pop-up shelters, event frames, and temporary party setups.
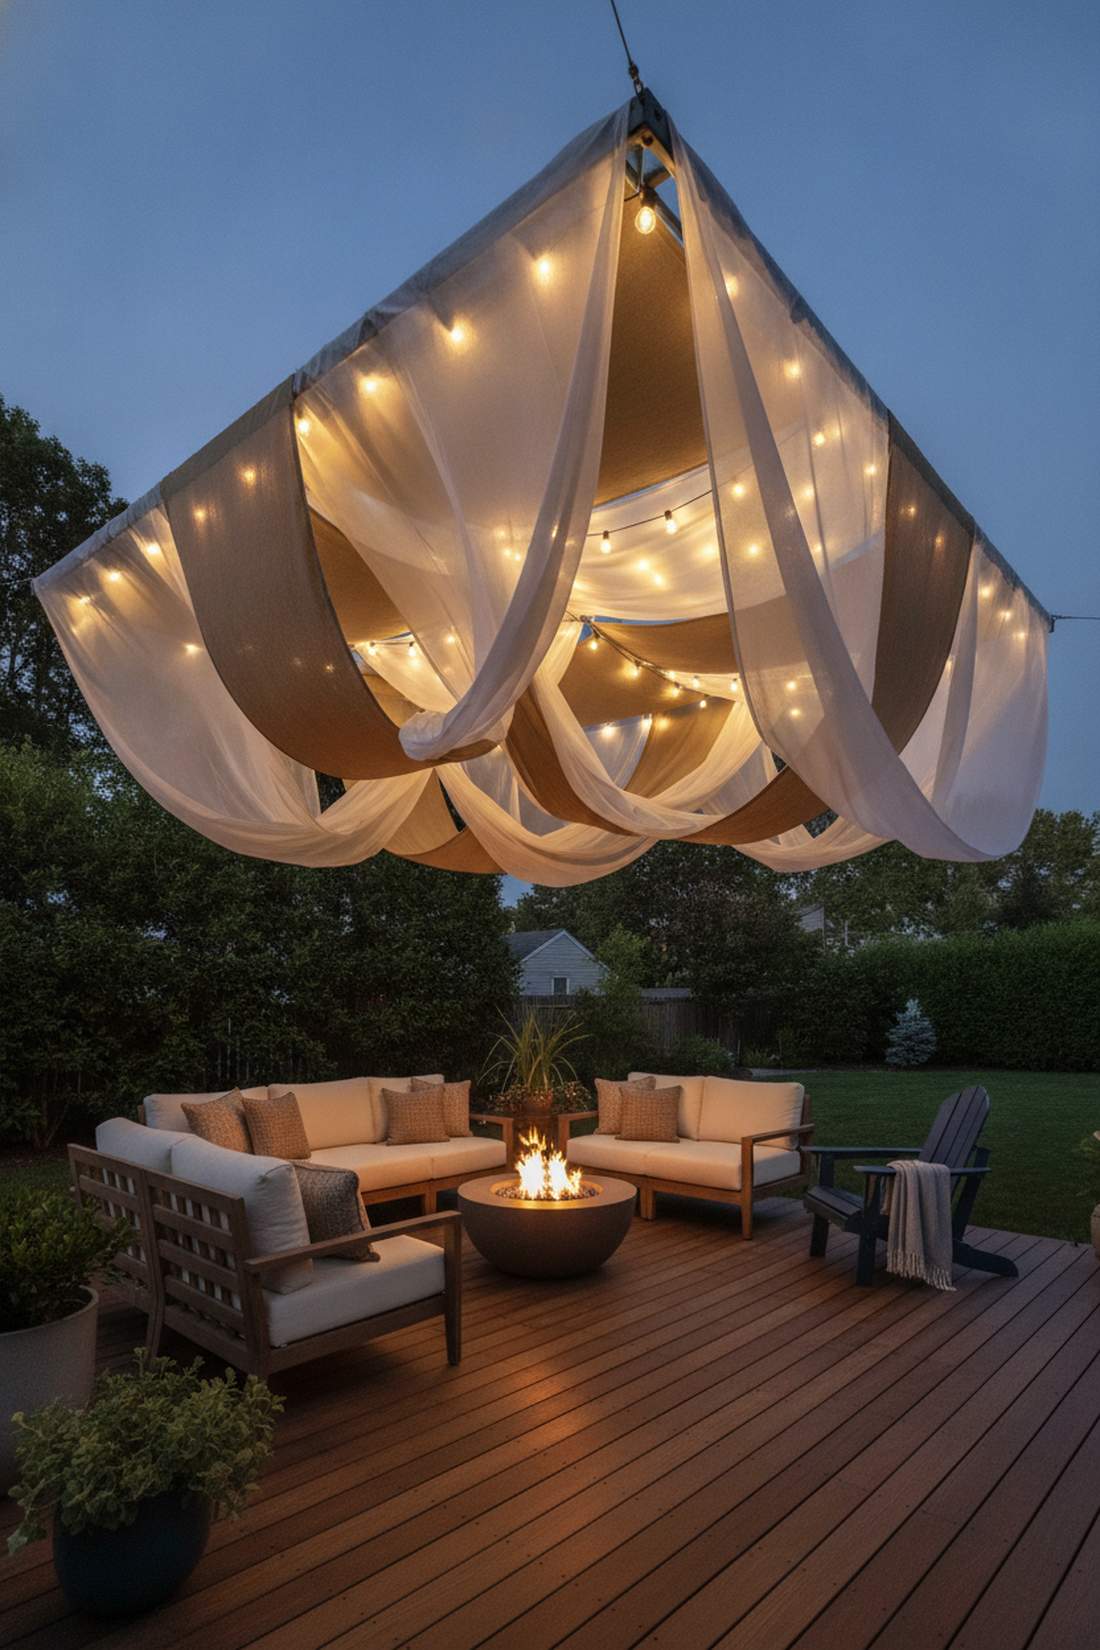
9. Center-Pole Canopy Cascade
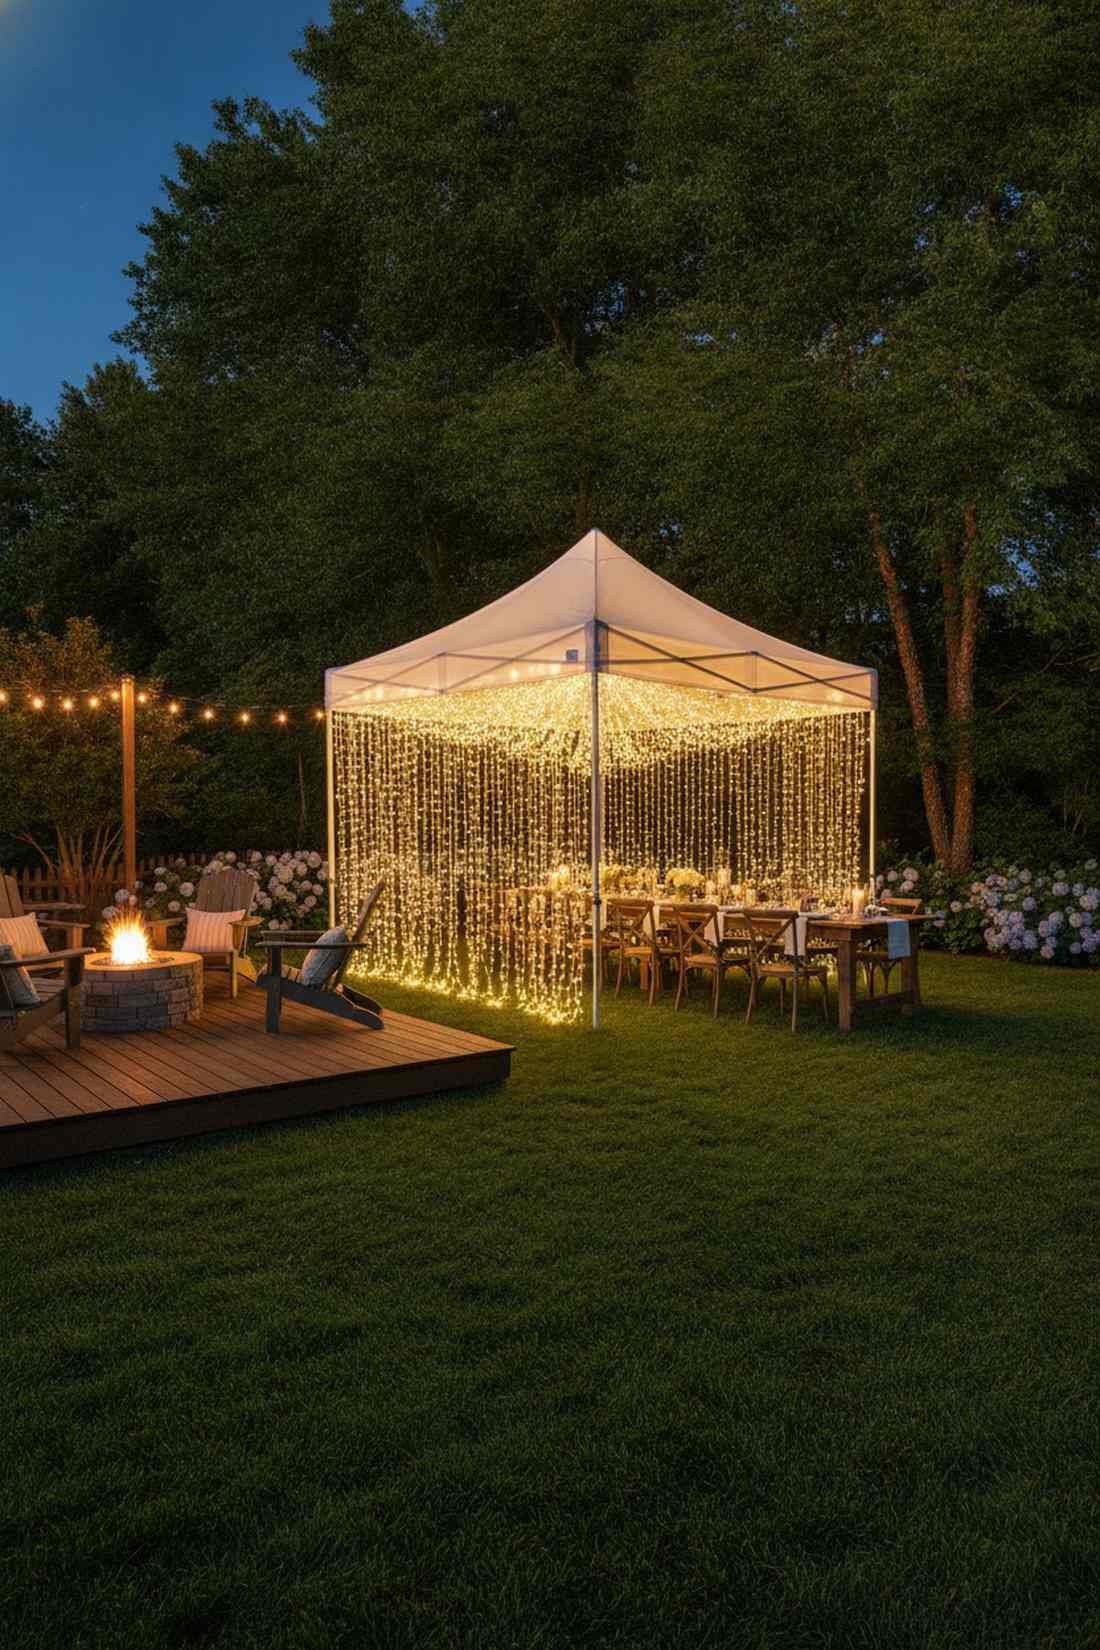
Sweeps down like a glowing waterfall cascading directly from the night sky. This umbrella style tent illumination is the ultimate aesthetic lifesaver for generic temporary pop-up shelters.
Amateur DIYers always struggle with tent center poles, but a simple heavy-duty tension ring solves the structural nightmare instantly. Opting for a centralized fairy garden canopy kit ensures you won’t accidentally overload a single fragile aluminum pole.
Set this temporary magic up for $35–$65. Save this to your event planning board!
- Key Materials: Center pole ring hook, cascading fairy strings
- Vibe / Style: Festive event pavilion
- Difficulty: Easy
- Budget Breakdown: Ring hardware: $15 | Lights: $35
- Creator’s Tip: Leave plenty of slack at the bottom so the wind can create a gentle, swaying motion.
- Smart Sourcing: Heavy-duty pole mounting rings and pre-cut cascading LED curtain bundles.
10. Side-Drape Tunnel Entrance
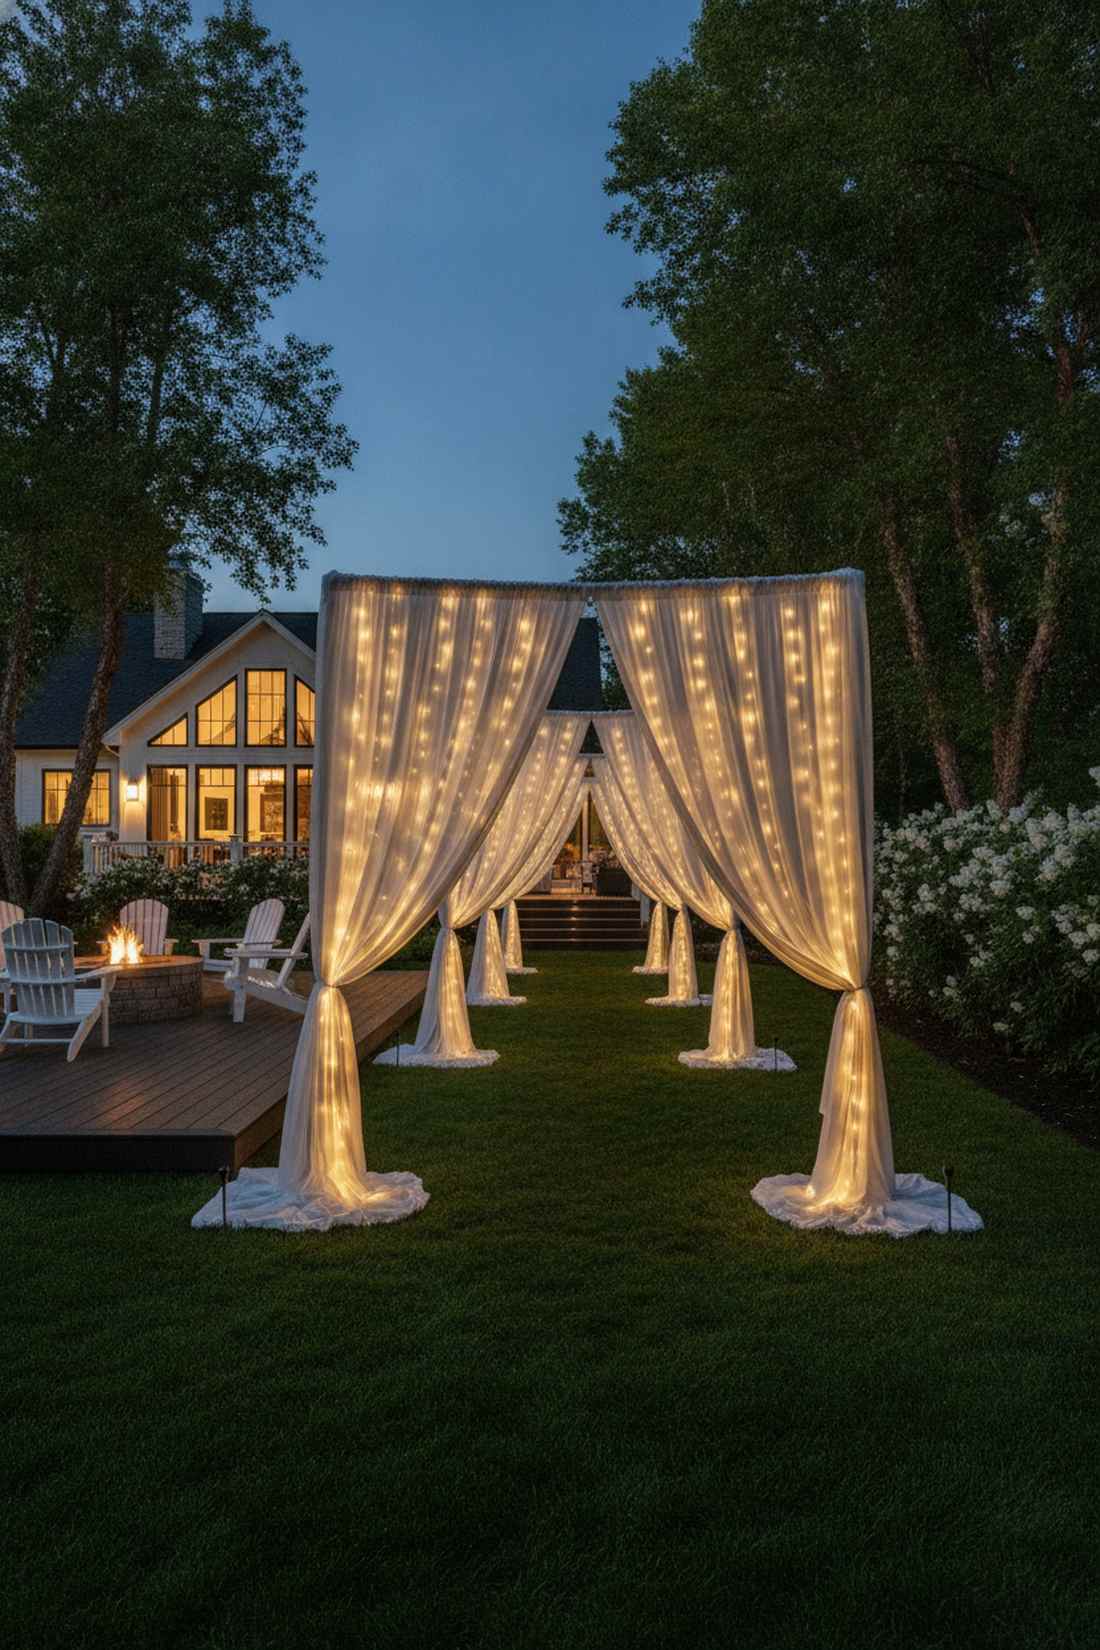
Creates an inviting, mysterious portal guiding guests into your evening festivities. An asymmetrical illuminated walkway perfectly dictates foot traffic through dark, narrow side yards.
Standard entryways are entirely forgettable, whereas a dramatic side curtain instantly elevates an event’s perceived luxury value. A plug-and-play curtain light backdrop is the industry secret weapon for massive visual impact with zero frustrating wiring.
You can completely transform a walkway for just $40–$70.
- Key Materials: LED curtain backdrops, ground stakes
- Vibe / Style: VIP event entrance
- Difficulty: Extremely fast
- Budget Breakdown: Curtain LEDs: $45 | Stakes: $10
- Creator’s Tip: Let the lights puddle on the grass for about 3 inches to create a glowing ground-level effect.
- Smart Sourcing: Outdoor-rated LED curtain backdrops (bulk pack) and rust-proof ground anchoring kits.
11. Billowing Fabric Backlit Panels
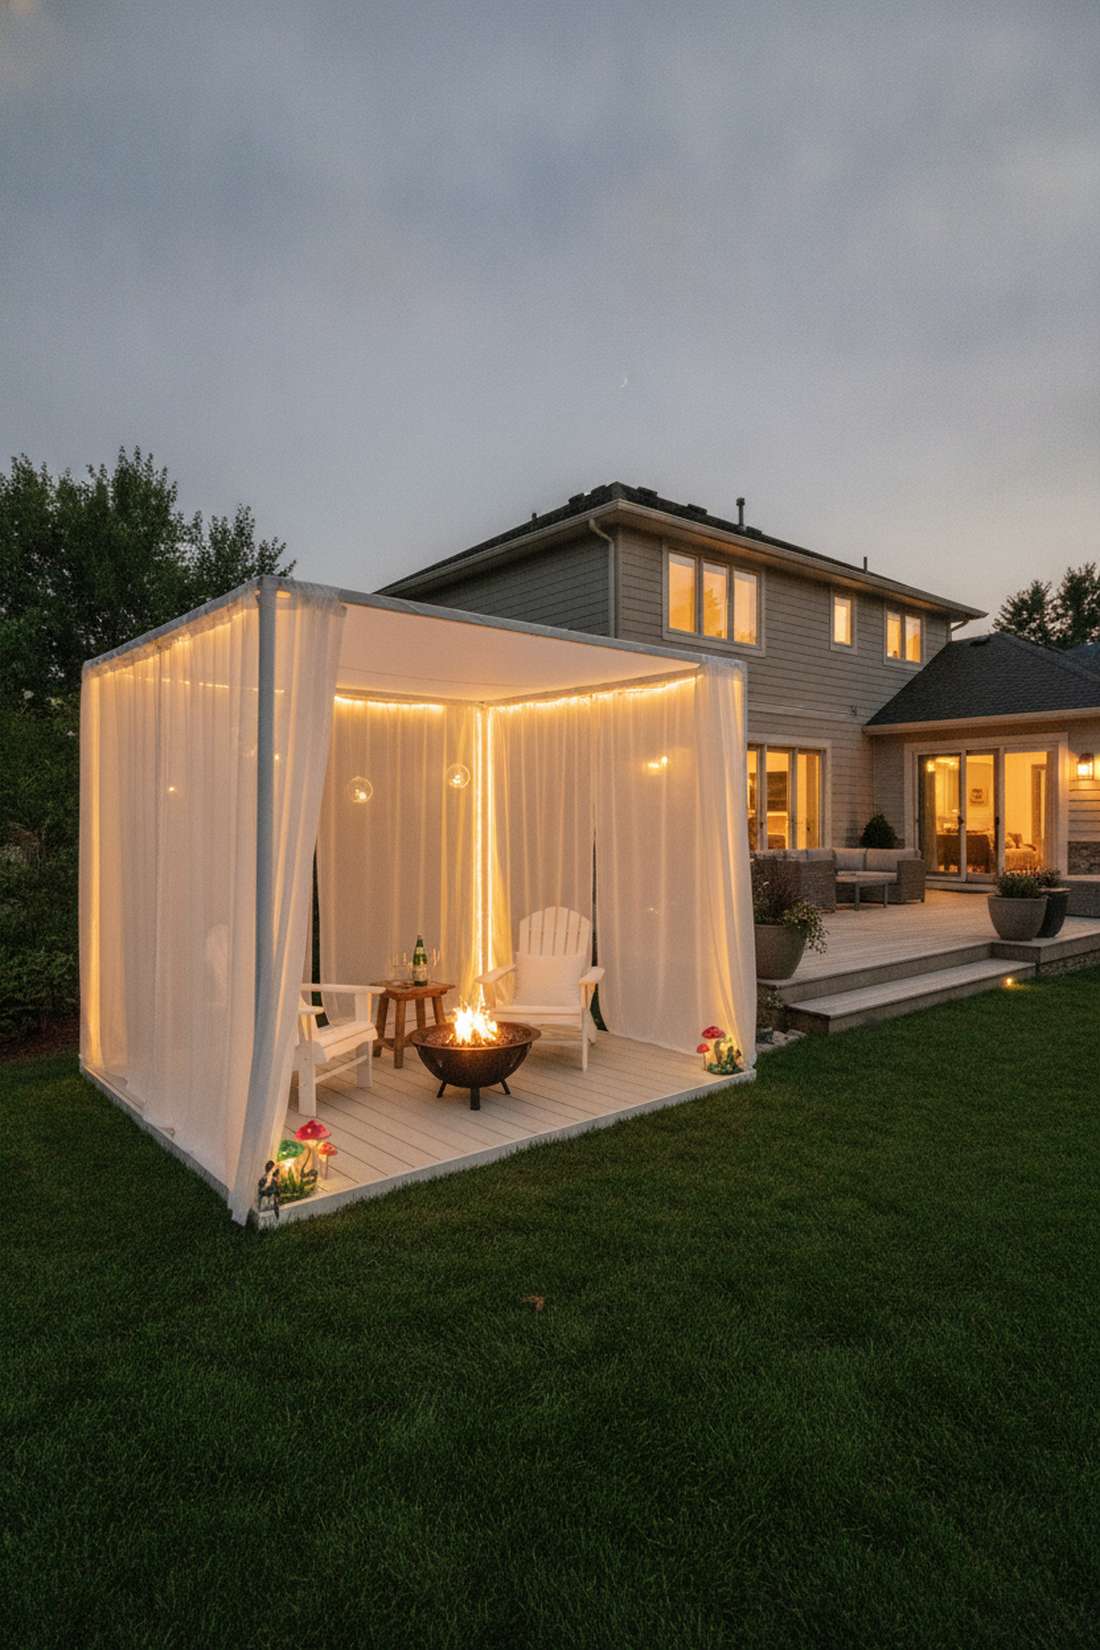
Soft, cinematic glowing walls that feel exactly like a private VIP cabana. The diffused privacy screen lighting concept is absolutely stellar for exposed suburban yards needing intimate borders.
Direct harsh lighting exposes ugly metal tent frames, but soft backlighting completely masks cheap structural poles beautifully. A brilliant combination of fire-retardant chiffon panels and premium fairy garden accessories creates the safest, most luxurious event barrier.
Achieve VIP status in your yard for approximately $75–$120. Pin this for ultimate backyard privacy!
- Key Materials: Chiffon fabric walls, LED strip lights, velcro ties
- Vibe / Style: Exclusive beach club cabana
- Difficulty: Intermediate
- Budget Breakdown: Fabric panels: $60 | LED Strips: $40
- Creator’s Tip: Keep the lights exactly 4 inches behind the fabric to eliminate hot spots and create an even wash.
- Smart Sourcing: Fire-retardant outdoor chiffon (bulk pack) and low-heat waterproof LED strips.
12. Peak-to-Perimeter Starburst
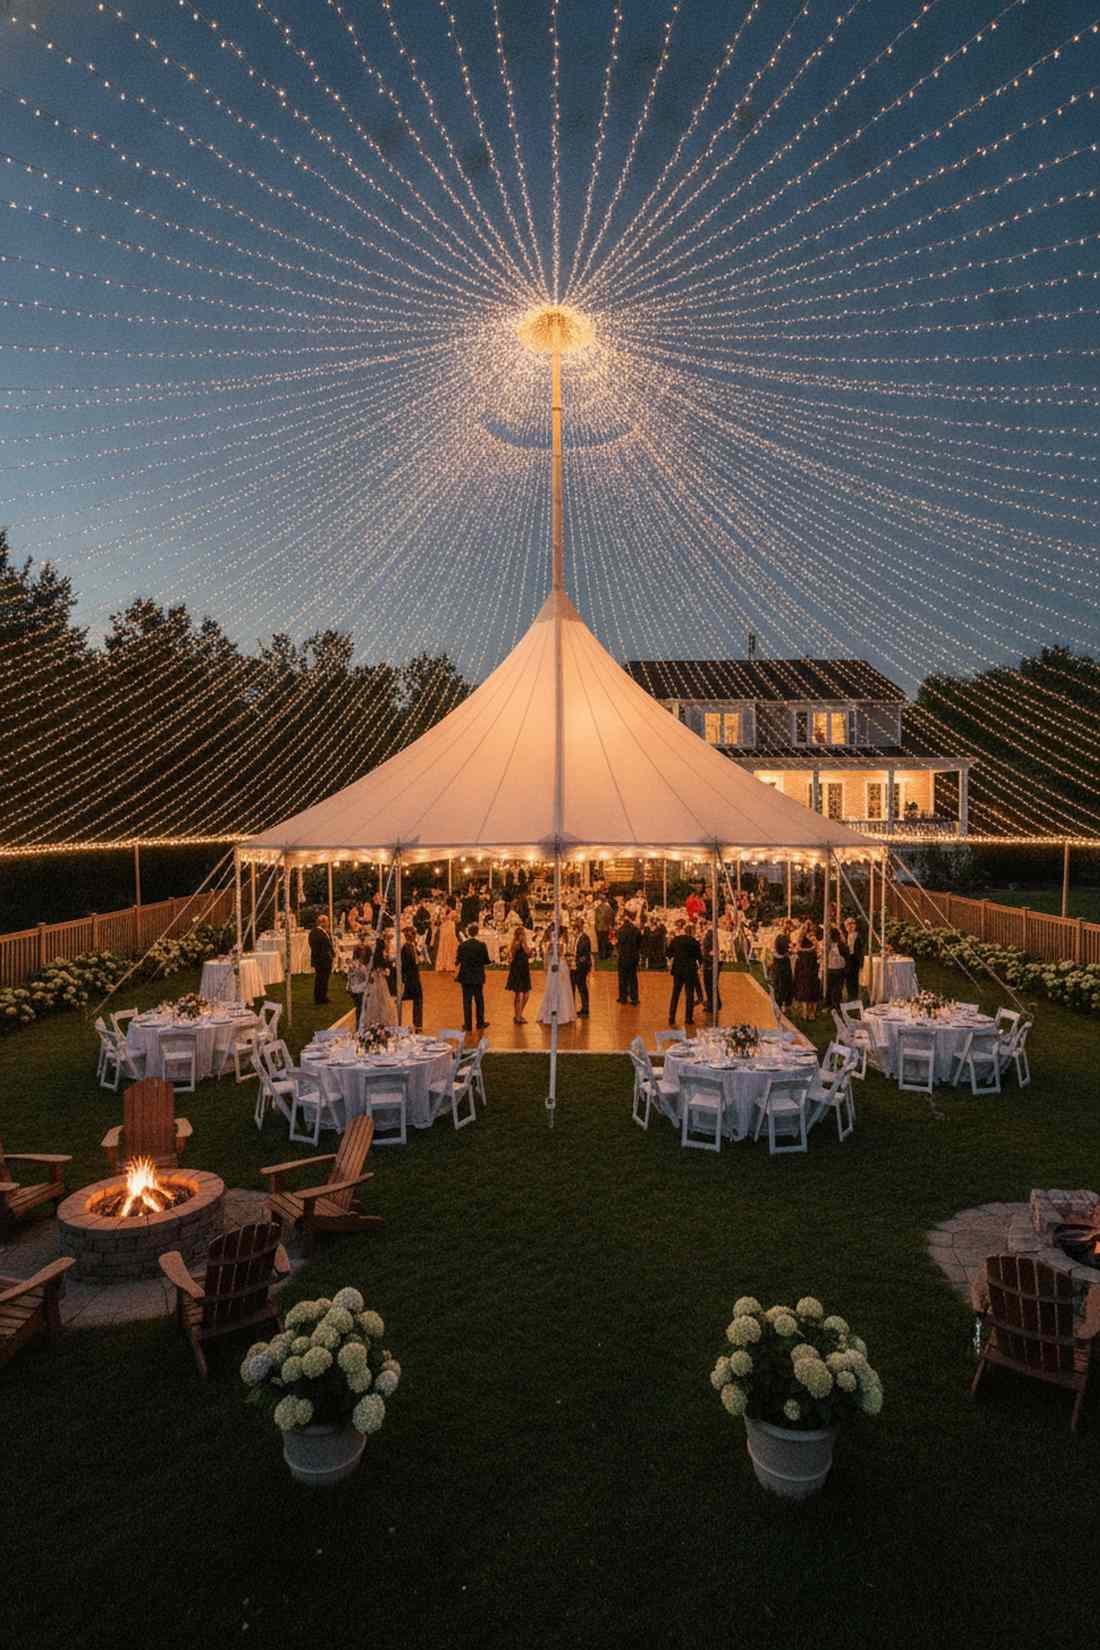
A majestic glowing circus tent ceiling that commands absolute attention from miles away. This comprehensive overhead event lighting layout is strictly non-negotiable for large-scale outdoor photography.
Harsh shadows are the ultimate enemy of good event photos, so full radiant coverage is a massive upgrade over basic perimeter-only setups. Purchasing commercial string light spools in bulk is the single most cost-effective way to fully blanket a massive ceiling.
This premium full-coverage design costs roughly $90–$150.
- Key Materials: Bulk fairy spools, peak hooks, perimeter clips
- Vibe / Style: Grand gala celebration
- Difficulty: Time intensive
- Budget Breakdown: Bulk light spools: $110 | Hardware: $25
- Creator’s Tip: Calculate your perimeter divided by 3 feet to know exactly how many anchor points you need.
- Smart Sourcing: Commercial-grade fairy light spools (100ft+) and heavy-duty perimeter tent clips.
This next setup is ridiculously cheap but looks like a $100 custom display…
13. Zigzag Canopy Weave
A rhythmic, hypnotic glowing ceiling that evenly blankets the night. The methodical rectangular patio weave is highly practical and efficient for illuminating long, narrow dining spaces.
Randomly stringing lights always leaves ugly dark patches, while a mathematically measured zigzag ensures perfectly even illumination across the board. Heavy-duty suspension wire kits prevent the dreaded middle sag that absolutely ruins so many DIY patio setups.
Expect to spend $40–$80 on this highly functional, clean grid. Save this to your functional backyard board!
- Key Materials: Long continuous LED strings, hook eyes
- Vibe / Style: Clean functional dining
- Difficulty: Easy
- Budget Breakdown: Lights: $50 | Hooks: $15
- Creator’s Tip: Alternate your anchor points strictly at 24-inch intervals to keep the geometry perfectly tight.
- Smart Sourcing: Extra-long continuous LED spools and weatherproof screw-eye hook packs.
14. Scalloped Edge Treatment
Soft, romantic swoops that beautifully frame the starry night sky above. A looping decorative tent border adds immediate, much-needed softness to rigid, angular metal event frames.
Straight edge lines can feel incredibly sterile, but a calculated scalloped drape delivers an instant dose of classic European charm. Securing the loops with specialized outdoor canopy clips ensures aggressive winds won’t destroy your carefully measured swoops.
This elegant, soft trim will only set you back $20–$45.
- Key Materials: Fairy lights, quick-release tent clips
- Vibe / Style: Classic European cafe
- Difficulty: Extremely easy
- Budget Breakdown: Lights: $25 | Clips: $10
- Creator’s Tip: Use exactly 8 inches of extra slack per 3-foot section to create the ideal scalloped curve depth.
- Smart Sourcing: Warm-white fairy light starter kits and quick-release canopy edge clips.
15. Gradient Density Draping
A brilliant magnetic glow that naturally pulls guests toward the center of the action. This focused gradient ambient lighting acts as an invisible visual bullseye for dance floors or buffet tables.
Uniform lighting lacks emotional drama, but concentrating bulbs where the action happens manipulates the space’s energy effortlessly. A premium dimmable fairy light set allows you to fine-tune the exact mood intensity as the party progresses into the night.
Pull off this psychological focal trick for around $55–$95. Pin this if you host frequent evening parties!
- Key Materials: Dimmable light bundles, density grid mapping
- Vibe / Style: High-end event focal point
- Difficulty: Advanced mapping
- Budget Breakdown: Dimmable lights: $70 | Remotes: $15
- Creator’s Tip: Double the amount of strings in the center 30% of the canopy, then fade them out toward the edges.
- Smart Sourcing: Dimmable multi-strand fairy kits and smart-plug outdoor lighting controllers.
Patio Overhead Installations For Magical Fairy Lights Patios
Creating robust overhead infrastructure allows you to bridge open airspace seamlessly. These designs turn the empty sky above your patio into a defined, glowing architectural room.
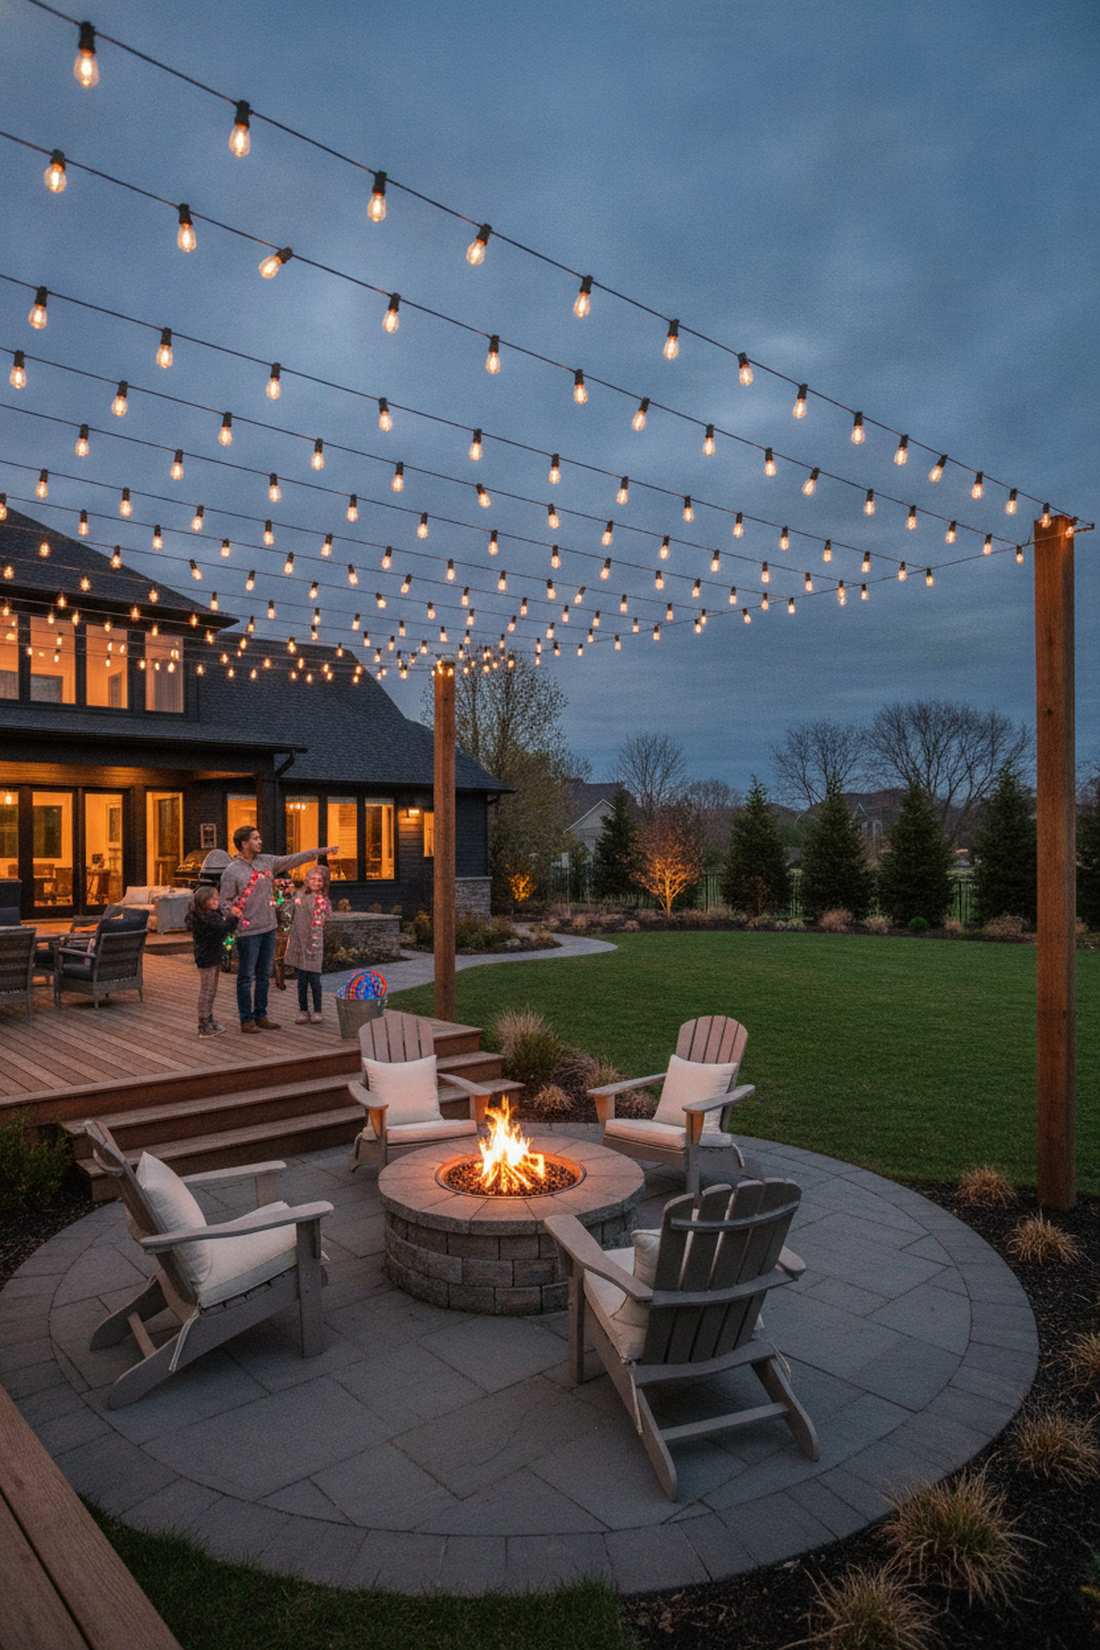
16. House-to-Post Suspension Cables
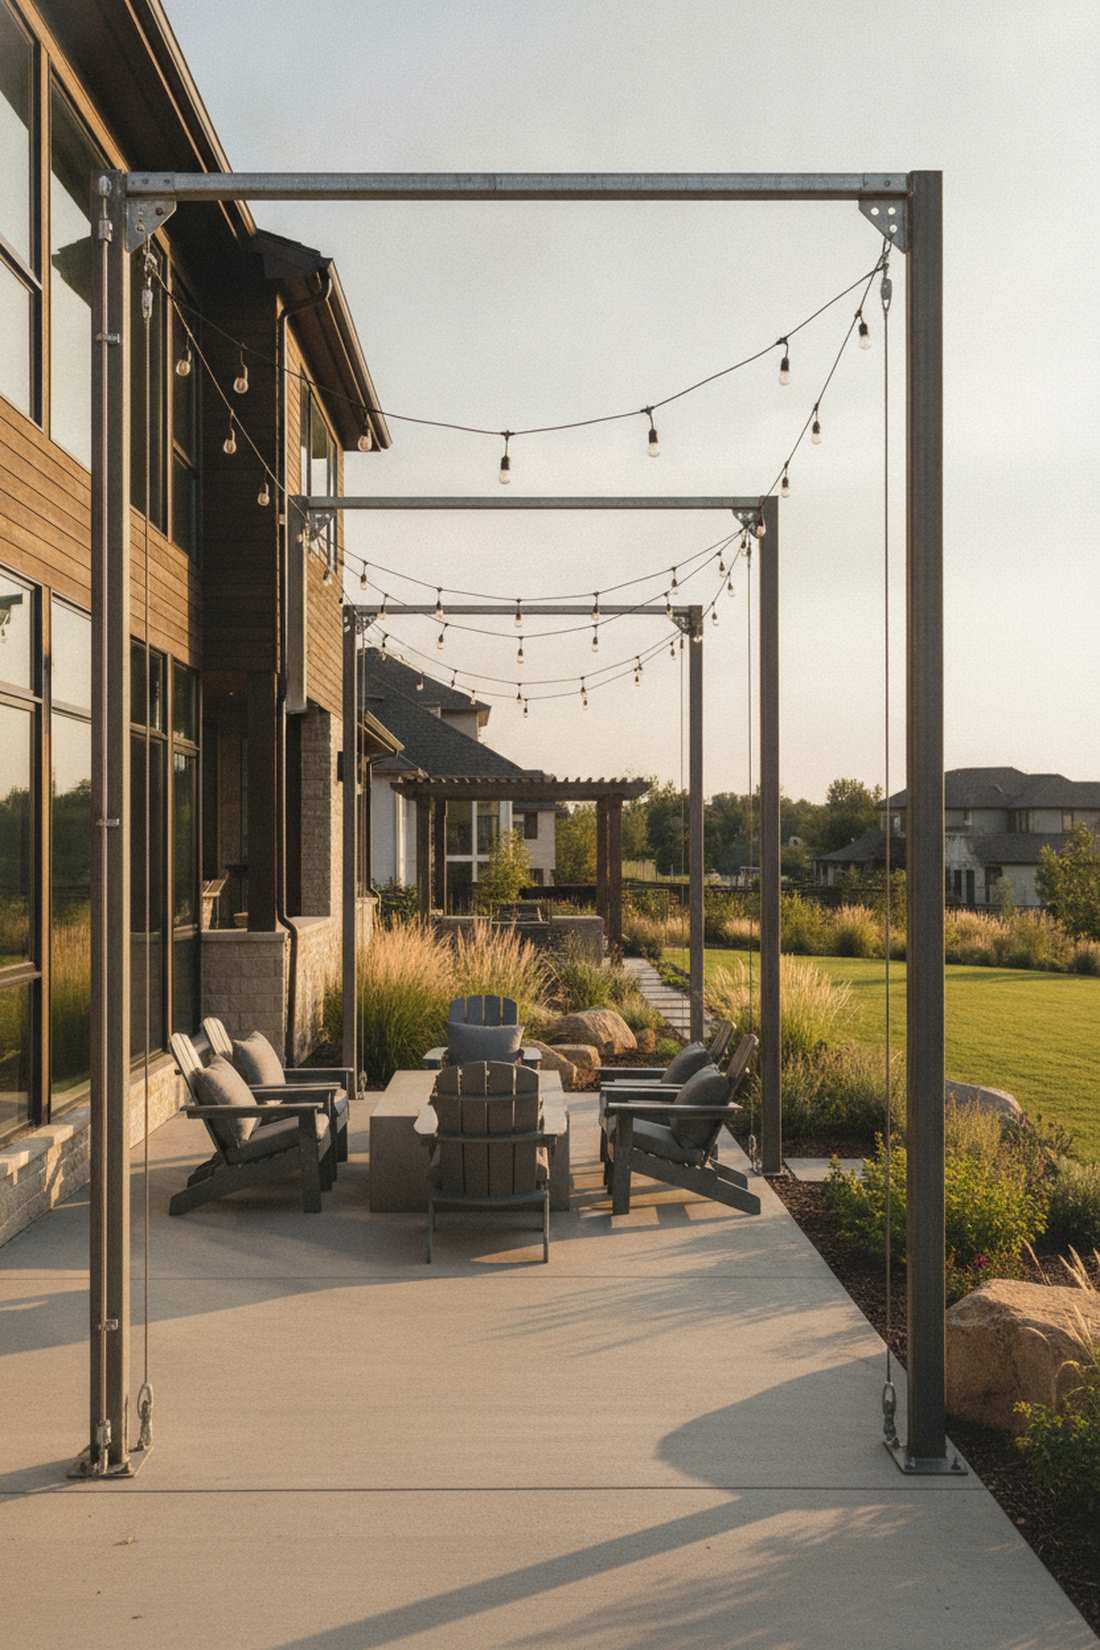
A breathtaking floating ceiling securely bridging your home directly to the garden. The suspended architectural outdoor wire setup is the ultimate structural solution for wide, roofless patios.
Hanging strings freely across open air is a guaranteed recipe for snapping wires, but utilizing structural steel cables provides bulletproof reliability. Using a high-tension cable mounting kit ensures your delicate lights survive heavy seasonal storms and high winds.
Building this permanent overhead infrastructure runs about $60–$110.
- Key Materials: Steel cable guides, turnbuckles, masonry anchors
- Vibe / Style: Industrial modern loft
- Difficulty: Requires power tools
- Budget Breakdown: Cable kit: $45 | Lights: $40
- Creator’s Tip: Always install the steel support cables first and tighten them fully before zip-tying the lights.
- Smart Sourcing: Stainless steel canopy suspension kits and weather-sealed outdoor fairy strands.
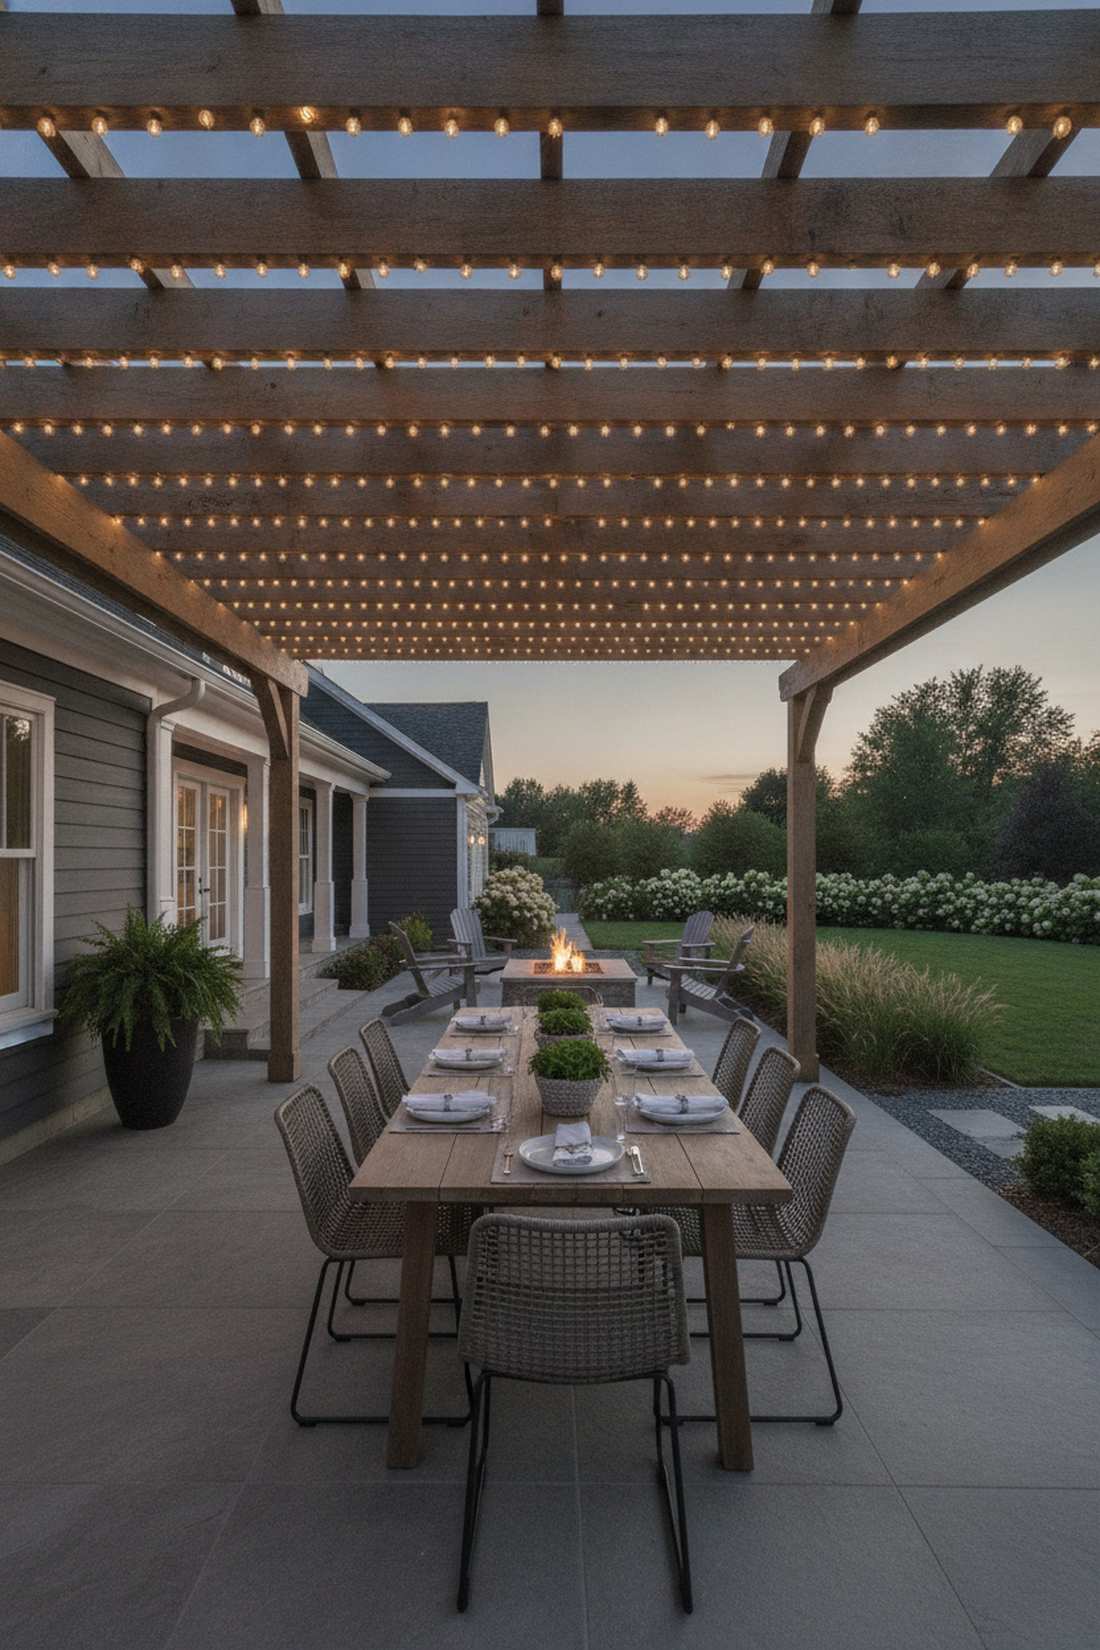
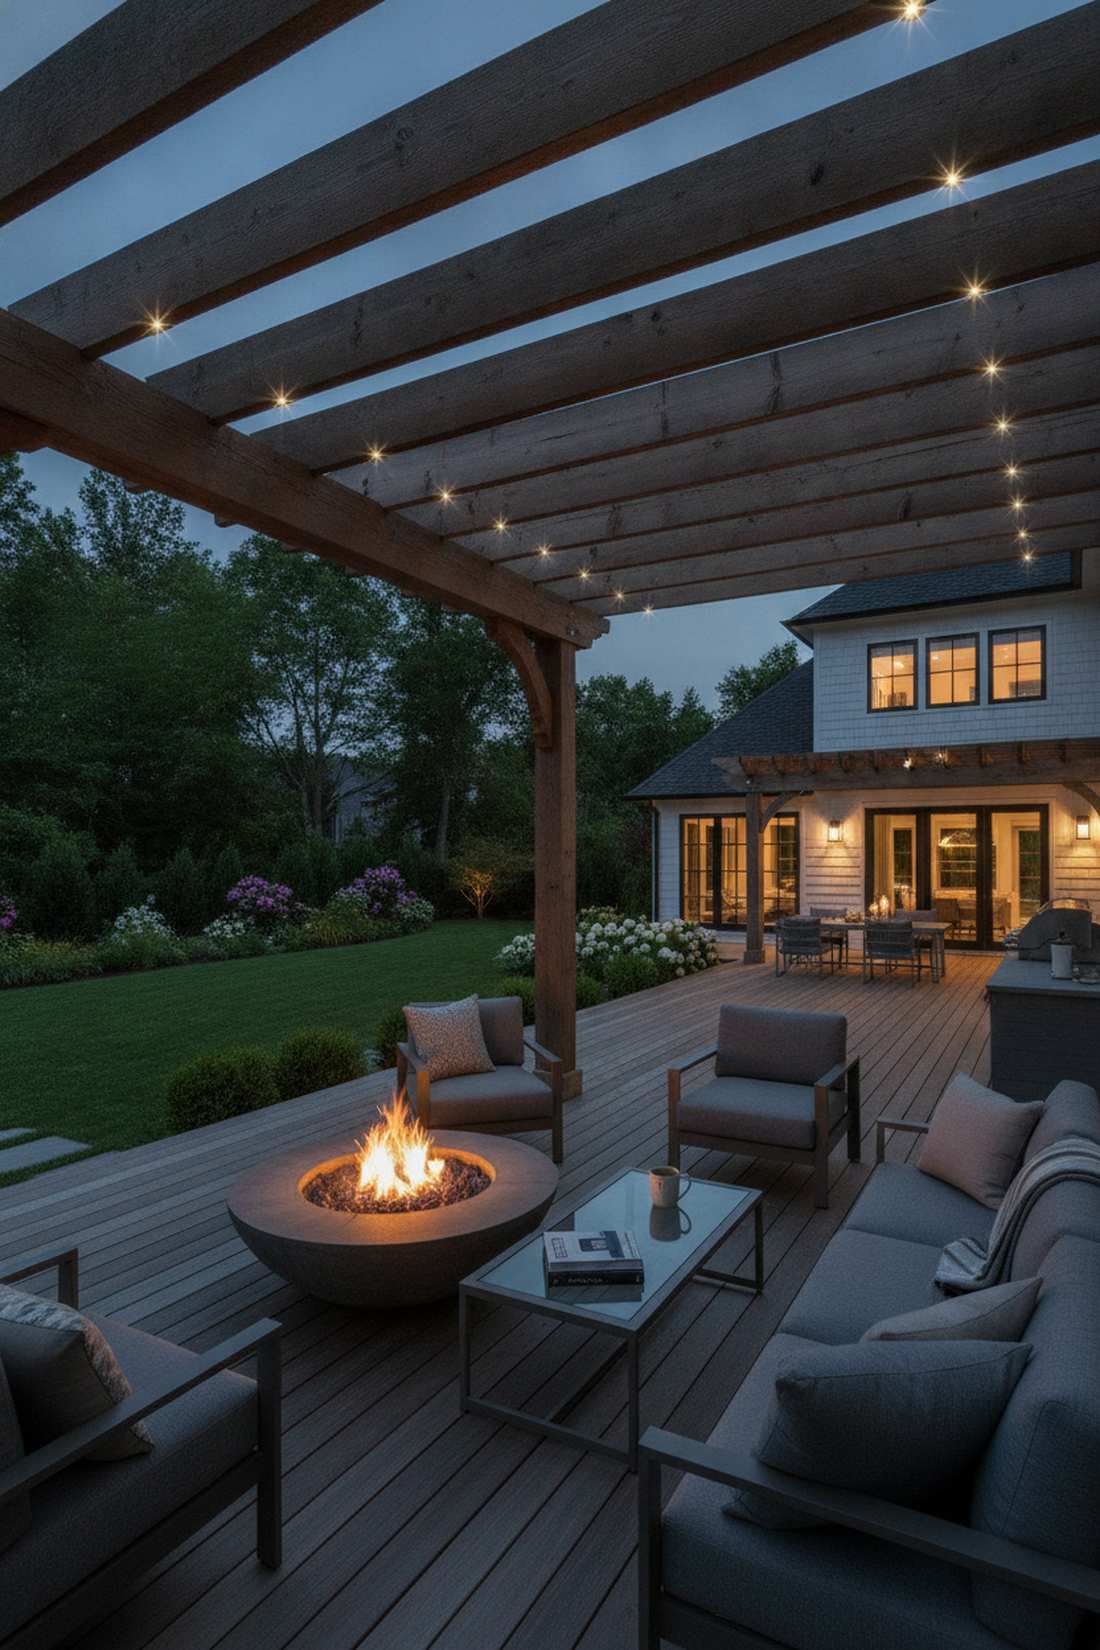
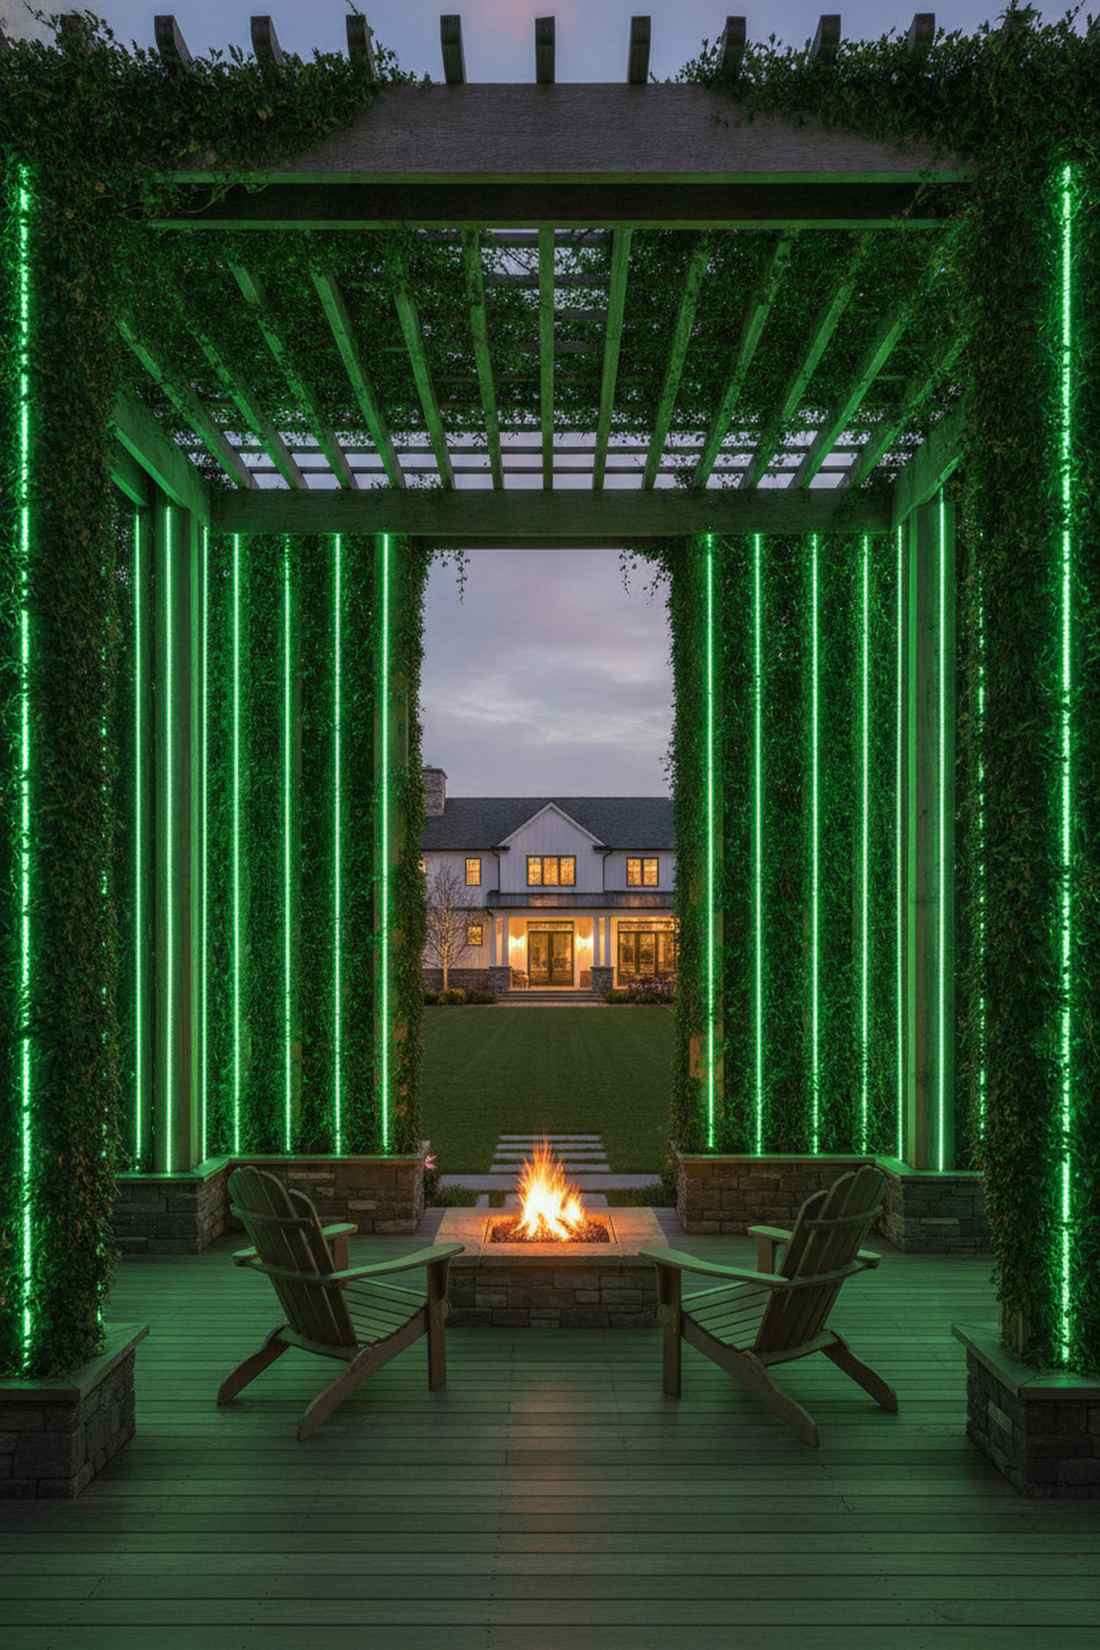
17. Pergola Beam Linear Runs
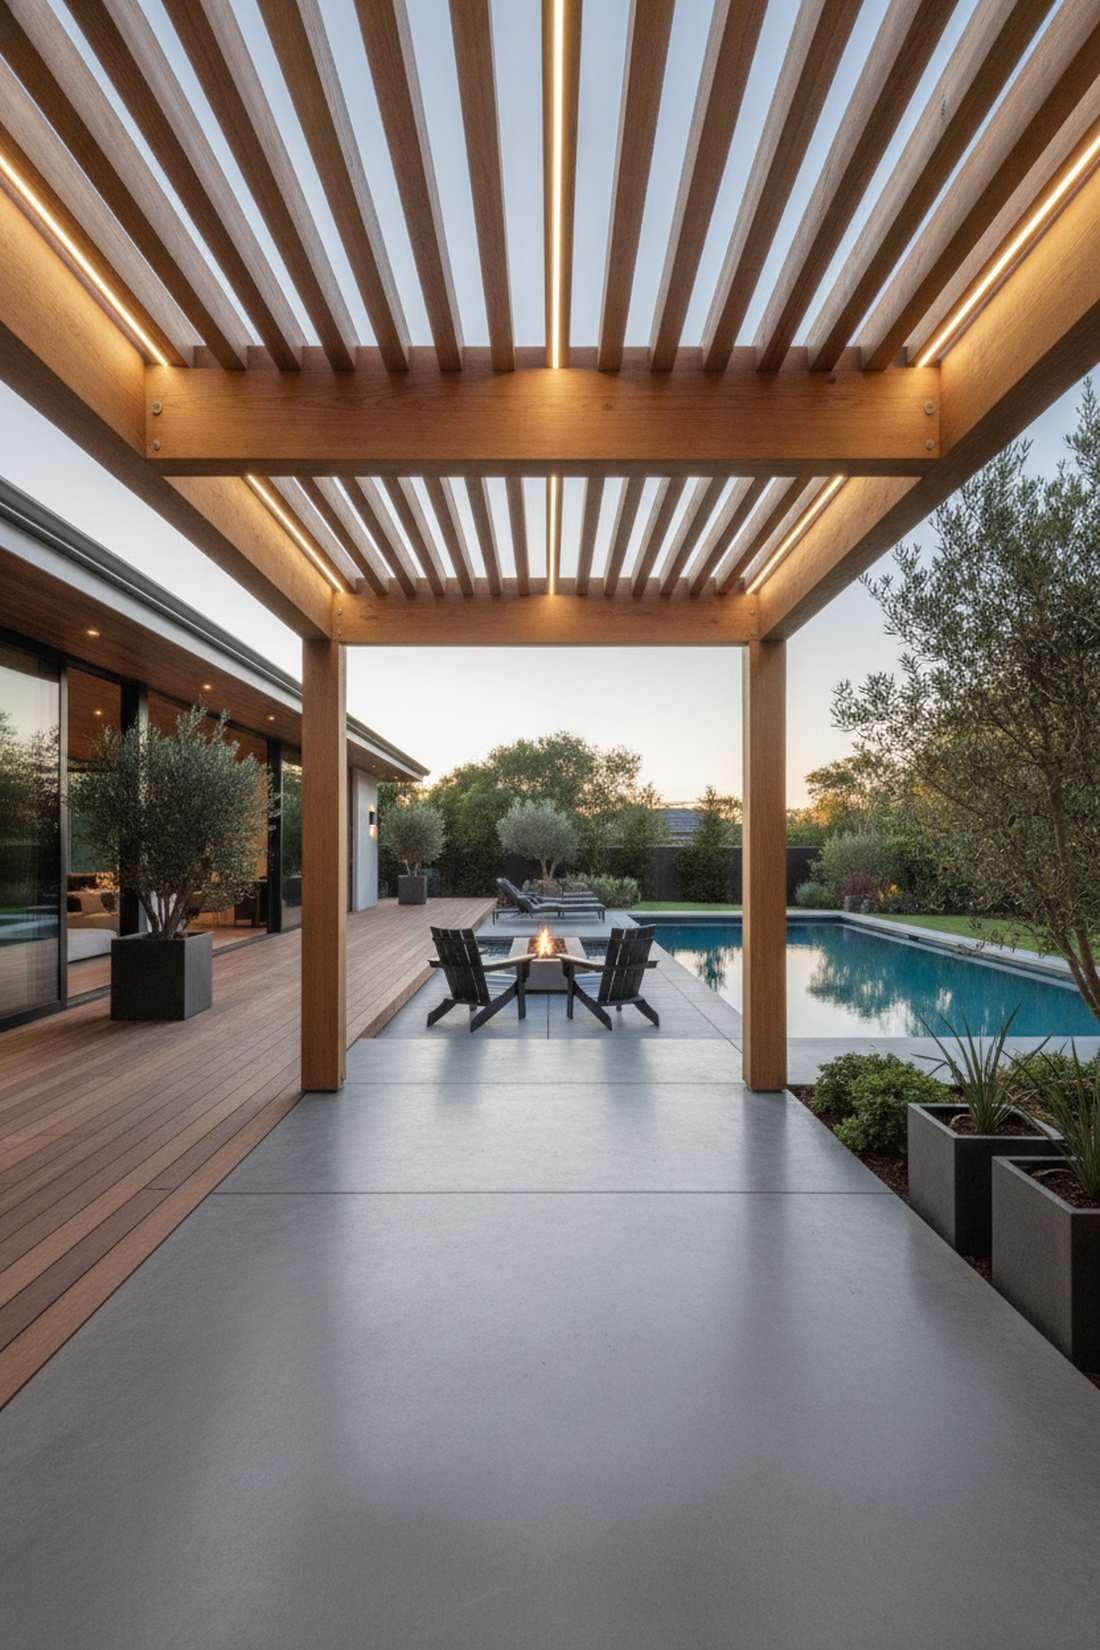
Strikingly modern and effortlessly clean, celebrating raw architectural timber lines. Linear structured patio lighting complements minimalist and contemporary outdoor styling absolutely perfectly.
Sloppy, wavy installations completely ruin the modern aesthetic, so strictly tracing the timber brings a sophisticated, high-end resort vibe. LED rope lighting or flat miniature garden supplies conform to the wood grain much better than bulky, dangling bulbs.
Snag this ultra-clean, architectural look for $50–$90. Pin this to your modern outdoor design board!
- Key Materials: Flat LED tape or rope lights, outdoor staples
- Vibe / Style: Sleek minimalist resort
- Difficulty: Easy
- Budget Breakdown: Flat LEDs: $60 | Fasteners: $15
- Creator’s Tip: Use a staple gun, but place a piece of cardboard over the wire to prevent accidental punctures.
- Smart Sourcing: UV-coated flat LED light strips and rust-proof outdoor cable staples.
If you skip this next trick, your entire patio lighting might look totally chaotic…
18. Multi-Strand Parallel Canopy
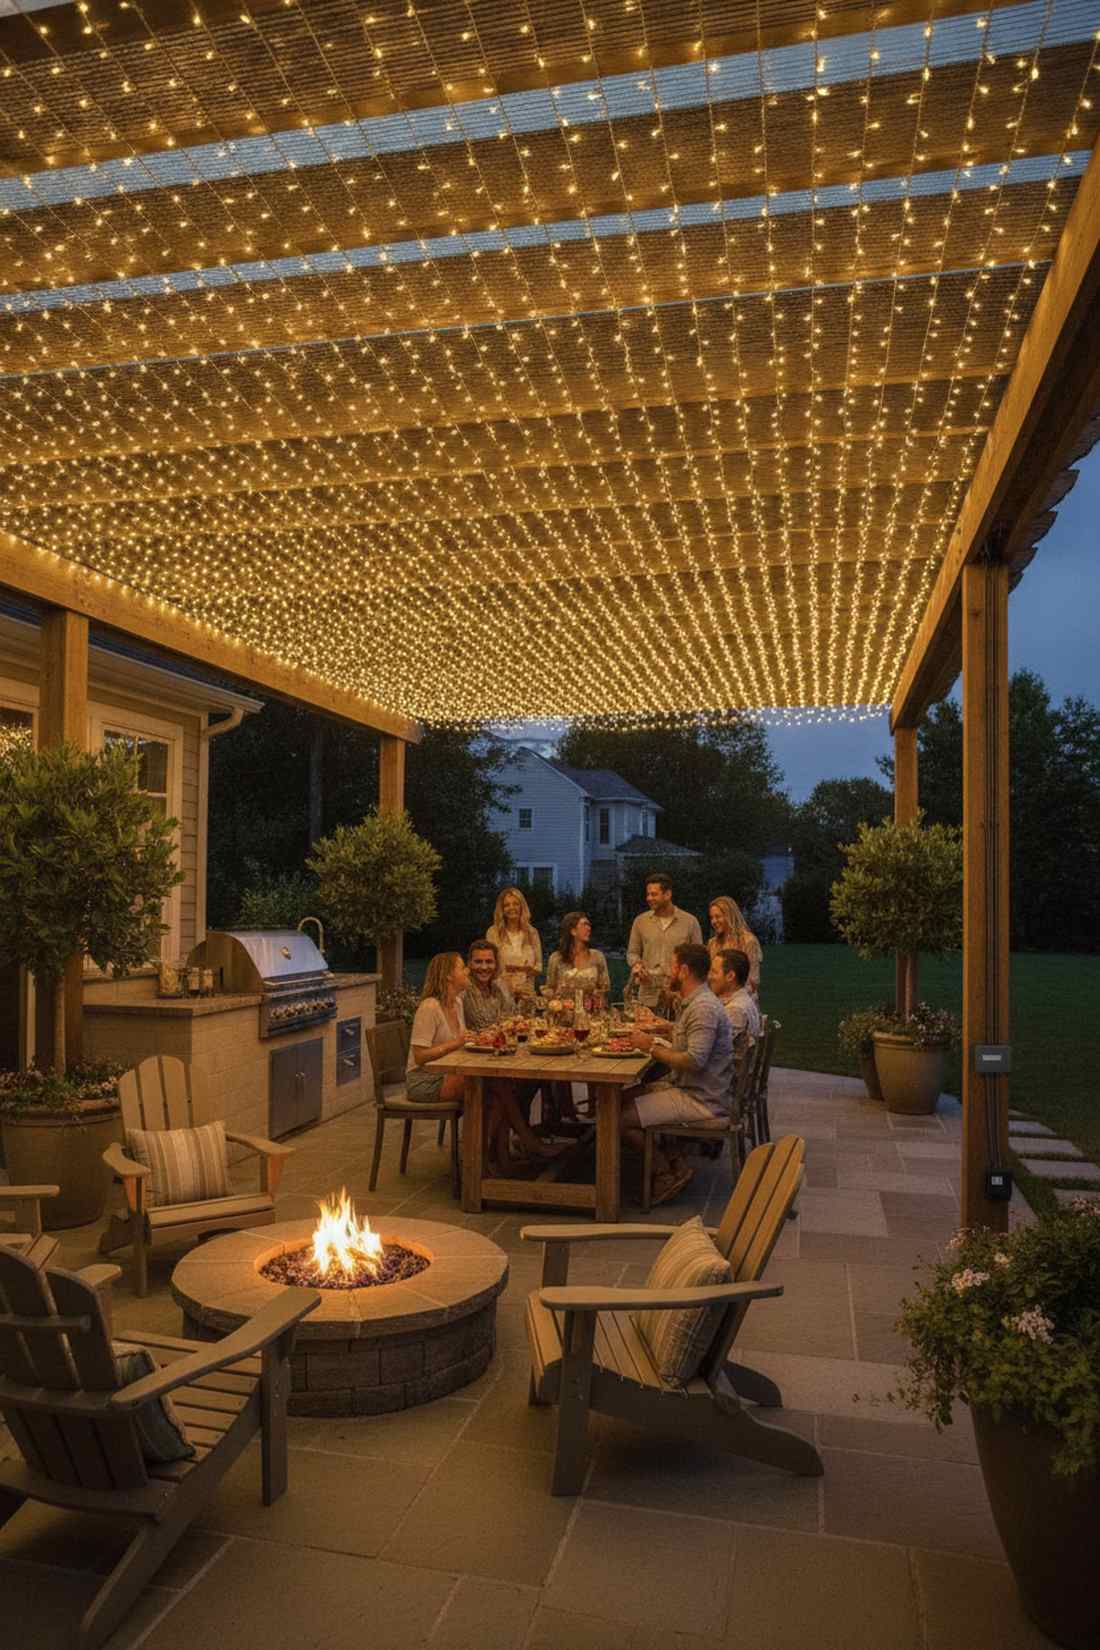
A dense, glowing false ceiling that creates immediate, overwhelming coziness. The uniform parallel string layout provides the absolute most reliable task lighting for midnight outdoor barbecues.
Leaving too much space between strands completely loses the false-ceiling effect, but keeping them tight delivers a rich, solid blanket of light. Heavy-duty waterproof splitters allow you to run a massive, dense array safely off a single outdoor power outlet.
Budget roughly $70–$130 for this intensely dense overhead coverage.
- Key Materials: Bulk fairy lights, multi-way power splitters
- Vibe / Style: Immersive blanket of light
- Difficulty: Intermediate
- Budget Breakdown: Bulk lights: $90 | Splitters: $25
- Creator’s Tip: Space the parallel lines exactly 12 inches apart to achieve the dense “solid ceiling” illusion.
- Smart Sourcing: Commercial outdoor multi-way splitters and bulk packs of connectable LED strings.
19. Alternating Height Wave Pattern
Playful, undulating waves of light dynamically dancing right overhead. An asymmetrical wave lighting installation injects much-needed movement and energy into static, boring boxy patios.
Flat ceilings are expected and safe, but staggered installation heights create mesmerizing shadows that literally shift with the evening breeze. Pre-measured string light suspension kits take all the frustrating guesswork out of mapping the uneven architectural peaks.
Create these glowing, floating waves for $45–$85. Save this for a unique architectural twist!
- Key Materials: Varied length wall hooks, standard string lights
- Vibe / Style: Playful dynamic motion
- Difficulty: Intermediate
- Budget Breakdown: Lights: $40 | Hardware: $20
- Creator’s Tip: Mount one wall’s hooks at 8 feet high, and the opposite wall at 6 feet high to force the wave.
- Smart Sourcing: Pre-cut adjustable suspension wire kits and heavy-duty wall anchoring systems.
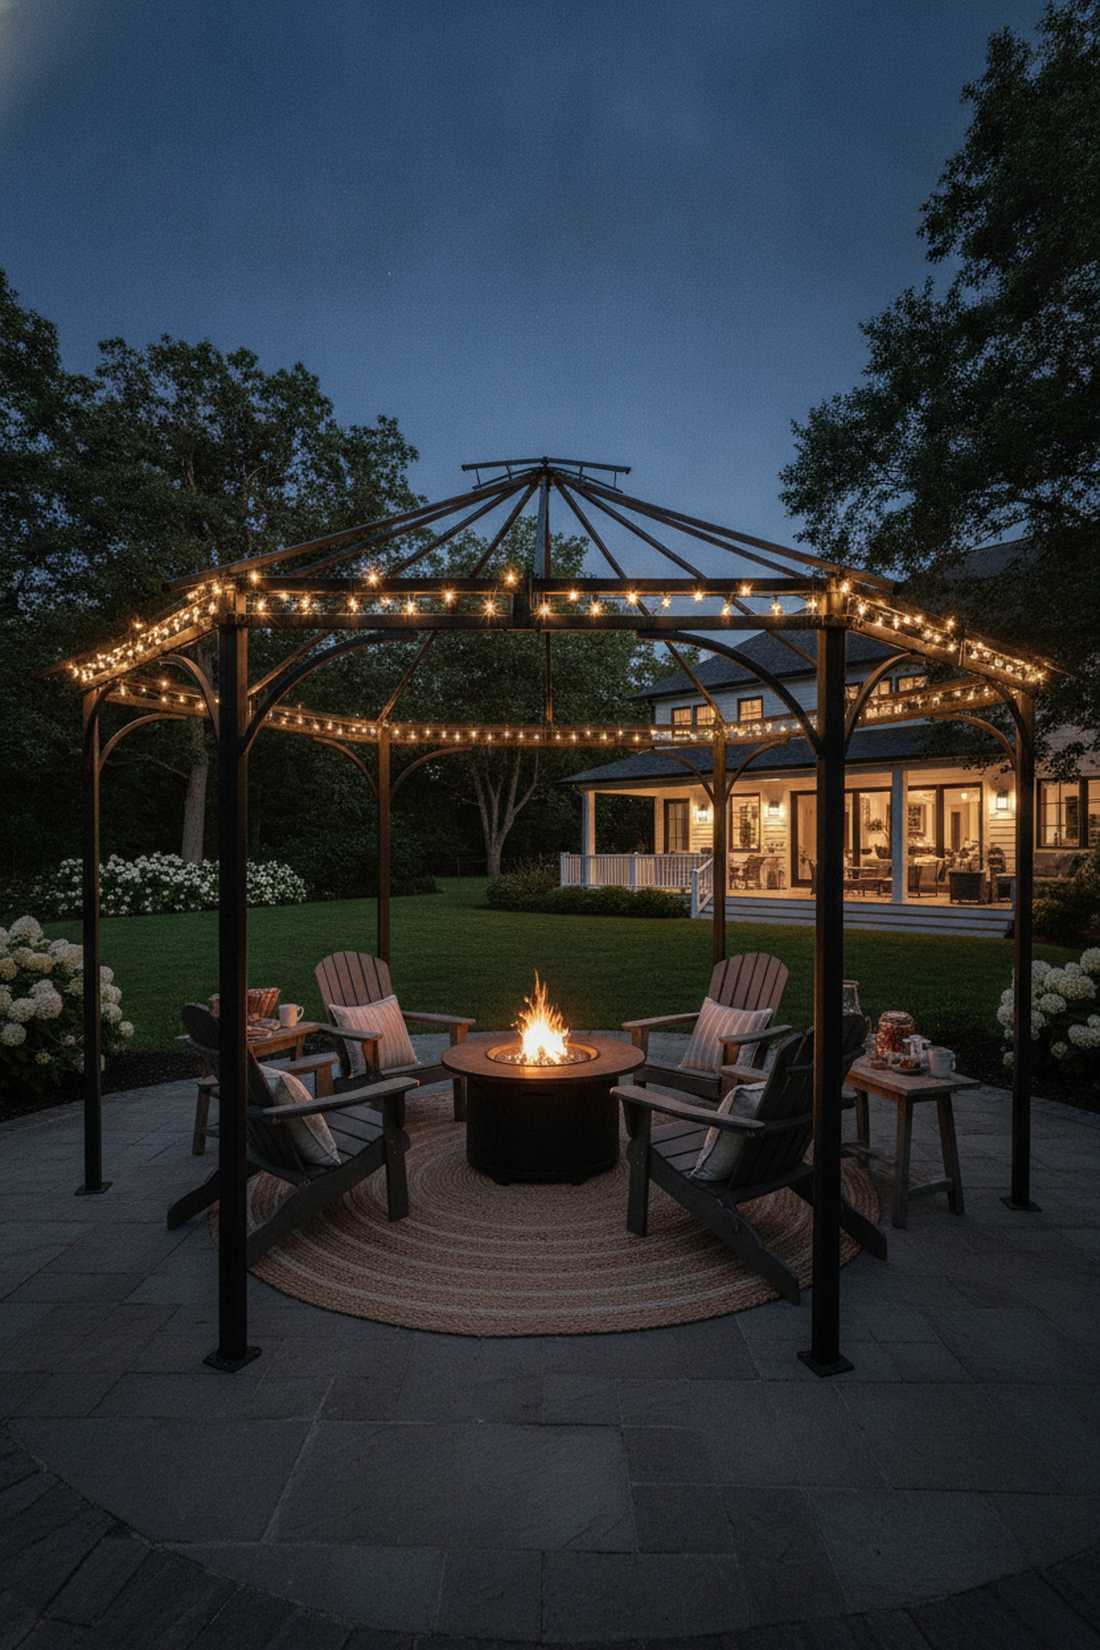
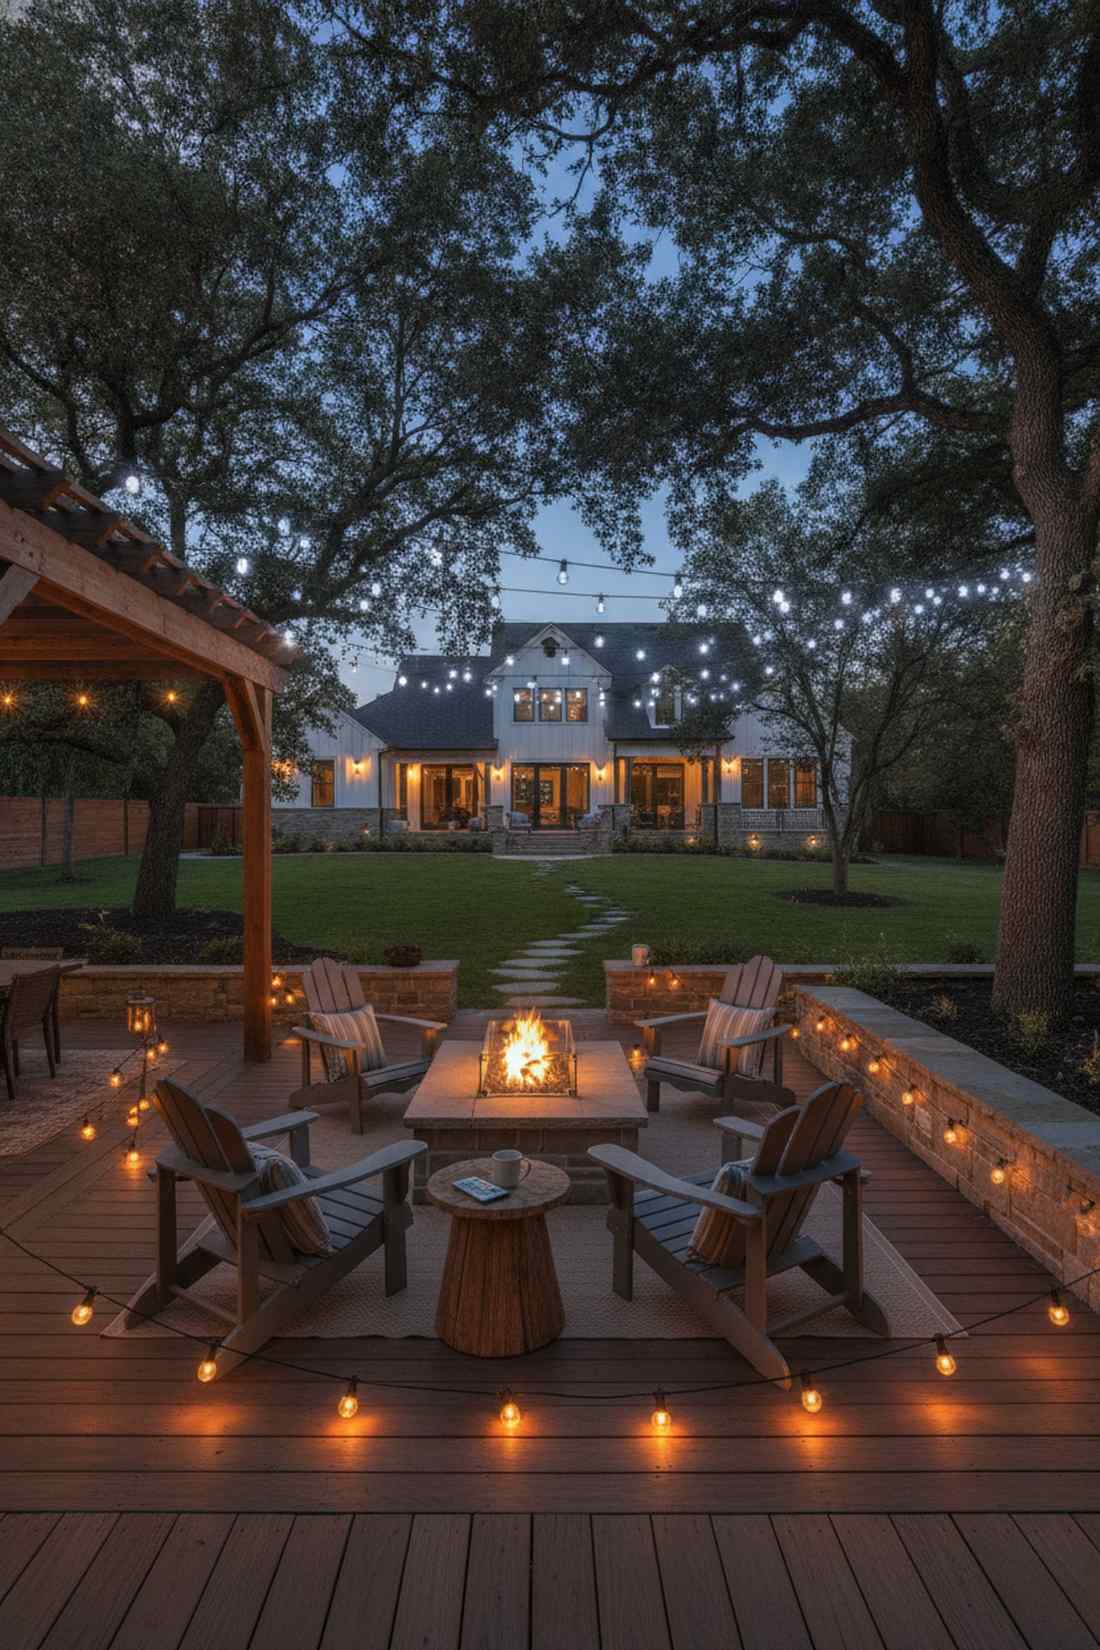
20. Corner-Focused Gathering
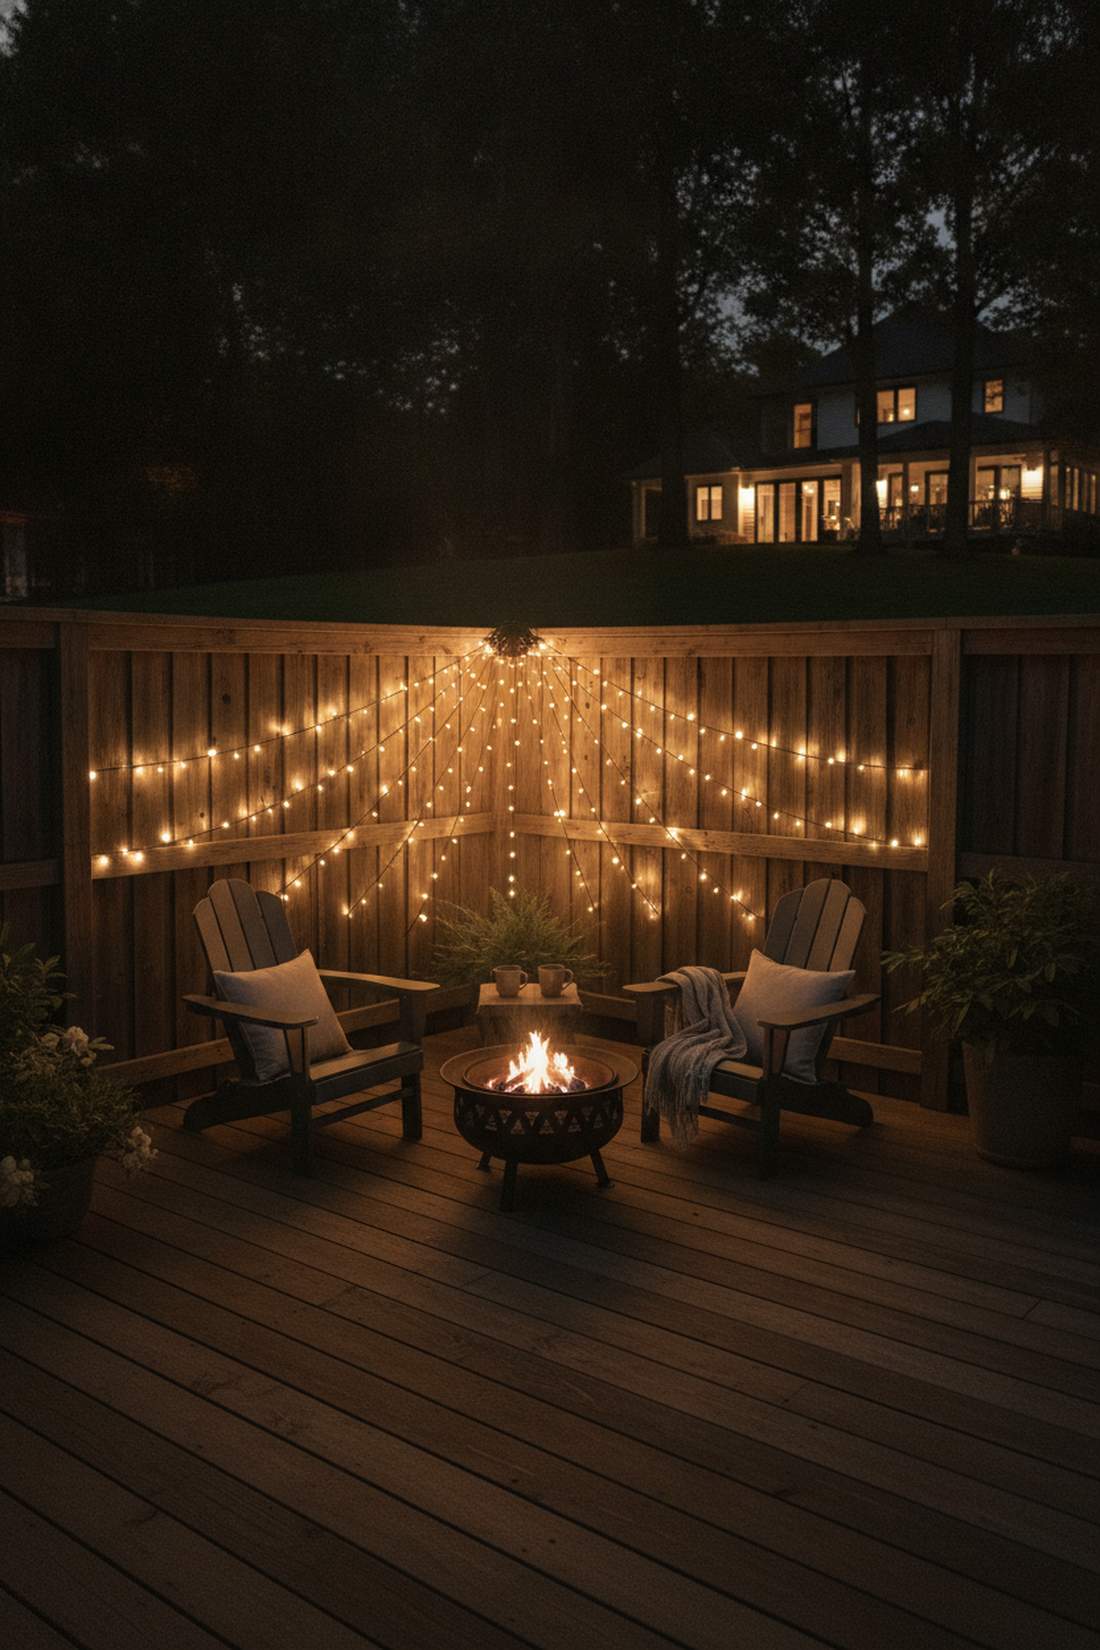
An intensely intimate glowing nook carved directly out of the darkness. This concentrated corner illumination zone is absolutely magical for isolating late-night fire pit conversations.
Lighting the whole yard wastes massive energy, whereas a dramatic corner sweep makes a tiny space feel incredibly exclusive and expensive. A premium multi-strand chandelier hook serves as the perfect heavy-duty wall anchor for this asymmetrical burst of light.
Make a cozy luxury corner for just $25–$55.
- Key Materials: Corner bracket hub, multiple short strings
- Vibe / Style: Intimate exclusive lounge
- Difficulty: Very easy
- Budget Breakdown: Bracket: $15 | Lights: $25
- Creator’s Tip: Fan the lights out from the corner exactly like a hand-held fan to maximize the corner-glow effect.
- Smart Sourcing: Heavy-duty corner bracket hubs and multi-strand fairy light starter kits.
21. Roof-Overhang Curtain Edge
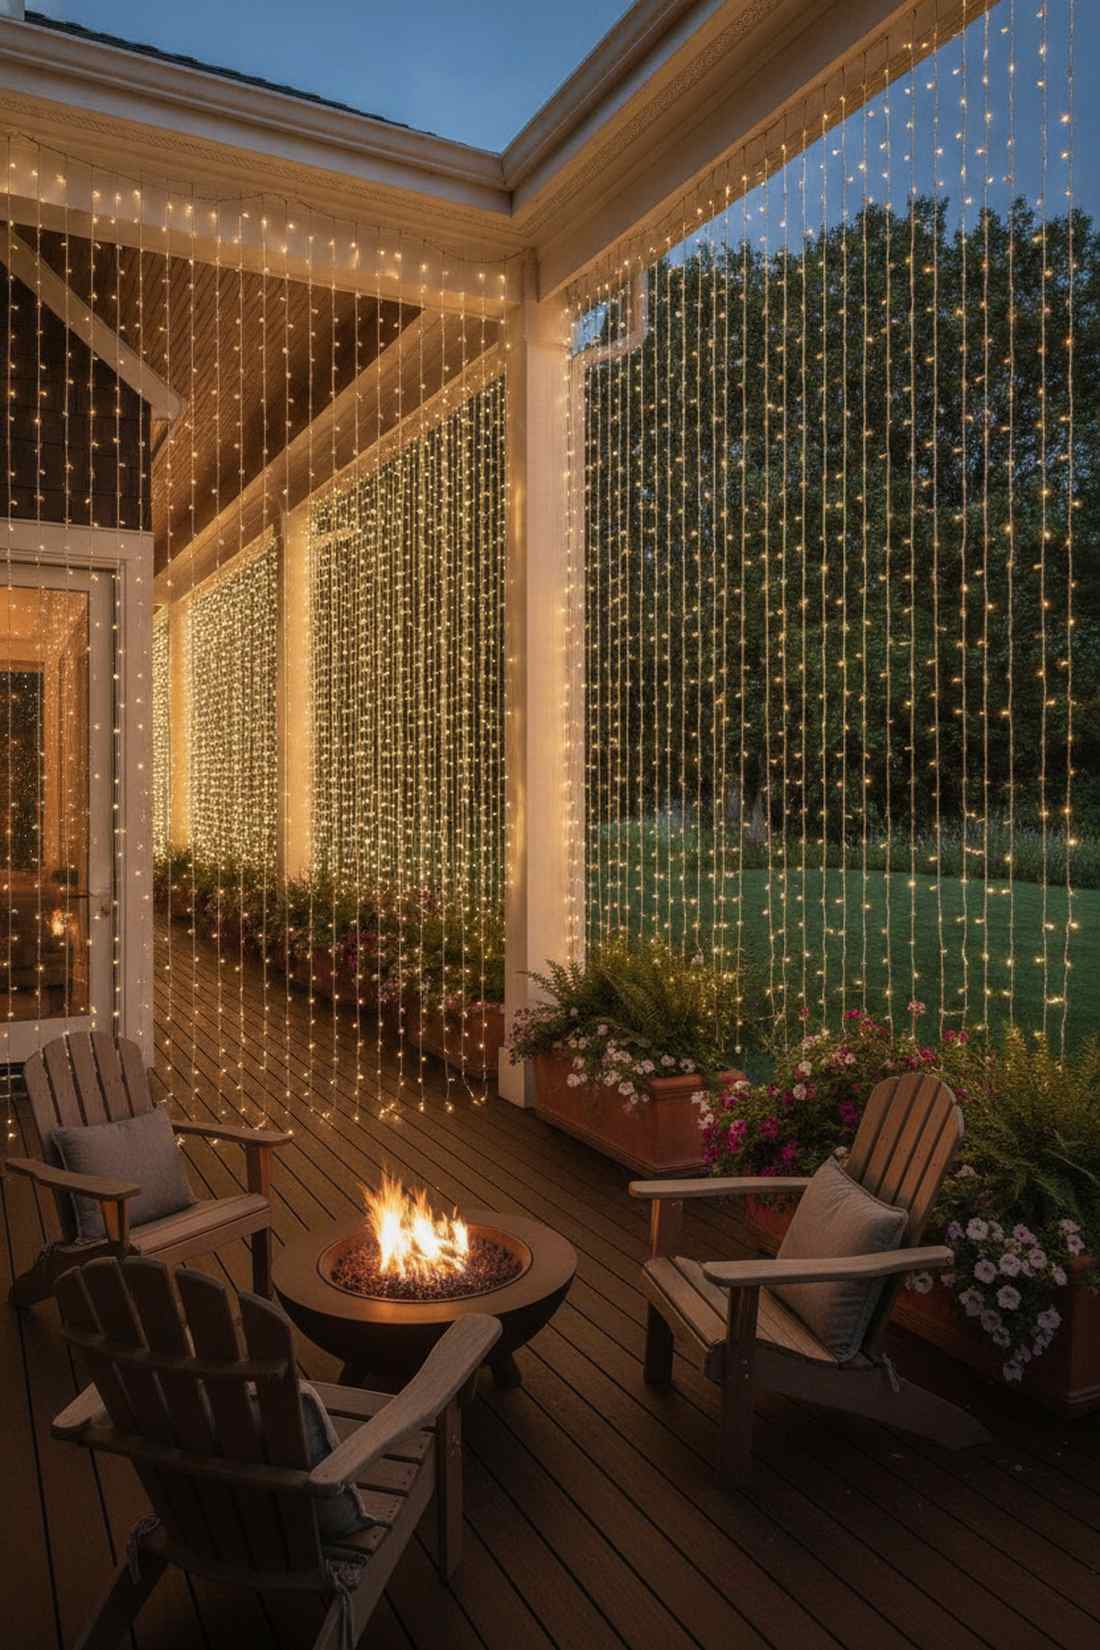
A cascading wall of starlight separating the safe porch from the wild yard. The vertical patio fringe border acts as a stunning, semi-private glowing outdoor screen.
Standard horizontal edge lights are barely visible, but dropping a sheer curtain of vertical LEDs creates a definitive, highly luxurious boundary. Sourcing an outdoor-rated icicle string set drastically reduces your ladder time compared to hanging dozens of individual vertical drops.
Border your outdoor space beautifully for $35–$65. Pin this to your porch upgrade board!
- Key Materials: Pre-made icicle or curtain lights, fascia clips
- Vibe / Style: Elegant glowing boundary
- Difficulty: Easy
- Budget Breakdown: Curtain LEDs: $40 | Clips: $10
- Creator’s Tip: Secure the bottom of the strands loosely to planter boxes to keep them from blowing wildly in the wind.
- Smart Sourcing: Pre-made outdoor LED curtain lights (bulk pack) and no-damage roof fascia clips.
22. Post-to-Post Diagonal Crosses
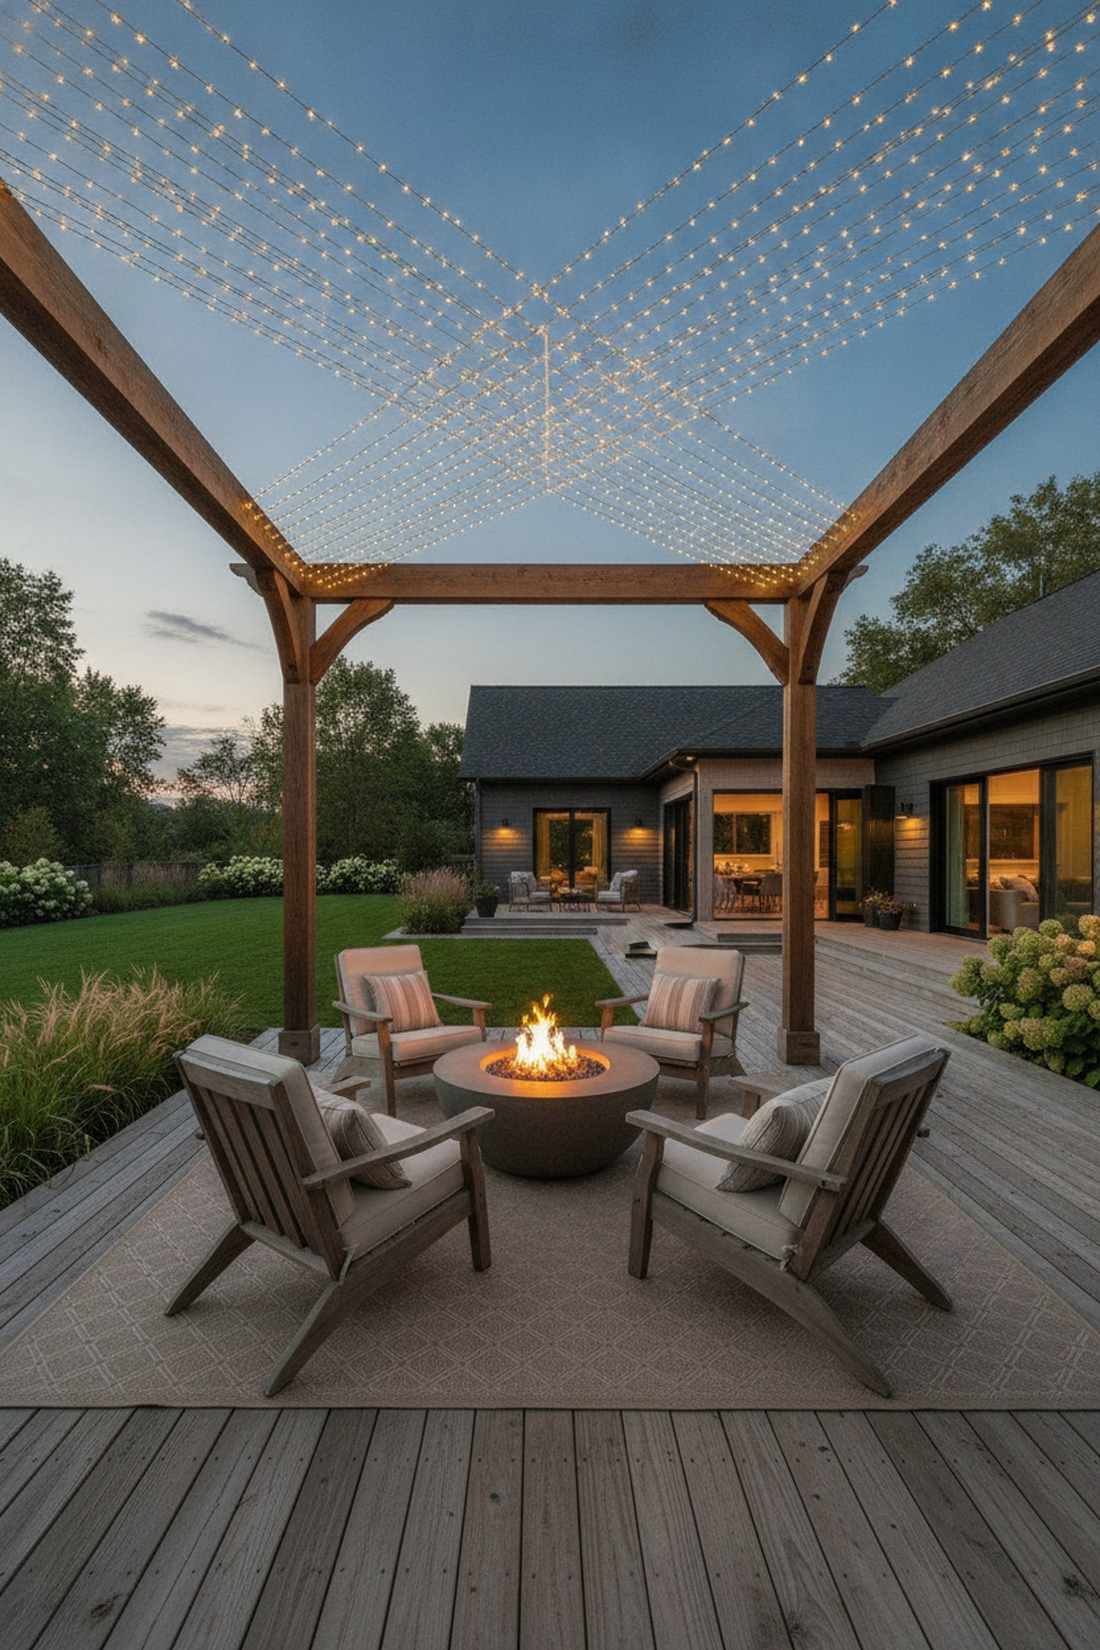
A sharp, highly energetic grid that breathes massive life into square spaces. The diagonal crossing patio pattern adds striking geometric movement to visually flat overhead areas.
Parallel lines are considered basic, but forcing a massive illuminated X-pattern overhead physically tricks the eye into thinking the space is much larger. Utilizing heavy-duty screw hooks and tension turnbuckles guarantees those massive diagonal spans stay razor-straight.
You can engineer this geometric architectural wonder for $40–$80.
- Key Materials: Turnbuckles, heavy outdoor fairy wire
- Vibe / Style: Expansive modern geometry
- Difficulty: Intermediate
- Budget Breakdown: Tension hardware: $30 | Wire: $35
- Creator’s Tip: Always overlap the crossing points in the exact center and secure them with a tiny zip tie to prevent rubbing.
- Smart Sourcing: Heavy-duty turnbuckle tension kits and acrylic-coated fairy wire spools.
Wait until you see how affordable this next high-end designer secret actually is…
23. Outdoor Ceiling Fan Integration

A kinetic whirlwind of warm light that cools and mesmerizes simultaneously. The illuminated rotating fixture hack is an absolute genius dual-purpose trick for muggy summer nights.
Nobody wants glaring, blinding spotlights, but wrapping the fan housing safely creates a beautiful ambient glow that dances. Ultra-lightweight copper wire fairy bundles won’t unbalance your fan blades or accidentally burn out the sensitive ceiling motor.
This incredibly smart, highly functional hack costs merely $15–$30. Save this genius trick!
- Key Materials: Battery-powered copper wire lights, electrical tape
- Vibe / Style: Kinetic ambient cooling
- Difficulty: Easy
- Budget Breakdown: Battery lights: $15 | Tape/Clips: $5
- Creator’s Tip: ONLY use battery-powered packs securely taped to the fan base to avoid tangling hard wires.
- Smart Sourcing: Battery-operated micro LED bundles and high-adhesion black electrical tape.
Architectural Accent Methods
Elevating your yard means highlighting the structure itself. These targeted techniques illuminate the architectural bones of your space, making cheap timber look like custom carpentry.
24. Column-Wrap Spiral Technique
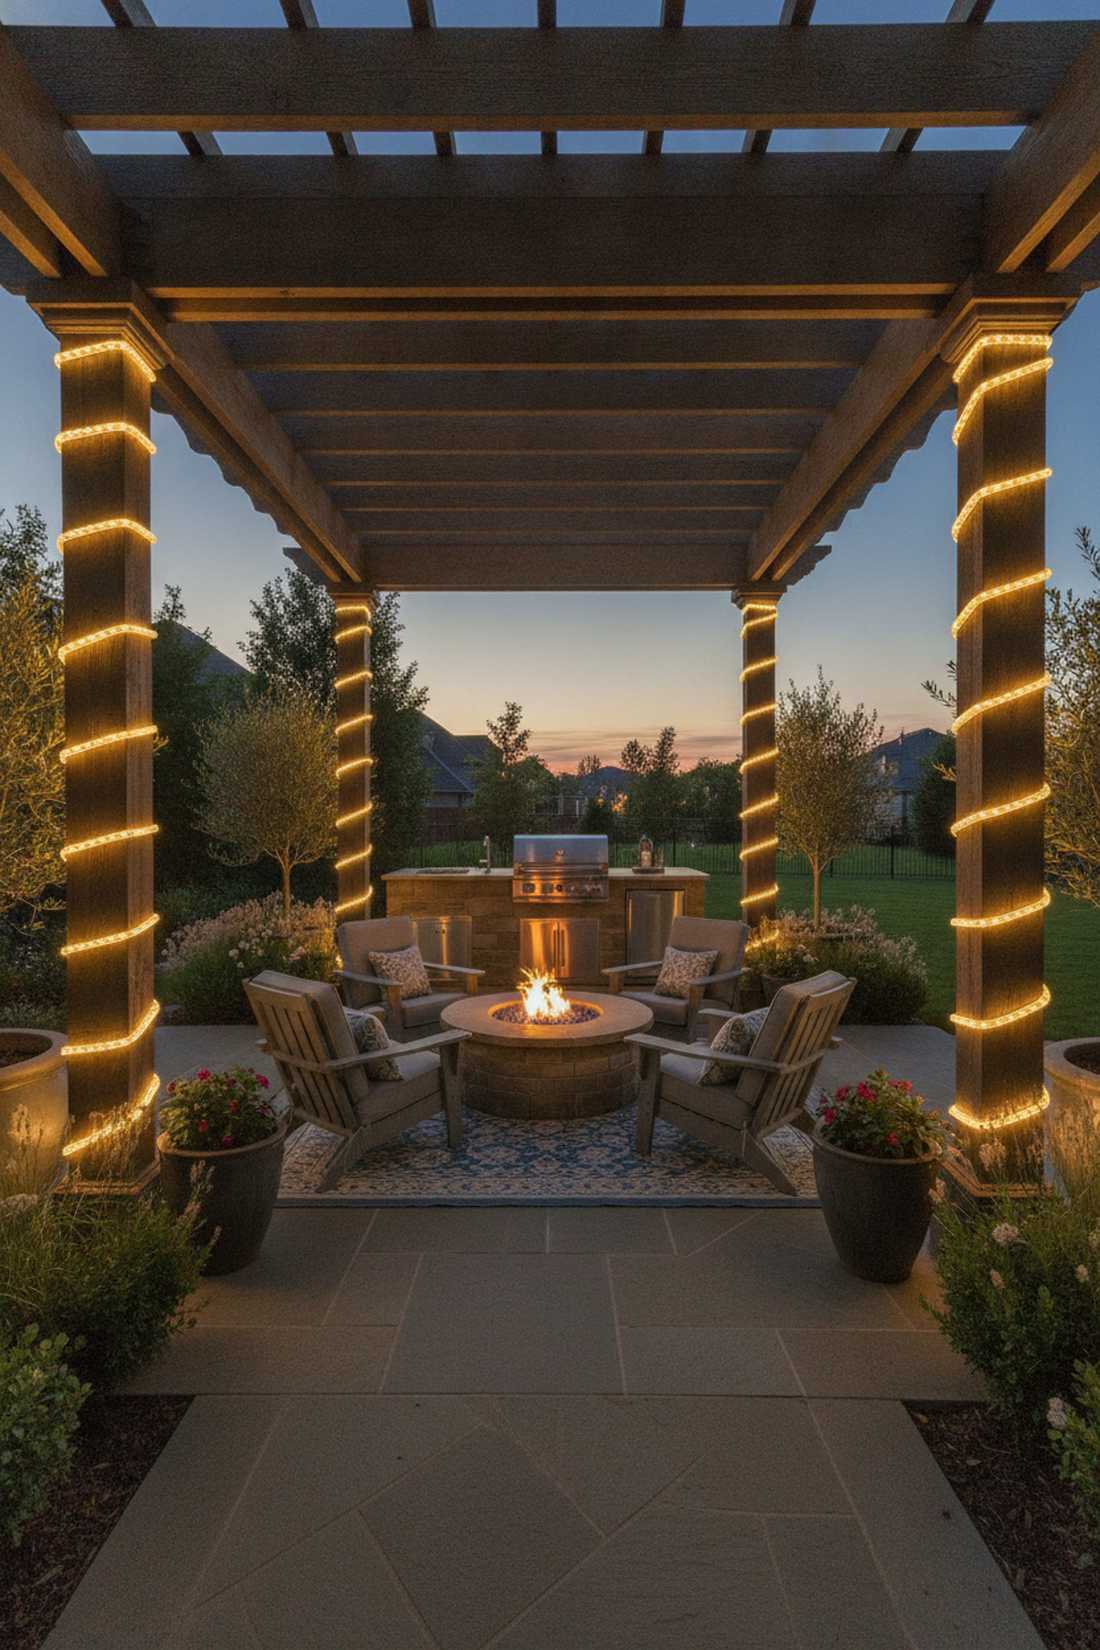
Majestic glowing pillars visually lifting the night sky on their shoulders. A spiraling architectural column highlight perfectly frames your entire backyard entertainment stage.
Wrapping cords haphazardly looks incredibly sloppy, but maintaining strict geometric spacing instantly delivers a five-star luxury resort aesthetic. Flexible solar rope lights are phenomenal here, completely eliminating the ugly extension cords wrapping around the patio base.
Dress up your support posts elegantly for $30–$60 per pillar.
- Key Materials: Solar rope lights, clear zip ties
- Vibe / Style: Grand architectural framing
- Difficulty: Easy
- Budget Breakdown: Rope lights: $40 | Clear ties: $5
- Creator’s Tip: Use clear zip ties on the back side of the column to anchor the spiral tightly against the wood.
- Smart Sourcing: Solar-powered flexible LED rope kits and UV-resistant clear zip ties (bulk pack).
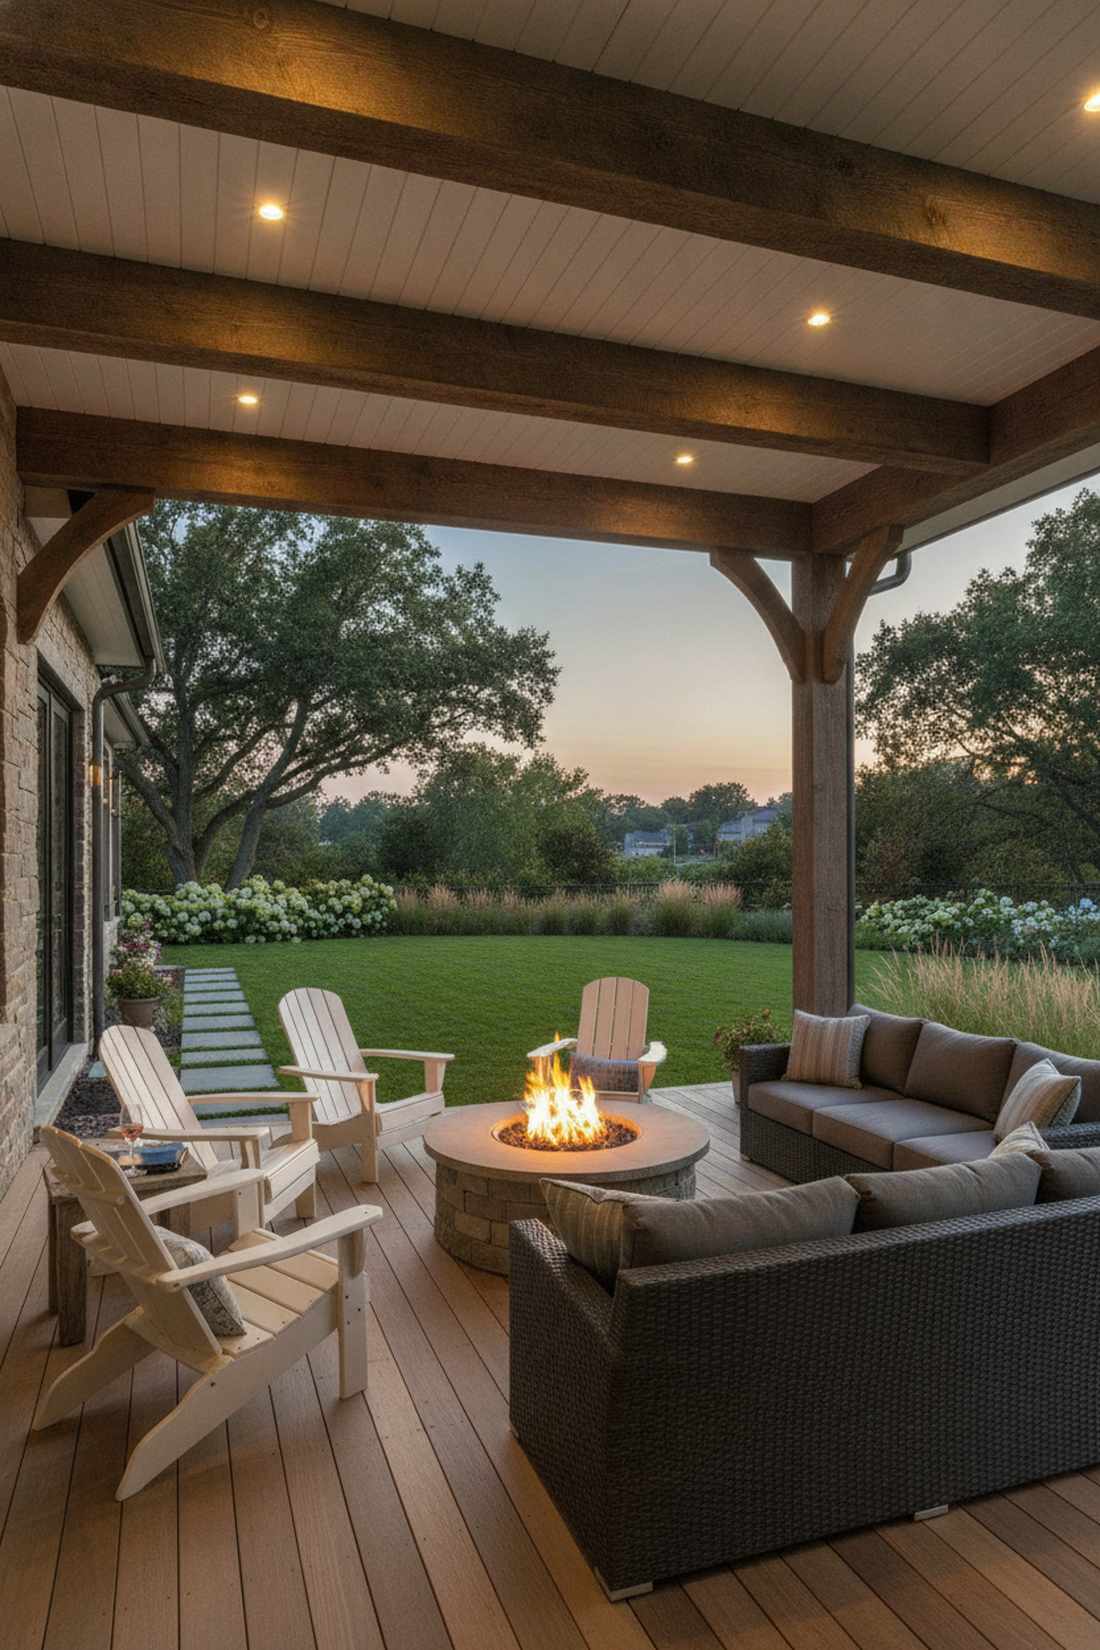
25. Rafter Tail Highlight Strings
Tiny glowing accents elegantly winking from the edges of the timber. Exposed beam end illumination is the ultimate sophisticated way to showcase custom pergola craftsmanship.
Flooding the entire roof completely washes out details, while micro-targeting the rafter tails creates a sophisticated, expensive jewelry-like glow. A bulk pack of battery-operated fairy garden supplies is incredibly easy to hide in the wood’s natural recesses.
Add this premium, highly detailed touch for around $20–$40. Pin this to your luxury outdoor detailing board!
- Key Materials: Micro LED bundles, wood tack pins
- Vibe / Style: Exquisite custom craftsmanship
- Difficulty: Intermediate precision
- Budget Breakdown: Micro LEDs: $20 | Tacks: $5
- Creator’s Tip: Only illuminate every alternating rafter tail to create a gorgeous, breathable visual rhythm.
- Smart Sourcing: Waterproof micro LED string bundles and rust-proof outdoor wood tacks.
26. Beam Cross-Section Outlining
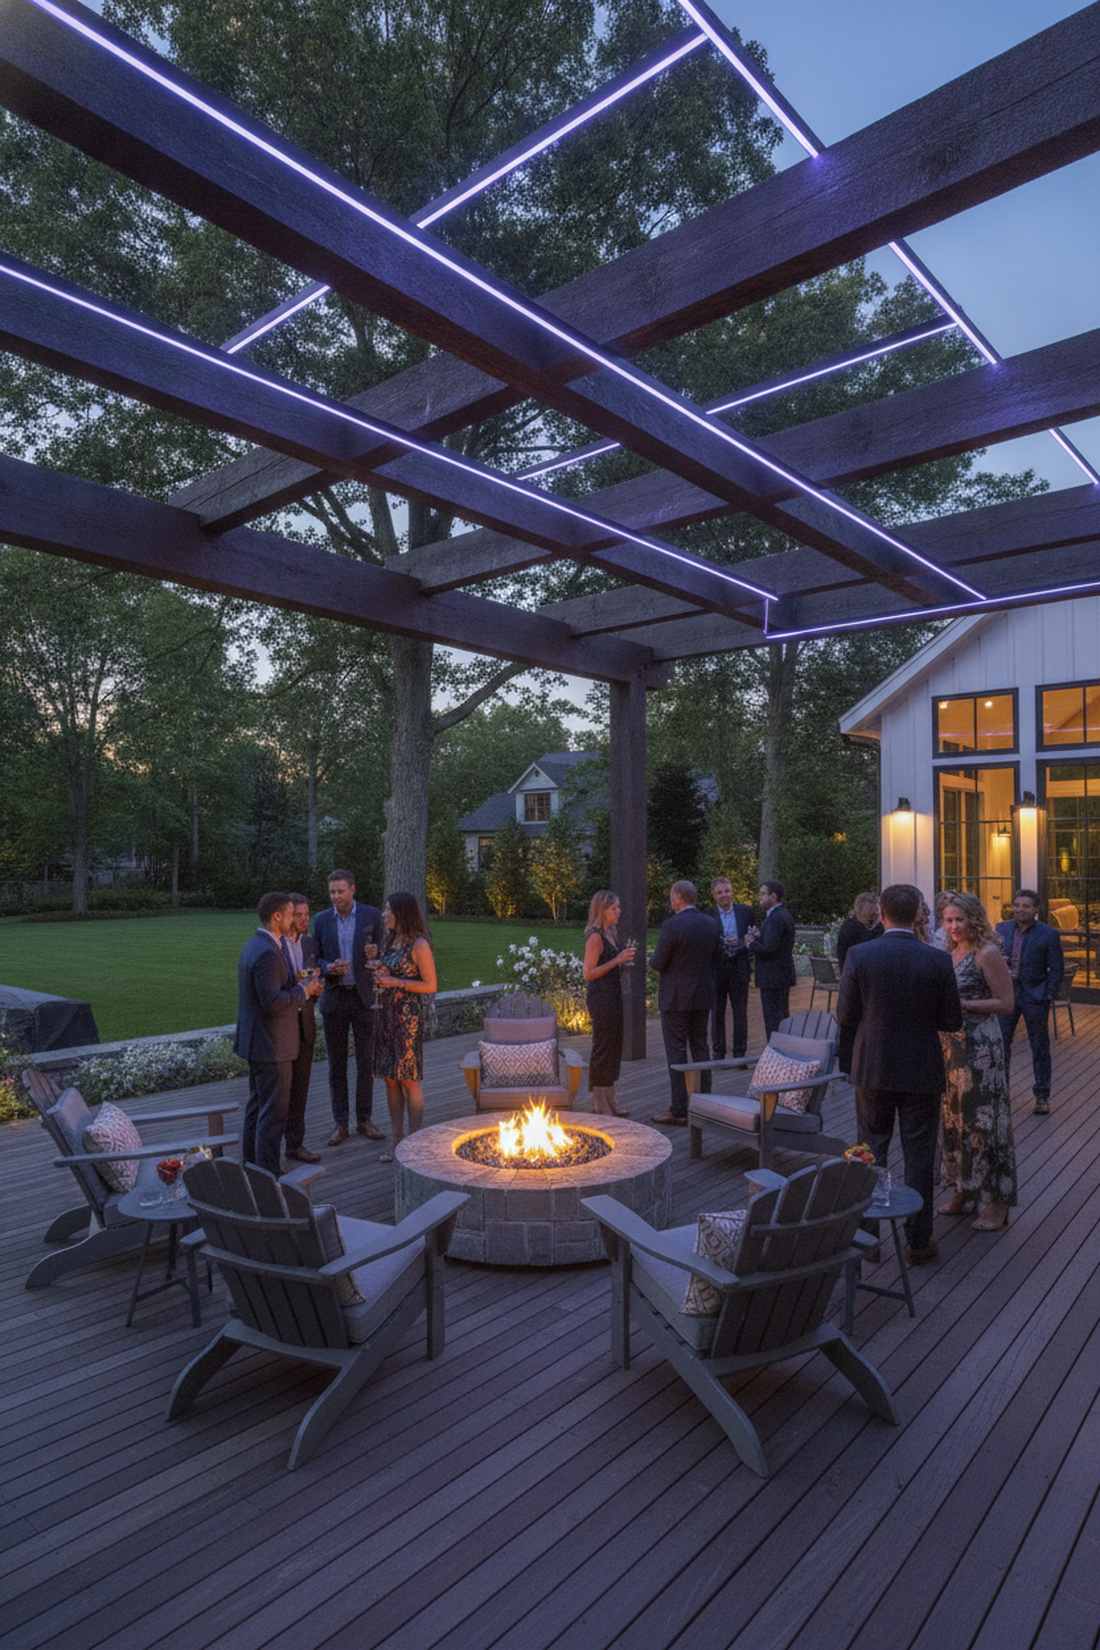
Floating neon-style frames aggressively hovering above your evening cocktail party. The geometric timber edge lighting brings a shockingly sharp modern twist to rustic wooden structures.
Traditional bulbs hang down and look cluttered, but flat-lining the exact architectural edges creates an impossibly sleek, futuristic perimeter. Using UV-resistant LED tape with a strong industrial adhesive backing ensures the strips won’t peel off in high summer humidity.
Modernize your heavy beams for roughly $45–$85.
- Key Materials: Flat LED strip tape, corner connectors
- Vibe / Style: Futuristic geometric modern
- Difficulty: Intermediate
- Budget Breakdown: Tape LEDs: $55 | Connectors: $15
- Creator’s Tip: Use proper 90-degree corner connectors instead of trying to bend the LED tape around sharp wood edges.
- Smart Sourcing: UV-resistant flat LED tape kits and 90-degree LED corner connectors.
27. Baluster Threading
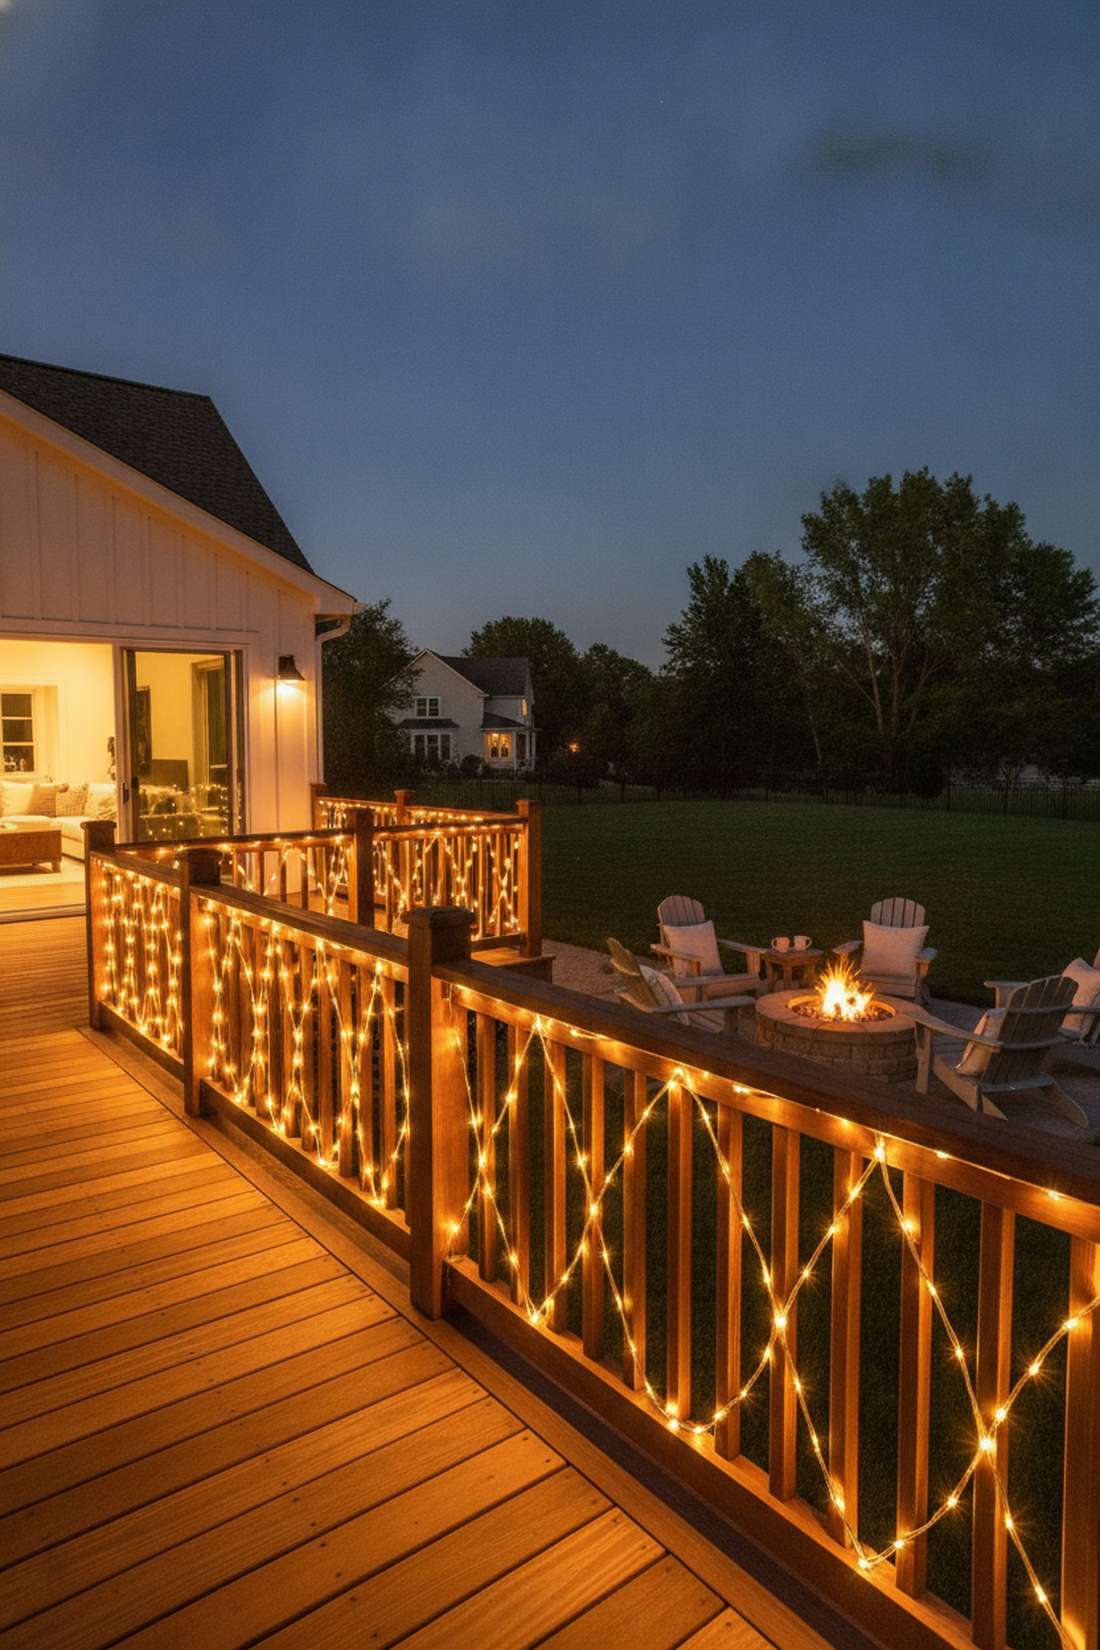
A hypnotic glowing fence line that completely wraps you in safety and warmth. This woven deck railing illumination provides stunning boundary safety lighting without resorting to harsh spotlights.
Simply tacking strings to the top rail looks highly amateurish, but painstakingly weaving them through the balusters creates a deeply integrated, expensive custom look. Heavy-duty coated wire strings are absolutely mandatory here to prevent weather rot and accidental guest snags.
Weave a beautiful boundary line for $30–$70. Save this safety hack!
- Key Materials: Heavy-coated string lights, wire staples
- Vibe / Style: Cozy integrated boundary
- Difficulty: Time consuming
- Budget Breakdown: Coated lights: $45 | Staples: $10
- Creator’s Tip: Do a figure-eight weave pattern to ensure the wire stays locked into the balusters without slipping down.
- Smart Sourcing: Acrylic-coated fairy wire spools and heavy-duty deck railing staples.
Most DIYers completely ignore this next element, leaving their yards looking completely unfinished.
28. Corbel and Bracket Accents
Hidden pockets of golden light tucked deep into the architecture. A recessed structural accent glow proves to your guests that true luxury lies in the absolute smallest details.
Leaving structural corners dark visually shrinks the patio, while lighting the brackets physically pushes the visual boundaries of the space outward. Tiny waterproof button-cell terrarium accessories fit seamlessly into tight architectural nooks where traditional bulky strings fail.
Master the micro-details for just $15–$35.
- Key Materials: Micro LED pods or short strands
- Vibe / Style: Hidden bespoke luxury
- Difficulty: Easy
- Budget Breakdown: Micro pods: $20 | Adhesive: $5
- Creator’s Tip: Tuck the battery packs directly behind the corbels using strong double-sided outdoor tape to hide them entirely.
- Smart Sourcing: Waterproof miniature LED light pods and extreme-hold outdoor double-sided tape.
29. Roof Peak Starburst
A brilliant crown jewel blazing fiercely at the highest point of your yard. The concentrated apex focal lighting instantly draws every single eye upwards to appreciate the tall architecture.
Most high peaks cast dreary, dark shadows, but flooding the absolute top with an explosion of light creates a majestic canopy effect. A specialized multi-port distribution hub makes routing a dozen glowing strands from a single peak incredibly simple and safe.
Crown your outdoor structure for $50–$95. Pin this if you have a tall gazebo!
- Key Materials: Central mounting hub, multiple long stringers
- Vibe / Style: Majestic structural crown
- Difficulty: Requires tall ladder safety
- Budget Breakdown: Hub: $25 | Strings: $50
- Creator’s Tip: Mount the central ring directly to the peak block first, then clip your lights in so you aren’t juggling wiring on a ladder.
- Smart Sourcing: Pre-wired peak canopy hubs and weatherproof outdoor fairy bundles.
Garden Structure Integrations With Garden Arch And Trellis Fairy Lights
Merging lighting with horticulture transforms simple garden beds into enchanted midnight landscapes. These techniques highlight the synergy between living plants and brilliant illumination.
30. Arbor Canopy Drape
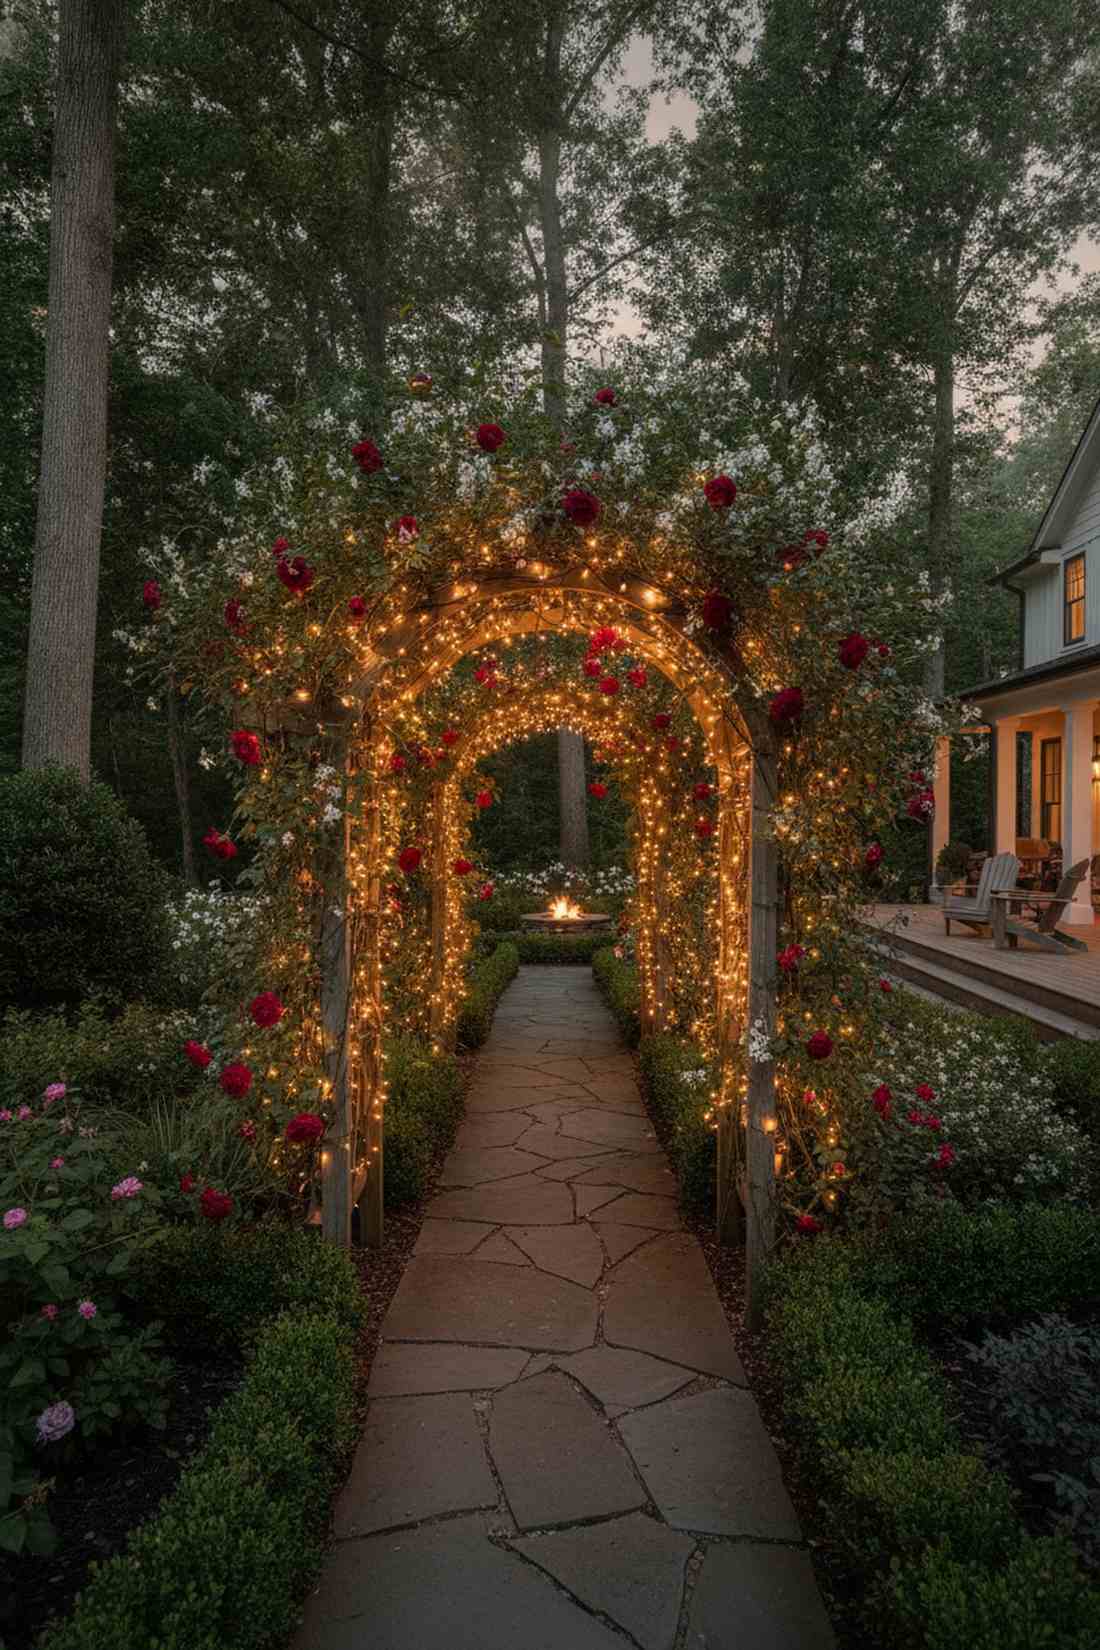
A glowing secret passageway leading deep into an enchanted evening garden. This illuminated archway floral fusion makes midnight backyard strolls feel unbelievably romantic and exclusive.
Bare wooden arbors fade completely into the darkness, but a soft draping technique turns them into breathtaking living, glowing sculptures. Sourcing a solar-powered copper wire kit means you never have to drag dangerous, ugly electrical cords through damp soil.
Build an enchanted floral arch for just $25–$50.
- Key Materials: Solar copper string lights, soft garden wire
- Vibe / Style: Secret garden passage
- Difficulty: Easy
- Budget Breakdown: Solar lights: $25 | Plant wire: $5
- Creator’s Tip: Let the lights hang slightly loose over the top so the climbing roses have room to grow through the wires.
- Smart Sourcing: Solar-powered copper fairy kits and soft silicone plant-training wire.
31. Trellis Vertical Striping
Bold, glowing pinstripes shooting aggressively up through a thick wall of ivy. The vertical climbing plant illumination creates massive height and incredibly dramatic garden contrast.
Tangling wires horizontally physically crushes delicate vines, but strict vertical runs highlight the growth while stretching the garden’s perceived visual height. Opt for green-coated miniature garden supplies so the mechanics completely vanish against the foliage during daylight hours.
Elevate your garden trellis for about $20–$45. Save this to your landscape design board!
- Key Materials: Green-coated wire lights, zip ties
- Vibe / Style: Dramatic vertical growth
- Difficulty: Easy
- Budget Breakdown: Green wire lights: $30 | Zip ties: $5
- Creator’s Tip: Only light the vertical wooden slats. Leave the horizontal cross-beams dark to enforce the illusion of extreme height.
- Smart Sourcing: Green-coated outdoor fairy wire (bulk pack) and camouflaged green garden zip ties.
Material Guide: Cheap vs. Premium Aesthetic
Knowing exactly where to save and where to spend makes all the difference in achieving that “looks expensive but isn’t” outdoor vibe.
- Standard vs. UV-Resistant/Premium: Standard indoor wires literally rot and crack in the sun within months. Upgrading to UV-coated acrylic wires stops fading, prevents electrical shorts, and survives freezing winters.
- Pre-made Kits vs. Sourcing Locally: Scavenging hardware aisles leads to mismatched color temperatures. Investing in professional starter kits ensures uniform glow, proper waterproof seals, and usually saves both time and money.
32. Moon Gate Circular Outline

A flawless glowing portal promising entry to another tranquil world. The circular garden gateway lighting creates the absolute most show-stopping centerpiece imaginable for a backyard.
Standard cheap strings kink badly and ruin the perfect circle, but a continuous flexible light strip traces the sacred geometry with absolute perfection. Premium silicone-encased neon LED ropes bend flawlessly while easily surviving brutal thunderstorms and high winds.
Outline your spectacular moon gate for $40–$75.
- Key Materials: Flexible neon LED rope, curved mounting clips
- Vibe / Style: Zen meditation garden
- Difficulty: Intermediate
- Budget Breakdown: Neon rope: $50 | Clips: $15
- Creator’s Tip: Warm up the LED rope gently in the sun before installing so it bends perfectly around the circular frame without fighting back.
- Smart Sourcing: Silicone-encased flexible LED ropes and curved track mounting clips.
33. Obelisk Spiral Ascent
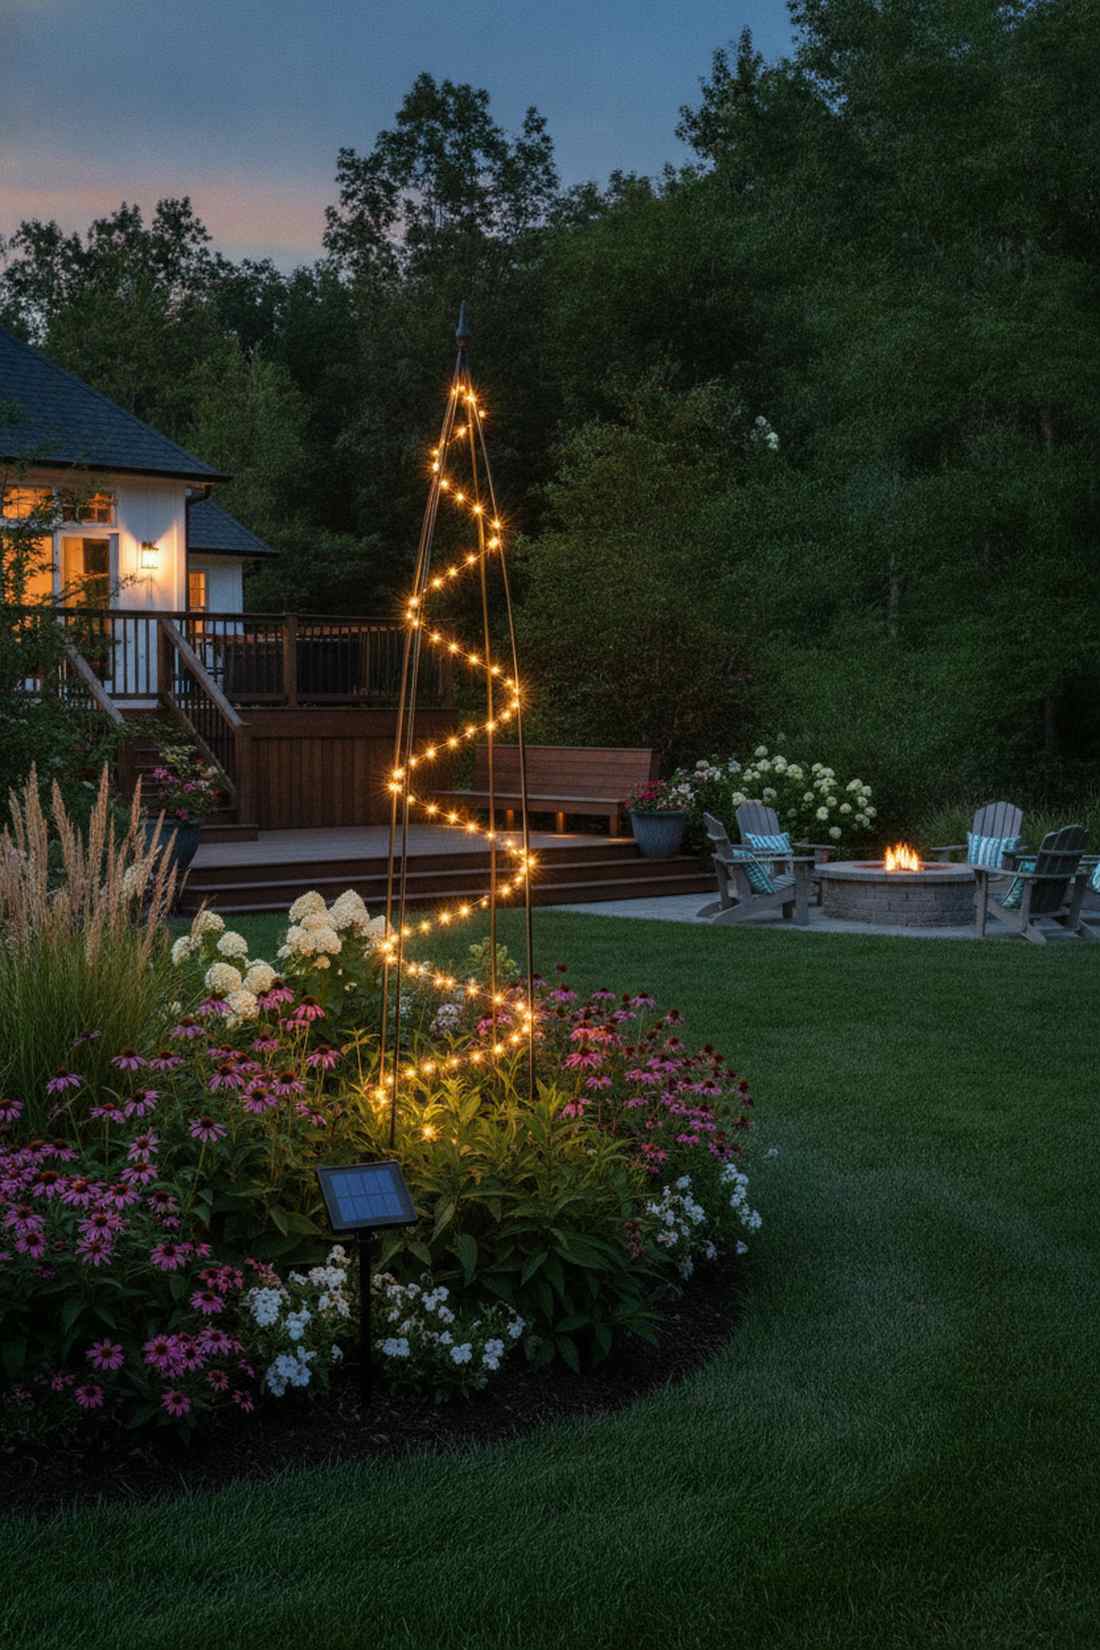
A mystical glowing pyramid securely anchoring the very edge of your flower beds. This illuminated vertical garden marker acts as a stunning, guiding beacon across a dark lawn.
Flat ground lights get completely swallowed by tall grass, but spiraling an obelisk creates a brilliant vertical focal point that truly commands the space. A high-efficiency solar string with a separate stake panel ensures the lights glow vibrantly without ugly cord clutter.
Light up your dark landscape for just $25–$45. Pin this easy garden upgrade!
- Key Materials: Solar fairy strings, metal obelisk
- Vibe / Style: Mystical garden beacon
- Difficulty: Extremely easy
- Budget Breakdown: Solar string: $25 | Tie wire: $5
- Creator’s Tip: Start the wrap tightly at the bottom and let the spacing get wider as you reach the peak to create a forced-perspective illusion.
- Smart Sourcing: High-efficiency solar string bundles and weatherproof garden obelisk frames.
34. Espalier Form Tracing
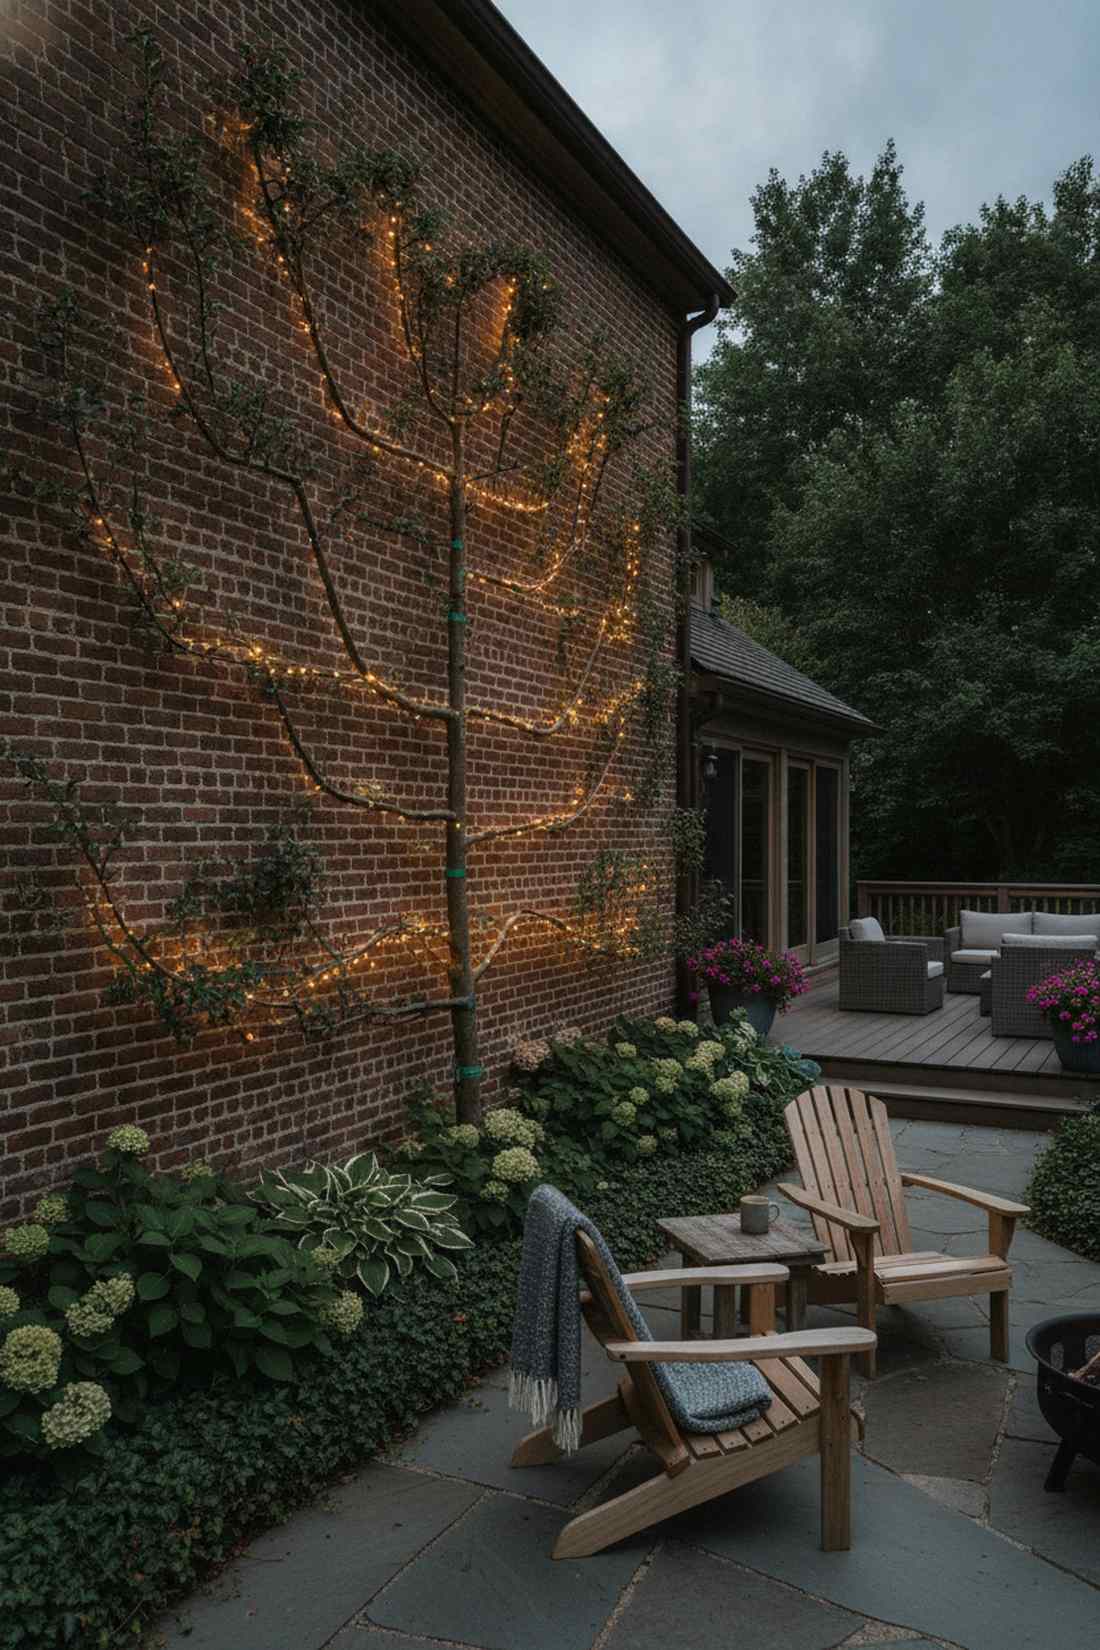
A highly disciplined, geometric living chandelier glowing brilliantly against a dark brick wall. The trained branch accent lighting is the ultimate flex of horticultural and design mastery.
Haphazard wrapping completely ruins the painstakingly trained shape, but meticulously tracing the right angles creates an awe-inspiring, high-fashion art piece. Use ultra-thin fairy garden kits attached with soft silicone plant ties to prevent accidentally scarring the delicate fruit tree bark.
Create living, glowing wall art for $30–$55.
- Key Materials: Micro copper wire LEDs, soft silicone plant ties
- Vibe / Style: Master horticulturist estate
- Difficulty: Advanced precision
- Budget Breakdown: Micro LEDs: $25 | Silicone ties: $15
- Creator’s Tip: Never wrap the wire entirely around the branch. Run it strictly along the bottom edge so the leaves can still face the sun above.
- Smart Sourcing: Ultra-thin copper fairy wire kits and soft silicone plant-training ties (bulk pack).
35. Lattice Diamond Weaving
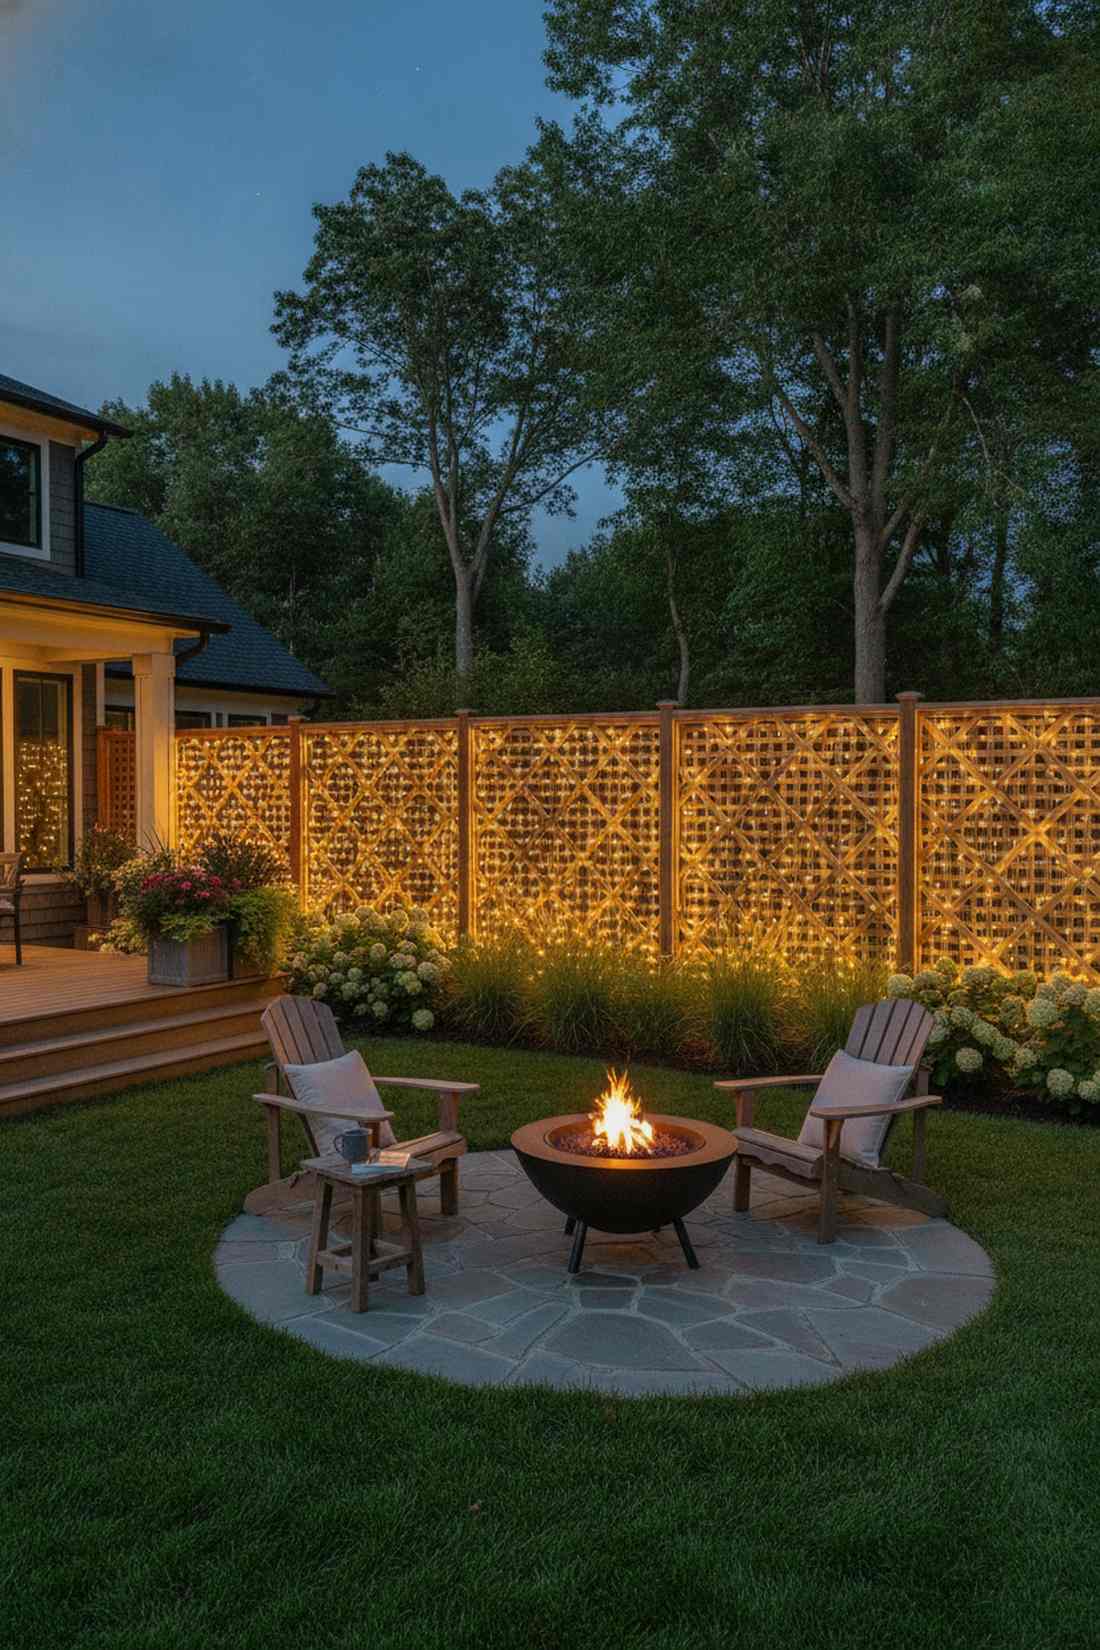
A glowing tapestry seamlessly woven directly into your wooden privacy screen. This diagonal integrated fence lighting turns an ugly, basic wooden lattice into a solid wall of stars.
Just slapping light strands on the front looks messy and cheap, but taking the time to weave through the diamonds creates an expensive embedded aesthetic. A durable outdoor mesh net light is the absolute ultimate shortcut for covering massive lattice panels in minutes.
Weave your privacy wall for $35–$80.
- Key Materials: Net mesh lights, staple gun
- Vibe / Style: Embedded glowing tapestry
- Difficulty: Easy
- Budget Breakdown: Net lights: $45 | Staples: $10
- Creator’s Tip: Use a commercial net light grid instead of a single string. Just drape, stretch, and staple for a perfect diamond grid every time.
- Smart Sourcing: Commercial outdoor net light grids and heavy-duty staple mounting kits.
36. Pergola Vine Interweaving
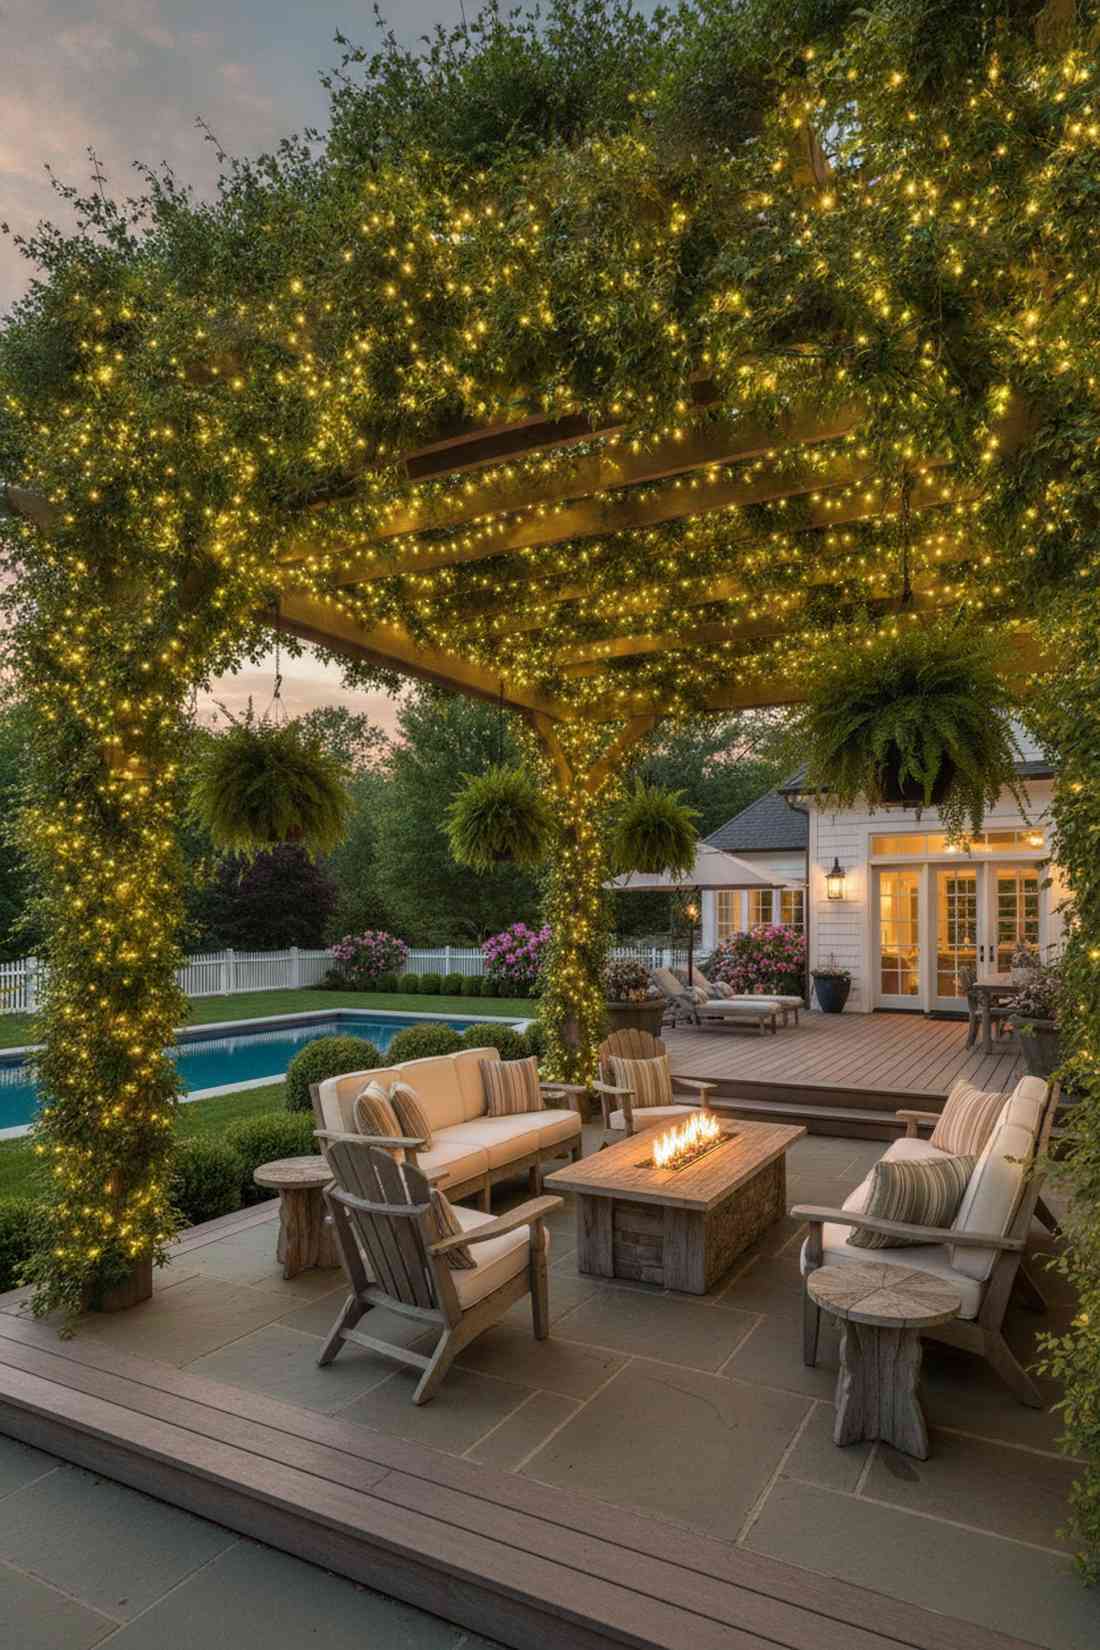
A canopy of glowing leaves that feels entirely organic, magical, and totally alive. The hidden botanical light integration is the undisputed pinnacle of the secret garden aesthetic.
Laying strings on top is the lazy route, but carefully weaving them directly inside the living vines makes the plant itself physically appear to glow. High-grade waterproof fairy light kits with green wiring are absolutely essential for maintaining the flawless daytime illusion.
Achieve this organic, living glow for $45–$90. Pin this to your ultimate outdoor living board!
- Key Materials: Green-wire waterproof LEDs, vine clips
- Vibe / Style: Alive botanical magic
- Difficulty: Time intensive
- Budget Breakdown: Green LEDs: $60 | Plant clips: $15
- Creator’s Tip: Interweave the lights in early spring before the foliage gets too thick. The vines will naturally grow over the wires and hide them completely.
- Smart Sourcing: Green-wire waterproof fairy bundles and gentle botanical vine clips.
Don’t even think about buying materials until you understand the genius of this next layout…
37. Fence-Top Runner
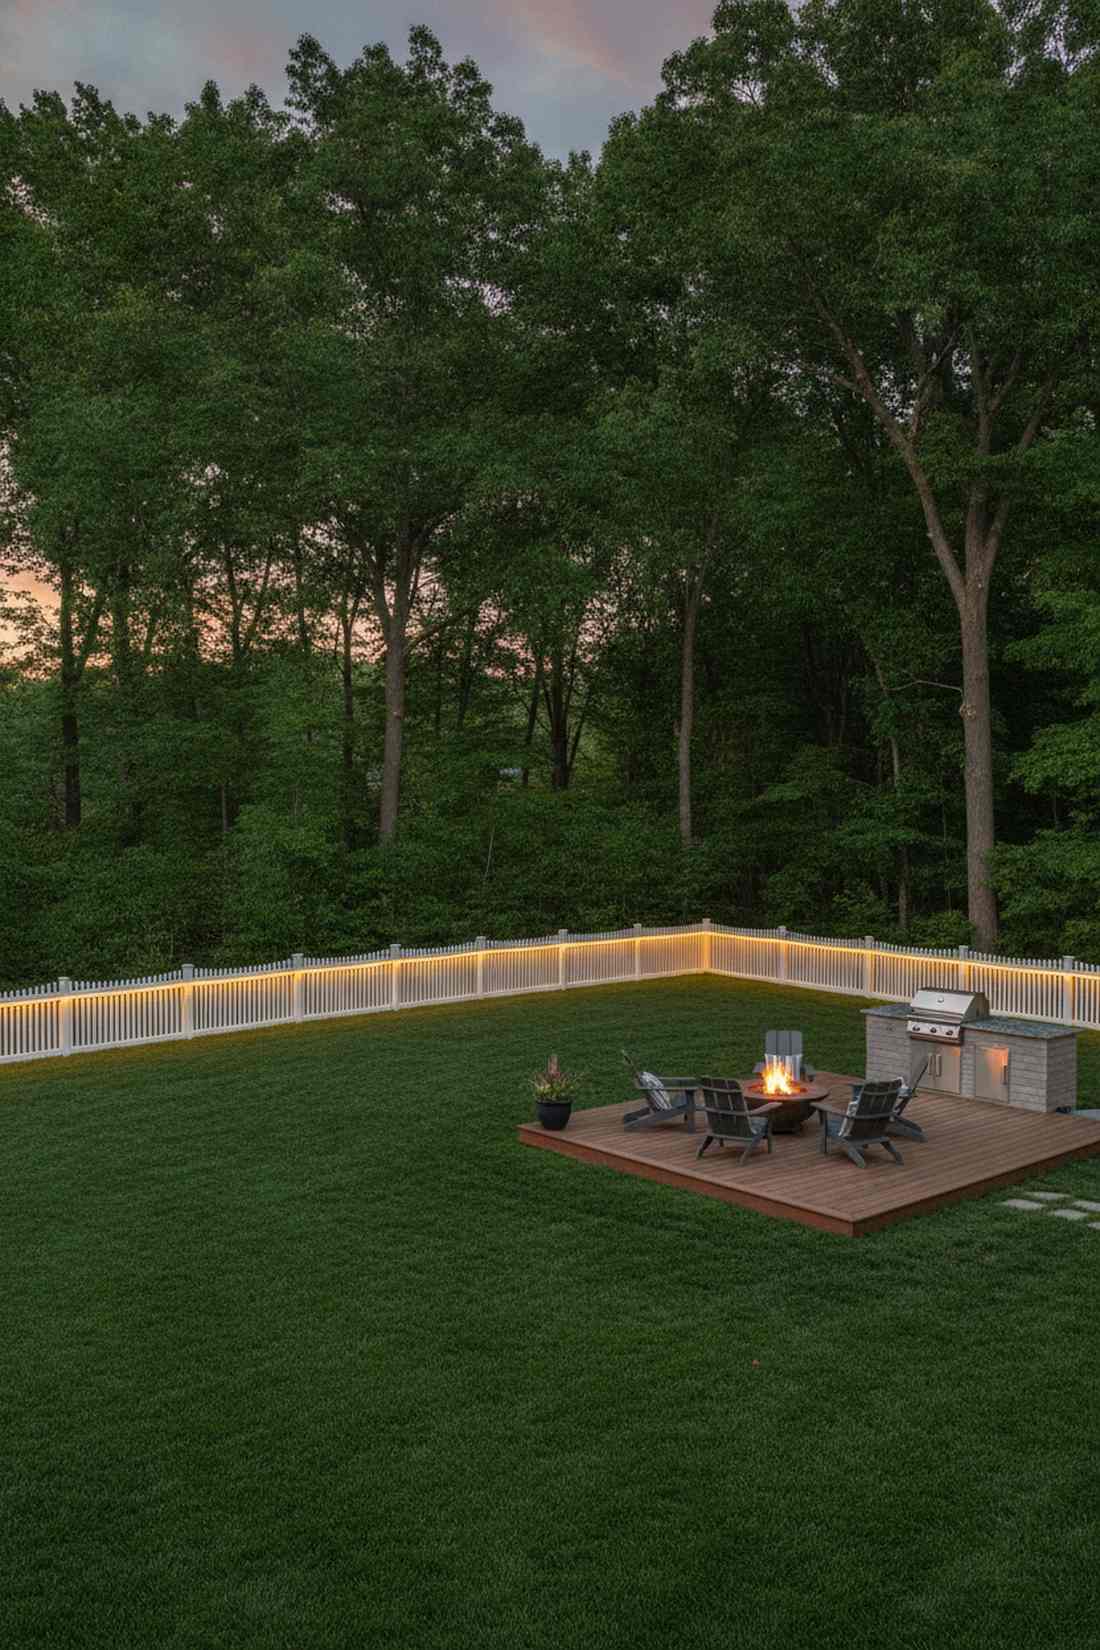
A crisp, glowing horizon line that tightly hugs the edge of your property. The continuous perimeter boundary lighting cleanly defines the outdoor space while adding crucial, beautiful security.
Flimsy strings sag horribly and snap over long yard distances, but a rigid runner makes the yard look massive and incredibly well-kept. Commercial-grade outdoor LED rope lights with UV-resistant casing prevent the punishing summer sun from cracking the plastic over time.
Define your property borders sharply for $50–$120 depending on lot size.
- Key Materials: LED rope lighting, PVC mounting track
- Vibe / Style: Crisp modern boundary
- Difficulty: Intermediate
- Budget Breakdown: Rope lights: $80 | Track guides: $20
- Creator’s Tip: Instead of using cheap nails, screw down a rigid plastic mounting track first, then pop the rope lights in for a laser-straight line.
- Smart Sourcing: Commercial UV-resistant LED ropes and rigid PVC mounting track kits.
Advanced Layering Patterns
When basic strings aren’t enough, complex layering introduces depth and high-end event-quality luxury to your backyard. These setups are strictly for those wanting a five-star aesthetic.
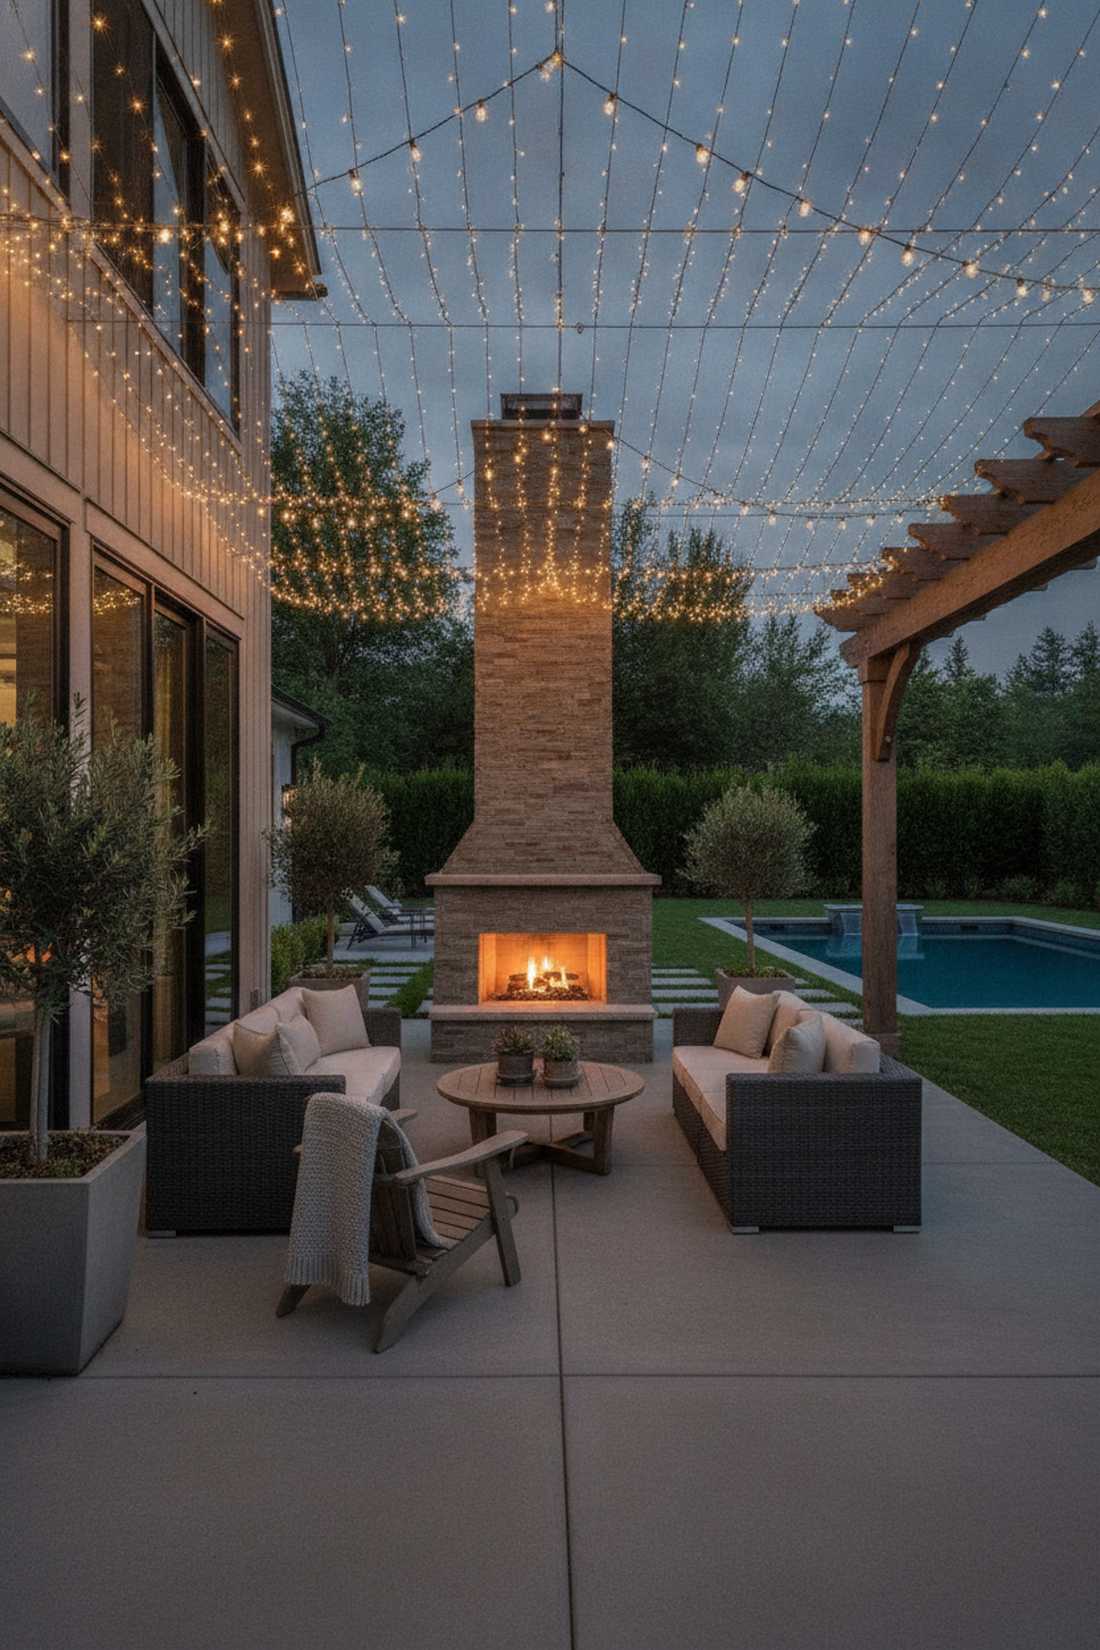
38. Three-Tier Graduated Canopy
A mind-blowing 3D lighting environment that flawlessly mimics a magical forest ceiling. This multi-level dimensional draping layout is normally reserved exclusively for elite, show-stopping event spaces.
Single flat layers look completely unimpressive, but drastically varying the heights creates extreme depth that tricks the eye into perceiving a massive, expensive installation. Snagging a bulk pack of variable-length commercial stringers provides the diverse layers needed without patching ugly extension cables.
Budget $100–$250 for this ultimate luxury setup. Save this to your dream patio board!
- Key Materials: Varied length drops, heavy tension cables, splitters
- Vibe / Style: Elite immersive woodland
- Difficulty: Advanced
- Budget Breakdown: Cables: $60 | Lights: $130
- Creator’s Tip: Set the highest layer at 10 feet, the middle at 8 feet, and let the lowest tier drop to 7 feet for perfect visual depth.
- Smart Sourcing: Variable-length commercial stringers (bulk pack) and heavy-duty suspension grid hardware.
39. Mixed Bulb Temperature Blending
A richly textured, pulsing glow that dances gracefully between crisp moonlight and warm firelight. The dual-tone color temperature mix violently breaks the design rules and delivers massive aesthetic rewards.
Monotone lighting often feels incredibly flat and artificial, but mixing crisp cool white peaks with warm golden drops creates an incredibly sophisticated depth. Specialized color-selectable outdoor lighting kits allow you to fine-tune the exact ratio of warm to cool without buying double the strings.
Master color theory in your yard for $60–$130.
- Key Materials: Color-adjustable LEDs, smart remote
- Vibe / Style: Sophisticated textured ambiance
- Difficulty: Easy
- Budget Breakdown: Smart lights: $80 | Controller: $20
- Creator’s Tip: Put the cool-white lights on the absolute highest structural peaks to mimic real starlight, and keep the warm-white bulbs down low near the seating.
- Smart Sourcing: Color-selectable smart string kits and multi-zone lighting remote controllers.
40. Opacity Variation Through Fabric Layers
Mysterious, glowing clouds of varying light intensity drifting above your patio lounge. The multi-density fabric diffusion trick creates a high-fashion, custom-designed ambiance that feels incredibly exclusive.
Using uniform fabric everywhere is safe and boring, but alternating sheer voile with heavy canvas creates mesmerizing bright and dim zones that look hyper-custom. Purchasing diverse outdoor-rated sheer canopy fabrics in bulk ensures you get the massive texture contrast without suffering through mildew rot.
Design this soft-focus, VIP masterpiece for $80–$160. Pin this for ultimate luxury!
- Key Materials: Mixed sheer/canvas fabrics, bright LED strings
- Vibe / Style: VIP custom-filtered lounge
- Difficulty: Intermediate
- Budget Breakdown: Mixed fabrics: $90 | Lights: $50
- Creator’s Tip: Place your brightest, highest-lumen bulbs directly behind the thickest canvas fabric to create an incredibly soft, deeply glowing radiator effect.
- Smart Sourcing: Mixed outdoor canopy fabrics (bulk pack) and high-lumen commercial LED strings.
This final group separates the amateur backyard decorators from the true outdoor design masters…
41. Kinetic Element Integration
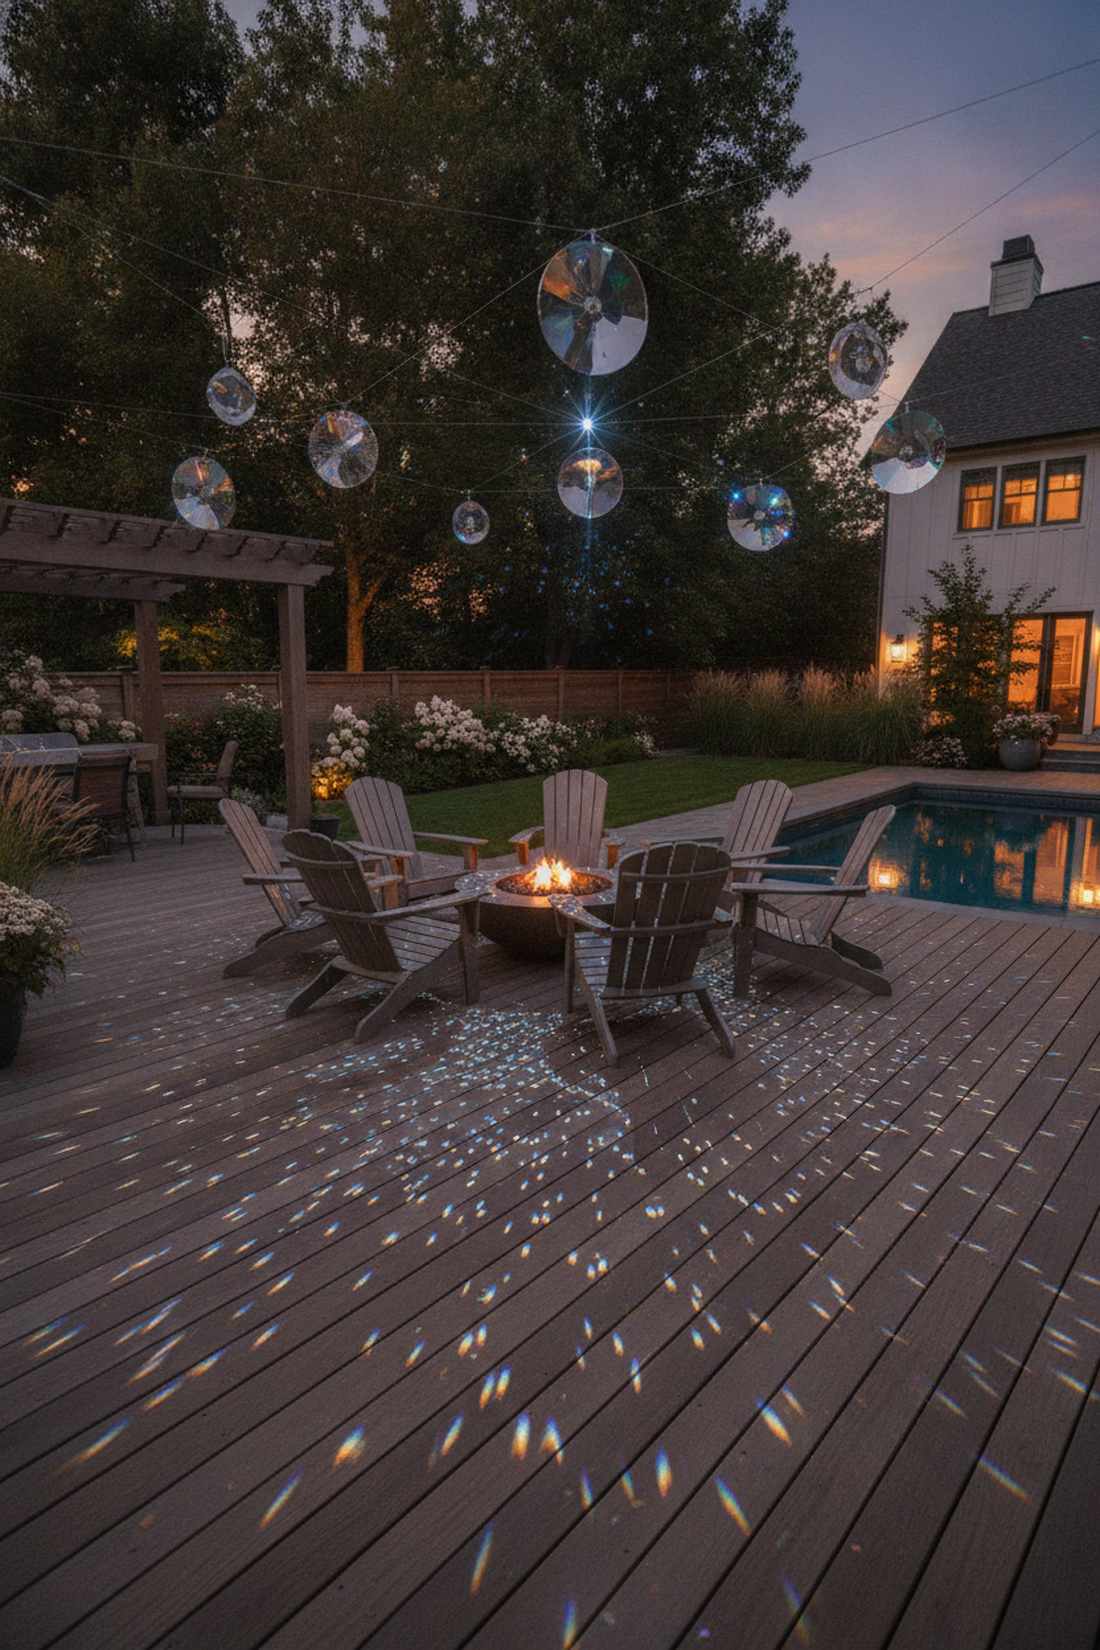
A shimmering, continuously shifting canopy that breathes directly with the wind. The reflective motion lighting addition miraculously brings a completely static installation to vibrant, dancing life.
Stationary glowing lights are pretty, but bouncing them off moving crystals or chimes scatters dynamic, sparkling reflections across the entire yard. Integrating acrylic prism catchers or mirrored spinners absolutely amplifies a cheap light string into a dazzling, expensive-looking display.
Add kinetic energy for just an extra $20–$45.
- Key Materials: Hanging prisms, mirrored spinners, spotlights
- Vibe / Style: Dancing reflective magic
- Difficulty: Easy
- Budget Breakdown: Prisms: $20 | Spinners: $15
- Creator’s Tip: Hang exactly three large acrylic prisms directly in the path of your brightest bulbs to create a gentle, rotating disco-ball effect on the patio floor.
- Smart Sourcing: Acrylic wind-spinner prisms (bulk pack) and targeted outdoor micro-spotlights.
42. Synchronized Dimming Zones
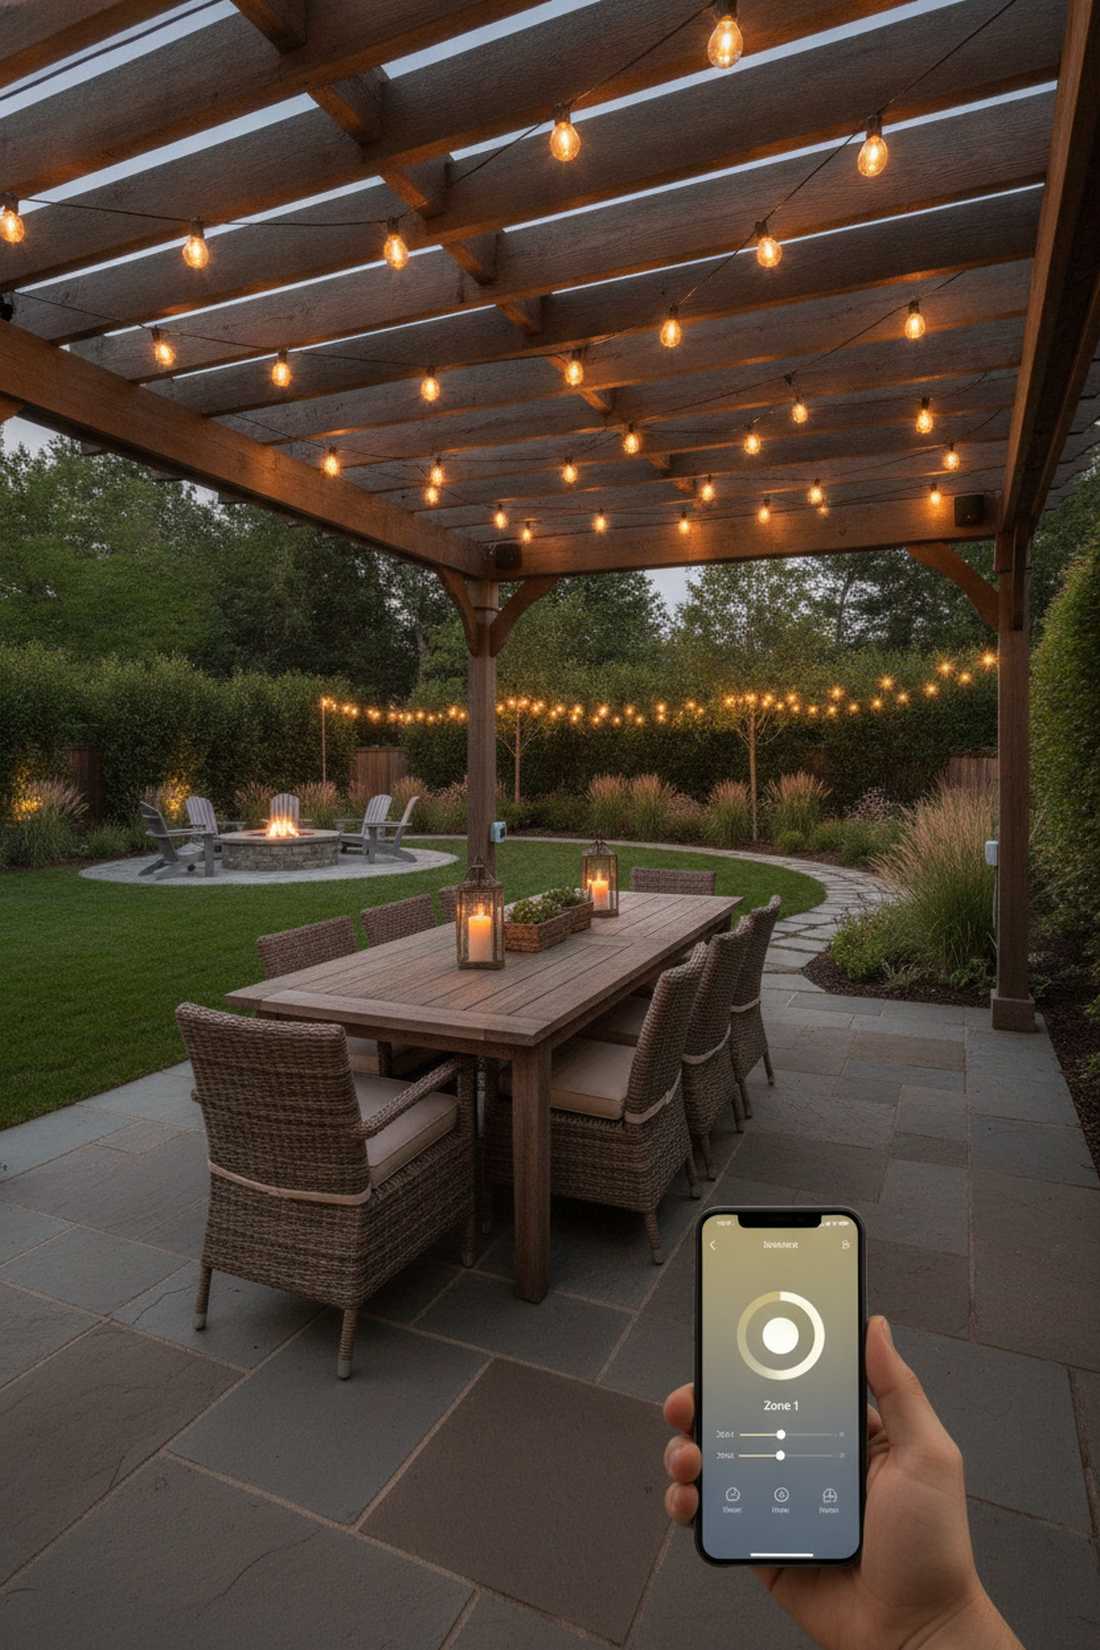
A highly responsive, intelligent environment that shifts the mood at the push of a button. The smart-controlled multi-zone canopy is the ultimate required luxury for tech-savvy backyard entertainers.
Blasting full, blinding brightness all night completely kills the relaxed mood, but mapping dimmable zones lets you lower the dining lights while boosting the perimeter. An outdoor-rated smart plug system with specific zone control is completely game-changing for effortlessly managing massive yard setups.
Wire up an intelligent, smart-dimming canopy for $70–$140.
- Key Materials: Smart outdoor plugs, dimmable string bulbs
- Vibe / Style: Intelligent modern luxury
- Difficulty: Intermediate
- Budget Breakdown: Smart plugs: $45 | Dimmable lights: $65
- Creator’s Tip: Group your dining lights into “Zone 1” and edge lights into “Zone 2” on your phone app so you can dim the eating area independently.
- Smart Sourcing: Outdoor-rated smart plug controllers and app-controlled dimmable light starter kits.
43. Focal Point Spotlight Accent
A dramatic, brilliant pool of light centered exactly where the party peaks. The high-density accent cluster guarantees your dining table looks like a flawless lifestyle magazine cover.
An even spread of light is nice, but violently tripling the bulb count right over the main gathering spot commands absolute, undeniable attention. Utilizing a heavy-duty multi-strand splitter allows you to densely pack the center ceiling without dangerously overloading the electrical circuit.
Create a brilliant focal spotlight effect for $40–$85. Save this brilliant hosting trick!
- Key Materials: High-density fairy clusters, power splitter
- Vibe / Style: Dramatic editorial lighting
- Difficulty: Easy
- Budget Breakdown: Extra lights: $35 | Splitter: $20
- Creator’s Tip: Use standard 12-inch spacing everywhere else, but compress the spacing to just 4 inches directly over your dining table for extreme contrast.
- Smart Sourcing: High-density fairy cluster kits and waterproof outdoor multi-splitters.
44. Seasonal Swap Infrastructure
The ultimate modular, brilliant backbone for a yard that changes heavily with the holidays. The permanent adaptable lighting framework is the absolute smartest long-term investment you can possibly make.
Re-hanging wires every single season is an absolute nightmare, but installing a fixed heavy-wire track means you just clip on new colors in mere minutes. Industrial-grade tension wire kits and heavy-duty carabiner clips make swapping out your summer whites for winter festival colors incredibly fast and totally painless.
Build the ultimate modular rig for $80–$150.
- Key Materials: Permanent steel cables, carabiner clips, swappable lights
- Vibe / Style: Highly functional modular framework
- Difficulty: Advanced initial setup
- Budget Breakdown: Cable framework: $70 | Quick-clips: $25
- Creator’s Tip: Leave the heavy steel cables up permanently year-round, and strictly use marine-grade carabiners to snap the light strings on and off in seconds.
- Smart Sourcing: Permanent stainless tension grids and marine-grade stainless carabiner clip packs.
Bring Your Outdoor Vision to Life
A thoughtfully designed fairy lights canopy transforms standard gazebos, patios, and temporary party setups into high-end, enchanting outdoor sanctuaries that dramatically extend your living space into the night. The 44 exact installation blueprints shared here provide the absolute most reliable methods for everything from quick, budget-friendly weekend upgrades to elaborate, permanently wired architectural masterpieces. Start with a single structural layout that matches your backyard, then upgrade your materials with UV-resistant kits to ensure your investment actually lasts. We highly encourage experimenting with premium starter kits, high-density bulb clustering, and smart dimmers until you achieve the ultimate balance of flawless function and nighttime magic.
Frequently Asked Questions
What type of fairy lights work best for outdoor canopy installations?
Opting for IP65 waterproof fairy light kits is absolutely crucial for outdoor canopy survival. Cheap indoor sets will rust and fail, while commercial-grade, UV-coated outdoor patio lighting setups withstand intense sun and heavy rain. If you lack outdoor outlets, investing in a high-efficiency solar-powered fairy bundle completely eliminates dangerous extension cords. Always ensure your strings explicitly carry UL outdoor certification for maximum safety.
How many strands of fairy lights do I need for a standard 10×10 foot gazebo?
For a standard space, grabbing a bulk pack of 20-foot outdoor strings is the most cost-effective strategy. A 10×10 gazebo typically requires 8-12 premium strands for basic radial coverage, but dense parallel ceiling weaves easily require 15-20 strands for that premium, solid-glow aesthetic. Always calculate your exact distance and purposely add 20% extra length to account for the necessary suspension slack and decorative draping.
Can I leave outdoor fairy light canopies up year-round?
Yes, if you invest in commercial-grade UV-coated string lights and heavy-duty suspension grids. Cheap plastics crack in winter freezing, but premium waterproof kits are explicitly designed for permanent 365-day installation. Ensure your power sources are routed through a weatherproof GFCI smart plug. If you live in an extreme blizzard zone, using a quick-release carabiner system makes taking the delicate bulbs down incredibly fast before heavy snow hits.
What is the most secure way to hang fairy lights without damaging structures?
Skip cheap tape and immediately upgrade to heavy-duty outdoor adhesive hooks for damage-free masonry mounting. For massive overhead spans bridging empty space, a stainless steel tension cable kit is mandatory—it bears all the heavy wind weight so your delicate copper wires never snap. For wooden pergolas, utilizing UV-resistant zip ties around the beams ensures a secure, long-lasting grip without drilling holes into your expensive timber.
How do I create slack in fairy light strands for natural draping curves?
Professional designers strictly use pre-measured suspension wire systems to calculate the perfect drape. Add exactly 15-25% extra string length beyond the straight line measurement to force the wire into a gorgeous, natural parabolic curve. Secure both extreme ends first with heavy-duty anchor clips, then slowly release the center to form the swoop. Mark the lowest droop point with a piece of tape to ensure every parallel strand matches identically.