Elevating your outdoor space requires strategic christmas backyard decor that commands attention. Smart lighting arrangements and weather-resistant focal points instantly establish a high-end atmosphere. Learn to build these professional-grade setups using accessible materials.
Design Snapshot Key Principles
- Layered Lighting: Combine string lights, spotlights, and pathway illumination to create depth and visual interest throughout your backyard space.
- Focal Point Strategy: Establish one or two statement pieces that anchor your display and draw the eye through the landscape.
- Weather-Resistant Materials: Select outdoor-rated decorations and lighting systems designed to withstand winter conditions without compromising aesthetic appeal.
- Color Cohesion: Choose a unified palette—traditional red and green, elegant white and gold, or icy blue and silver—to create a polished, professional look.
Illuminated Pathways and Walkways
Pathway lighting serves dual purposes in backyard christmas displays—it guides guests safely through your outdoor space while establishing visual flow throughout the landscape. Professional designers prioritize pathway illumination as the foundation for comprehensive lighting schemes.
1. Mason Jar Candle Luminaries
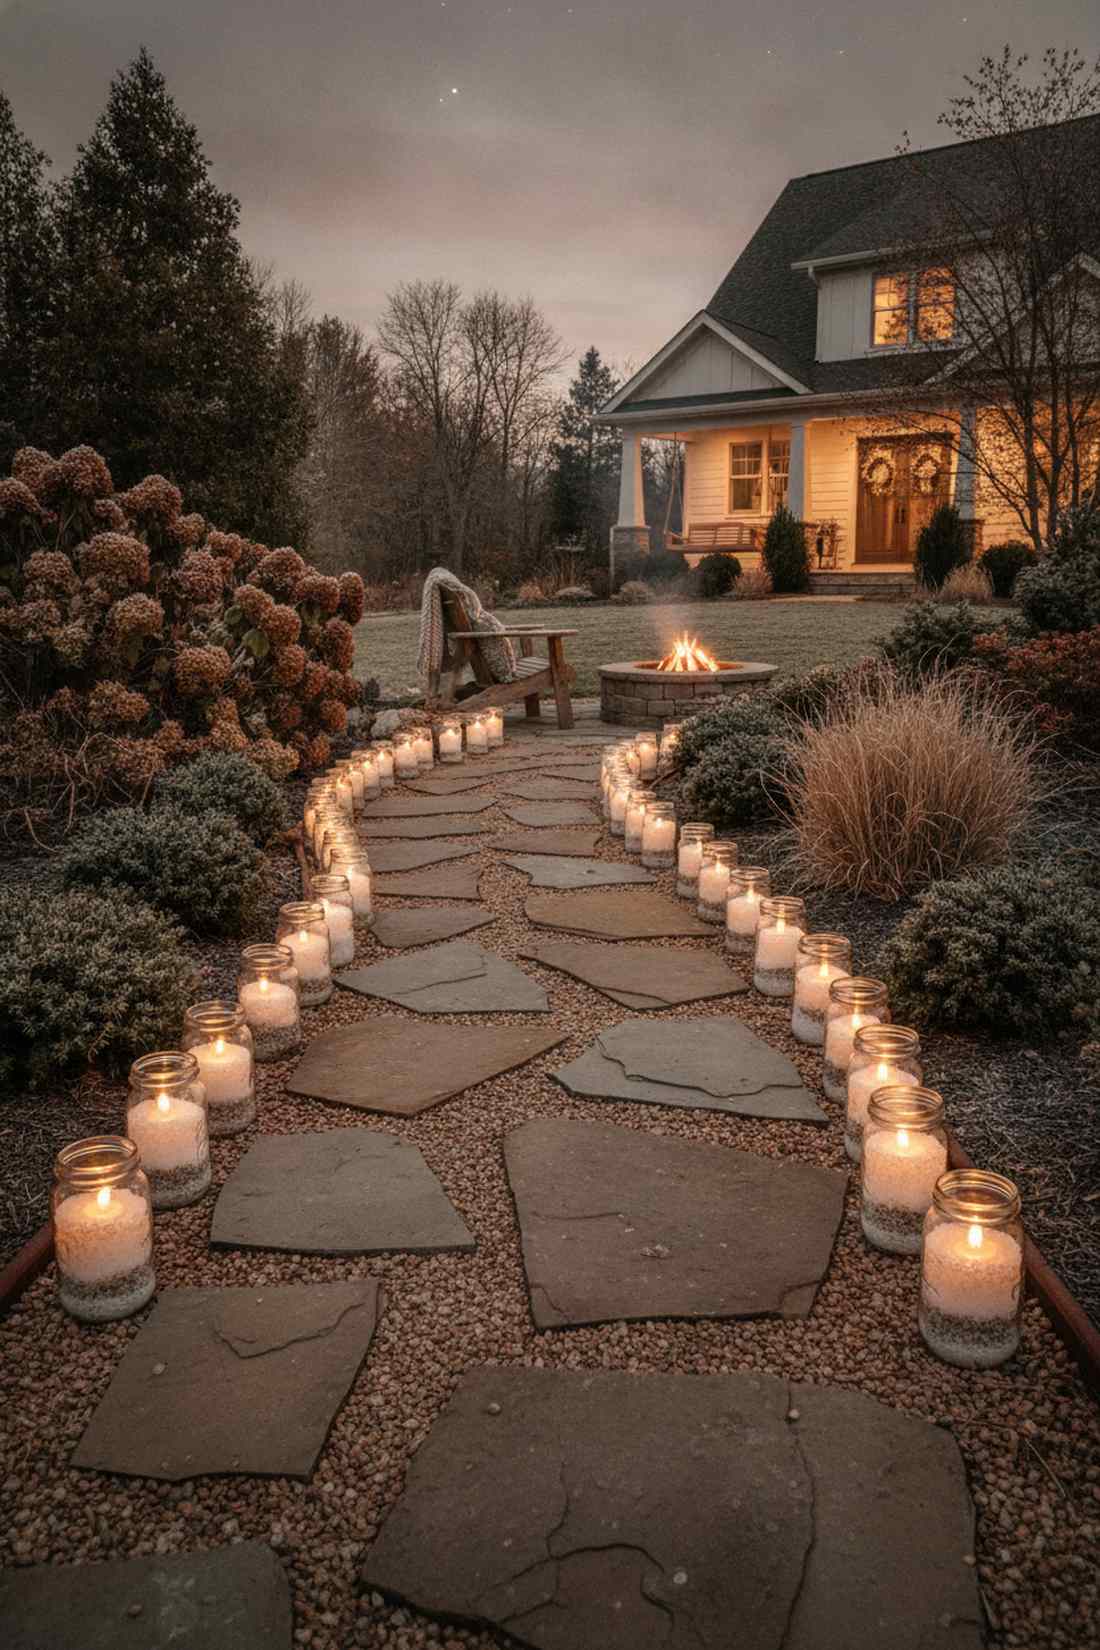
This setup feels like a nostalgic memory you can actually walk through. Creating a frosted glass pathway border works exceptionally well for curved garden walkways where rigid lights fail.
Swapping standard solar stakes for this custom layout gives a designer-level finish that outperforms basic neighborhood setups. Adding heavy-duty outdoor flameless candles guarantees the look survives harsh winter winds.
You can easily pull this off for around $25–$40 depending on your walkway length. Save this to your DIY winter garden board for easy weekend reference.
- Key Materials: Glass mason jars, Epsom salt, outdoor-rated LED candles.
- Vibe / Style: Rustic vintage charm.
- Difficulty: Very easy beginner setup.
- Budget Breakdown: Materials: $20 | Lighting: $15.
- Creator’s Tip: Weigh down the base with actual gravel under the salt to prevent tipping.
- Smart Sourcing: bulk pack clear acrylic jars and weatherproof LED tea light kits.
2. String Light Arches
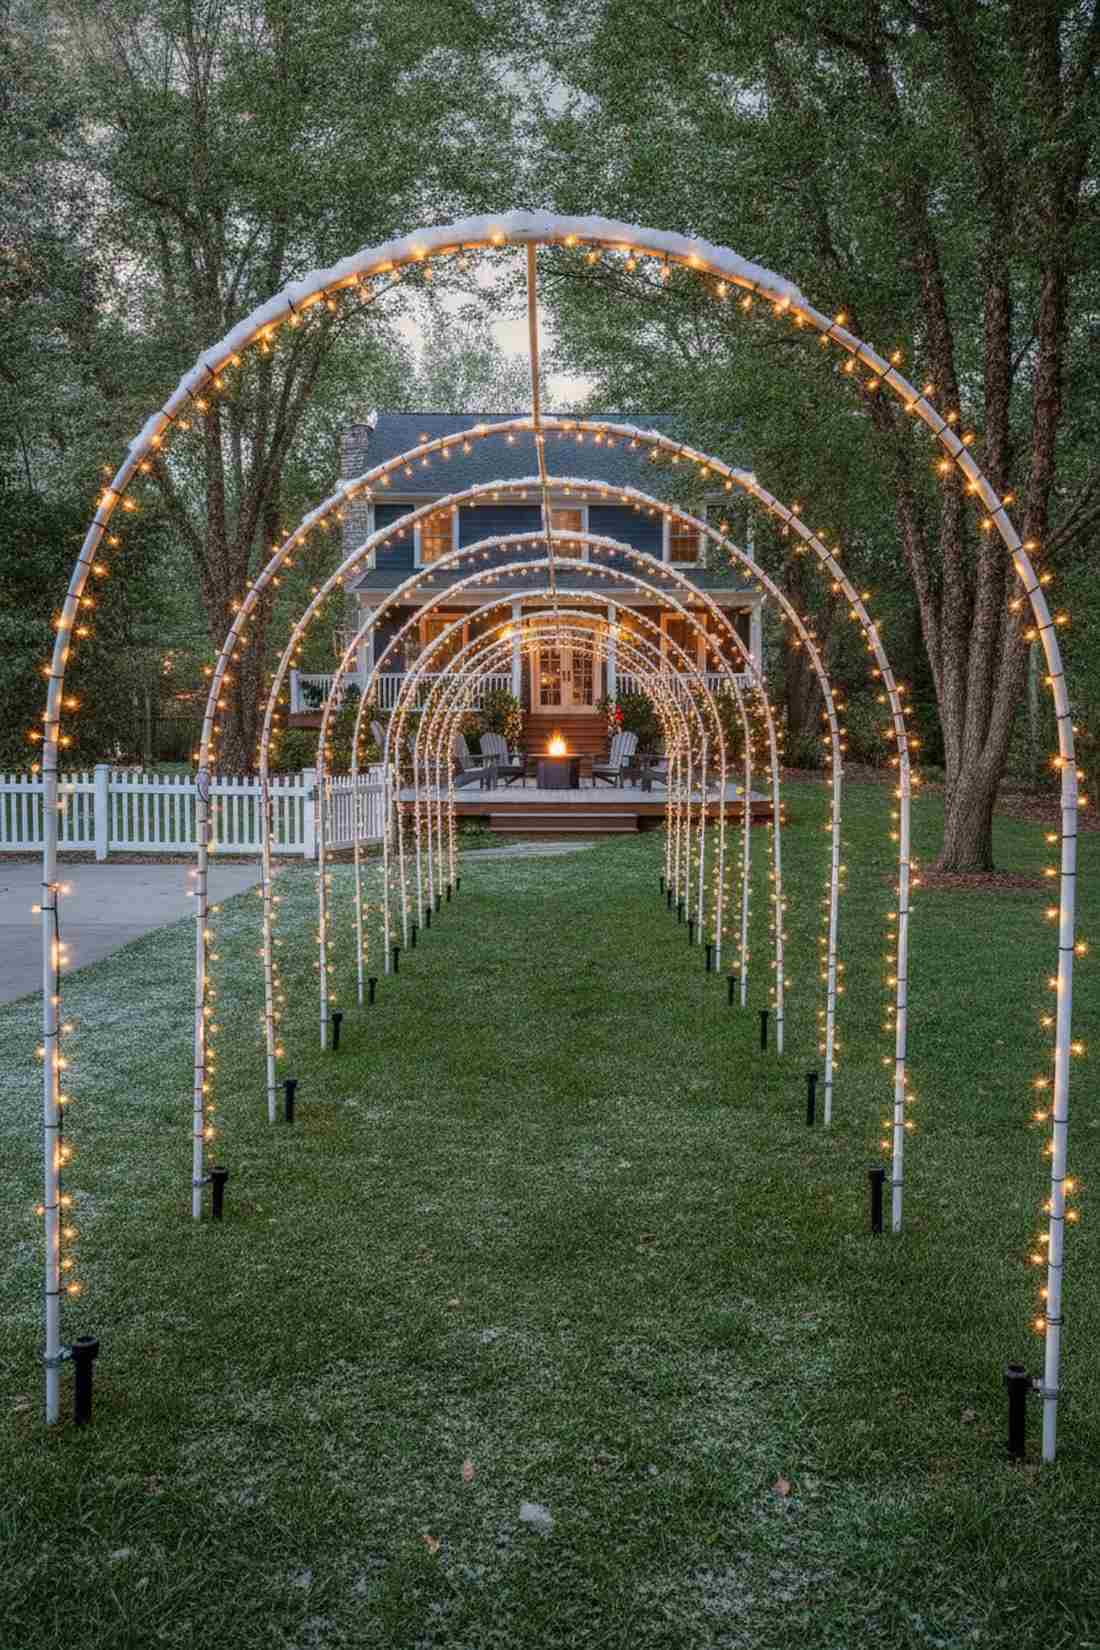
Stepping under these glowing arches feels like crossing into a magical portal. A vibrant illuminated walkway tunnel is perfect for leading guests from the driveway straight into the backyard.
Most people overpay for pre-built tunnels, but this DIY PVC method looks far more expensive than it actually is. Utilizing commercial-grade outdoor string lights ensures the bulbs stay bright even wrapped tightly around frames.
Expect to spend about $45–$70 to create a decent length corridor. It’s a fast upgrade that completely changes the spatial vibe of your yard.
- Key Materials: Flexible PVC piping, heavy-duty ground stakes, string lights.
- Vibe / Style: Immersive theme park energy.
- Difficulty: Moderate weekend project.
- Budget Breakdown: Frame: $25 | Lights: $35.
- Creator’s Tip: Use zip ties every 12 inches to keep light strands from sagging in the snow.
- Smart Sourcing: UV-coated commercial string lights (100ft) and heavy-duty zip tie bulk packs.
3. Lighted Orbs Along Pathways
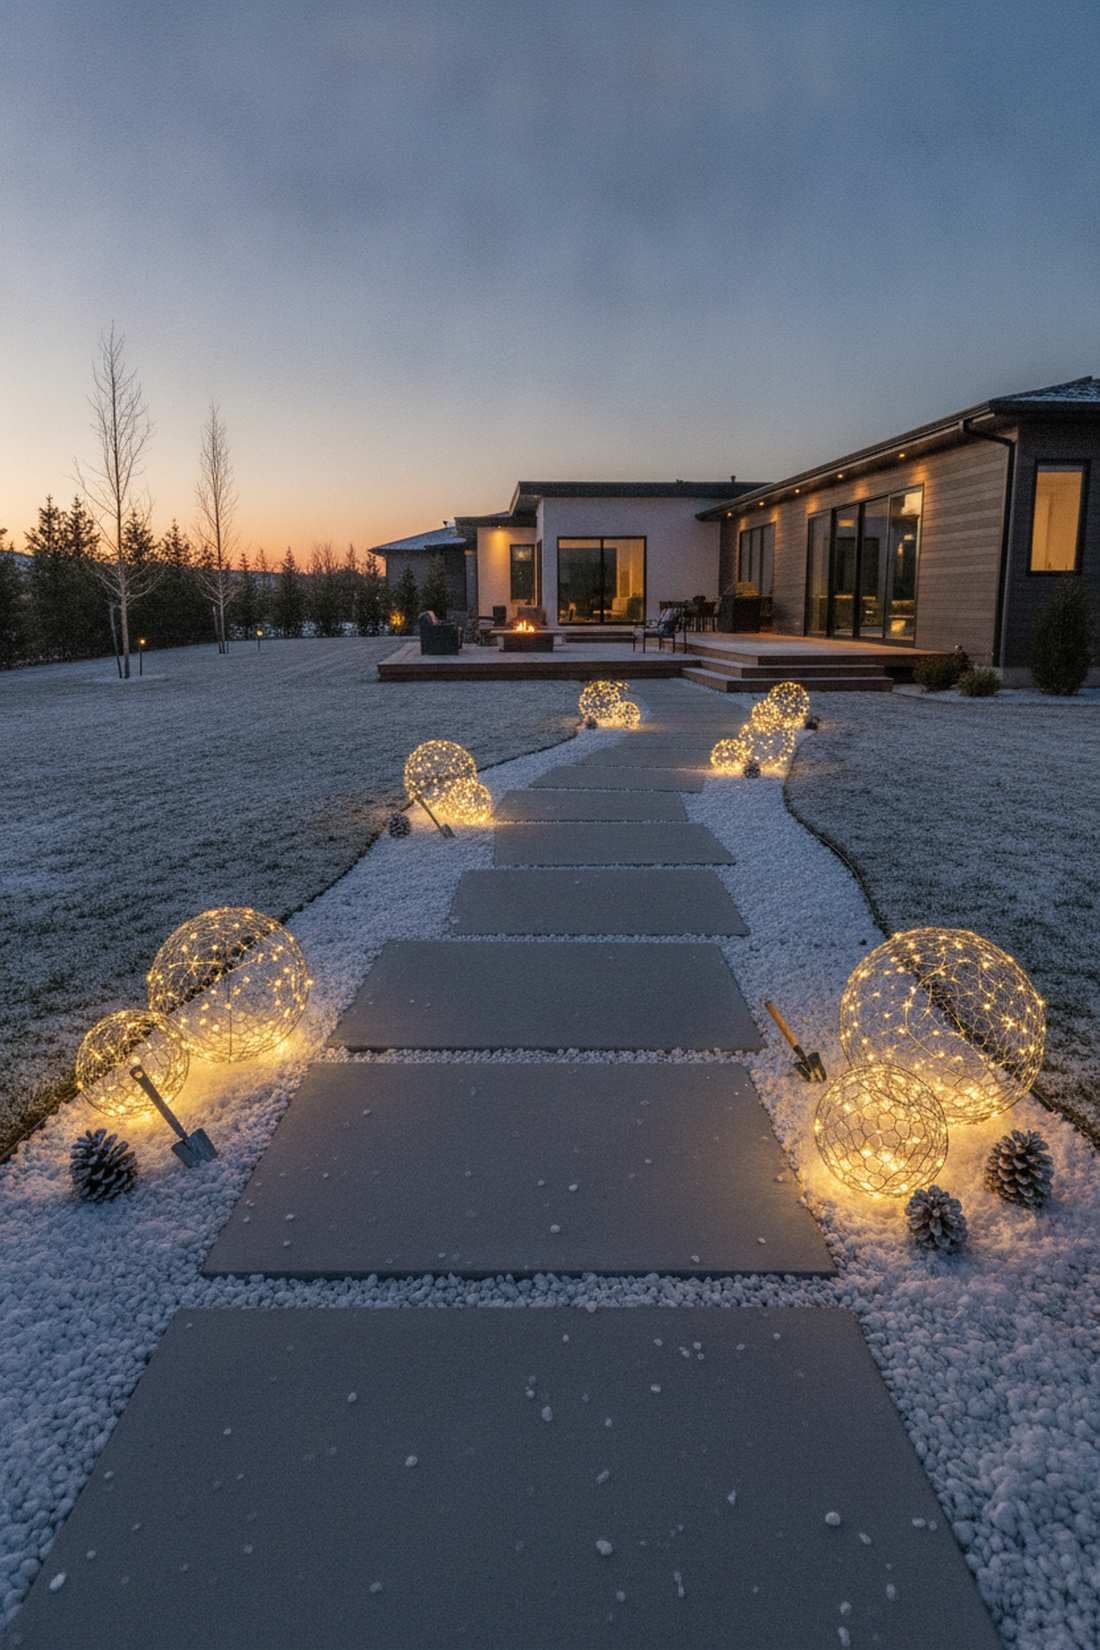
This aesthetic creates an icy, modern glow that looks straight out of an upscale hotel courtyard. Integrating glowing landscape spheres is ideal for bordering modern concrete patios or flat lawns.
Layering varied sizes of these spheres delivers a surprisingly premium look that instantly elevates flat terrain. Pairing them with miniature garden supplies or artificial snow blankets amplifies the expensive aesthetic.
A set of three handmade orbs will run you roughly $30–$50. Pin this if you’re planning a modern backyard upgrade this season.
- Key Materials: Chicken wire, wire cutters, warm LED fairy lights.
- Vibe / Style: Contemporary winter minimalism.
- Difficulty: Moderate crafting required.
- Budget Breakdown: Wire: $15 | Lighting: $25.
- Creator’s Tip: Wear thick leather gloves when shaping the wire to avoid sharp edges.
- Smart Sourcing: pre-cut galvanized wire mesh and outdoor battery-pack LED strings.
4. Icicle Pathway Lights
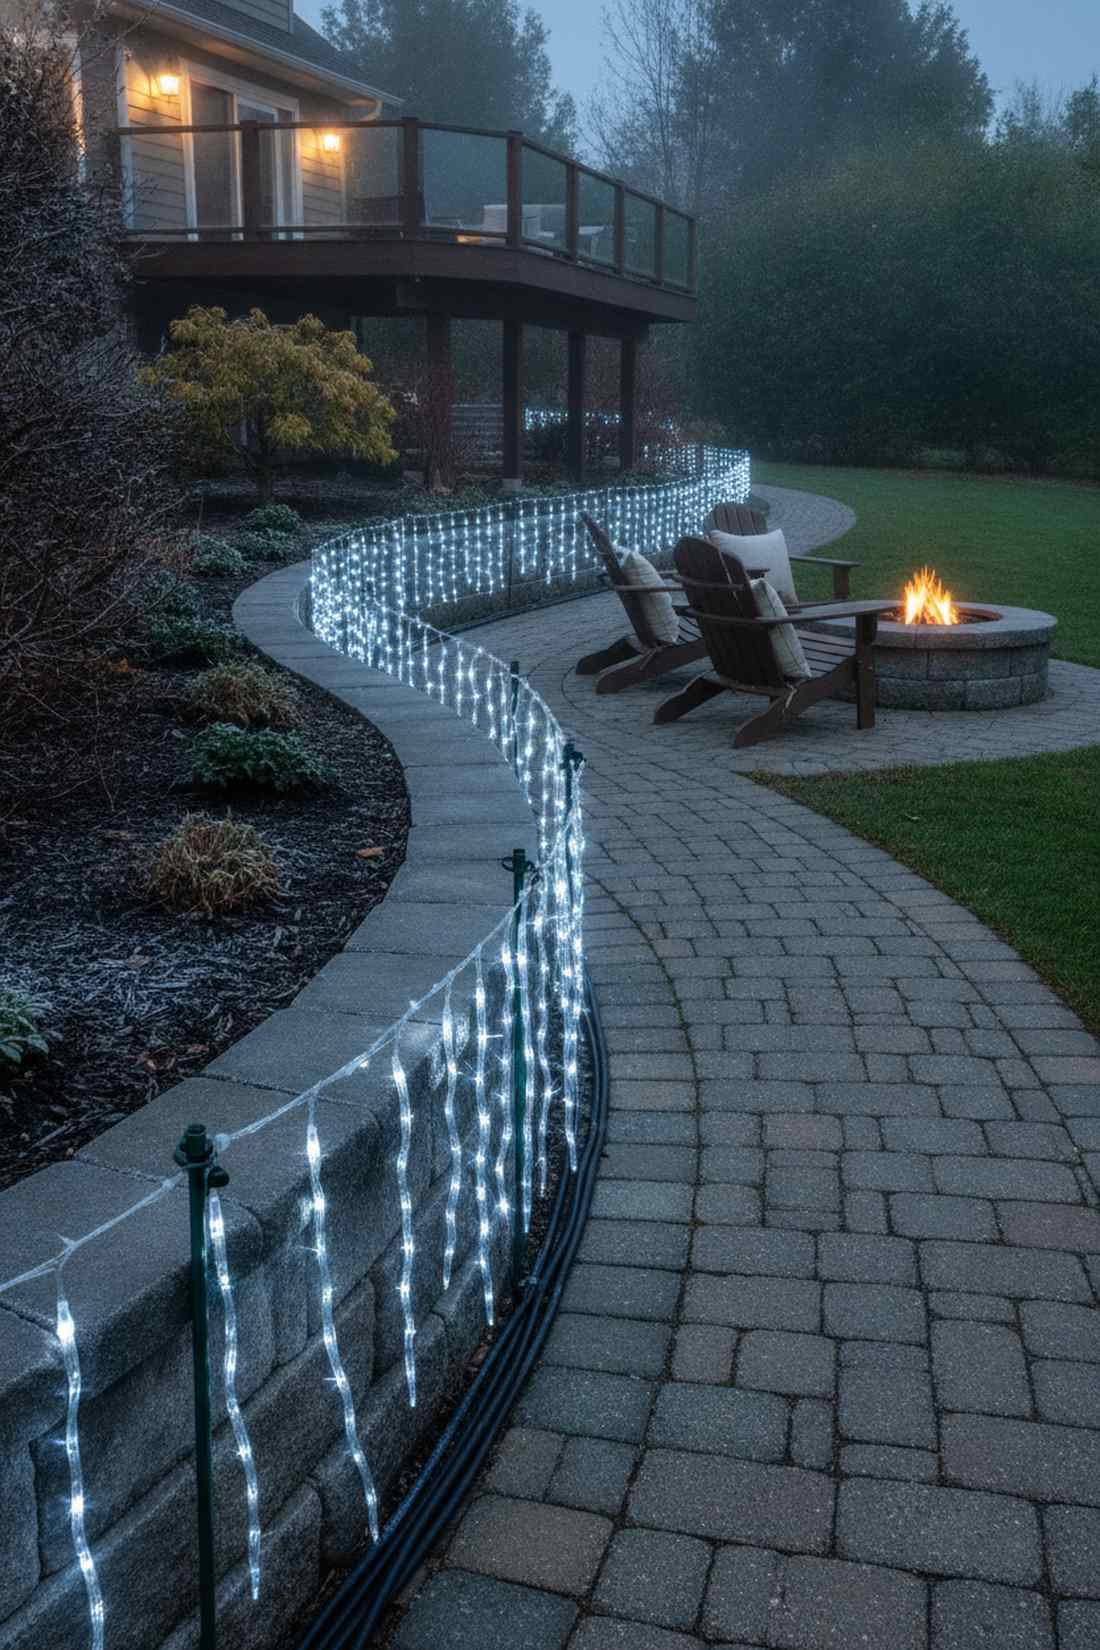
These crisp, dropping lights feel like a frozen forest captured in time. Deploying dangling icicle edge lighting works flawlessly along elevated garden beds or retaining walls.
Instead of throwing these on a roofline, bringing them down to the pathway creates a controversial but brilliant depth effect. Sourcing weatherproof extension cables is critical to keep the ground-level connections safe from puddles.
You can light up a 20-foot border for about $35. Highly recommended for a quick, high-impact weekend win.
- Key Materials: Icicle light strands, metal garden stakes, zip ties.
- Vibe / Style: Classic icy elegance.
- Difficulty: Quick 30-minute setup.
- Budget Breakdown: Lights: $25 | Stakes: $10.
- Creator’s Tip: Overlap the strands slightly so there are no awkward dark gaps between sets.
- Smart Sourcing: heavy-duty waterproof extension cords and outdoor-rated icicle light kits.
Most homeowners get outdoor paths completely wrong… until they try the exact high-contrast layout coming up next.
5. Christmas Tree Path Lights
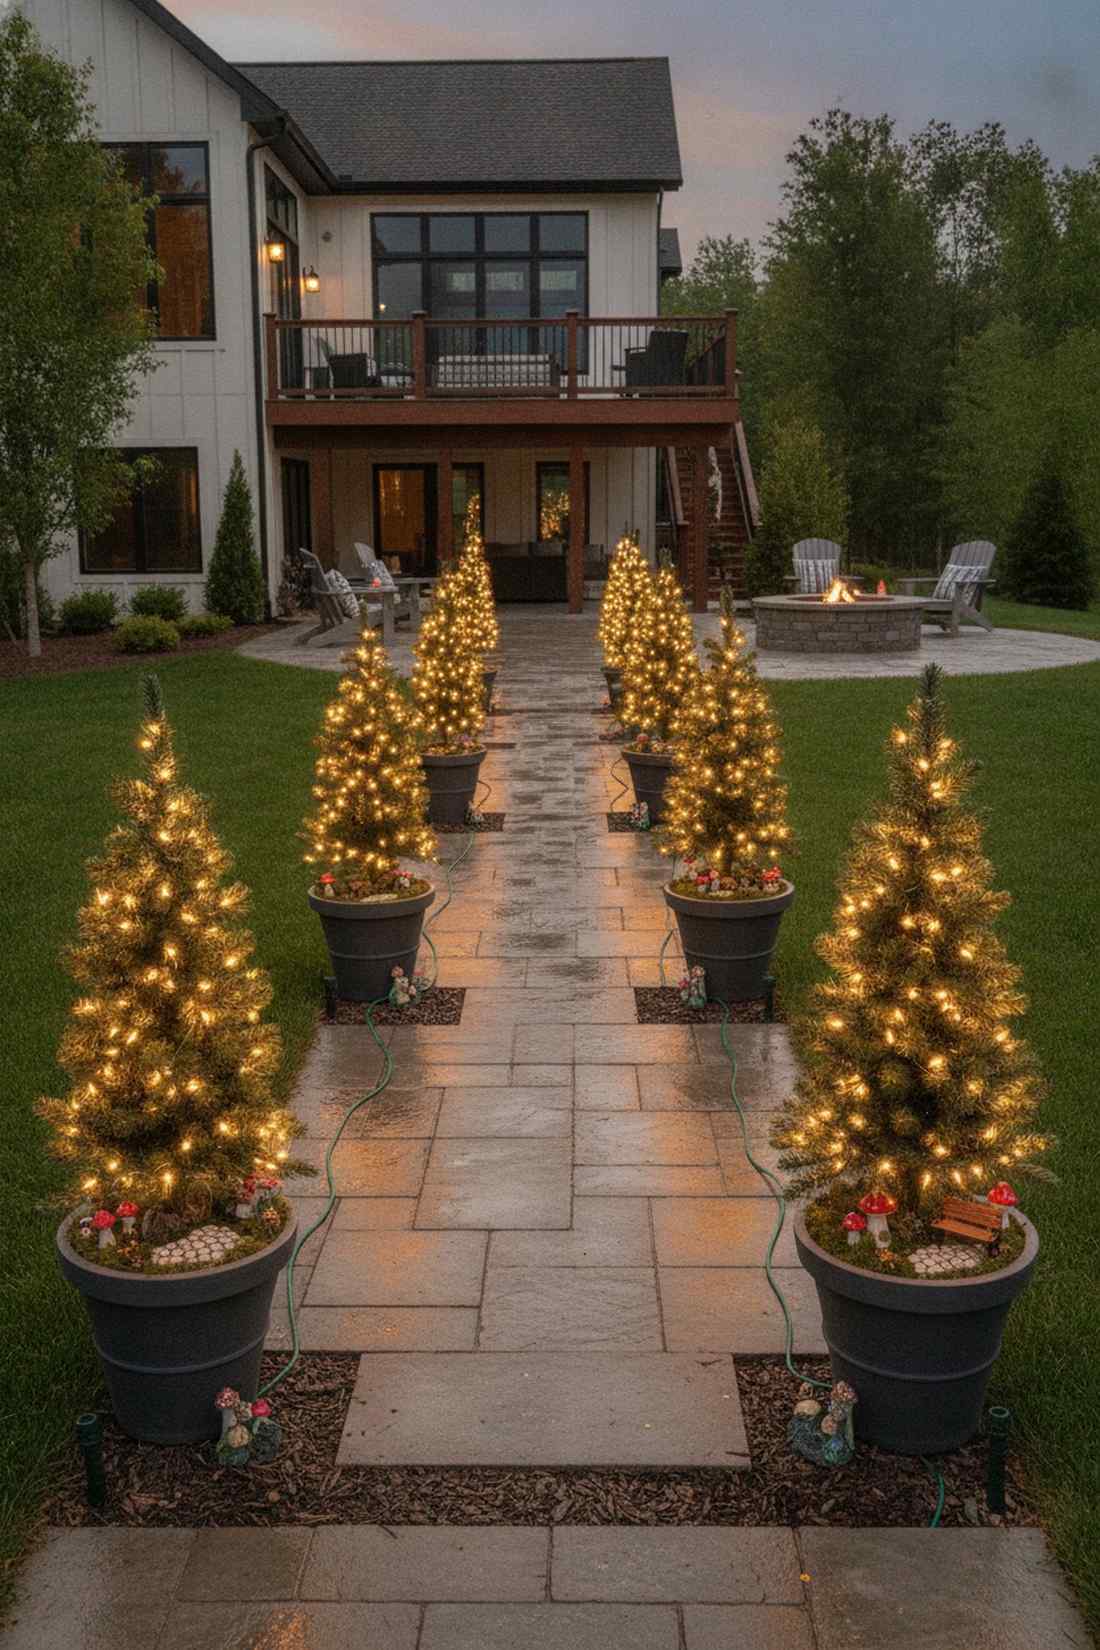
Walking past these feels like wandering through a miniature enchanted alpine village. A miniature tree-lined avenue is the perfect framing technique for long, straight stone walkways.
Using artificial foliage instead of real bushes guarantees a designer-level finish that won’t require watering or sweeping up dead needles. Integrating outdoor fairy garden kits at the base of each tree adds a hidden layer of detail for guests.
Setting up a row of six small trees costs roughly $60–$100. Save this idea for when you want maximum curb appeal with minimal upkeep.
- Key Materials: Pre-lit mini artificial trees, heavy base pots, extension cords.
- Vibe / Style: Upscale botanical garden.
- Difficulty: Easy plug-and-play.
- Budget Breakdown: Mini Trees: $75 | Anchors: $15.
- Creator’s Tip: Use U-shaped tent stakes over the base of the pots so the wind doesn’t knock them over.
- Smart Sourcing: pre-lit UV-resistant mini evergreens and heavy-duty steel landscape staples.
6. Lantern-Lined Walkways
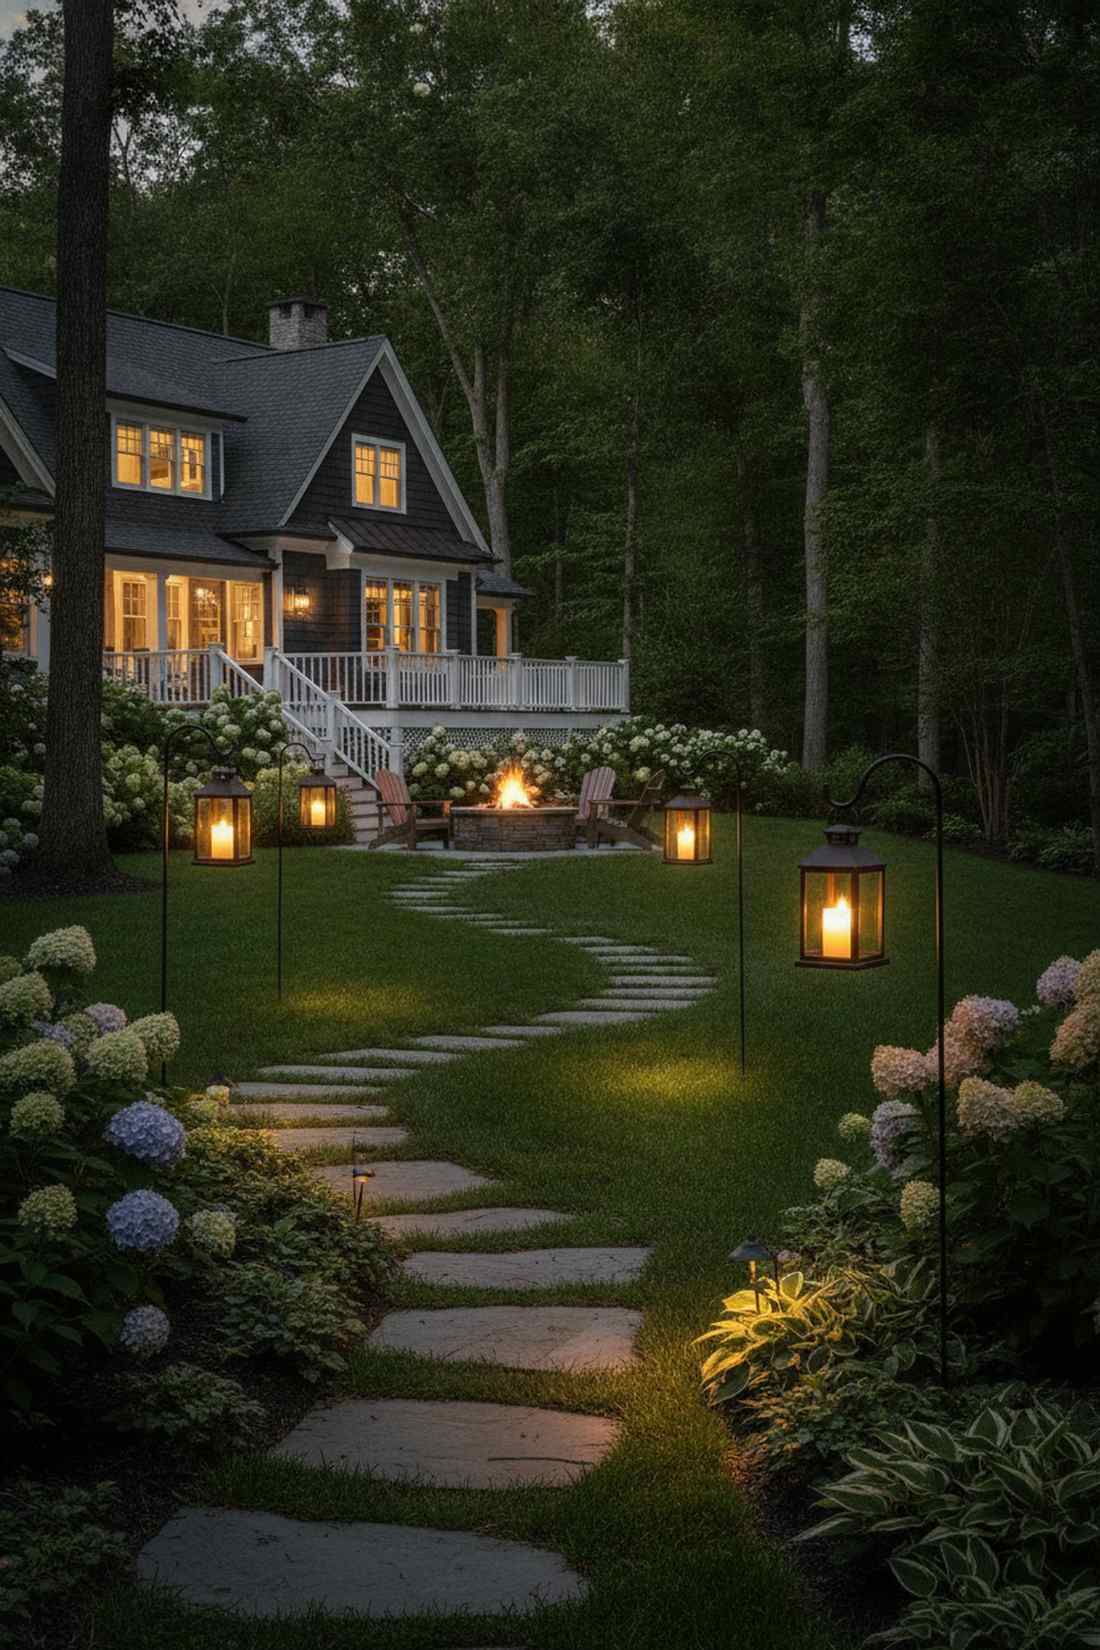
This layout gives off the cozy, historic charm of a 19th-century street corner. Suspending elevated glowing lanterns works beautifully to illuminate dark backyard corners without blinding your guests.
Skipping cheap plastic for genuine metal housings creates a focal point that looks incredibly high-end during the day and night. Investing in automated timer systems ensures your pathway is magically lit before you even get home.
A solid set of four lanterns on hooks will cost about $50–$80. It’s an effortless addition that completely transforms plain grass borders.
- Key Materials: Shepherd’s hooks, metal lanterns, outdoor pillar candles.
- Vibe / Style: Traditional farmhouse cozy.
- Difficulty: Simple ground installation.
- Budget Breakdown: Hooks: $20 | Lanterns: $40.
- Creator’s Tip: Stagger the hooks in a zig-zag pattern rather than a straight line for better light distribution.
- Smart Sourcing: rust-proof steel shepherd hooks (bulk pack) and weather-sealed automated timer candles.
7. Pinecone Luminaries
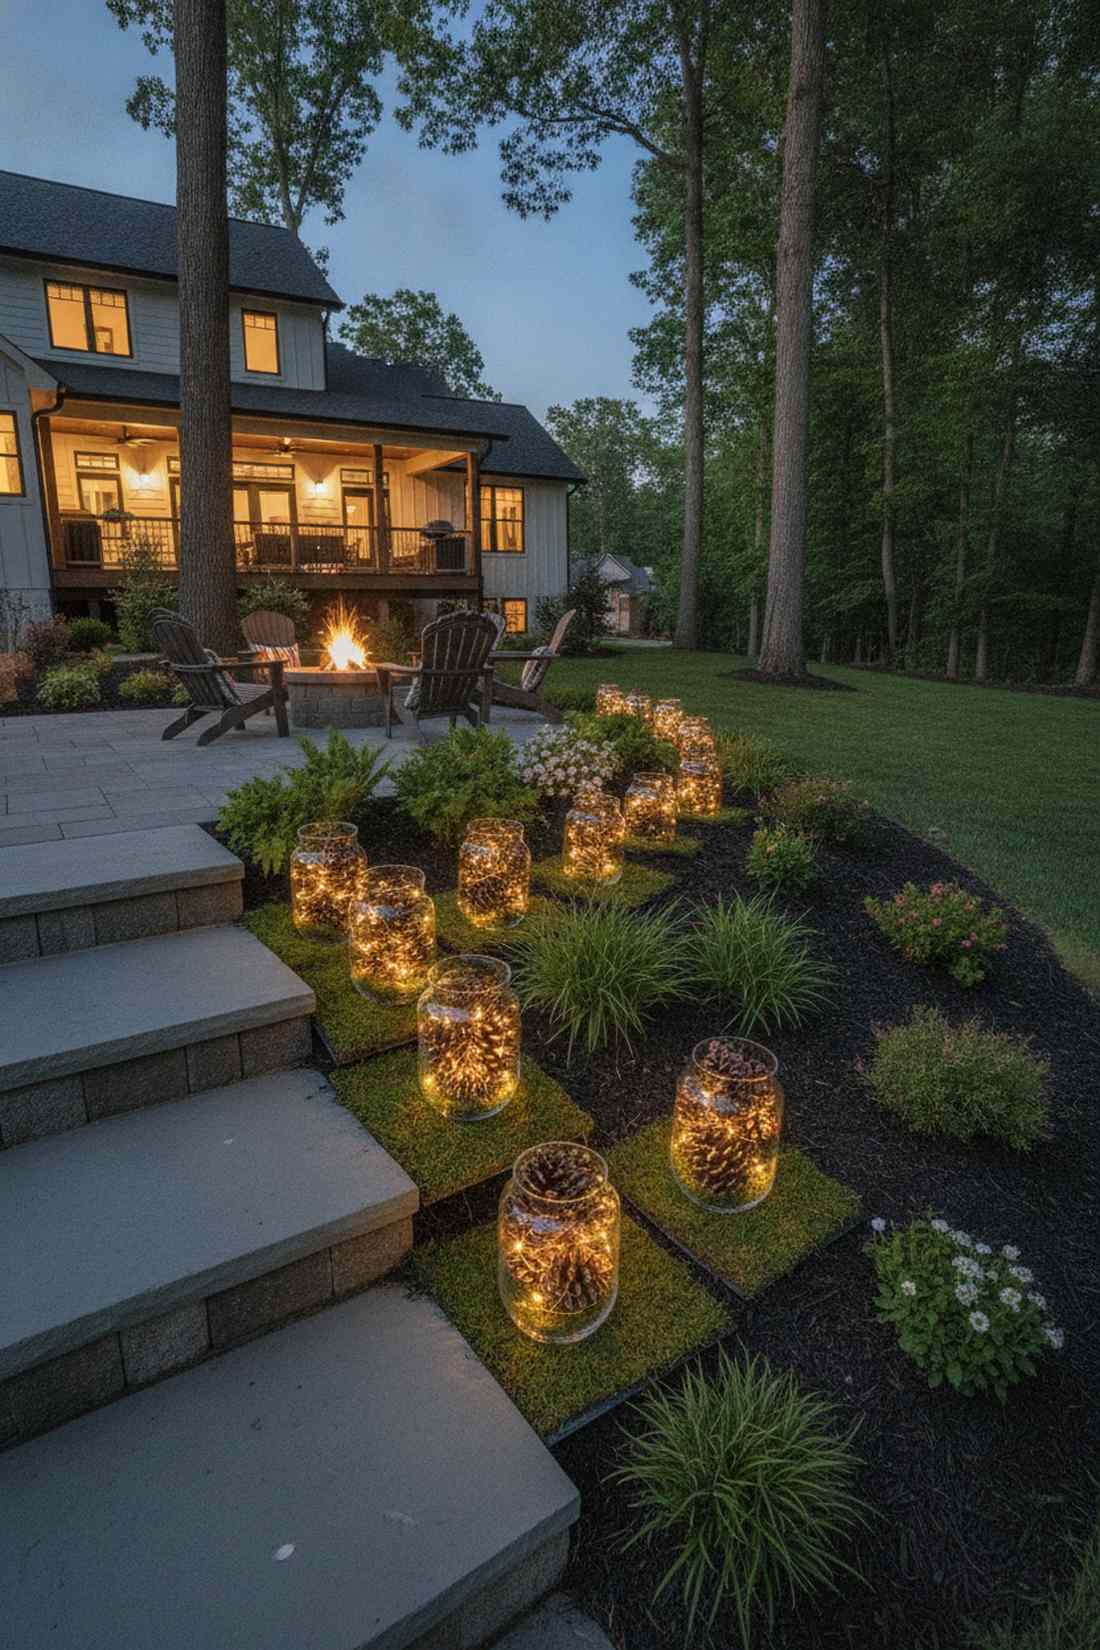
This rustic setup feels like a cozy cabin retreat right in your suburban yard. Crafting a natural illuminated ground border is exceptional for blending harsh concrete steps into natural garden soil.
Pairing raw textures with micro-LEDs fools guests into thinking you bought these at an expensive boutique. Sourcing premium terrarium accessories or preserved moss around the base hides the battery packs flawlessly.
You can create a dozen of these for under $20. Pin this to your budget-friendly holiday craft board.
- Key Materials: Foraged pinecones, copper wire string lights, clear vases.
- Vibe / Style: Organic woodland retreat.
- Difficulty: Very easy beginner craft.
- Budget Breakdown: Lights: $15 | Pinecones: Free.
- Creator’s Tip: Bake wild pinecones at 200°F for 30 minutes to kill bugs before bringing them near your patio.
- Smart Sourcing: copper wire micro-LED string lights and pre-cut preserved moss sheets.
Statement Lighting Installations
Large-scale lighting features establish visual hierarchy and create memorable focal points within backyard displays. These installations anchor your design and provide reference points that organize smaller decorative elements.
8. Illuminated Wireframe Displays
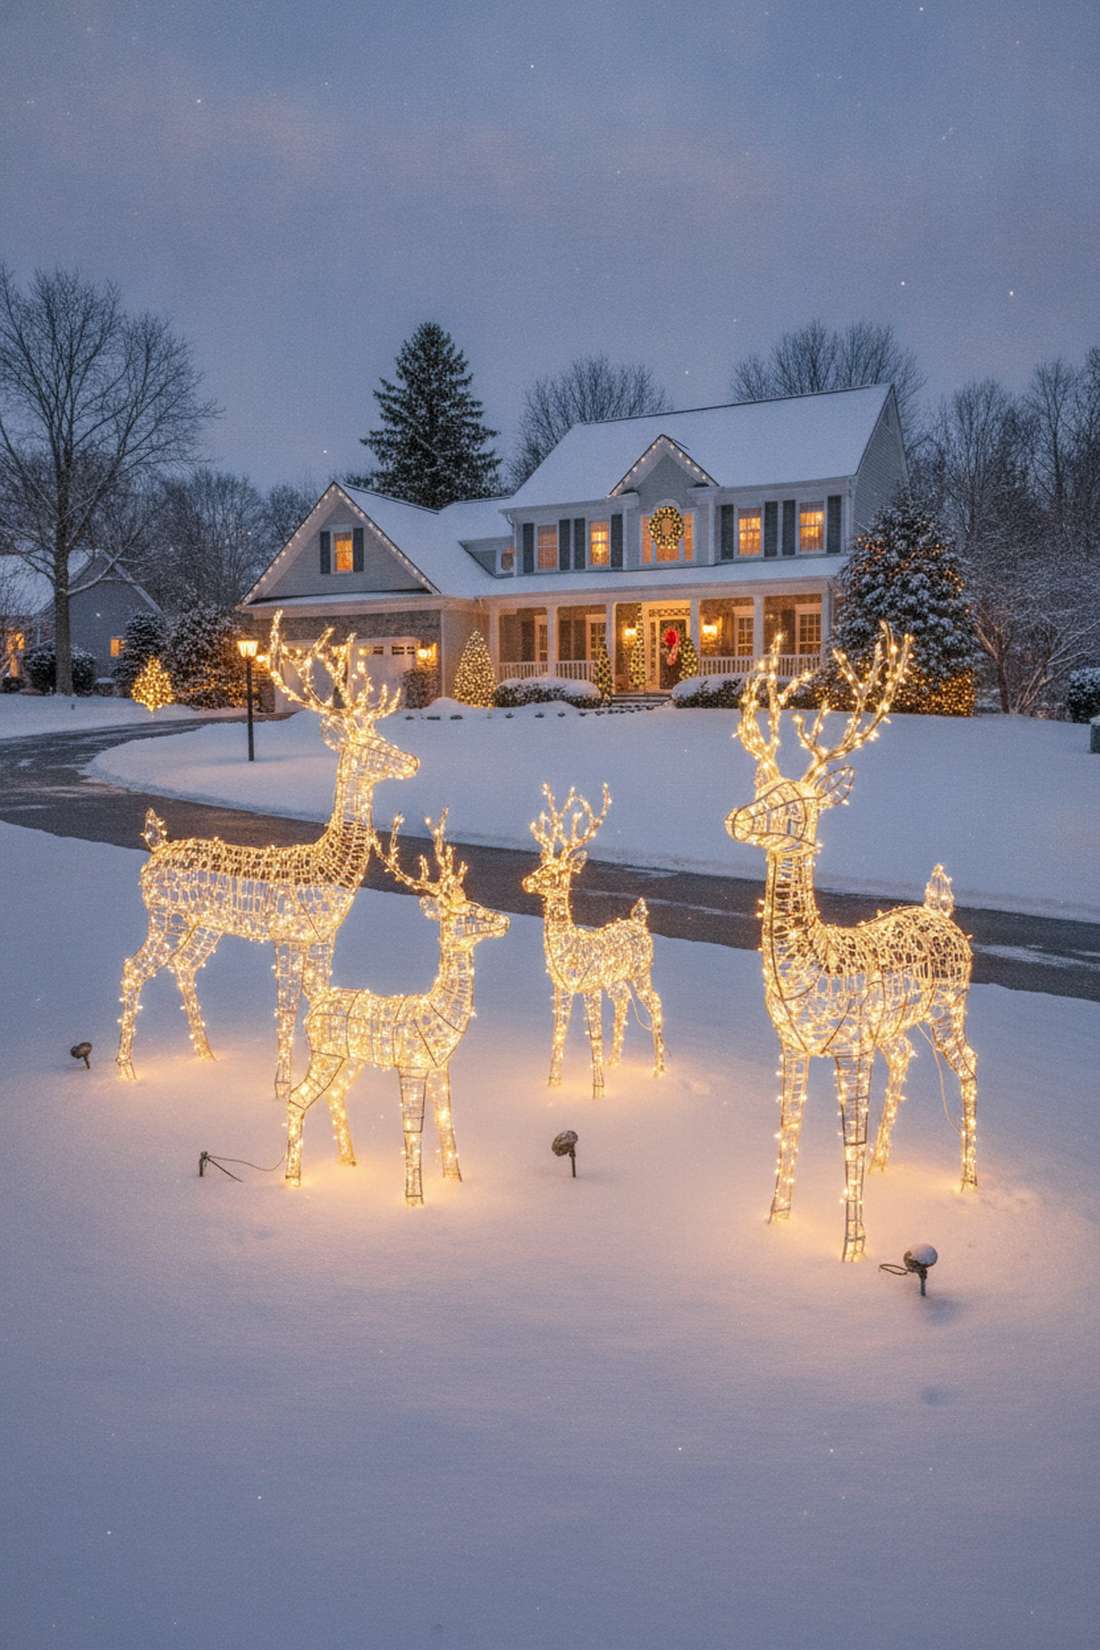
These glowing figures create a nostalgic silhouette that feels like a childhood storybook come to life. Setting up large-scale lighted yard art is the ultimate anchor for flat, expansive lawns.
Opting for 3D commercial structures instead of flat cutouts delivers a surprisingly premium look from every angle. Upgrading your outdoor layout with commercial-grade wireframes guarantees they won’t snap during the first blizzard.
Quality wireframes run between $80–$150 per figure. It’s a foundational investment that will last for a decade of winters.
- Key Materials: Pre-lit wireframe figures, heavy ground anchors.
- Vibe / Style: Classic neighborhood centerpiece.
- Difficulty: Moderate assembly required.
- Budget Breakdown: Wireframe: $100 | Anchors: $10.
- Creator’s Tip: Spray the metal joints with clear rust-oleum before putting them outside to prevent orange rust stains on snow.
- Smart Sourcing: commercial-grade LED reindeer kits and clear protective enamel spray.
9. Curtain Light Walls
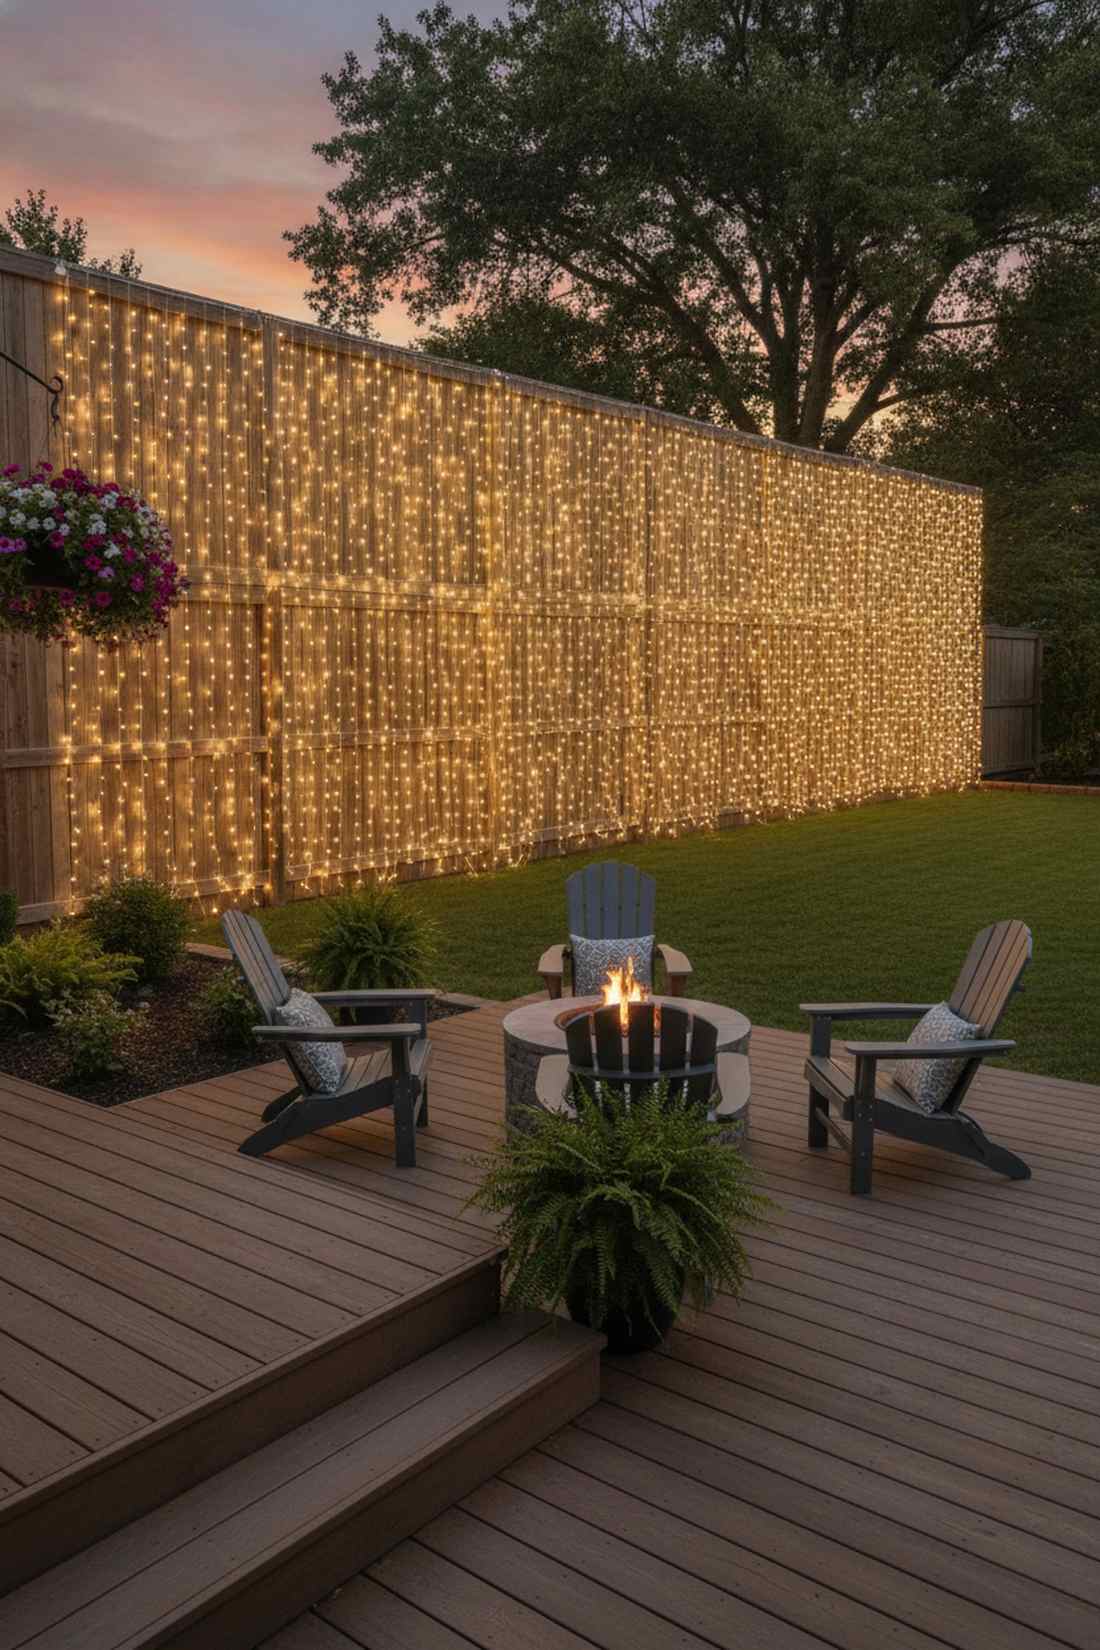
Hanging these feels like stepping behind a cascading waterfall of pure starlight. Installing a vertical glowing light backdrop instantly transforms ugly wooden privacy fences into luxury aesthetic walls.
Most overlook this layout, but covering a stark surface with dense lights outshines generic neighborhood setups by a mile. Sourcing multi-function cascading light kits allows you to change the “flow” speed of the lights for a dynamic effect.
Covering a standard fence panel costs about $30–$50. Pin this if you have an ugly backyard fence you need to hide for holiday parties.
- Key Materials: LED curtain lights, staple gun or outdoor hooks.
- Vibe / Style: Dreamy luxury event space.
- Difficulty: Easy but time-consuming.
- Budget Breakdown: Light Curtains: $35 | Hooks: $5.
- Creator’s Tip: Do not untie the vertical light drops until the main horizontal wire is completely hung up.
- Smart Sourcing: heavy-duty curtain light packs and damage-free outdoor light clips.
This next installation is ridiculously low-effort but looks like you hired a $2,000 professional lighting crew…
💡 Must-Have Supplies for High-End Setups
To build these setups faster and ensure they last, skip the generic craft aisles and invest in the right foundational kits.
- Base & Support: Heavy-duty steel landscape staples (bulk pack)
- Setup Tools: Commercial-grade weatherproof extension cable kits
- Weather/Durability Protection: UV-resistant clear acrylic sealant spray
10. Projection Mapping Effects
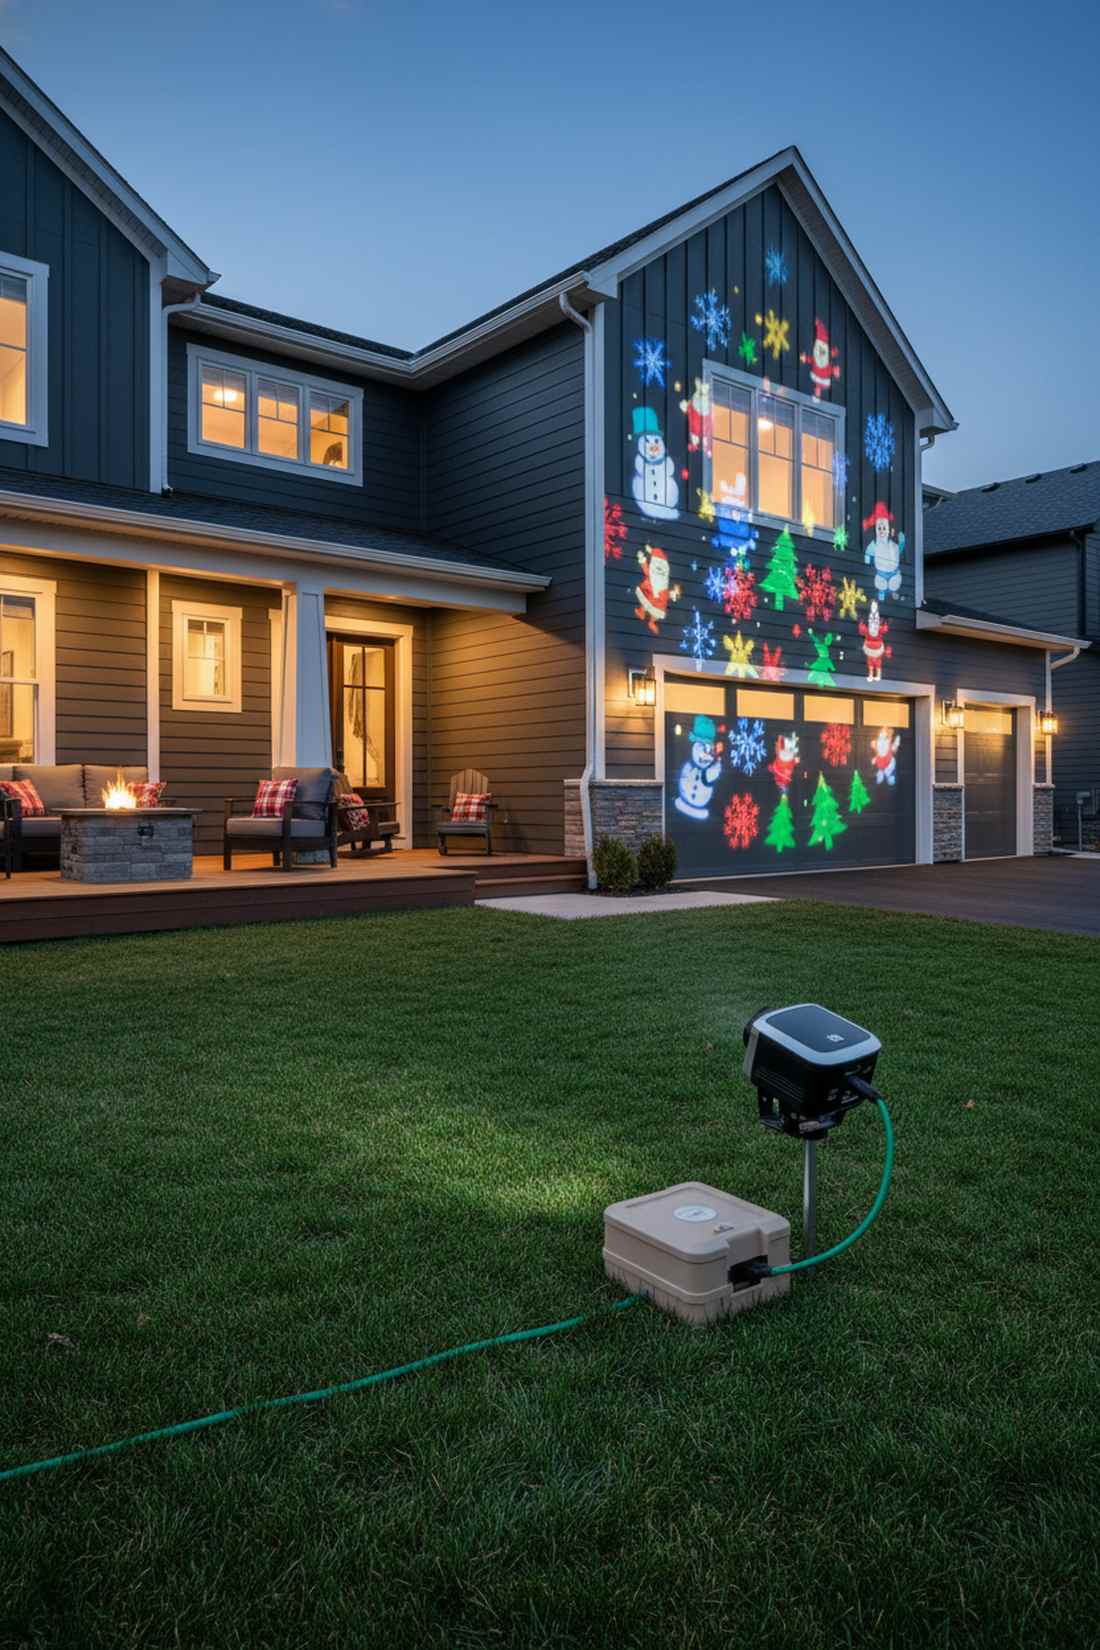
This tech-forward approach feels like hosting a private laser show in your own backyard. Utilizing an animated outdoor landscape projector is the perfect cheat code for illuminating second-story walls or blank garage doors.
Swapping out tangled physical strings for digital lights gives a designer-level finish in literally three minutes. Investing in high-lumen digital light units ensures the colors stay sharp even if streetlights are nearby.
A premium projector will set you back around $60–$120. Save this if you hate climbing ladders in the freezing cold.
- Key Materials: Outdoor landscape projector, heavy outdoor extension cord.
- Vibe / Style: High-tech modern holiday.
- Difficulty: Ultimate zero-effort setup.
- Budget Breakdown: Projector unit: $85 | Cord: $15.
- Creator’s Tip: Keep the projector relatively close to the wall (10-15 feet) to prevent the image from washing out.
- Smart Sourcing: high-lumen animated holiday projectors and weatherproof cord protector boxes.
11. Net Light Coverage
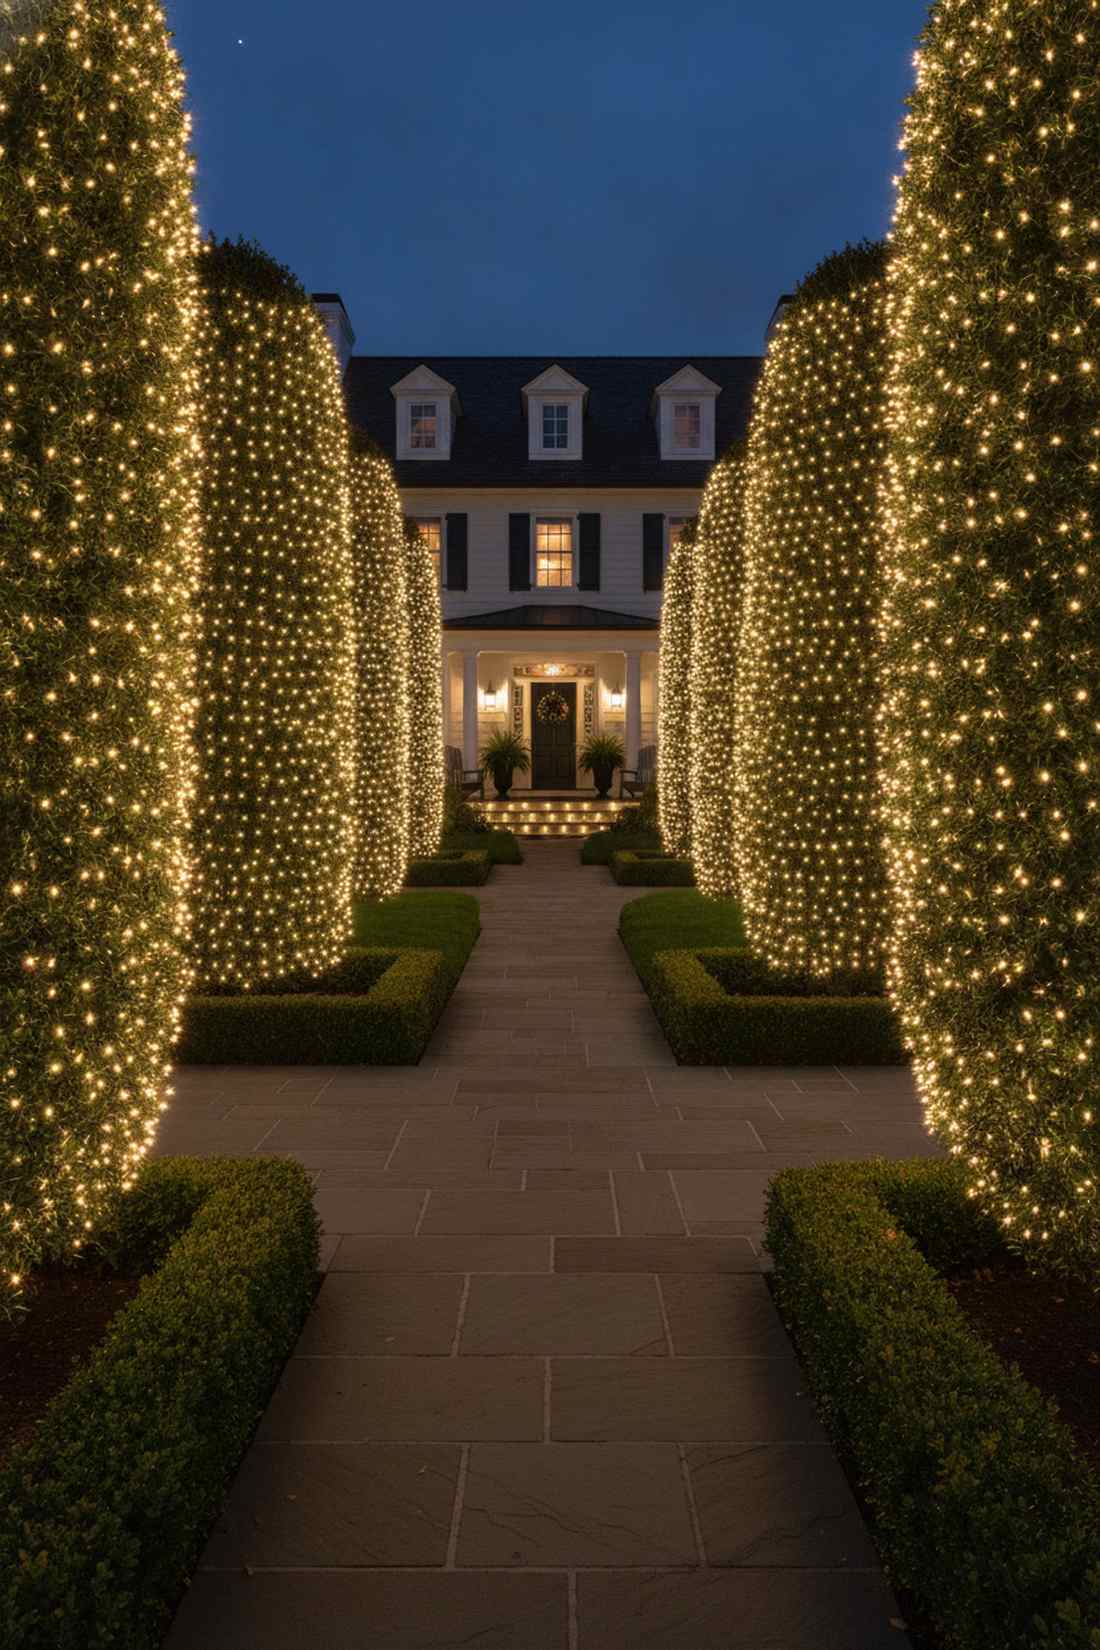
Draping these creates a perfectly symmetrical, glowing blanket over your landscaping. A tightly wrapped illuminated shrubbery grid is unmatched for manicured boxwoods or front yard hedges.
While wrapping individual branches takes hours, this method looks far more expensive than it is and finishes in seconds. Grabbing commercial net lighting grids ensures the matrix doesn’t short out when a single bulb goes down.
Expect to spend $20–$40 per large bush. It’s the ultimate time-saving hack for massive yard displays.
- Key Materials: LED net lights, gentle garden ties.
- Vibe / Style: Perfectly manicured estate.
- Difficulty: Very easy drape-and-go.
- Budget Breakdown: Net grids: $25 | Ties: $5.
- Creator’s Tip: Buy dark green wiring instead of white so the cables completely vanish into the foliage during the day.
- Smart Sourcing: commercial-grade LED net light grids and green camouflaged zip ties.
12. Roofline Icicle Lights
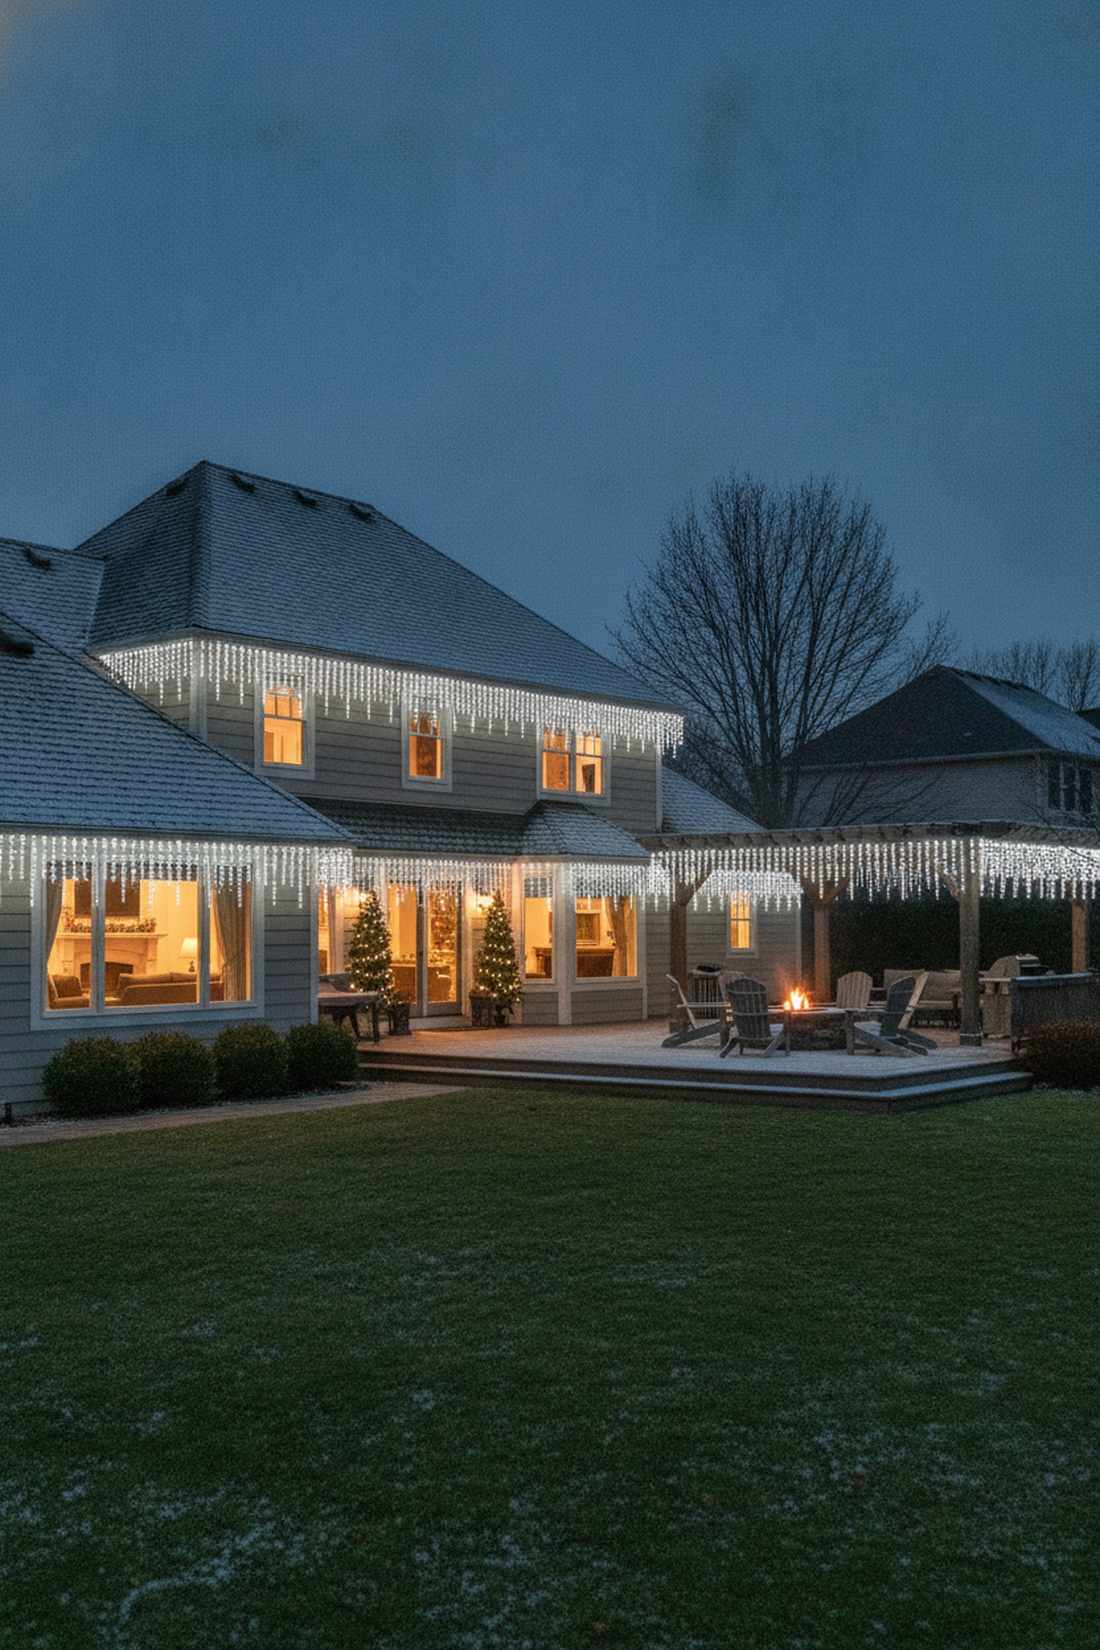
This classic perimeter lighting feels like your home is encased in a glamorous layer of frost. A crisp architectural roofline border works wonders for defining the silhouette of pergolas, sheds, and main roof eaves.
Executing clean, straight lines with these strands outshines generic neighborhood setups that look droopy and rushed. Utilizing professional gutter clip accessories is the secret to keeping the main wire perfectly taut against the wind.
A standard backyard structure will cost about $50–$90 to outline properly. Pin this to your exterior home upgrade board to remember the clip trick.
- Key Materials: Icicle light strands, outdoor gutter/shingle clips.
- Vibe / Style: Traditional winter elegance.
- Difficulty: Moderate ladder work required.
- Budget Breakdown: Lights: $55 | Clips: $15.
- Creator’s Tip: Always plug the lights in while hanging them to immediately spot any dead zones before you climb down.
- Smart Sourcing: dense-drop LED icicle light packs and universal shingle and gutter light clips.
Winter Wonderland Focal Points
Themed focal points establish the conceptual framework for your entire backyard display. These elements communicate design intent and create Instagram-worthy moments that guests will remember.
13. Santa Sleigh and Reindeer
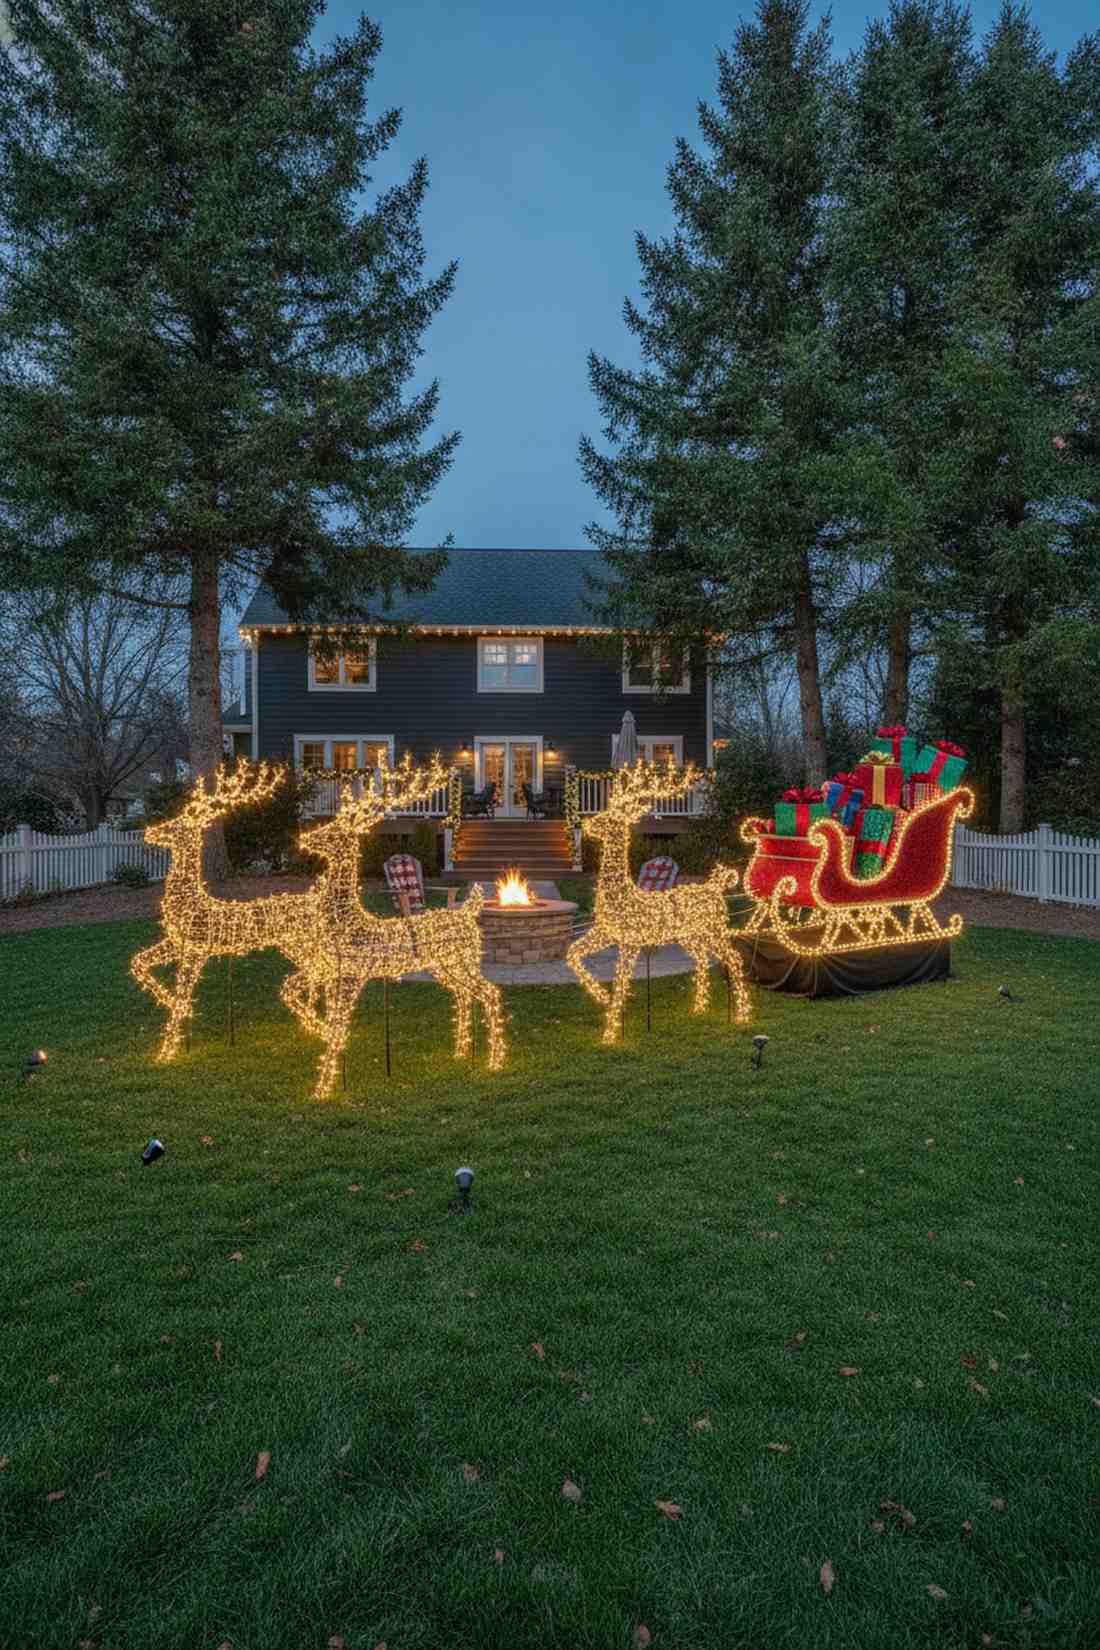
This dramatic centerpiece feels like magic just landed right in the middle of your grass. A full-scale illuminated lawn sleigh display acts as a magnetic focal point for large open yard spaces.
Elevating the sleigh on hidden platforms delivers a surprisingly premium look by simulating real flight. Incorporating weatherproof outdoor staging elements takes this from a basic store-bought kit to a custom theatrical scene.
A mid-sized setup runs anywhere from $150–$300 depending on the detail. Highly recommended if you have kids that love the theatrical side of the season.
- Key Materials: Sleigh & reindeer wireframes, fake wrapped gifts, spotlights.
- Vibe / Style: Grand theatrical holiday.
- Difficulty: Moderate to heavy assembly.
- Budget Breakdown: Props: $180 | Spotlights: $40.
- Creator’s Tip: Use empty cardboard boxes wrapped in heavy-duty vinyl outdoor tablecloths for weather-proof gift props.
- Smart Sourcing: waterproof vinyl wrapping sheets and ground-level LED landscape spotlights.
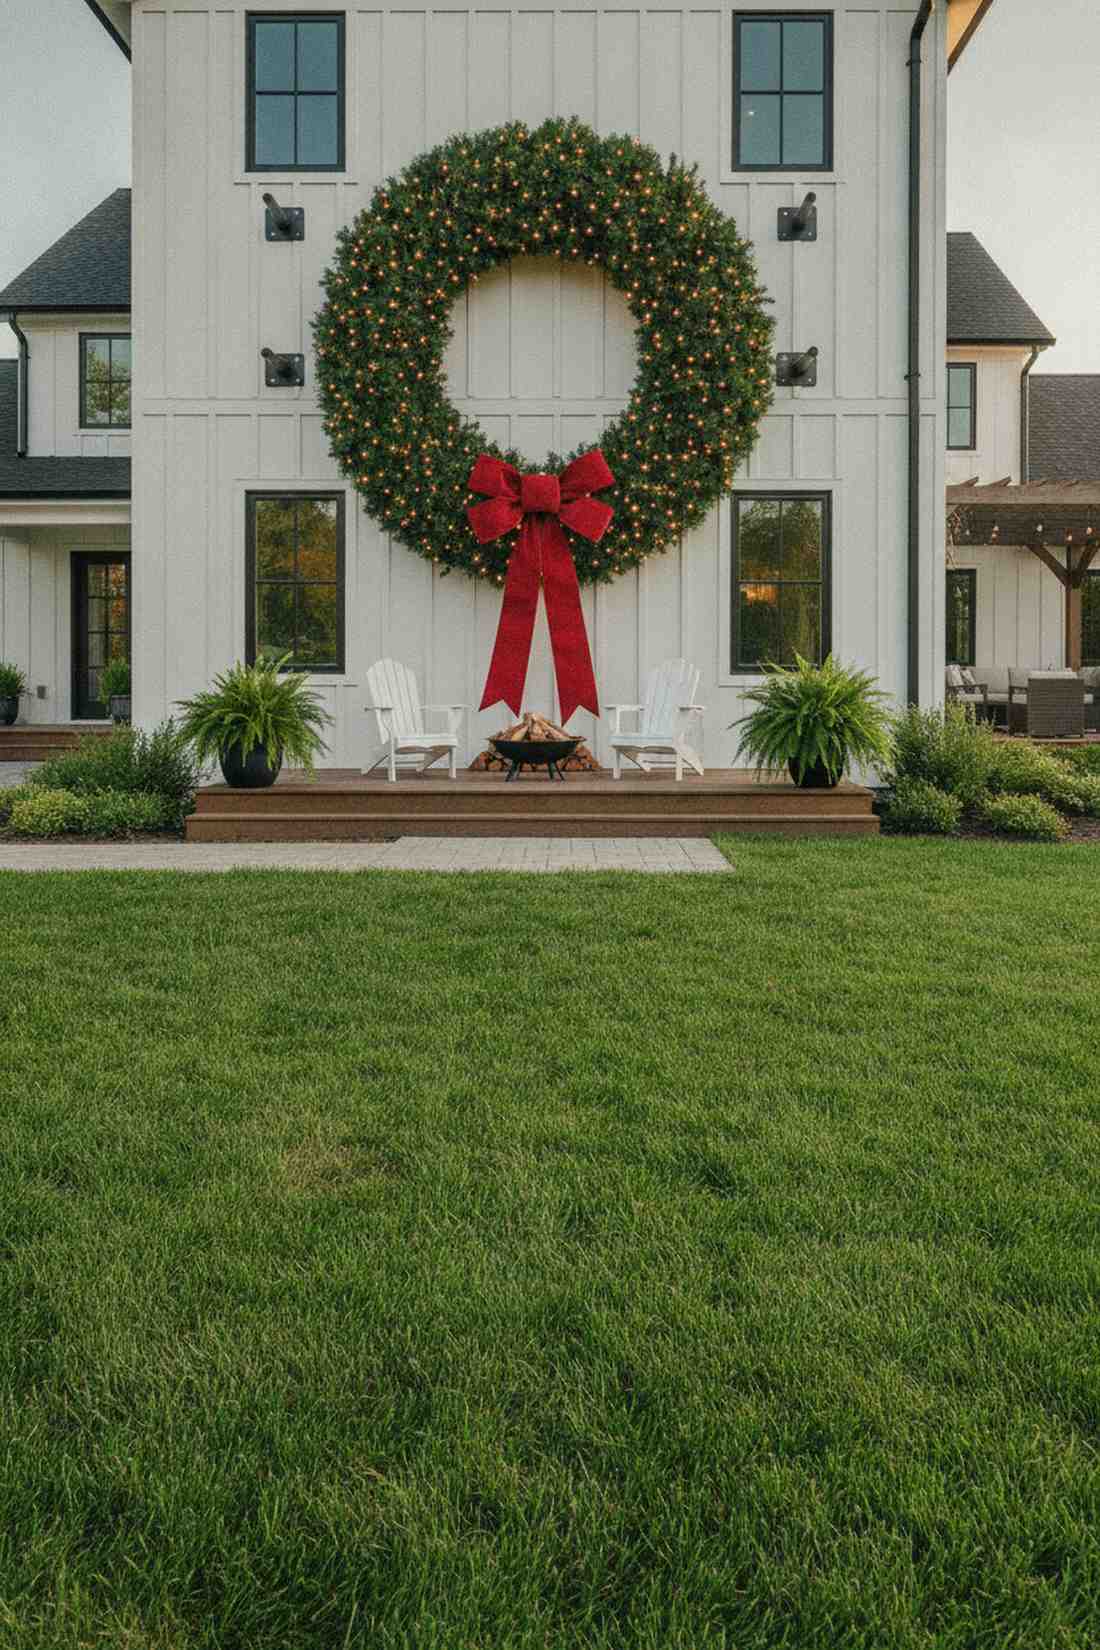
14. Outdoor Christmas Tree Display
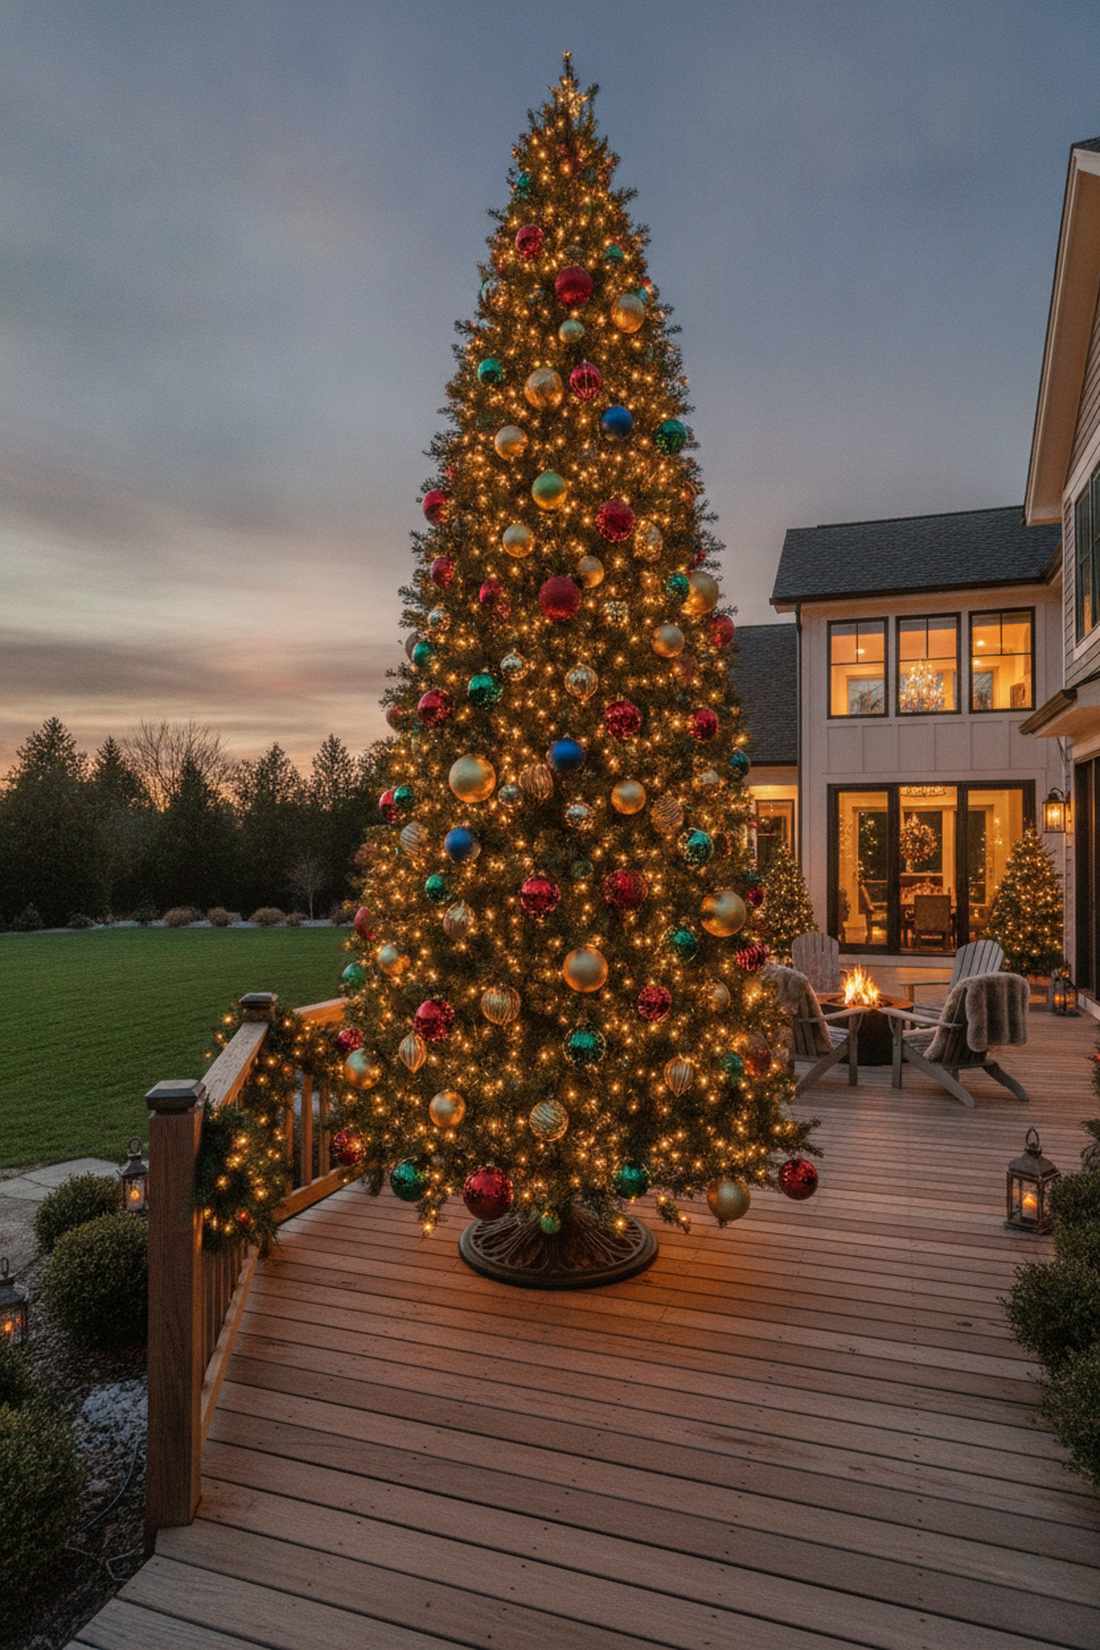
This striking addition makes your exterior feel just as cozy and decorated as your living room. An oversized weather-resistant patio tree is perfect for anchoring a deck or a visible outdoor living area.
Transitioning indoor aesthetics outside gives a designer-level finish that constantly turns heads. Upgrading to shatterproof UV-coated ornaments ensures the color won’t fade to dull pastels after one week in the sun.
You can construct a beautiful patio tree for roughly $100–$200. Save this to your outdoor living space Pinterest board.
- Key Materials: Artificial tree, heavy umbrella base, shatterproof ornaments.
- Vibe / Style: Seamless indoor-to-outdoor luxury.
- Difficulty: Easy setup.
- Budget Breakdown: Tree: $80 | Ornaments: $40.
- Creator’s Tip: Anchor the tree trunk into an actual patio umbrella stand to prevent it from blowing over.
- Smart Sourcing: bulk pack shatterproof outdoor ornaments and heavy-duty cast iron umbrella bases.
Most backyard decor completely ignores spatial depth… until you apply this ridiculously clever tiering trick coming up next.
15. Illuminated Snowman Family
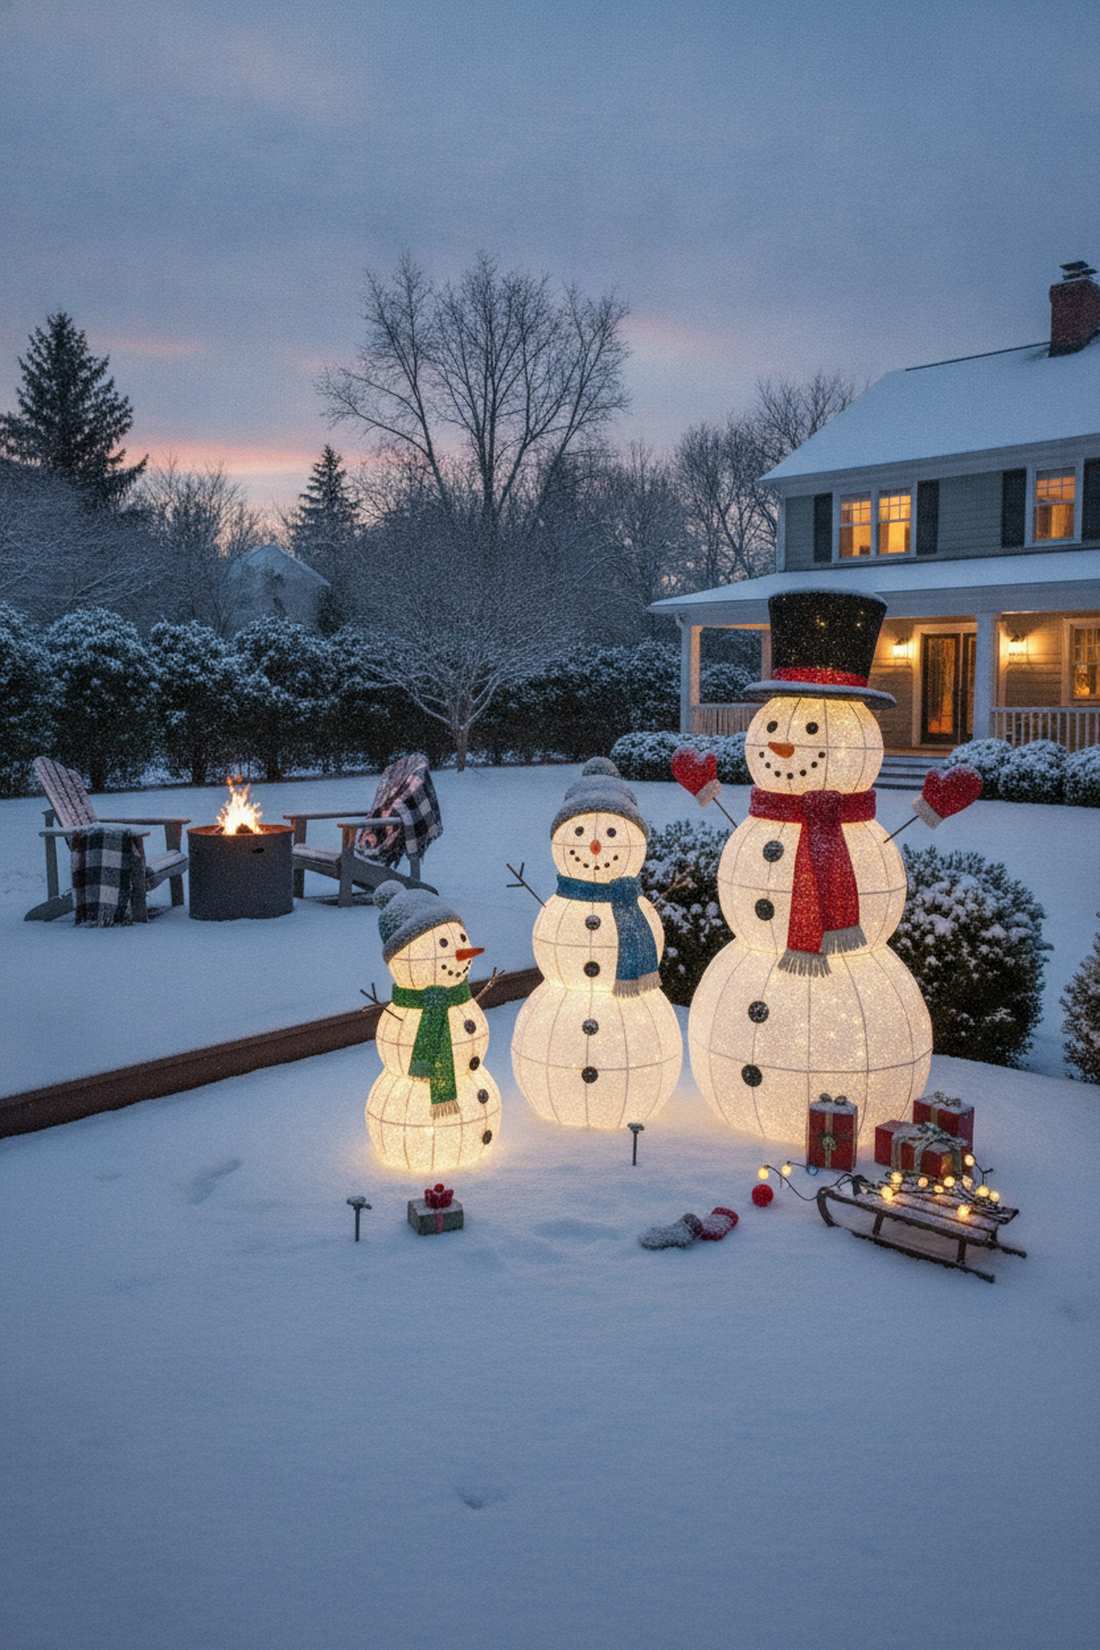
This cheerful gathering feels like inviting a frosty family directly to your holiday party. Grouping a multi-sized glowing snowman cluster works beautifully to fill empty, awkward corners of your patio.
Placing these figures in conversational angles rather than a straight line fools guests into thinking you hired a pro to stage the yard. Using outdoor miniature accessories like real knitted scarves adds a tactile layer that cheap plastic lacks.
A family of three typically costs around $90–$140. It’s a joyful upgrade that completely changes the vibe of dark corners.
- Key Materials: 3D lighted snowman figures, fabric accessories, tent stakes.
- Vibe / Style: Playful family-friendly charm.
- Difficulty: Easy plug-and-play.
- Budget Breakdown: Figures: $110 | Accessories: $15.
- Creator’s Tip: Spray their fabric accessories with a waterproof camp gear spray so they don’t freeze into solid blocks of ice.
- Smart Sourcing: waterproofing fabric silicone spray and pop-up LED snowman starter kits.
16. Nativity Scene Backdrop
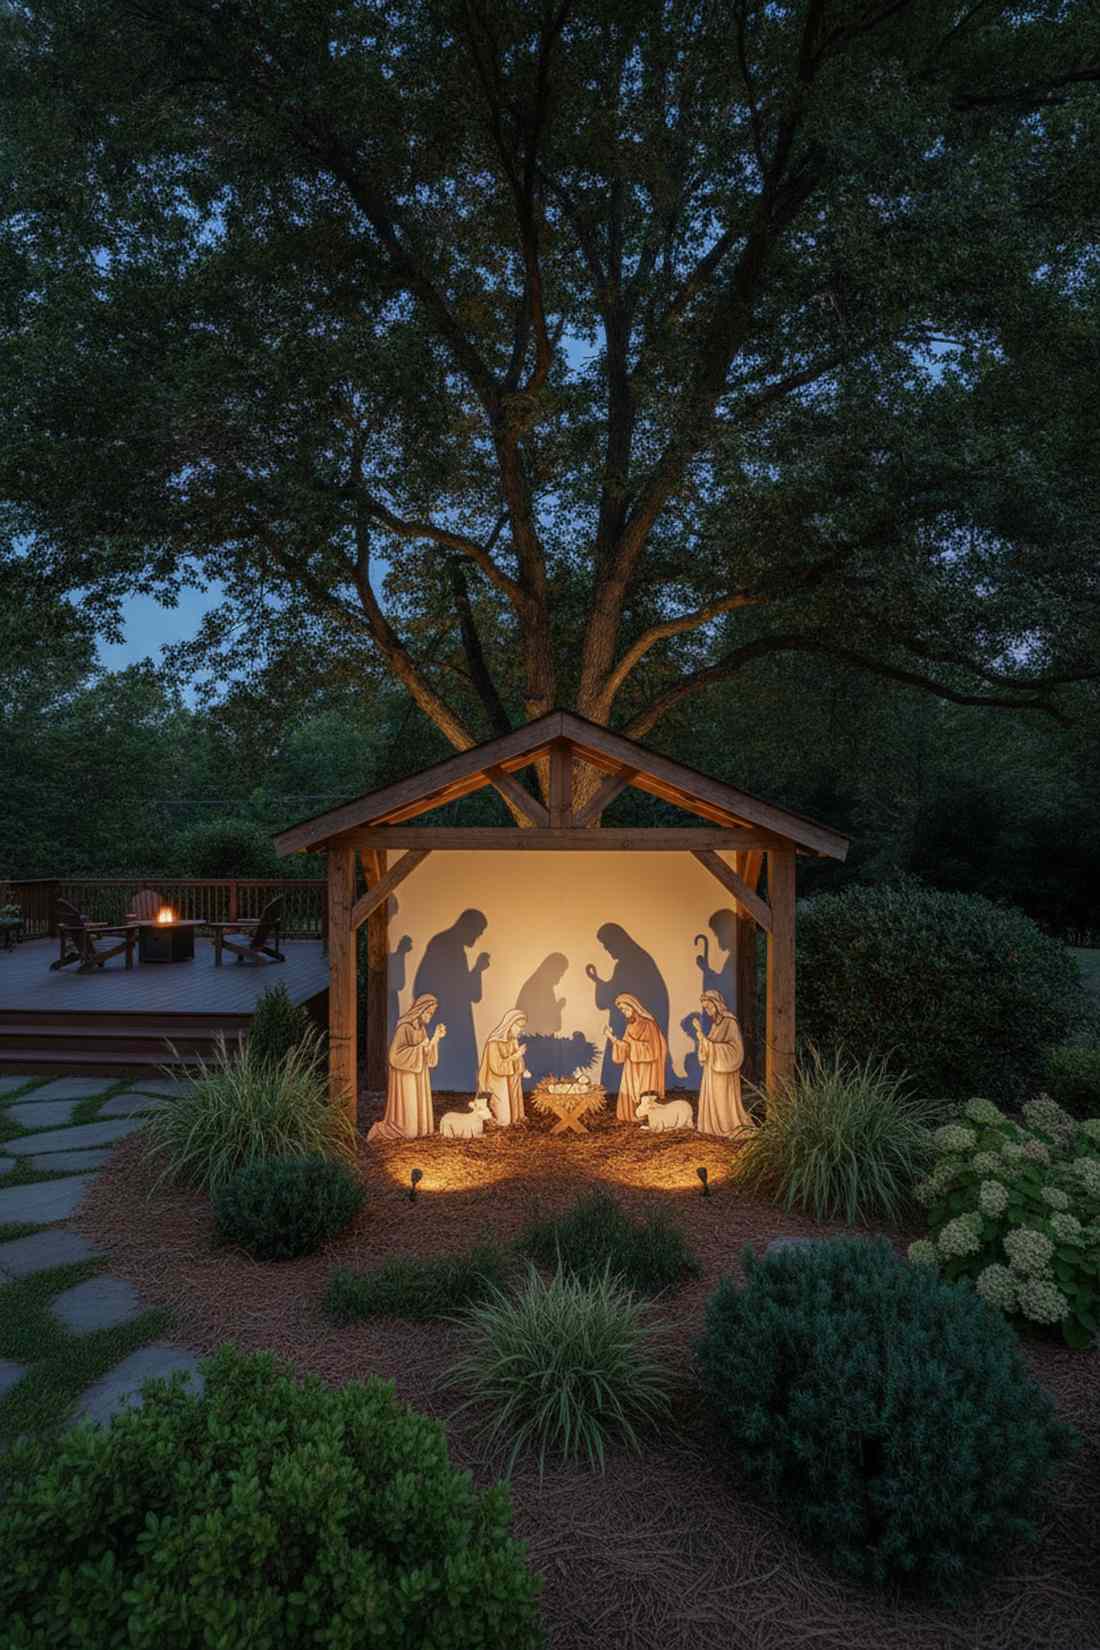
This serene installation provides a quiet, reverent glow that feels incredibly peaceful. Designing a subtly backlit nativity silhouette is perfect for quiet garden corners or underneath large privacy trees.
Swapping blaring colored lights for soft, warm uplighting looks far more expensive than it is and commands respect. Leveraging premium outdoor garden supplies to build a rustic wooden stable frame grounds the entire display.
A well-lit silhouette setup costs around $80–$120. Pin this if you want a classic, meaningful focal point this year.
- Key Materials: Silhouette cutouts, warm LED spotlights, wooden framing.
- Vibe / Style: Elegant traditional reverence.
- Difficulty: Moderate DIY framing.
- Budget Breakdown: Cutouts: $70 | Lighting: $30.
- Creator’s Tip: Mount the figures an inch off the backdrop wall to create a striking 3D shadow effect when lit from below.
- Smart Sourcing: weatherproof PVC nativity cutouts and warm-white solar spotlight kits.
17. Winter Village Vignette
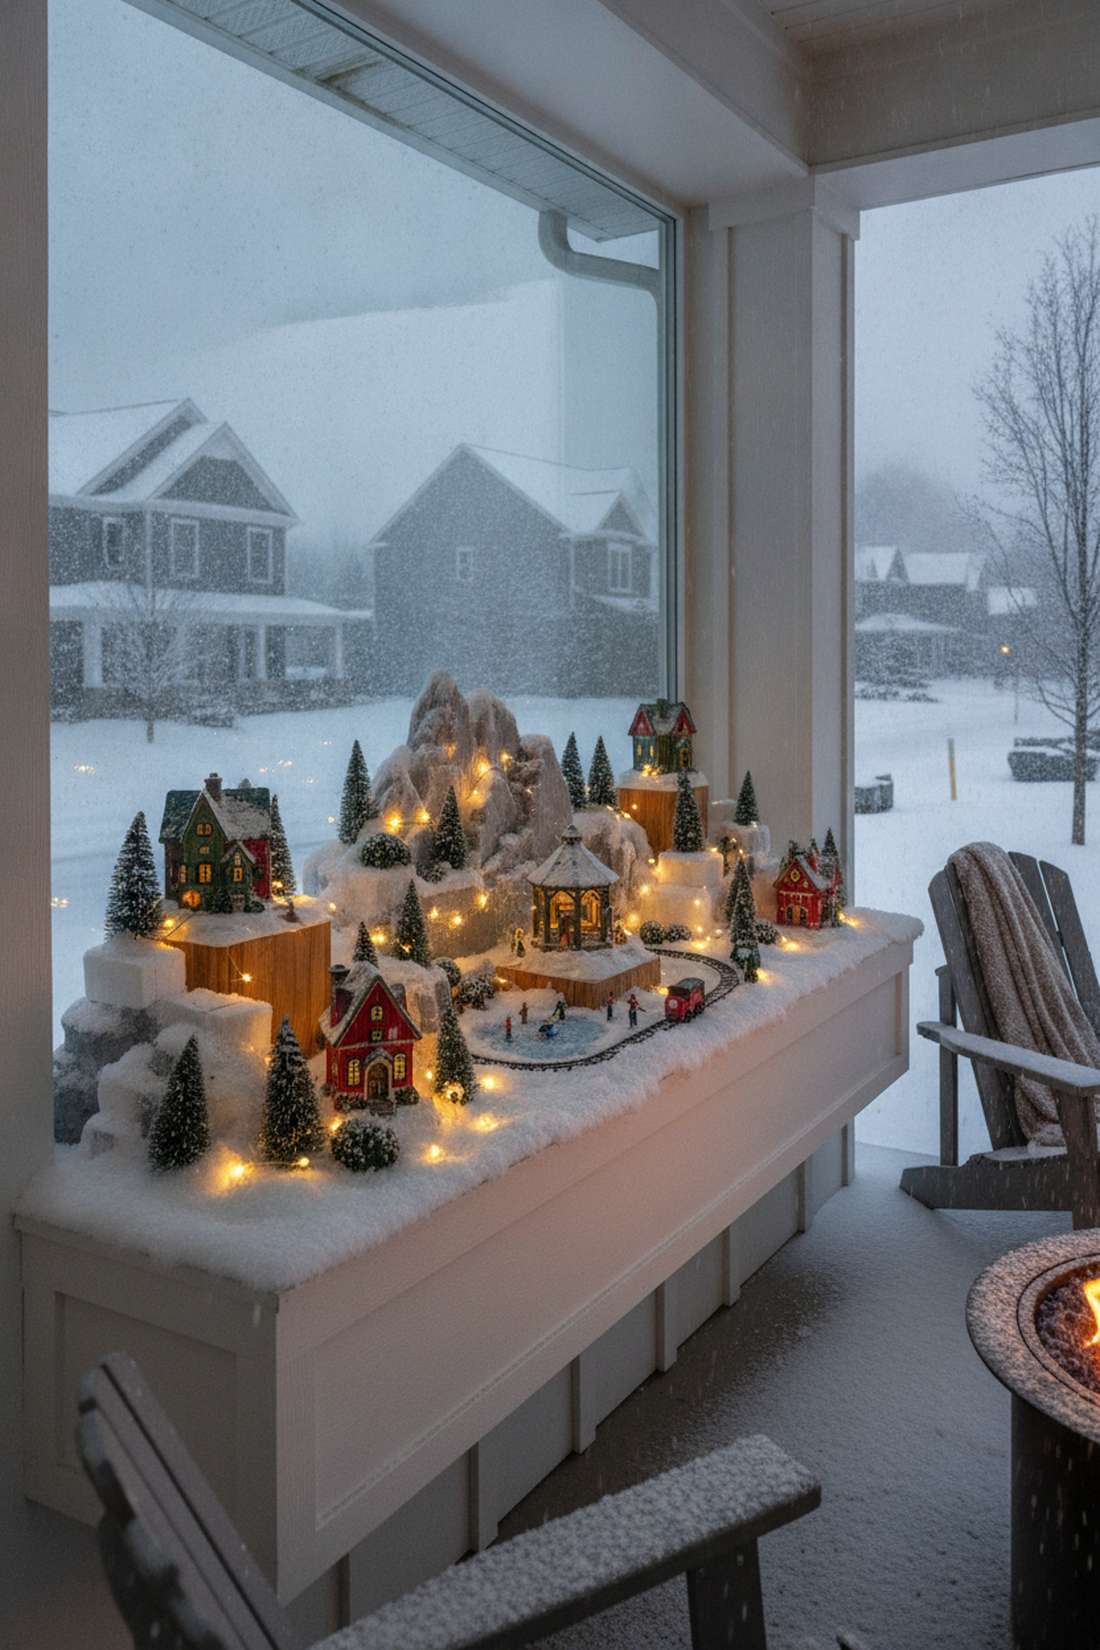
This micro-world feels like a tiny hidden forest town you accidentally discovered. Building a multi-tiered miniature outdoor village is an exceptional use-case for covered porches or large bay window flower boxes.
Elevating the structures on varying heights delivers a surprisingly premium look that demands close-up inspection. Sneaking in specialized fairy garden kits and faux snow bases transforms cheap plastic houses into a luxury diorama.
You can assemble a rich village for about $50–$85. Save this to your weekend DIY craft board to keep the kids entertained.
- Key Materials: Resin houses, fake snow, fairy lights, wooden risers.
- Vibe / Style: Whimsical micro-scale storytelling.
- Difficulty: Highly detailed, fun setup.
- Budget Breakdown: Village Kits: $45 | Snow/Lights: $20.
- Creator’s Tip: Use foam packing blocks carved with a hot wire to create the tiered mountain landscape underneath the snow blanket.
- Smart Sourcing: UV-coated resin fairy cottage kits and waterproof micro-LED fairy string packs.
18. Oversized Ornament Clusters
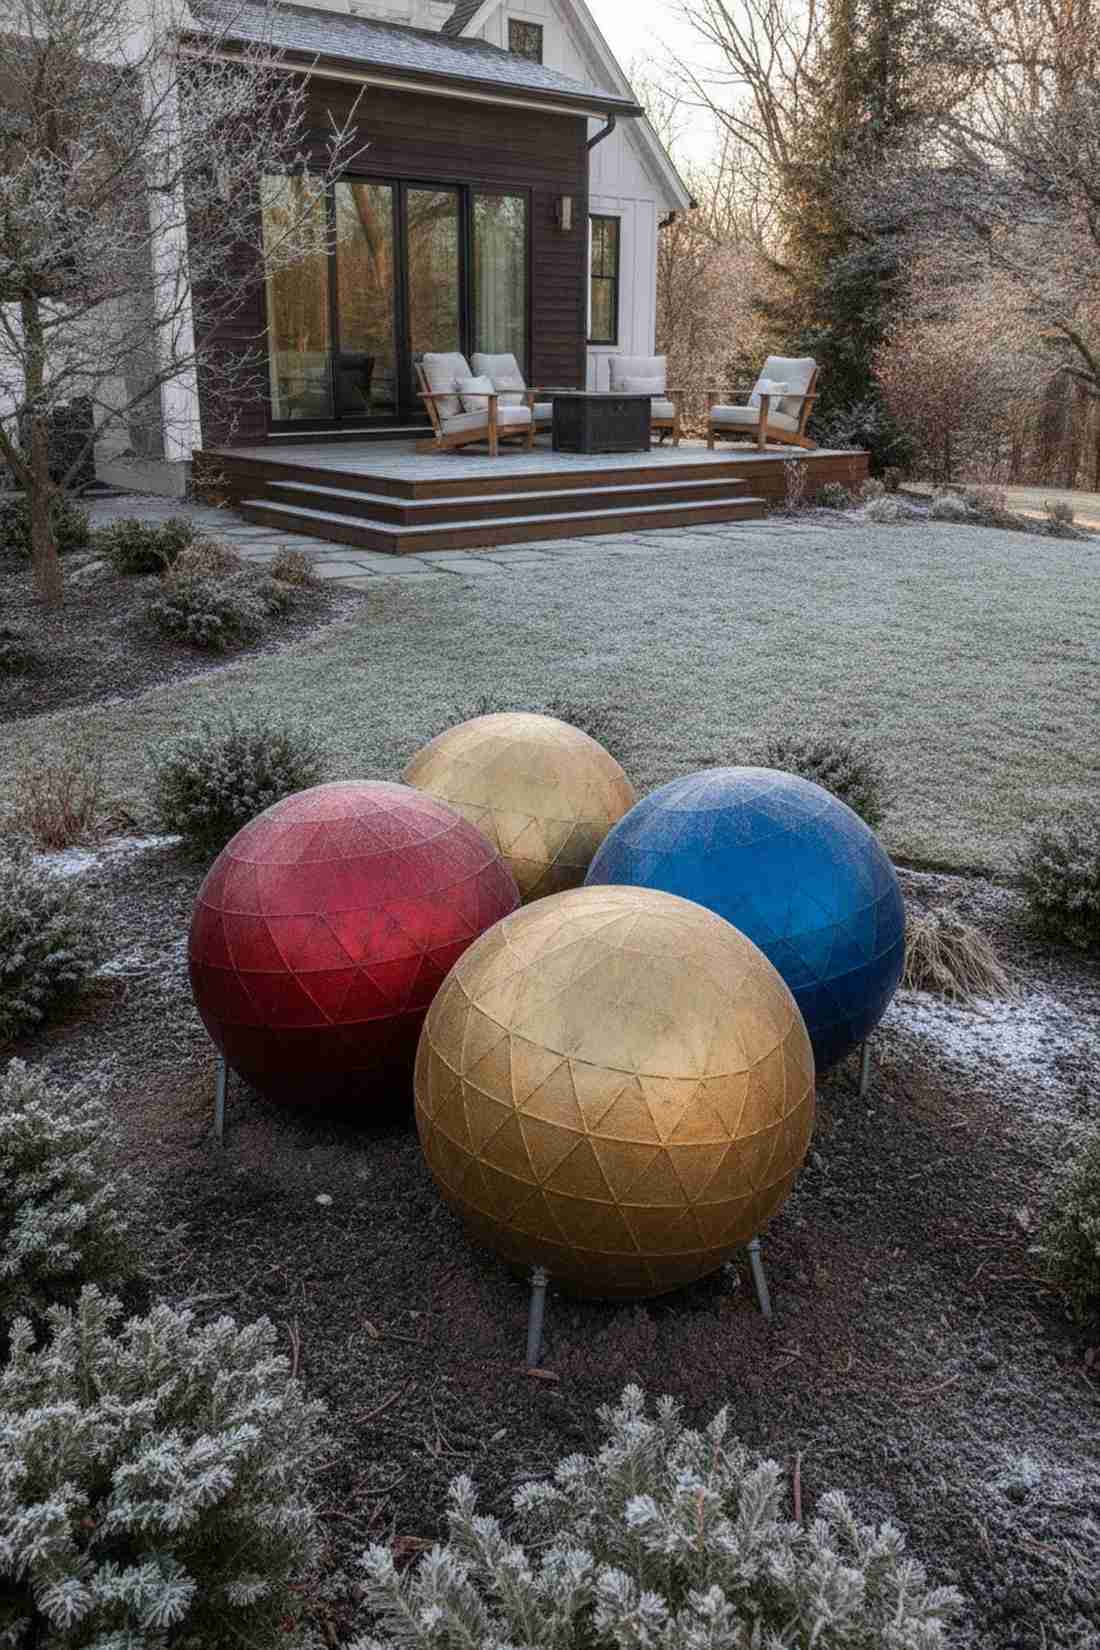
These massive pops of color feel like a giant’s playground dropped into your landscaping. Dropping giant textured garden ornaments is brilliant for breaking up the visual monotony of dead winter garden beds.
Abandoning tiny tree decor for giant scaled pieces outshines generic neighborhood setups by playing with extreme perspective. Buying commercial-scale outdoor props ensures they won’t blow away or crack in freezing temperatures.
A cluster of three large pieces costs roughly $60–$100. It’s a bold, modern upgrade that completely changes the yard’s geometry.
- Key Materials: 24-inch weatherproof ornaments, ground anchors.
- Vibe / Style: Bold modern art installation.
- Difficulty: Super easy placement.
- Budget Breakdown: Ornaments: $75 | Anchors: $10.
- Creator’s Tip: If buying blow-up plastic ornaments, fill the bottom 10% with play sand before inflating to make them wind-proof.
- Smart Sourcing: jumbo inflatable PVC outdoor ornaments and heavy-duty decorative outdoor resin spheres.
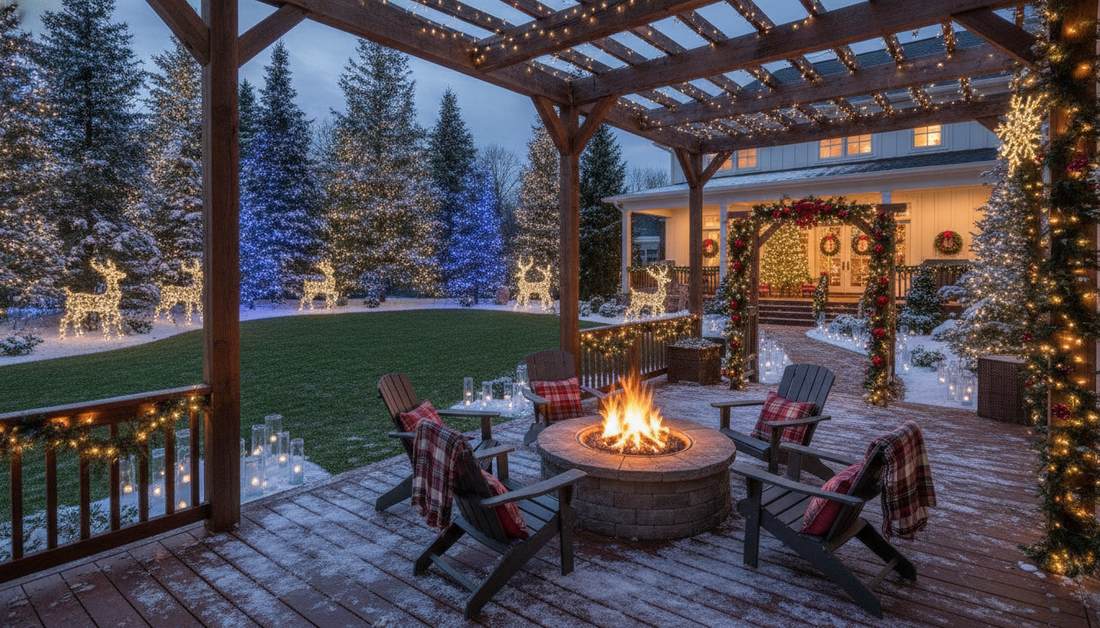
19. Illuminated Archway Entrance

Walking through this massive glow feels like getting a VIP ticket to the North Pole. A glowing threshold arbor is the ultimate transition piece to place right at your backyard gate or patio entrance.
Layering thick garland over a standard metal frame fools guests into thinking you hired a pro landscaping crew. Adding dense cluster lighting kits maximizes the brightness and hides the underlying metal perfectly.
You can build a stunning archway for $90–$140. Pin this to your entryway inspiration board immediately.
- Key Materials: Metal garden arch, artificial garland, cluster string lights.
- Vibe / Style: Upscale botanical grand entrance.
- Difficulty: Moderate wrapping required.
- Budget Breakdown: Arch: $40 | Garland/Lights: $70.
- Creator’s Tip: Wrap the arch with green duct tape first; it stops the garland from sliding down the slick metal poles.
- Smart Sourcing: pre-lit thick artificial garland (bulk pack) and budget metal garden arbor kits.
Wait until you see how cheap it actually is to make your existing trees look like a million bucks…
Tree and Shrub Enhancements
Existing landscape plantings provide natural frameworks for holiday decorations. Professional designers leverage established vegetation to reduce installation requirements while maximizing visual impact.
20. Wrapped Tree Trunks
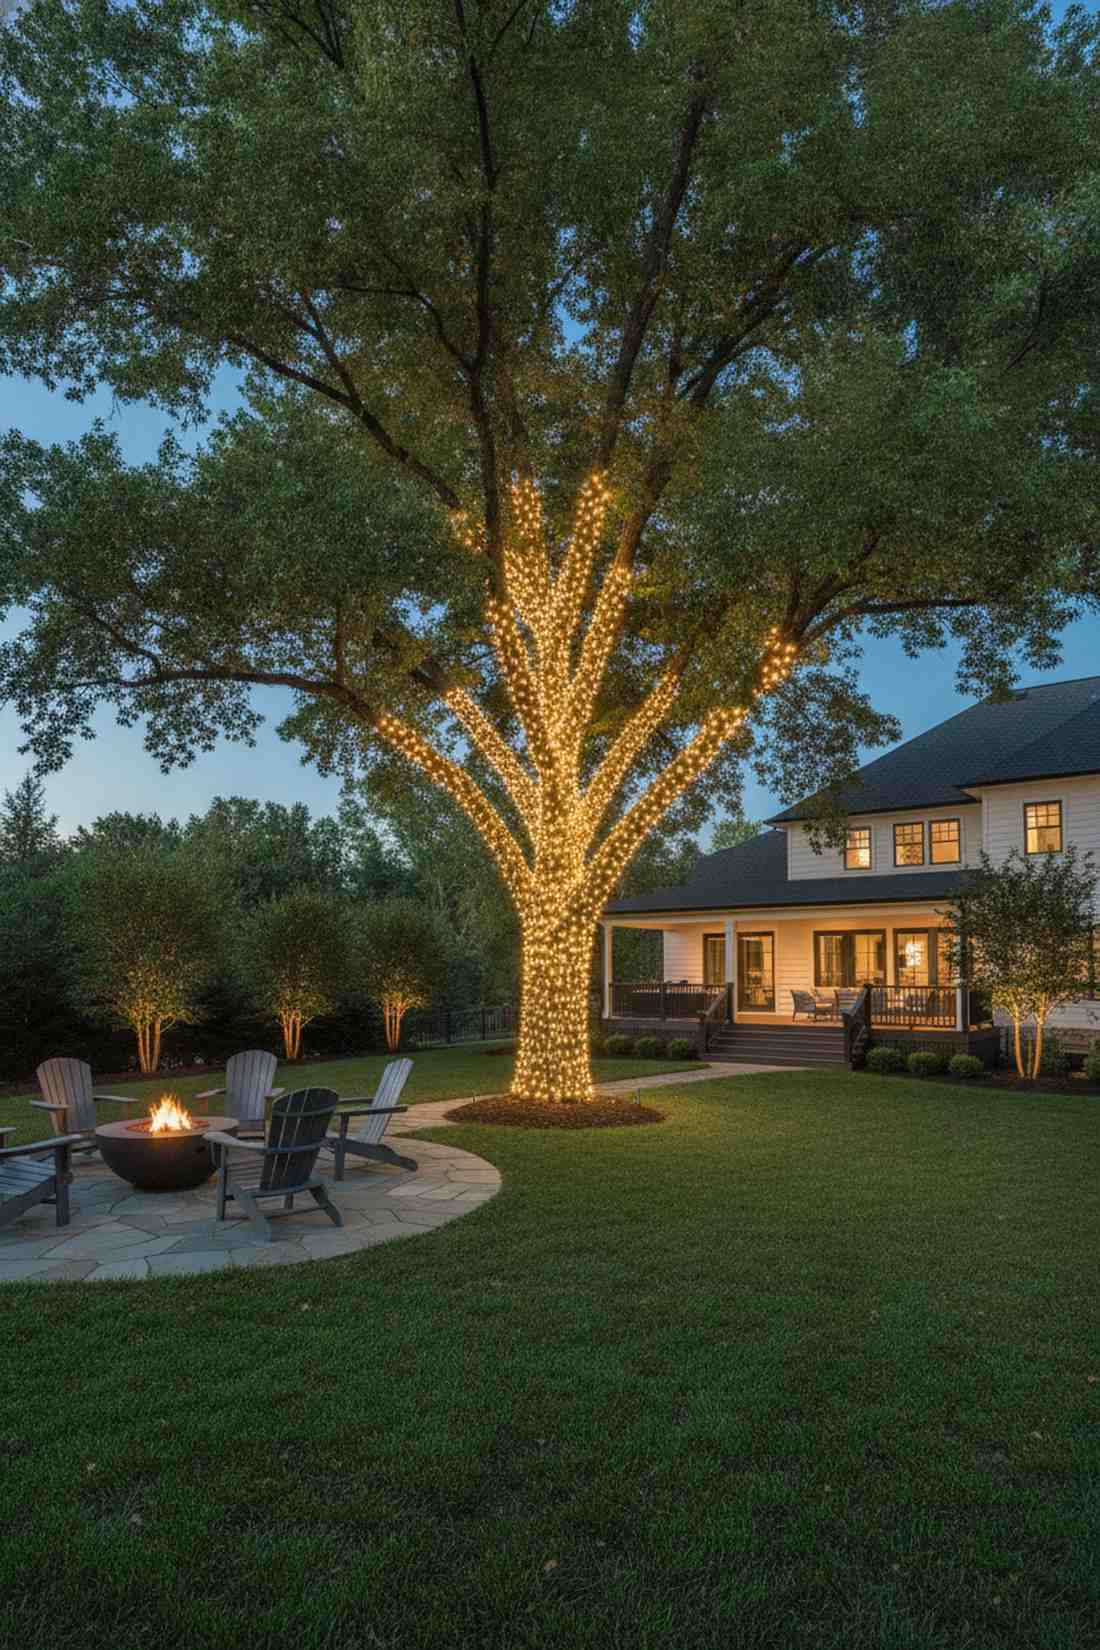
This lighting technique creates a glowing forest pillar that commands absolute attention. A tightly wound illuminated tree trunk wrap is the perfect way to highlight mature oaks or maples in your yard.
Executing perfectly spaced lines rather than chaotic loops gives a designer-level finish that rivals commercial city centers. Utilizing heavy-duty commercial string reels is non-negotiable here to avoid half the trunk burning out in the rain.
Wrapping a single mature tree correctly costs about $40–$60 in lights. It’s an essential foundation for any premium outdoor layout.
- Key Materials: Mini LED string lights, staple gun (optional), extension cords.
- Vibe / Style: Professional downtown light display.
- Difficulty: Moderate, requires patience.
- Budget Breakdown: Lighting reels: $45 | Cords: $10.
- Creator’s Tip: Roll the string lights into a tight ball before wrapping; it makes passing it around the trunk 10x faster.
- Smart Sourcing: commercial-grade LED mini light reels and weatherproof outdoor extension blocks.
21. Lighted Branch Canopy
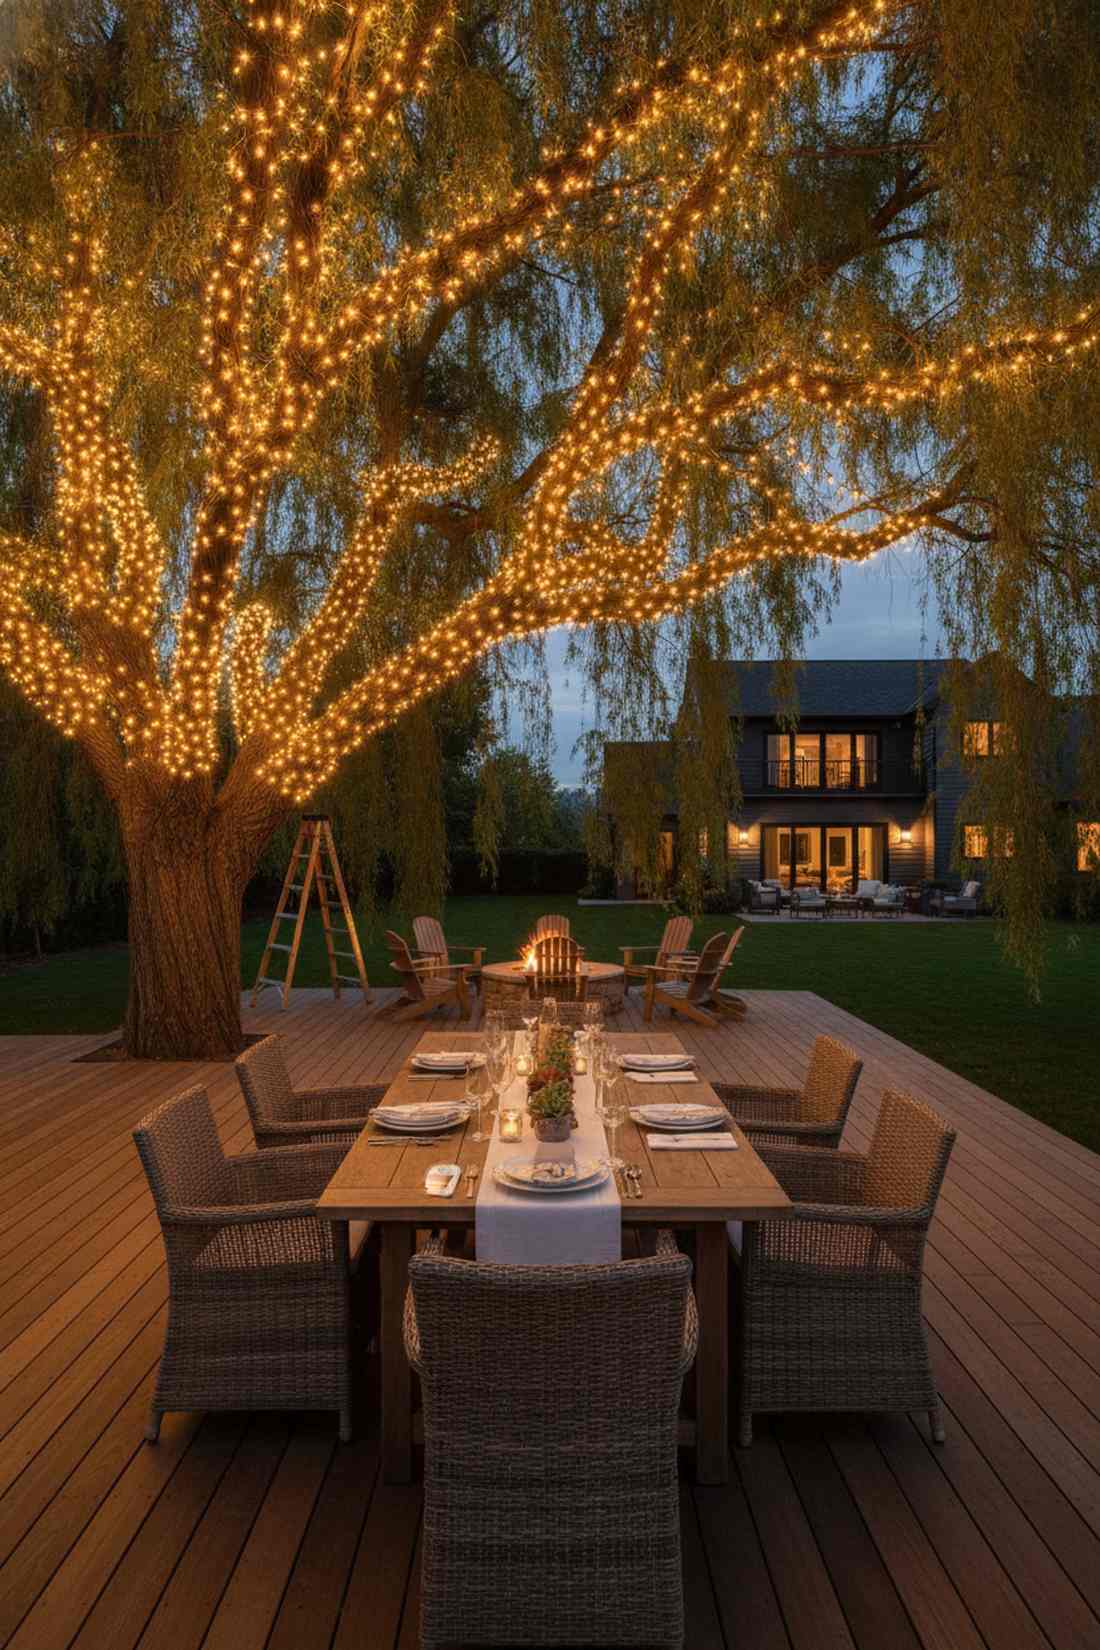
Looking up into this web of lights feels like staring into a warm, glowing galaxy. Creating an overhead illuminated foliage web works incredibly well for low-hanging weeping willows or patio shade trees.
This layout takes real effort, but the sprawling celestial effect looks far more expensive than it is. Weaving specialized wide-angle LED kits ensures the light disperses downward toward your guests instead of shooting up into the sky.
Covering a large canopy will run $80–$150. Save this to your luxury backyard dining board.
- Key Materials: Wide-angle LED strands, ladder, branch clips.
- Vibe / Style: Romantic celestial dining.
- Difficulty: Hard, requires ladder safety.
- Budget Breakdown: Lights: $100 | Clips: $20.
- Creator’s Tip: Only light the underside of the main structural branches—lighting the top is a waste of bulbs since no one sees it.
- Smart Sourcing: wide-angle 5mm LED outdoor strings and telescoping light hanging poles.
22. Evergreen Garland Wrapping
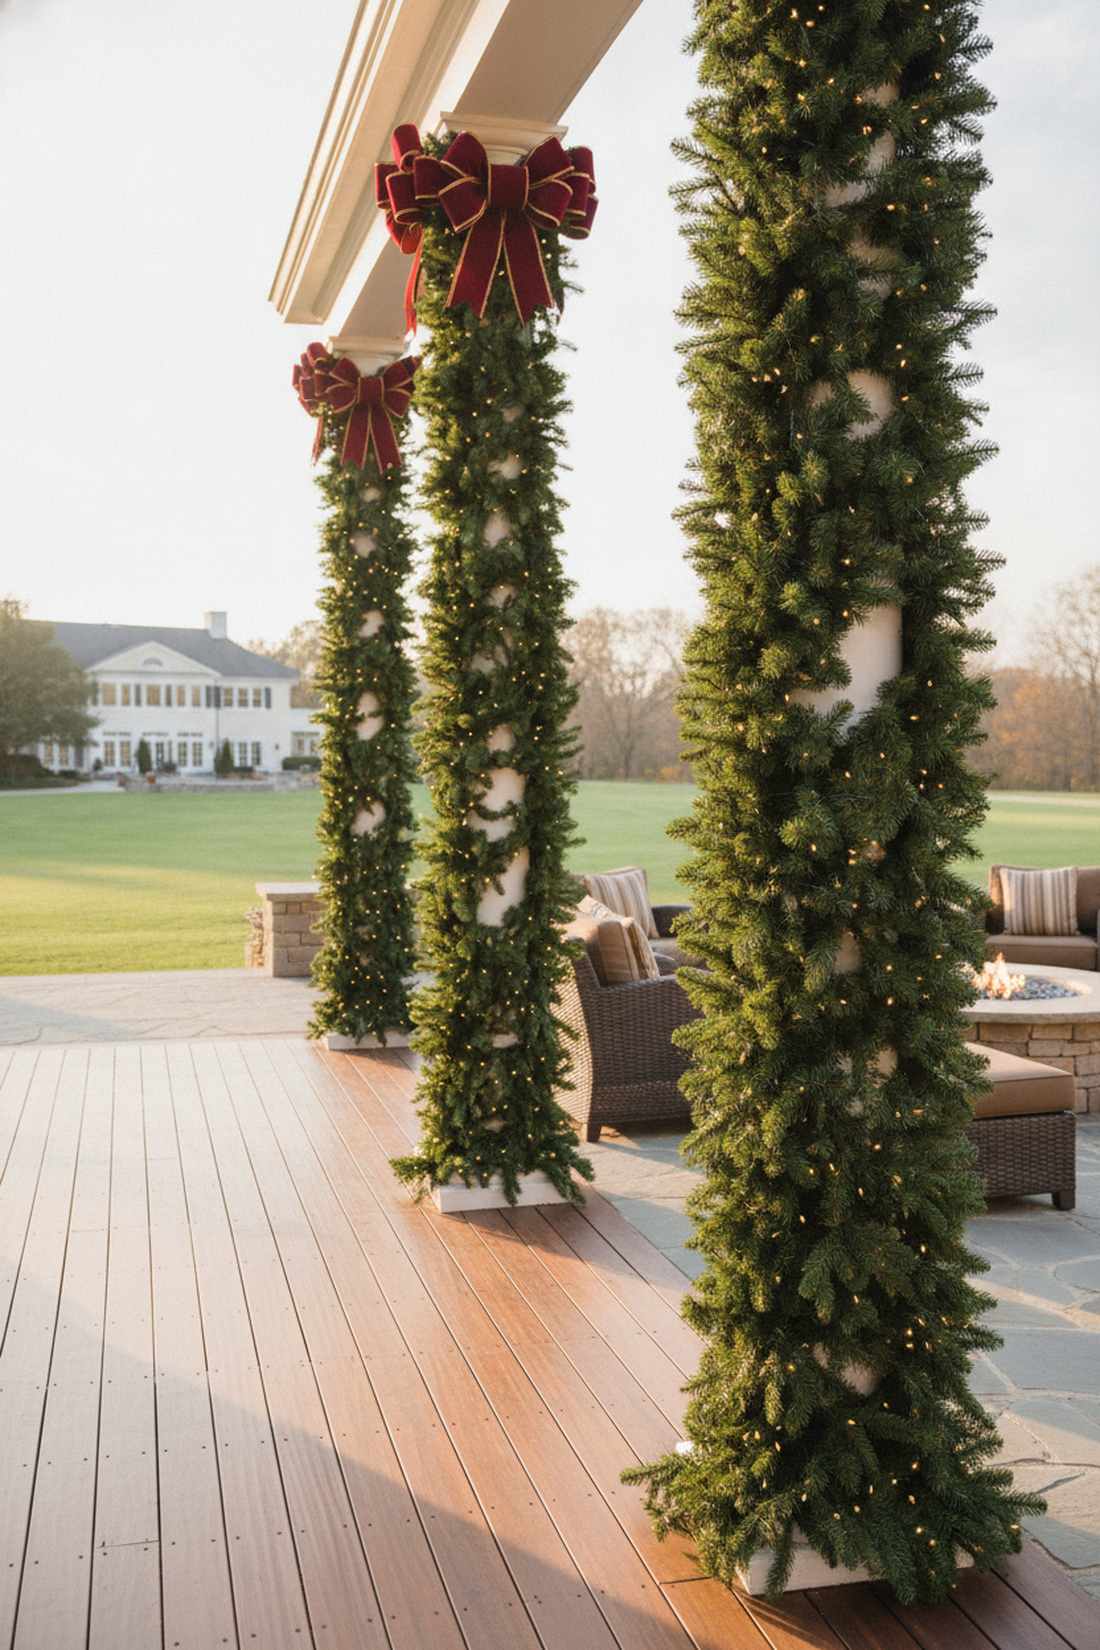
This thick, organic texture feels incredibly rich and inviting against cold architecture. Adding textured foliage column wraps is the best way to hide ugly deck posts or metal pergola legs.
Ditching plain lights for pre-lit greenery outshines generic neighborhood setups by adding daytime visual interest. Sourcing commercial artificial pine supplies prevents the garland from looking crushed and plasticky.
Wrapping four patio columns costs roughly $60–$90. It completely softens the hard edges of your outdoor structures.
- Key Materials: Thick artificial pine garland, outdoor wire, bows.
- Vibe / Style: High-end country club aesthetic.
- Difficulty: Very easy wrap-around.
- Budget Breakdown: Garland: $65 | Wire: $5.
- Creator’s Tip: Fluff the garland aggressively before hanging it; pulling the branches 90 degrees outward doubles its visual thickness.
- Smart Sourcing: pre-lit thick commercial garland strips and green floral wire spools.
23. Ornament-Hung Branches
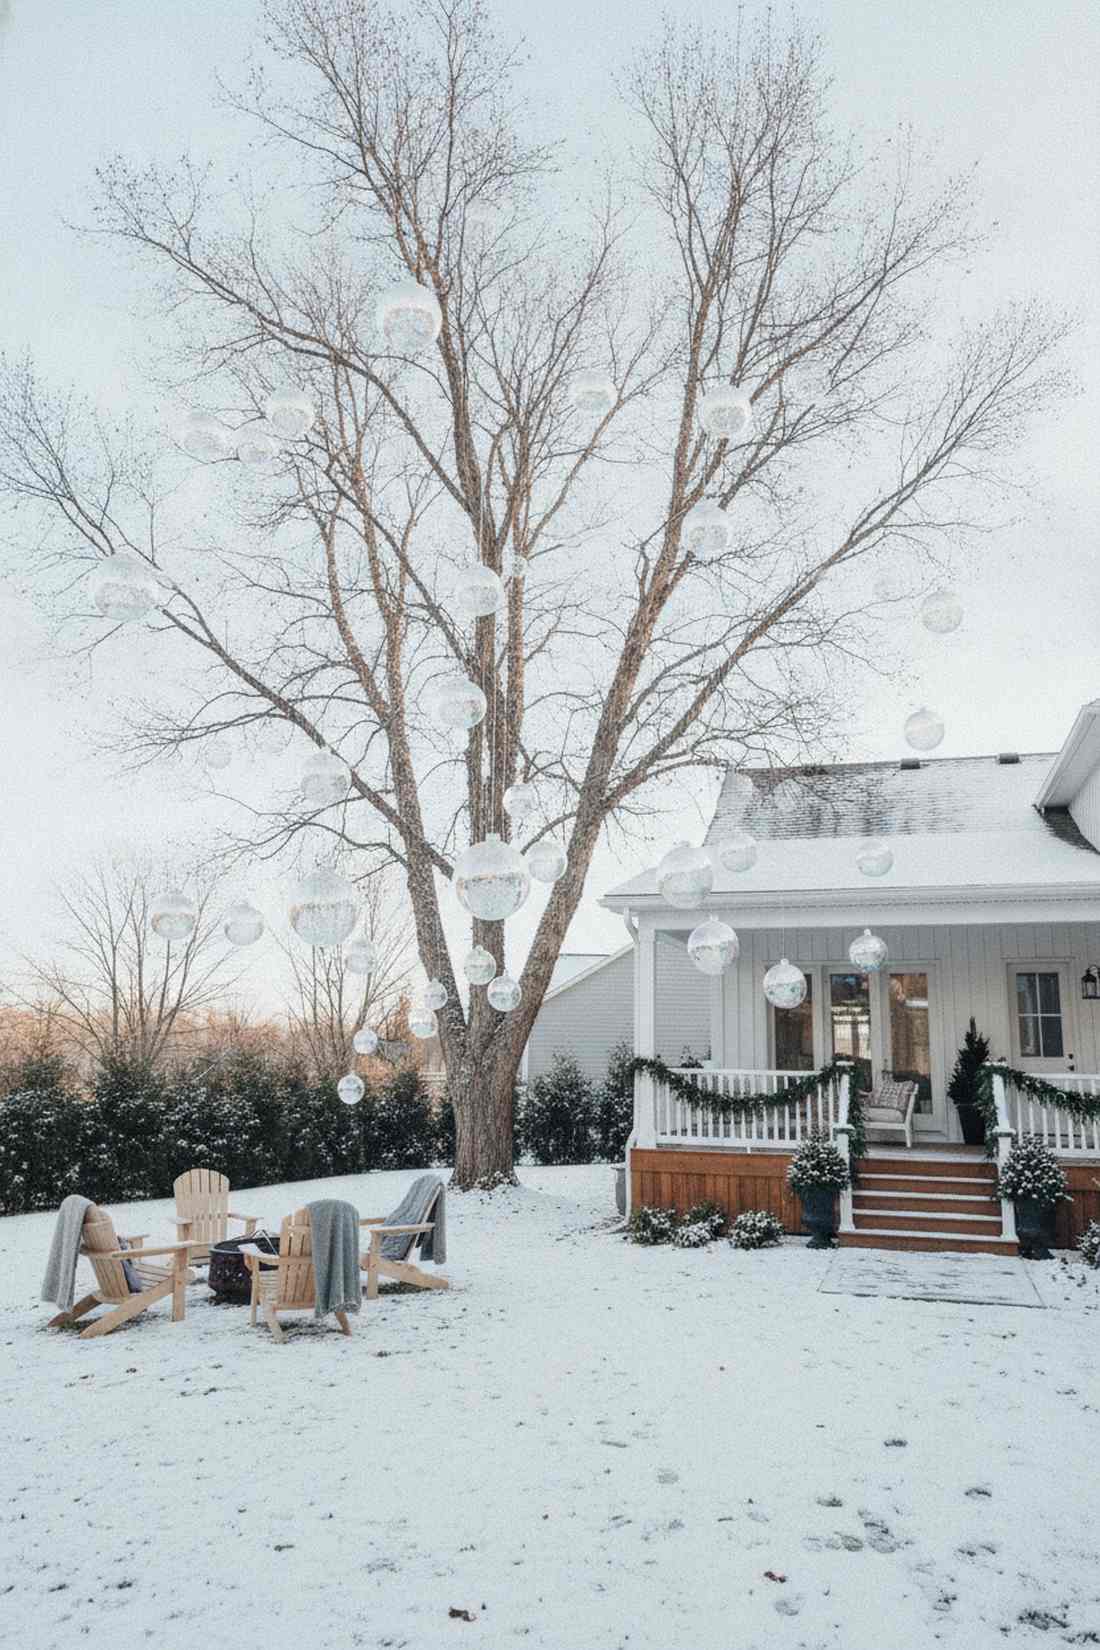
These floating baubles look like magical fruit growing in a winter wonderland. Suspending oversized hanging yard ornaments is a genius tactic for activating bare, leafless winter trees.
Spacing them out with invisible line delivers a surprisingly premium look that makes them appear to levitate. Snagging bulk packs of UV-resistant acrylic ornaments guarantees they survive aggressive wind storms without shattering over your lawn.
You can dress an entire tree for $30–$50. Pin this if you want maximum daytime impact without running electricity.
- Key Materials: Large shatterproof ornaments, heavy fishing line.
- Vibe / Style: Modern whimsical levitation.
- Difficulty: Easy but involves reaching.
- Budget Breakdown: Ornaments: $35 | Line: $5.
- Creator’s Tip: Use 50lb test clear fishing line; standard thread will snap instantly in a winter gust.
- Smart Sourcing: jumbo shatterproof outdoor baubles (bulk pack) and heavy-duty clear fluorocarbon line.
24. Spotlit Specimen Trees
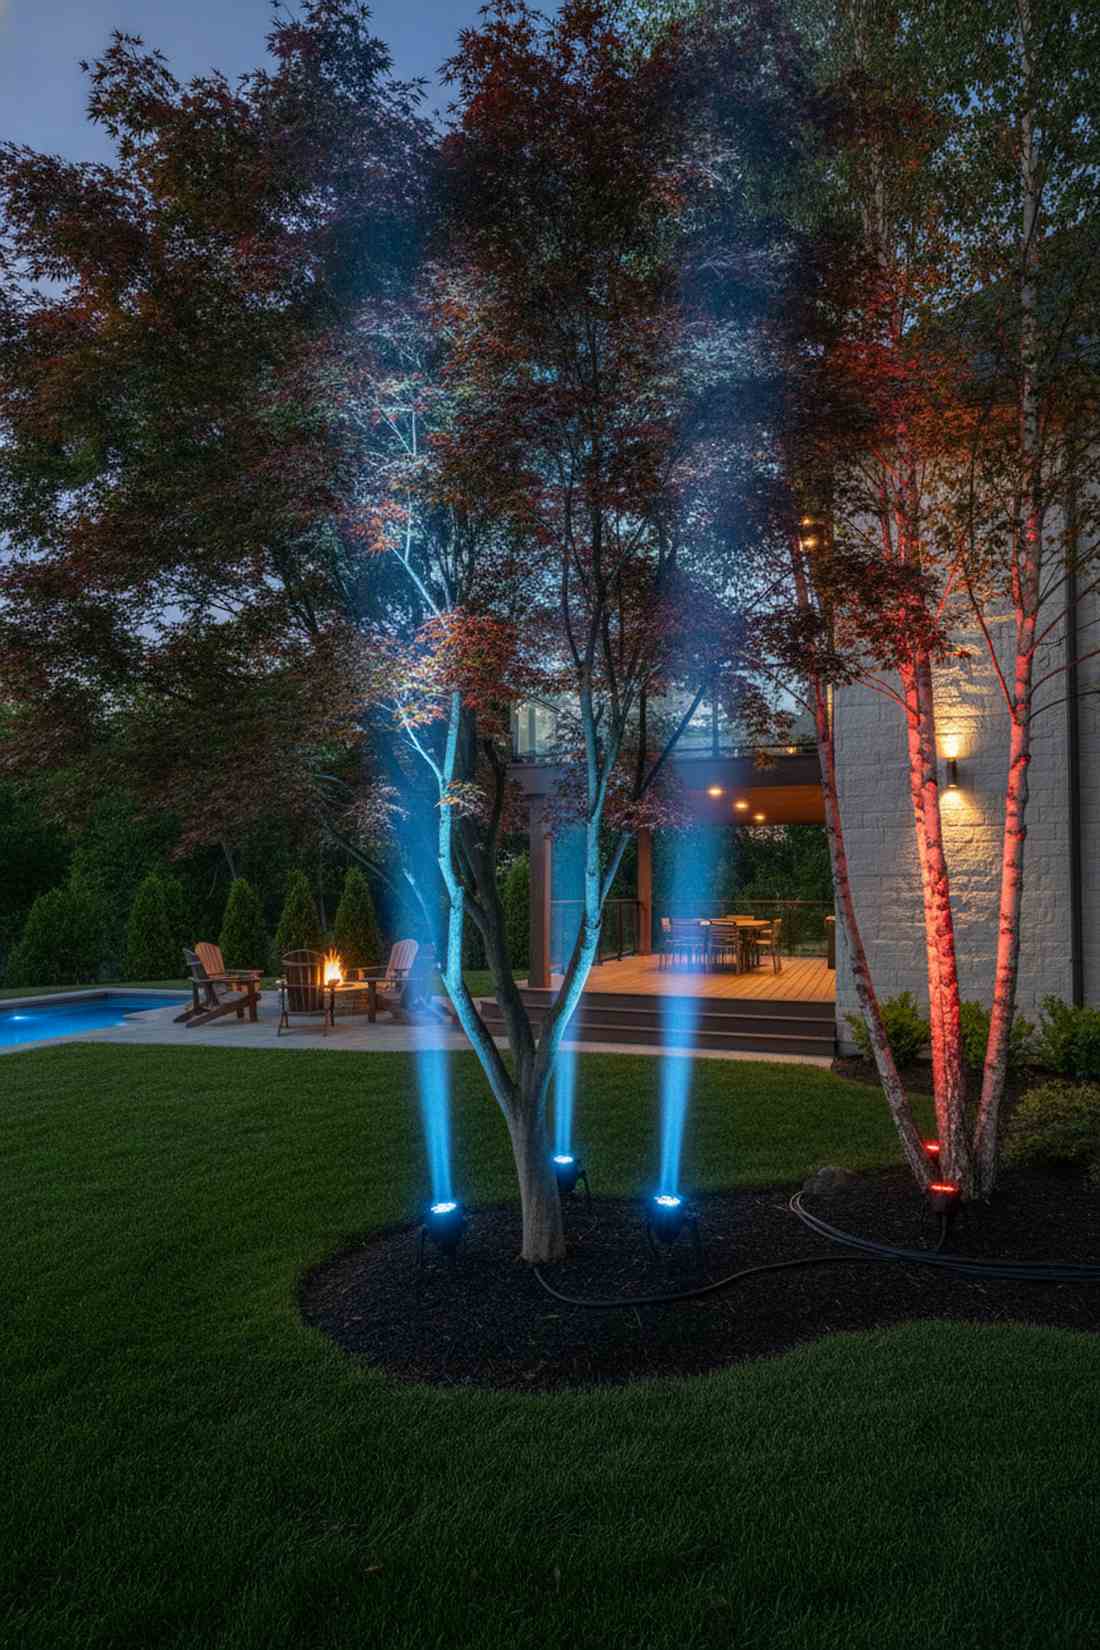
This architectural lighting casts dramatic, sweeping shadows that feel incredibly luxurious. Using high-contrast ground uplighting is perfect for showcasing unique, sculptural trees like Japanese maples or birch.
Skipping string lights entirely for bold colored floods fools guests into thinking you hired a pro lighting architect. Investing in smart color-changing LED landscape kits allows you to switch from icy blue to festive red with an app.
A set of premium smart spotlights costs $60–$120. It’s the ultimate hack for lazy decorators who want maximum impact.
- Key Materials: LED floodlights, outdoor extension cables.
- Vibe / Style: Expensive architectural drama.
- Difficulty: Zero effort, just plug and point.
- Budget Breakdown: Spotlights: $80 | Cables: $20.
- Creator’s Tip: Position the light extremely close to the trunk pointing straight up to highlight the bark texture dramatically.
- Smart Sourcing: smart RGB outdoor LED floodlights and weatherproof outdoor timer stakes.
Most people leave their backyard structures bare. The next few ideas will turn them into the centerpiece of your entire property…
25. Flocked Landscape Trees
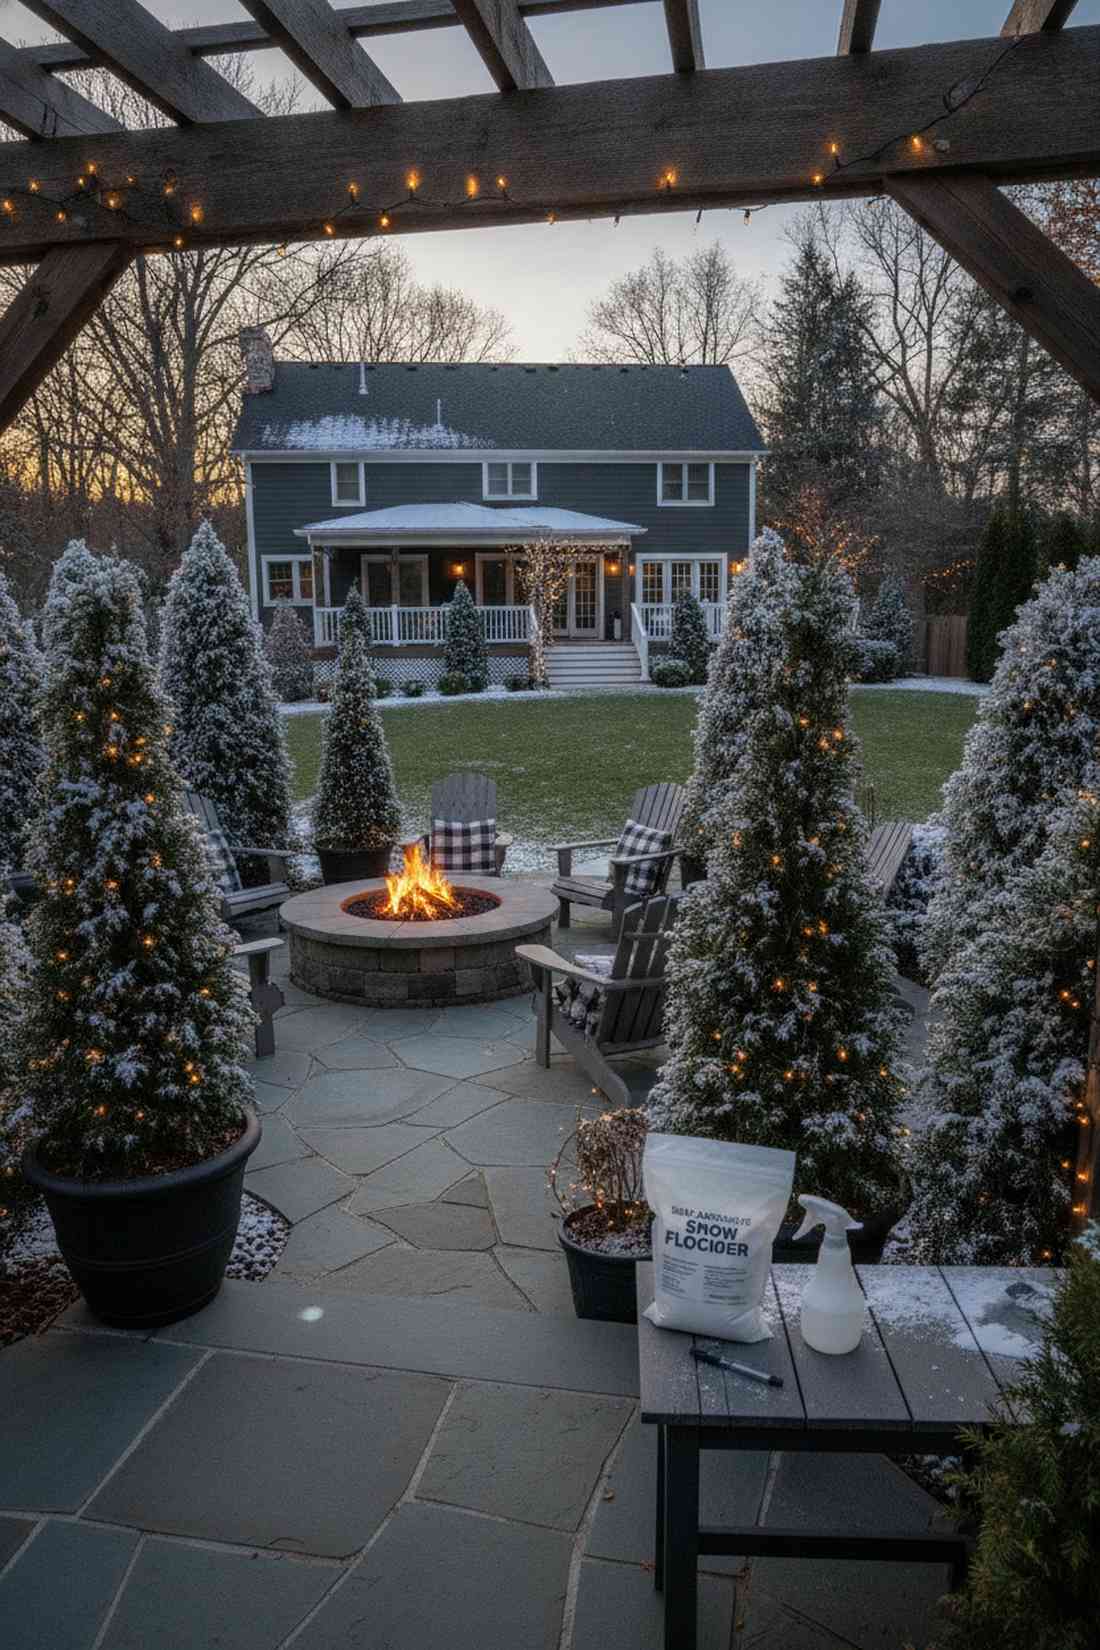
This icy coating makes your yard look like a pristine, untouched alpine forest. Applying a faux snow foliage treatment works wonders on dark green arborvitae or basic patio potted evergreens.
Creating this permanent frost layer gives a designer-level finish that catches and amplifies nearby string lights beautifully. Using professional cellulose flocking supplies ensures the snow won’t just melt away during the first rainstorm.
You can professionally flock several small trees for $30–$45. Save this to your DIY winter garden board for an instant snowy upgrade.
- Key Materials: Outdoor flocking powder, spray bottle with water.
- Vibe / Style: Pristine winter wonderland.
- Difficulty: Messy but very easy.
- Budget Breakdown: Flocking powder: $35 | Spray: $0.
- Creator’s Tip: Always mist the tree with water first, sift the powder on, and then mist again to “lock” the adhesive.
- Smart Sourcing: self-adhesive snow flocking powder (bulk pack) and fine-mist continuous spray bottles.
Festive Garden Structures
Permanent landscape structures offer ready-made frameworks for holiday decoration. Gazebos, pergolas, and arbors become central features within backyard christmas displays when thoughtfully adorned.
26. Wrapped Pergola Beams
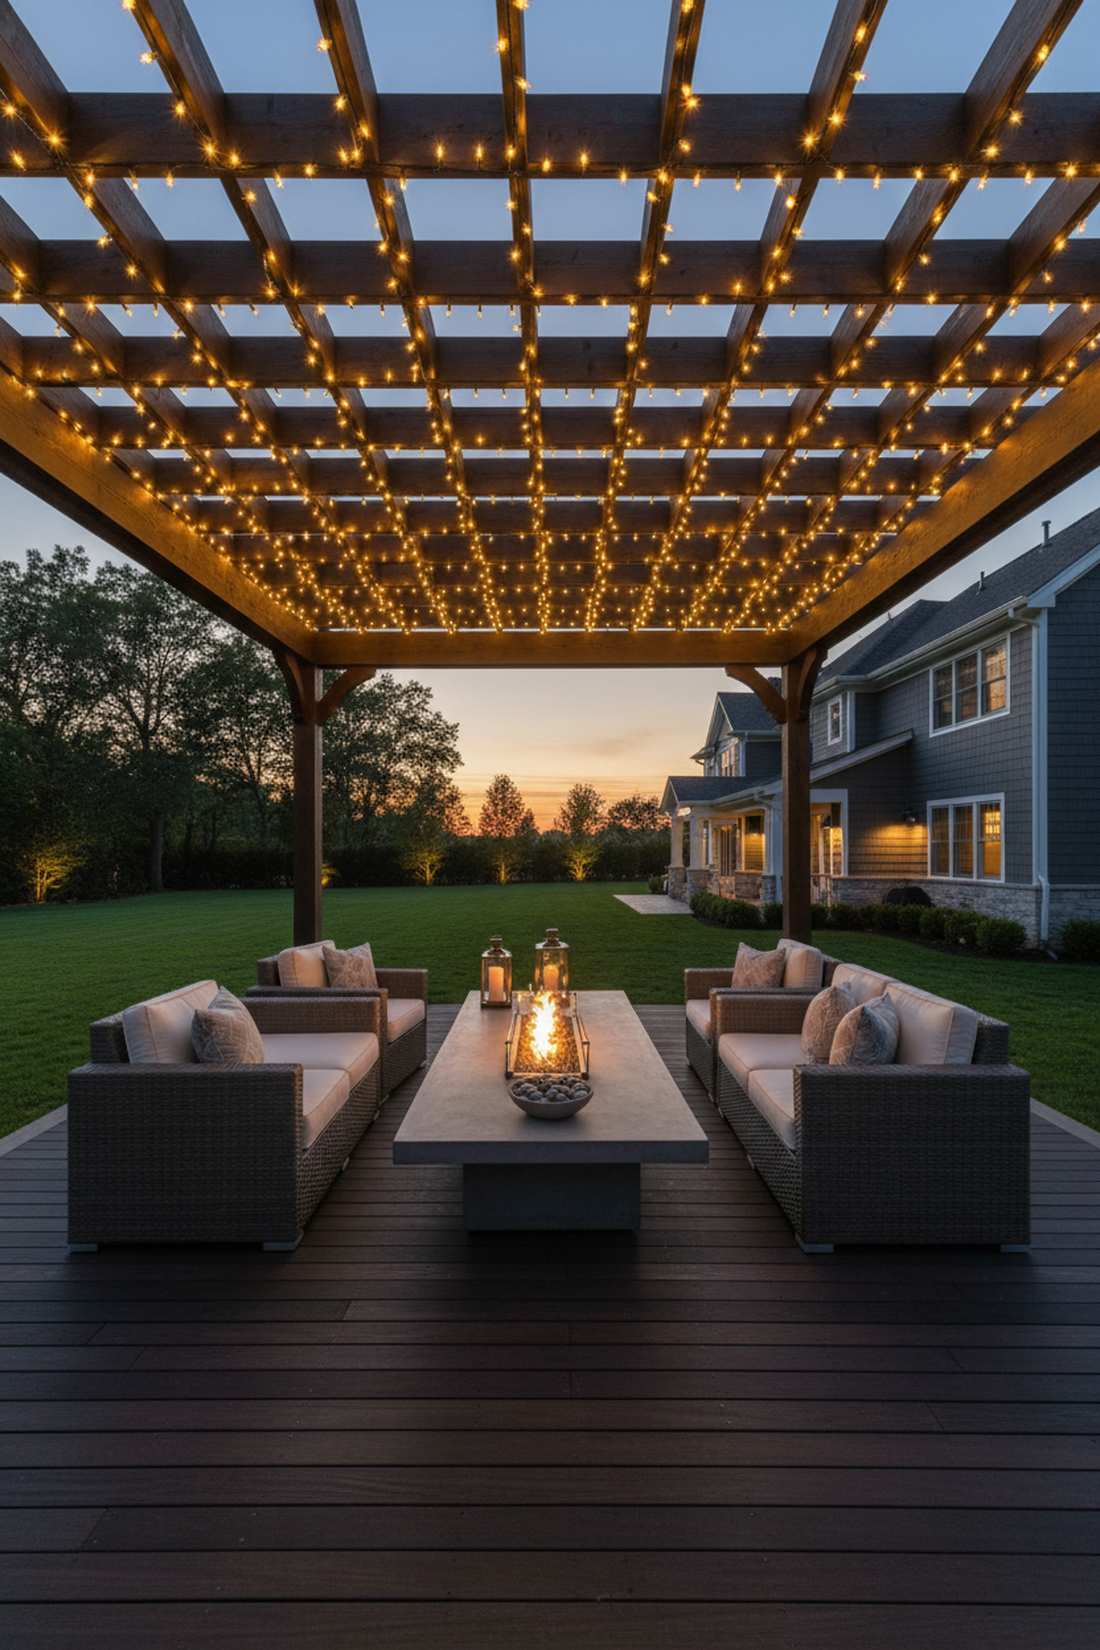
Sitting underneath this glowing grid feels like dining in a high-end rooftop restaurant. Creating an illuminated outdoor ceiling grid is the absolute best way to utilize an existing backyard pergola.
Wrapping every single rafter individually outshines generic neighborhood setups by creating intense geometric depth overhead. Snagging commercial bulk light reels prevents you from dealing with twenty different messy plugs.
Wrapping a standard 10×10 pergola costs around $80–$140. It completely redefines your patio space for night hosting.
- Key Materials: String lights, staple gun or zip ties, ladder.
- Vibe / Style: Upscale modern patio.
- Difficulty: Labor intensive but simple.
- Budget Breakdown: Lighting: $110 | Ties: $15.
- Creator’s Tip: Wrap the beams tightly, but leave a tiny bit of slack between connections to account for wood expanding/contracting in the cold.
- Smart Sourcing: commercial 500-LED string reels and UV-resistant clear zip ties.
27. Gazebo Winter Retreat
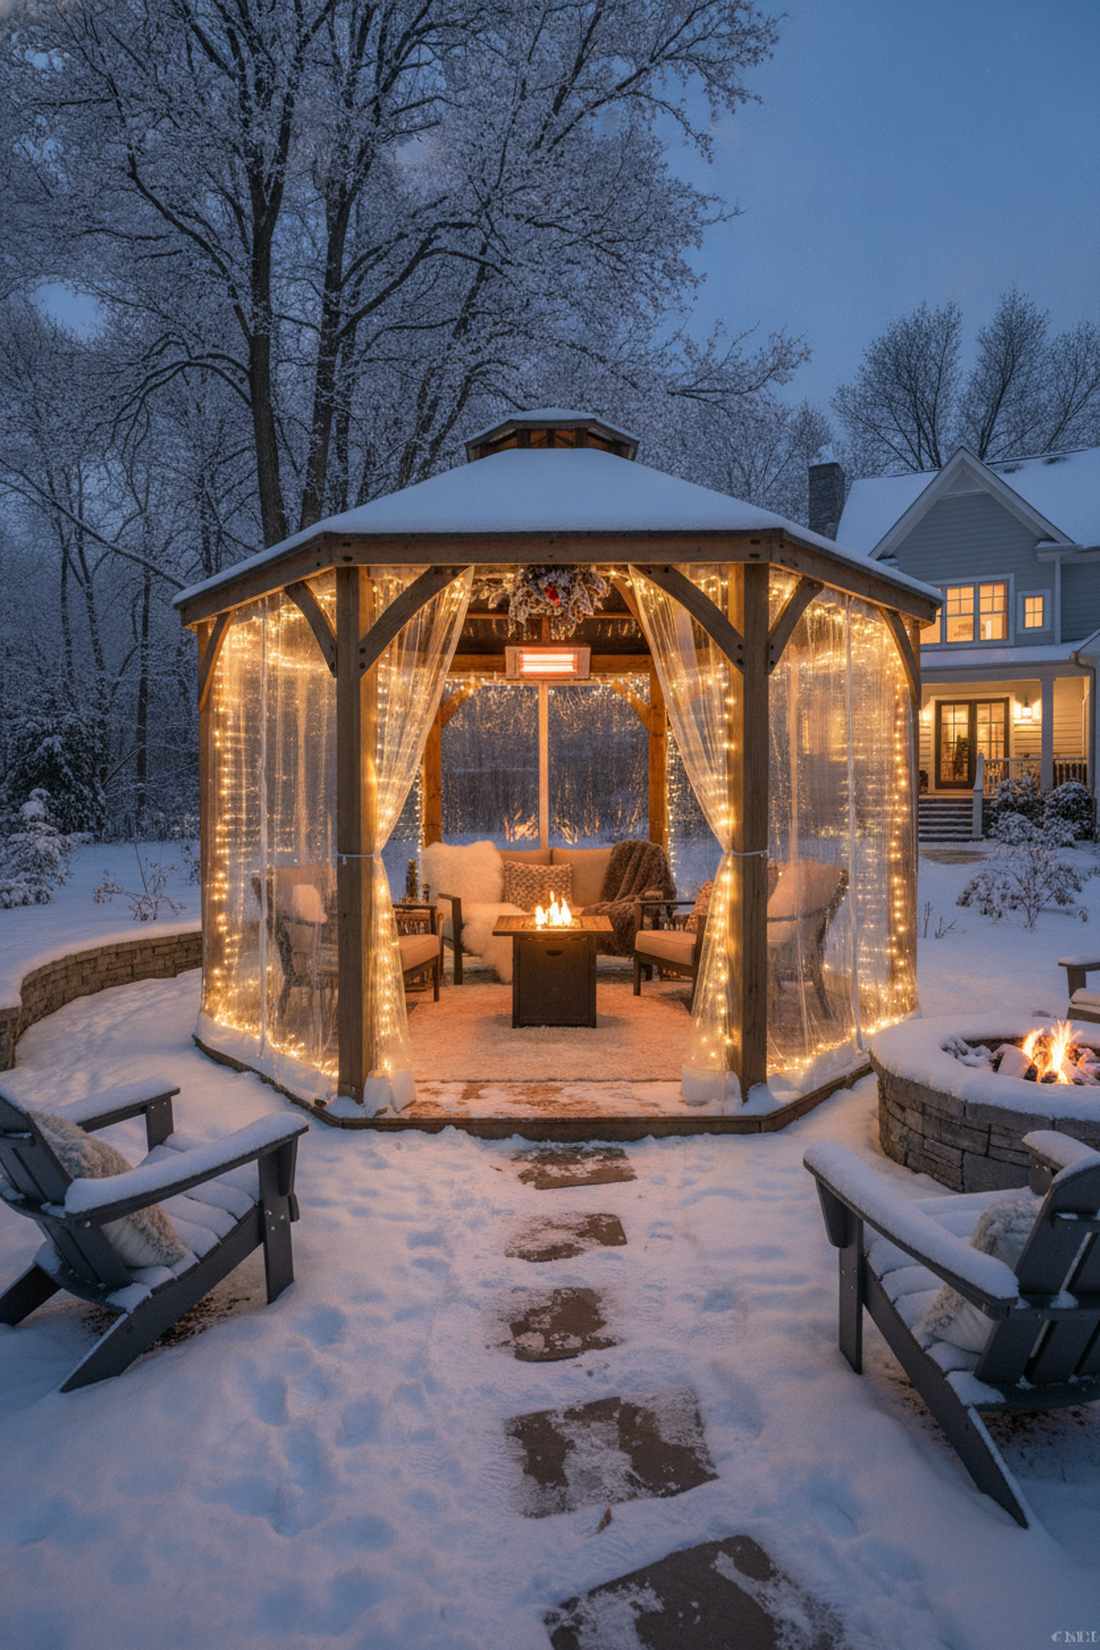
This enclosed setup feels like your own private, heated snow globe. Designing a cozy enclosed patio lounge turns an unused summer gazebo into the ultimate holiday party VIP section.
Adding hanging faux-fur textures and ambient heat looks far more expensive than it is while actually making the space functional. Utilizing heavy-duty outdoor heating accessories means you can actually enjoy your backyard in December.
Equipping a gazebo space costs $150–$300 including the heat source. Pin this if you love hosting winter fire-pit nights.
- Key Materials: Infrared heater, curtain lights, outdoor rugs, warm blankets.
- Vibe / Style: Luxury ski lodge retreat.
- Difficulty: Easy styling and placement.
- Budget Breakdown: Heater: $120 | Decor: $80.
- Creator’s Tip: Hang warm white curtain lights on the inside perimeter of the gazebo so the light reflects warmly inward instead of outward.
- Smart Sourcing: weatherproof infrared patio heaters and washable faux-fur outdoor throws.
28. Santa’s Grotto Setup
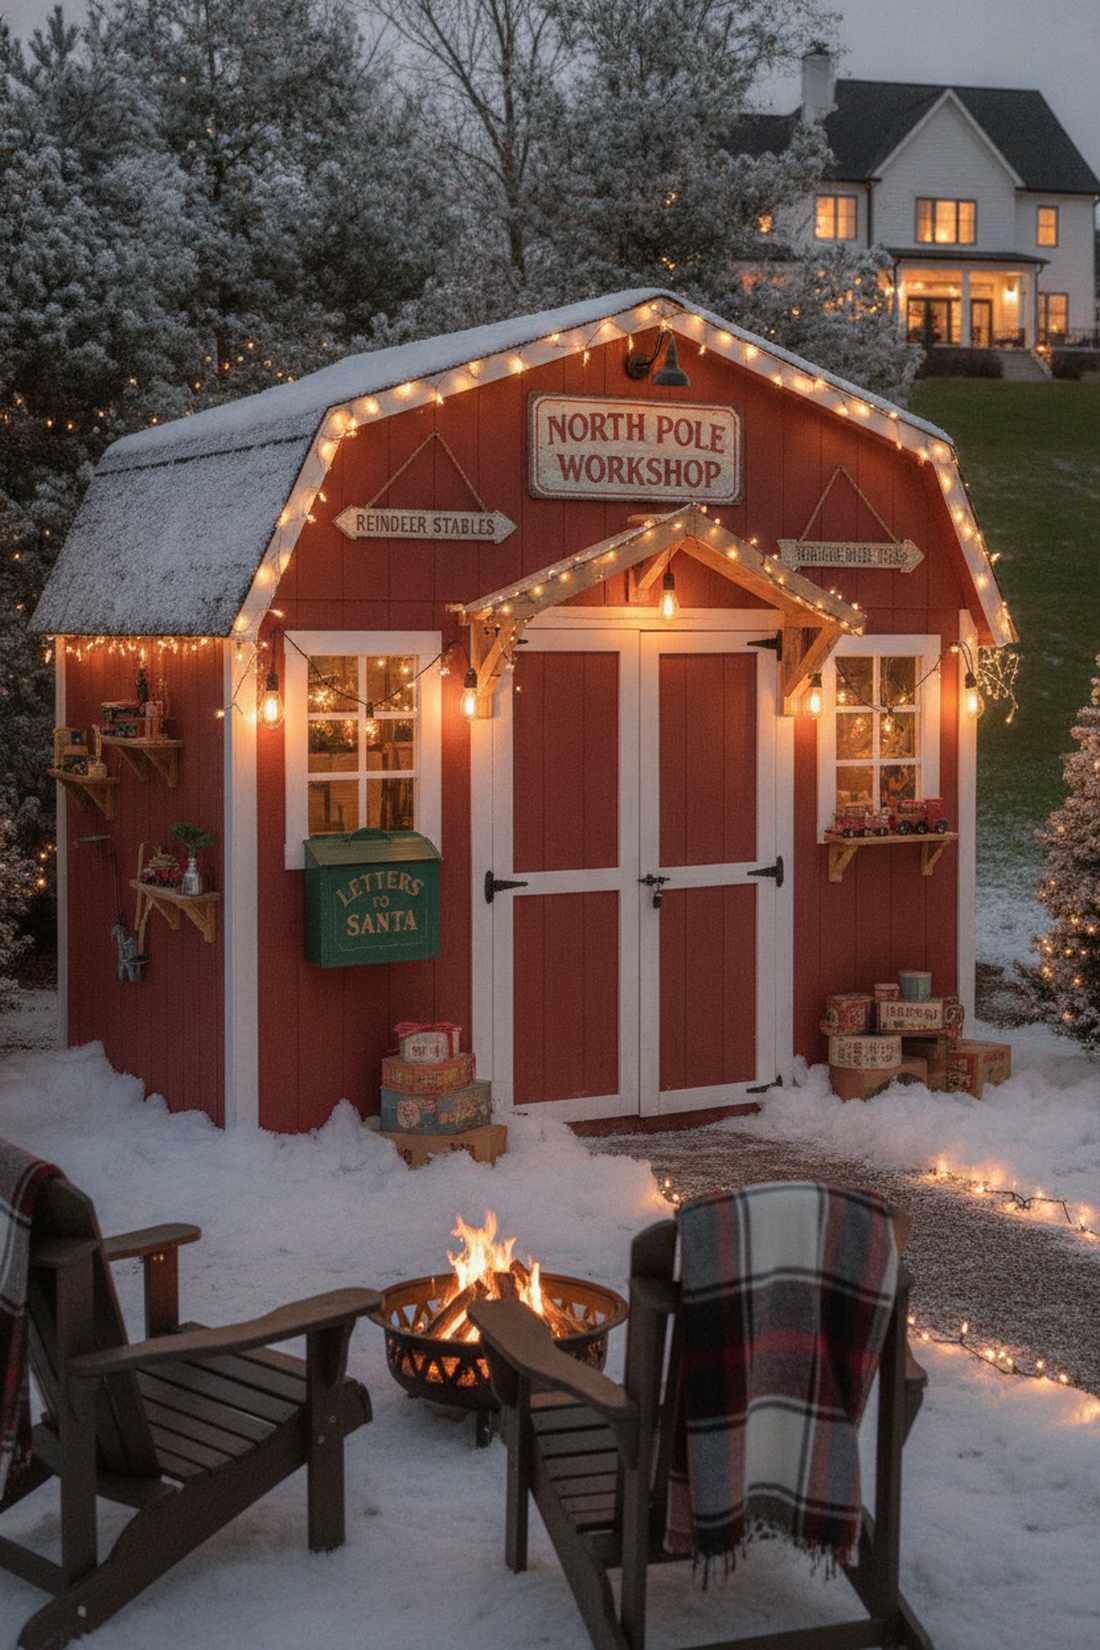
This magical shed transformation feels like you’ve uncovered a secret workshop in the snow. Building an interactive holiday prop shed is incredible for families with young kids or for epic holiday party photo booths.
Overhauling a boring tool shed with intensive lighting and props delivers a surprisingly premium look that guests will obsess over. Injecting miniature garden supplies and vintage toy props creates a deeply immersive environment.
A full shed makeover costs about $100–$200 in props. It’s a memory-making project that kids will talk about all year.
- Key Materials: Vintage wooden signs, warm lighting, fake snow, mailbox prop.
- Vibe / Style: Interactive vintage wonderland.
- Difficulty: Creative weekend project.
- Budget Breakdown: Signage: $50 | Lighting/Props: $80.
- Creator’s Tip: Install a motion-sensor sound box that plays faint sleigh bells or workshop hammering when someone walks near the door.
- Smart Sourcing: vintage-style metal North Pole signs and motion-activated holiday sound boxes.
29. Arbor Entrance Decoration
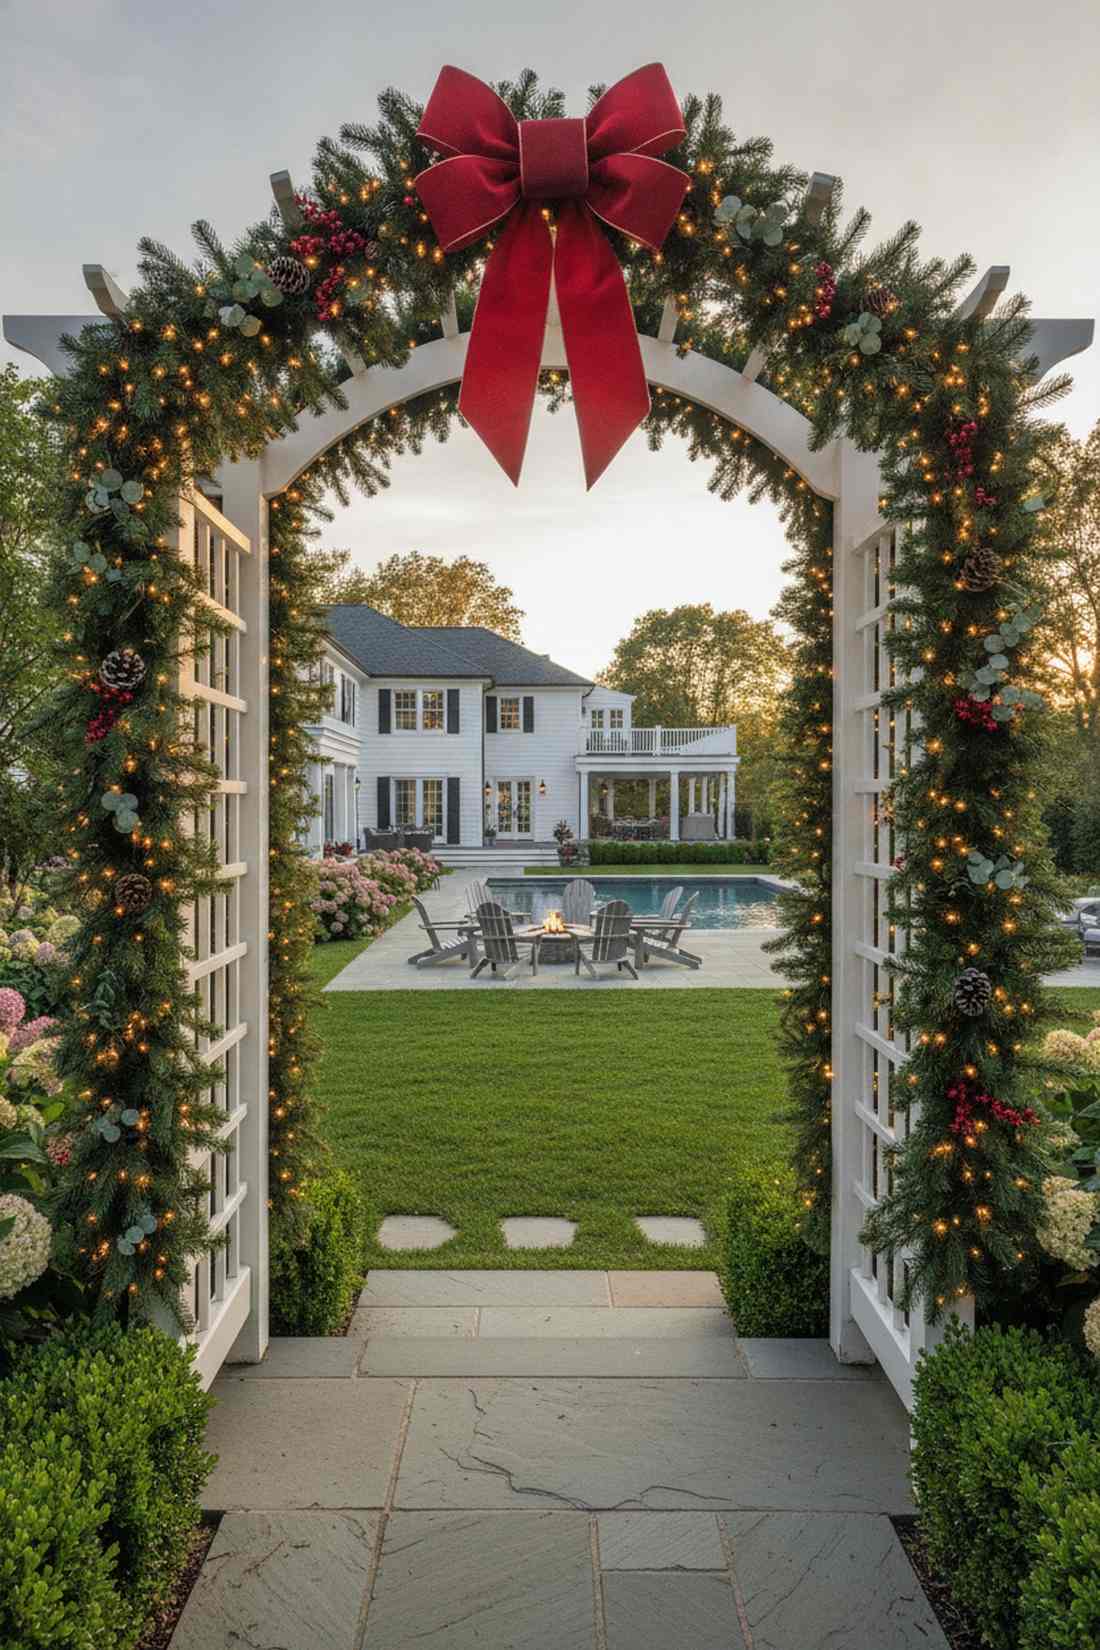
Walking through this formal arch feels like a grand welcome to an exclusive holiday estate. Crafting a garland-wrapped transition archway is the perfect way to separate your front yard from your backyard oasis.
Accenting the top with an oversized velvet bow fools guests into thinking you hired a pro decorator. Getting premium UV-resistant ribbon supplies stops the fabric from bleaching out after two weeks in the sun.
Dressing an existing arbor costs just $40–$70. Pin this for a high-impact, low-effort entryway fix.
- Key Materials: Pre-lit garland, oversized structural bow, floral wire.
- Vibe / Style: Classic traditional estate.
- Difficulty: Quick 20-minute setup.
- Budget Breakdown: Garland: $45 | Bow: $20.
- Creator’s Tip: Stuff the loops of your oversized bow with plastic grocery bags so they maintain their perfect 3D puff shape in the rain.
- Smart Sourcing: structured velvet outdoor bows and heavy-duty floral bind wire.
Before you spend another dollar on basic plastic decor, read this breakdown on where to actually put your budget…
Material Guide: Cheap vs. Premium Aesthetic
Knowing exactly where to save and where to spend makes all the difference in achieving that “looks expensive but isn’t” vibe.
- Standard vs. UV-Resistant/Premium: Standard plastic shatters in the cold and bleaches in the sun. Upgrading to UV-resistant acrylics and commercial wireframes means you buy it once and it looks pristine for years.
- Pre-made Kits vs. Sourcing Locally: While foraging is free, buying pre-lit commercial garland or starter kits saves you 10+ hours of untangling wires and replacing dead bulbs.
30. Fence-Line Garland Display
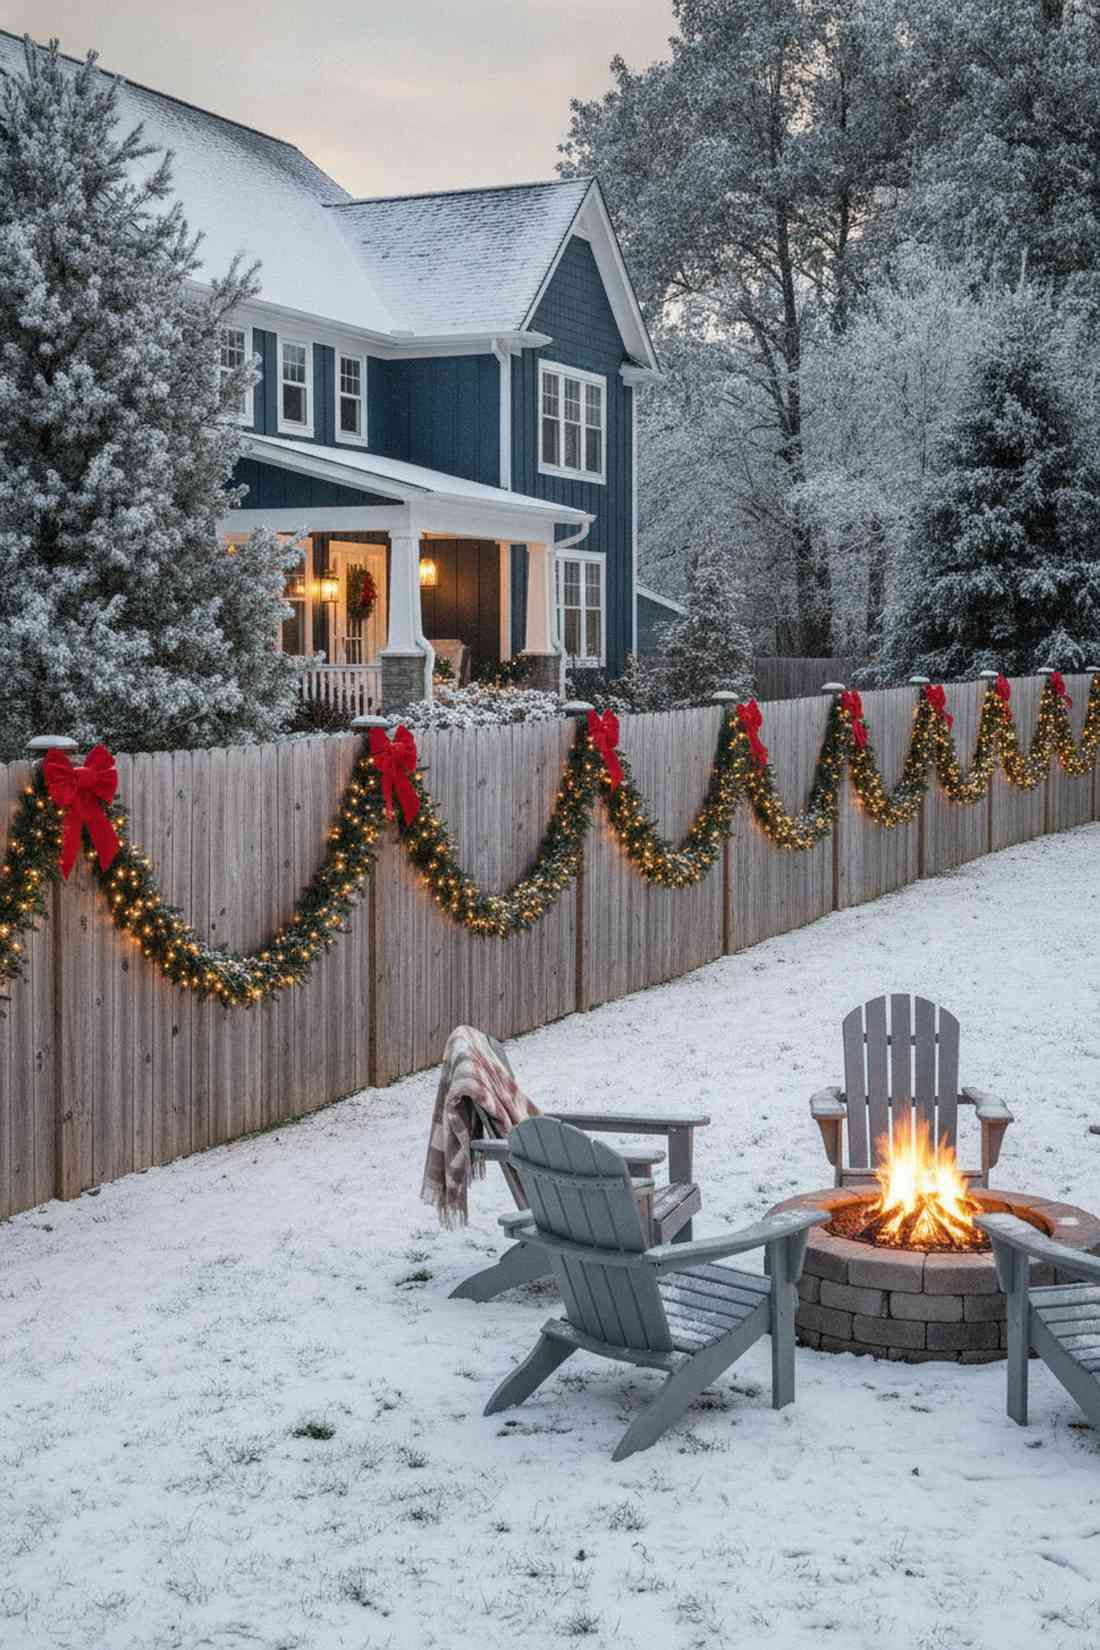
This continuous sweeping greenery makes your perimeter look like a perfectly tailored winter boundary. Installing a draped perimeter foliage line is the smartest way to make an ugly wooden fence look intentional and festive.
Spacing out rhythmic swoops instead of pulling it tight outshines generic neighborhood setups by adding classic volume. Snagging bulk packs of pre-lit commercial greenery ensures you don’t go broke covering a 50-foot fence line.
You can drape a long fence for about $70–$120. It beautifully frames your entire backyard canvas.
- Key Materials: Continuous pre-lit garland, fence hooks, red accent bows.
- Vibe / Style: Tailored neighborhood charm.
- Difficulty: Very easy repetitive hanging.
- Budget Breakdown: Bulk Garland: $90 | Hooks: $15.
- Creator’s Tip: Drop the swag exactly 12 inches at the center of each fence panel for a mathematically perfect, professional drape line.
- Smart Sourcing: 50ft pre-lit artificial garland rolls and damage-free vinyl fence hooks.
Natural & Rustic Elements
Organic materials introduce authentic texture that balances high-tech lighting systems. Designers use natural elements to ground displays and connect holiday decorations with surrounding landscapes.
31. Birch Log Arrangements
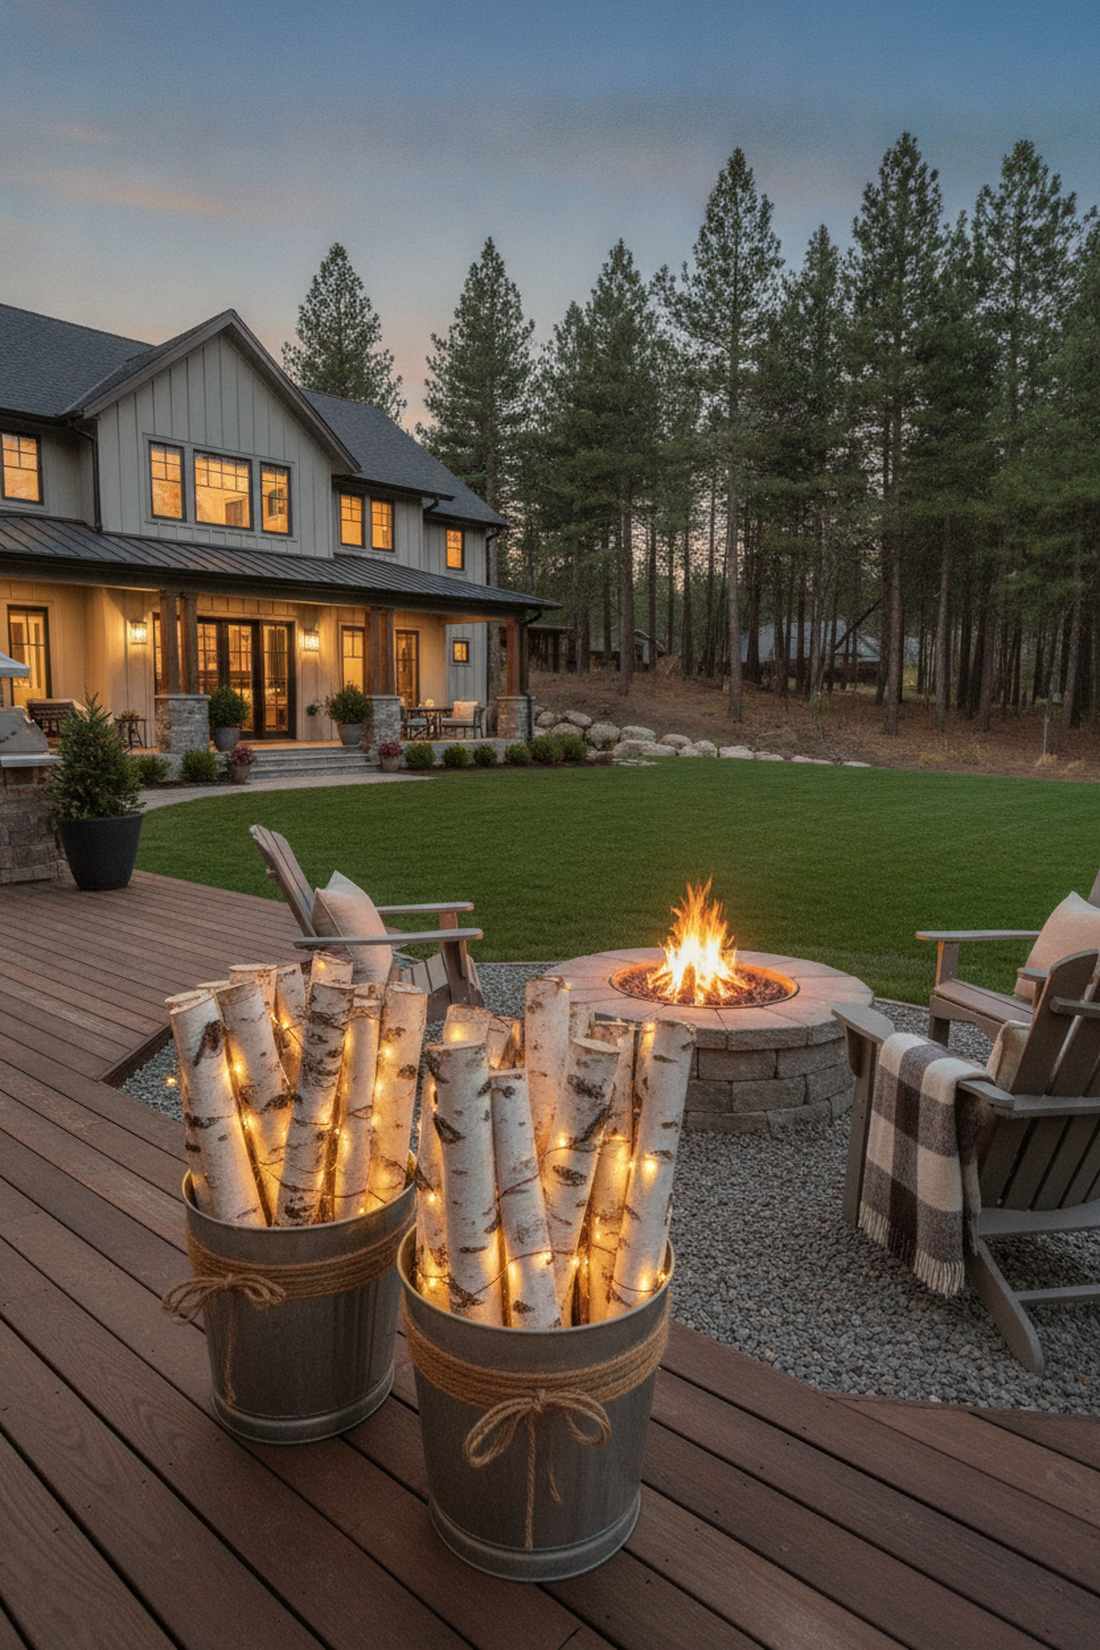
This sculptural arrangement feels like a sophisticated centerpiece at a luxury ski lodge. Stacking illuminated natural wood bundles is highly effective for decorating front porches or flanking backyard fire pits.
Contrasting stark white bark against warm fairy lights gives a designer-level finish without needing flashy colors. Sourcing pre-kiln-dried decorative logs guarantees you aren’t bringing nasty termites or ants onto your patio.
A set of premium birch bundles costs $35–$60. Save this to your rustic outdoor styling board.
- Key Materials: White birch logs, twine, copper wire warm LEDs.
- Vibe / Style: Upscale rustic lodge.
- Difficulty: Extremely easy styling.
- Budget Breakdown: Birch Logs: $30 | Lighting: $15.
- Creator’s Tip: Stand them vertically in a galvanized metal bucket filled with sand to keep the bundle perfectly upright and stable.
- Smart Sourcing: kiln-dried white birch log sets and battery-operated copper string lights.
32. Evergreen Wreath Fence Display
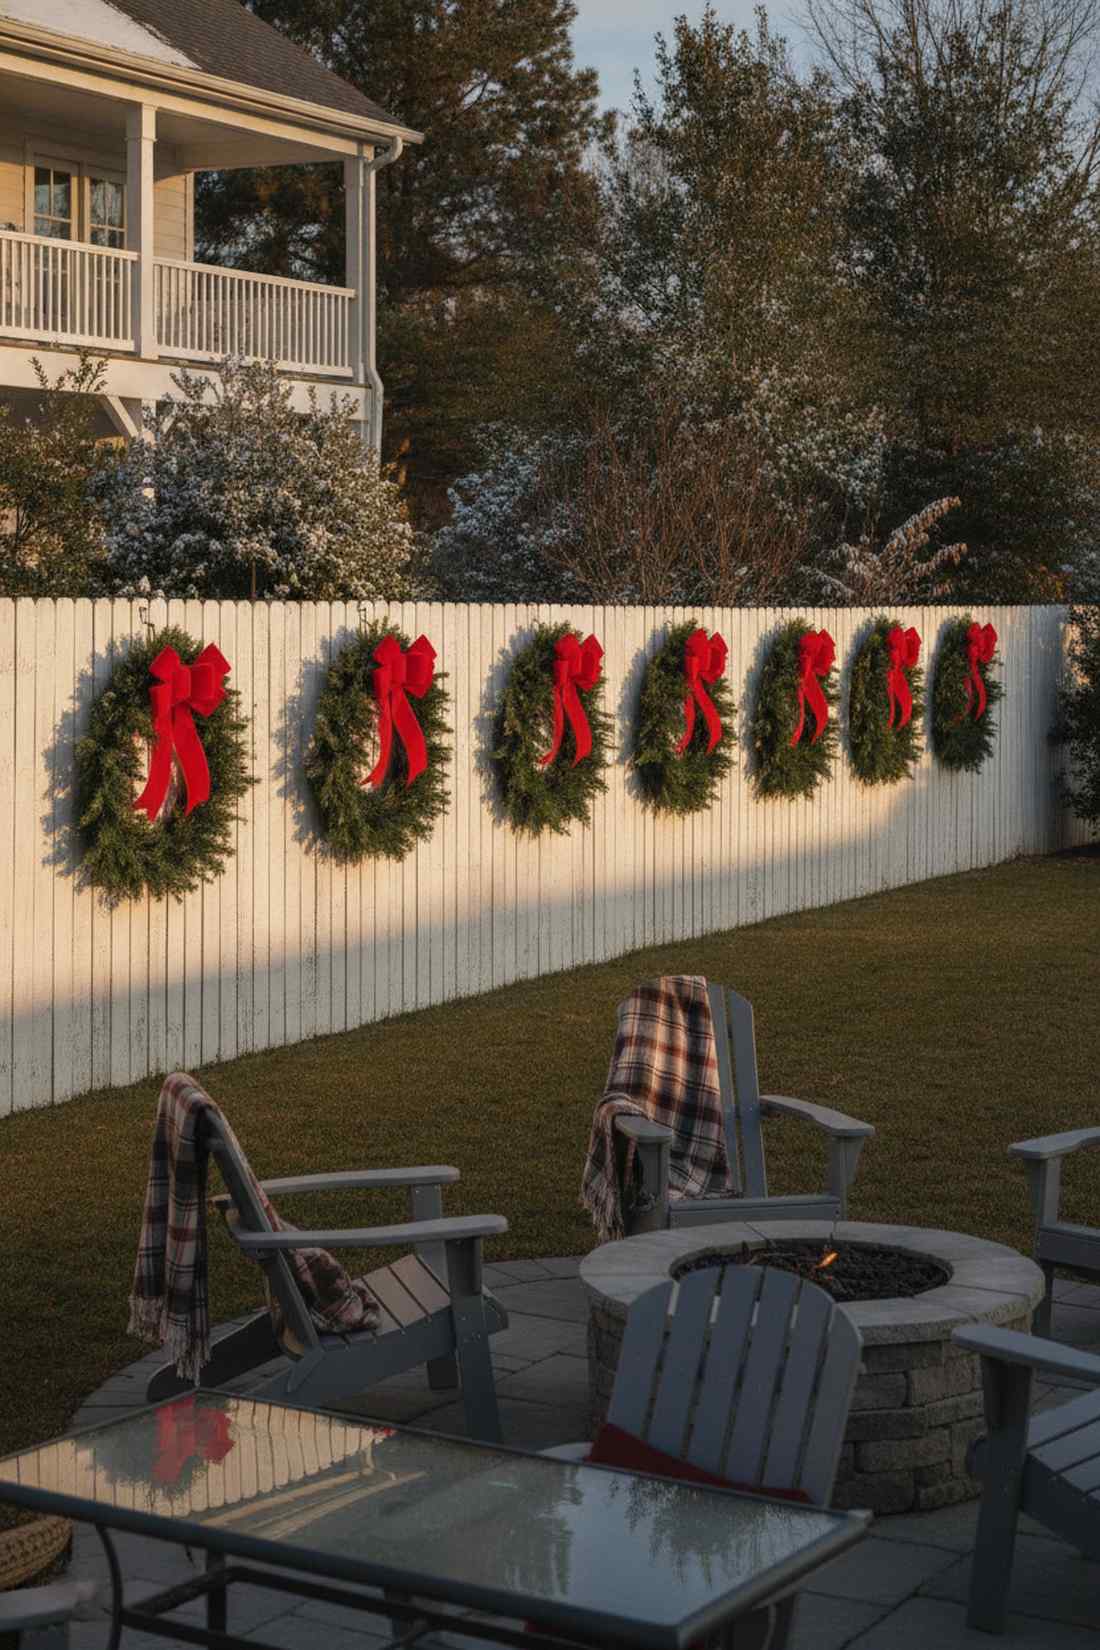
This rhythmic repetition looks like a scene pulled from a classic holiday movie. Hanging a symmetrical floating wreath line works wonders on long, boring privacy fences or repetitive porch railings.
Spacing identical wreaths mathematically looks far more expensive than it is and creates massive visual impact. Utilizing outdoor-rated ribbon supplies ensures the bows stay crisp and don’t turn into soggy rags after a snowstorm.
Six basic wreaths will cost about $50–$90. It’s a high-impact pattern that instantly upgrades dull boundaries.
- Key Materials: Identical artificial wreaths, outdoor ribbon, fence hooks.
- Vibe / Style: Crisp traditional symmetry.
- Difficulty: Easy but requires measuring.
- Budget Breakdown: Wreaths: $60 | Ribbon: $20.
- Creator’s Tip: Use a 4-foot piece of scrap wood as a spacer block between each wreath to guarantee they are mounted perfectly without using a tape measure every time.
- Smart Sourcing: plain artificial wreaths (bulk pack) and weatherproof stiff-wire outdoor ribbon.
33. Pinecone and Berry Accents
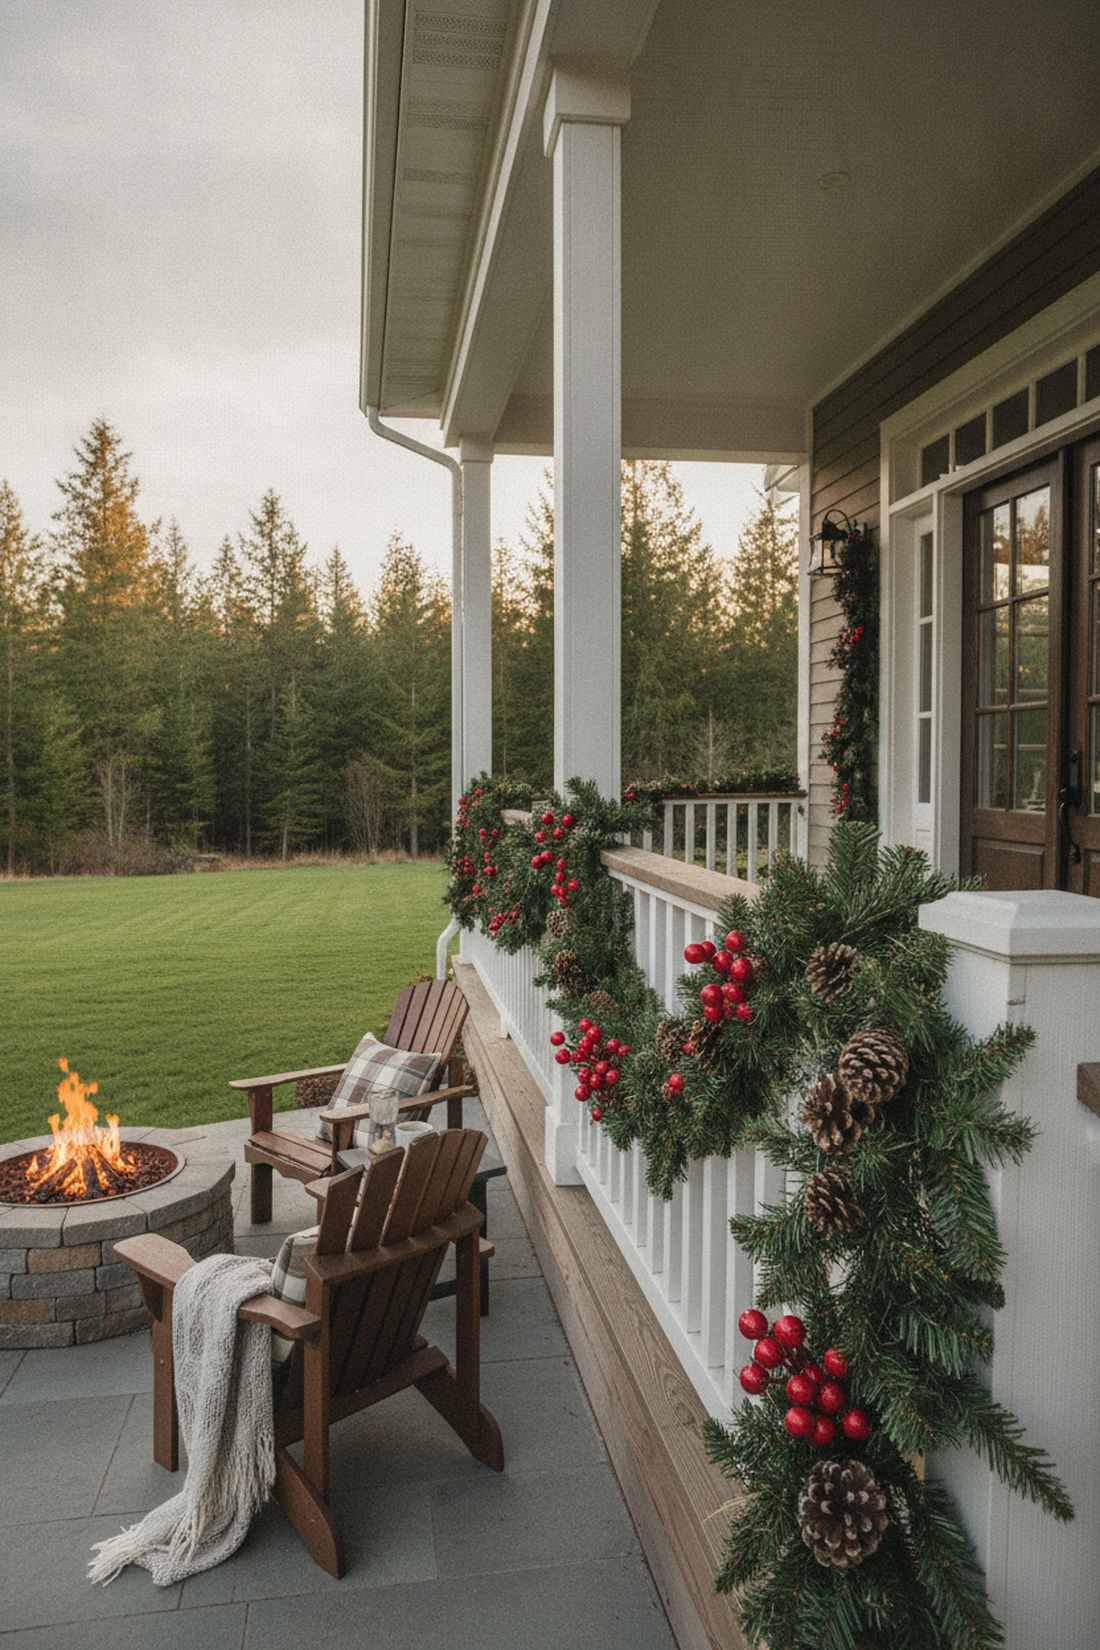
This textured detailing makes standard greenery look incredibly lush and professionally styled. Integrating natural foraging foliage accents is the perfect hack to make cheap, thin garlands look thick and expensive.
Mixing bright red faux berries with organic brown textures fools guests into thinking you hired a pro florist. Sourcing premium floral picks allows you to just jam them into the greenery without needing hot glue or wire.
Upgrading your greenery costs a mere $15–$30. Pin this if you want to resurrect old, tired decorations.
- Key Materials: Faux berry stems, real pinecones, glitter spray.
- Vibe / Style: Lush organic richness.
- Difficulty: Super easy tuck-and-go.
- Budget Breakdown: Berry Picks: $15 | Spray: $10.
- Creator’s Tip: Group the berries and pinecones in clusters of three; odd numbers always look more natural to the human eye.
- Smart Sourcing: waterproof red berry floral picks and outdoor clear glitter sealant spray.
34. Winter Planter Displays
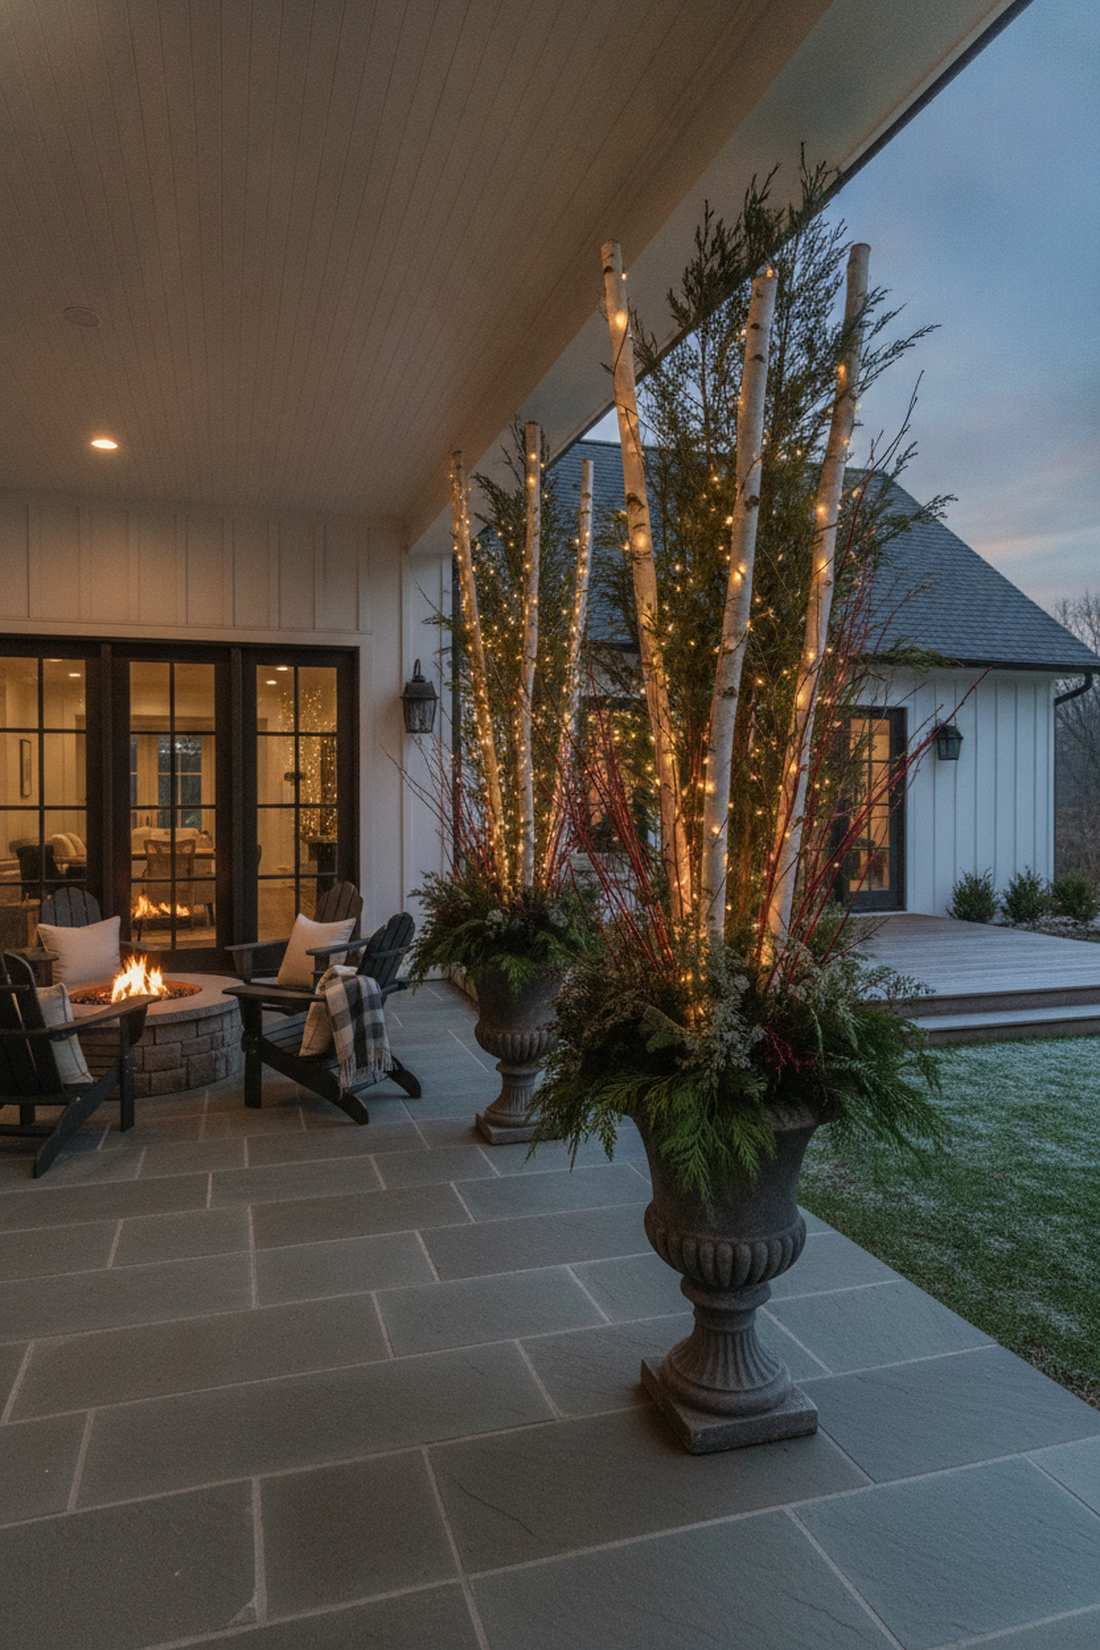
These towering arrangements feel like custom boutique installations flanking your doorway. Designing a vertical winter porch urn is an absolute necessity for framing your back patio doors or main entryways.
Ditching dead summer flowers for tall dogwood branches and illuminated evergreens delivers a surprisingly premium look. Utilizing heavy-duty outdoor potting supplies prevents the tall branches from snapping in heavy winds.
A pair of large custom planters will run $60–$100. Save this to your high-end curb appeal board.
- Key Materials: Large urns, floral foam, evergreen cuttings, birch poles, warm LEDs.
- Vibe / Style: High-end botanical architecture.
- Difficulty: Moderate floral arranging.
- Budget Breakdown: Branches/Greens: $45 | Base Foam: $20.
- Creator’s Tip: Fill the bottom half of the urn with heavy gravel before adding the floral foam block to lower the center of gravity.
- Smart Sourcing: heavy-duty dry floral foam blocks and pre-lit decorative birch branch stakes.
You don’t need a massive budget to create viral-worthy decor. This next DIY trick looks incredible for under $15…
35. Burlap and Twine Elements
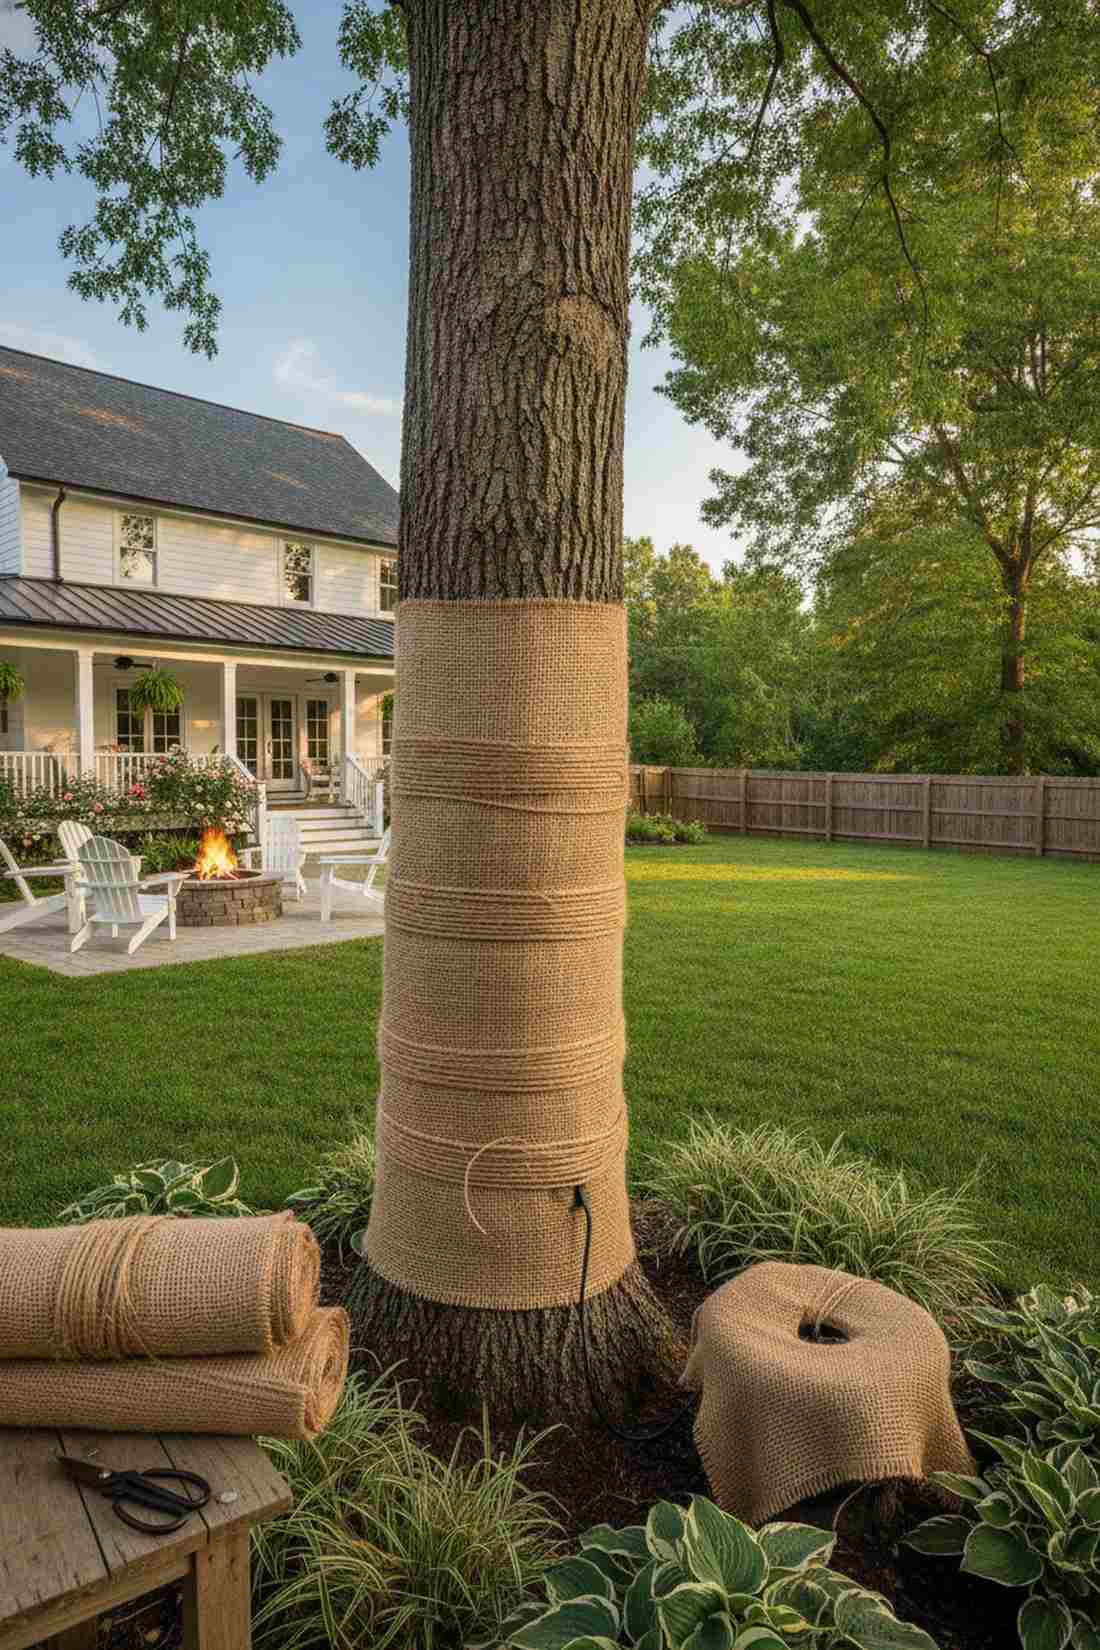
This cozy, textured wrap gives off the ultimate warm, farmhouse country vibe. Incorporating rustic woven fabric accents is incredibly effective for wrapping the base of outdoor trees or covering ugly extension cord hubs.
Trading shiny plastics for raw, matte materials outshines generic neighborhood setups by adding grounded, authentic texture. Sourcing bulk landscaping fabric supplies saves you a fortune compared to buying tiny craft-store ribbon rolls.
You can upgrade multiple zones for under $20. It’s the perfect finishing touch for a farmhouse aesthetic.
- Key Materials: Wide burlap ribbon, heavy jute twine, scissors.
- Vibe / Style: Authentic country farmhouse.
- Difficulty: Very easy wrapping.
- Budget Breakdown: Burlap Roll: $15 | Twine: $5.
- Creator’s Tip: Spray the edges of the burlap with cheap hairspray or clear acrylic to stop it from fraying in the wind.
- Smart Sourcing: wide jute burlap rolls (bulk pack) and heavy-duty landscape twine spools.
DIY & Budget-Friendly Displays
Creative fabrication techniques allow homeowners to achieve professional results without commercial budgets. These approaches prioritize ingenuity and resourcefulness while maintaining design integrity.
36. Wooden Pallet Christmas Trees
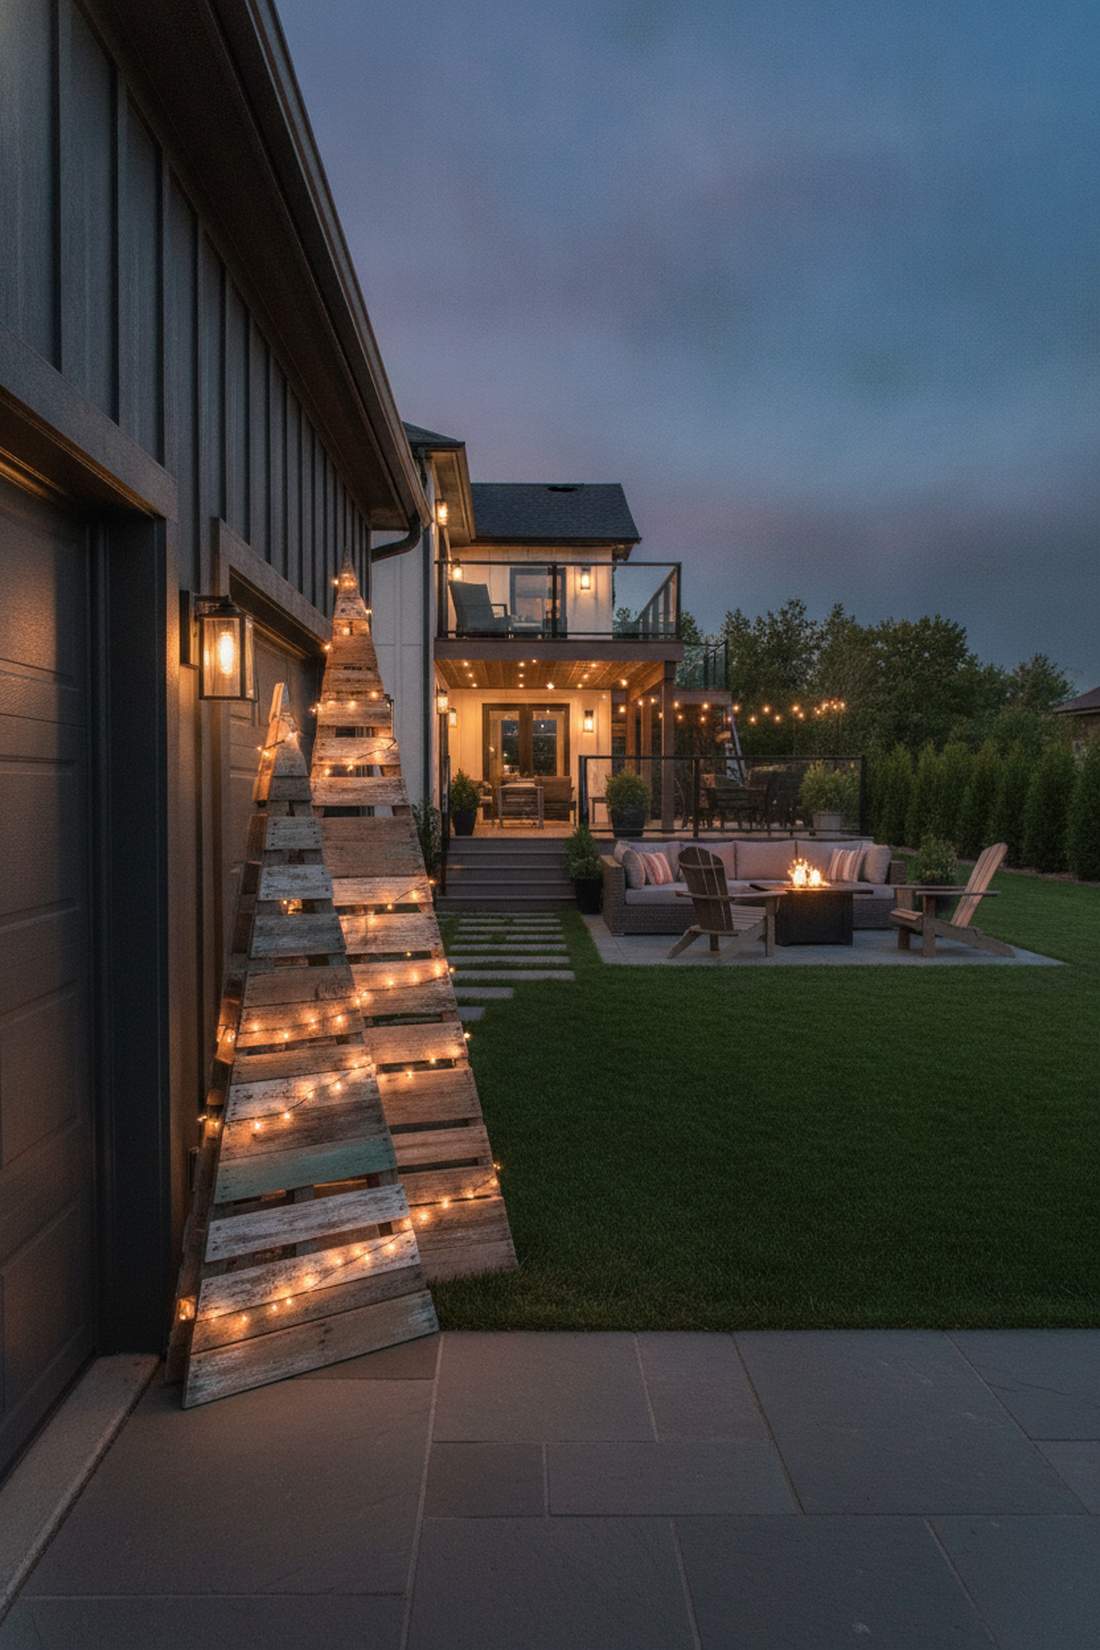
This upcycled project feels incredibly clever and boasts major rustic charm. Cutting a geometric reclaimed wood silhouette is perfect for leaning against blank garage walls or filling large empty lawn spaces.
Turning trash into a structured, illuminated triangle looks far more expensive than it is and adds massive scale for pennies. Grabbing premium outdoor wood sealer kits ensures your creation doesn’t rot into a soggy mess by January.
Building one of these costs practically nothing, maybe $10 for lights. Pin this to your weekend woodworking projects board.
- Key Materials: Free pallets, circular saw, string lights, paint.
- Vibe / Style: Clever rustic upcycling.
- Difficulty: Moderate, requires power tools.
- Budget Breakdown: Wood: Free | Paint/Lights: $15.
- Creator’s Tip: Leave the nails in the pallet wood after cutting; they make perfect, free anchor points for zigzagging the string lights.
- Smart Sourcing: outdoor-rated acrylic craft paint kits and battery-pack fairy light strings.
37. Painted Log Characters
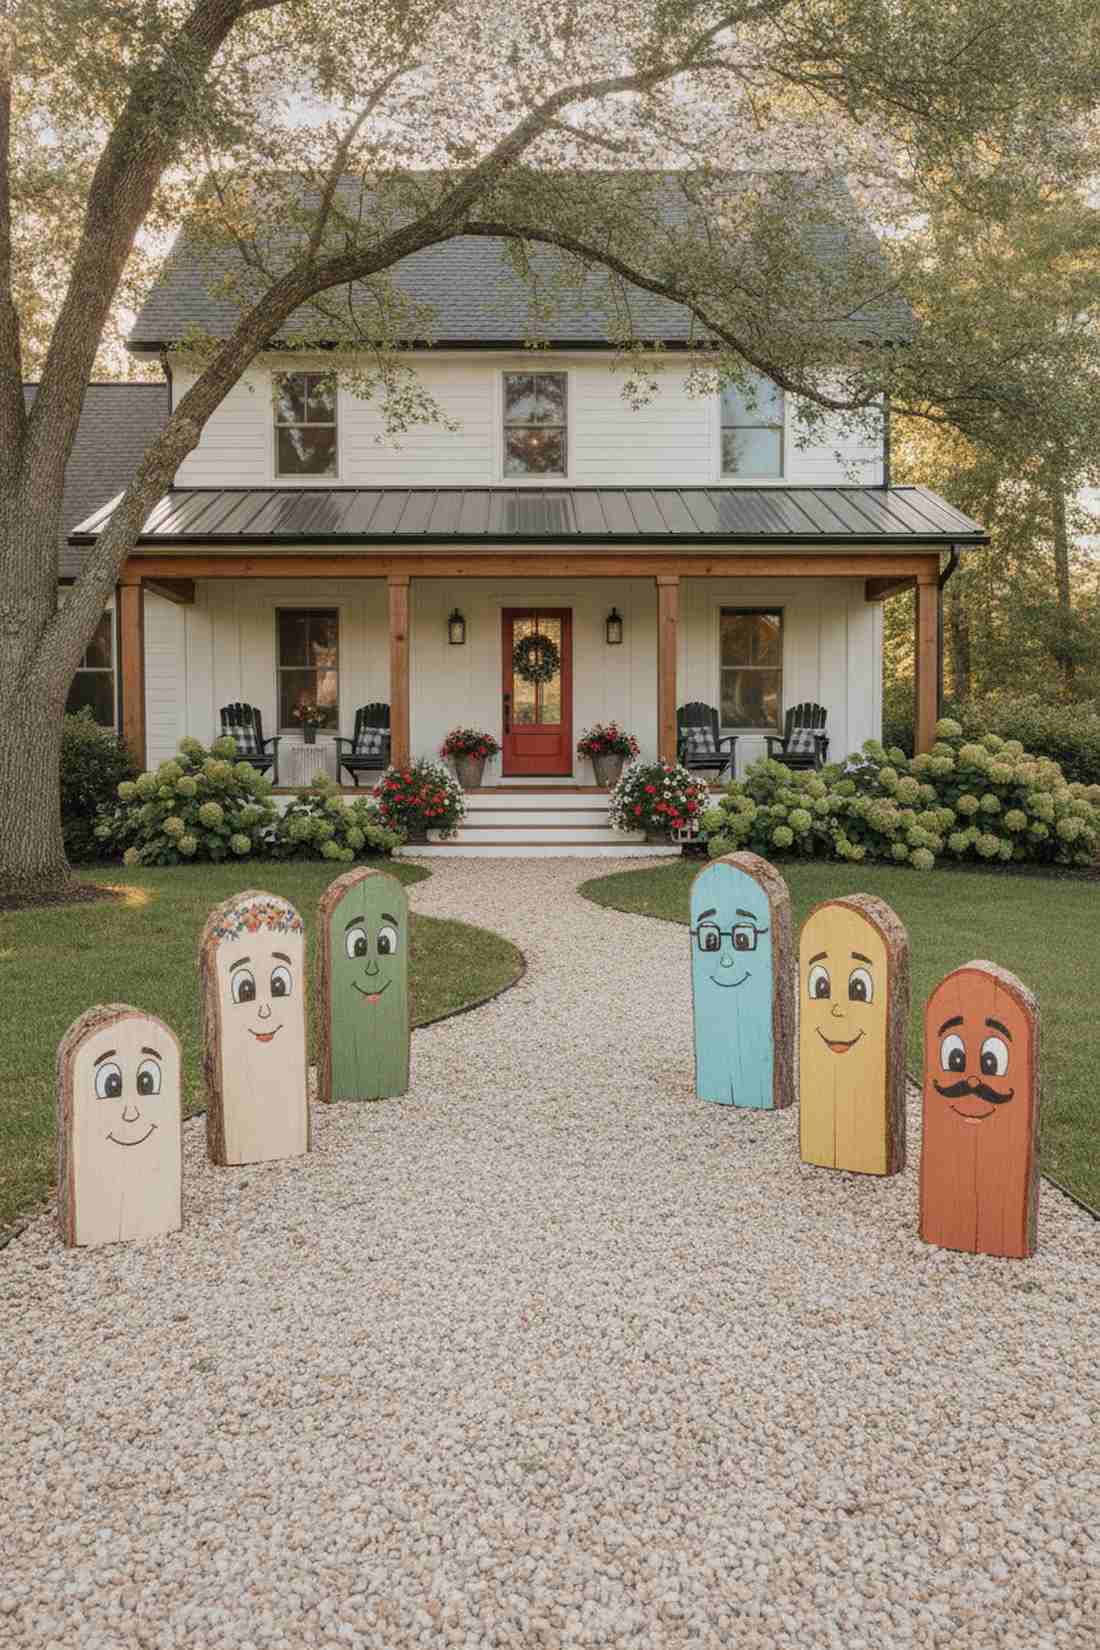
These quirky little faces feel like friendly forest spirits guarding your garden. Crafting painted firewood yard figures is a brilliant, zero-cost way to line your driveway or front steps.
Using natural wood grain as a canvas fools guests into thinking you bought these at a high-end craft fair. Using specialized outdoor acrylic supplies prevents the faces from washing off in the first heavy snowmelt.
A family of logs costs around $10 in paint supplies. Save this idea to keep the kids busy for an afternoon.
- Key Materials: Thick firewood logs, acrylic outdoor paint, seal spray.
- Vibe / Style: Whimsical folk art.
- Difficulty: Fun, easy painting craft.
- Budget Breakdown: Logs: Free | Paint/Sealer: $15.
- Creator’s Tip: Slice the bottom of the log perfectly flat with a saw before painting so they stand up securely on windy days.
- Smart Sourcing: multi-surface outdoor acrylic paint sets and clear UV-protective enamel spray.
38. Tin Can Luminaries
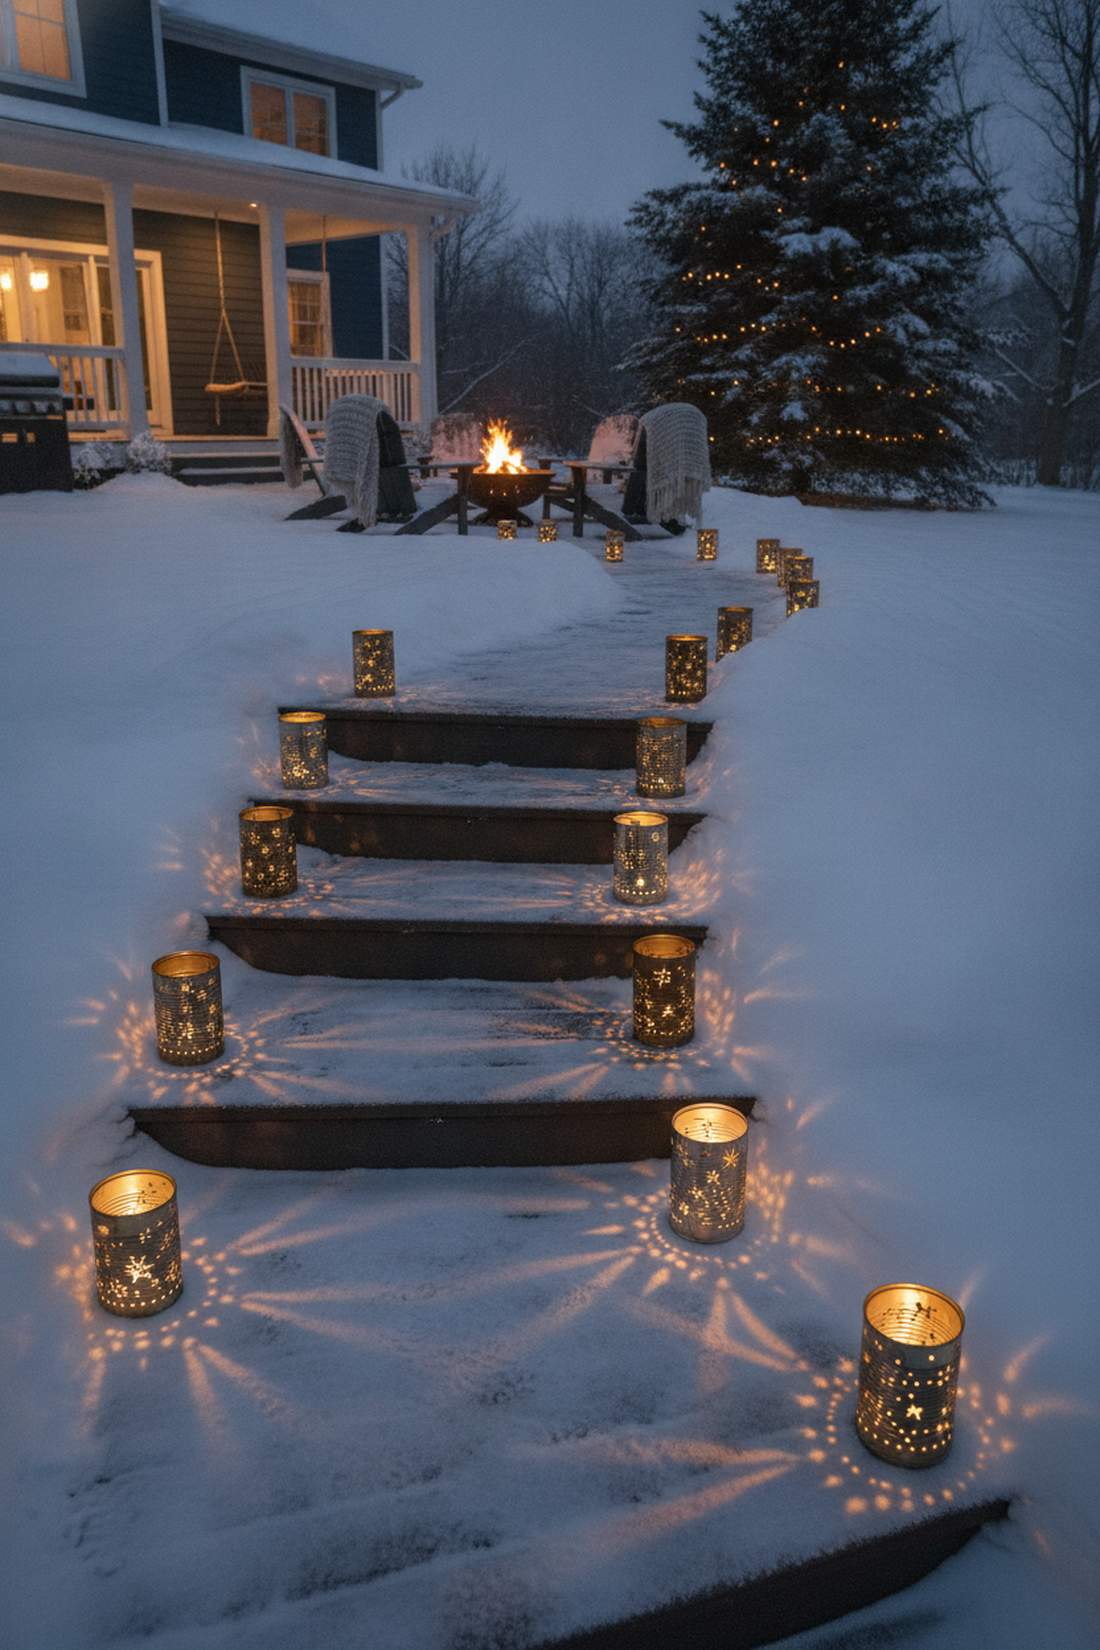
These glowing metal cylinders cast stunning, intricate shadows across the snow. Punching a perforated metal lantern path is a stunning upcycle trick for outlining your back deck or patio stairs.
Creating custom lighting patterns delivers a surprisingly premium look that beats cheap plastic solar stakes every time. Snagging waterproof LED candle kits is essential so you don’t have to relight them manually every night.
You can make 20 of these for less than $15. Pin this if you love eco-friendly holiday hacks.
- Key Materials: Empty soup cans, hammer & nail, spray paint, LEDs.
- Vibe / Style: Intricate starry-night glow.
- Difficulty: Easy but repetitive.
- Budget Breakdown: Cans: Free | Paint/Lights: $20.
- Creator’s Tip: Fill the cans with water and freeze them solid before punching the holes; the ice stops the can from denting when you hit it with the hammer.
- Smart Sourcing: rust-oleum metallic spray paint and bulk pack outdoor LED tea lights.
39. PVC Pipe Candy Canes
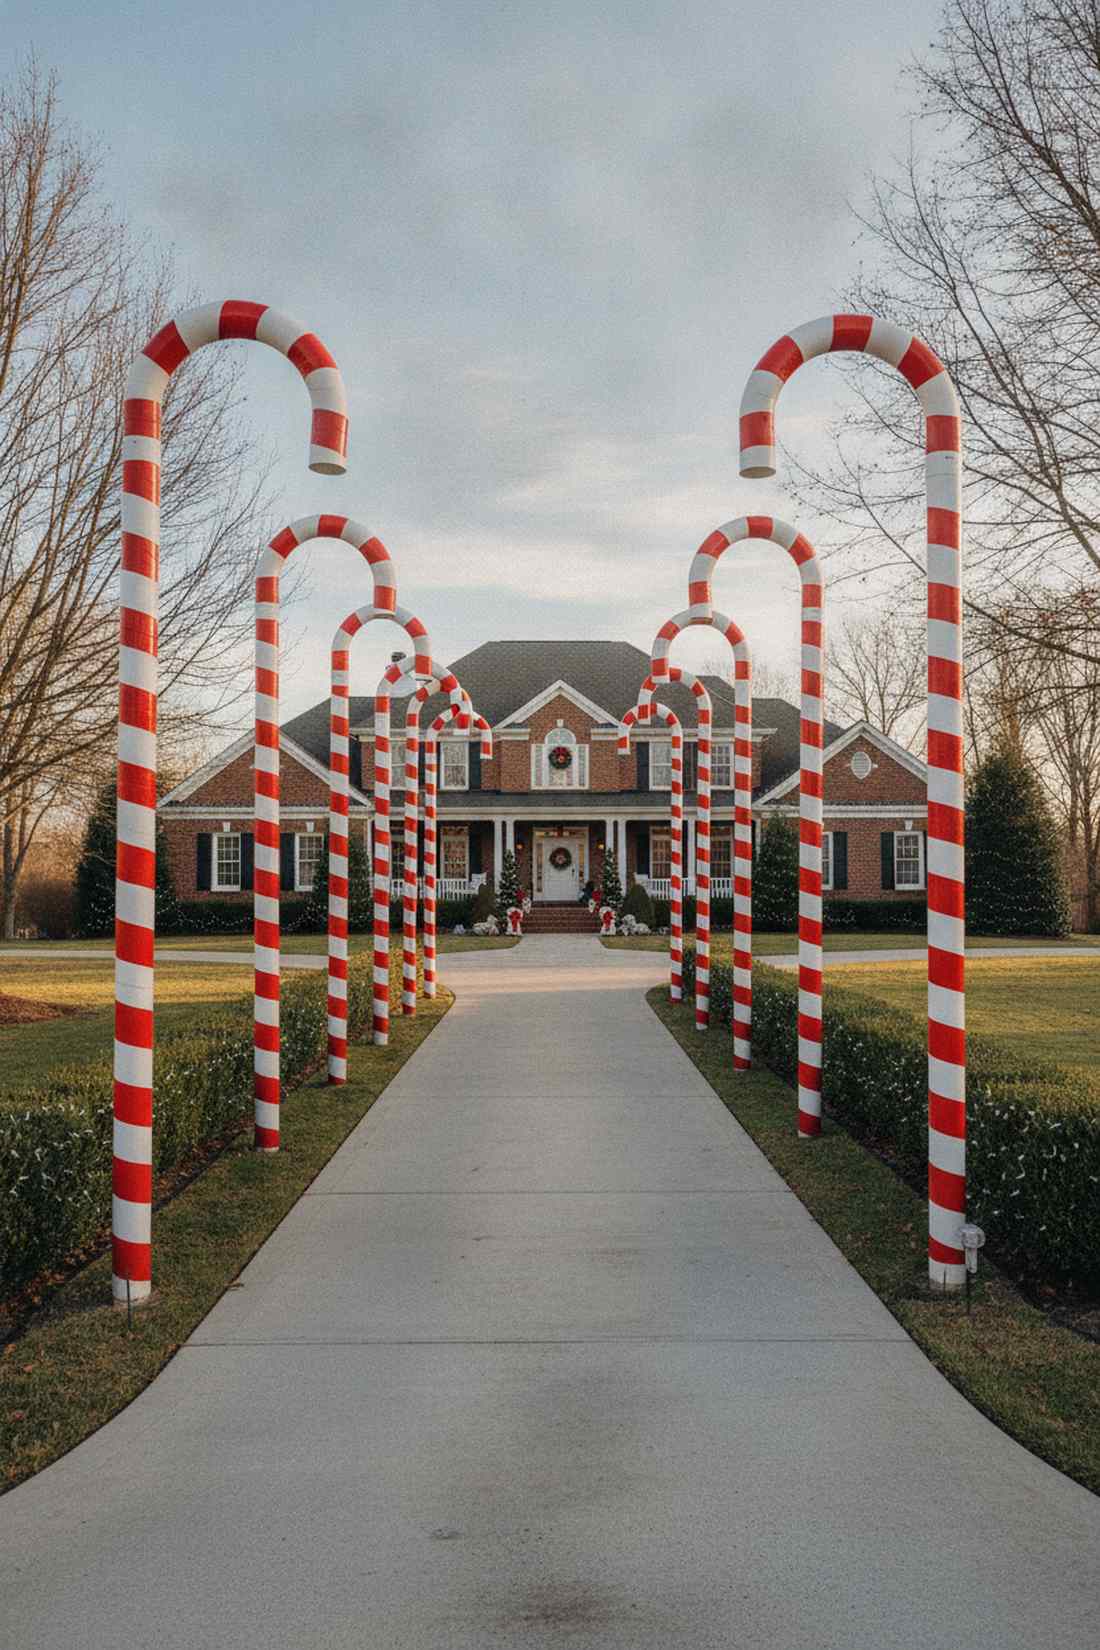
These massive sweets look like a Willy Wonka factory exploded in your front yard. Assembling jumbo striped structural poles is the most dominant way to frame a wide driveway or long sidewalk.
Skipping flimsy inflatables for rigid, painted pipes outshines generic neighborhood setups by standing perfectly straight in heavy winds. Buying commercial red duct tape supplies makes striping the poles take five minutes instead of hours of painting.
A set of giant candy canes costs roughly $30–$50 to build. Highly recommended for a massive visual footprint on a tiny budget.
- Key Materials: 3-inch PVC pipes, PVC curve joints, red tape.
- Vibe / Style: Bold, oversized pop-art.
- Difficulty: Easy assembly and taping.
- Budget Breakdown: PVC: $25 | Tape: $10.
- Creator’s Tip: Pound a piece of rebar halfway into the grass, then slide the hollow PVC pipe over it to keep it standing vertically without any messy guy-wires.
- Smart Sourcing: heavy-duty weather-resistant red duct tape and pre-cut steel rebar ground stakes.
Most DIY projects look cheap, but this final trick turns pure garbage into an absolute luxury statement…
40. Wire Hanger Snowflakes
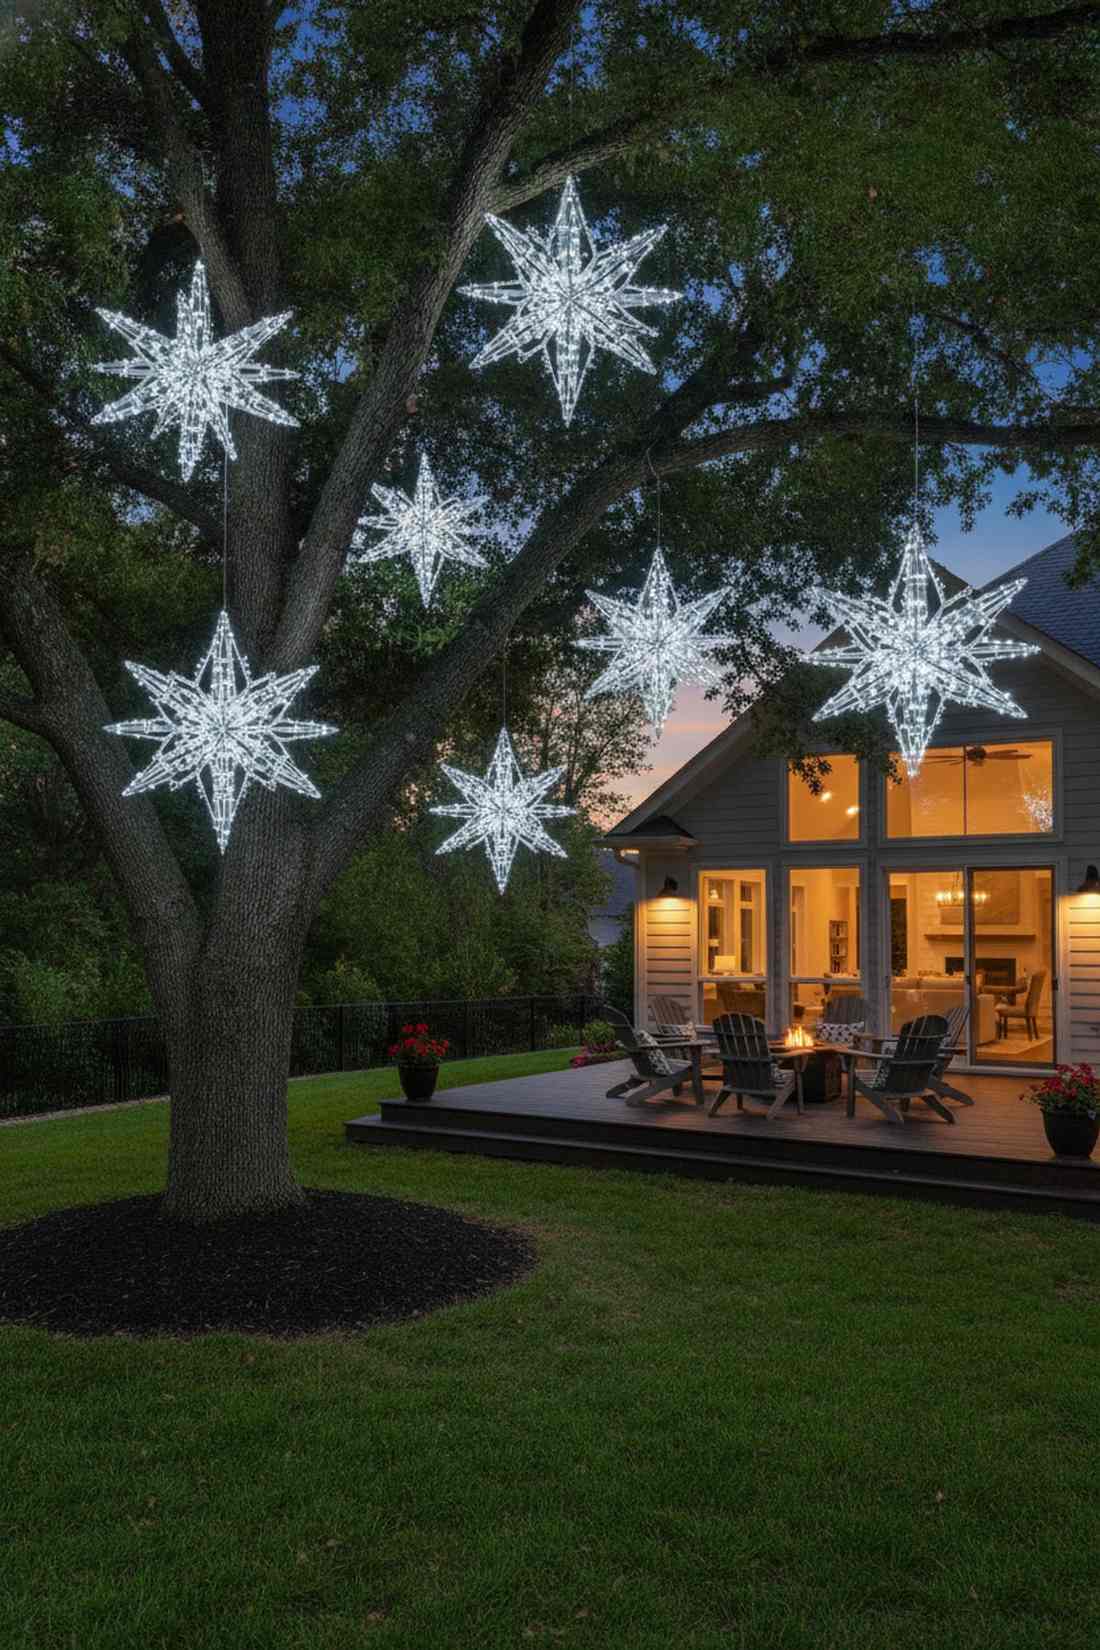
These glowing geometric shapes look like glowing crystals suspended in mid-air. Tying together a floating wireframe starburst works perfectly when hung from high tree branches or dark porch ceilings.
Zip-tying closet junk into symmetrical art gives a designer-level finish once wrapped tightly with micro-LEDs. Utilizing transparent zip tie kits is the secret to making the structural connections completely invisible at night.
Creating five large snowflakes costs only $15. Save this to your extreme budget lighting board.
- Key Materials: Plastic/wire hangers, zip ties, string lights.
- Vibe / Style: Modern illuminated geometry.
- Difficulty: Simple repetitive tying.
- Budget Breakdown: Hangers: Free | Lights/Ties: $15.
- Creator’s Tip: Use white plastic tubular hangers instead of thin wire; they catch the light better and give a chunkier, more substantial look.
- Smart Sourcing: transparent mini zip tie packs and pure-white LED wire light strings.
41. Fabric Scrap Bows
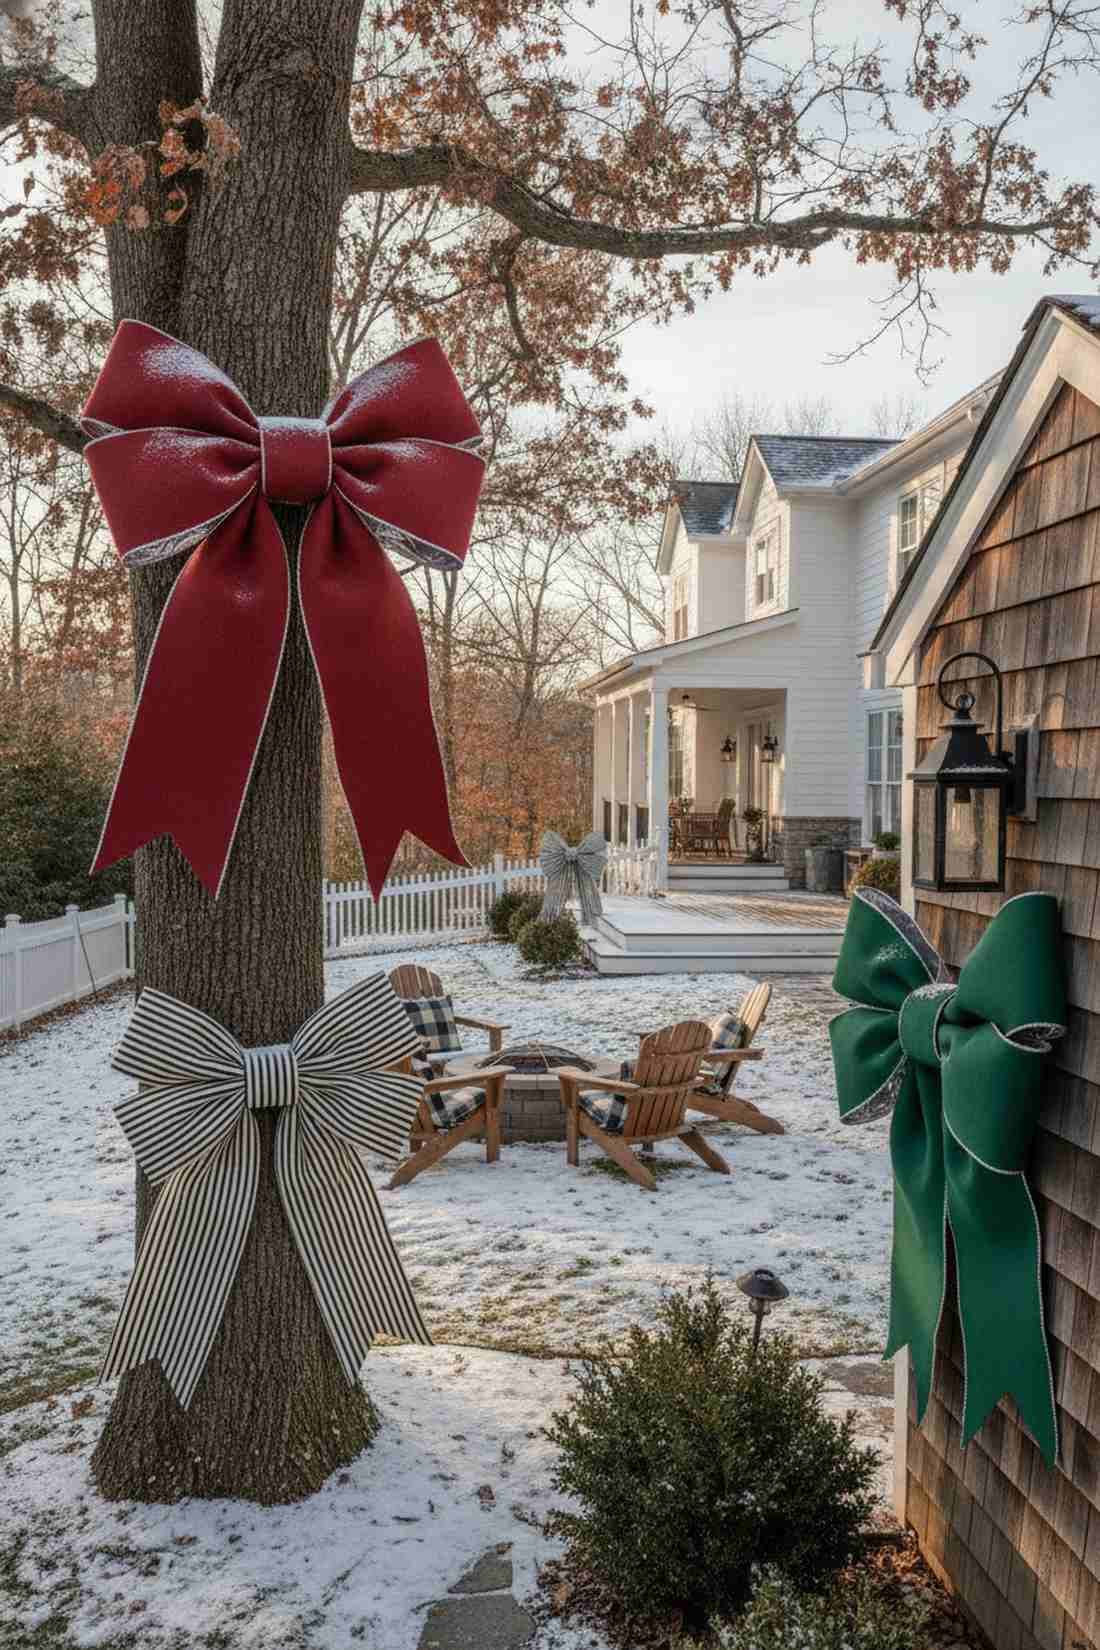
These massive, soft textures feel incredibly luxurious and rich. Tying oversized structural fabric knots is an amazing hack for decorating fences, bare tree trunks, or outdoor lighting sconces.
Using heavy upholstery fabric instead of thin ribbon looks far more expensive than it is and holds its shape in the snow. Snagging waterproof fabric guard supplies ensures the bows repel water instead of freezing into heavy blocks.
You can make huge designer bows for $5–$10 each. It’s the ultimate finishing touch for any outdoor structure.
- Key Materials: Heavy outdoor fabric scraps, floral wire, fabric spray.
- Vibe / Style: Plump, luxurious traditional.
- Difficulty: Easy folding and wiring.
- Budget Breakdown: Fabric: $15 | Wire: $5.
- Creator’s Tip: Insert a layer of cheap aluminum foil inside the loops before you tie them; it makes the fabric moldable so you can pose the bow perfectly.
- Smart Sourcing: weatherproof outdoor canvas fabric rolls and heavy-duty water repelling fabric spray.
42. Repurposed Tire Wreath
This massive installation feels like a commercial prop you’d see at a luxury outdoor mall. Creating a jumbo upcycled foundation wreath is the absolute best way to decorate the side of an empty barn or a massive two-story house.
Wrapping an old tire completely in faux greenery delivers a surprisingly premium look that commands attention from the street. Investing in heavy-duty mounting hardware kits is critical because these get extremely heavy when wet.
This massive statement piece costs only $30–$50 to decorate. Pin this if you have a massive blank exterior wall you need to fill.
- Key Materials: Old car tire, thick garland, massive outdoor bow, heavy bolts.
- Vibe / Style: Commercial-scale impact.
- Difficulty: Heavy lifting/mounting required.
- Budget Breakdown: Tire: Free | Garland/Bow: $45.
- Creator’s Tip: Drill three massive drainage holes in the bottom of the tire before hanging it, otherwise it will fill with rainwater and become too heavy for the wall mount.
- Smart Sourcing: pre-lit commercial thickness garland rolls and heavy-duty lag bolt mounting kits.
Transform Your Backyard This Season
Implementing thoughtful christmas backyard decor creates outdoor environments that extend your living space and establish memorable holiday experiences. By applying these 42 premium yet accessible blueprints, you can skip the cheap plastic look and build a display that rivals high-end commercial installations. Start with foundational pathway lighting, anchor the yard with a massive focal point, and use smart sourcing for commercial-grade LED kits and UV-resistant materials to ensure your setup survives the harsh winter. Quality execution of focused elements delivers a far more expensive aesthetic than a rushed implementation of random features.
Frequently Asked Questions
How early should I install christmas backyard decor?
Professional installers typically start wrapping trunks and stringing rooflines right after Halloween to beat the freezing weather. Getting your foundational outdoor LED kits and heavy-duty extension cables laid out before the ground freezes saves hours of frustration. Utilize automated smart timer systems to keep the display dark until late November, saving energy while having everything perfectly pre-staged.
What lighting type works best for outdoor christmas displays?
Commercial-grade wide-angle LEDs are the absolute gold standard for any serious outdoor setup. They draw significantly less power, allowing you to chain more strands together without tripping breakers, and they don’t shatter like glass incandescents. Always source lighting kits specifically marked with UV-coated wires and weatherproof seals to prevent the entire line from shorting out during a heavy snowstorm.
How do I protect outdoor decorations from winter weather?
To keep a premium aesthetic all season, you must aggressively weatherproof your gear. Use UV-resistant clear acrylic sprays on painted props and heavy-duty silicone water repellents on fabric bows. Swap out flimsy plastic pegs for deep steel landscape staples to anchor wireframes, and always encase your electrical connections in waterproof cord protector boxes.
What is the most impactful christmas backyard decoration technique?
Creating illuminated architectural depth delivers the highest visual ROI. Wrapping existing tree trunks and creating a glowing tunnel or pathway instantly forces the eye to travel through the space. Instead of scattering small items, invest your budget in one massive focal point—like a commercial-grade wireframe or an oversized outdoor tree—and frame it with clean, symmetrical pathway lighting.
How much does professional christmas backyard decoration cost?
Hiring a crew ranges from $1,500 to $5,000+, but utilizing the DIY hacks in this guide drops that cost to $300–$800. The secret is knowing where to spend: invest heavily in commercial LED string reels and waterproof electrical hubs, then save money by upcycling pallets, tires, and foraged pinecones. Smart sourcing of bulk starter kits over individual pieces is the fastest way to slash your budget.