Transforming outdoor spaces begins with properly engineered backyard garden raised beds. Uncover premium material blueprints and exact budget breakdowns for maximum yield. Elevate your entire property layout using these commercial-grade structural techniques.
Design Snapshot Key Principles
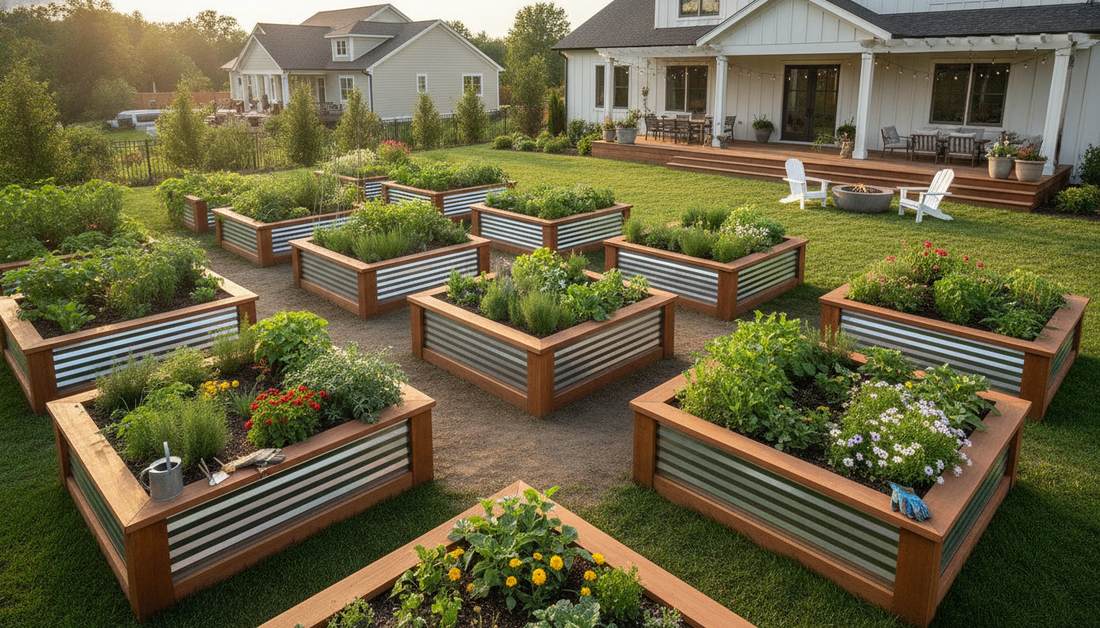
- Optimal Dimensions: Beds should measure 2-4 feet wide for easy access from both sides, with lengths adjusted to fit your space
- Material Durability: Cedar, galvanized steel, and composite materials provide 10-30 years of service with minimal maintenance
- Pathway Planning: Maintain 2-3 feet between beds for comfortable movement and wheelbarrow access
- Soil Depth Requirements: Allocate 12-18 inches for most vegetables and flowers, with deeper beds for root crops
Classic Rectangular Backyard Garden Beds
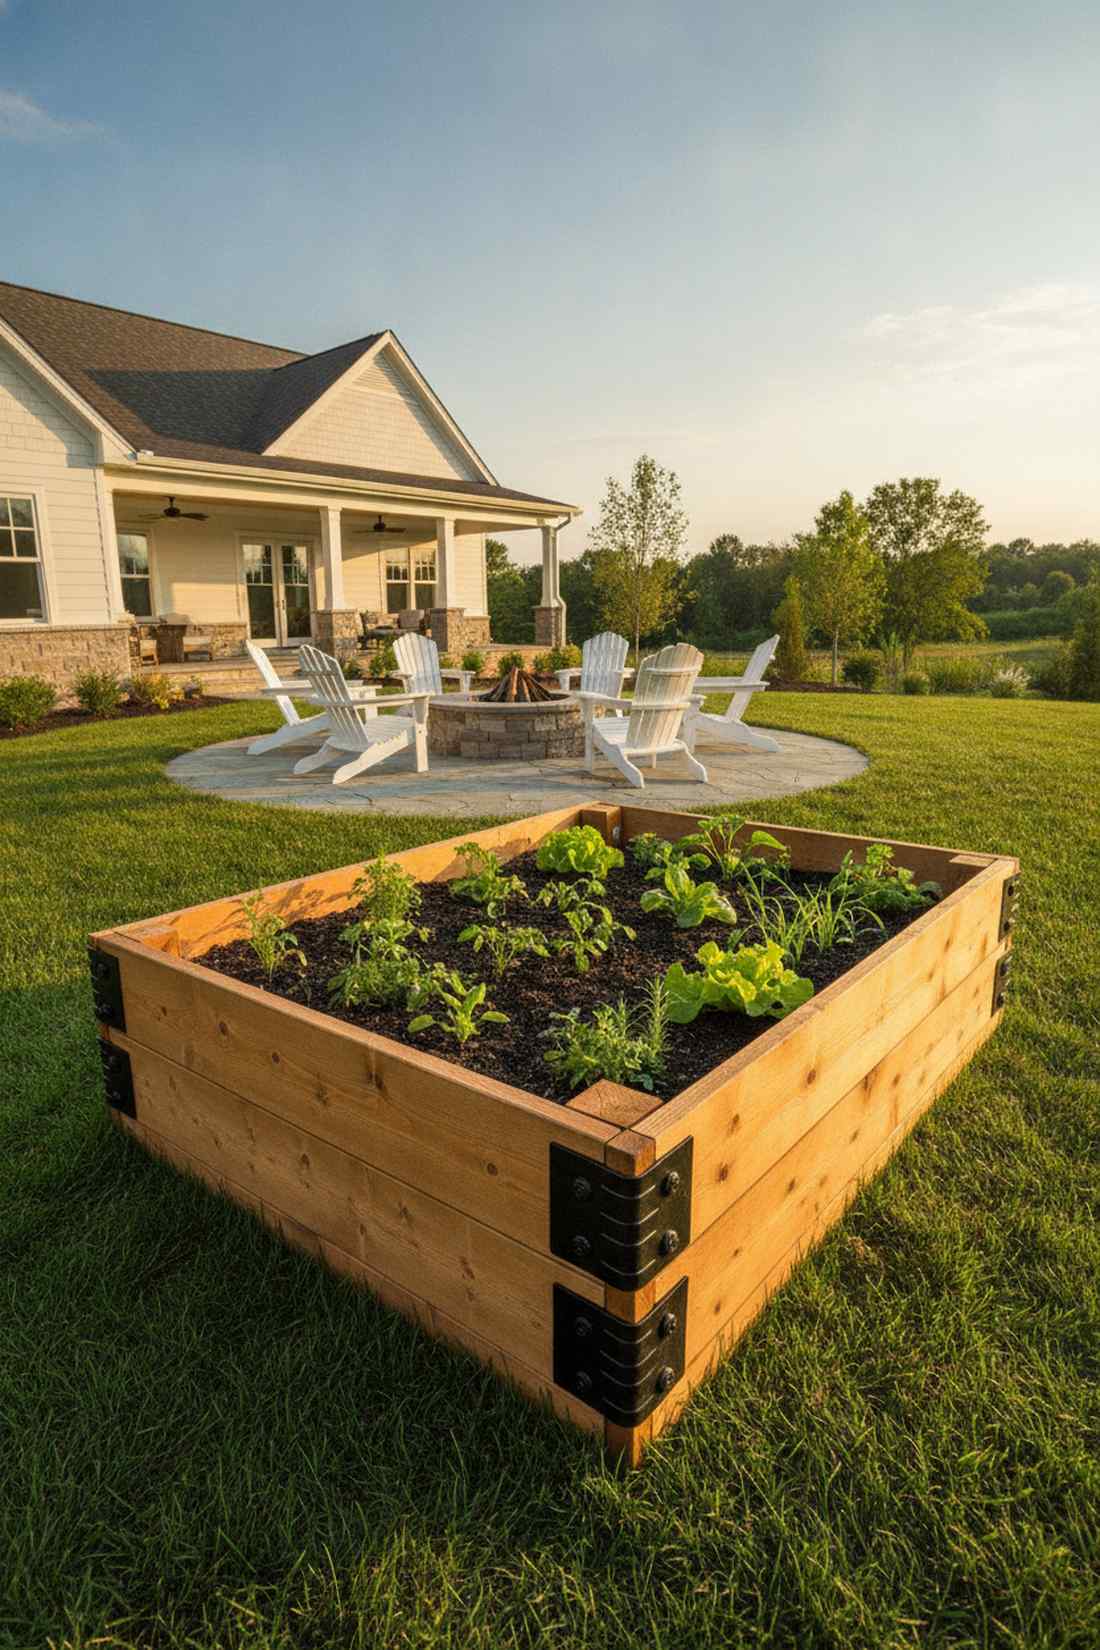
1. Standard Four-by-Eight Cedar Bed

Feels like a traditional farmer’s sanctuary right outside your door. A classic cedar backyard vegetable planter works exceptionally well for defining large open suburban lawns.
Most beginners overcomplicate construction, but this simple stacked profile delivers a surprisingly premium look. Integrate a premium organic soil starter mix to immediately boost crop yields in your newly built structure.
You can easily pull this off for around $60–$120 depending on lumber. Save this to your DIY weekend garden board!
- Key Materials: 2×6 untreated cedar boards, exterior wood screws
- Vibe / Style: Rustic farmhouse harvest
- Difficulty: Easy beginner setup
- Budget Breakdown: Materials: $85 | Hardware: $15
- Creator’s Tip: Orient the long side facing south to maximize sunlight exposure across all plants.
- Smart Sourcing: pre-cut cedar raised bed kits | galvanized rust-proof corner brackets (bulk pack)
2. Narrow Three-by-Ten Border Bed
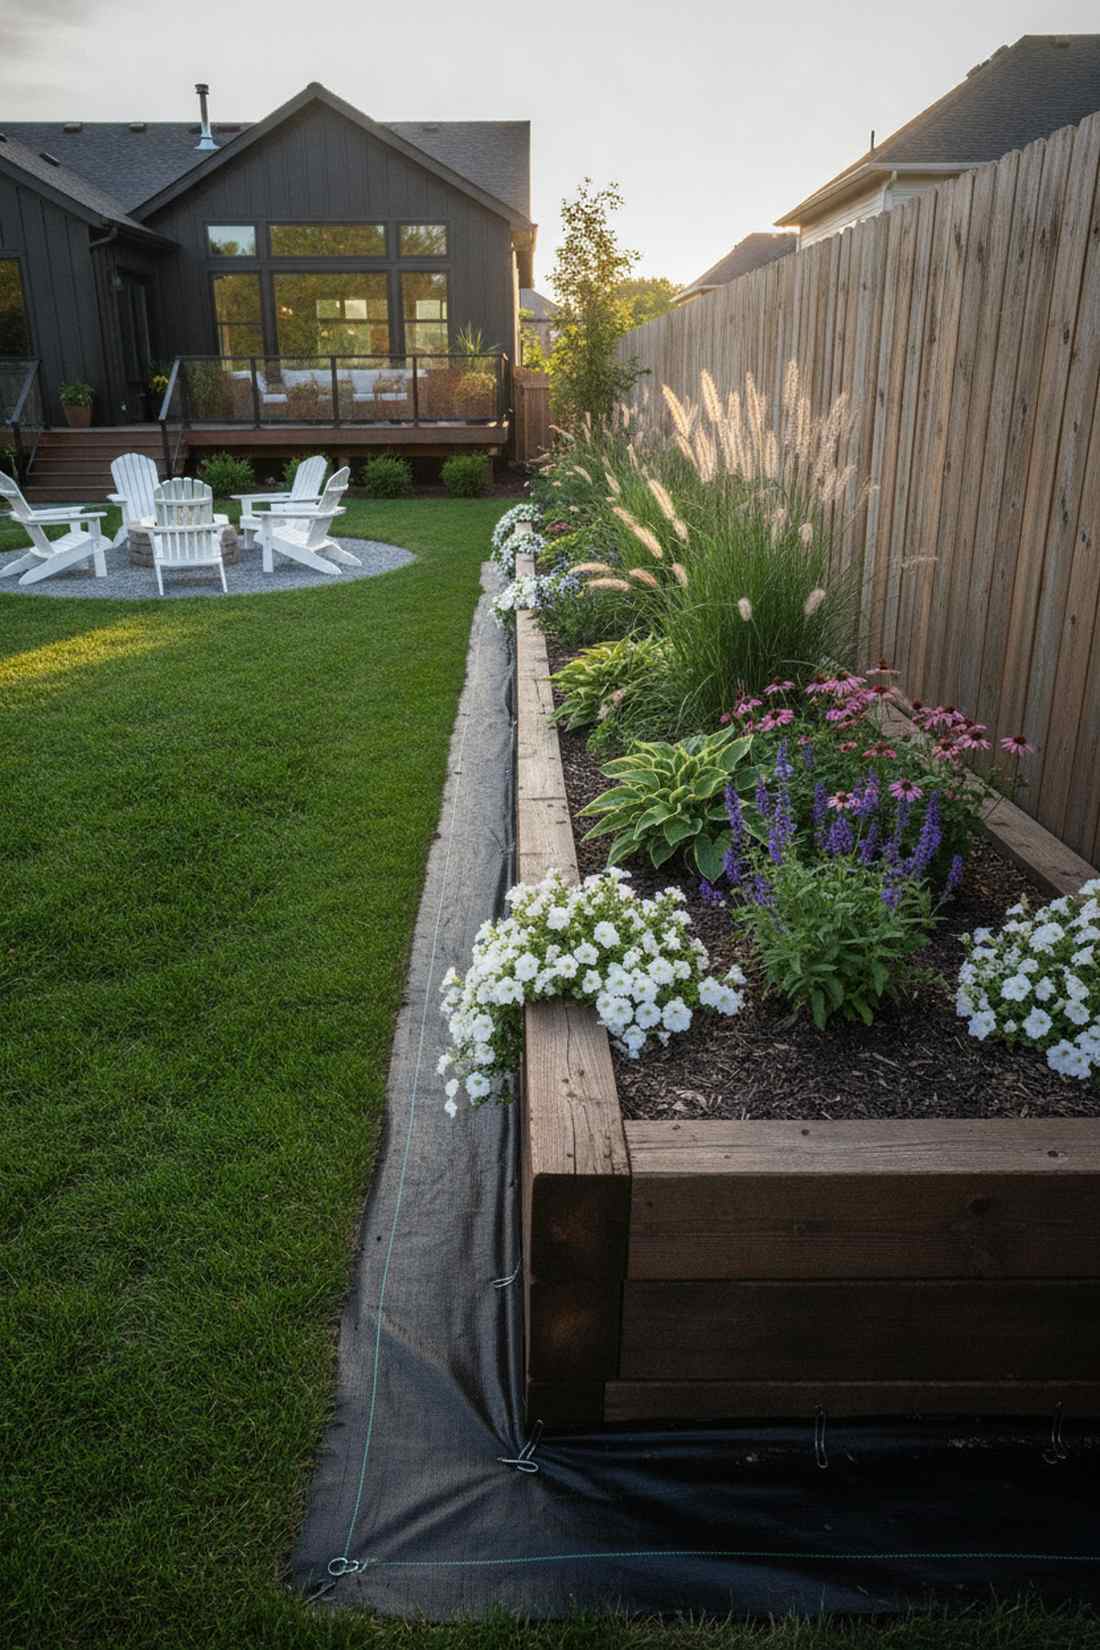
Straight out of a luxury landscape architectural digest. These slim border planting zones are absolute magic for framing ugly fence lines or dividing patio spaces.
Many homeowners waste property edges, yet this elongated profile looks far more expensive than it is. Dropping in a heavy-duty landscape weed barrier before adding soil keeps those pristine edges maintenance-free.
Expect to spend about $45–$90 for this upgrade. It’s a fast project that completely changes the boundary vibe.
- Key Materials: Long wooden planks, landscape fabric
- Vibe / Style: Clean structural boundary
- Difficulty: Very easy
- Budget Breakdown: Wood: $60 | Barrier: $15
- Creator’s Tip: Plant trailing flowers on the outside edge to soften the rigid wooden lines.
- Smart Sourcing: commercial-grade weed barrier fabric rolls | heavy-duty soil staples (100-pack)
3. Double-Wide Four-by-Twelve Production Bed
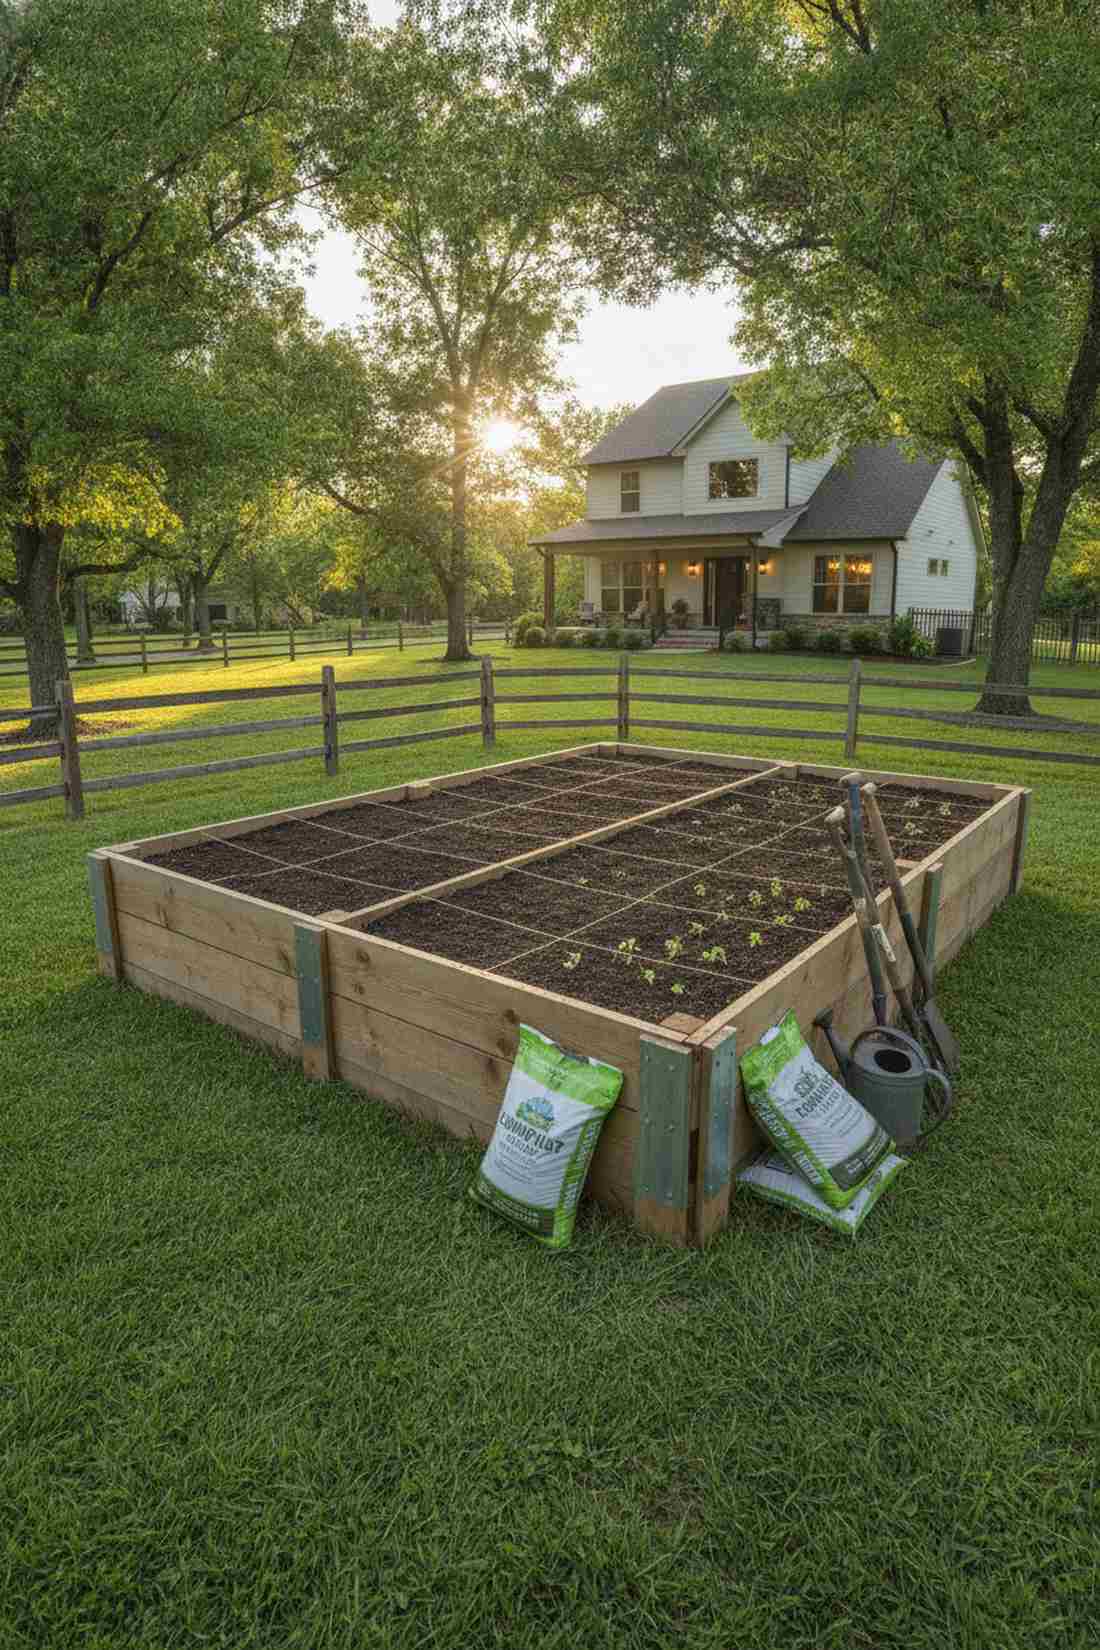
Radiates serious homesteader energy. This high-capacity crop layout is perfect for dedicated side yards where maximum food production is the end goal.
While massive beds often bow outward, adding internal cross-bracing gives a designer-level finish and structural integrity. Utilizing a bulk organic compost delivery is essential for filling this massive square footage affordably.
Materials generally run between $100–$150. Pin this if you’re planning a massive property overhaul!
- Key Materials: Heavy lumber, internal metal braces
- Vibe / Style: Homestead utility
- Difficulty: Moderate weekend build
- Budget Breakdown: Lumber: $110 | Hardware: $25
- Creator’s Tip: Use twine to divide this massive space into one-foot square foot gardening blocks.
- Smart Sourcing: heavy-duty internal corner braces | organic slow-release vegetable fertilizer bags
4. Shallow Two-by-Six Herb Rectangle
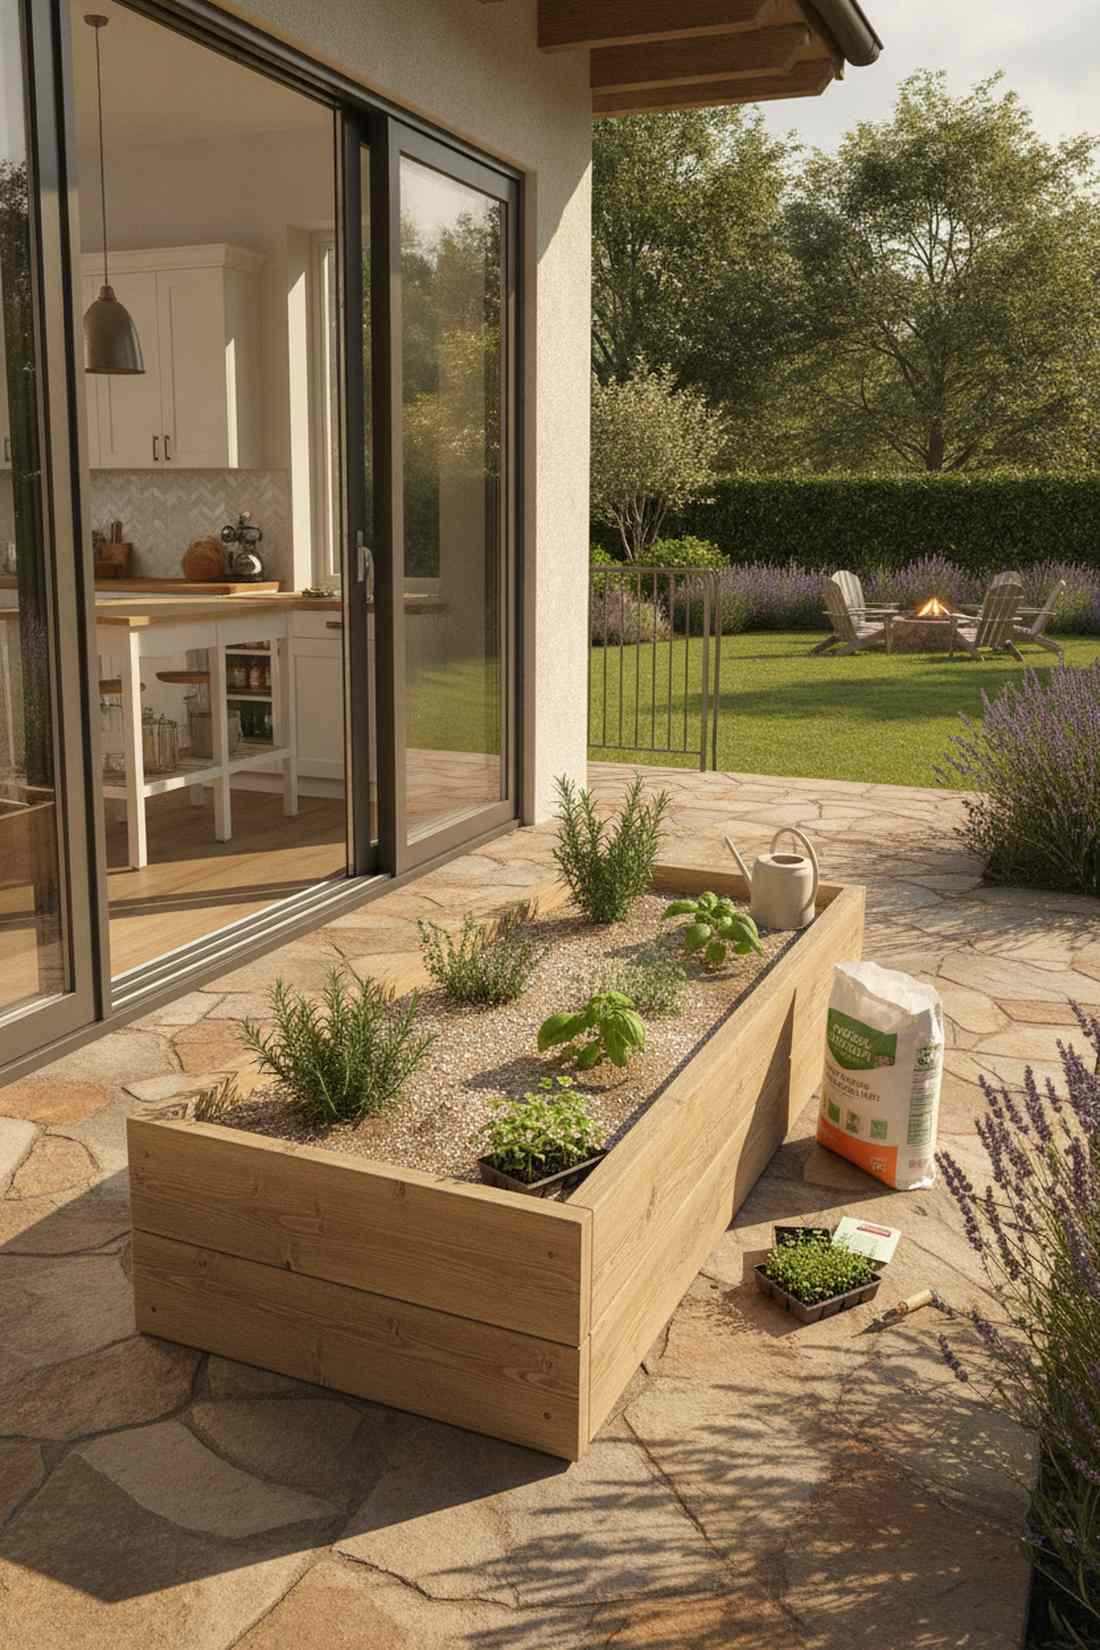
Feels like a sun-drenched Mediterranean courtyard. A compact kitchen herb station fits flawlessly right next to your back patio door for quick chef access.
Deep beds waste soil for shallow plants, but this single-board height setup provides the ultimate budget hack. Mixing in premium horticultural perlite ensures the rapid drainage that rosemary and thyme crave.
You can set this up for as little as $25–$40. Highly recommended for a quick weekend win.
- Key Materials: Single tier 2×6 boards, sand-heavy soil
- Vibe / Style: Chef’s patio essential
- Difficulty: Ultra-fast beginner build
- Budget Breakdown: Wood: $20 | Soil mix: $15
- Creator’s Tip: Keep this bed on the drier side; Mediterranean herbs hate “wet feet.”
- Smart Sourcing: coarse horticultural perlite (bulk bag) | heirloom herb seed starter kits
Most people get their layouts completely wrong… until they try the exact high-efficiency pathway configuration coming up next.
5. Side-by-Side Twin Beds
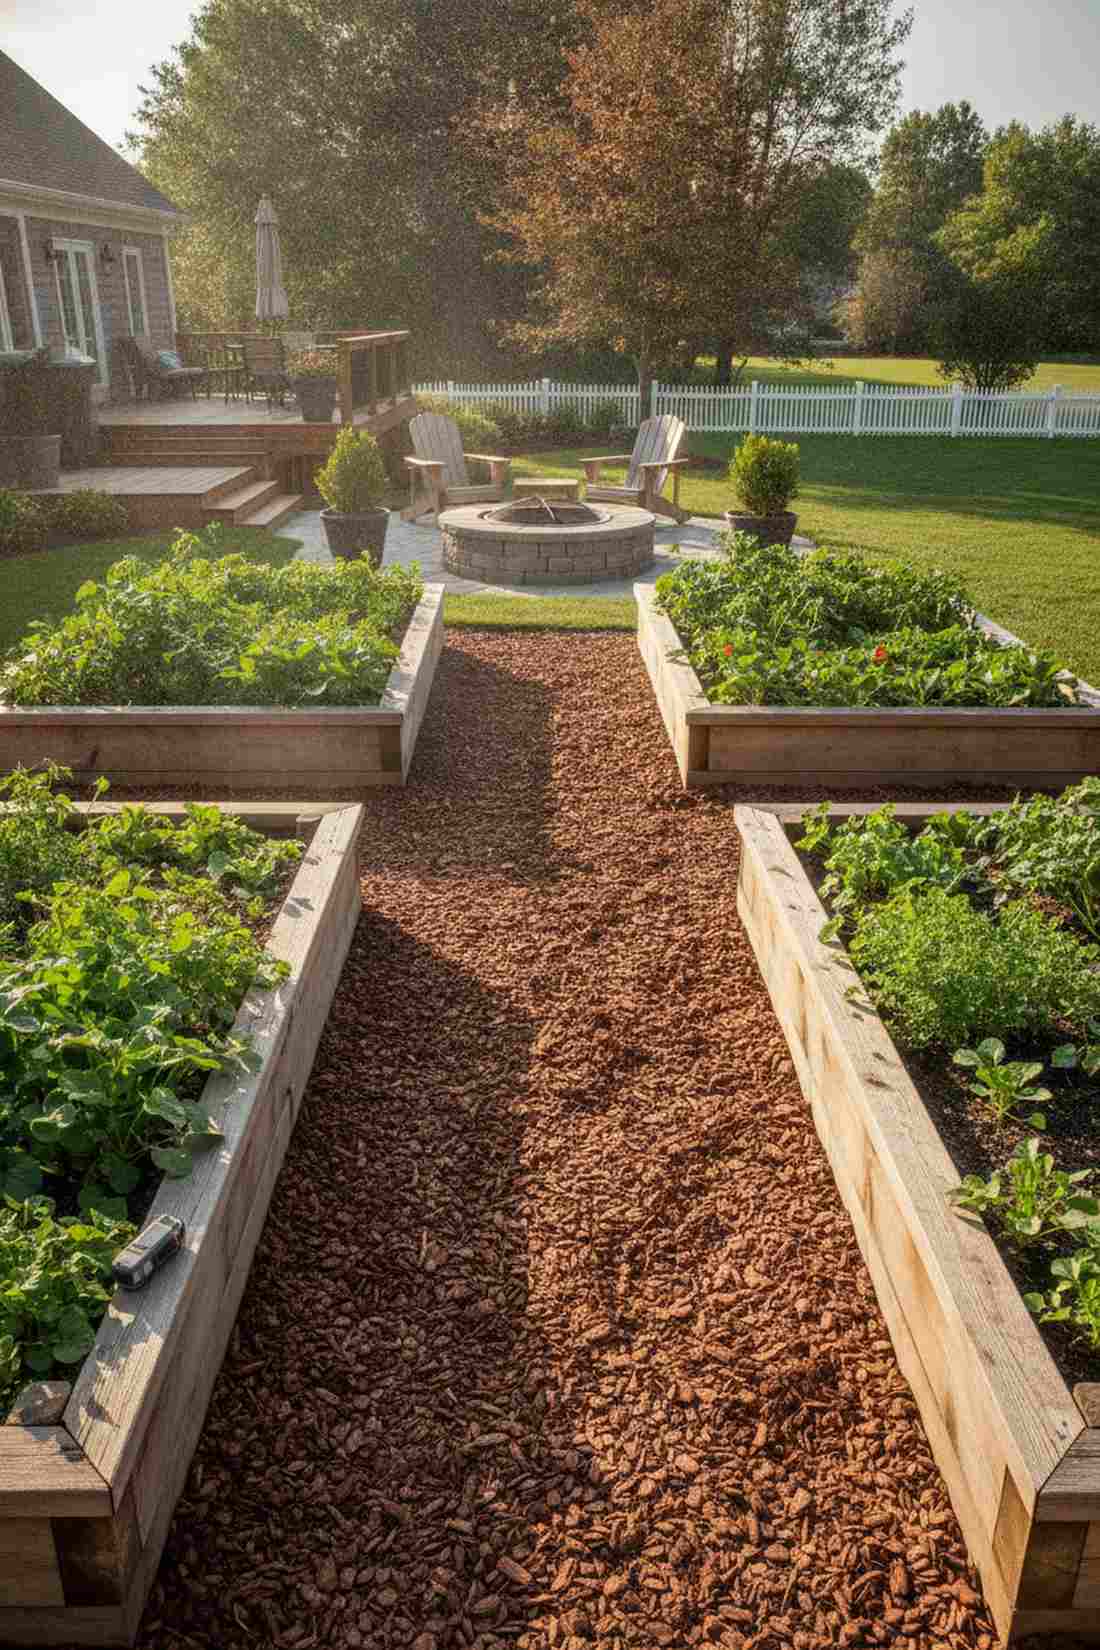
Exudes the calm symmetry of a formal botanical garden. This parallel growing zone layout is the ultimate solution for organizing messy suburban backyards.
Randomly placed boxes look cluttered, but mirroring twin structures instantly commands visual respect. Laying down UV-resistant heavy-duty pathway mulch between them completely eliminates muddy footprints during harvest time.
Plan for a combined budget of $120–$200. Save this to your master garden layout board.
- Key Materials: Matched lumber sets, pathway mulch
- Vibe / Style: Symmetrical perfection
- Difficulty: Moderate alignment required
- Budget Breakdown: Twin frames: $150 | Path materials: $30
- Creator’s Tip: Space the beds exactly 36 inches apart so a standard wheelbarrow glides through easily.
- Smart Sourcing: premium cedar wood chips (bulk) | laser alignment leveling tools
6. Extra-Deep Eighteen-Inch Root Vegetable Bed
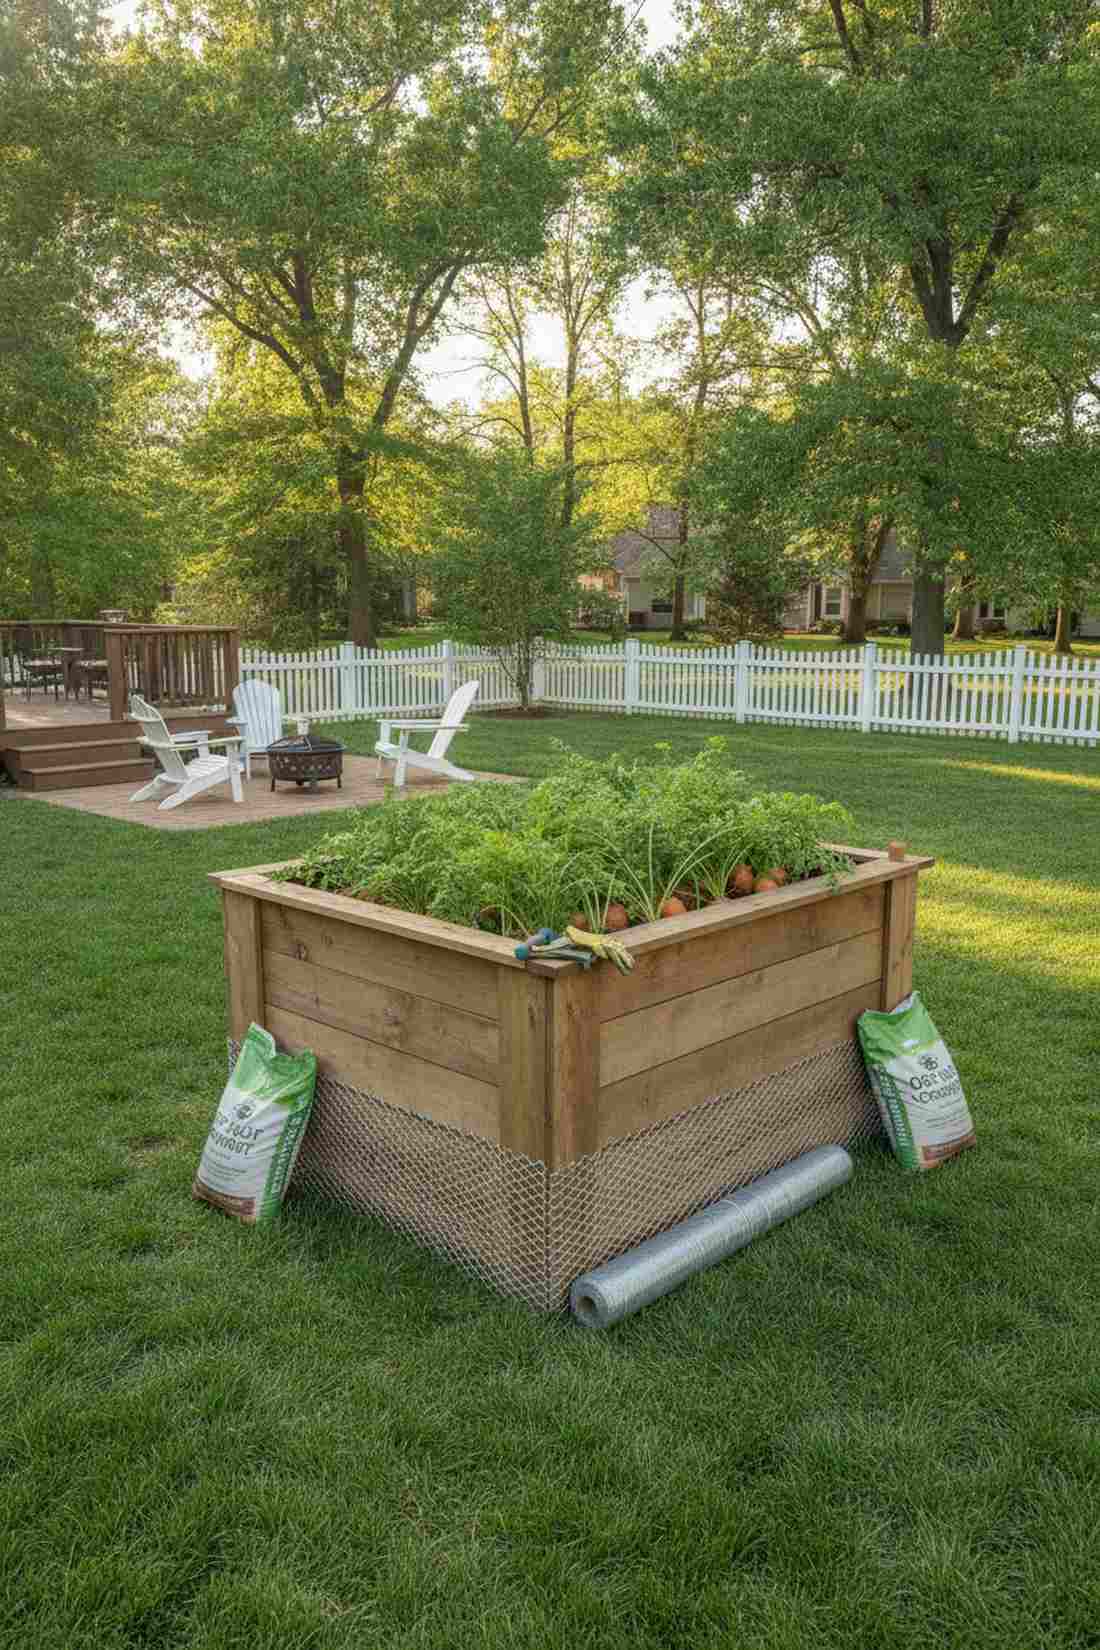
Feels like a hidden underground treasure chest. A high-profile deep soil planter is an absolute necessity for growing competition-sized carrots and potatoes.
Shallow boxes stunt root crops, yet this towering four-board profile guarantees massive yields while saving your back. Fortifying the base with galvanized hardware cloth rolls ensures gophers won’t steal your harvest from below.
Constructing this beast costs around $100–$160. It’s a structural masterpiece that pays for itself in groceries.
- Key Materials: Stacked high-wall lumber, wire mesh base
- Vibe / Style: High-yield professional
- Difficulty: Heavy lifting required
- Budget Breakdown: Wood: $120 | Mesh barrier: $30
- Creator’s Tip: Never step inside a deep bed; the uncompacted fluffy soil is the secret to huge root vegetables.
- Smart Sourcing: 1/2-inch galvanized hardware cloth rolls | deep root organic compost blends
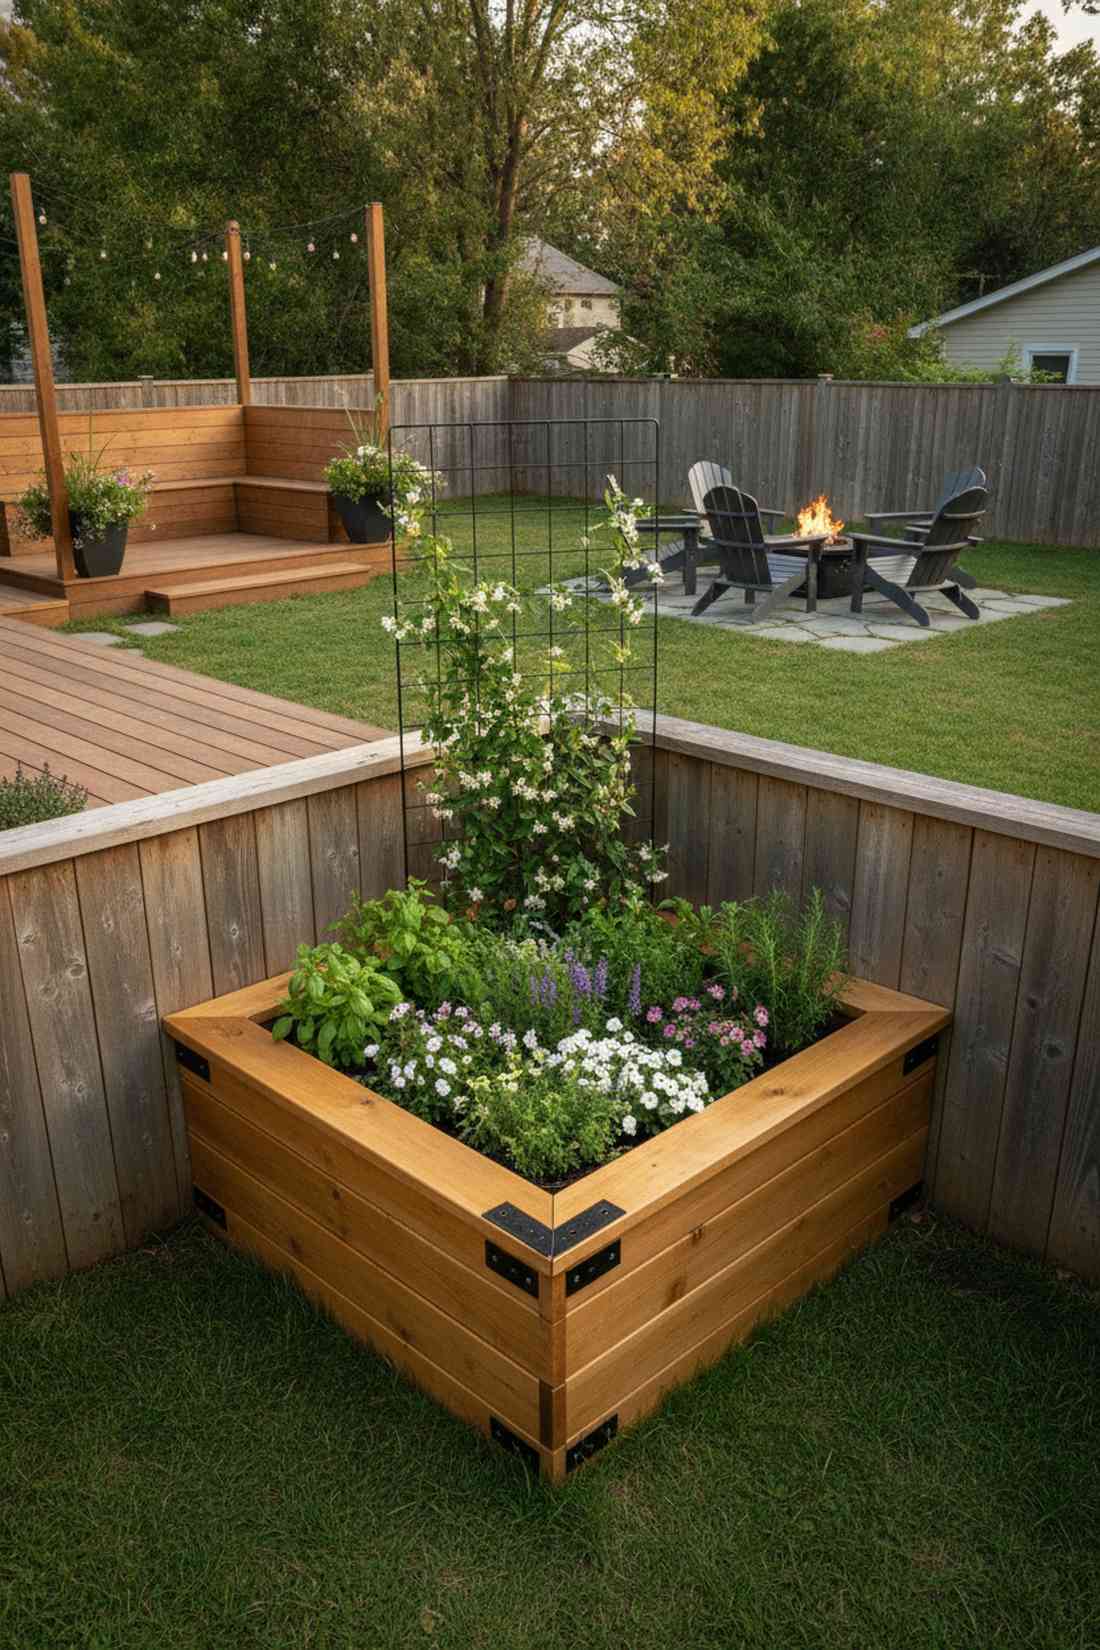
7. Corner-Fitted L-Bracket Bed
Instantly turns dead space into a lush oasis. An L-shaped property wrap design works flawlessly to transform awkward fence intersections into a focal point.
Standard rectangles look awkward in corners, but wrapping the structure delivers a custom-built, expensive aesthetic. Installing a drip irrigation starter system along the angle guarantees perfect watering without dragging hoses into tight spots.
This custom geometry runs about $80–$130 to build. Pin this if you want to maximize every inch of a small yard!
- Key Materials: Miter-cut lumber, corner brackets
- Vibe / Style: Custom architectural fit
- Difficulty: Requires basic saw skills
- Budget Breakdown: Wood: $90 | Irrigation: $30
- Creator’s Tip: Place your tallest vining crops right at the 90-degree corner to create a stunning backdrop.
- Smart Sourcing: adjustable angle corner brackets (heavy-duty) | micro-drip irrigation starter kits
Elevated and Waist-High Designs
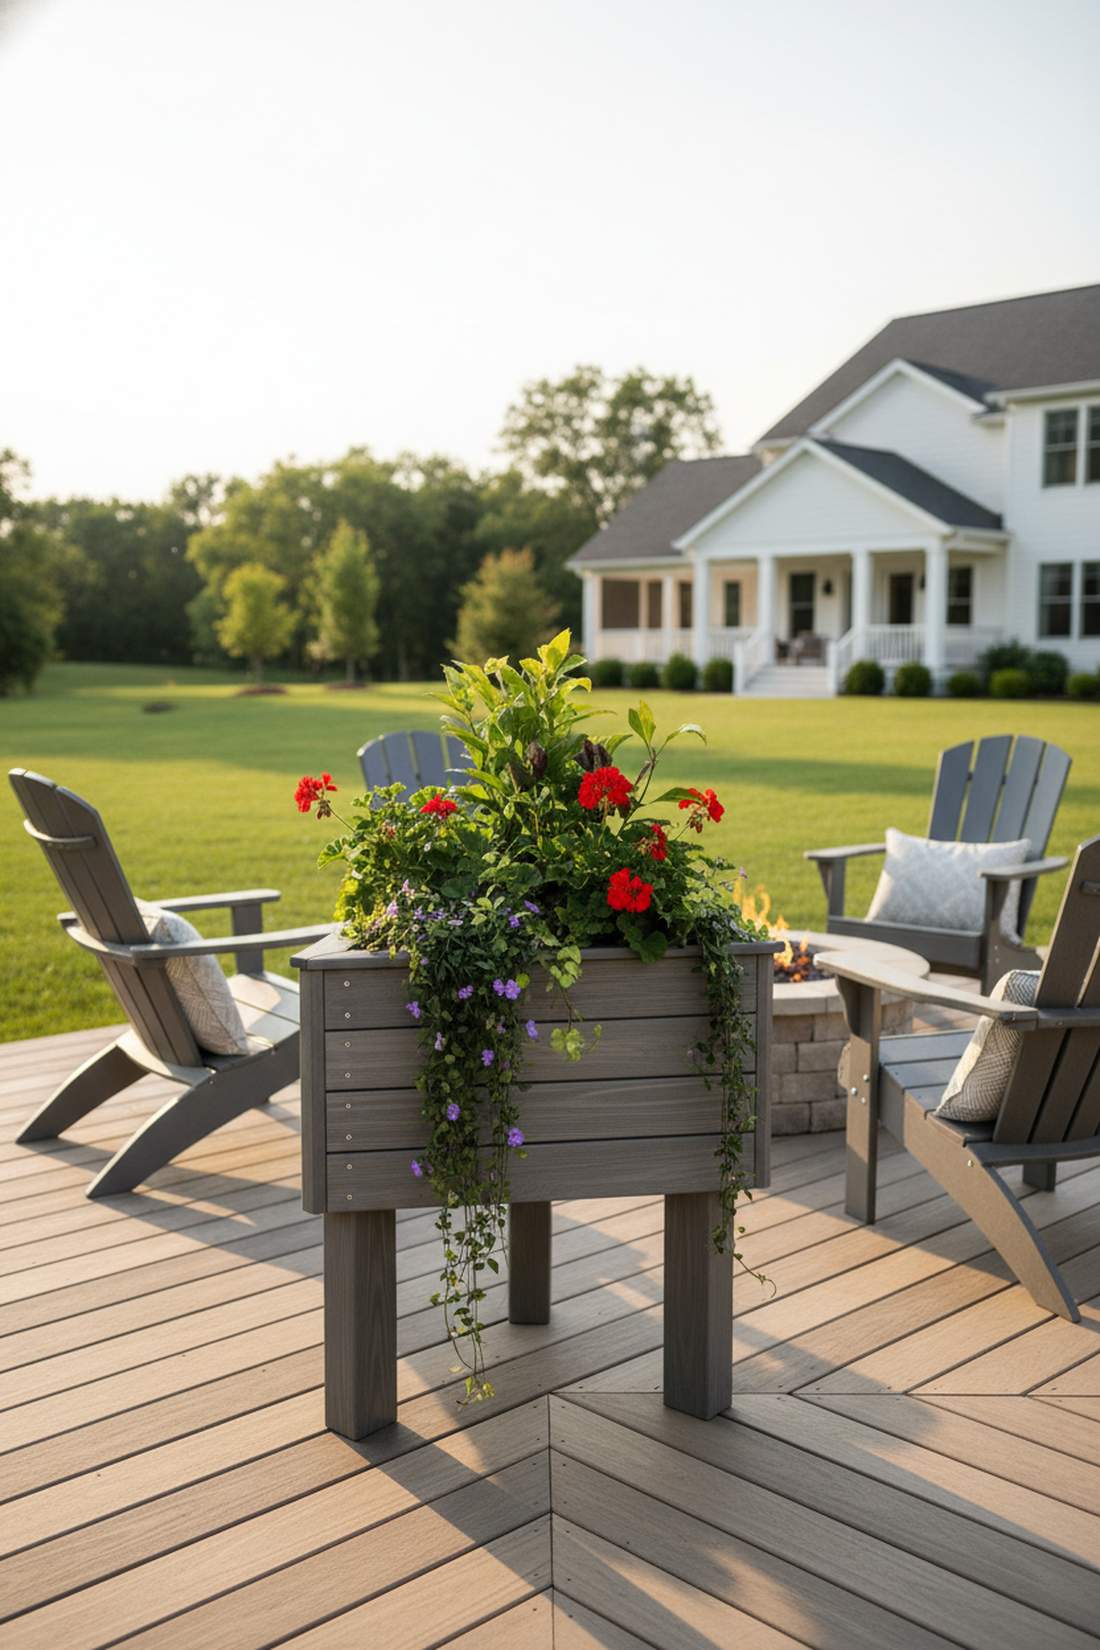
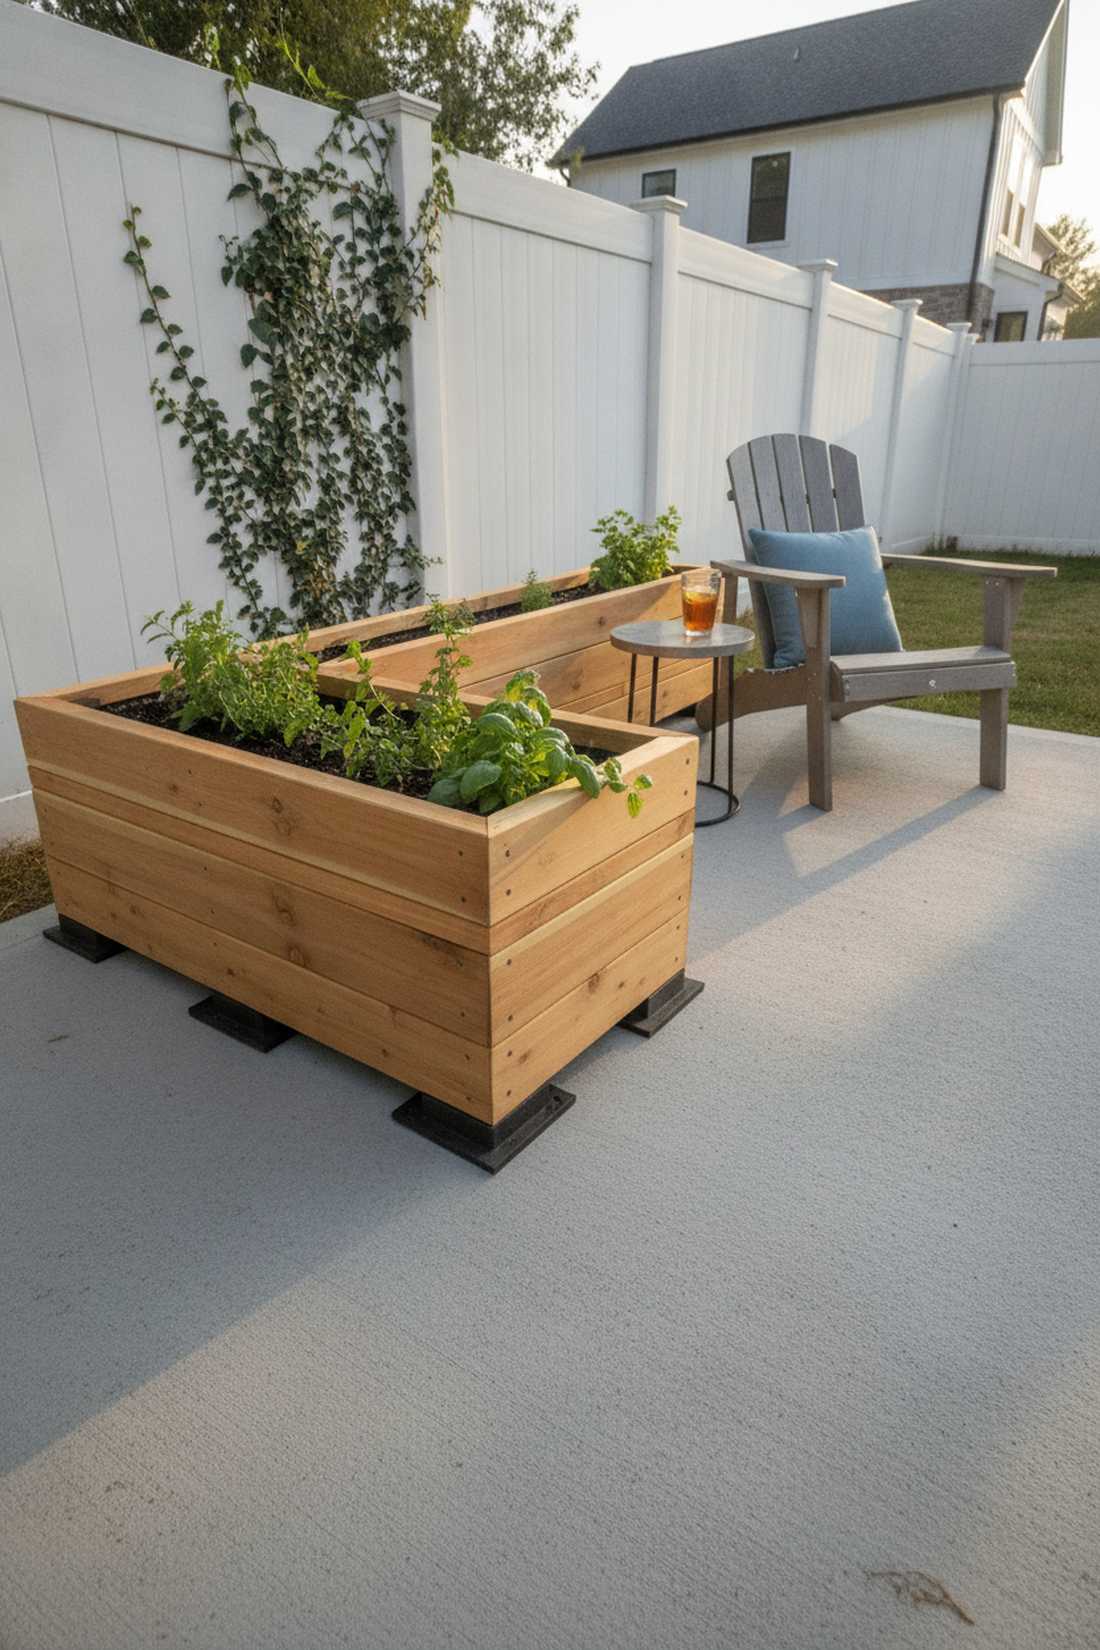
8. Waist-High Table Garden

Feels like a modern culinary workstation. A standing tabletop planter brings fresh greens right to your deck without a single bending motion.
Ground-level gardening destroys knees, but elevating the soil profile creates an accessible, premium-looking patio feature. Lining the basin with waterproof heavy-duty planter liners prevents soil moisture from rotting the supportive leg joints.
These units range from $90–$150 if built from scratch. Truly a game-changer for accessible gardening.
- Key Materials: Sturdy 4×4 legs, shallow planting box
- Vibe / Style: Ergonomic patio chic
- Difficulty: Intermediate carpentry
- Budget Breakdown: Frame: $80 | Waterproofing: $25
- Creator’s Tip: Drill ample drainage holes and add a layer of gravel at the bottom to prevent soggy roots.
- Smart Sourcing: pre-formed waterproof planter liners | heavy-duty structural wood screws
9. Rolling Mobile Planter
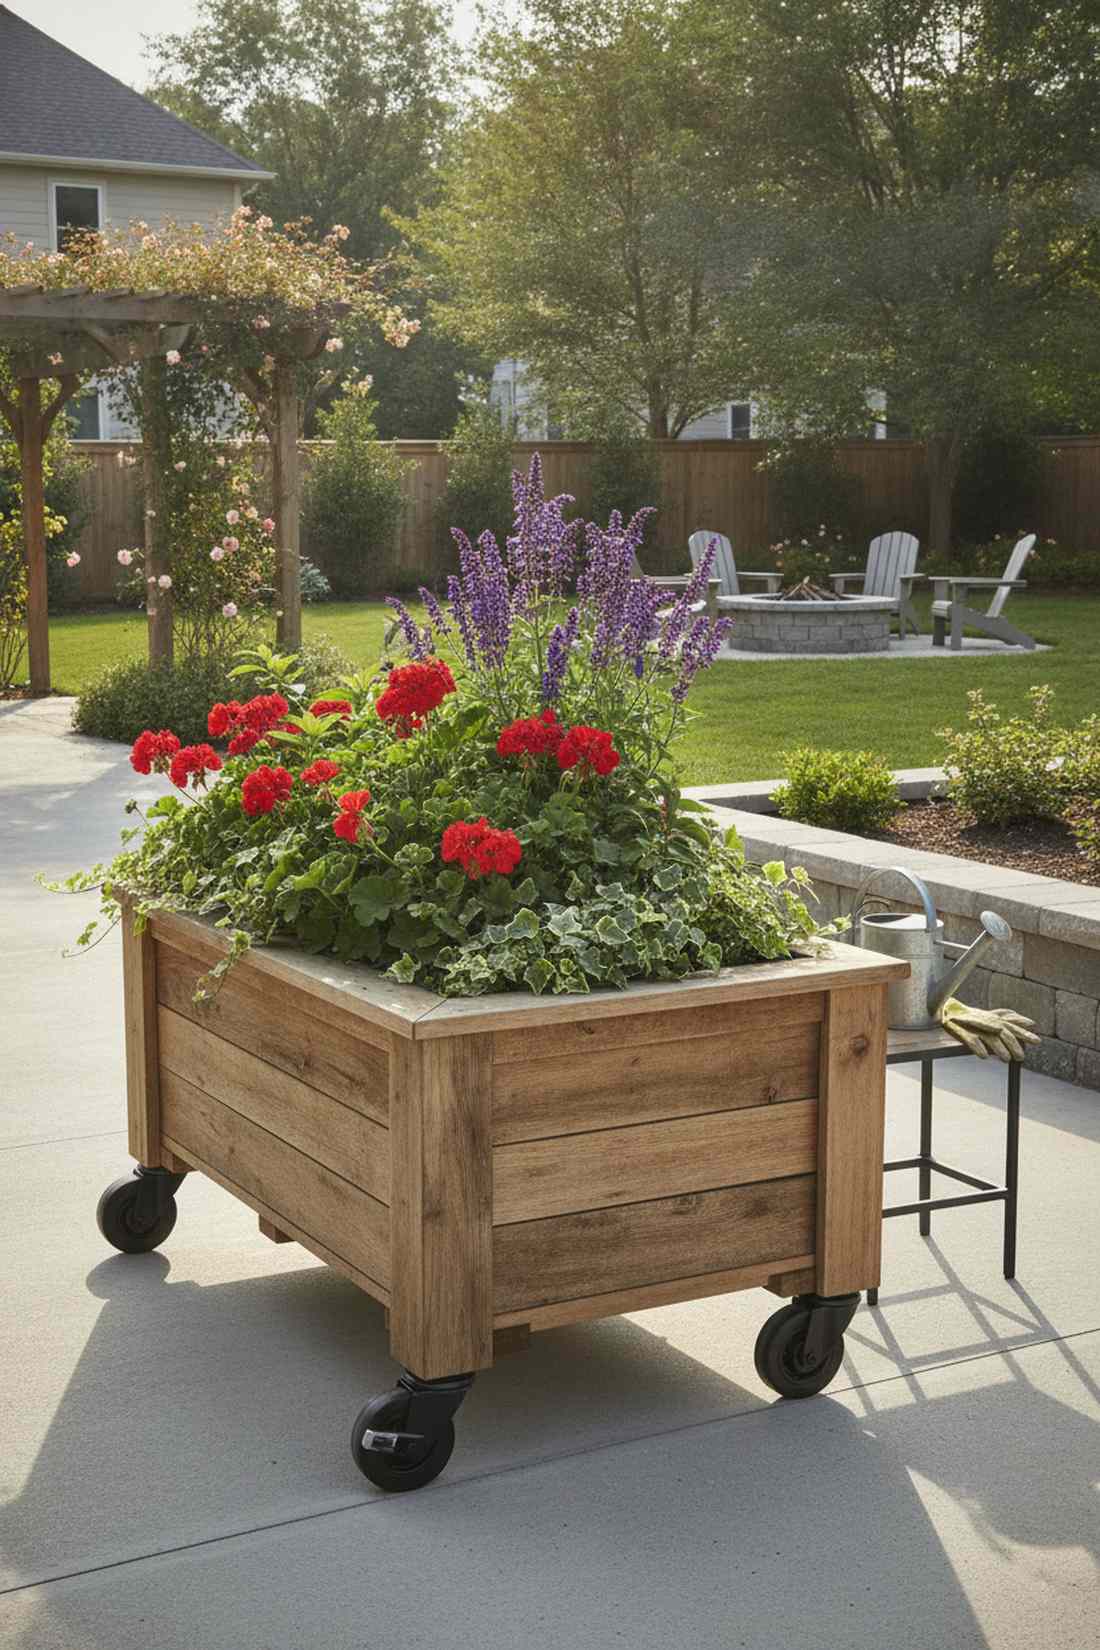
Brings a dynamic, shifting energy to your outdoor living space. A caster-mounted rolling garden box is perfect for chasing the sun across a shaded concrete patio.
Stationary boxes limit your options, whereas this mobile setup gives you total seasonal control over your plant’s environment. Bolting on locking polyurethane outdoor casters ensures the heavy wet soil glides effortlessly without scratching deck boards.
Adding mobility bumps the cost to $70–$120. Pin this if your yard has tricky sunlight patterns!
- Key Materials: Reinforced base floor, heavy-duty wheels
- Vibe / Style: Dynamic urban utility
- Difficulty: Intermediate assembly
- Budget Breakdown: Wood: $50 | Casters: $45
- Creator’s Tip: Always reinforce the bottom panel with cross-beams; wet soil weighs dramatically more than you think.
- Smart Sourcing: heavy-duty locking polyurethane casters (4-pack) | marine-grade waterproof sealant
💡 Must-Have Supplies for High-End Setups
To build these setups faster and ensure they last, skip the generic craft aisles and invest in the right foundational kits.
- Base & Support: Heavy-duty galvanized corner brackets (bulk packs)
- Setup Tools: Laser alignment tools and pre-cut cedar kits
- Weather/Durability Protection: UV-resistant commercial weed barrier rolls
10. Standing Corner Wedge Planter
Feels like a high-end luxury resort balcony. The elevated triangular wedge box slides effortlessly into tight deck corners to maximize visual impact.
Leaving patio corners empty looks unfinished, but this tailored geometry creates a striking, elevated focal point. Using weather-resistant composite deck boards for the frame ensures it withstands harsh sun exposure without splitting.
This premium corner piece costs around $85–$140. A brilliant trick to make small balconies feel lush.
- Key Materials: 3-leg support system, custom angled cuts
- Vibe / Style: Space-saving luxury
- Difficulty: Advanced angle cutting
- Budget Breakdown: Composite wood: $100 | Fasteners: $20
- Creator’s Tip: Plant cascading trailing vines at the front edge to soften the sharp triangular point.
- Smart Sourcing: UV-coated composite fascia boards | stainless steel decking screws
This next setup completely breaks the mold—it’s ridiculously narrow but creates a stunning visual wall…
11. Bar-Height Narrow Herb Ledge
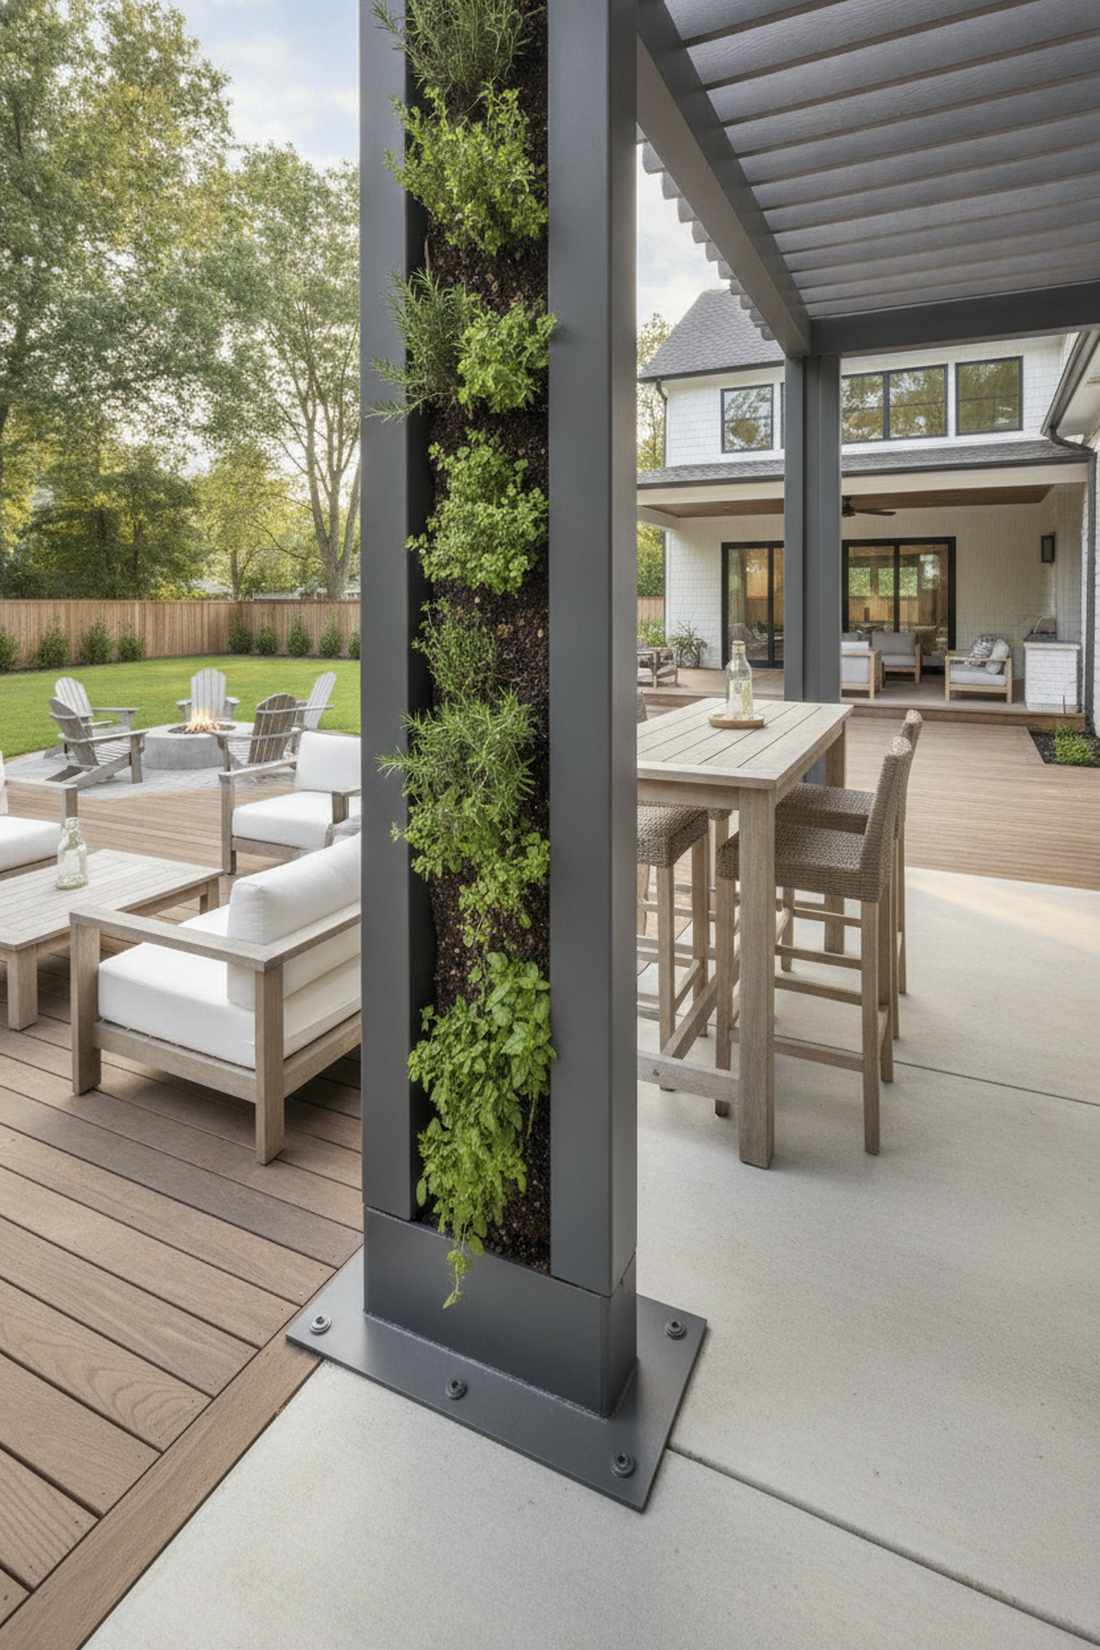
Exudes the chic atmosphere of an upscale outdoor cafe. A tall slender boundary planter is brilliant for creating a fragrant privacy screen around seating areas.
Bulky boxes consume too much floor space, whereas this skinny profile looks sleek and acts as a brilliant space divider. Filling it with moisture-control potting soil blends is critical since narrow beds dry out exceptionally fast in summer heat.
You can construct this sleek wall for $60–$95. Save this if you love hosting patio dinner parties!
- Key Materials: Tall slim framing, broad base plate
- Vibe / Style: Modern architectural divider
- Difficulty: Moderate (requires stability planning)
- Budget Breakdown: Frame: $70 | Soil: $20
- Creator’s Tip: Add heavy bricks or gravel to the very bottom to prevent the tall structure from tipping in high winds.
- Smart Sourcing: moisture-retaining organic potting mix | concealed steel base anchors
12. Wheelchair-Accessible Cutout Bed
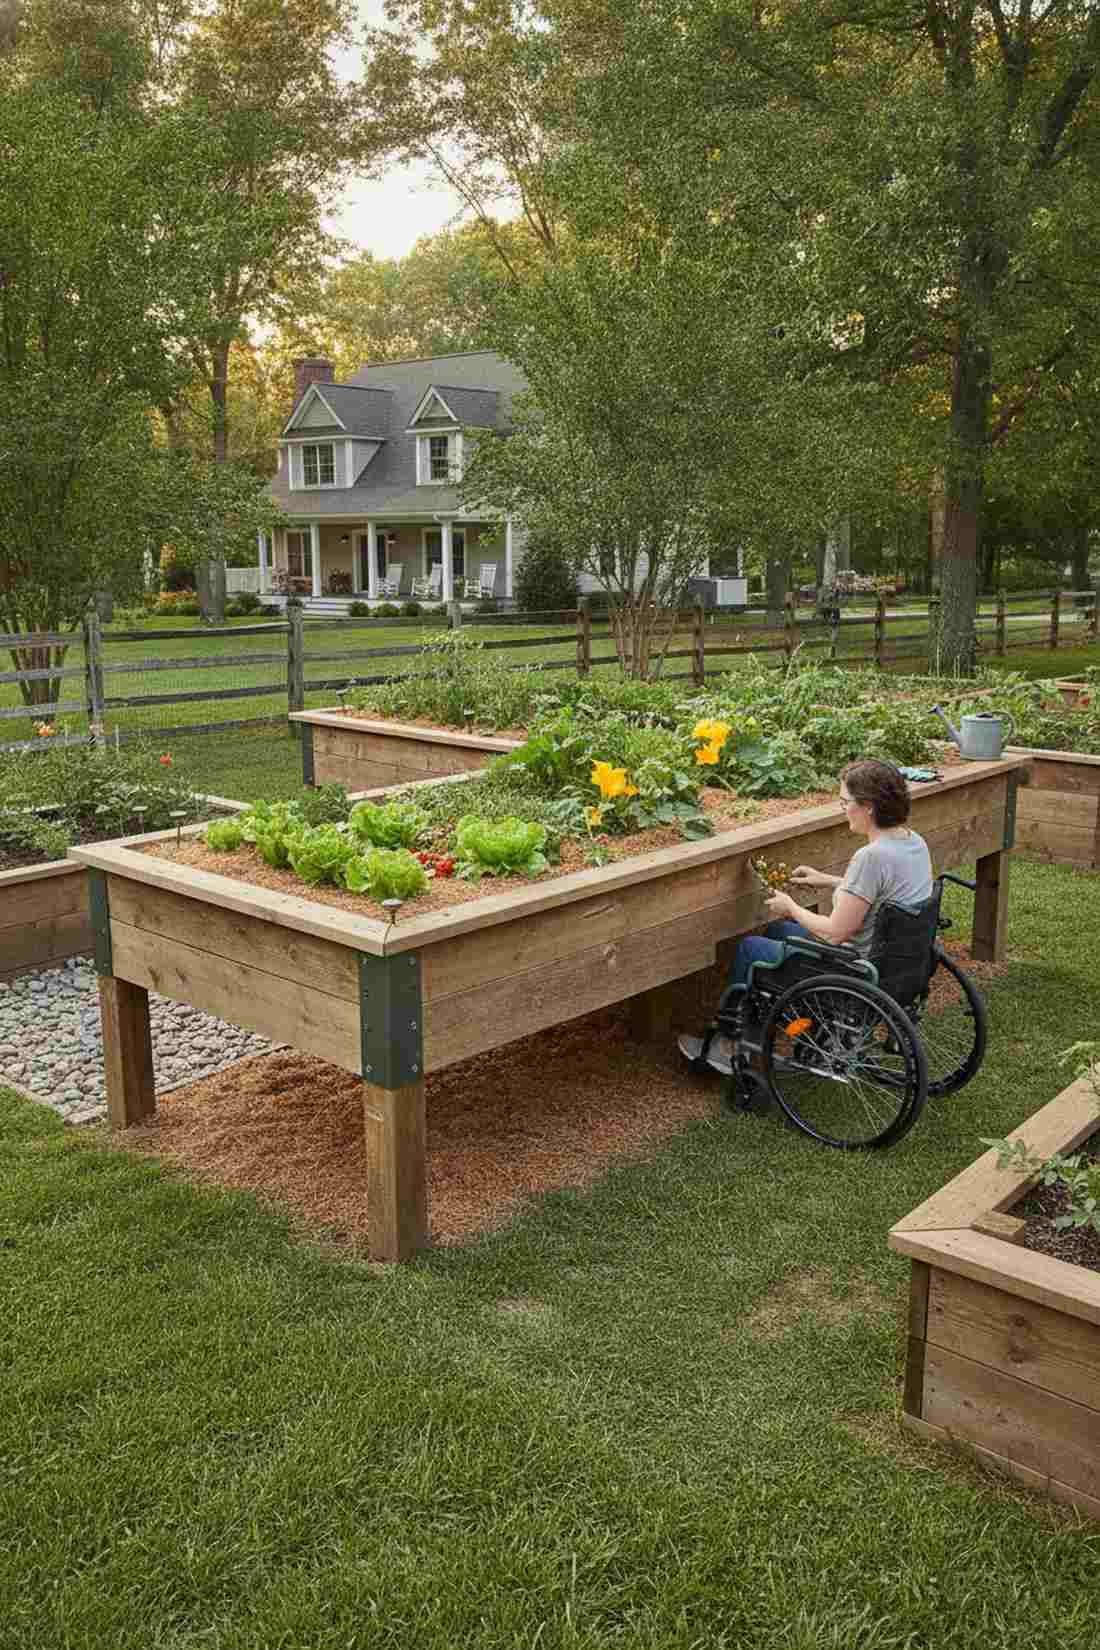
Radiates thoughtful, inclusive landscape design. A U-shaped ADA-compliant garden station ensures everyone can experience the joy of harvesting fresh vegetables.
Traditional setups block seated access, but this open-front cantilever design provides life-changing garden ergonomics. Utilizing ultra-lightweight raised bed filler mediums ensures the suspended growing area doesn’t collapse under extreme soil weight.
Building this specialized unit costs roughly $150–$250. An incredibly rewarding project that transforms daily living.
- Key Materials: Heavy duty posts, reinforced cantilever box
- Vibe / Style: Ergonomic inclusive living
- Difficulty: Advanced structural build
- Budget Breakdown: Support lumber: $120 | Lightweight soil: $60
- Creator’s Tip: Ensure a minimum of 27 inches of vertical clearance underneath for comfortable wheelchair approach.
- Smart Sourcing: ultra-lightweight coconut coir bricks (bulk) | heavy-duty steel L-brackets
13. Adjustable-Height Planter
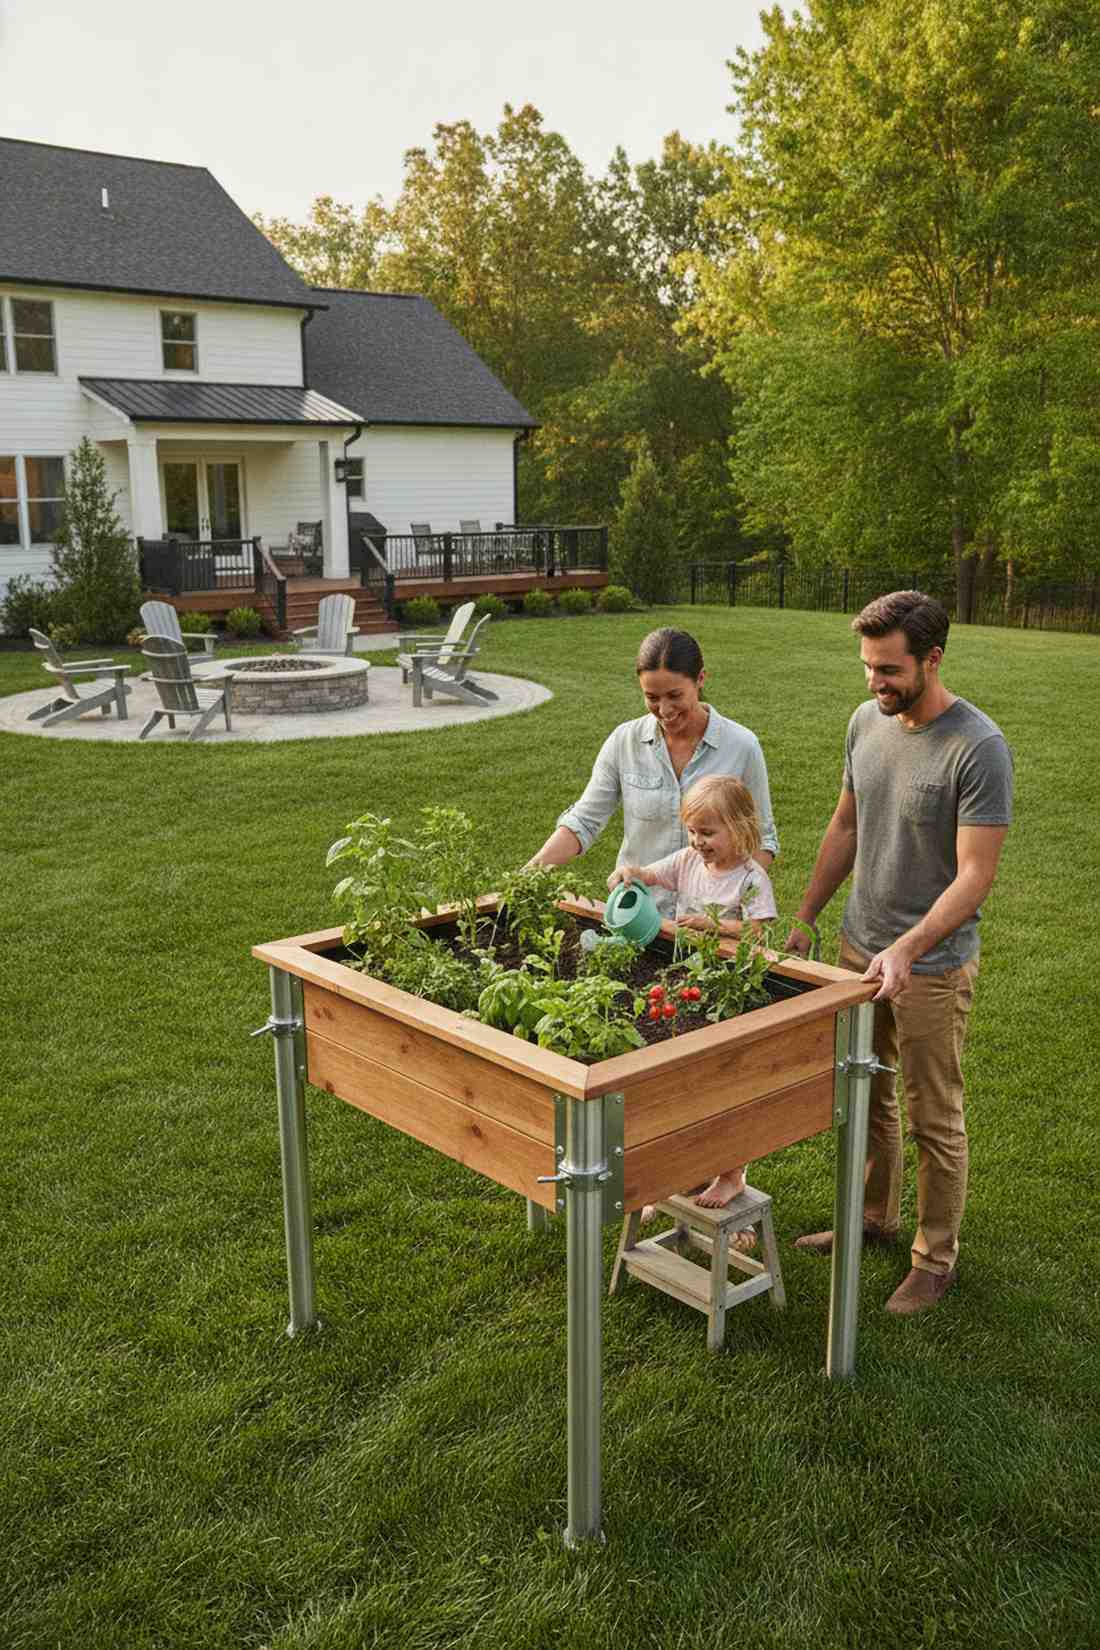
Feels like a piece of high-tech outdoor furniture. An adjustable telescoping leg planter adapts instantly from child-friendly heights to standing adult workstations.
Static beds lock you in, but integrating sliding leg mechanics delivers a completely customized, future-proof growing experience. Investing in commercial-grade telescoping metal table legs guarantees smooth adjustments without rusting or jamming.
This hardware-heavy project will run about $120–$180. Pin this if you want a garden that grows with your family!
- Key Materials: Standard box, metal sliding legs
- Vibe / Style: High-utility modern
- Difficulty: Intermediate mechanical assembly
- Budget Breakdown: Box materials: $50 | Adjustable legs: $90
- Creator’s Tip: Use pin-lock style legs rather than friction-locks to safely hold the immense weight of wet dirt.
- Smart Sourcing: outdoor-rated adjustable metal table legs | heavy-duty locking pins
14. Hexagonal Honeycomb Cluster
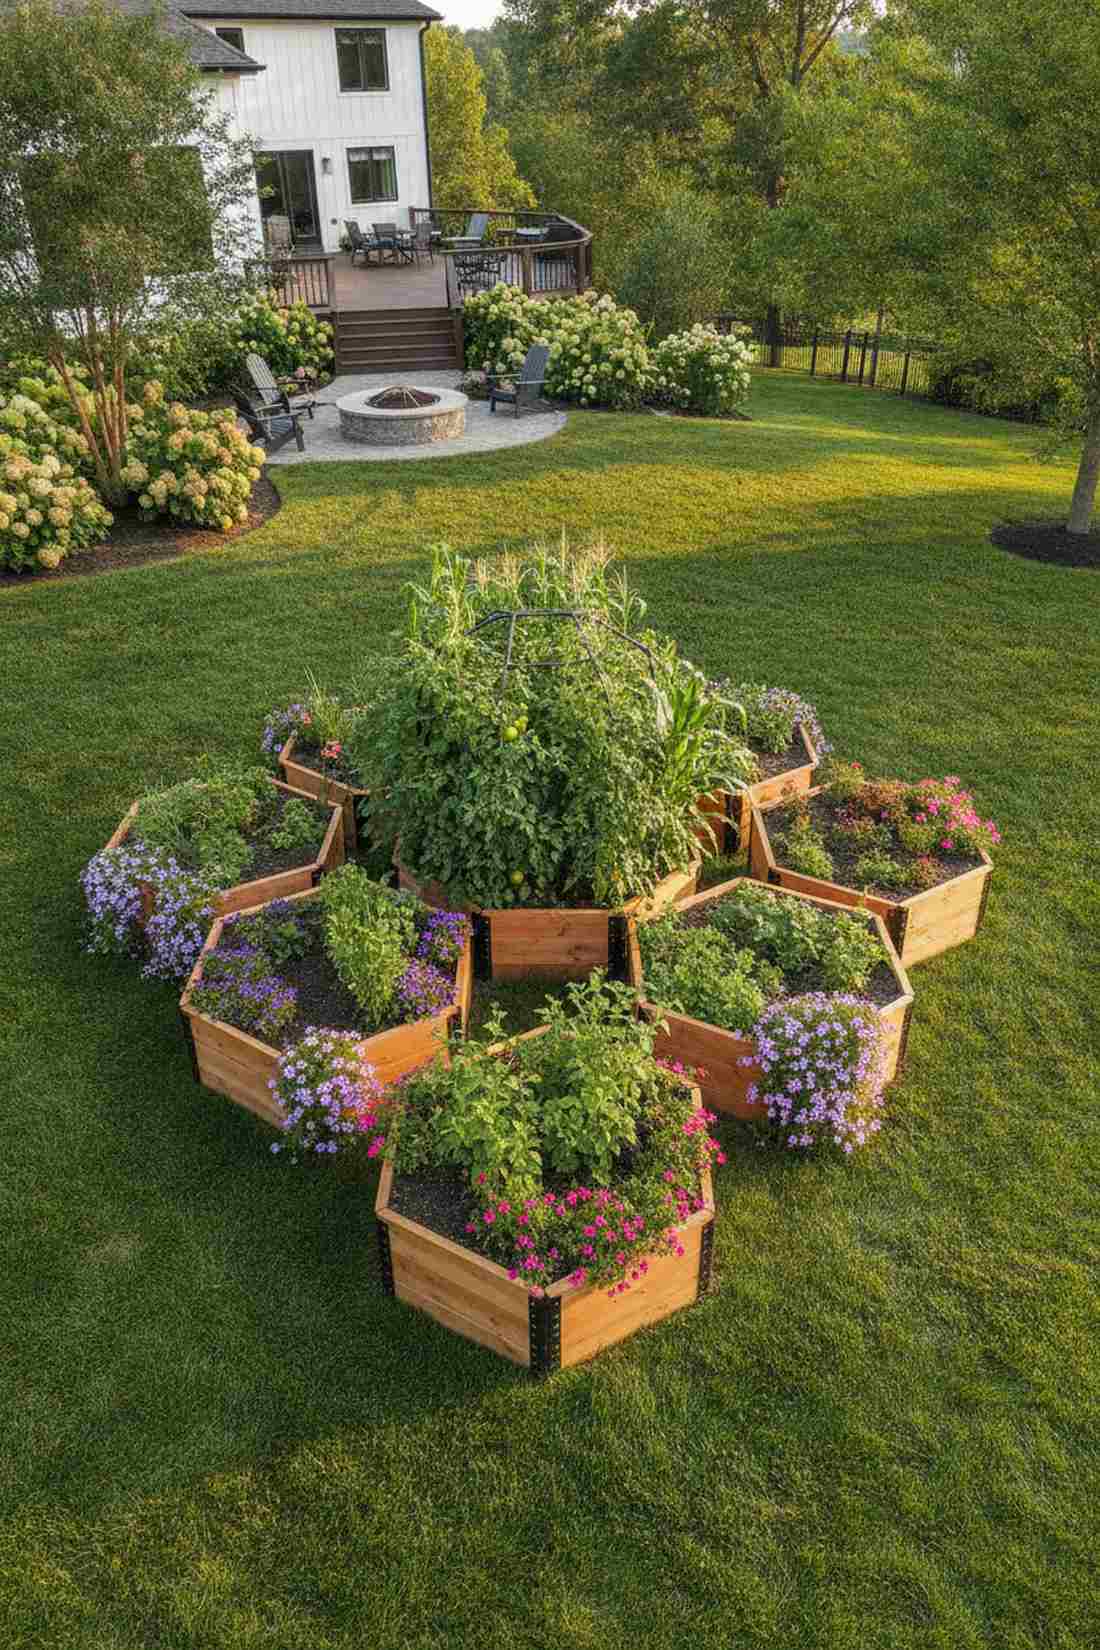
Looks like a beautifully chaotic organic math puzzle. A tessellating hexagon garden layout creates a breathtaking focal point in the center of a wide-open lawn.
Basic squares get boring, but this intricate geometric network delivers a bespoke, designer-level garden aesthetic. Utilizing pre-cut hexagonal raised bed bracket kits completely eliminates the nightmare of calculating 60-degree corner cuts.
A cluster of three costs around $180–$250. It’s a total showstopper that demands attention.
- Key Materials: Short identical wood cuts, angle brackets
- Vibe / Style: Geometric organic art
- Difficulty: Moderate (with brackets)
- Budget Breakdown: Lumber: $120 | Bracket kits: $80
- Creator’s Tip: Plant taller crops in the central hexagon and cascading flowers in the outer rings for a dome effect.
- Smart Sourcing: pre-angled 60-degree corner brackets | premium cedar plank bundles
Most backyard setups waste ridiculous amounts of water, but this next ancient design actually irrigates itself…
15. Circular Keyhole Bed
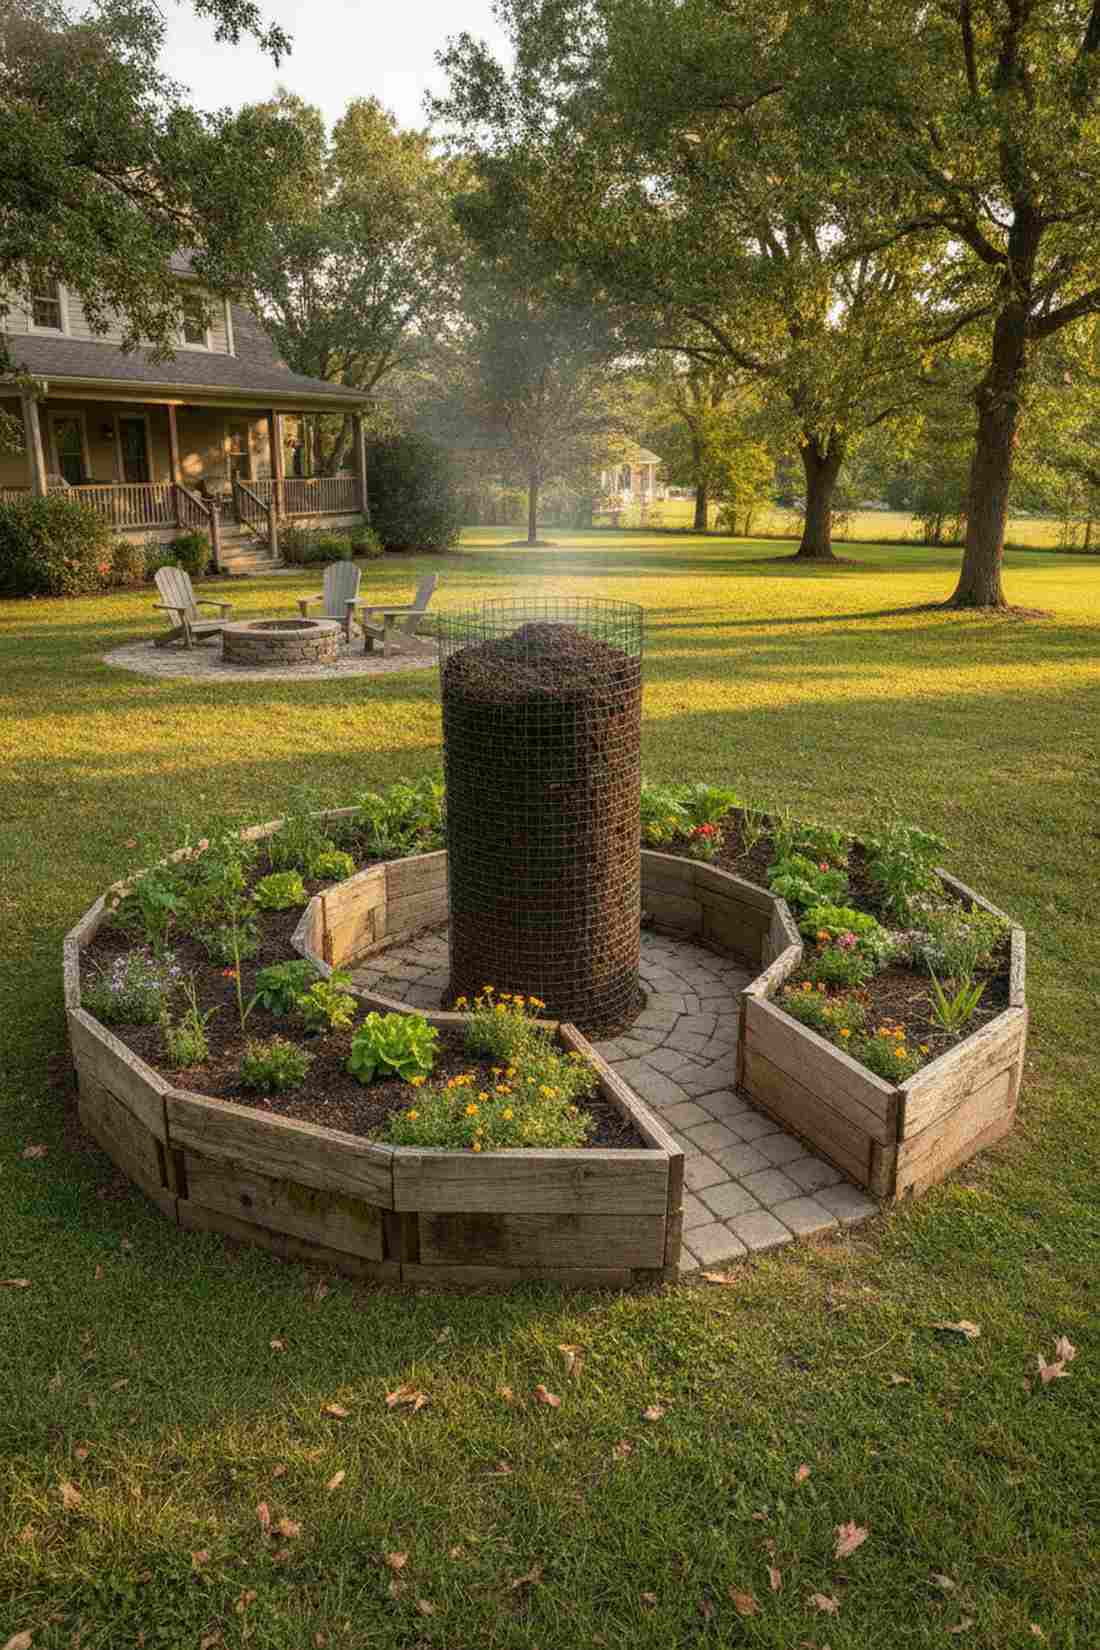
Feels like stepping into an ancient permaculture oasis. A radial keyhole compost garden is the ultimate survivalist setup for drought-prone outdoor spaces.
Standard watering evaporates fast, yet this central-composting design constantly feeds and hydrates the surrounding soil automatically. Building the center basket with heavy-duty PVC-coated garden wire ensures the compost column won’t rust away in a single season.
Materials for this eco-engine run about $90–$140. Save this to your off-grid or sustainable gardening board!
- Key Materials: Retaining wall blocks or curved wood, wire mesh
- Vibe / Style: Permaculture mastery
- Difficulty: Moderate layout planning
- Budget Breakdown: Outer wall: $100 | Inner wire: $25
- Creator’s Tip: Slope the soil slightly downward from the center basket to help water wick out to the plant roots.
- Smart Sourcing: PVC-coated welded wire mesh rolls | organic compost starter cultures
16. Triangular Corner Maximizer
Exudes sharp, clean modern architectural lines. A right-angle triangular garden box reclaims those annoying dead corners where your property fences meet.
Rectangles leave wasted gaps, but forcing this wedge shape instantly makes a small yard look twice as big. Sealing the interior wood with non-toxic raw linseed oil protects the structure from trapped moisture in shady corners.
You can throw this together for $40–$75. A brilliant, low-cost weekend geometry project.
- Key Materials: Two long sides, one angled hypotenuse
- Vibe / Style: Modern spatial efficiency
- Difficulty: Easy with a circular saw
- Budget Breakdown: Lumber: $45 | Sealant: $15
- Creator’s Tip: Add a tall trellis right at the back 90-degree corner to draw the eye upward and maximize vertical space.
- Smart Sourcing: 100% pure raw linseed oil | heavy-duty corner mending plates
17. Diamond-Shaped Focal Bed
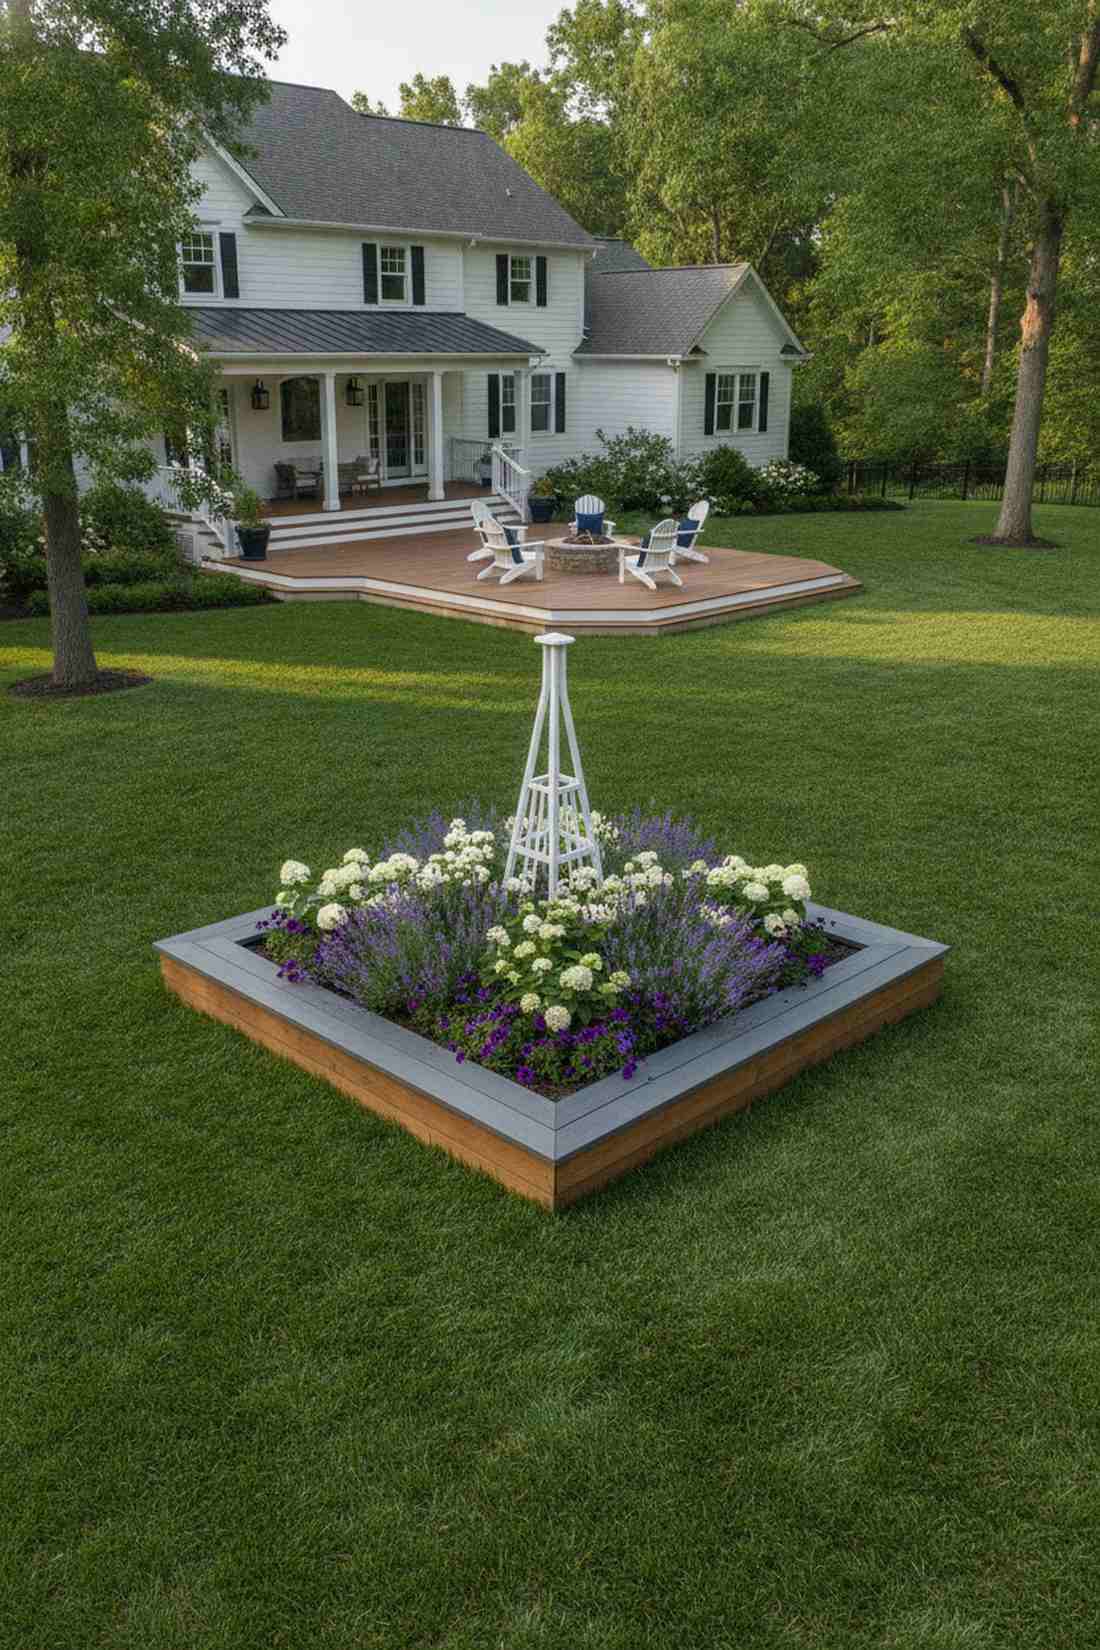
Feels like the elegant centerpiece of a French chateau courtyard. A rotated square diamond planter breaks up the monotony of endless rectangular lawn spaces.
A standard square looks utilitarian, but rotating it 45 degrees completely tricks the eye into seeing an expensive landscape feature. Capping the top edges with weatherproof composite trim boards gives it a framed, gallery-ready finish.
Expect a budget of $60–$100 for this elegant focal point. Pin this if you love formal garden aesthetics!
- Key Materials: Standard square frame, rotated placement
- Vibe / Style: Formal courtyard elegance
- Difficulty: Easy beginner
- Budget Breakdown: Base frame: $50 | Trim: $30
- Creator’s Tip: Place a large, striking architectural plant (like an agave or a tall obelisk) perfectly in the diamond’s center.
- Smart Sourcing: pre-painted composite edge trim | decorative central garden obelisks
18. Oval Racetrack Bed
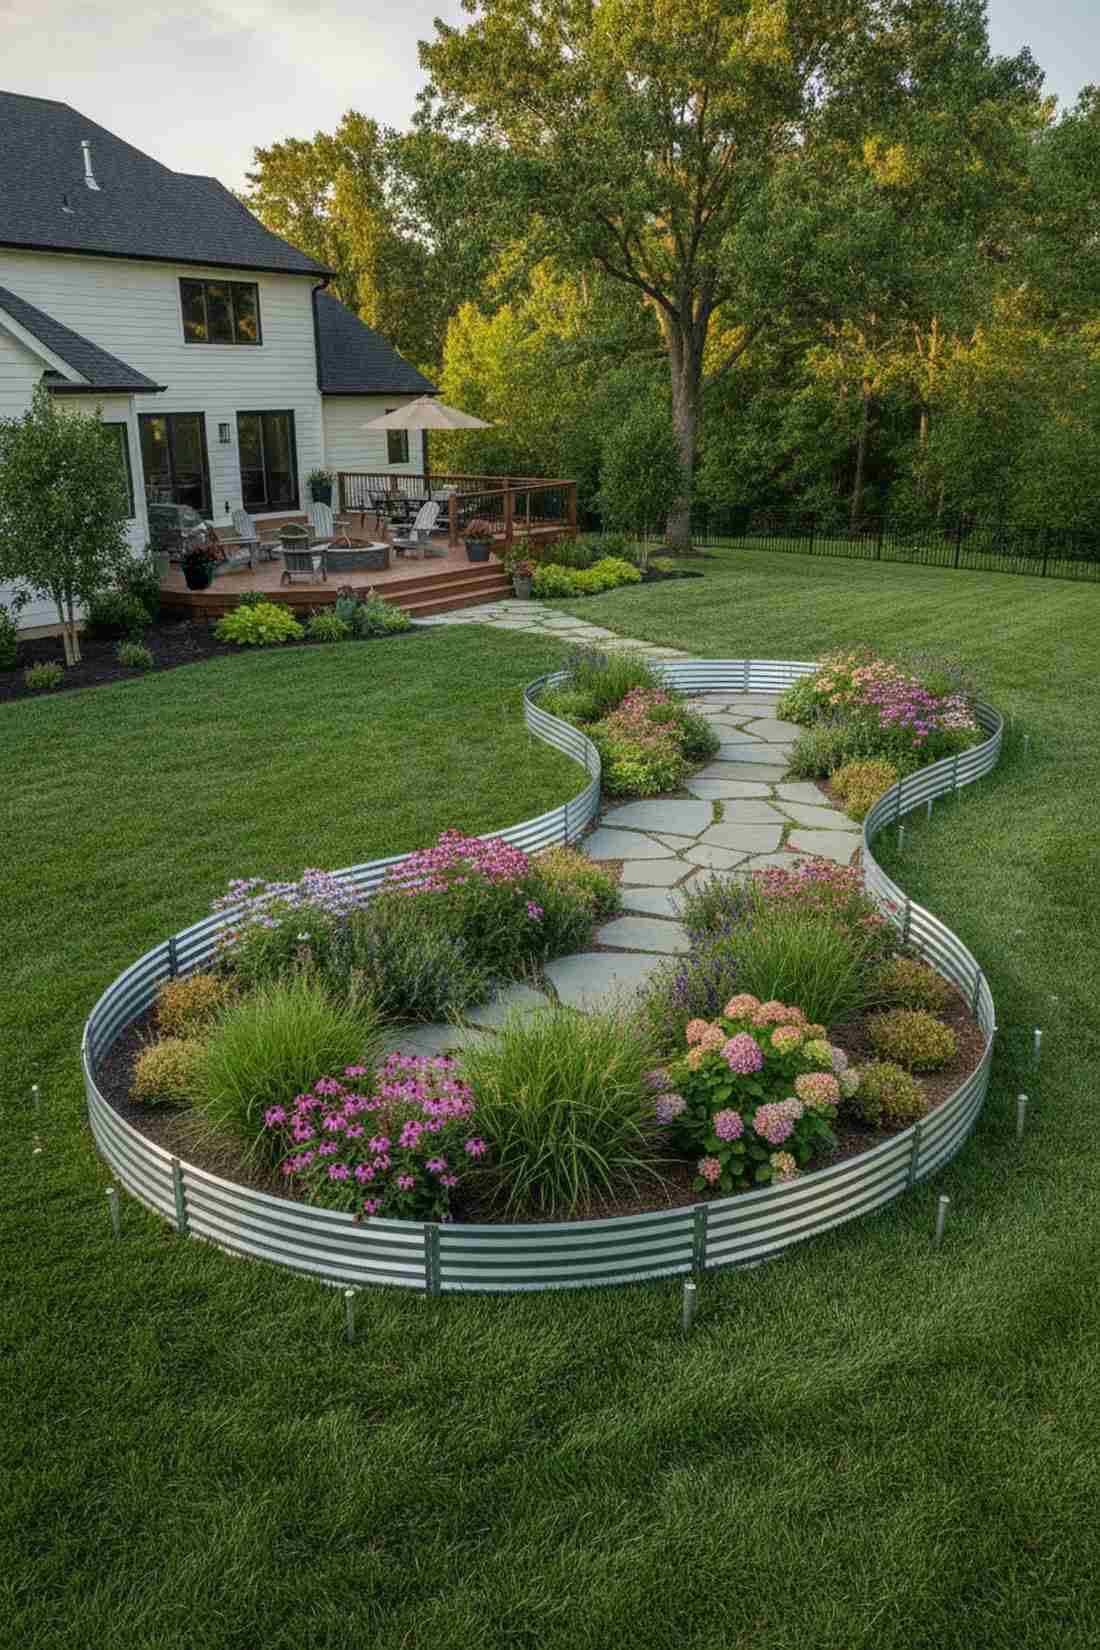
Radiates a gentle, flowing, organic energy. The curved oval island garden softens harsh property lines and creates beautiful sweeping walkways in the grass.
Rigid wood creates harsh stops, but curving the perimeter gives your landscaping a fluid, professionally-designed aesthetic. Utilizing flexible corrugated metal landscape edging allows you to bend smooth, perfect arches without snapping materials.
Bending this custom shape costs around $80–$130. It completely revolutionizes the flow of your yard.
- Key Materials: Flexible metal or composite bender board
- Vibe / Style: Flowing organic landscape
- Difficulty: Intermediate shaping
- Budget Breakdown: Flexible edging: $80 | Stakes: $20
- Creator’s Tip: Lay out a garden hose on the grass first to test and perfect the oval curve before driving any stakes.
- Smart Sourcing: flexible galvanized steel lawn edging | heavy-duty metal grounding stakes
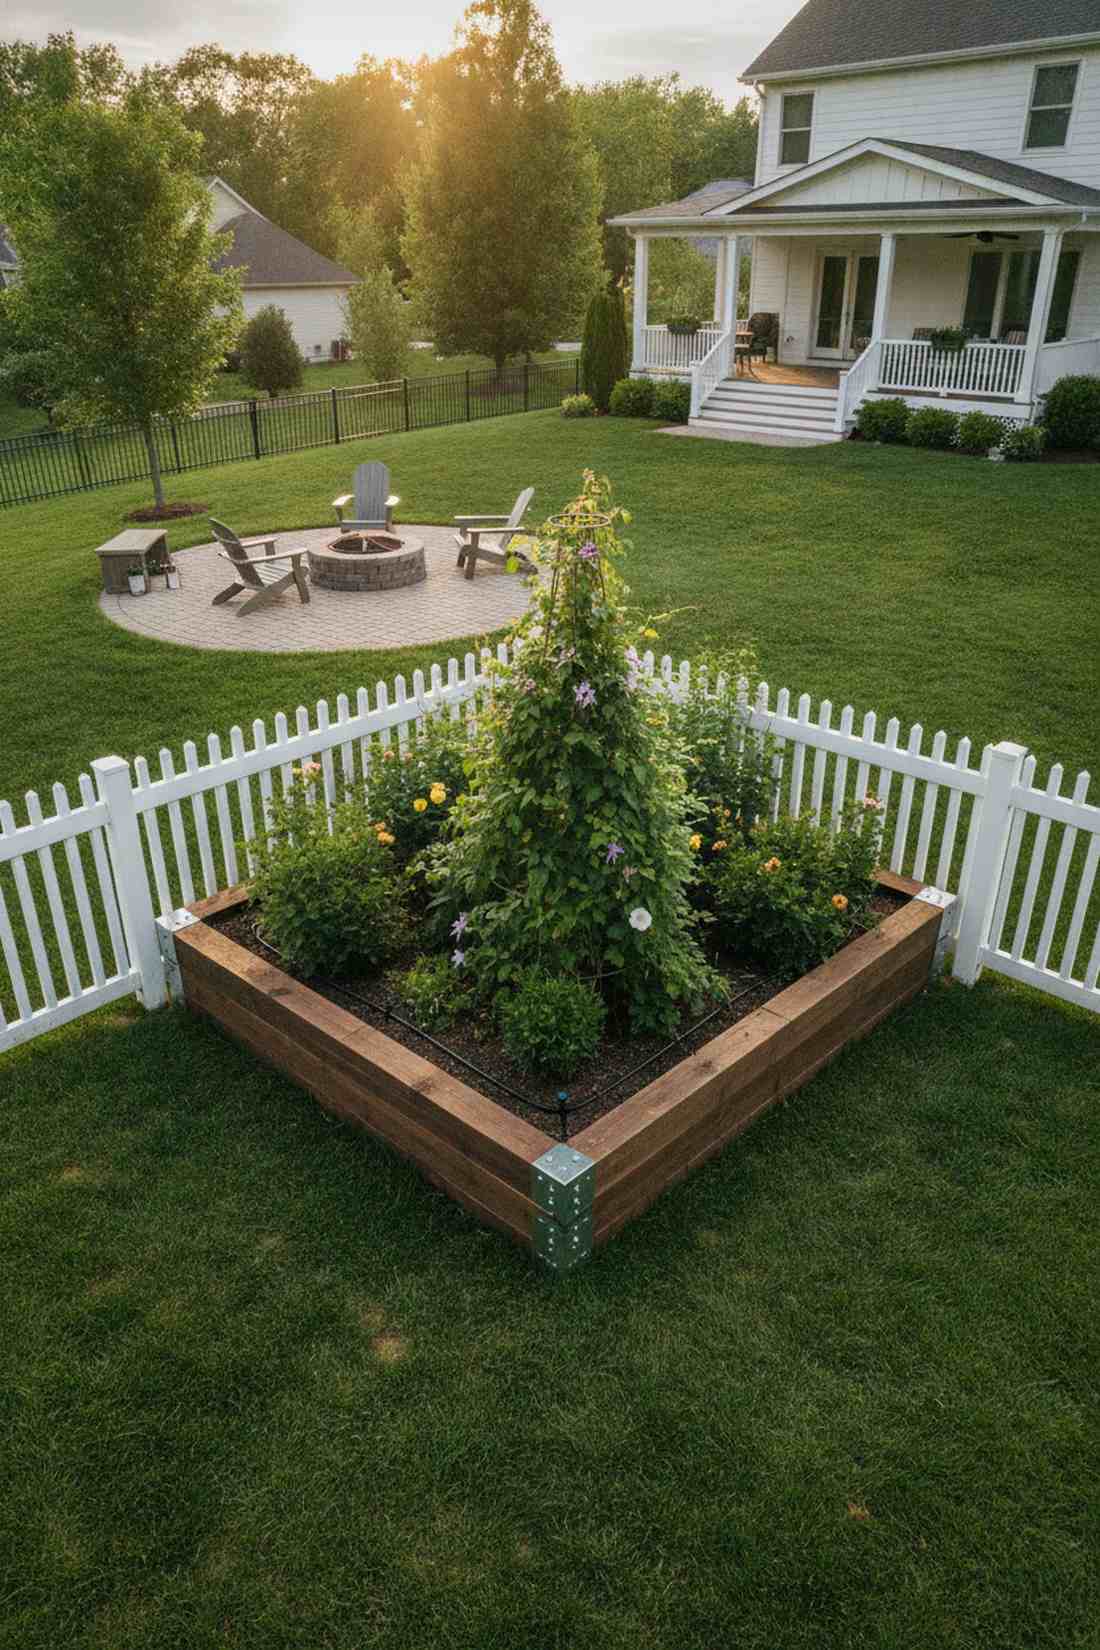
19. Square Quartet with Center Focal
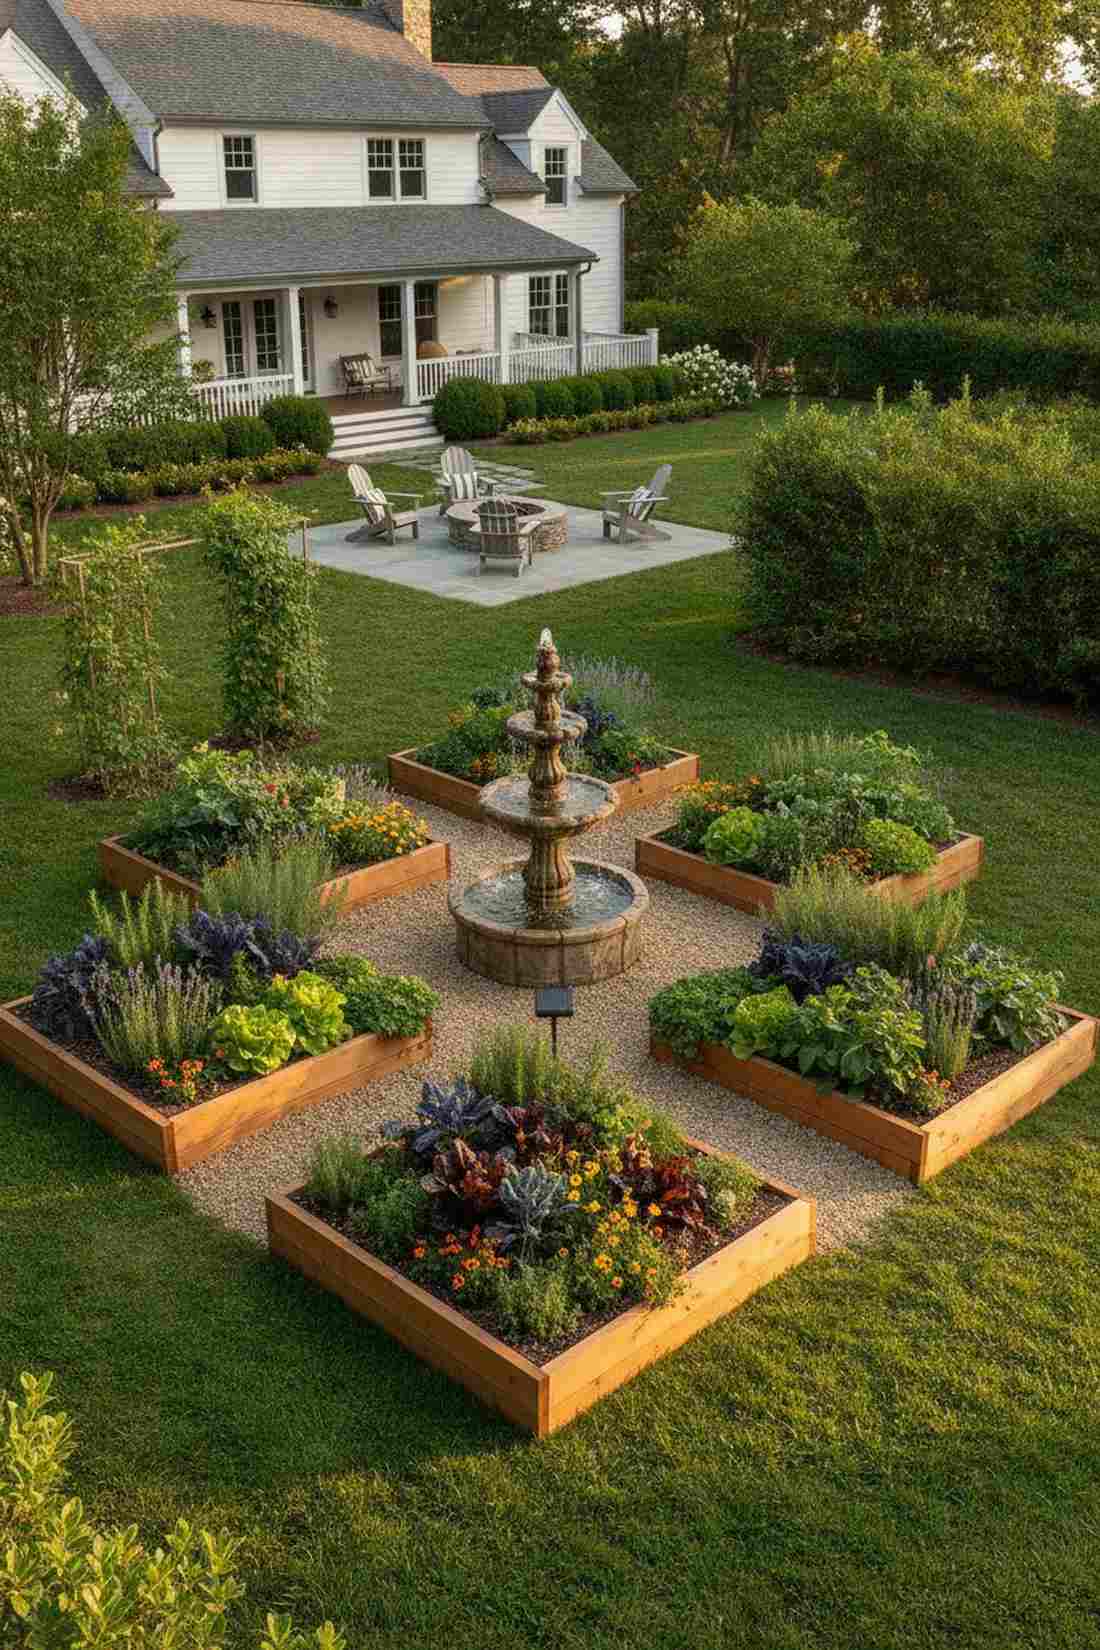
Straight out of a grand historic estate. A four-square potager garden layout transforms an empty backyard into a highly structured, productive paradise.
Building one massive plot looks messy, whereas this classical grid layout delivers a high-end, organized visual hierarchy. Installing a solar-powered outdoor birdbath fountain in the center crossing point creates breathtaking ambient noise and movement.
Four distinct beds will cost $150–$300 total. Save this to your ultimate dream garden board!
- Key Materials: Four identical square frames, central ornament
- Vibe / Style: Historic European potager
- Difficulty: Moderate (requires precise leveling)
- Budget Breakdown: Frames (x4): $200 | Centerpiece: $80
- Creator’s Tip: Ensure the crossing pathways between the four beds are exactly uniform—symmetry is the secret to this aesthetic.
- Smart Sourcing: solar-powered water fountain kits | pre-cut square cedar garden kits
Most basic beds ignore vertical space, but this next setup turns a standard garden into a magical walk-through tunnel…
20. Serpentine Curved Border
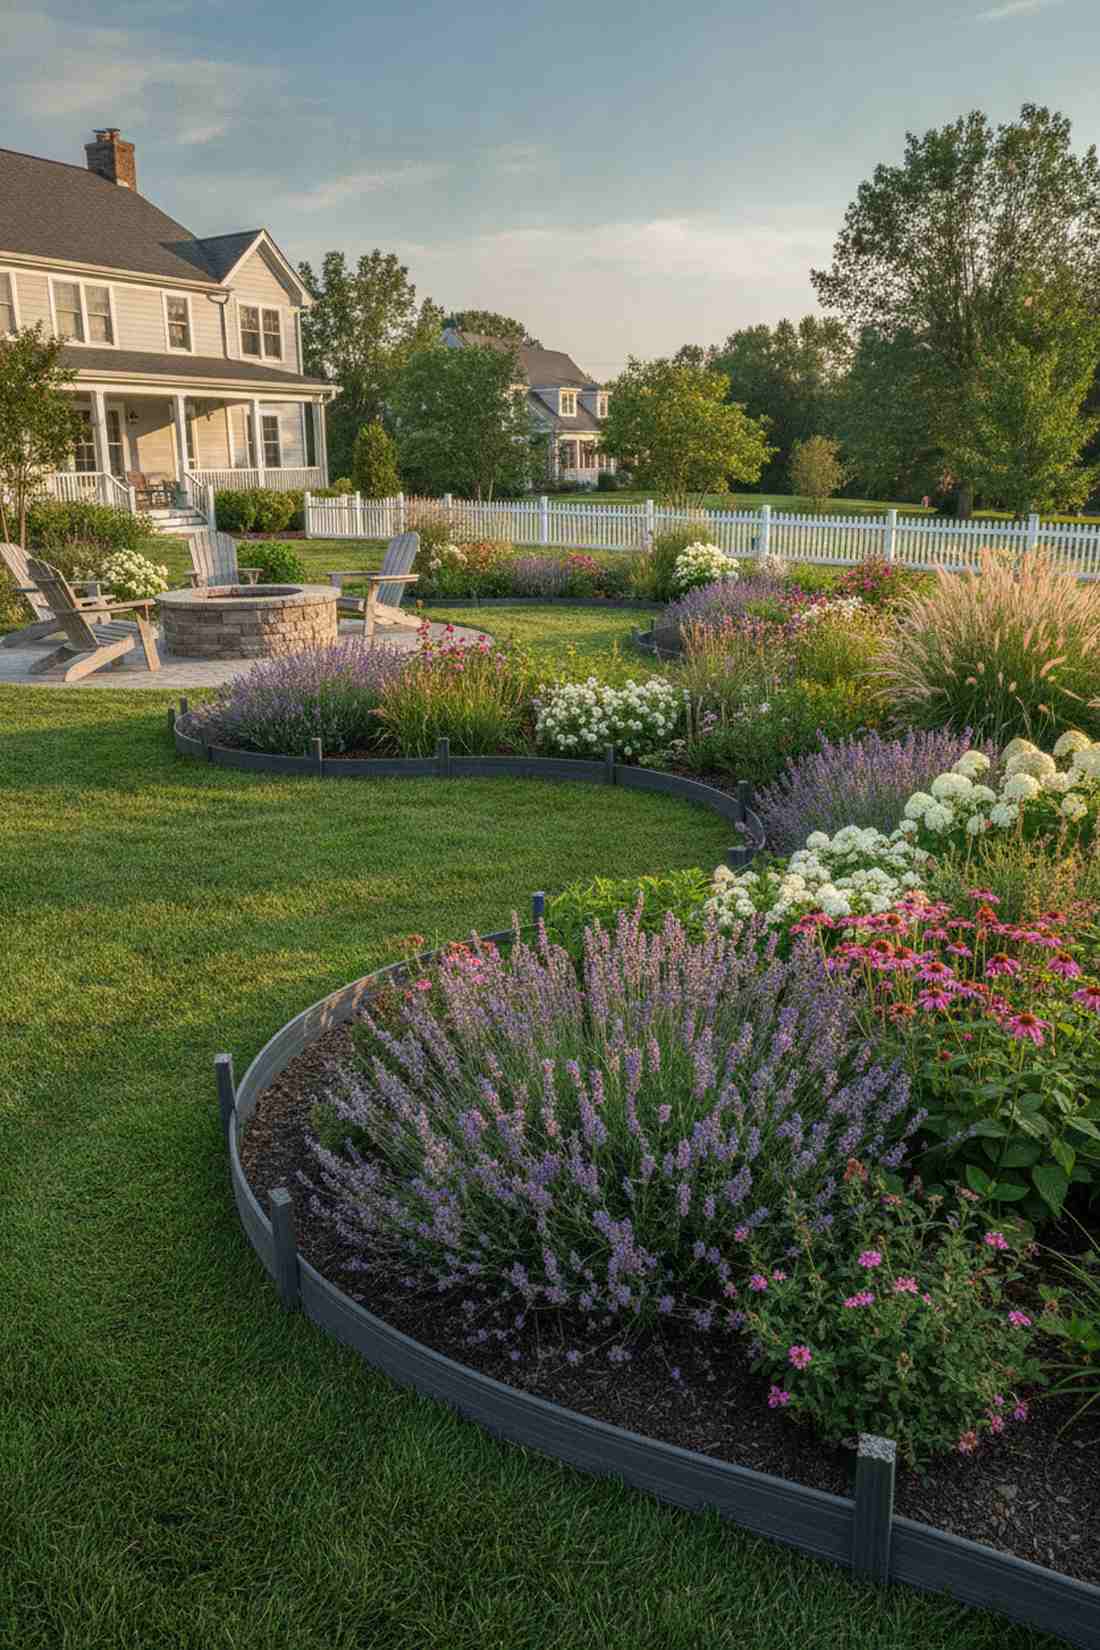
Feels like a whimsical path winding through a fairy tale. A wavy serpentine garden edge brings incredible dynamic movement to a boring, flat property line.
Straight borders feel rigid and industrial, but adding S-curves tricks the eye into thinking the garden is much deeper than it is. Using recycled composite bender boards guarantees the curves won’t rot or snap under ground pressure over time.
This flowing border costs roughly $60–$110 depending on length. It’s a gorgeous way to soften hardscapes.
- Key Materials: Composite bender board, wooden stakes
- Vibe / Style: Whimsical flowing landscape
- Difficulty: Intermediate (requires smooth bending)
- Budget Breakdown: Bender board: $70 | Fasteners: $15
- Creator’s Tip: Plant in “drifts” (large staggered groups of the same plant) that follow the curves for maximum visual impact.
- Smart Sourcing: premium recycled plastic bender board rolls | heavy-duty composite garden stakes
21. Cattle Panel Arch Tunnel
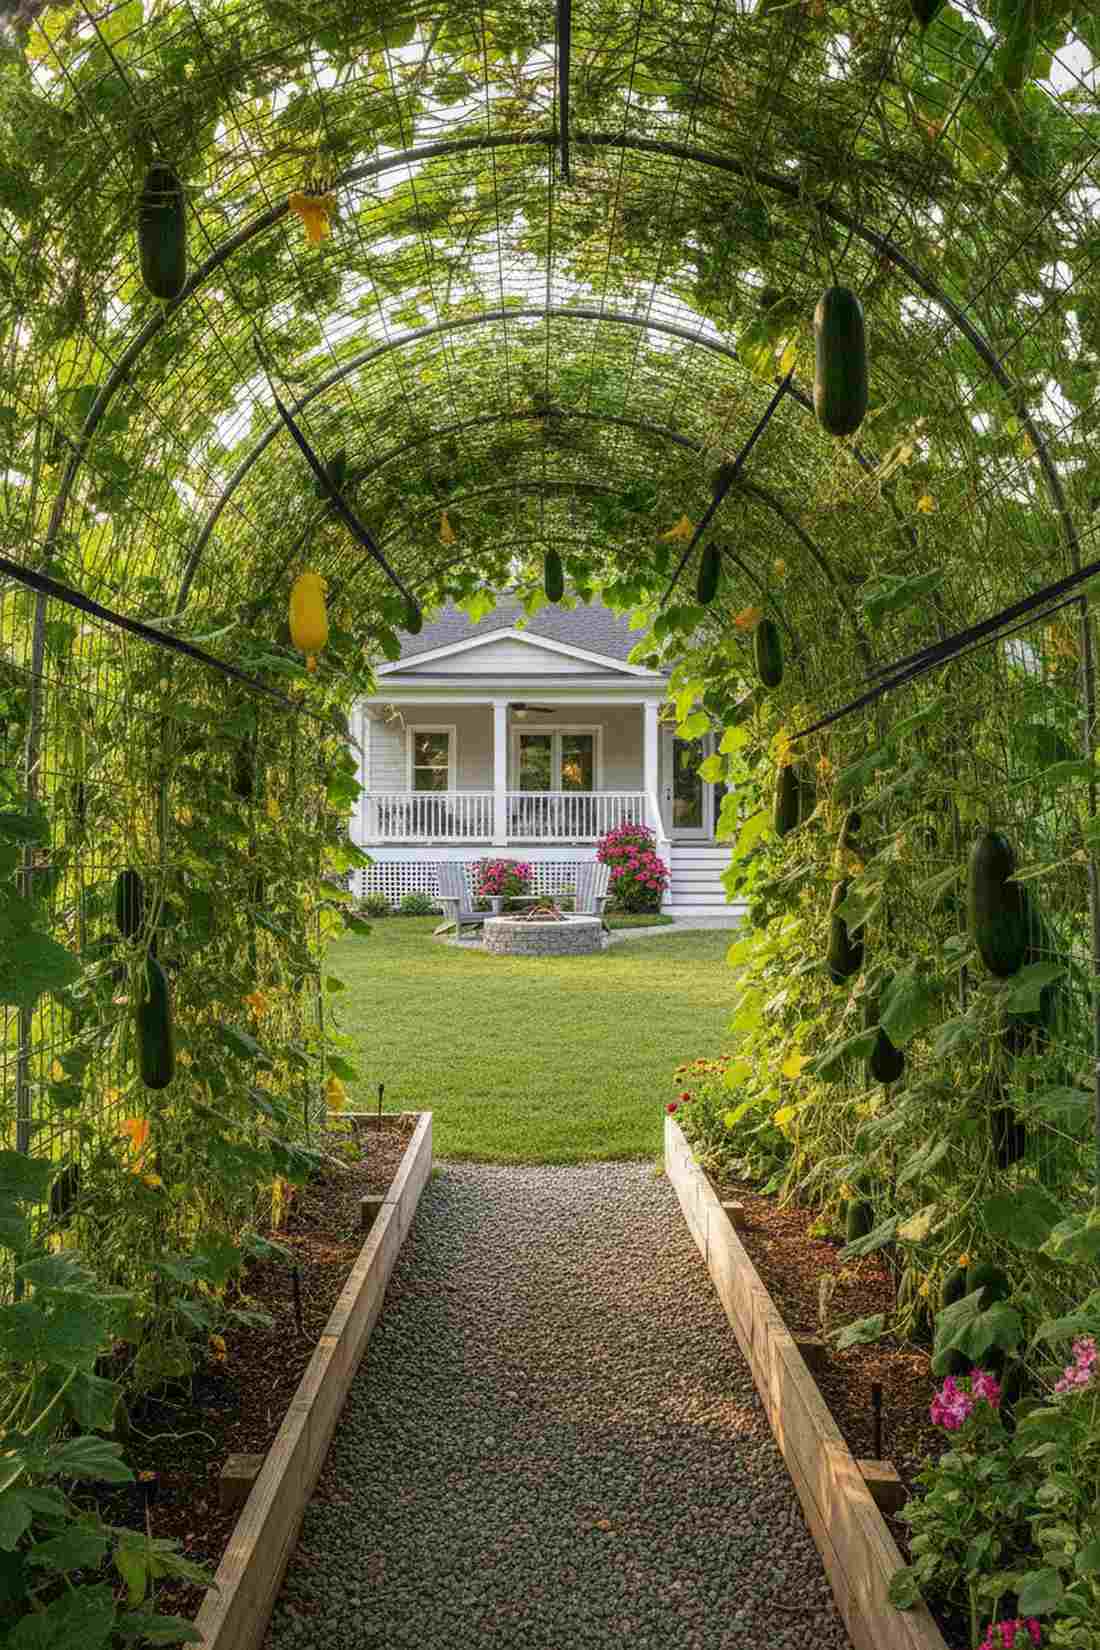
Feels like walking through an enchanted green cavern. A bent wire archway tunnel connects two beds and creates a stunning, immersive vertical harvest experience.
Standard trellises snap under heavy vines, but agricultural-grade mesh easily supports hundreds of pounds of hanging squash and cucumbers. Securing the arch with heavy-duty UV-resistant zip ties ensures the tension won’t cause the metal to spring loose mid-season.
You can build this magnificent tunnel for just $50–$80. Pin this if you want to grow massive vertical yields!
- Key Materials: 16-foot wire cattle panel, metal T-posts
- Vibe / Style: Enchanted harvest tunnel
- Difficulty: Requires two people to bend
- Budget Breakdown: Panel: $40 | Fasteners: $15
- Creator’s Tip: Harvest from the inside—the heavy fruits will naturally hang down through the wire grid for easy picking.
- Smart Sourcing: 16ft galvanized livestock panels | ultra-heavy-duty UV zip ties (bulk)
22. A-Frame Trellis Bed
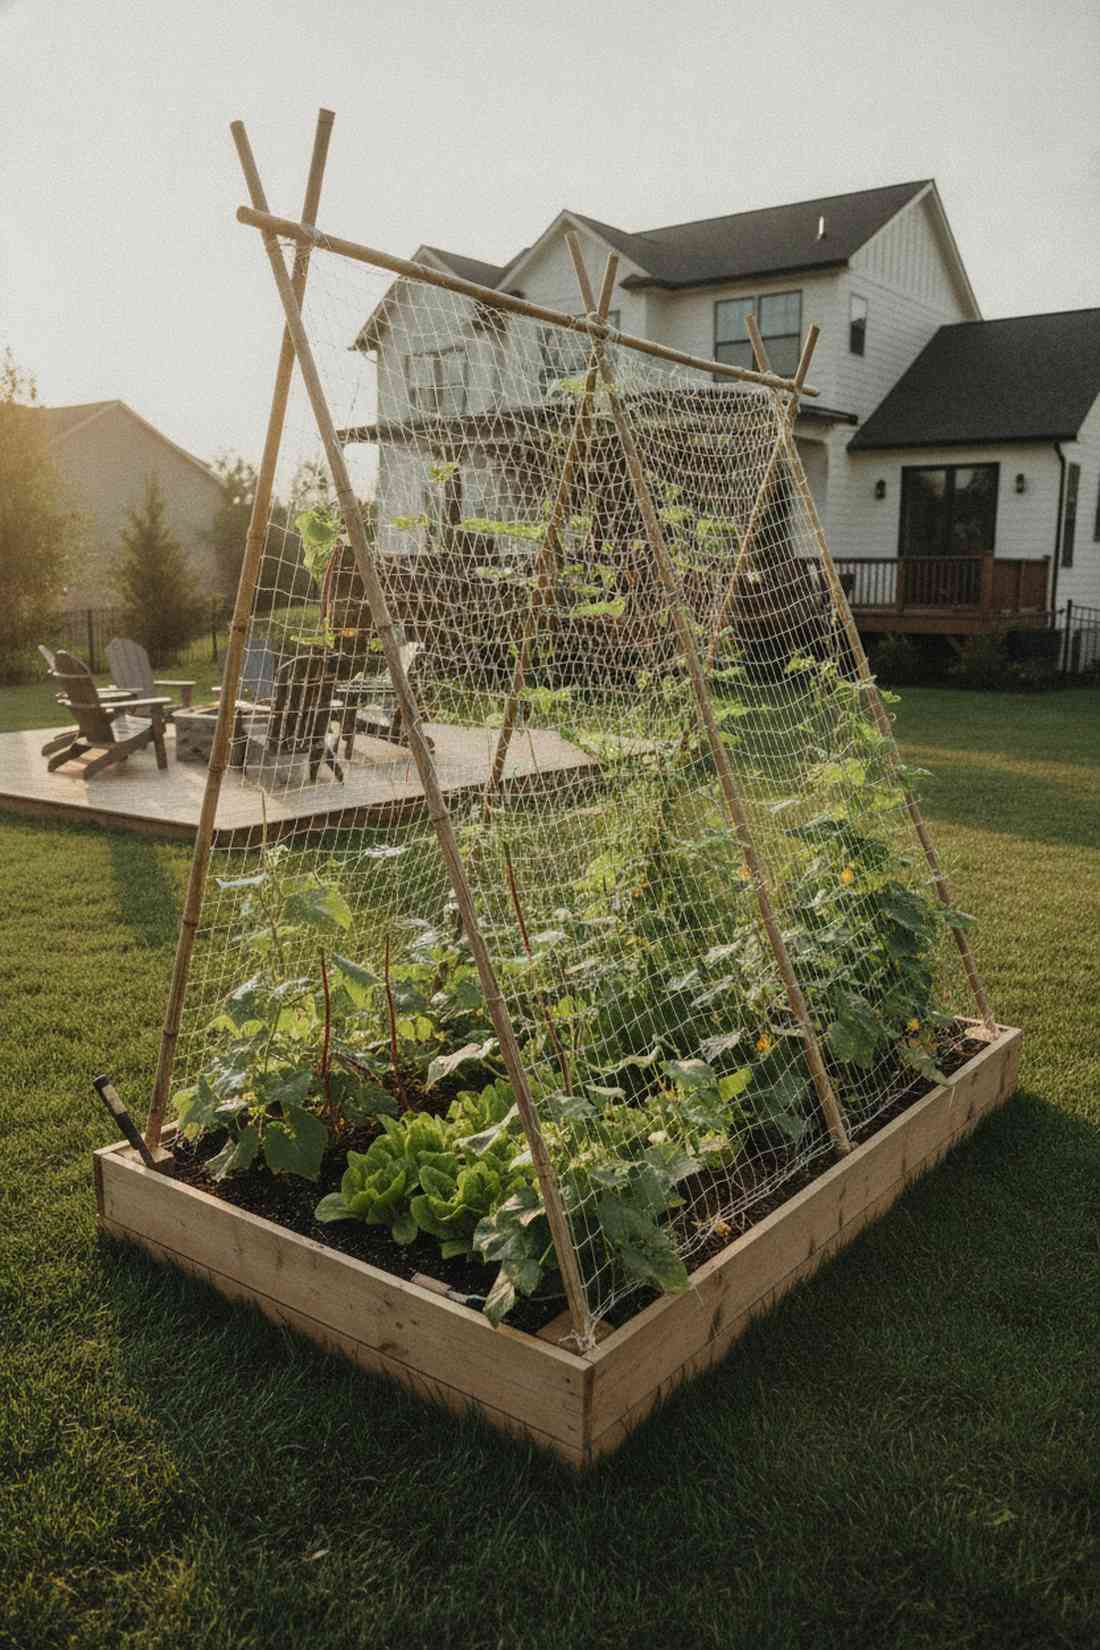
Exudes the rustic charm of a thriving countryside farm. An angled A-frame climbing structure maximizes airflow while doubling your planting real estate.
Vertical walls cast harsh shadows, but this slanted geometry allows sunlight to hit both the climbers and the base crops perfectly. Draping a nylon heavy-duty trellis netting over the frame makes cleanup a breeze at the end of the season.
This two-in-one upgrade costs around $40–$70. A fantastic hack for supercharging small space production.
- Key Materials: Tall wooden stakes, garden twine or netting
- Vibe / Style: Rustic high-yield farm
- Difficulty: Easy beginner build
- Budget Breakdown: Wood frame: $30 | Netting: $15
- Creator’s Tip: Plant shade-loving crops like lettuce directly underneath the A-frame to protect them from scorching summer heat.
- Smart Sourcing: heavy-duty nylon climbing plant netting | bamboo garden stakes (bulk pack)
23. Back-Mounted Wire Panel
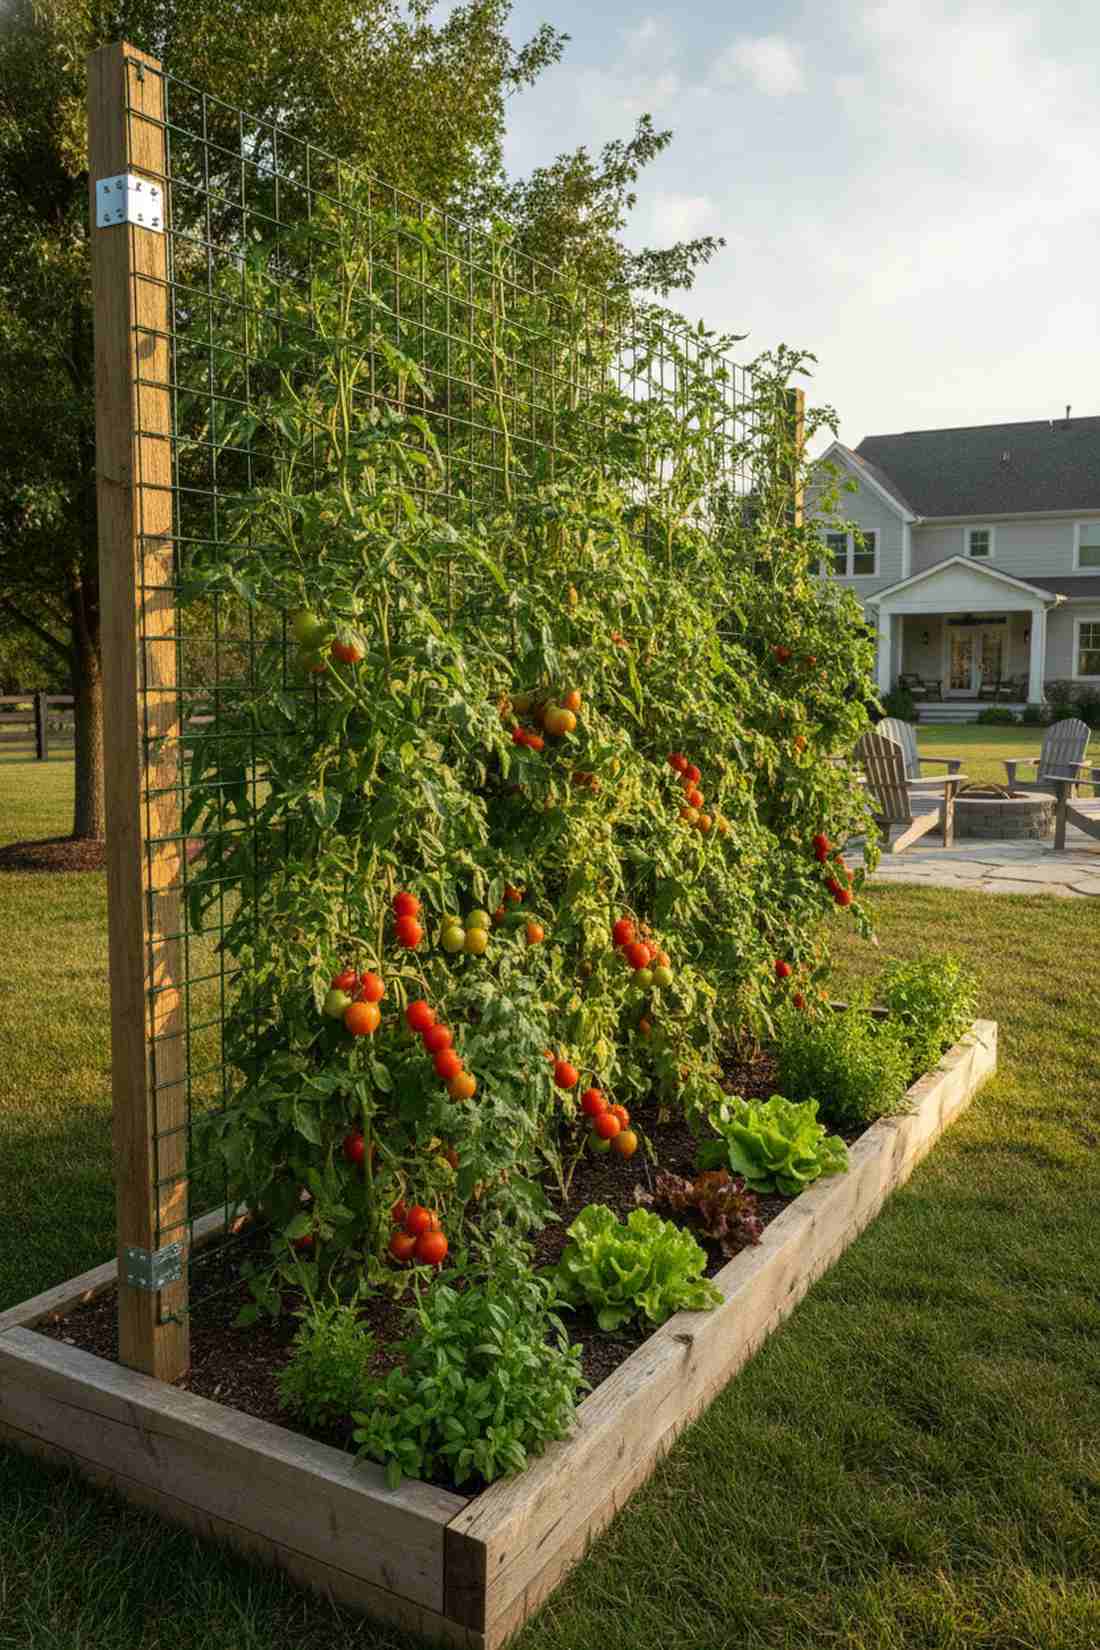
Looks like a crisp, organized commercial growing operation. A rear-mounted flat wire grid acts as a brilliant privacy screen while supporting towering tomato vines.
Flimsy tomato cages tip over constantly, but integrating a rigid metal wall directly into the wood frame delivers unstoppable structural support. Utilizing a rust-proof vinyl-coated wire grid prevents the metal from burning sensitive plant stems during peak summer heat.
Adding this permanent wall costs roughly $35–$60. Save this if you are tired of collapsing tomato cages!
- Key Materials: Flat wire mesh panel, rear structural posts
- Vibe / Style: Clean commercial utility
- Difficulty: Easy bolt-on upgrade
- Budget Breakdown: Wire panel: $30 | Hardware: $15
- Creator’s Tip: Mount the panel exclusively on the North side of the bed so the tall vines never shade out your shorter front crops.
- Smart Sourcing: vinyl-coated welded wire fencing | heavy-duty galvanized fencing staples
24. Obelisk Centerpiece Structure
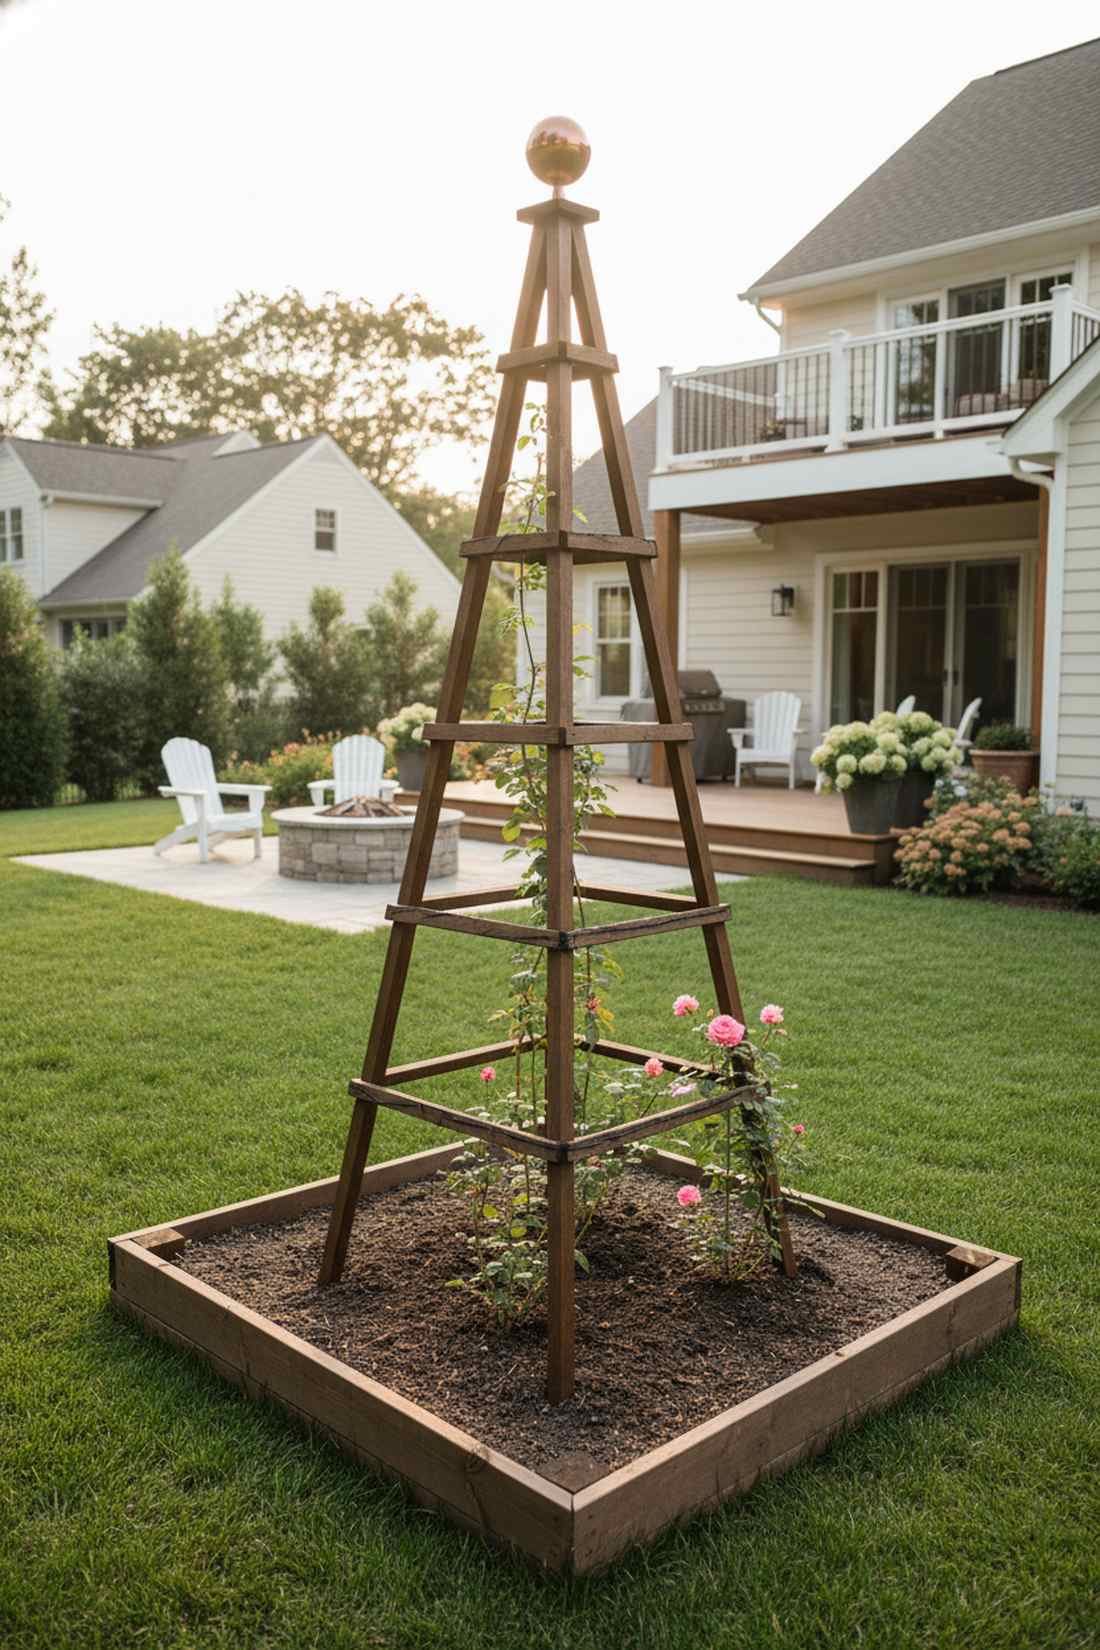
Brings a striking touch of high-society English garden elegance. A tall pyramidal climbing tower planted dead center adds immediate architectural drama to flat boxes.
Basic stakes look messy, but a tapering wooden obelisk acts as a year-round sculptural art piece even when plants are dormant. Finishing the wood with an eco-friendly waterproof wood stain ensures the delicate lattice survives constant moisture exposure.
A DIY obelisk build runs $45–$85. An incredibly chic way to grow climbing roses or beans.
- Key Materials: Slender wood slats, decorative finial top
- Vibe / Style: English manor elegance
- Difficulty: Intermediate carpentry
- Budget Breakdown: Wood slats: $40 | Top finial: $15
- Creator’s Tip: Wrap twine horizontally around the obelisk every 12 inches to give the vines better gripping points as they ascend.
- Smart Sourcing: non-toxic exterior garden stain | decorative copper post finials
You probably think building custom supports is expensive, but this next string-based system costs pennies and works like magic…
25. Horizontal Crossbar System
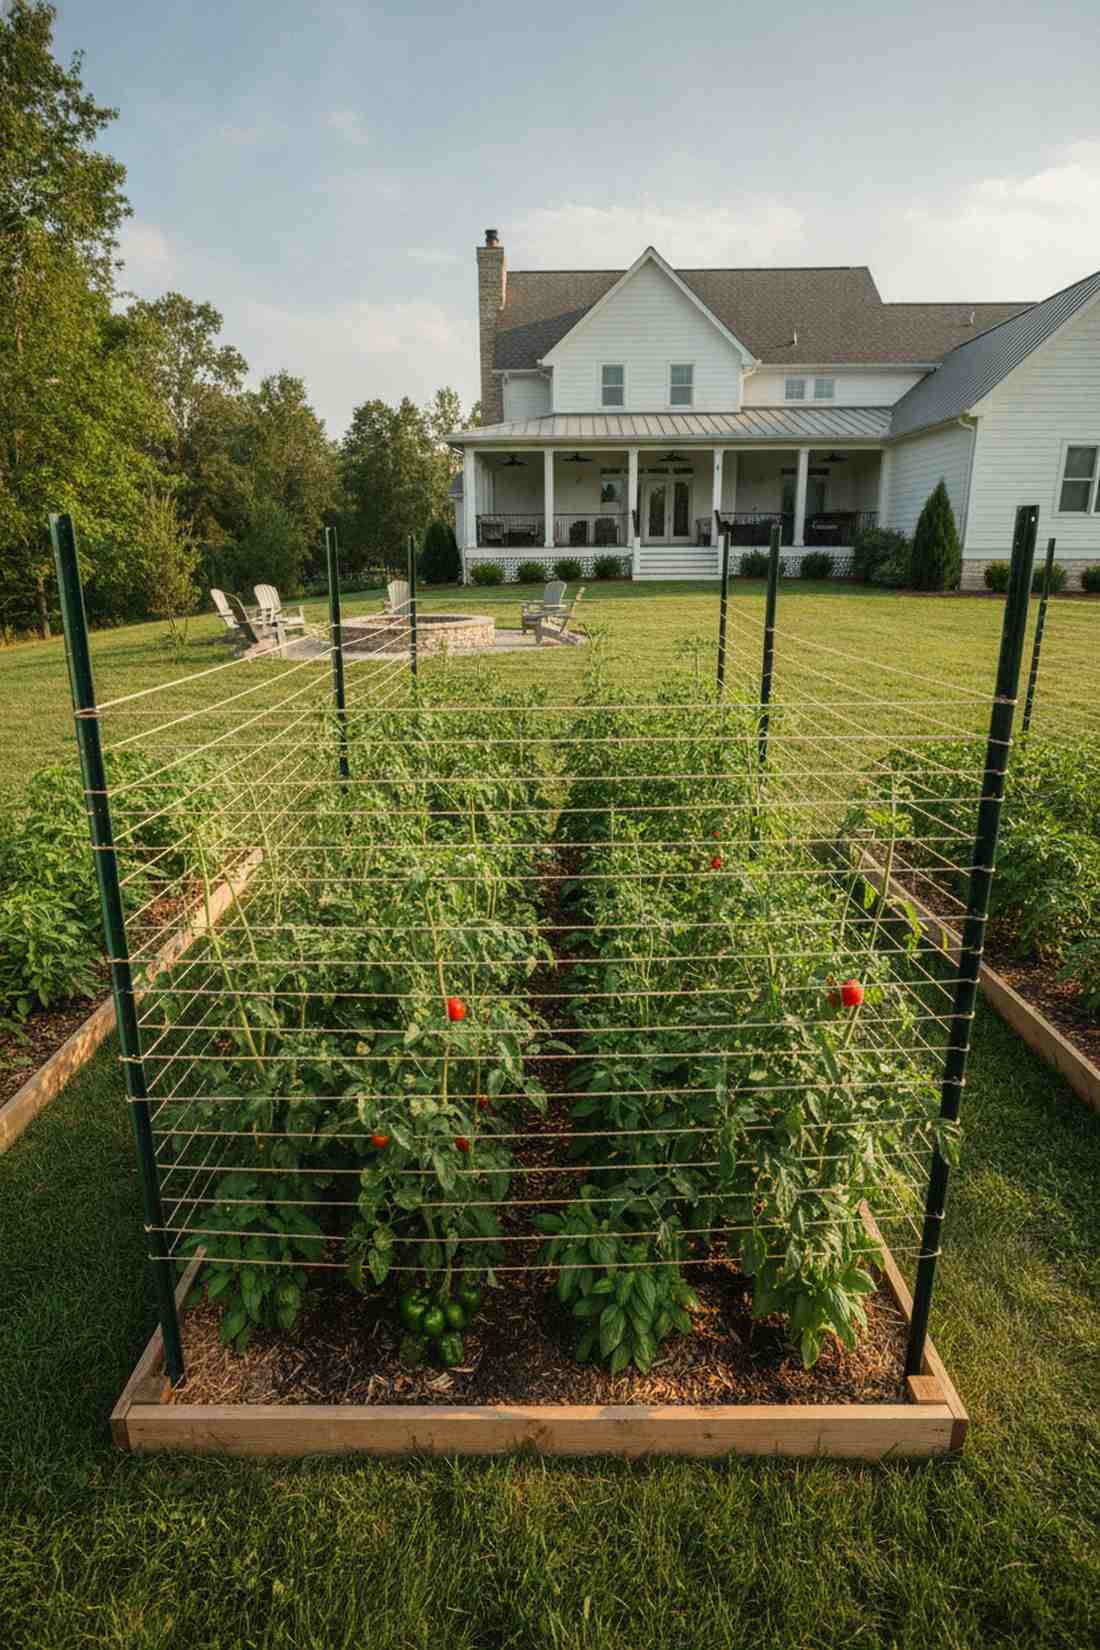
Feels like an advanced minimalist botanical laboratory. The suspended horizontal string grid (often called the Florida Weave) is the ultimate secret for pristine, upright crops.
Metal cages are expensive and ugly, but suspending crops between tight horizontal lines looks incredibly clean and professional. Using a UV-resistant heavy-duty agricultural twine guarantees the tension won’t snap under the weight of ripening fruit.
This minimalist support system costs a mere $15–$30. Pin this if you want the tidiest tomatoes on the block!
- Key Materials: Heavy corner posts, strong garden twine
- Vibe / Style: Minimalist pro-grower
- Difficulty: Very easy
- Budget Breakdown: Corner posts: $20 | Twine: $10
- Creator’s Tip: Add a new horizontal string layer every time the plant grows another 8 inches to keep it perfectly contained.
- Smart Sourcing: UV-resistant commercial tomato twine | heavy-duty steel T-posts
26. Folding Fan Trellis
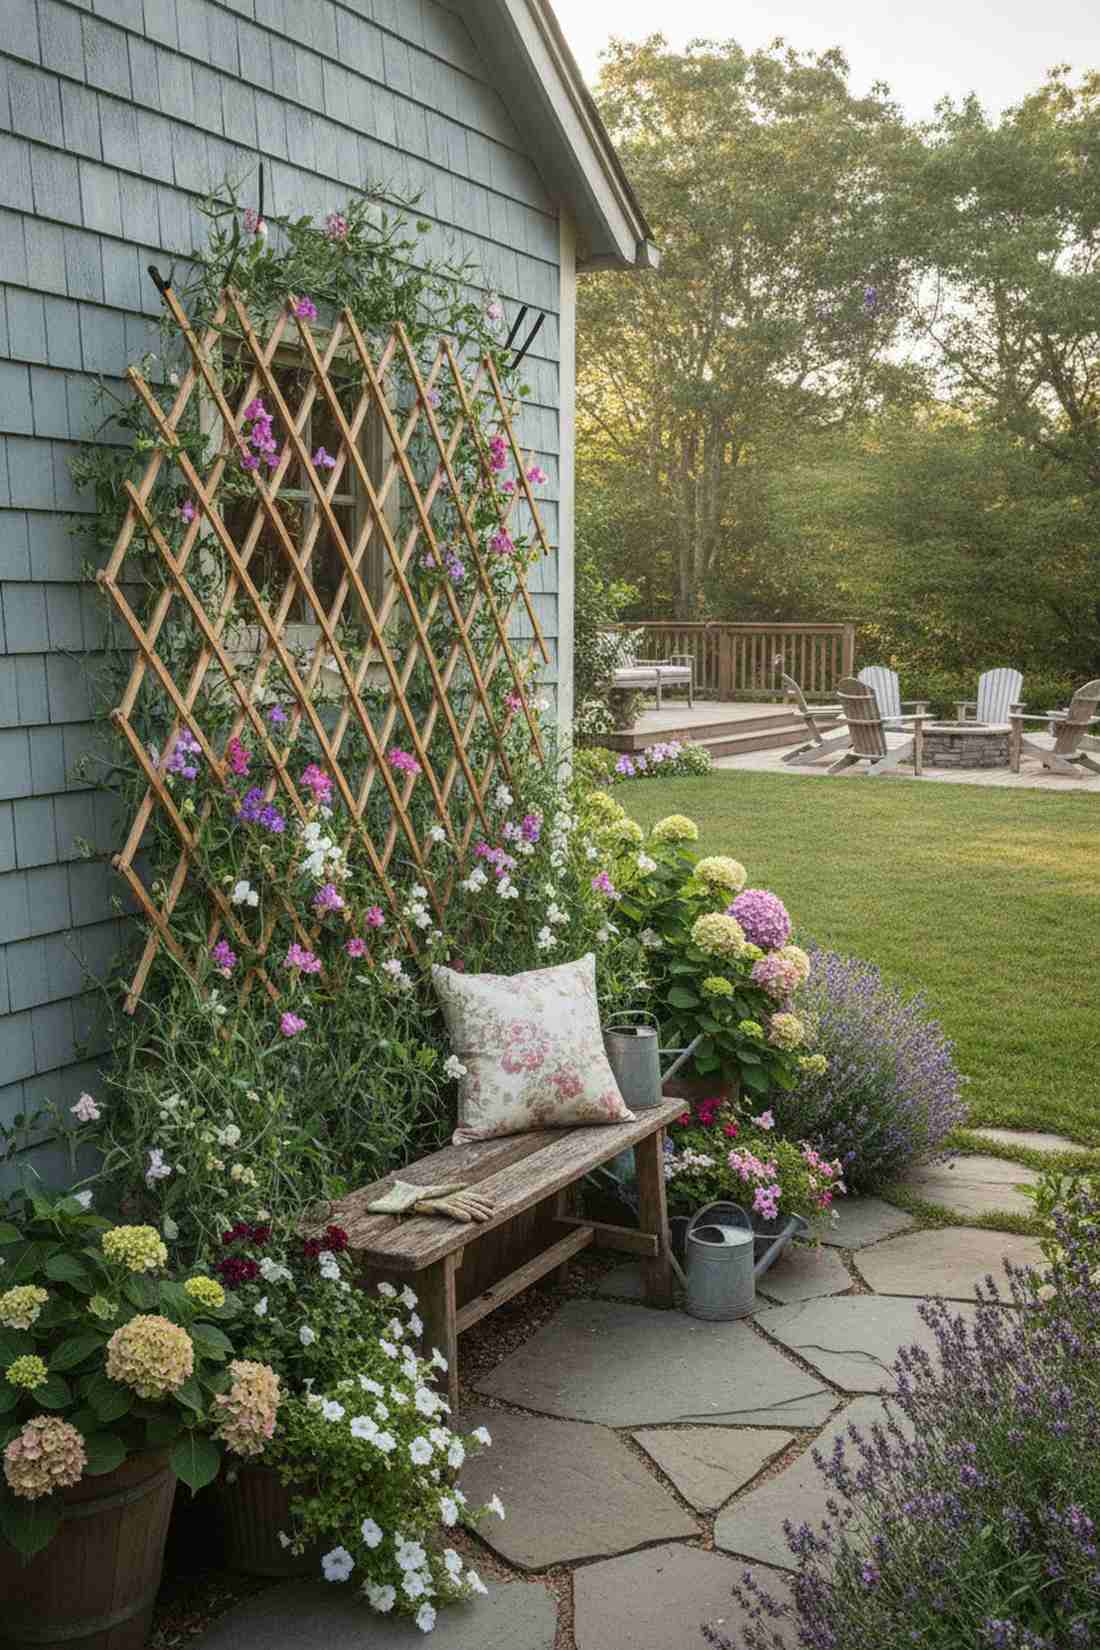
Radiates a soft, romantic cottage-core charm. An expandable wooden fan lattice provides a gorgeous, spreading backdrop for sweet peas and flowering vines.
Rigid square grids lack character, but this fanning geometry mimics the natural spreading growth habit of climbing plants perfectly. Sourcing a pre-riveted expandable willow lattice saves you hours of tedious nailing and instantly upgrades the visual appeal.
You can snag or build one for $25–$50. A brilliant, removable option for seasonal climbers.
- Key Materials: Expanding wood or willow fan, base stakes
- Vibe / Style: Romantic cottage garden
- Difficulty: Instant pop-up setup
- Budget Breakdown: Expanding fan: $30 | Anchor stakes: $10
- Creator’s Tip: Angle the fan slightly backward toward a wall to give heavy plants better balance against strong winds.
- Smart Sourcing: expandable natural willow trellis panels | outdoor-rated zip ties (brown)
27. Teepee Willow Structure
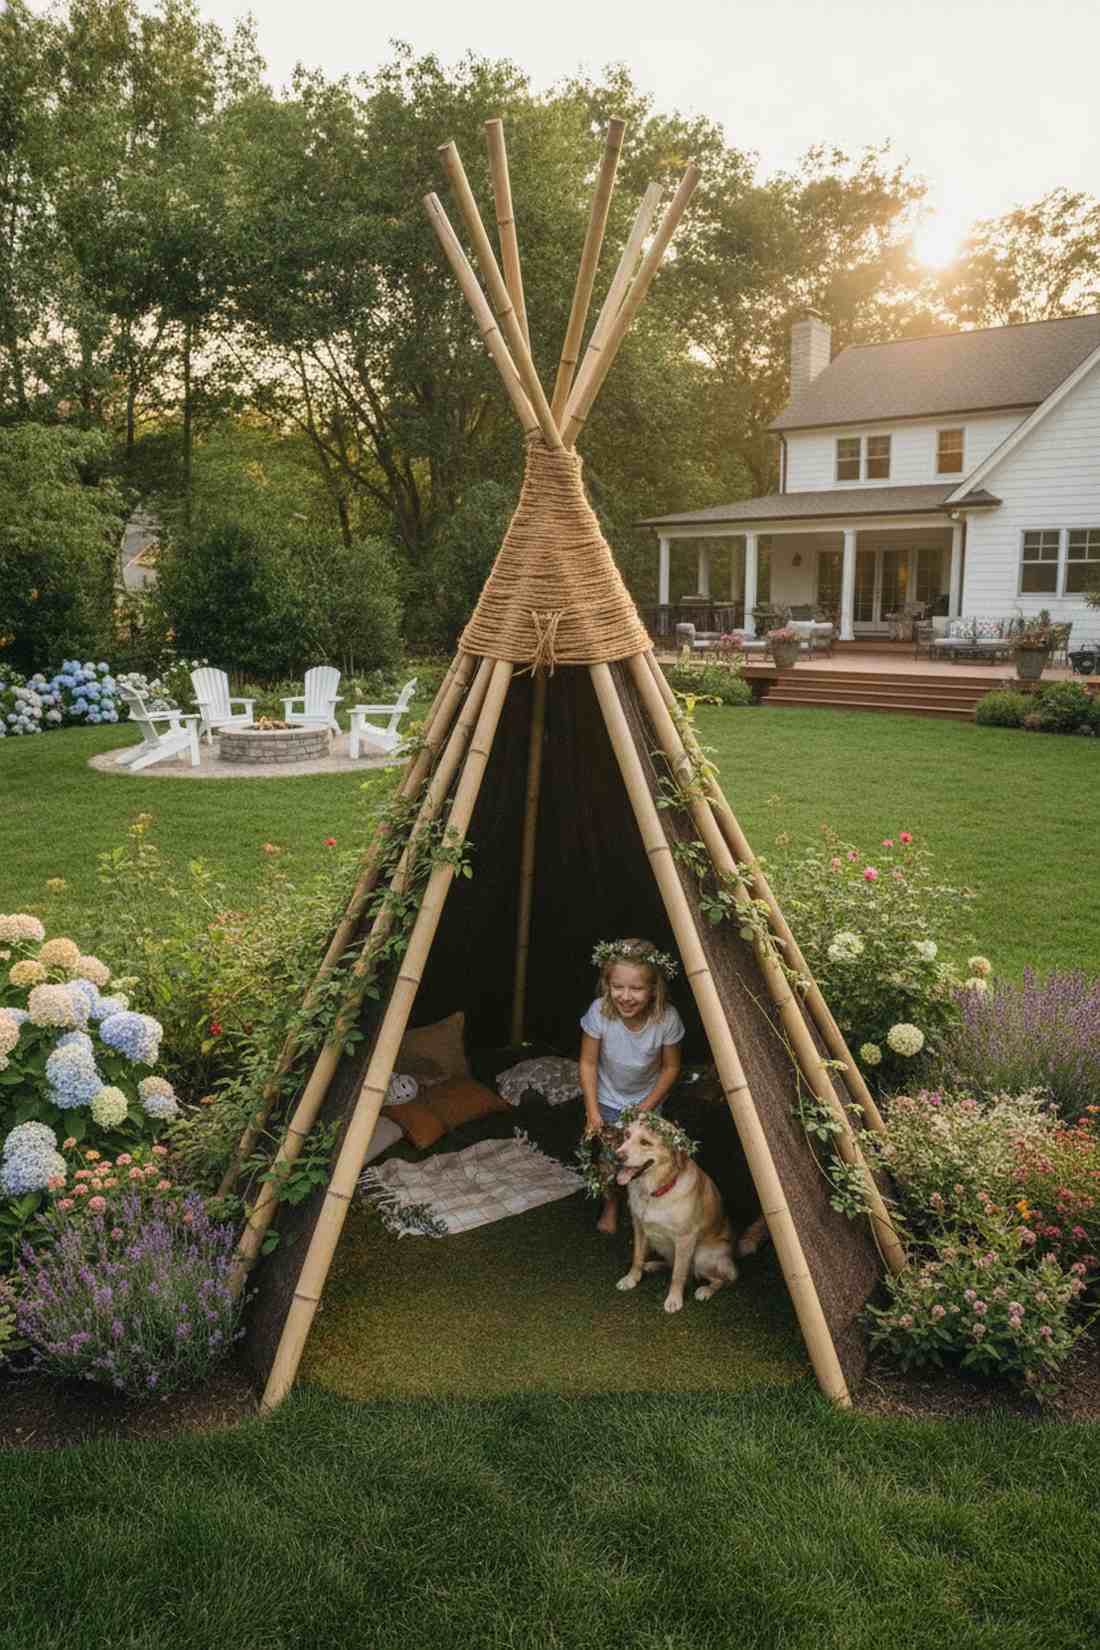
Looks like a magical fairy fort right in the middle of the garden. A rustic bamboo teepee frame is unmatched for creating height and whimsy in a flat landscape.
Metal poles look industrial, but lashing natural branches together delivers a stunning, earthy aesthetic that kids absolutely love. Tying the apex tightly with weatherproof waxed lashing cord ensures the structure survives harsh summer storms without collapsing.
This whimsical tower costs an unbelievable $10–$25. Save this for a fun weekend project with the kids!
- Key Materials: 6-8 long bamboo poles, lashing twine
- Vibe / Style: Earthy woodland whimsy
- Difficulty: Super easy beginner
- Budget Breakdown: Bamboo poles: $15 | Twine: $8
- Creator’s Tip: Leave a wide gap between two of the poles to create a “doorway” so kids can hide inside the vine-covered fort.
- Smart Sourcing: 6-foot natural bamboo stakes (bulk) | waxed heavy-duty lashing twine
Tiered and Multi-Level Layouts
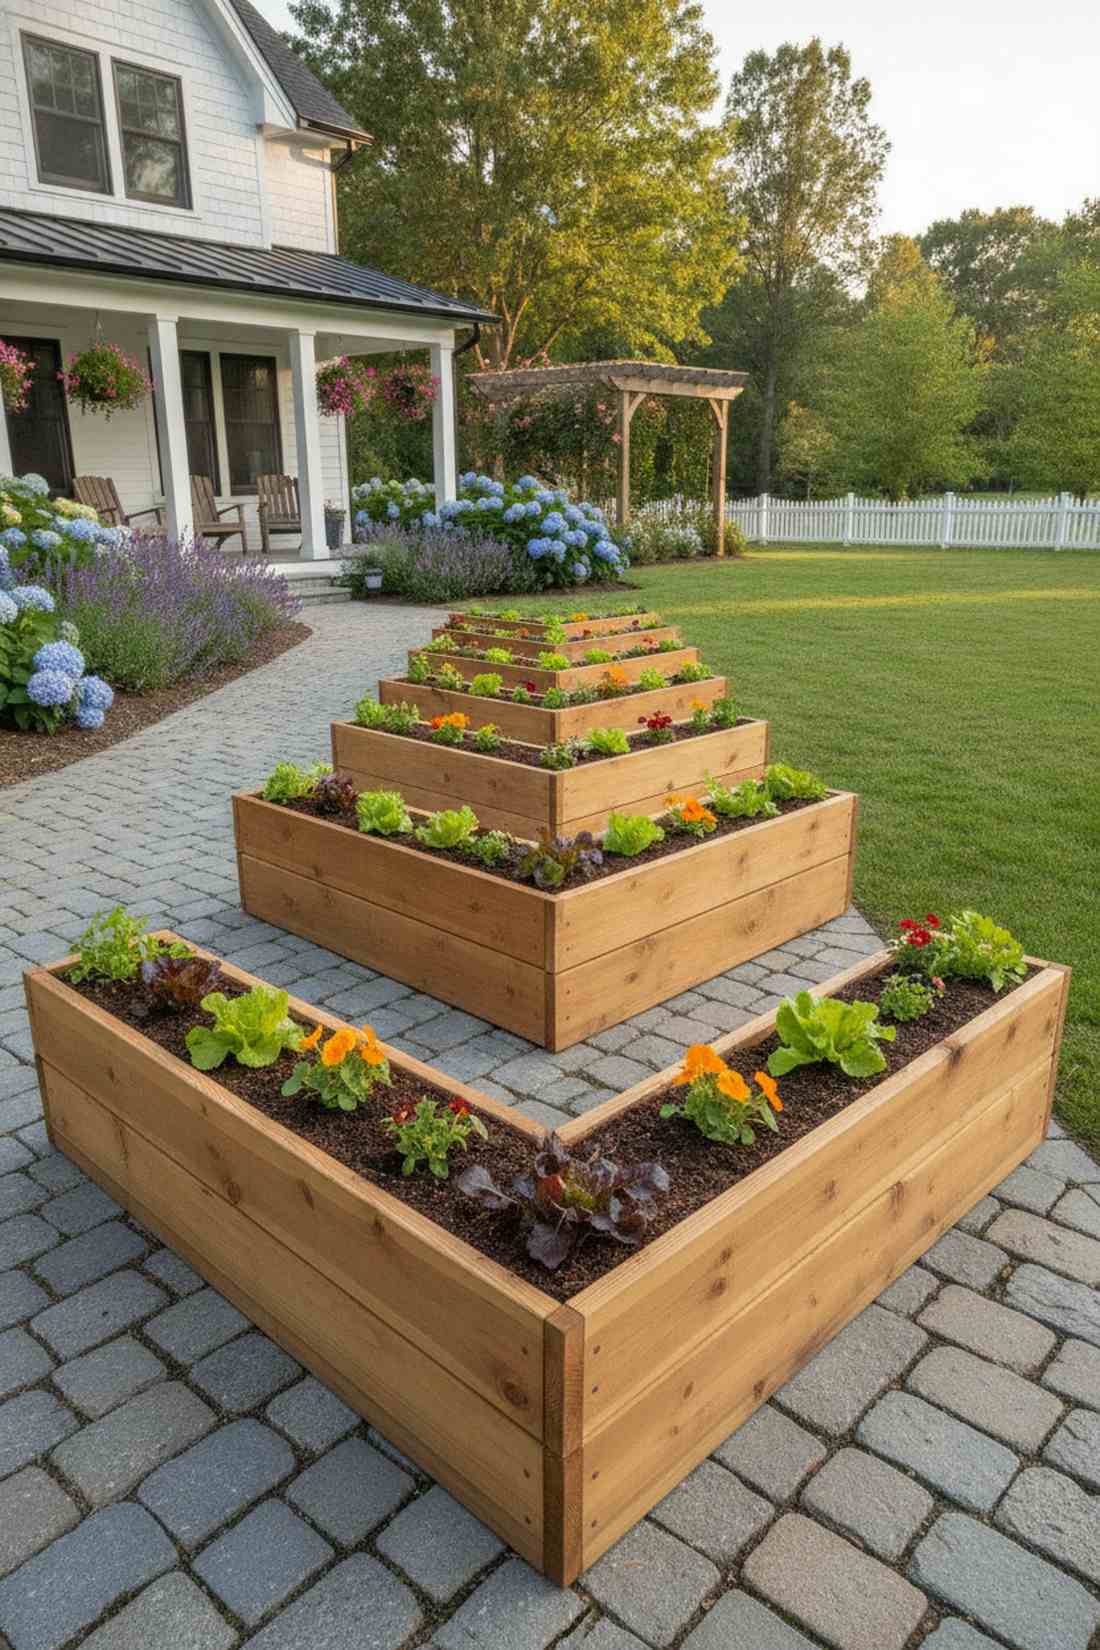
28. Three-Tier Cascade
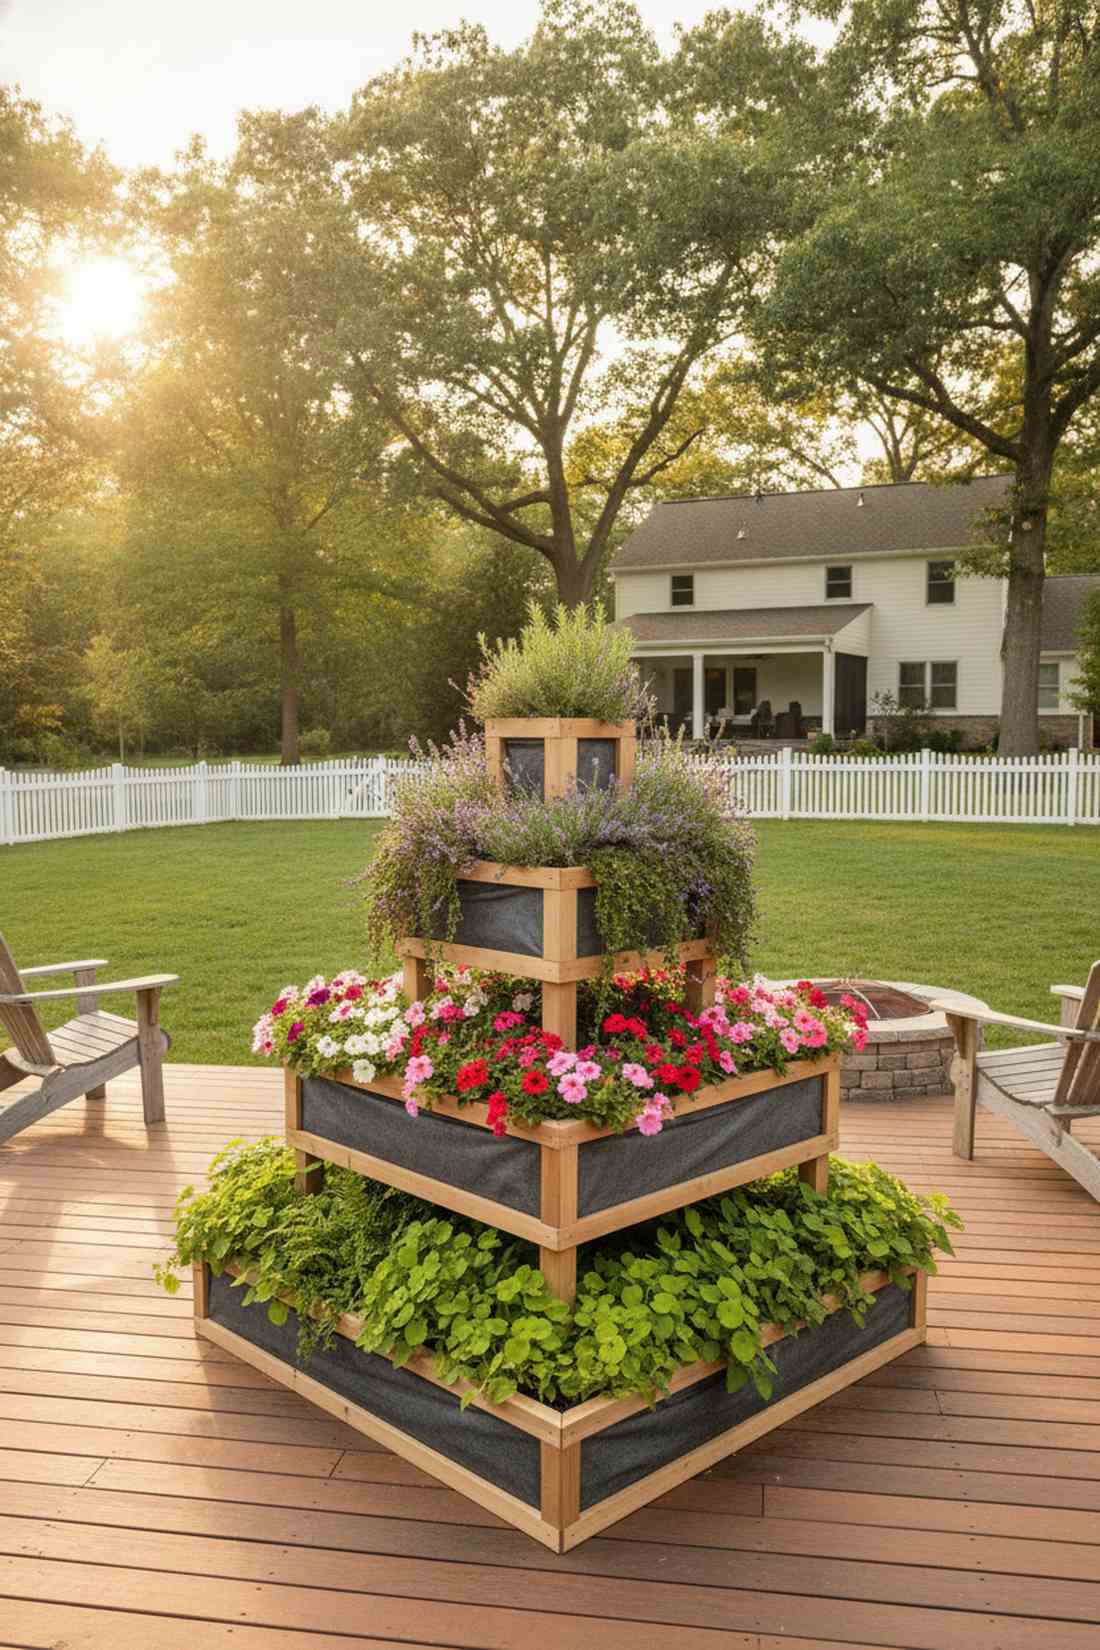
Exudes the grandeur of an ancient hanging garden. A pyramid stair-step planter completely maximizes yield while creating a jaw-dropping cascading floral waterfall.
Flat boxes lack drama, but stacking levels instantly creates custom microclimates for plants with different watering needs. Lining the interior steps with heavy-duty permeable landscaping fabric prevents soil from washing down into the lower tiers during heavy rain.
This impressive structure costs around $80–$140. A brilliant way to get a massive harvest in a tiny footprint.
- Key Materials: Ascending wood frames, soil separation fabric
- Vibe / Style: Dramatic cascading centerpiece
- Difficulty: Intermediate stacking
- Budget Breakdown: Wood levels: $100 | Liner: $20
- Creator’s Tip: Plant drought-tolerant herbs on the top tier and thirsty plants on the bottom tier to catch the water runoff.
- Smart Sourcing: heavy-duty permeable landscape fabric rolls | premium cedar decking screws
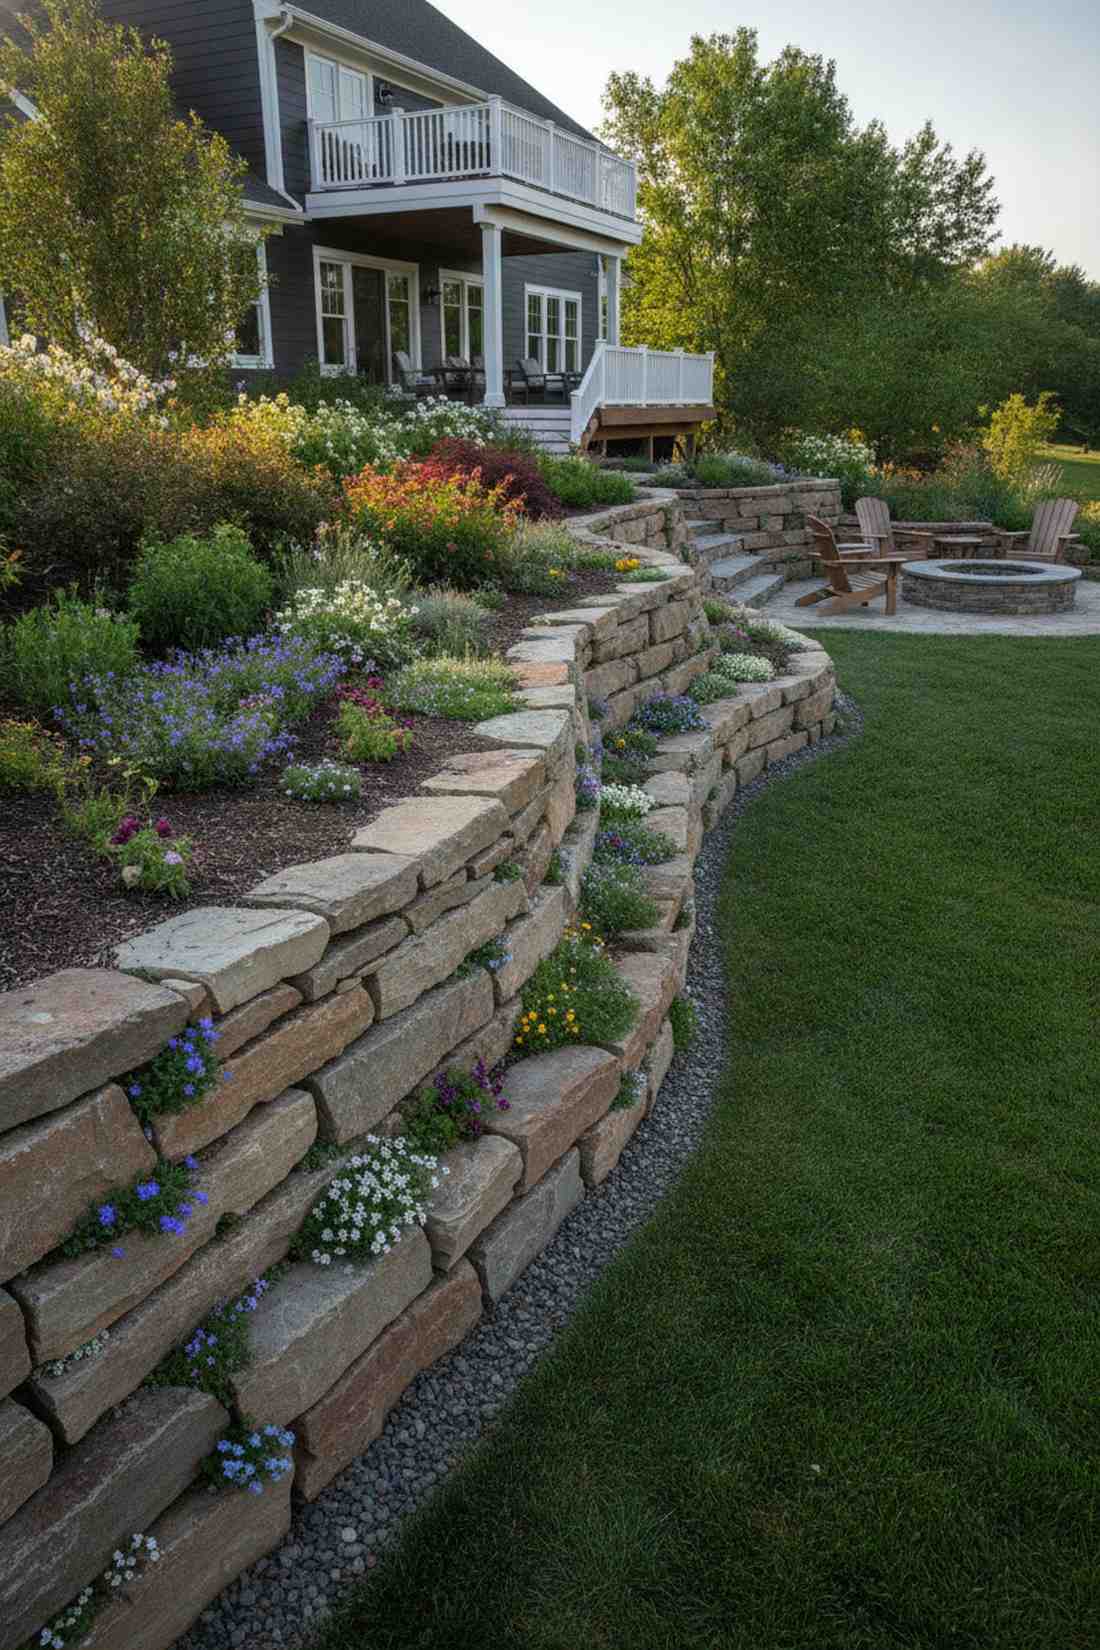
29. Hillside Terrace Steps
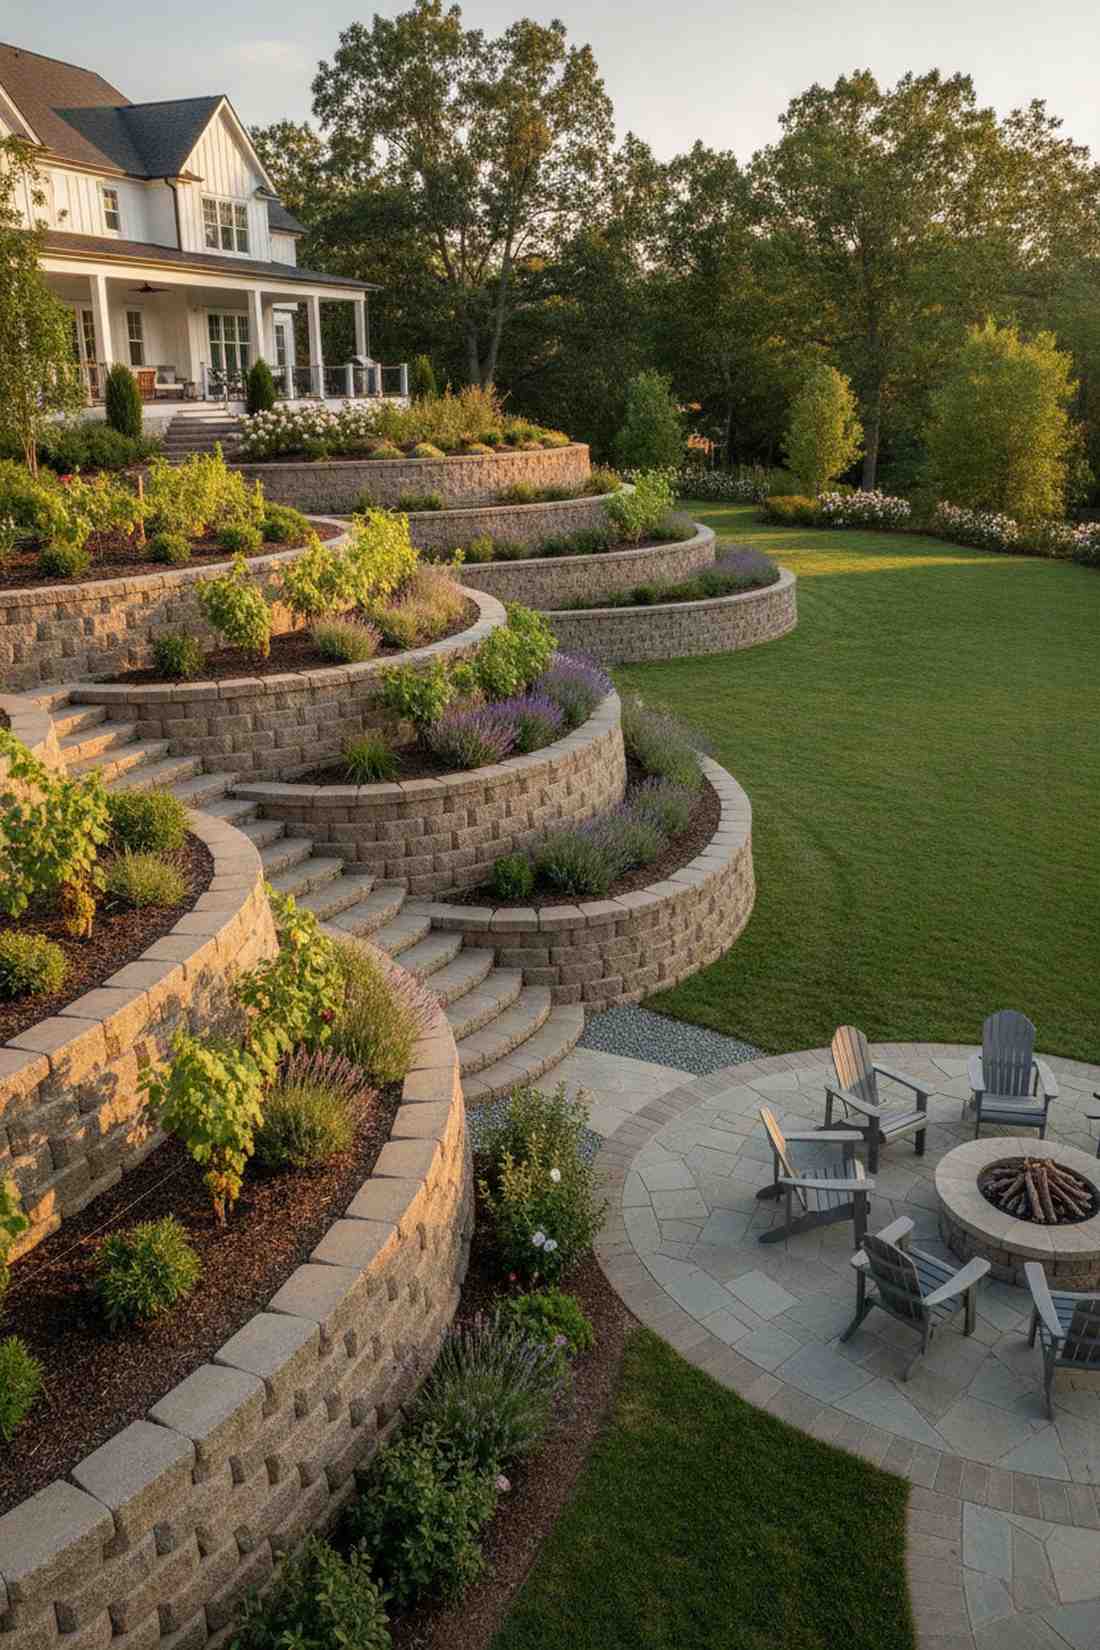
Feels like a masterfully engineered Mediterranean vineyard. Contoured retaining wall terraces turn a useless, eroding backyard slope into premium planting real estate.
Sloped yards wash away seeds, but cutting level steps into the hill transforms liability into a luxury landscaping feature. Using interlocking concrete retaining wall blocks ensures the immense weight of the hillside is safely held back for decades.
Terracing is an investment, running $200–$500+. Pin this if you have a sloped yard you don’t know how to use!
- Key Materials: Heavy masonry blocks, leveling sand
- Vibe / Style: Old-world vineyard estate
- Difficulty: Advanced heavy labor
- Budget Breakdown: Blocks: $300 | Leveling base: $50
- Creator’s Tip: Always backfill behind the wall with a layer of gravel to relieve hydrostatic water pressure before it pushes the wall over.
- Smart Sourcing: interlocking landscaping retaining blocks | commercial drainage gravel bags
Most corners end up as dead weed zones, but this next tiered hack turns them into the focal point of the whole yard…
30. Corner Pyramid Stack
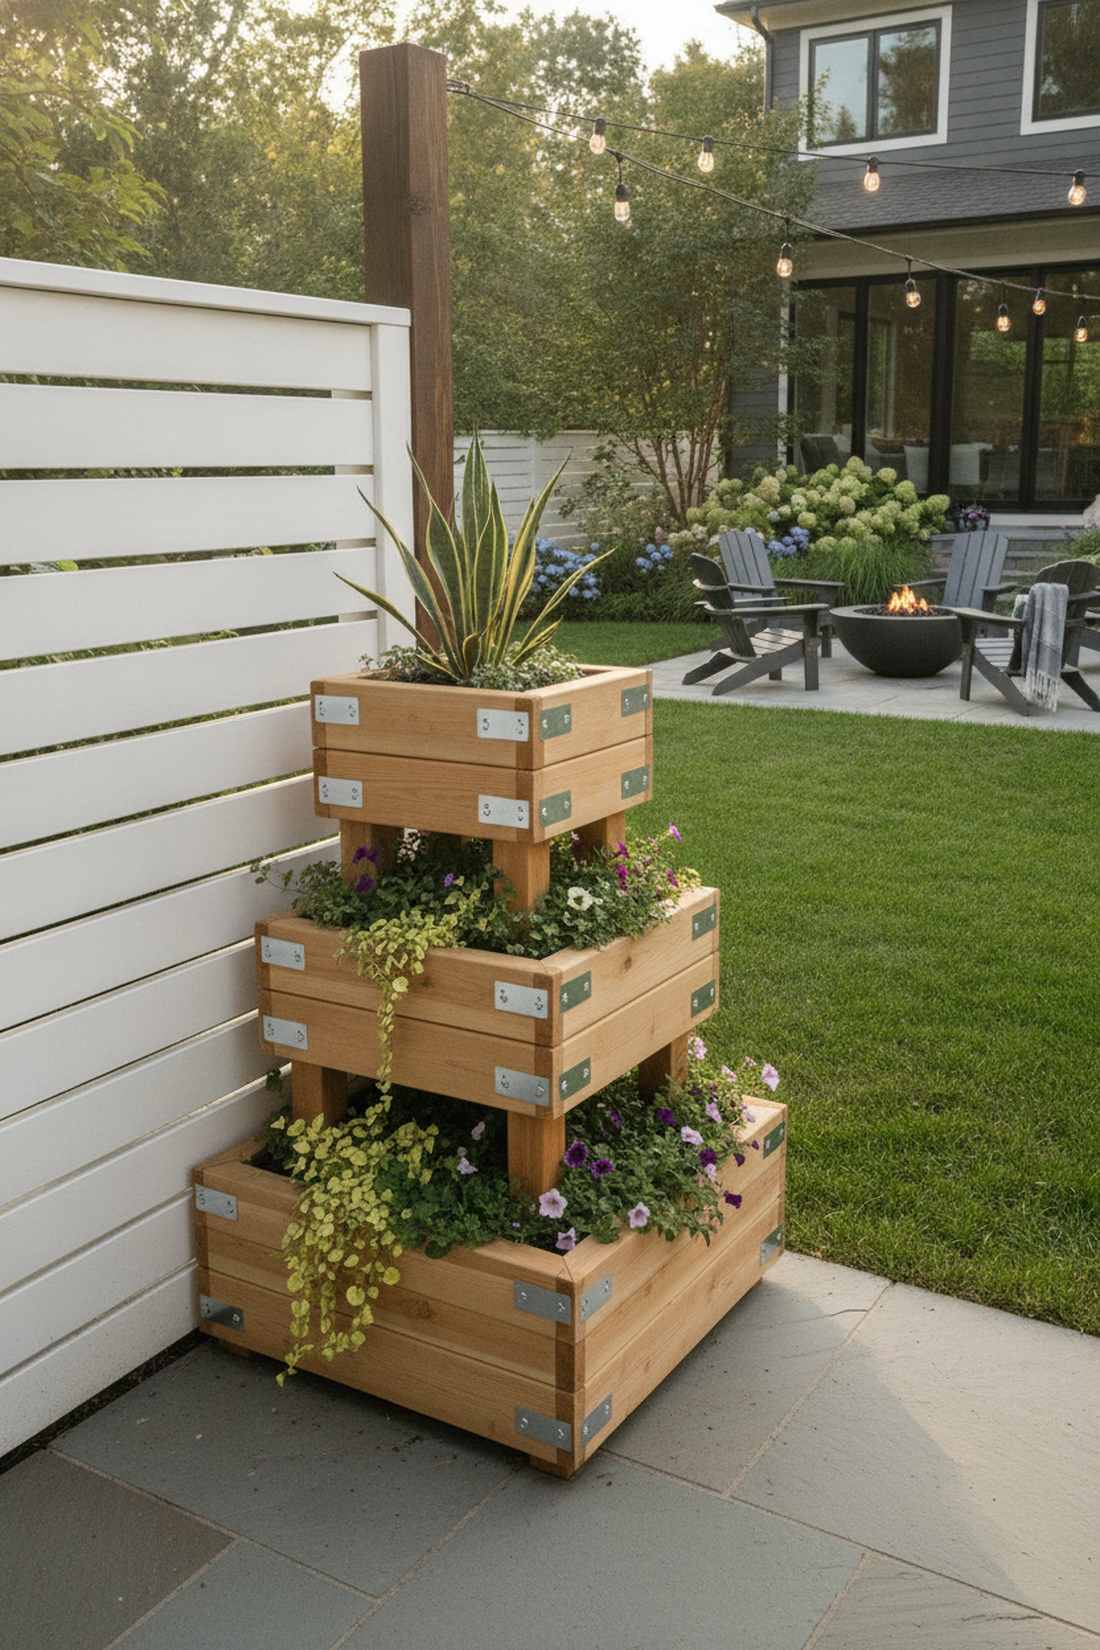
Looks like a bespoke piece of modern architectural geometry. A nested right-angle stair planter tucks perfectly into fence corners, ascending beautifully into the vertical space.
Standard corner beds look flat, but a descending tiered approach gives a designer-level finish that naturally showcases varied plant heights. Bolting the levels together with galvanized structural mending plates prevents the upper boxes from shifting when the soil gets heavy.
This corner upgrade costs about $90–$150. A brilliant solution for tight suburban patios.
- Key Materials: Three shrinking square frames, mending plates
- Vibe / Style: Modern spatial efficiency
- Difficulty: Intermediate assembly
- Budget Breakdown: Lumber: $110 | Hardware: $25
- Creator’s Tip: Plant a dramatic, tall architectural plant on the very top tier, letting the lower tiers cascade over the edges.
- Smart Sourcing: flat galvanized mending plates (bulk) | premium moisture-control potting mix
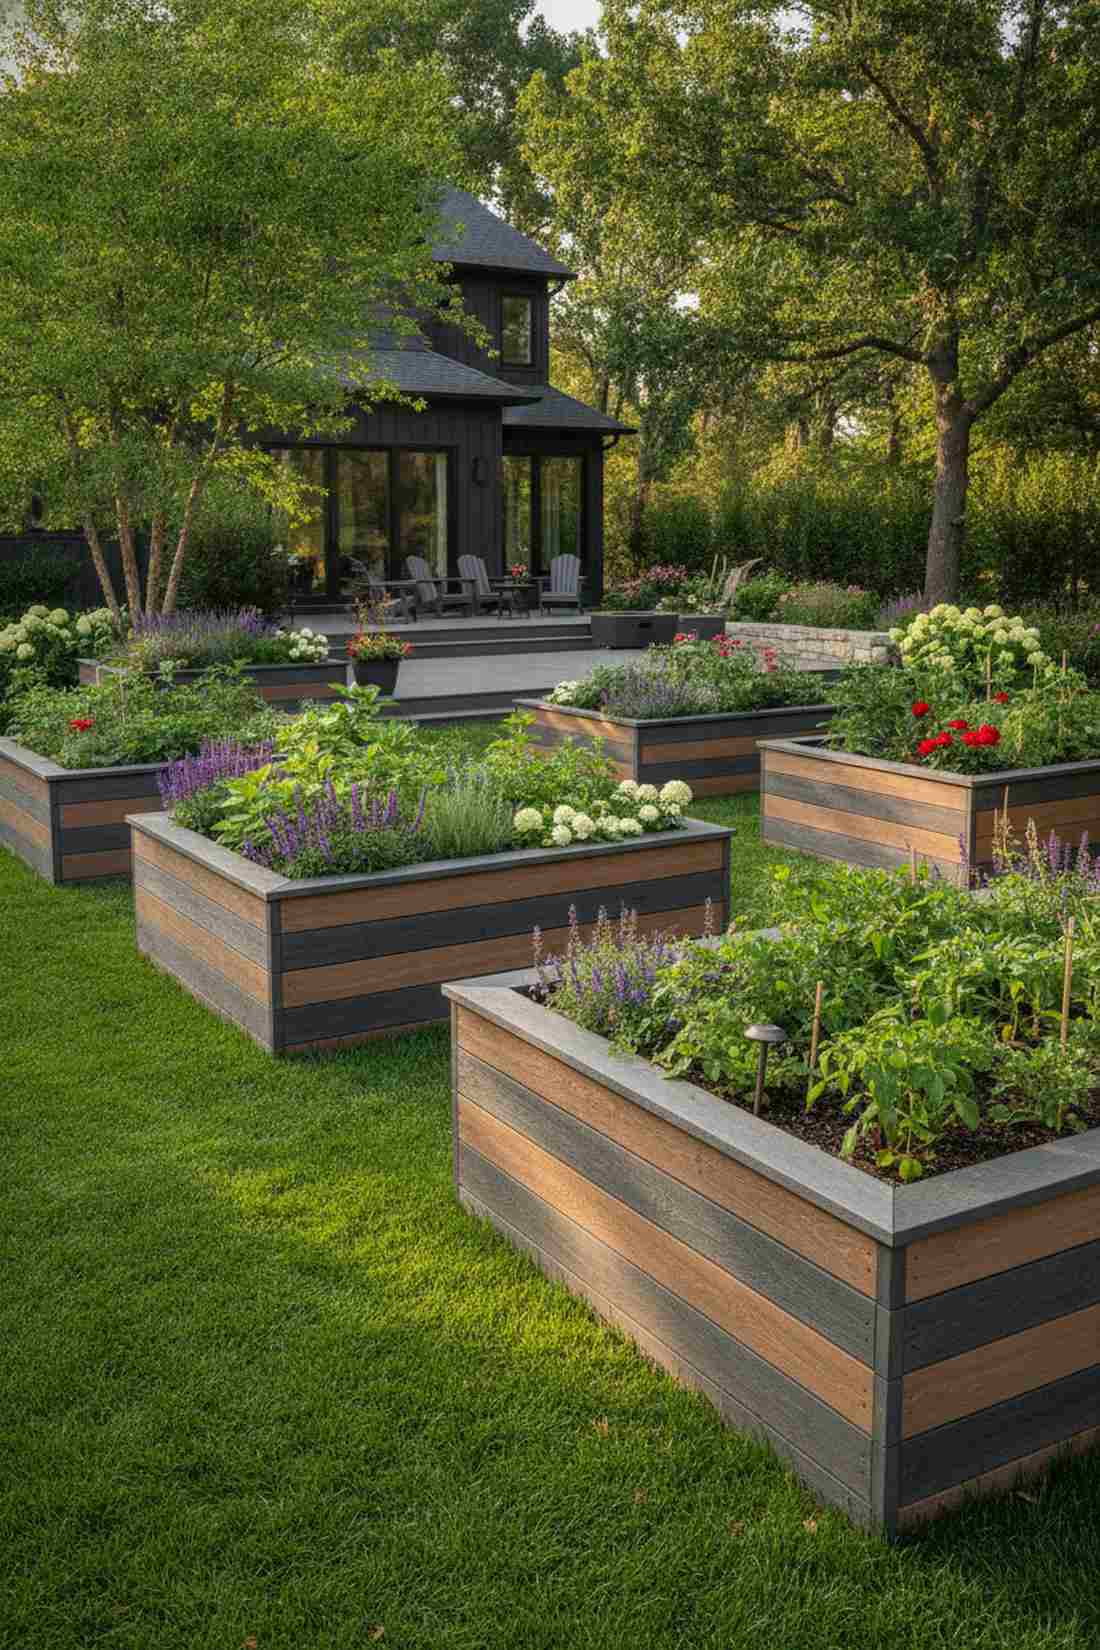
31. Stadium-Seating Arrangement
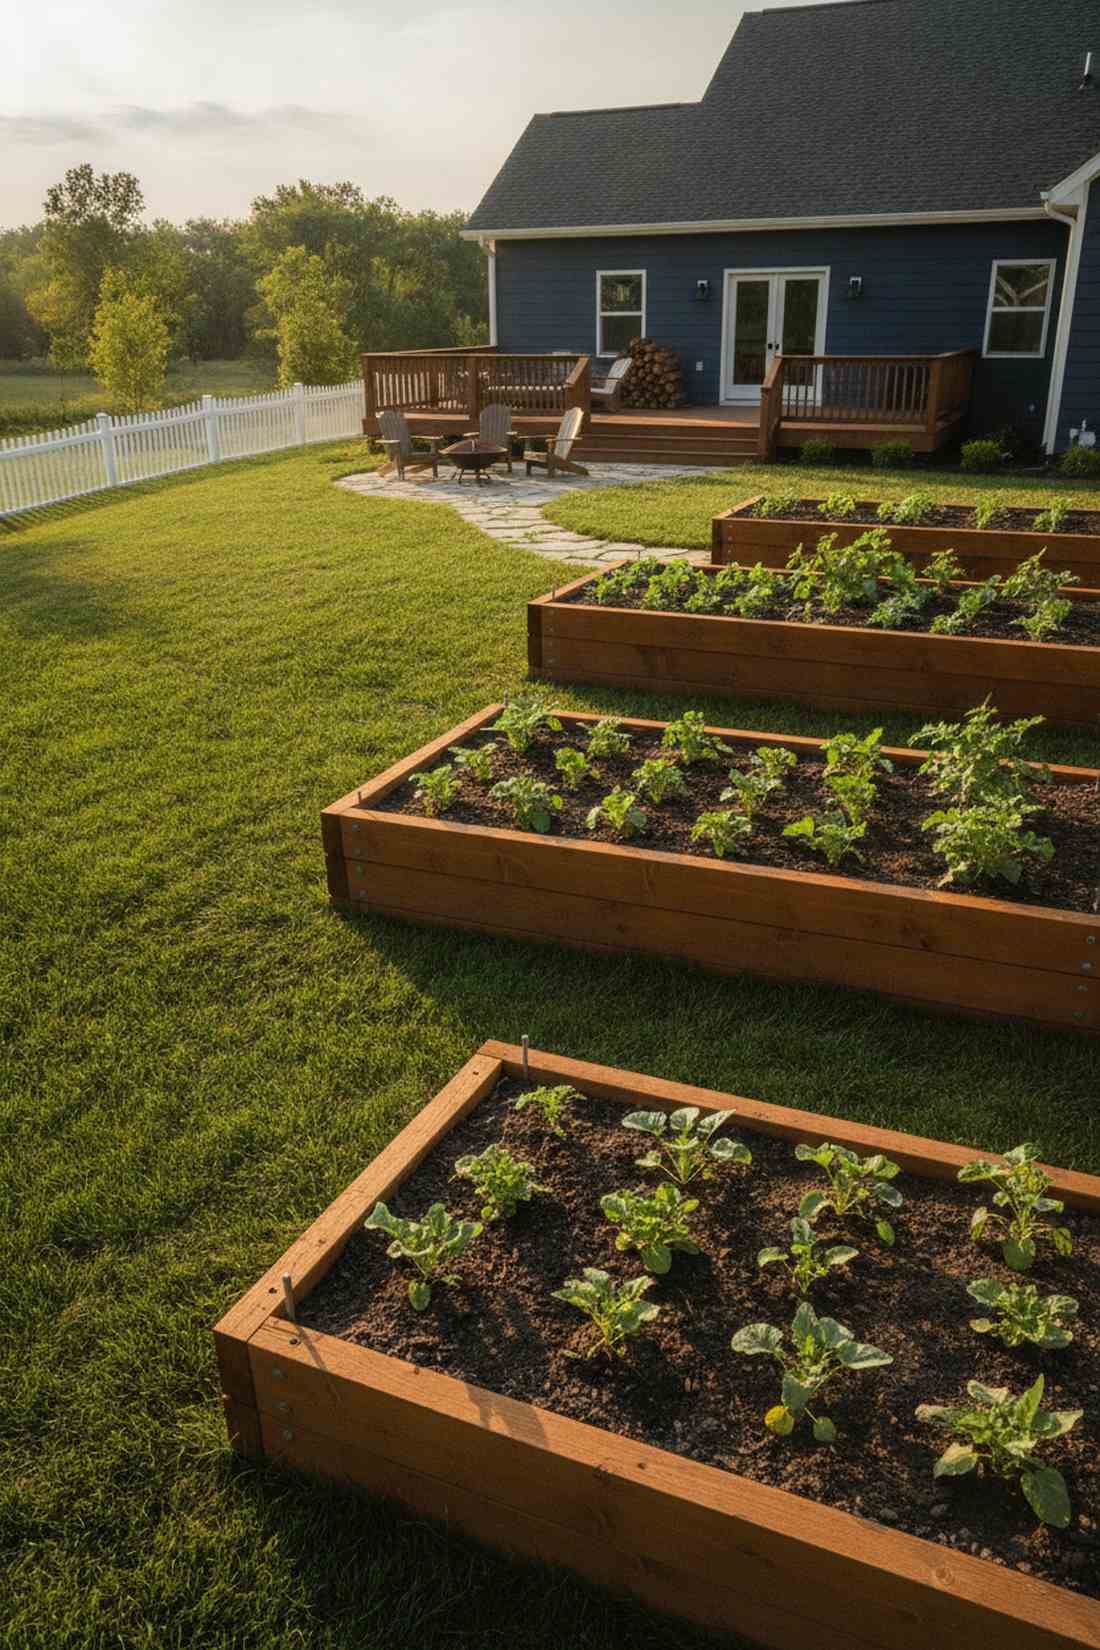
Radiates incredible organization and thoughtful sun planning. A sloped amphitheater row layout guarantees every single crop gets VIP, front-row sun exposure.
Flat side-by-side rows inevitably shade each other out, but this escalating height profile is a brilliant hack for maximizing photosynthesis. Utilizing weather-treated structural timber for the taller back rows ensures they don’t bow under the massive soil volume.
Building this tiered system runs $150–$280. Pin this to your advanced garden planning board!
- Key Materials: Progressive height lumber, deep stakes
- Vibe / Style: High-efficiency sun catcher
- Difficulty: Moderate volume build
- Budget Breakdown: Staggered wood: $200 | Hardware: $40
- Creator’s Tip: Position the lowest bed facing due South, with the highest bed at the North end, to prevent any shadows from falling on your crops.
- Smart Sourcing: thick profile structural landscape timber | heavy-duty landscaping spikes
32. Split-Level Island
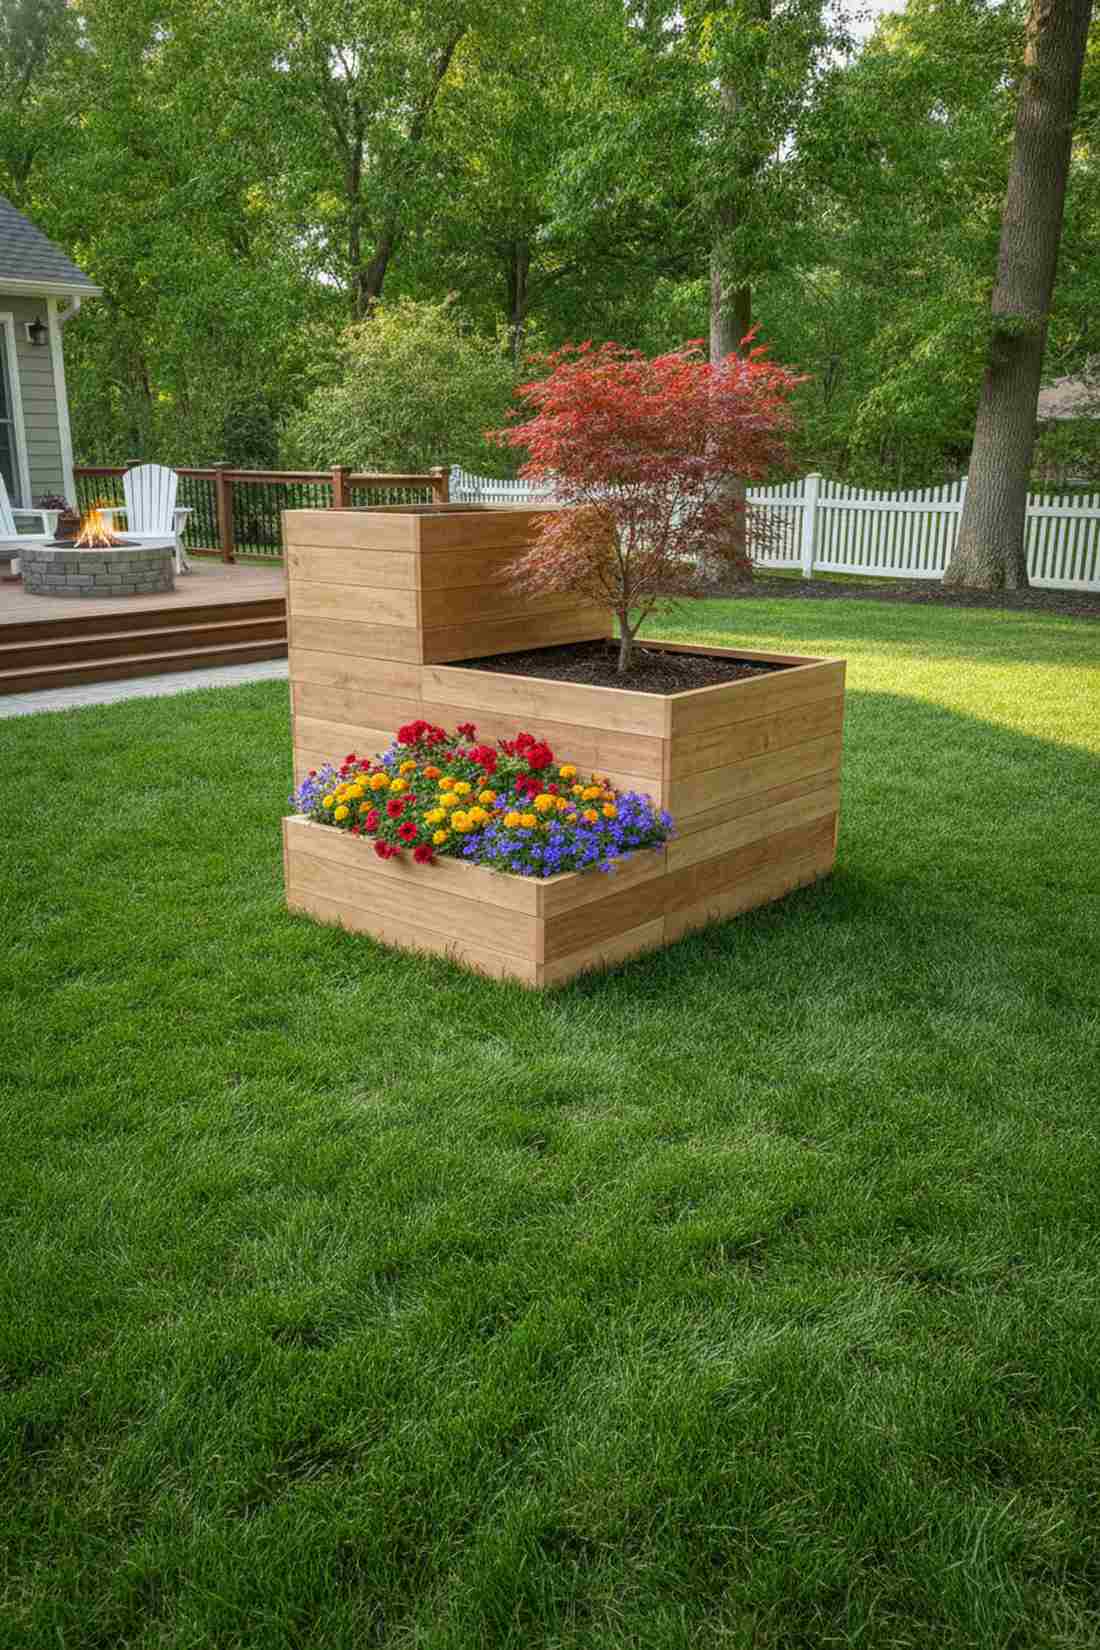
Feels like a custom-poured concrete landscape feature. A dual-height freestanding island creates incredible visual contrast directly in the middle of a lawn.
Single-depth islands lack dimension, but splitting the profile delivers a strikingly modern aesthetic that separates deep-rooted plants from shallow ground covers. Installing a hidden internal partition board is the crucial secret to keeping the high dirt from spilling into the low side.
This stylish centerpiece costs about $80–$140. Highly recommended for breaking up boring grass landscapes.
- Key Materials: Standard box, vertical partition, elevated rear walls
- Vibe / Style: Modern architectural island
- Difficulty: Intermediate custom cuts
- Budget Breakdown: Lumber: $100 | Fasteners: $20
- Creator’s Tip: Use the taller section to anchor a small ornamental tree or large shrub, and fill the lower section with bright seasonal annuals.
- Smart Sourcing: pre-cut cedar project panels | organic elevated raised bed soil mix
33. Stepped Corner Unit
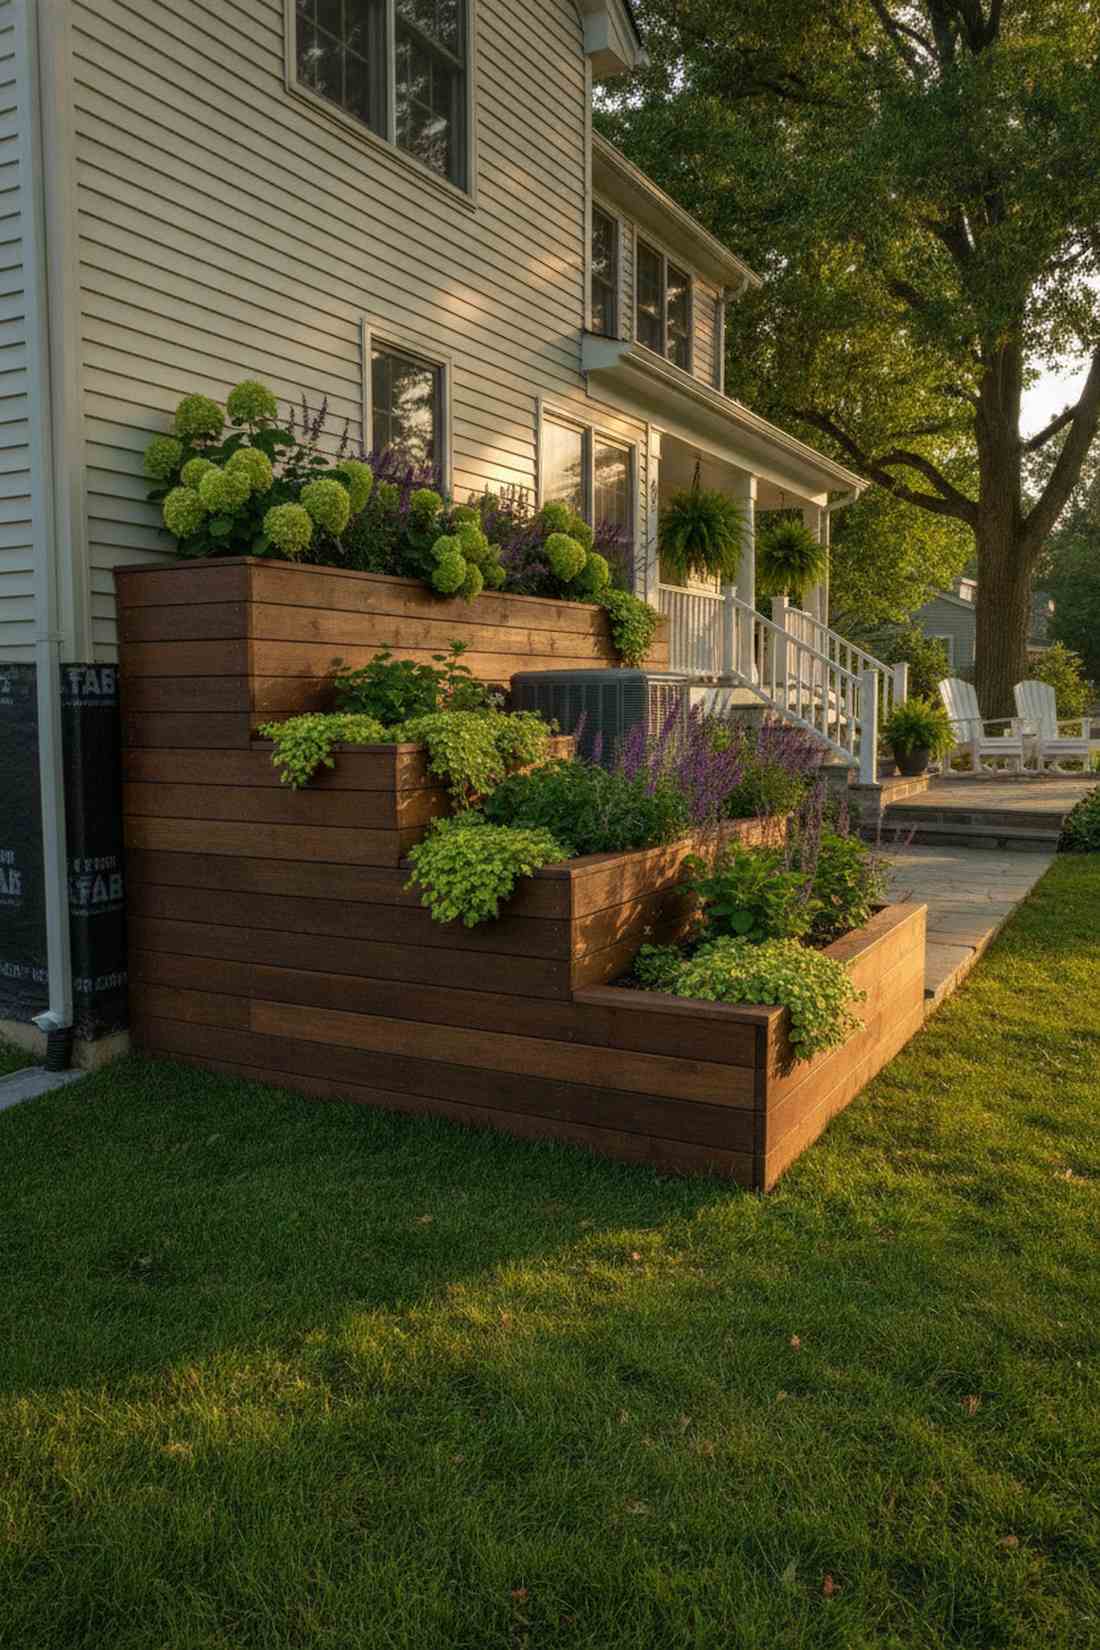
Exudes the sophisticated wrap-around look of a custom deck build. The ascending L-shaped wrap hugs your home’s foundation while brilliantly masking ugly utility meters or air units.
Flat foundation beds look dated, but introducing a stepped ascent gives a fresh, designer-level finish to the front of your house. Applying a waterproofing foundation barrier membrane to the back panels is critical to prevent moisture damage to your home’s siding.
This custom foundation wrap runs $120–$190. Save this if you want to drastically improve your home’s curb appeal!
- Key Materials: Varied height wood panels, house-wrap barrier
- Vibe / Style: Custom curb-appeal upgrade
- Difficulty: Advanced alignment
- Budget Breakdown: Custom wood: $140 | Barrier: $30
- Creator’s Tip: Never attach the bed directly to your house; leave a 2-inch air gap to prevent rot and termite bridges.
- Smart Sourcing: heavy-duty foundation waterproofing membrane | exterior grade wood stain (dark walnut)
Material-Specific Construction Ideas
34. Corrugated Metal Modernist Bed
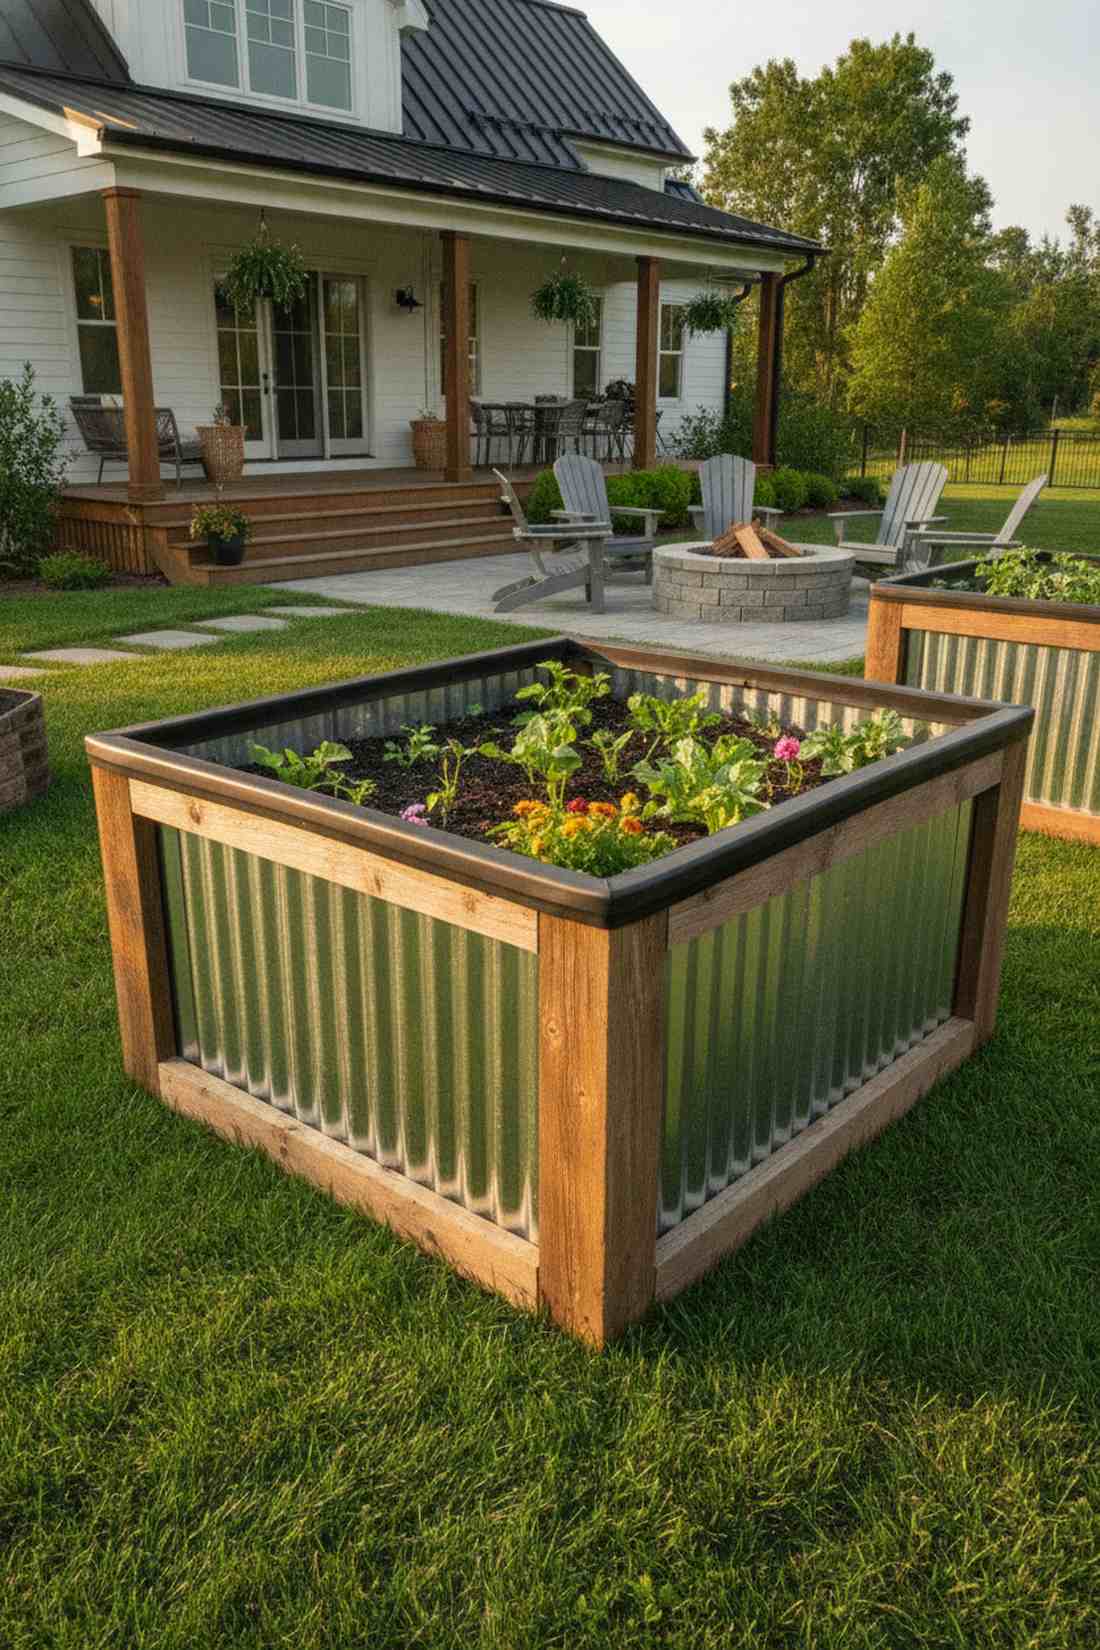
Strikes the perfect balance between industrial chic and rustic farmhouse. A galvanized steel panel planter reflects sunlight beautifully and warms the soil weeks faster in spring.
Wood eventually rots, but bolting corrugated metal to a frame delivers an incredibly durable, premium look that lasts for decades. Capping the sharp metal edges with U-channel rubber safety trim is an absolute must to protect your hands while weeding.
These hybrid metal beds cost around $70–$130. Pin this if you love that modern-industrial aesthetic!
- Key Materials: Corrugated steel roof panels, wood frame, rubber trim
- Vibe / Style: Modern industrial farmhouse
- Difficulty: Intermediate (requires metal cutting)
- Budget Breakdown: Metal panels: $50 | Wood/Trim: $40
- Creator’s Tip: Cut metal panels easily and cleanly by turning the blade backward on a standard circular saw.
- Smart Sourcing: galvanized corrugated steel panels | flexible U-channel rubber edge trim
Most DIYers use the wrong wood and watch their hard work rot in a year. The next material completely eliminates that problem…
Material Guide: Cheap vs. Premium Aesthetic
Knowing exactly where to save and where to spend makes all the difference in achieving that “looks expensive but isn’t” vibe.
- Standard Pine vs. UV-Resistant Cedar: Untreated pine rots in 2 years. Upgrading to naturally rot-resistant cedar stops decay and looks vastly more premium.
- Pre-made Kits vs. Sourcing Locally: While buying loose lumber seems cheaper, metal corner bracket starter kits often save hours of frustrating leveling and eliminate warped joints.
35. Natural Cedar Traditional Frame
Exudes timeless, high-quality craftsmanship. A thick-cut natural cedar garden frame is the undisputed gold standard for organic, chemical-free vegetable growing.
Cheap pine warps and rots instantly, but investing in cedar delivers a remarkably beautiful grain that naturally repels insects and decay. Securing the corners with exterior-grade coated timber screws ensures the acidic wood doesn’t corrode your fasteners and cause structural blowout.
Premium cedar costs $90–$160 per bed. It is the ultimate investment for serious organic gardeners.
- Key Materials: 2-inch thick rough sawn cedar, timber screws
- Vibe / Style: Premium organic traditional
- Difficulty: Easy beginner
- Budget Breakdown: Premium cedar: $130 | Fasteners: $15
- Creator’s Tip: Don’t stain it! Let the cedar weather naturally to a gorgeous, maintenance-free silvery gray.
- Smart Sourcing: pre-cut premium cedar raised bed kits | epoxy-coated exterior structural screws
36. Composite Woodcrete Plank
Feels like the garden of the future. A recycled composite lumber planter provides the beautiful texture of wood with the invincible, rot-proof durability of plastic.
Real wood inevitably degrades, but this modern material hack looks far more expensive than it is and literally lasts a lifetime. Using concealed composite deck fastening systems hides ugly screw heads and gives the outside a flawless, seamless finish.
These high-tech beds run $120–$200. Save this if you absolutely hate replacing rotten wood!
- Key Materials: Composite deck boards, concealed fasteners
- Vibe / Style: Flawless modern luxury
- Difficulty: Intermediate assembly
- Budget Breakdown: Composite boards: $150 | Fasteners: $30
- Creator’s Tip: Pre-drill every single hole; composite material doesn’t compress like wood and will snap your screws if forced.
- Smart Sourcing: UV-resistant composite fascia boards | hidden deck fastener starter kits
37. Natural Stone Wall Bed
Radiates the ancient, permanent beauty of a Scottish countryside estate. A dry-stacked natural stone retaining bed makes your garden look like it has been there for centuries.
Wooden boxes feel temporary, whereas stacking heavy stone gives a designer-level finish that absorbs sun during the day and warms roots at night. Tucking crevice-loving alpine flower seeds into the gaps transforms the wall itself into a living vertical garden.
Sourcing local stone costs anywhere from $50–$300. It’s a breathtaking, permanent landscape upgrade.
- Key Materials: Flat stackable fieldstone, gravel base
- Vibe / Style: Ancient permanent estate
- Difficulty: Heavy manual labor
- Budget Breakdown: Stone (if bought): $200 | Gravel: $30
- Creator’s Tip: Angle the stones slightly backward (into the dirt) as you build up to prevent the wall from bowing outward over time.
- Smart Sourcing: alpine rock garden seed mixes | heavy-duty landscaping work gloves
38. Brick Mortared Perimeter

Exudes crisp, historical elegance that matches classic home architecture. A formal mortared brick garden border creates a stunning, multi-generational growing space.
Loose borders look messy, but a cemented brick frame delivers a surprisingly premium look that instantly increases property value. Using a high-strength exterior mortar mix is critical to prevent winter freezing and thawing from cracking your joints.
Masonry work pushes the budget to $150–$300. Pin this if you want a formal, high-end courtyard aesthetic.
- Key Materials: Clay bricks, exterior mortar, concrete footing
- Vibe / Style: Historical formal courtyard
- Difficulty: Advanced masonry skills
- Budget Breakdown: Bricks: $180 | Mortar/Base: $60
- Creator’s Tip: Always lay a shallow concrete or gravel trench footing first, or the bricks will heave and crack during the first winter.
- Smart Sourcing: high-strength exterior masonry mortar | professional bricklaying trowel kits
39. Reclaimed Wood Rustic Assembly
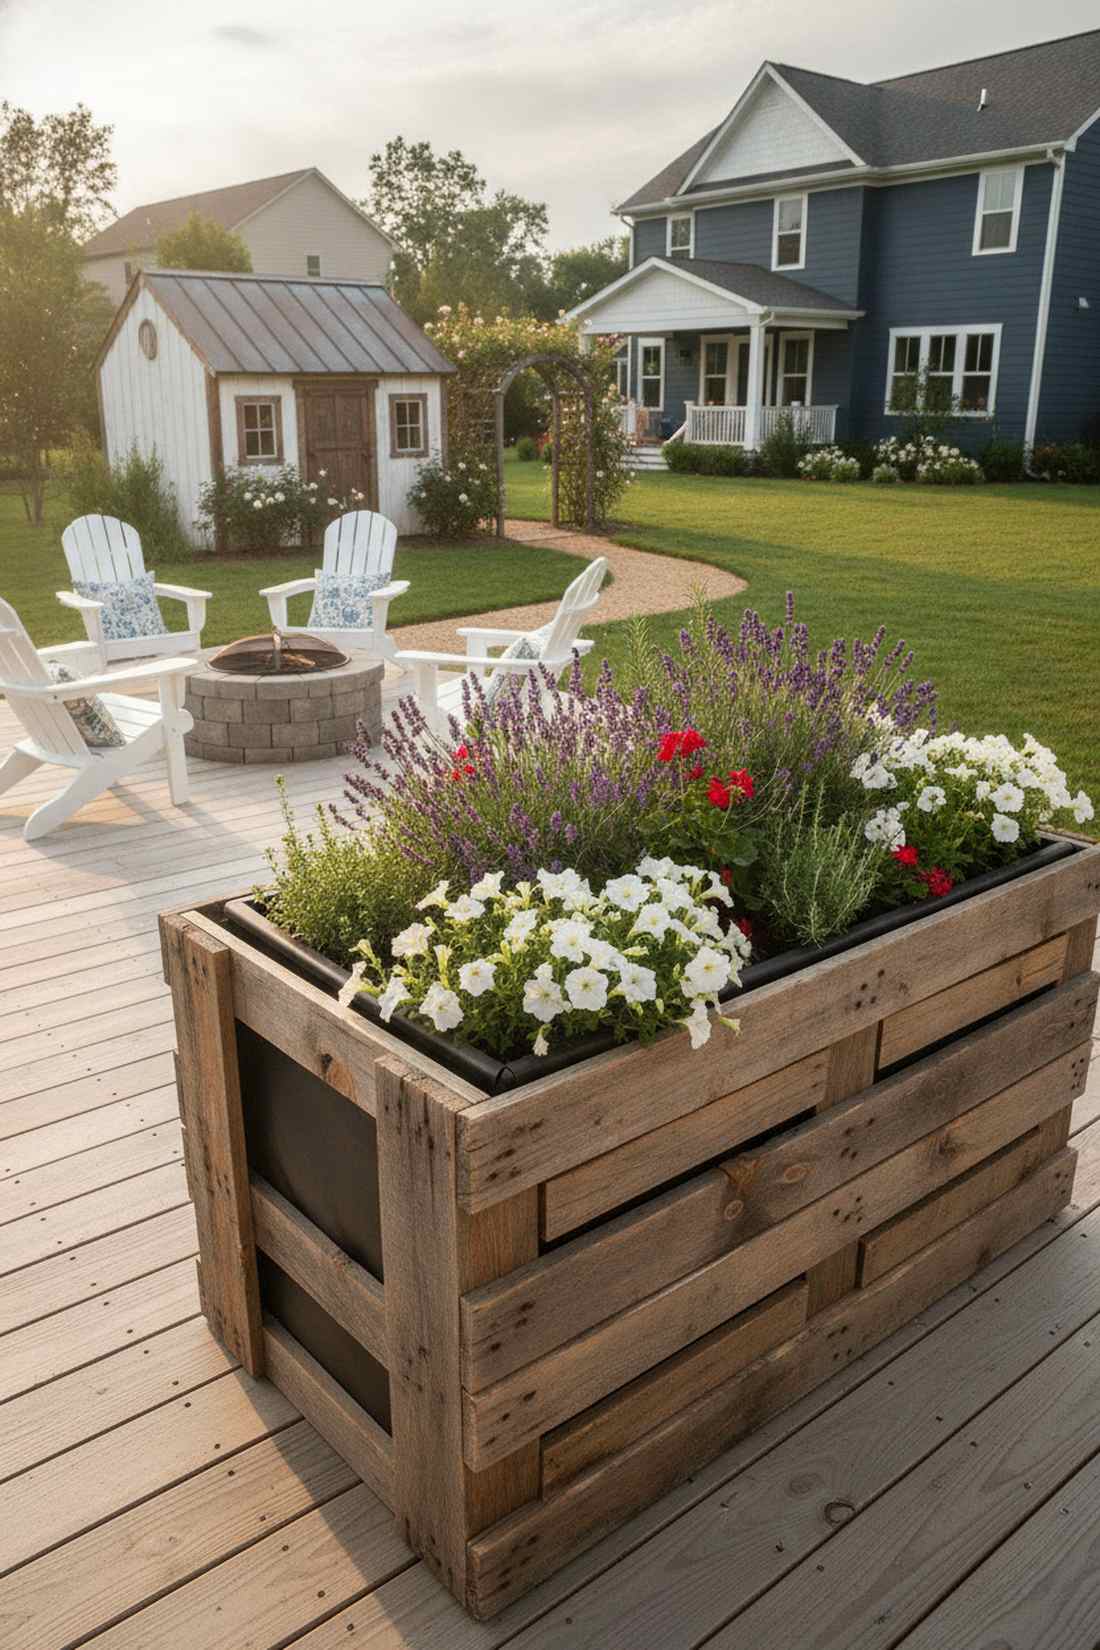
Feels like a cozy, Pinterest-perfect shabby chic farm. A weathered reclaimed pallet wood planter brings massive character to your yard for literally zero dollars.
Buying new wood is expensive, but upcycling old barn wood or pallets delivers that highly sought-after rustic aesthetic on a shoestring budget. Brushing the interior with a non-toxic liquid rubber sealant ensures the old, dry wood doesn’t rot out after one season.
This scrap project can cost $0–$30. It’s the ultimate eco-friendly budget hack!
- Key Materials: Heat-treated pallets, scrap 2x4s, pry bar
- Vibe / Style: Eco-friendly rustic chic
- Difficulty: Moderate (dismantling pallets is tough)
- Budget Breakdown: Wood: $0 | Sealant: $25
- Creator’s Tip: Only use pallets stamped with “HT” (Heat Treated). Never use “MB” pallets, which are treated with highly toxic chemicals.
- Smart Sourcing: eco-friendly liquid rubber waterproof sealant | heavy-duty pallet dismantling pry bars
Before you spend a fortune on custom materials, this next modular hack uses the cheapest items at the hardware store…
40. Concrete Block Modular System
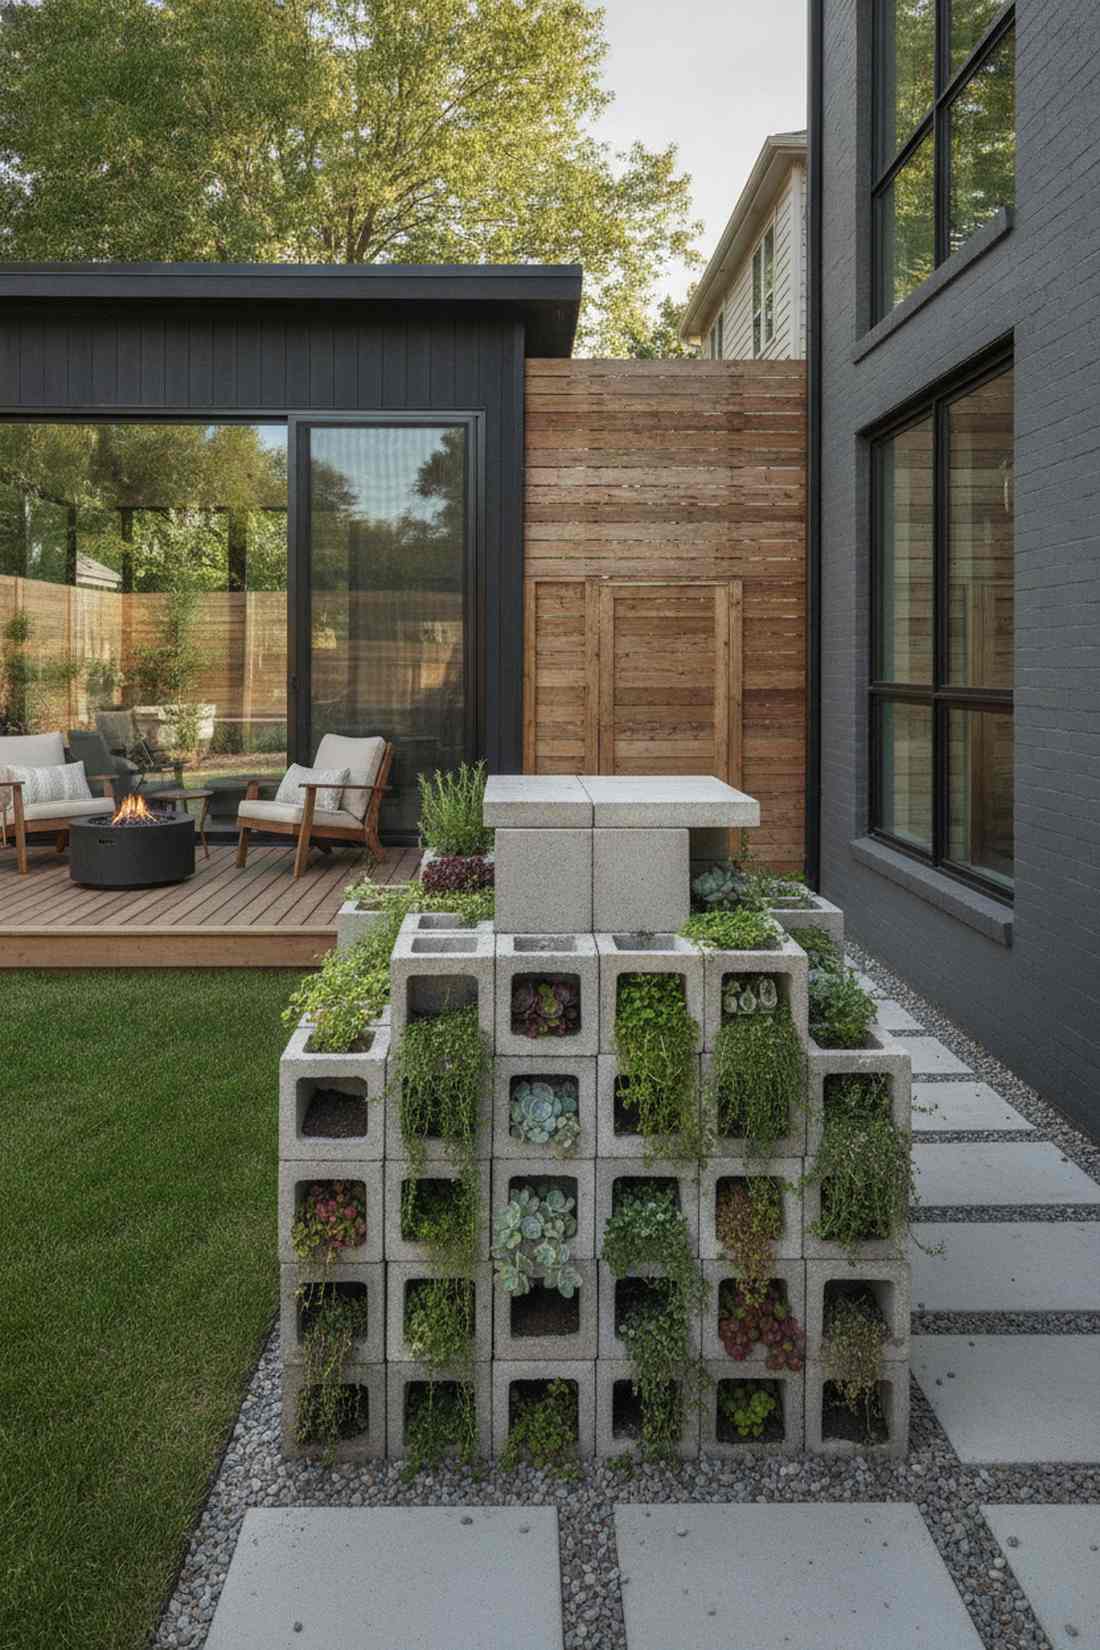
Looks like a trendy, brutalist urban loft garden. A cinder block modular grid bed is practically indestructible and assembles like giant adult legos.
Wood rots and stone is expensive, but basic cinder blocks give a designer-level industrial finish for pocket change. Dropping compact trailing herb starter plants into the hollow outer holes turns the gray concrete into a lush, green living wall.
You can stack this up for $30–$60. Save this for a hyper-budget, bulletproof garden.
- Key Materials: Standard 8x8x16 cinder blocks, capstones
- Vibe / Style: Urban industrial brutalism
- Difficulty: Very easy stacking
- Budget Breakdown: Blocks: $40 | Soil for holes: $10
- Creator’s Tip: Paint the blocks charcoal gray or stark white with exterior masonry paint to instantly elevate them from “cheap” to “designer.”
- Smart Sourcing: exterior acrylic masonry paint | succulent and herb starter plugs
41. Aluminum Powder-Coated Frame
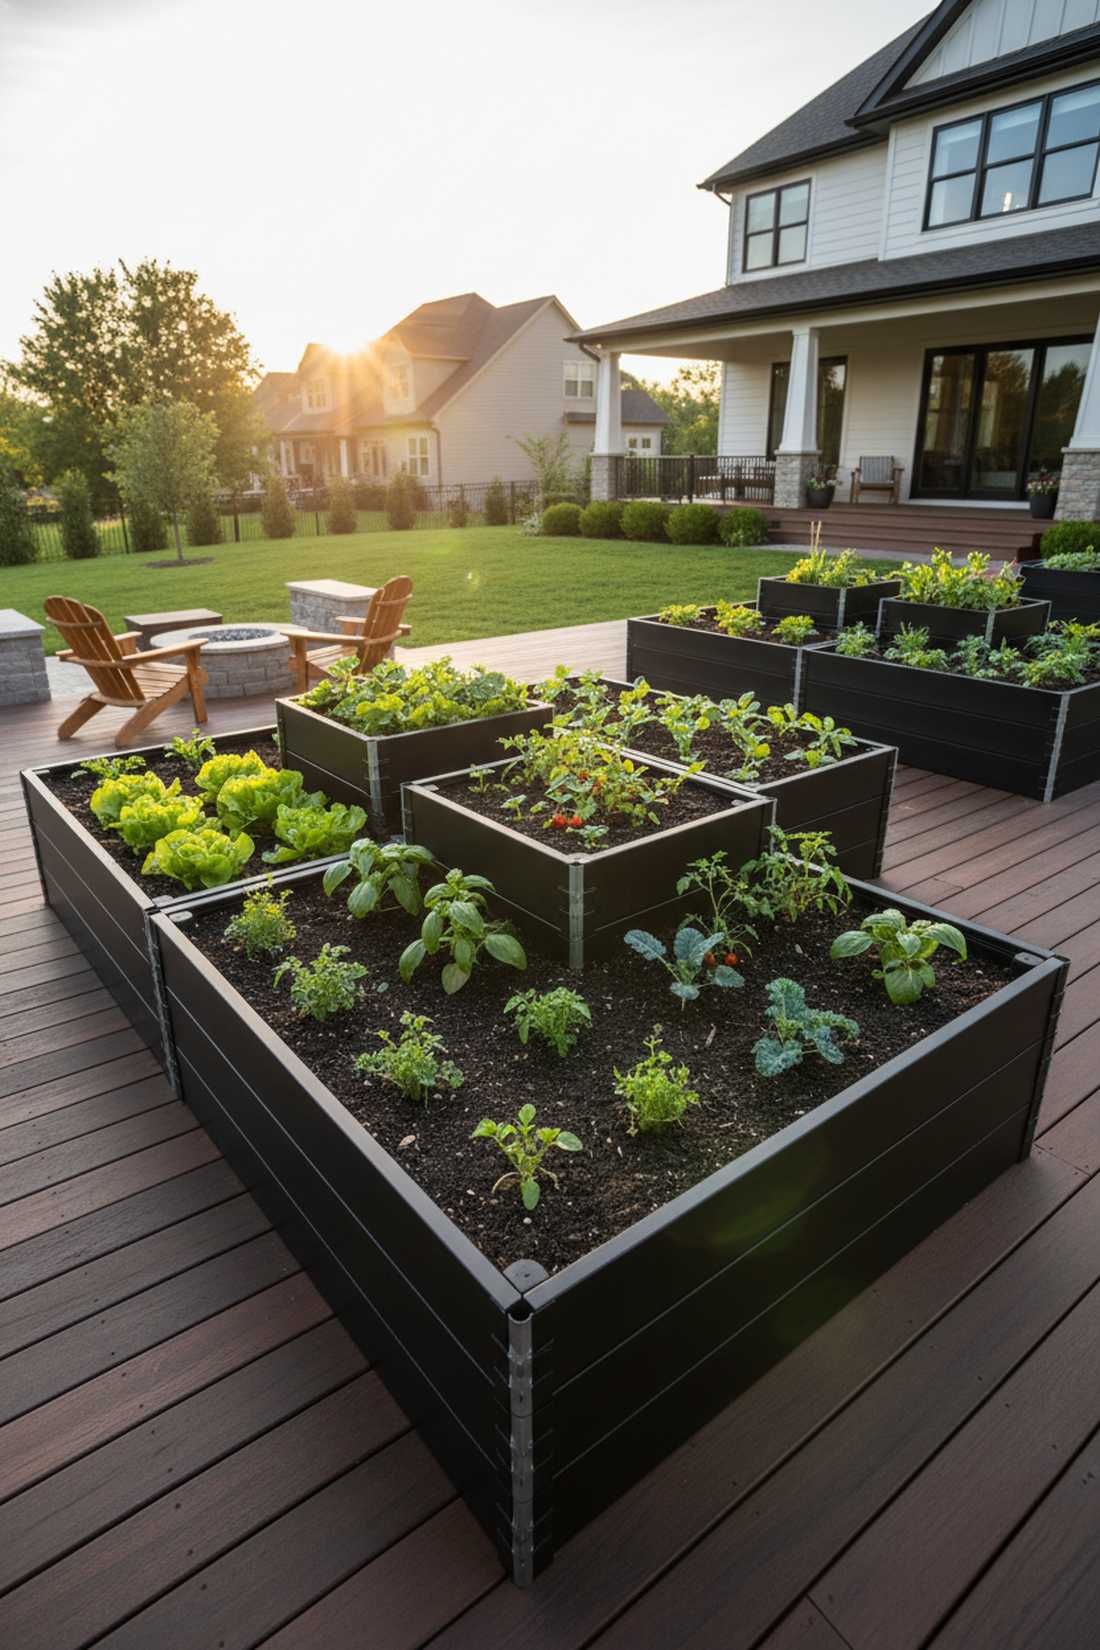
Radiates sleek, ultra-modern luxury. A powder-coated aluminum garden system offers razor-sharp aesthetic lines that will literally never rust, fade, or rot.
Steel rusts and wood degrades, but aircraft-grade aluminum looks far more expensive than it is and provides an eternal, maintenance-free solution. Investing in a modular aluminum raised bed kit allows you to snap the pieces together in minutes without any power tools.
These premium kits run $150–$250. Pin this if you want a clean, modern aesthetic with zero upkeep.
- Key Materials: Extruded aluminum panels, corner sliding locks
- Vibe / Style: Ultra-modern eternal luxury
- Difficulty: Instant tool-free assembly
- Budget Breakdown: Aluminum kit: $190 | Soil: $40
- Creator’s Tip: Choose a dark bronze or matte black finish—it absorbs heat to warm the soil early in spring while looking incredibly high-end.
- Smart Sourcing: modular powder-coated aluminum bed kits | premium organic raised bed soil mix
Space-Saving and Compact Solutions
42. Balcony Rail Planter
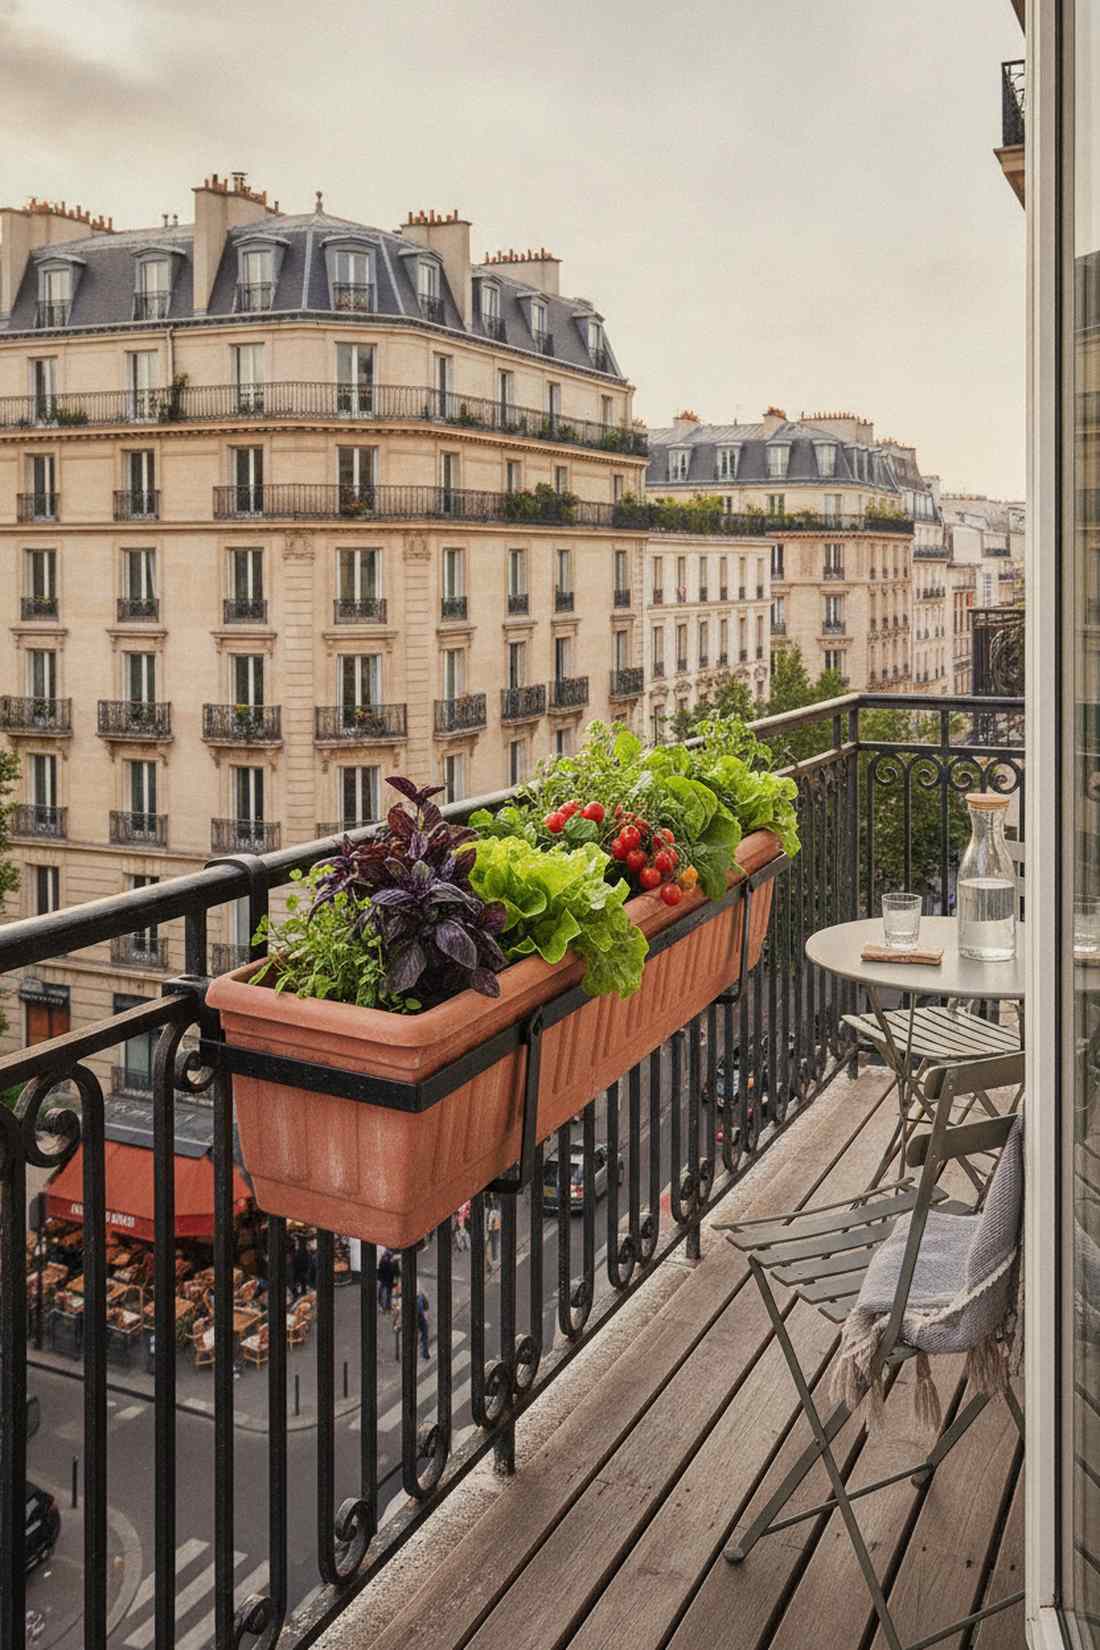
Feels like a lush Parisian apartment overview. A suspended balcony rail box turns unused airspace into a thriving, space-saving salad bar.
Floor space is precious on a balcony, but mounting these elevated troughs gives a designer-level finish while hiding ugly metal railings. Utilizing adjustable heavy-duty railing brackets ensures the boxes sit perfectly level regardless of your balcony’s thickness.
Outfit your railing for just $30–$60. A brilliant trick to maximize tiny urban apartments!
- Key Materials: Narrow planter box, adjustable steel brackets
- Vibe / Style: Parisian urban chic
- Difficulty: Easy bolt-on
- Budget Breakdown: Planter: $25 | Brackets: $20
- Creator’s Tip: Always double-check your apartment’s drainage rules, and ensure your brackets are tightened to withstand high urban wind gusts.
- Smart Sourcing: adjustable heavy-duty railing brackets | self-watering rectangular window boxes
43. Vertical Pocket Wall
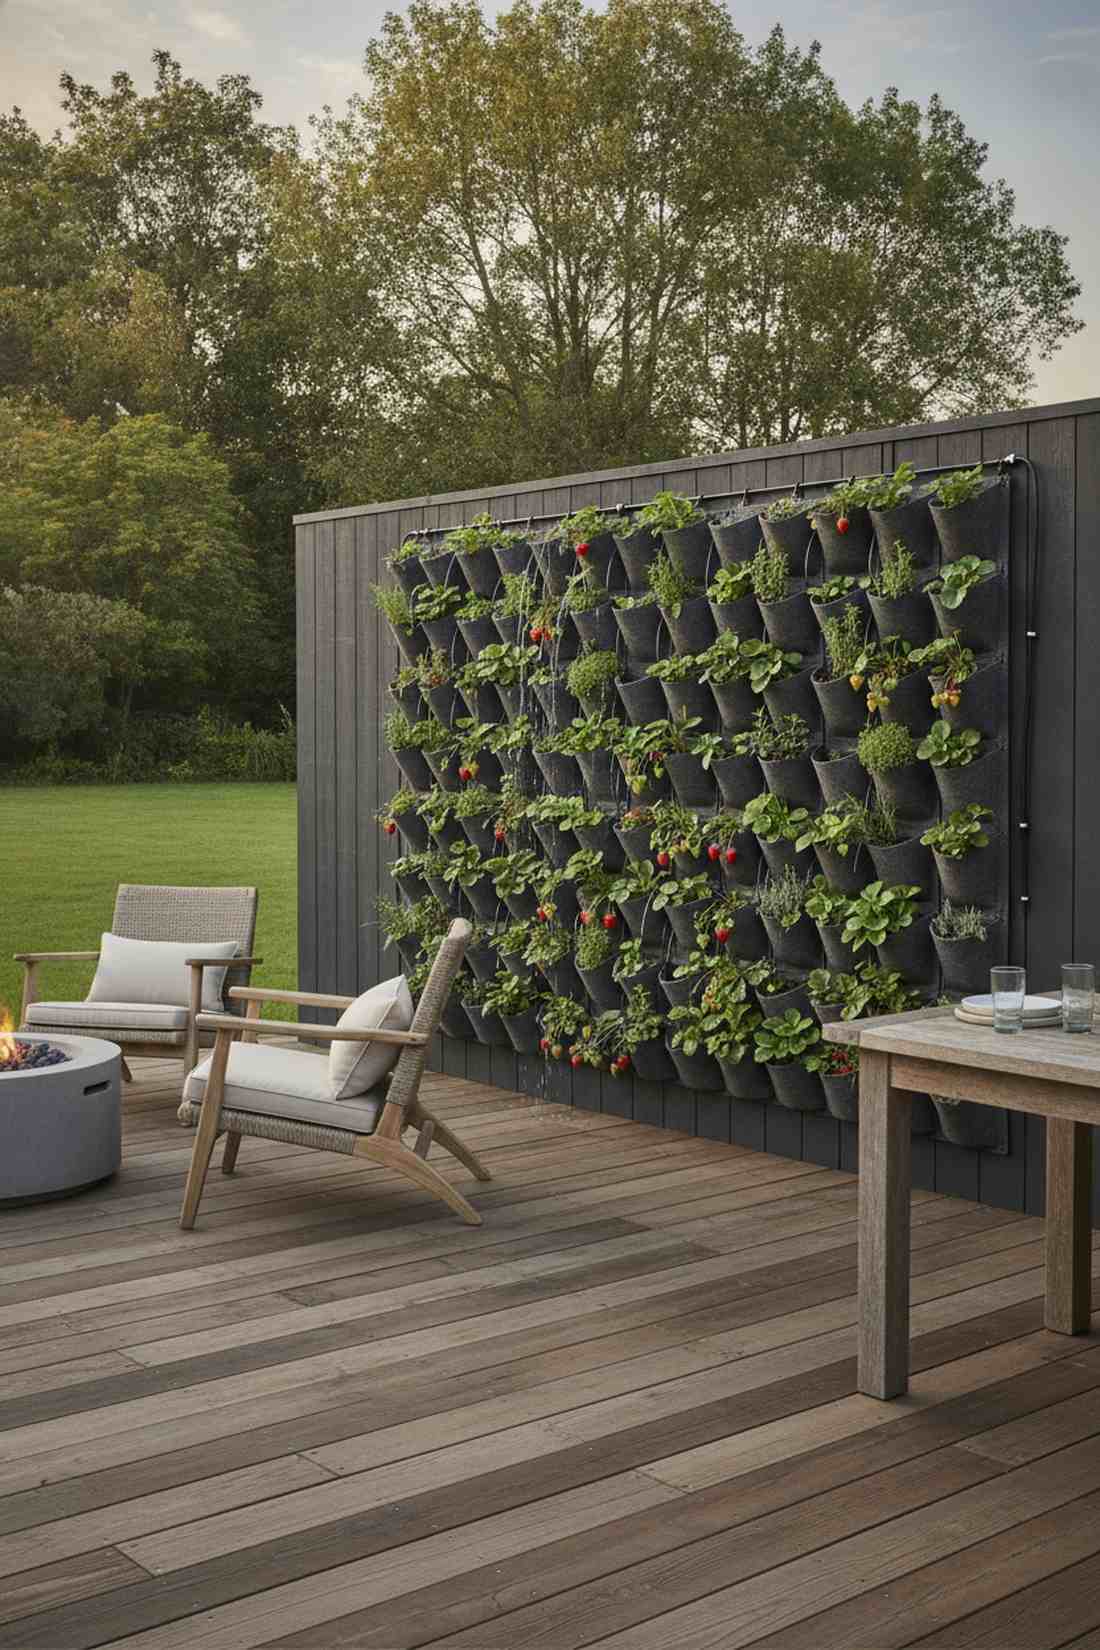
Looks like a breathtaking living art installation. A fabric vertical wall pocket hanger transforms blank, boring fences into a massive vertical strawberry or herb farm.
Pots clutter up small patios, but hanging a breathable fabric grid looks incredibly modern and creates massive yields in zero square feet. Upgrading to UV-resistant felt planting pouches ensures the material won’t disintegrate into plastic dust after a month in the sun.
Hanging this wall costs a mere $20–$40. Pin this to your tiny-space patio board!
- Key Materials: Fabric pocket hanger, zip ties or wall hooks
- Vibe / Style: Modern living wall art
- Difficulty: Instant hang-and-fill
- Budget Breakdown: Fabric wall: $25 | Potting mix: $15
- Creator’s Tip: Water from the very top row and let gravity drip-irrigate the lower pockets to save massive amounts of time.
- Smart Sourcing: UV-resistant felt vertical wall planters | moisture-control potting mix (bulk)
44. Corner-Nesting L-Bed
Exudes brilliant, puzzle-piece efficiency. A miniature L-shaped patio hugger tucks perfectly into the corner of a tiny concrete slab to maximize walking room.
Standard boxes block walkways on small patios, but nesting an L-shape into the corner looks far more expensive and custom-built for the space. Elevating the bottom slightly with heavy-duty rubber riser pads prevents moisture from staining your concrete deck permanently.
This compact build costs $40–$70. Save this if your backyard is just a tiny concrete slab!
- Key Materials: Short cedar boards, hidden corner brackets
- Vibe / Style: Compact patio efficiency
- Difficulty: Easy beginner
- Budget Breakdown: Wood: $45 | Risers: $10
- Creator’s Tip: Plant fragrant herbs like mint and basil right at the corner vertex so you brush past them and release their scent every time you walk by.
- Smart Sourcing: heavy-duty rubber planter risers | pre-cut small space cedar kits
Most renters think they can’t have a real garden, but this next collapsible design changes everything…
45. Windowbox Raised Version
Feels like a charming European cottage border. A ground-level miniature window box lines walkways perfectly without requiring massive amounts of dirt to fill.
Deep beds are massive overkill for shallow-rooted salad greens, whereas this slim profile delivers a surprisingly premium look on a tiny budget. Filling them with a premium coconut coir moisture mix keeps the shallow dirt from drying out to a crisp on hot afternoons.
These mini boxes cost about $20–$35 each. A beautiful, cheap way to frame a front walkway.
- Key Materials: 1×8 lumber boards, finish nails
- Vibe / Style: Charming cottage pathway
- Difficulty: Ultra-fast assembly
- Budget Breakdown: Wood: $15 | Soil: $10
- Creator’s Tip: Arrange them in a staggered, zig-zag pattern along the path rather than a straight line to add instant visual interest.
- Smart Sourcing: compressed coconut coir bricks (bulk pack) | exterior wood glue and finish nails
46. Folding Collapsible Bed
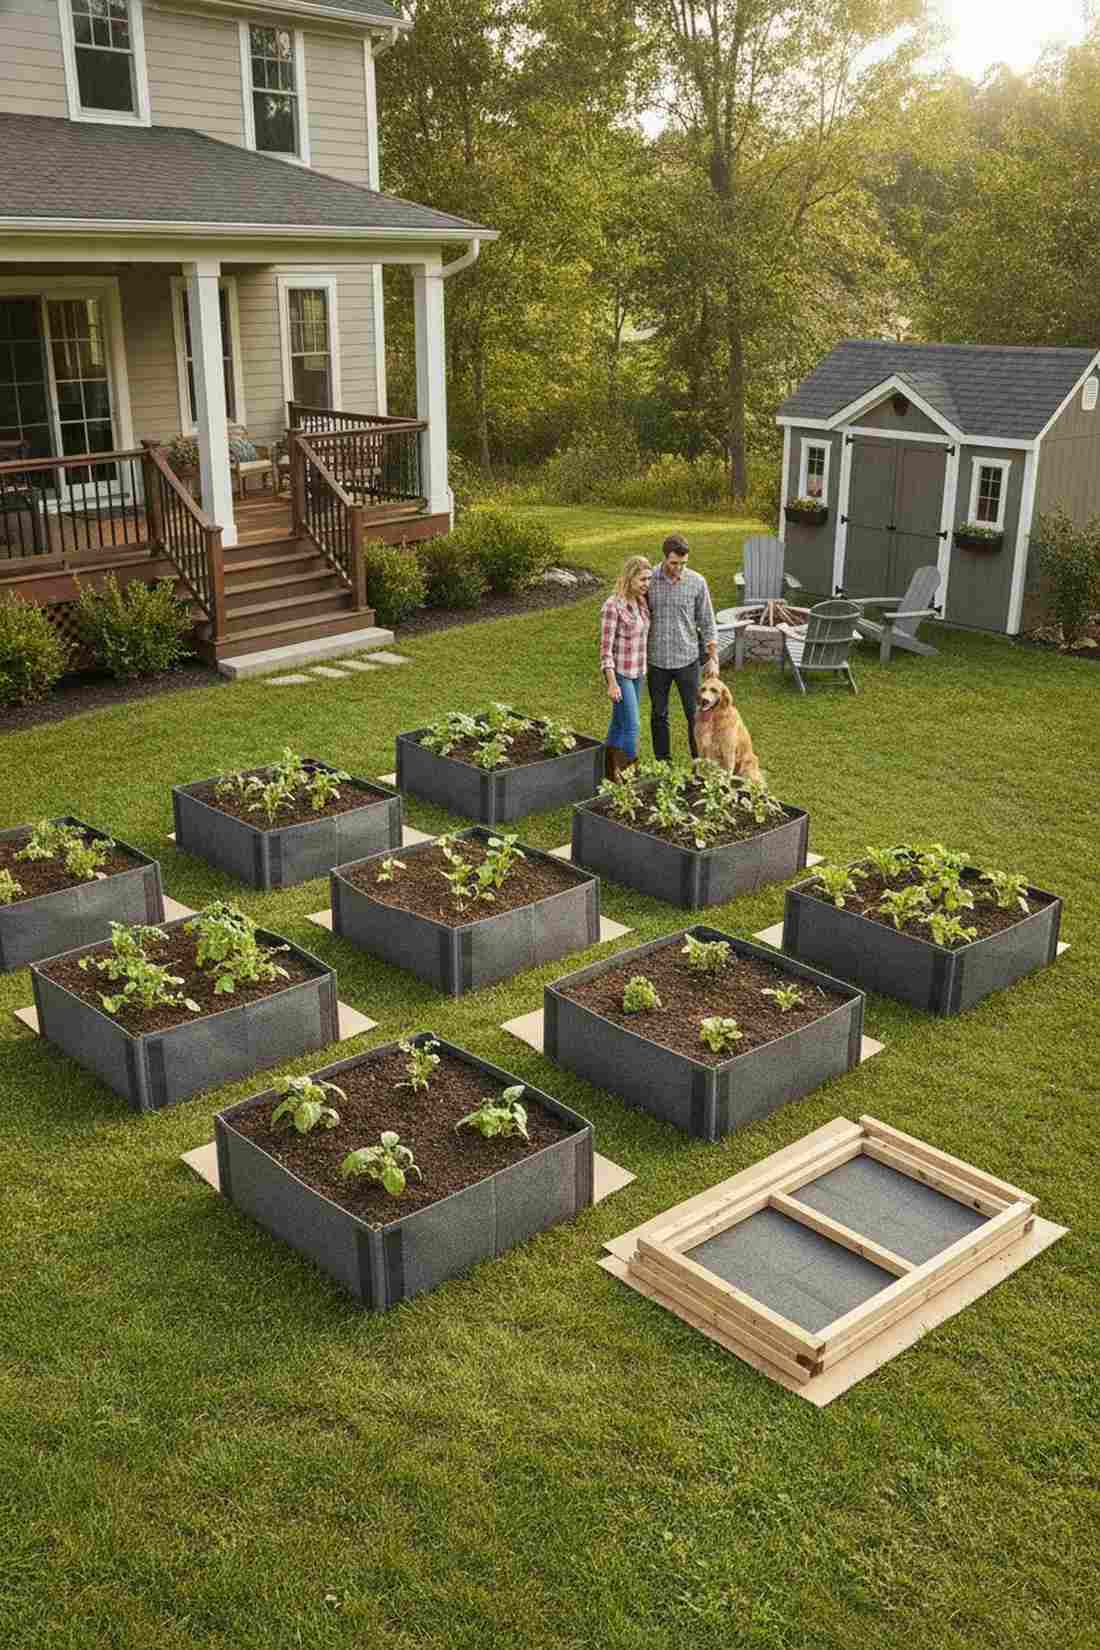
Radiates brilliant nomadic utility. A hinged foldable fabric garden frame pops up for the summer season and flat-packs into a closet during winter.
Permanent beds are impossible for renters, but utilizing a heavy-duty folding layout gives a designer-level finish that you can take when you move. Investing in commercial-grade thick fabric raised bed kits ensures the sides won’t bulge and blow out when filled with heavy, wet dirt.
These pop-up kits run $30–$50. Pin this if you are renting but still want to grow your own food!
- Key Materials: Thick geotextile fabric or hinged wood frames
- Vibe / Style: Urban nomadic utility
- Difficulty: Zero-tool instant setup
- Budget Breakdown: Fabric kit: $35 | Soil: $15
- Creator’s Tip: Place a layer of cardboard underneath before adding soil to protect the grass and make end-of-season cleanup a breeze.
- Smart Sourcing: heavy-duty fabric raised bed grids | organic bagged potting soil
47. Stacked Crate Tower
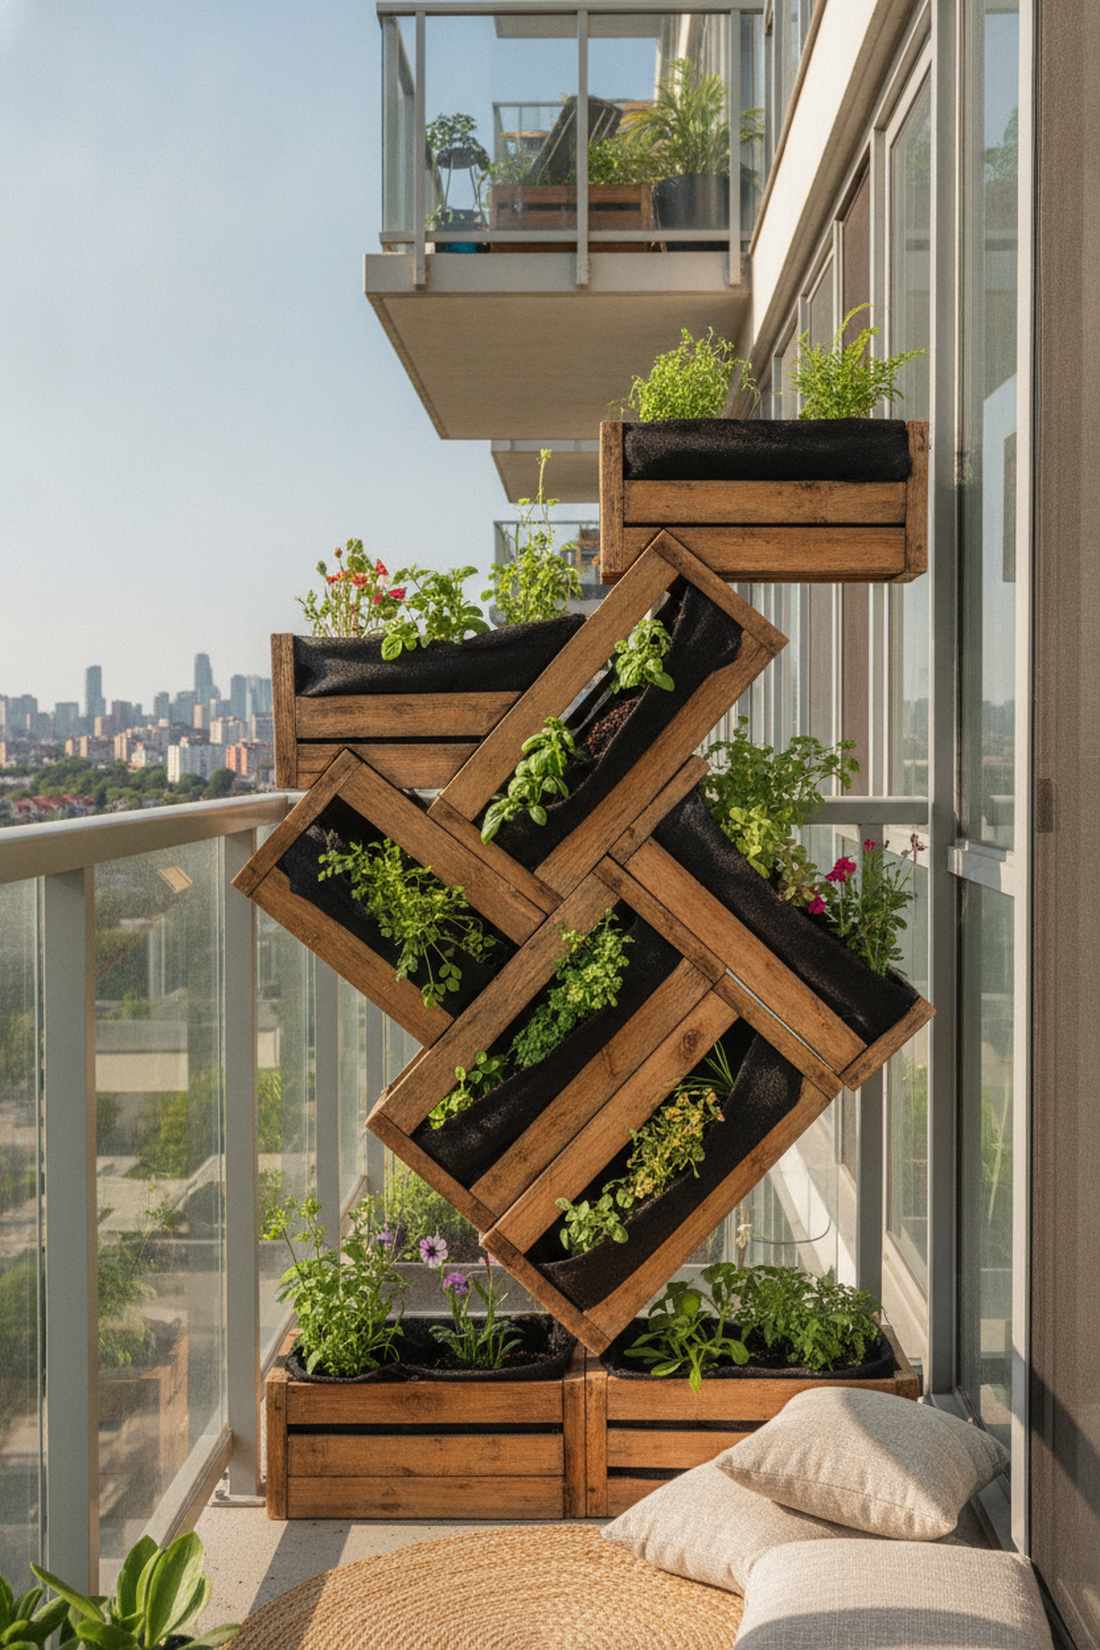
Looks like a trendy, upcycled coffee shop display. An offset stacked wooden crate tower creates a massive amount of individual planting pockets in a microscopic footprint.
Standard shelving blocks the sun, but staggering the crates diagonally provides a brilliant, expensive-looking aesthetic that lets light hit every single tier. Lining the crates with stapled landscape weed barrier keeps the dirt inside while letting excess water drain perfectly.
This upcycled tower costs $20–$45. A spectacular aesthetic for tiny apartment balconies.
- Key Materials: Wooden apple crates, staple gun, liner
- Vibe / Style: Upcycled boho chic
- Difficulty: Easy stacking and screwing
- Budget Breakdown: Crates: $30 | Liner: $10
- Creator’s Tip: Screw the crates together securely; a tall tower of wet soil is incredibly heavy and dangerous if it tips over.
- Smart Sourcing: heavy-duty wooden craft crates (bulk) | breathable landscape fabric rolls
Decorative and Ornamental Designs
48. Painted Gradient Bed
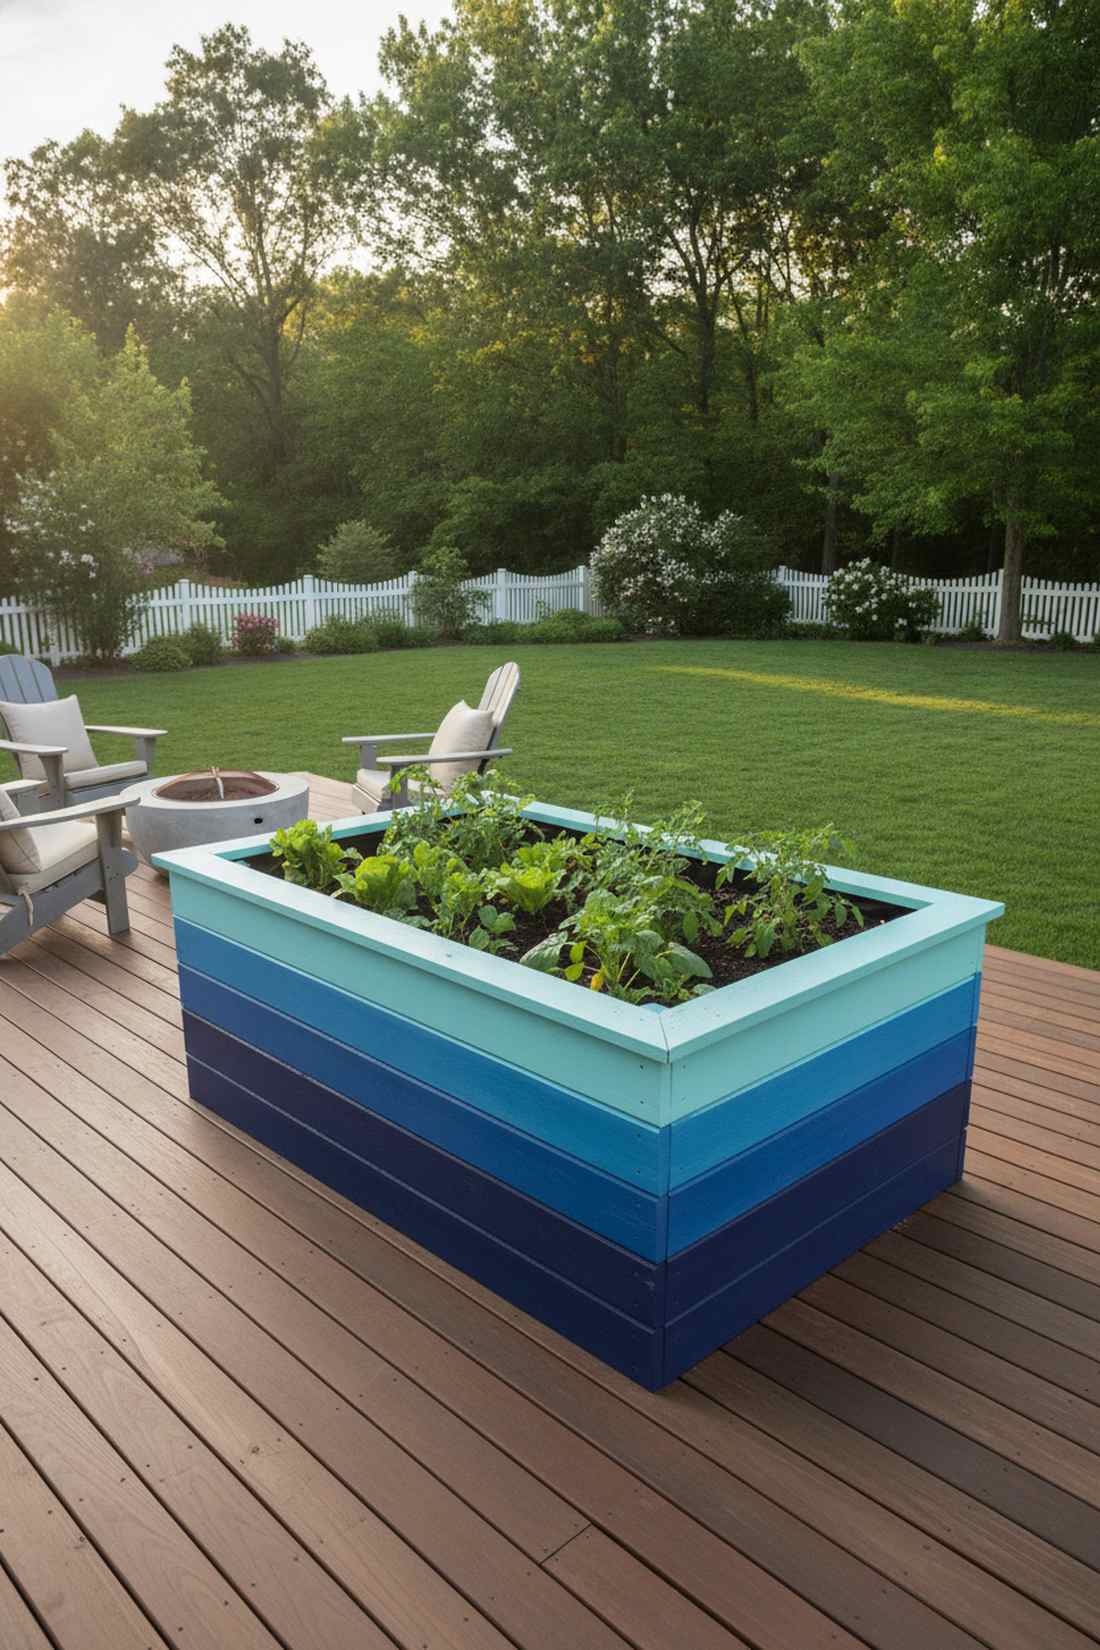
Feels like a vibrant, modern pop-art installation. An ombre color-gradient painted planter transforms boring pine wood into a spectacular backyard statement piece.
Plain wood turns gray and dull, but applying a bold color gradient looks far more expensive than it is and commands visual attention year-round. Using an exterior-grade non-toxic acrylic enamel ensures the colors won’t chip, peel, or leach chemicals into your vegetable soil.
A few cans of paint cost $20–$40. Pin this to your colorful garden inspiration board!
- Key Materials: Built wood frame, 3 shades of exterior paint
- Vibe / Style: Modern pop-art splash
- Difficulty: Fun weekend painting
- Budget Breakdown: Paint samples: $25 | Painter’s tape: $5
- Creator’s Tip: Paint the darkest color at the bottom to ground the bed visually, fading to the lightest color at the top edge.
- Smart Sourcing: non-toxic exterior acrylic paint sets | weather-resistant clear coat sealant
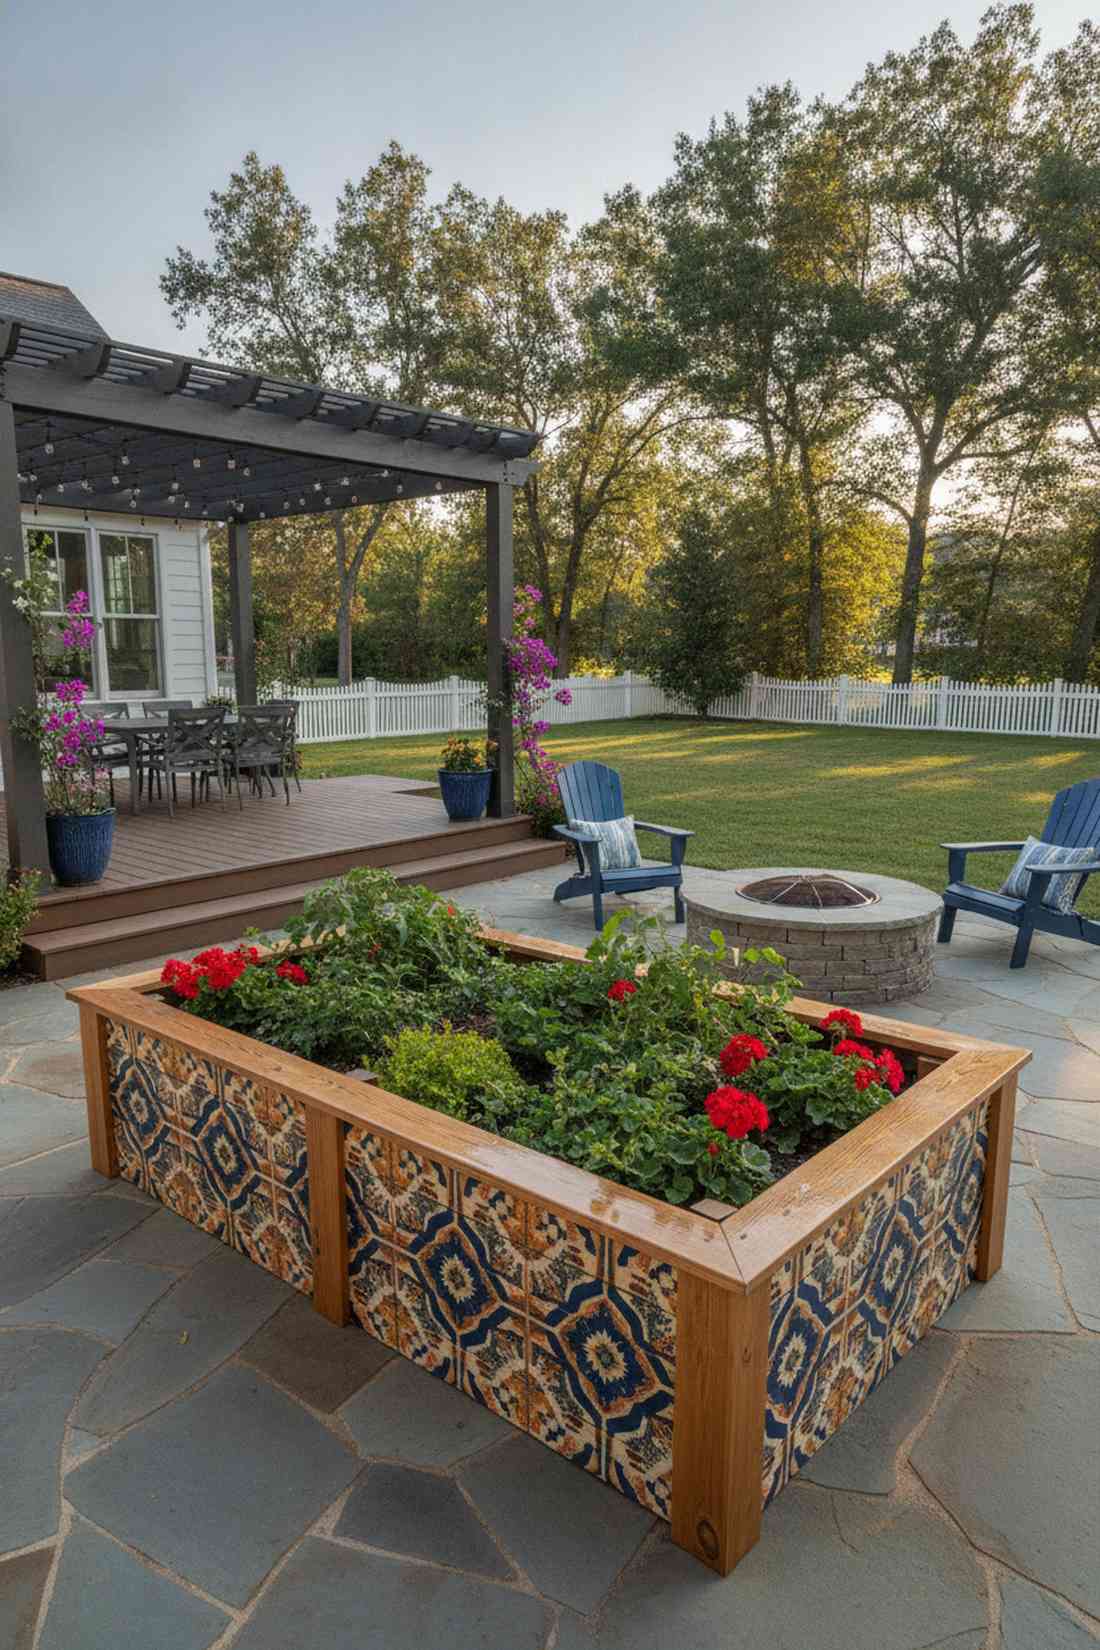
49. Carved Relief Panels
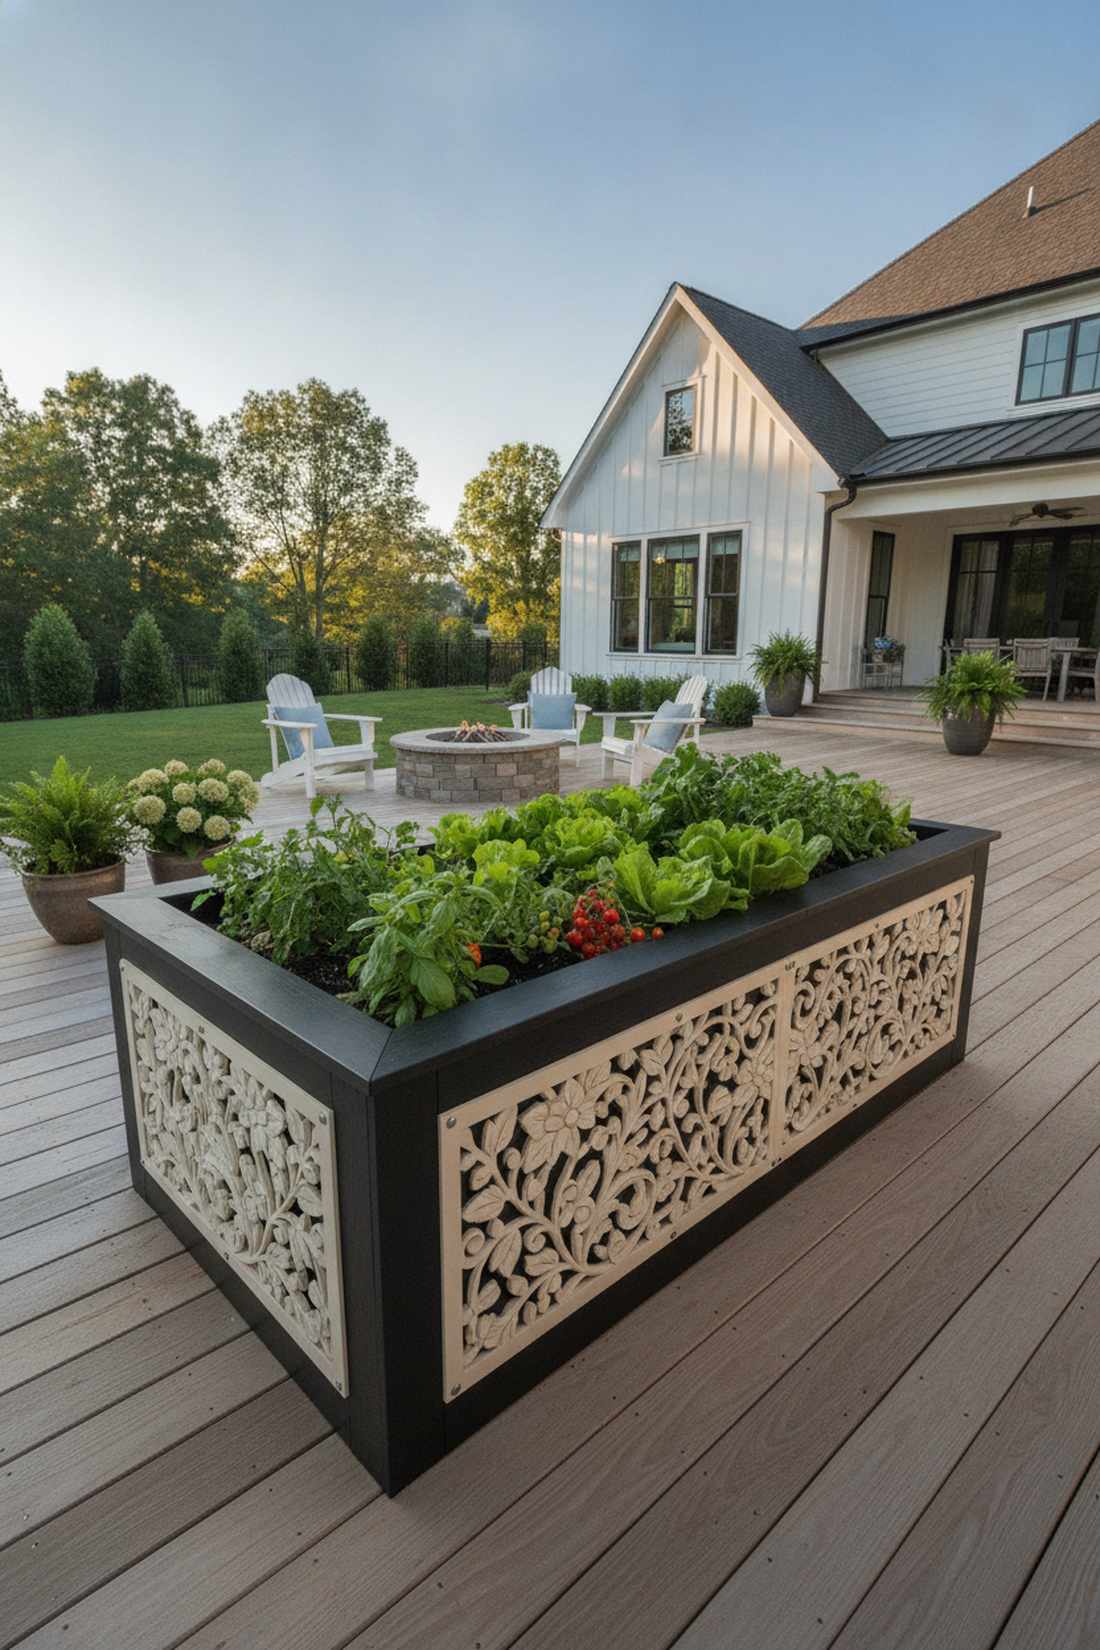
Radiates the exquisite craftsmanship of custom Balinese furniture. Botanical carved relief side panels elevate a basic dirt box into a breathtaking sculptural masterpiece.
Utilitarian boxes look boring, but screwing decorative architectural panels to the sides delivers a designer-level finish that stuns guests. Sourcing laser-cut composite privacy screens and cutting them to size gives you this ornate look without spending weeks hand-carving wood.
Adding decorative panels runs $50–$90. It completely disguises the fact that it’s just a vegetable bed.
- Key Materials: Wood box, decorative laser-cut panels
- Vibe / Style: Exquisite custom craftsmanship
- Difficulty: Intermediate (requires precise cutting)
- Budget Breakdown: Base box: $50 | Decorative panels: $60
- Creator’s Tip: Paint the wood box behind the panel a dark, contrasting color (like black) to make the carved geometric patterns pop visually.
- Smart Sourcing: laser-cut decorative composite screens | stainless steel finishing nails
Most gardeners fight a losing battle with slugs, but this next brilliant decorative trim actually electrocutes them naturally…
50. Copper Cap Edging
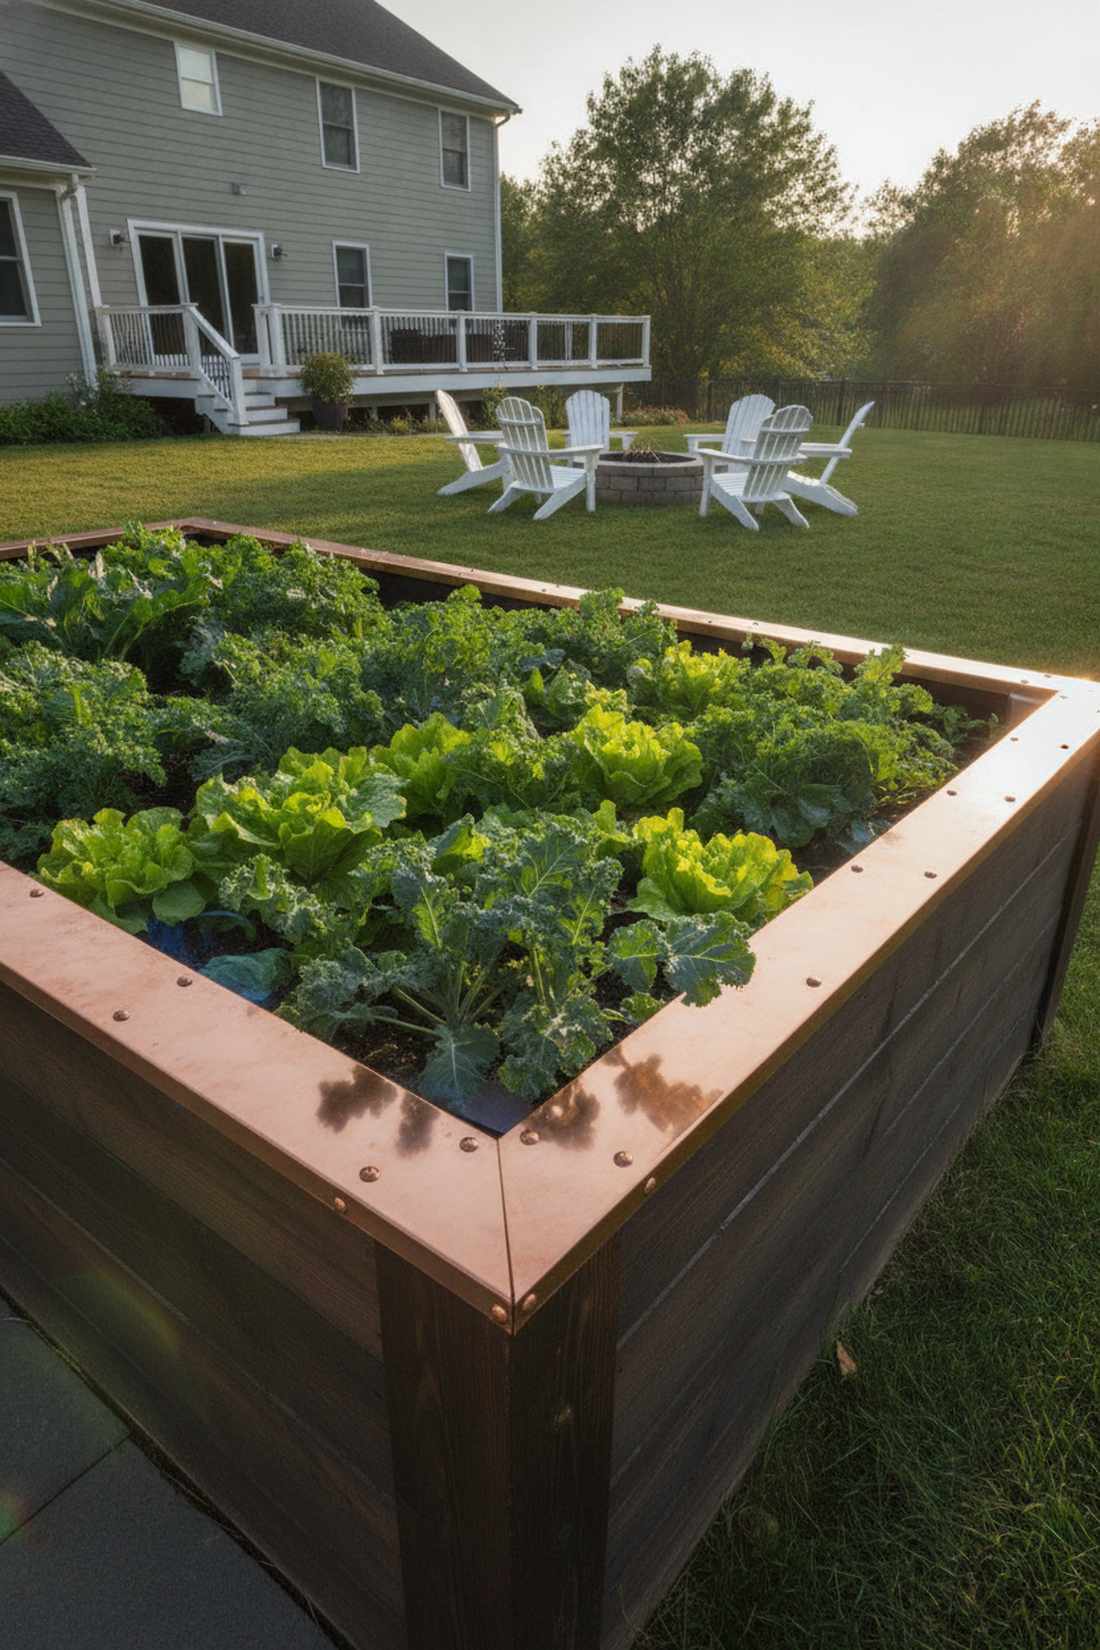
Exudes a warm, high-end metallic sophistication that ages beautifully. A gleaming copper-trimmed edge cap looks incredible and creates an impenetrable barrier against garden pests.
Slugs destroy leafy greens overnight, but wrapping the top edge in copper gives a stunning finish while delivering a tiny natural electric shock to slugs trying to cross. Applying heavy-duty adhesive copper tape rolls gives you the premium metal look for a fraction of the cost of real plumbing copper.
This shiny upgrade costs just $15–$30. Pin this if you want a chemical-free pest solution that looks gorgeous!
- Key Materials: Finished wood box, copper tape or flashing
- Vibe / Style: High-end metallic polish
- Difficulty: Easy peel-and-stick
- Budget Breakdown: Copper tape: $20 | Box: $50
- Creator’s Tip: Let the copper naturally oxidize over the years into a beautiful, chalky green patina that perfectly matches the garden aesthetic.
- Smart Sourcing: 2-inch wide slug-repellent copper tape (bulk) | solid copper decorative tacks
51. Stenciled Pattern Bed
Feels like a custom-tiled Spanish courtyard feature. A geometric painted stencil design brings incredible rhythm and personalized flair to otherwise boring wooden sides.
Leaving cheap wood bare highlights its flaws, but repeating a crisp stencil pattern tricks the eye and delivers a surprisingly premium look. Coating the finished design with a UV-resistant clear marine varnish locks the paint in and prevents sun-fading and dirt smudges.
This artistic upgrade costs about $20–$40. A massive visual impact for very little money.
- Key Materials: Mylar stencils, stencil brush, exterior paint
- Vibe / Style: Custom Spanish tile illusion
- Difficulty: Easy but tedious
- Budget Breakdown: Stencils/Paint: $25 | Clear coat: $15
- Creator’s Tip: Use a nearly dry brush and dab the paint on (don’t wipe) to prevent the color from bleeding under the plastic stencil edges.
- Smart Sourcing: reusable geometric mylar stencil kits | UV-resistant clear marine varnish spray
52. Living-Edge Wood Slab
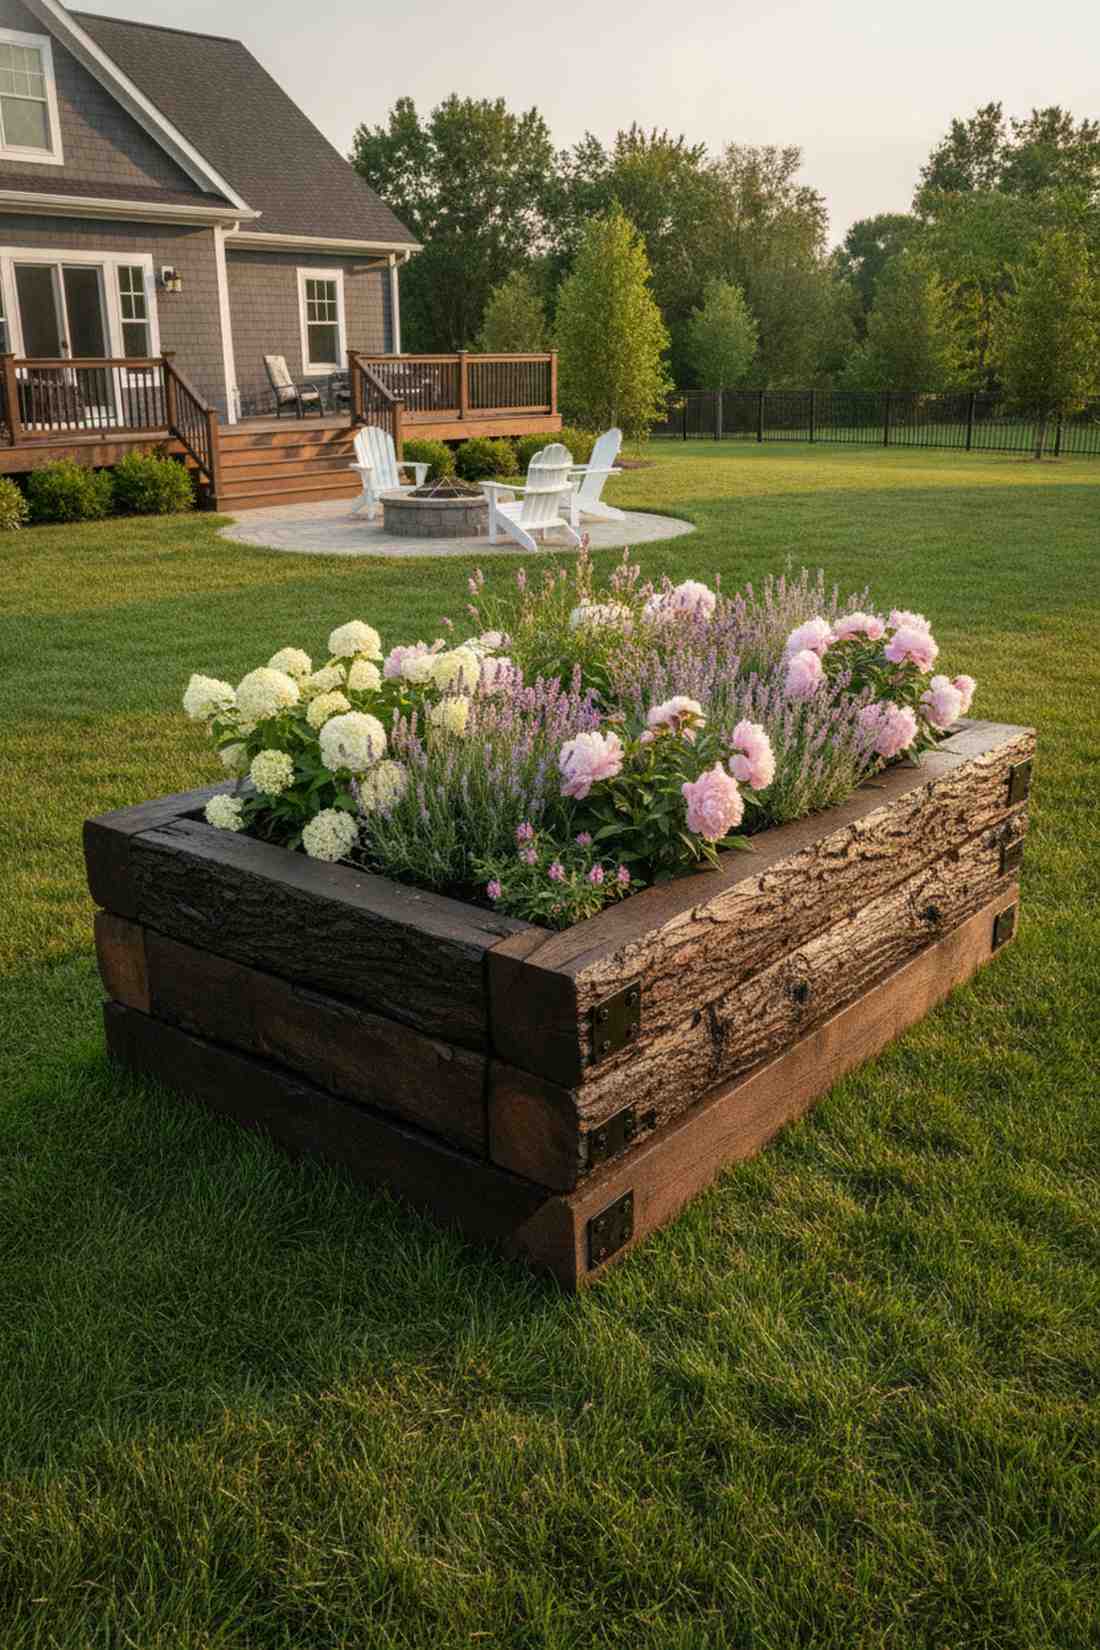
Radiates rugged, untamed natural majesty. A thick-cut live-edge timber bed celebrates the organic, irregular bark contours of a raw forest tree.
Perfectly milled lumber feels sterile, whereas utilizing raw slab wood gives a bespoke, expensive aesthetic that contrasts beautifully with delicate flowers. Treating the bark edge with a deep-penetrating natural wood preserver ensures the bark doesn’t flake off after a single harsh winter.
Raw slabs cost $80–$150 from a local mill. Save this if you love that high-end rustic lodge aesthetic!
- Key Materials: Unmilled live-edge slabs, heavy corner brackets
- Vibe / Style: Rugged woodland lodge
- Difficulty: Heavy lifting, basic assembly
- Budget Breakdown: Wood slabs: $120 | Hardware: $30
- Creator’s Tip: Because the edges are uneven, use internal metal corner brackets rather than trying to perfectly mate the irregular wooden ends together.
- Smart Sourcing: heavy-duty internal corner braces (bulk) | deep-penetrating natural wood preserver
53. Mosaic Tile Accent

Feels like a vibrant, sun-drenched Mediterranean villa. A broken glass mosaic exterior panel catches the sunlight and turns a simple box into a dazzling work of art.
Plain wood absorbs light and looks heavy, but embedding reflective tile pieces delivers a remarkably premium look that sparkles after a rainstorm. Using a weatherproof exterior silicone grout is absolutely crucial so the tiles don’t pop off during freezing winter temperatures.
This gorgeous craft project costs $40–$70. Pin this to your ultimate outdoor art board!
- Key Materials: Broken tiles/glass, exterior adhesive, grout
- Vibe / Style: Radiant Mediterranean art
- Difficulty: Fun, messy weekend craft
- Budget Breakdown: Tiles/Adhesive: $35 | Grout: $20
- Creator’s Tip: Check your local ReStore or tile shop for clearance broken tiles; you can often get buckets of gorgeous material for pennies.
- Smart Sourcing: pre-tumbled mosaic glass fragments (bulk) | weatherproof exterior silicone grout
This final trick completely transforms your garden at night, turning a dark yard into a glowing, high-end luxury resort…
54. Laser-Cut Metal Screen
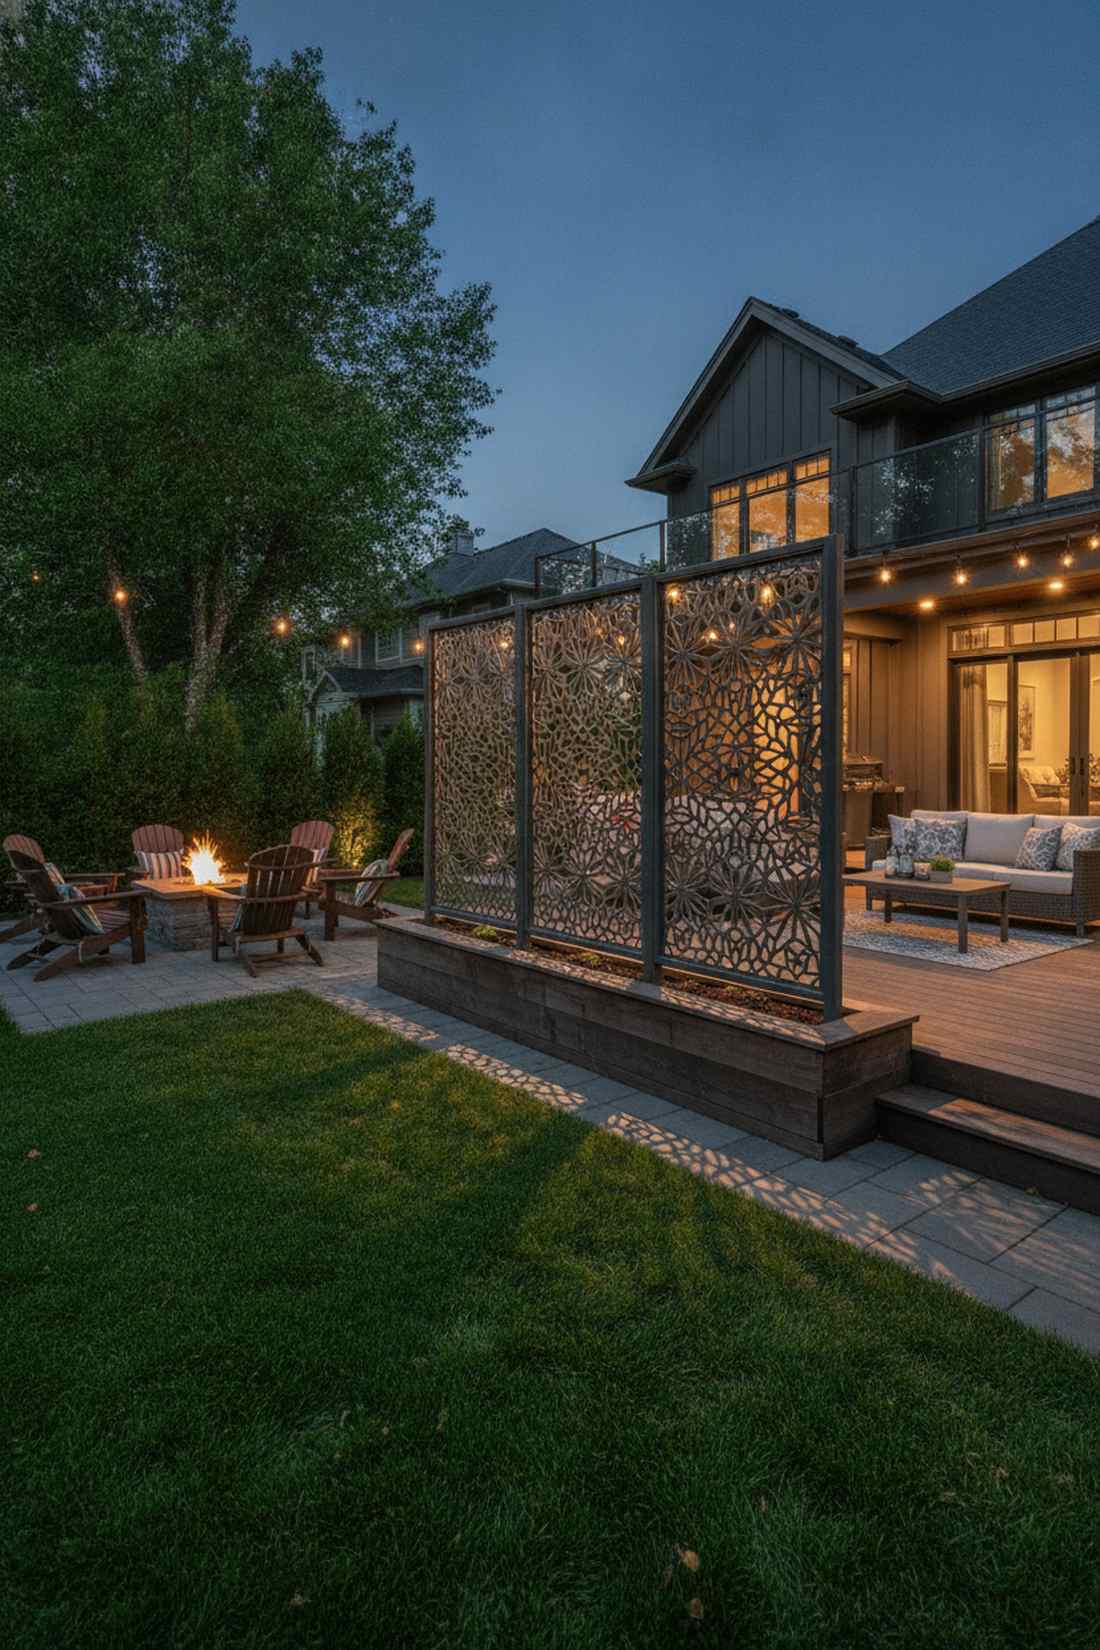
Exudes the high-end drama of a luxury hotel patio. Attaching a backlit laser-cut metal panel transforms a basic dirt box into a jaw-dropping evening focal point.
Beds disappear into the dark at night, but hiding solar lights behind intricate openwork metal gives a designer-level finish that casts gorgeous shadows across your lawn. Utilizing powder-coated aluminum privacy screens gives you that heavy, expensive metal look without the massive weight or rust issues.
Adding backlit screens costs $80–$150. A spectacular upgrade for people who host evening parties.
- Key Materials: Metal privacy screen, spacers, solar lights
- Vibe / Style: Luxury hotel ambiance
- Difficulty: Easy bolt-on upgrade
- Budget Breakdown: Metal screen: $90 | Lighting: $30
- Creator’s Tip: Mount the metal screen exactly 2 inches away from the wood box using rubber spacers, giving the lights room to glow outward.
- Smart Sourcing: laser-cut aluminum decorative screens | outdoor-rated waterproof LED light strips
55. Integrated LED Lighting
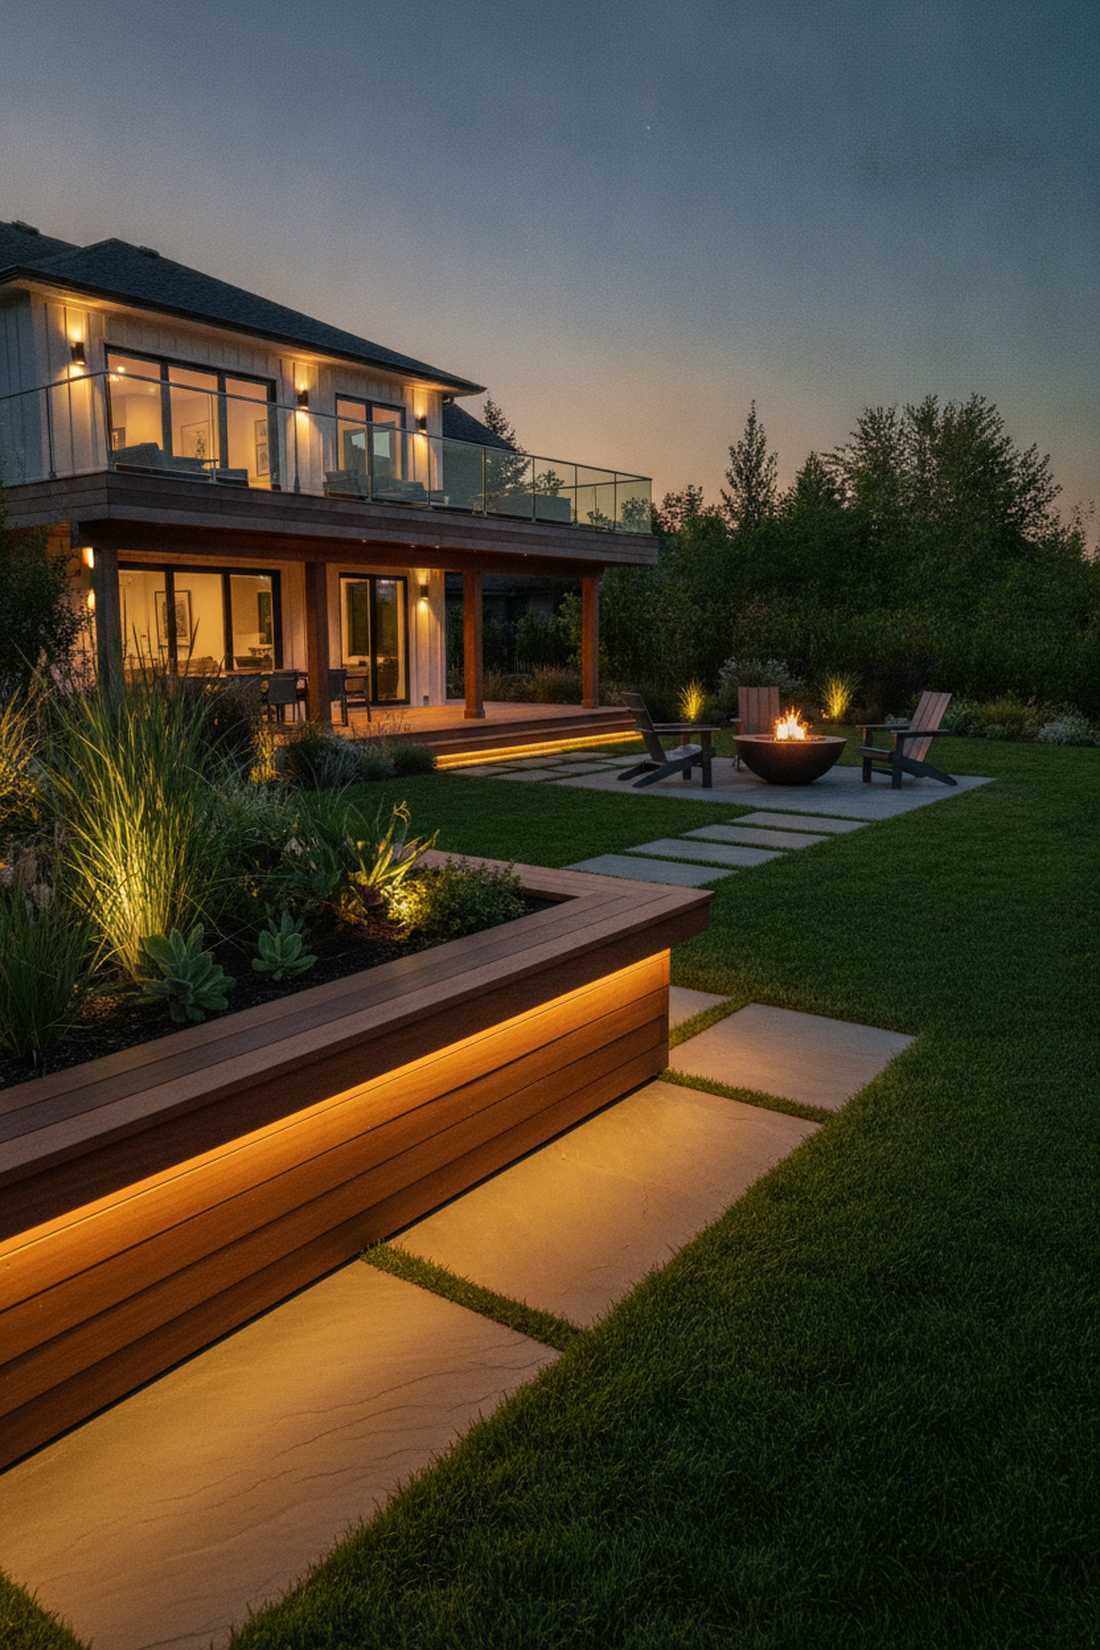
Feels like a sleek, futuristic landscape architectural masterpiece. Installing under-lip glowing LED strip lights highlights the beauty of your plants while illuminating dark pathways safely.
Stabbing cheap plastic solar lights into the dirt looks incredibly tacky, but recessing lights under the wood lip looks far more expensive than it is. Using a solar-powered waterproof LED light rope completely eliminates the nightmare of running extension cords across your wet lawn.
This high-tech glow-up costs just $30–$60. Pin this if you want the coolest backyard in the neighborhood!
- Key Materials: Standard wood box with overhanging top lip, LED strips
- Vibe / Style: Sleek modern nightlife
- Difficulty: Simple peel-and-stick
- Budget Breakdown: Solar LED strip: $35 | Mounting clips: $10
- Creator’s Tip: Never rely purely on the adhesive tape on the back of the lights; use plastic screw-in mounting clips to ensure they never sag.
- Smart Sourcing: solar-powered waterproof LED strip lights | silicone LED mounting brackets (bulk)
Conclusion
These exactly 55 backyard garden raised beds prove that you can achieve a commercial-grade, high-end landscape without paying premium contractor prices. Whether you are assembling a simple cedar box or engineering a massive multi-tiered hillside layout, controlling your soil profile is the ultimate secret to explosive plant growth. By sourcing the right pre-cut materials and utilizing smart budget hacks, you can build structures that outlast and outperform traditional in-ground gardening for decades.
Frequently Asked Questions
What is the ideal height for raised garden beds?
For optimal root health, standard beds perform best between 12-18 inches deep. However, if you are upgrading for accessibility, targeting 30-36 inches completely eliminates bending. To save money filling deeper boxes, consider picking up a lightweight raised bed filler core pack or filling the bottom 40% with organic composted logs (Hugelkultur method).
How wide should pathways be between raised beds?
Always maintain a strict minimum of 24-30 inches between boxes for comfortable movement. If you use a wheelbarrow, expand this to 36 inches. Laying down commercial-grade heavy-duty weed barrier rolls topped with thick cedar mulch ensures those pathways remain clean, dry, and professional-looking all season long.
Which wood types work best for raised garden beds?
Untreated cedar and redwood are the gold standards, naturally resisting rot for over a decade. If you want a setup that lasts 30+ years, investing in UV-coated composite lumber starter kits provides the exact look of wood but with the indestructible durability of modern engineered materials.
Do raised beds need bottoms or bases?
Standard ground-level boxes do not need solid bottoms; open dirt encourages beneficial worms. However, if you have pest issues, stapling heavy-duty galvanized gopher wire rolls to the base is absolutely critical. For elevated patio planters, a solid bottom with ample drainage holes and a waterproof liner is required.
How do I prevent grass from growing into raised beds?
Never place dirt directly over aggressive grass. Instead, lay down a thick layer of overlapping cardboard, followed by a professional permeable landscape fabric sheet. This combination instantly smothers weeds while allowing heavy rainwater to drain seamlessly into the subsoil without drowning your crops.
What soil mix works best in raised beds?
Pure topsoil turns into concrete, and pure compost drains too fast. The perfect high-yield blend is a 1-1-1 ratio: one part compost, one part peat or coconut coir, and one part perlite. Grabbing an organic raised bed potting mix bulk pack is often the most cost-effective and time-saving way to achieve this perfect fluffy consistency.