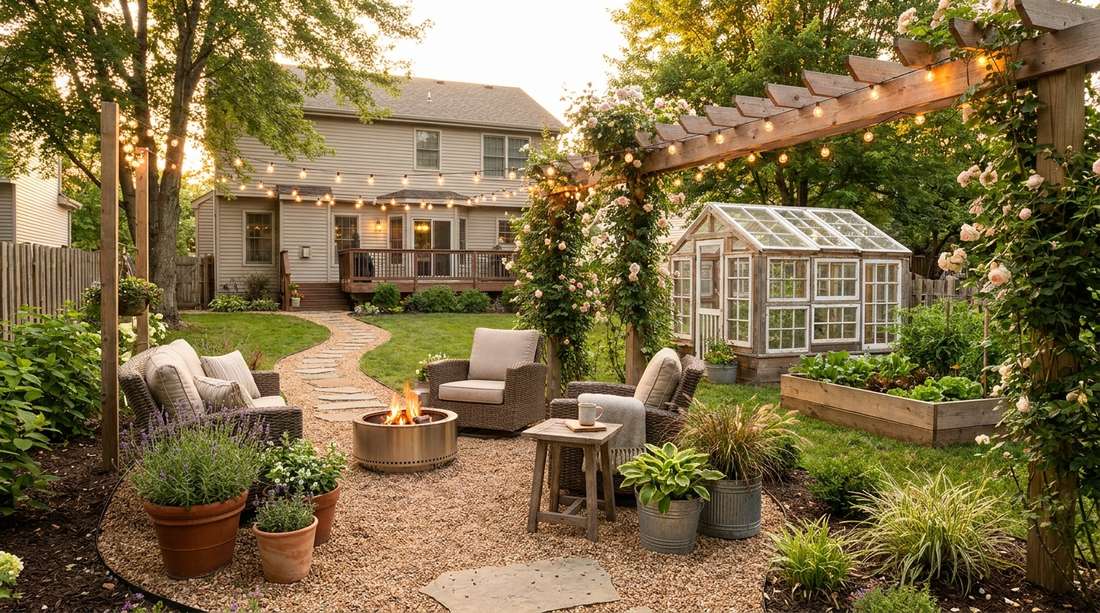
Designing a striking cozy garden often requires specific materials over massive budgets. We reveal professional layouts paired with exact sourcing tricks to bypass marked-up patio prices. Achieve a designer-level sanctuary without draining your savings account.
Design Snapshot: High-RPM Buyer Strategy
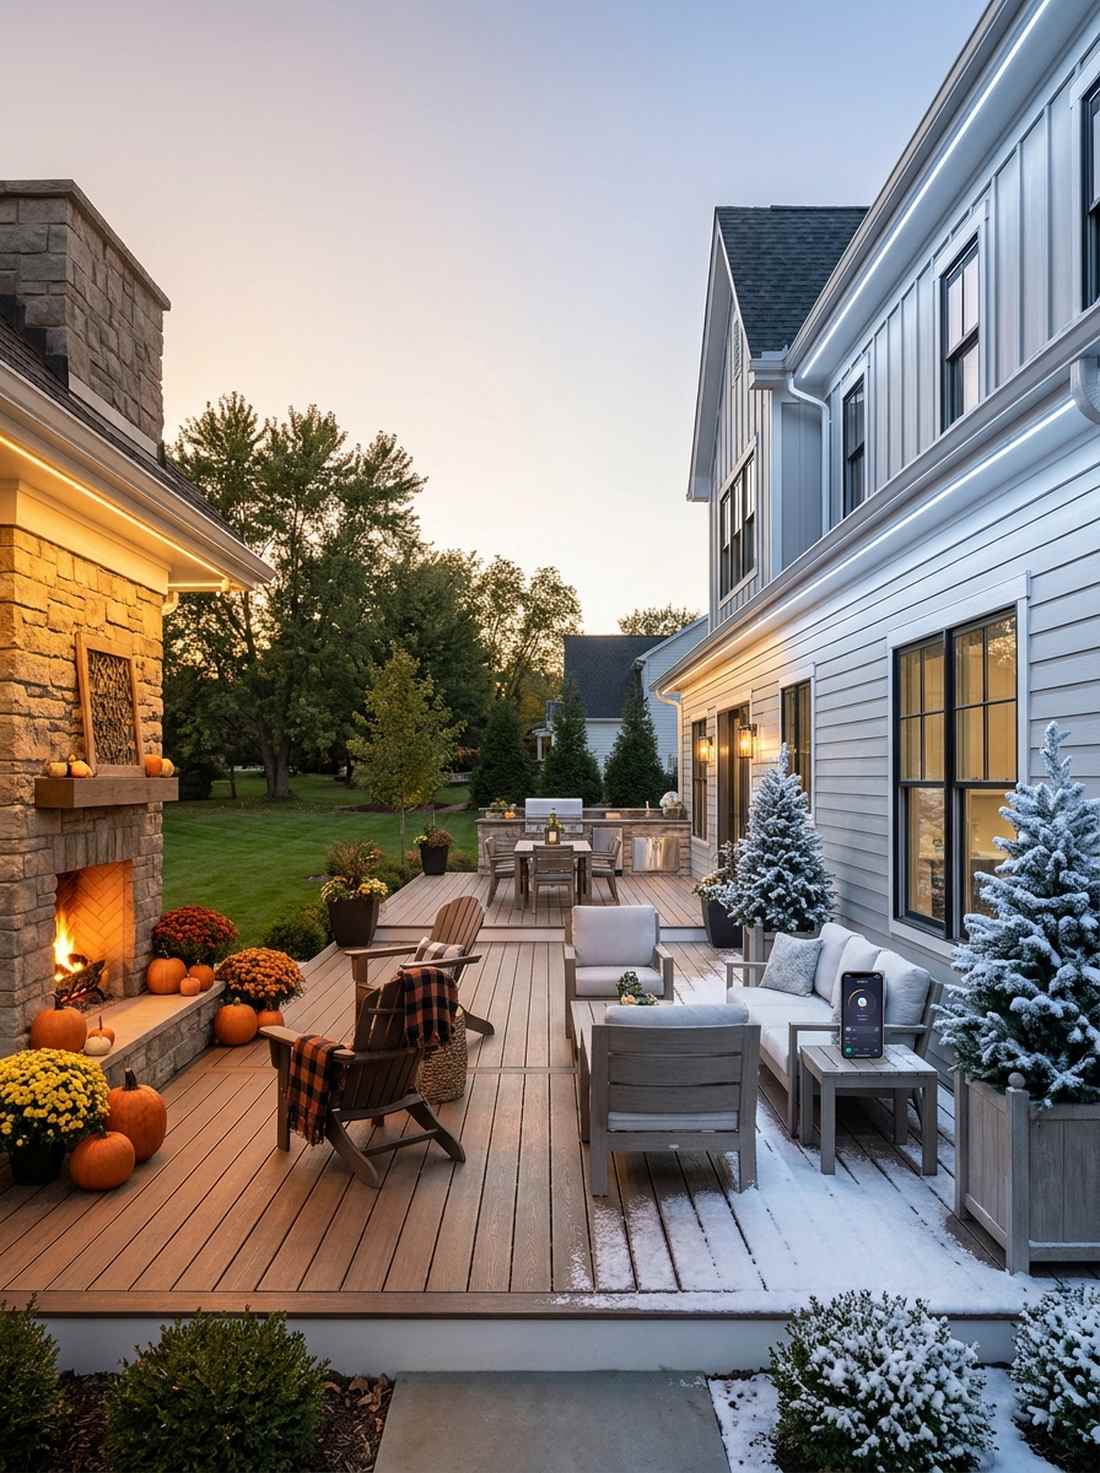
- Enclosure Over Exposure: Designers bypass expensive masonry by using UV-coated faux ivy screens and bulk privacy lattice kits to create instant wind shelter.
- Scale Reduction: Anchoring the visual height with heavy-duty commercial string light strands brings down the perceived ceiling, making expansive spaces feel wonderfully intimate.
- Layered Lighting: Integrating weatherproof ambient LED kits alongside premium gel-fuel fire features establishes an expensive glow for a fraction of hardwiring costs.
- Textural Depth: The secret to high-end lounging involves layering mildew-resistant outdoor plush inserts with all-weather poly-rattan furniture sets.
Sheltered Seating Zones for Cozy Gardens
1. Corner Pocket Seating
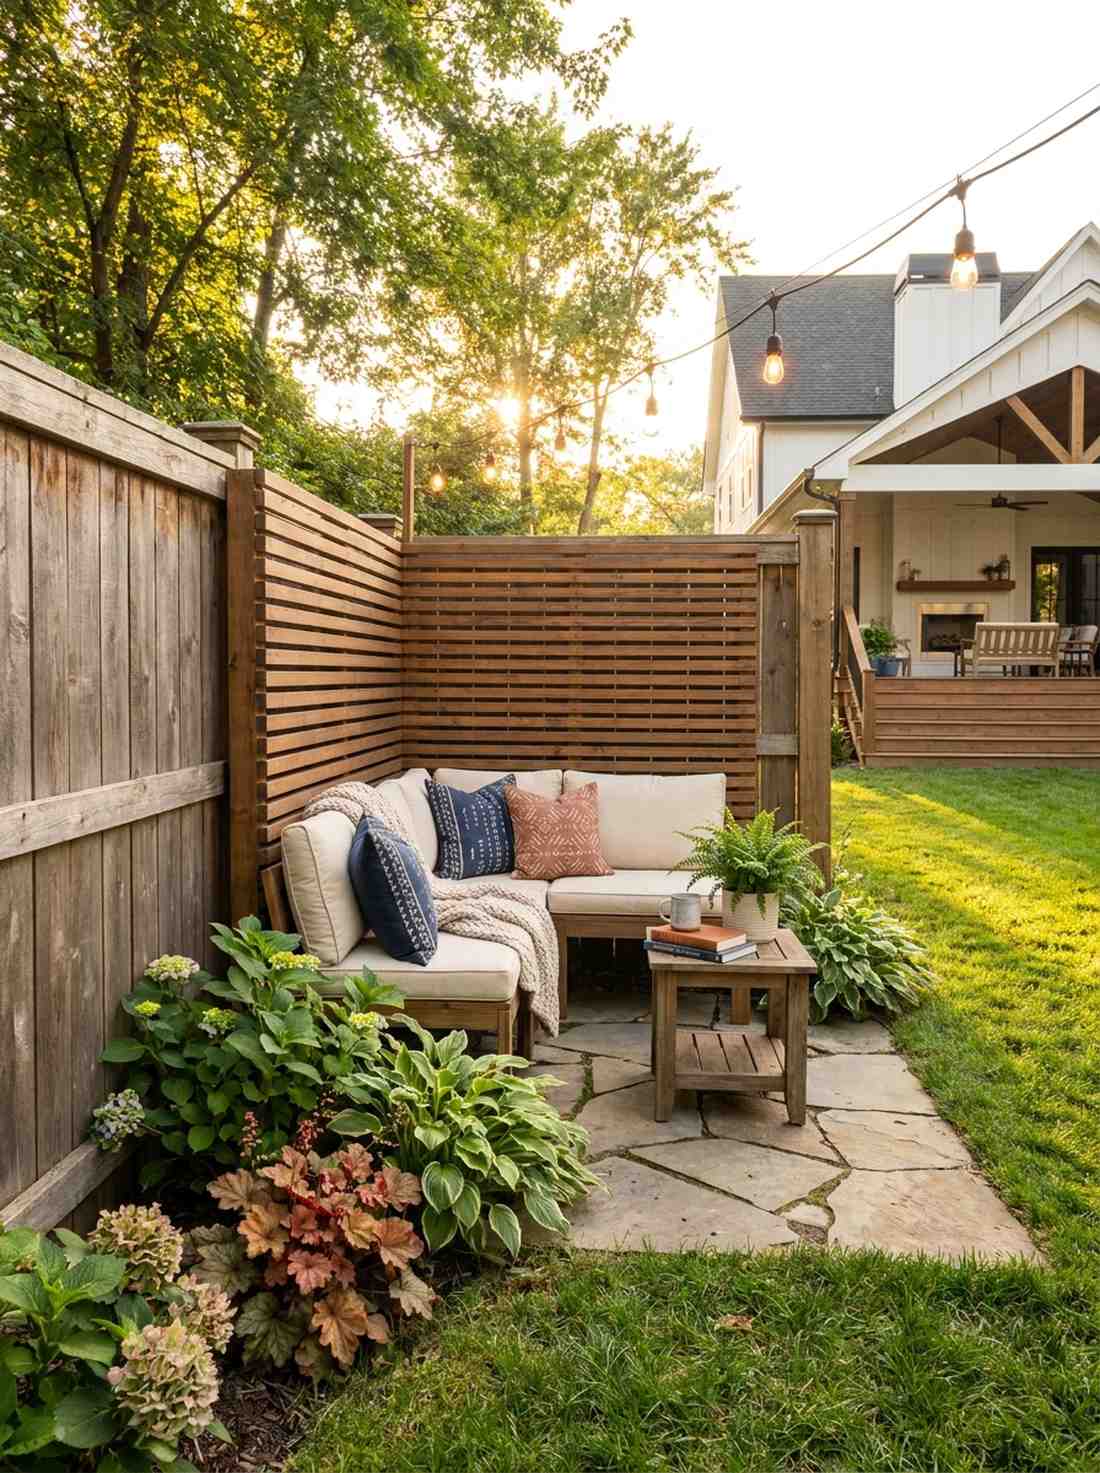
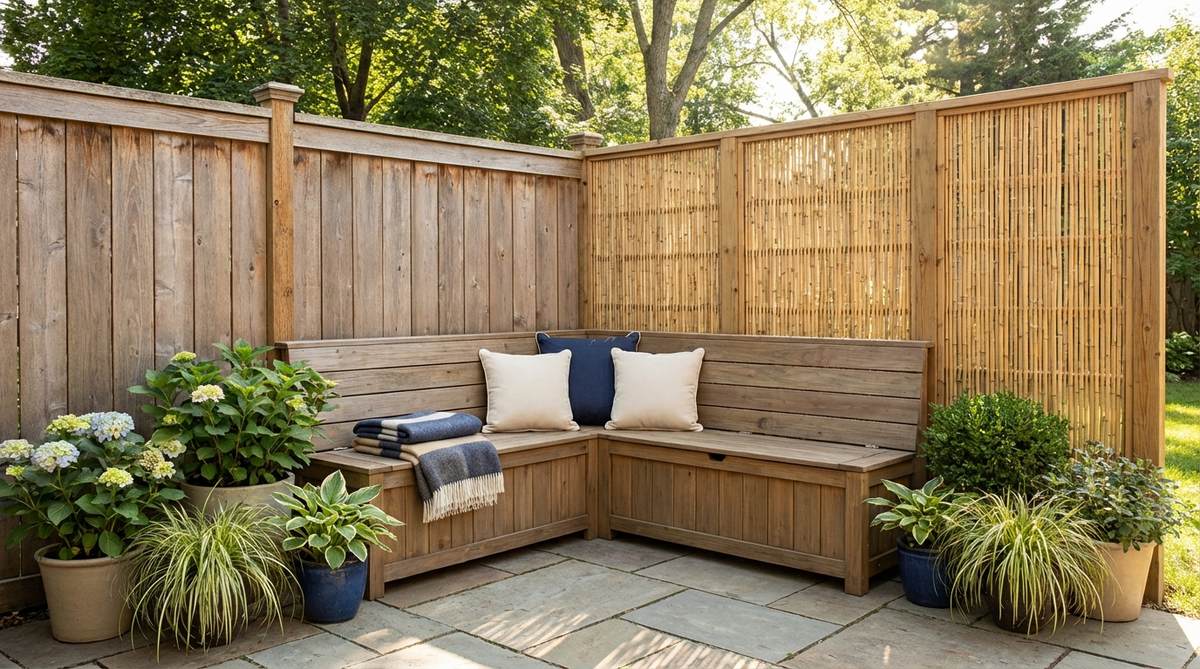
Feels like a secluded reading nook tucked away from the world. Establishing a private corner garden bench provides immense psychological comfort. Works exceptionally well for a shaded balcony or an unused fence intersection.
Most overlook the power of corner angles, but leveraging existing fence lines delivers a surprisingly premium look without any construction. By securing a slatted wood backing, you instantly mimic high-end outdoor patio seating kits.
You can pull this off for around $40–$75 depending on the wood used. Save this to your DIY weekend garden board for quick reference.
- Key Materials: Pre-stained wood slats, weatherproof deck screws
- Vibe / Style: Minimalist hidden refuge
- Difficulty: Easy beginner setup
- Budget Breakdown: Materials: $45 | Base Hardware: $15
- Creator’s Tip: Angle the seating exactly 45 degrees toward the sunset to capture the best late-afternoon golden hour light.
- Smart Sourcing: pre-cut cedar slat bundles or weatherproof corner bracket sets.
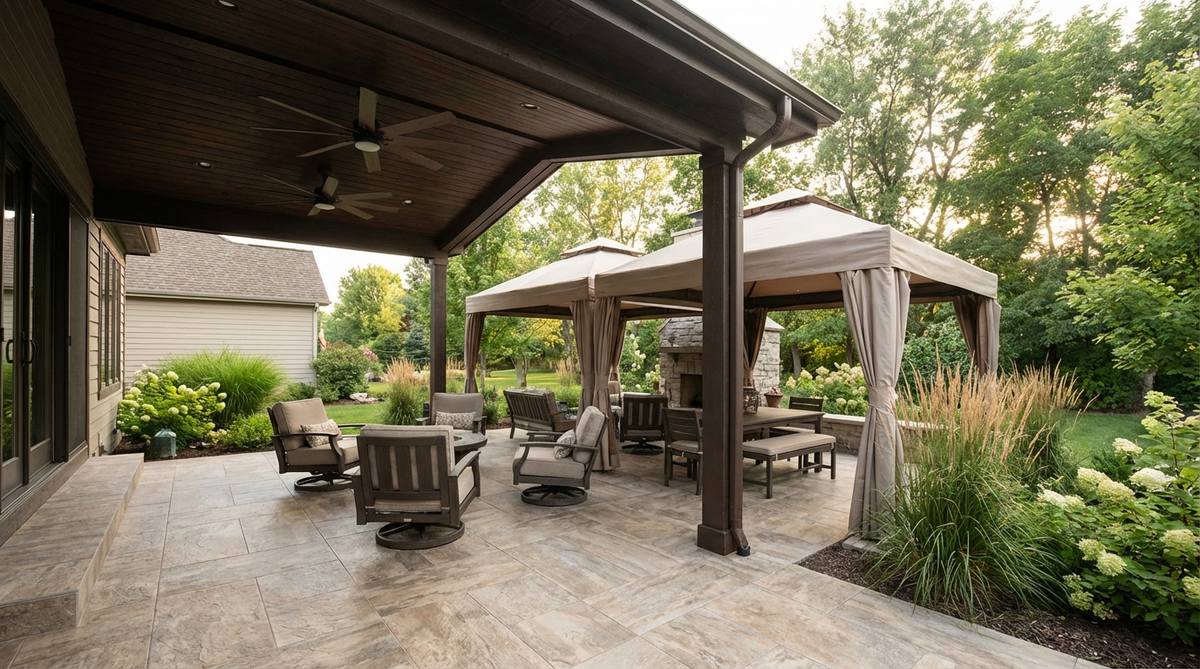
2. Pergola-Covered Lounge
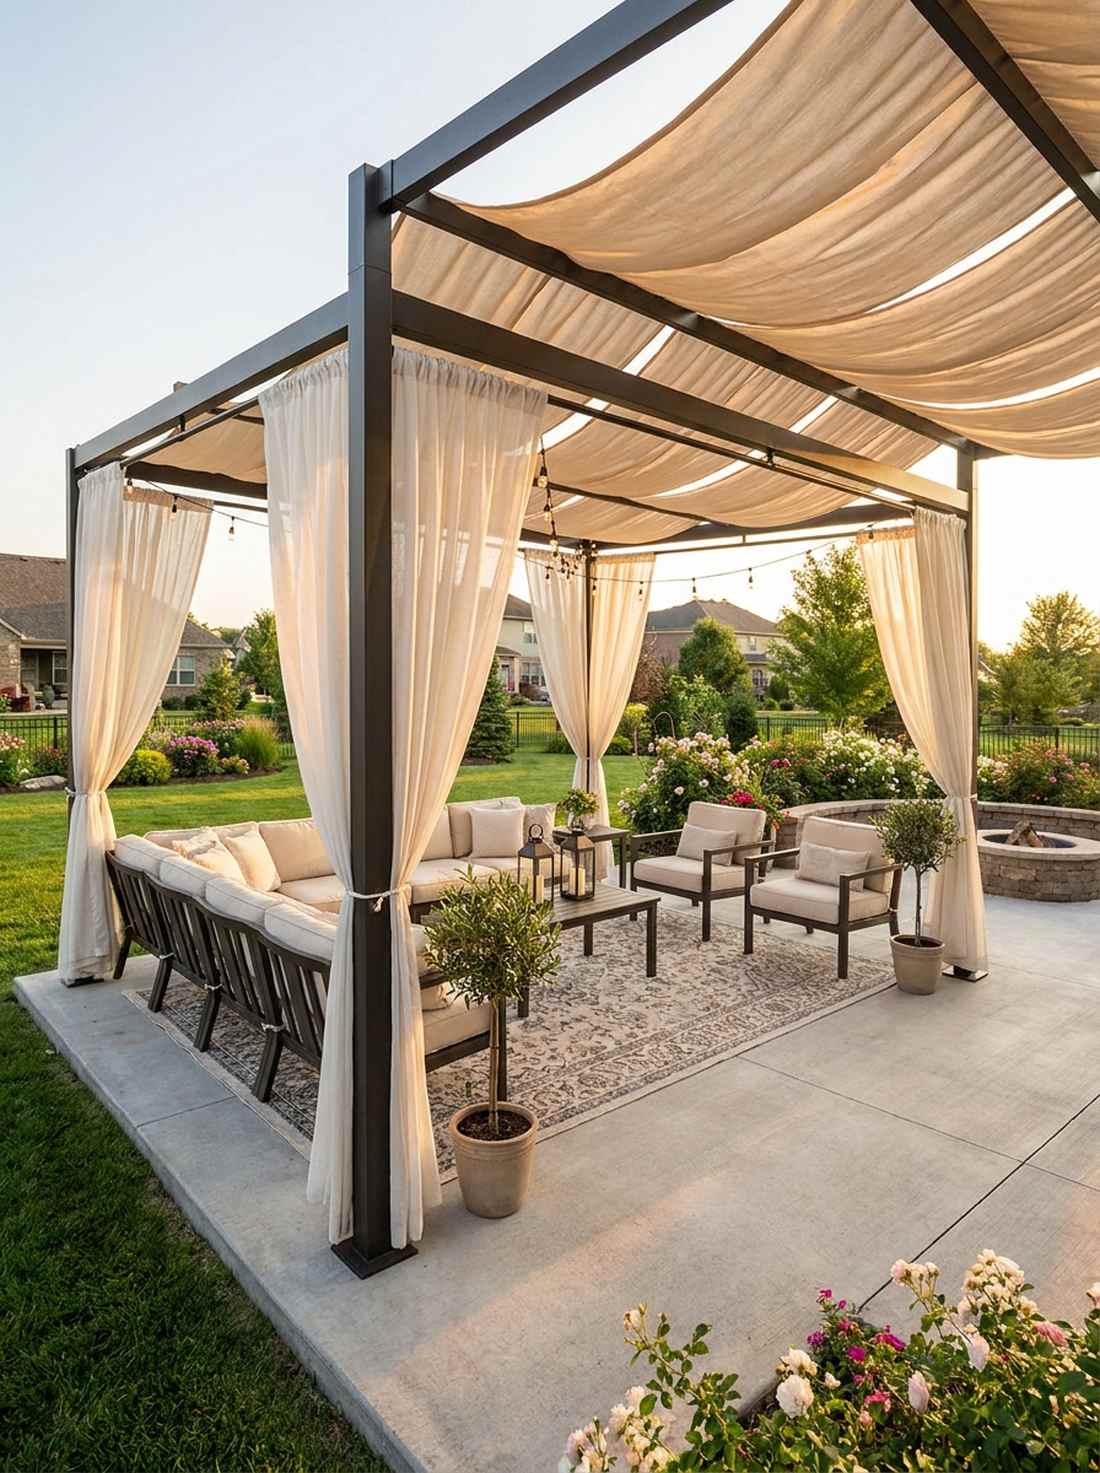
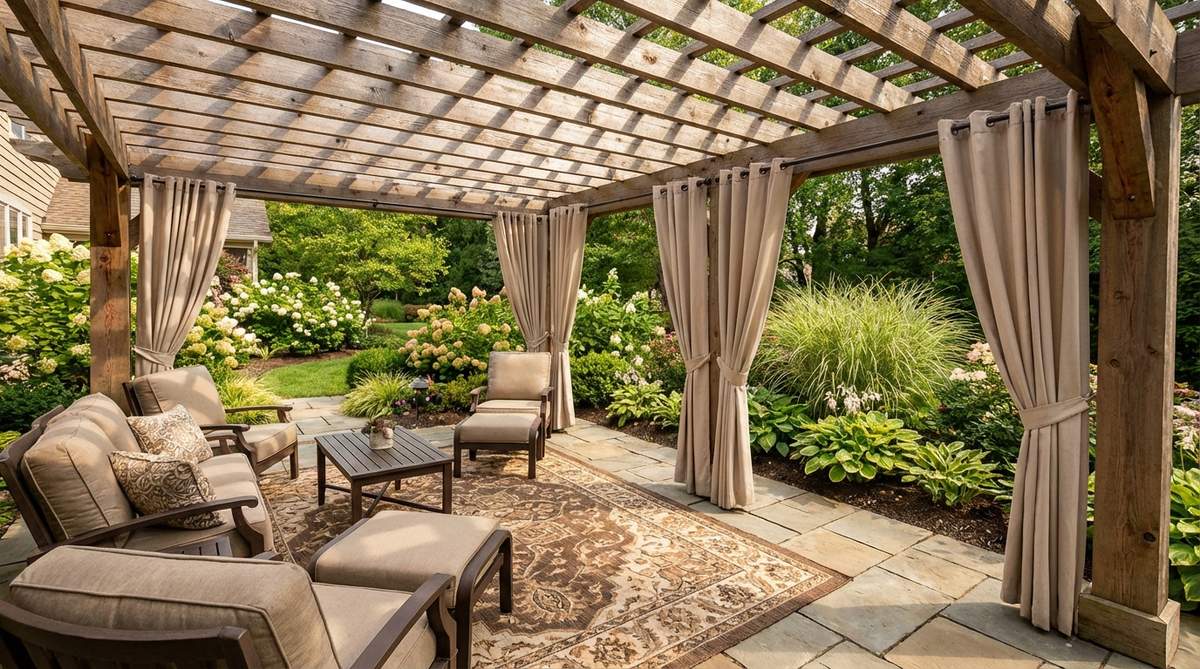
Creates the sensation of an open-air Mediterranean resort. A draped pergola shade canopy is the ultimate hack for overhead enclosure. Perfect for transforming an exposed concrete slab into a proper outdoor living room.
Forget hiring expensive contractors; installing a modular frame system gives a designer-level finish for a fraction of the price. Integrating heavy-duty outdoor curtain panels blocks harsh crosswinds while looking incredibly lavish.
Expect to spend roughly $150–$300 if you use a ready-to-assemble kit. It’s a fast upgrade that completely changes the vibe.
- Key Materials: Modular aluminum pergola kit, outdoor sheer curtains
- Vibe / Style: Resort-style luxury lounging
- Difficulty: Moderate weekend build
- Budget Breakdown: Frame: $150 | Fabric: $50
- Creator’s Tip: Use UV-resistant fabric sprays on your canopy to double its lifespan against sun bleaching.
- Smart Sourcing: waterproof pergola shade covers (pre-sized) or heavy-duty outdoor curtain rod kits.
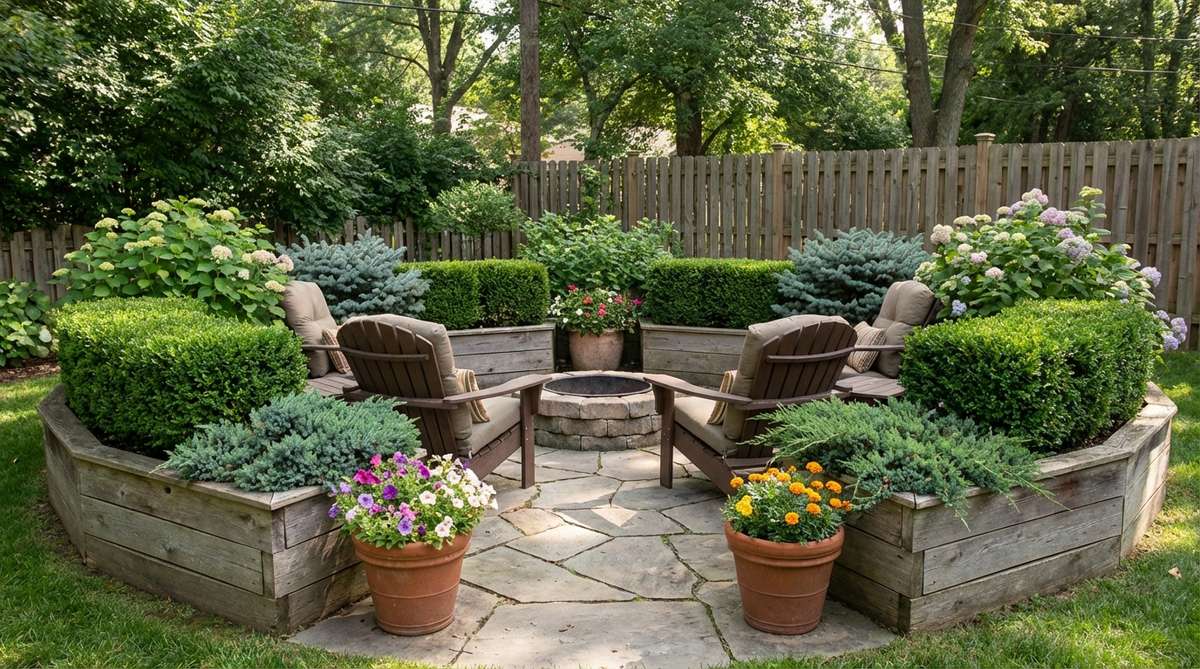
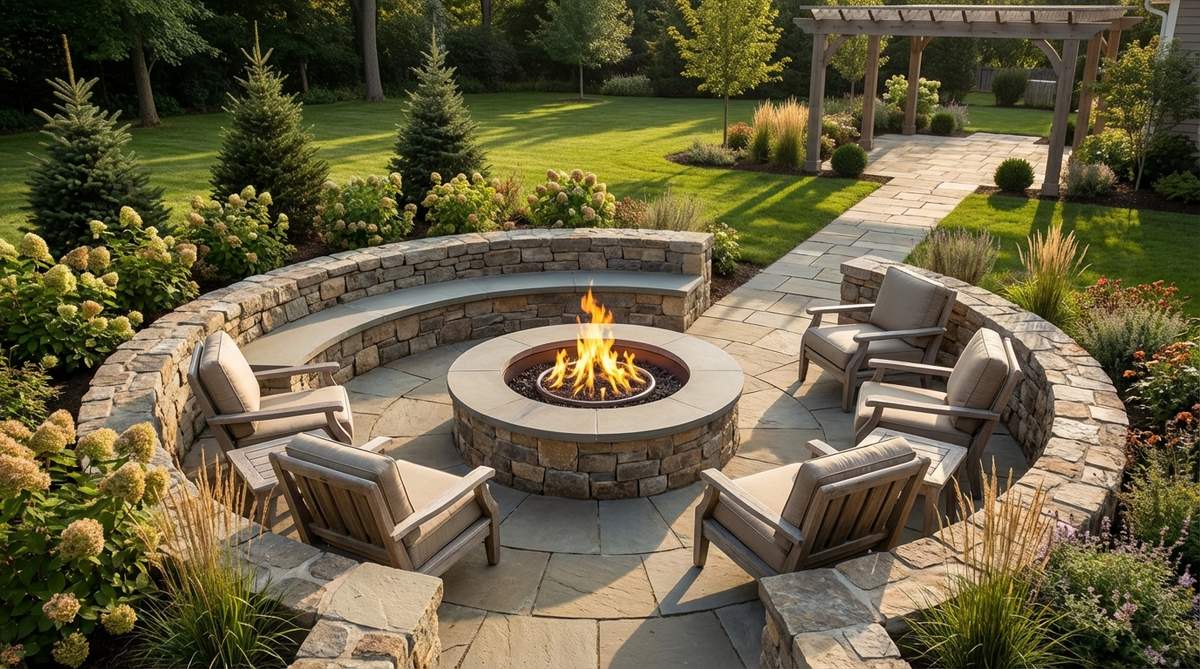
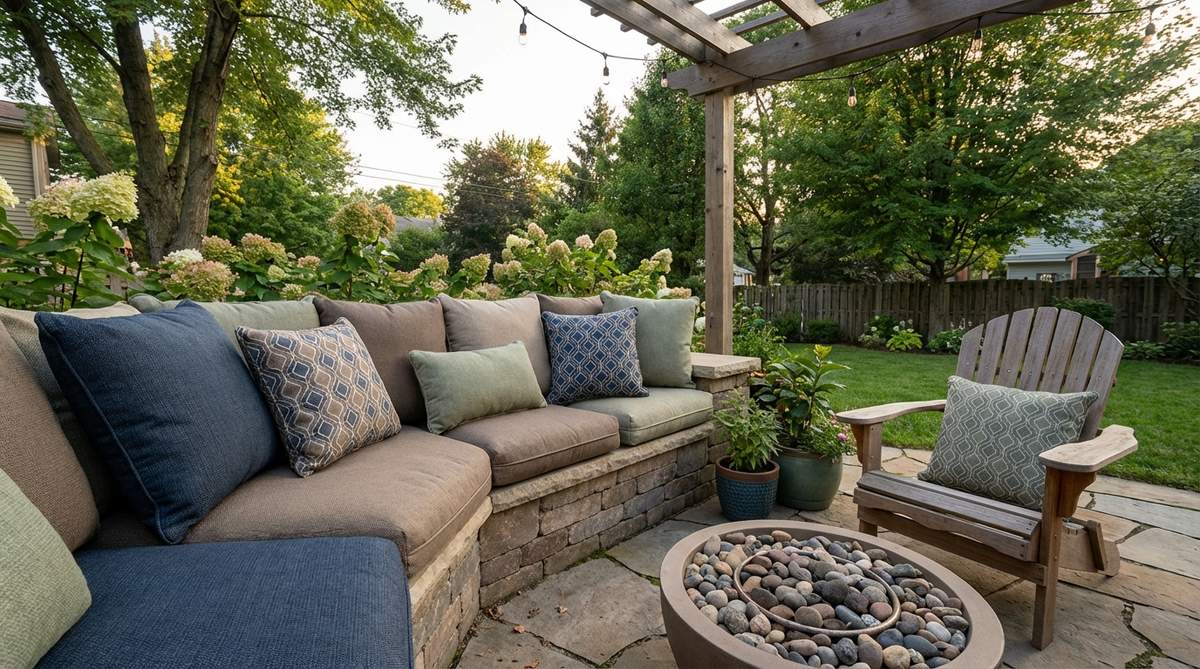
3. Built-In Seat Walls
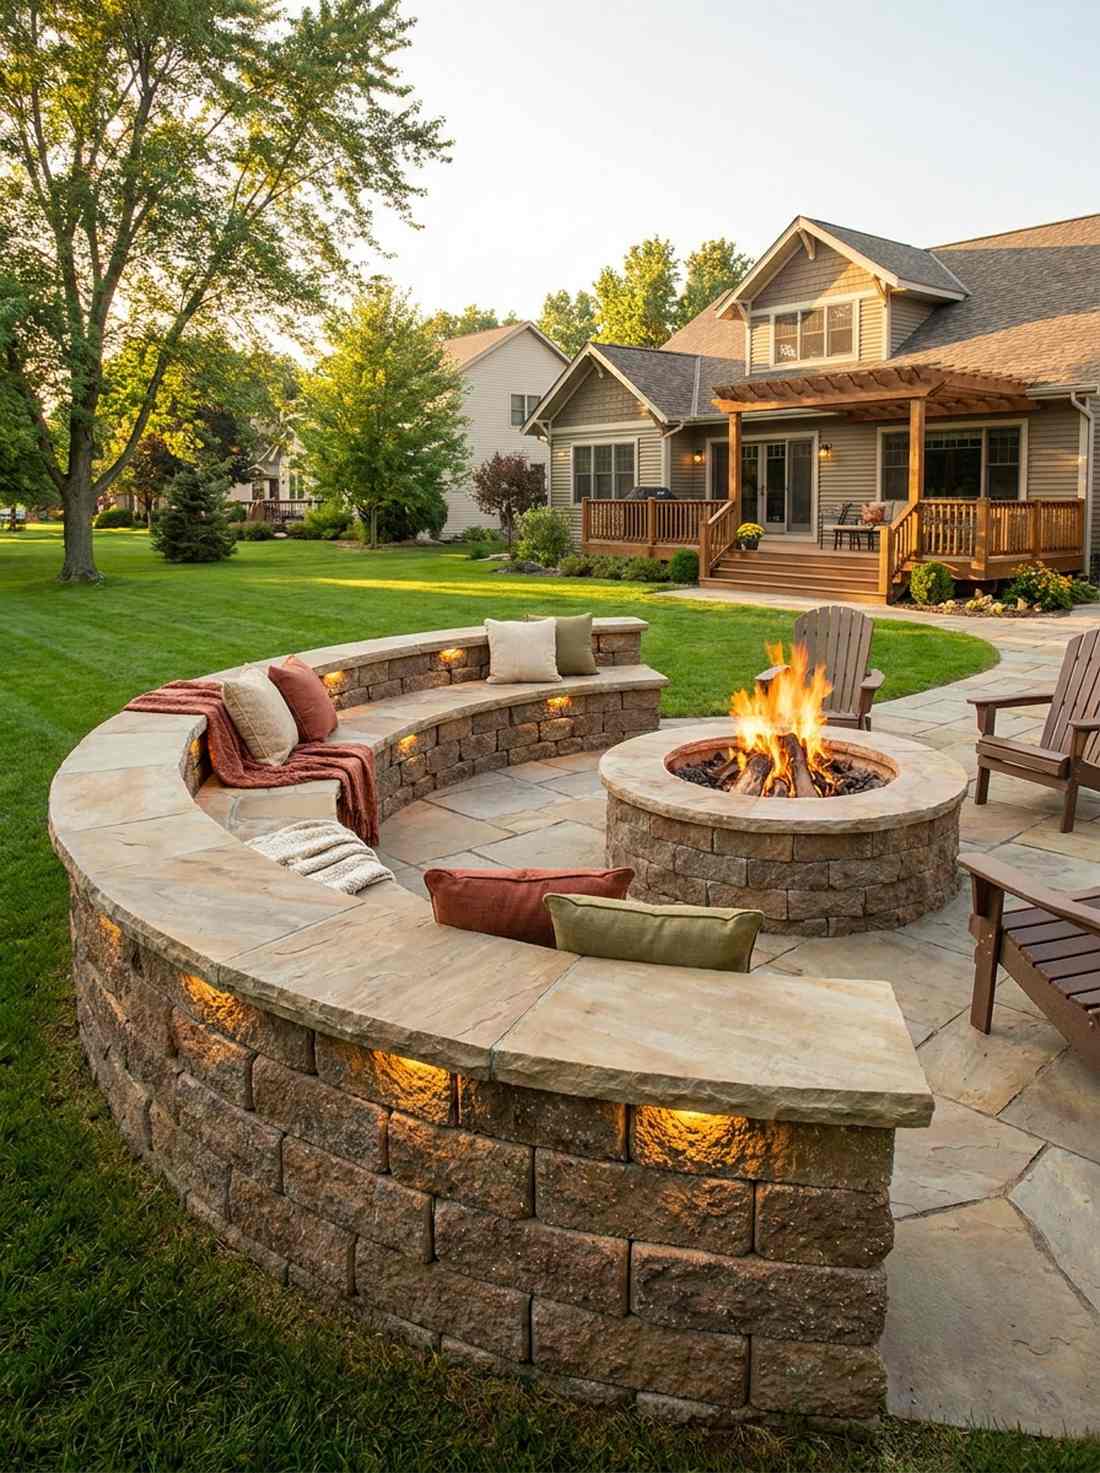
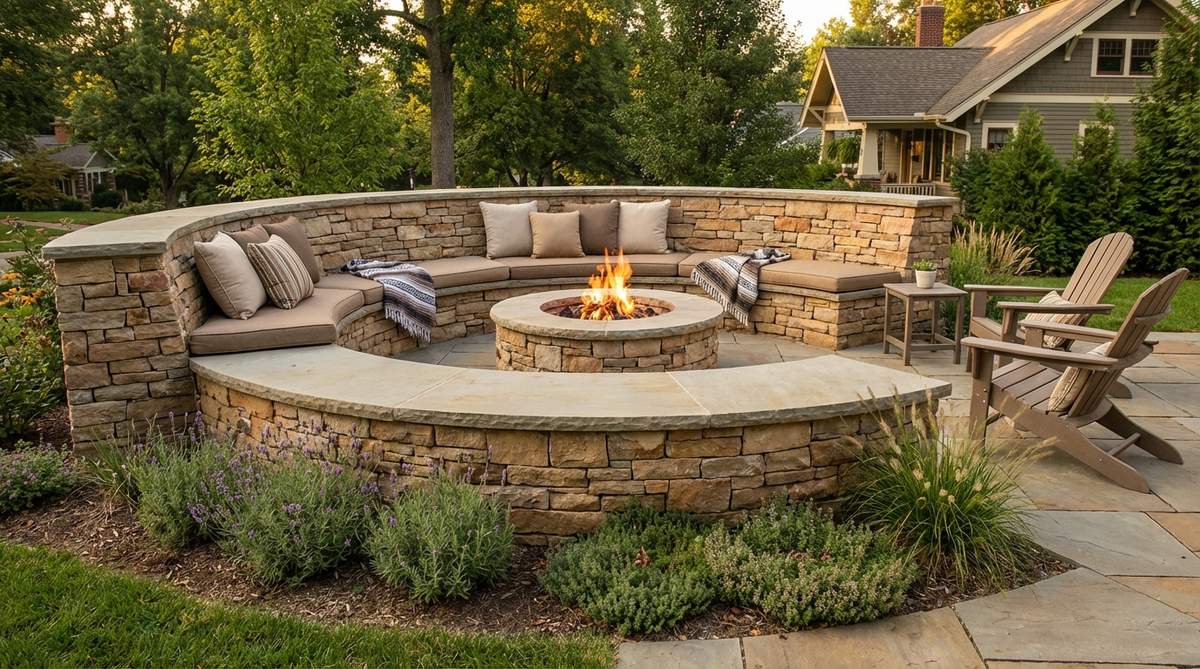
Evokes the warmth of a historic European courtyard gathering space. A curved masonry seating wall serves as both structural boundary and functional furniture. Incredible for grounding a fire pit zone in a large, open yard.
While traditional concrete pours cost thousands, utilizing dry-stack retaining wall blocks looks far more expensive than it actually is. Top it off with smooth flagstone caps, and you instantly eliminate the need to buy bulky patio chairs.
You can execute a stunning half-circle for about $200–$400 in raw materials.
- Key Materials: Dry-stack concrete blocks, landscape construction adhesive
- Vibe / Style: Permanent rustic courtyard
- Difficulty: Heavy lifting involved
- Budget Breakdown: Blocks: $250 | Adhesive & Caps: $100
- Creator’s Tip: Leave a small gap at the base to feed low-voltage LED strip wires for stunning under-seat illumination.
- Smart Sourcing: commercial-grade landscape block adhesive or bulk flagstone cap pallets.
4. Tree Canopy Shelter
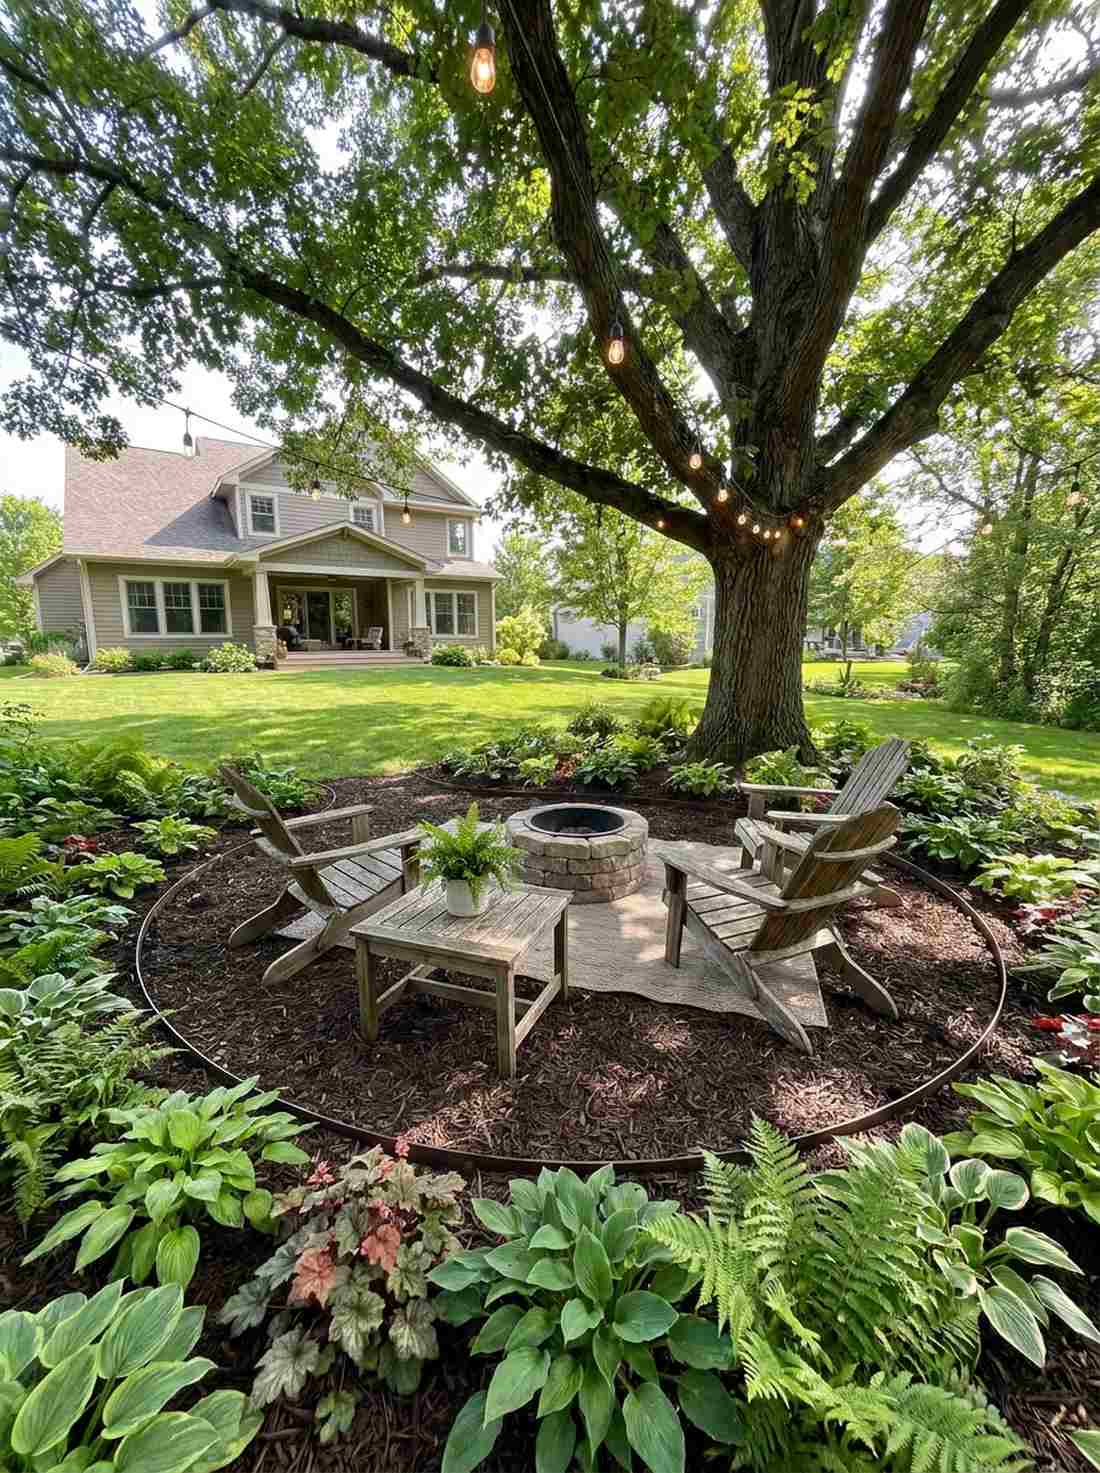
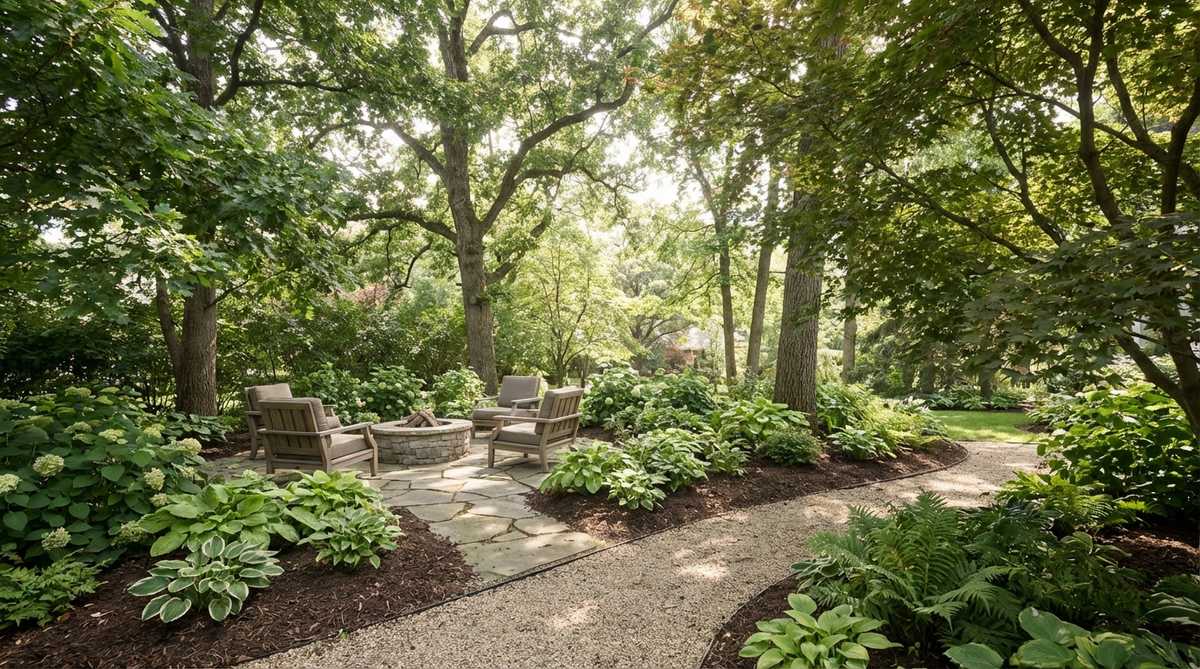
Feels like stepping into an enchanted woodland sanctuary. Designing a mature tree under-canopy lounge capitalizes on nature’s existing architecture. Works brilliantly for sprawling lawns that lack structural shade.
Ignoring the space under mature trees is a huge missed opportunity, but carving out a mulched footprint elevates the entire yard’s aesthetic. Surrounding the base with shade-tolerant border plants creates a lush, organic living room.
The total cost is ridiculously low, usually around $30–$60 for edge materials and mulch. Pin this if you’re planning a small space upgrade!
- Key Materials: Premium bark mulch, flexible landscape edging
- Vibe / Style: Organic forest retreat
- Difficulty: Extremely simple
- Budget Breakdown: Mulch: $25 | Edging: $15
- Creator’s Tip: Never mound mulch directly against the tree trunk to prevent rot; keep a two-inch breathing gap.
- Smart Sourcing: no-dig landscape border kits or weed-barrier landscape fabric rolls.
This next setup is ridiculously cheap but looks like a $1,000 custom landscape installation…
5. Alcove Garden Room
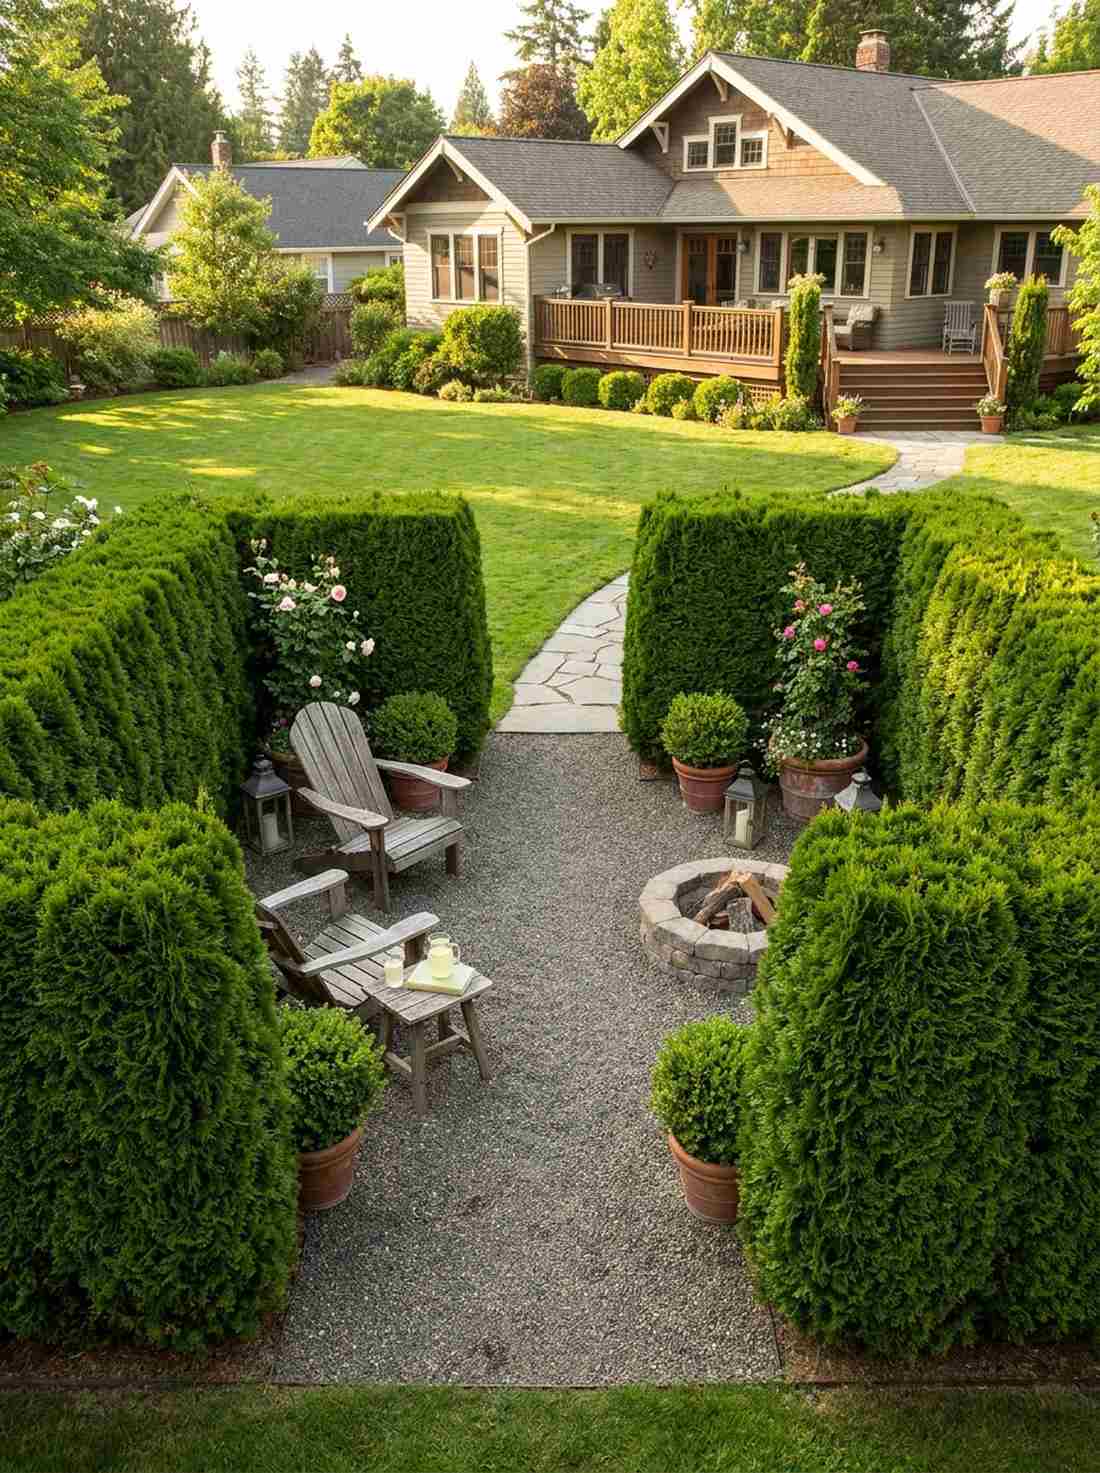
Brings out an aura of a secretive, high-society garden club. A carved hedge alcove retreat uses dense greenery to form literal walls. The ultimate use-case for long, narrow side yards needing a distinct destination.
Most rely on wooden fences, but planting a U-shaped evergreen boundary delivers a much richer, oxygenated atmosphere. Filling the floor with crisp gravel anchors the space, clearly signaling it as a premium relaxation zone.
Depending on plant sizes, expect an initial investment of $100–$250.
- Key Materials: Fast-growing evergreen shrubs, crushed granite gravel
- Vibe / Style: Classic botanical garden
- Difficulty: Patience required for growth
- Budget Breakdown: Shrubs: $150 | Gravel base: $50
- Creator’s Tip: Lay heavy-duty weed fabric before dropping the gravel to prevent constant maintenance headaches.
- Smart Sourcing: bulk boxwood starter plants or commercial-grade weed barrier fabric.
6. Sunken Conversation Pit
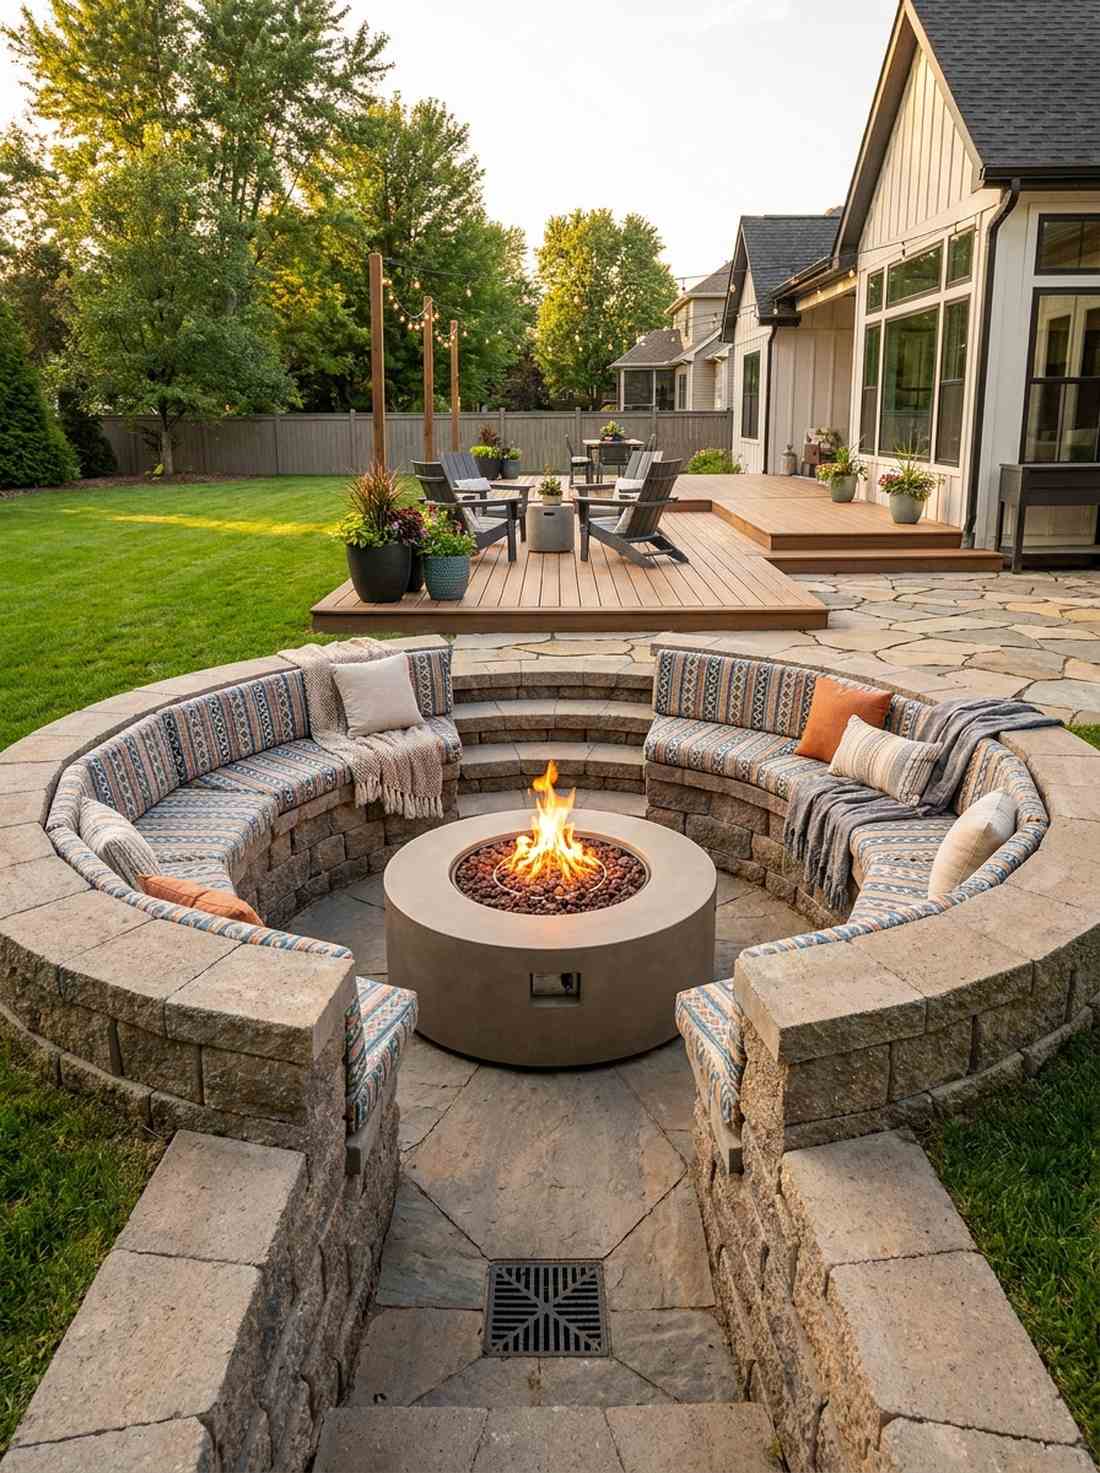
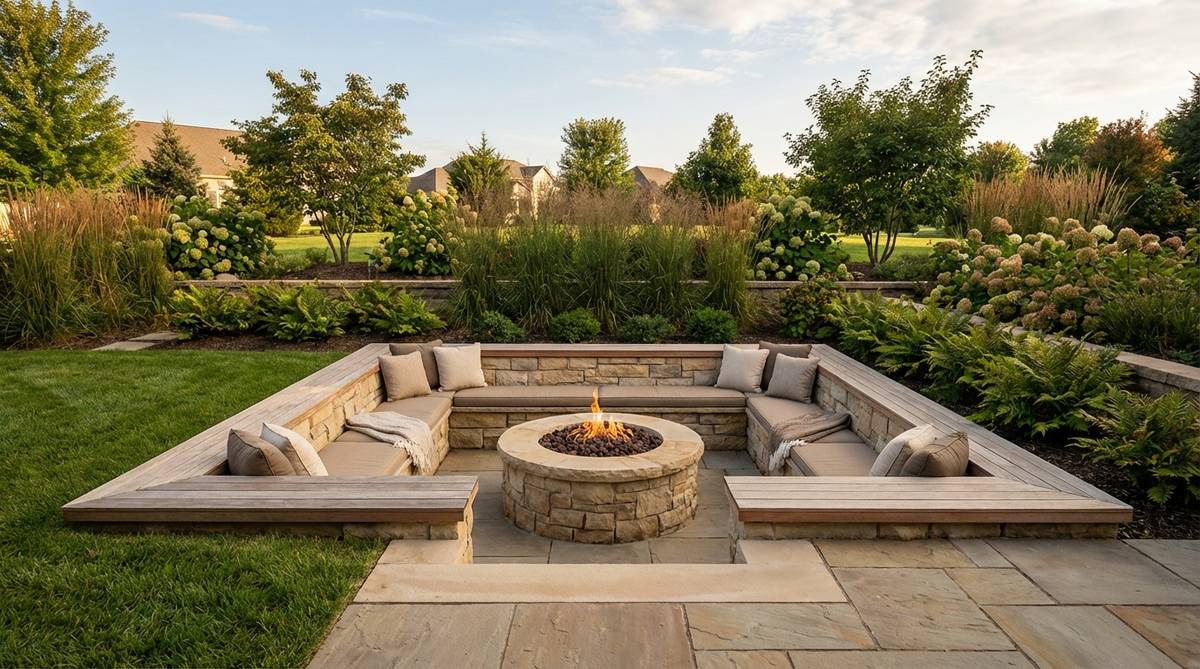
Wraps you up like a cozy, retro-modern cocoon. Digging a recessed outdoor fire lounge dramatically drops the eyeline away from nosy neighbors. Brilliant for flat, boring backyard terrain that needs sudden architectural interest.
Instead of building up, going down completely alters the microclimate by shielding guests from chilly crosswinds. With a central heat source, this setup absolutely screams premium real estate without requiring a contractor’s permit.
DIY excavation and block work usually lands between $300–$600 depending on depth.
- Key Materials: Shovels, retaining blocks, drainage gravel
- Vibe / Style: Mid-century modern hangout
- Difficulty: Labor intensive
- Budget Breakdown: Excavation tools: $0 (if owned) | Wall blocks: $350
- Creator’s Tip: Install a proper French drain at the lowest point, or your beautiful pit will become a muddy pond after heavy rain.
- Smart Sourcing: corrugated drainage pipe coils or heavy-duty retaining wall anchors.
7. Hammock Corner Retreat

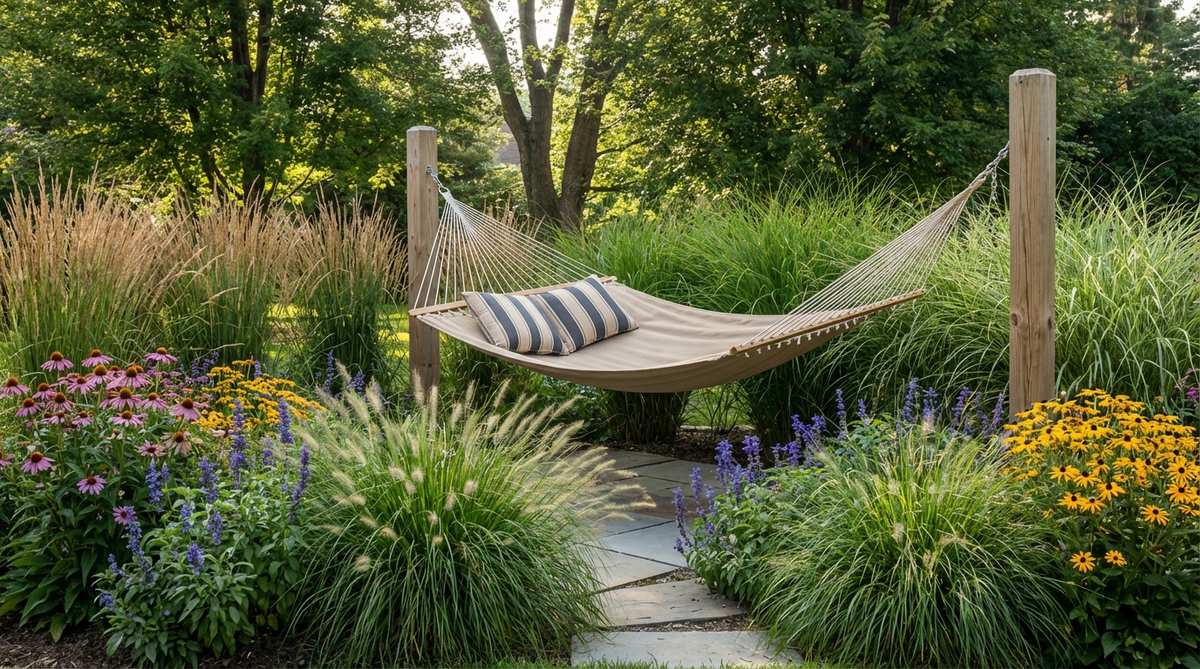
Radiates the carefree energy of a tropical island escape. Setting up a boho hammock relaxation zone is the ultimate low-footprint lounge. It’s a lifesaver for renters who cannot permanently alter their outdoor spaces.
Many string these up poorly, but using heavy-duty hardware and a thick, weather-treated fabric instantly upgrades the experience. Framing the base with potted ornamental grasses creates a stunning eye-level privacy screen while you sway.
You can assemble a highly durable setup for just $40–$80. Highly recommended for a quick weekend win.
- Key Materials: Weatherproof hammock, heavy-duty tree straps
- Vibe / Style: Effortless bohemian lounge
- Difficulty: Five-minute setup
- Budget Breakdown: Hammock: $35 | Mounting kit: $20
- Creator’s Tip: Use wide, flat tree straps instead of ropes to prevent damaging the tree bark over time.
- Smart Sourcing: UV-coated parachute hammocks or load-tested tree suspension strap kits.
8. Covered Patio Extension
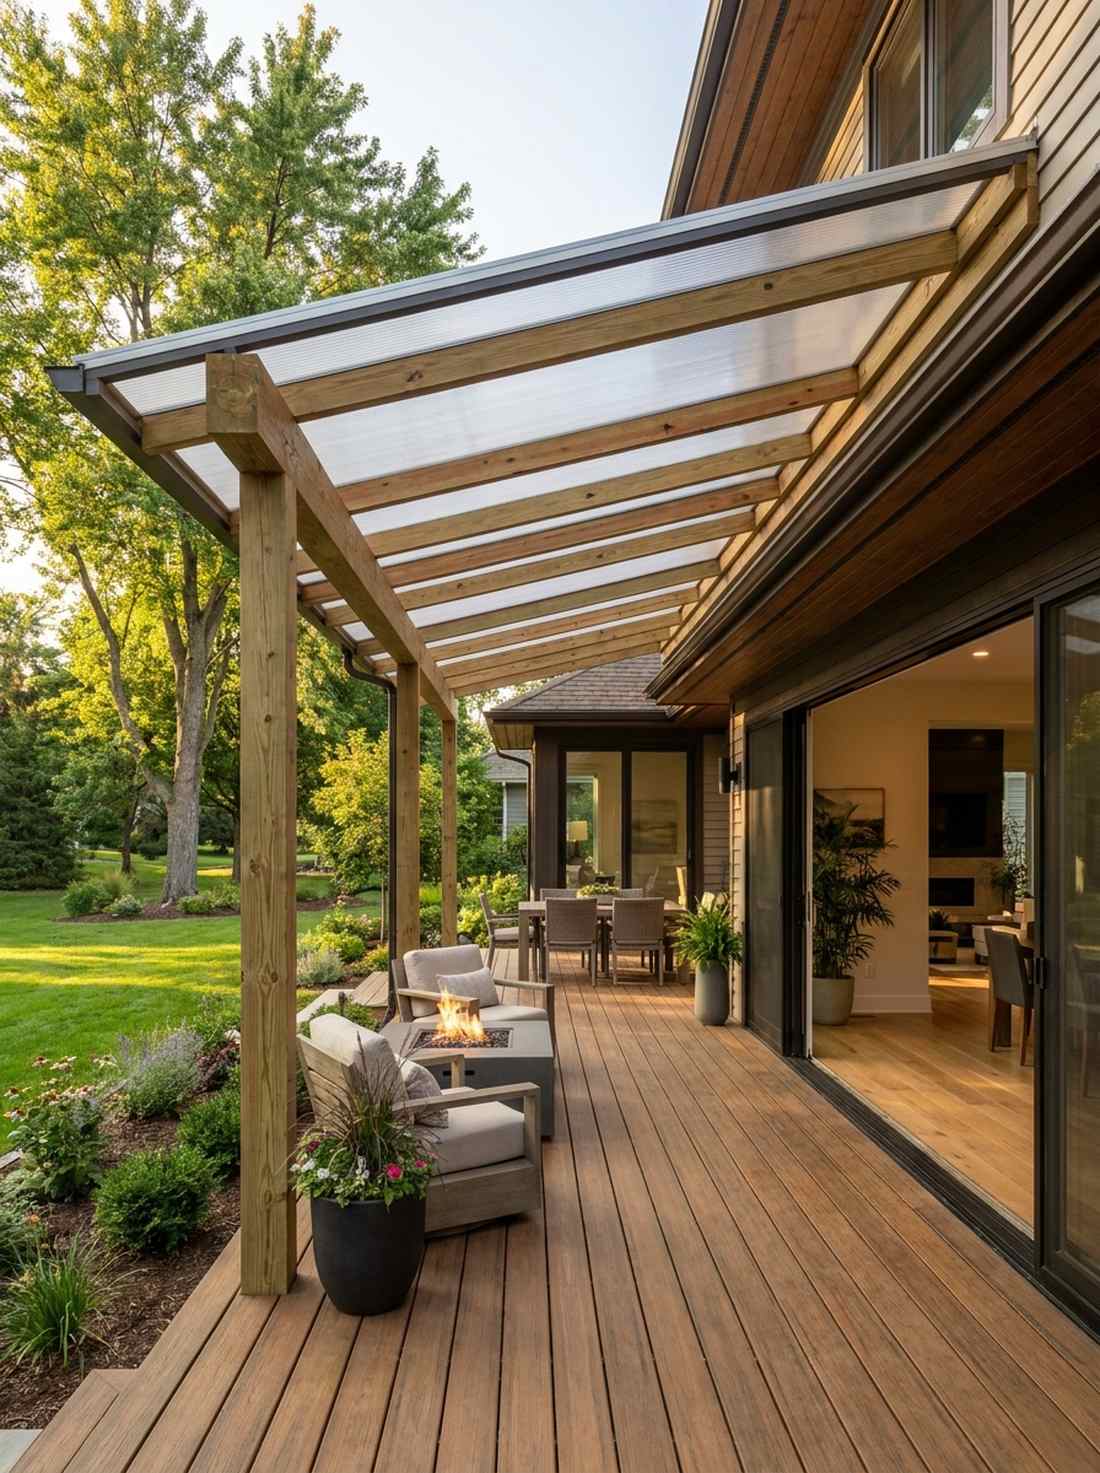
Blurs the line between indoor living and outdoor wilderness perfectly. A hard-roof patio transition area extends your home’s square footage outward. Essential for regions where sudden rainstorms typically ruin outdoor dining plans.
Rather than a flimsy pop-up tent, attaching a slanted, permanent polycarbonate canopy offers a highly durable, modern architectural edge. It traps heat efficiently in the autumn while reflecting blistering summer UV rays away from your furniture.
Materials for a sturdy extension run between $400–$800, adding massive home value.
- Key Materials: Polycarbonate roofing panels, pressure-treated lumber
- Vibe / Style: Seamless modern indoor-outdoor
- Difficulty: Advanced DIY
- Budget Breakdown: Timber frame: $300 | Roof panels: $250
- Creator’s Tip: Match the flooring material of the patio exactly to your indoor flooring for a flawless optical illusion of space.
- Smart Sourcing: UV-blocking polycarbonate roof sheets or weather-sealed joist hanger kits.
Ambient Lighting Concepts for Cozy Garden Life
Everyone skips this lighting trick… until they realize it instantly doubles the visual warmth of any outdoor space.
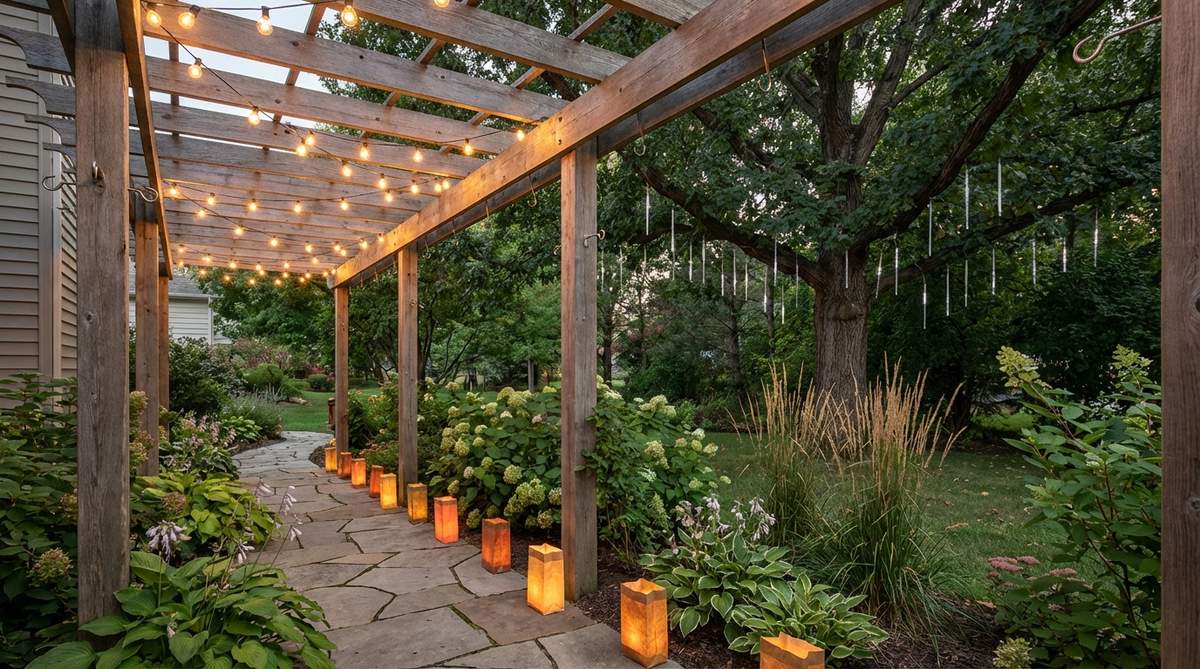
9. String Light Canopy

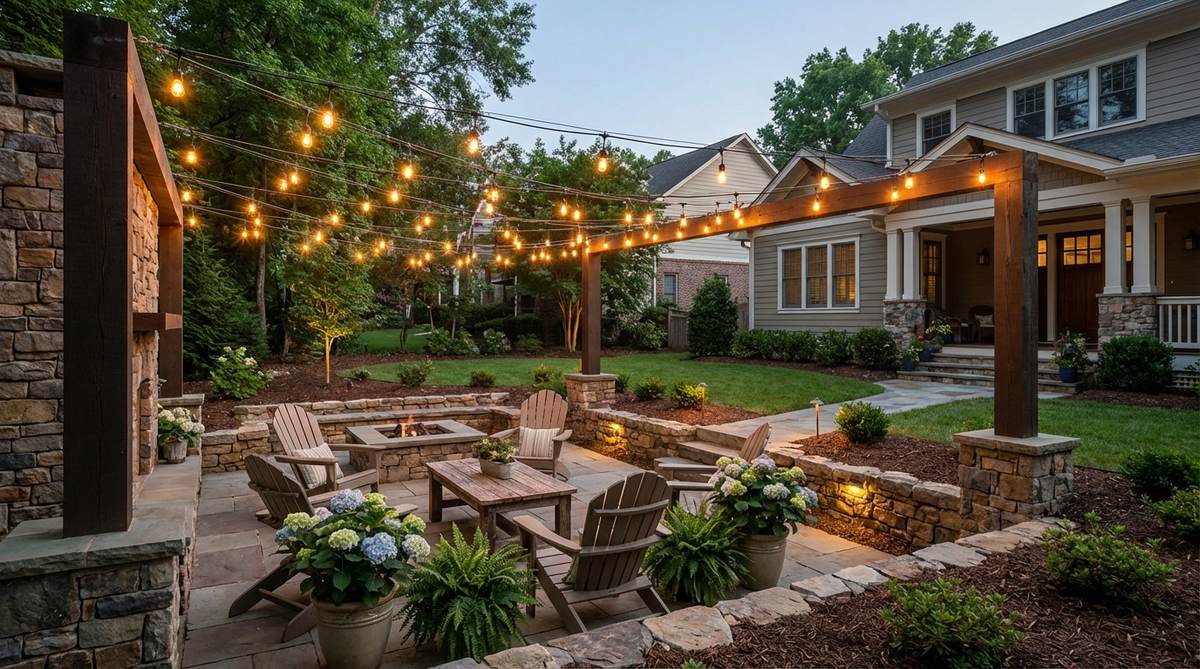
Feels like dining under a blanket of warm, glowing stars. Suspending an overhead Edison bulb grid creates an instant ceiling of light. Ideal for framing a patio dining table or a wide-open courtyard.
Most buy cheap plastic sets that die in a month, but investing in commercial-grade, rubberized strands guarantees a brilliant, expensive-looking setup year-round. Crisscrossing the lines heavily amplifies the cozy garden life aesthetic dramatically.
A thick canopy layout costs about $60–$120. Save this to your DIY weekend garden board for inspiration.
- Key Materials: Commercial string lights, stainless steel guide wire
- Vibe / Style: Festive bistro dining
- Difficulty: Easy but requires a ladder
- Budget Breakdown: Light strands: $70 | Wire kit: $30
- Creator’s Tip: Always run a steel guide wire first, then zip-tie the lights to it to prevent drooping and cable snapping.
- Smart Sourcing: shatterproof LED string lights (bulk pack) or stainless steel wire tension kits.
10. Uplighting Trees & Shrubs
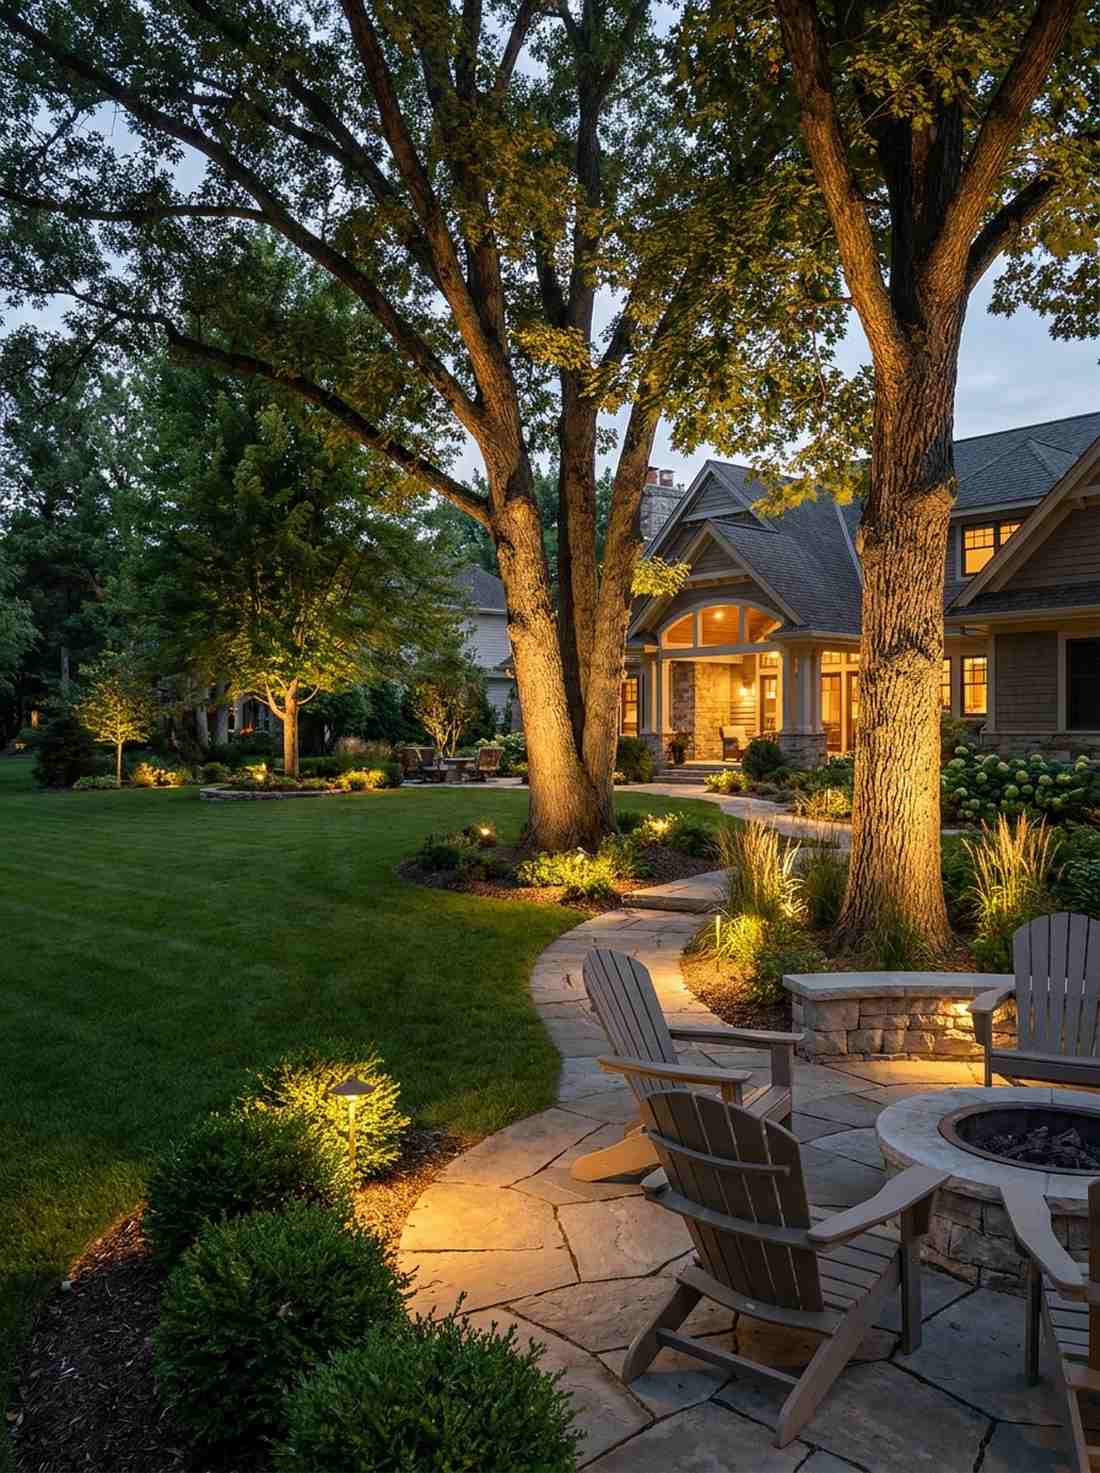
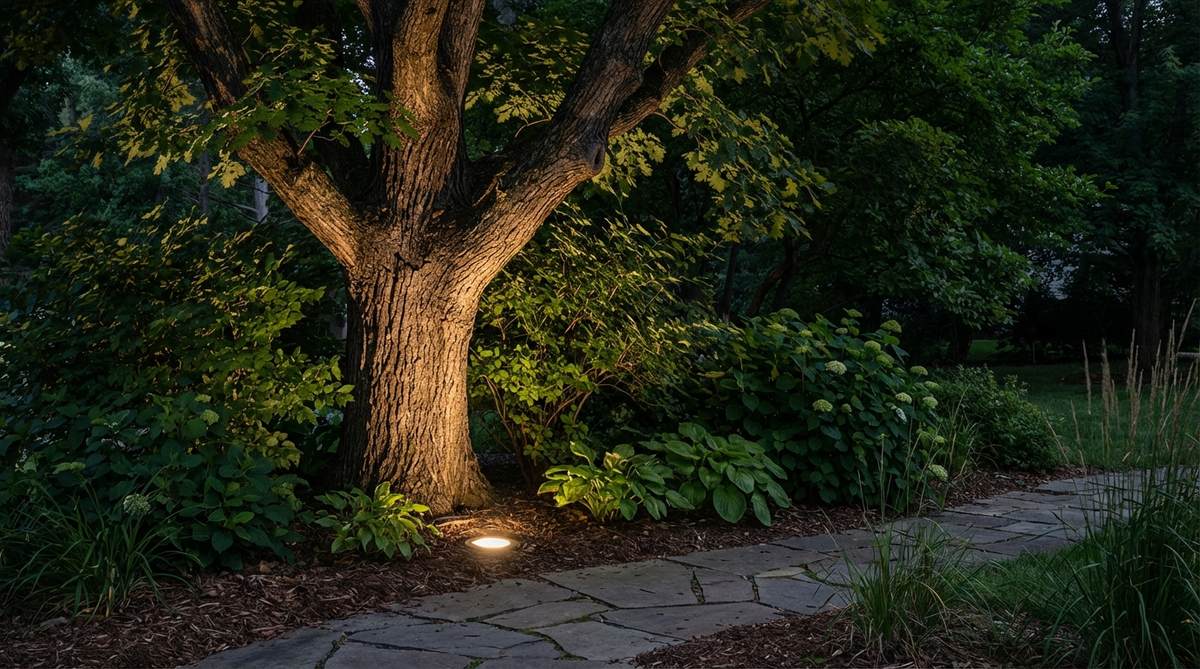
Transforms ordinary foliage into dramatic, glowing garden sculptures. Using base-level tree spotlights throws massive architectural shadows upward. Incredible for highlighting thick, mature tree trunks or detailed architectural plants.
Far too many yards stay pitch black at the borders, but hitting key trees with a 3000K warm LED totally expands the perceived size of the property. The contrast between bright bark and dark leaves gives a designer-level finish.
Grab a solid low-voltage kit for roughly $80–$150.
- Key Materials: Low-voltage LED spotlights, waterproof wiring
- Vibe / Style: Luxury estate landscaping
- Difficulty: Moderate wiring task
- Budget Breakdown: Fixture kit: $100 | Transformer: $40
- Creator’s Tip: Place the light exactly 12 inches from the trunk and angle it straight up to catch the texture of the bark.
- Smart Sourcing: low-voltage landscape lighting starter kits or heavy-duty direct burial wire rolls.
💡 Must-Have Supplies for High-End Setups
To build these setups faster and ensure they last, skip the generic craft aisles and invest in the right foundational kits.
- Base & Support: Heavy-duty weatherproofing landscape fabric (bulk roll)
- Setup Tools: Commercial-grade wire tension starter kits
- Weather/Durability Protection: UV-resistant clear acrylic spray sealants
11. Lantern Clusters
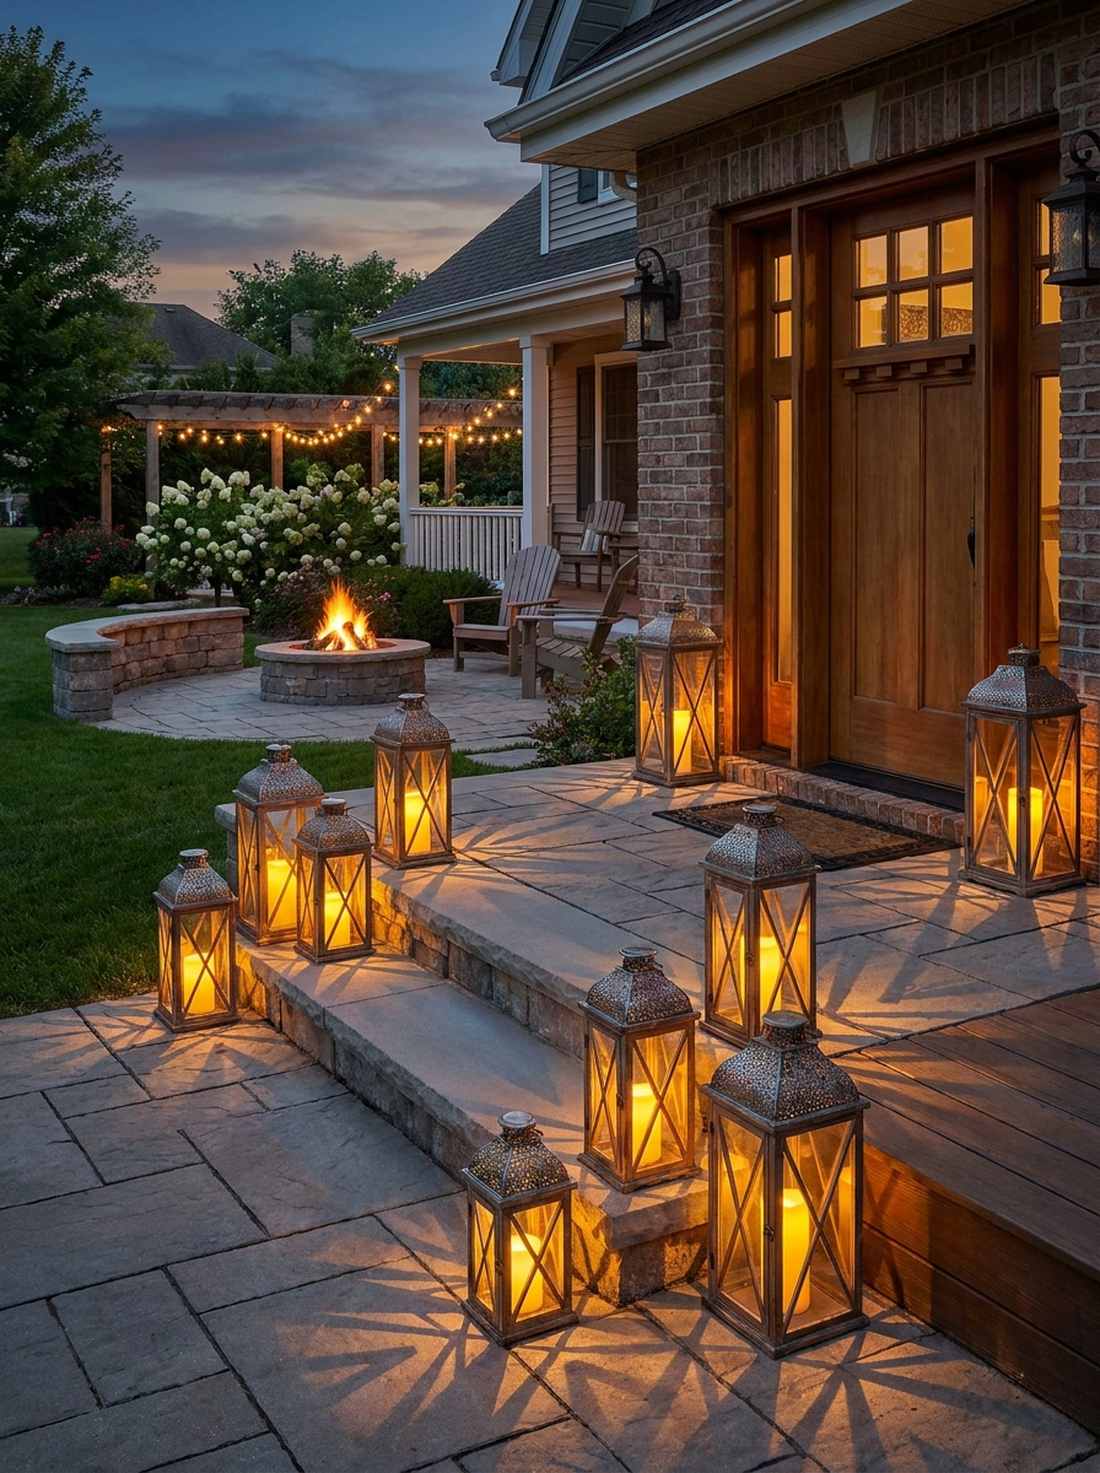
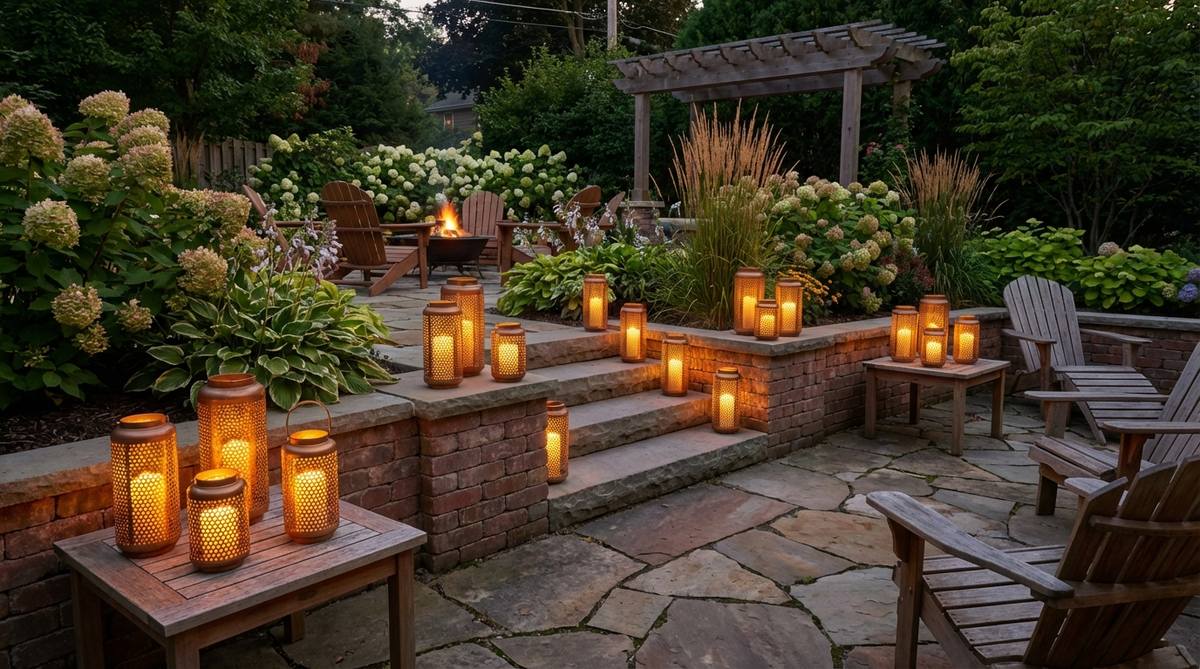
Radiates the romance of a twilight stroll through an antique village. Grouping mixed-height outdoor floor lanterns builds brilliant pockets of scattered light. Absolutely perfect for wide patio steps or flanking an entryway.
Using a single light source is boring, but clustering three different sized metal frames creates a highly curated, magazine-worthy vignette. Stuffing them with battery-operated flickers means zero fire hazard while maintaining the magic.
You can easily pull this off for around $40–$90.
- Key Materials: Metal/glass lanterns, outdoor LED pillar candles
- Vibe / Style: Rustic vintage charm
- Difficulty: Zero installation
- Budget Breakdown: Lantern set: $60 | LED Candles: $20
- Creator’s Tip: Buy lanterns with perforated metal tops; they cast mesmerizing geometric shadows on the surrounding walls.
- Smart Sourcing: weatherproof flameless candle kits (with remotes) or rust-resistant iron lantern trios.
12. Path Marker Lights
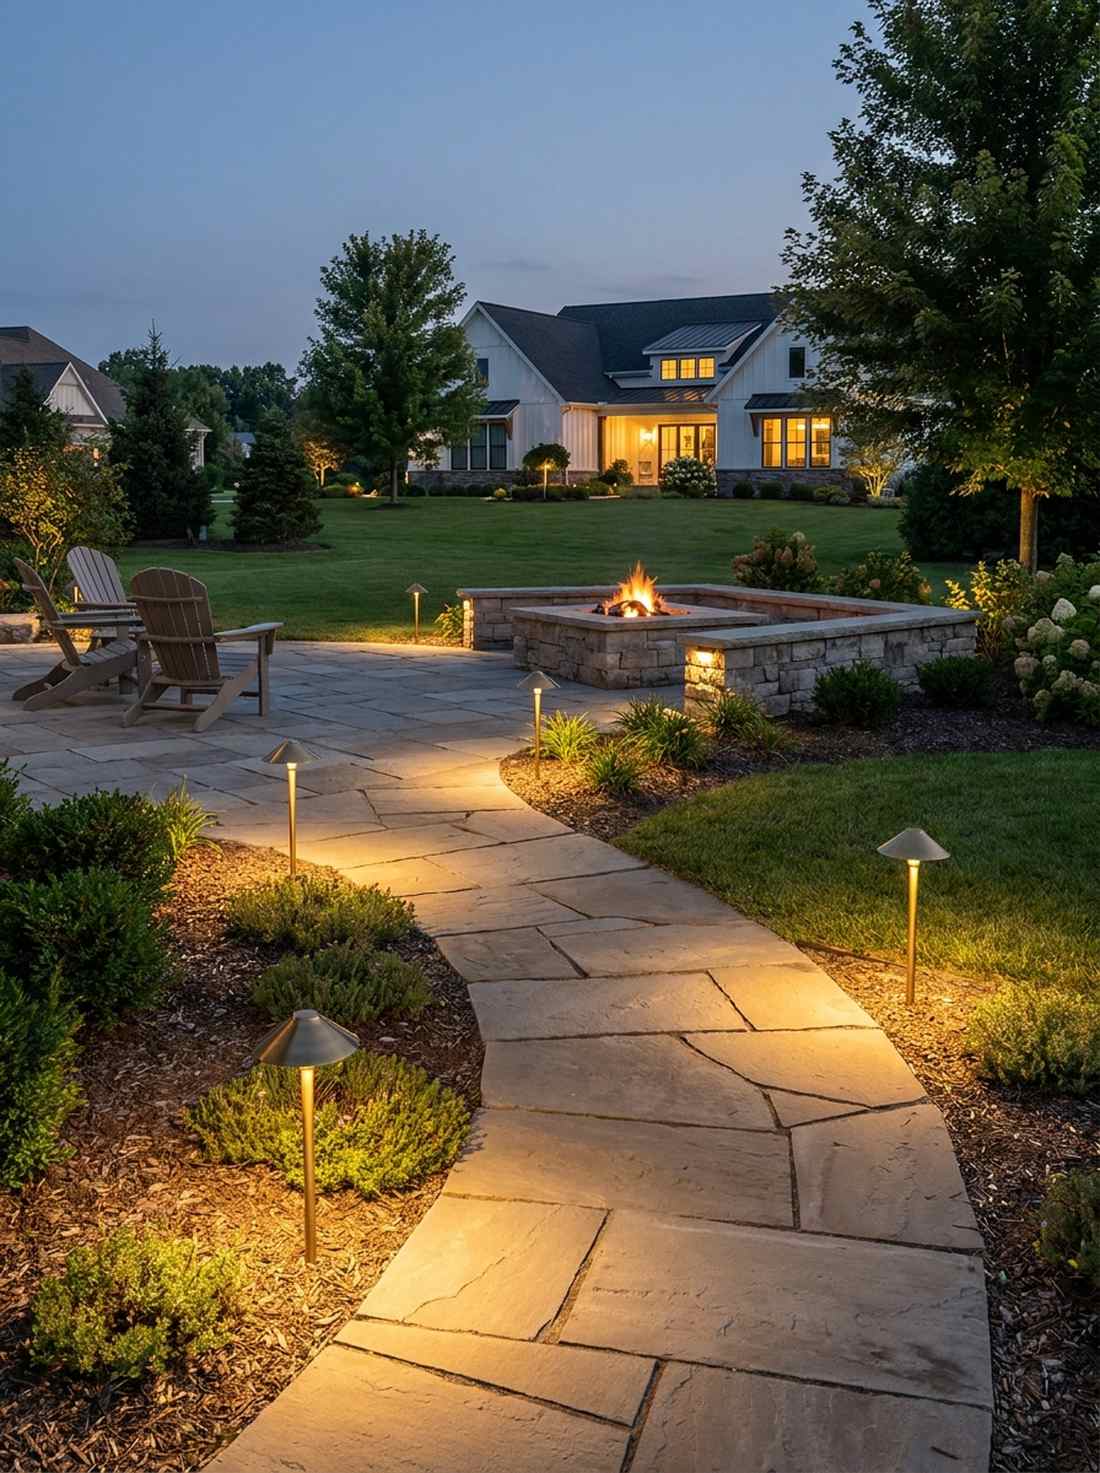
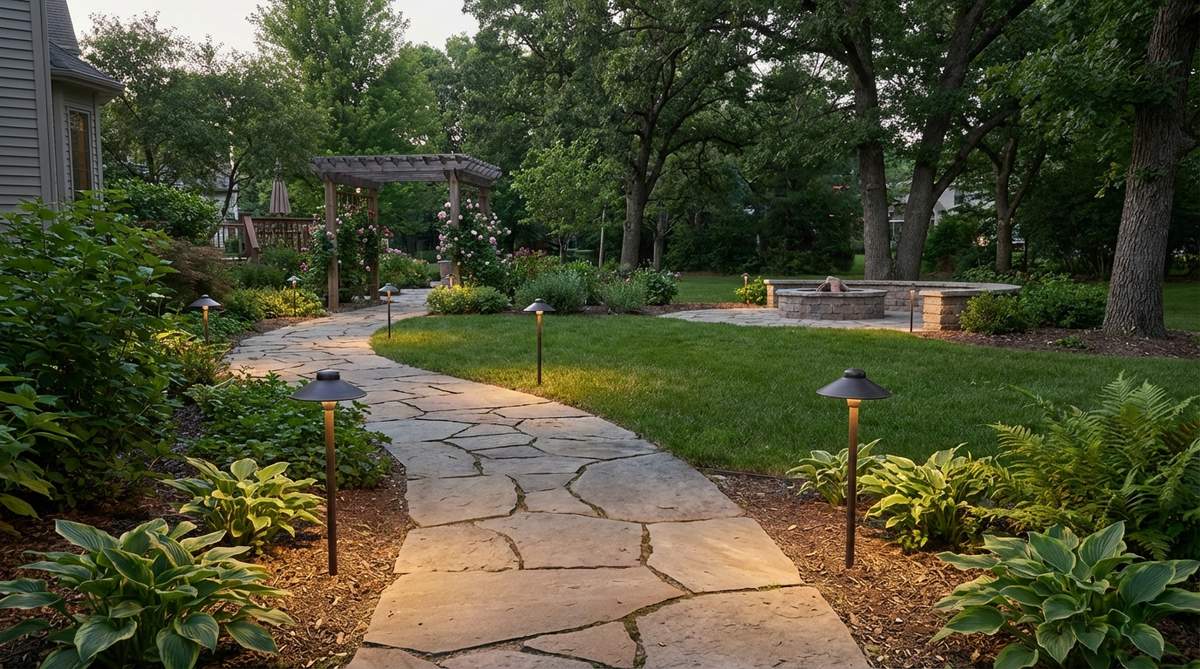
Looks like a glowing runway guiding you toward a hidden sanctuary. Installing low-profile walkway illumination draws the eye exactly where you want it. Essential for safely navigating from the house to the fire pit area.
Many make the mistake of using blinding floodlights, but shielded downward path markers keep the cozy ambiance totally intact. This strategic approach highlights your expensive landscaping stones rather than blinding your guests.
A reliable 6-pack setup runs between $50–$100. Pin this if you’re planning a nighttime garden upgrade!
- Key Materials: Shielded solar or wired path lights, ground stakes
- Vibe / Style: Clean contemporary guidance
- Difficulty: Easy plug-and-play
- Budget Breakdown: Light pack: $65 | Extra wiring: $15
- Creator’s Tip: Stagger the lights in a zigzag pattern along the path rather than straight across from each other for a wider glow.
- Smart Sourcing: brass-finish LED path light kits or high-efficiency solar landscape stakes.
13. Under-Bench Lighting
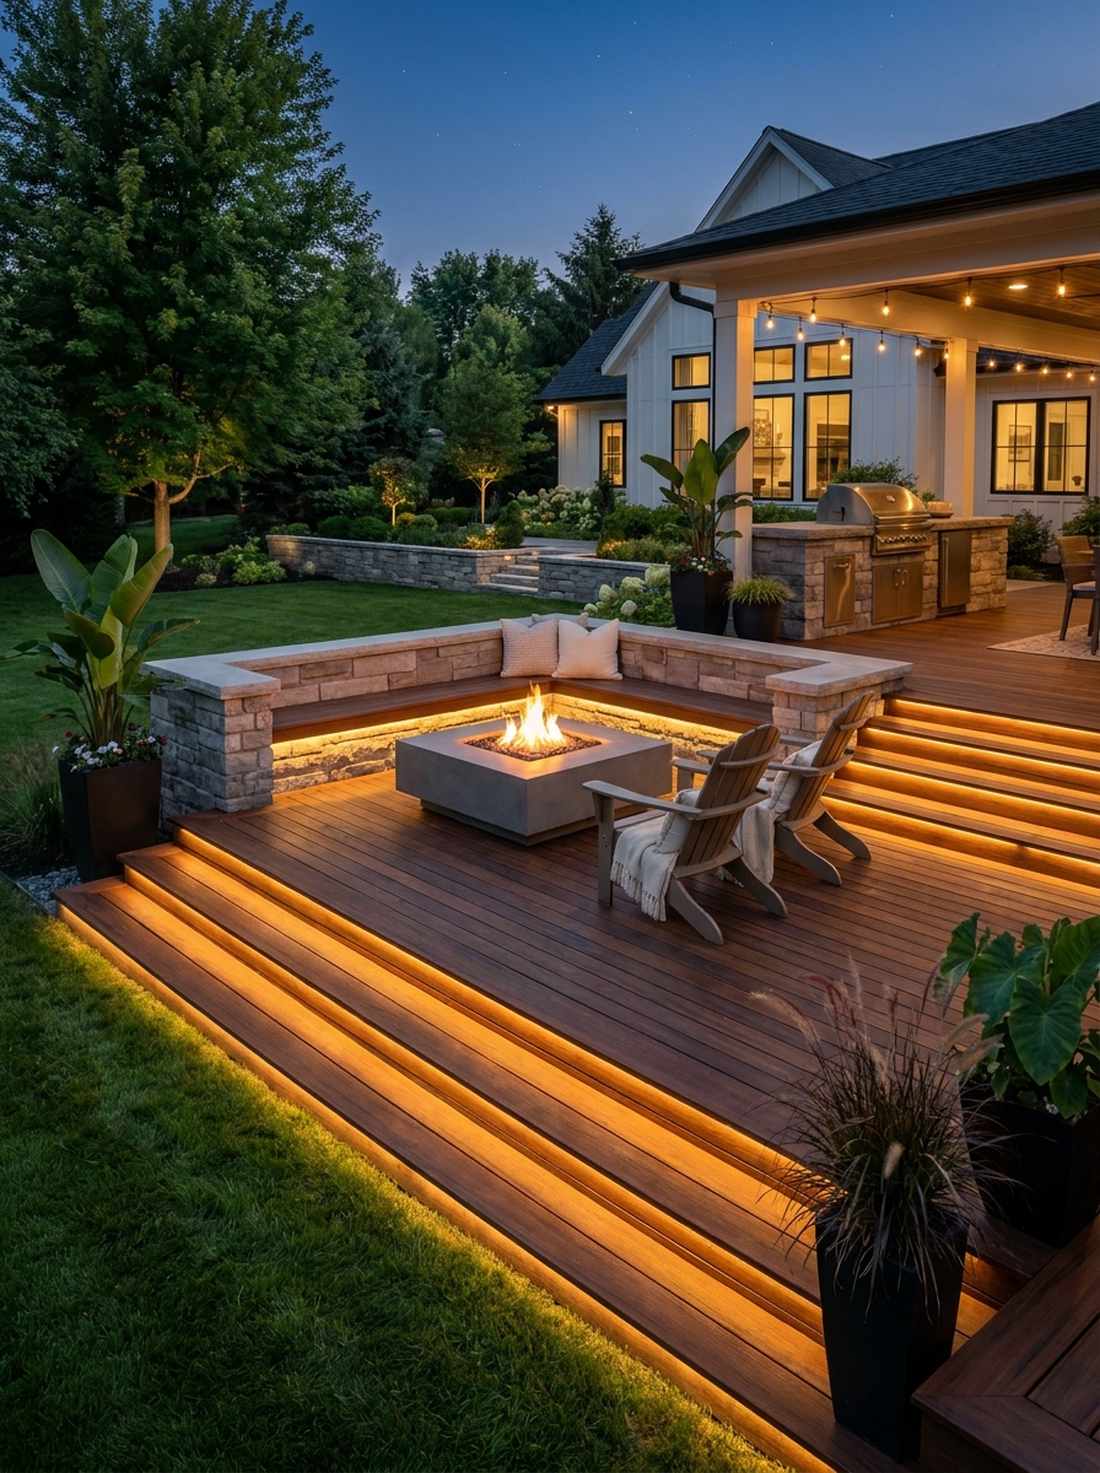
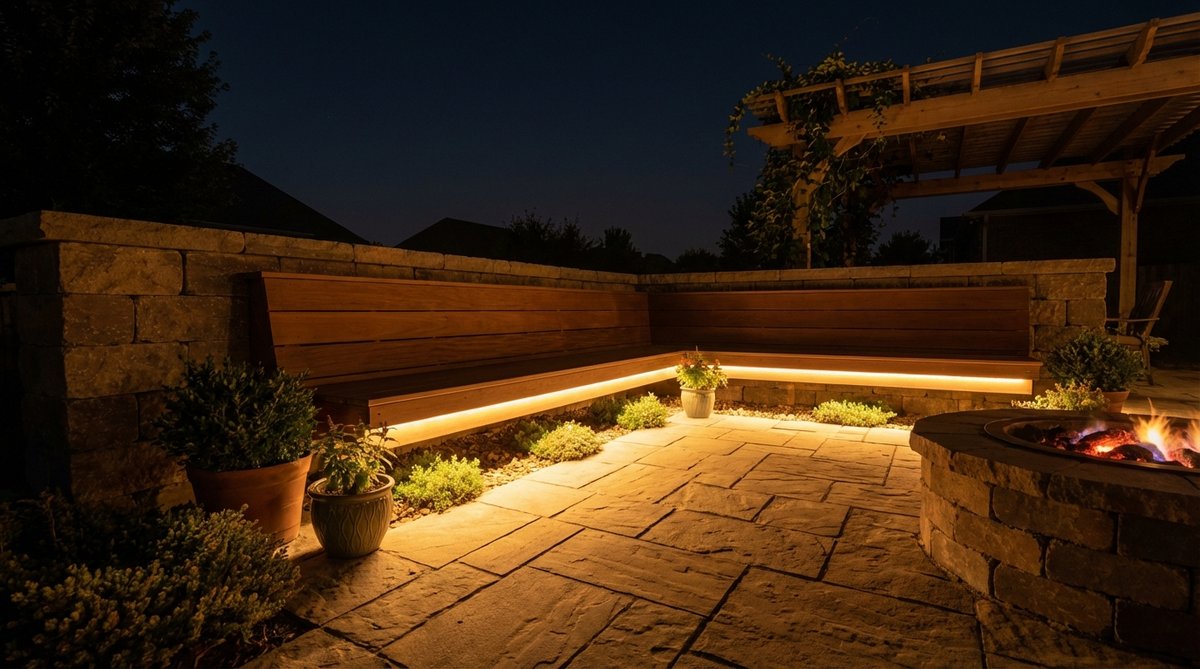
Creates an ultra-modern floating illusion straight out of a luxury hotel. Securing waterproof LED strip glows underneath seating edges casts a smooth, indirect wash of light. Ideal for wooden deck stairs and built-in masonry seats.
Harsh overhead glare ruins the mood, but this hidden lighting trick delivers a surprisingly premium look by keeping the source invisible. Sticking with warm amber tones creates a highly inviting, high-end campfire effect.
You can wire this striking upgrade for just $30–$60.
- Key Materials: Outdoor-rated LED strips, mounting channels
- Vibe / Style: Sleek architectural modern
- Difficulty: Simple adhesive prep
- Budget Breakdown: LED Strip: $25 | Aluminum channels: $20
- Creator’s Tip: Always mount the strips inside aluminum diffuser channels; it protects the diodes from moisture and prevents “dotting.”
- Smart Sourcing: IP68 waterproof LED strip kits or aluminum LED diffuser channel packs.
14. Moonlight Effect Fixtures

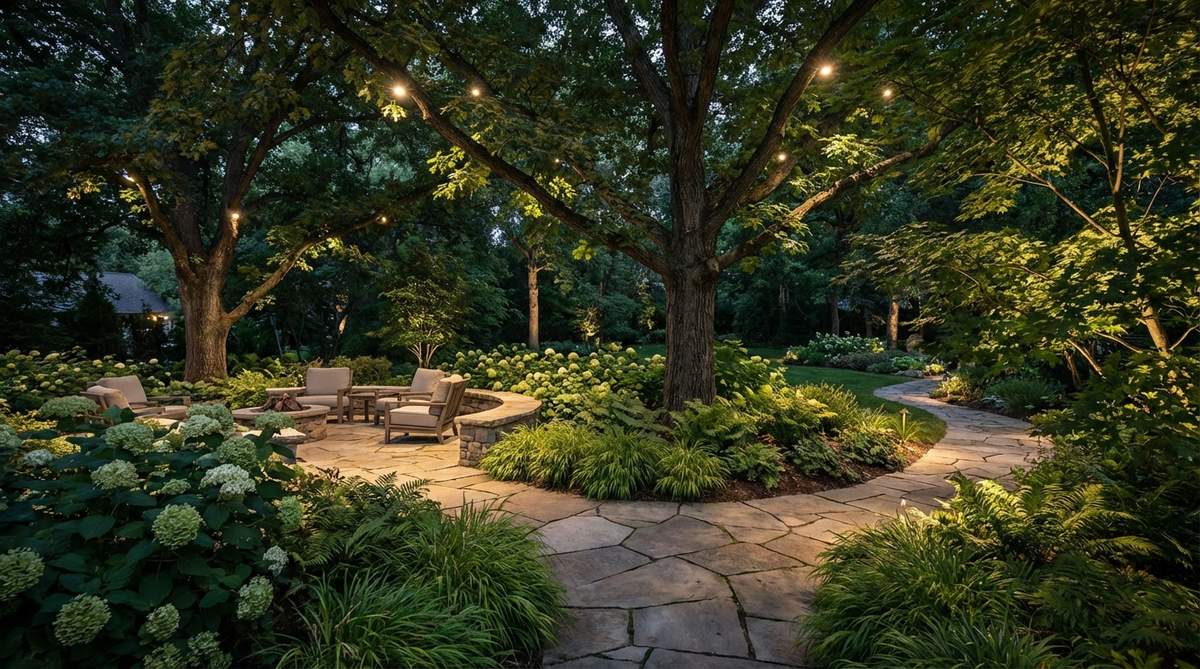
Mimics a crystal-clear night with a giant, glowing full moon. Mounting high-canopy tree downlights forces a soft, dappled light through the branches onto the ground. The absolute best lighting strategy for massive oak or maple trees.
Most amateurs only light from the ground up, but establishing this top-down wash looks far more expensive and natural. The cool blue-white filtration totally bypasses that artificial, overly-staged theme park look.
A solid fixture and wiring will cost about $70–$130. Highly recommended for a high-impact win.
- Key Materials: Tree-mount spotlights, UV-resistant zip ties
- Vibe / Style: Natural ethereal glow
- Difficulty: Requires climbing/tall ladder
- Budget Breakdown: Mount light: $60 | Extension wire: $25
- Creator’s Tip: Cross two beams from different branches aiming at the same patio center to eliminate harsh shadows on people’s faces.
- Smart Sourcing: directional tree-mount landscape lights or weather-proof wire junction boxes.
You won’t believe how easy the next lighting hack is, especially for tiny, awkward backyard corners…
15. Tabletop Fire Bowls
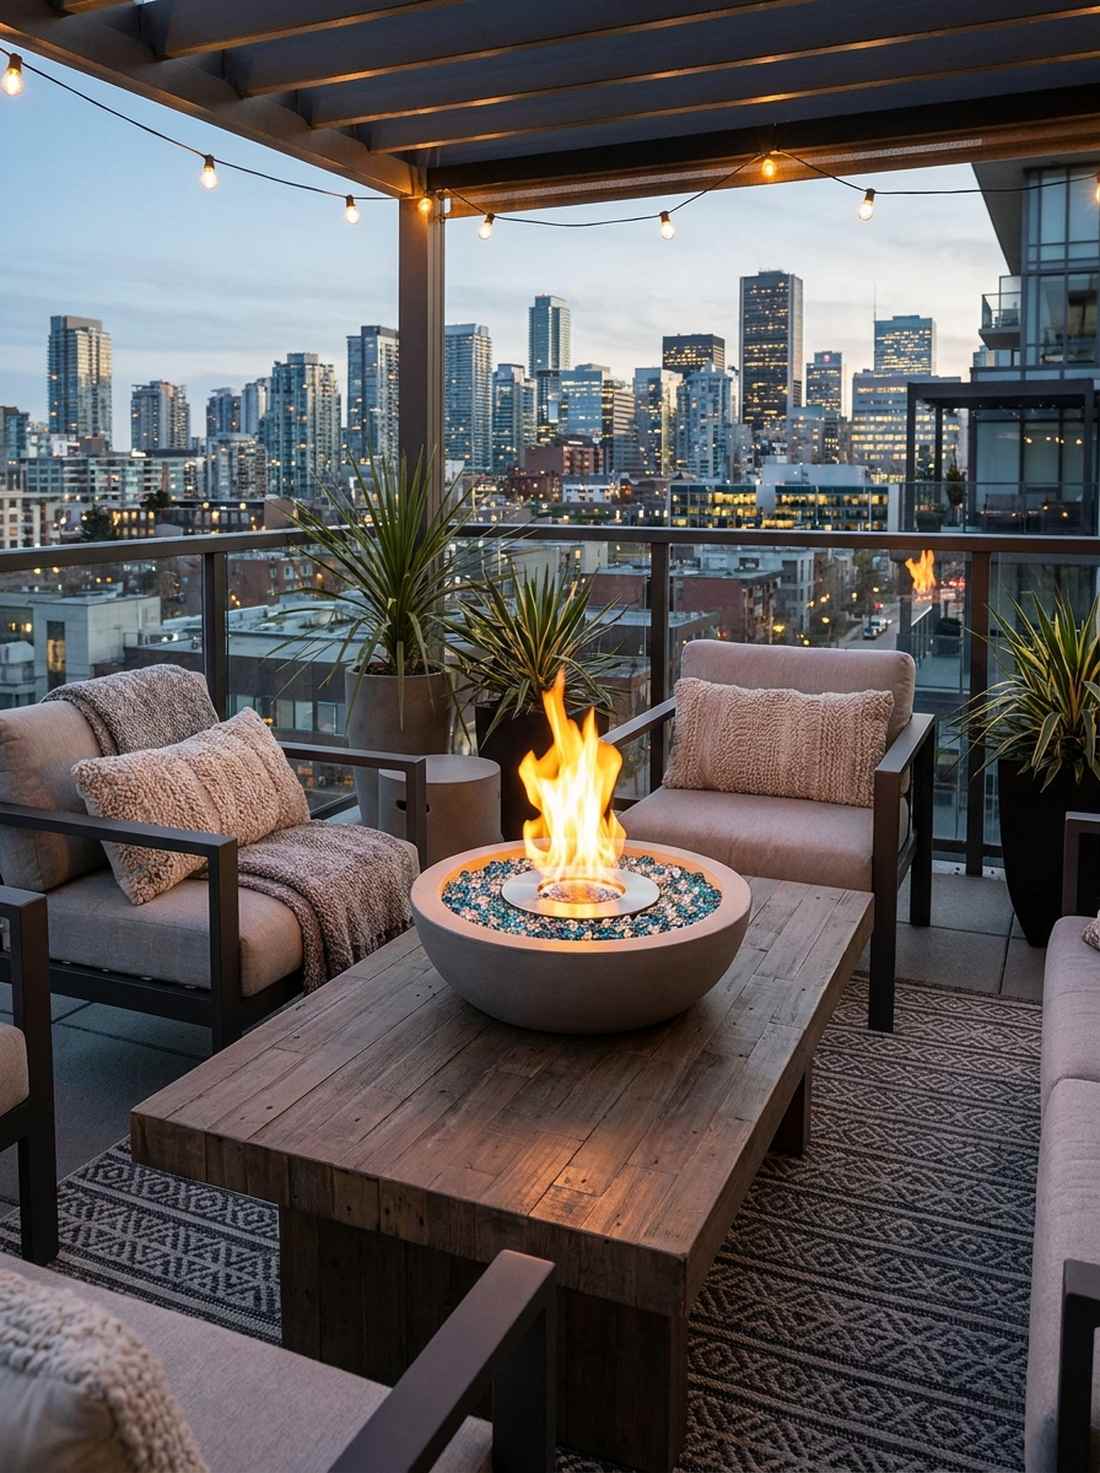
Captures the hypnotic, dancing energy of a real fire without the smoke. A miniature gel-fuel fire centerpiece immediately commands attention on a dining surface. Perfect for tiny condo balconies that strictly ban wood-burning pits.
Skipping the massive masonry fire pits in favor of this compact setup gives a designer-level finish for pennies. By using clean-burning bioethanol, you get serious warmth and ambiance without smelling like a campground.
Grab a sleek concrete bowl model for about $40–$80.
- Key Materials: Concrete fire bowl, bioethanol fuel
- Vibe / Style: Urban chic dining
- Difficulty: Instant unbox and light
- Budget Breakdown: Bowl setup: $50 | Fuel bottles: $20
- Creator’s Tip: Add tempered fire glass around the burner can inside the bowl to catch the flame’s reflection for double the glow.
- Smart Sourcing: tabletop concrete fire bowl kits or clean-burning bioethanol fuel multi-packs.
16. Solar Jar Lights
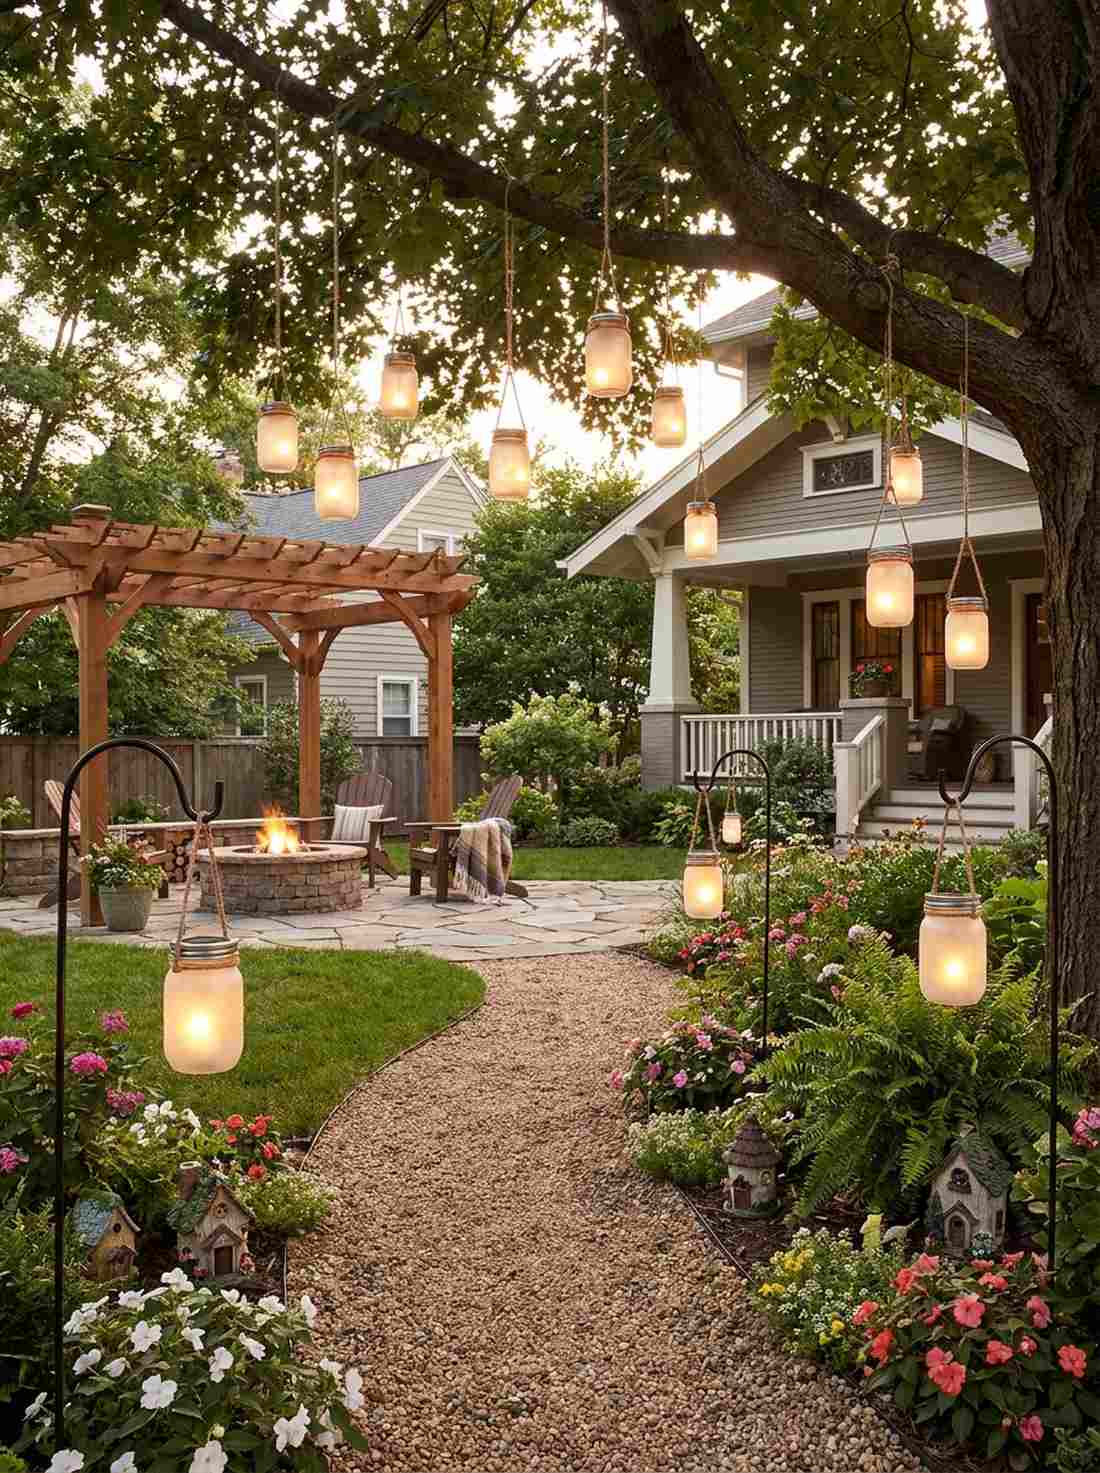
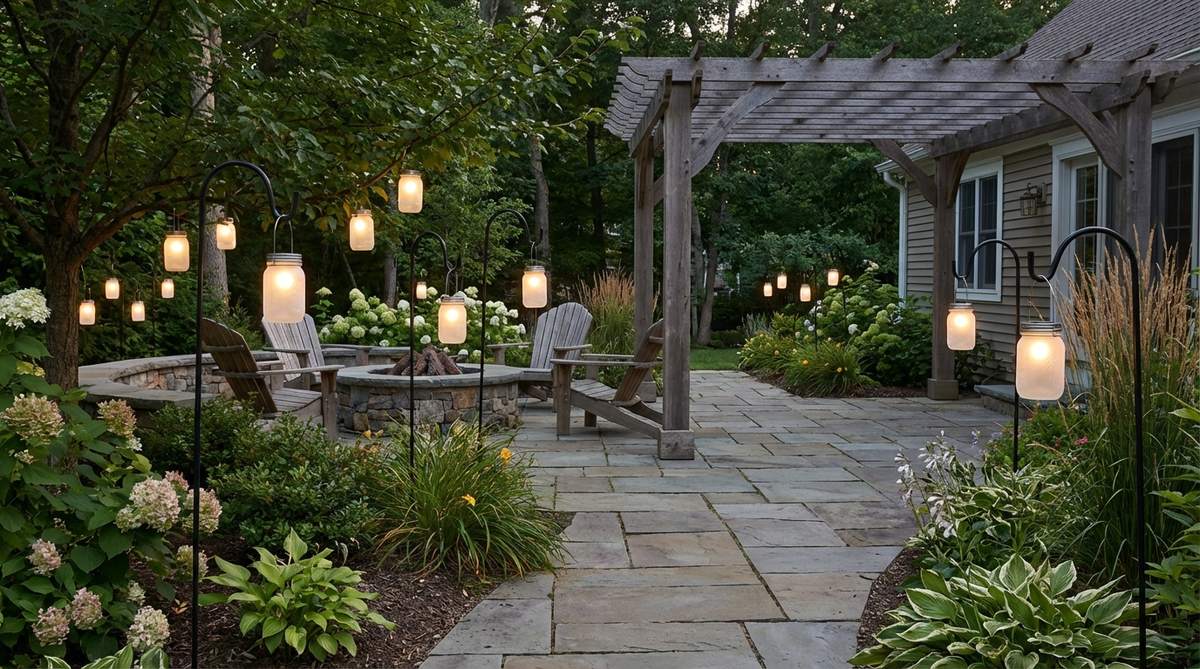
Feels like catching glowing fireflies in a vintage glass trap. Hanging frosted solar mason jar lanterns from tree branches adds serious whimsical charm. A wonderful, whimsical addition to a children’s fairy garden pathway.
It’s incredibly frustrating running extension cords deep into a yard, but these self-charging units completely bypass wiring constraints. Grouping them in odd numbers delivers a surprisingly premium look that feels totally organic.
You can buy a pack of these for just $20–$40. Save this to your budget decor board!
- Key Materials: Solar jar lids, frosted mason jars
- Vibe / Style: Rustic farmhouse magic
- Difficulty: Extremely simple setup
- Budget Breakdown: 6-pack solar lids: $25 | Hanging hooks: $10
- Creator’s Tip: Spray the inside of clear jars with frosted glass paint to beautifully diffuse the harsh LED diode.
- Smart Sourcing: solar mason jar lid insert sets or heavy-duty shepherd hooks (bulk pack).
Plant Enclosure Strategies for Cozy Garden Ideas
17. Plant Hug Arrangement
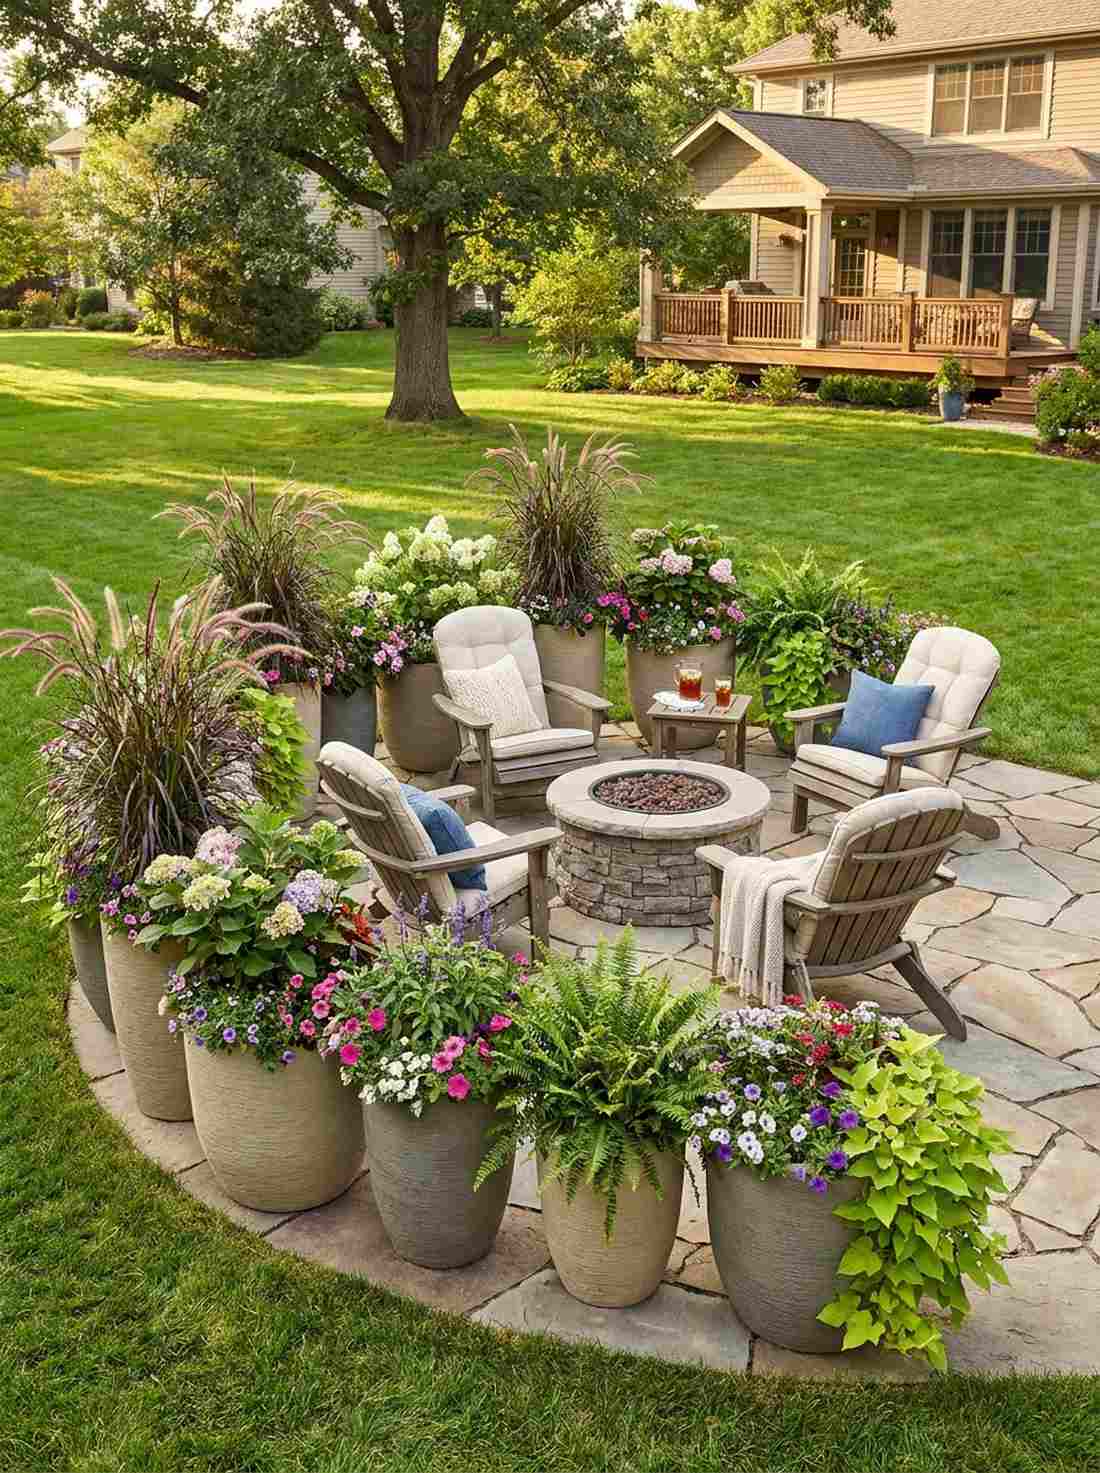
Wraps your seating area in a lush, living green embrace. Positioning a curved container garden perimeter physically separates a lounge from the open yard. Highly effective for renters needing instant, movable privacy.
Instead of building a permanent fence, this flexible strategy looks far more expensive than it is by utilizing varied pot heights. You can seamlessly rotate seasonal blooms to keep the aesthetic vibrant and evolving all year long.
Pot and soil setups usually start around $100–$200 for a solid cluster.
- Key Materials: Large resin planters, high-quality potting mix
- Vibe / Style: Lush botanical embrace
- Difficulty: Easy but heavy lifting
- Budget Breakdown: Planters: $120 | Soil & Plants: $80
- Creator’s Tip: Use the ‘thriller, filler, spiller’ method in each pot to ensure the arrangement looks massive and overflowing.
- Smart Sourcing: lightweight faux-stone resin planters or premium moisture-control potting soil mix.
18. Mixed-Height Border
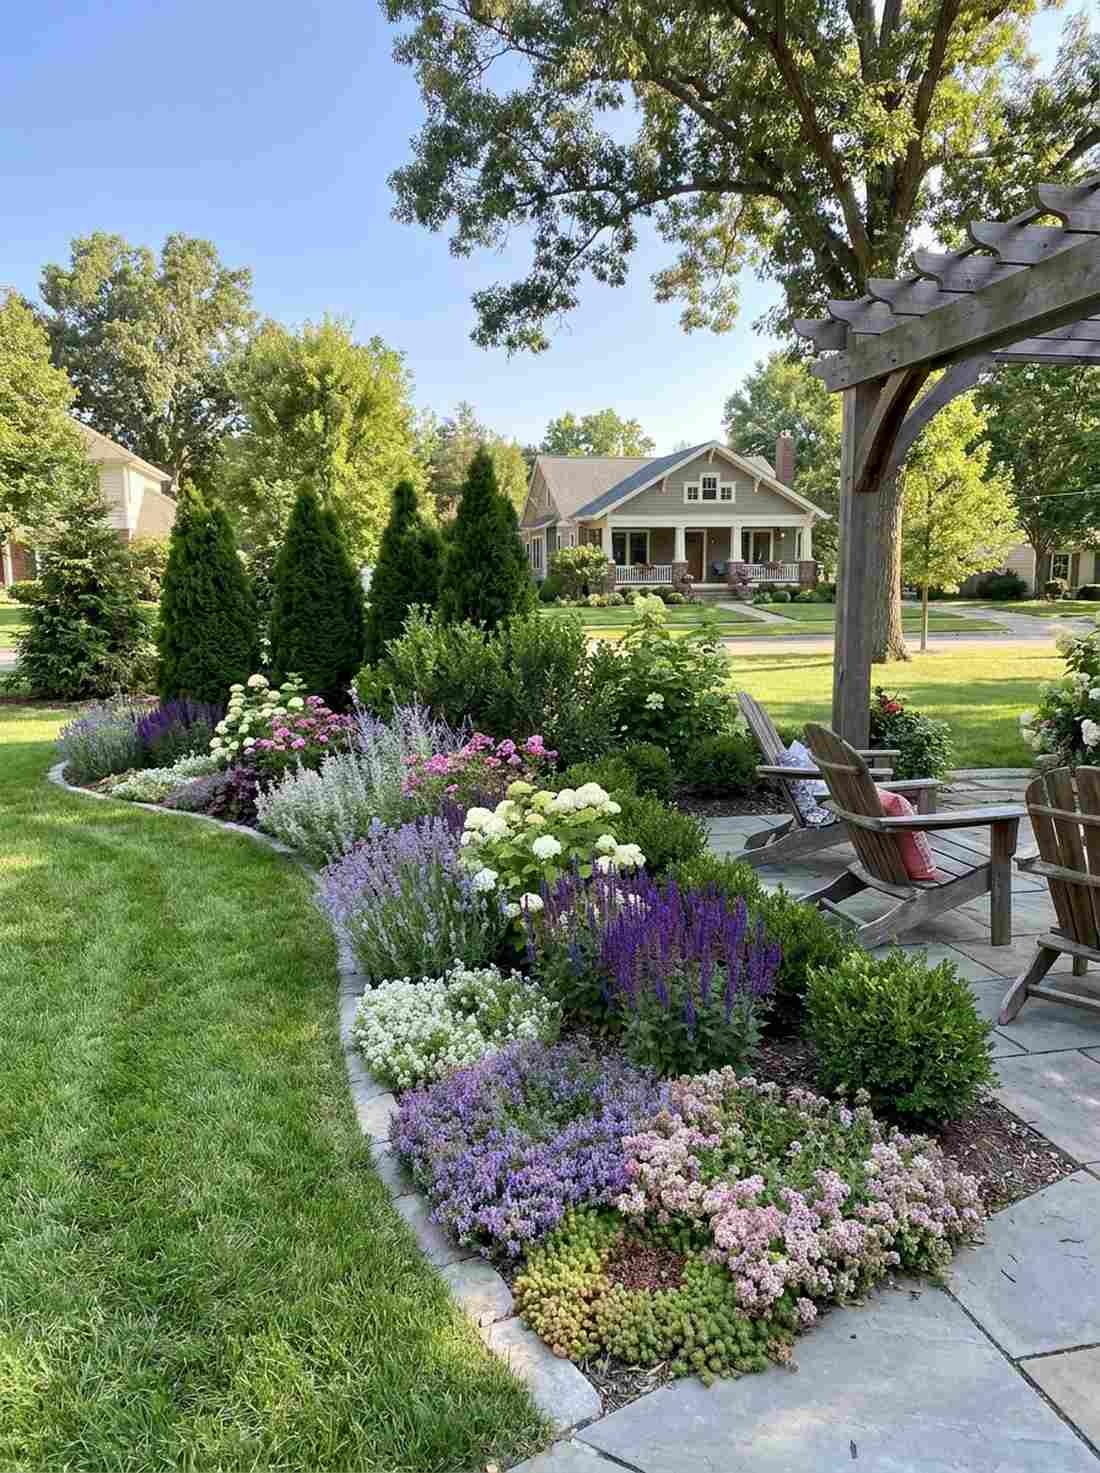
Creates a mesmerizing, deep visual wave of color and texture. Planting a tiered landscape flower bed establishes a clear psychological line between lawn and patio. Ideal for adding immense depth to flat, boring property lines.
The biggest amateur mistake is planting everything in a straight, flat row, but stepping the plants from groundcover up to tall shrubs gives a designer-level finish. It forces the eye to travel, making the garden feel infinitely larger.
A well-planned 10-foot border costs roughly $150–$300.
- Key Materials: Groundcovers, mid-perennials, tall evergreens
- Vibe / Style: English cottage landscape
- Difficulty: Requires digging and planning
- Budget Breakdown: Core Shrubs: $150 | Edge plants: $75
- Creator’s Tip: Stick to a strict 3-color palette for your blooms so the border looks intentional and not like a chaotic jungle.
- Smart Sourcing: bulk creeping thyme starter plugs or slow-release landscape fertilizer spikes.
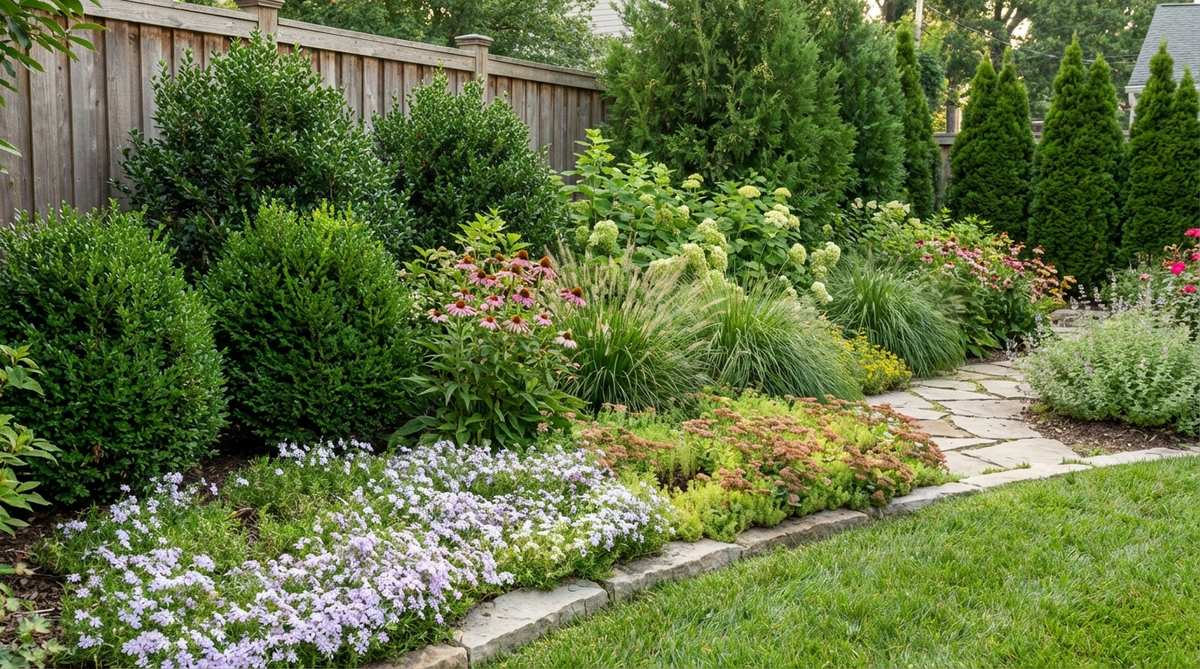
19. Privacy Hedge Wall

Stands like a silent, majestic green fortress protecting your peace. Growing a dense evergreen privacy screen totally blocks out nosy neighbors and ugly street views. The absolute best long-term strategy for suburban backyards.
Wooden fences rot and warp, but this living boundary delivers a much richer, oxygenated atmosphere that absorbs serious street noise. Sticking to fast-growing varieties means you won’t wait a decade for actual privacy.
A row of saplings will cost about $200–$400 to get started. Pin this for your master yard plan!
- Key Materials: Arborvitae or Cypress saplings, root stimulator
- Vibe / Style: Stately estate boundary
- Difficulty: Labor intensive planting
- Budget Breakdown: 10 Saplings: $250 | Soil amendments: $50
- Creator’s Tip: Dig a trench rather than individual holes; it ensures perfect alignment and makes soil amendment 10x faster.
- Smart Sourcing: fast-growing arborvitae starter kits or bulk root-boosting fertilizer powder.
Landscapers gatekeep this next privacy method because it completely bypasses the need for expensive structural fencing…
20. Ornamental Grass Screen
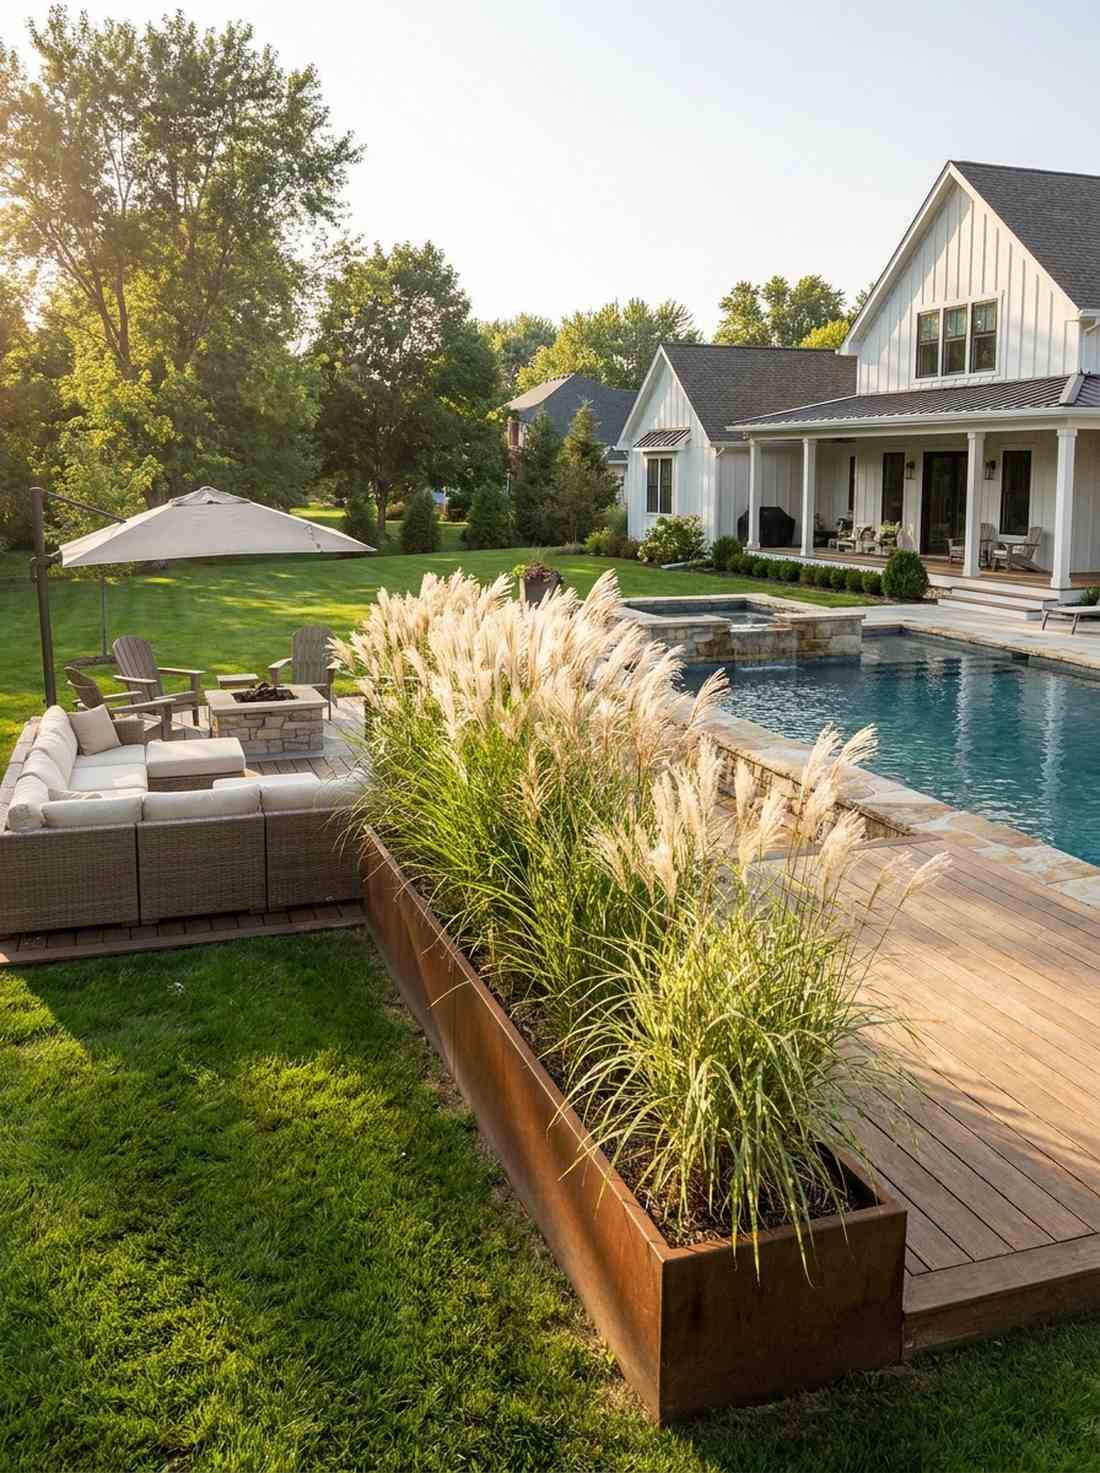
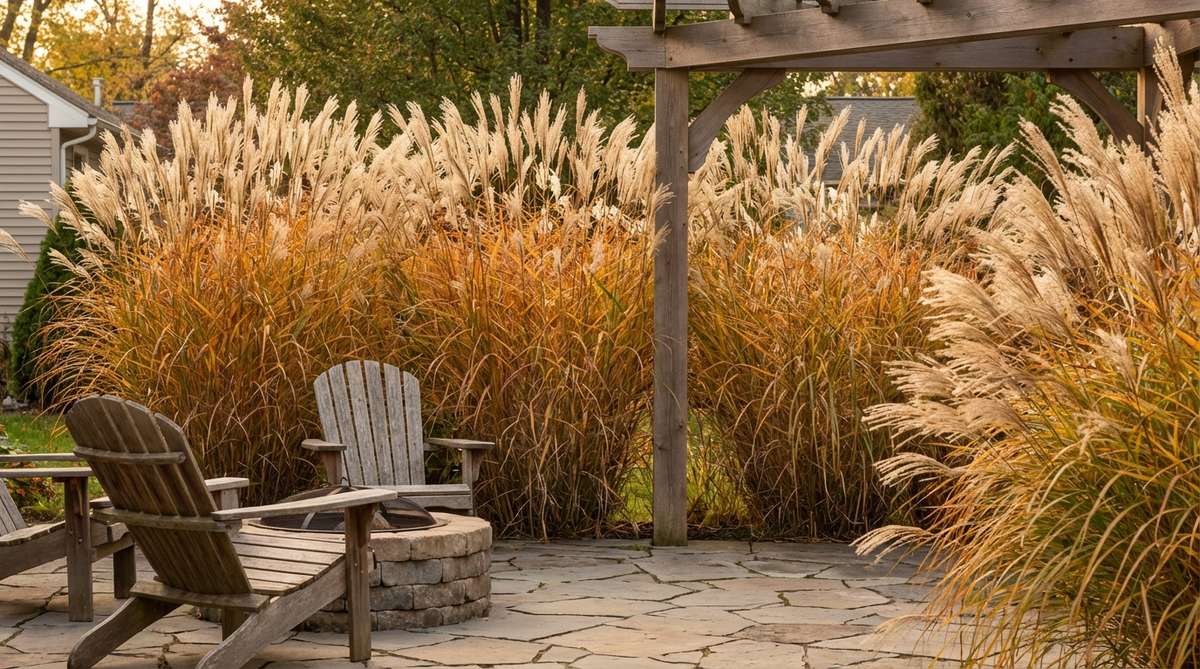
Sways hypnotically, adding dynamic movement and a soft, shushing sound to the wind. Utilizing tall ornamental feather grass creates a semi-transparent, elegant veil. Brilliant for sectioning off a pool deck or a sunny patio edge.
Solid hedges can feel intensely claustrophobic, but these wispy stalks give a designer-level finish by allowing light and air to pass through. They require almost zero maintenance, surviving heavy droughts with ease.
You can buy large grass clumps for about $60–$120 total.
- Key Materials: Pampas or zebra grass, compost
- Vibe / Style: Breezy coastal modern
- Difficulty: Very simple planting
- Budget Breakdown: 5 Grass gallons: $80 | Compost: $20
- Creator’s Tip: Tie the grass stalks together with a bungee cord in early spring before chopping them down to make cleanup effortless.
- Smart Sourcing: drought-tolerant ornamental grass seed bulk packs or heavy-duty landscape shears.
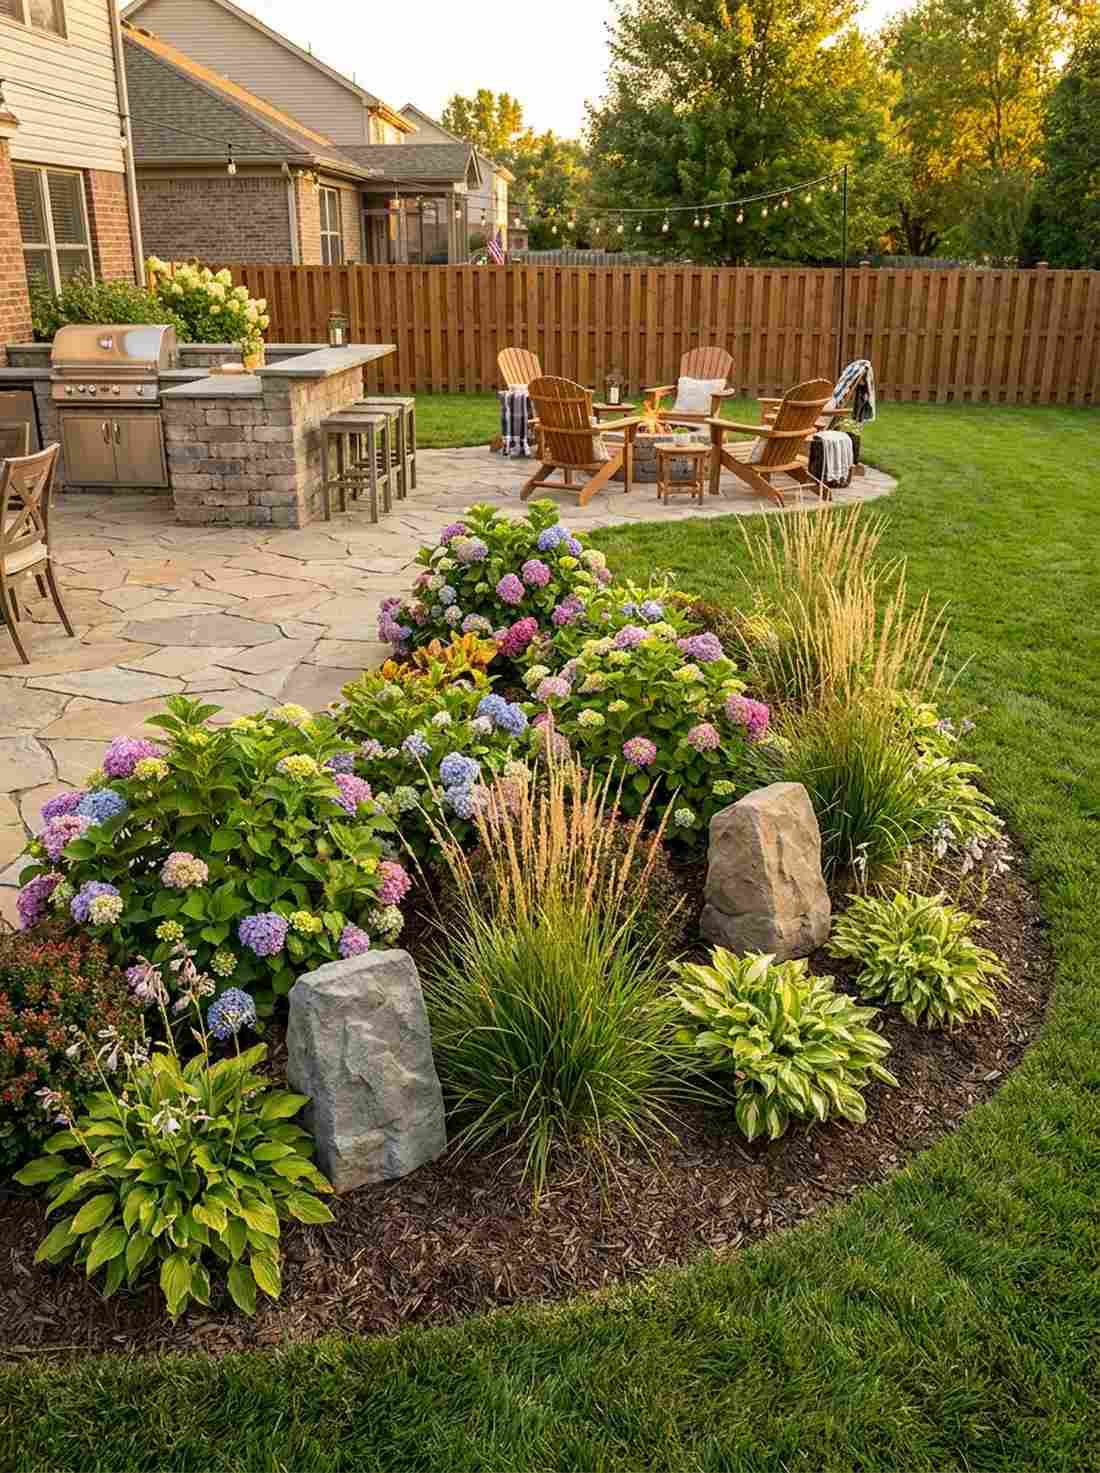
21. Flowering Shrub Clusters
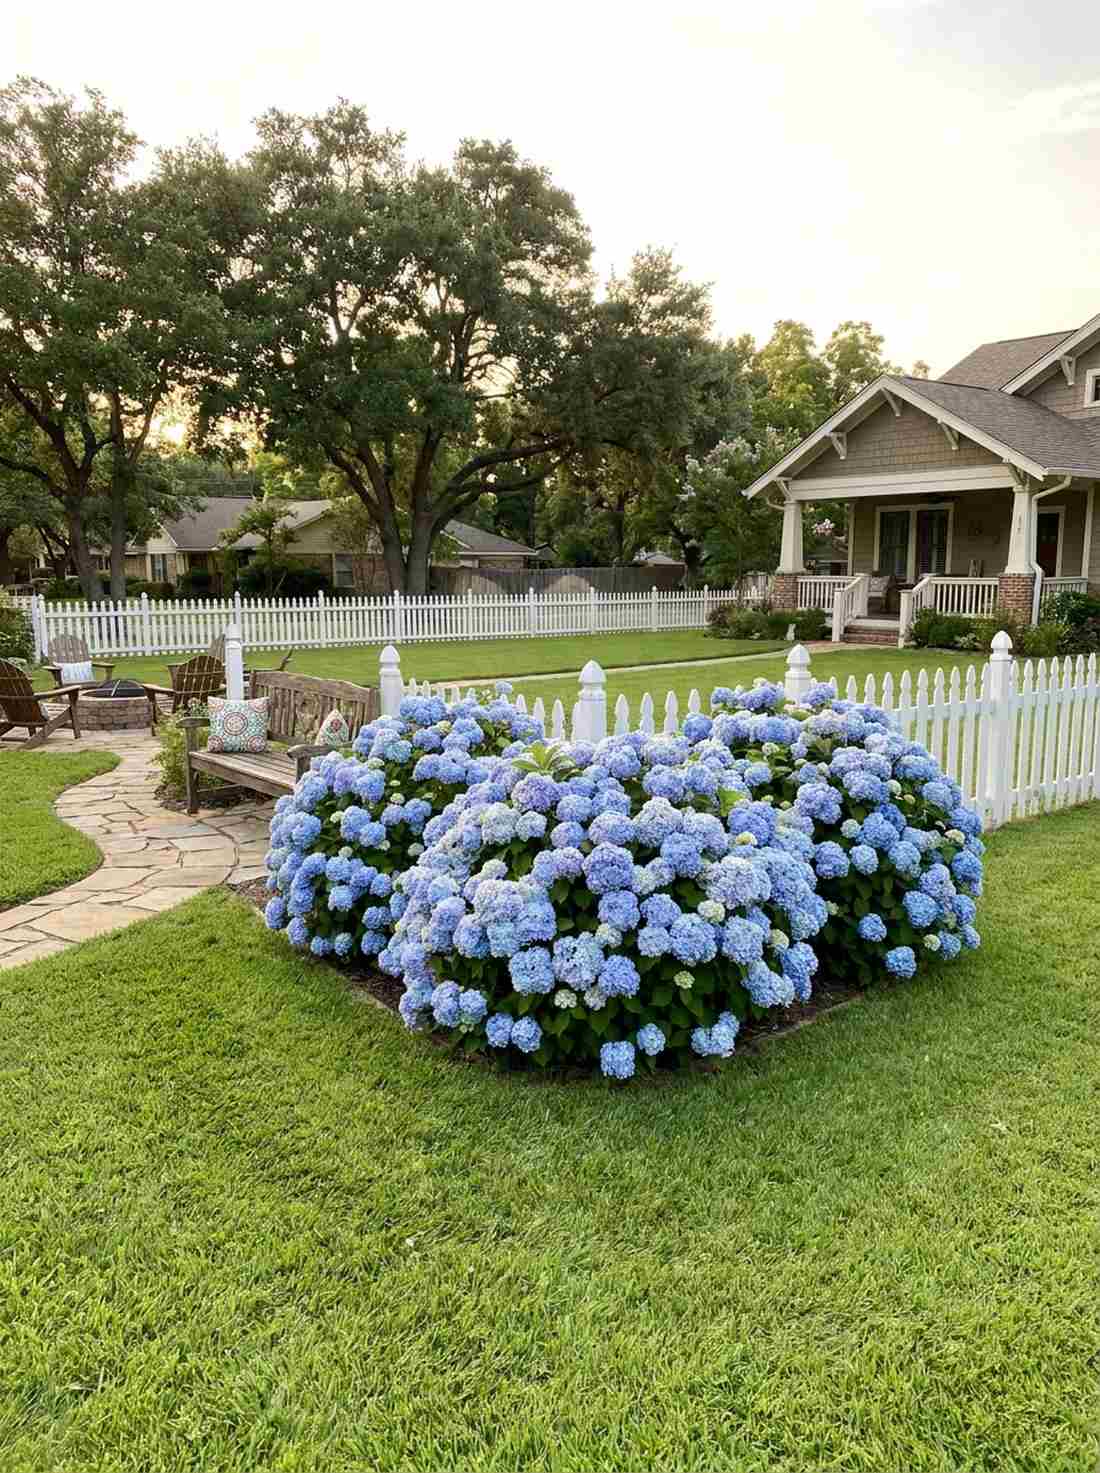
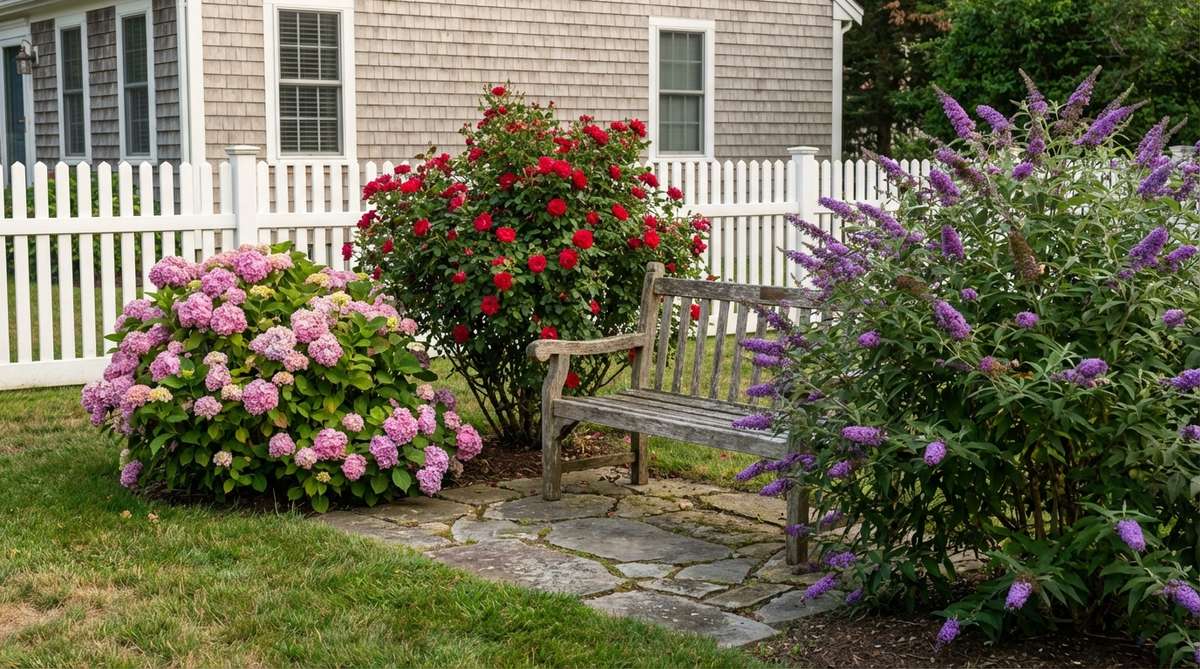
Explodes with massive, fragrant blooms that anchor the corners of your yard. Grouping a multi-shrub flowering focal point creates an undeniable visual magnet. Perfectly suited for breaking up massive, boring expanses of green lawn.
Planting one lonely bush looks cheap, but clustering three identical hydrangeas looks far more expensive than it is. The mass grouping creates a literal cloud of color that professional landscape architects rely on constantly.
A trio of quality shrubs usually runs $90–$150.
- Key Materials: Hydrangeas or Rose bushes, acidic soil mix
- Vibe / Style: Romantic floral abundance
- Difficulty: Easy weekend dig
- Budget Breakdown: Shrubs: $100 | Specific soil mix: $30
- Creator’s Tip: Use an odd-numbered cluster (3 or 5) planted in a tight triangle; even numbers naturally look rigid and unnatural.
- Smart Sourcing: aluminum sulfate soil acidifiers (for blue hydrangeas) or premium rose bush fertilizer kits.
22. Potted Evergreen Boundary
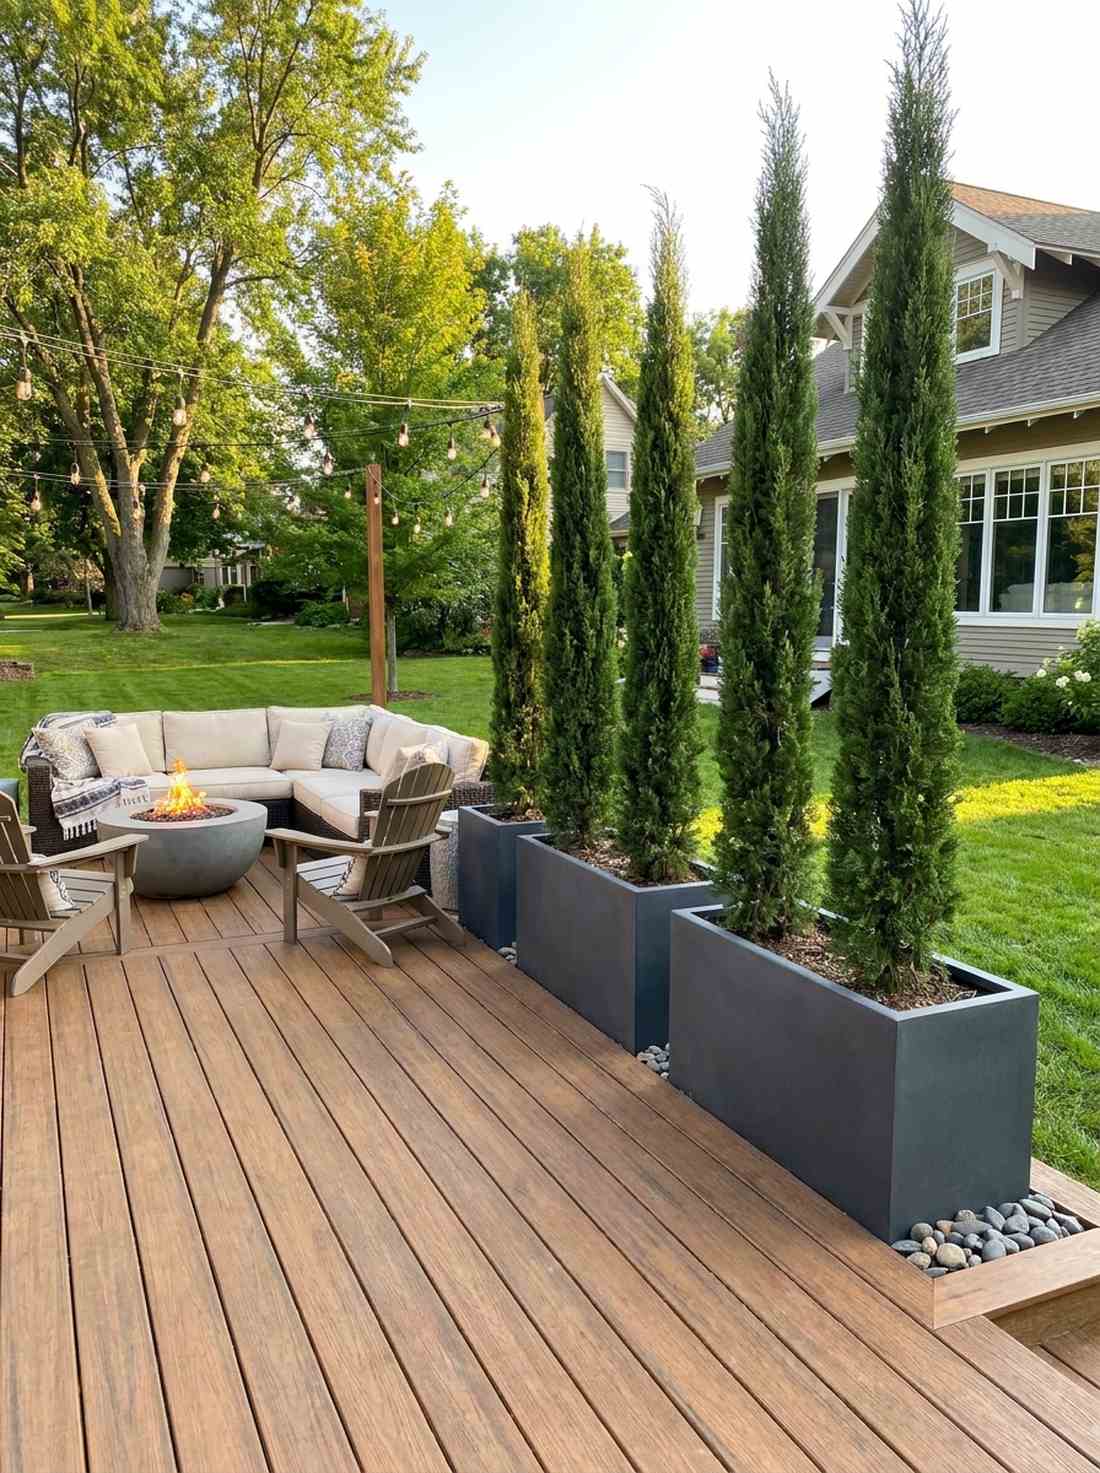

Stands at attention like architectural sentinels guarding your patio. Using tall columnar trees in large planters creates an incredibly sleek, portable wall. The smartest move for renters who need a modern privacy screen immediately.
Most portable screens blow over, but these heavy, soil-filled setups deliver a surprisingly premium look that defies high winds. The vertical, narrow growth ensures they don’t eat up precious square footage on a tiny balcony.
Expect to spend $150–$300 for premium pots and trees combined. Save this to your apartment patio board!
- Key Materials: Italian cypress trees, weighted tall planters
- Vibe / Style: Modern Mediterranean chic
- Difficulty: Instant arrangement
- Budget Breakdown: Trees: $120 | Tall pots: $140
- Creator’s Tip: Throw heavy river rocks into the bottom 1/3 of the planter before adding soil to prevent top-heavy tipping during storms.
- Smart Sourcing: tall modern fiberglass planter boxes or slow-release evergreen fertilizer spikes.
23. Tiered Planter Wall
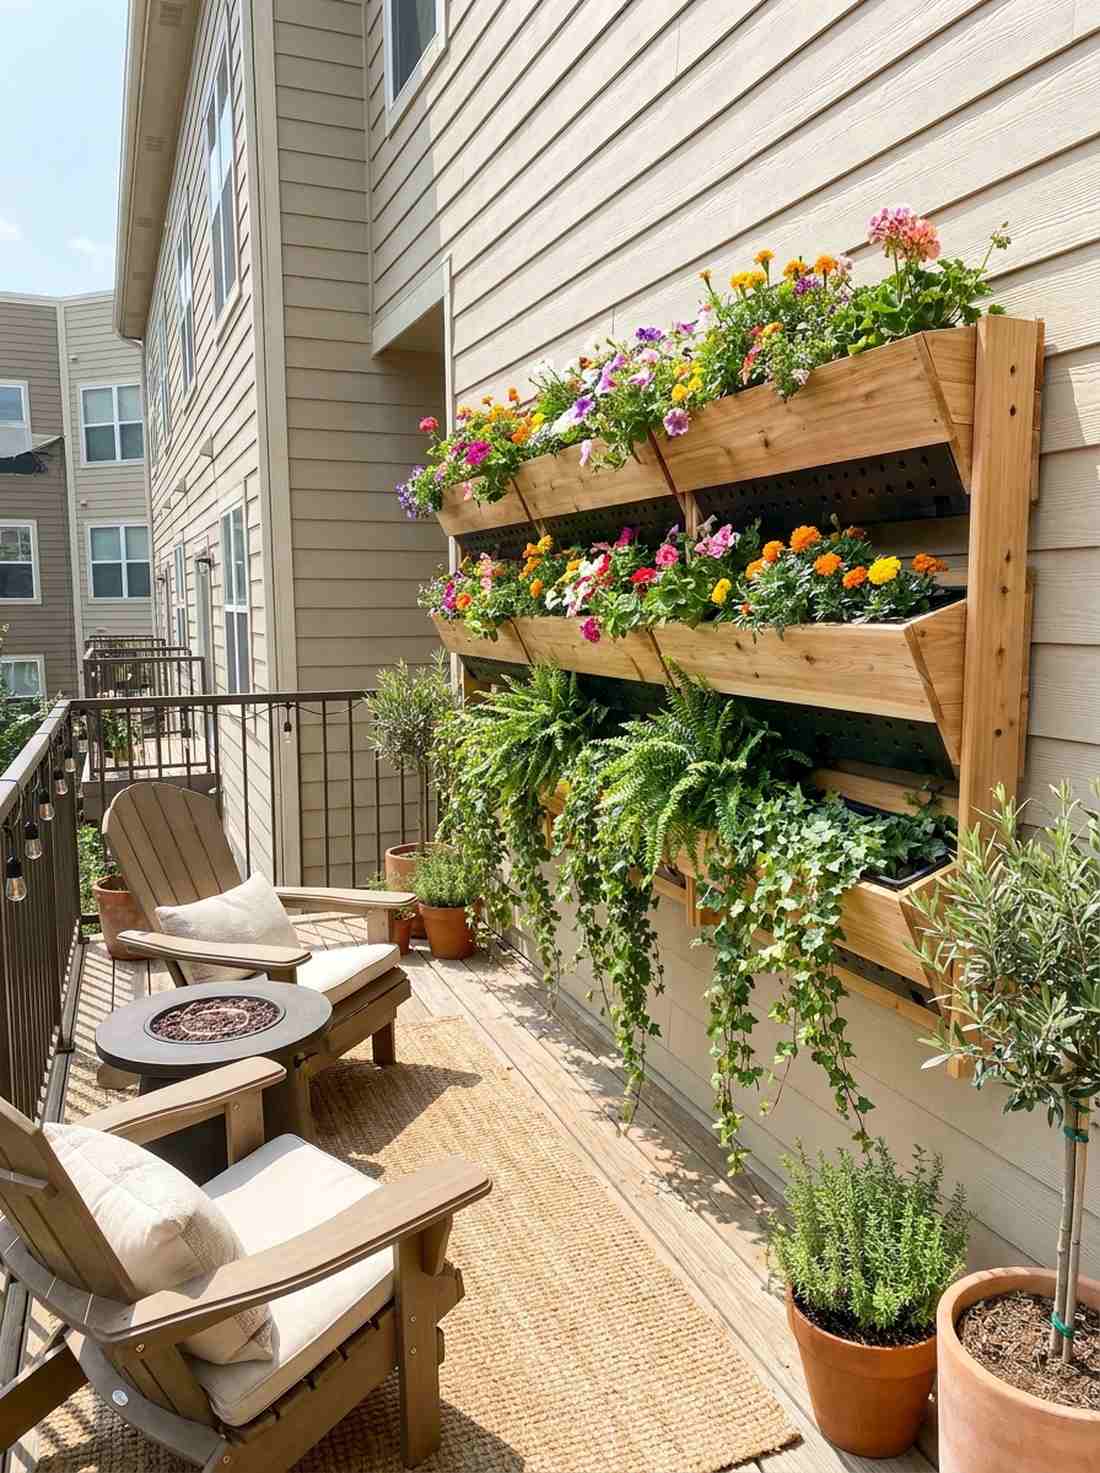

Cascades lush greenery like a beautiful, living waterfall. A stacked vertical garden planter box maximizes growing space while occupying zero ground room. Absolutely essential for tight condo balconies or covering ugly siding.
Many struggle to grow food in small spaces, but this stepped architecture bypasses footprint limits while looking incredibly lavish. Loading the bottom with trailing ivy and the top with colorful annuals completely transforms a dead wall.
A pre-built cedar tiered system usually costs $100–$200.
- Key Materials: Wooden tiered planter stand, trailing plant varieties
- Vibe / Style: Urban vertical oasis
- Difficulty: Light assembly
- Budget Breakdown: Stand kit: $120 | Dirt & Plants: $60
- Creator’s Tip: Line the wooden boxes with heavy plastic sheeting (poke drainage holes!) to prevent the wood from rotting out in one season.
- Smart Sourcing: vertical tiered cedar planter kits or bulk coco coir moisture-retaining liners.
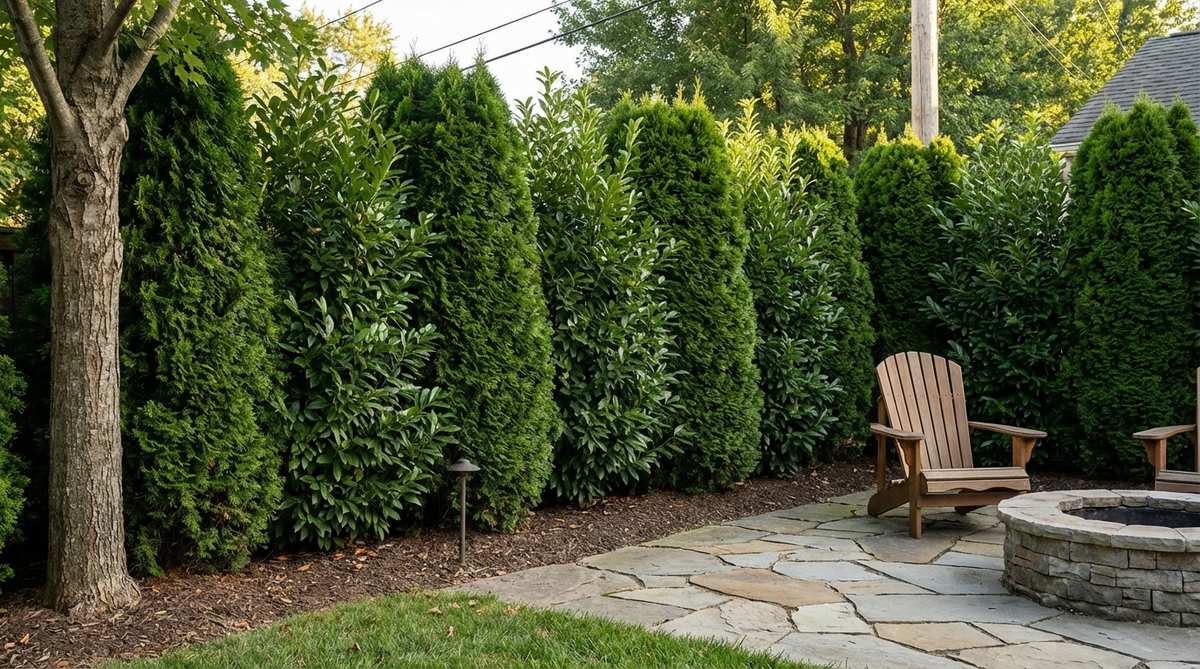
24. Bamboo Grove Enclosure

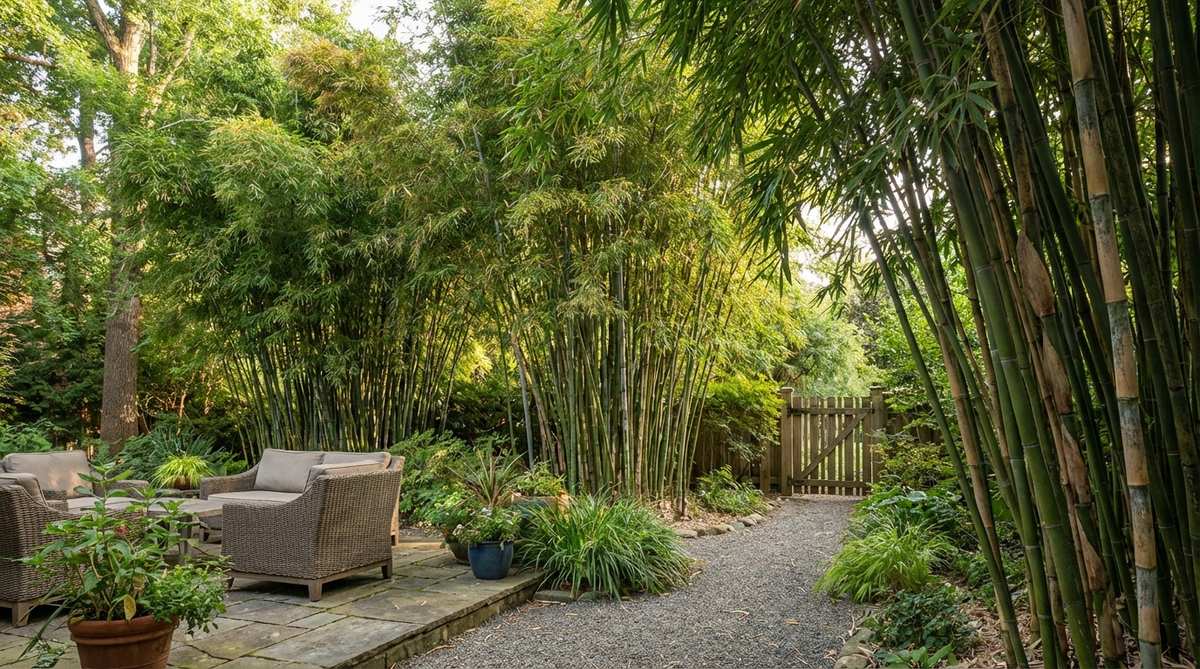
Whispers and clacks gently, creating a highly serene, Zen-like atmosphere. Planting a clumping bamboo privacy screen shoots up faster than almost any other plant. The perfect fast-track solution for blocking a two-story neighbor’s window.
People are terrified of bamboo spreading, but utilizing specific clumping varieties totally bypasses the nightmare of yard invasions. The distinct, architectural canes give a designer-level finish that standard green bushes simply cannot match.
A starter grove will cost about $150–$250. Highly recommended for Asian-inspired garden aesthetics.
- Key Materials: Clumping bamboo varieties, heavy mulch
- Vibe / Style: Minimalist Zen retreat
- Difficulty: Fast planting, quick results
- Budget Breakdown: Bamboo pots: $180 | Barrier/Mulch: $40
- Creator’s Tip: Always double-check you are buying ‘Clumping’ (Sympodial) and NOT ‘Running’ (Monopodial) bamboo to prevent total yard takeover.
- Smart Sourcing: non-invasive clumping bamboo root starters or heavy-duty root barrier rolls.
If you’re sick of standard patio layouts, the fire placement coming up completely breaks the mold (and costs less).
Fire & Warmth Features for Cozy Garden Corner Designs
25. Central Fire Pit
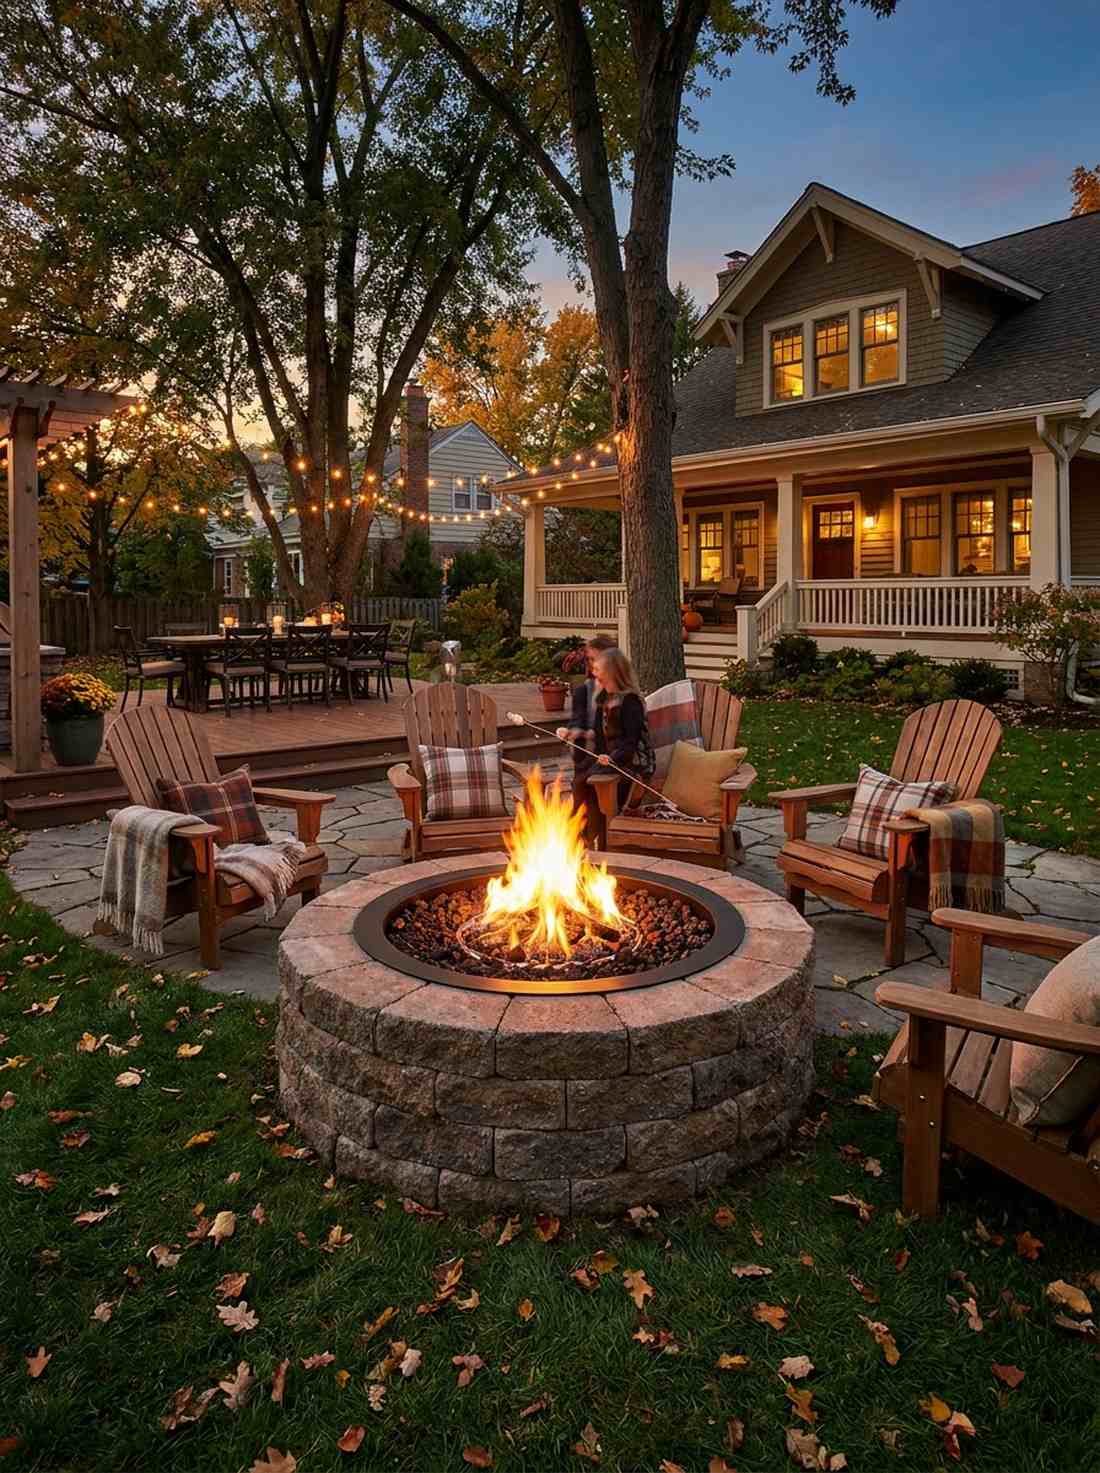
Draws everyone in naturally like a magnetic, glowing campfire. Anchoring the yard with a classic circular stone fire pit establishes a permanent 360-degree gathering hub. The ultimate feature for roasting marshmallows on crisp autumn nights.
Paying a mason thousands is unnecessary when drop-in metal ring kits deliver a surprisingly premium look for peanuts. Constructing the outer ring with rugged retaining blocks radiates intense heat outward, maximizing your cozy garden life.
A complete DIY block and ring setup costs around $150–$250.
- Key Materials: Steel fire ring insert, trapezoid fire pit blocks
- Vibe / Style: Timeless rustic gathering
- Difficulty: Moderate heavy lifting
- Budget Breakdown: Metal ring: $70 | Blocks: $120
- Creator’s Tip: Never use river rocks inside the pit; they hold moisture and can literally explode when heated. Use lava rock instead.
- Smart Sourcing: heavy-duty steel fire pit ring inserts or high-heat rated black lava rocks.
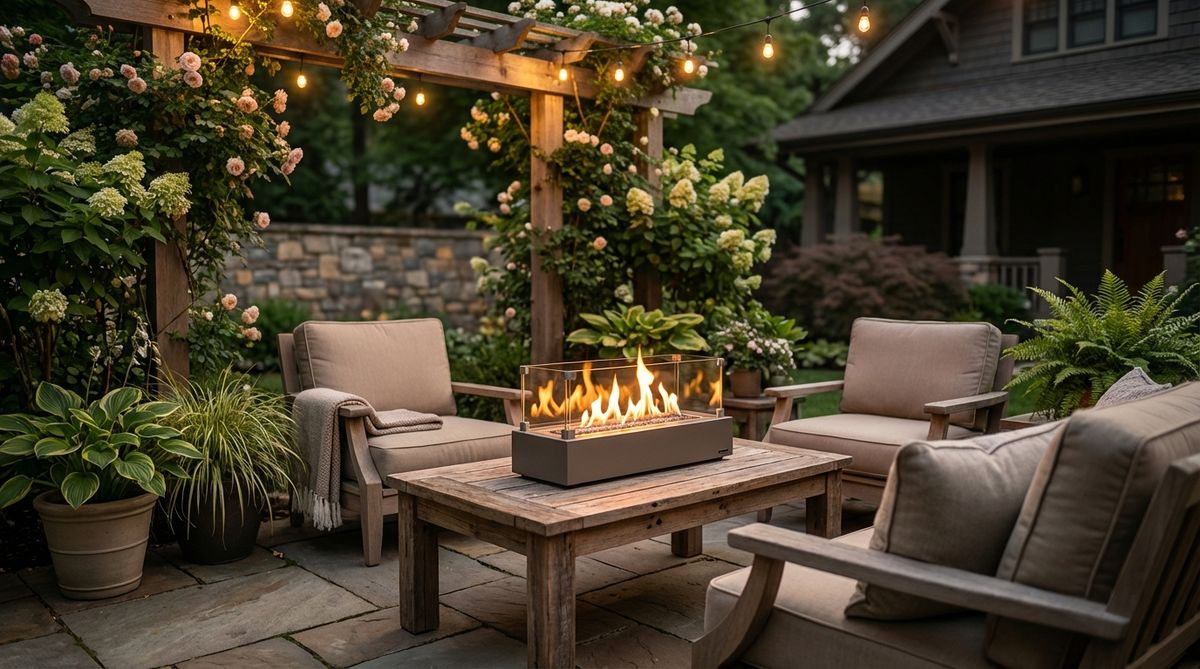
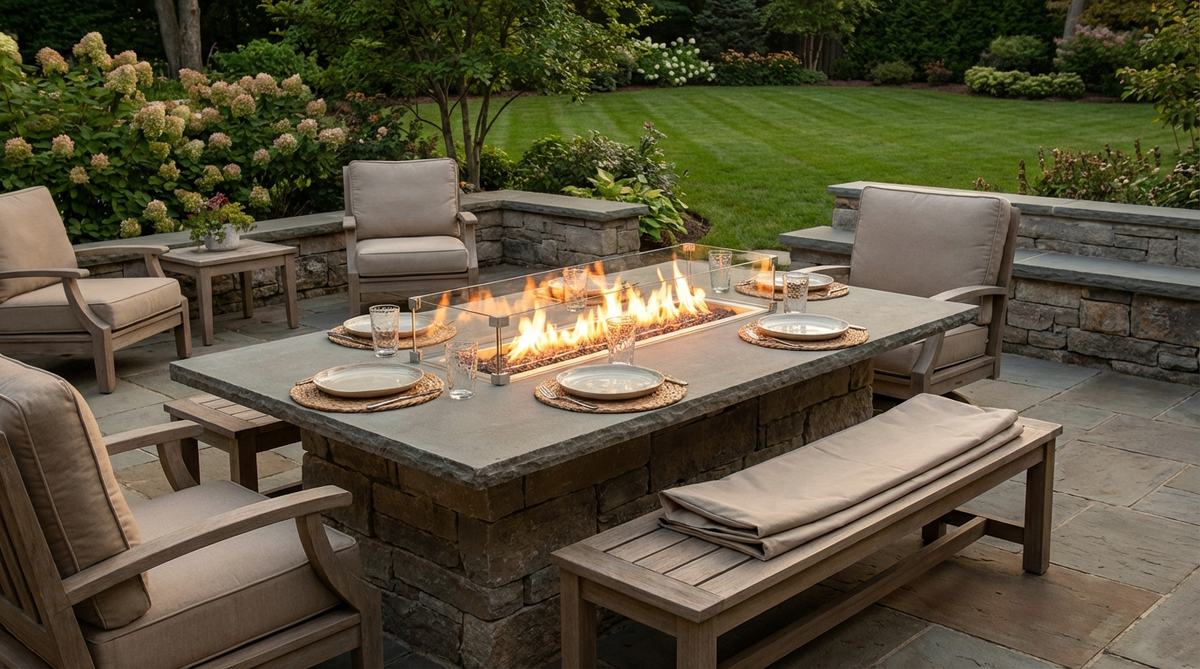
26. Linear Fire Feature
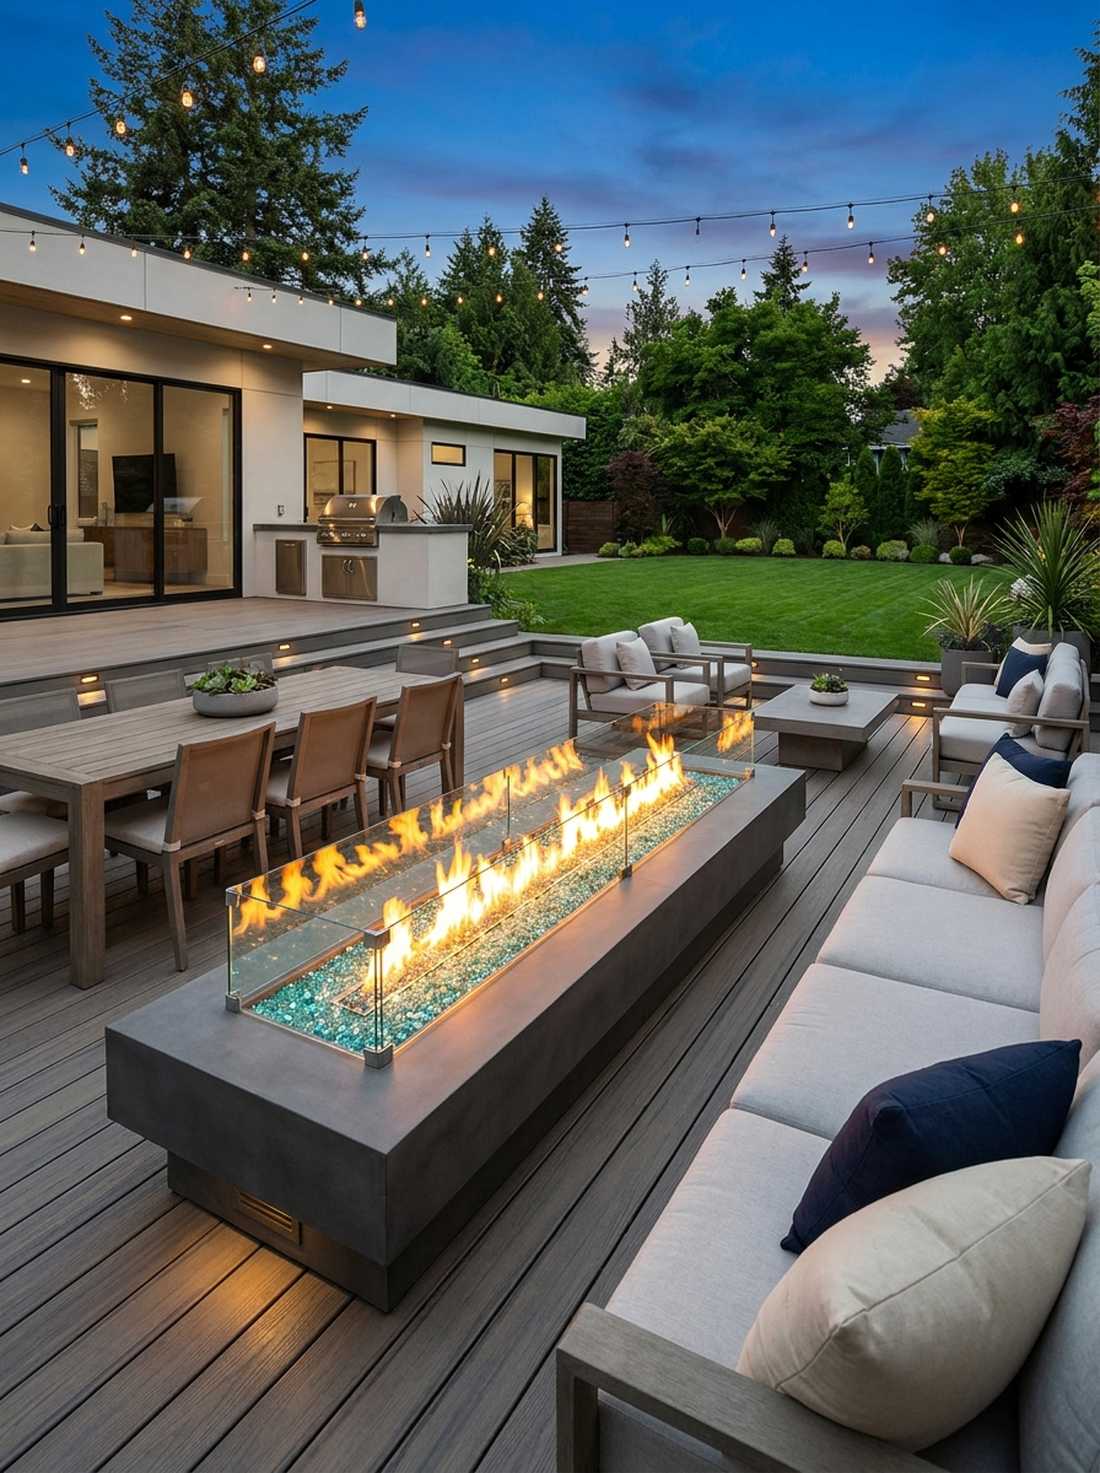
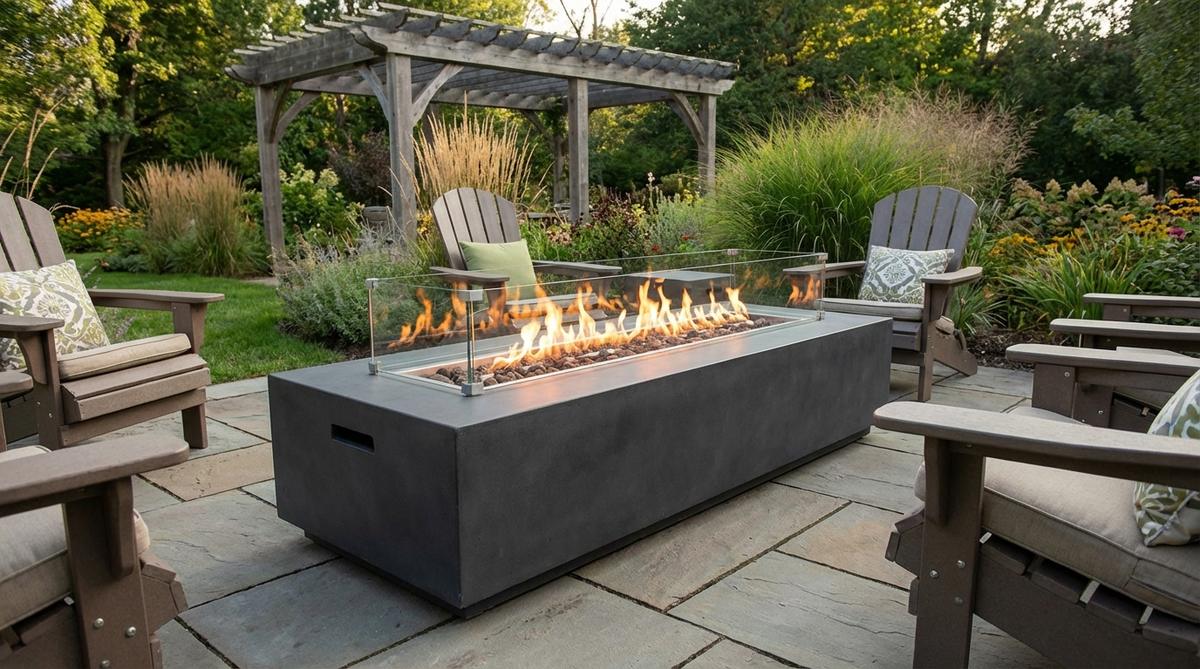
Slices through the night with a sleek, continuous ribbon of bright flame. A modern rectangular gas fire trough perfectly matches contemporary, straight-edged architecture. Ideal for dividing a dining zone from a lounging area on a massive deck.
Traditional round pits look messy in modern yards, but this strict geometry looks far more expensive than it is. Covering the burner with reflective crushed glass amplifies the glow, making the flames look brilliantly suspended.
A stunning gas-powered linear table usually runs $300–$600. Pin this for your luxury patio mood board!
- Key Materials: Linear gas fire table, tempered fire glass
- Vibe / Style: Ultra-modern luxury
- Difficulty: Instant placement
- Budget Breakdown: Fire table: $350 | Glass rocks: $50
- Creator’s Tip: Buy a model with a heavy glass wind guard; it prevents breezes from blowing the flame flat and burning fuel inefficiently.
- Smart Sourcing: tempered reflective fire glass (bulk bags) or linear gas fire pit tables (with wind guards).
27. Chiminea Accent
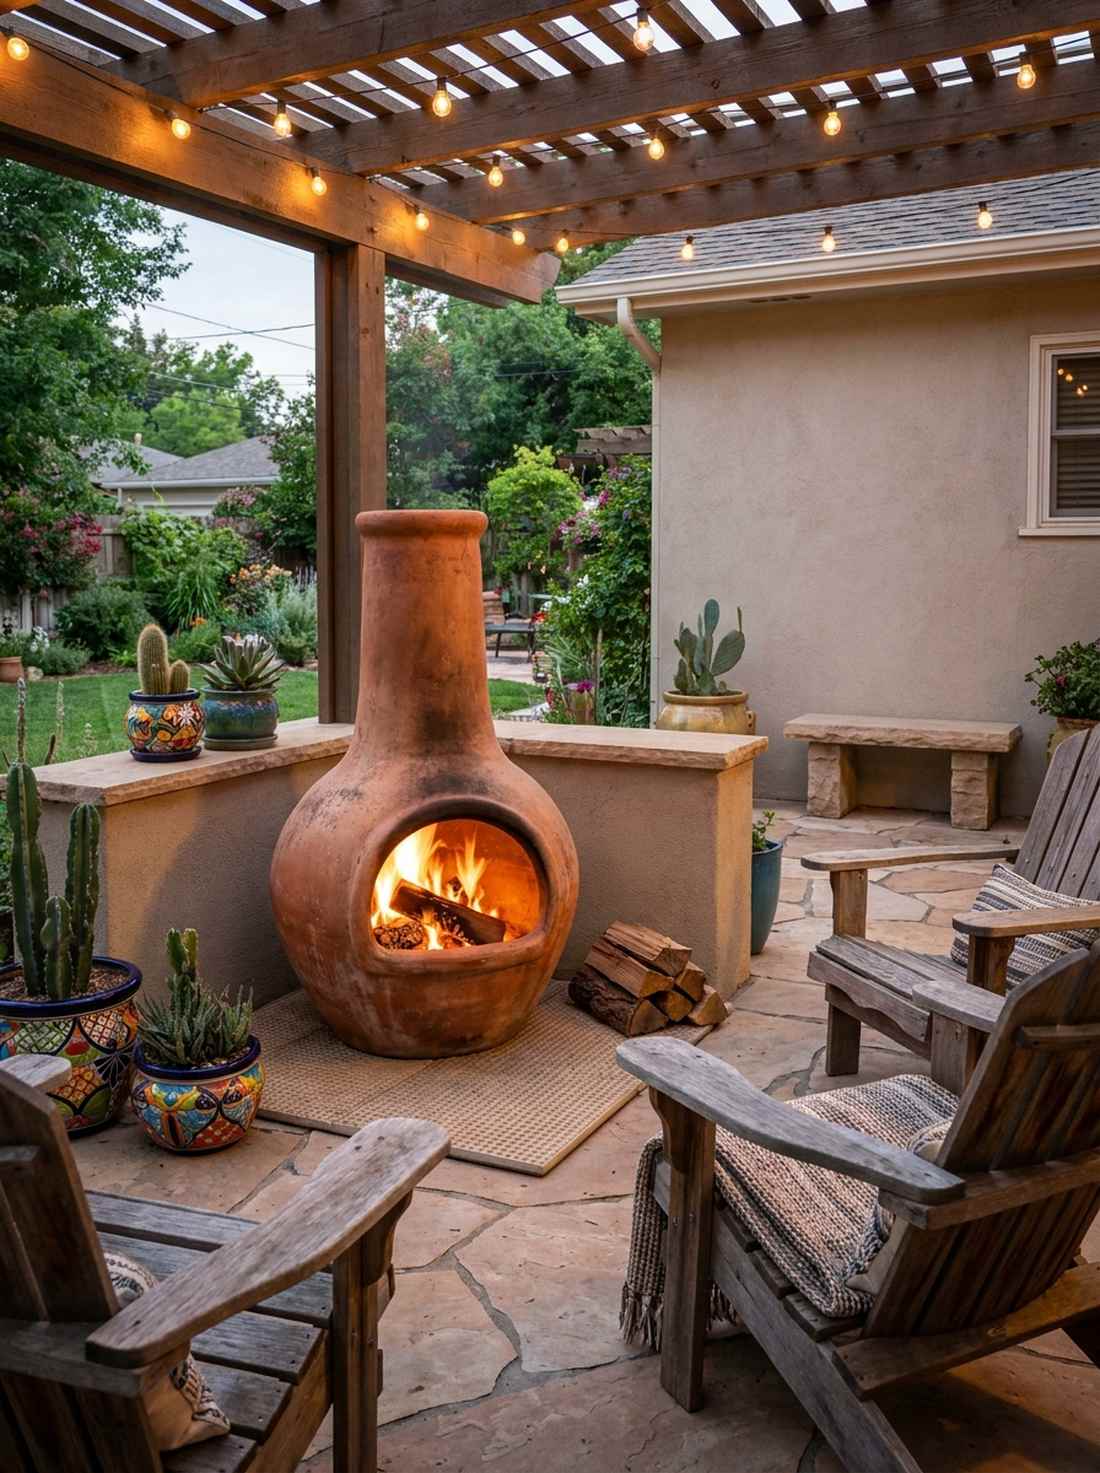
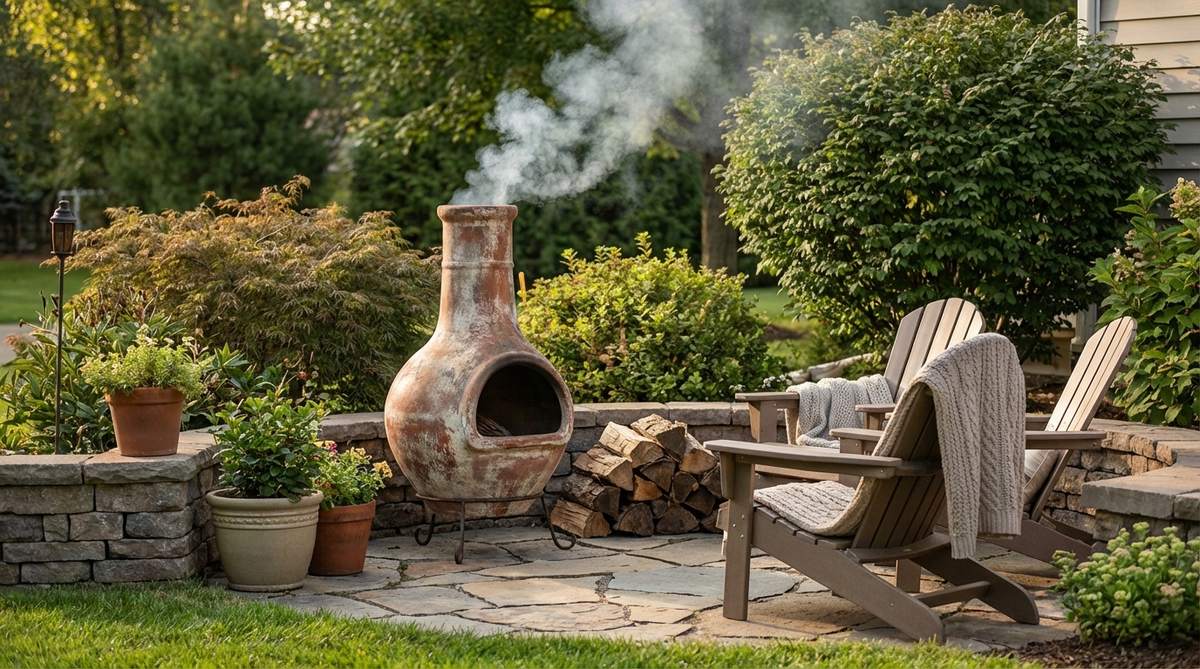
Throws serious heat while acting as a gorgeous, sculptural clay masterpiece. Tucking a traditional wood-burning chiminea into a corner saves massive floor space. Extremely practical for small, tight patios that can’t handle open flames safely.
Open bowls let smoke blow right into your eyes, but this vertical stack completely bypasses that issue by drafting smoke straight up. The enclosed belly radiates intense heat, giving a designer-level finish with a southwestern flair.
You can grab a heavy cast-iron or clay unit for $100–$200.
- Key Materials: Clay or cast iron chiminea, heat-proof pad
- Vibe / Style: Southwestern artisan flair
- Difficulty: Easy drop-in
- Budget Breakdown: Chiminea: $150 | Base pad: $30
- Creator’s Tip: Put two inches of play sand in the bottom before your first fire to protect the clay base from cracking under direct extreme heat.
- Smart Sourcing: heavy-duty cast iron chiminea kits or fireproof patio protection mats.
28. Patio Heater Zones
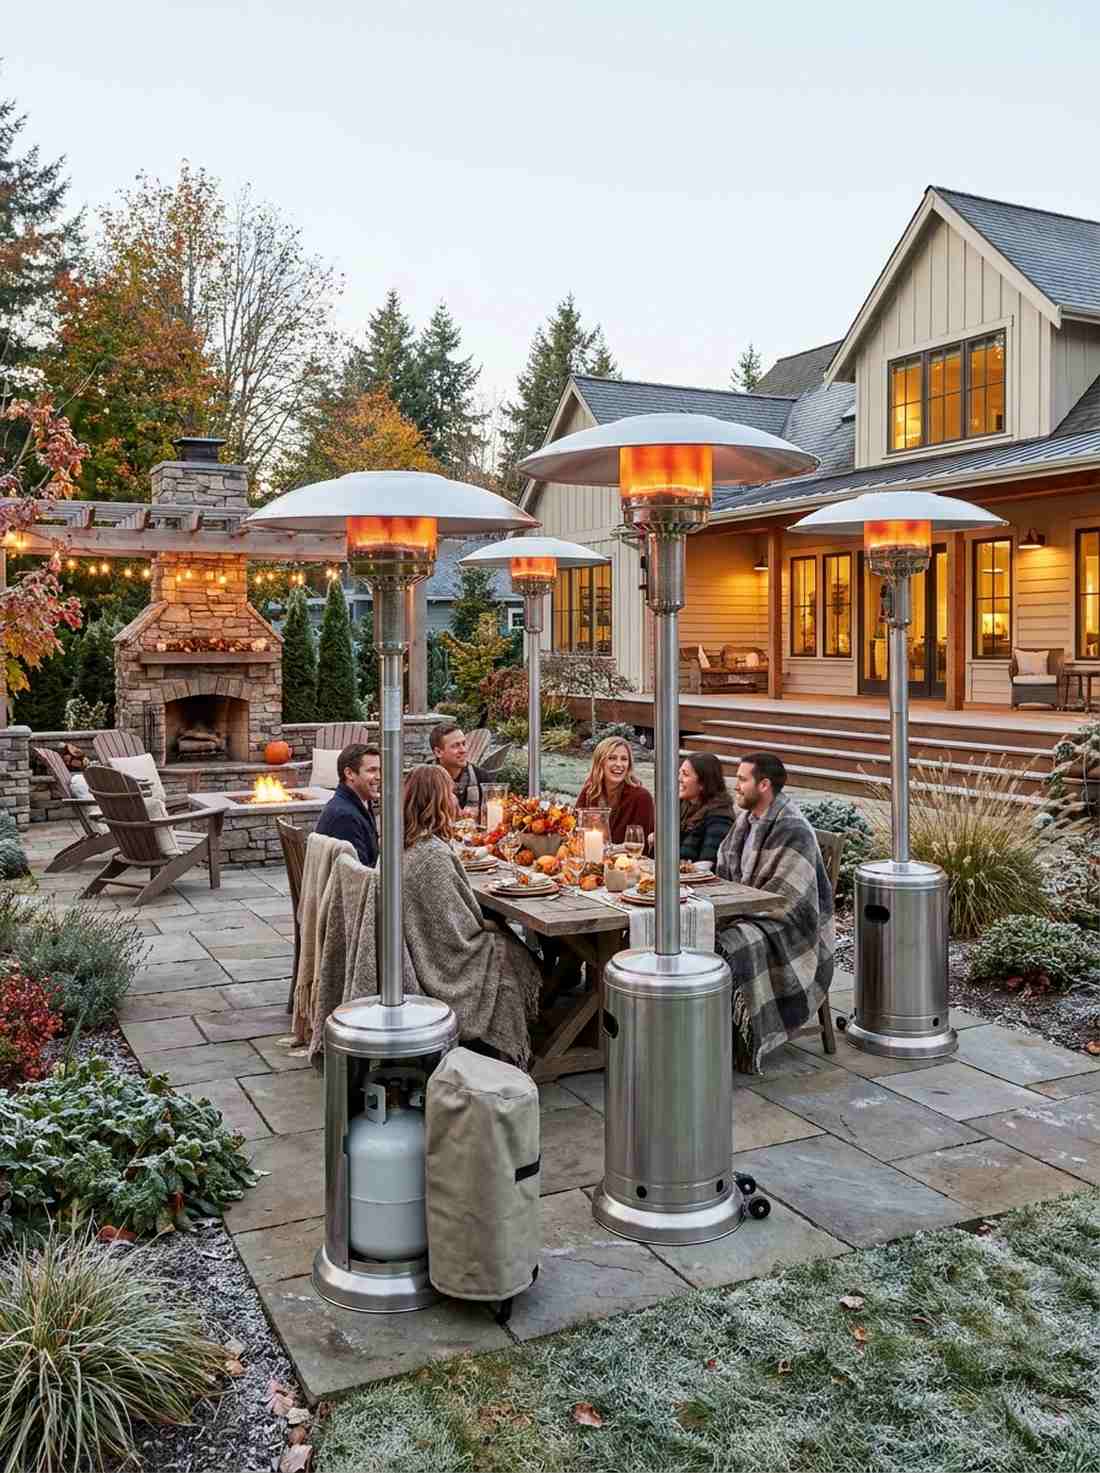
Pushes down a blanket of tropical warmth even when there’s frost on the ground. Deploying freestanding propane umbrella heaters instantly winter-proofs any seating area. The ultimate hack for extending your outdoor dinner parties into late November.
Huddling under blankets only goes so far, but these towering commercial units deliver a surprisingly premium look straight from high-end restaurant patios. They require zero wiring and can be rolled directly over the coldest guests.
A reliable high-BTU heater costs about $130–$250.
- Key Materials: Propane patio heater, heavy base weights
- Vibe / Style: Commercial restaurant patio
- Difficulty: Basic wrench assembly
- Budget Breakdown: Heater unit: $160 | Propane tank: $50
- Creator’s Tip: Always buy a waterproof cover and keep it on when not in use; spider webs in the burner tube are the #1 cause of heater failure.
- Smart Sourcing: commercial-grade propane patio heaters or heavy-duty waterproof tall heater covers.
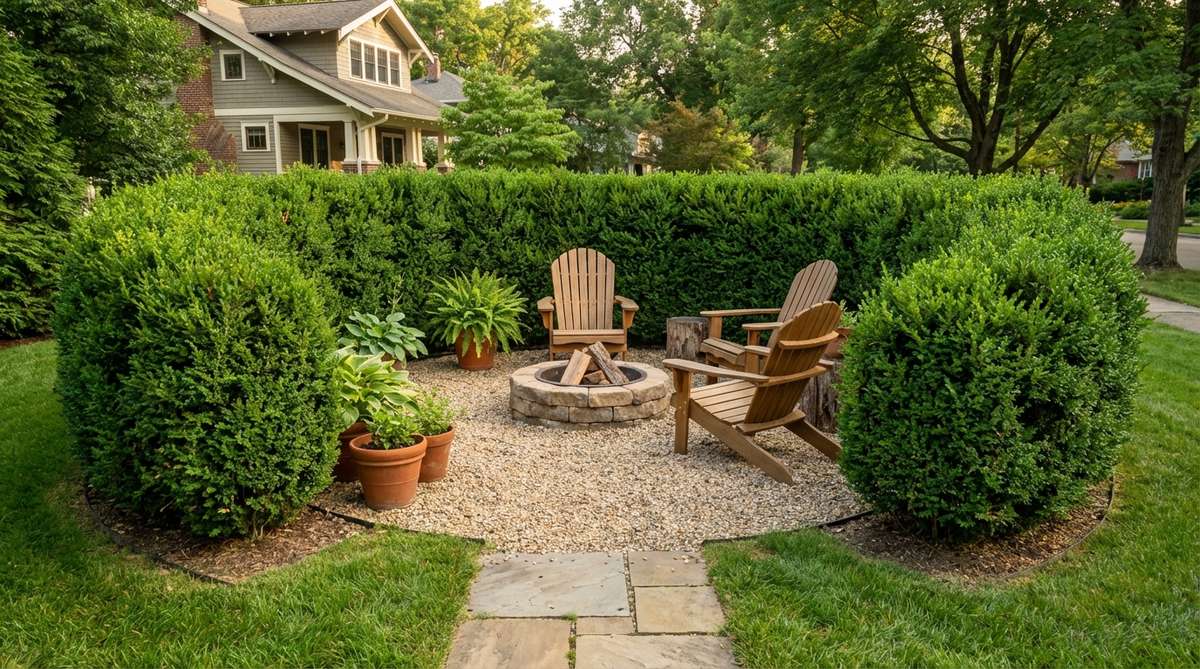
29. Fire Bowl Centerpiece
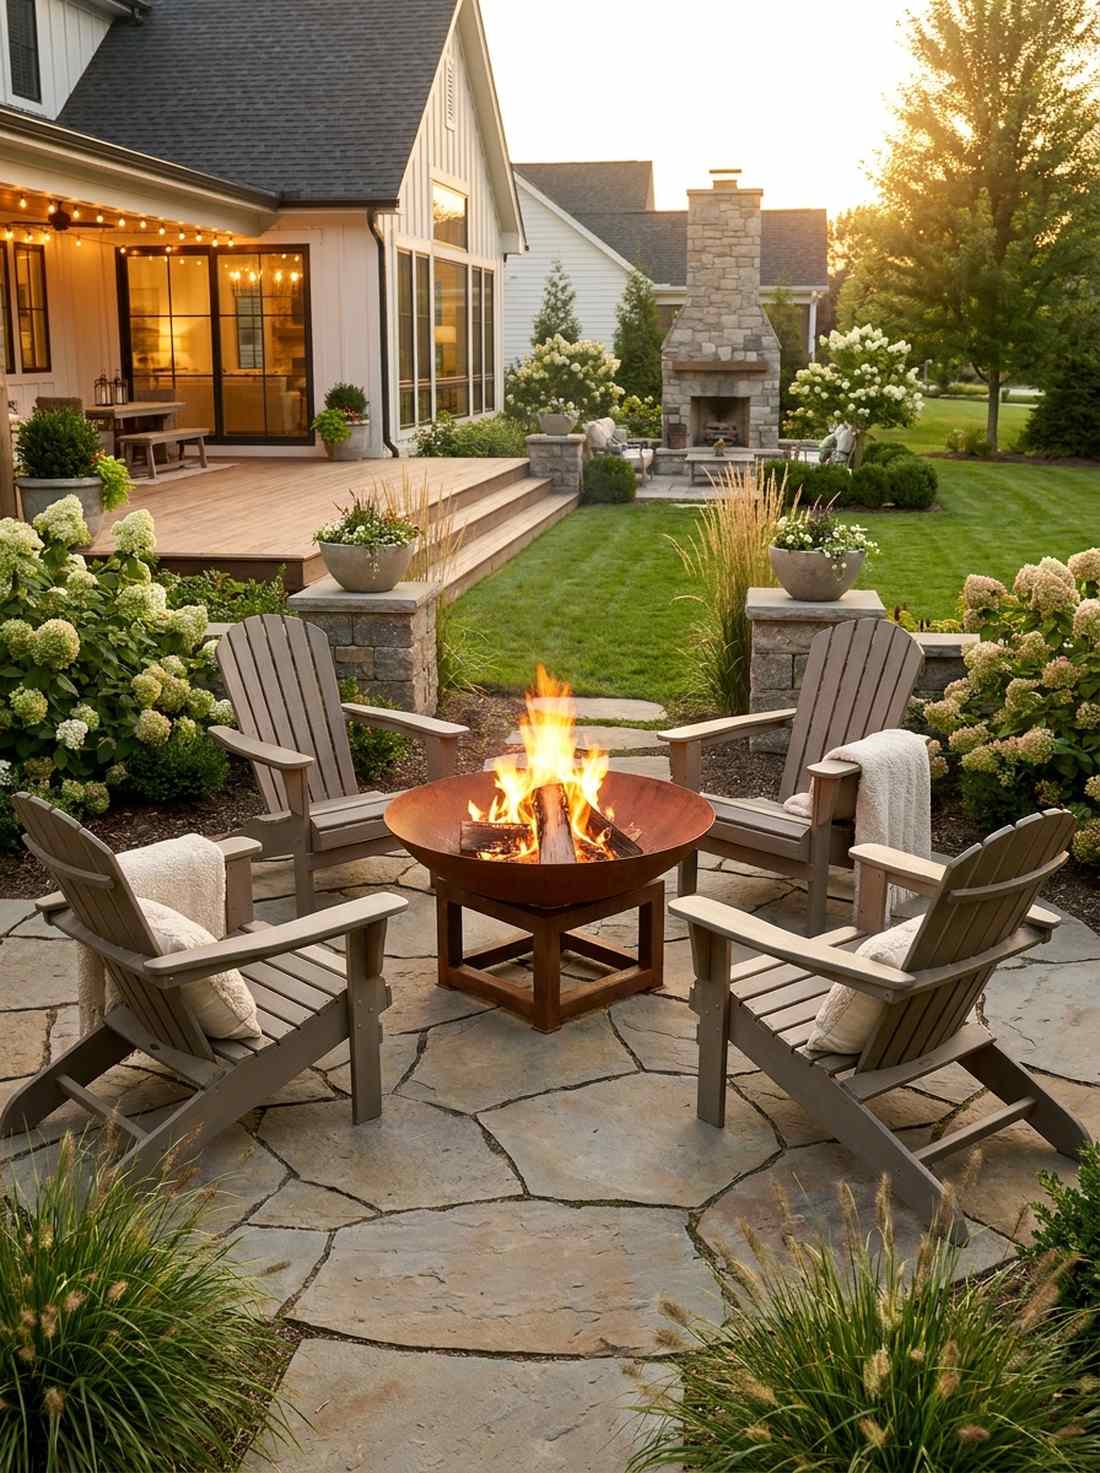
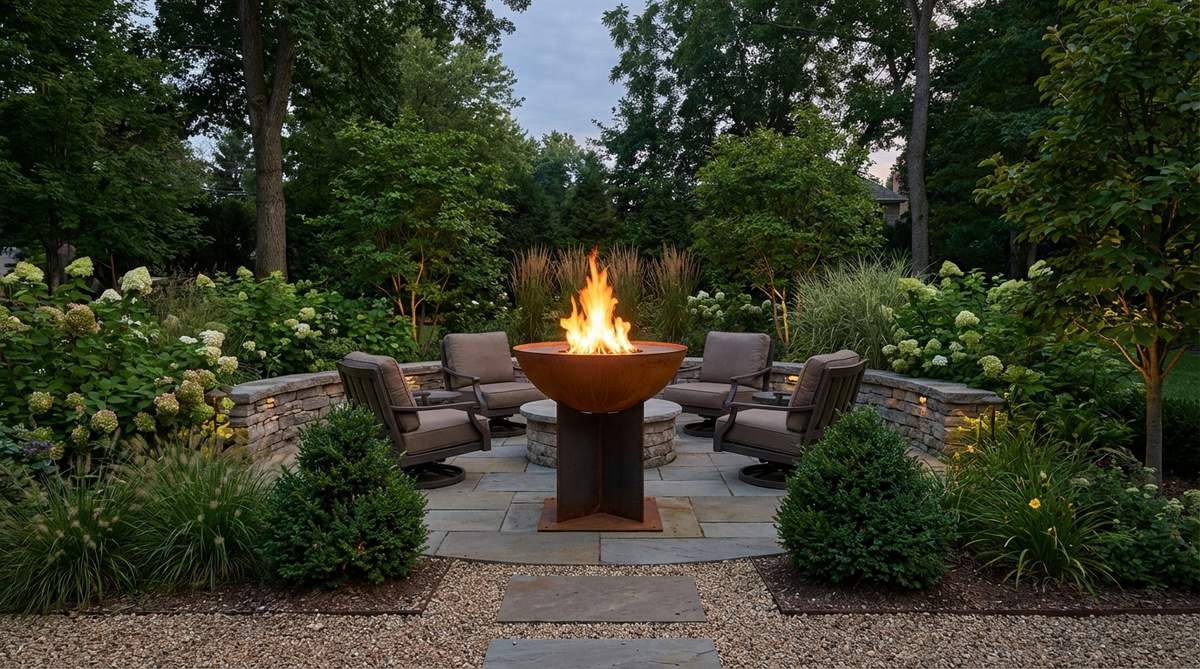
Elevates the flame to torso level, hitting you with direct, comforting warmth. A raised pedestal fire bowl acts as an instant, glowing focal statue. Perfect for centering between four Adirondack chairs in a tight garden circle.
Ground-level pits lose heat to the dirt, but raising the iron bowl looks far more expensive and radiates heat directly at your chest. Allowing a copper or corten steel bowl to naturally rust outside gives a designer-level finish.
You can find stunning steel bowls for $80–$150. Save this idea for a fast aesthetic upgrade.
- Key Materials: Corten steel or cast iron bowl, metal stand
- Vibe / Style: Industrial modern art
- Difficulty: Zero setup required
- Budget Breakdown: Metal bowl & stand: $120 | Firewood: $20
- Creator’s Tip: Drill a small 1/4-inch hole dead center in the bottom of the bowl so rainwater drains out instead of forming a gross rust puddle.
- Smart Sourcing: weathering corten steel fire bowls or waterproof canvas fire pit covers.
Wait until you see how this next heating element instantly transforms a plain seating zone into a premium outdoor lounge…
30. Outdoor Fireplace

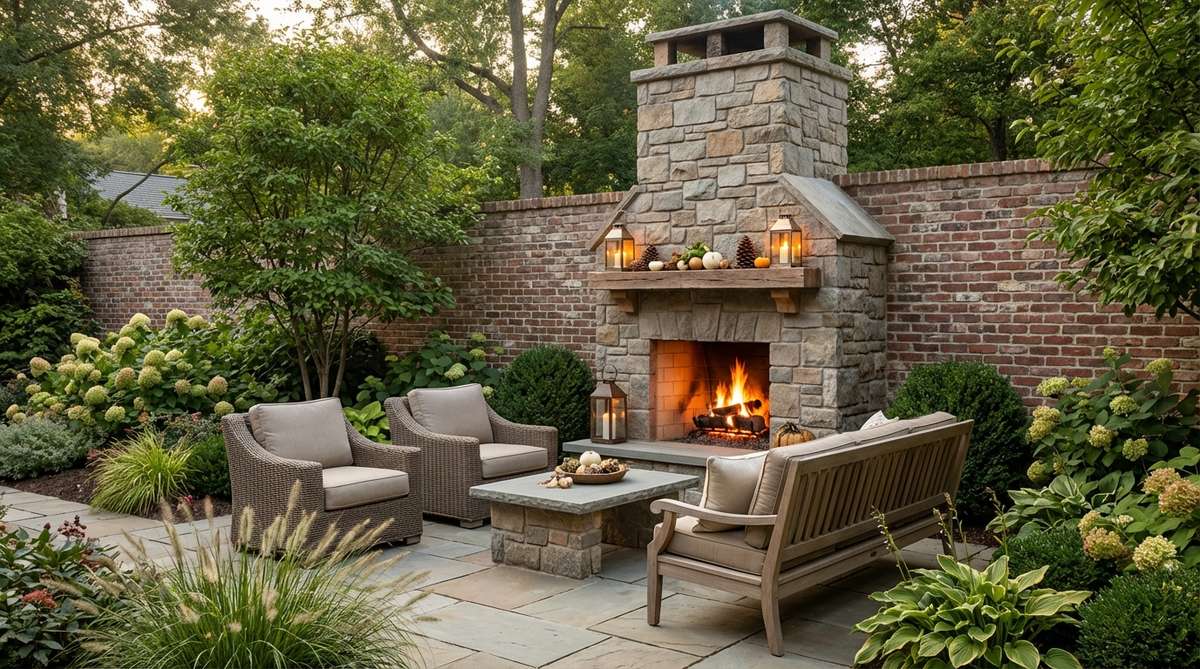
Anchors the entire backyard with a massive, architectural statement wall. An upright masonry outdoor fireplace turns a basic patio into a legitimate living room. The grandest choice for blocking a bad view while generating incredible heat.
Custom brickwork costs tens of thousands, but using prefabricated modular fireplace kits completely bypasses the contractor fees. Stacking the stone veneer over the frame yourself delivers a surprisingly premium look that permanently boosts property value.
A solid modular DIY kit will run between $800–$1,500.
- Key Materials: Modular fireplace frame, stone veneer flats
- Vibe / Style: Grand estate luxury
- Difficulty: Advanced DIY project
- Budget Breakdown: Frame Kit: $600 | Stone Veneer & Mortar: $400
- Creator’s Tip: Build the fireplace facing the prevailing wind direction so the back wall blocks the breeze and reflects the fire’s heat directly at you.
- Smart Sourcing: prefabricated modular fireplace core kits or natural stone veneer flat packs.
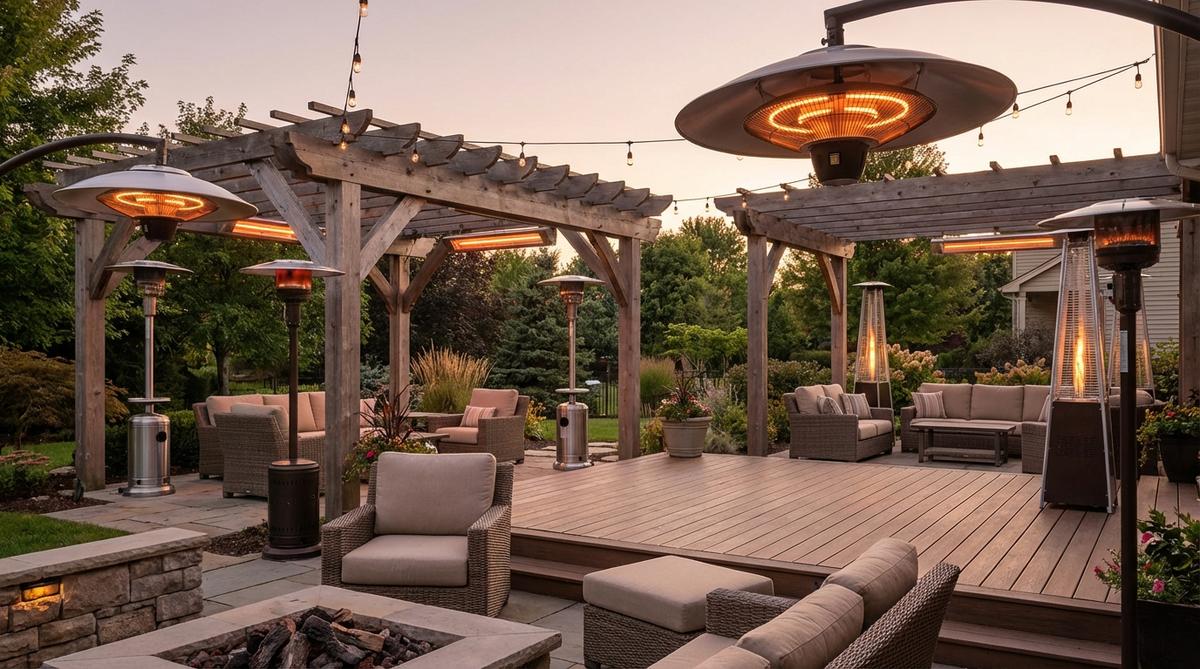
31. Heat Lamp Installation
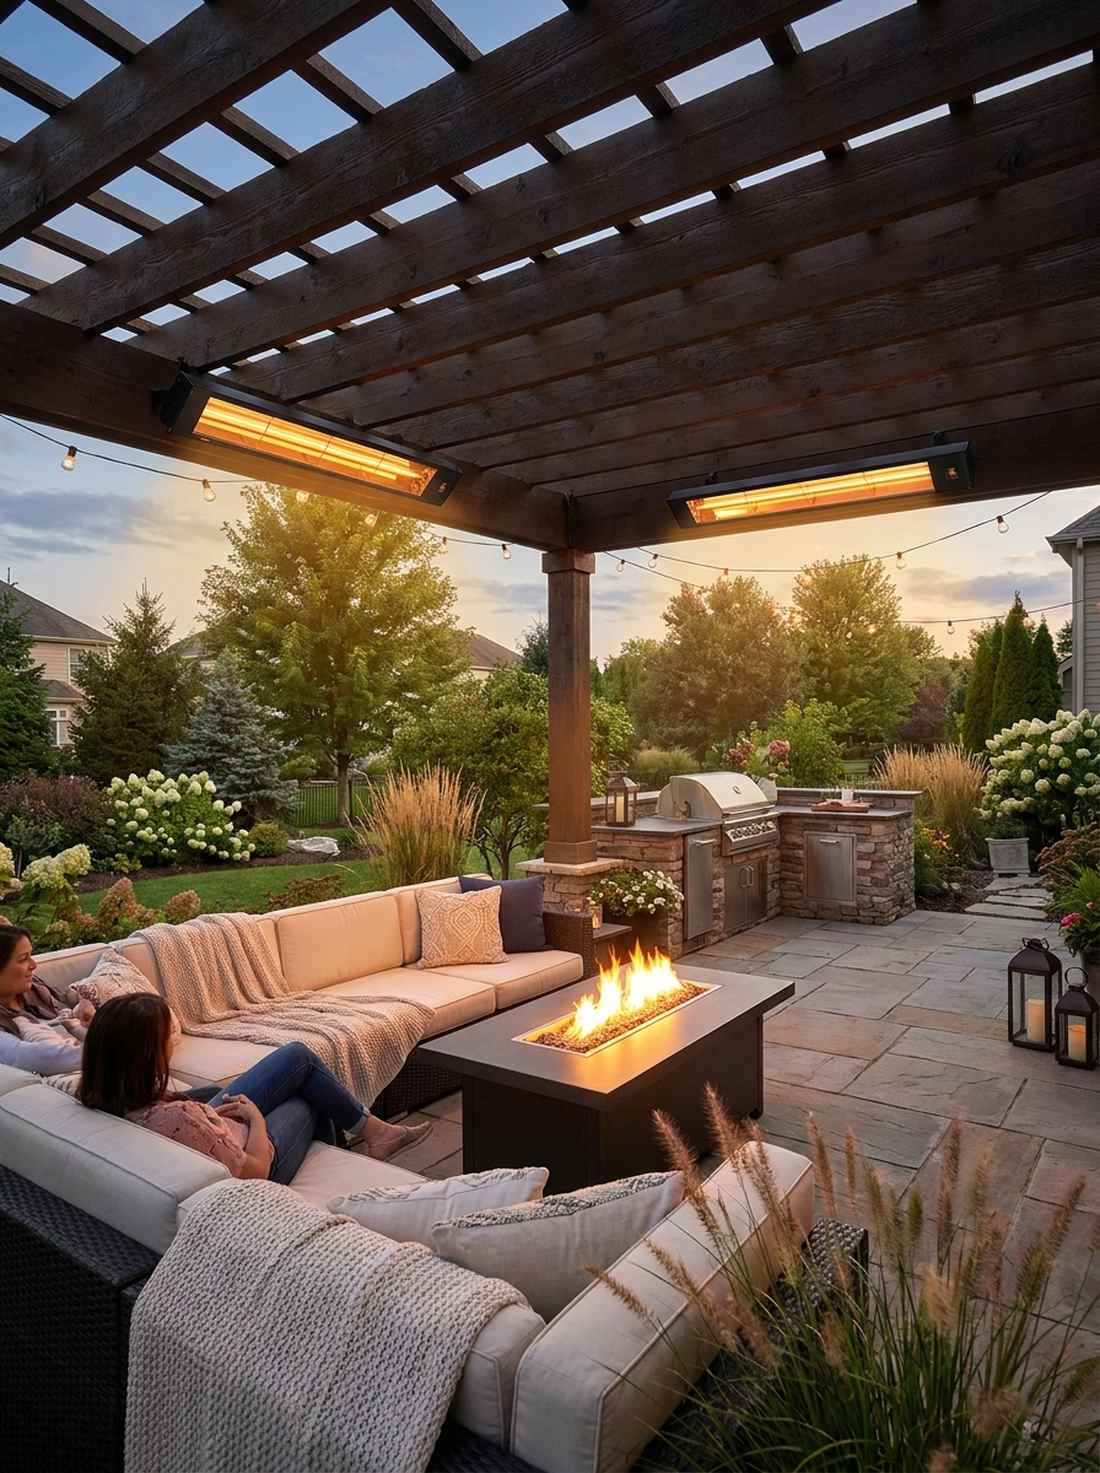
Beams down invisible, sun-like warmth directly onto your shoulders. Mounting infrared electric ceiling heaters keeps the floor completely clear of clunky tanks. The stealthiest warmth solution for covered pergolas or enclosed sunrooms.
Gas heaters waste energy heating the air, but this targeted infrared tech gives a designer-level finish by heating objects (like you) directly. Flicking a wall switch for instant heat is the ultimate luxury in cozy garden ideas.
High-quality electric lamp bars cost roughly $150–$300.
- Key Materials: Wall-mounted infrared heater, dedicated outlet
- Vibe / Style: High-tech seamless comfort
- Difficulty: Requires electrical know-how
- Budget Breakdown: Heater unit: $200 | Mounting hardware: $20
- Creator’s Tip: Mount the heaters at a 45-degree angle right at the edge of the roofline, pointing inward toward the center of the seating area.
- Smart Sourcing: wall-mounted electric infrared patio heaters or weatherproof outdoor smart plugs.
32. Fire Table Dining
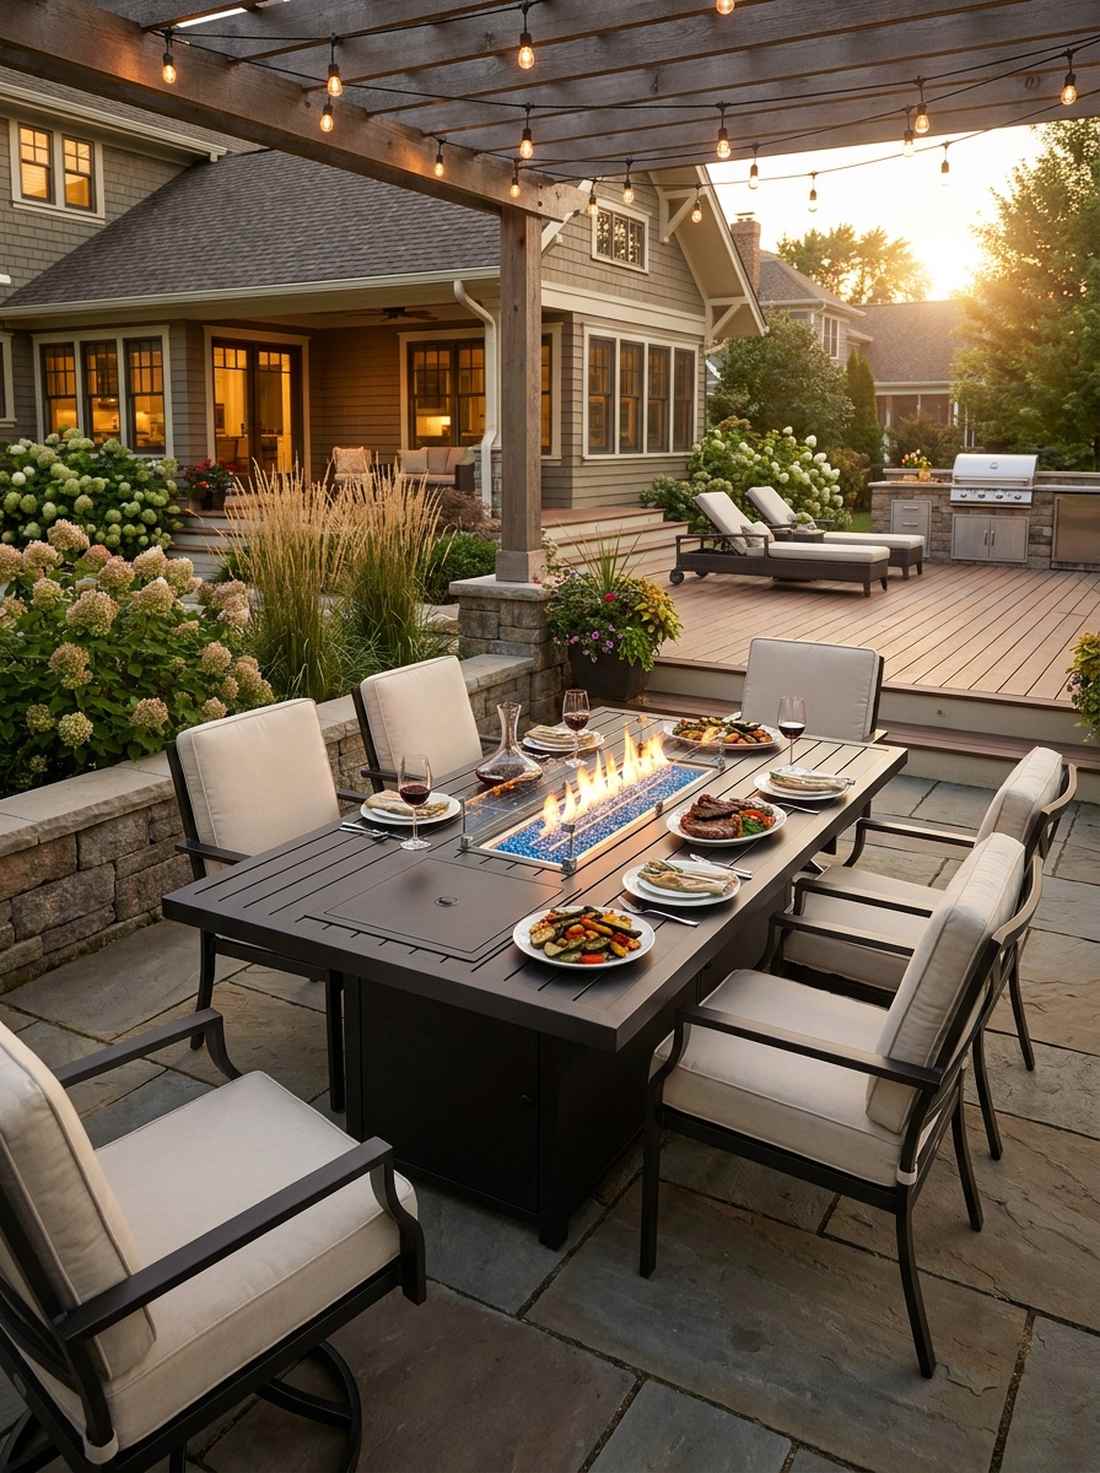
Combines a five-star dining experience with a mesmerizing, glowing centerpiece. Upgrading to an integrated gas fire dining table forces guests to linger for hours after the meal. Incredible for maximizing utility on small patios that can’t fit a table AND a fire pit.
Having two separate furniture pieces clutters the yard, but combining them looks far more expensive than it is. Hiding the ugly propane tank inside the table base completely preserves the high-end aesthetic.
A beautiful aluminum fire table usually ranges from $300–$700. Pin this if you love hosting outdoor dinners!
- Key Materials: Propane fire dining table, burner cover lid
- Vibe / Style: Premium alfresco dining
- Difficulty: Easy furniture assembly
- Budget Breakdown: Fire table: $450 | Tank cover: $0 (included)
- Creator’s Tip: Ensure your table comes with a flush-mount metal lid, allowing you to cover the burner and use the full table surface for daytime lunches.
- Smart Sourcing: aluminum gas fire dining table sets or premium colored fire glass bead drops.
Textural Comfort Layers That Define Cozy Gardens
33. Outdoor Rug Foundation
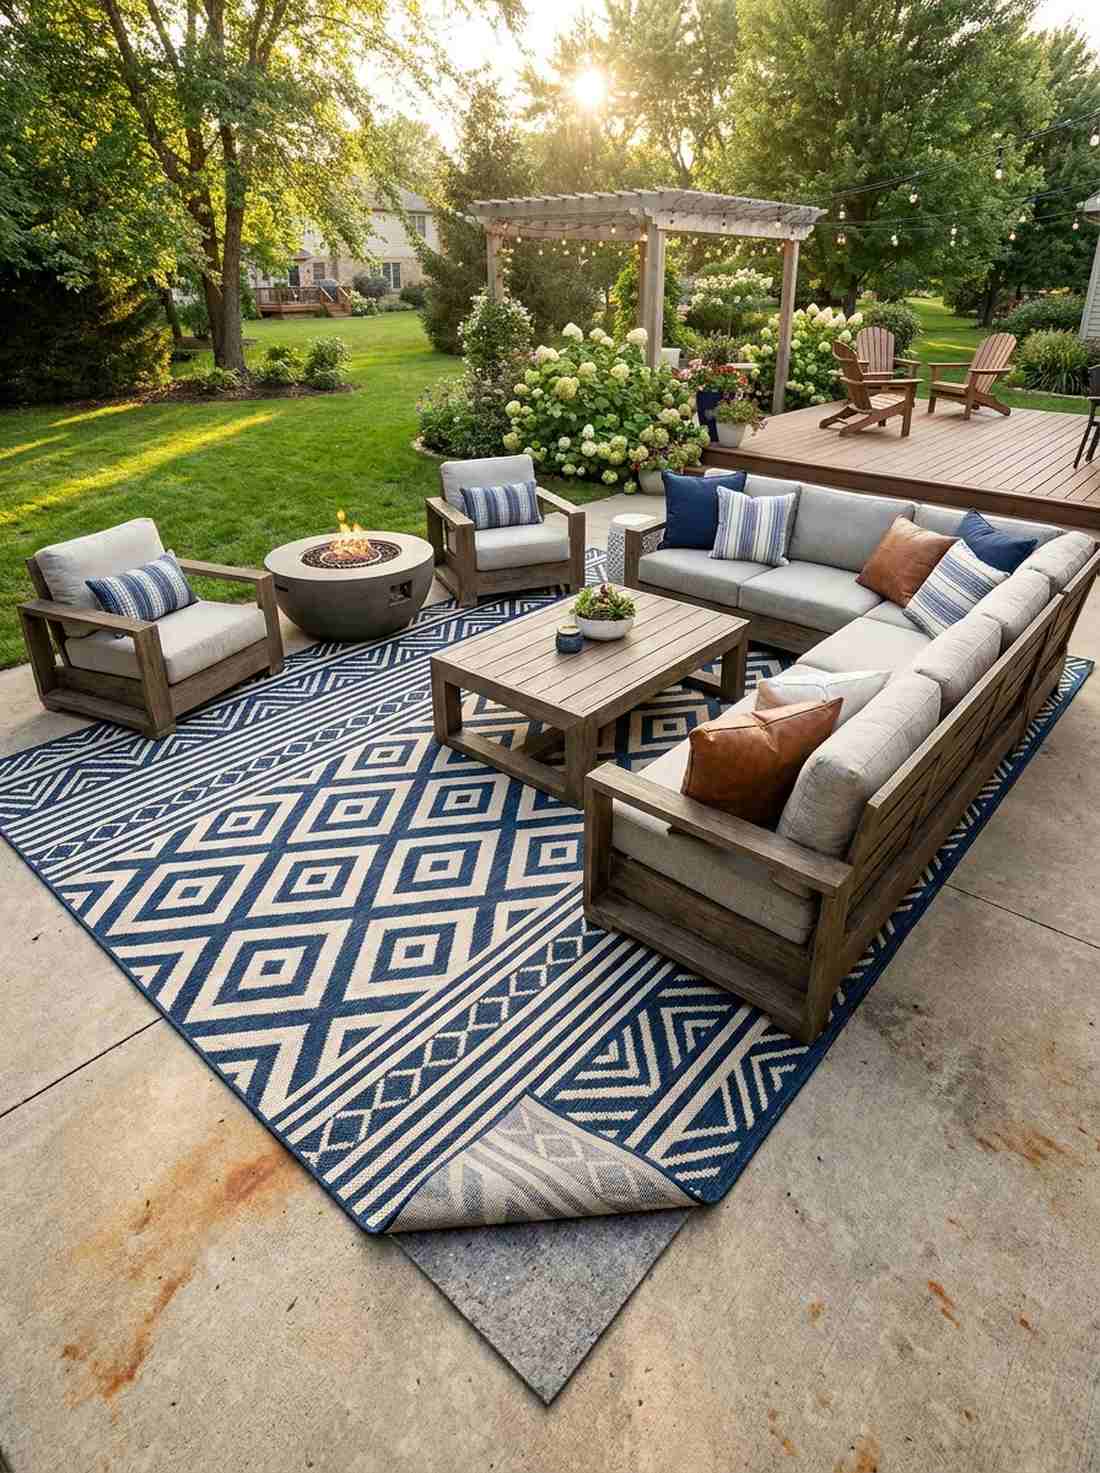
Instantly ties floating furniture together into a cohesive, grounded room. Rolling out a massive woven outdoor rug hides ugly, stained concrete slabs instantly. The ultimate foundation hack for defining a specific cozy garden corner.
Most leave their patio floor bare, but laying down a bold geometric pattern delivers a surprisingly premium look that softens the entire space. By choosing UV-treated polypropylene, you get the plush feel of an indoor carpet that you can literally hose off.
You can score a massive 8×10 rug for about $70–$150.
- Key Materials: Polypropylene outdoor rug, rug pad
- Vibe / Style: Structured outdoor living room
- Difficulty: Unroll and done
- Budget Breakdown: Rug: $100 | Heavy grip pad: $30
- Creator’s Tip: Always buy an outdoor rug pad; it stops slipping, but more importantly, it allows water to drain underneath so the rug doesn’t mold.
- Smart Sourcing: waterproof polypropylene outdoor area rugs or breathable outdoor rug grip pads.
34. Layered Throw Blankets
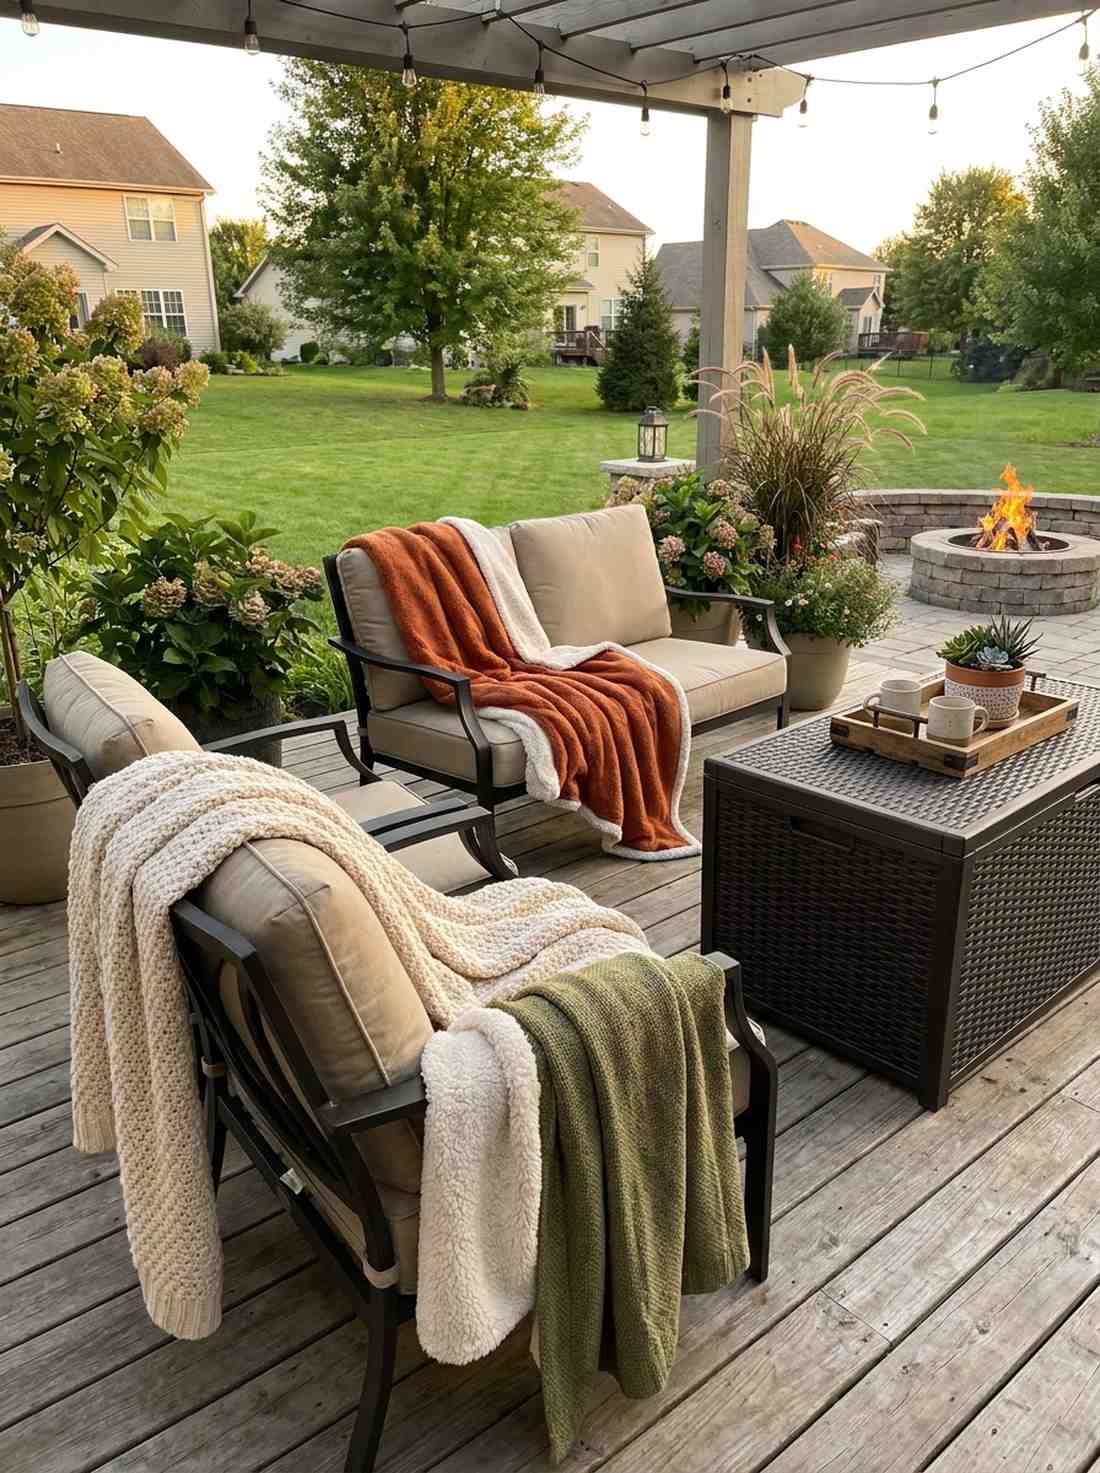
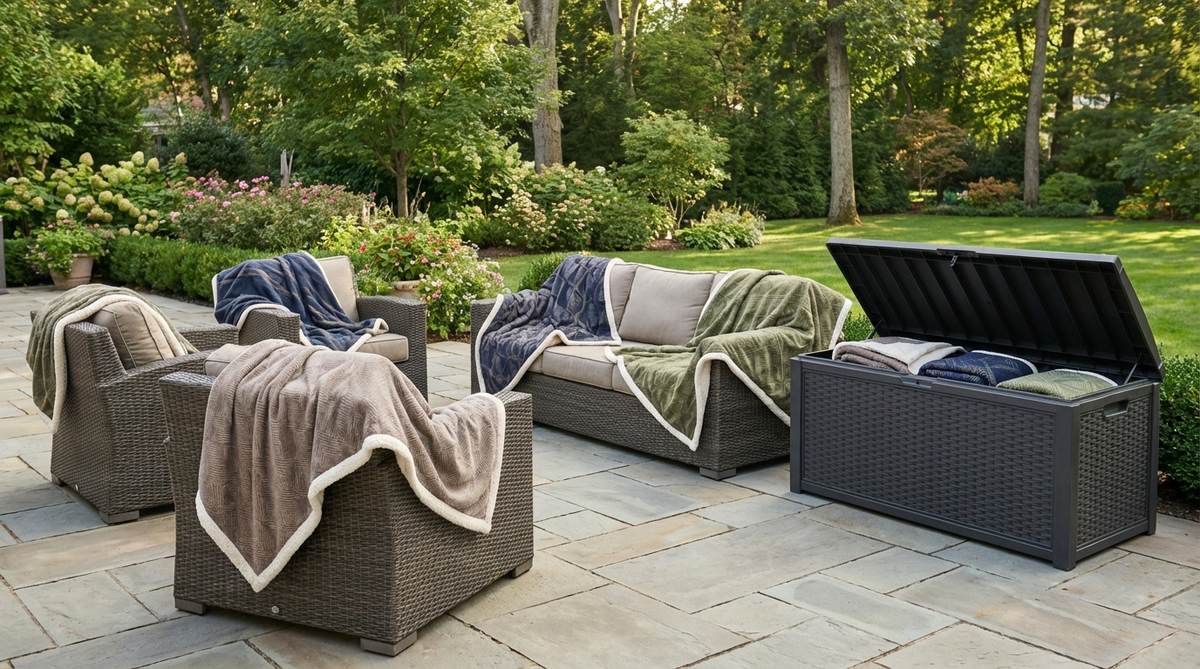
Invites guests to snuggle up and stay outside long after the sun drops. Draping textured outdoor throw blankets over rigid chair arms breaks up hard lines. Essential for creating that incredibly photogenic, lived-in Pinterest vibe.
Leaving metal chairs bare looks cold and institutional, but strategically dropping thick, fleece-backed throws gives a designer-level finish. It screams hospitality and warmth, transitioning your space seamlessly into the cooler autumn months.
A set of high-quality outdoor blankets costs just $40–$80. Save this tip to soften your aesthetic!
- Key Materials: Weather-resistant blankets, waterproof storage box
- Vibe / Style: Maximum hygge comfort
- Difficulty: Literally just folding
- Budget Breakdown: 3 Blankets: $60 | Storage bin: $40
- Creator’s Tip: Store the blankets in a watertight resin deck box that doubles as a side table to keep them dry and readily accessible.
- Smart Sourcing: waterproof fleece-lined stadium blankets or resin outdoor storage deck boxes.
The texture upgrade coming up next is exactly what makes high-end Pinterest patios look so unbelievably soft and inviting…
35. Cushion Abundance
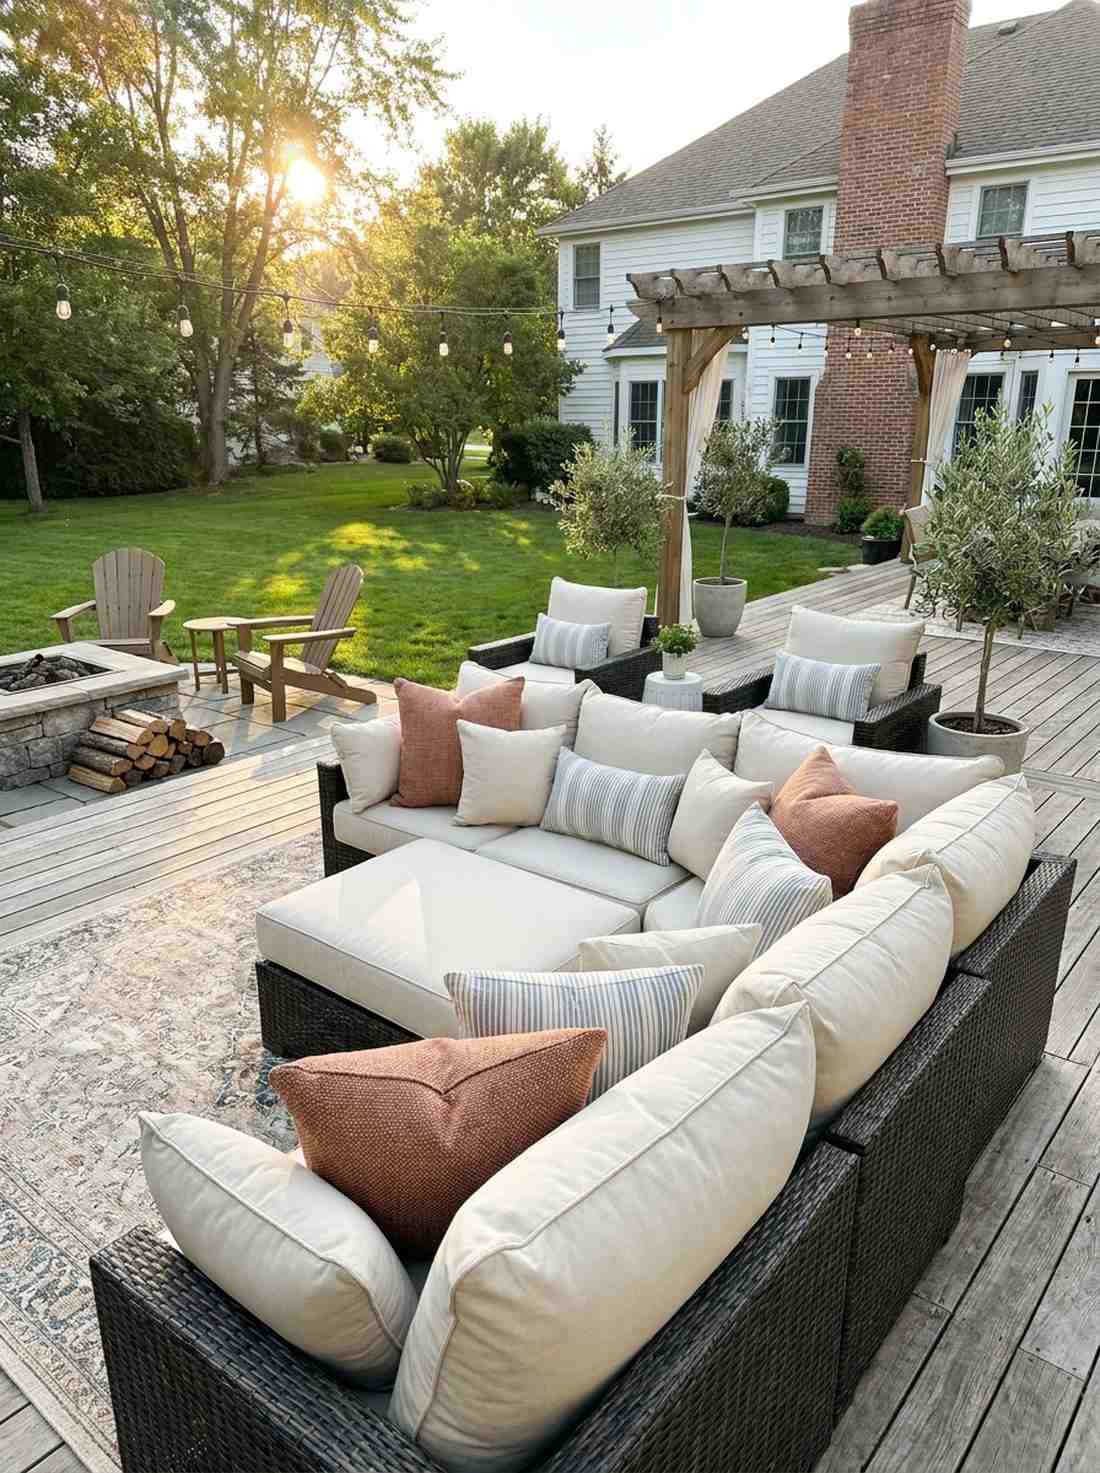
Turns stiff, unforgiving patio chairs into clouds of deep relaxation. Overstuffing seating with thick, varying-sized outdoor cushions completely masks cheap furniture frames. Ideal for deep-seating lounge sofas that need a pop of colorful personality.
Skimping on seat padding ruins the experience, but stacking oversized pillows completely bypasses the need to buy brand new couches. Utilizing fade-resistant acrylic fabrics ensures your investment doesn’t turn bleach-white in the July sun.
You can refresh an entire couch layout for $100–$250.
- Key Materials: Solution-dyed acrylic pillows, quick-dry foam inserts
- Vibe / Style: Plush resort lounging
- Difficulty: Just toss them on
- Budget Breakdown: Seat inserts: $100 | Decorative covers: $80
- Creator’s Tip: Mix three different textures (e.g., solid canvas, subtle stripe, textured weave) rather than buying a matching set for a curated look.
- Smart Sourcing: UV-resistant outdoor pillow cover sets or quick-dry outdoor foam cushion inserts.
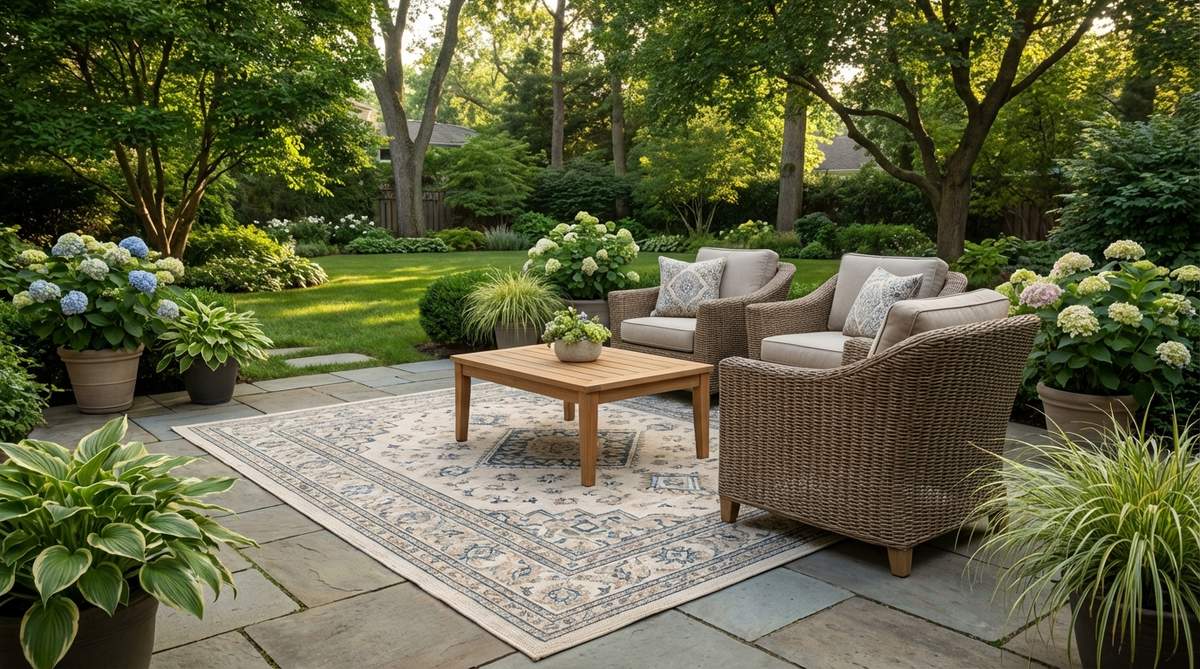
36. Woven Furniture Textures
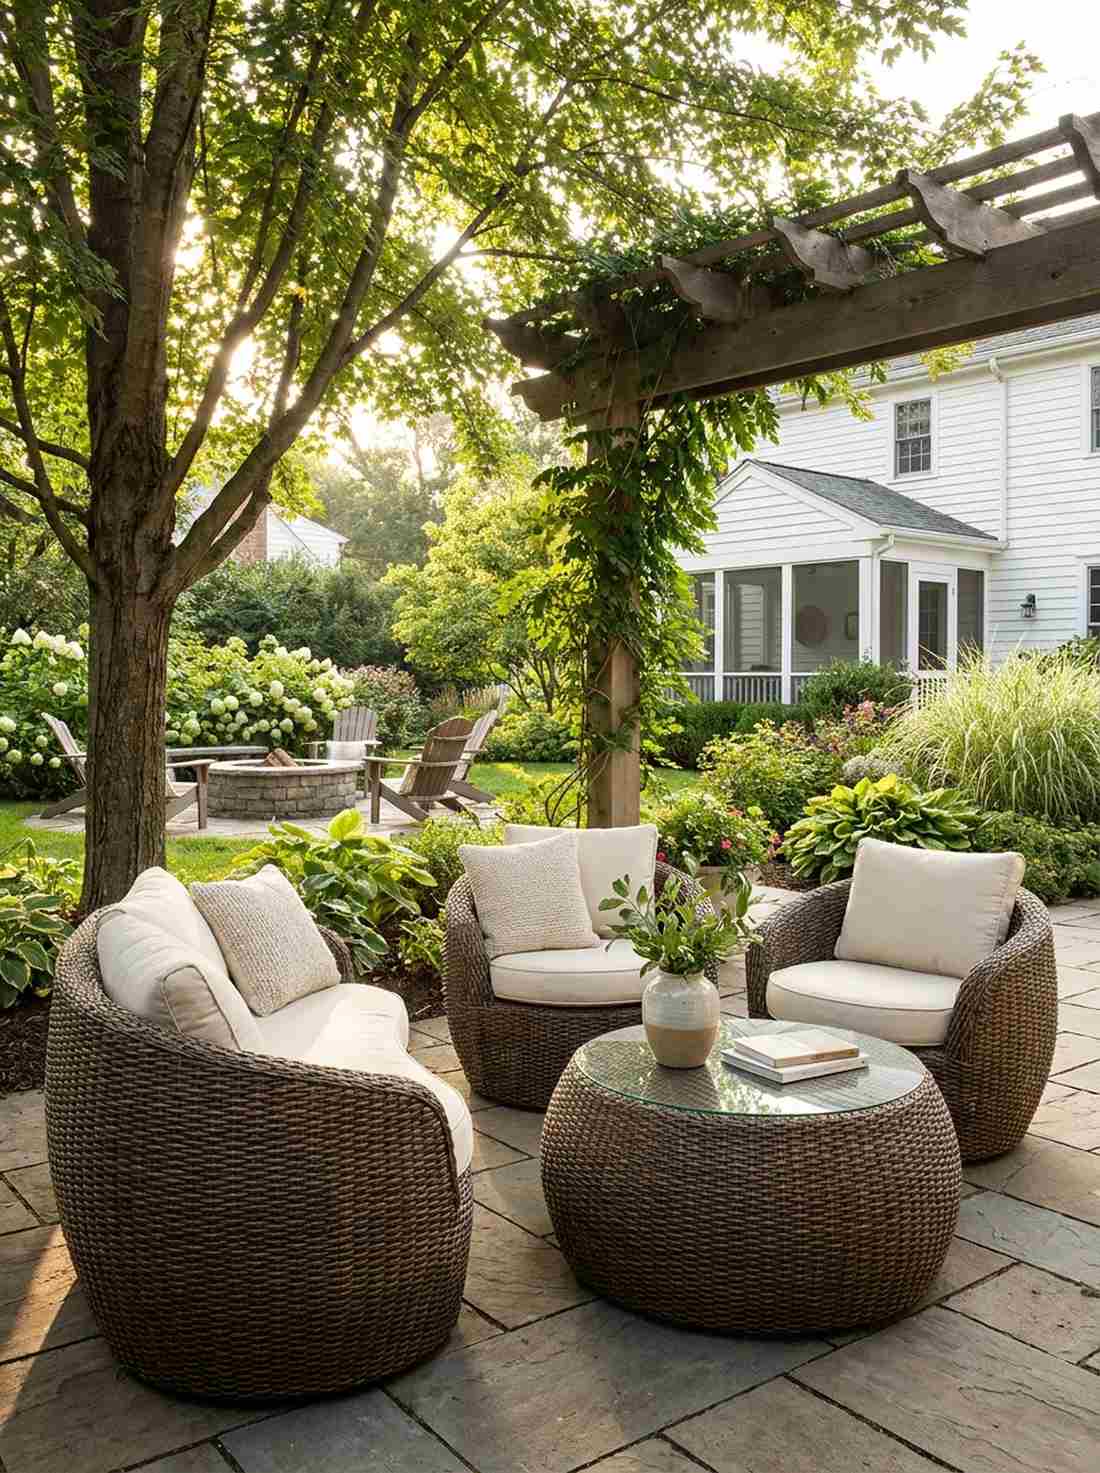
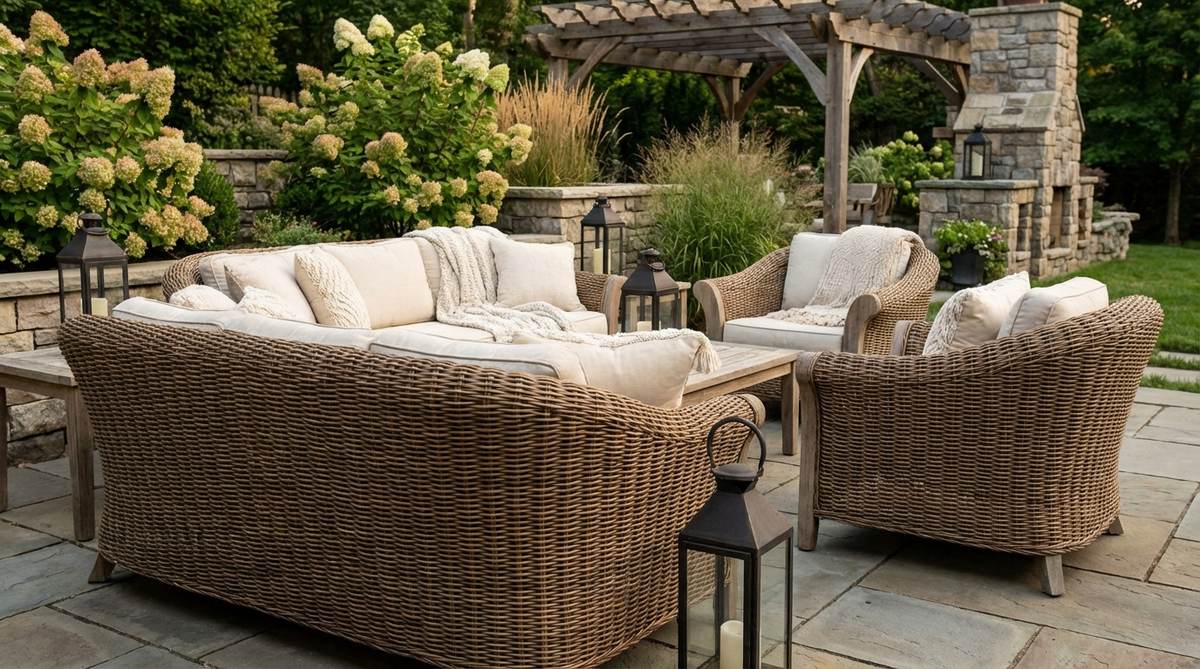
Brings a heavy dose of organic, earthy warmth to cold, modern patios. Investing in chunky poly-rattan woven seating adds massive tactile richness to the space. The perfect visual anchor for a shaded, cozy garden corner.
Standard aluminum chairs feel icy and harsh, but this deep, basket-weave aesthetic looks far more expensive than it is. Opting for high-density resin over real wicker guarantees the chairs won’t crack or unravel after one rainy season.
A solid woven chat set usually costs $250–$500.
- Key Materials: Synthetic resin wicker chairs, tempered glass table
- Vibe / Style: Tropical organic modern
- Difficulty: Basic hex-key assembly
- Budget Breakdown: 3-piece set: $300 | Furniture covers: $40
- Creator’s Tip: Avoid flat-looking plastic wicker; look for sets described as “round weave” or “half-round weave” for a hyper-realistic shadow depth.
- Smart Sourcing: all-weather PE rattan conversation sets or heavy-duty waterproof patio furniture covers.
37. Natural Wood Accents
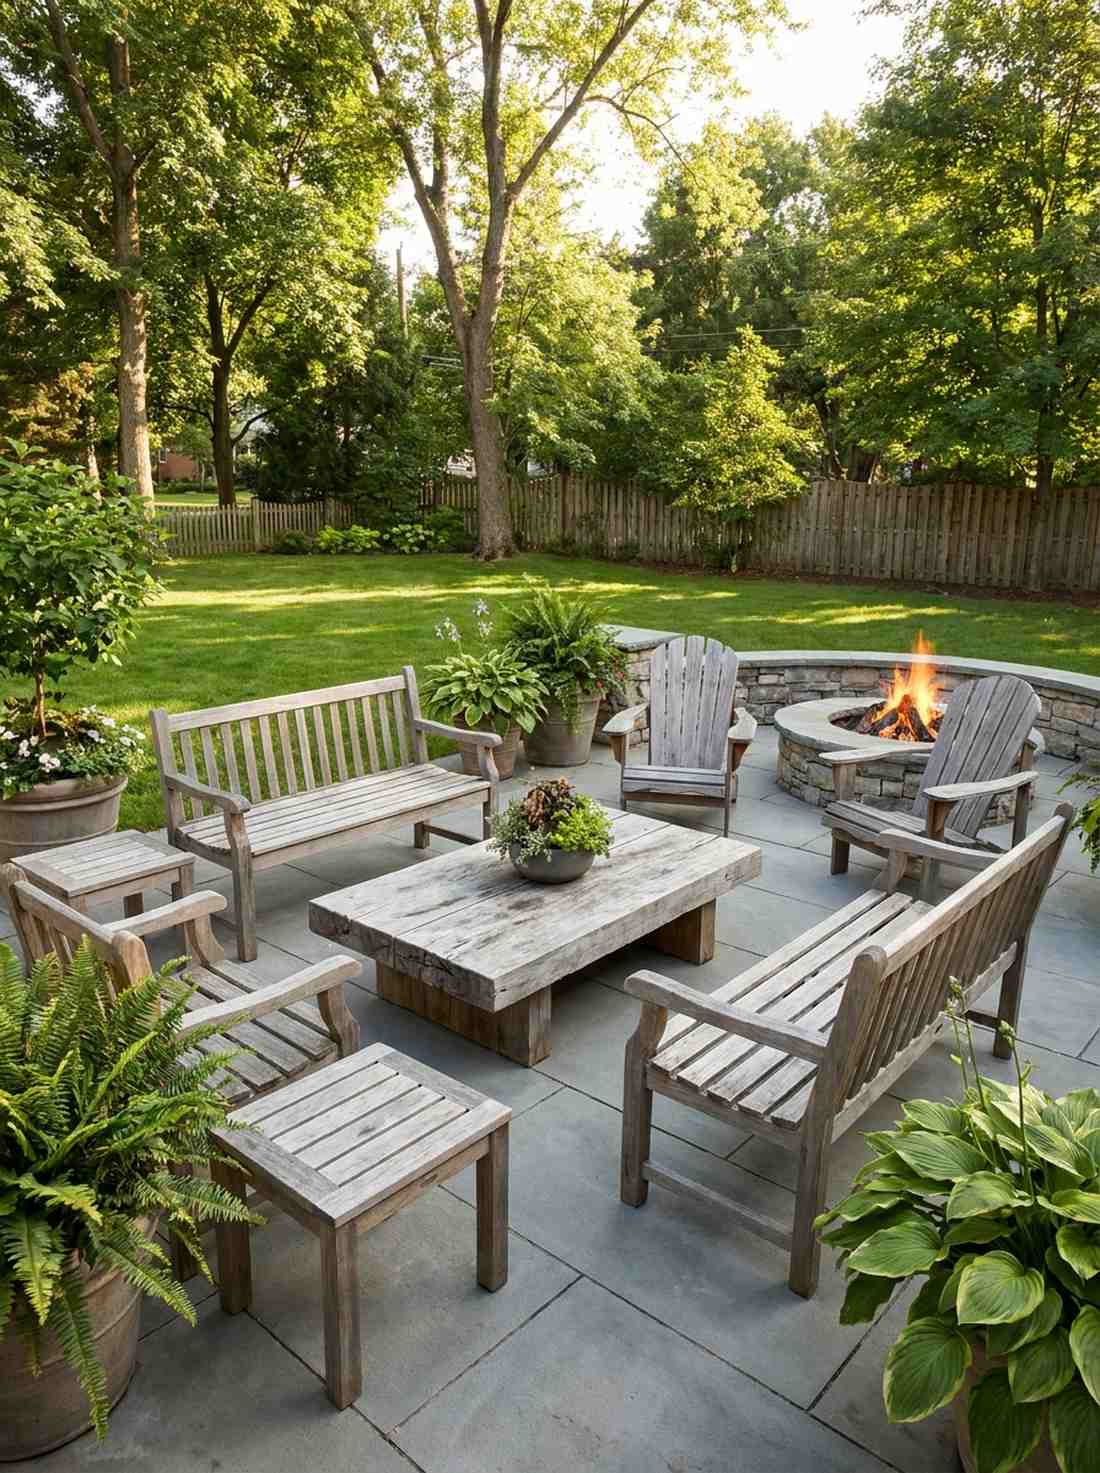
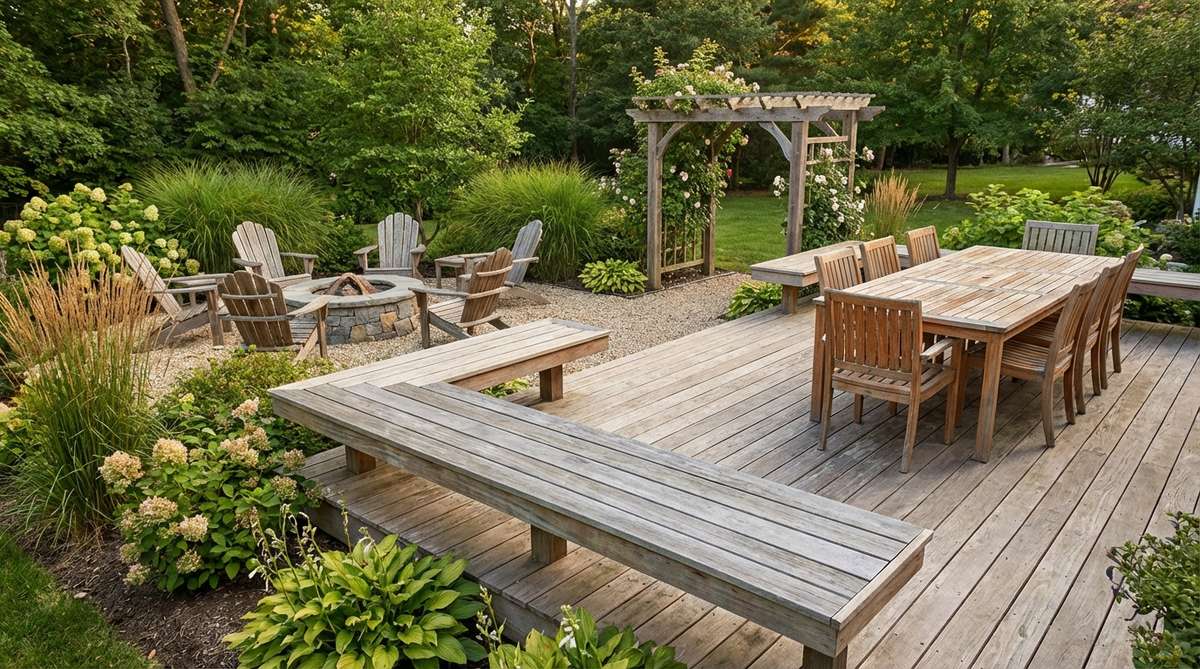
Glows with a rich, natural patina that synthetic materials simply cannot fake. Integrating raw teak or cedar accent furniture injects serious, grounding warmth. An absolute necessity to break up the monotony of massive gray concrete slabs.
Too much plastic makes a yard look cheap, but adding a heavy eucalyptus coffee table delivers a surprisingly premium look. Letting the wood weather to a majestic silver-gray totally bypasses the need for constant, exhausting re-staining.
A solid wooden side table or bench runs $100–$200. Pin this for high-end material inspiration!
- Key Materials: Solid teak or acacia wood, protective teak oil
- Vibe / Style: Organic architectural luxury
- Difficulty: Requires seasonal oiling (optional)
- Budget Breakdown: Acacia bench: $150 | Teak oil: $20
- Creator’s Tip: If you want to keep that rich honey-brown color, apply a UV-blocking teak sealer immediately after purchase before the sun hits it.
- Smart Sourcing: solid acacia wood outdoor benches or premium marine-grade teak sealer oils.
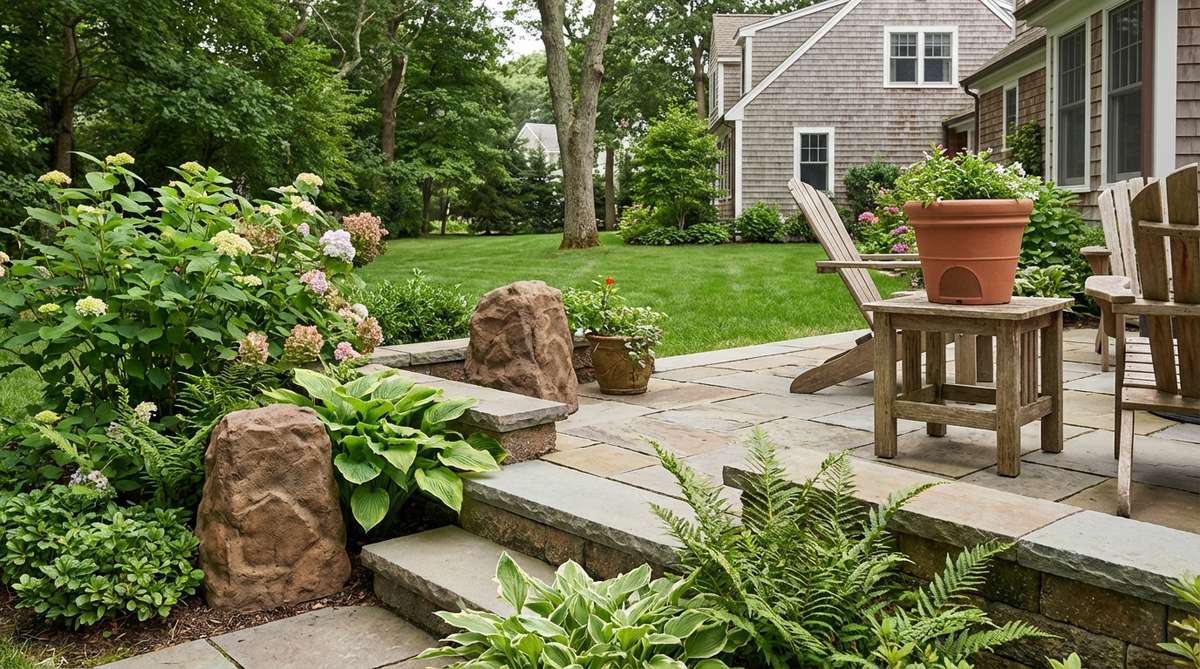
38. Stone Surface Contrast
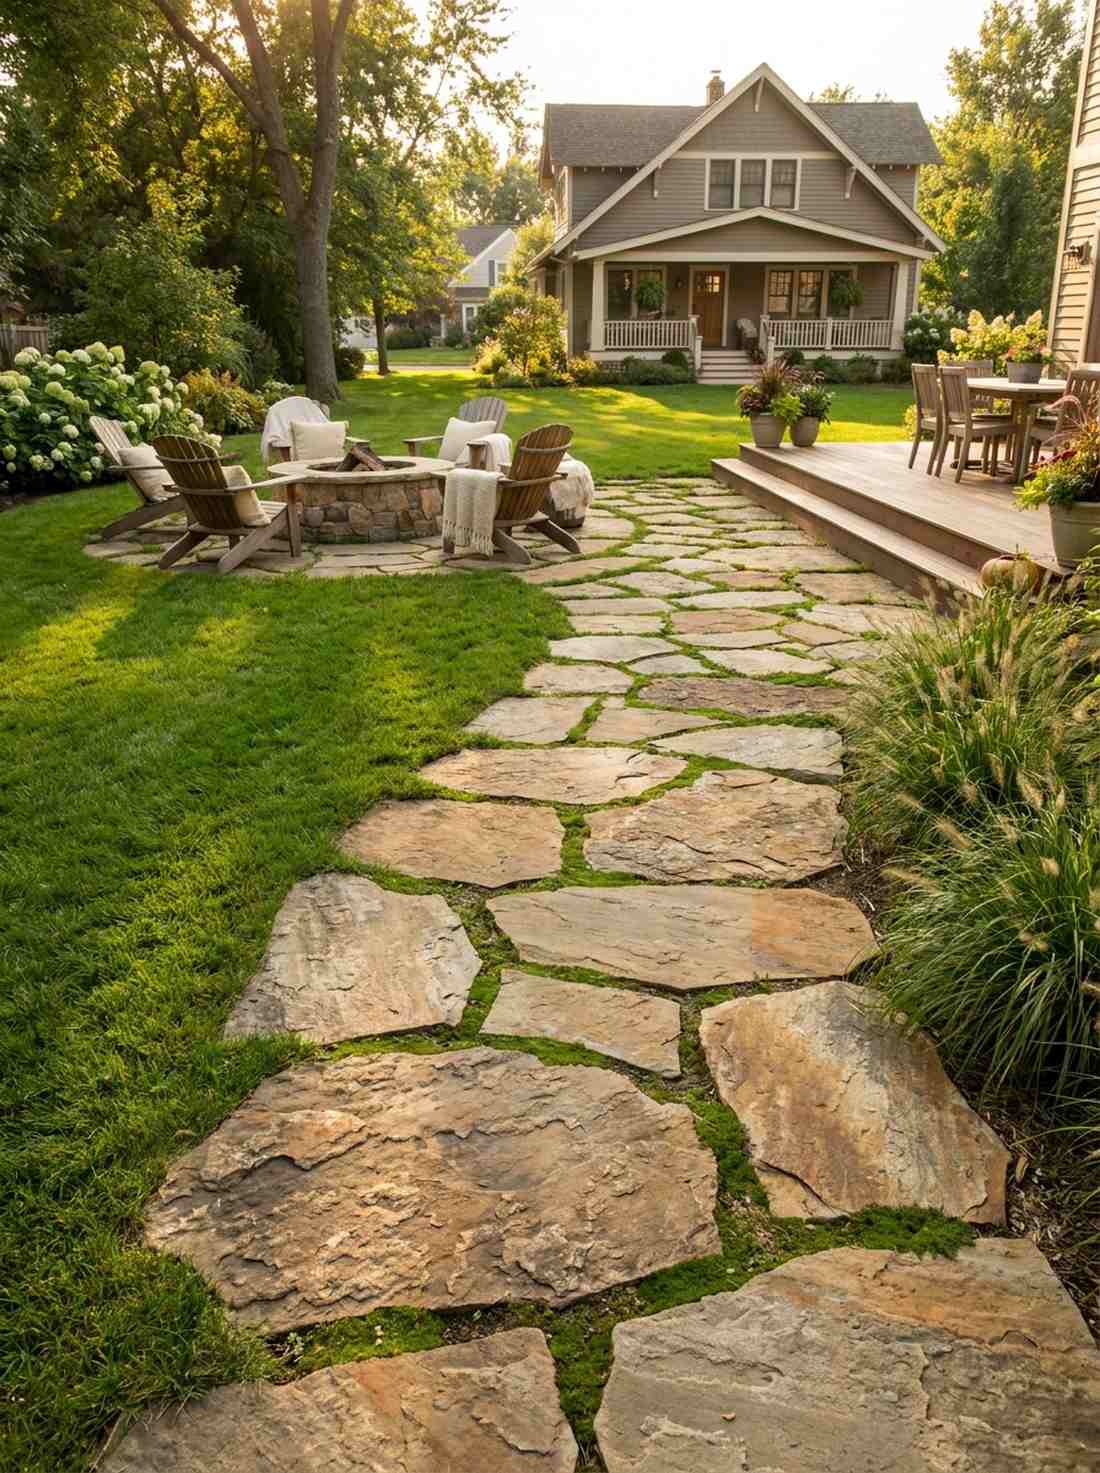
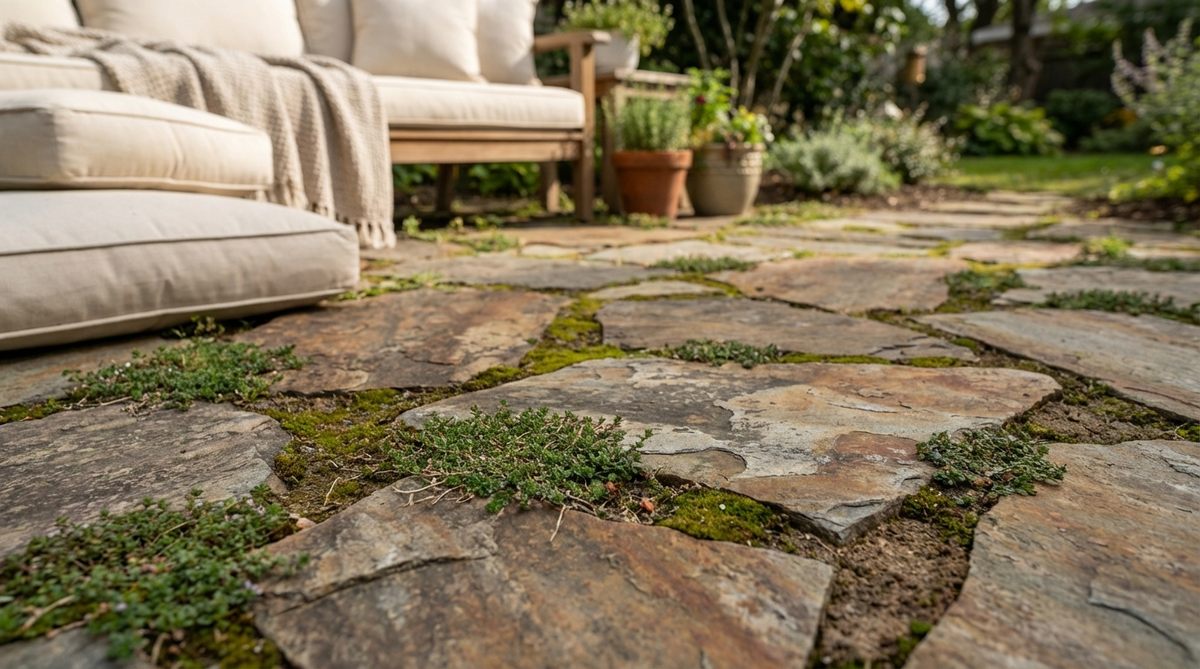
Provides a rugged, ancient texture that makes soft furnishings pop beautifully. Laying irregular natural flagstone stepping paths introduces hard, earthy elements. Excellent for breaking up a sea of soft green grass or uniform mulch.
Perfectly square pavers can look overly sterile, but this jagged, organic approach gives a designer-level finish. Allowing creeping moss to grow between the heavy stone joints creates an incredibly romantic, aged appearance.
A pallet of stepping stones costs roughly $150–$300.
- Key Materials: Large irregular flagstones, coarse leveling sand
- Vibe / Style: Historic estate pathway
- Difficulty: Heavy lifting and digging
- Budget Breakdown: Stone flats: $200 | Sand base: $40
- Creator’s Tip: Dig down two inches and lay a sand base under each stone so they sit perfectly flush with the lawn, allowing you to mow right over them.
- Smart Sourcing: bulk natural flagstone stepping units or polymeric jointing sand bags.
39. Fabric Curtain Panels
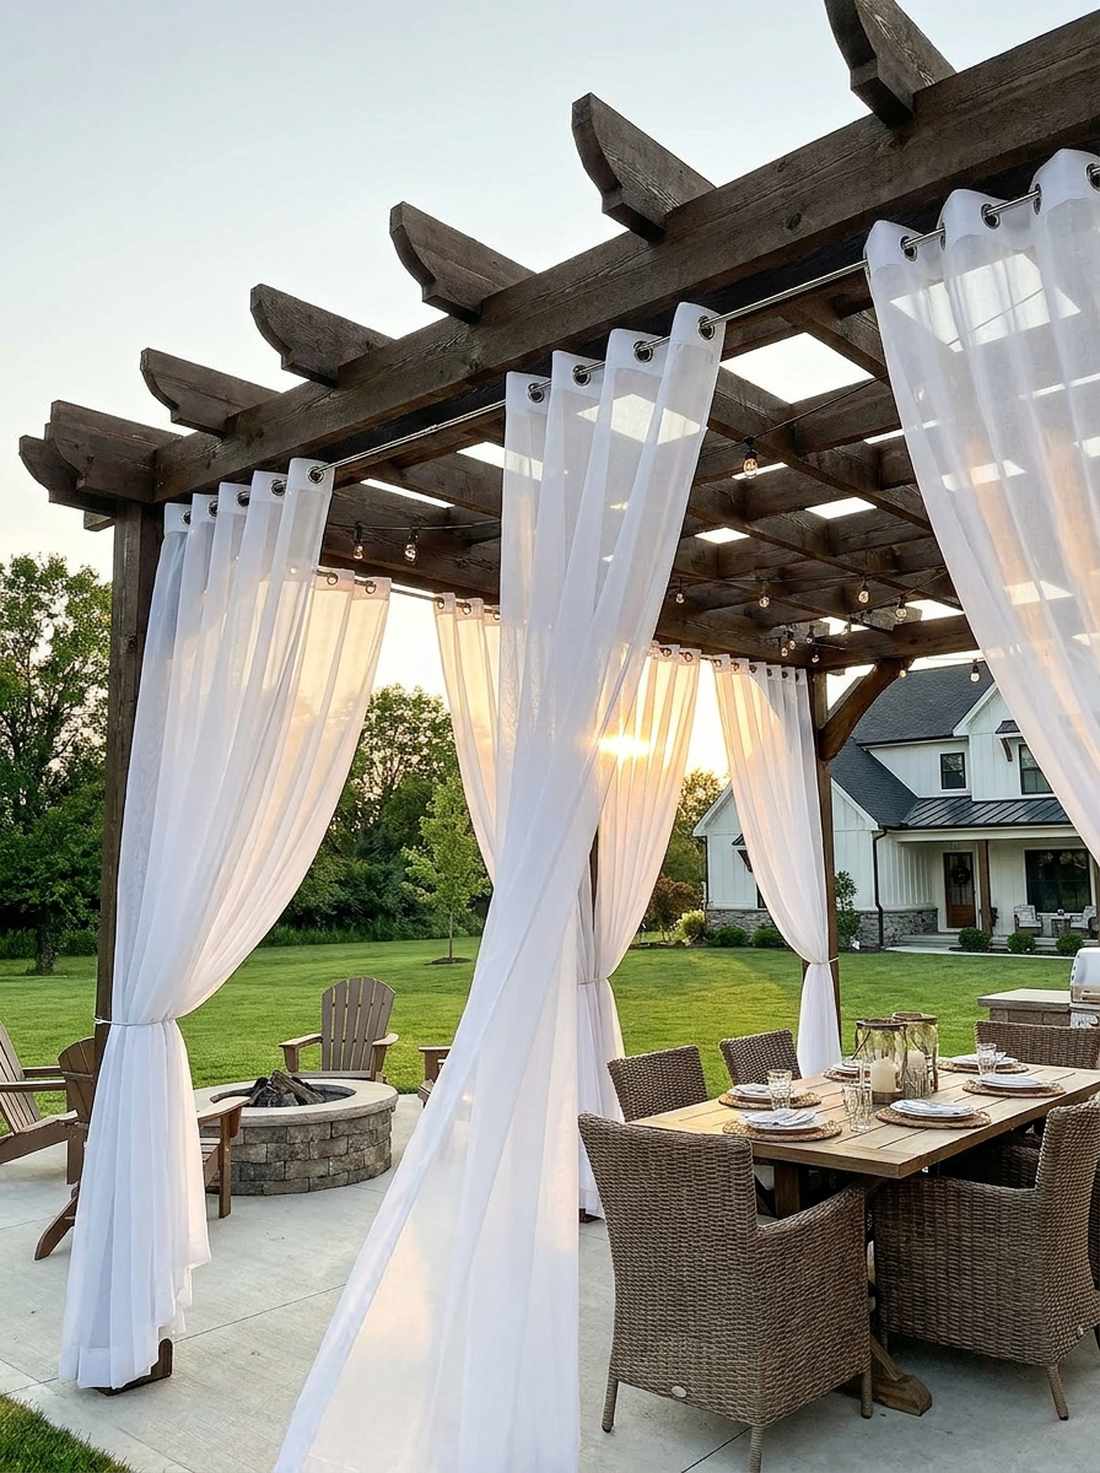
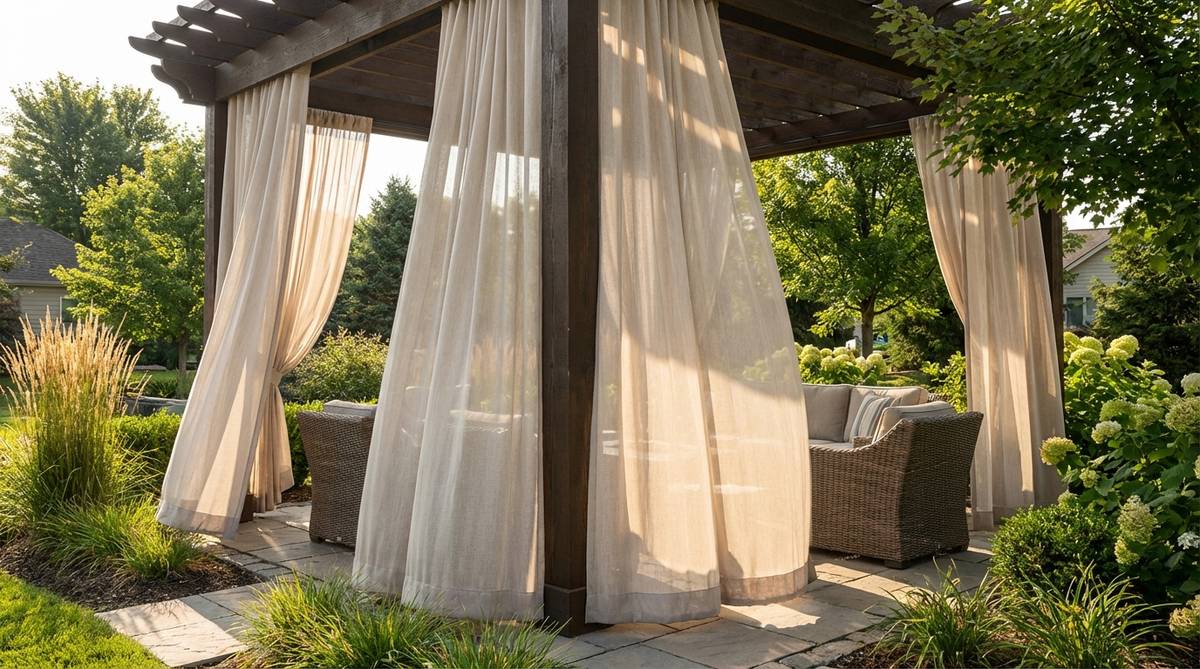
Billows dramatically in the breeze, creating an undeniably romantic, flowing room. Hanging sheer outdoor drapery panels instantly softens rigid wooden pergolas. The ultimate hack for diffusing blinding western sun during evening dinners.
Solid walls block airflow, but these translucent curtains completely bypass the heat trap while looking incredibly lavish. Using weighted hems ensures the fabric sways elegantly instead of violently whipping around in heavy winds.
You can outfit a pergola for $80–$160. Save this to your patio shading board!
- Key Materials: Outdoor sheer curtains, stainless steel tension wire
- Vibe / Style: Breezy resort cabana
- Difficulty: Quick wire installation
- Budget Breakdown: 4 Curtain panels: $90 | Wire kit: $30
- Creator’s Tip: Buy curtains with rust-proof grommets and thread them through a tight steel cable rather than a rod to prevent sagging across long spans.
- Smart Sourcing: waterproof sheer outdoor curtain panels or rust-proof outdoor grommet wire kits.
Most homeowners settle for plain walls, but this next vertical planting trick delivers a massive “wow” factor…
40. Potted Texture Variety
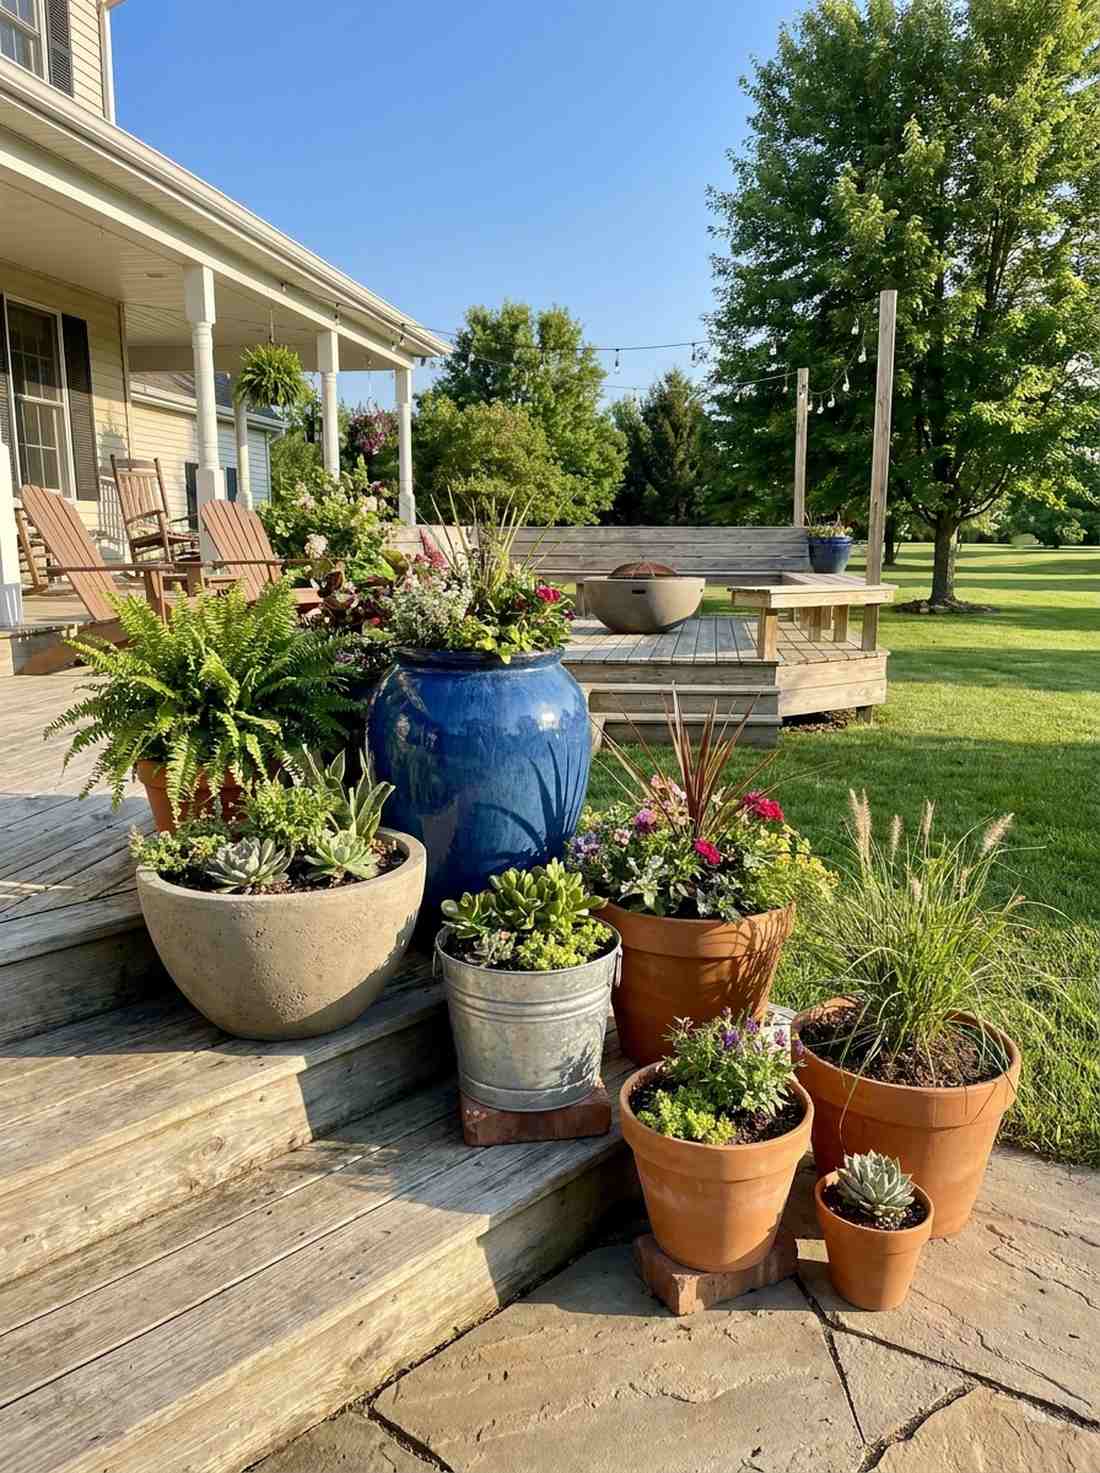
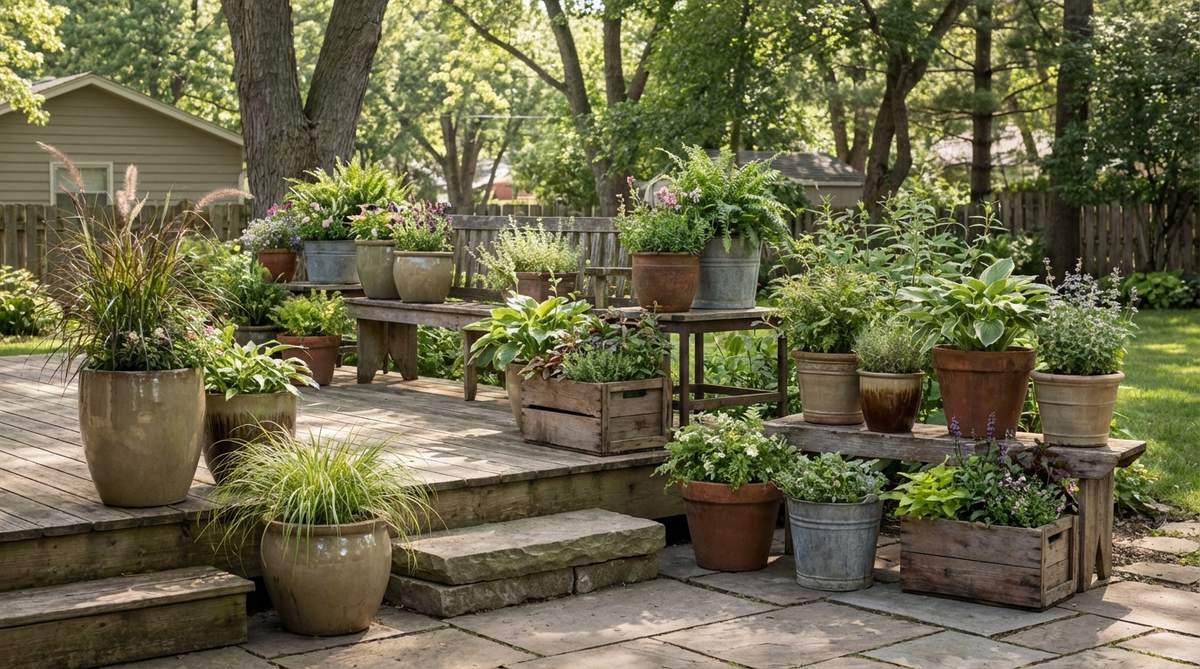
Creates a curated, collected-over-time artistic gallery feel. Mixing contrasting ceramic, metal, and terracotta pots forces the eye to explore different finishes. Brilliant for decorating empty staircases or bare patio corners.
Buying perfectly matching pots looks like a cheap hotel lobby, but this eclectic approach looks far more expensive than it is. Pairing a glossy blue glazed urn next to a rough, matte concrete bowl delivers massive visual depth.
A diverse trio of pots will cost about $100–$200 depending on size.
- Key Materials: Glazed ceramics, raw terracotta, galvanized steel
- Vibe / Style: Eclectic artisan garden
- Difficulty: No tools required
- Budget Breakdown: Large ceramic: $80 | Med terracotta: $30 | Metal bucket: $20
- Creator’s Tip: Elevate the back pots using hidden bricks or overturned plastic buckets to instantly create professional, stadium-style height variations.
- Smart Sourcing: large glazed ceramic outdoor planters or lightweight faux-concrete resin bowls.
Vertical Garden Structures for Cozy Garden Life
41. Climbing Rose Trellis
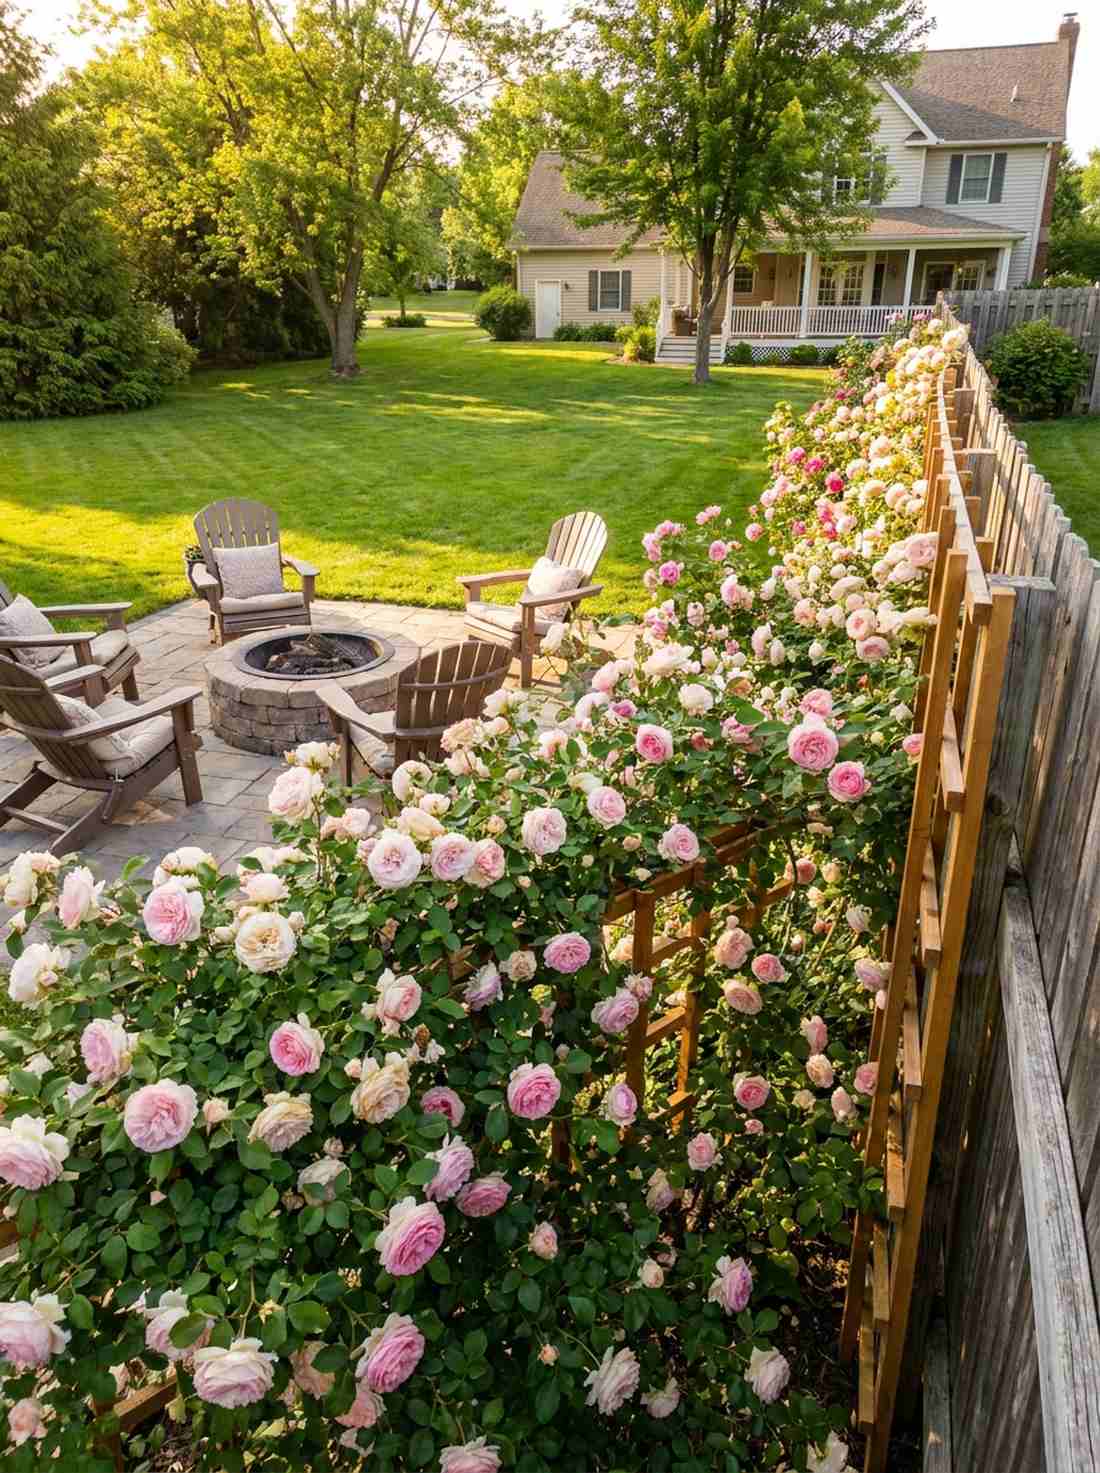
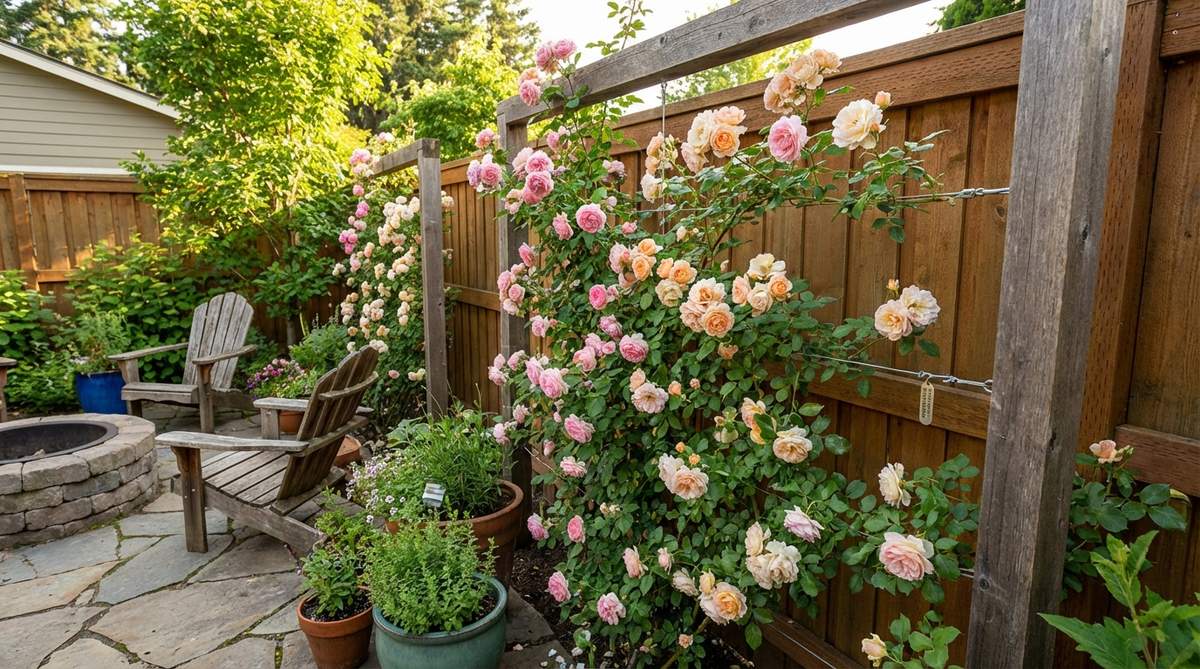
Weaves a stunning tapestry of romantic, fragrant blooms high into the air. Installing a heavy-duty floral climbing wall pulls color directly into your line of sight. Unbeatable for masking an ugly garage wall or dilapidated wooden fence.
Most leave vines to run wild, but securing them to a rigid grid completely bypasses structural damage to your home. Training the canes horizontally gives a designer-level finish by forcing maximum bloom explosions at eye level.
A tall wood trellis and a premium rose bush cost roughly $80–$150.
- Key Materials: Cedar trellis panel, climbing rose bush, plant ties
- Vibe / Style: Classic English manor
- Difficulty: Easy mounting, requires pruning
- Budget Breakdown: Trellis: $60 | Rose bush: $40 | Soft ties: $10
- Creator’s Tip: Space the trellis at least 3 inches away from the wall using wood blocks to allow crucial air circulation and prevent mildew.
- Smart Sourcing: heavy-duty cedar grid trellis panels or soft velcro garden plant tie rolls.
42. Vegetable Arbor Entrance
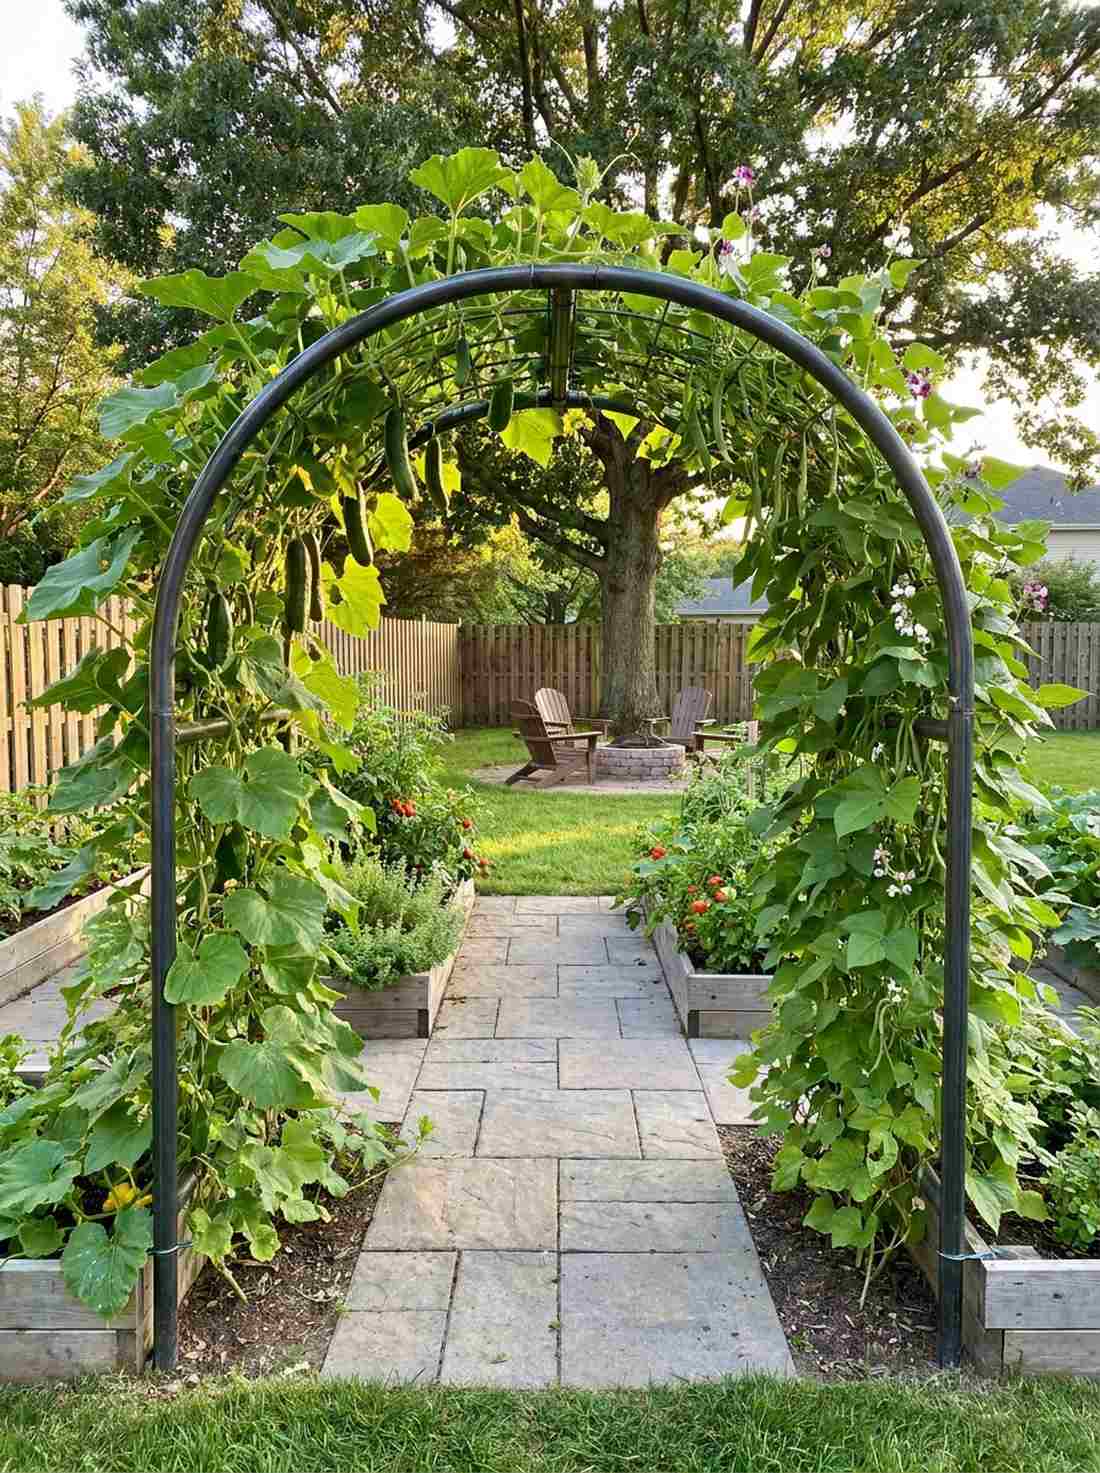
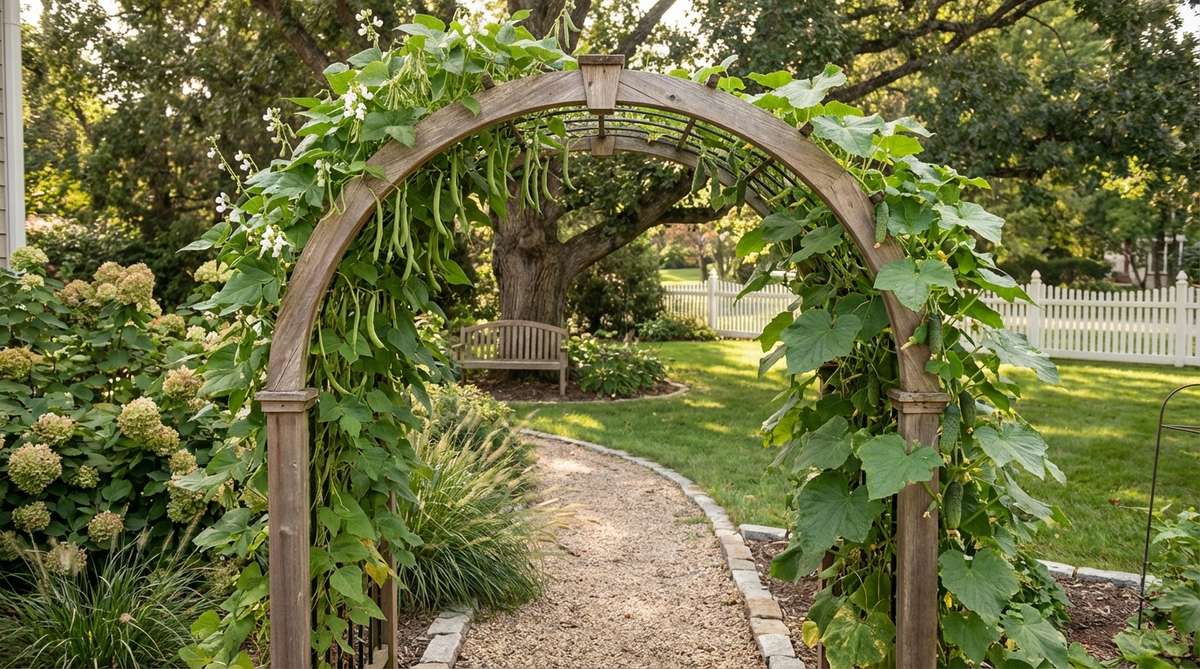
Drips with edible greenery, creating a magical gateway to your backyard. Building a curved walk-through garden arbor frames a stunning transition point. The smartest space-saving hack for growing trailing vegetables like cucumbers and pole beans.
Standard arches look thin and flimsy, but covering one in massive squash leaves delivers a surprisingly premium look that is also highly functional. It totally bypasses the need for massive, ground-level garden beds.
An iron arch kit will run about $100–$200. Pin this for a functional garden upgrade!
- Key Materials: Tubular metal arbor arch, climbing vegetable seeds
- Vibe / Style: Whimsical edible landscape
- Difficulty: Simple bolt assembly
- Budget Breakdown: Metal Arch: $130 | Seeds & Soil base: $30
- Creator’s Tip: Sink the legs of the arbor 12 inches into the dirt and pack with gravel; heavy vines act like a sail in the wind and will blow it over.
- Smart Sourcing: heavy-duty steel garden arbor arches or climbing pole bean seed bulk packs.
43. Espalier Fruit Wall
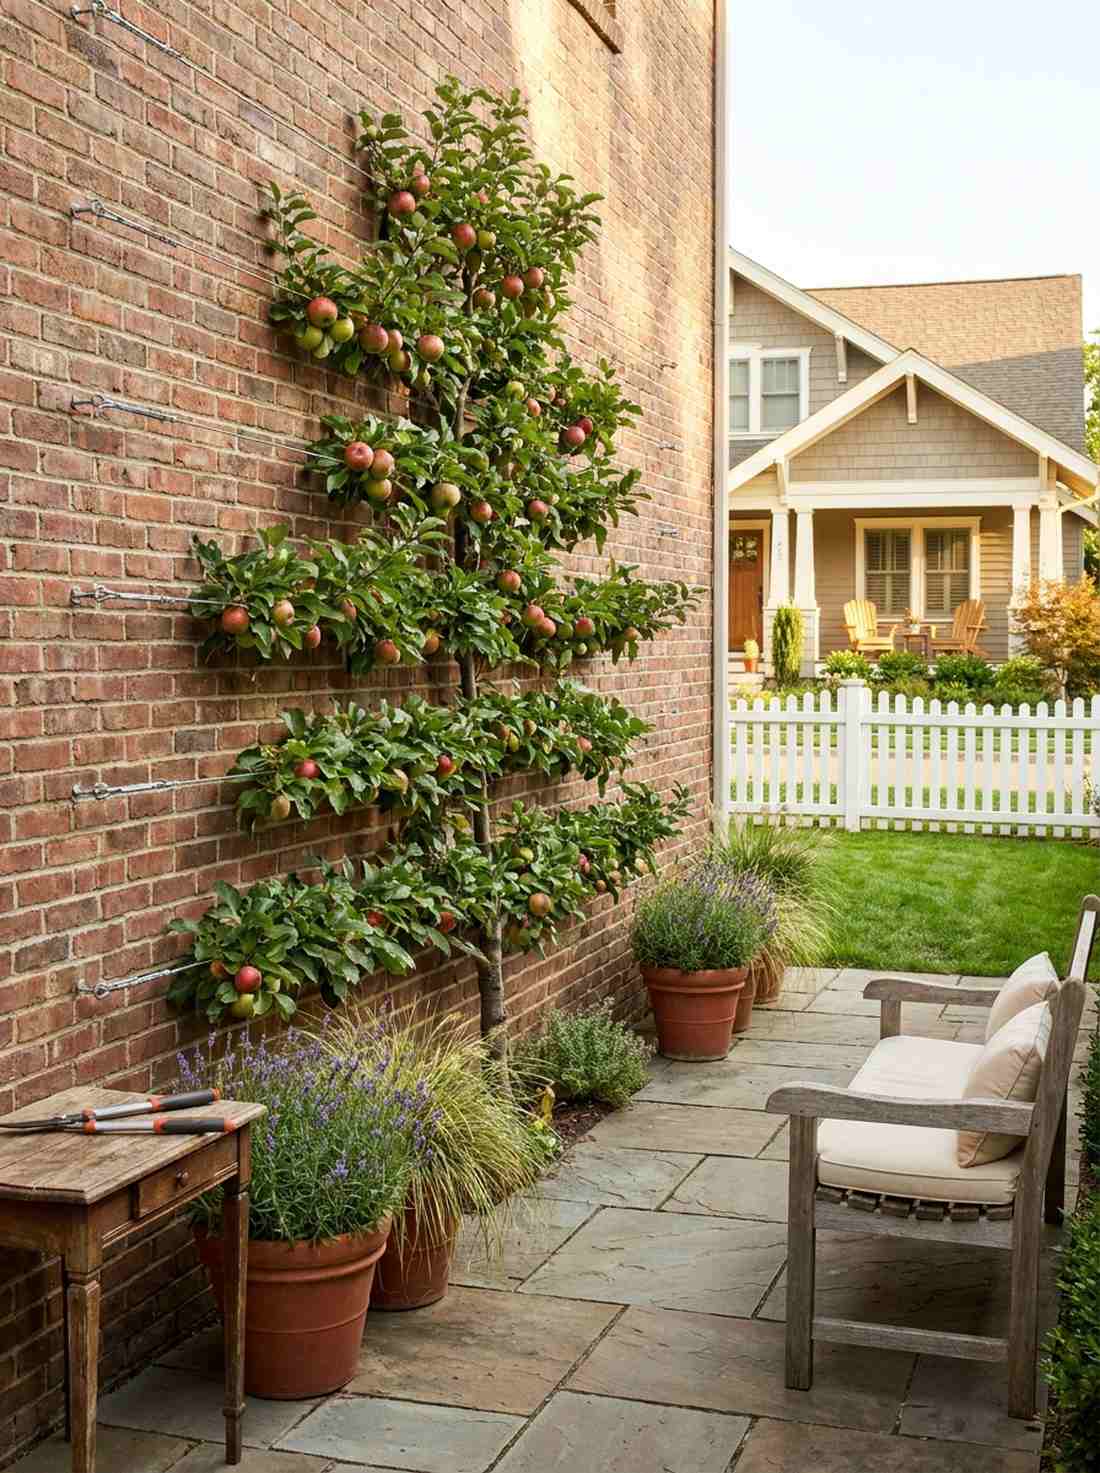
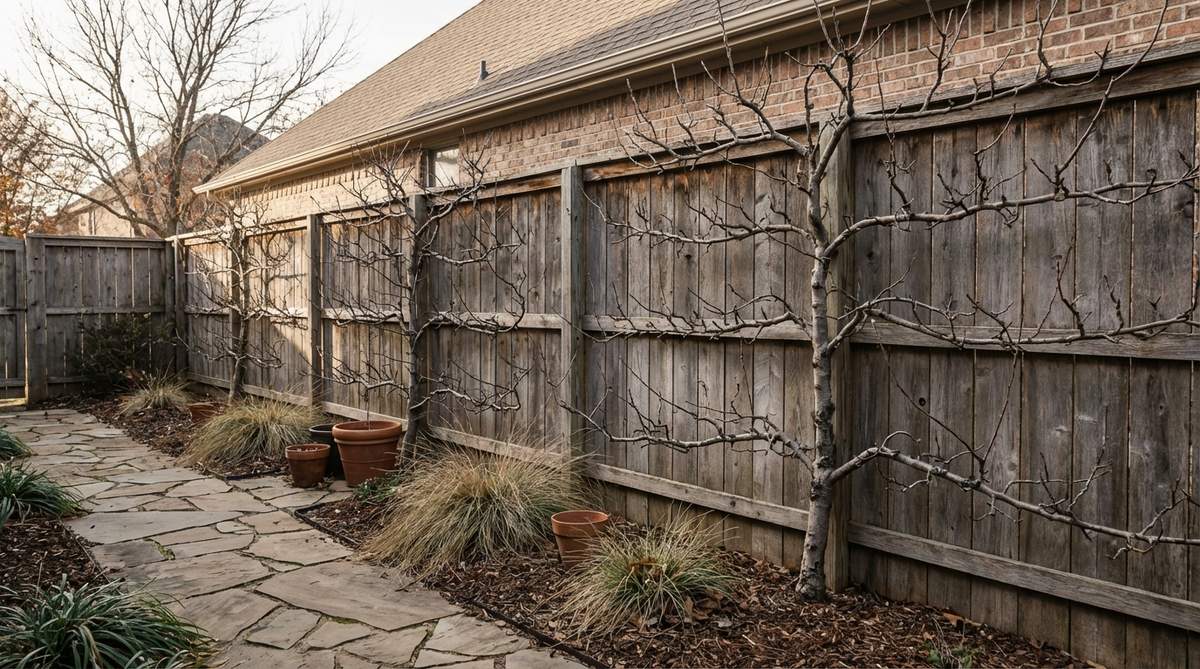
Flattened like a living, breathing piece of geometric wall art. Training a two-dimensional espalier fruit tree turns a tight alleyway into a productive orchard. An absolute game-changer for ultra-narrow side yards that cannot fit standard tree canopies.
Growing standard trees wastes horizontal space, but this aggressive pruning method looks far more expensive than it is. It creates a stunning, rigid architectural grid against brickwork while still yielding massive amounts of apples or pears.
A starter tree and wire setup costs about $120–$200.
- Key Materials: Dwarf fruit tree, high-tension wall wire kit
- Vibe / Style: Historic French courtyard
- Difficulty: Requires meticulous pruning
- Budget Breakdown: Bare-root tree: $60 | Wire & Anchors: $50
- Creator’s Tip: Buy a tree already pre-pruned into a “Y” or flat shape from the nursery; starting from a messy, bushy tree is a nightmare for beginners.
- Smart Sourcing: heavy-duty masonry wire anchor kits or specialty espalier pruning shears.
44. Living Wall Panel

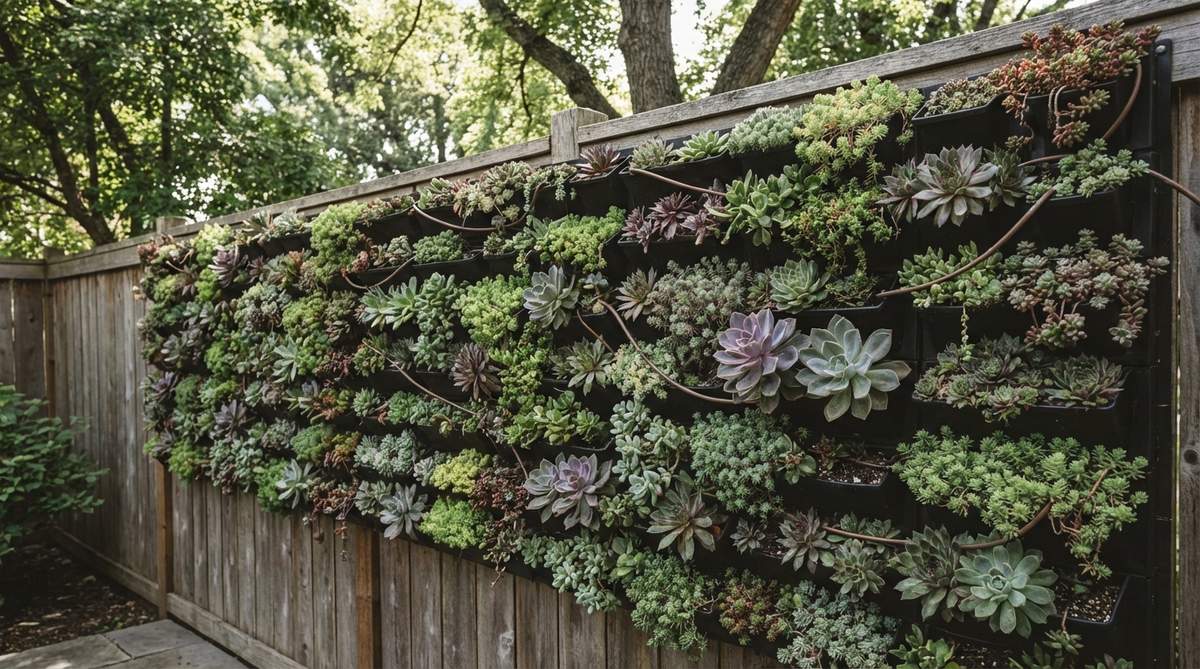
Bursts from the siding like a hyper-modern slice of the jungle. Mounting a modular succulent wall planter transforms dead vertical space into a living mural. Excellent for shady apartment balconies that desperately need a punch of nature.
Custom hydroponic walls cost thousands, but using pocketed felt planters totally bypasses the expense while giving a designer-level finish. Stuffing the pockets tight with drought-tolerant succulents creates a stunning, low-maintenance tapestry.
A large pocket system with plants runs $100–$250.
- Key Materials: Felt vertical planter pockets, variety of succulents
- Vibe / Style: High-end modern eco-chic
- Difficulty: Easy hang, tricky watering
- Budget Breakdown: Pocket panel: $40 | Succulent bulk pack: $100
- Creator’s Tip: Install a micro-drip irrigation line across the top row before planting; hand-watering 30 tiny vertical pockets gets old extremely fast.
- Smart Sourcing: waterproof felt vertical wall planters or bulk live succulent starter packs.
This specific privacy screen setup might be the fastest way to hide ugly fences while keeping a high-end aesthetic…
Material Guide: Cheap vs. Premium Aesthetic
Knowing exactly where to save and where to spend makes all the difference in achieving that “looks expensive but isn’t” vibe.
- Standard vs. UV-Resistant/Premium: Standard plastics crack in one winter. Upgrading to UV-coated resins and solution-dyed acrylics stops fading, saving you from replacing your setup every single year.
- Pre-made Kits vs. Sourcing Locally: Sourcing raw lumber and hardware often costs more than buying commercial-grade starter kits that include pre-cut, weather-sealed pieces and exact instructions.
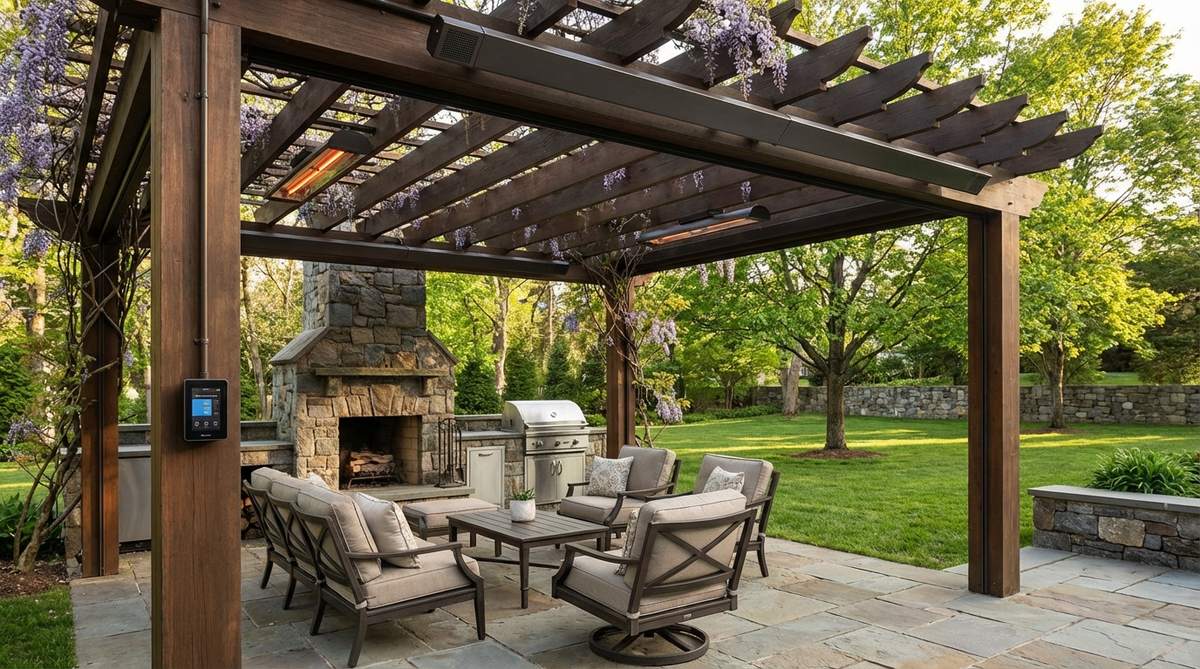
45. Wisteria Pergola Canopy
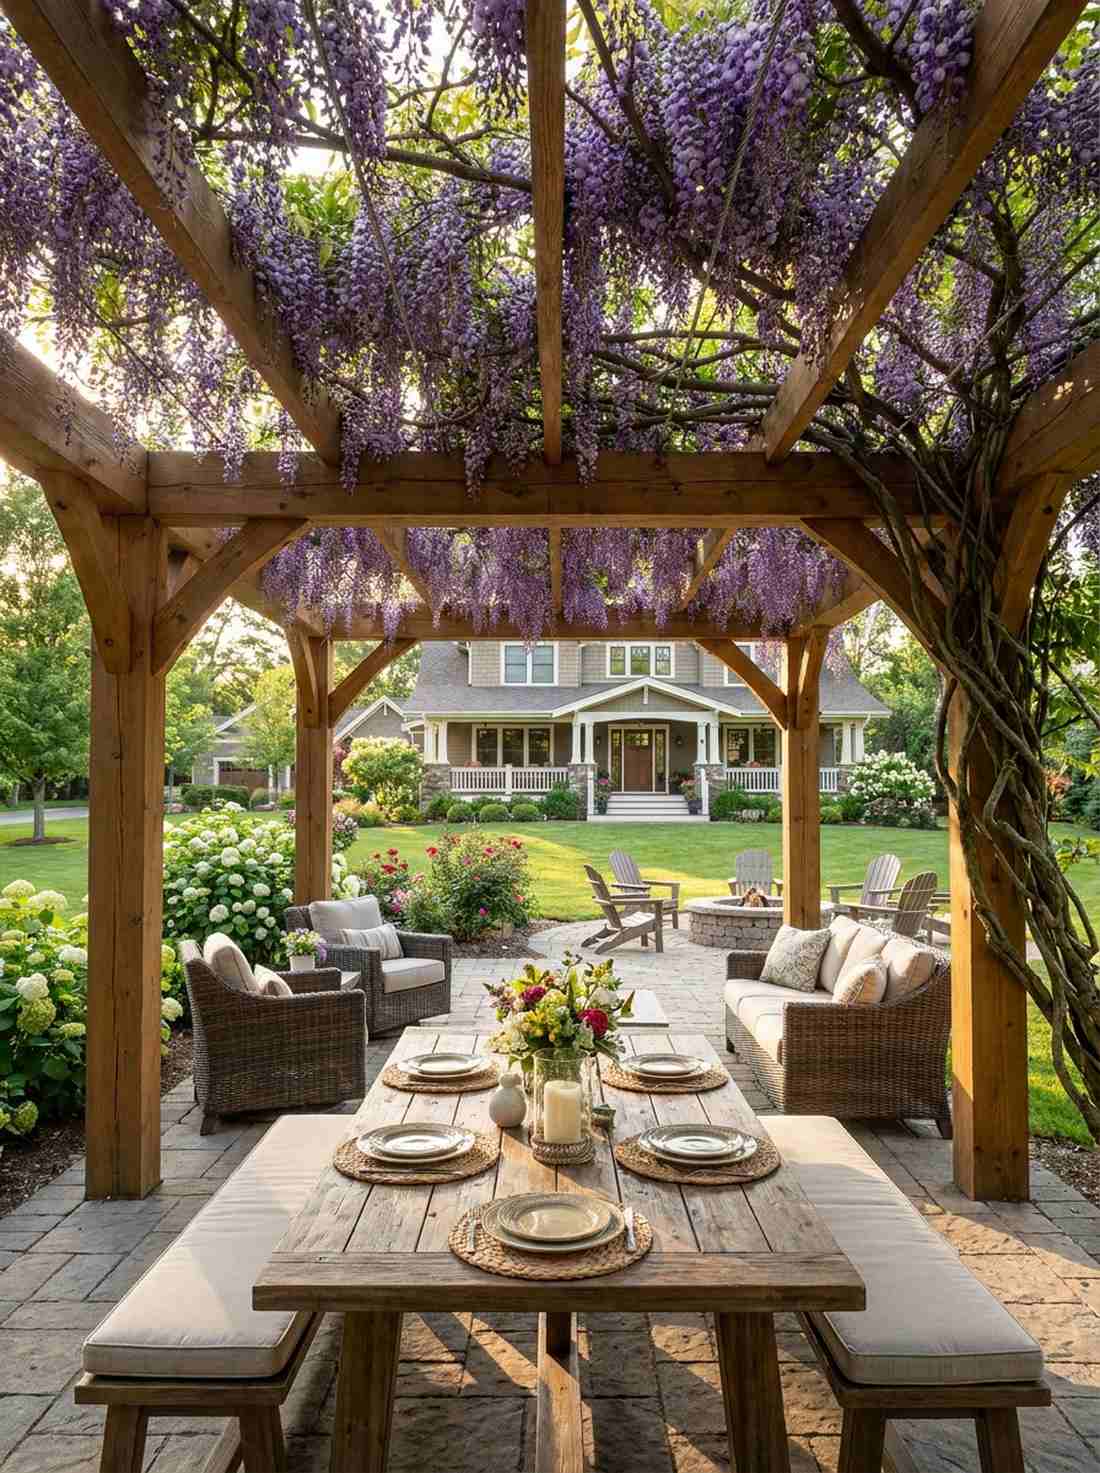
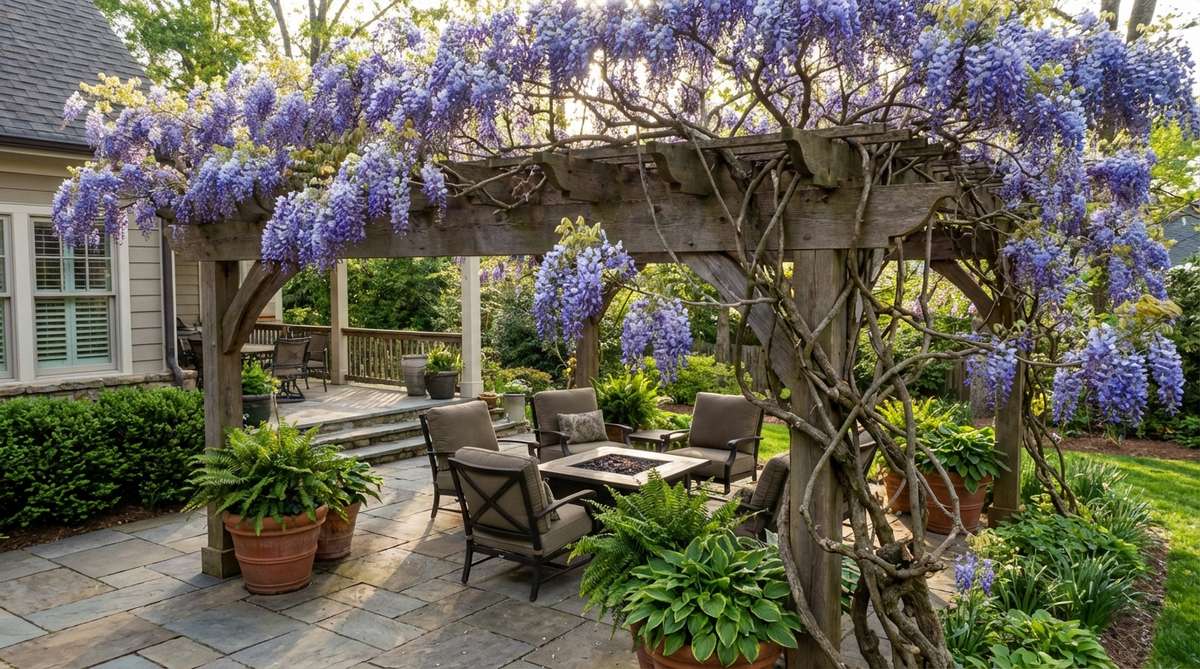
Drapes massive, cascading purple blooms down right over your dining table. Growing a thick wisteria vine ceiling creates the ultimate, fairytale-like shade structure. The absolute peak of cozy garden ideas for large, sturdy wooden pergolas.
Aluminum roofs feel sterile, but this aggressive living canopy looks far more expensive and provides massive cooling shade in August. When the leaves drop in winter, the sun brilliantly penetrates through to warm the patio.
A starter vine costs $40–$80, but requires a very strong structure.
- Key Materials: Wisteria vine starter, heavy-duty timber pergola
- Vibe / Style: Magical fairytale estate
- Difficulty: Requires aggressive annual trimming
- Budget Breakdown: Plant: $50 | Heavy support wire: $20
- Creator’s Tip: Wisteria vines are notoriously heavy and can literally crush flimsy vinyl pergolas; only plant this on 6×6 solid wood or heavy steel frames.
- Smart Sourcing: heavy-duty steel vine support cables or fast-growing wisteria live plants.
46. Lattice Privacy Panel
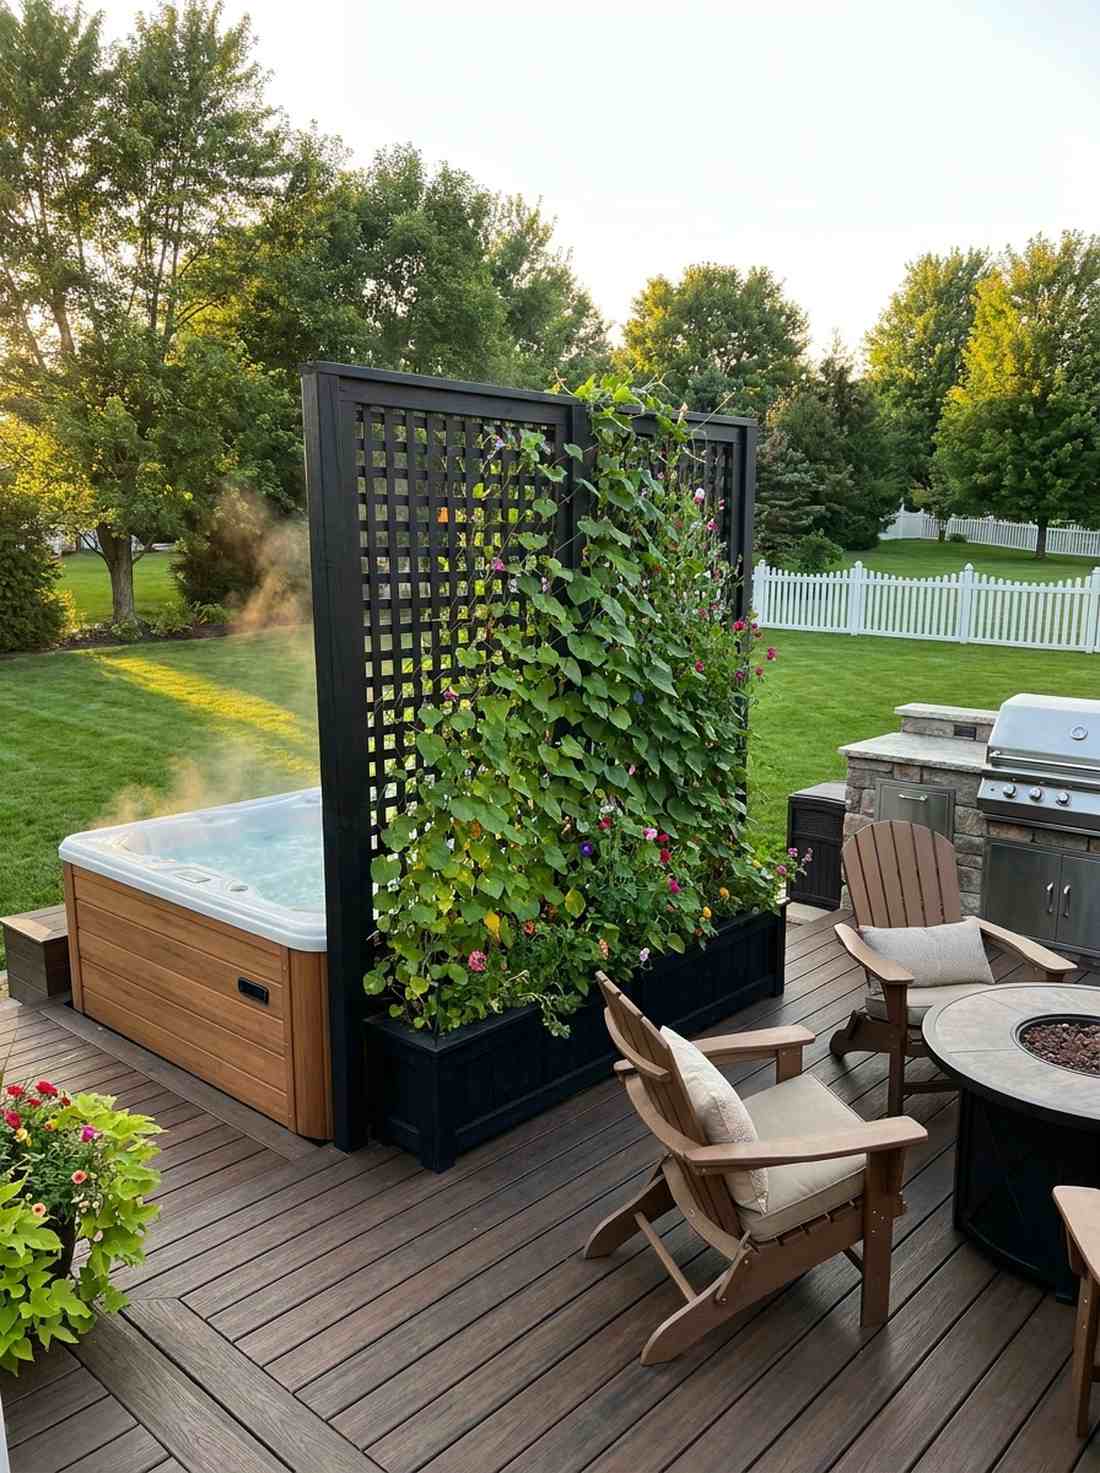
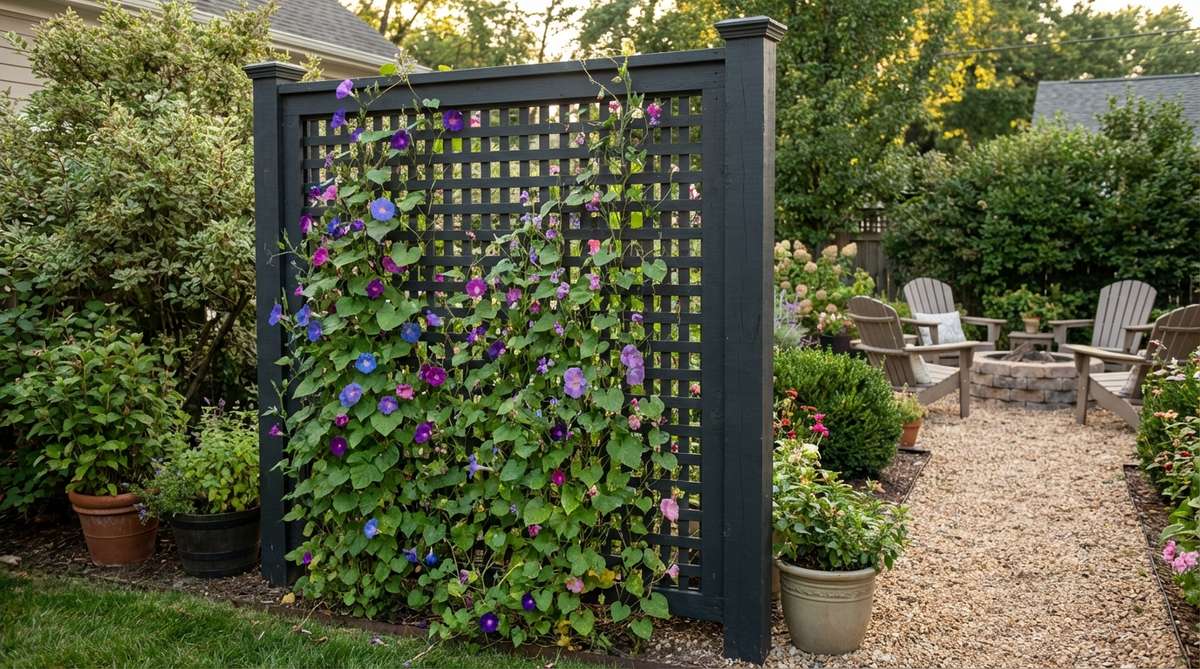
Creates a delicate, geometric barrier wrapped in fast-growing greens. Erecting a freestanding wood lattice screen provides instant visual blockage without blocking the breeze. Perfect for shielding a hot tub or a messy grill station.
Solid fences make small spaces feel like prisons, but this crisscross pattern gives a designer-level finish that breathes beautifully. Painting the wood matte black makes the green leaves pop violently for a high-end, modern contrast.
You can frame out a custom panel for $70–$120. Save this for your quick-fix privacy board!
- Key Materials: Pre-fab wood lattice, 4×4 posts, fast-climbing annuals
- Vibe / Style: Classic transitional garden
- Difficulty: Basic carpentry required
- Budget Breakdown: Lattice sheets: $40 | Lumber & Paint: $60
- Creator’s Tip: Plant Morning Glories or Sweet Peas at the base; they shoot up the lattice in weeks, providing massive privacy in a single summer.
- Smart Sourcing: heavy-duty vinyl lattice panels or rapid-growth climbing vine seed packs.
47. Vertical Herb Garden
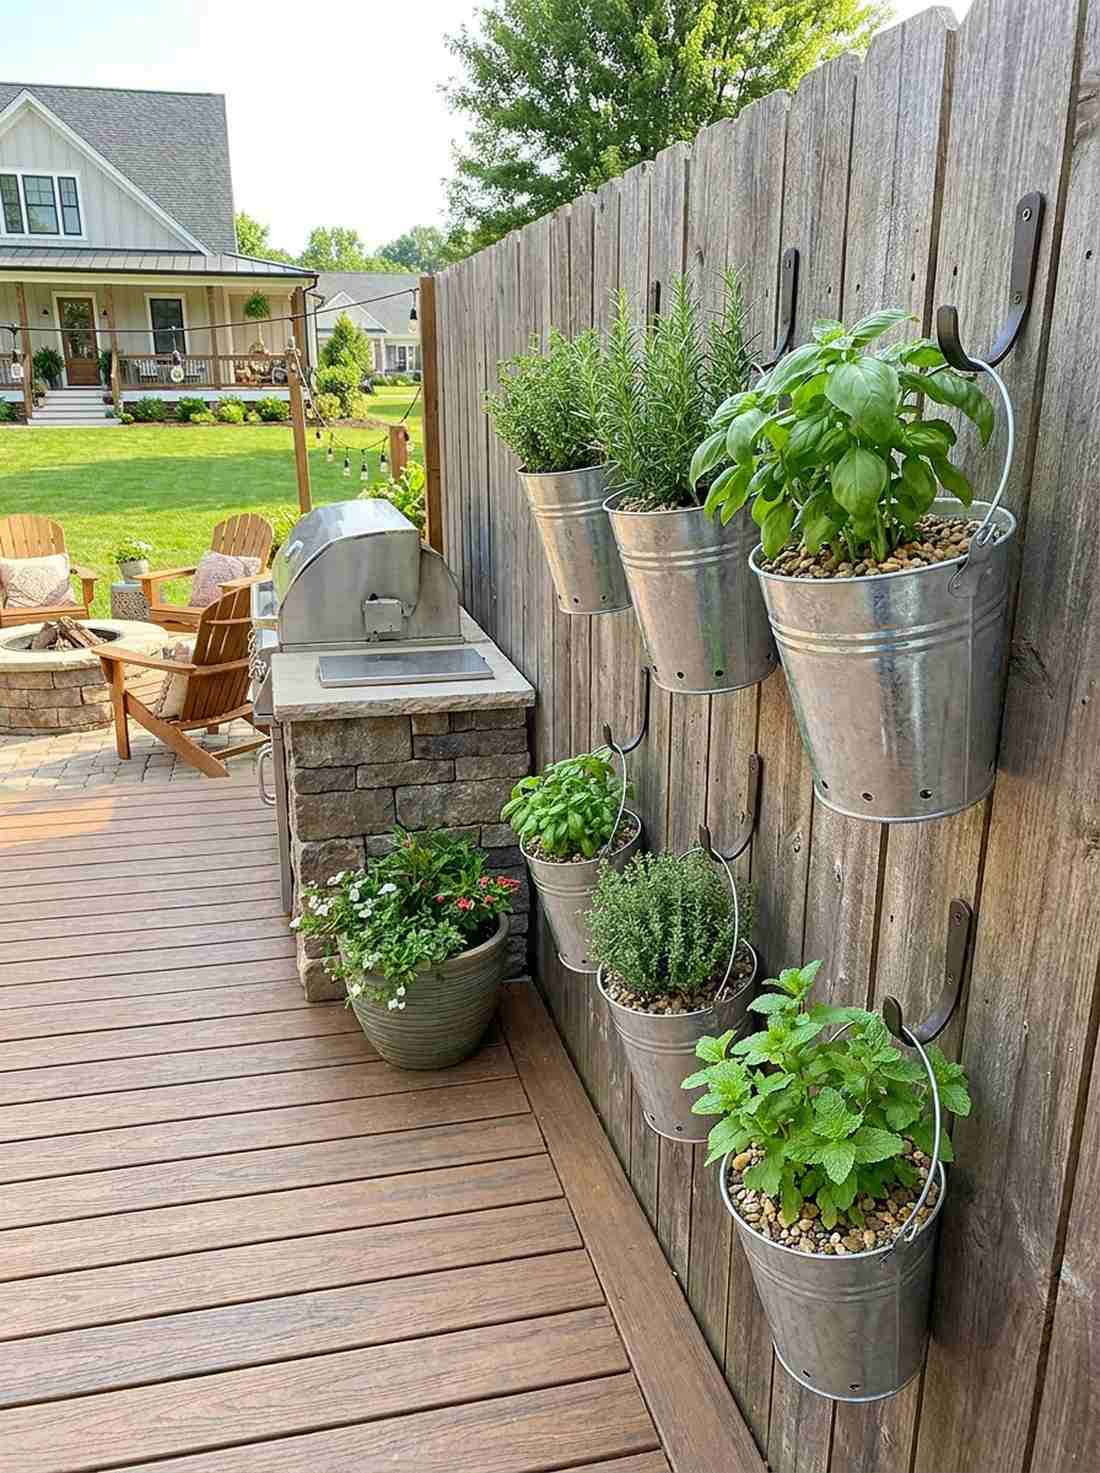
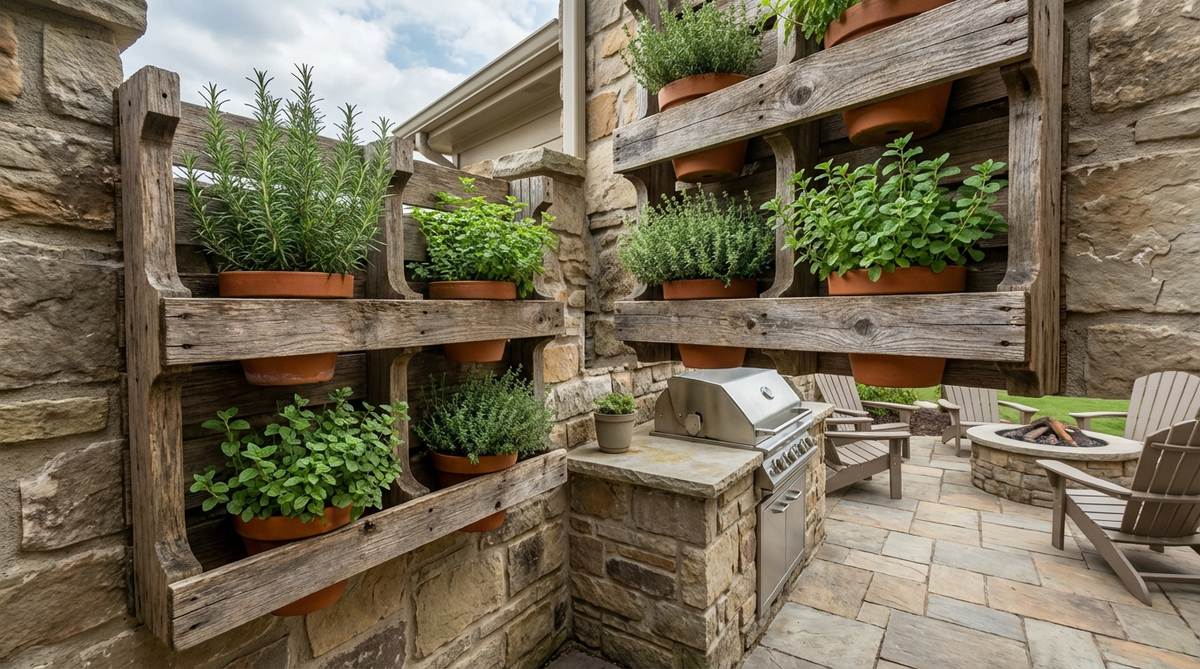
Surrounds your outdoor kitchen with an incredibly fragrant, accessible pantry. Mounting galvanized bucket planters to a fence keeps fresh ingredients right at your fingertips. Brilliant for narrow paths next to a BBQ grill where ground space is zero.
Pots on the floor get kicked over, but this wall-mounted approach completely bypasses the mess. Using metal accents against raw wood delivers a surprisingly premium look that leans into a highly trendy, modern-farmhouse aesthetic.
A complete 6-bucket setup costs roughly $50–$90.
- Key Materials: Hanging metal buckets, organic herb soil, wall hooks
- Vibe / Style: Rustic chef’s courtyard
- Difficulty: Very easy mounting
- Budget Breakdown: Buckets/Hooks: $40 | Soil & Starter herbs: $40
- Creator’s Tip: Drill three holes in the bottom of each bucket and add a layer of gravel; herbs hate wet feet and will rot quickly without severe drainage.
- Smart Sourcing: galvanized metal hanging bucket sets or organic culinary herb starter kits.
48. Ivy-Covered Fence
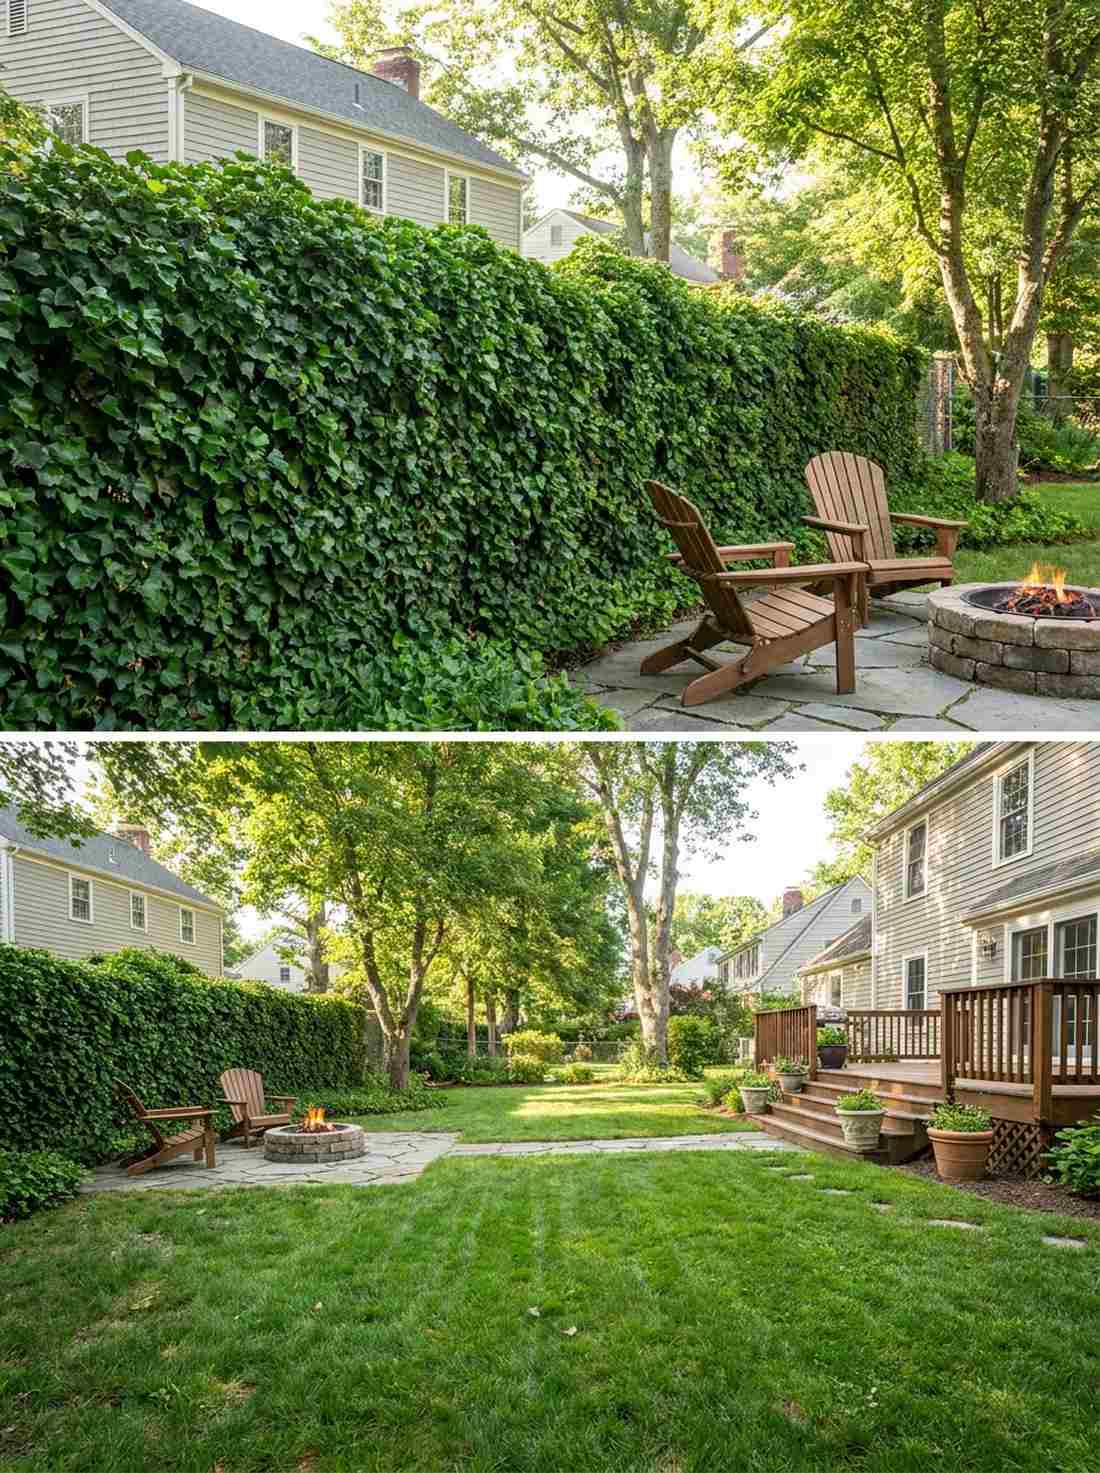
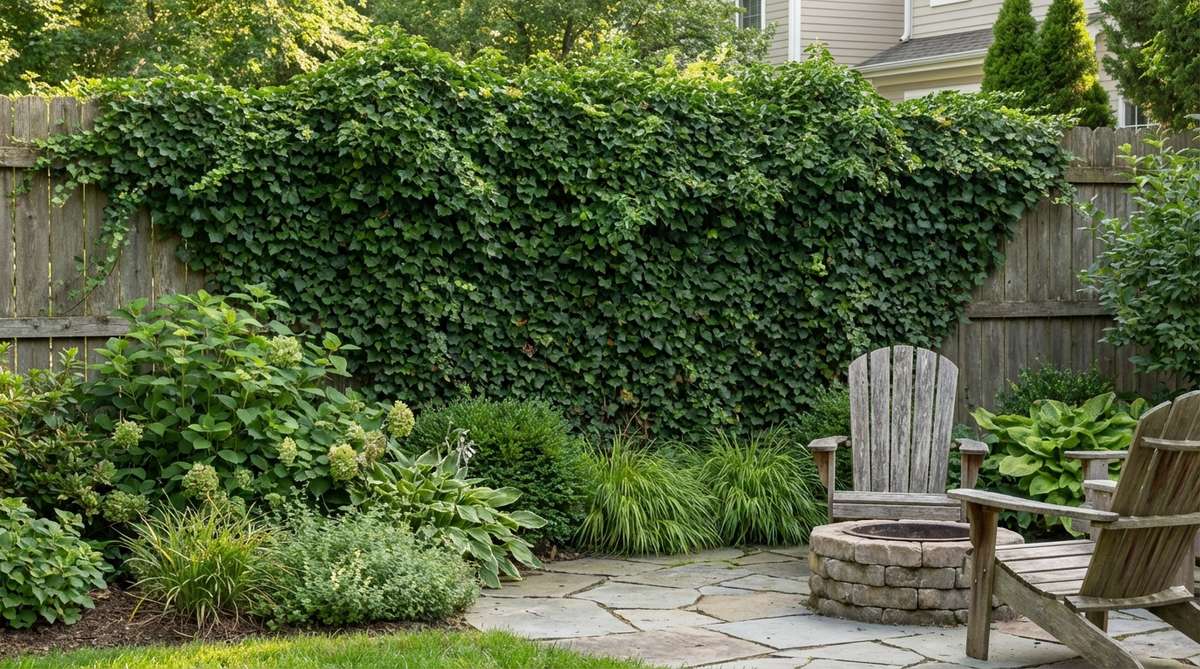
Transforms ugly chain-link into a solid, lush wall of deep green. Allowing an evergreen climbing ivy mat to consume an old boundary creates total, unshakeable privacy. The absolute best cover-up job for renters with hideous industrial fences.
Ripping out a fence costs thousands, but this aggressive foliage gives a designer-level finish for mere pennies. The dense leaf layering absorbs massive amounts of heat and street noise, creating a highly insulated, quiet yard.
You can start a massive ivy wall for just $30–$60.
- Key Materials: English or Boston ivy plugs, zip ties for initial training
- Vibe / Style: Historic university aesthetic
- Difficulty: Easy planting, requires edge trimming
- Budget Breakdown: Ivy flats: $40 | Root hormone: $10
- Creator’s Tip: Keep the ivy ruthlessly trimmed at the base of your home’s siding; if it gets under your shingles or wood slats, it will tear them off.
- Smart Sourcing: bulk English ivy starter plugs or heavy-duty bypass pruning shears.
If you live near a noisy street, this next sensory hack is an absolute lifesaver (and looks fantastic).
Water & Sound Elements for Cozy Garden Corner Ambiance
49. Tabletop Fountain
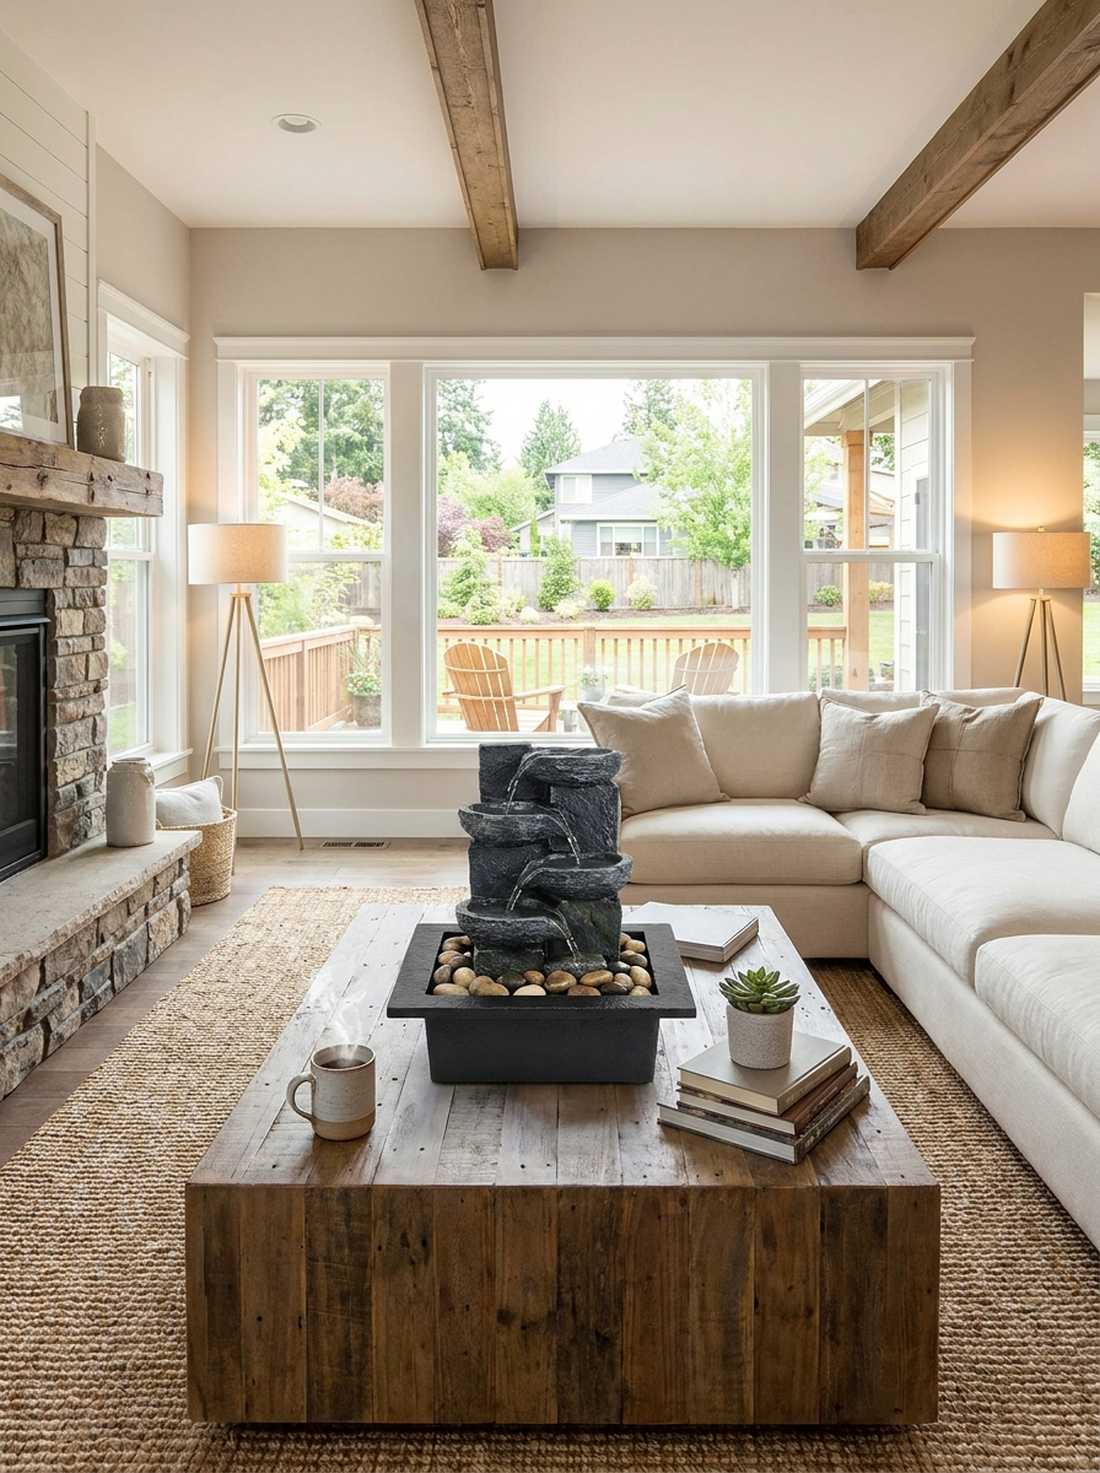
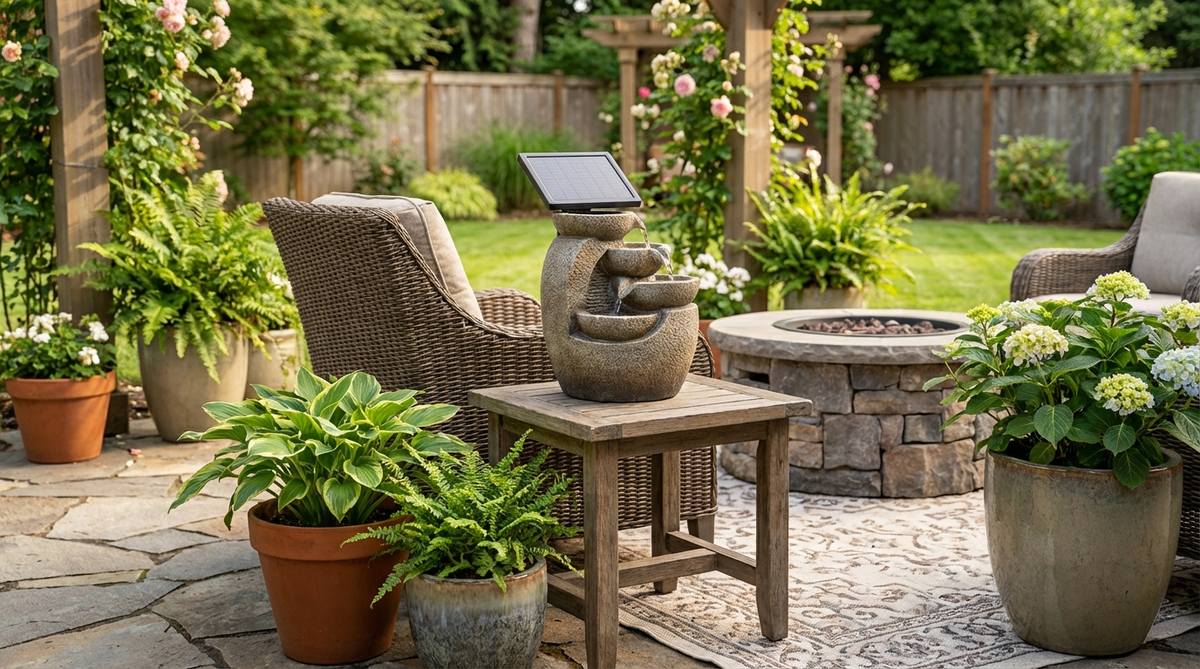
Creates a delicate, mesmerizing trickle that completely melts away daily stress. Placing a compact tiered water fountain directly on your coffee table adds instant kinetic energy. Perfect for tiny patios where a massive pond is impossible.
Giant stone fountains require expensive plumbing, but these self-contained units deliver a surprisingly premium look by just adding water and plugging them in. Choosing a slate or ceramic finish absolutely elevates the perceived value.
A highly-rated tabletop model runs $50–$100. Pin this for a fast sensory upgrade!
- Key Materials: Resin or ceramic tabletop fountain, distilled water
- Vibe / Style: Compact Zen spa
- Difficulty: Unbox and plug in
- Budget Breakdown: Fountain unit: $60 | Extension cord: $15
- Creator’s Tip: Always use distilled water instead of tap water; it prevents nasty white calcium buildup from ruining the dark stone finish.
- Smart Sourcing: slate-finish tabletop water fountains or solar-powered mini fountain pumps.
50. Bubbling Urn Feature
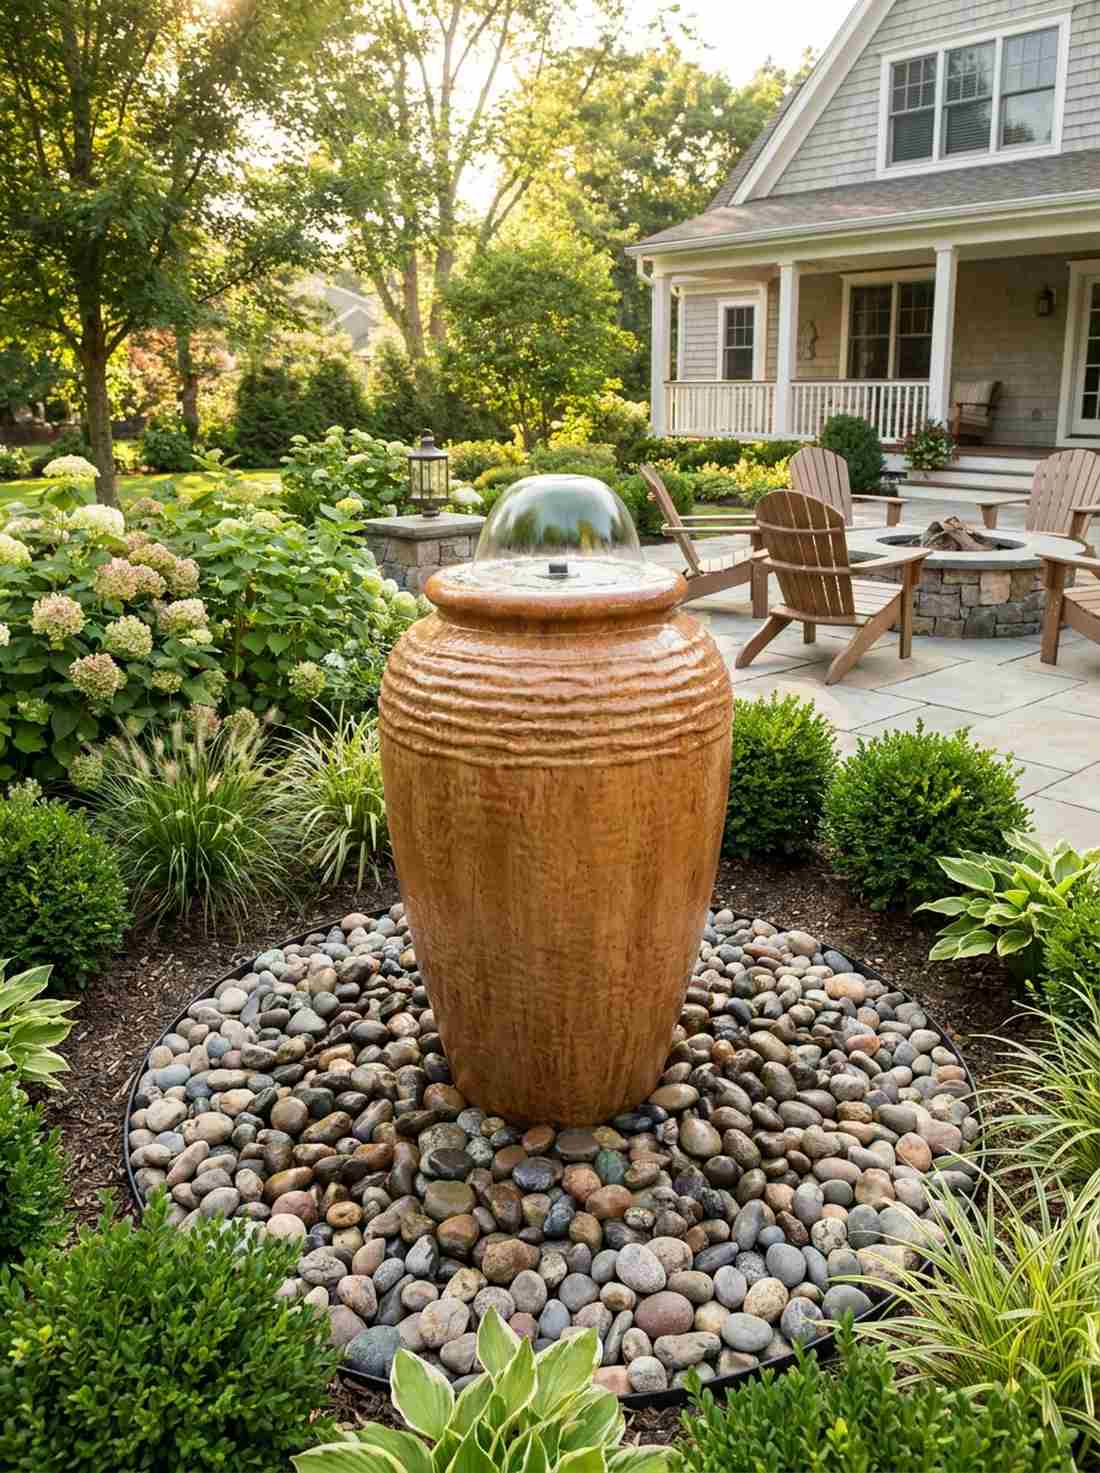
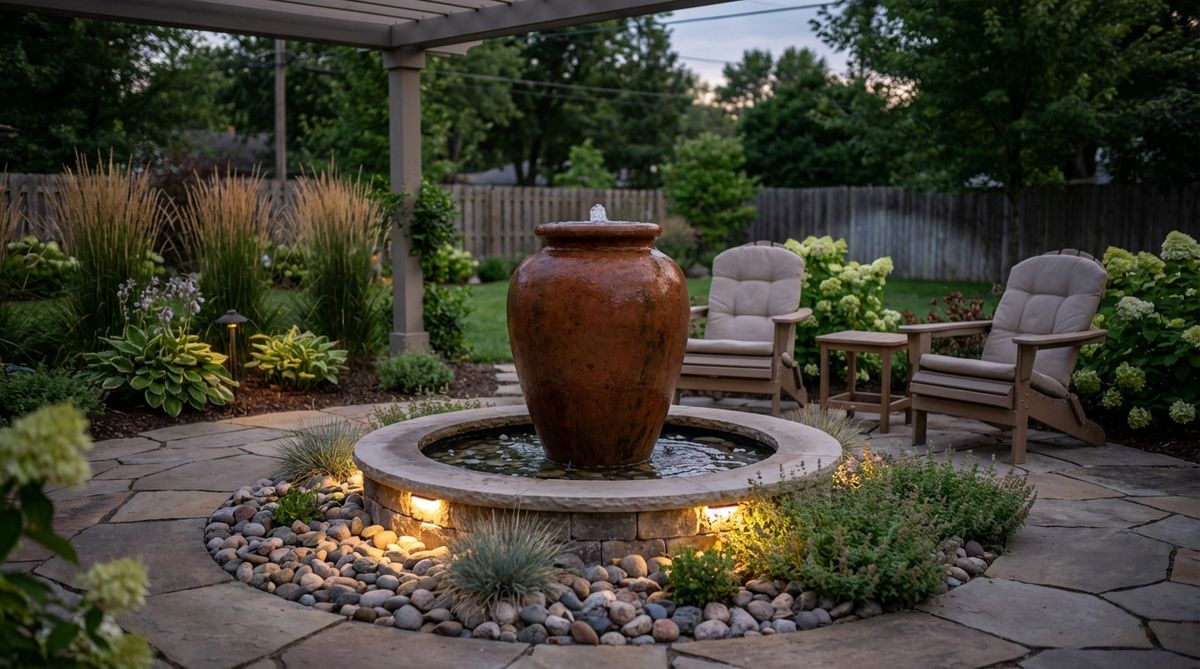
Pushes a smooth, glassy dome of water that spills over elegantly. Installing a recirculating ceramic vase fountain anchors a garden bed with a stunning visual focal point. Excellent for drowning out the hum of neighborhood air conditioners.
Open ponds breed mosquitoes, but this closed-loop system totally bypasses that nightmare while looking incredibly lavish. Surrounding the base with smooth river rocks hides the hidden basin, giving a designer-level finish.
A complete DIY urn and pump kit costs about $150–$300.
- Key Materials: Glazed tall urn, submersible pump, underground catch basin
- Vibe / Style: Elegant estate courtyard
- Difficulty: Moderate digging required
- Budget Breakdown: Urn & Pump: $150 | Basin & Rocks: $80
- Creator’s Tip: Buy an urn with a slightly textured glaze; the water rippling over the bumps creates a much louder, more relaxing sound than smooth glass.
- Smart Sourcing: complete bubbling urn fountain kits or heavy-duty underground fountain basins.
51. Wall-Mounted Spout
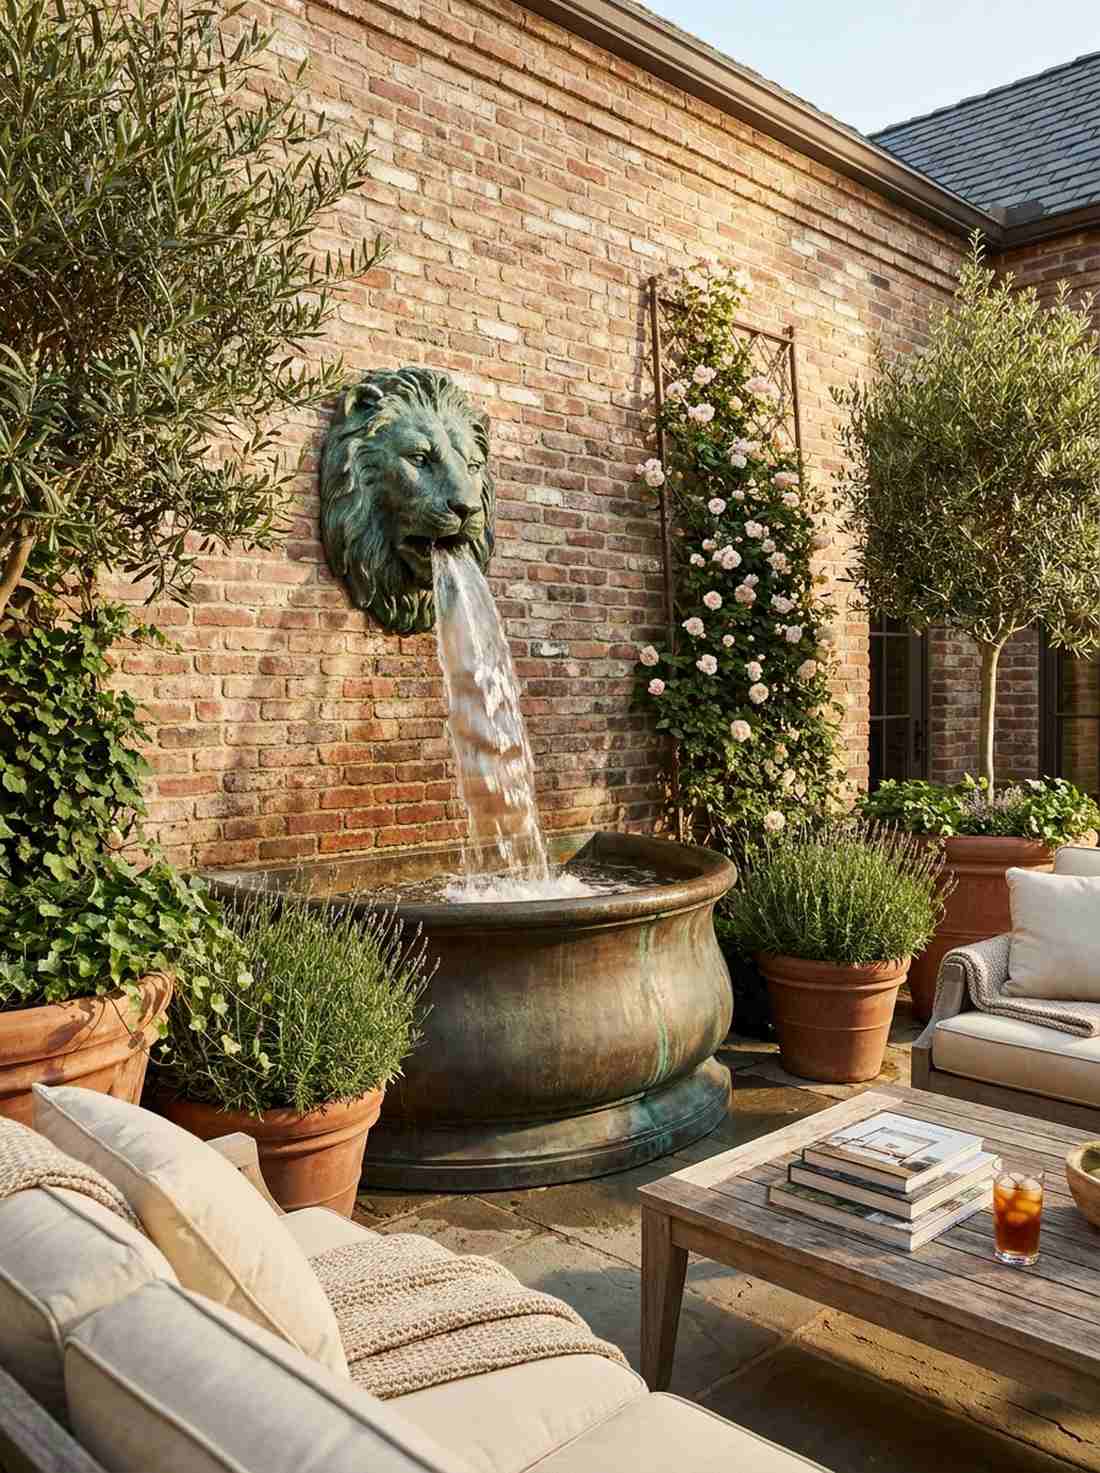
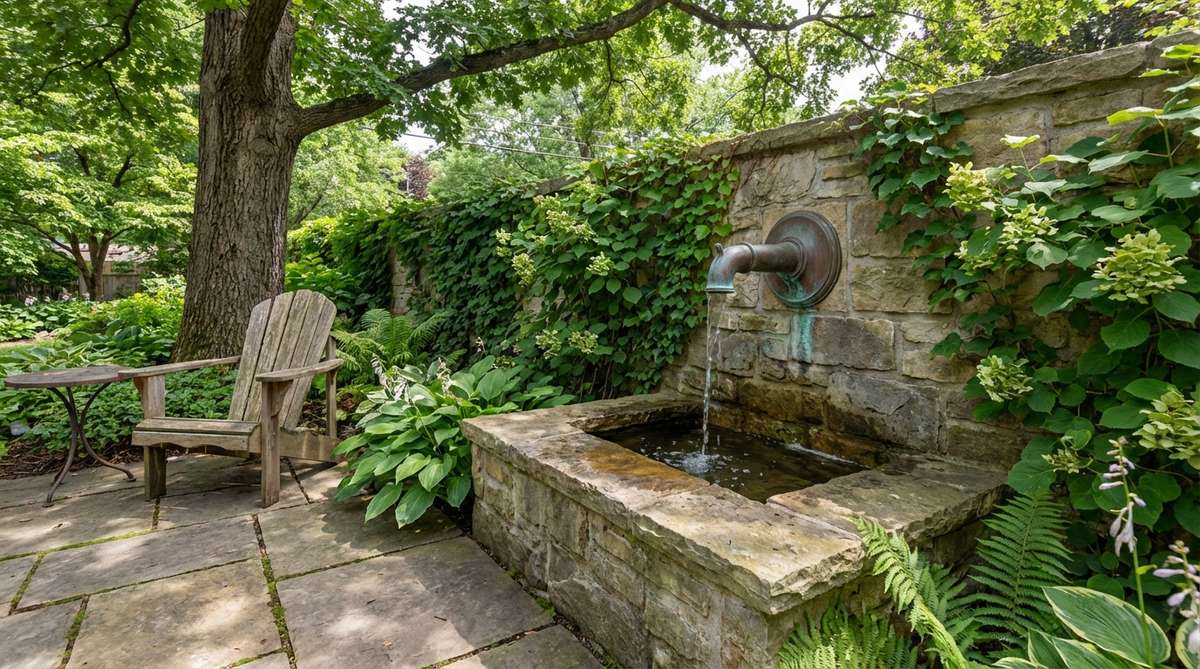
Pours a heavy, dramatic stream of water reminiscent of ancient Roman baths. Affixing a bronze wall spigot fountain to an existing brick wall utilizes zero floor space. The ultimate luxury addition for a tight, high-walled courtyard.
Freestanding fountains clutter walkways, but mounting the feature vertically looks far more expensive than it is. Allowing the copper or bronze spout to develop a natural green patina over time leans heavily into that premium, old-world aesthetic.
You can rig a wall spout system for $150–$250.
- Key Materials: Bronze lion head or spout, half-moon catch basin
- Vibe / Style: Classic Tuscan villa
- Difficulty: Requires masonry drilling
- Budget Breakdown: Spout: $80 | Basin & Pump: $120
- Creator’s Tip: Ensure the drop from the spout to the basin is at least 18 inches; any lower and the splashing sound won’t be loud enough to mask traffic.
- Smart Sourcing: bronze wall-mounted fountain spouts or submersible adjustable-flow water pumps.
52. Rain Chain Feature
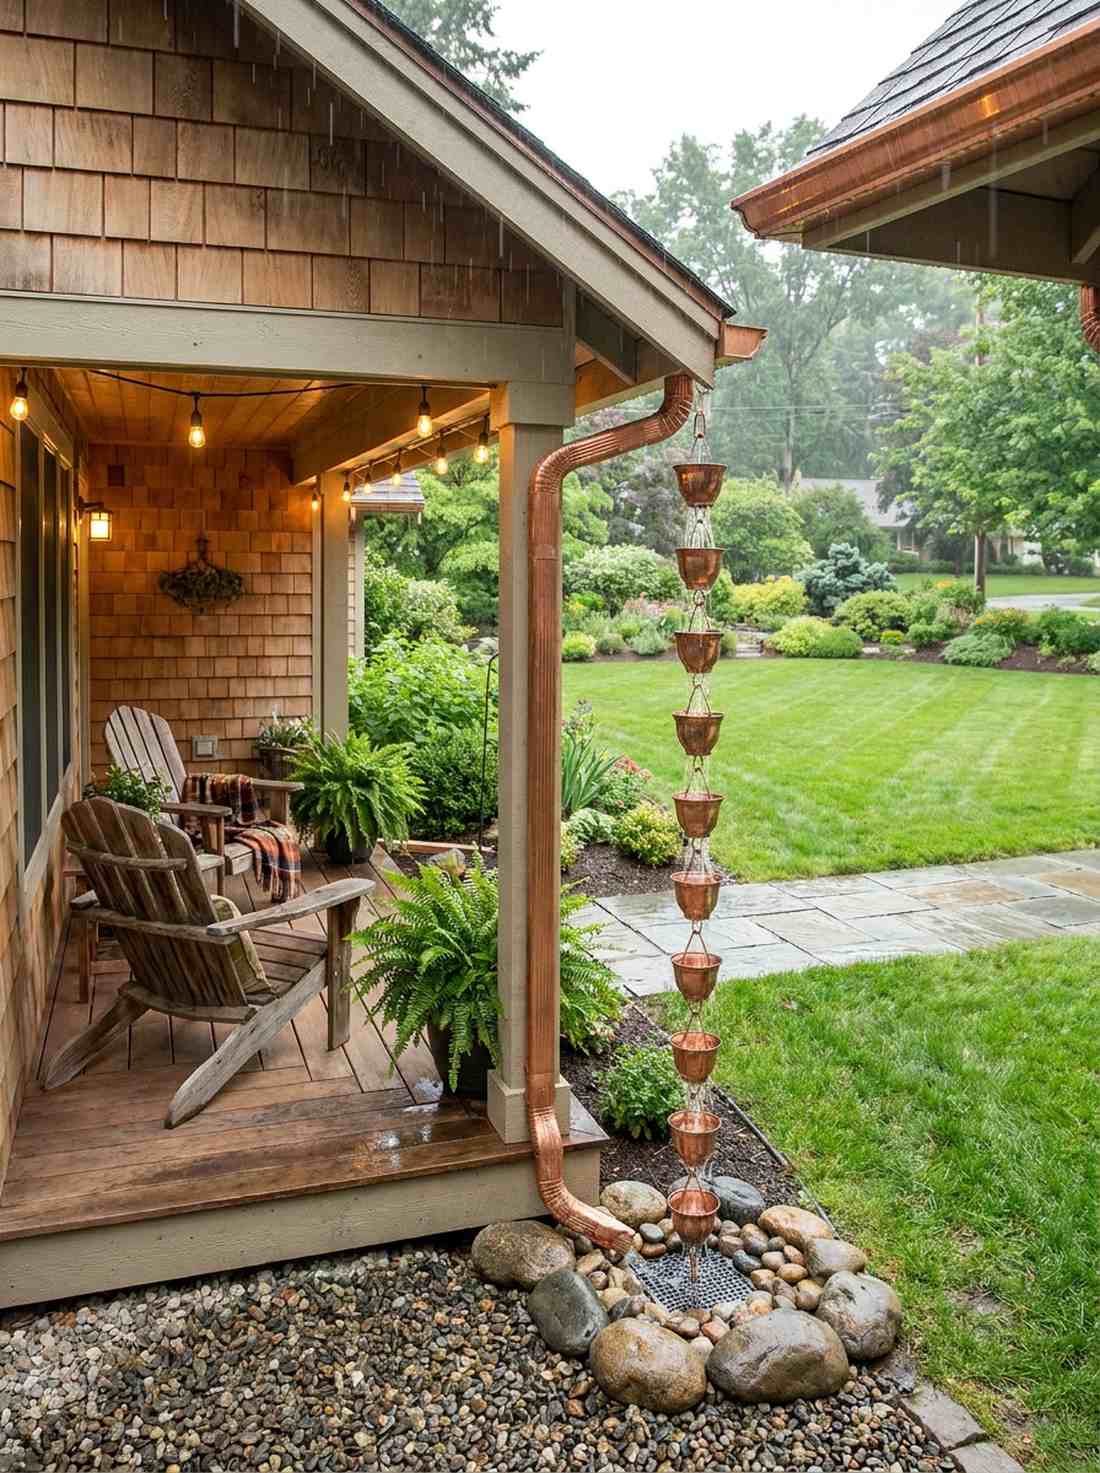
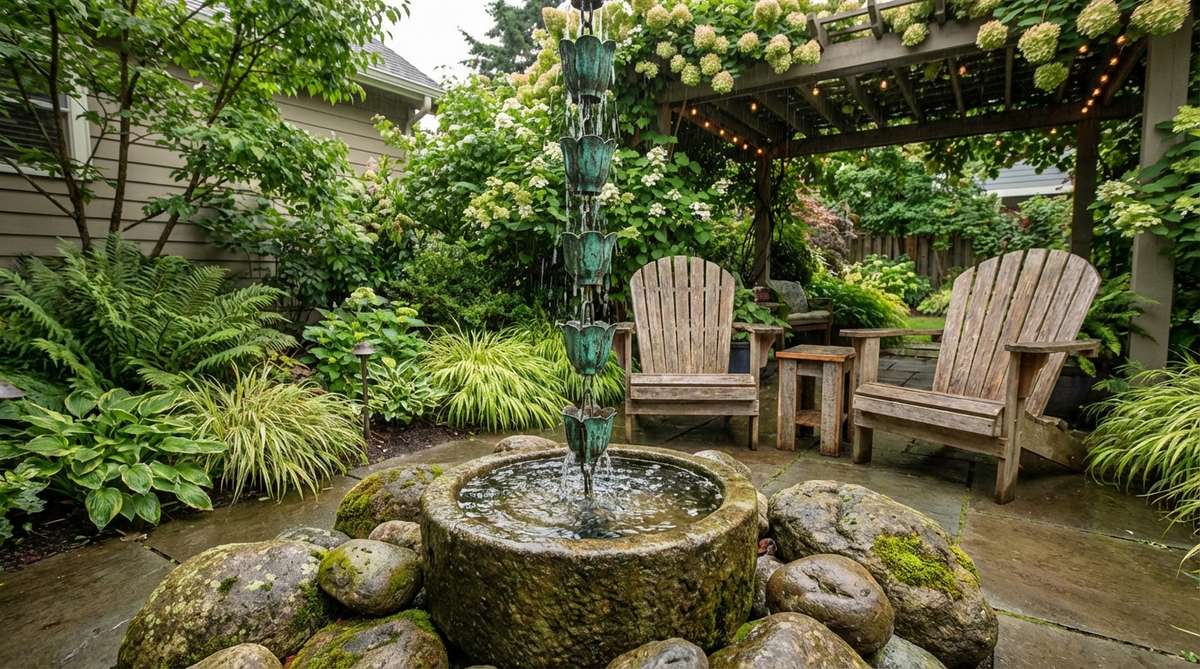
Turns a gloomy rainstorm into a stunning, cascading water show. Replacing ugly aluminum downspouts with copper linked rain chains adds instant architectural jewelry to your home. Essential for porches where downspouts ruin the aesthetic.
Standard gutters look incredibly cheap, but hanging a heavy copper chain gives a designer-level finish for a fraction of a roofing remodel. Watching the water weave through the metal cups is highly hypnotizing.
A high-quality 8-foot chain runs $60–$120. Save this for your exterior remodel board!
- Key Materials: Copper rain chain, downspout adapter kit, gravel catch drain
- Vibe / Style: Artisan craftsman charm
- Difficulty: Five-minute ladder job
- Budget Breakdown: Chain kit: $80 | Copper adapter: $15
- Creator’s Tip: Anchor the bottom of the chain to a heavy stone or deep gravel pit so heavy winds don’t swing it into your siding and smash the wood.
- Smart Sourcing: pure copper cup rain chains or rain chain gutter adapter clips.
53. Koi Pond Corner
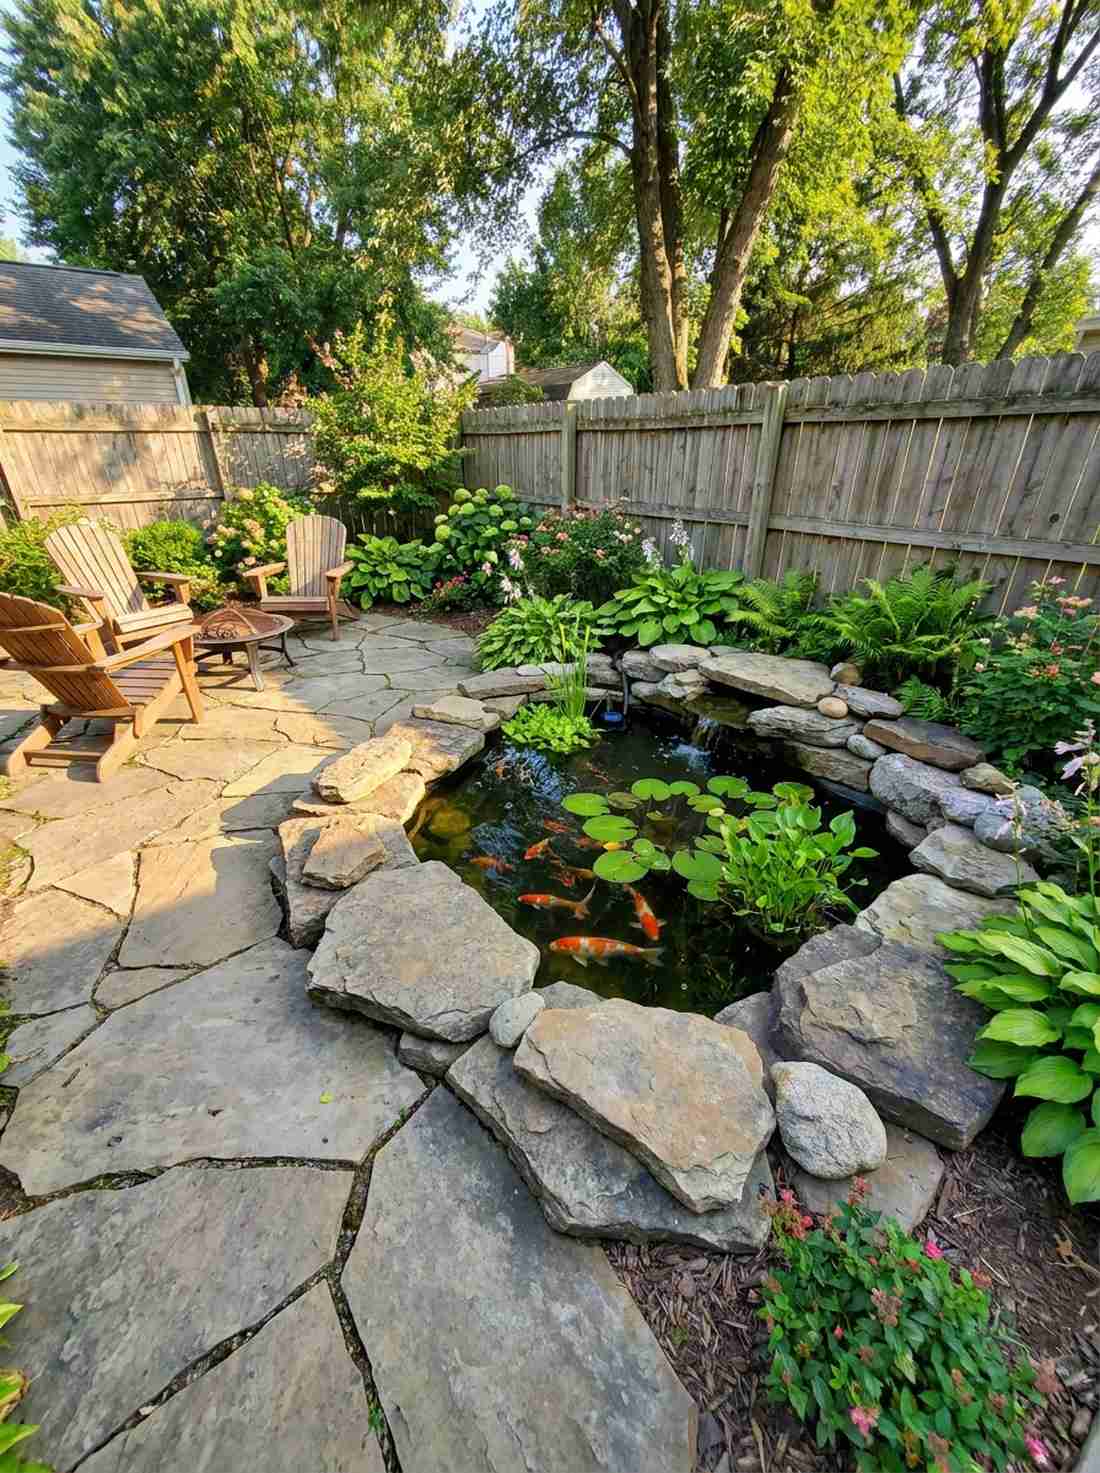
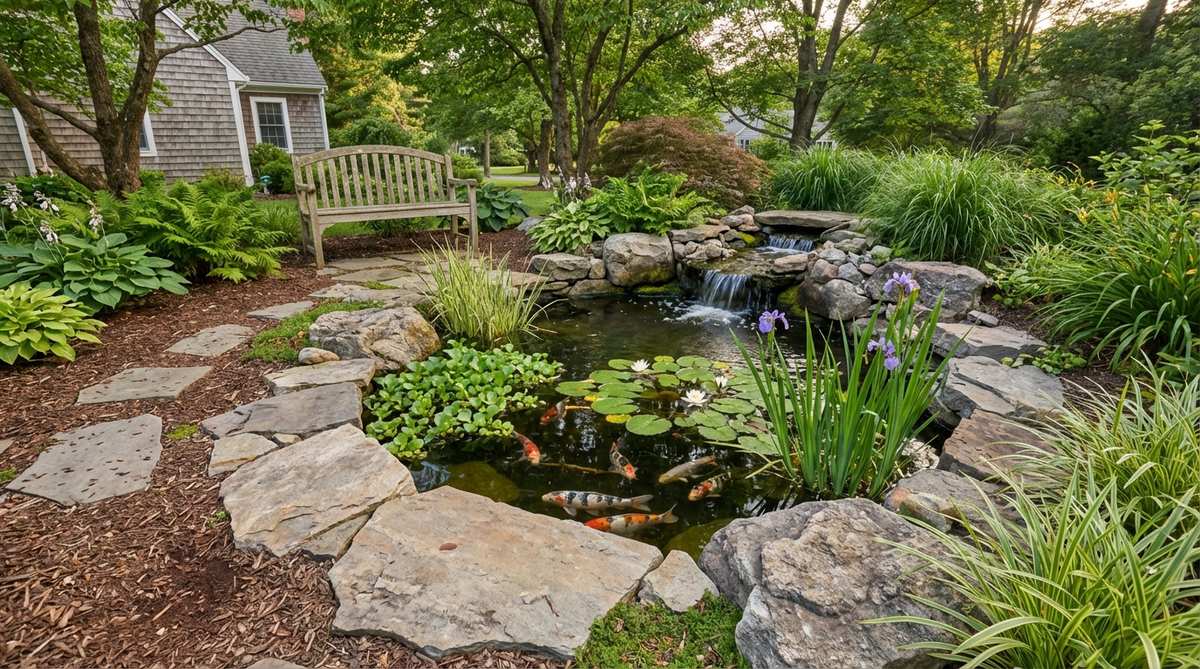
Brings a vibrant, living ecosystem right to the edge of your seating area. Digging a compact corner water garden introduces flashing flashes of orange fish and lush lily pads. Perfect for adding massive, undeniable value to a permanent yard layout.
Hiring an excavator costs a fortune, but dropping a pre-formed rigid liner into a corner delivers a surprisingly premium look over a weekend. Using heavy flat stones to overhang the plastic lip hides the evidence, making it look 100% natural.
A basic DIY pre-formed pond setup costs $250–$500.
- Key Materials: Pre-formed plastic pond liner, filtration pump, flat edging stones
- Vibe / Style: Lush botanical sanctuary
- Difficulty: Heavy digging and leveling
- Budget Breakdown: Liner: $150 | Filter pump: $100 | Rocks: $100
- Creator’s Tip: Dig the pond at least 24 inches deep; any shallower and the water will overheat in the summer sun, killing the fish and breeding algae.
- Smart Sourcing: heavy-duty preformed pond liners or all-in-one pond filter pump systems.
Skip the expensive sound systems; the auditory trick coming next costs almost nothing and feels incredibly relaxing…
54. Wind Chime Accents
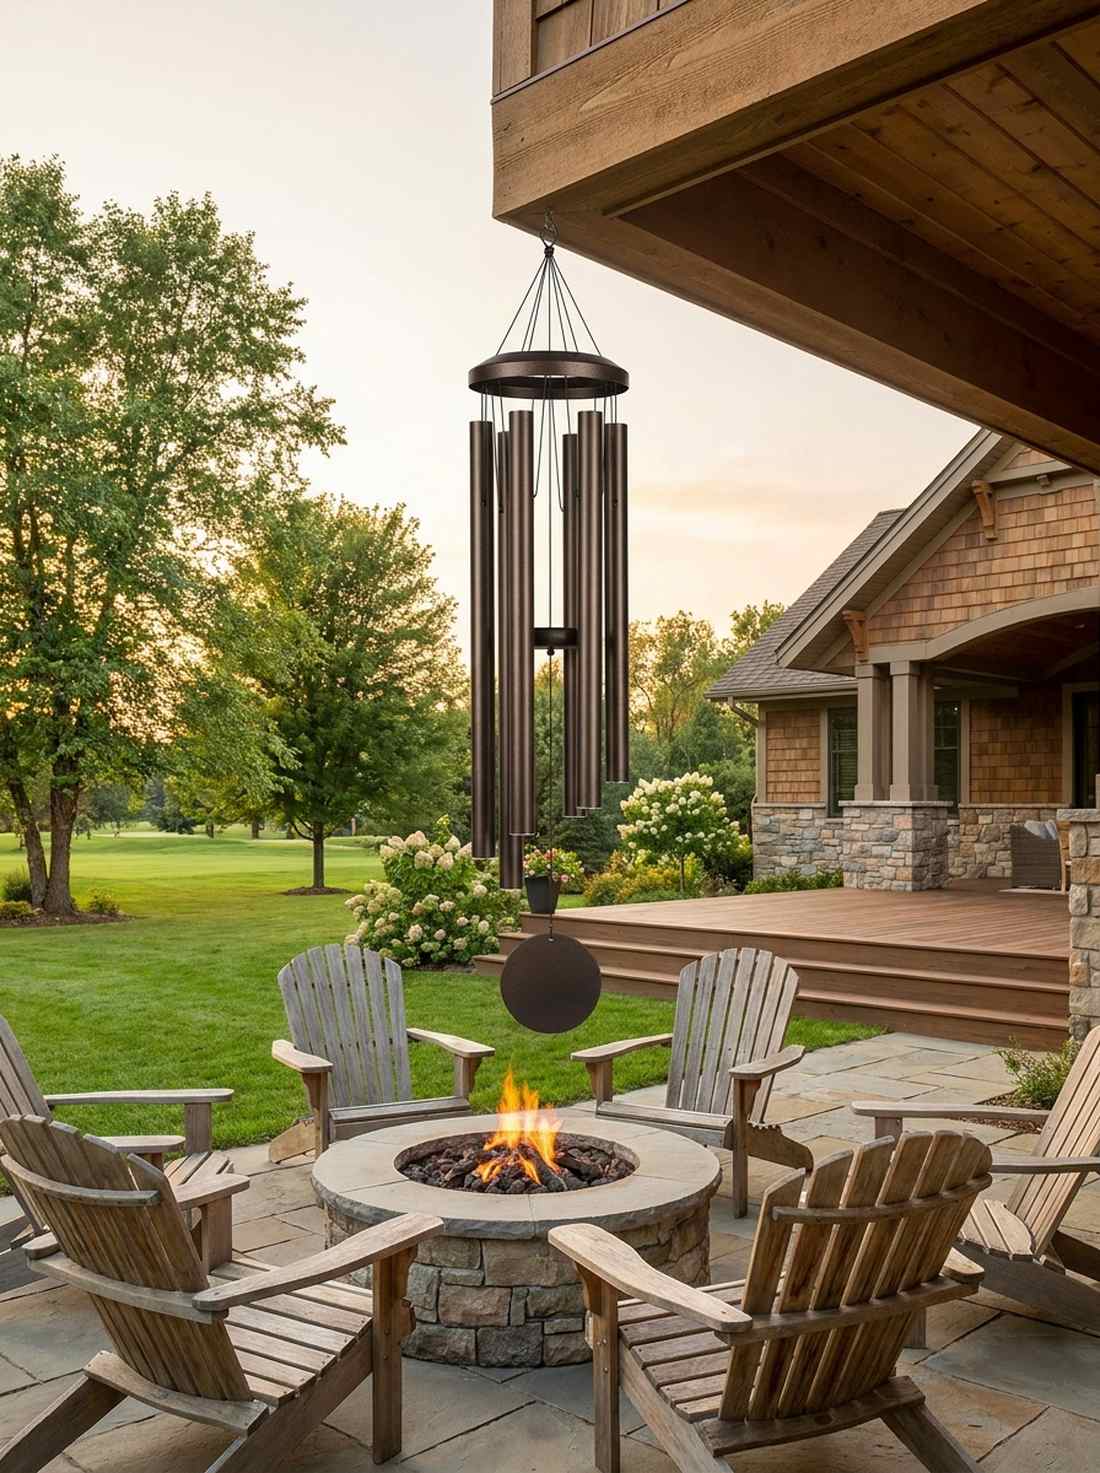
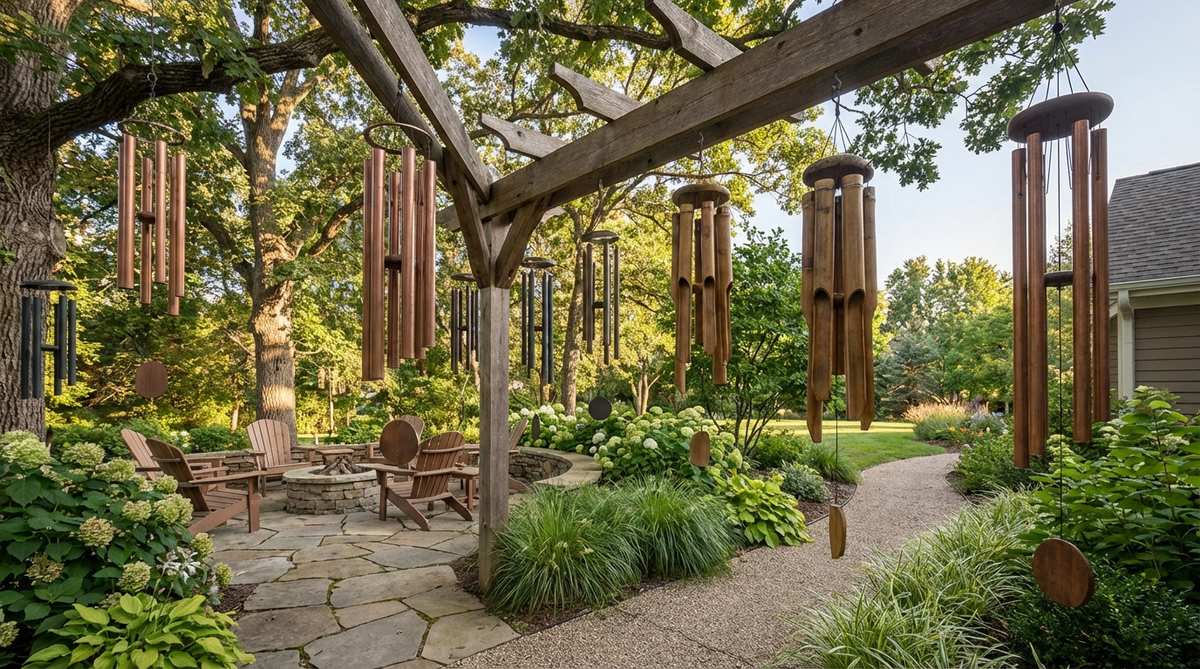
Rings out with a deep, resonant hum that vibrates right through your chest. Hanging thick-tubed aluminum wind chimes adds a layer of auditory warmth triggered by the breeze. Incredible for high-wind areas that usually feel chaotic.
Cheap tin chimes sound shrill and annoying, but investing in acoustically tuned, heavy-walled tubes completely bypasses the noise pollution. The deep baritone echoes give a designer-level finish to the garden’s atmosphere.
A premium, tuned chime costs roughly $70–$150.
- Key Materials: Heavy-gauge aluminum chimes, strong mounting hook
- Vibe / Style: Meditative sound bath
- Difficulty: Hang and listen
- Budget Breakdown: Tuned chime: $90 | Mount hardware: $10
- Creator’s Tip: Hang them off the corner of a heavy roof overhang rather than a flimsy tree branch to ensure they ring clearly without tangling.
- Smart Sourcing: acoustically tuned baritone wind chimes or heavy-duty swivel hanging hooks.
55. Gravel Pathway Crunch
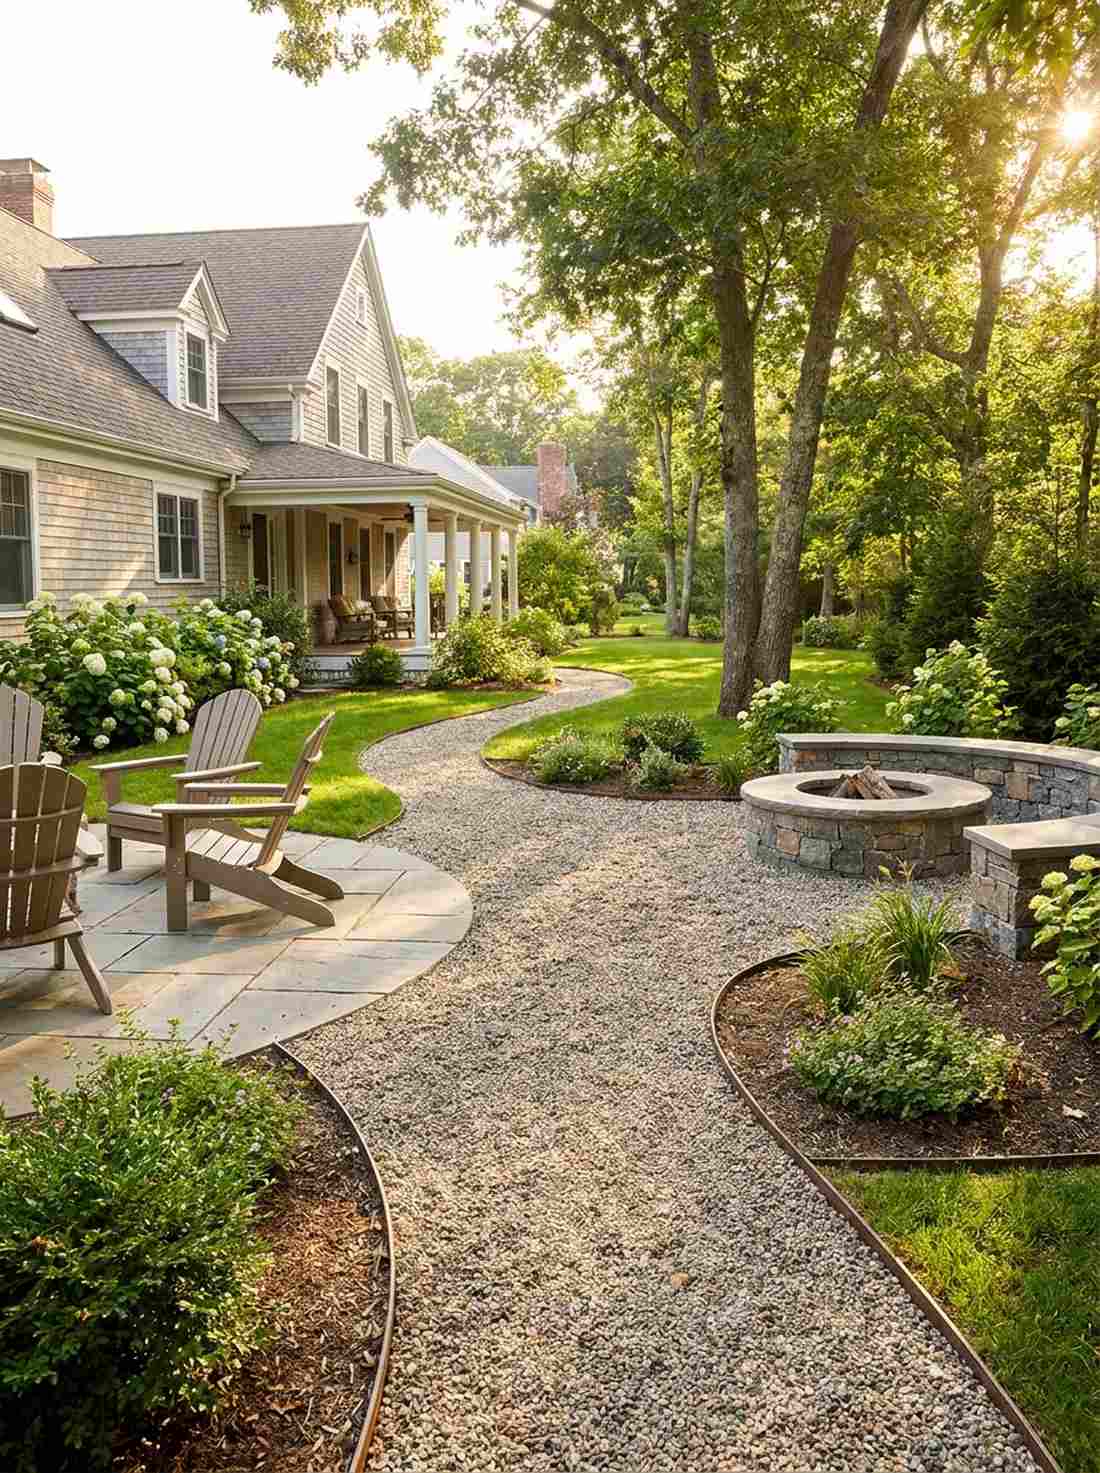
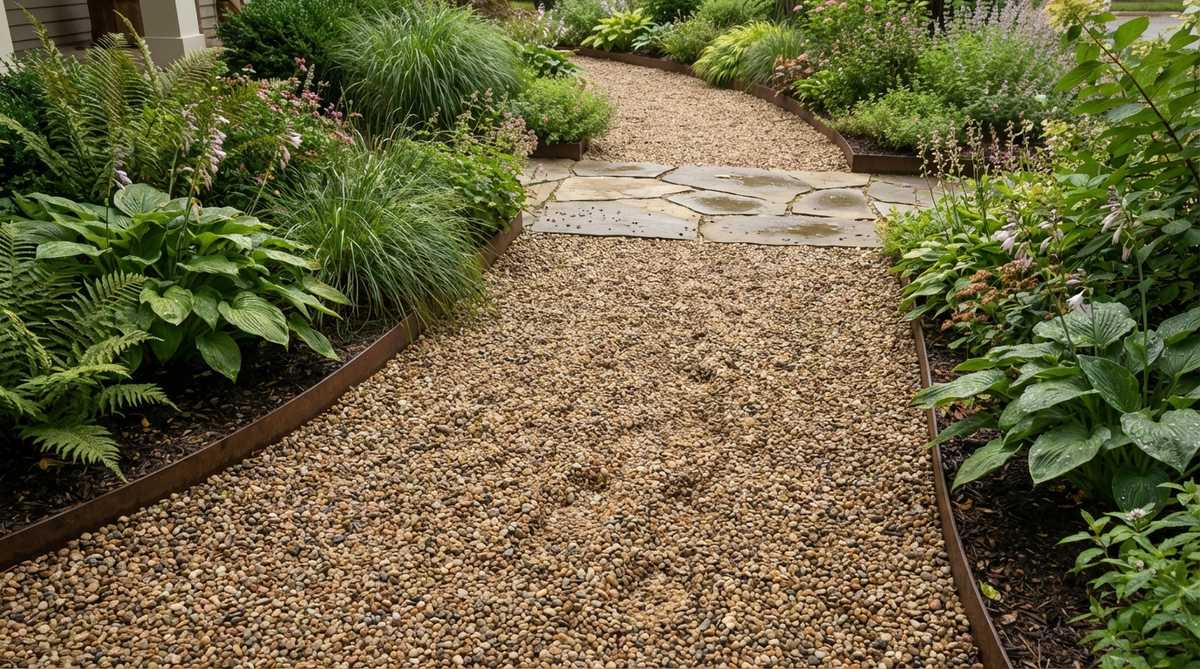
Provides a highly satisfying auditory crunch underfoot that signals a shift in space. Laying down a loose pea gravel walking path adds immense textural and sound dynamics. The smartest choice for connecting a patio to a hidden fire pit.
Pouring solid concrete looks cold and commercial, but this loose material looks far more expensive than it is. It naturally absorbs heavy rainfall, totally preventing those massive, muddy puddles that ruin grass yards.
A long gravel path costs about $100–$250. Pin this for a weekend transformation!
- Key Materials: Washed pea gravel, steel landscape edging, weed fabric
- Vibe / Style: Classic French countryside
- Difficulty: Lots of shoveling
- Budget Breakdown: Gravel yards: $150 | Steel edge: $60
- Creator’s Tip: Use rigid steel edging rather than cheap plastic; it keeps the crisp, high-end straight lines and completely stops the gravel from spilling into the grass.
- Smart Sourcing: flexible steel landscape edging strips or commercial weed barrier rolls.
56. Outdoor Speaker Integration
Blankets the yard in crisp, high-fidelity audio without exposing ugly wires. Hiding rock-camouflaged Bluetooth speakers inside your flower beds delivers invisible entertainment. Essential for hosting lively BBQ parties without dragging out a boombox.
Mounting ugly white box speakers on your siding ruins the natural vibe, but these disguised units deliver a surprisingly premium look by disappearing completely. Streaming nature sounds or low-fi jazz instantly elevates the cozy garden life.
A reliable dual-speaker Bluetooth setup runs $100–$250.
- Key Materials: Weatherproof rock speakers, outdoor wire (if passive)
- Vibe / Style: Hidden high-tech luxury
- Difficulty: Simple Bluetooth pairing
- Budget Breakdown: Rock speaker pair: $150 | Wire: $0 (if wireless)
- Creator’s Tip: Place the speakers pointing inward from the corners of the yard, rather than blasting out from the house; it contains the sound and avoids angry neighbors.
- Smart Sourcing: waterproof Bluetooth rock speaker pairs or solar-powered outdoor wireless speakers.
Seasonal Adaptation Ideas for Year-Round Cozy Gardens
57. Retractable Awning Shade
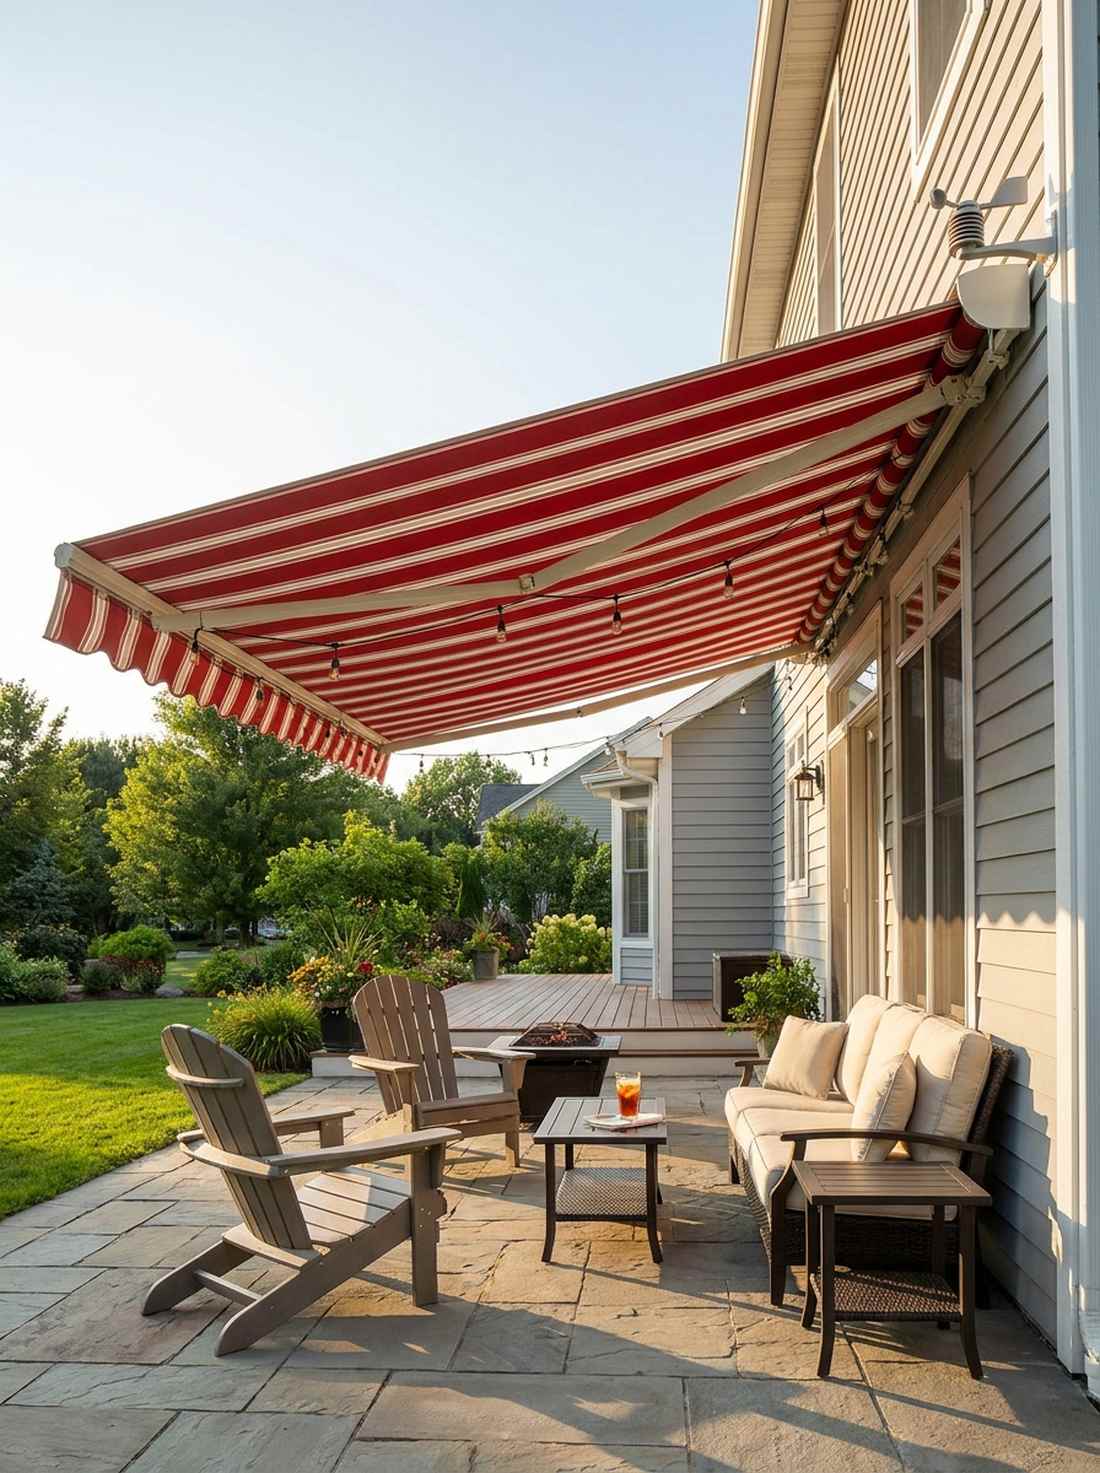
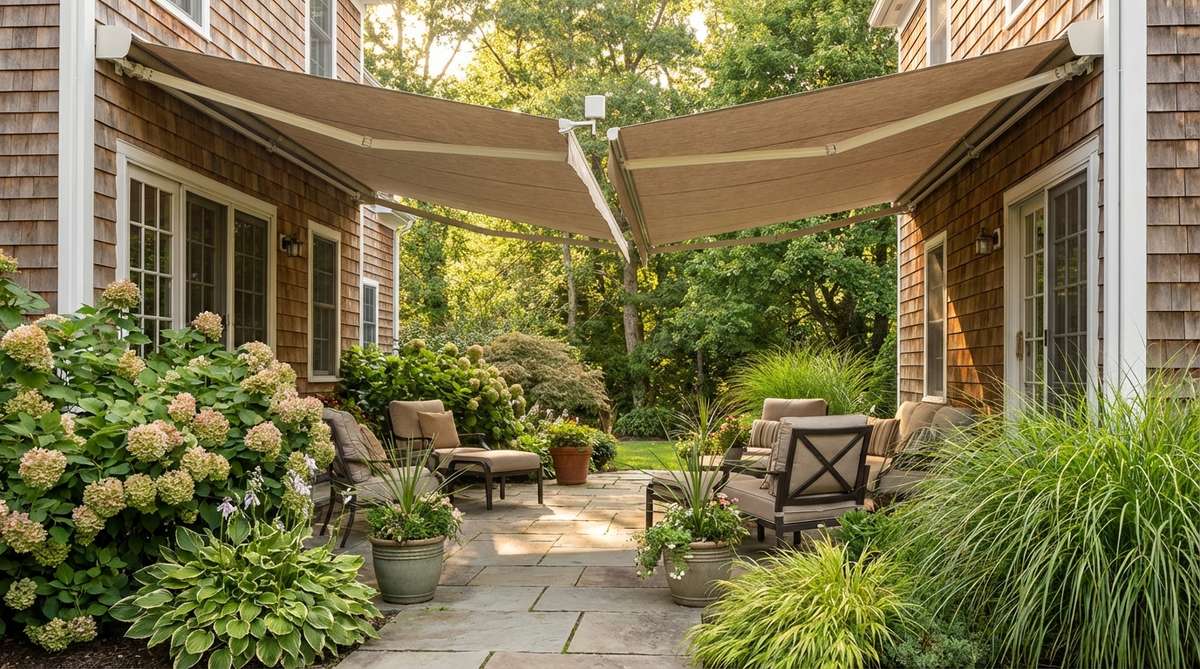
Provides a massive sweep of cooling shade exactly when the sun hits its peak. Bolting a motorized retractable fabric awning to your exterior wall is the ultimate flexible roof. Perfect for blistering west-facing patios that become unusable at 4 PM.
Building a permanent roof makes the house dark in the winter, but this retractable system completely bypasses that by rolling away. Opting for a bold, striped canvas gives a designer-level finish reminiscent of an Italian café.
A solid motorized unit costs between $400–$900 depending on width.
- Key Materials: Motorized awning unit, heavy-duty lag bolts
- Vibe / Style: European street cafe
- Difficulty: Requires two people and drill
- Budget Breakdown: Awning unit: $600 | Hardware: $30
- Creator’s Tip: Always buy an awning with an integrated wind sensor; it will automatically reel itself in during a sudden storm before the arms snap.
- Smart Sourcing: motorized retractable patio awnings or UV-resistant acrylic awning canvas covers.
58. Glass Windbreak Panels

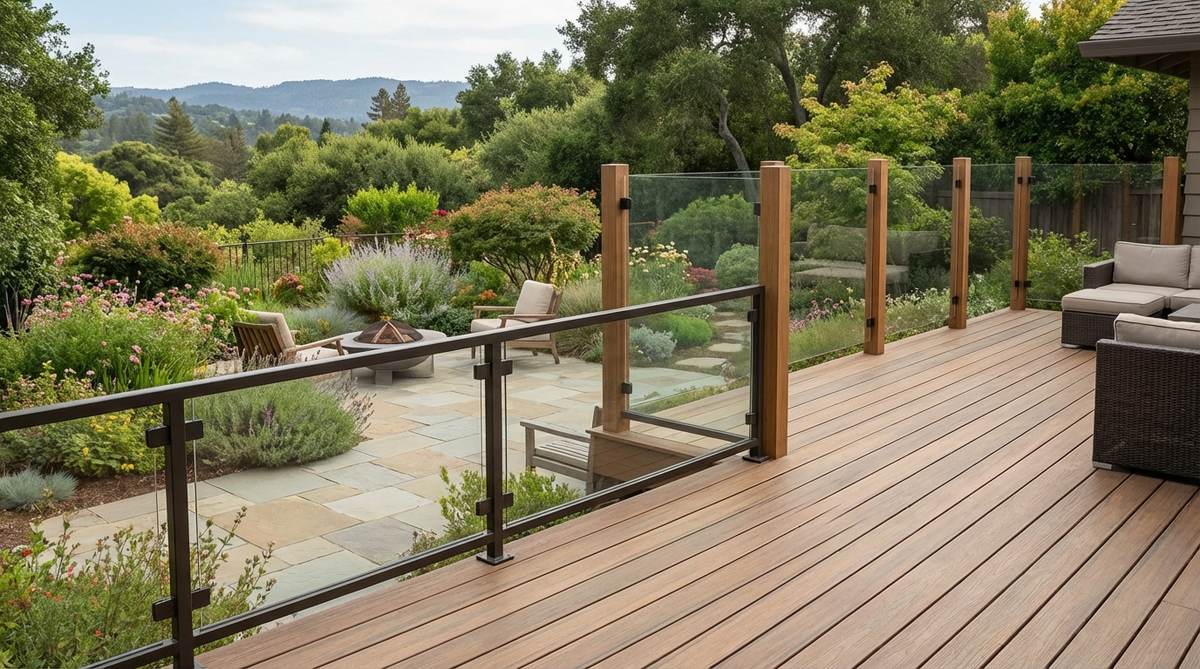
Shields you from freezing gales without blocking a single inch of your gorgeous view. Installing frameless tempered glass railing screens wraps a deck in an invisible fortress. The absolute smartest upgrade for high-elevation balconies or coastal homes.
Wooden slats block the view entirely, but this thick glass totally preserves the landscape while looking incredibly lavish. It completely stops the wind chill factor, extending your patio season deep into November.
Glass panels and spigots cost roughly $300–$600 per section. Save this to your premium remodel board!
- Key Materials: 1/2-inch tempered glass panels, stainless steel base spigots
- Vibe / Style: Ultra-modern invisible edge
- Difficulty: Very heavy, precision required
- Budget Breakdown: Glass panes: $400 | Steel hardware: $150
- Creator’s Tip: Coat the exterior of the glass with a hydrophobic ceramic car spray; rainwater will bead right off, saving you from constant squeegee maintenance.
- Smart Sourcing: stainless steel glass railing spigots or hydrophobic glass ceramic coating sprays.
59. Evergreen Structure Planting
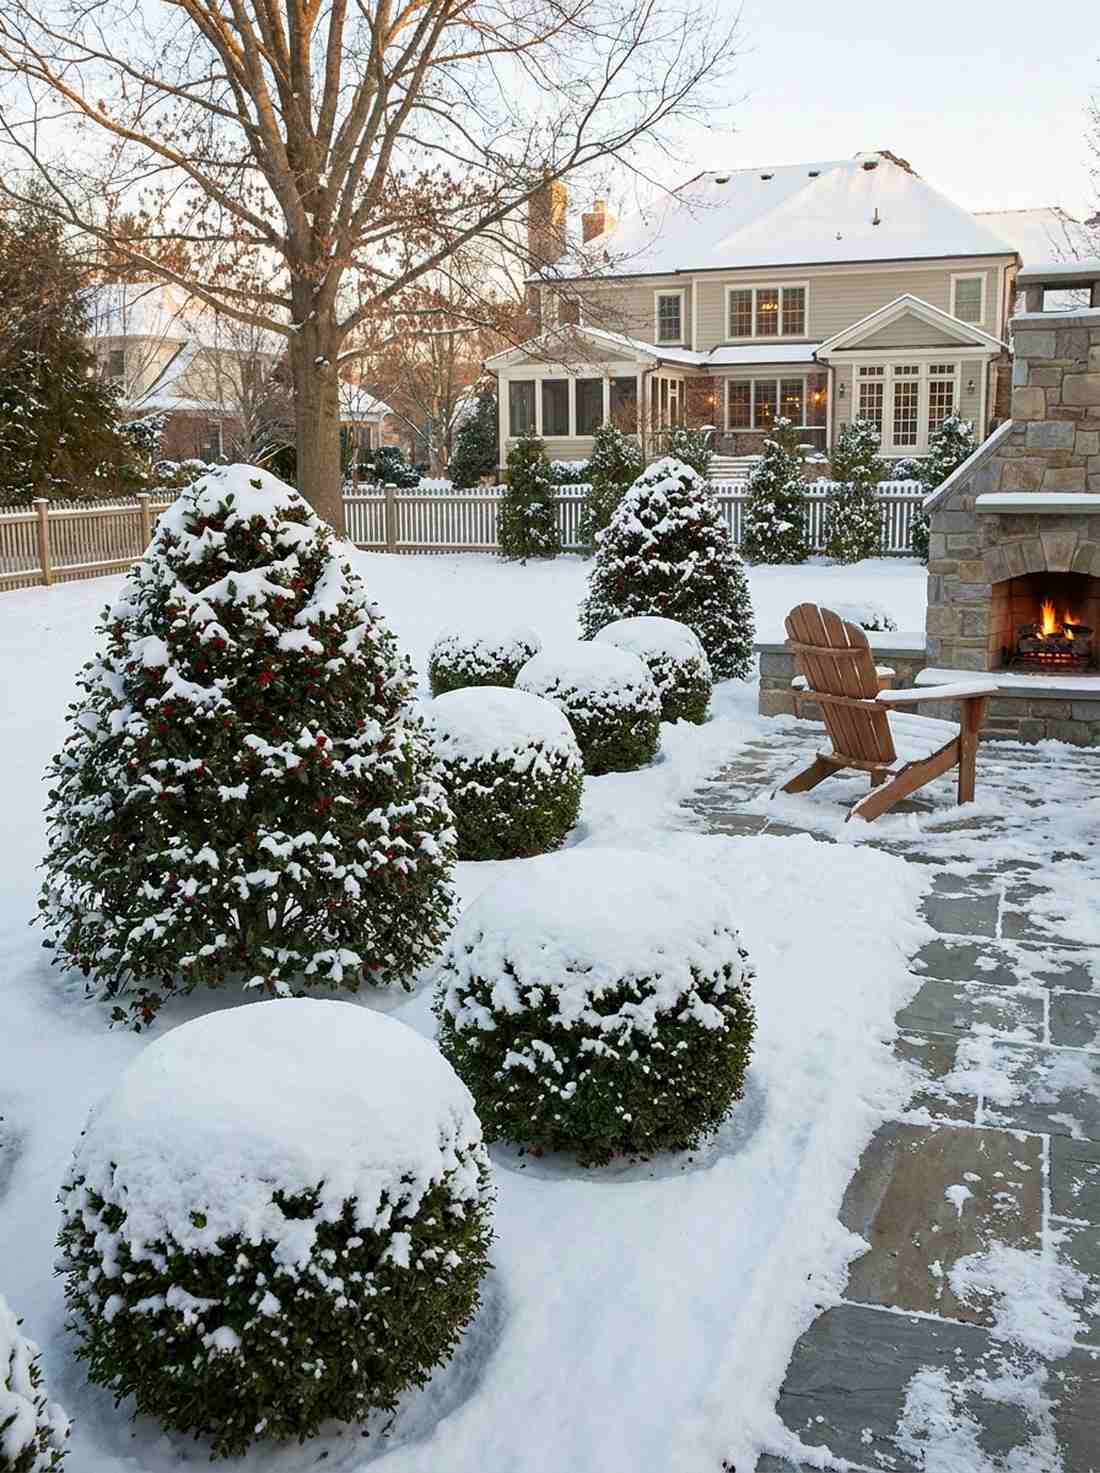
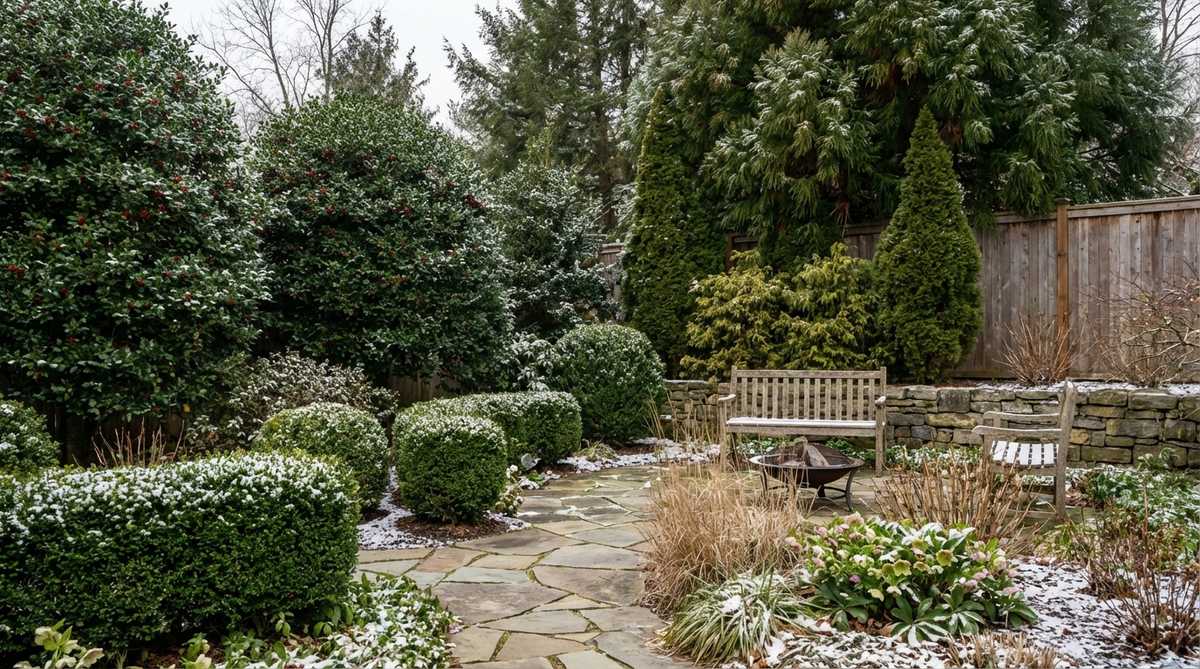
Holds the powerful architectural shape of your yard even when covered in heavy snow. Utilizing structured boxwood and holly shrubs ensures the garden never looks dead. Essential for regions with long, brutal winters where perennials vanish.
Relying only on summer flowers leaves your yard looking like a barren wasteland in January, but these permanent green anchors deliver a surprisingly premium look year-round. They provide the necessary bones for cozy garden ideas to thrive in the cold.
A few mature structural plants cost $150–$300.
- Key Materials: Winter-hardy evergreens, sharp pruning shears
- Vibe / Style: Stately winter estate
- Difficulty: Easy planting
- Budget Breakdown: 5 Boxwoods: $150 | Holly bush: $60
- Creator’s Tip: Spray the leaves with an anti-desiccant spray in late November; it locks in moisture and prevents brutal winter winds from turning the bushes brown.
- Smart Sourcing: cold-hardy boxwood starter plants or plant anti-desiccant winter protection sprays.
The secret to using your yard year-round relies entirely on this next weatherproofing strategy…
50. Heated Flooring Zones
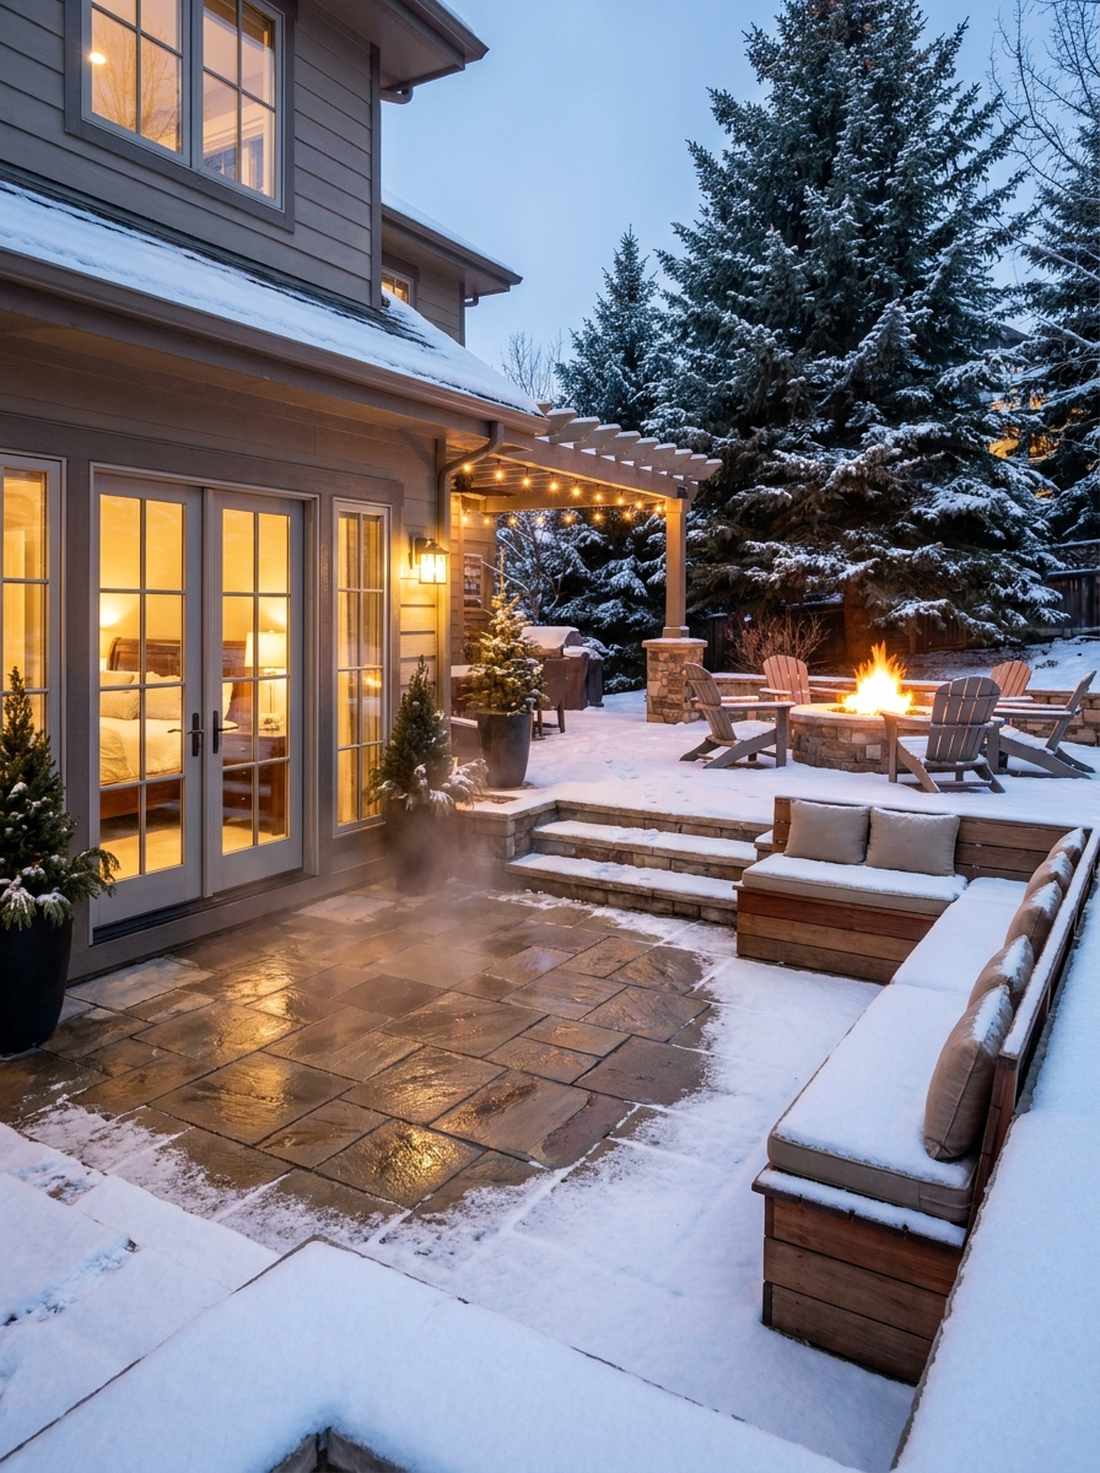
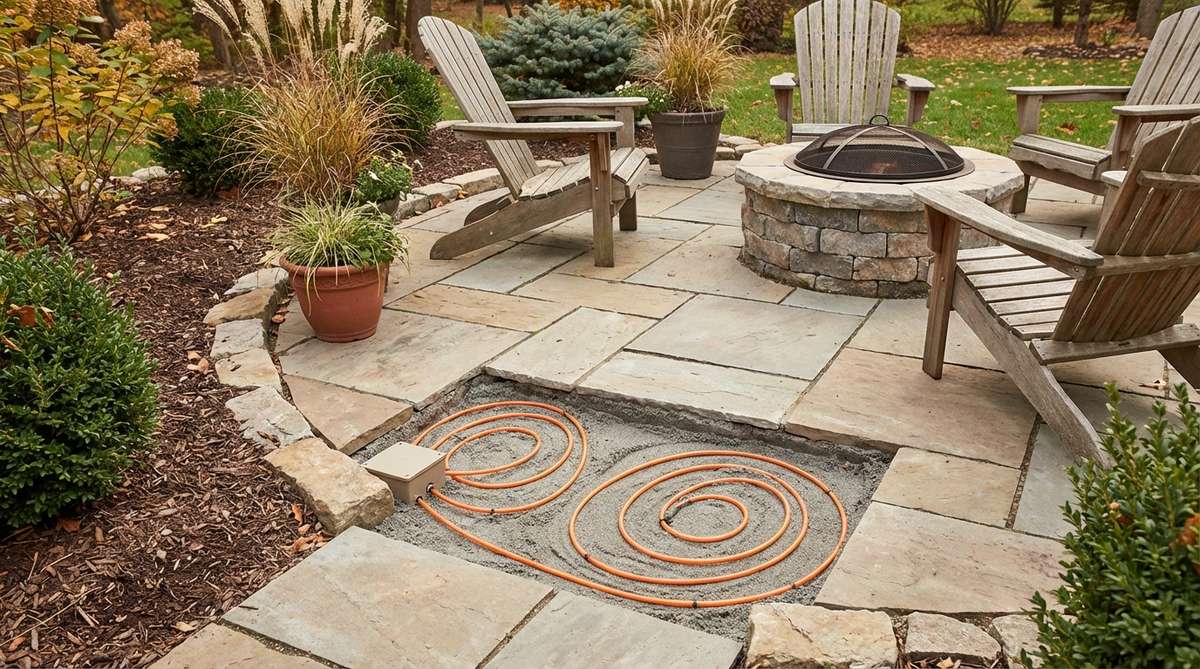
Melts snow on contact and radiates incredible, barefoot-friendly warmth upward. Laying an electric radiant heat mesh under pavers is the ultimate hidden luxury. Perfect for small patio spaces outside a master bedroom door.
Bulky space heaters ruin the aesthetic, but this invisible matrix looks far more expensive because you literally can’t see it. Stepping out onto warm stones in the middle of October is a massive lifestyle upgrade.
A DIY heating mat system for a small patio costs $300–$600.
- Key Materials: Outdoor radiant heat mats, paving stones, outdoor thermostat
- Vibe / Style: Five-star ski resort
- Difficulty: Requires professional electrician
- Budget Breakdown: Heat mat: $350 | Thermostat & Wiring: $150
- Creator’s Tip: Hook the system to a smart-home switch so you can turn the patio floor on from your phone an hour before you step outside.
- Smart Sourcing: outdoor snow-melting heating mats or smart WiFi heavy-duty outdoor switches.
61. Winterberry Seasonal Color

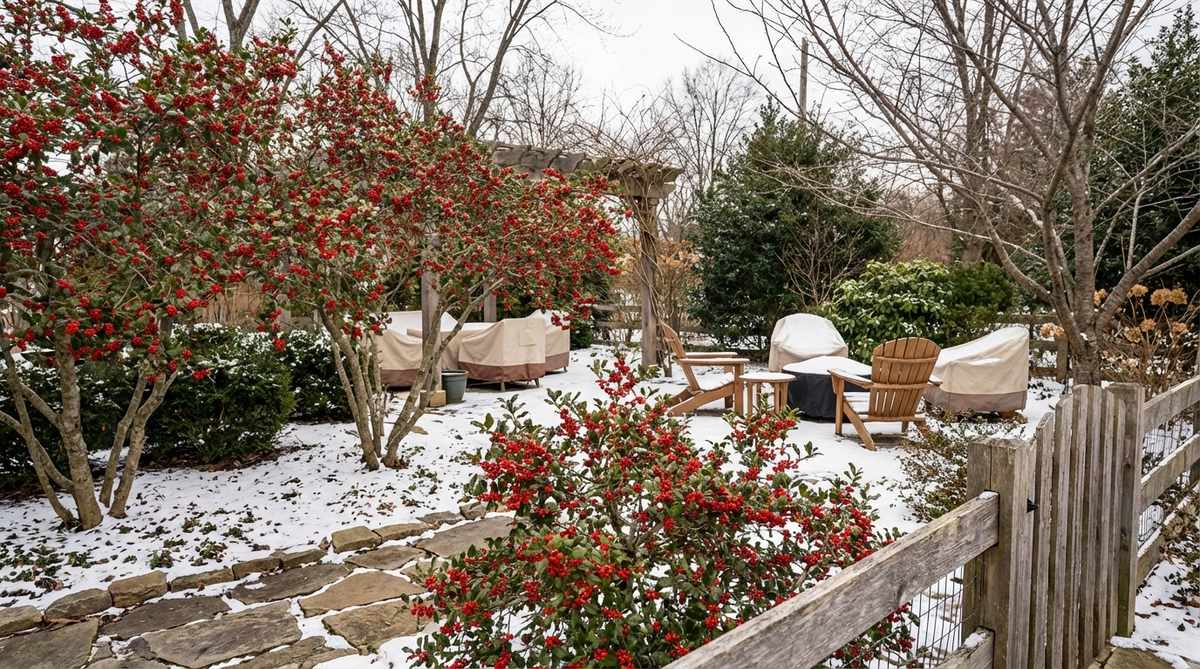
Explodes against the stark white snow with violently bright, cherry-red branches. Planting a deciduous winterberry holly cluster adds shocking seasonal contrast. A brilliant, low-maintenance hack for keeping your landscape alive in February.
Most people give up on winter color, but these bare branches loaded with berries give a designer-level finish that attracts gorgeous native birds. It completely bypasses the depressing gray palette of standard dormant yards.
A pair of bushes will run about $60–$120. Pin this to your winter landscape board!
- Key Materials: Male and female winterberry bushes, acidic soil
- Vibe / Style: Striking winter wildlife haven
- Difficulty: Standard digging
- Budget Breakdown: 2 Bushes: $80 | Soil acidifier: $15
- Creator’s Tip: You MUST buy at least one male plant for every five female plants, otherwise the females will never produce those iconic red berries.
- Smart Sourcing: winterberry holly live plant sets (male/female paired) or organic berry-tone fertilizers.
62. Removable Storm Panels
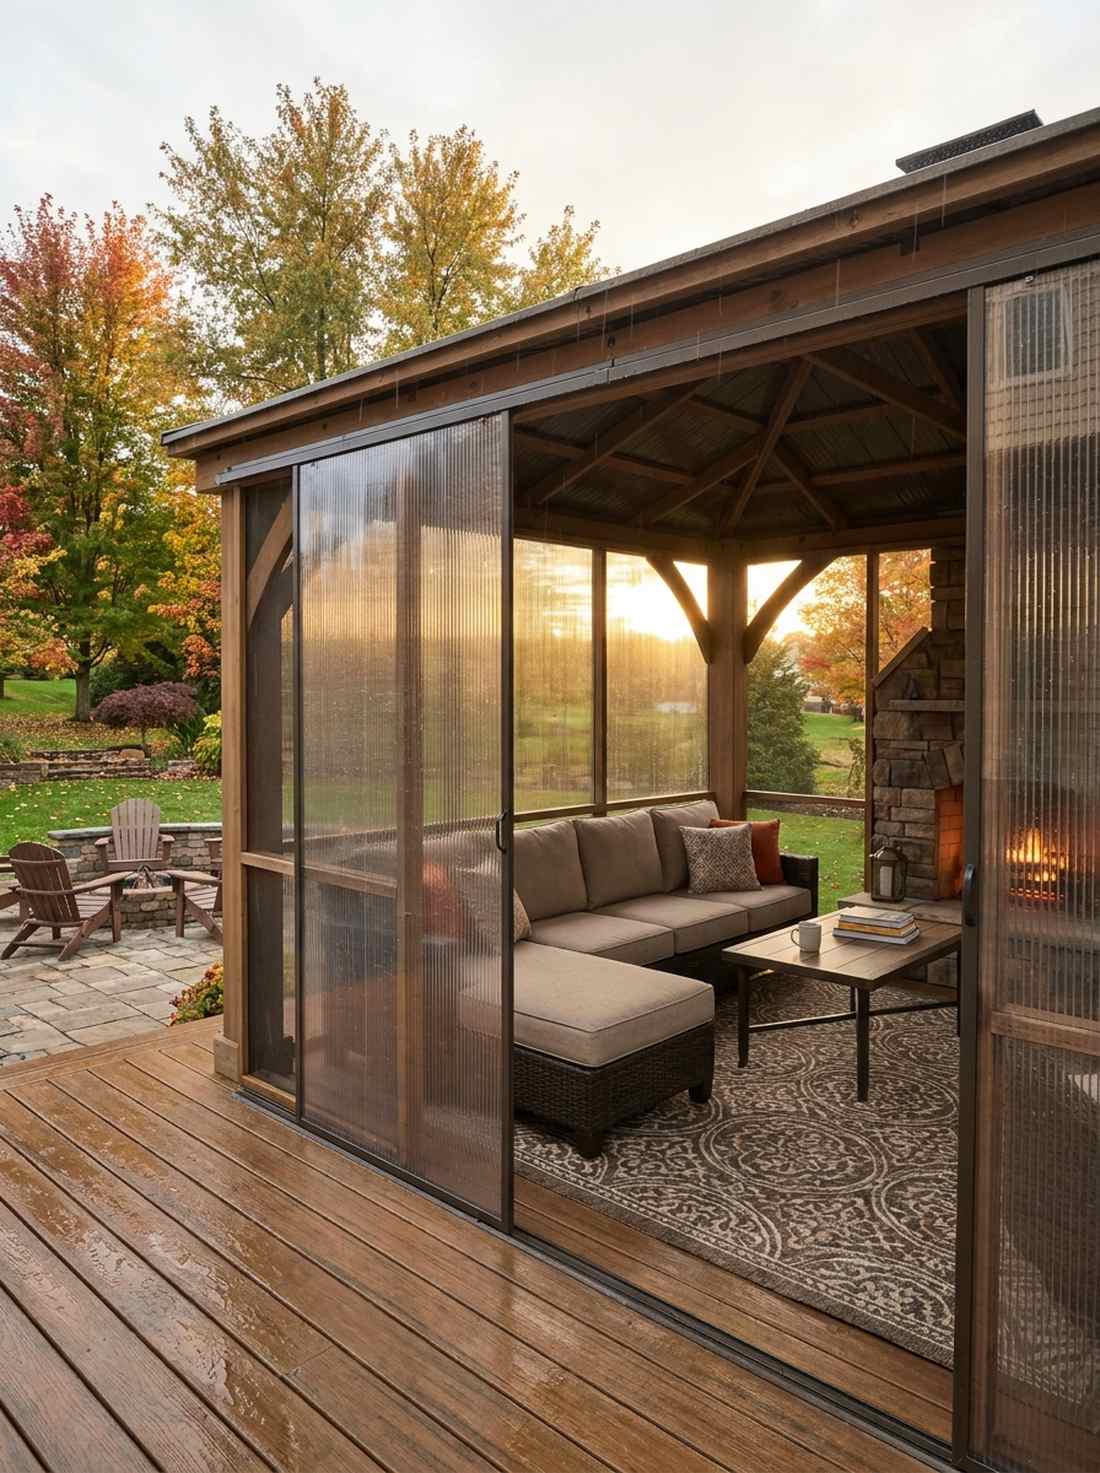
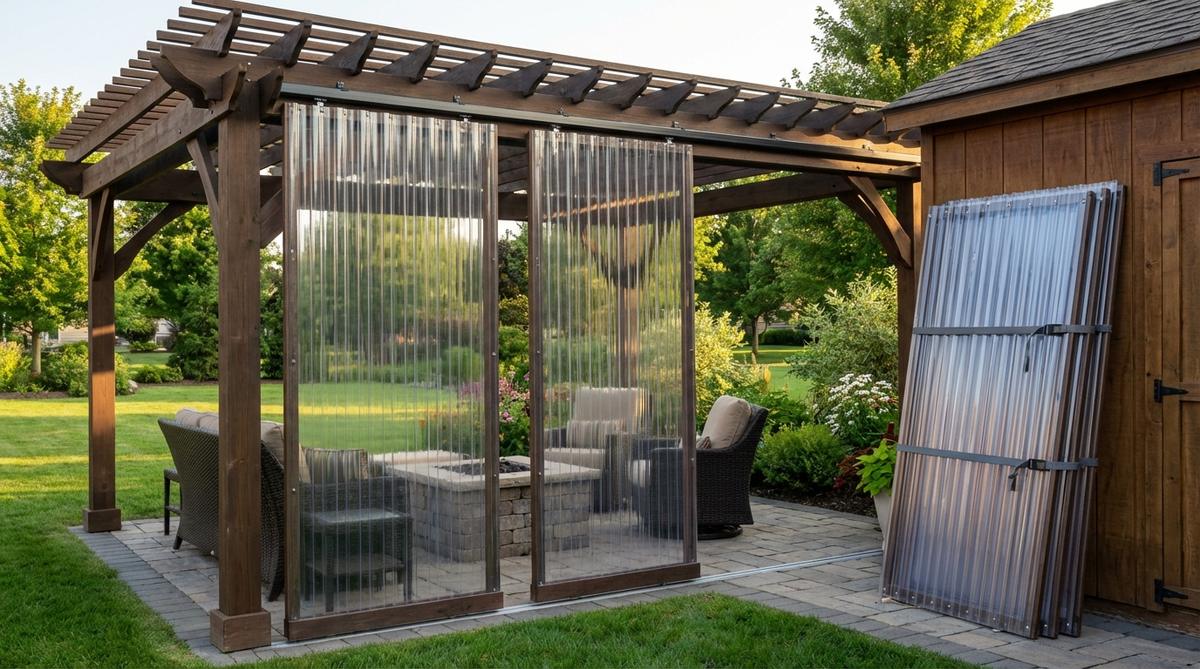
Converts a breezy summer gazebo into a completely sealed, dry three-season room. Sliding clear corrugated polycarbonate panels over screen framing blocks vicious autumn rain. Essential for keeping expensive patio furniture totally bone-dry during storms.
Enclosing a porch with real glass costs thousands in permits, but this track-based hack totally bypasses the red tape. The panels weigh almost nothing and deliver a surprisingly premium look while keeping the space flooded with natural light.
You can panel a standard porch for $300–$500.
- Key Materials: Clear polycarbonate sheets, plastic tracking channels
- Vibe / Style: Weather-proof sunroom
- Difficulty: Precise cutting required
- Budget Breakdown: Poly panels: $300 | Track hardware: $80
- Creator’s Tip: Cut the panels using a fine-tooth circular saw blade installed backward; it melts through the plastic smoothly without shattering or splintering the edges.
- Smart Sourcing: clear polycarbonate corrugated roof panels or weather-stripping foam seal tapes.
63. Autumn Ornamental Grass
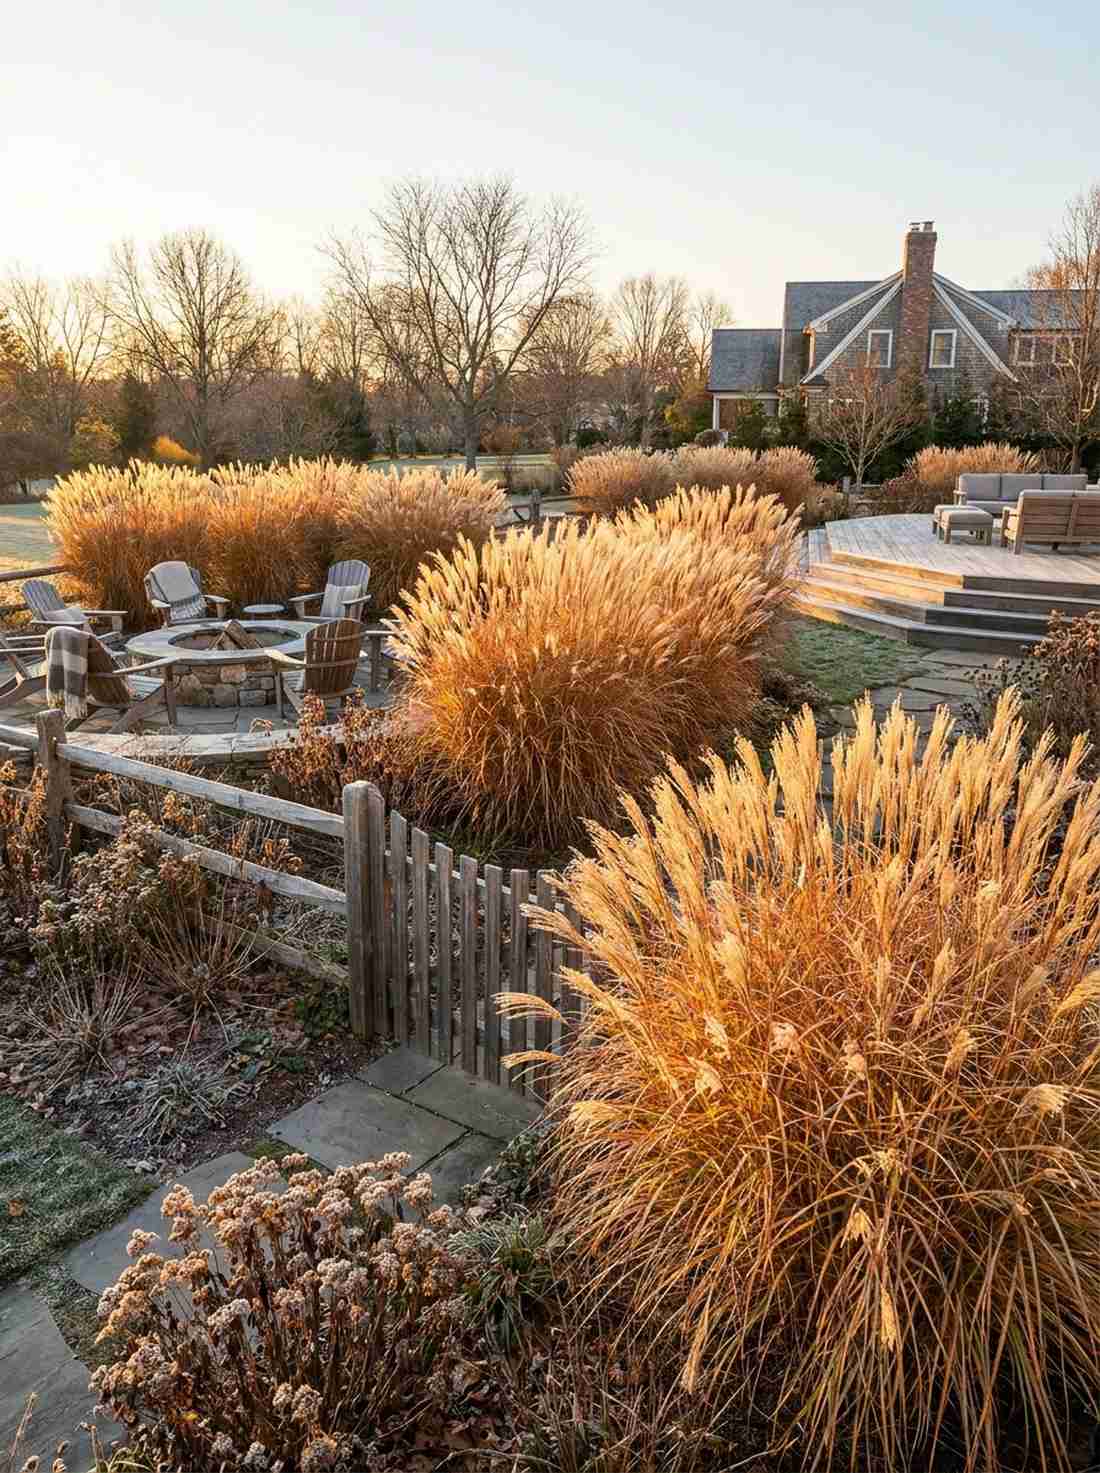
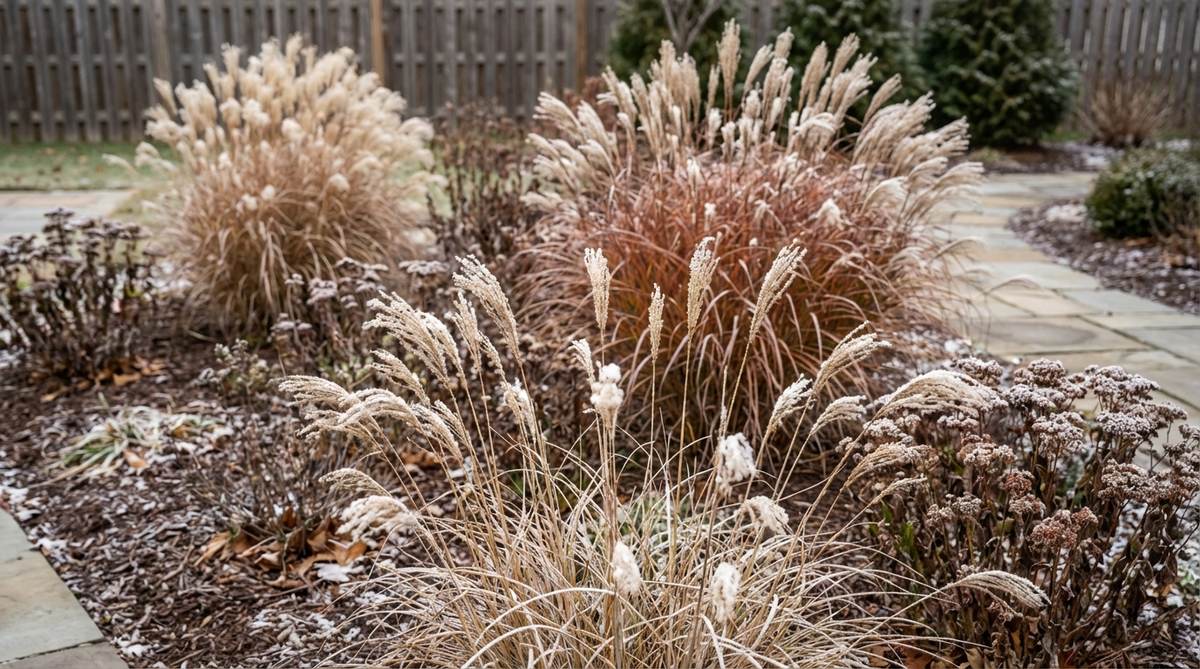
Catches the golden hour sunlight, turning the yard into a glowing, amber sea. Leaving tall maiden grass uncut through winter provides striking vertical architecture. Perfect for catching delicate morning frost for an incredibly photogenic garden.
Amateurs chop all their plants to the dirt in October, but leaving these stalks standing looks far more expensive than it is. The dried seed heads provide critical winter habitat for wildlife while maintaining massive visual volume.
Mature grass clumps cost roughly $40–$80.
- Key Materials: Miscanthus or Flame grass, twine
- Vibe / Style: Golden rustic prairie
- Difficulty: Zero winter maintenance
- Budget Breakdown: Grass bases: $50 | Twine: $5
- Creator’s Tip: Wait until late March just before new green growth appears to chop the dead stalks down; you get 5 extra months of free aesthetic value.
- Smart Sourcing: maiden grass live starter pots or heavy-duty bypass loppers.
64. Festive Lighting Rotation
Transforms the patio to match the emotional energy of every passing holiday. Utilizing commercial permanent LED lighting tracks allows instant color shifts. The ultimate flex for homeowners who love dominating neighborhood holiday aesthetics.
Climbing ladders every December is a nightmare, but these app-controlled smart lights completely bypass the hassle. Running a warm amber glow in autumn, then shifting to crisp ice-white in winter gives a designer-level finish all year long.
A smart outdoor LED track kit runs $200–$400. Save this for your smart-home upgrade board!
- Key Materials: WiFi-enabled outdoor LED strips, aluminum mounting tracks
- Vibe / Style: High-tech seasonal magic
- Difficulty: Ladder work and app setup
- Budget Breakdown: Smart LED kit: $250 | Mounting tracks: $80
- Creator’s Tip: Install the aluminum tracks facing backward toward the house siding rather than outward; the reflected wash of light looks 10x more expensive.
- Smart Sourcing: smart WiFi outdoor LED strip kits or aluminum LED mounting channel packs.
Bringing Your Cozy Garden Vision to Life
Creating intimate outdoor living spaces depends entirely on layering enclosure, lighting, texture, and smart material choices. The 64 premium cozy garden concepts presented here bypass massive contractor fees by utilizing high-end productized kits, UV-resistant materials, and specific DIY layouts. Start with foundational elements like bulk faux ivy privacy screens, then build complexity through heavy-duty commercial string lights and all-weather poly-rattan textures. The most striking, expensive-looking outdoor sanctuaries evolve when you strategically combine these high-impact, low-cost blueprints.
Frequently Asked Questions
What makes a garden feel cozy versus just functional?
Cozy gardens prioritize heavy visual enclosure, strategic scale reduction, and layering premium textures beyond basic concrete setups. Designers achieve this by ditching flat spaces and using UV-coated faux ivy screens to define boundaries, dropping the perceived ceiling with commercial-grade LED string lights, and utilizing mildew-resistant plush outdoor cushions. The aesthetic relies heavily on creating distinct, high-end “rooms” that feel insulated from the surrounding neighborhood using smart, budget-friendly starter kits.
How can I create privacy in a small garden without blocking all sunlight?
Bypass solid wooden fences and invest in translucent privacy kits like pre-cut vinyl lattice panels or fast-growing clumping bamboo root starters. Position your taller screening elements specifically on the north sides to ensure you don’t cast dark shadows over your cozy garden corner during golden hour. Stacking different heights of lightweight faux-stone resin planters creates a tiered privacy wall that breathes beautifully and looks wildly expensive.
What are the most weather-resistant materials for cozy outdoor furnishings?
Skip generic plastics that crack instantly and invest in all-weather PE rattan conversation sets or heavy-duty powder-coated aluminum frames. For fabrics, you must source solution-dyed acrylics and quick-dry foam cushion inserts, which heavily resist UV fading and devastating mold. Using a premium marine-grade teak sealer oil on real wood accents ensures your budget-friendly layout maintains a luxury, resort-style aesthetic year after year.
How do I extend my outdoor season into cooler months?
Stop relying on thin blankets and stack high-BTU heating products strategically. Anchor the space with a linear gas fire pit table, blast overhead warmth with commercial-grade propane patio heaters, and block freezing crosswinds using clear polycarbonate corrugated roof panels. Trapping the heat within these insulated zones makes your cozy garden life completely viable even in late November.
What lighting techniques create cozy ambiance without harsh brightness?
Ditch blinding floodlights and utilize layered, low-voltage lighting kits to mimic high-end estate architecture. Suspend shatterproof LED string lights for an overhead ambient glow, and use brass-finish LED path light kits to keep beams safely on the ground. Incorporating clean-burning bioethanol fuel tabletop bowls injects organic, dancing firelight that instantly makes the layout look incredibly premium.
Can renters create cozy gardens without permanent installations?
Absolutely. Renters should strictly utilize high-impact, temporary cozy garden ideas. Rely on heavy weatherproof outdoor area rugs to cover ugly slabs, and use solar mason jar lid insert sets for zero-wire lighting. Build instant, portable privacy walls using tall modern fiberglass planter boxes filled with tall grasses. These smart product combinations deliver a massive luxury aesthetic without risking a single dollar of your security deposit.