Mastering garden design bricks elevates ordinary yards into striking architectural masterpieces using precise, budget-friendly placement. Smart pattern selection completely bypasses high contractor fees while establishing highly durable, weather-resistant zones.
Design SnapshotKey Principles
- Pattern Selection: Choose layouts based on traffic patterns, with herringbone and basket weave offering superior structural interlock for high-traffic zones
- Edge Definition: Vertical, angled, and raised brick borders create clear boundaries that reduce maintenance and prevent mulch migration
- Scale Proportion: Match brick dimensions to space size—compact patterns suit narrow paths while expansive designs enhance large patios
- Installation Foundation: Proper base preparation with compacted gravel and sand ensures long-term stability and prevents settling or frost heave
Classic Pathway Patterns for High-Traffic Areas
Traditional brick patterns deliver proven performance in walkways and patios through mechanical interlock and visual rhythm. These foundational designs form the backbone of professional landscape construction across residential gardens.
1. Herringbone 45-Degree
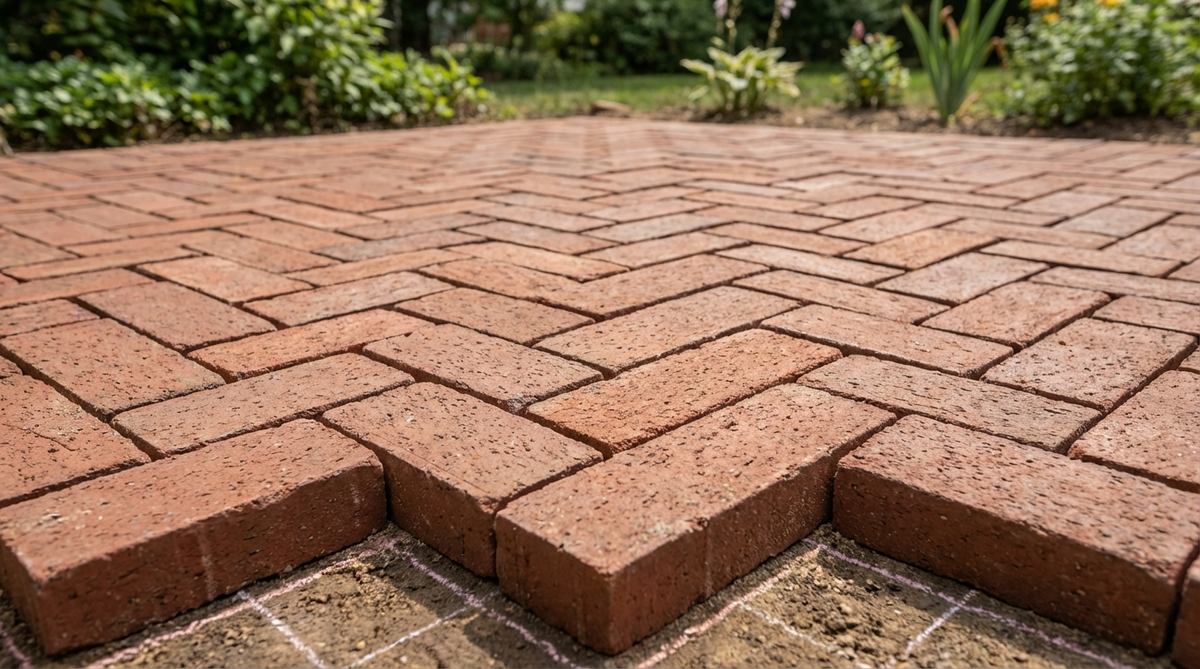
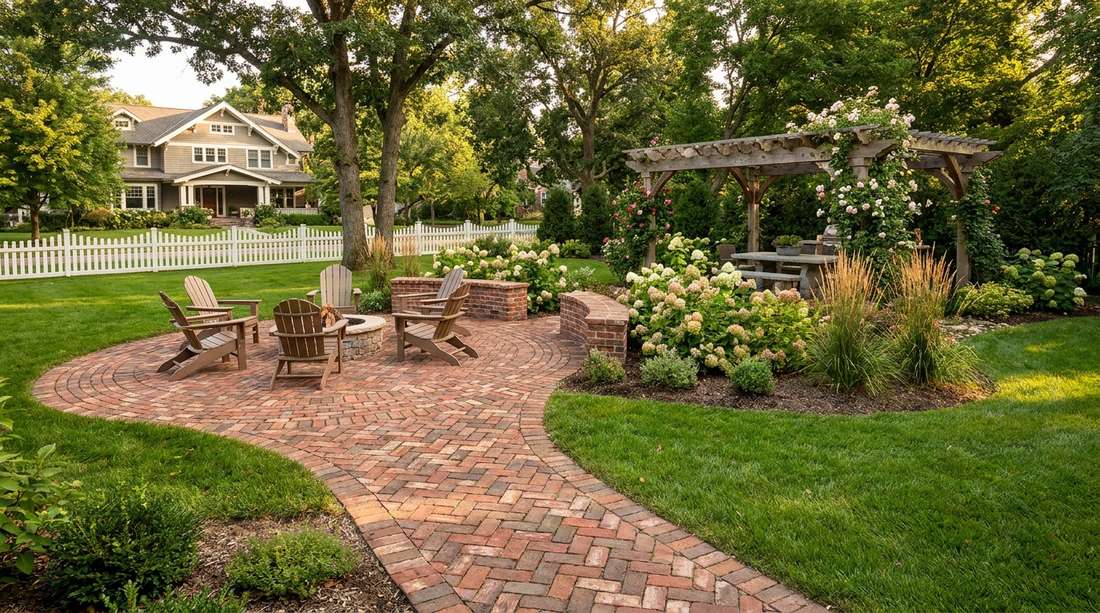
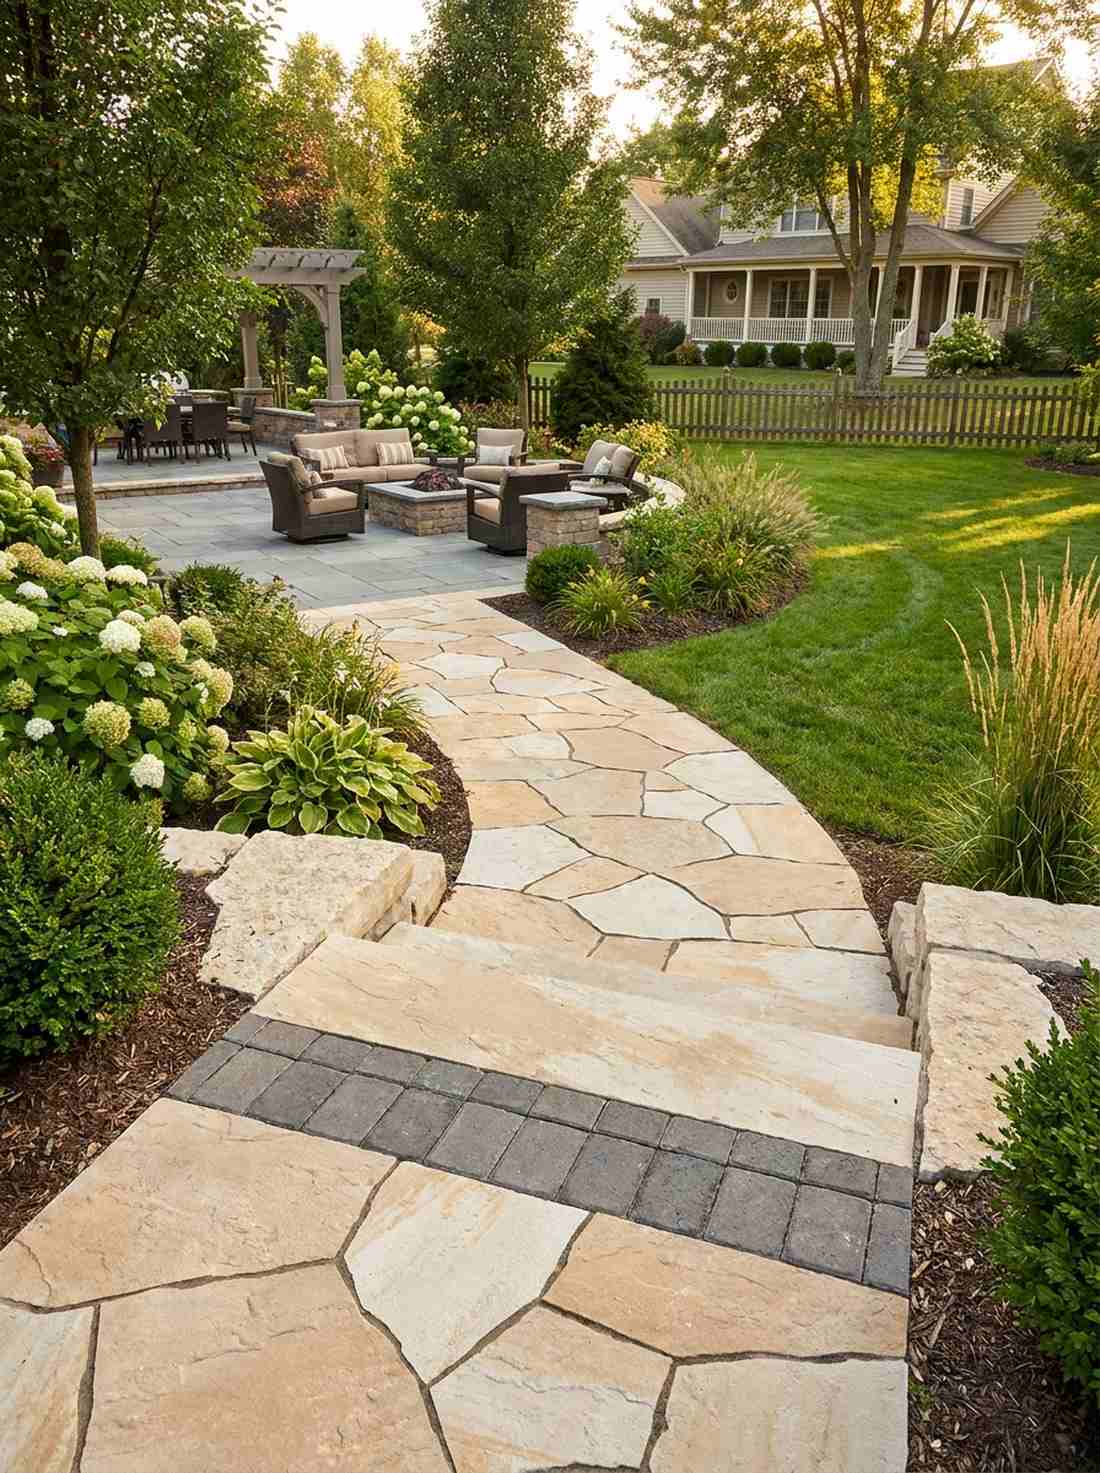
This classic courtyard pathway layout feels exactly like a romantic European estate you accidentally discovered. It works phenomenally well for a wide main entrance or patio gathering zone where you want to make a massive first impression.
Many landscapers overcharge for this simply because the geometry looks intimidating, but laying these at a strict angle naturally locks the pieces together for a designer-level finish. The structural integrity here is unmatched, especially when integrating heavy-duty landscape fabric rolls beneath your base.
You can easily pull this off for around $120–$250 depending on your square footage. Pin this to your ultimate backyard makeover board if you love timeless aesthetics!
- Key Materials: High-density clay pavers, jointing sand
- Vibe / Style: Old-world elegance
- Difficulty: Intermediate measuring required
- Budget Breakdown: Materials: $180 | Base prep: $40.
- Creator’s Tip: Snap chalk lines every 3 feet to prevent the pattern from drifting.
- Smart Sourcing: pre-cut edge restraint kits and bulk-pack leveling sand.
2. Herringbone 90-Degree
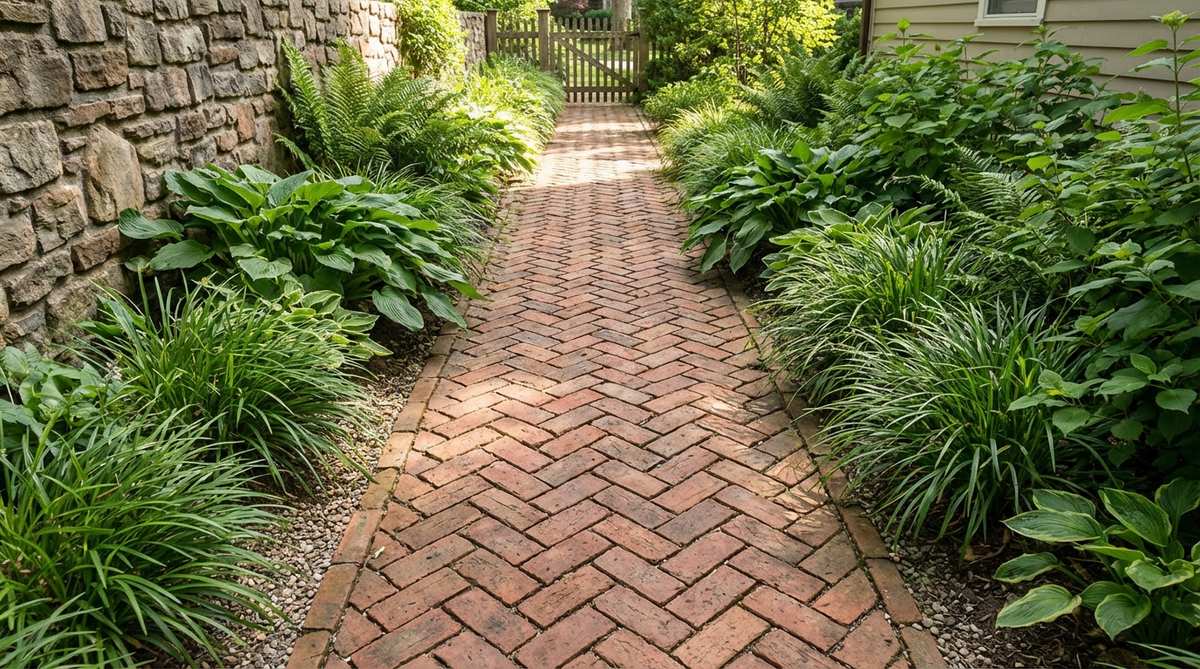
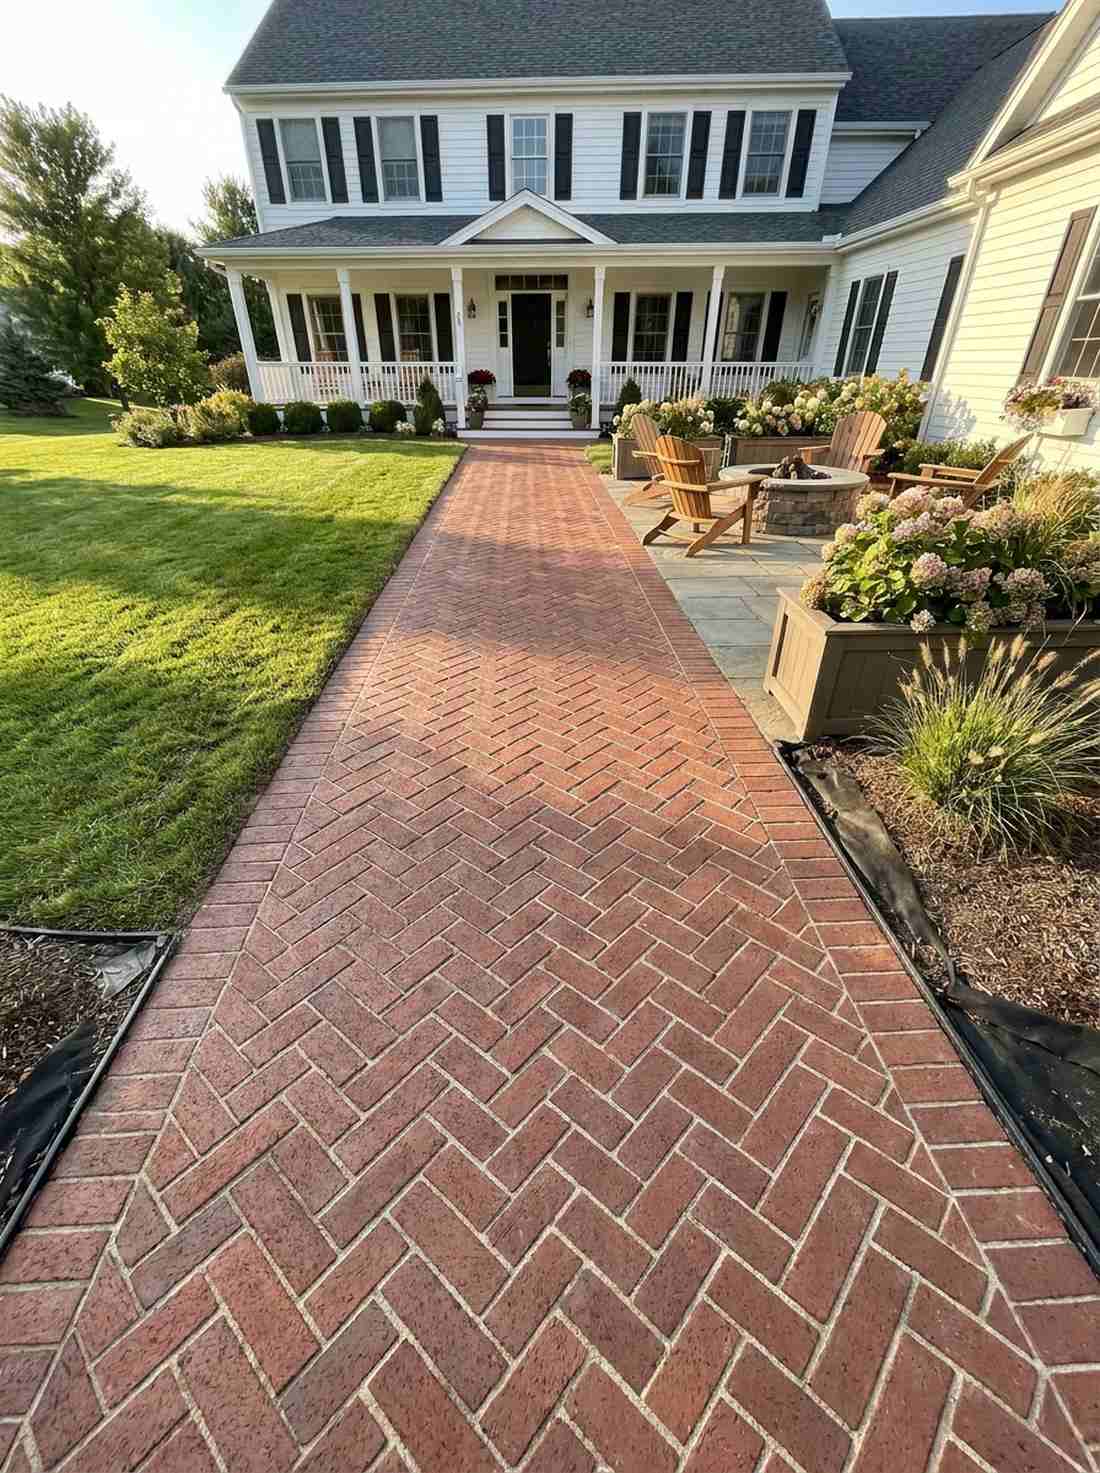
A structured straight-edged zigzag walkway that gives off immaculate, manicured English garden vibes. Set this up in narrow side yards or leading up to a secondary doorway to instantly elevate a neglected space.
It visually elongates tight corridors, tricking the eye into thinking the property is much larger than it is. Implementing this specific bricks design for garden pathways creates zero lateral movement, securing a lifetime of durability.
Expect materials to run you roughly $100–$200 for a standard side passage. It’s a fast upgrade that completely changes the vibe of your home’s exterior.
- Key Materials: Rectangular bricks, crushed limestone base
- Vibe / Style: Traditional formal garden
- Difficulty: Intermediate
- Budget Breakdown: Pavers: $110 | Gravel base: $35.
- Creator’s Tip: Start perfectly square from your house foundation to ensure seamless edges.
- Smart Sourcing: UV-resistant polymeric sand kits and professional paver tampers.
3. Basket Weave Classic
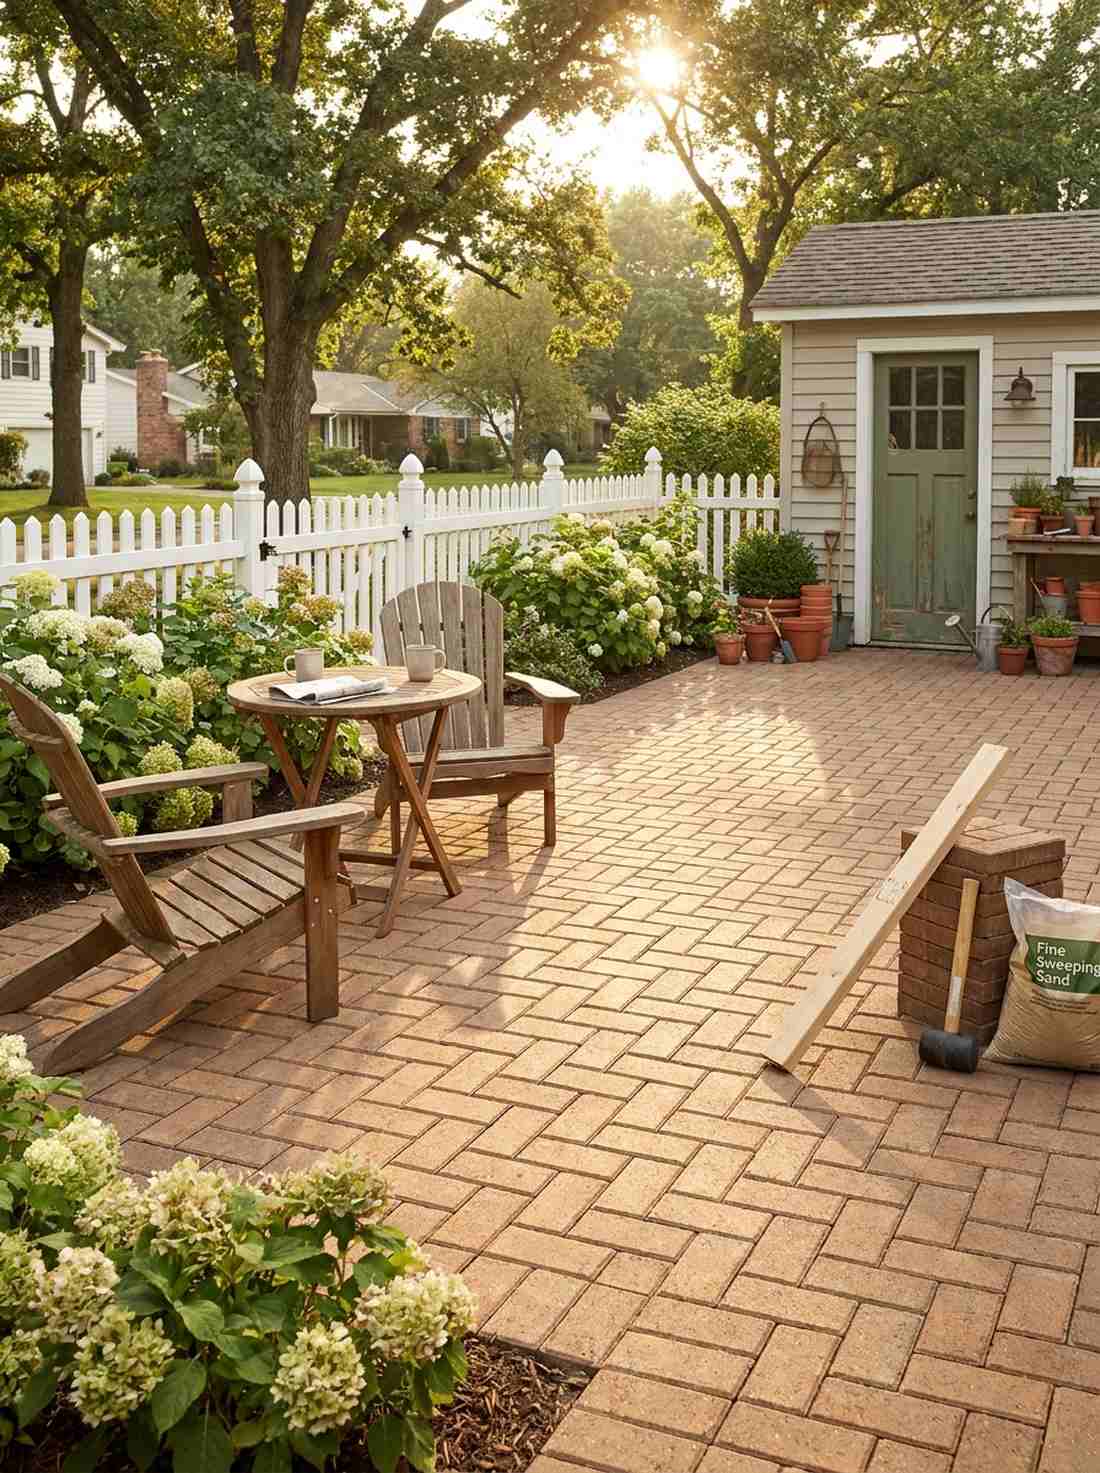
This woven outdoor patio flooring feels like a cozy morning coffee spot straight out of a storybook. It is undeniably perfect for casual backyard patios, potting shed entries, or surrounding a quaint kitchen garden.
The beauty of this setup is that it requires absolutely zero angled cuts, making it the ultimate weekend hack for a premium look. Utilizing a checkerboard approach alongside patio installation starter sets guarantees a flawless, flat finish even for complete beginners.
You can transform a 10×10 space for about $150 to $300. Save this to your DIY weekend projects board for when spring weather hits!
- Key Materials: Uniform pavers, fine sweeping sand
- Vibe / Style: Relaxed cottage core
- Difficulty: Easy beginner setup
- Budget Breakdown: Materials: $200 | Tools: $50.
- Creator’s Tip: Keep a 2×4 piece of lumber handy to constantly check for a level surface.
- Smart Sourcing: heavy-duty rubber mallets and pre-mixed base gravel packs.
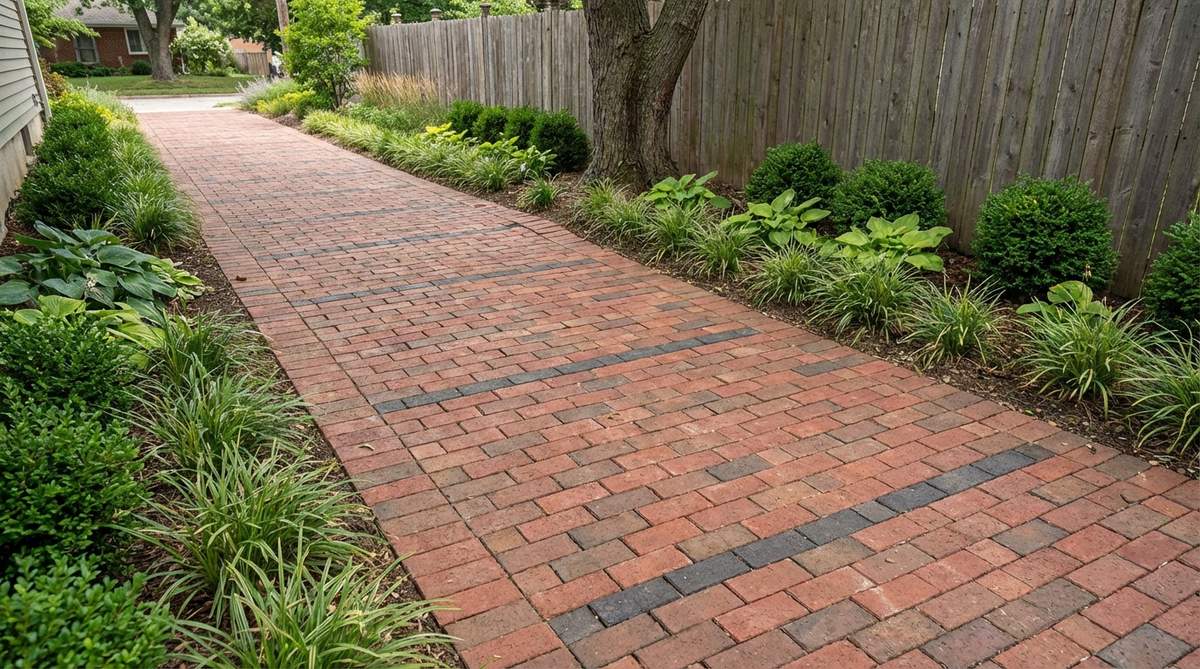
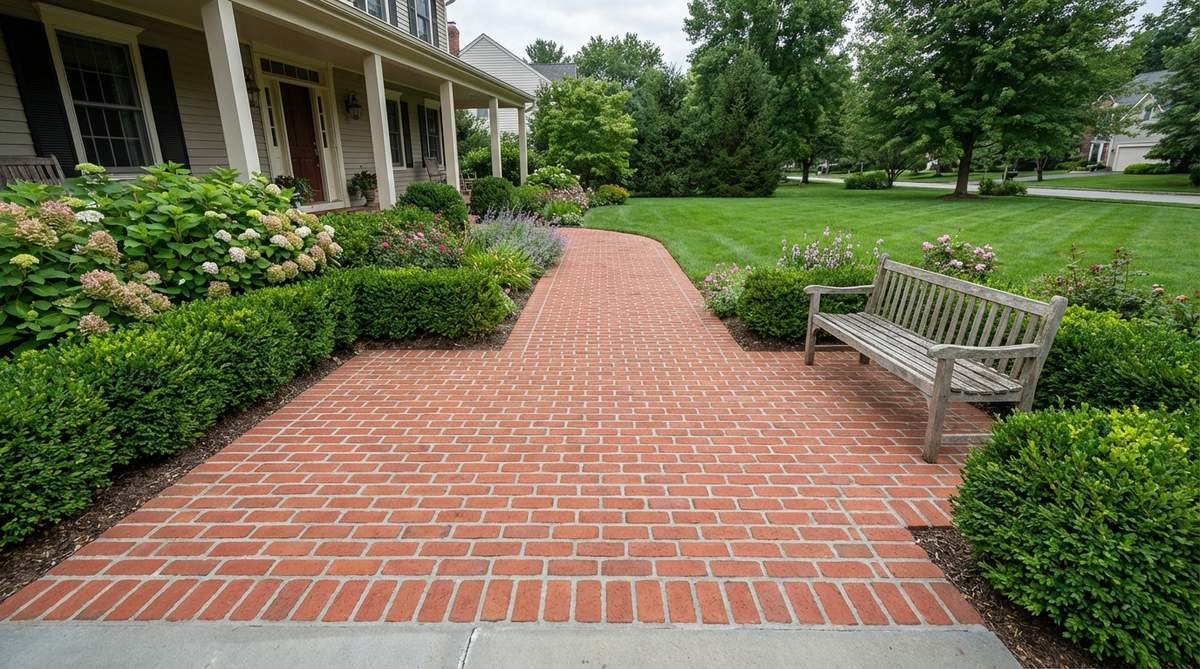
4. Running Bond
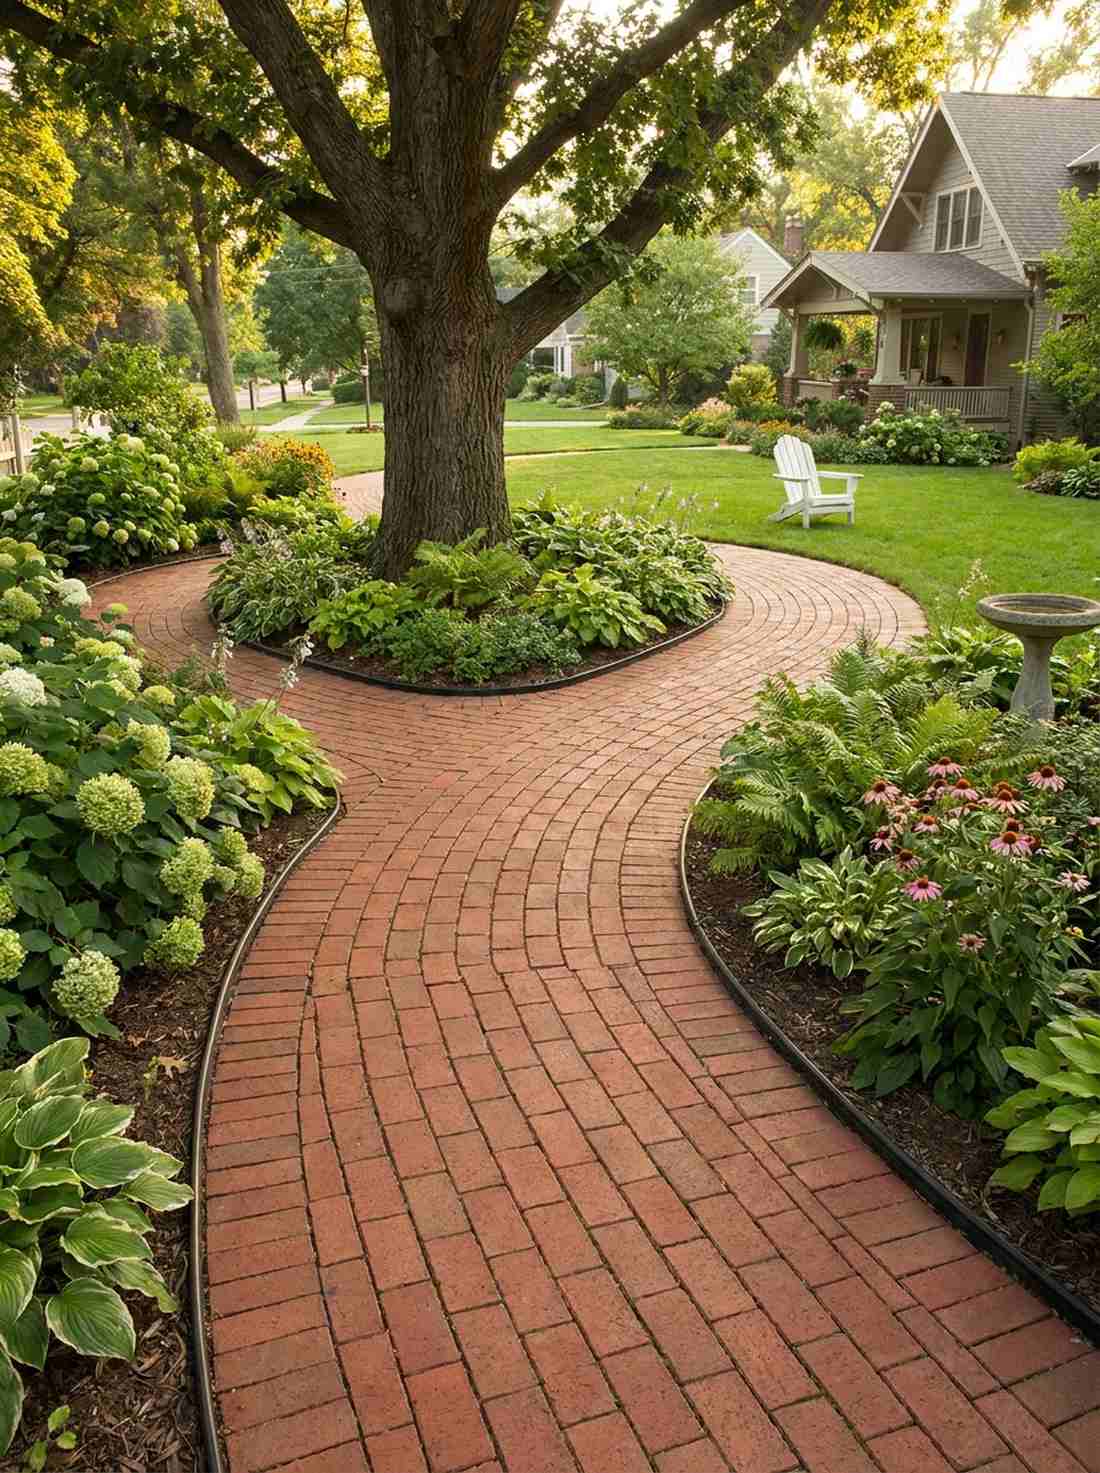
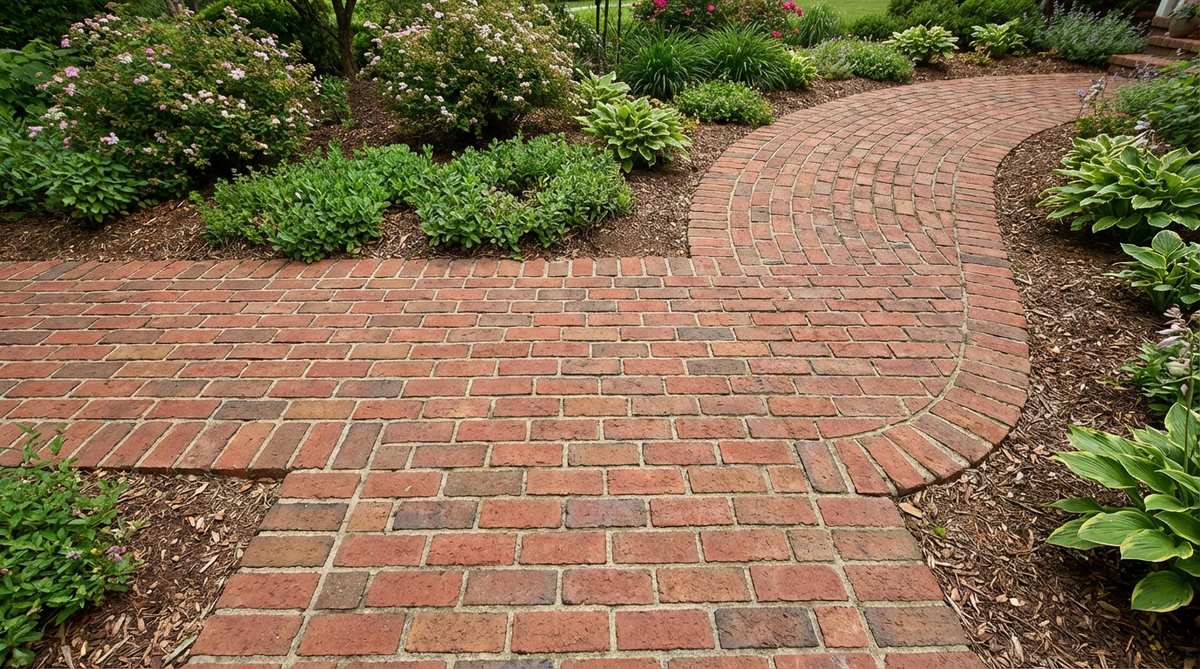
A sweeping curved garden walkway idea that creates a highly soothing, flowing path through your flower beds. This is the absolute best choice for navigating around old trees or snaking through dense perennial borders.
Achieving a high-end estate aesthetic doesn’t require complex geometry; this offset layout is famous for hiding minor imperfections naturally. When exploring bricks in garden design, this method reigns supreme because the continuous horizontal lines gracefully mask any slight shifts in the soil.
For a standard 15-foot path, you’re looking at around $80 to $150 in costs. Highly recommended for a quick weekend win that won’t break the bank.
- Key Materials: Standard red brick, flexible landscape edging
- Vibe / Style: Classic American heritage
- Difficulty: Very accessible
- Budget Breakdown: Bricks: $90 | Base materials: $40.
- Creator’s Tip: Offset every row precisely at the halfway mark to keep the visual rhythm tight.
- Smart Sourcing: flexible plastic paver edging rolls and rust-proof securing spikes.
Most beginners skip this next step… until they realize it’s the exact secret that makes cheap materials look like a $500 designer installation.
5. Stack Bond

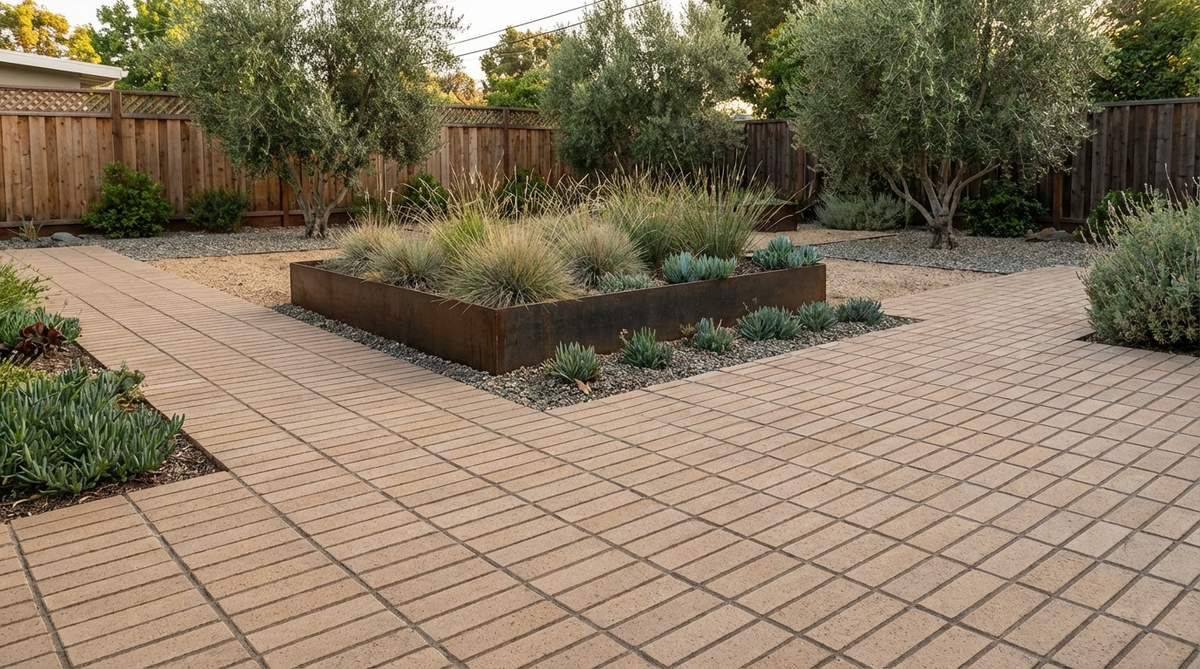
An ultra-sleek modernist geometric grid floor that radiates high-end architectural luxury. Drop this layout into a small, enclosed courtyard or use it to frame an outdoor minimalist fire pit.
While traditionalists might call it too simple, aligning the joints flawlessly creates a striking contemporary visual that modern developers charge a premium for. Precision is everything here, so grabbing a tile spacer bulk pack is non-negotiable for keeping those lines razor-sharp.
A smaller feature area usually costs between $75 and $120 to completely finish. Pin this if you’re planning a small space upgrade with a modern edge!
- Key Materials: Color-matched modern pavers, strict spacers
- Vibe / Style: Urban minimalist
- Difficulty: Moderate (requires strict leveling)
- Budget Breakdown: Modern pavers: $85 | Edging: $20.
- Creator’s Tip: A laser level will save you hours of frustration on this strict grid.
- Smart Sourcing: reusable plastic tile spacers (bulk pack) and compact laser levelers.
6. Chevron Continuous
This dynamic zigzag hardscape feature feels like a high-fashion runway running right through your backyard. It generates immense visual energy, making it exceptional for long, otherwise boring transit paths or upscale pool deck surrounds.
Unlike standard herringbone, matching these precision-cut points delivers an astonishingly luxurious surface that commands attention. Because it demands angled cuts on every single piece, relying on commercial-grade diamond masonry blades ensures you won’t chip or ruin your expensive materials.
Due to the cutting involved, budget around $200–$400 for a truly polished finish. The jaw-dropping final result is absolutely worth the extra effort.
- Key Materials: Oversized pavers, masonry saw
- Vibe / Style: High-end contemporary
- Difficulty: Advanced
- Budget Breakdown: Materials: $250 | Blade/Rental: $60.
- Creator’s Tip: Create a wooden jig to make your 45-degree cuts perfectly uniform every time.
- Smart Sourcing: premium diamond saw blades and high-contrast joint filler sand.
Architectural Edging Techniques That Define Spaces
Strategic brick edging establishes clear boundaries while adding three-dimensional sculptural elements to garden beds. These vertical and angled applications require different installation approaches than horizontal paving patterns.
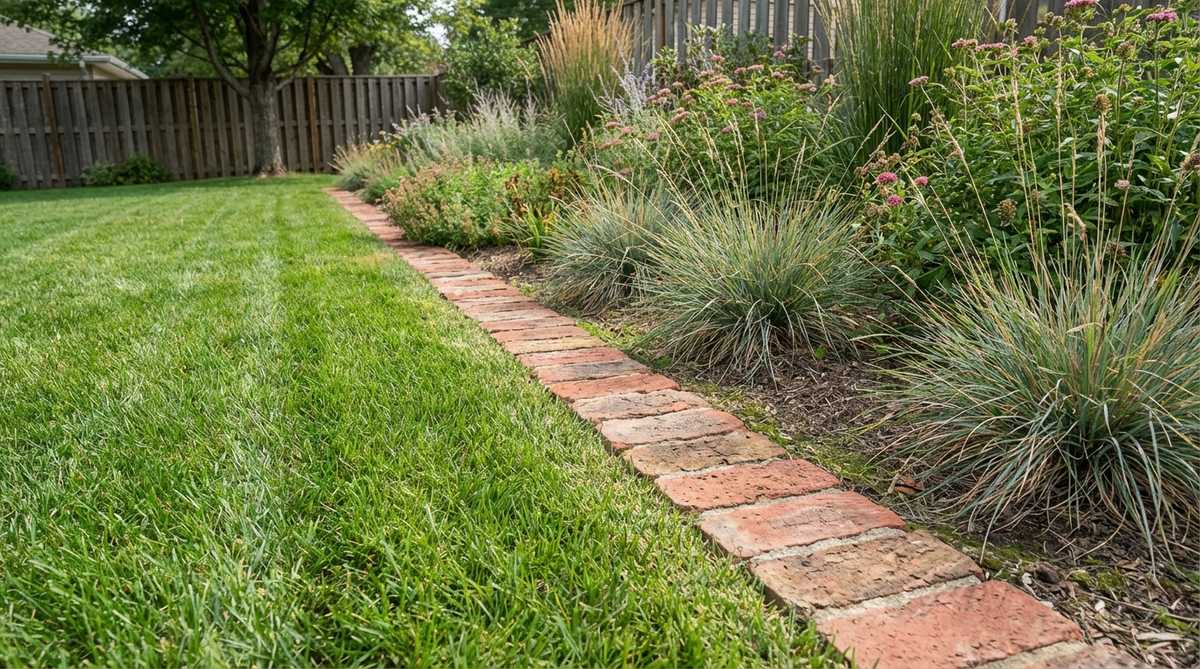
7. Soldier Course Vertical
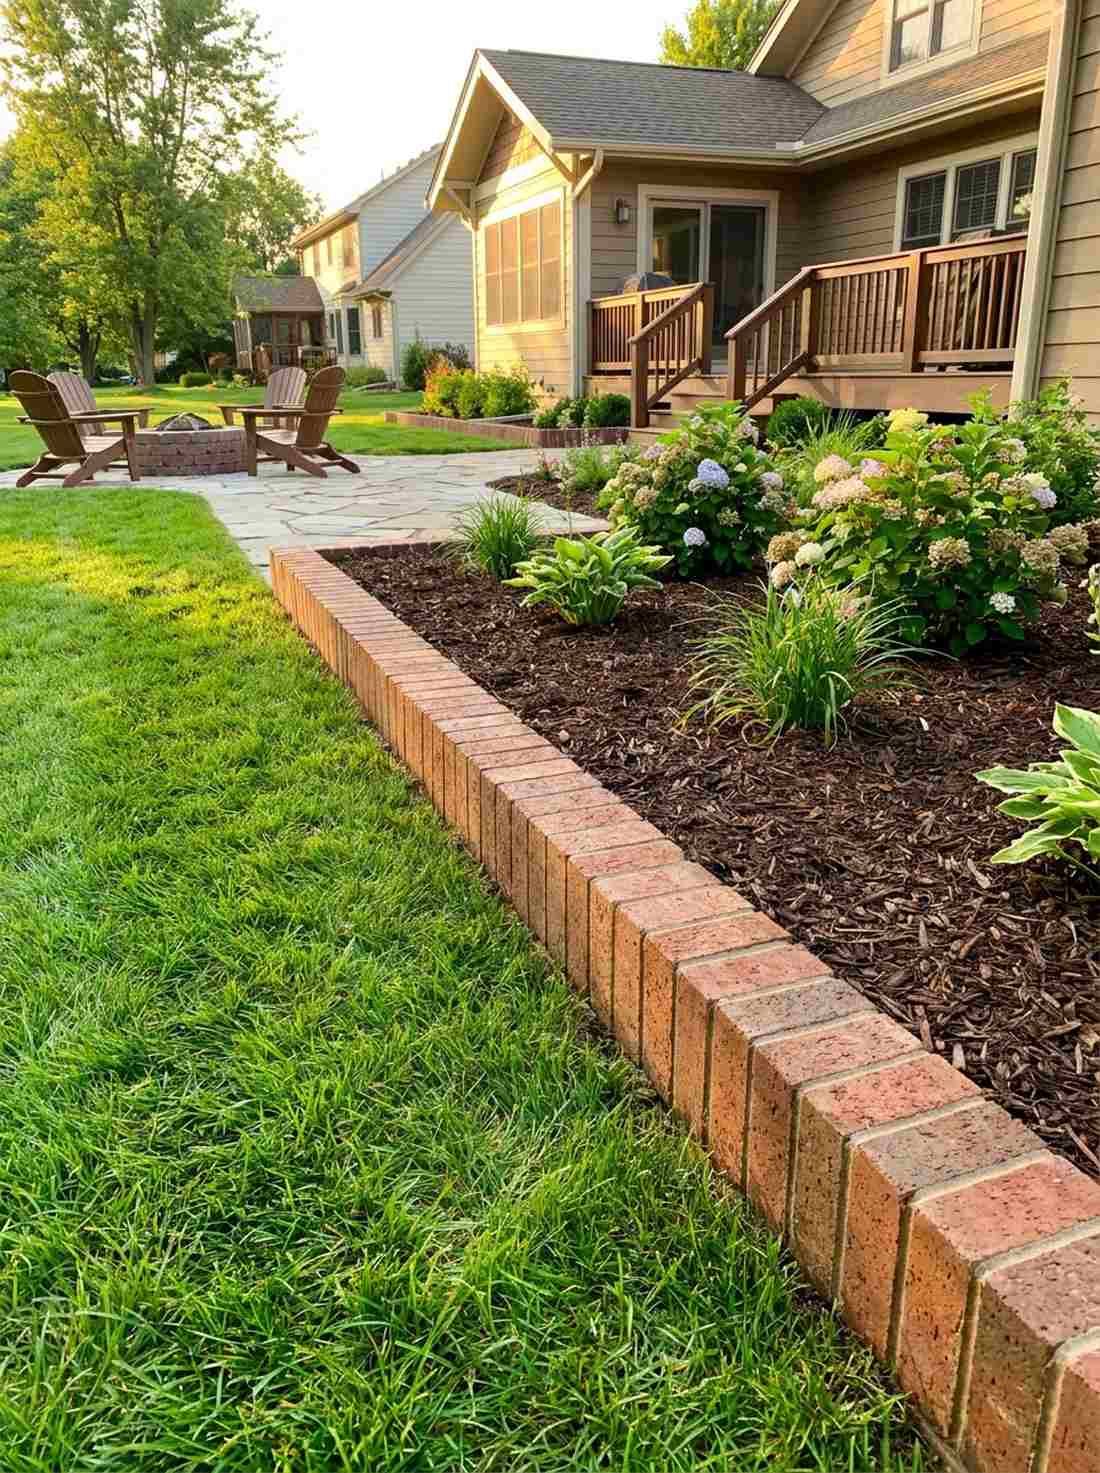

A rigid raised border defense wall that feels perfectly groomed and stops aggressive lawn weeds in their tracks. It works exceptionally well separating freshly mulched perennial beds from high-growth summer grass.
Most homeowners install flat plastic borders that warp in the sun, but standing heavy clay units vertically instantly guarantees a robust, permanent line. Incorporating this bricks garden design strategy prevents soil erosion while giving your beds that highly sought-after professional manicured look.
You can border an entire 20-foot flower bed for roughly $40 to $80. Save this to your garden maintenance board to banish messy mulch forever!
- Key Materials: Standard bricks, trenching shovel
- Vibe / Style: Crisp and formal
- Difficulty: Easy
- Budget Breakdown: Bricks: $50 | Base sand: $15.
- Creator’s Tip: Bury exactly half the brick to ensure the lawnmower wheels don’t knock them over.
- Smart Sourcing: heavy-duty landscaping trenchers and weed-blocking fabric tape.
8. Sawtooth Diagonal Edge
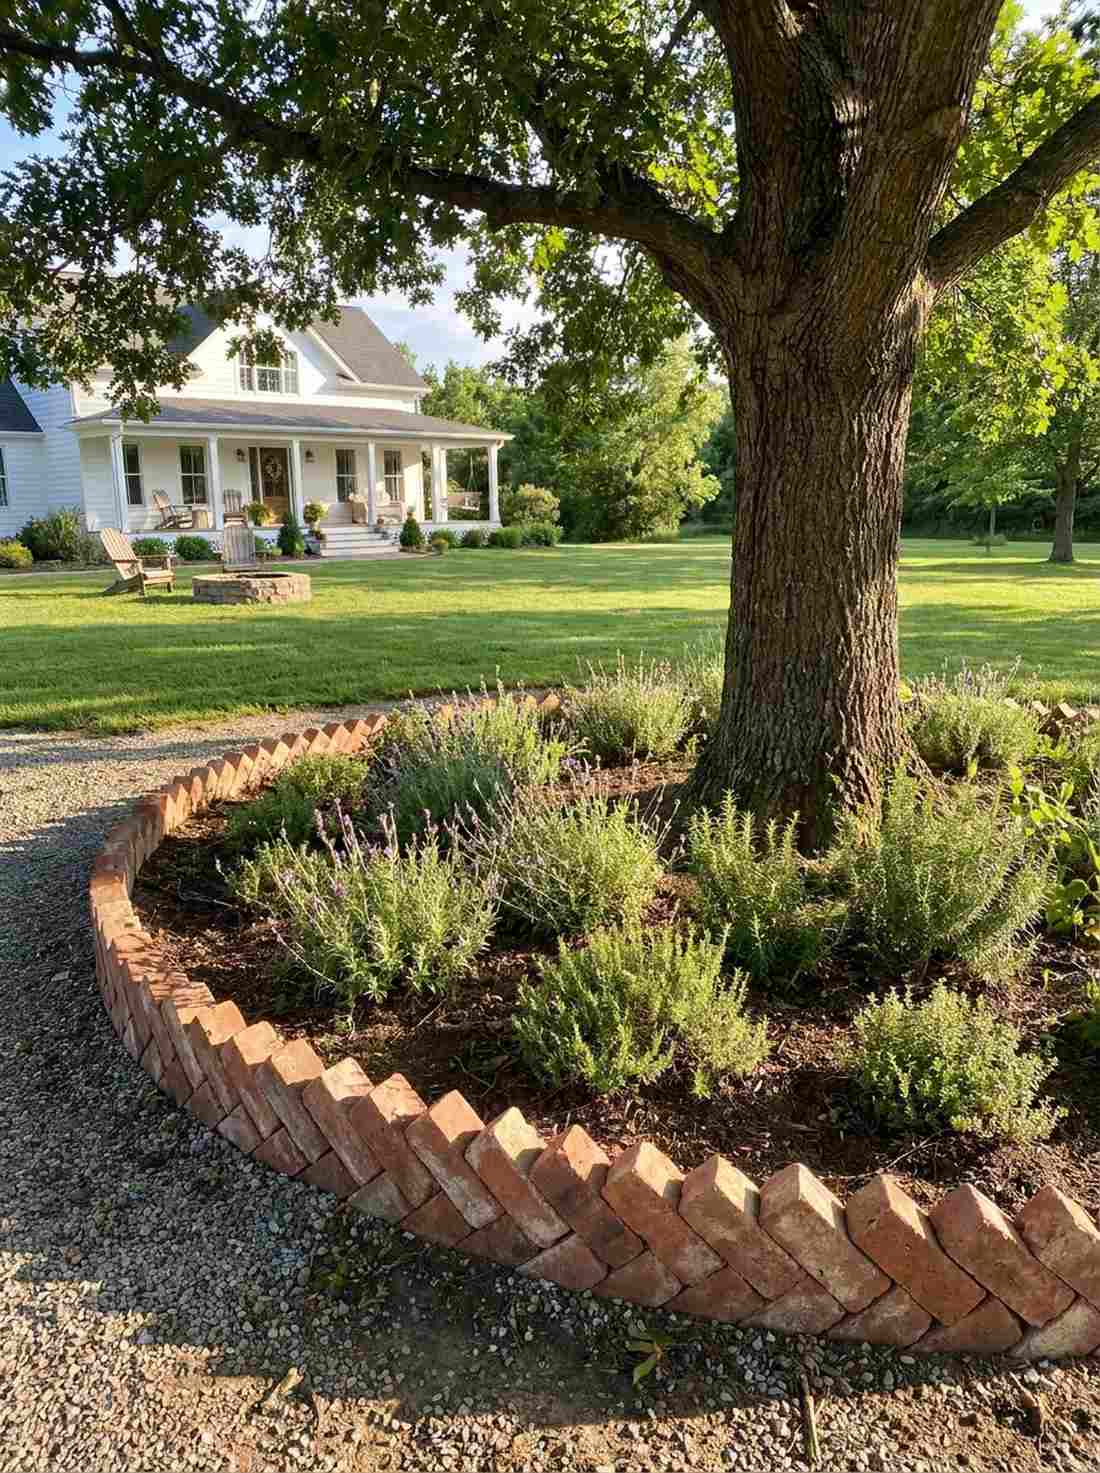
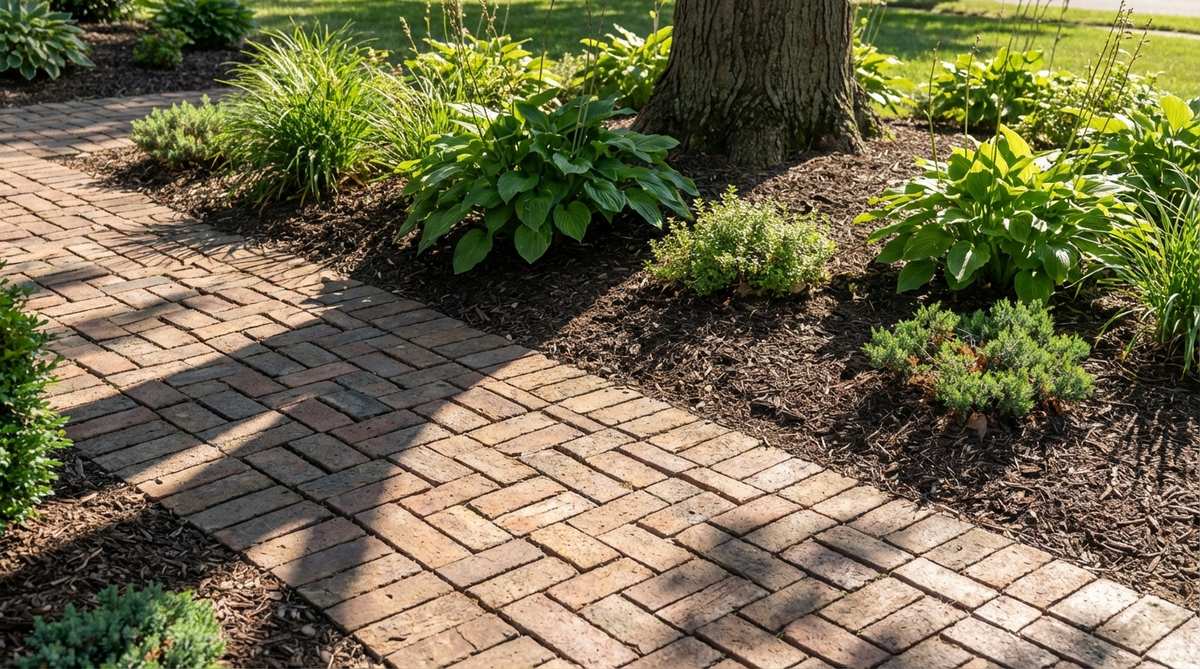
This textured zigzag garden border catches the afternoon shadows perfectly, looking like a historic Victorian estate feature. Place this around the base of a mature shade tree or outlining a whimsical herb garden for maximum charm.
It completely avoids the sterile look of concrete curbs, replacing it with an interlocking chain of dynamic angles that actually support each other structurally. It’s a wildly clever way to use basic materials to achieve an intricate, highly textured visual without any messy mortar.
Setting up a beautiful sawtooth ring around a tree costs about $25–$45. It’s an incredibly satisfying afternoon project with immediate visual payoff.
- Key Materials: Uniform vintage-look bricks, soil
- Vibe / Style: Whimsical vintage
- Difficulty: Easy
- Budget Breakdown: Materials: $30 | Labor: Free DIY.
- Creator’s Tip: Dig a slight V-shaped trench to cradle the leaning bricks naturally.
- Smart Sourcing: pre-mixed garden soil boosters and weatherproof landscape adhesive.
💡 Must-Have Supplies for High-End Setups
To build these setups faster and ensure they last, skip the generic craft aisles and invest in the right foundational kits.
- Base & Support: heavy-duty commercial weed barrier fabric
- Setup Tools: professional paver leveling tool kits
- Weather/Durability Protection: UV-resistant clear masonry sealer
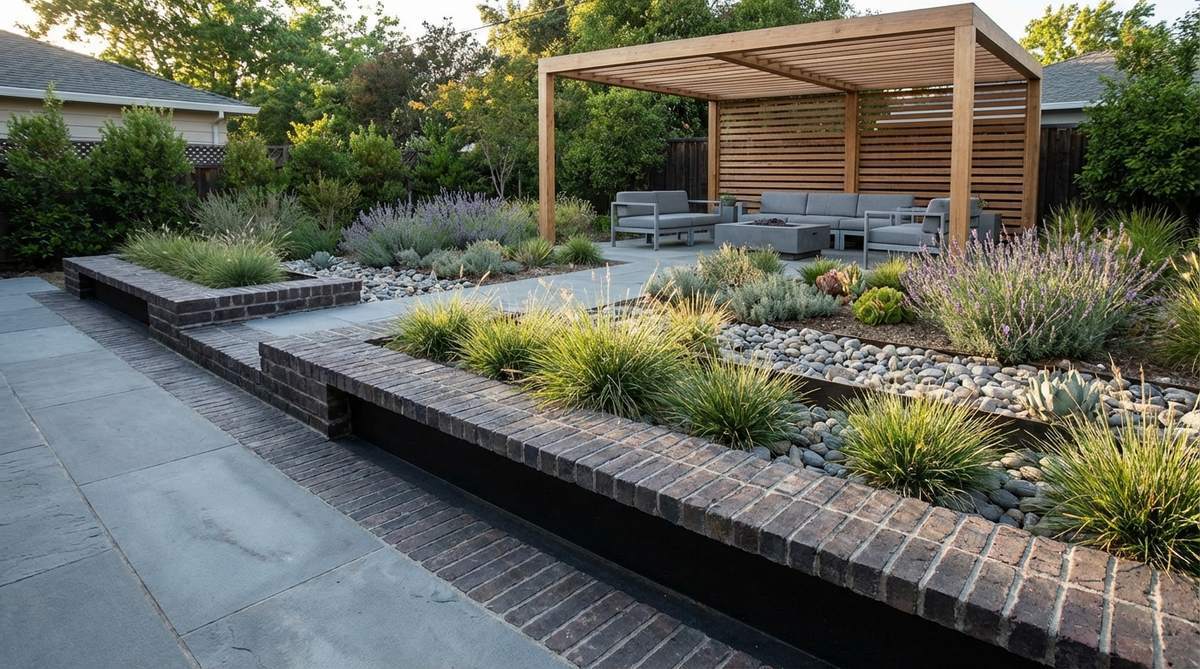
9. Double-Stacked Raised Bed
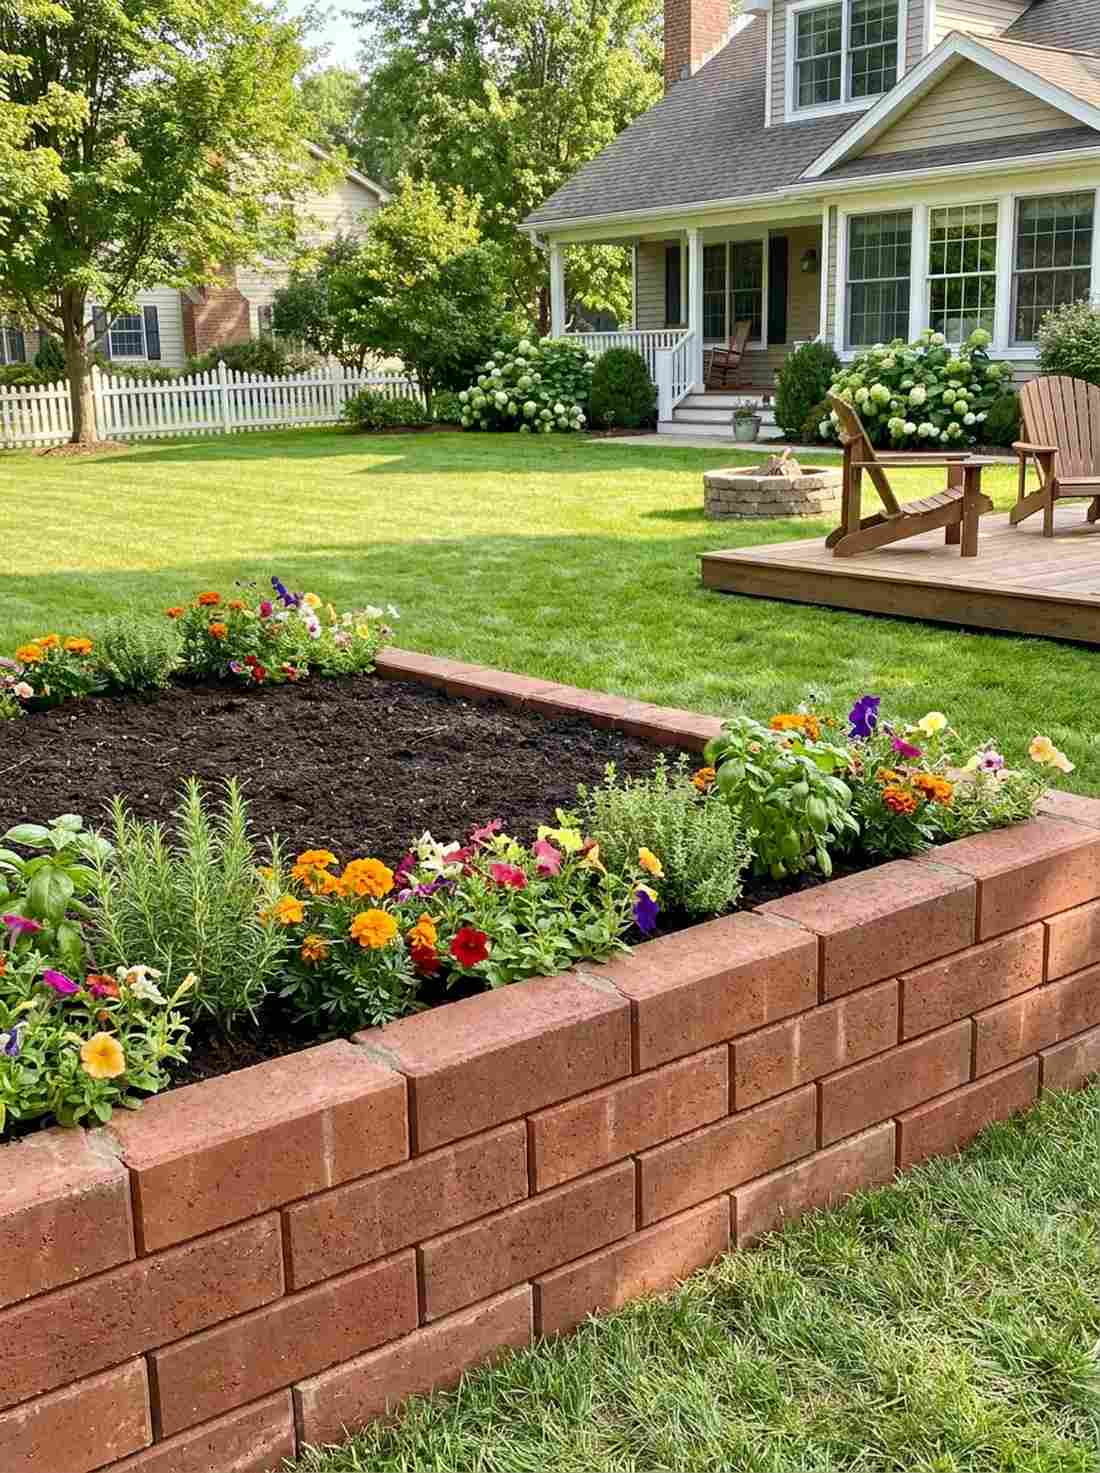
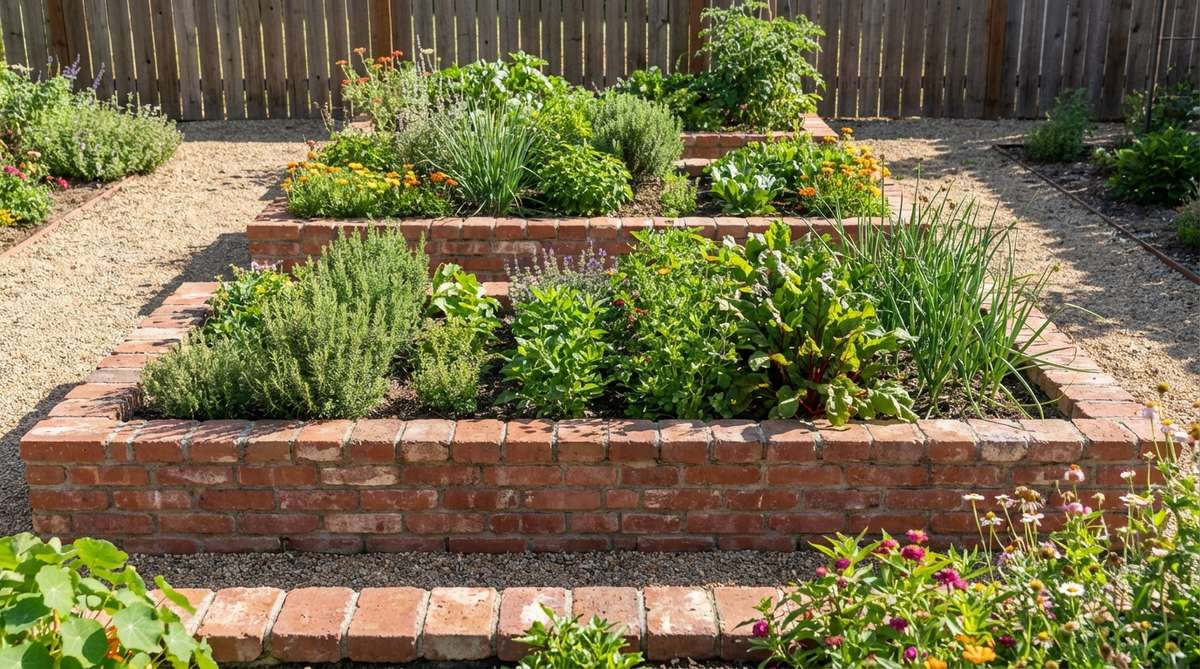
A sturdy miniature raised planting wall that creates a lush, elevated stage for your favorite seasonal blooms. This is functionally flawless for small backyard vegetable plots or tiered corner herb stations.
Timber beds rot after three years, but stacking fired clay with a dab of construction adhesive builds a fortress that lasts for decades. Integrating premium waterproof exterior masonry glue ensures these mini-walls won’t bow outward after a heavy rainstorm.
A 4×4 stacked box generally runs about $70 to $110 depending on brick height. Pin this if you’re tired of replacing rotten wooden garden boxes!
- Key Materials: Solid face bricks, masonry adhesive
- Vibe / Style: Structured and practical
- Difficulty: Beginner friendly
- Budget Breakdown: Bricks: $80 | Adhesive: $15.
- Creator’s Tip: Stagger the joints on the second layer (running bond) for crucial structural strength.
- Smart Sourcing: heavy-duty landscape block adhesive tubes and organic raised bed soil mixes.
Wait until you see the next edging trick. It’s ridiculously affordable but completely transforms how professional your yard looks.
10. Curved Flowing Border
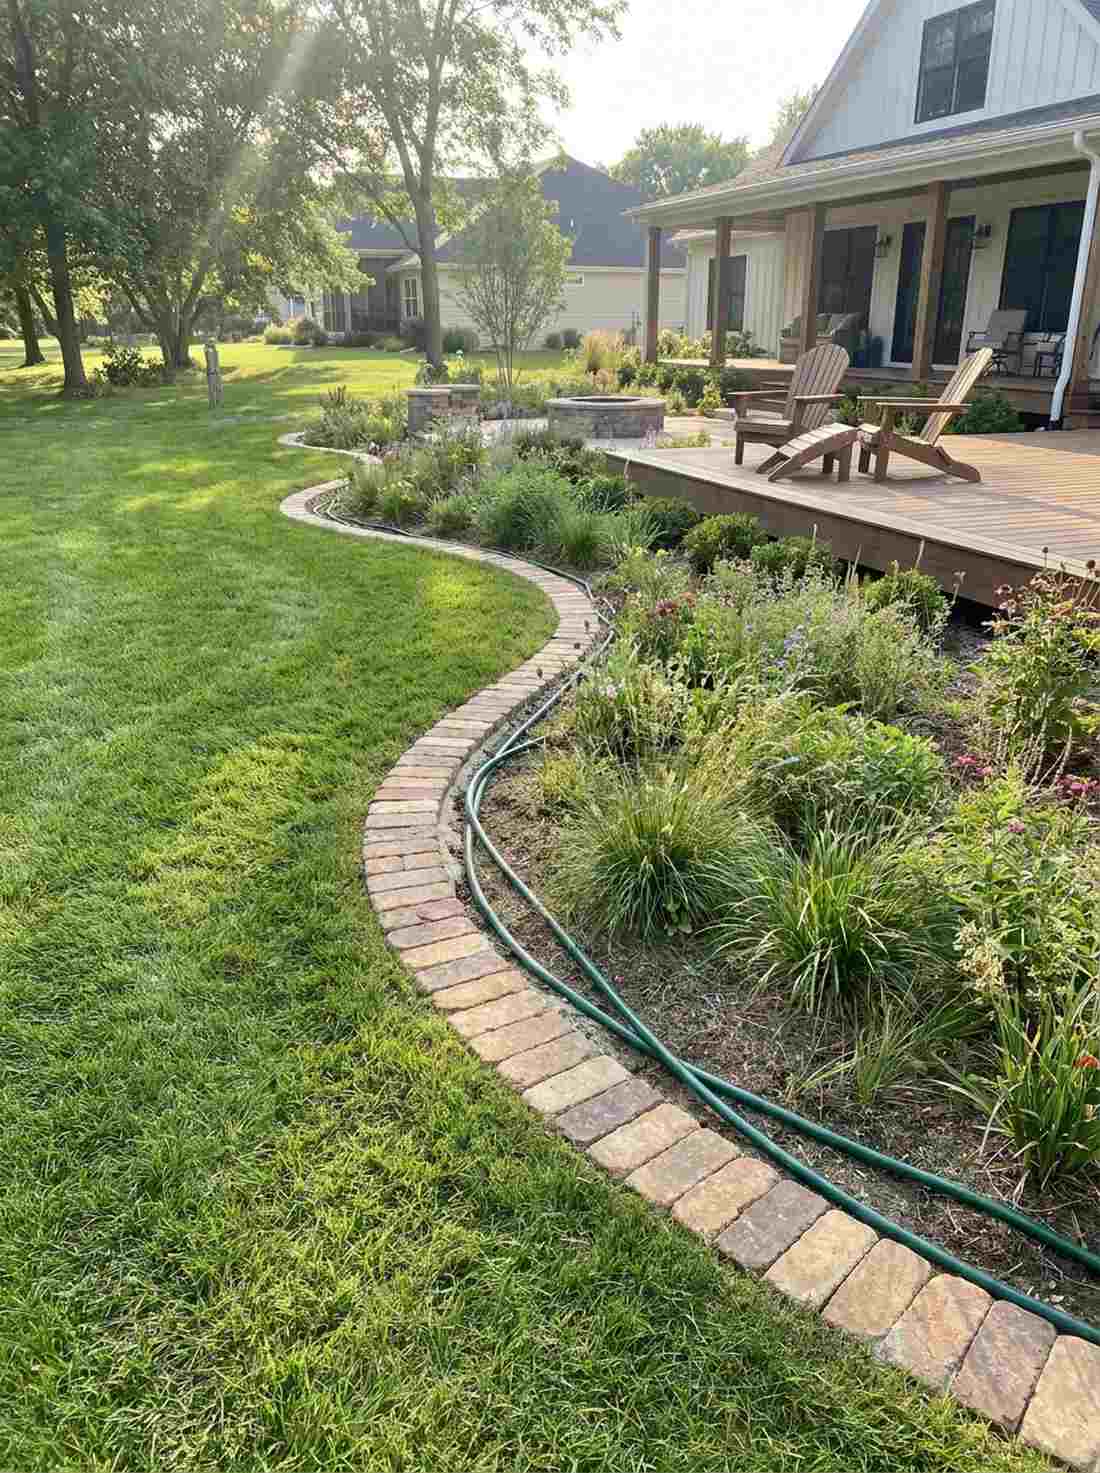
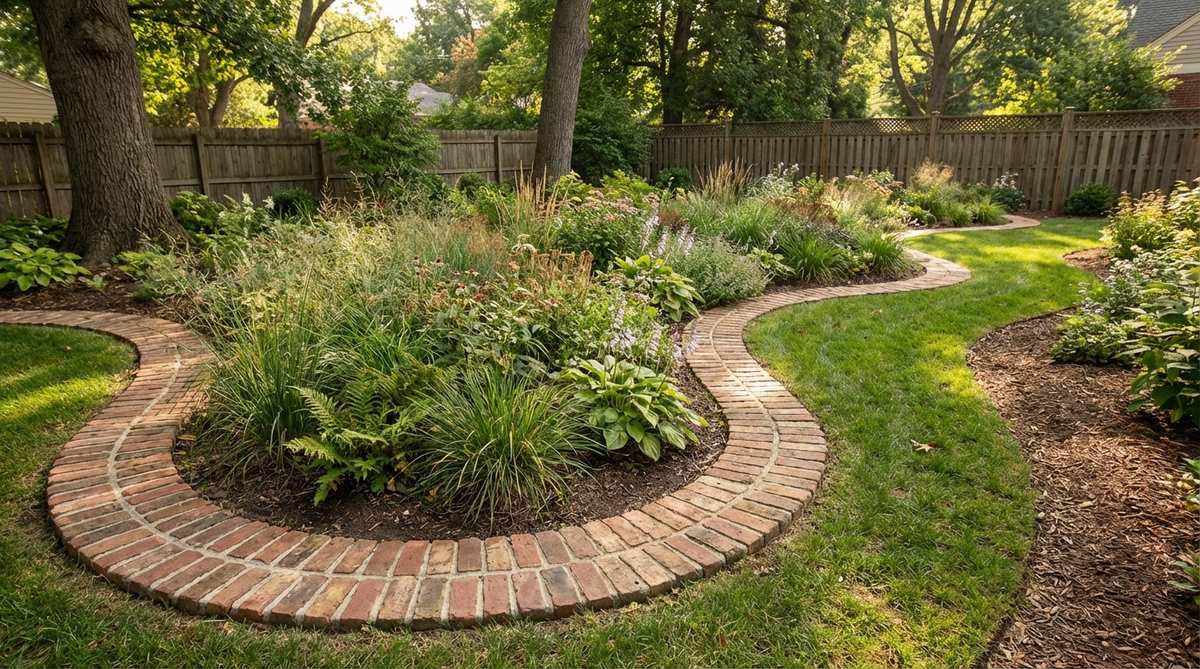
This soft organic separation edge mimics the gentle flow of a natural stream moving through your property. It effortlessly blends lush grass into wild native plant beds, softening hard property lines.
Rigid geometric lines can sometimes make a yard feel like a parking lot, but fanning the joints along a curve brings profound tranquility to the layout. You can totally bypass the need for expensive cutting tools by simply allowing the outer edge joints to breathe slightly wider.
Creating a 30-foot meandering line usually costs between $60 and $100. It’s the ultimate secret weapon for creating that relaxed, professionally landscaped illusion.
- Key Materials: Tumbled landscape bricks, hose for marking
- Vibe / Style: Naturalist flowing garden
- Difficulty: Easy
- Budget Breakdown: Edging bricks: $75 | Sand: $15.
- Creator’s Tip: Lay a heavy garden hose out in the sun to warm up, then use it as your perfect curve stencil.
- Smart Sourcing: flexible marking paint sprays and tumbled vintage-style edgers.
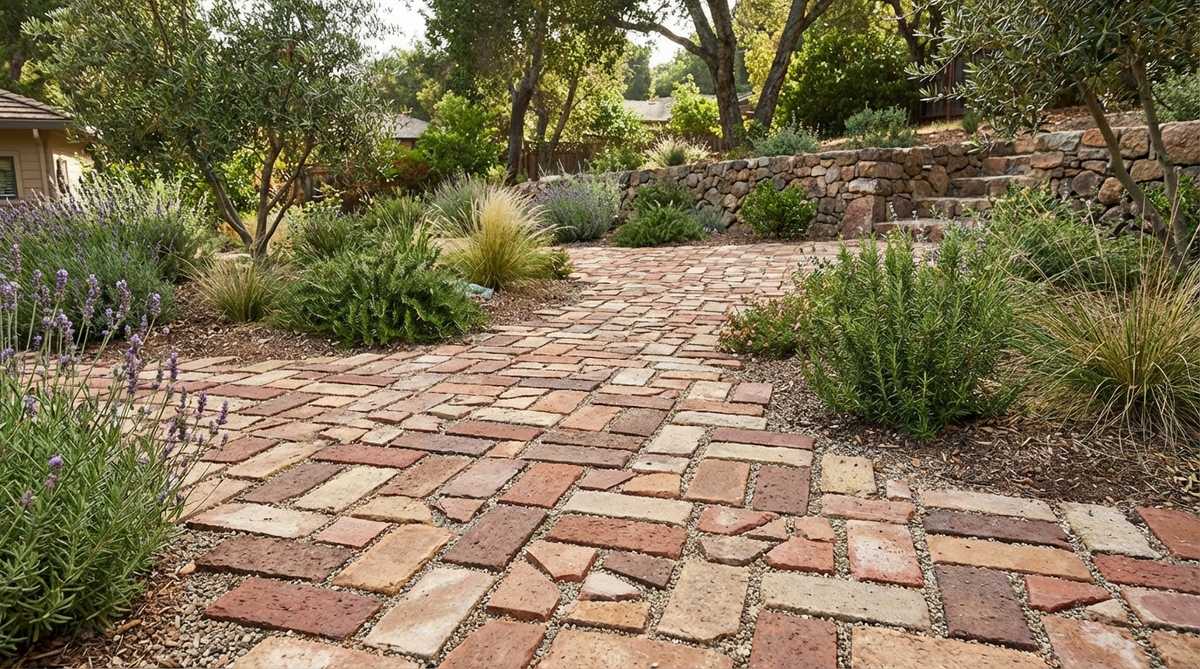
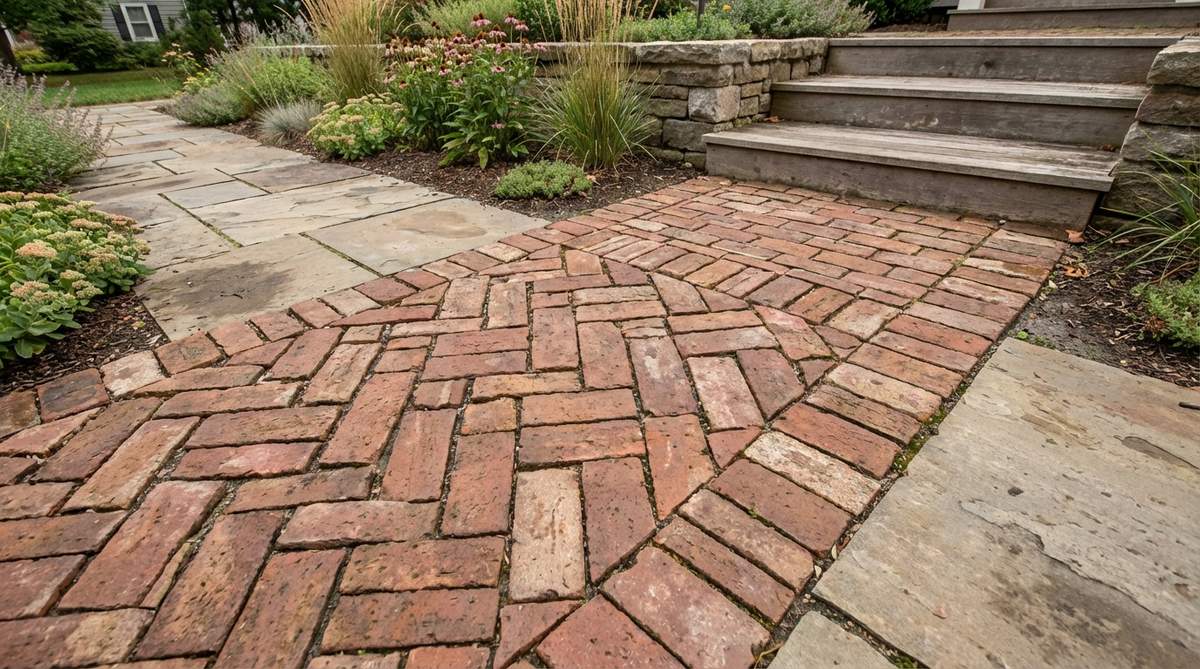
11. Reclaimed Brick Rustic Edge
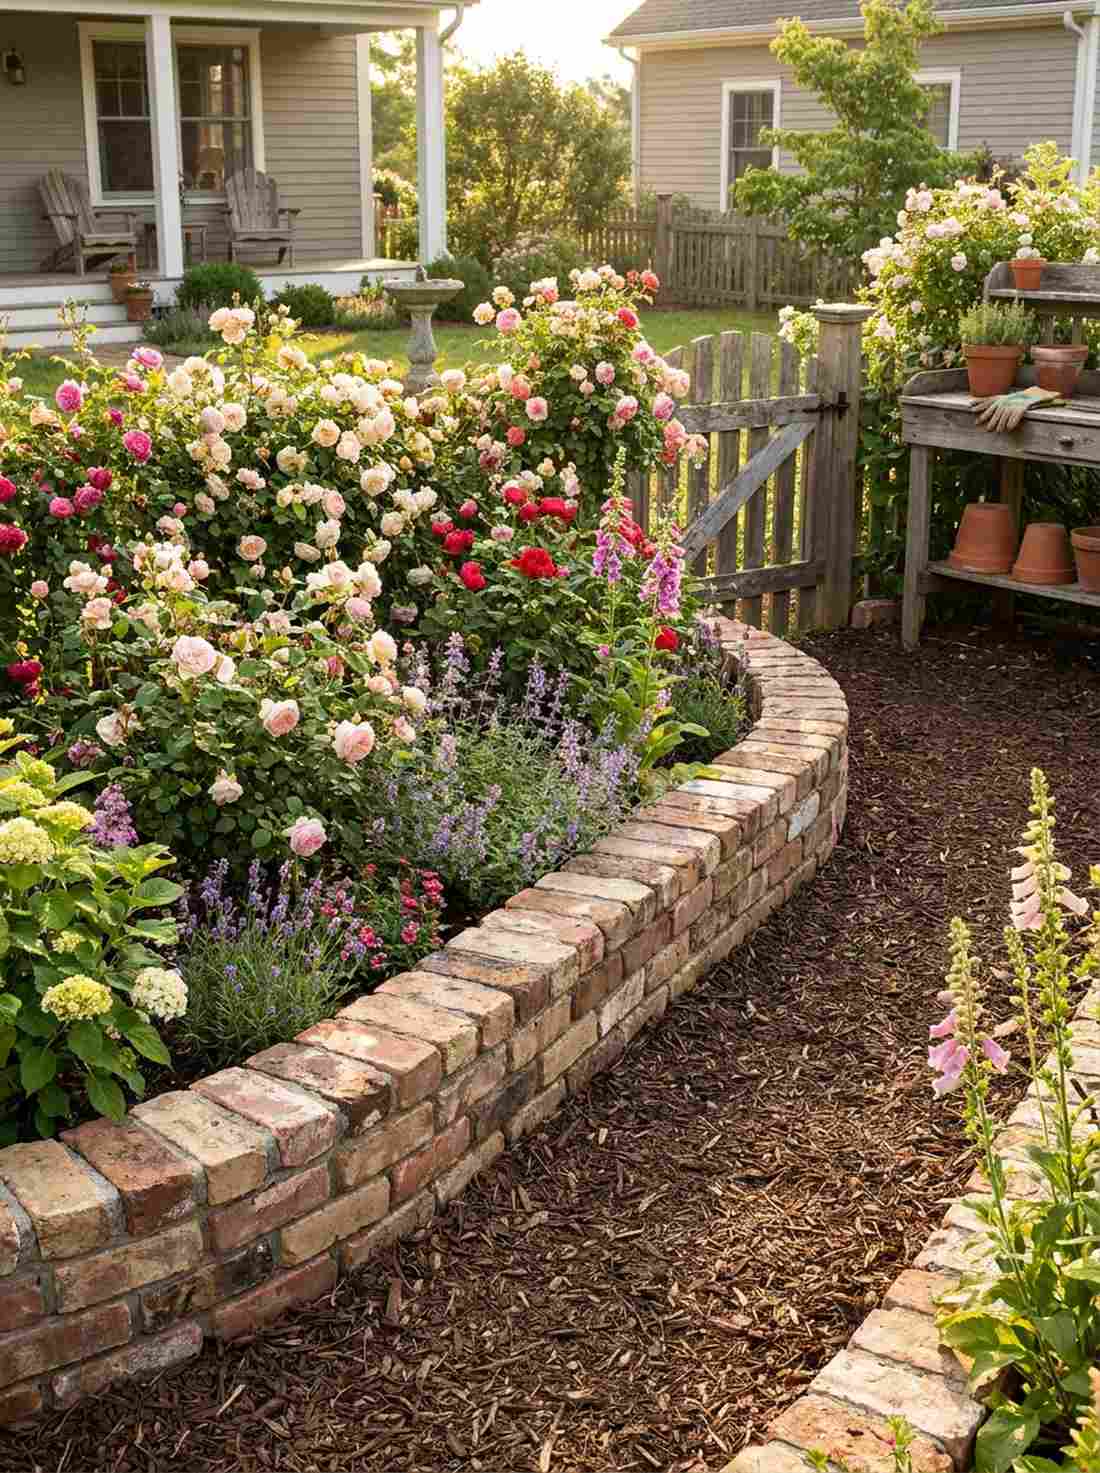
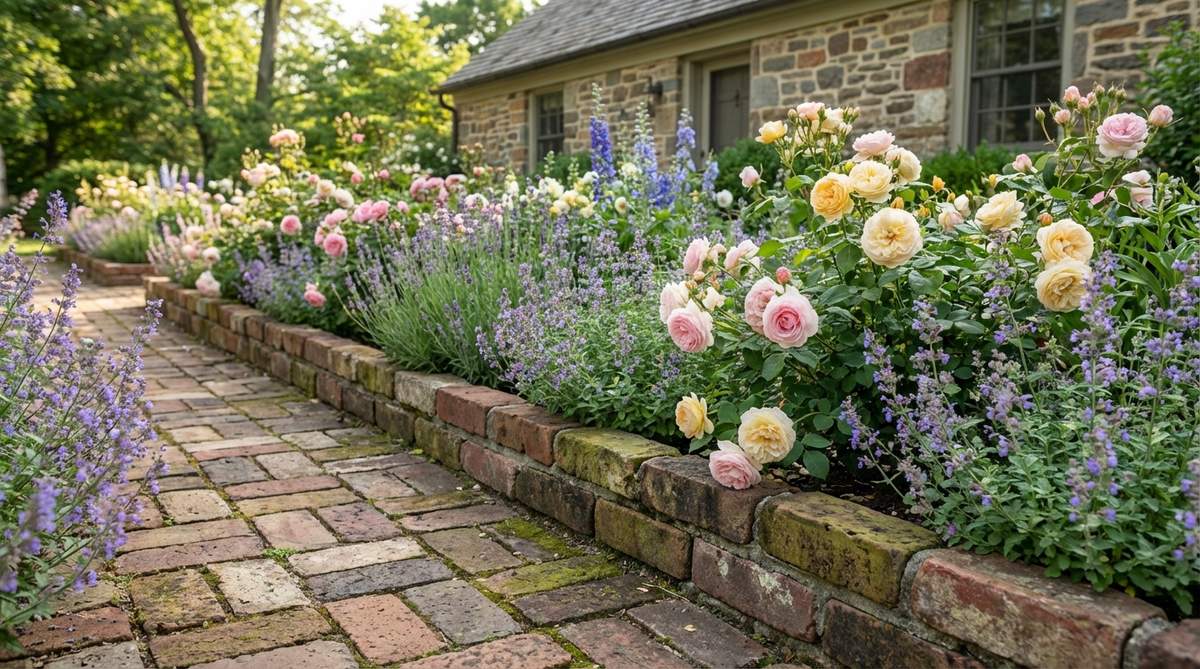
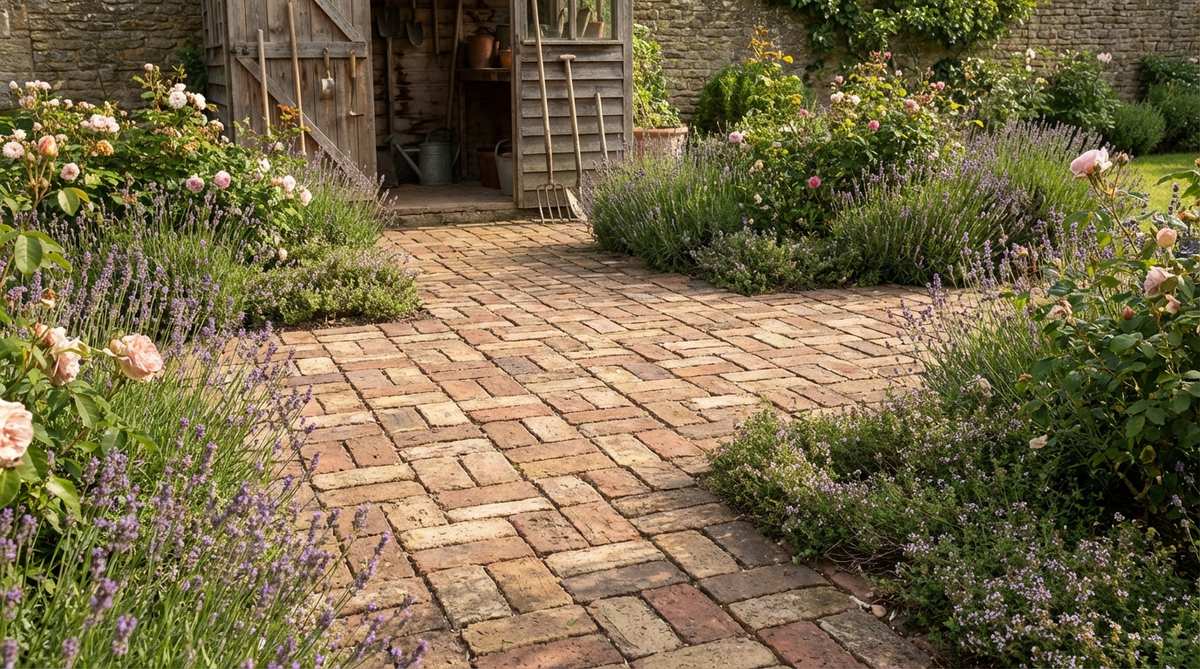
An incredibly charming weathered historic property border that feels infused with a hundred years of secret garden history. This is the ultimate finishing touch for an heirloom rose garden or a wild cottage-style flower patch.
Using brand new, perfectly uniform factory pieces often kills the vintage illusion, making salvaged materials the superior design choice. Blending chipped corners and faded colors creates an authentic, lived-in texture that modern mass-production simply cannot replicate.
Sourcing local reclaimed pieces might cost you $40 to $90 per pallet. Save this to your upcycled garden ideas board to remind yourself to hunt for salvage materials!
- Key Materials: Salvaged historic bricks, organic mulch
- Vibe / Style: Antique cottage charm
- Difficulty: Very easy
- Budget Breakdown: Salvage bricks: $50 | Mulch: $20.
- Creator’s Tip: Mix different colors randomly—do not let two matching heavily-colored blocks sit next to each other.
- Smart Sourcing: premium cedar mulch bulk bags and heavy-duty leather gardening gloves.
12. Half-Brick Buried Edge
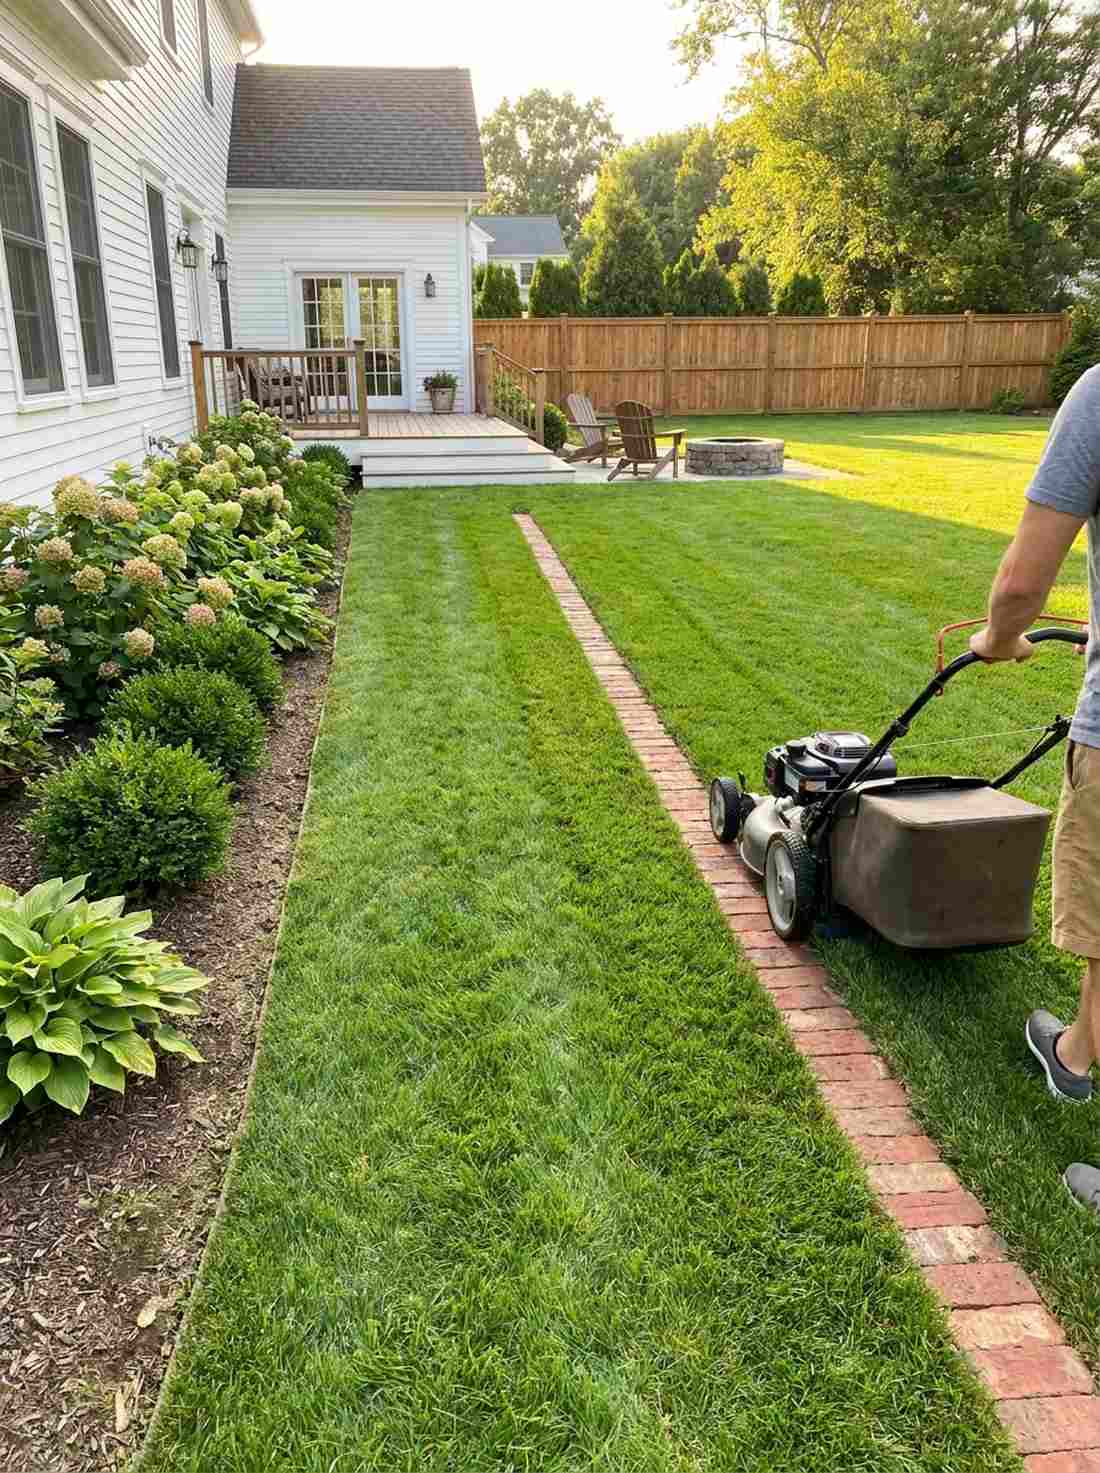
A minimalist flush mowing strip that looks effortlessly chic while being incredibly practical for weekend chores. Bury this sleek separator right at the grass line along any foundation planting or long suburban fence line.
People hate trimming tall grass against raised borders, but dropping the hardscape flush with the dirt allows your mower wheels to glide right over it. This hidden garden design using bricks establishes a distinct visual boundary without visually cluttering the open space.
You can execute a 40-foot invisible mowing strip for about $50 to $85. Highly recommended if you want to completely eliminate weed-whacking from your weekend routine.
- Key Materials: Standard solid brick, sharp spade
- Vibe / Style: Clean English estate
- Difficulty: Moderate digging required
- Budget Breakdown: Bricks: $60 | Base prep: $10.
- Creator’s Tip: Use a flat-edged border spade to slice a perfectly straight dirt trench before placing.
- Smart Sourcing: flat-edged nursery spades and pre-cut weed barrier strips.
Contemporary Accent Designs for Visual Impact
Innovative brick arrangements push beyond traditional patterns to create focal points and artistic statements within landscape compositions. These advanced techniques combine multiple orientations and scales for memorable garden features.
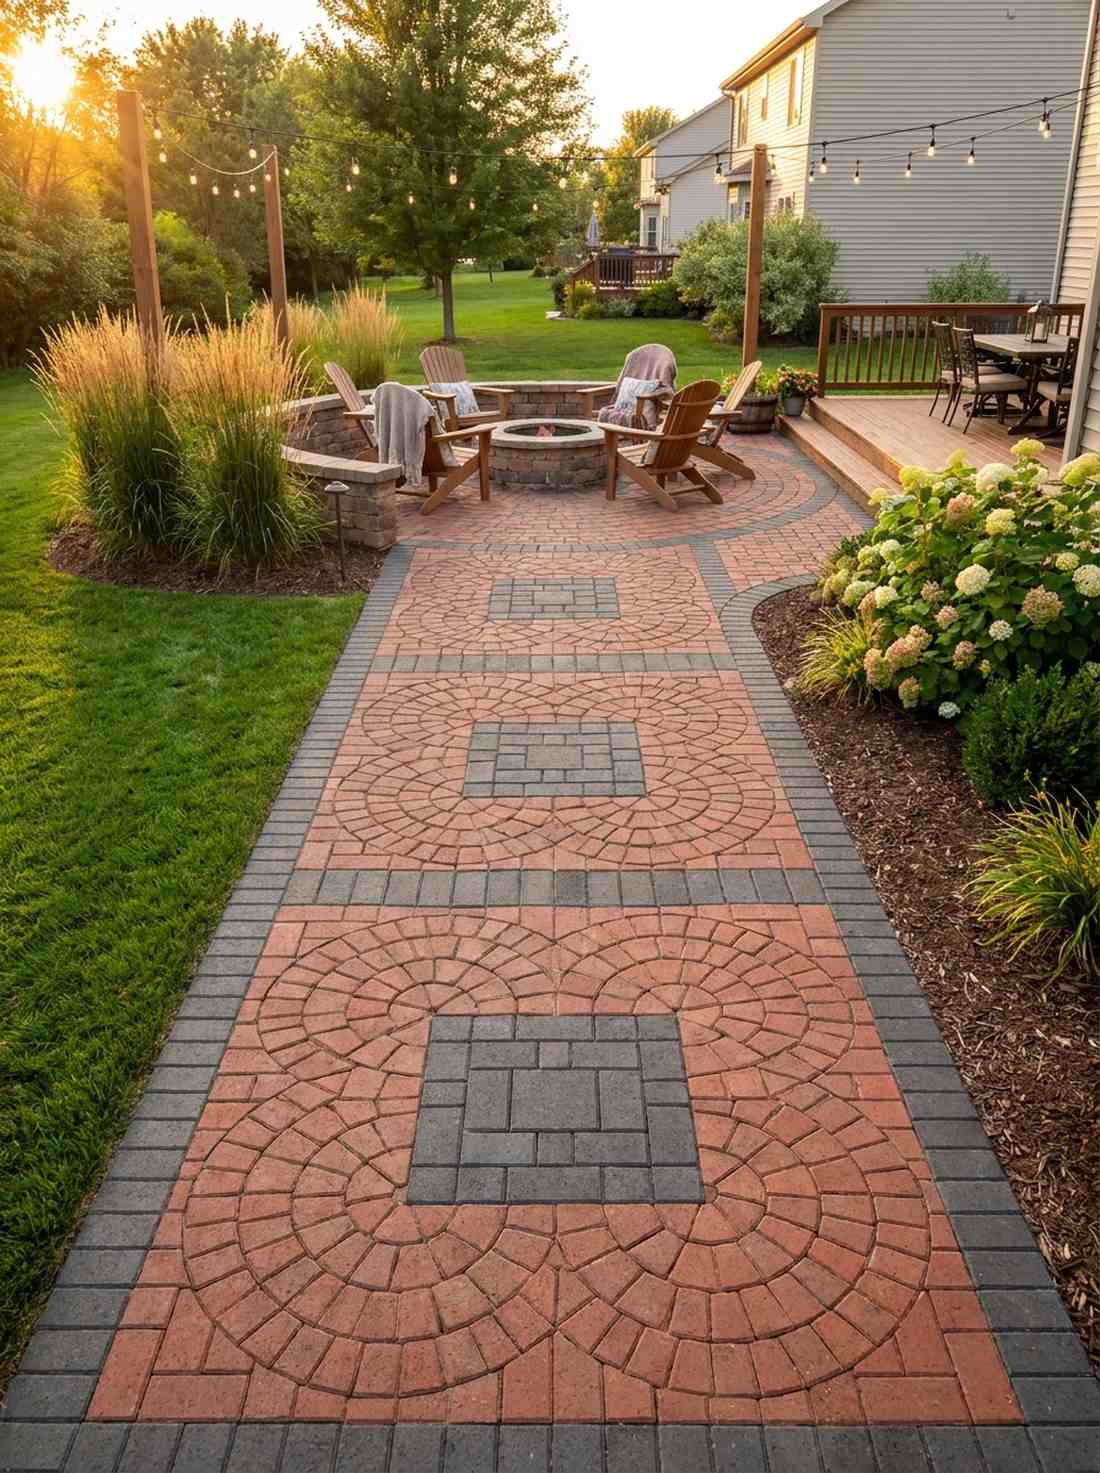
13. Circular Radial Pattern
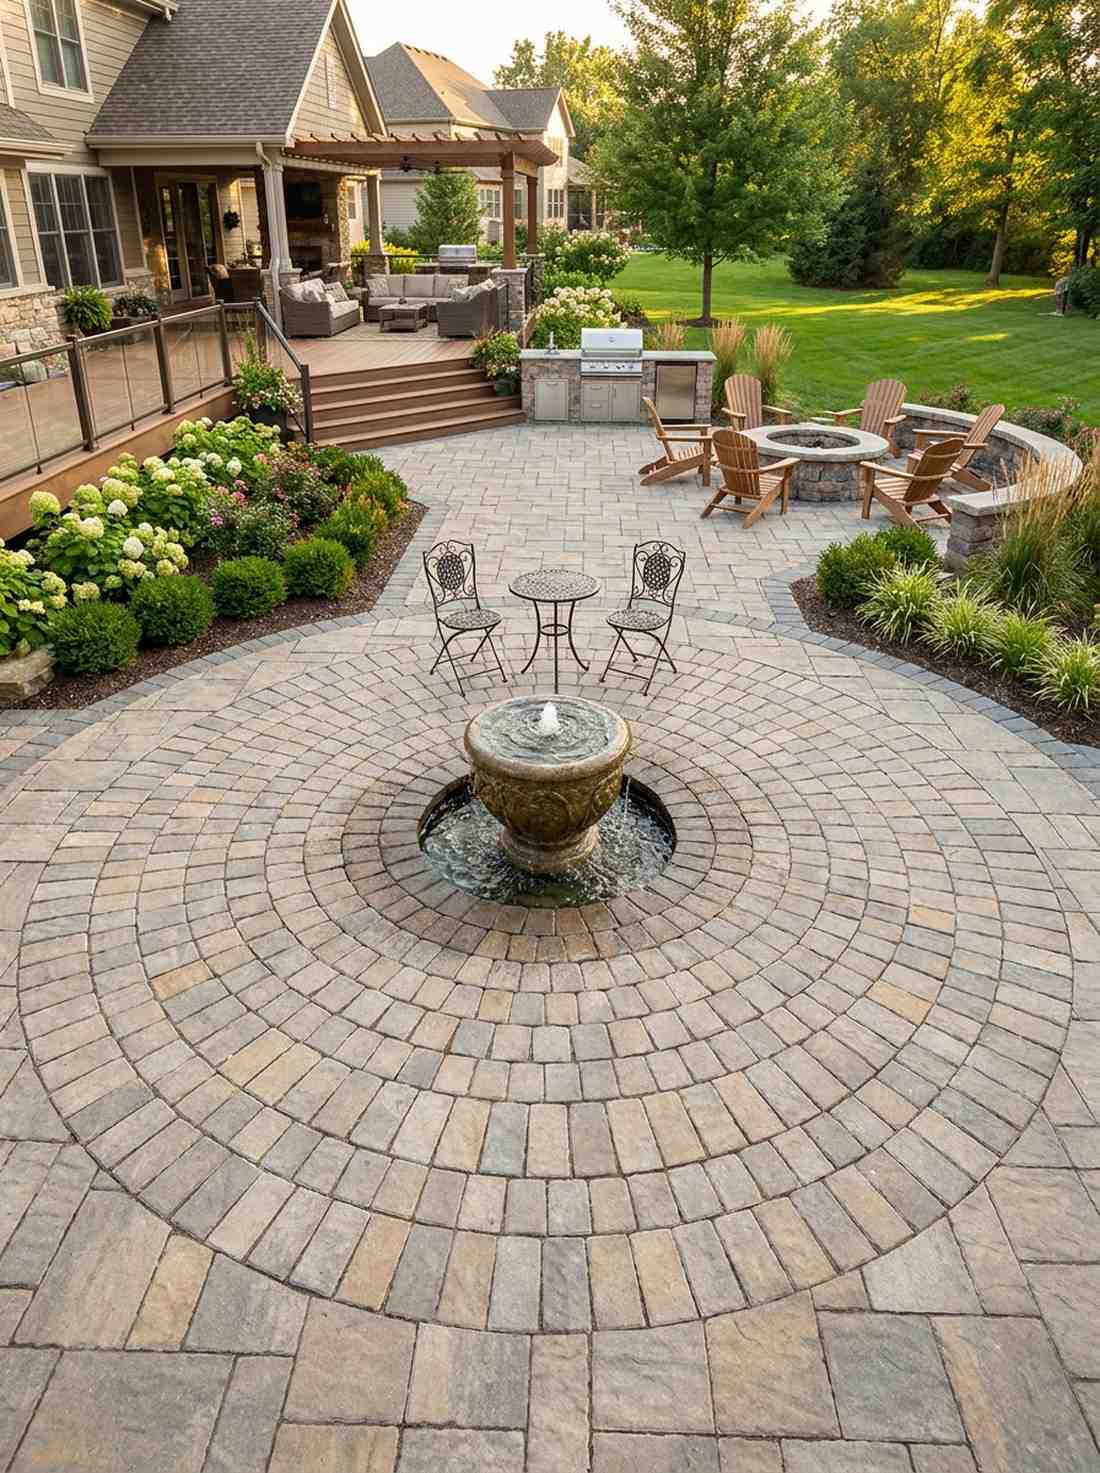
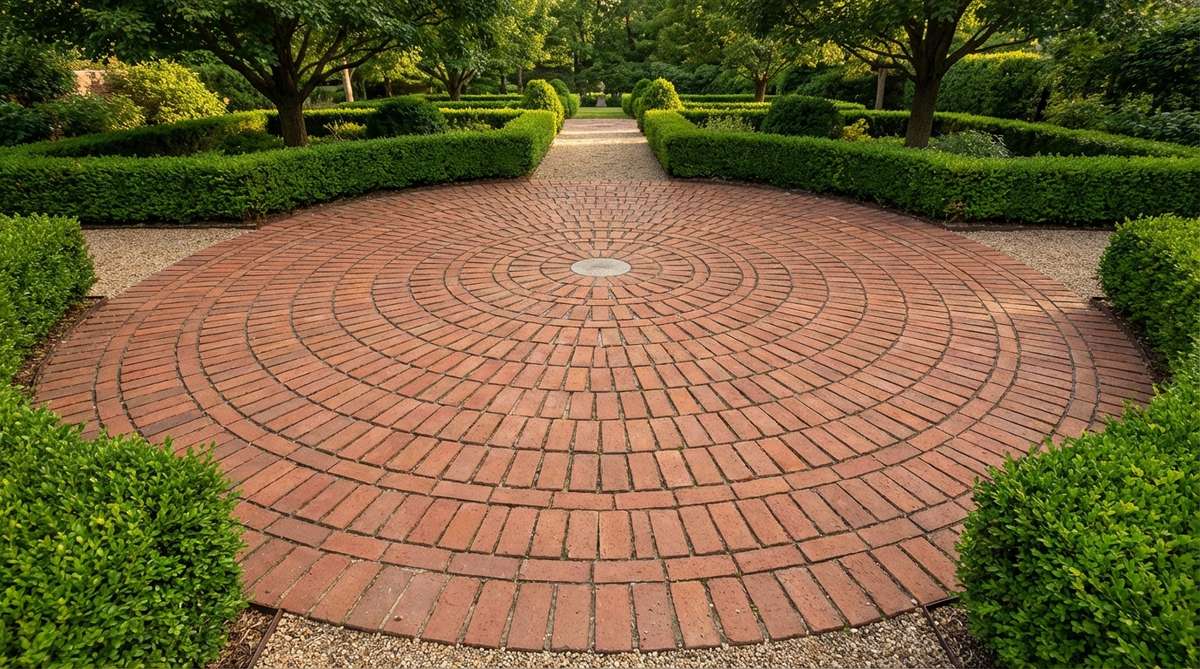
A majestic concentric hardscape medallion that serves as the absolute focal point of your entire property. Build this gorgeous wheel underneath an iron bistro set or surrounding an upscale bubbling water feature.
Laying out squares is easy, but manipulating straight blocks into perfect expanding rings instantly screams “expensive custom architecture.” Sourcing a pre-cut circle paver starter kit drastically cuts down the math and eliminates the frustration of trying to wedge square pegs into round holes.
A 6-foot diameter focal point will run you about $150 to $350. Pin this to your luxury outdoor living board for major inspiration!
- Key Materials: Wedge-cut pavers, center keystone
- Vibe / Style: Formal grand courtyard
- Difficulty: Advanced (requires custom cuts)
- Budget Breakdown: Center kit: $200 | Base sand: $30.
- Creator’s Tip: Always secure your center stone first and build outwards; never work from the outside in.
- Smart Sourcing: pre-cut patio circle layout kits and premium setting mortar.
14. Diagonal Stepped Edge
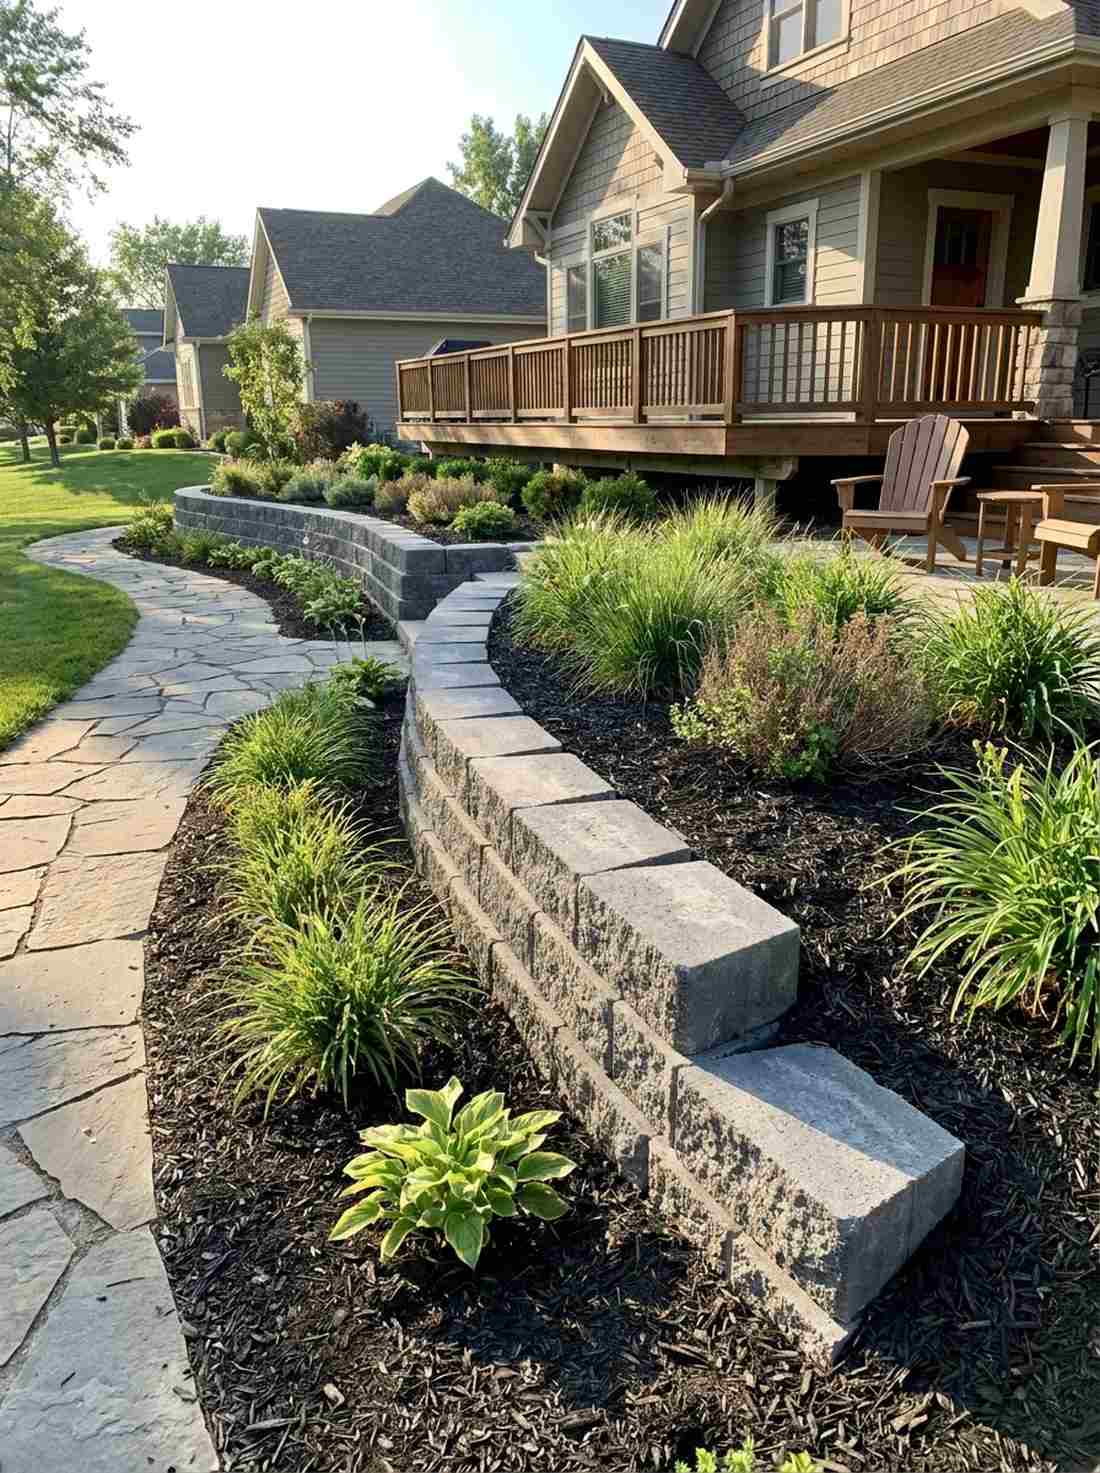
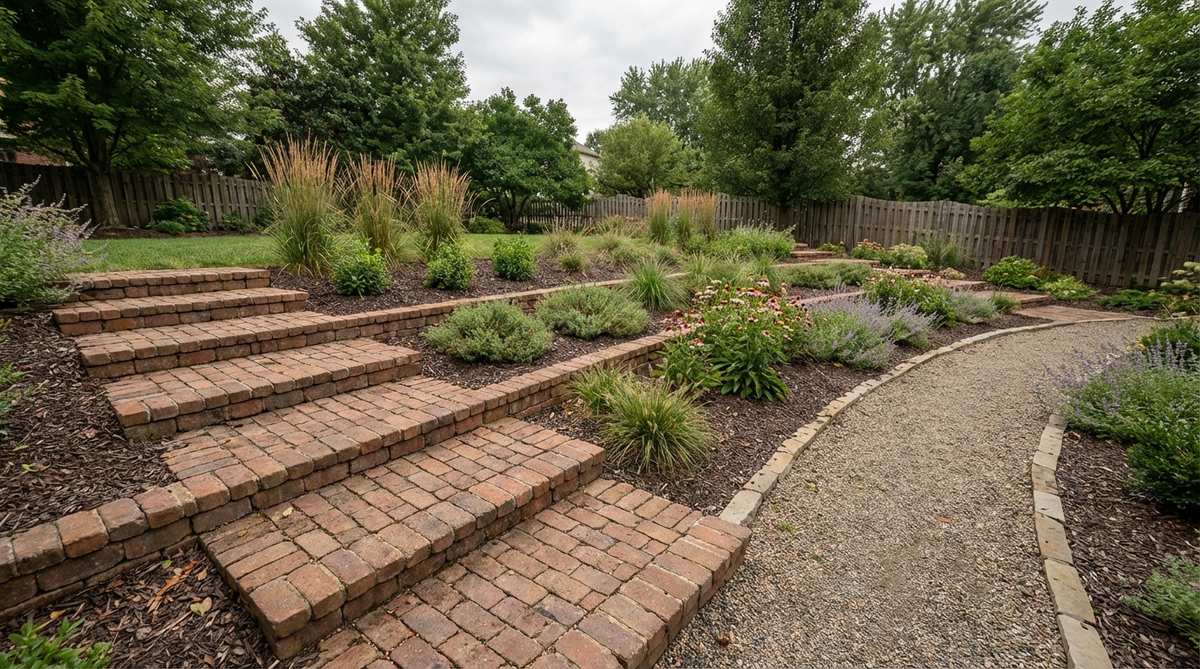
An ingenious sloped terrain leveling border that controls wild hillsides while looking like a deliberate architectural statement. Deploy this brilliant strategy on uneven side yards or sloping front walkways where mulch always washes away.
Fighting gravity with flat wood always results in failure, but stepping these blocks down dynamically locks the soil in place. This visually engaging technique tames chaotic elevations without forcing you to build a massively expensive retaining wall.
A 15-foot slope upgrade costs merely $50 to $90 depending on height. It’s a lifesaver for tricky, uneven properties that need instant curb appeal.
- Key Materials: Heavy masonry blocks, leveler tool
- Vibe / Style: Sculptural and functional
- Difficulty: Intermediate
- Budget Breakdown: Bricks: $65 | Gravel base: $20.
- Creator’s Tip: Ensure every single piece is leveled horizontally before moving to the next step down.
- Smart Sourcing: torpedo bubble levels and erosion control landscape pins.
Material Guide: Cheap vs. Premium Aesthetic
Knowing exactly where to save and where to spend makes all the difference in achieving that “looks expensive but isn’t” vibe when executing bricks garden design.
- Standard vs. UV-Resistant/Premium: Upgrading to a UV-coated sealant stops your colored pavers from fading to a dull gray after one harsh summer.
- Pre-made Kits vs. Sourcing Locally: Bulk-pack edge restraints and pre-mixed polymeric sand kits often save both time and money compared to buying individual bags at big-box hardware stores.
Warning: The upcoming layout is so visually addictive, your neighbors might actually try to copy your entire front yard.
15. Mixed-Size Mosaic
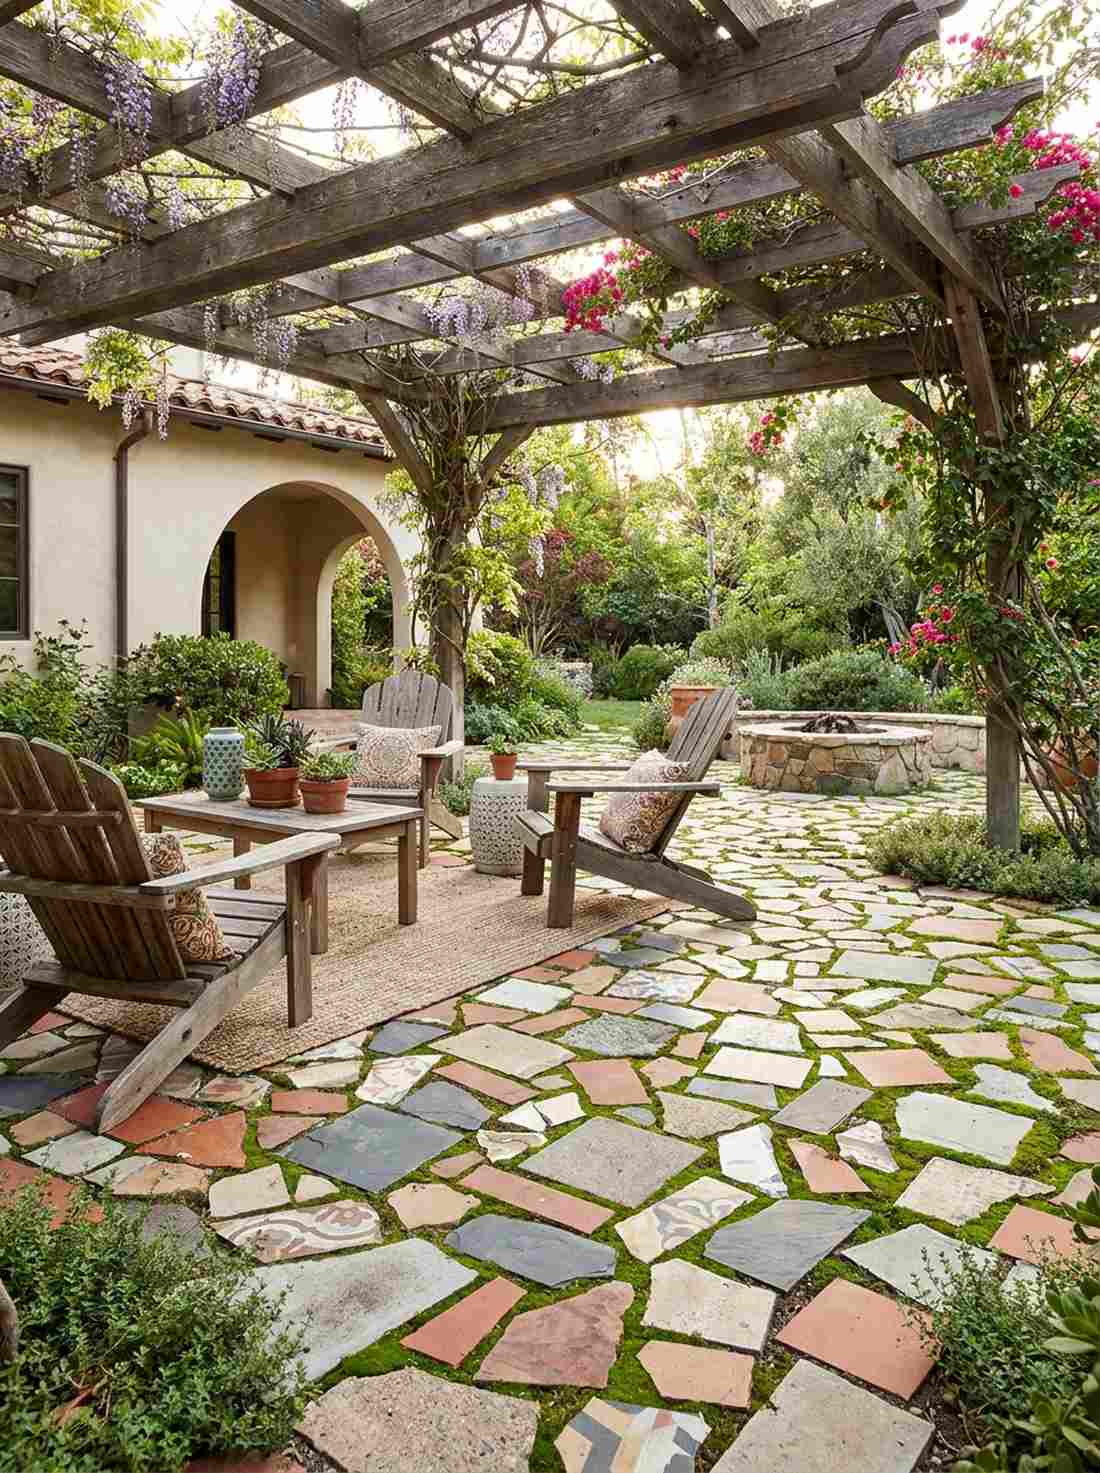
A wildly creative fragmented eco-friendly patio floor that feels like a hidden artist’s retreat in the Mediterranean. It absolutely thrives in bohemian backyard lounges or underneath a dense, shady pergola.
Tossing broken pieces away is a tragic waste when combining irregular fragments organically creates a jaw-dropping custom tapestry. Using leftover hardscape materials alongside bulk-pack terrarium moss accents in the joints transforms trash into a highly textured, high-value artistic installation.
Since you are using broken or leftover pieces, this entire look can be achieved for $30 to $60. Save this if you love sustainable, zero-waste DIY projects!
- Key Materials: Broken/leftover pavers, joint filler
- Vibe / Style: Spanish Colonial / Bohemian
- Difficulty: Moderate (puzzle-solving)
- Budget Breakdown: Leftovers: $0 | Poly sand: $40.
- Creator’s Tip: Lay the biggest feature pieces first, then treat the small gaps like a jigsaw puzzle.
- Smart Sourcing: polymeric sand (bulk pack) and creeping thyme seed starters.
16. Pinwheel Pattern
A delightfully playful spinning geometric walkway setup that adds rhythmic energy to an otherwise flat patio space. Perfect for defining a cozy outdoor dining area or a dedicated backyard fire pit zone.
It completely bypasses the visual intensity of strict herringbone while still offering a layout that looks meticulously planned. Dropping in a contrasting color for the center square of the pinwheel creates a custom designer touch that blows generic concrete slabs out of the water.
You can execute this vibrant hardscape for about $140–$260 for a medium-sized patio. It’s an incredibly fun aesthetic upgrade that guests will immediately notice.
- Key Materials: Dual-colored bricks, edge restraints
- Vibe / Style: Lively and geometric
- Difficulty: Intermediate
- Budget Breakdown: Main color: $150 | Accent blocks: $30.
- Creator’s Tip: Build one perfect pinwheel module first, then replicate that exact template across the yard.
- Smart Sourcing: rigid plastic paver edge strips and high-impact rubber mallets.
17. Bordered Herringbone Frame
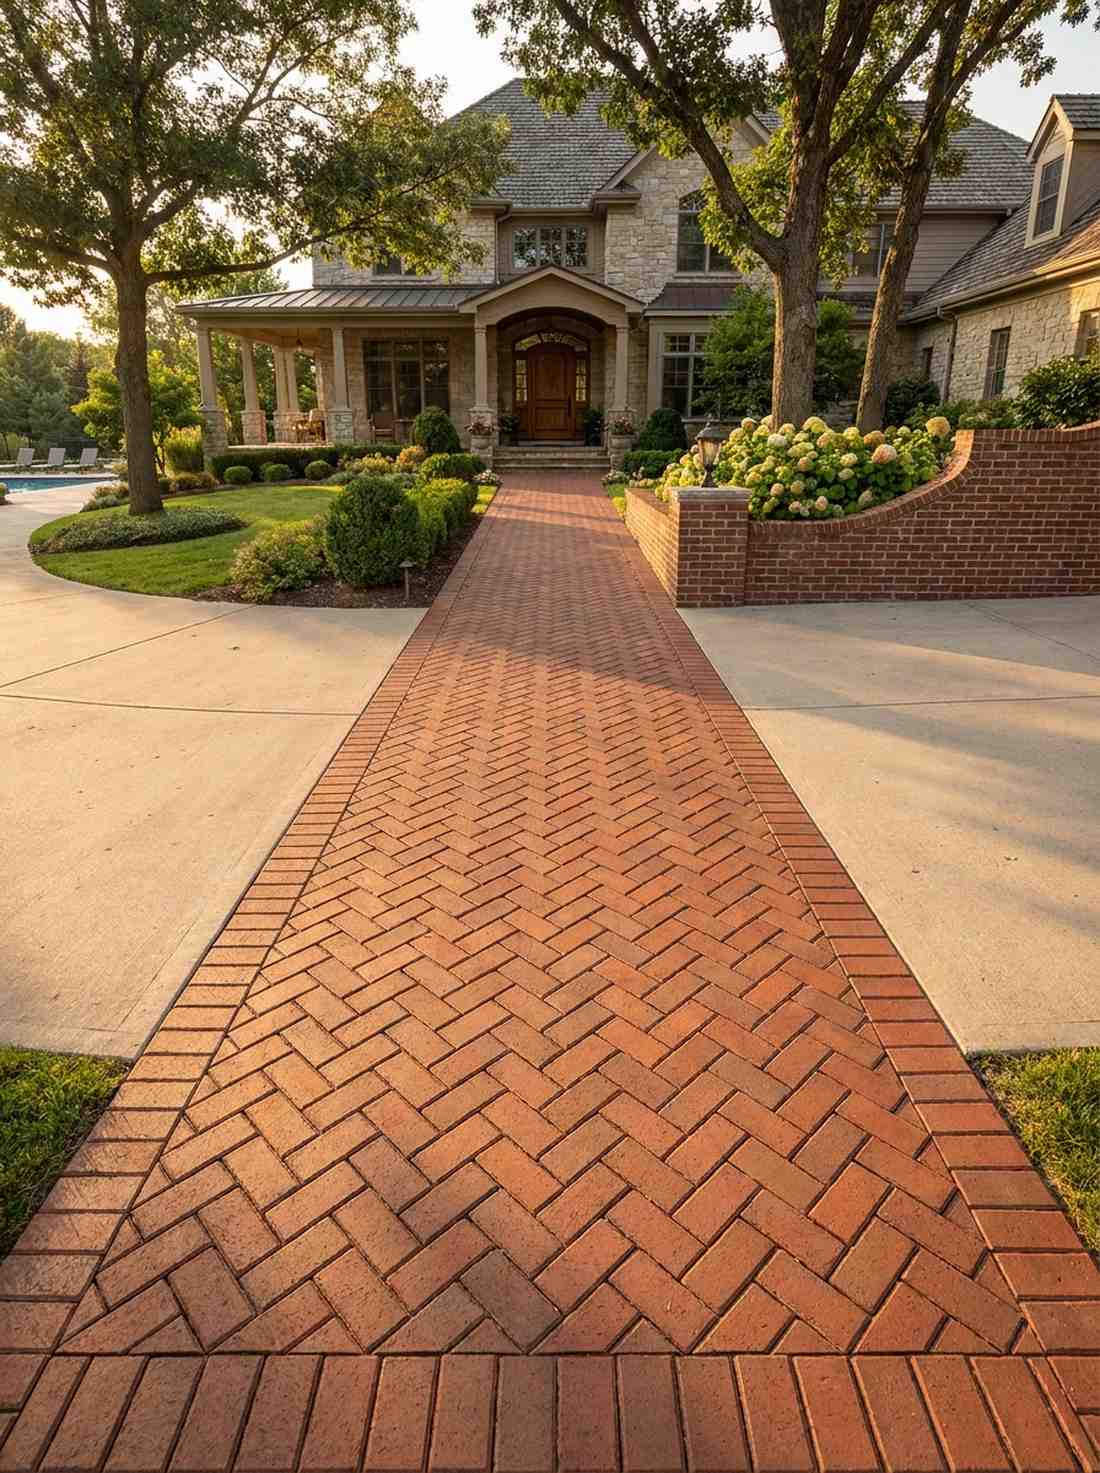
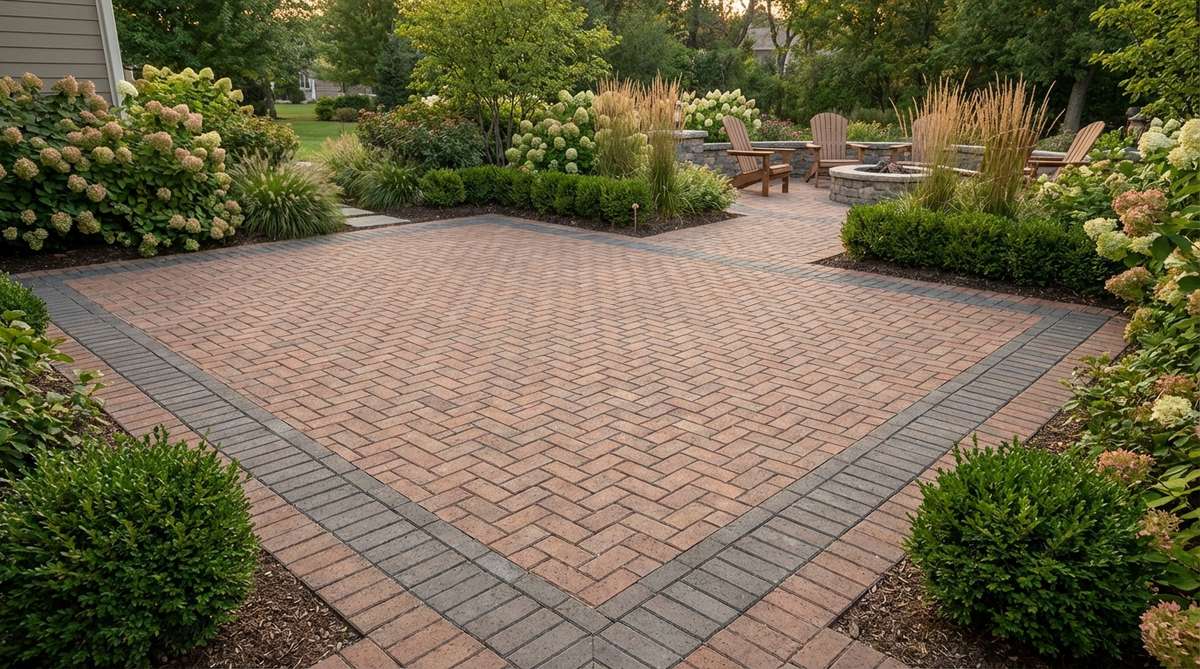
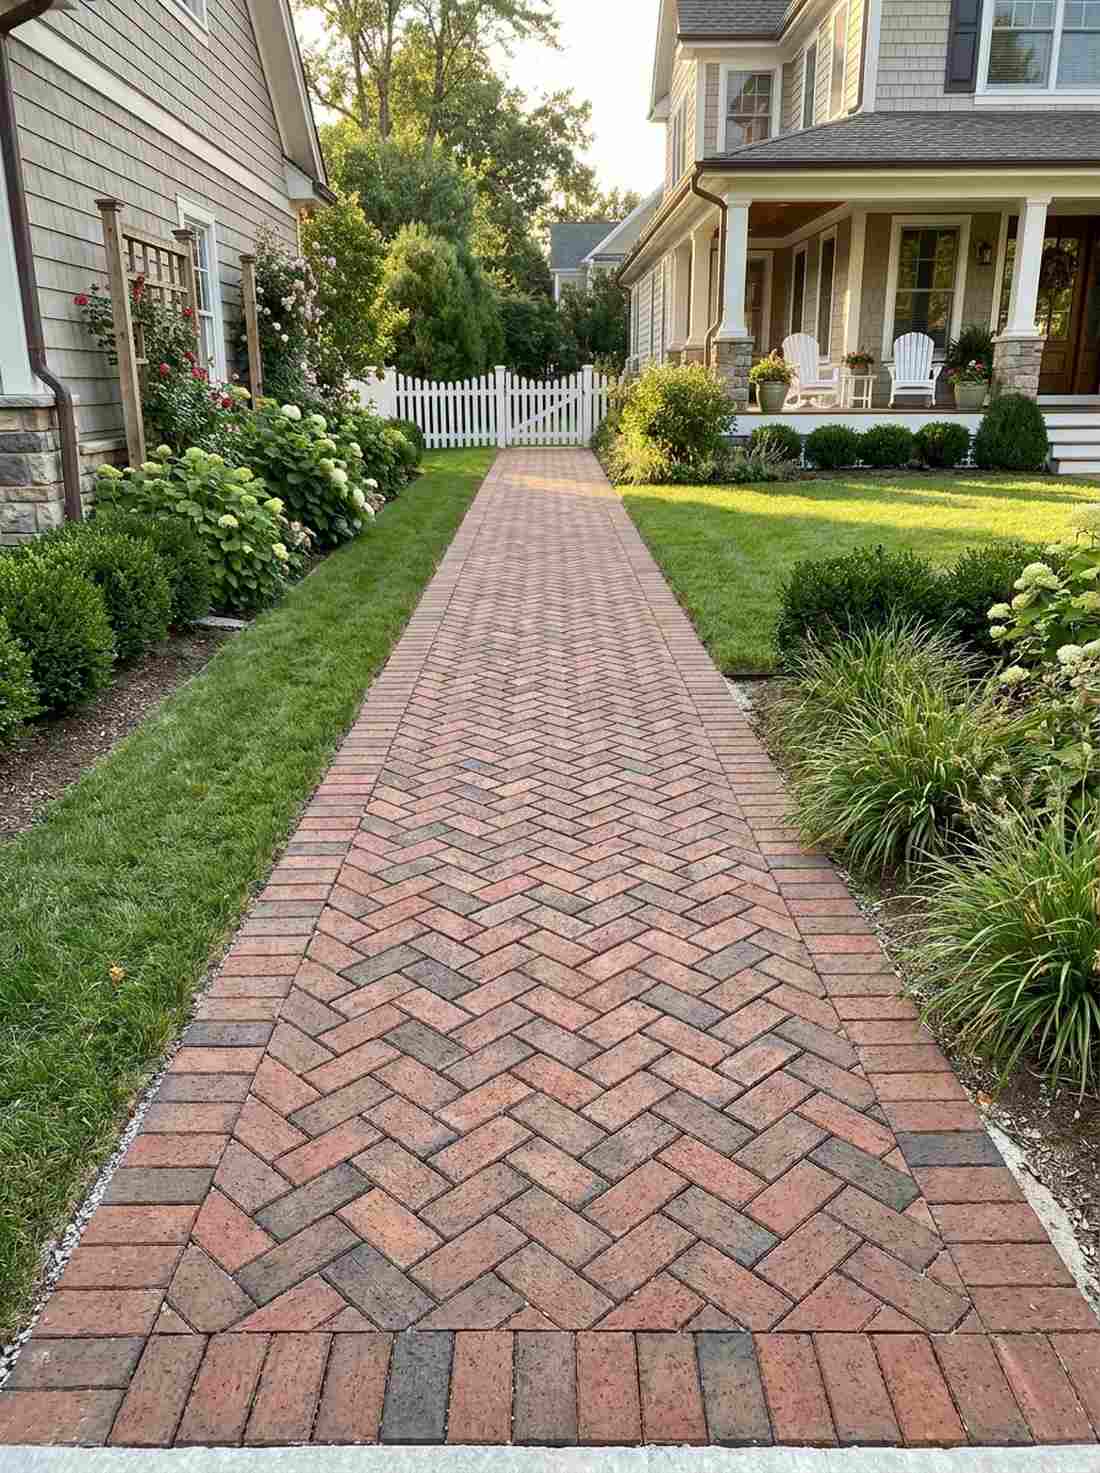
An impeccably tailored framed luxury entrance path that screams high-budget professional landscape architecture. This is the ultimate layout to dramatically frame a front doorway or the entrance to a high-end pool deck.
Leaving complex zigzag edges exposed looks sloppy, but wrapping the entire arrangement in a solid soldier-course border cleans up the visual instantly. This structured framing technique delivers massive curb appeal and locks the interior pattern down tighter than a drum.
Expect to invest around $250 to $450 for a stunning framed entryway. Pin this to your curb-appeal masterclass board because it adds massive property value!
- Key Materials: Premium clay blocks, masonry saw
- Vibe / Style: Luxury estate entrance
- Difficulty: Advanced
- Budget Breakdown: Field blocks: $200 | Border blocks: $80.
- Creator’s Tip: Always lay the solid outer border perfectly first, then cut the inner pieces to fit exactly.
- Smart Sourcing: professional diamond blade masonry saws and commercial-grade setting sand.
18. Jack-on-Jack with Accent Rows
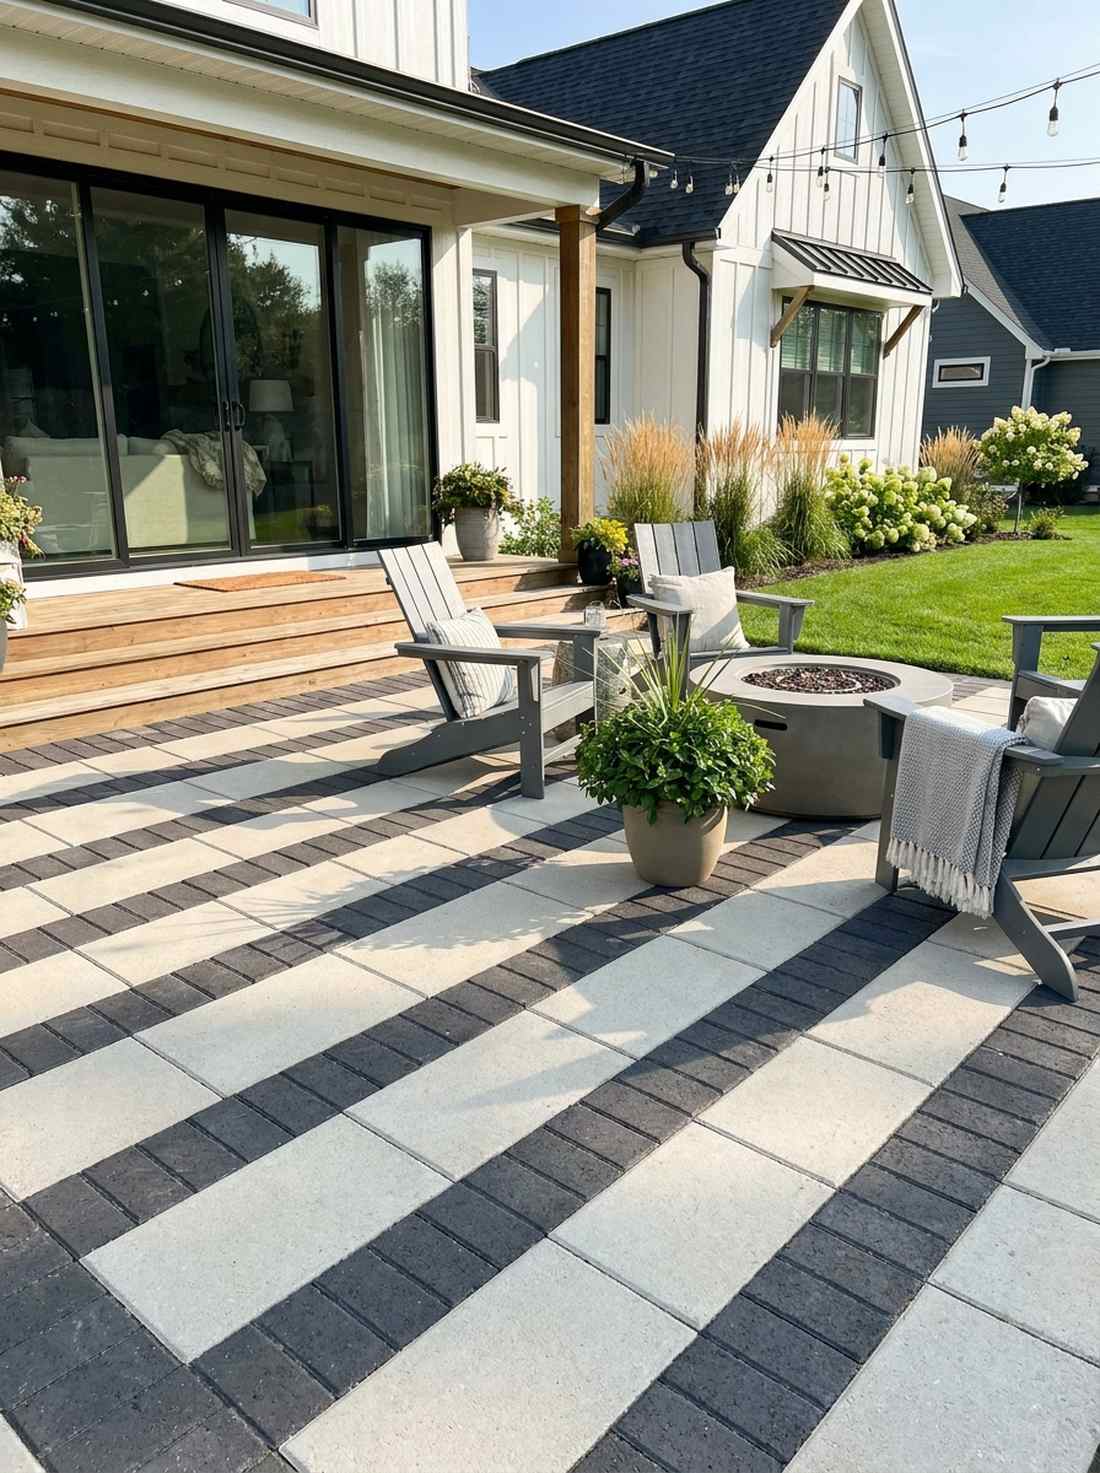
A highly modern striped geometric patio floor that uses contrasting bands to completely reshape the visual dimensions of your yard. It works miracles in short, stubby courtyards by creating an optical illusion of extended length.
Solid uniform slabs can feel overwhelmingly monotonous, but breaking up the grid with a dark charcoal or vibrant red stripe forces the eye to travel. Utilizing this bold strategy in your garden design bricks layout easily replicates the look of a boutique hotel lounge.
Adding contrast blocks only bumps the budget slightly, making this a $100 to $200 project. Highly recommended for urban backyards that need a splash of modern flair.
- Key Materials: Standard colors + 1 accent color
- Vibe / Style: Modern boutique hotel
- Difficulty: Moderate
- Budget Breakdown: Primary bricks: $120 | Accent: $40.
- Creator’s Tip: Sketch the stripe rhythm on paper first to ensure the proportions fit your exact square footage.
- Smart Sourcing: charcoal accent block bundles and UV-coated clear paver sealant.
This next detail separates basic DIY projects from luxury landscaping. Do not skip this if you want maximum property value.
Specialty Installation Methods for Unique Challenges
Advanced applications address specific site conditions and functional requirements through adapted brick techniques. These specialized approaches solve problems while maintaining aesthetic cohesion with overall landscape design.
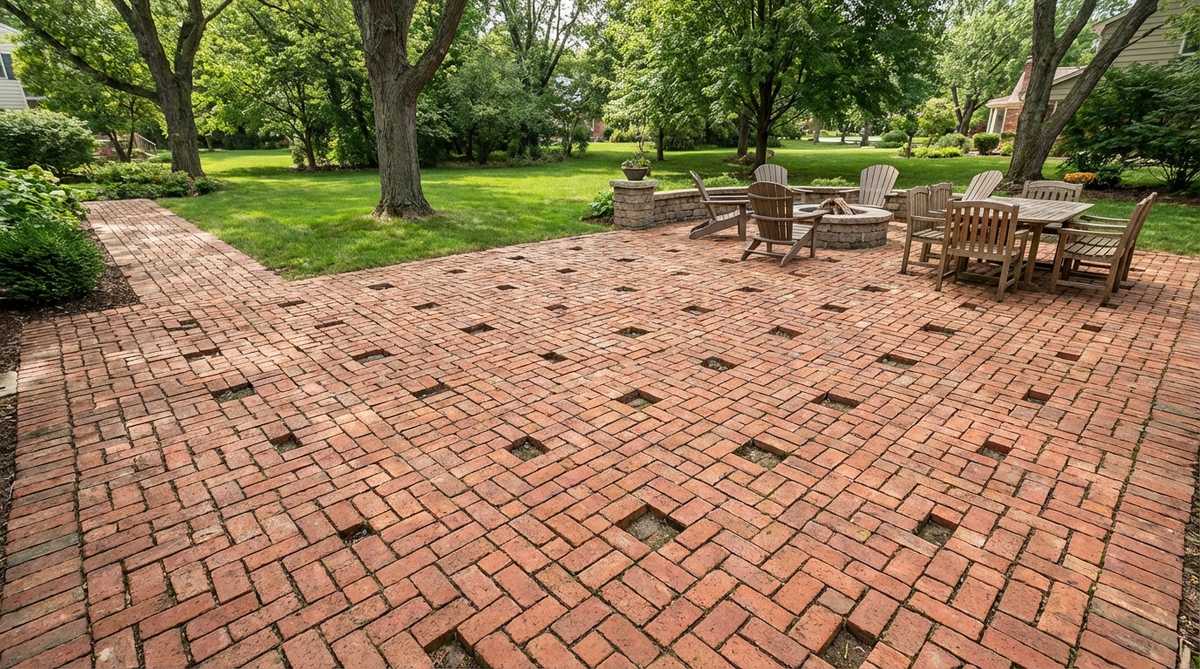
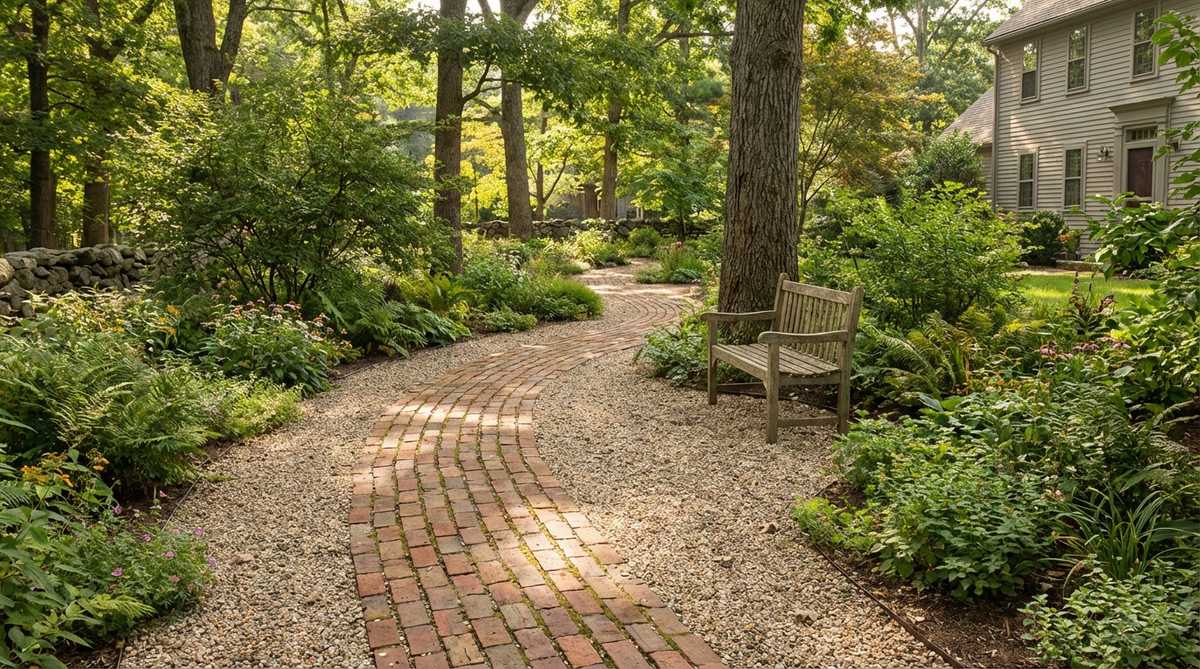
19. Permeable Gapped Paving
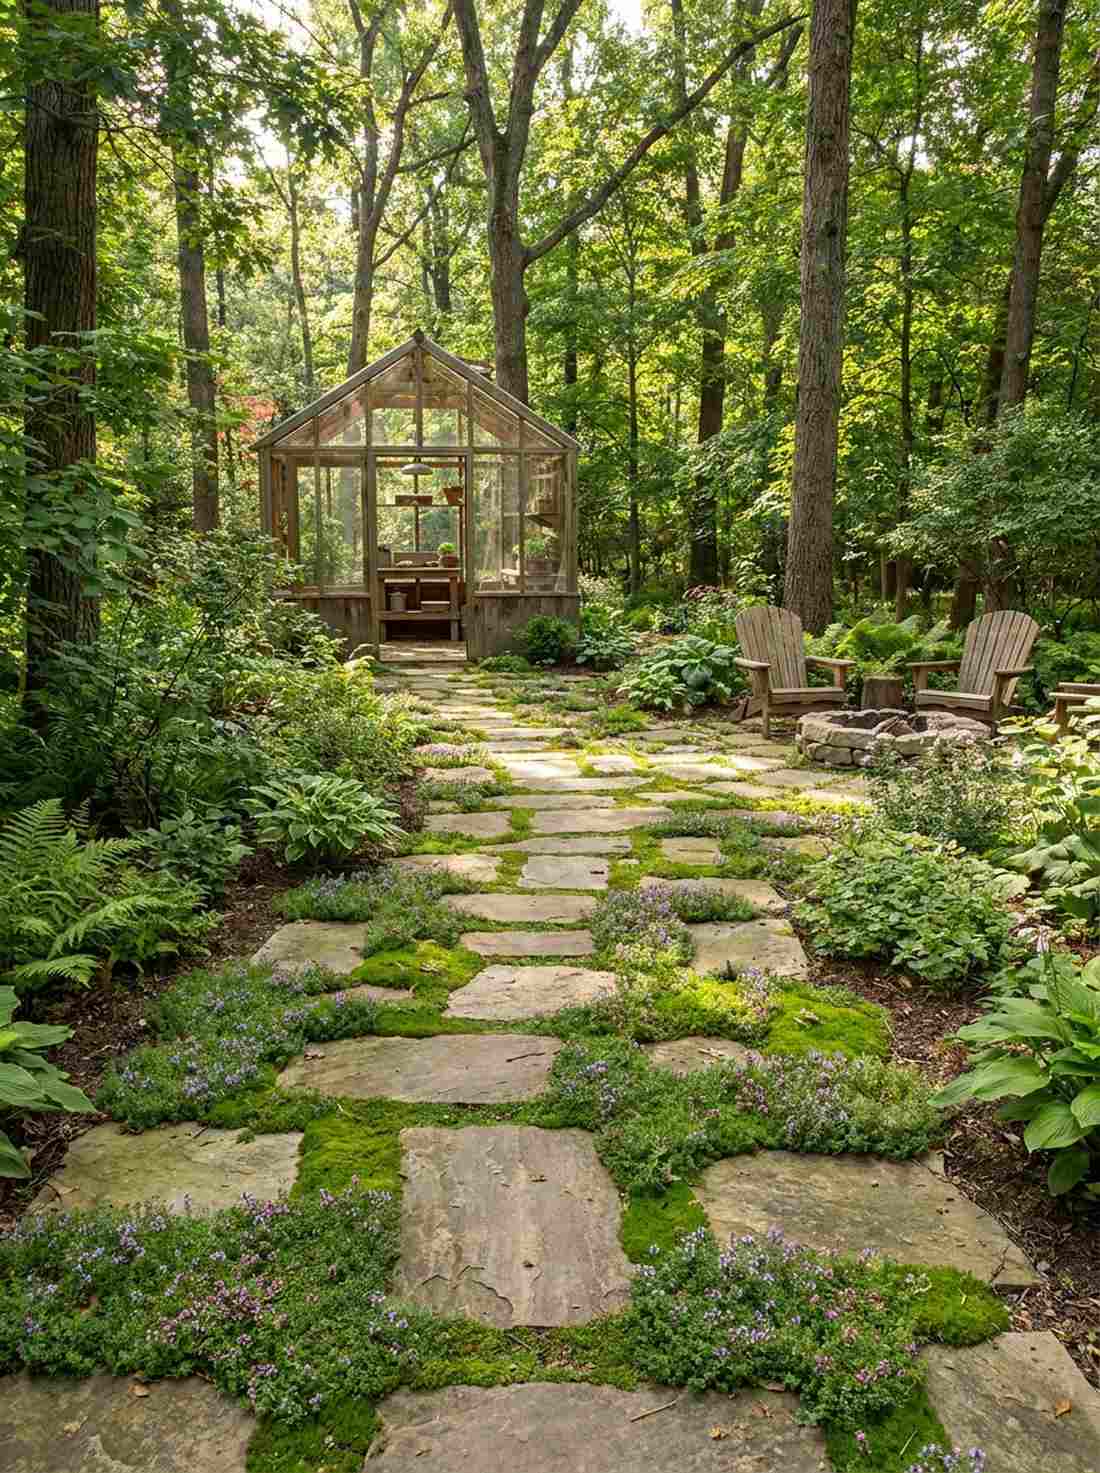
A lush, eco-friendly green-jointed garden walkway that practically breathes and feels alive beneath your feet. It looks breathtaking leading out to a garden greenhouse or woven through a dense, shady woodland area.
Pouring solid concrete causes massive rain runoff problems, but leaving intentional two-inch gaps allows nature to manage the water for you. Filling these deliberate voids with hardy groundcover seed starter kits creates a gorgeous, velvety green grid that is completely flood-proof.
Because you use fewer solid blocks, materials usually sit around $80 to $130. Pin this right now if you are obsessed with sustainable, green-thumb design ideas!
- Key Materials: Spaced pavers, creeping thyme/moss
- Vibe / Style: Enchanted woodland retreat
- Difficulty: Easy
- Budget Breakdown: Blocks: $60 | Soil/Seeds: $30.
- Creator’s Tip: Choose corsican mint or creeping thyme depending on how much direct sunlight the path gets.
- Smart Sourcing: creeping thyme bulk seed packets and organic gap filler soil.
20. Mortared Formal Path
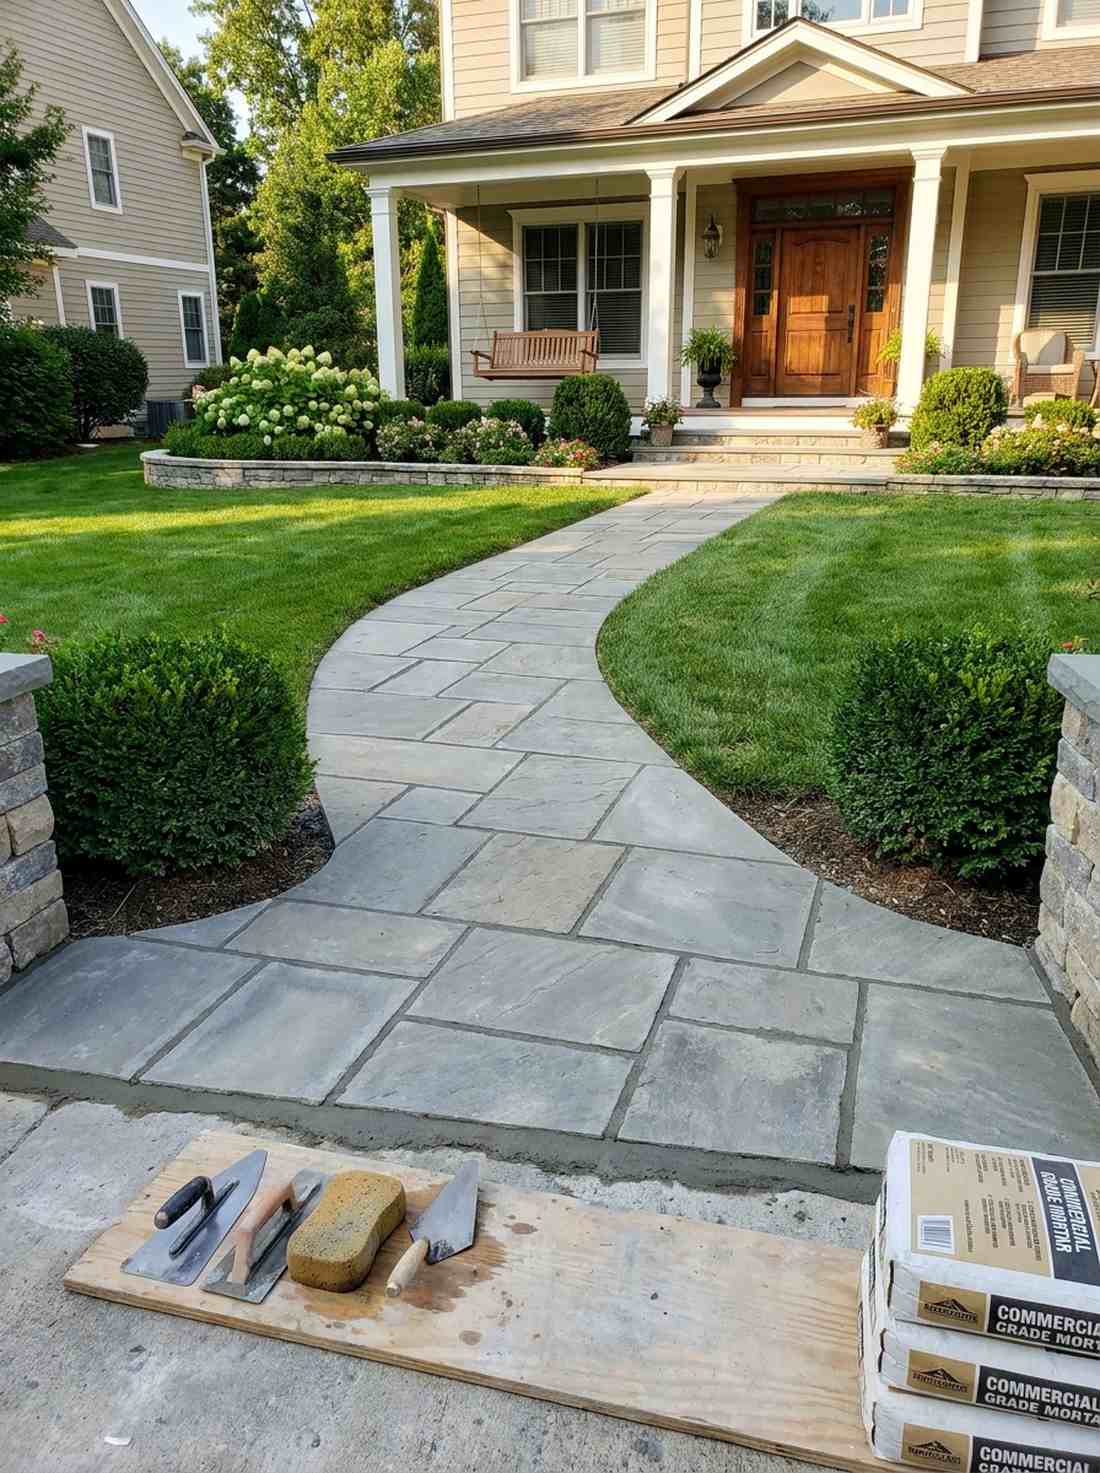
An ultra-durable commercial-grade masonry walkway that feels as permanent and solid as a city street. This is the non-negotiable standard for heavy-traffic public entrances or sloped walkways experiencing heavy snow-shoveling.
Loose sand setups are great for patios, but locking hardscape into a wet concrete base guarantees zero weeds and zero shifting over the decades. It requires significantly more labor upfront, but utilizing pre-mixed high-strength mortar kits secures a bulletproof surface that outlasts the house itself.
Factoring in the concrete slab, expect to spend $300 to $600 for a pristine entrance. It is the ultimate “one and done” investment for your home’s exterior.
- Key Materials: Wet mortar, concrete base, trowel
- Vibe / Style: Unbreakable traditional
- Difficulty: Advanced (requires wet concrete)
- Budget Breakdown: Blocks: $200 | Concrete/Mortar: $150.
- Creator’s Tip: Use a damp sponge to wipe the brick faces completely clean before the mortar permanently cures.
- Smart Sourcing: pre-mixed commercial grade mortar and professional masonry trowel sets.
21. Shadow Gap Modern Edge

A razor-sharp architectural floating border line that injects sleek, contemporary gallery vibes right into your backyard. Install this against stark white concrete retaining walls or modern black fencing to force a dramatic visual pop.
Jamming materials directly against each other looks amateurish, but leaving a deliberate negative-space reveal creates stunning shadow lines throughout the day. This highly disciplined technique elevates cheap materials into a premium visual simply by controlling the empty space perfectly.
This layout actually saves you money on cuts, costing around $50 to $90 for the run. Pin this to your modern outdoor architecture board!
- Key Materials: Clean-edged modern pavers, exact spacers
- Vibe / Style: High-end modern gallery
- Difficulty: Moderate (requires patience)
- Budget Breakdown: Materials: $70 | Spacers: $10.
- Creator’s Tip: Cut a 2-inch block of wood to use as a consistent spacer jig as you work down the line.
- Smart Sourcing: heavy-duty rubber spacer blocks and dark tinted leveling sand.
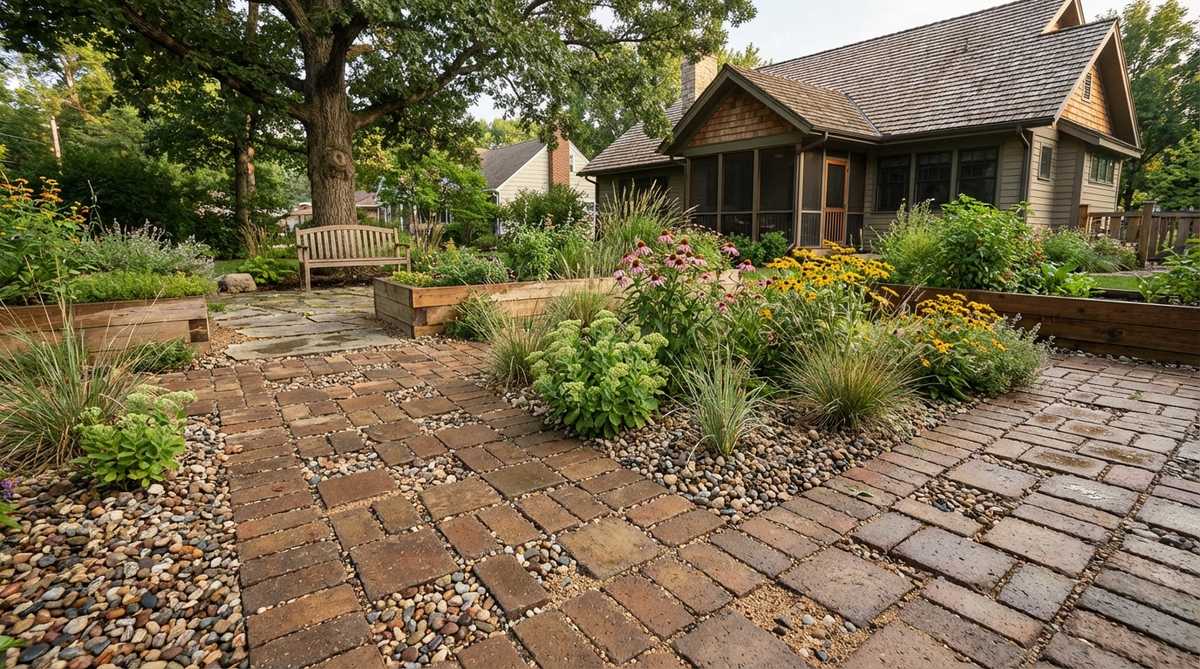
22. Brick and Gravel Combination
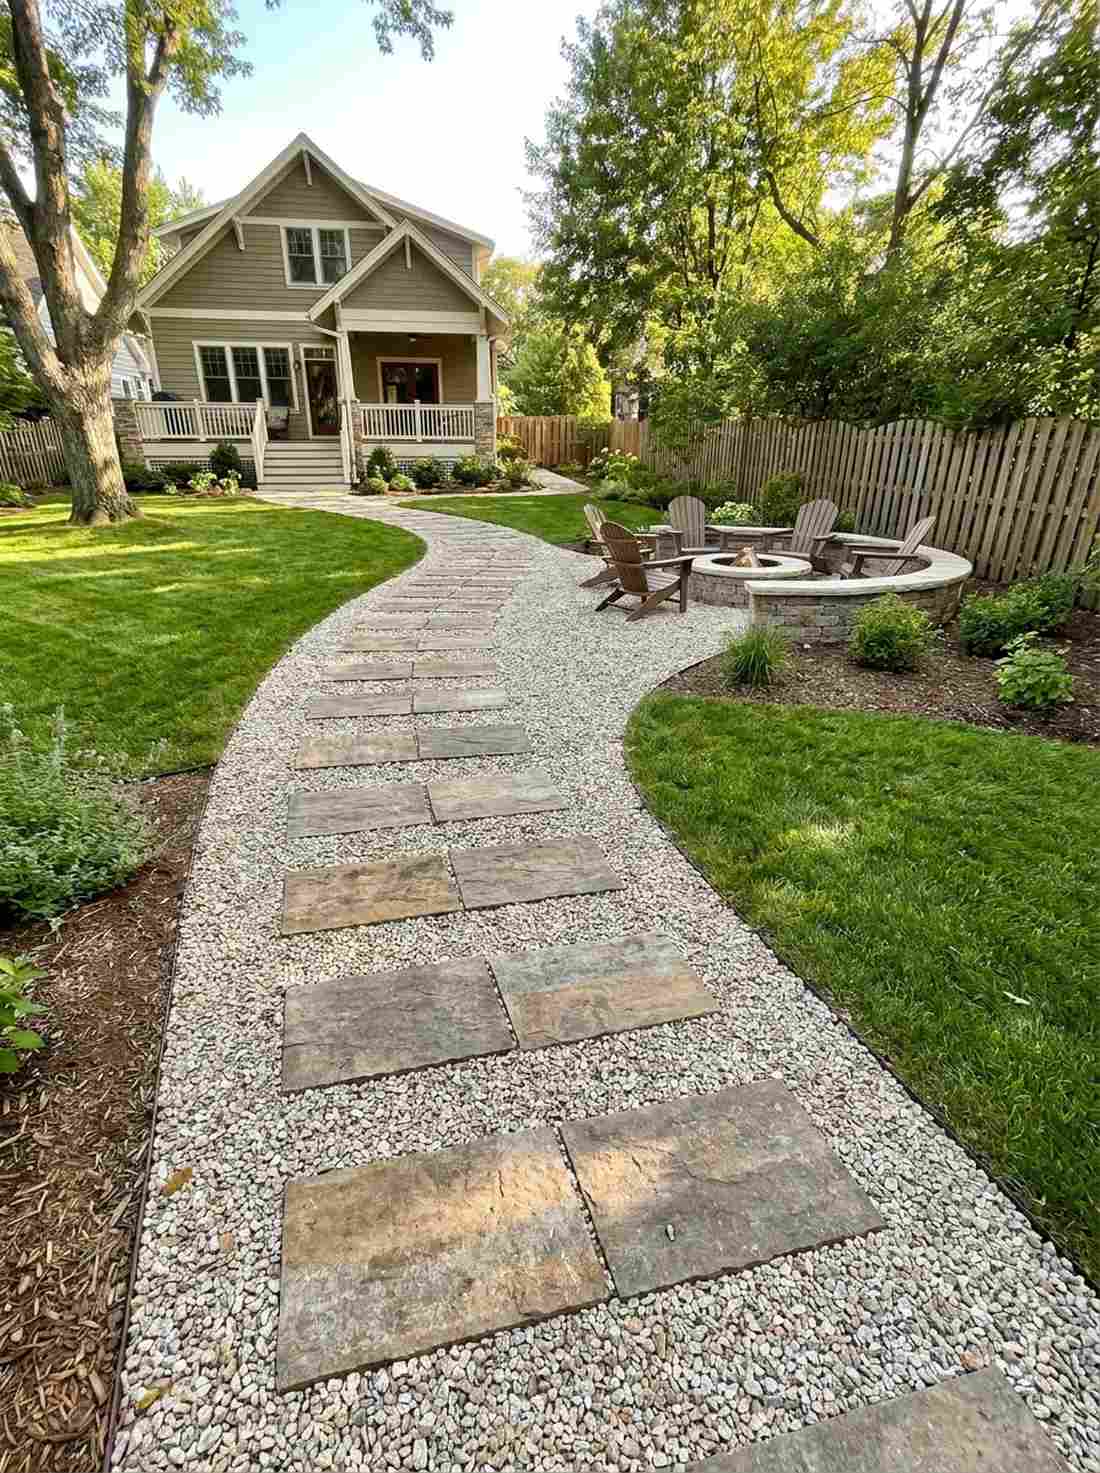
A highly textured mixed-media transit path that balances crisp geometric structure with satisfying, crunchy gravel. It is the absolute best solution for long side-yard utility paths or connecting the main house to a fire pit area.
Solid paving across a massive area drains your wallet instantly, but inserting solid step-strips into a bed of crushed stone delivers high-end aesthetic value for pennies. Installing a commercial grade weed barrier fabric underneath stops the stone from sinking into the mud, ensuring it looks pristine year-round.
Combining these elements drops your cost to an incredibly low $75 to $150 for a massive space. Save this genius hybrid hack for tackling large yards on a tiny budget!
- Key Materials: Stepping pavers, crushed granite
- Vibe / Style: Rustic modern hybrid
- Difficulty: Easy
- Budget Breakdown: Bricks: $40 | Gravel/Granite: $60.
- Creator’s Tip: Tamp the gravel down heavily in layers so it locks in place and doesn’t kick out into the grass.
- Smart Sourcing: commercial weed barrier fabric rolls and bulk decorative crushed granite.
23. Angled Header Course
A brilliant cross-grain threshold marker that acts as a visual speed bump signaling a transition into a new garden room. Place this tactile detail directly before garden steps or right where a patio meets a walkway.
A continuous path can feel like an airport runway, but turning the blocks perpendicular at key intersections tells the brain that the space’s function is changing. Master landscape architects rely on this subtle trick to create hierarchy and rhythm without buying expensive custom medallion inserts.
It costs zero extra dollars since you are just changing the layout orientation. It’s an incredibly smart, free upgrade that delivers massive psychological impact to your hardscape design.
- Key Materials: Same blocks used in main path
- Vibe / Style: Thoughtful and organized
- Difficulty: Easy
- Budget Breakdown: Extra costs: $0 (Uses existing material).
- Creator’s Tip: Use a slightly different colored block for the header to make the transition stand out even more.
- Smart Sourcing: color-enhancing paver sealer kits and heavy-duty push brooms.
Conclusion
These 23 meticulously curated layouts prove that high-end garden design using bricks doesn’t require a limitless budget or a massive construction crew. By applying strategic material sourcing and the right visual patterns, you can instantly turn a basic lawn into a highly structured, low-maintenance outdoor oasis. Grab those bulk starter kits, follow the strict base-layer prep guidelines, and watch your property value rise dramatically alongside your new luxury aesthetic.
Frequently Asked Questions
What is the strongest brick pattern for garden pathways?
Herringbone patterns in either a 45-degree or 90-degree orientation provide superior structural strength through extreme mechanical interlock. Because each unit supports multiple neighbors at right angles, it naturally resists lateral movement from heavy foot traffic or patio furniture. If you are building a high-traffic driveway or entertaining zone, investing in a heavy-duty paver starter kit and using a herringbone layout guarantees it will survive decades without shifting.
How deep should I dig for brick garden edging installation?
You must excavate trenches at least 4 to 6 inches deep for standard horizontal edging to allow room for a solid, compacted commercial-grade leveling sand base. If you are doing a vertical soldier course, you need a trench 6 to 8 inches deep so the blocks don’t tip over. Always calculate the actual material depth plus at least 2 inches for your compacted base layer to ensure a premium, freeze-proof result.
Can I install garden brick patterns without cutting bricks?
Absolutely; layouts like running bond, basket weave, and stack bond work perfectly along straight edges without ever requiring a masonry saw. Curved installations can also be executed without cuts if you allow the outer joints to fan slightly open. However, if you want the high-end look of herringbone or chevron, investing in premium diamond saw blades is mandatory to achieve those crisp, luxury diagonal cuts.
What type of bricks work best for outdoor garden pathways?
You must specifically source clay pavers rated for severe weather (SW-grade) with a compressive strength of at least 8,000 psi to prevent cracking. These dense units resist freeze-thaw cycles and maintain their rich color without fading under intense UV exposure. Never use cheap standard wall bricks for flat pathways; instead, opt for heavy-duty interlocking clay pavers designed specifically to handle ground moisture and foot traffic.
How do I prevent weeds from growing between garden bricks?
The ultimate secret is installing a heavy-duty landscape weed barrier fabric roll completely underneath your base layer before placing a single block. Once laid, sweep a high-quality polymeric jointing sand kit into the gaps and activate it with water so it hardens like concrete while remaining flexible. This dual-layer defense completely chokes out root systems and keeps your premium patio looking pristine all year.