Imagine stepping out your back door into a lush, custom-designed sanctuary that feels like a 5-star woodland resort you exclusively booked for the weekend. In this guide, you’ll find realistic cost estimates, material options, and smart sourcing ideas to help you build these stunning garden decor wood projects without overspending. The best part? Many of these setups use surprisingly cheap, accessible components but deliver a completely high-end, designer-level outdoor oasis.
Design Snapshot Key Principles
- Material Selection: Match wood type to project durability requirements—use treated timber for structural pieces, driftwood for decorative accents, and bark for functional ground applications.
- Weather Protection: Apply appropriate sealants to preserve wood grain while extending lifespan through seasonal temperature fluctuations and moisture exposure.
- Sustainable Sourcing: Prioritize reclaimed timber, naturally fallen branches, and ethically harvested materials to reduce environmental impact while adding character.
- Visual Balance: Combine wood textures with complementary plantings and hardscape elements to create cohesive outdoor rooms that feel intentional.
Structural Timber Projects for Garden Framework
Timber forms the backbone of functional garden design, providing durable structures that define spaces and support plant growth. These projects require basic carpentry skills and untreated or sustainably treated wood appropriate for outdoor exposure.
1. Raised Cedar Planting Beds
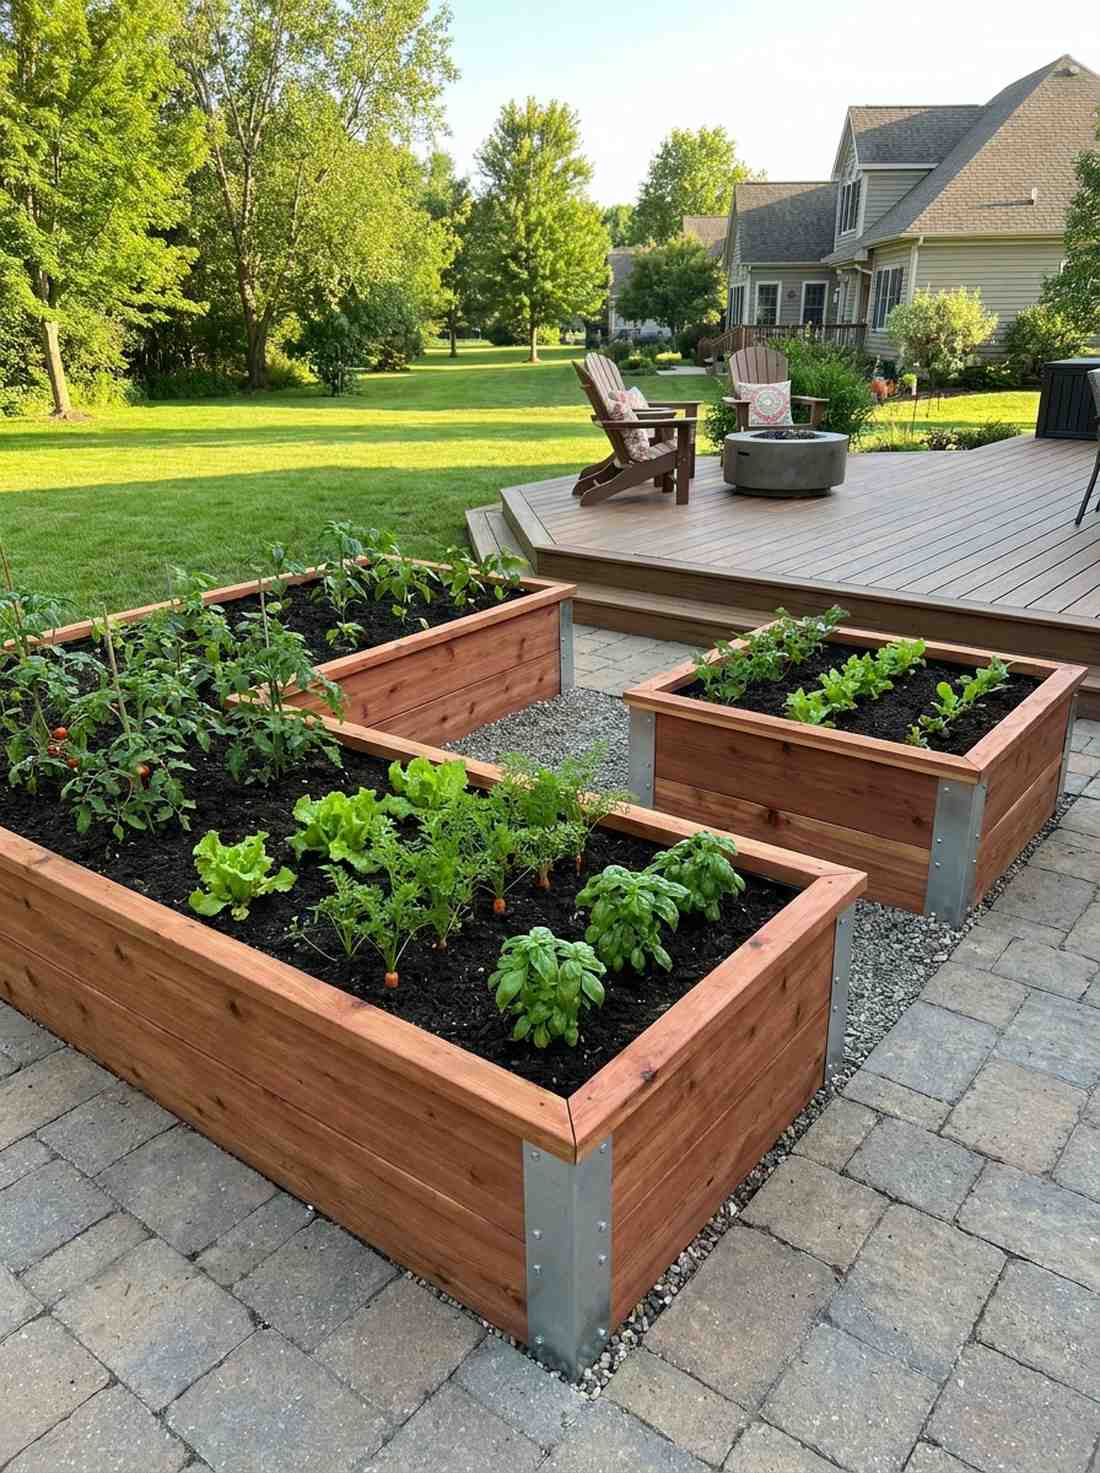
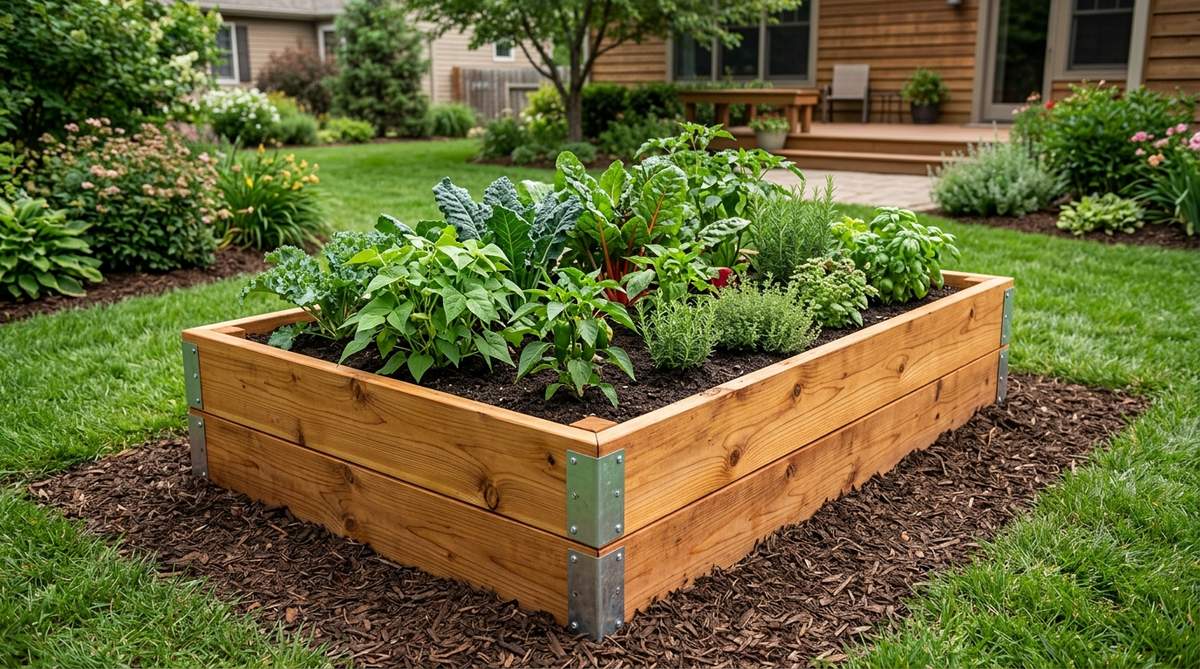
There is something incredibly satisfying about harvesting your own vegetables from a setup that feels like a chic countryside estate. This modern garden decor wood aesthetic works exceptionally well for sunny backyard corners or patio perimeters where you want highly controlled soil.
Construct these boxes using robust boards connected by galvanized brackets for a pristine, sharp-cornered finish. This exact layout delivers a surprisingly premium look, elevating basic vegetable growing into high-end landscape architecture.
You can realistically build a sturdy base for about $40 to $90, depending on lumber dimensions. Pin this to your spring garden planning board so you don’t lose the inspiration!
- Key Materials: Pre-cut cedar planks, galvanized steel corner brackets, heavy-duty weed barrier.
- Vibe / Style: Structured farmhouse elegance.
- Difficulty: Beginner-friendly weekend build.
- Budget Breakdown: Wood: $45 | Brackets & Hardware: $15 | Soil/Barrier: $25.
- Creator’s Tip: Line the inside walls with heavy plastic (leaving the bottom open) to dramatically extend the wood’s lifespan by preventing direct wet soil contact.
- Smart Sourcing: Pre-cut rot-resistant cedar kits and bulk-pack heavy duty steel corner brackets.
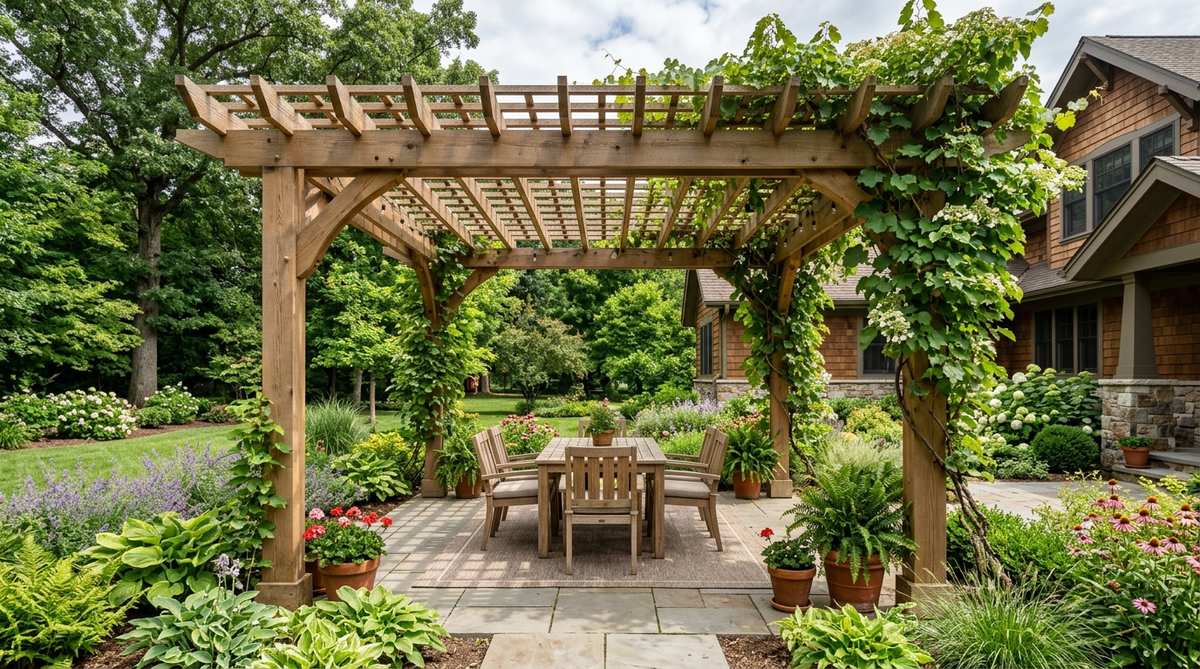
2. Timber-Framed Garden Arbor
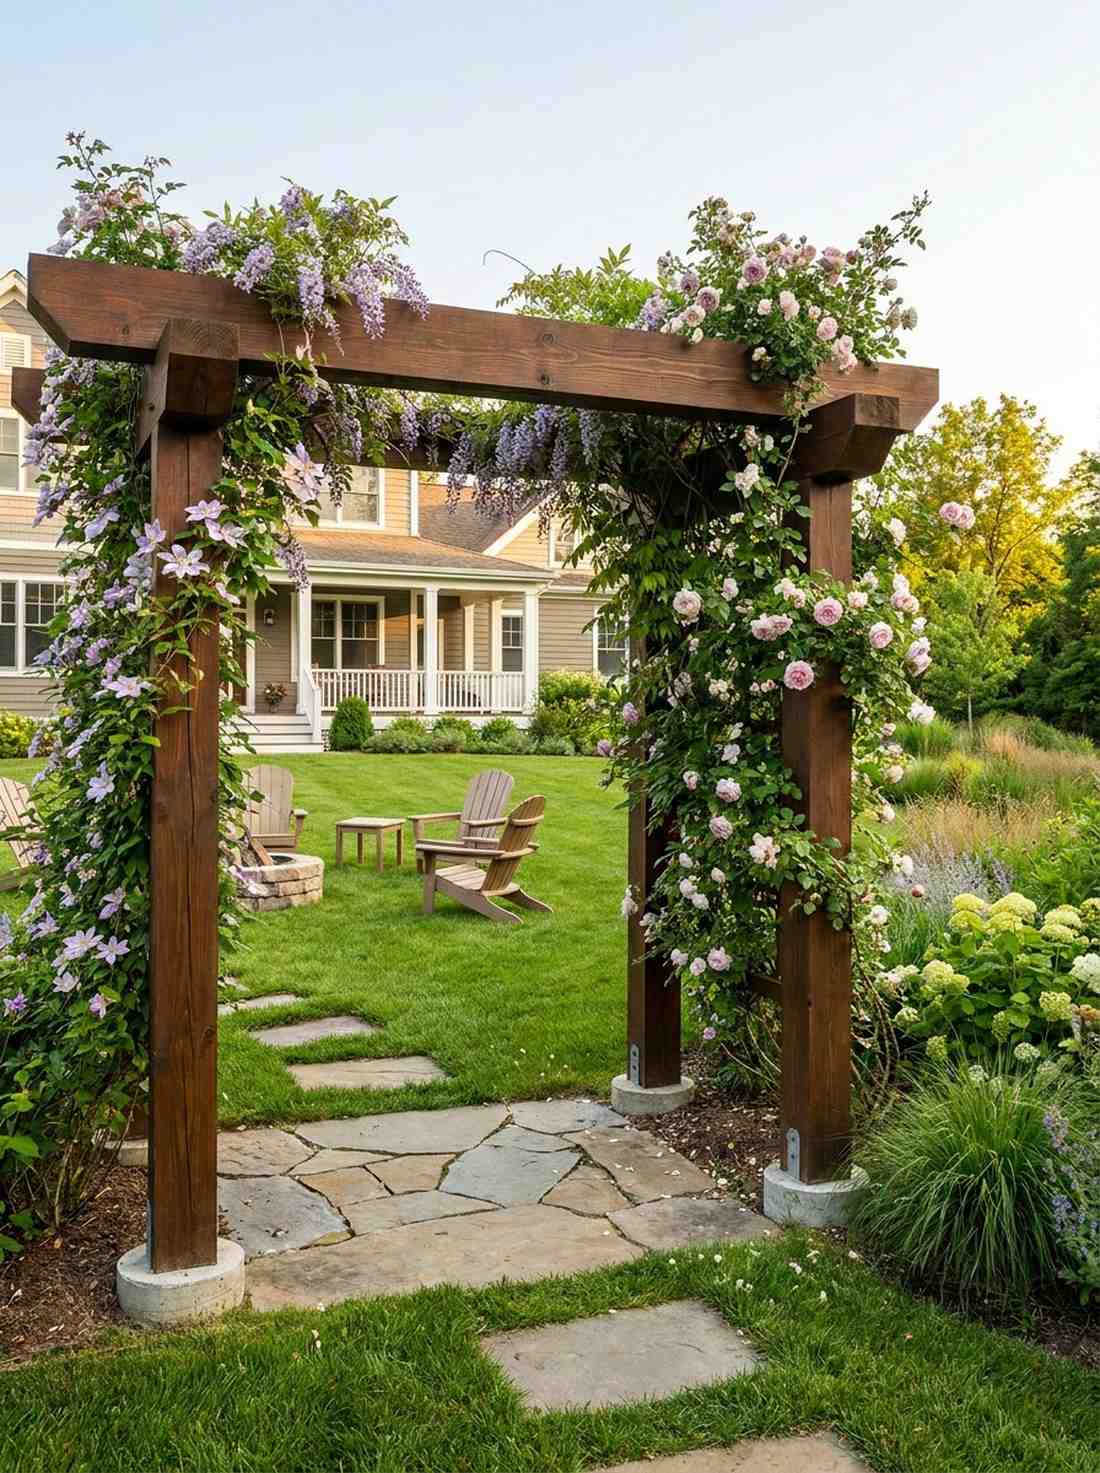
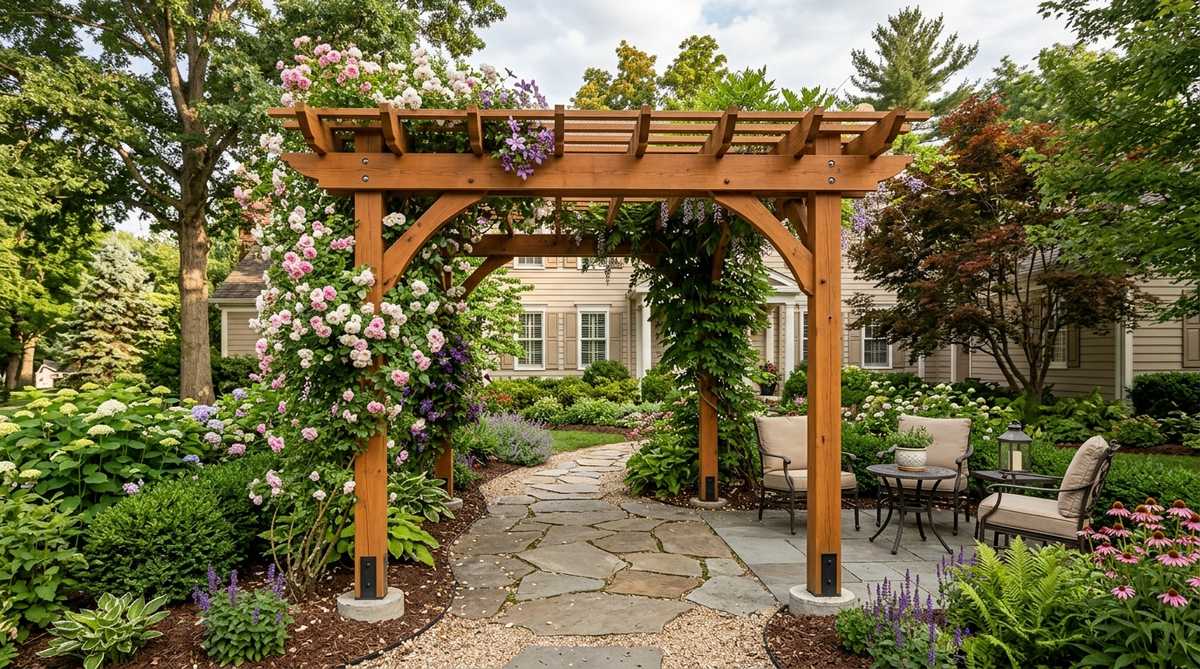
Imagine walking through a lush, vine-covered entryway that feels straight out of a botanical garden romance. This wood garden decor ideas concept is the perfect use-case for defining the transition between a manicured lawn and a wilder garden space.
Anchor thick vertical posts in concrete, adding heavy top beams to create an imposing, permanent focal point. Most people settle for flimsy wire arches, but this chunky wood approach gives a designer-level finish that drastically boosts backyard appeal.
A solid DIY arbor usually runs between $100 and $200 in raw materials. It’s a weekend upgrade that completely transforms the entire vibe of your property.
- Key Materials: 4×4 pressure-treated posts, quick-set concrete, exterior-grade wood stain.
- Vibe / Style: Grand botanical garden entrance.
- Difficulty: Intermediate (requires measuring and post-hole digging).
- Budget Breakdown: Lumber: $80 | Concrete: $15 | Hardware/Stain: $30.
- Creator’s Tip: Stain the wood *before* assembling or planting vines near it to ensure a completely even, drip-free finish.
- Smart Sourcing: Fast-setting structural concrete mix and UV-blocking exterior timber stain.
3. Chunky Timber Garden Benches
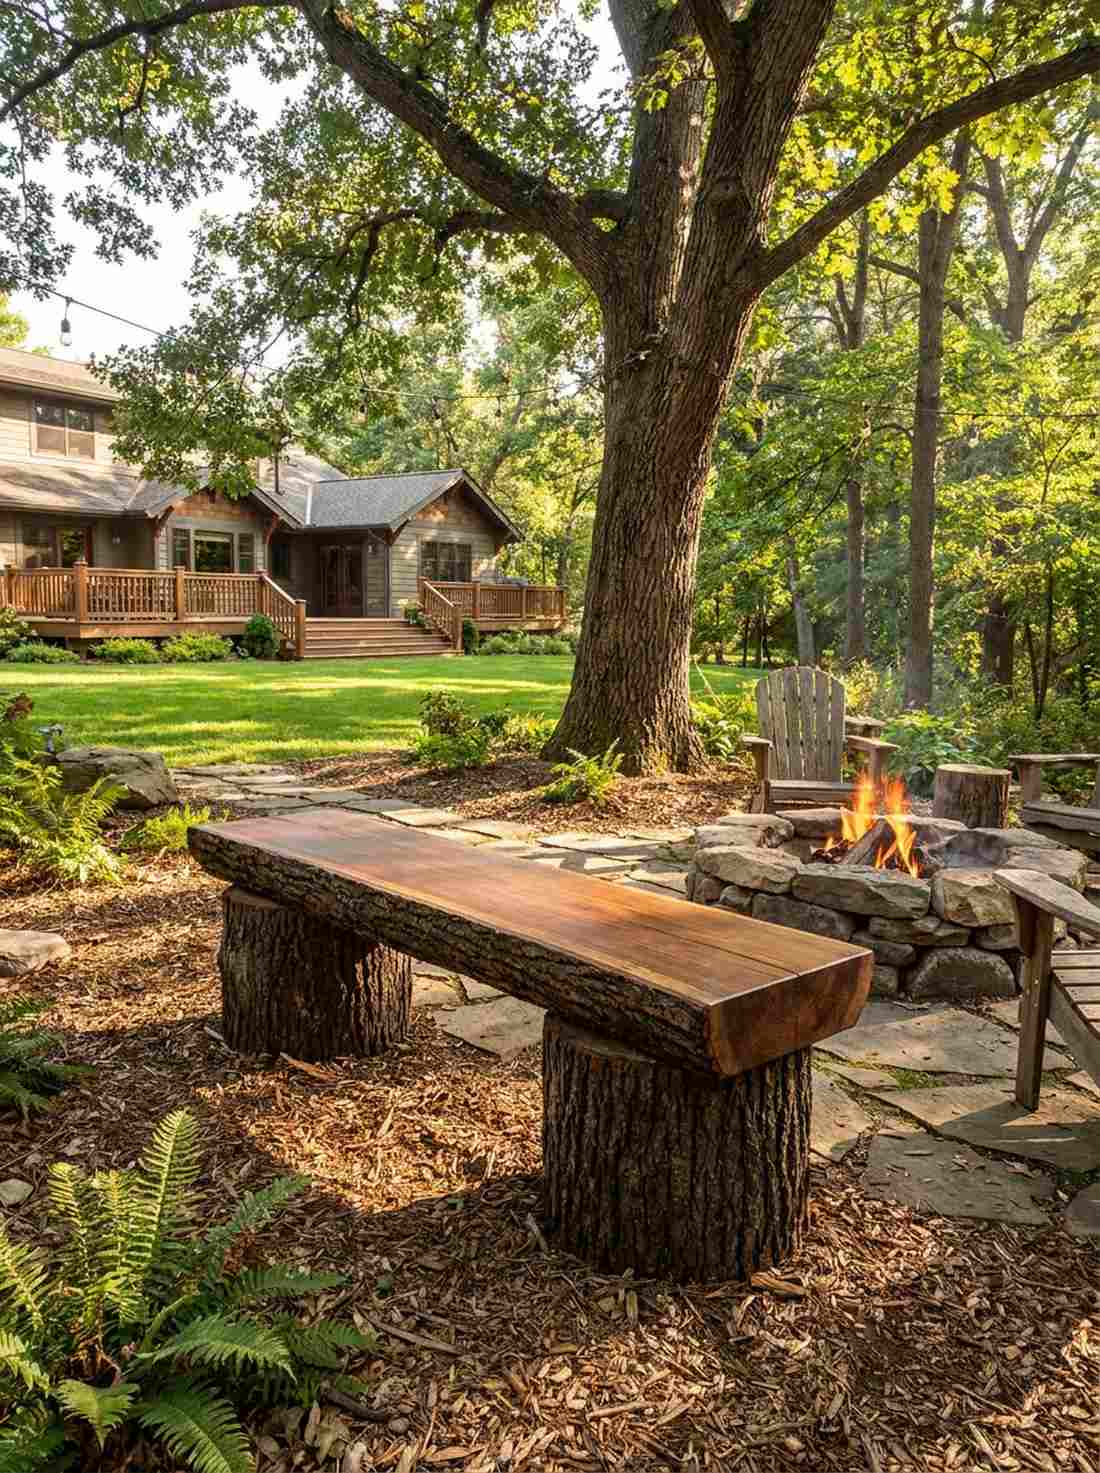
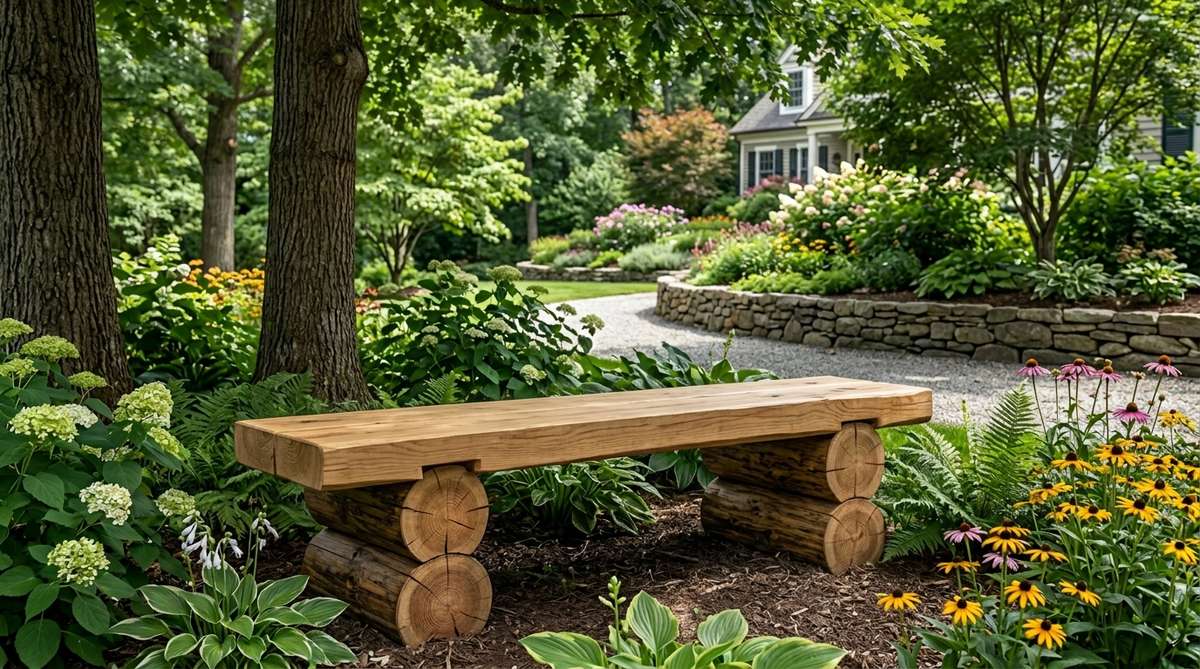
This seating arrangement feels like a quiet meditation spot you stumbled upon in a hidden forest. Using heavy logs for seating is a brilliant woodland garden decor strategy, working flawlessly beneath large shade trees or alongside fire pits.
Top two thick log rounds with a smoothly sanded, heavy plank secured firmly with hidden lag screws. This rugged, minimalist approach looks far more expensive than it is, completely bypassing the flimsy look of big-box store patio furniture.
You can often source the materials for under $30 if you contact local tree service companies. Save this idea for when you need heavy, storm-proof outdoor seating.
- Key Materials: Salvaged hardwood logs, thick timber planks, exterior polyurethane sealant.
- Vibe / Style: Rustic forest retreat.
- Difficulty: Easy (mostly sanding and sealing).
- Budget Breakdown: Wood: $0-$20 | Hardware: $5 | Sealant: $15.
- Creator’s Tip: Strip the bark off the seat plank but leave it on the base logs for a stunning, high-contrast textural effect.
- Smart Sourcing: Heavy-duty structural lag screws and marine-grade clear wood epoxy.
4. Pressure-Treated Retaining Walls
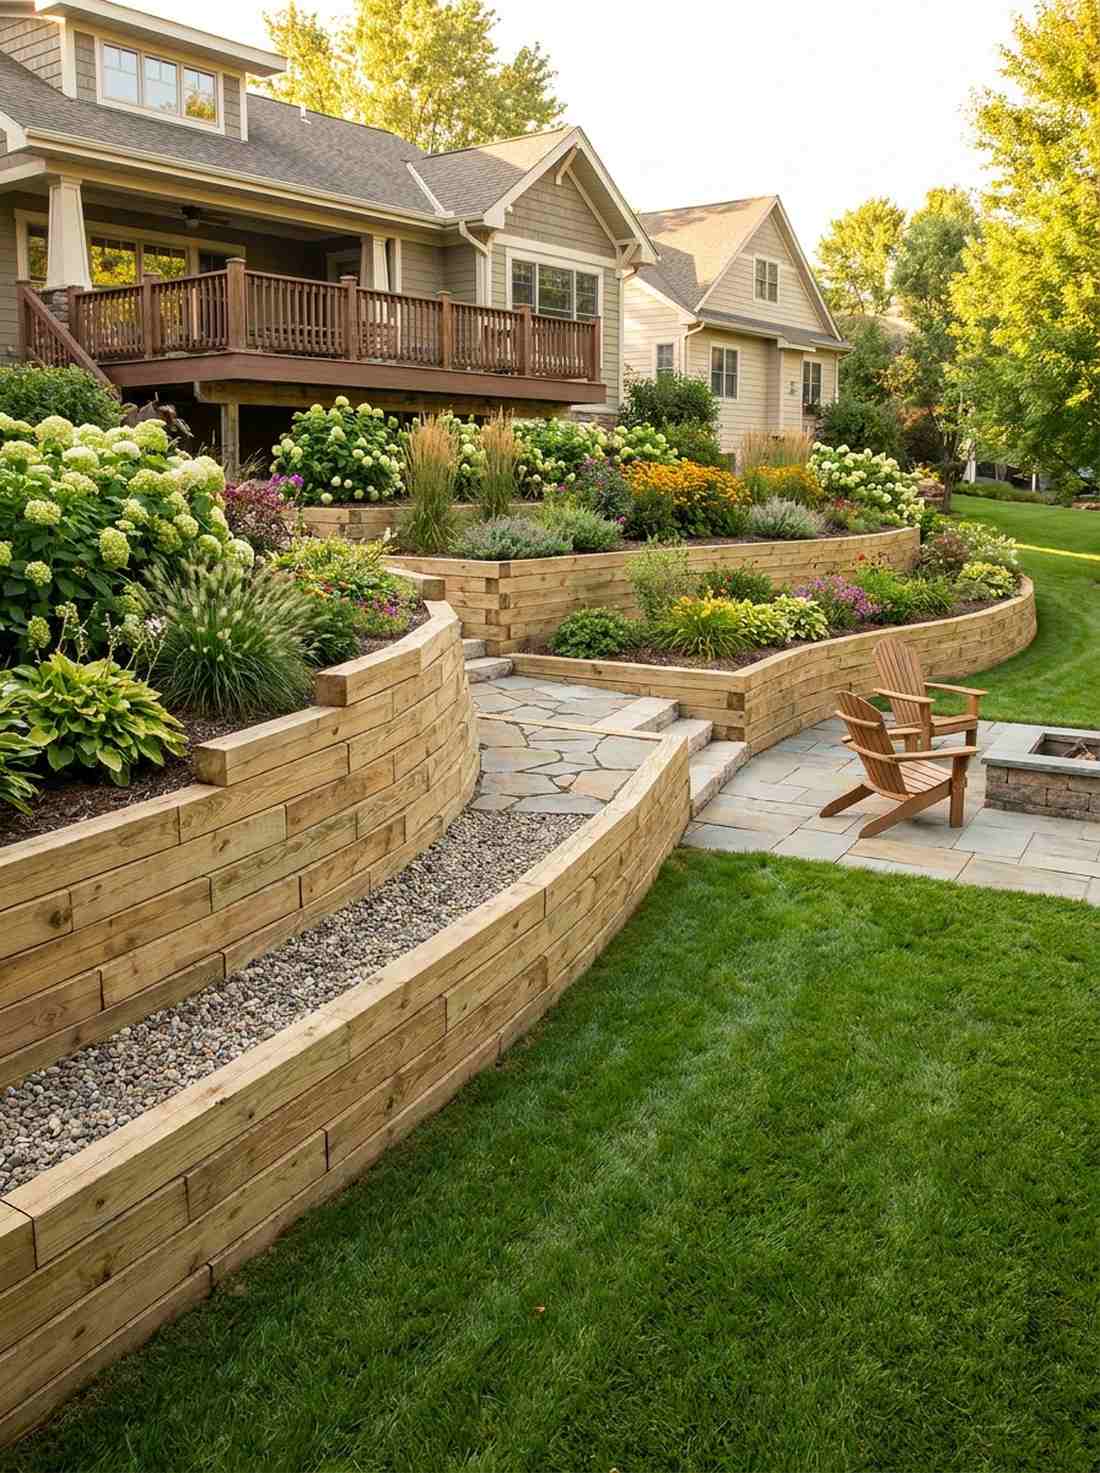
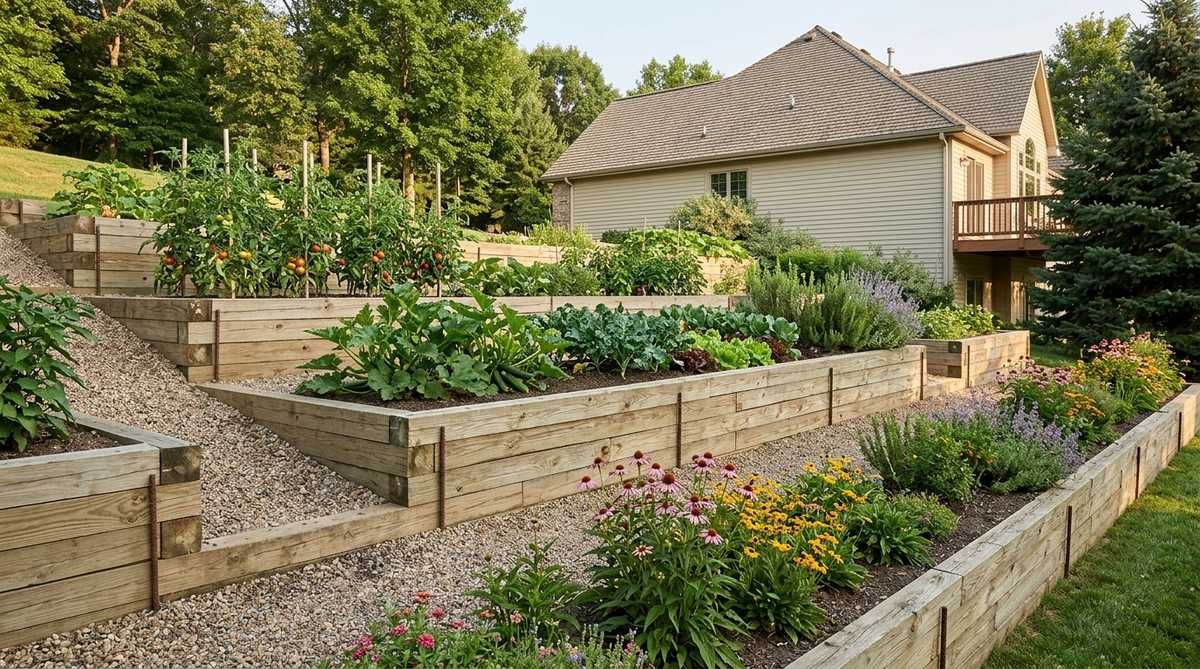
Nothing tames a chaotic, sloping yard quite like neat, terraced borders that feel like a professionally sculpted mountainside. This heavy-duty wood decor for garden layout is perfect for transforming unusable hills into prime planting real estate.
Stack heavy landscape timbers in an overlapping brick pattern, pinning them into the earth with thick rebar. Doing this right immediately adds structural integrity and presents a bespoke, high-end landscape architecture look without the masonry price tag.
Depending on the wall’s length, expect to spend around $150 to $300 to do it correctly with proper drainage.
- Key Materials: Pressure-treated 4×4 or 6×6 timbers, 2-foot steel rebar spikes, drainage gravel.
- Vibe / Style: Clean, structured landscaping.
- Difficulty: Advanced (requires heavy lifting and leveling).
- Budget Breakdown: Timbers: $120 | Rebar: $30 | Gravel base: $40.
- Creator’s Tip: Always install a perforated drain pipe behind the bottom row of timber to prevent water pressure from blowing out your wall during heavy rain.
- Smart Sourcing: Bulk-pack galvanized landscaping spikes and heavy-duty woven geotextile fabric.
Most people get their garden spacing completely wrong… until they try the exact pathway layout coming up next. It instantly makes any yard look twice as big!
5. Wooden Garden Pathways
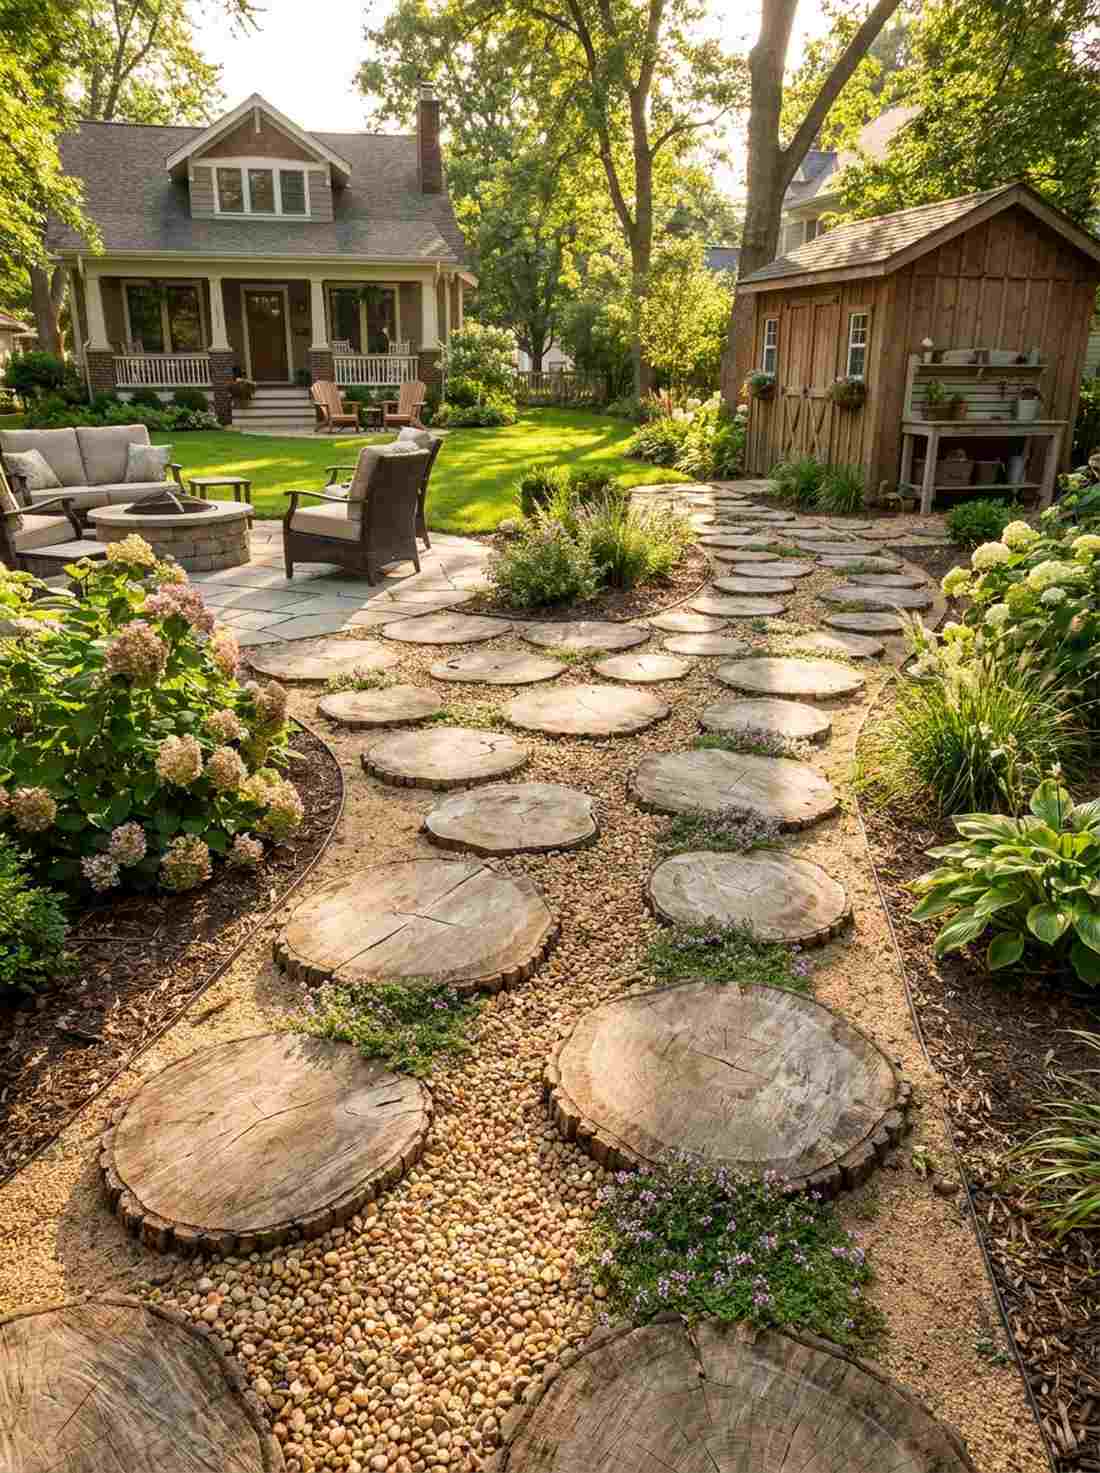

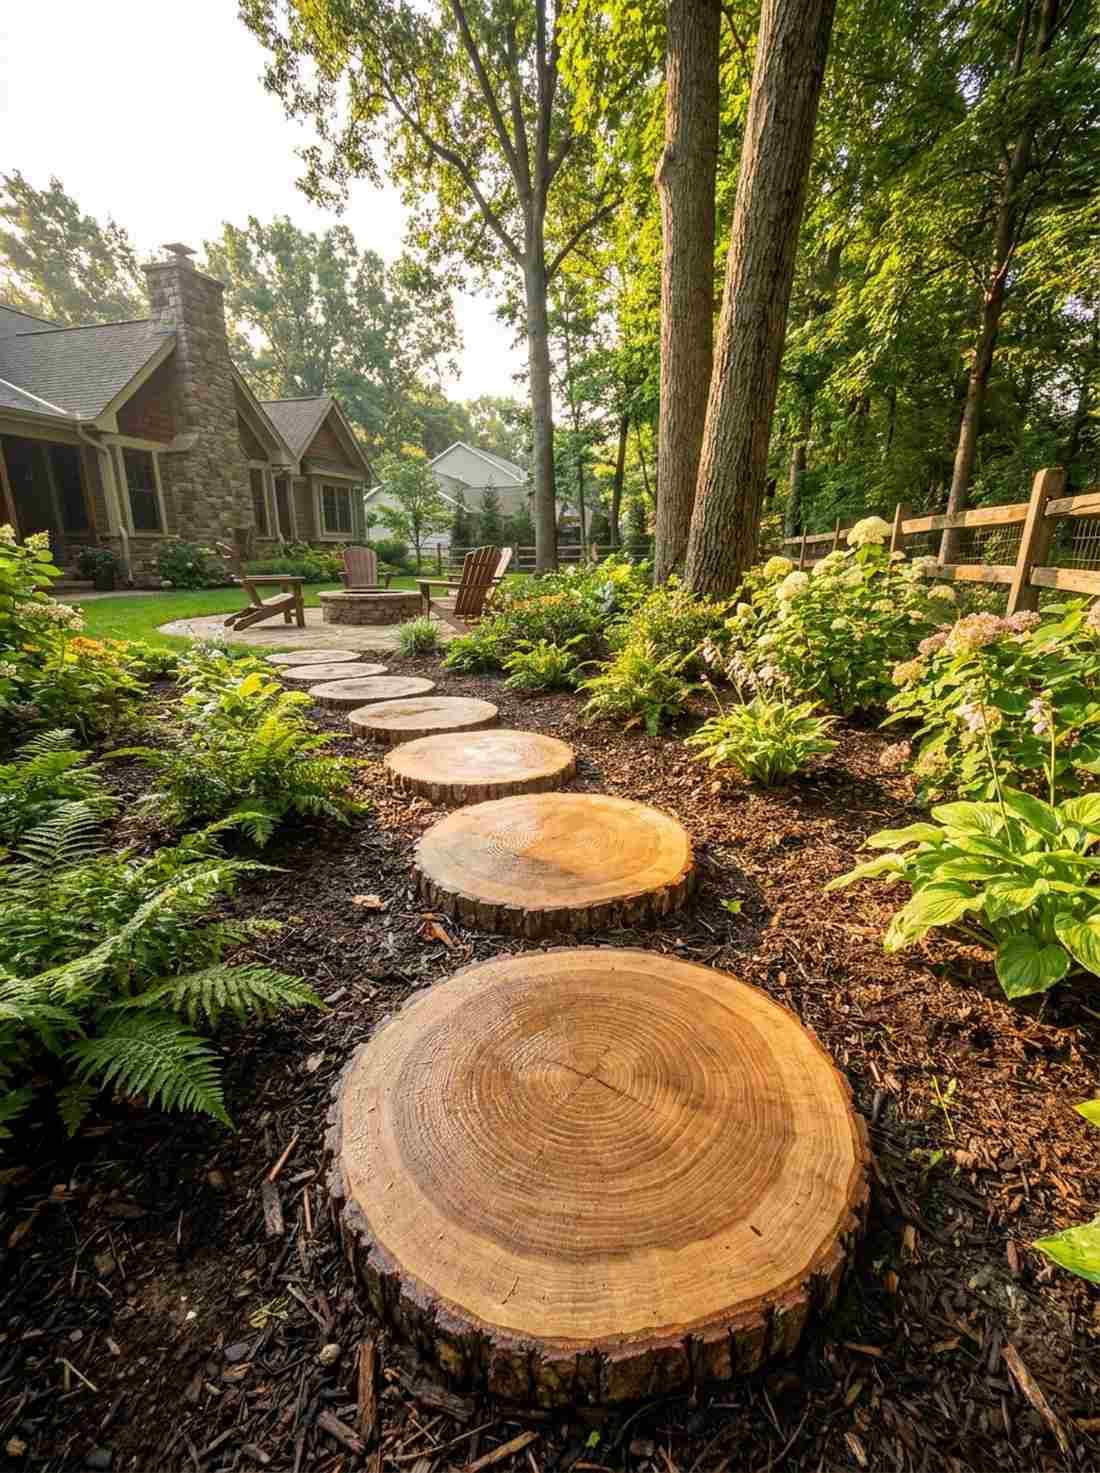
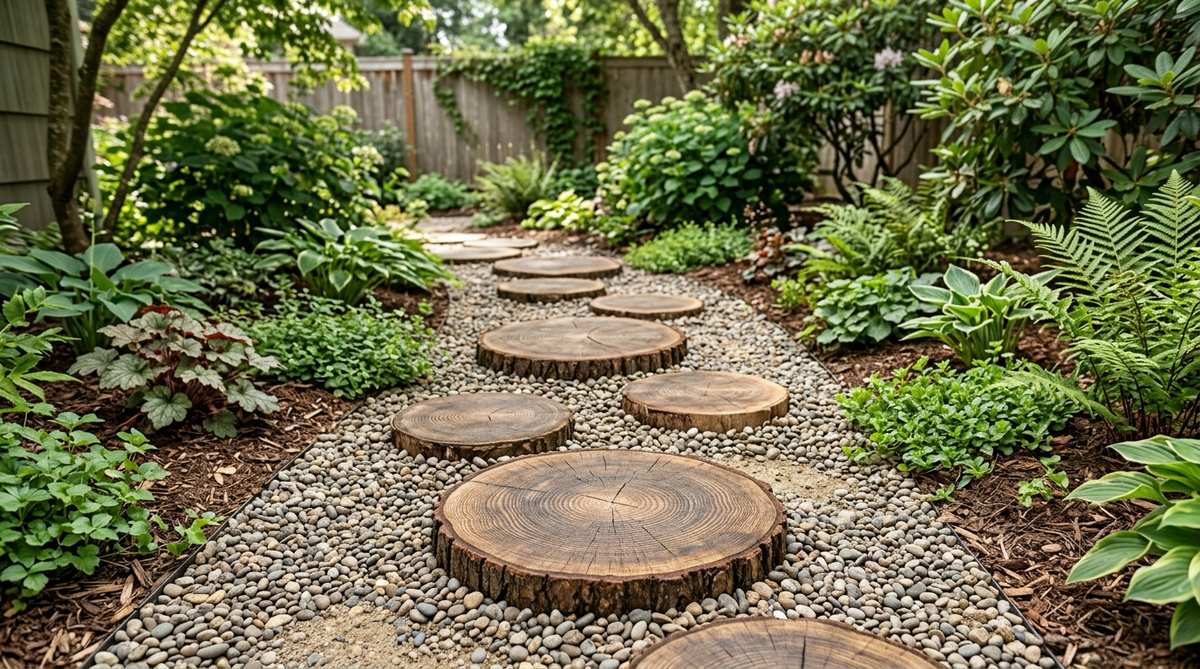
Picture wandering down a meandering trail that feels like a fairytale woodland crossing right in your backyard. A rustic stepping-stone path is the ultimate diy garden decor wood project for connecting disjointed patio areas to garden sheds.
Embed thick, flat log slices into a bed of soft sand, filling the gaps with contrasting pea gravel or creeping thyme. This layout creates an aggressively cozy aesthetic that completely outshines boring concrete or standard paving stones.
If you cut the wood yourself, this entire pathway can be created for about $40 in sand and gravel. Pin this right now if you want a weekend project that gets instant compliments!
- Key Materials: Hardwood log slices (3-inch thick), leveling sand, decorative river rock or pea gravel.
- Vibe / Style: Storybook cottage core.
- Difficulty: Easy but labor-intensive.
- Budget Breakdown: Wood slices: $0-$30 | Sand base: $15 | Gap filler: $20.
- Creator’s Tip: Soak the bottom of each wood slice in a wood preservative before setting them in the earth to prevent them from rotting away in just one season.
- Smart Sourcing: Pre-cut kiln-dried wood slices (bulk pack) and copper-based wood preservative solutions.
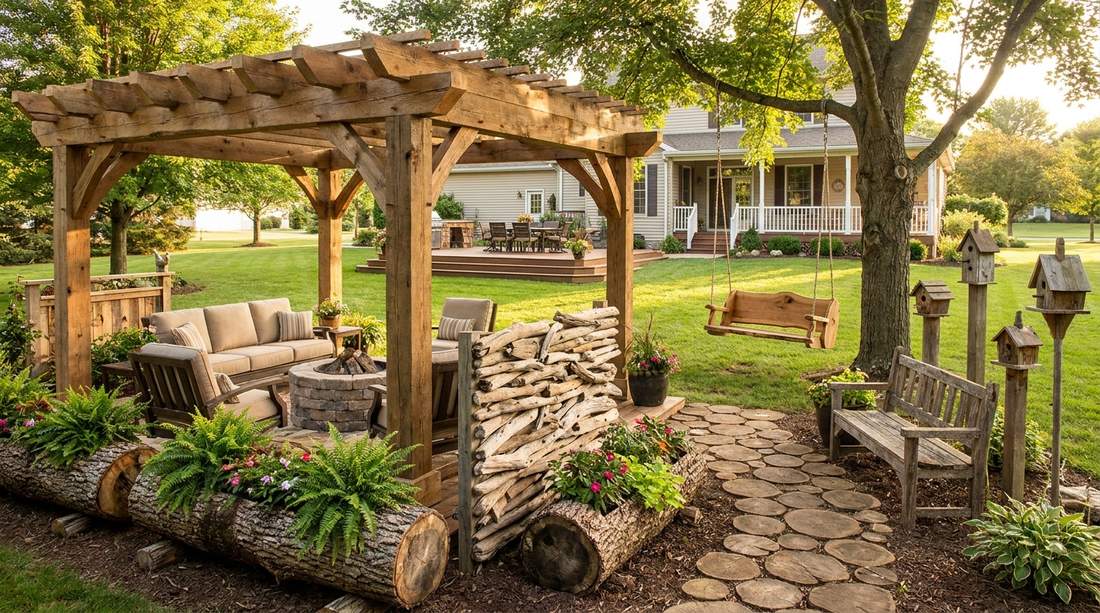
6. Timber Pergola with Shade Lattice
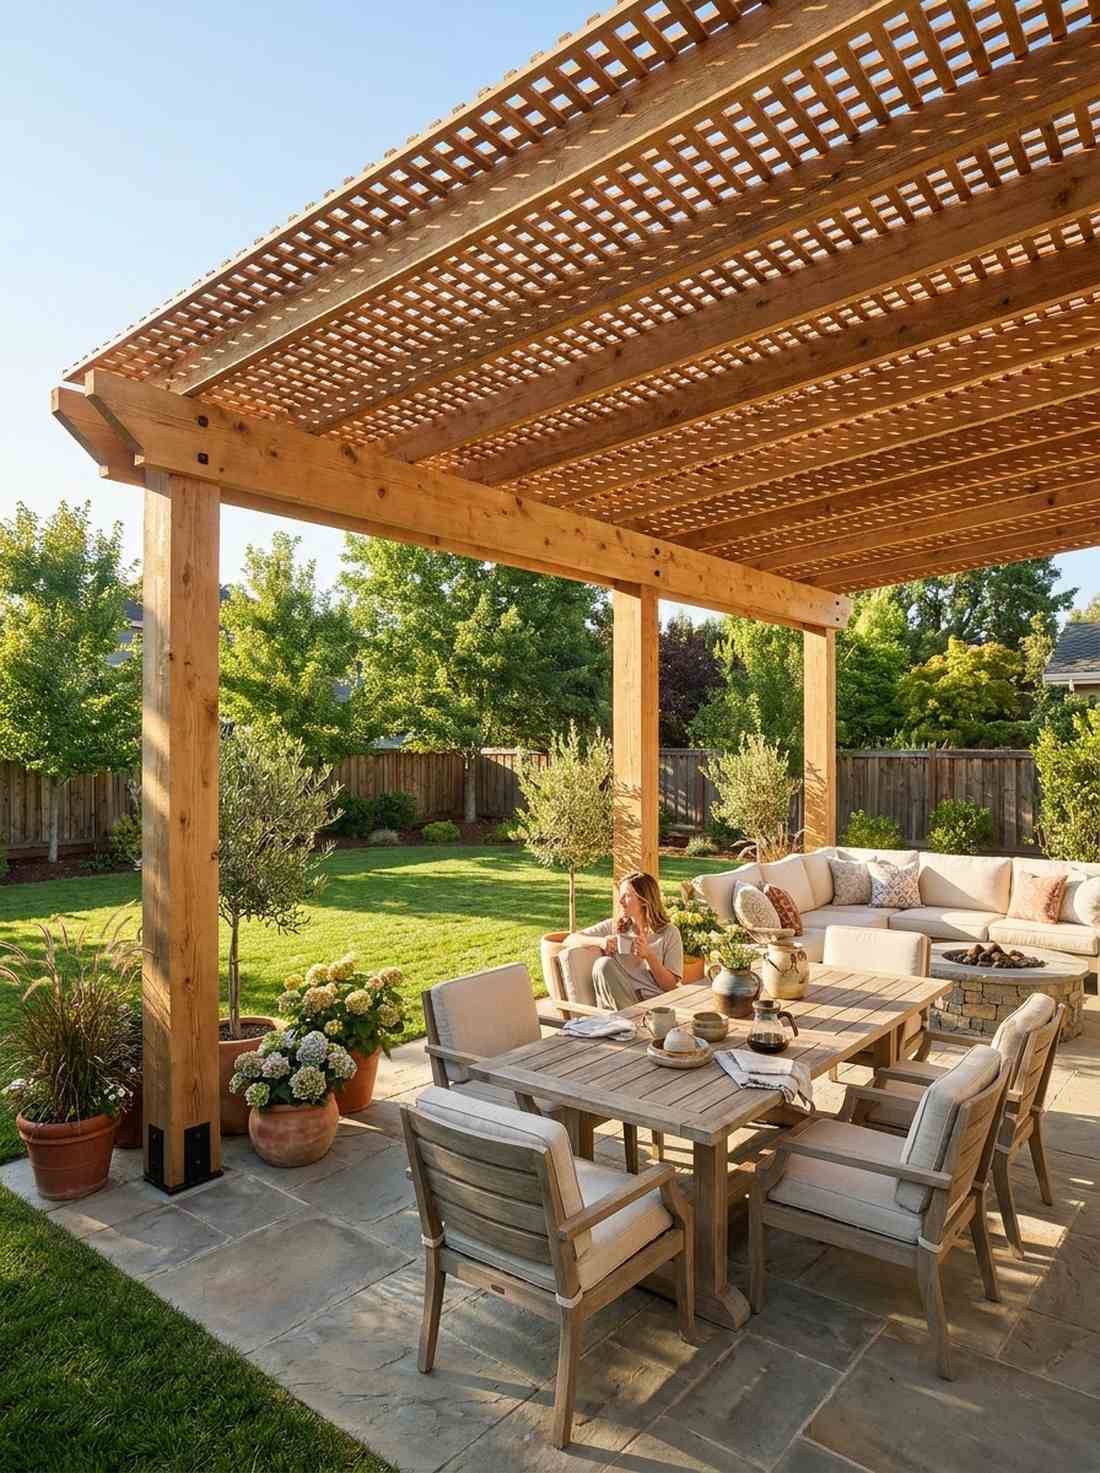
Imagine sipping your morning coffee under a dappled canopy that feels like an exclusive Mediterranean outdoor lounge. This massive garden decor wood installation is the absolute best use-case for defining a dining area on a plain, sun-baked patio.
By layering a tight wooden grid over sturdy structural rafters, you create the perfect blend of sunlight and cool shade. This architectural upgrade instantly skyrockets your home’s exterior appeal, delivering a phenomenally premium look.
A robust DIY pergola will cost anywhere from $300 to $800, which is thousands cheaper than hiring a contractor. Highly recommended for a high-impact property upgrade.
- Key Materials: 6×6 anchor posts, 2×8 cross beams, pre-made wooden lattice panels, heavy-duty post brackets.
- Vibe / Style: Luxury resort patio.
- Difficulty: Advanced (requires multiple people and ladders).
- Budget Breakdown: Main Lumber: $250 | Hardware & Anchors: $80 | Lattice & Trim: $100.
- Creator’s Tip: Bolt the base brackets directly into your concrete patio using masonry anchors rather than digging holes, saving you hours of exhausting labor.
- Smart Sourcing: Powder-coated steel post base brackets and UV-resistant pre-cut wood lattice panels.
Driftwood Decorative Elements and Artistic Accents
Driftwood’s weathered silvery-gray tones and sculptural forms bring coastal charm to inland gardens. These lightweight pieces require minimal processing while delivering maximum visual impact through their organic shapes.
7. Driftwood Garden Wall Art
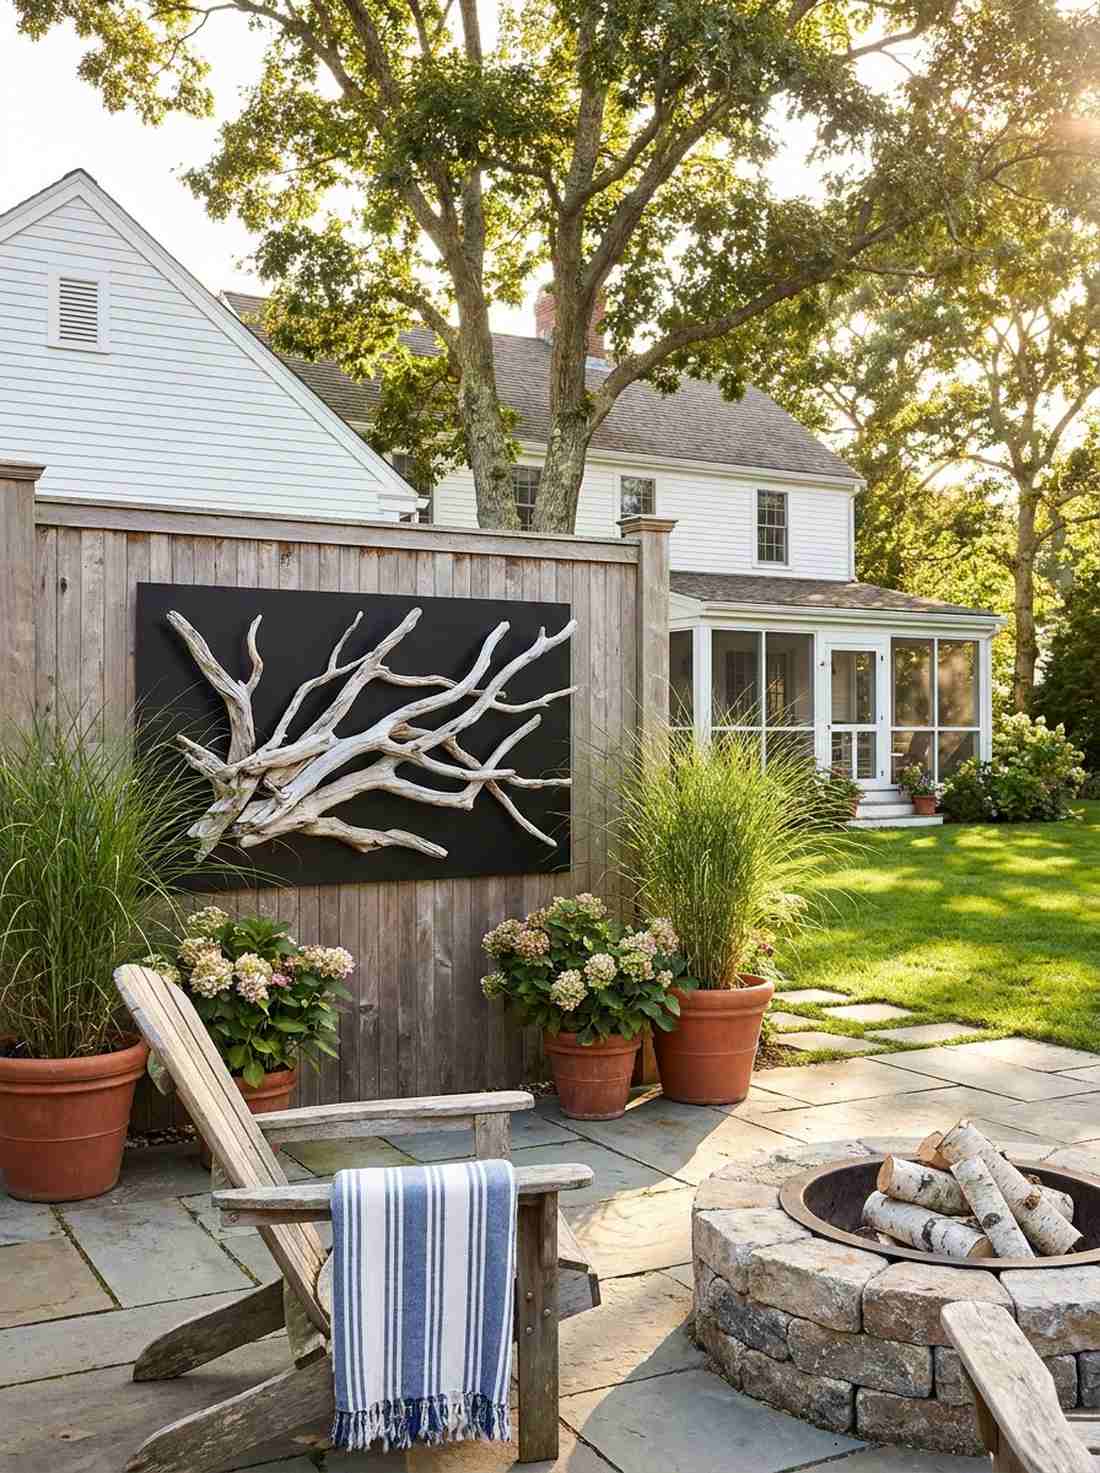
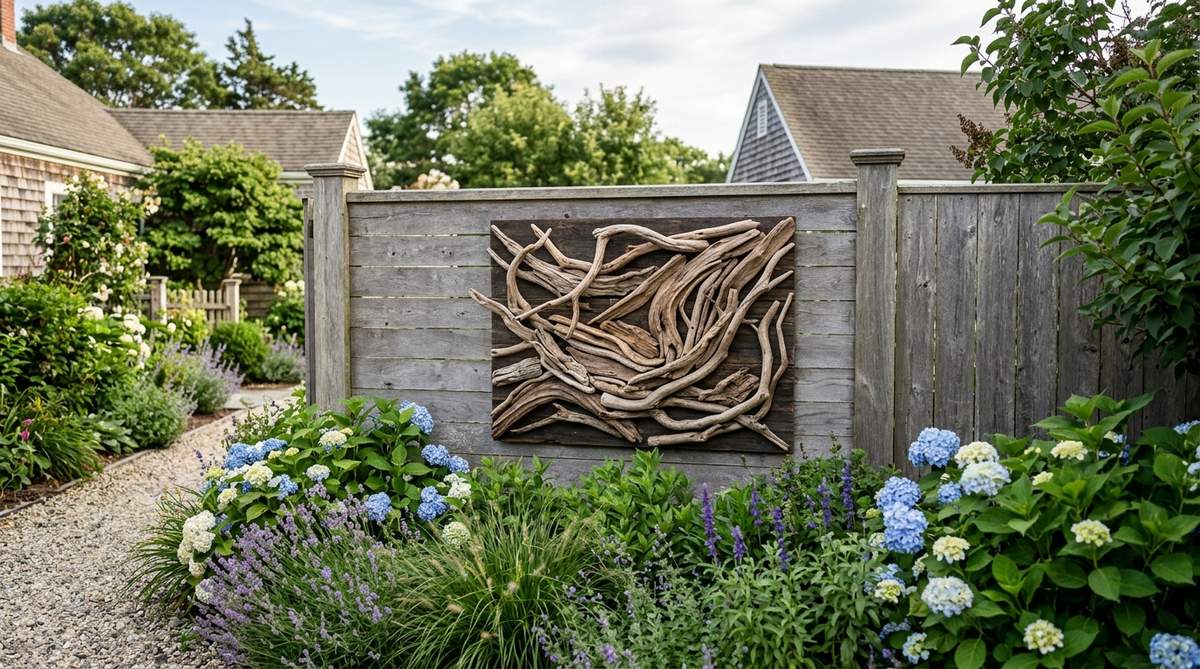
Turn a boring wooden fence into a gallery wall that radiates relaxed, beach-house energy. Utilizing found coastal branches is a brilliant wood garden decor ideas strategy for dressing up blank shed walls or boring balcony partitions.
Mount uniquely twisted driftwood pieces onto a dark, weatherproof backing board to make the pale silver tones pop. This striking visual contrast tricks the eye, making free, scavenged materials look like high-end commissioned outdoor art.
You can easily pull this off for around $15 in adhesive and backing materials. Save this idea to your outdoor styling board for a quick afternoon craft!
- Key Materials: Sun-bleached driftwood pieces, exterior construction adhesive, weatherproof composite backing board.
- Vibe / Style: Coastal bohemian chic.
- Difficulty: Very easy.
- Budget Breakdown: Wood: Free | Backing Board: $10 | Adhesive: $5.
- Creator’s Tip: Use a wire brush to scrub off any soft, rotting bits from the driftwood before gluing, ensuring a permanent bond to the backing board.
- Smart Sourcing: Waterproof exterior mounting adhesive and pre-cut black acrylic backing boards.
8. Driftwood Wind Chimes
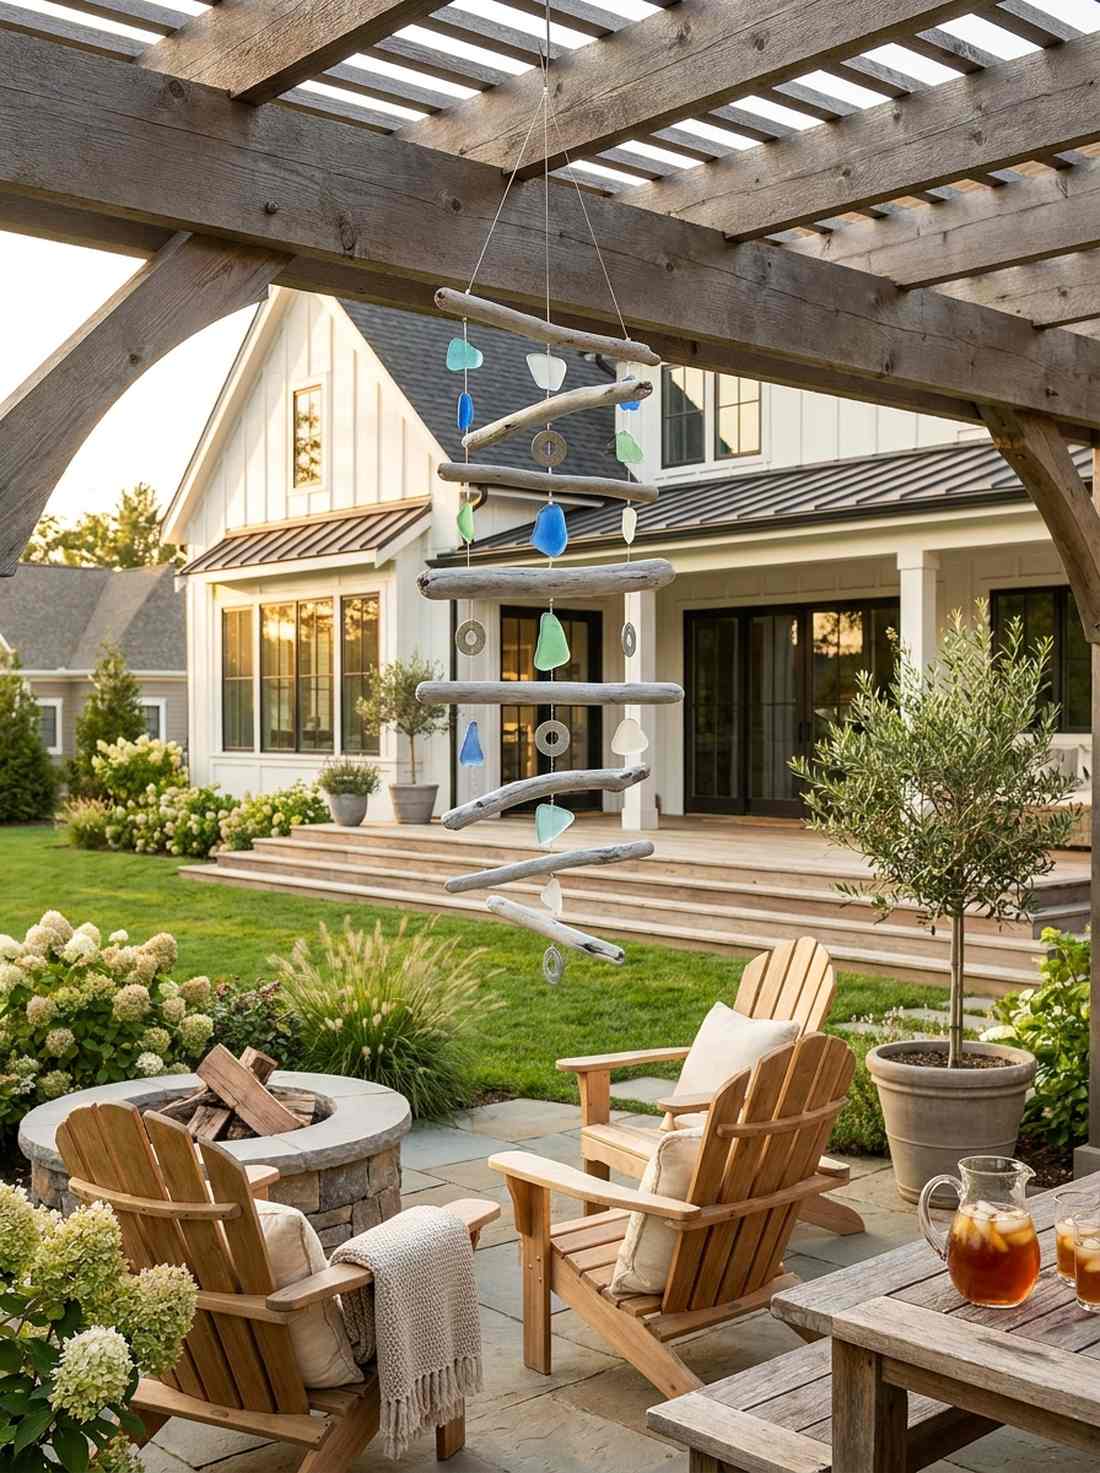
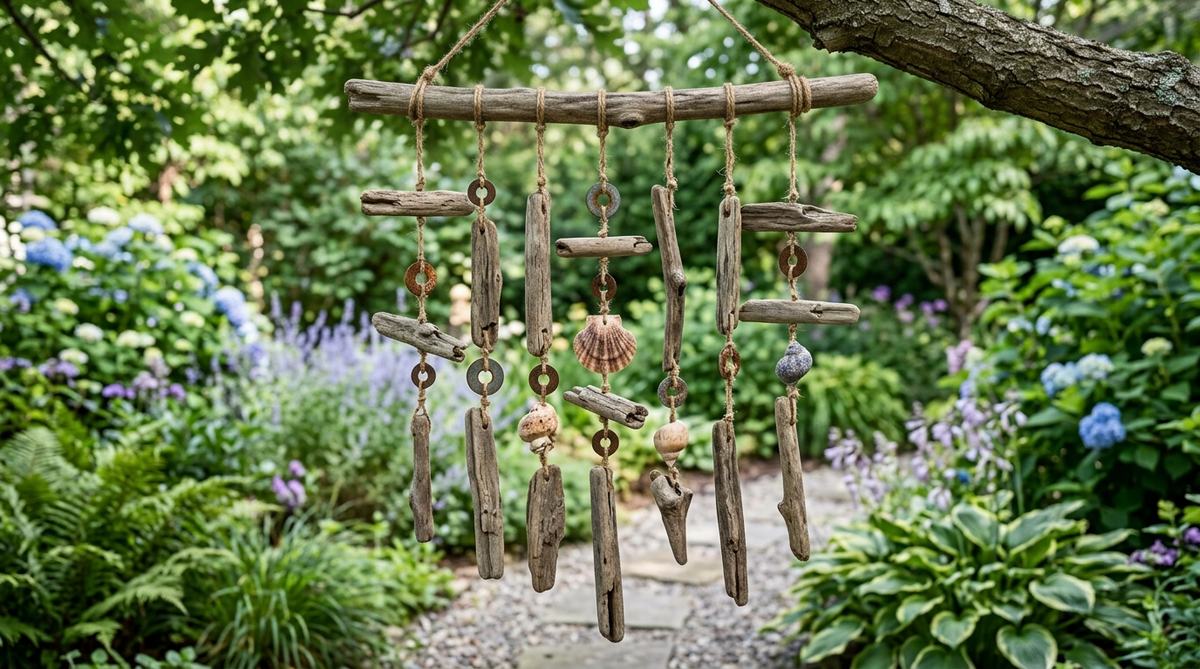
The soft, hollow clatter of this setup feels like a gentle ocean breeze right in your own backyard. This kinetic wood decor for garden piece works beautifully when hung from pergola rafters or the low-hanging branches of a shade tree.
String varying lengths of silver-toned branches together using invisible fishing line, interspersing them with polished sea glass or metal washers. This delicate, layered assembly feels incredibly bespoke and adds a sensory, calming soundscape to your outdoor space.
This project is virtually free, costing maybe $5 for durable hanging string. It’s a fast upgrade that completely changes the vibe of your sitting area.
- Key Materials: Small driftwood sticks, braided fishing line, metal washers or sea glass.
- Vibe / Style: Zen coastal retreat.
- Difficulty: Easy beginner craft.
- Budget Breakdown: String/Line: $5 | Accents: $5.
- Creator’s Tip: Use a tiny dab of superglue on every knot you tie with the fishing line so it never unravels in harsh winds.
- Smart Sourcing: Heavy-duty braided fishing line (bulk roll) and pre-drilled sea glass bead kits.
9. Rustic Driftwood Planters
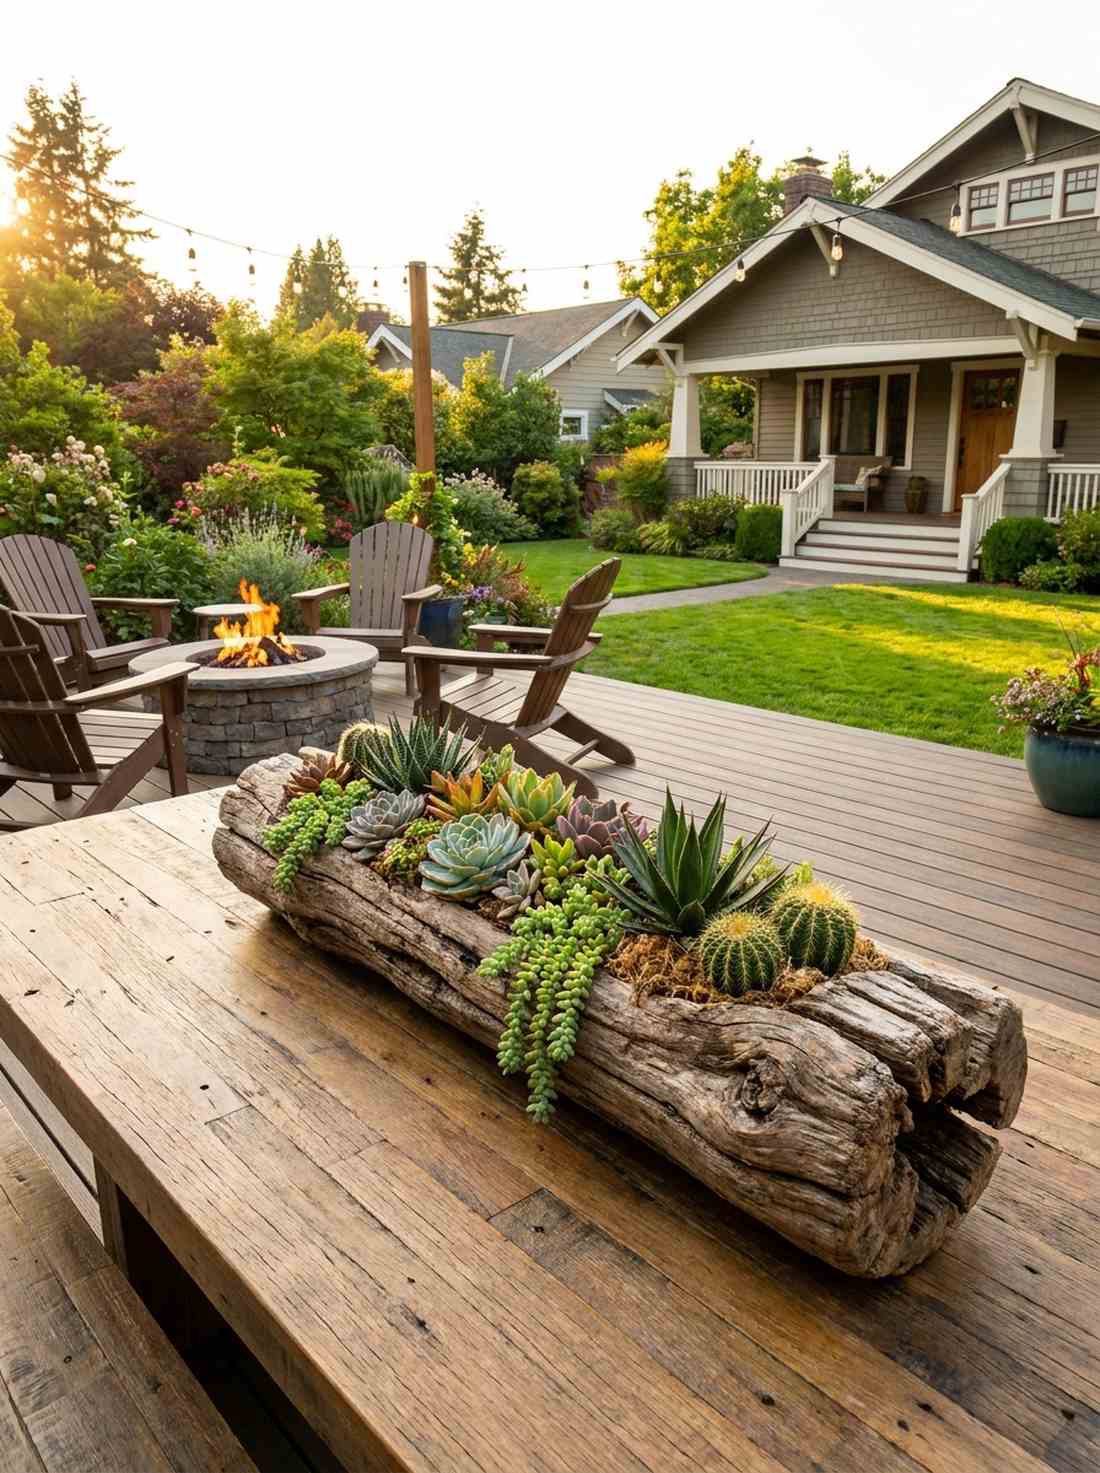
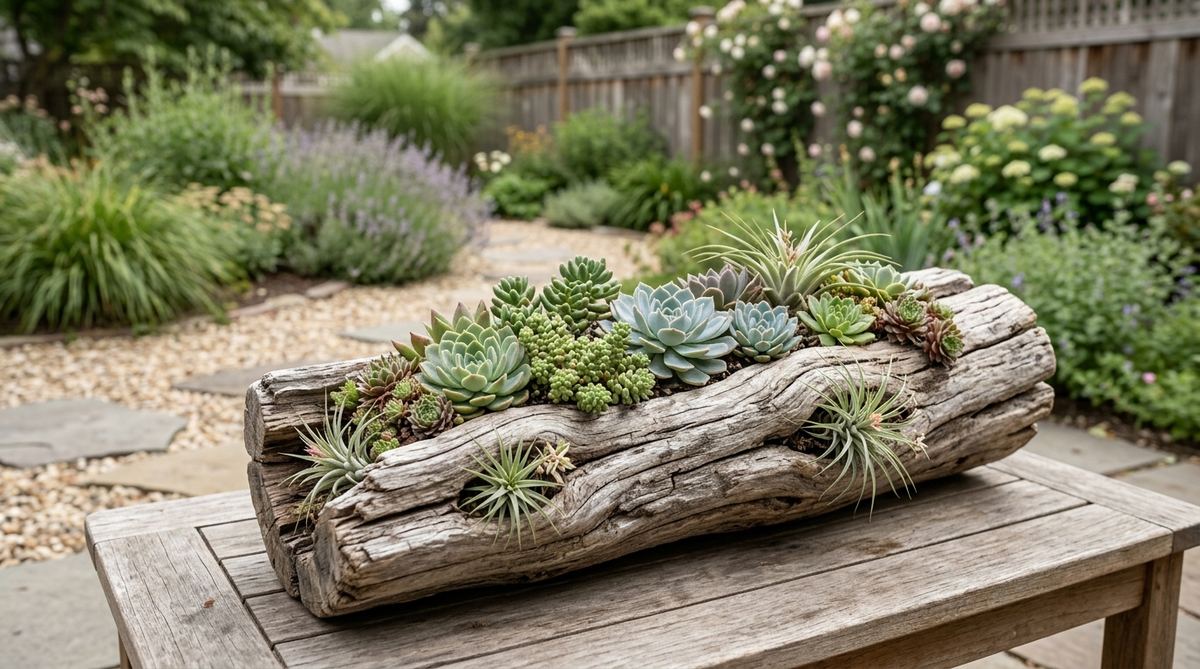
Imagine a miniature desert landscape bursting out of a weathered, ancient-looking log. This eye-catching primitive wood garden decor is the absolute perfect centerpiece for an outdoor dining table or a sunny patio shelf.
Hollow out the natural crevices of a thick driftwood branch and pack it tightly with vivid, geometric succulents. This organic pairing of dead wood and fleshy greenery provides a striking designer-level finish that rivals expensive boutique nursery arrangements.
You can create this striking living sculpture for about $15 to $25 in plants and cactus soil. Pin this right now if you are obsessed with low-maintenance plant displays!
- Key Materials: Thick driftwood logs, succulent potting mix, sphagnum moss, assorted mini succulents.
- Vibe / Style: Organic modern desert.
- Difficulty: Easy (requires minor drilling/chiseling).
- Budget Breakdown: Plants: $15 | Soil/Moss: $5.
- Creator’s Tip: If your log doesn’t have deep enough holes, use a large spade drill bit to carefully bore out perfect circular pockets for the plant roots.
- Smart Sourcing: Live succulent starter kits (bulk pack) and premium organic cactus potting mix.
💡 Must-Have Supplies for High-End Wood Setups
To build these stunning wooden setups faster and ensure they survive harsh weather for years, skip the generic hardware aisles and invest in the right foundational kits and treatments.
- Weather & Durability Protection: Marine-grade clear epoxy wood sealants
- Setup Tools: Heavy-duty titanium drill bit kits (for thick logs)
- Base Connections: Powder-coated rust-proof corner brackets
This next installation completely changes how vines grow… and it costs almost nothing compared to store-bought metal frames.
10. Driftwood Garden Trellis
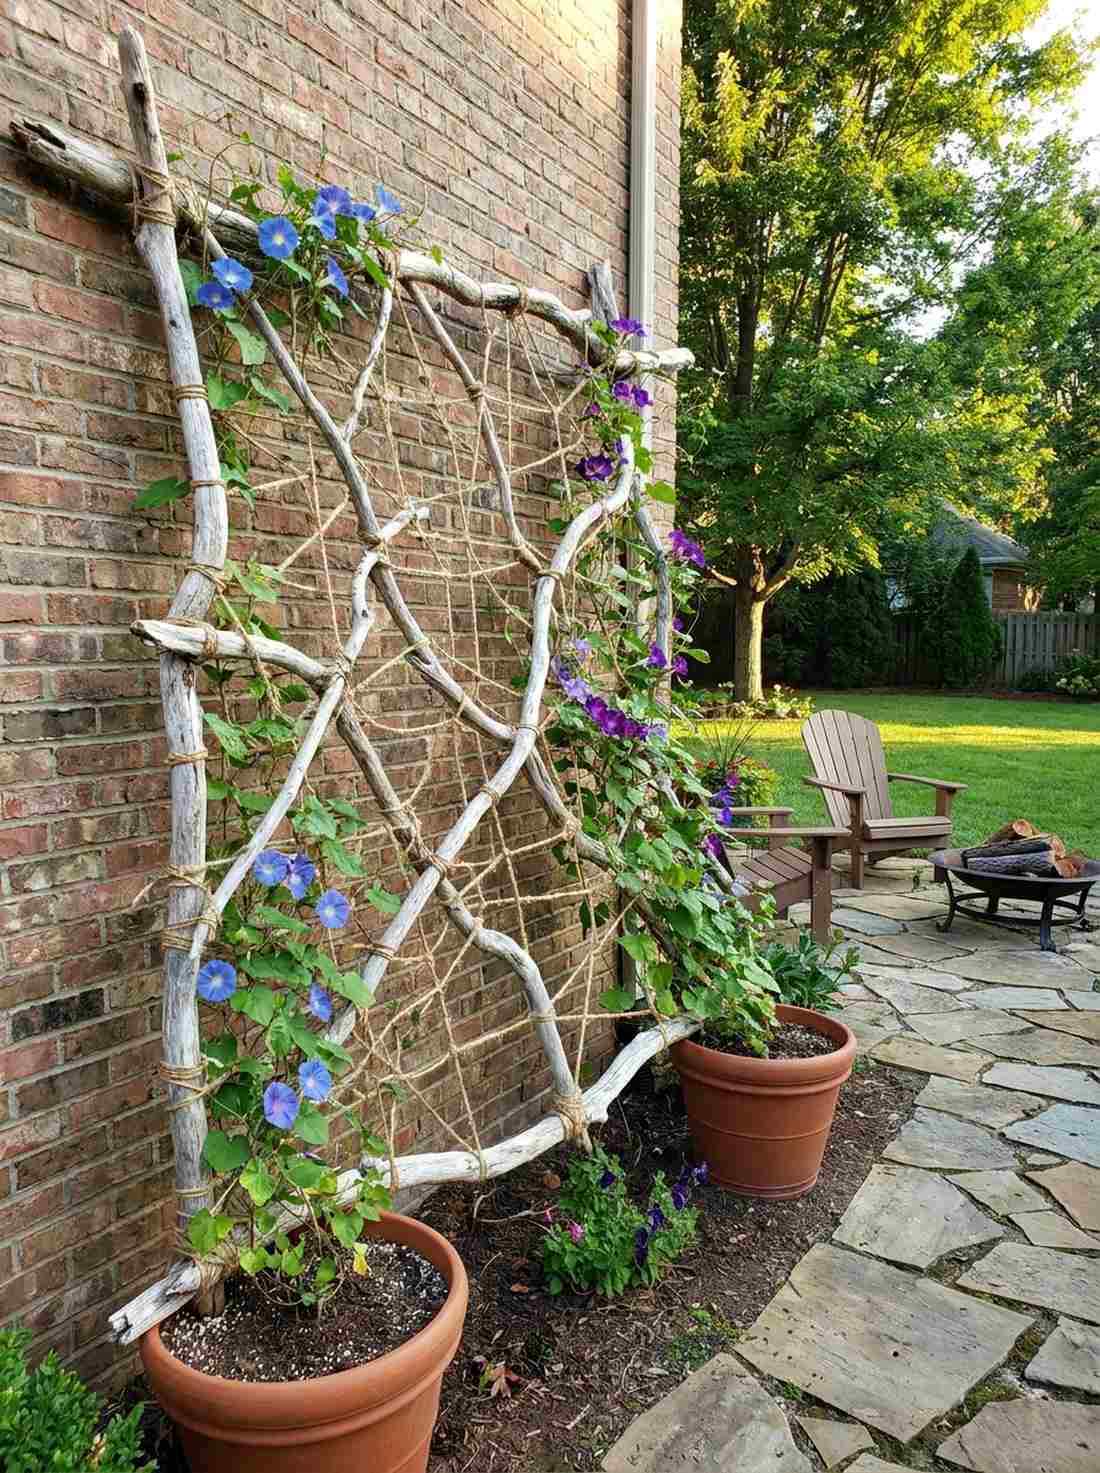
Watch as climbing vines weave through a structure that feels like a natural extension of the forest floor itself. Creating an organic framework is a brilliant diy garden decor wood idea for supporting delicate clematis or morning glories against a plain brick wall.
Lash twisting branches together using rustic jute twine to form an unpredictable, web-like grid. Foregoing rigid, symmetrical store-bought trellises in favor of this wild aesthetic gives your garden an incredibly highly-curated, whimsical appeal.
This beautiful support structure takes about an hour to build and costs under $10 for heavy twine.
- Key Materials: Long driftwood branches, thick jute twine or copper wire, heavy anchoring pots.
- Vibe / Style: Wild, untamed botanical.
- Difficulty: Easy.
- Budget Breakdown: Wire/Twine: $8 | Base anchors: $10.
- Creator’s Tip: Wrap intersections with copper wire instead of twine; it ages beautifully into a green patina that blends perfectly with the foliage.
- Smart Sourcing: Thick natural jute garden twine (bulk spool) and pure copper craft wire rolls.
11. Driftwood Garden Arch
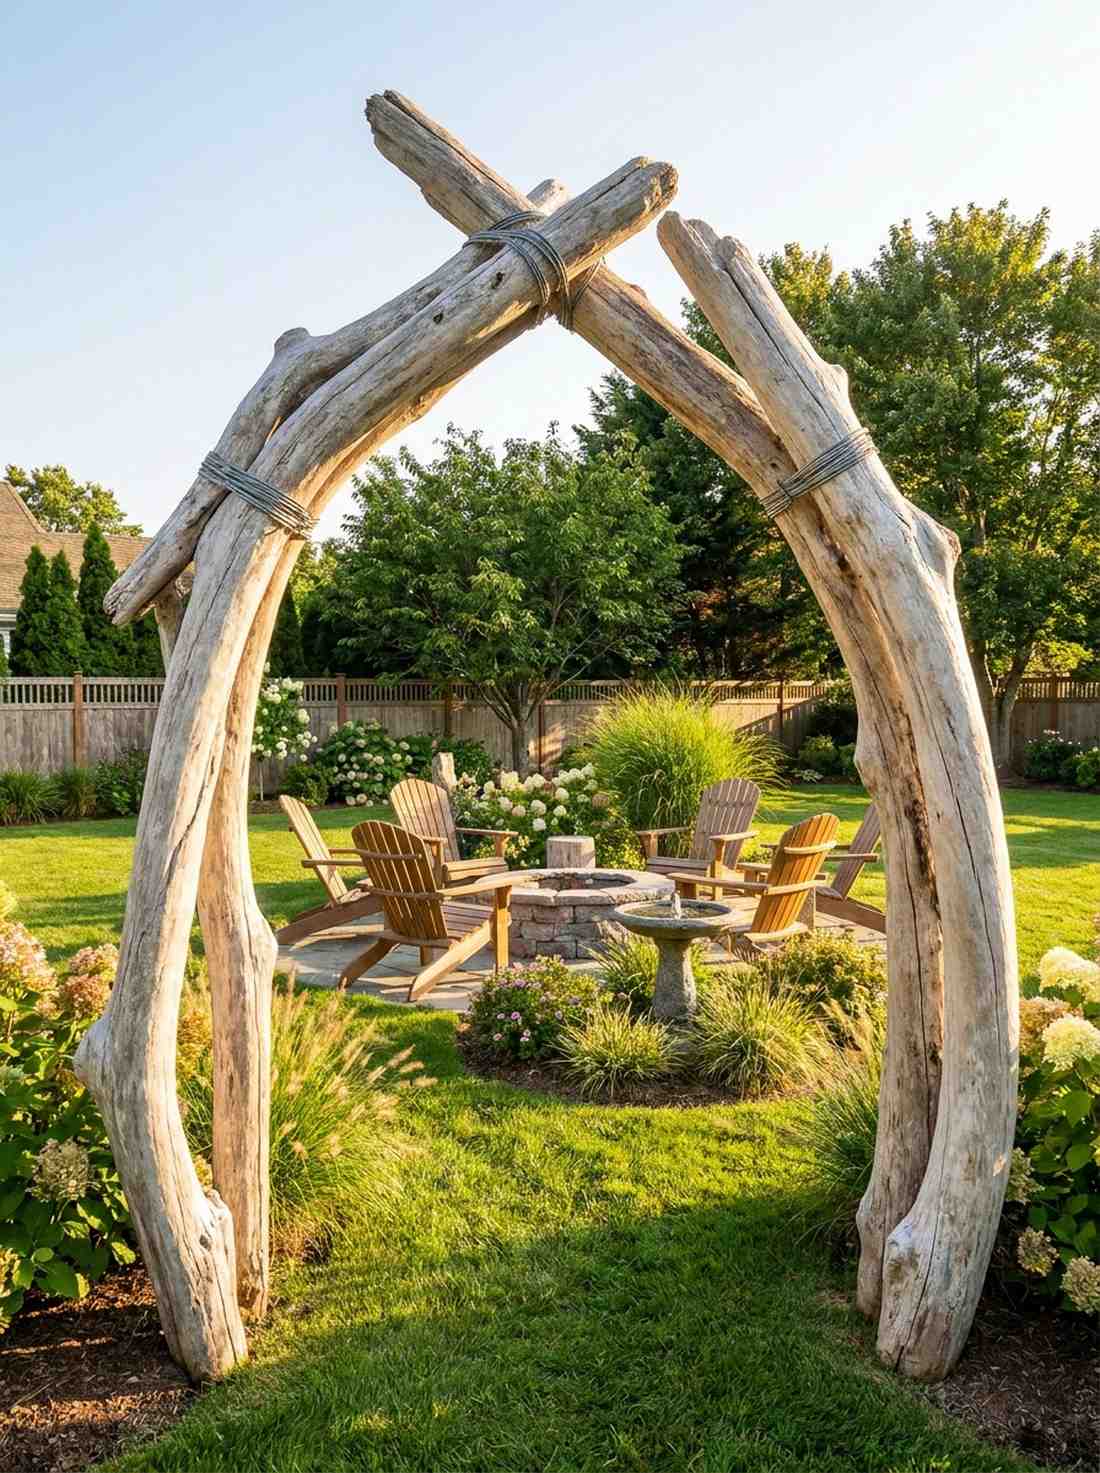
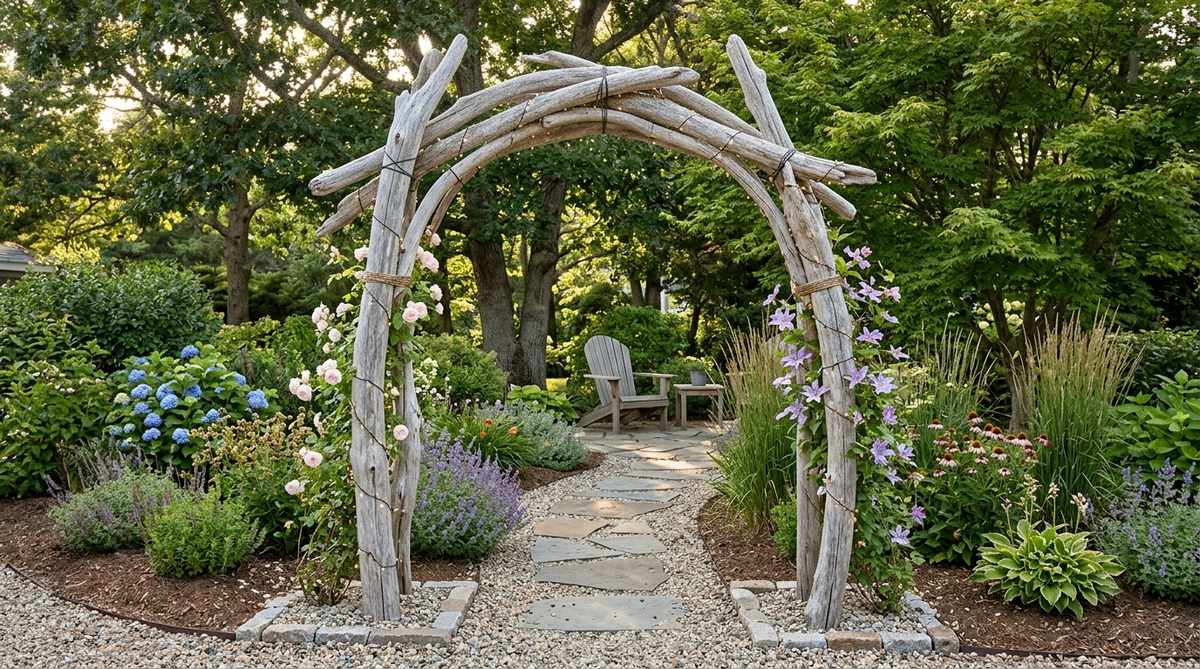
Stepping through this arched masterpiece feels like entering a portal to a hidden seaside cove. This massive, sculptural garden decor wood statement piece is perfect for framing a specific view, like a birdbath or a seating area at the back of your yard.
Secure two massive, curved coastal branches deep into the ground, tying them at the apex for a dramatic silhouette. While most arbors look blocky and generic, this free-flowing architecture looks far more expensive, bringing a permanent artistic installation to your lawn.
You can lock this in place using about $20 worth of gravel and quick-set concrete. Pin this to your dream yard layout board!
- Key Materials: 2 large curving driftwood logs, thick gauge lashing wire, post hole gravel.
- Vibe / Style: Dramatic coastal architecture.
- Difficulty: Intermediate (requires deep digging).
- Budget Breakdown: Gravel/Concrete: $15 | Heavy wire: $10.
- Creator’s Tip: Sink the base of the branches at least 18 inches deep and surround them with crushed gravel to prevent the arch from blowing over in a storm.
- Smart Sourcing: Galvanized heavy-duty lashing wire and fast-draining post hole base gravel.
12. Driftwood Candle Holders
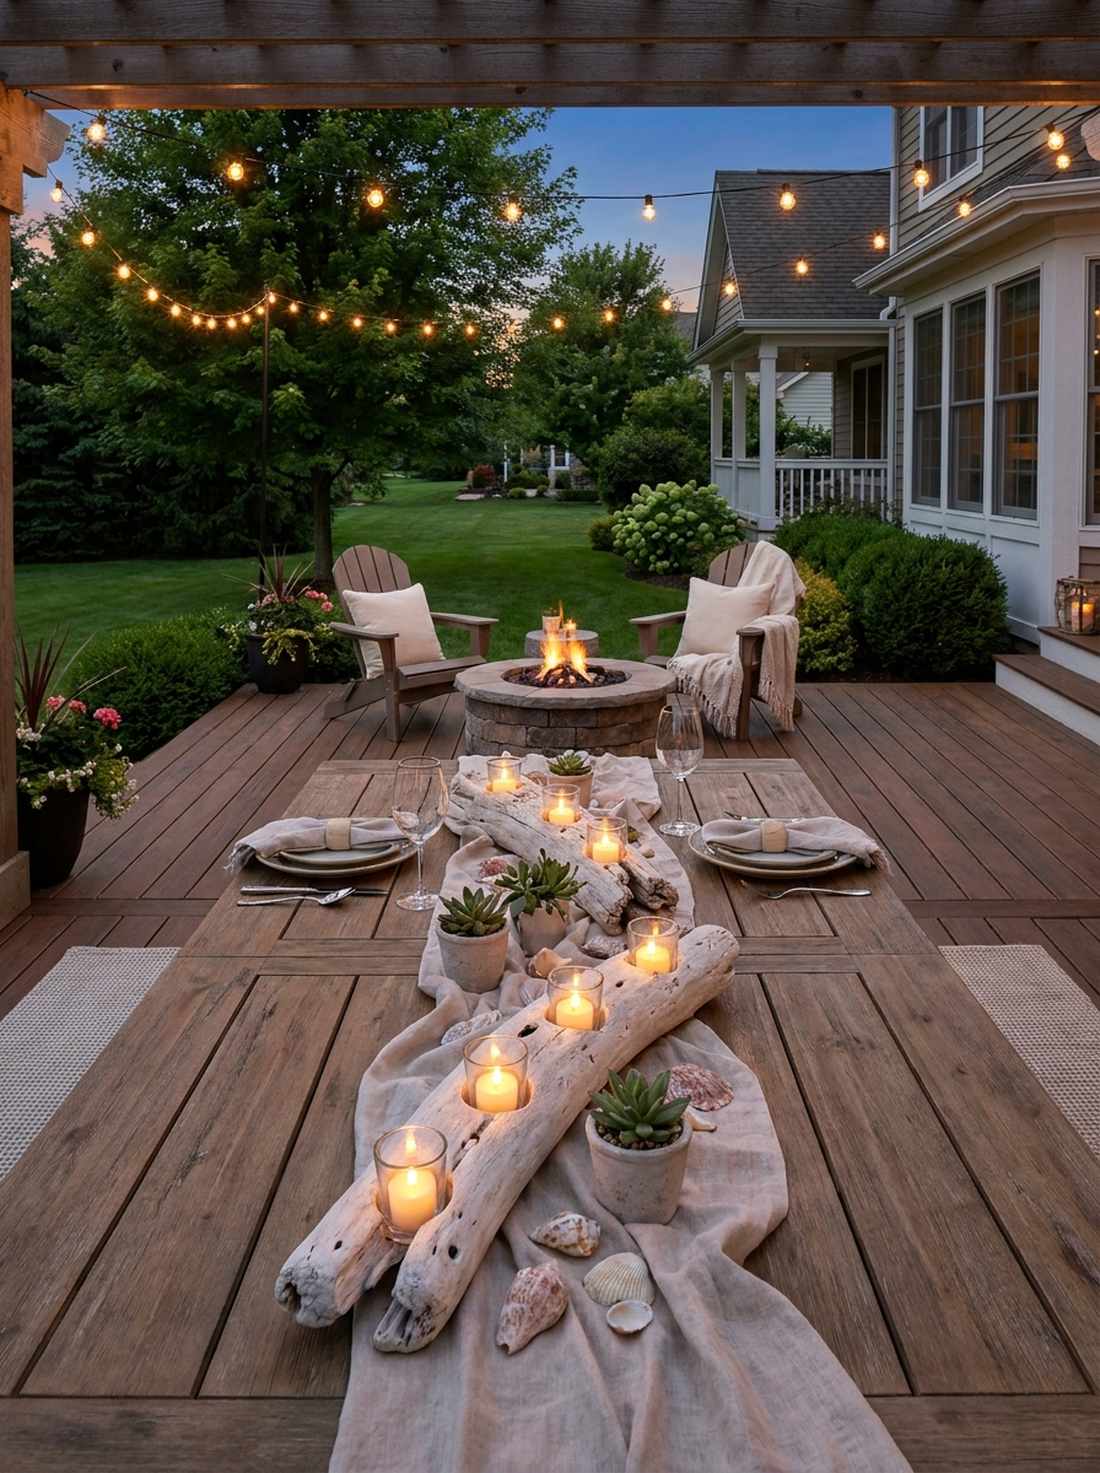
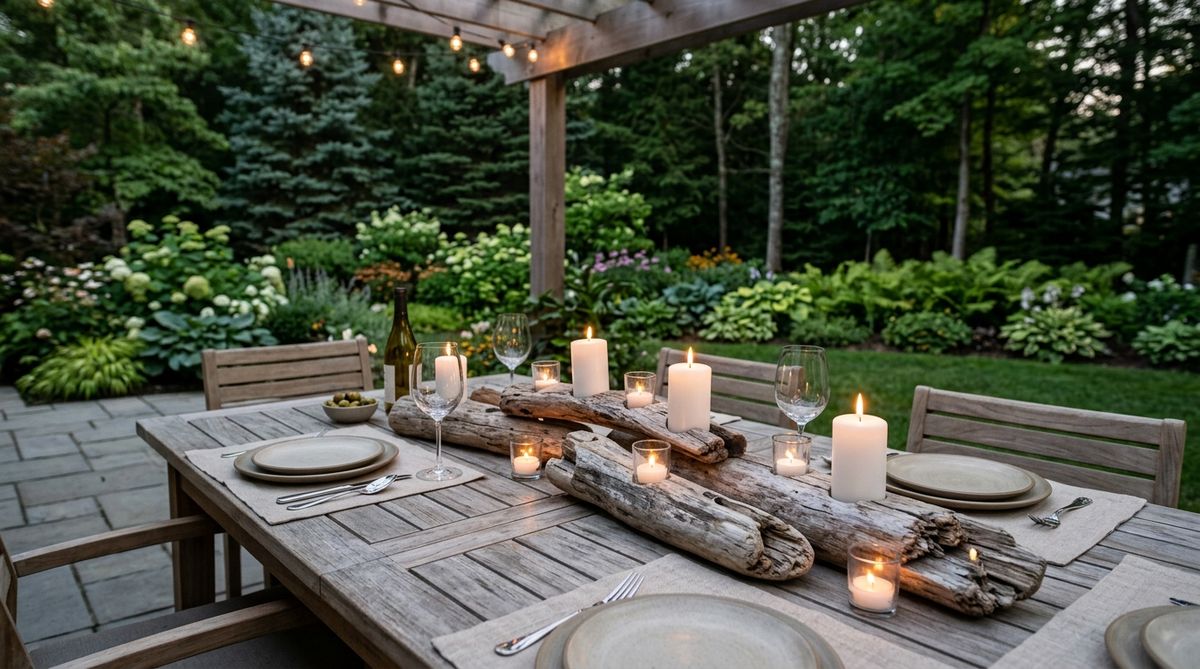
The warm flicker of candlelight bouncing off weathered wood creates an impossibly cozy, romantic evening vibe. This simple wood garden decor ideas project acts as the perfect mood-lighting centerpiece for late-night patio dinners or wine on the deck.
Drill shallow, perfectly sized depressions into flat pieces of pale driftwood to nestle glass votives seamlessly into the wood. This minimalist integration of fire and wood delivers a surprisingly premium look, mimicking high-end boutique home decor items.
You can craft a set of these in 20 minutes for under $15. Save this for your next outdoor entertaining prep list!
- Key Materials: Flat driftwood pieces, glass tea light votives, spade or Forstner drill bit.
- Vibe / Style: Romantic beachside dinner.
- Difficulty: Very easy.
- Budget Breakdown: Votives & Candles: $12 | Wood: Free.
- Creator’s Tip: Use battery-operated LED tea lights instead of real flames to ensure zero fire hazard when the wind picks up outdoors.
- Smart Sourcing: Waterproof LED outdoor tea lights (bulk pack) and precision Forstner wood drill bits.
13. Driftwood Birdhouse Installation
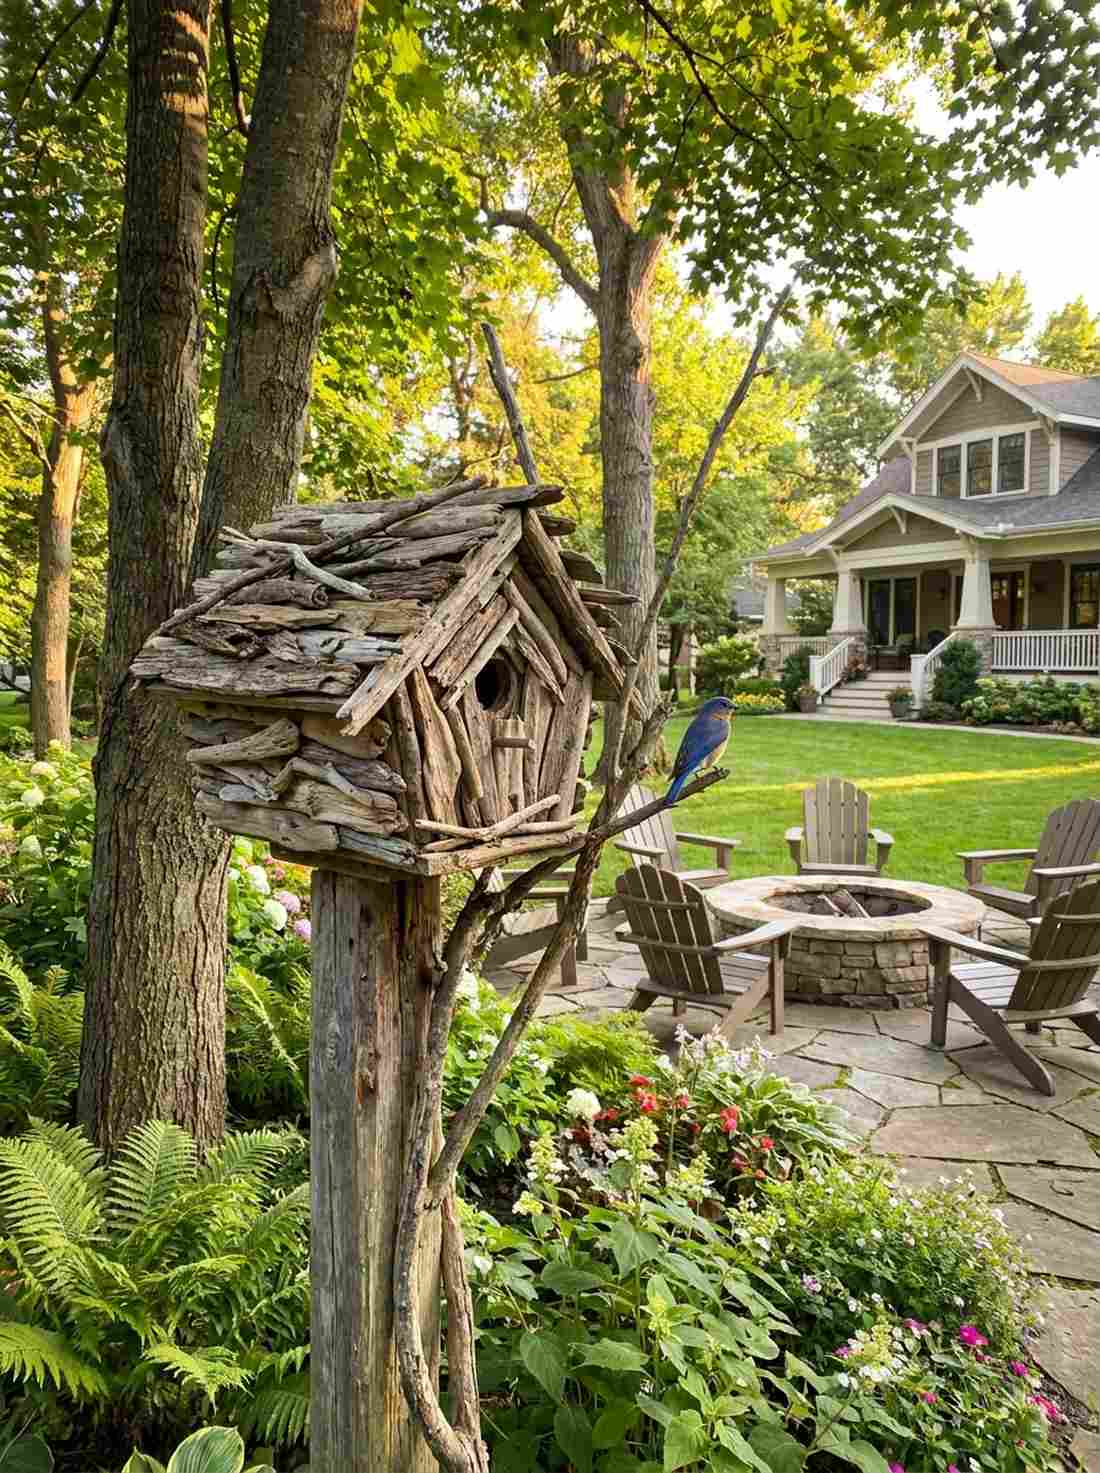
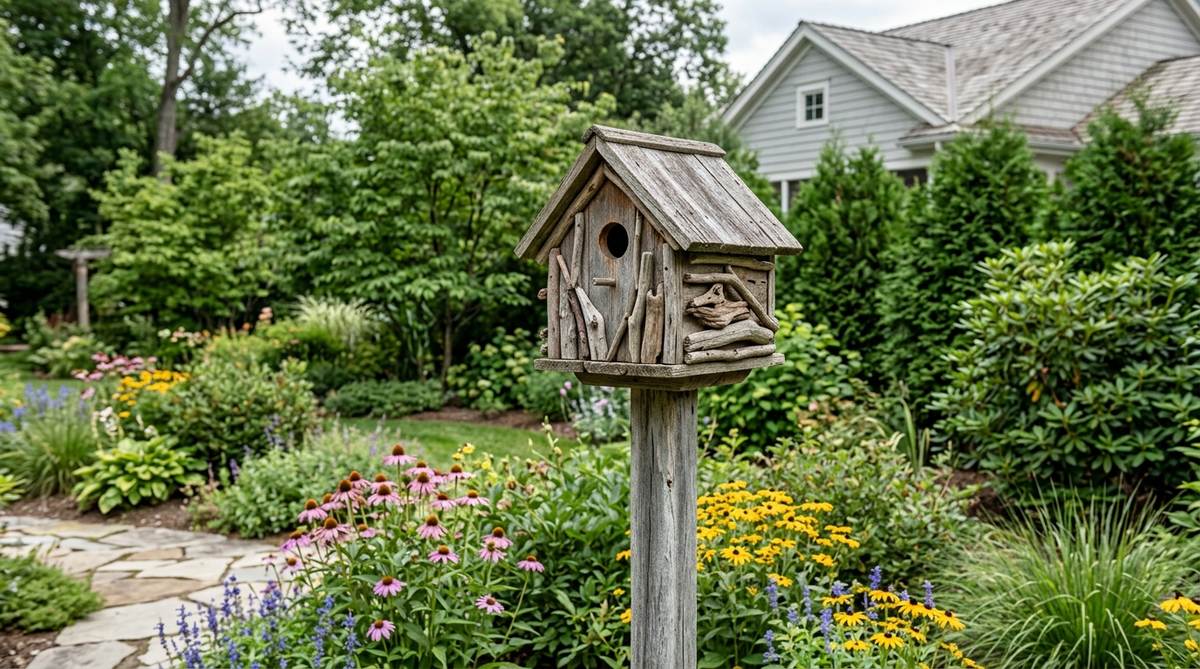
Watching local birds flock to a tiny, rustic cabin that feels entirely at one with nature is incredibly rewarding. Using coastal bark and twigs as cladding is an ingenious woodland garden decor trick to camouflage bright, generic birdhouses into the tree canopy.
Cover a standard pine birdhouse completely in layered driftwood splinters using heavy-duty weatherproof glue. Bypassing painted wood for this rugged, camouflaged exterior gives a designer-level finish that wildlife actually prefers.
You can upgrade a cheap craft-store birdhouse for less than $15.
- Key Materials: Basic wooden birdhouse, small driftwood shards, exterior waterproof wood glue.
- Vibe / Style: Whimsical forest wildlife.
- Difficulty: Easy craft.
- Budget Breakdown: Base Birdhouse: $10 | Glue: $5.
- Creator’s Tip: Ensure you leave a hinged roof or clean-out door unglued so you can empty the old nests out at the end of the season.
- Smart Sourcing: Unfinished wooden birdhouse starter kits and extreme-weather exterior wood glue.
Stop fighting weeds with toxic chemicals. The next section shows you the absolute cheapest way to make your garden beds look like a professional landscaper just left.
Bark Functional Applications for Ground and Border
Bark mulch and bark chippings serve multiple practical purposes while improving garden aesthetics. These renewable materials regulate soil conditions, suppress weeds, and create cohesive visual flow.
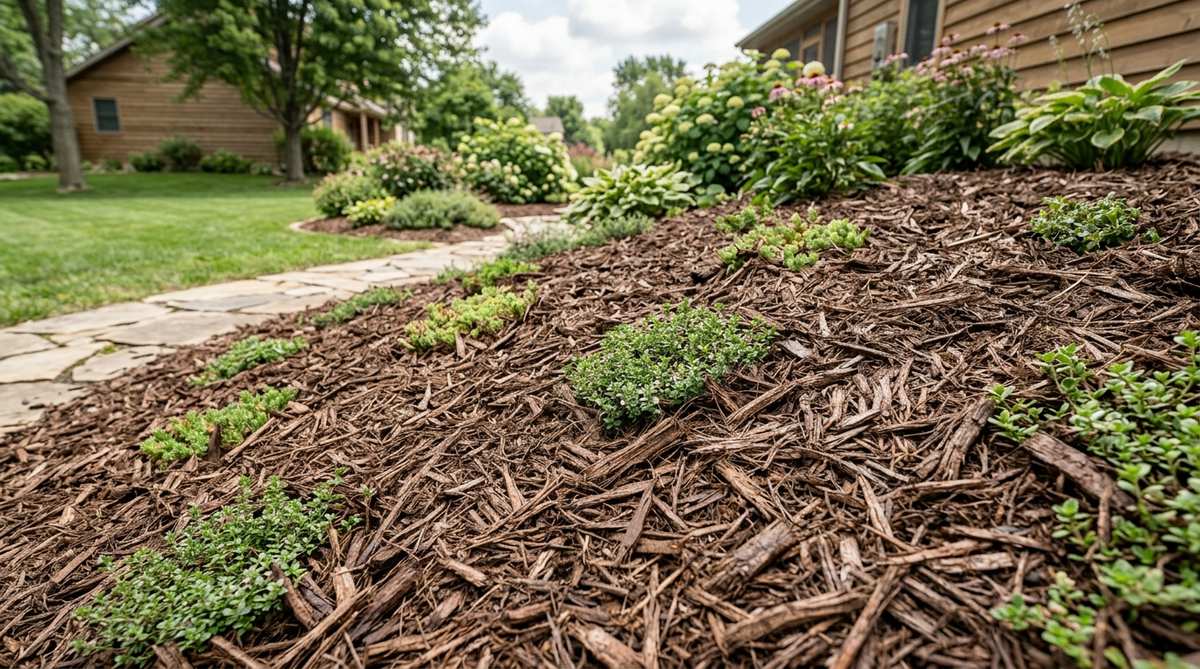
14. Decorative Bark Mulch Borders
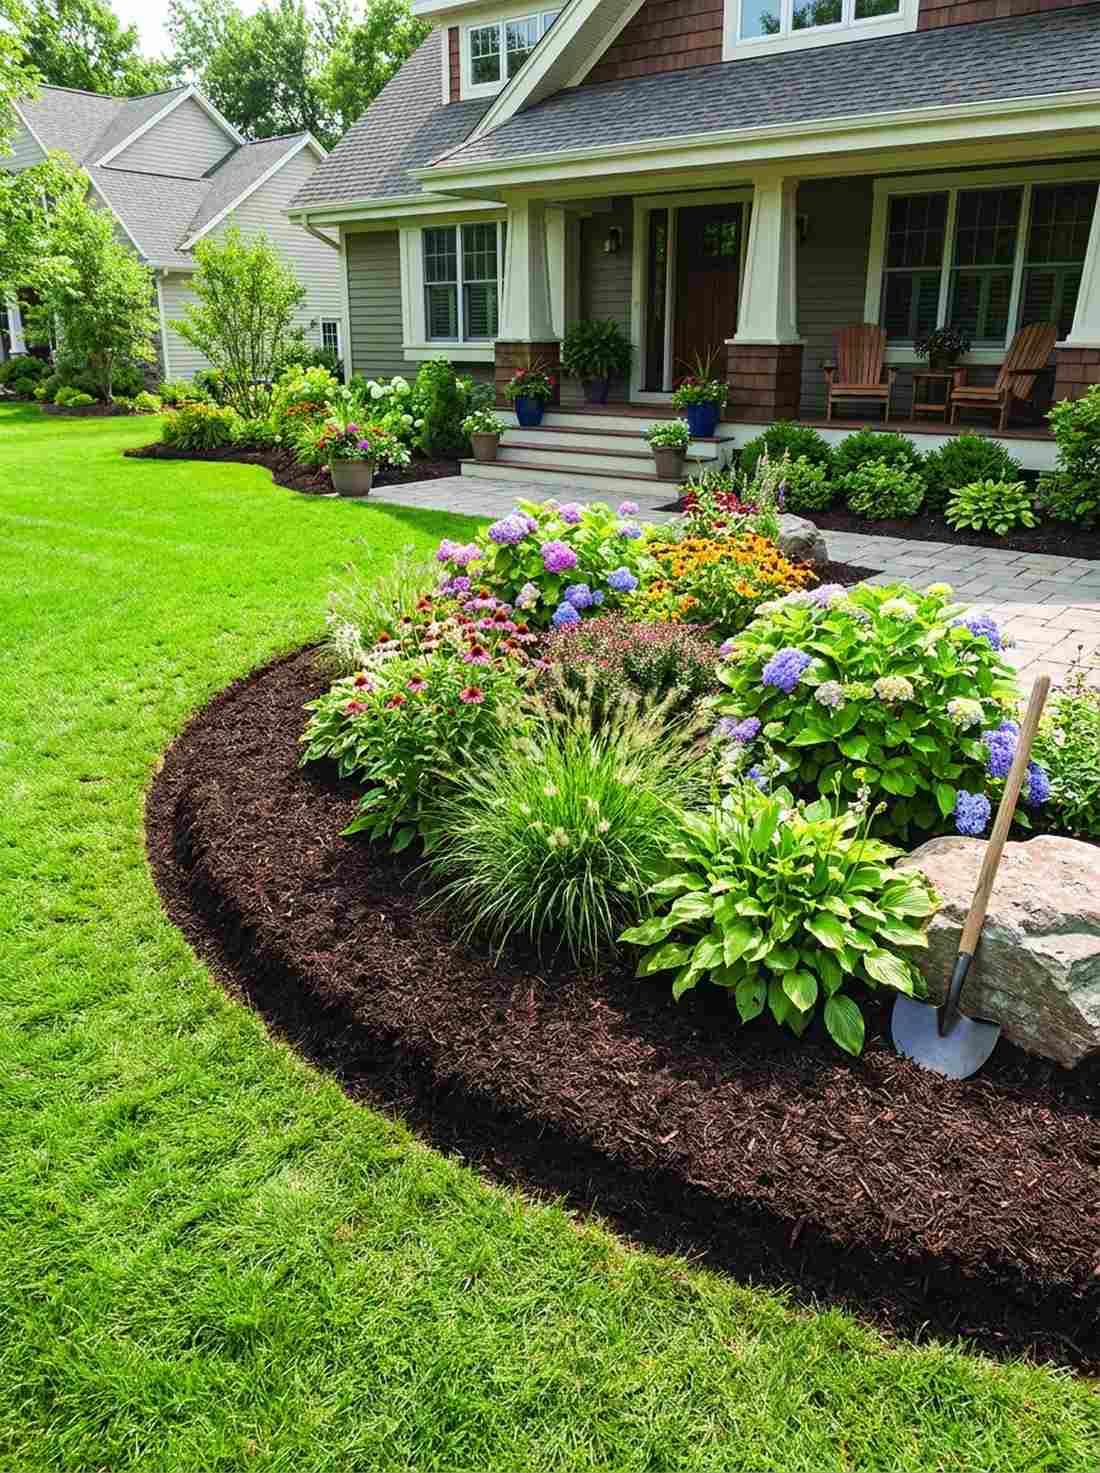
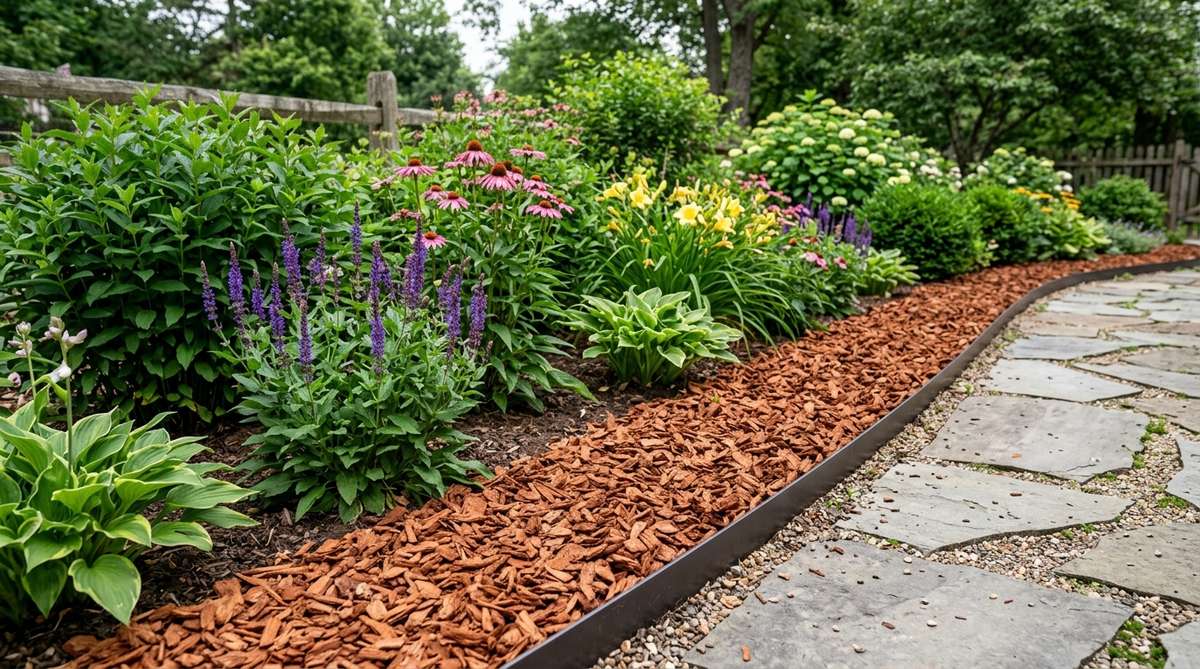
The rich, dark contrast of fresh wood chips against bright green leaves instantly makes your yard look impeccably maintained. Utilizing thick layers of bark is a fundamental garden decor wood technique that works flawlessly to outline vibrant perennial flower beds.
Spread a heavy three-inch layer of spruce or cedar chips, locking them in place with a crisp, trenched edge. Doing this aggressively suppresses weeds while delivering a pristine, highly-manicured aesthetic that frames your plants beautifully.
A few bags of premium mulch will cost you roughly $20 to $40 and completely revitalize your front yard curb appeal.
- Key Materials: Premium shredded cedar or spruce bark, half-moon edging tool.
- Vibe / Style: Crisp, professional landscaping.
- Difficulty: Easy (requires spreading and edging).
- Budget Breakdown: Mulch bags: $25 | Edging spade: $20.
- Creator’s Tip: Avoid the “mulch volcano” look; never pile the wood chips directly against the trunks of your trees or stems of your plants, as it causes severe rot.
- Smart Sourcing: Organic premium cedar mulch blends and heavy-duty half-moon steel edgers.
15. Bark Chip Garden Pathways
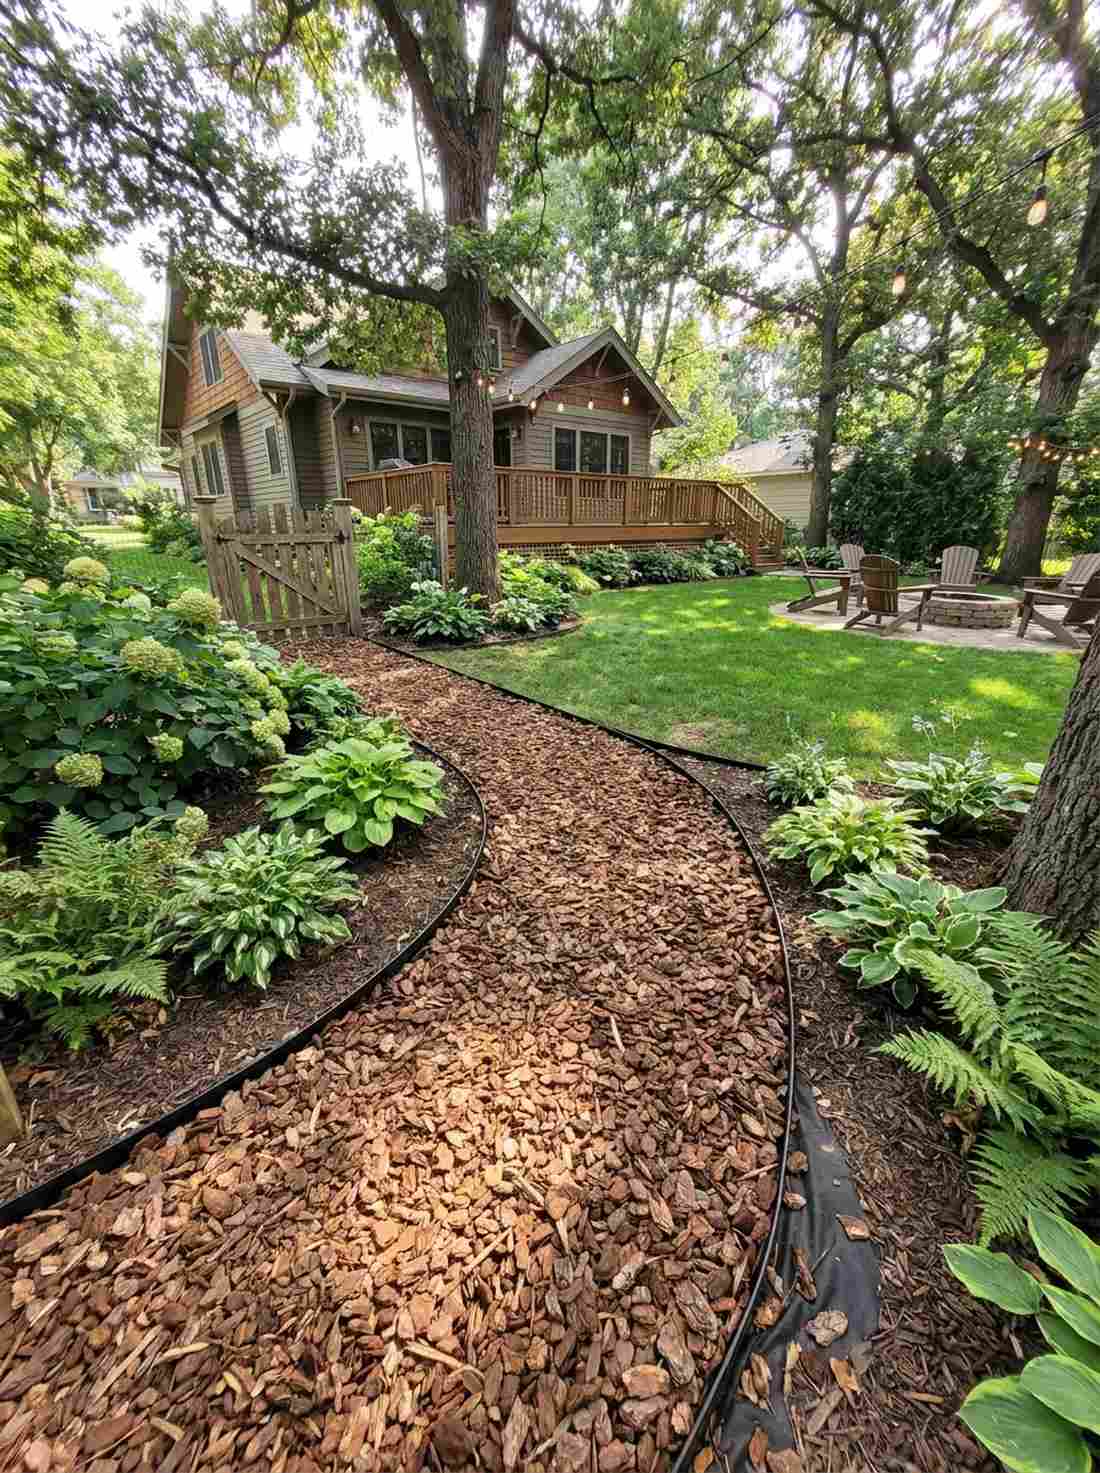
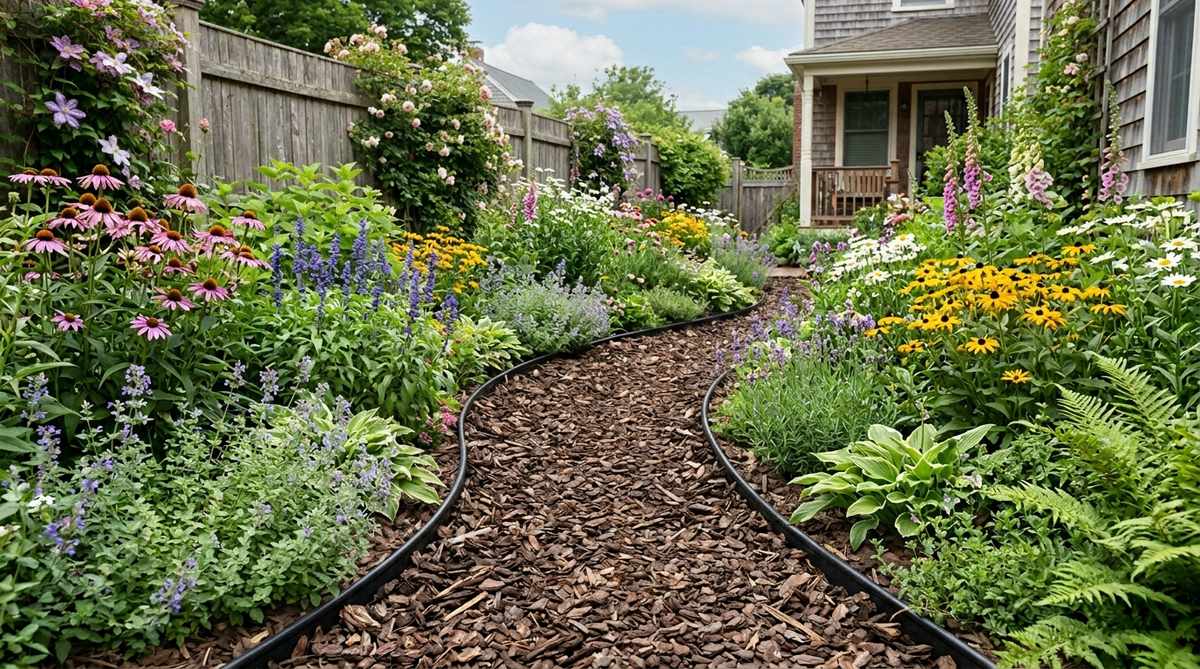
Strolling down a soft, quiet path that feels like a private hiking trail is the ultimate backyard luxury. This spongy, natural wood decor for garden approach is ideal for winding routes through deep shade gardens or dense vegetable patches.
Lay down heavy-duty landscape fabric first, then bury it beneath four solid inches of chunky bark pieces. This method is incredibly cost-effective compared to pouring concrete, and it presents a lush, earthy aesthetic that drains water perfectly.
You can lay a 20-foot pathway for around $50 to $80. Pin this layout if you need a quick, affordable walkway solution!
- Key Materials: Medium-chunk pine bark, heavy-duty weed barrier fabric, landscape staples.
- Vibe / Style: Natural woodland trail.
- Difficulty: Easy but physical.
- Budget Breakdown: Fabric/Staples: $30 | Bark chips: $40.
- Creator’s Tip: Always install rigid border edging (like metal or plastic strips) before laying the bark so the chips don’t wash away into your grass during the first rainstorm.
- Smart Sourcing: Commercial-grade woven landscape fabric and galvanized steel landscape fabric staples (bulk pack).
16. Composted Bark Soil Amendment
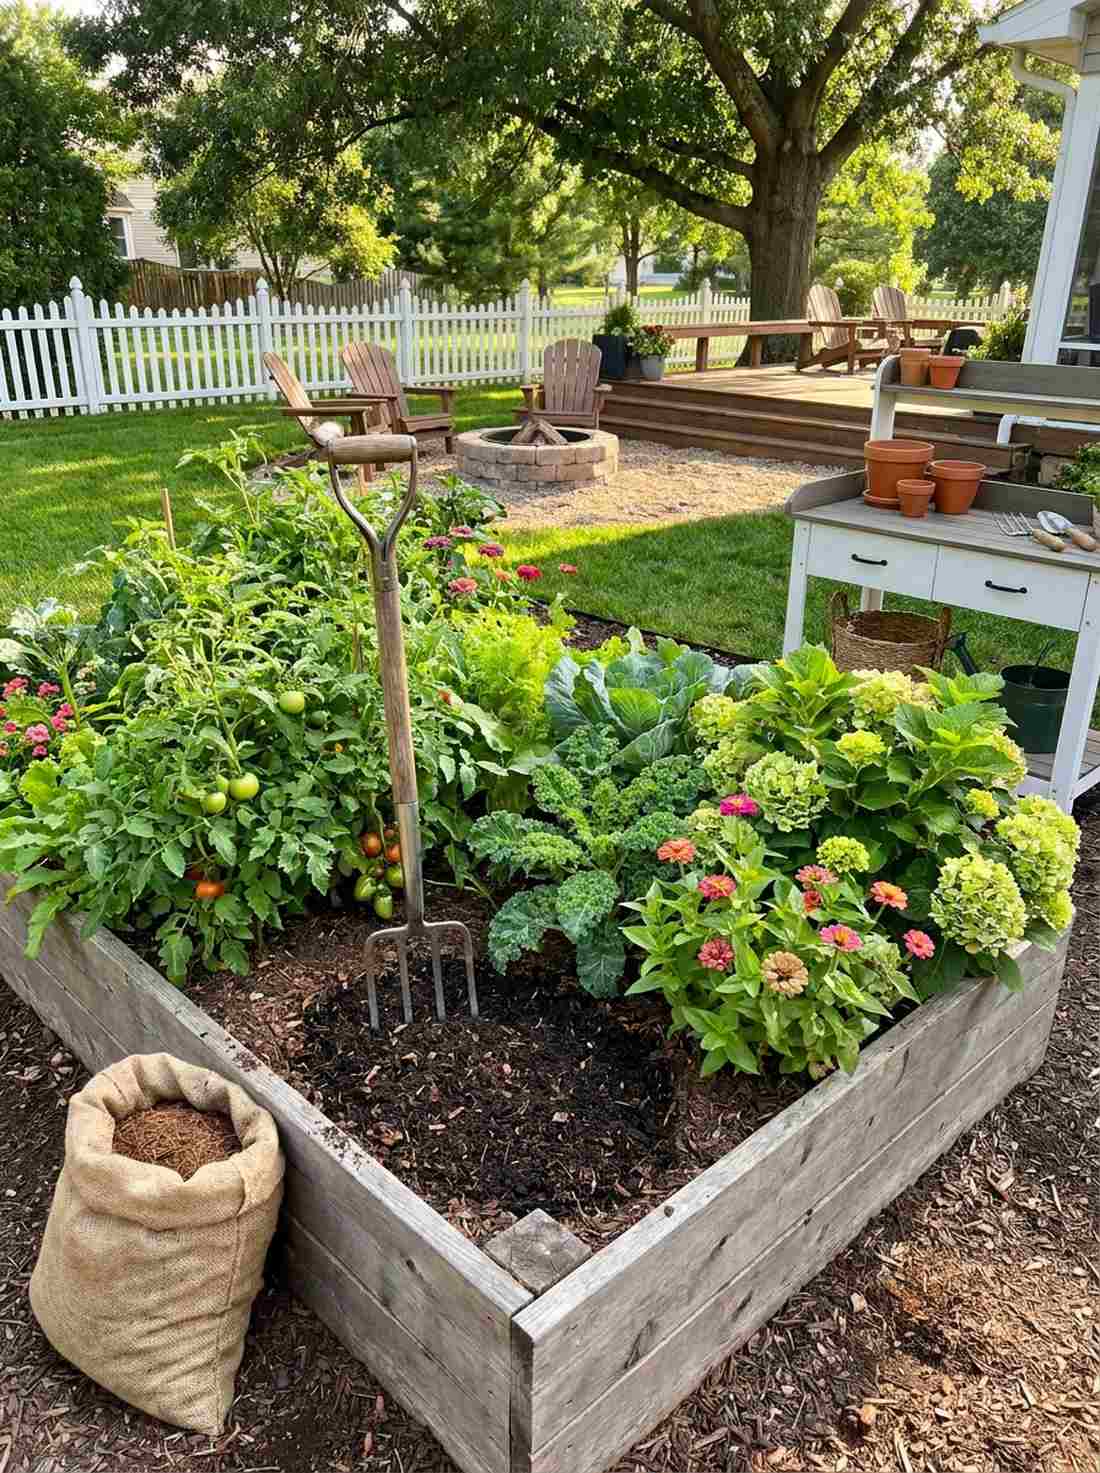
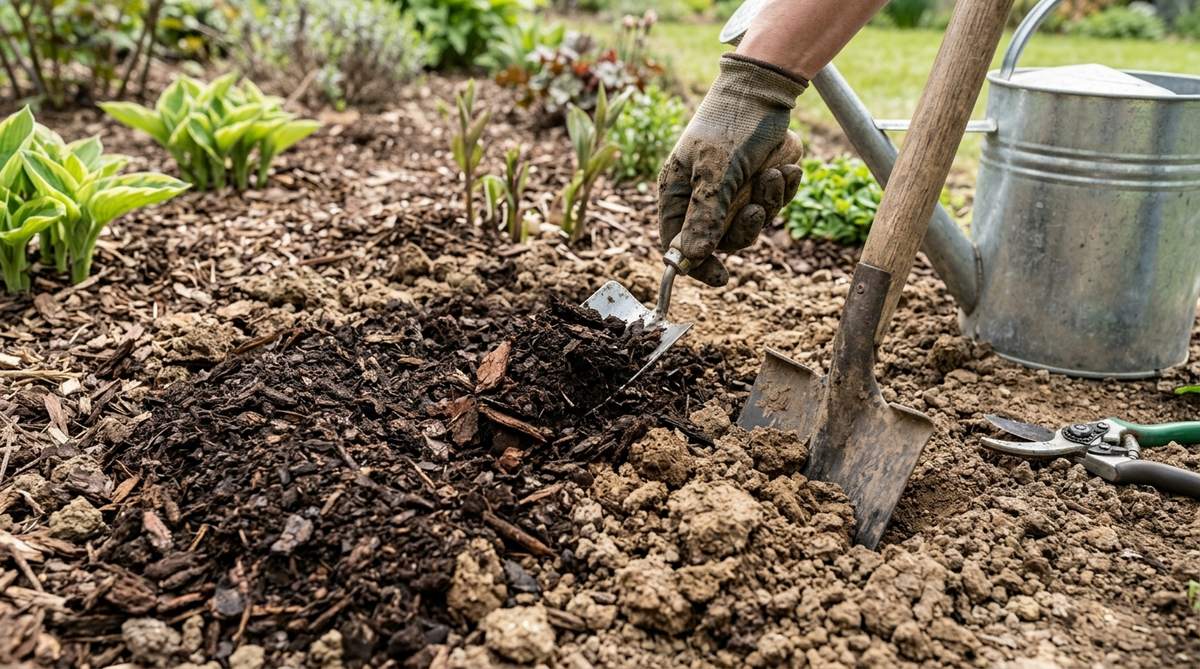
Watching your previously stunted plants suddenly explode with lush, vibrant growth feels like unlocking a gardening superpower. Mixing aged, broken-down timber into your dirt is a brilliant diy garden decor wood secret for fixing hard, lifeless clay soils.
Blend finely composted pine bark directly into the root zones of your raised beds to drastically improve oxygen flow and water retention. Bypassing expensive liquid fertilizers for this organic, structural soil fix delivers long-lasting vitality that makes your greenery look incredibly premium.
You can heavily amend a large garden bed for under $30. It’s an invisible upgrade that completely changes the health of your yard.
- Key Materials: Finely shredded composted pine fines, digging fork.
- Vibe / Style: Lush, thriving botanicals.
- Difficulty: Moderate (requires heavy soil turning).
- Budget Breakdown: Composted bark bags: $25 | Hand tools: $0.
- Creator’s Tip: Make sure the bag explicitly says “composted” or “aged” pine bark; using raw, fresh wood chips in the soil will actually steal nitrogen from your plants!
- Smart Sourcing: Premium organic composted pine fines and heavy-duty steel digging forks.
17. Bark Play Area Surfacing


Creating a safe, bounce-friendly zone that seamlessly blends into your beautiful yard design is a massive relief for parents. Using engineered wood fiber is the perfect primitive wood garden decor solution to place beneath backyard swing sets or climbing walls.
Excavate a shallow pit and fill it with a deep, springy layer of certified playground bark to cushion falls. This natural alternative completely bypasses the ugly, toxic look of shredded rubber tires, maintaining a high-end, cohesive landscape design while keeping kids safe.
Depending on the area size, safe wood surfacing generally costs between $100 and $250. Save this to your family backyard ideas board!
- Key Materials: Certified playground engineered wood fiber (EWF), landscape timbers for edging.
- Vibe / Style: Safe, natural park setting.
- Difficulty: Moderate (moving heavy loads of material).
- Budget Breakdown: EWF Bulk Delivery: $150 | Timber borders: $60.
- Creator’s Tip: Always lay a heavy permeable weed fabric beneath the play bark to stop muddy spots from forming and swallowing up the expensive wood chips.
- Smart Sourcing: Certified impact-absorbing playground wood mulch and heavy-duty plastic timber border edging.
18. Shredded Bark Erosion Control
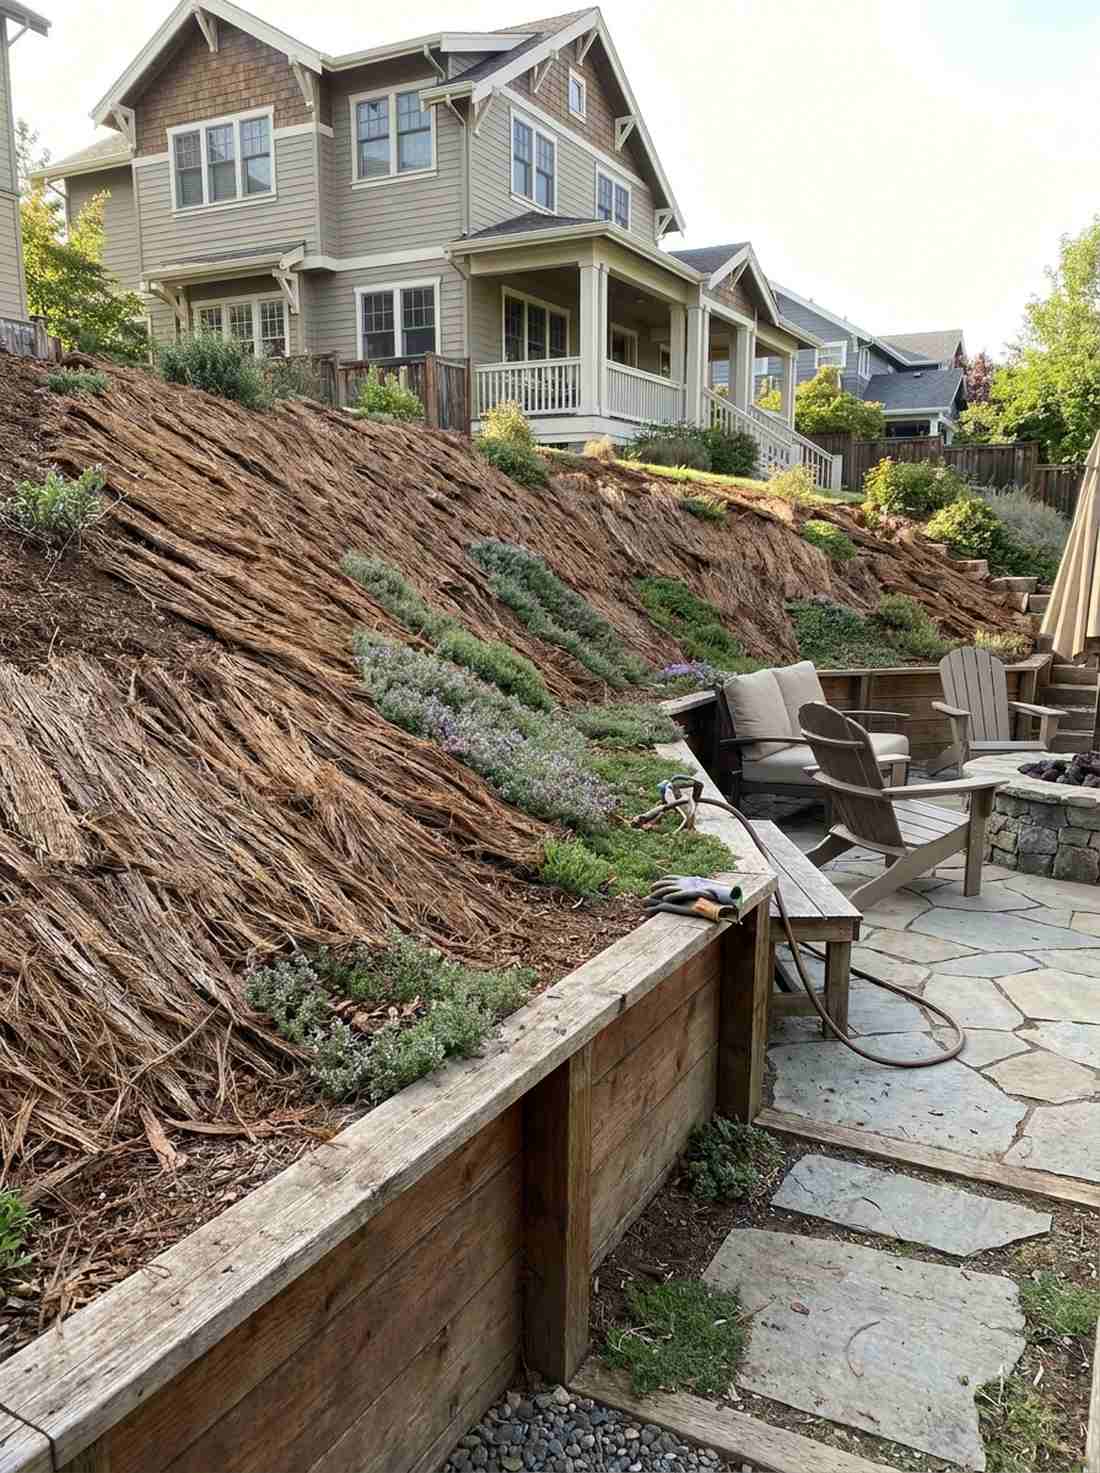
Locking down a steep, muddy slope with a textured mat of wood feels like saving your yard from an impending disaster. This highly functional garden wood decor strategy is an absolute lifesaver for hilly properties plagued by washout after heavy storms.
Apply long, stringy shredded bark (often called “gorilla hair”) to slopes, allowing the fibers to aggressively knit together into a wind-proof, rain-proof blanket. This clever textural trick gives a polished, designer-level finish to troublesome hillsides without the massive expense of building stone retaining walls.
You can secure a large, problematic slope for around $60 to $100 in materials.
- Key Materials: Shredded redwood or cedar bark (“gorilla hair”), groundcover plant plugs.
- Vibe / Style: Rugged, stabilized hillside.
- Difficulty: Easy.
- Budget Breakdown: Shredded bark bales: $70 | Groundcover plugs: $30.
- Creator’s Tip: Lightly wet the shredded bark with a hose immediately after laying it down; the moisture helps the fibers instantly lock together, preventing them from blowing away.
- Smart Sourcing: Interlocking shredded cedar bark bales and fast-spreading creeping thyme groundcover seeds.
Wait until you see the genius way old, free pallets are being used in this next section. It’s the ultimate money-saving hack for small patios!
Repurposed Wood Features and Salvaged Materials
Reclaimed wood brings character and sustainability to garden projects through materials with existing patina and history. These pieces often require less processing while delivering unique aesthetic qualities.
19. Pallet Wood Vertical Gardens
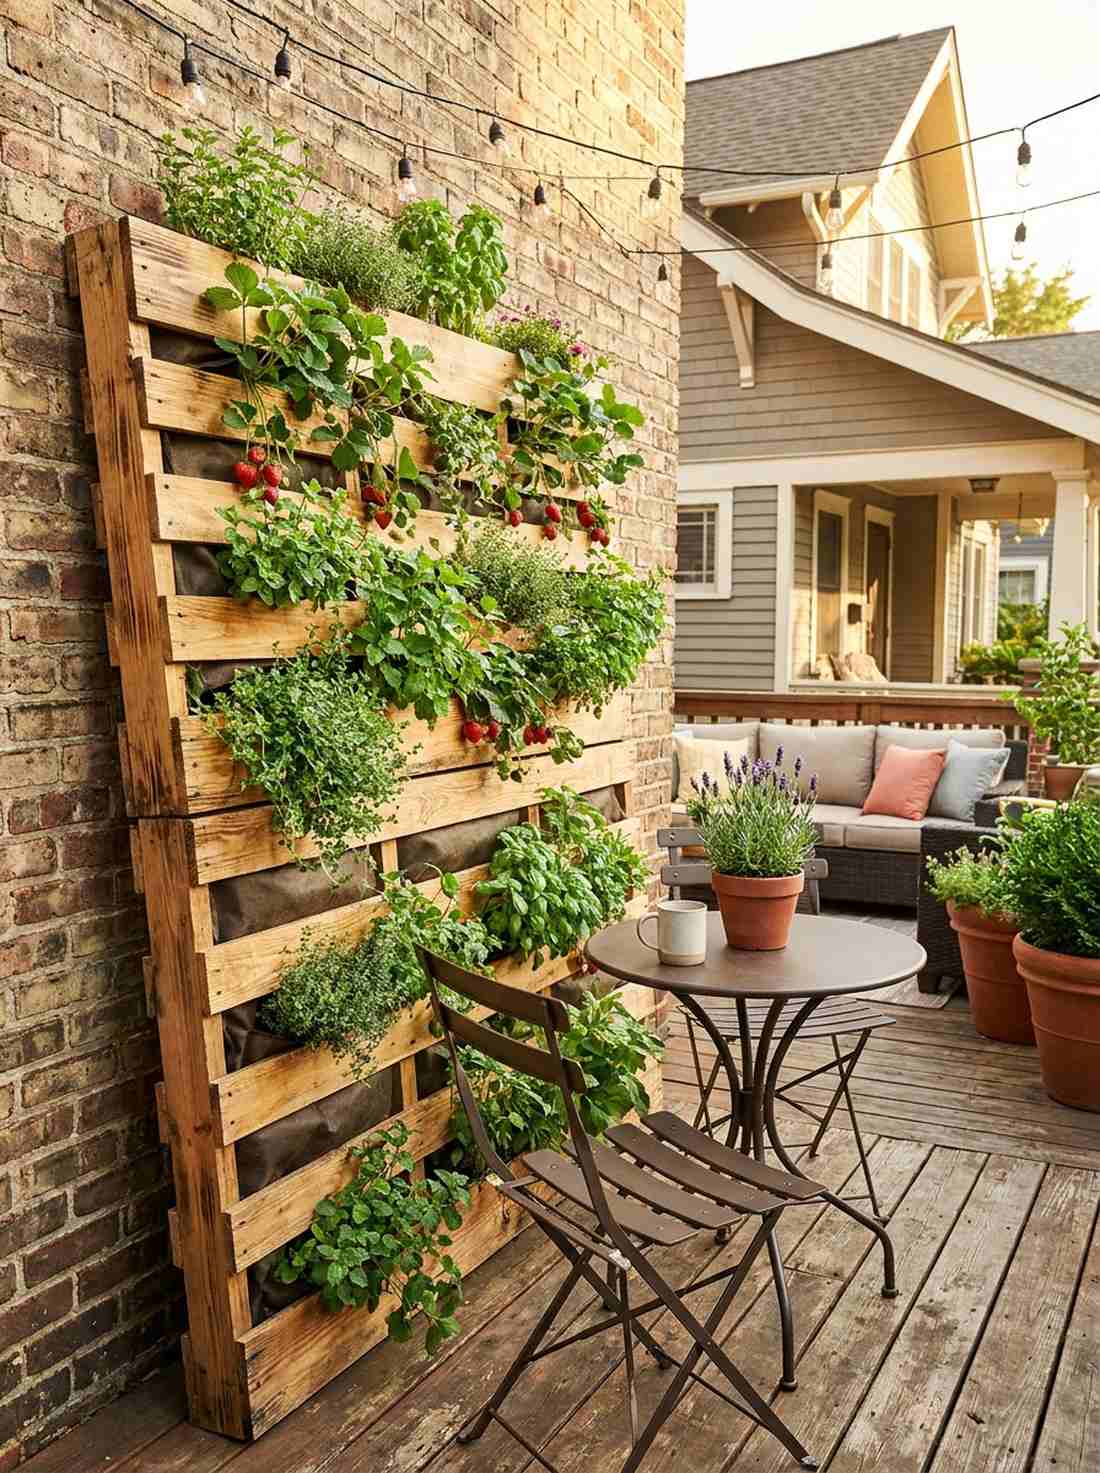
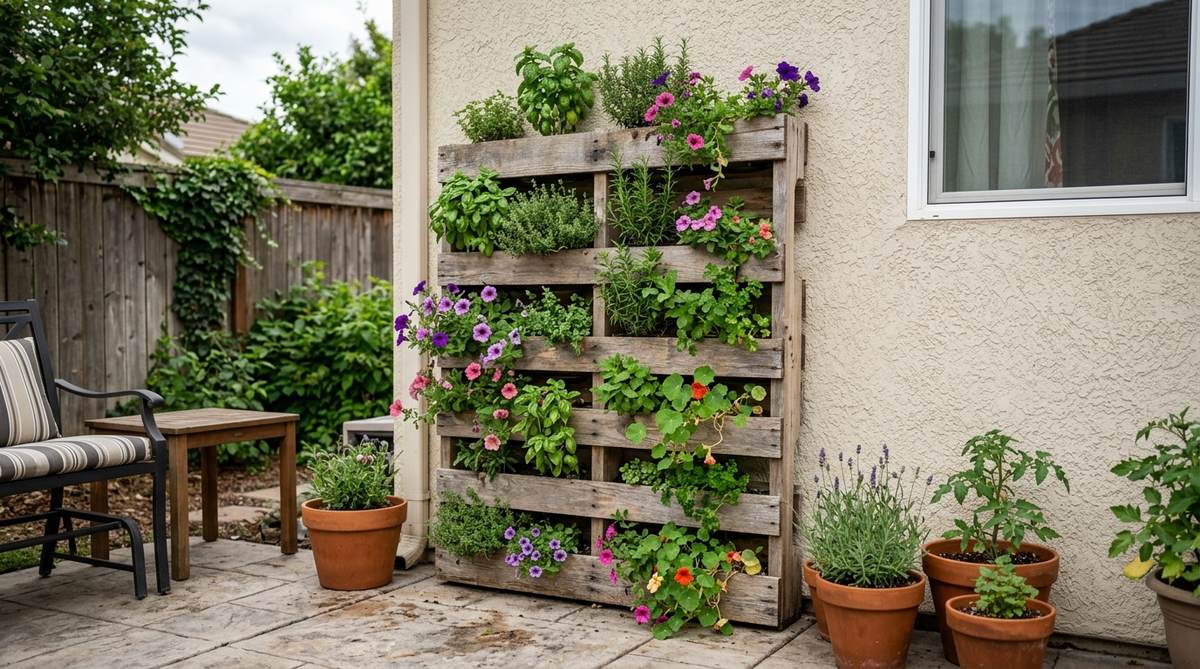
Imagine a lush wall of cascading strawberries and herbs that turns a boring balcony into a vibrant, living ecosystem. This brilliant wood garden decor ideas upcycling trick is the ultimate space-saving solution for urban patios and tight apartment outdoor spaces.
Line the back of a heat-treated shipping pallet with landscaping fabric, lean it vertically, and stuff the slat openings with rich potting soil and trailing plants. This zero-footprint layout delivers a surprisingly premium look, turning what is essentially trash into a jaw-dropping vertical focal point.
You can build this entire living wall for about $25 in soil and plants, since the wood is usually free. Pin this if you are obsessed with maximizing tiny outdoor spaces!
- Key Materials: Heat-treated (HT) wooden pallet, landscape fabric, heavy staple gun, trailing plants.
- Vibe / Style: Urban rustic jungle.
- Difficulty: Easy beginner project.
- Budget Breakdown: Pallet: Free | Fabric/Staples: $10 | Soil/Plants: $20.
- Creator’s Tip: Only use pallets stamped with “HT” (Heat Treated). Never use pallets stamped with “MB” (Methyl Bromide), as they are treated with toxic chemicals that will poison your plants.
- Smart Sourcing: Heavy-duty upholstery staple guns and thick, tear-resistant weed barrier fabric.
20. Reclaimed Wood Potting Bench
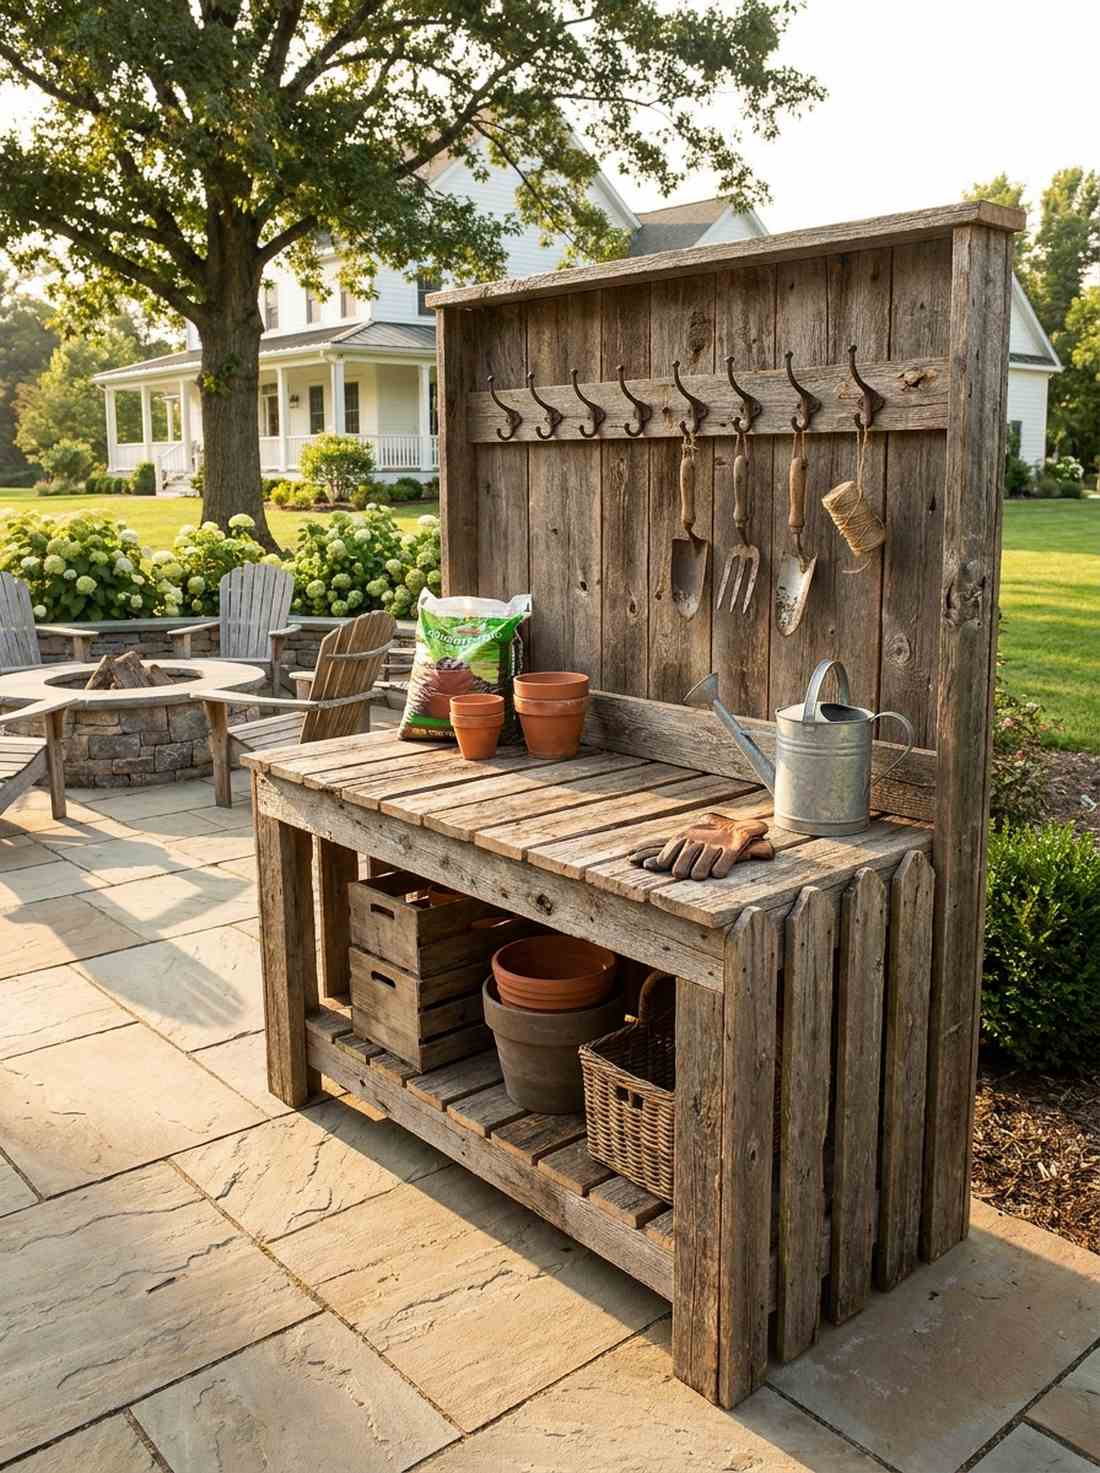
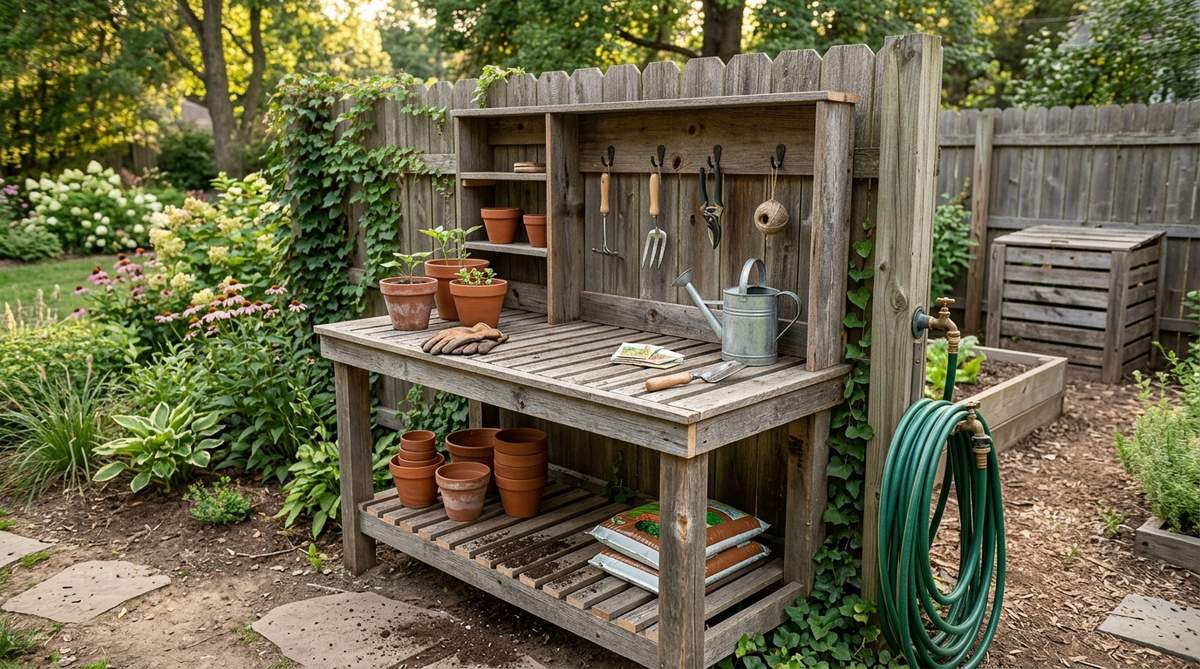
Having a dedicated, weather-beaten station for mixing soil and potting plants feels like owning a piece of a historic farmhouse. A dedicated workspace is a phenomenal woodland garden decor addition that keeps your patio perfectly clean while organizing your tools.
Construct a sturdy, waist-high table using thick, salvaged barn boards or old fence pickets, adding a back panel with hooks for hanging trowels. Bypassing cheap plastic tables for this heavy, storied timber gives your garden a bespoke, highly functional designer edge.
If you source salvaged wood, this entire workstation can be built for under $40 in screws and brackets.
- Key Materials: Salvaged planks/2x4s, exterior wood screws, metal utility hooks.
- Vibe / Style: Vintage farmhouse utility.
- Difficulty: Intermediate carpentry.
- Budget Breakdown: Reclaimed Wood: $0-$30 | Hardware/Screws: $15.
- Creator’s Tip: Leave a 1/4-inch gap between the top surface boards so that spilled soil and water can easily fall through instead of pooling and rotting the wood.
- Smart Sourcing: Rust-proof exterior star-drive wood screws and vintage-style cast iron utility hooks.
21. Wine Barrel Planters
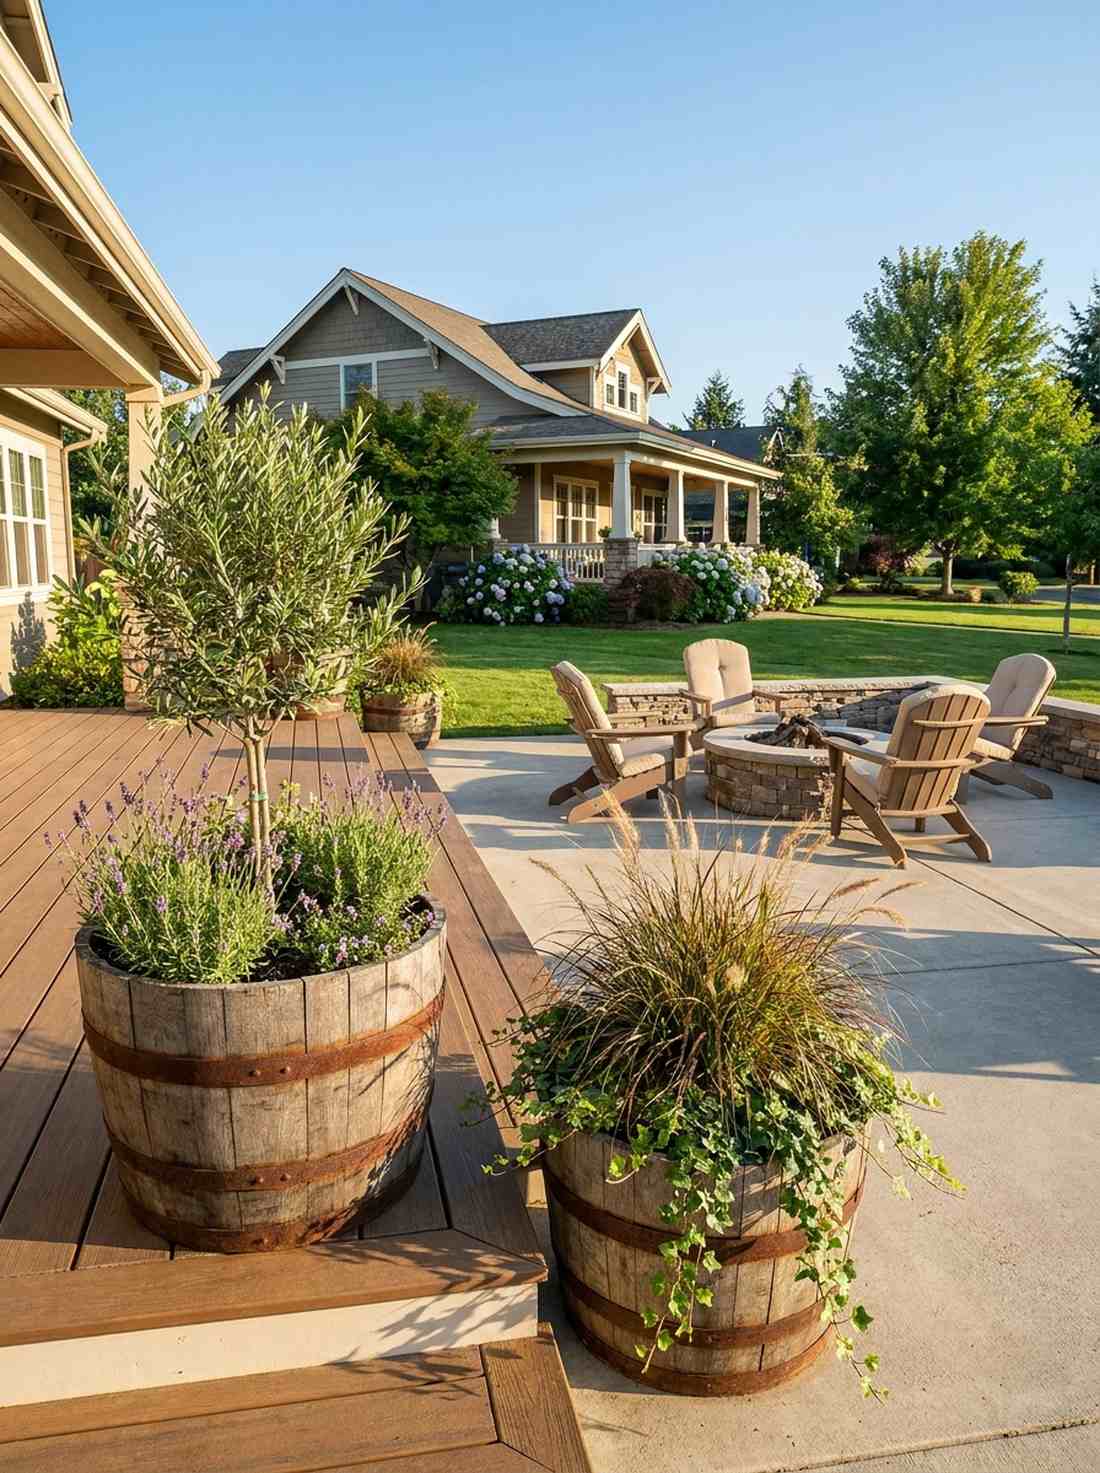
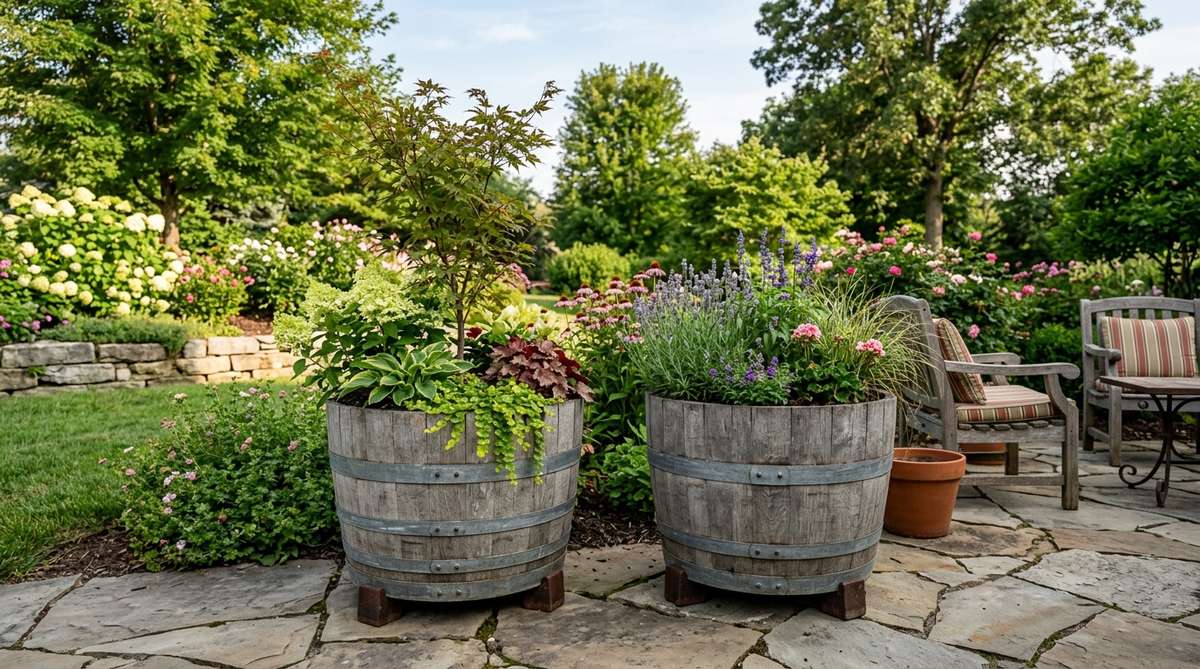
The thick oak staves and rusted iron bands of this container feel like they were pulled straight out of a Tuscan vineyard. These massive garden decor wood planters are perfect for flanking a front door or anchoring the corners of a large concrete patio.
Cut an authentic oak barrel in half, drill heavy drainage holes, and fill it with small fruit trees or dramatic ornamental grasses. This substantial, heavy-duty display looks far more expensive than standard plastic pots, bringing instant architectural weight to any setting.
Authentic half-barrels usually run between $40 and $70 at home improvement stores. Save this idea for when you want to plant a patio tree!
- Key Materials: Authentic oak half-barrel, drill with large spade bit, lightweight potting mix.
- Vibe / Style: Tuscan vineyard elegance.
- Difficulty: Easy.
- Budget Breakdown: Half-barrel: $50 | Potting Soil: $20.
- Creator’s Tip: Fill the bottom one-third of the heavy barrel with empty, crushed plastic water bottles before adding soil to drastically reduce weight and improve drainage.
- Smart Sourcing: Authentic rustic oak half-barrel planters and premium moisture-control potting mix.
22. Tree Stump Planters

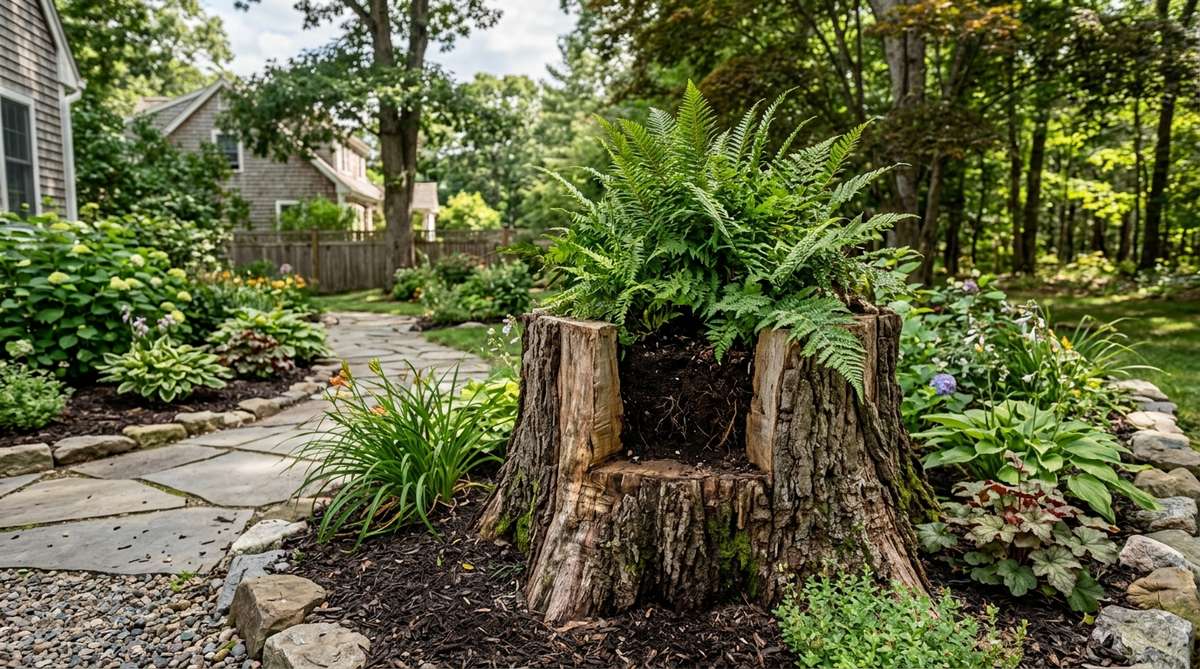
Turning a dead, immovable yard obstacle into an overflowing fountain of flowers feels like a total landscape design triumph. This clever primitive wood garden decor idea is the smartest way to deal with expensive-to-remove stumps left in the middle of your lawn.
Hollow out the center of the stump with a chisel, treat the interior to slow rotting, and pack the cavity with bright, cascading annuals. This clever illusion completely transforms an eyesore into a striking, natural focal point that blends seamlessly with the earth.
Since the stump is already there, this magical transformation only costs about $15 in flowers and soil.
- Key Materials: Existing tree stump, wood chisel/drill, shade-loving plants, potting mix.
- Vibe / Style: Enchanted forest floor.
- Difficulty: Moderate (requires heavy chiseling).
- Budget Breakdown: Plants & Soil: $15 | Tools: $0.
- Creator’s Tip: Drill several deep holes angled down and out through the sides of the stump to ensure water can drain out, preventing your plants from drowning in a “wooden bowl.”
- Smart Sourcing: Heavy-duty wood chisel sets and fast-blooming trailing flower seed blends.
23. Wooden Crate Storage
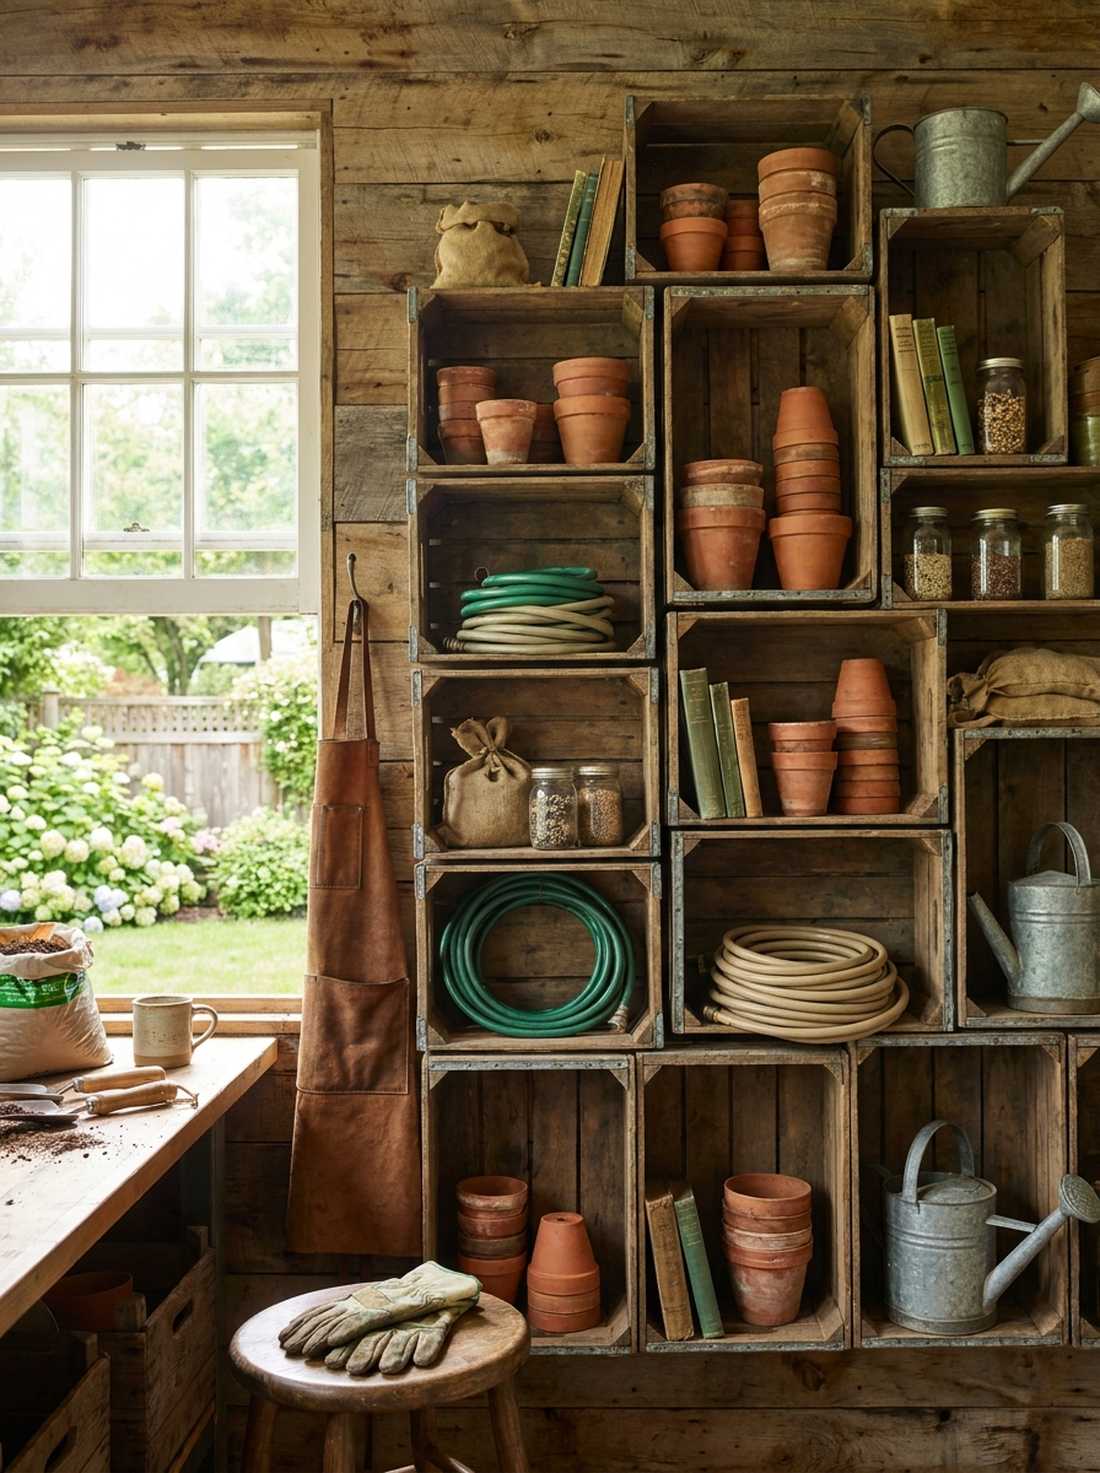
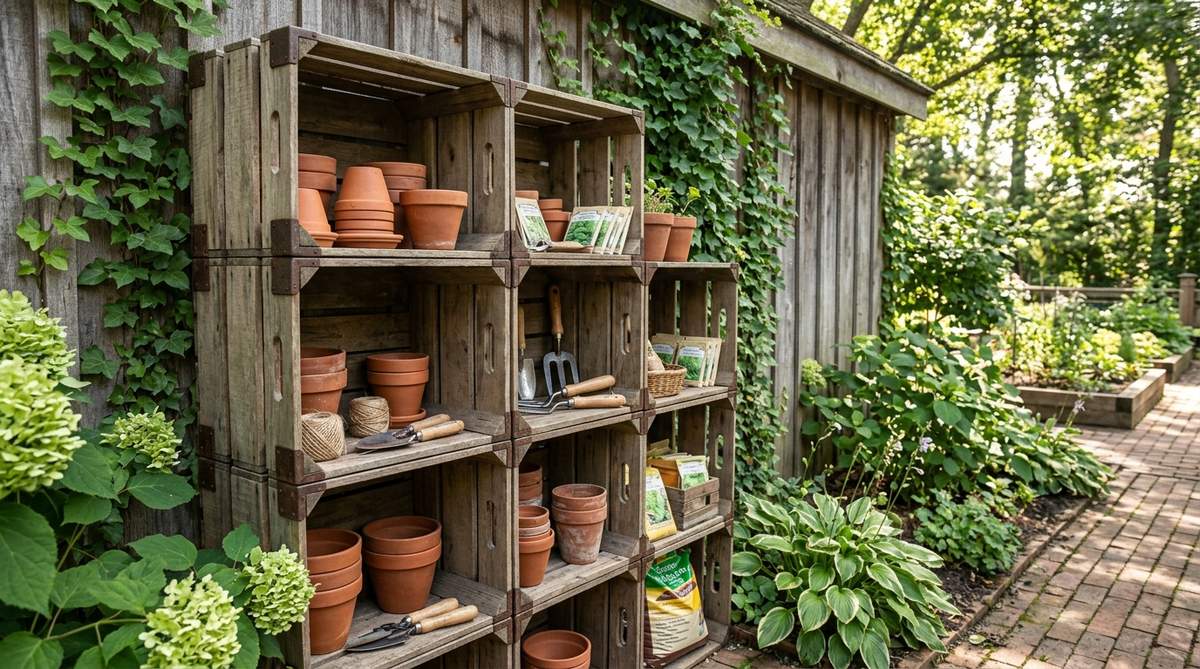
A perfectly stacked wall of vintage boxes creates a rustic shelving system that feels like an old-world botanical supply shop. This modular wood decor for garden layout is perfect for bringing vertical organization to a messy, cluttered potting shed or garage wall.
Secure weathered wooden apple crates together in an asymmetrical grid, using the cubbies to display terracotta pots and neatly coiled hoses. This industrial, compartmentalized look gives a surprisingly premium aesthetic, totally outclassing cheap plastic shelving racks.
You can piece together a brilliant storage wall for about $40 to $80 depending on where you source the crates. Pin this to your shed organization board!
- Key Materials: Vintage or reproduction wooden crates, mending plates, wood screws.
- Vibe / Style: Vintage botanical apothecary.
- Difficulty: Easy.
- Budget Breakdown: Crates (x4): $60 | Brackets: $10.
- Creator’s Tip: Always secure the top-most crates directly into the wall studs using heavy L-brackets so the entire unit doesn’t tip forward when loaded with heavy pots.
- Smart Sourcing: Pre-weathered rustic wooden storage crates (bulk pack) and flat steel mending joining plates.
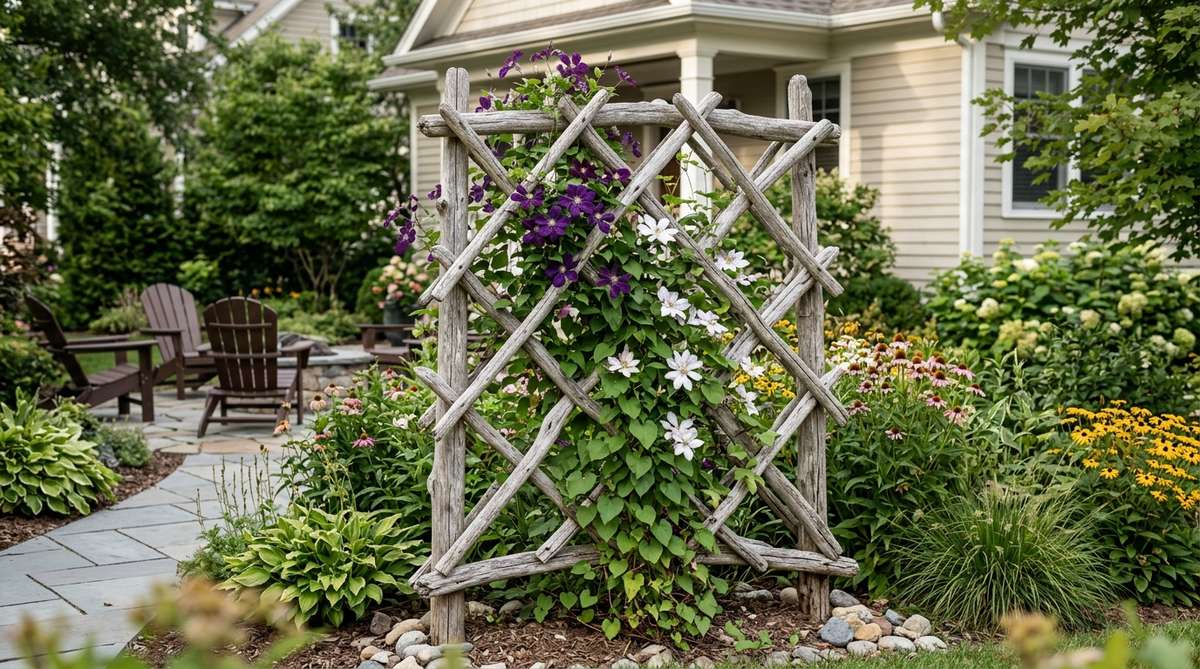
24. Cedar Obelisk Trellises
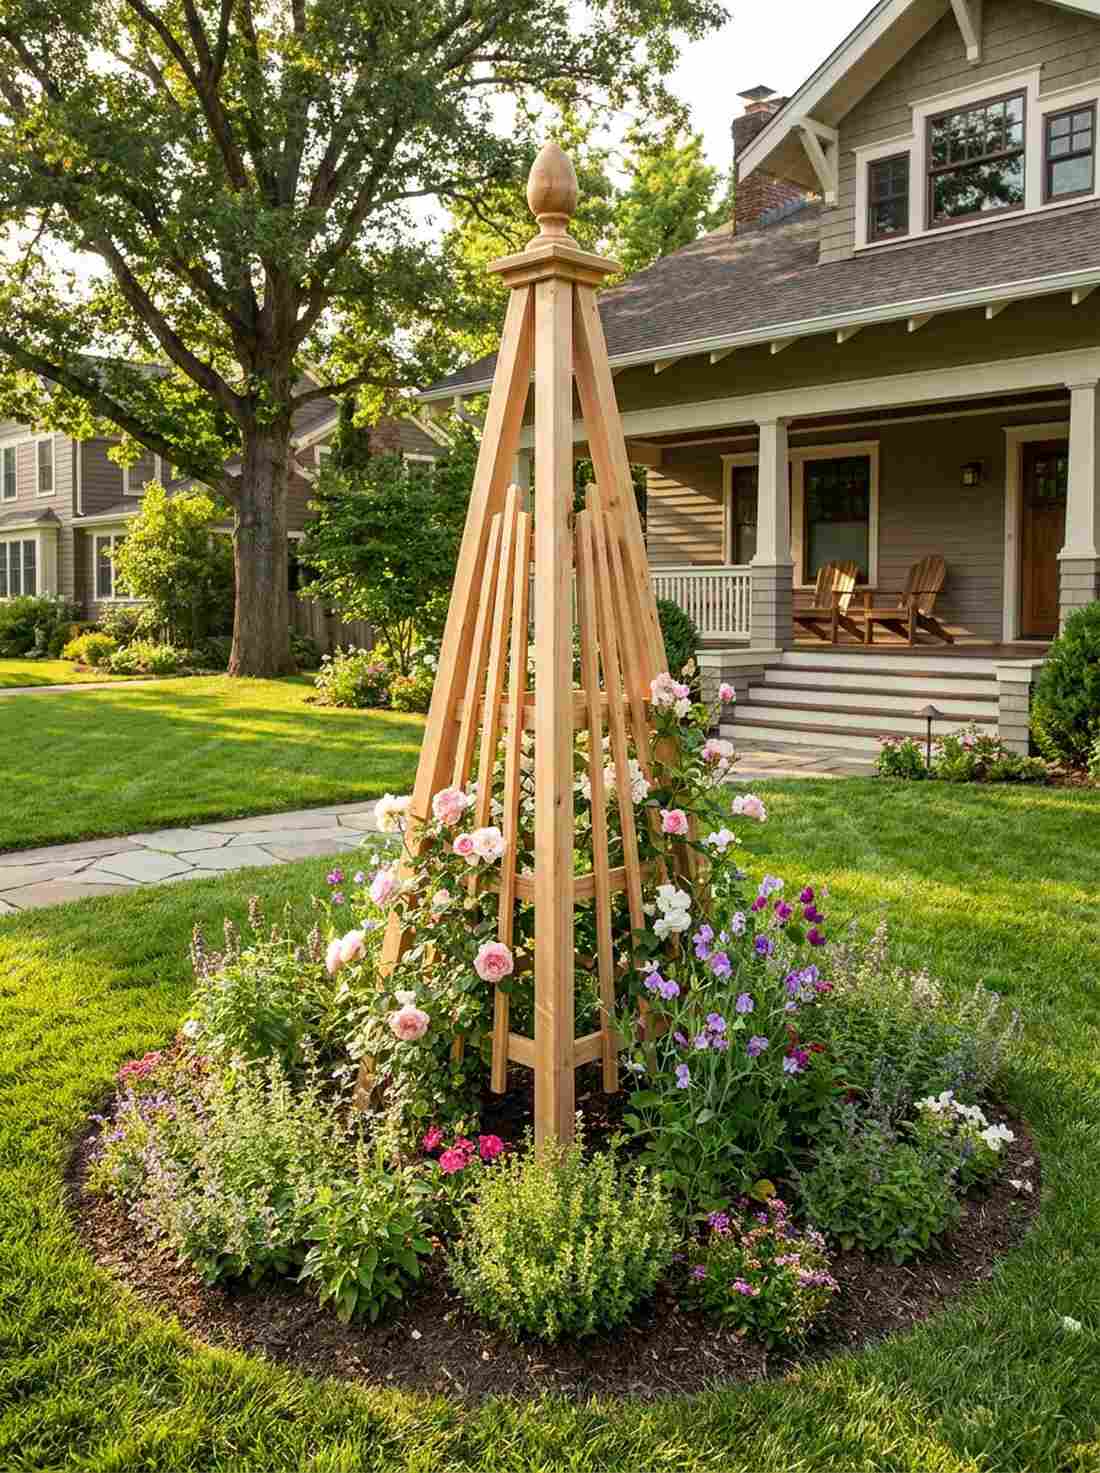

Rising from the center of a flower bed, this towering pyramid structure feels like a piece of high-end English estate architecture. This elegant diy garden decor wood feature is absolutely phenomenal for supporting heavy, climbing roses or sweet peas in the center of your lawn.
Construct a tapering, four-sided wooden spire using slender cedar battens topped with a decorative wooden finial. Bypassing flimsy wire cages for this solid, geometric form delivers a highly-curated, expensive look that adds crucial vertical height to flat gardens.
You can build a stunning 6-foot obelisk for about $35 in raw cedar strips.
- Key Materials: 1×2 cedar strips, exterior brad nails, decorative wooden post cap.
- Vibe / Style: Classic English garden.
- Difficulty: Intermediate (requires angle cuts).
- Budget Breakdown: Cedar strips: $25 | Finial & Nails: $10.
- Creator’s Tip: Build the obelisk with slightly longer legs at the bottom, leaving them unpainted, so you can push them 6 inches deep into the soil to anchor the structure against high winds.
- Smart Sourcing: Decorative wooden finial post caps and stainless steel exterior brad nails.
Material Guide: Cheap vs. Premium Aesthetic
Knowing exactly where to save and where to spend makes all the difference in achieving that “looks expensive but isn’t” outdoor vibe.
- Standard vs. UV-Resistant/Premium: Cheap pine rots in two years. Spending slightly more on Cedar or applying a heavy UV-blocking marine sealant ensures your wood stays golden and strong for over a decade.
- Pre-made Kits vs. Sourcing Locally: While scavenging pallets is free, utilizing pre-cut, precision-drilled wood hardware kits for structures like arbors and raised beds will literally save you 15 hours of frustrating labor and result in a dramatically cleaner finish.
If you have a boring, blank brick wall on the side of your house, this next space-saving technique will completely blow your mind.
Vertical Wood Installations for Climbing Plants
Vertical wooden structures maximize planting space while adding architectural dimension to flat landscapes. These projects support climbing vegetables, flowering vines, and espalier fruit trees.
25. Wall-Mounted Espalier Frames
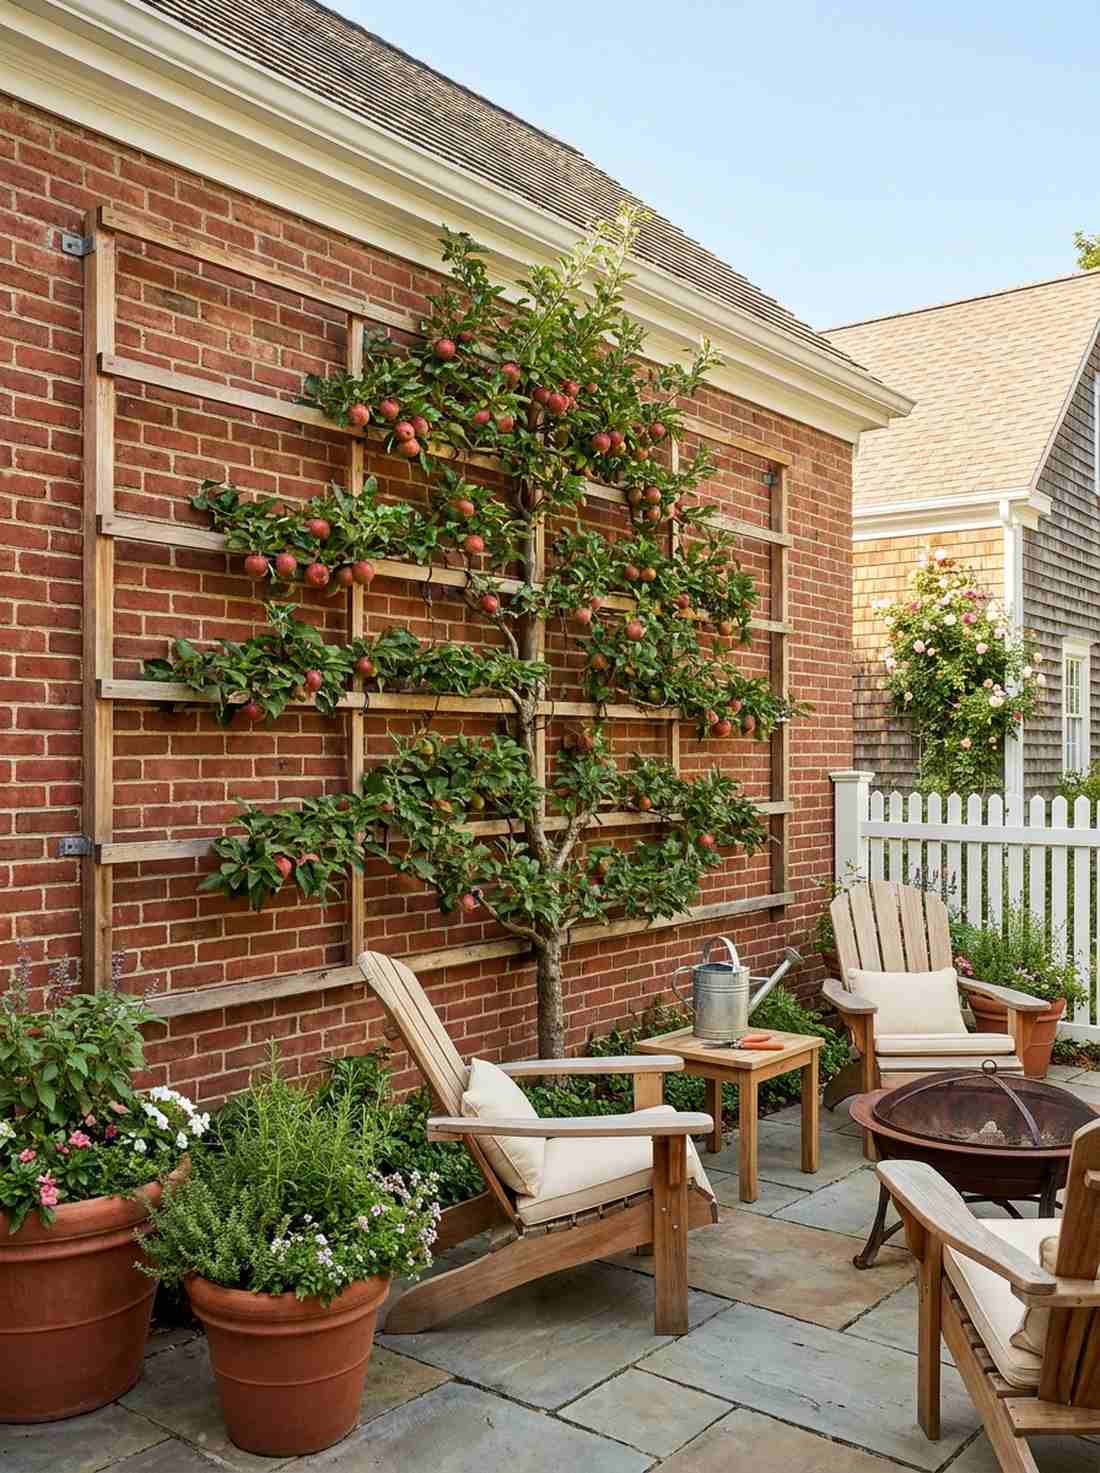
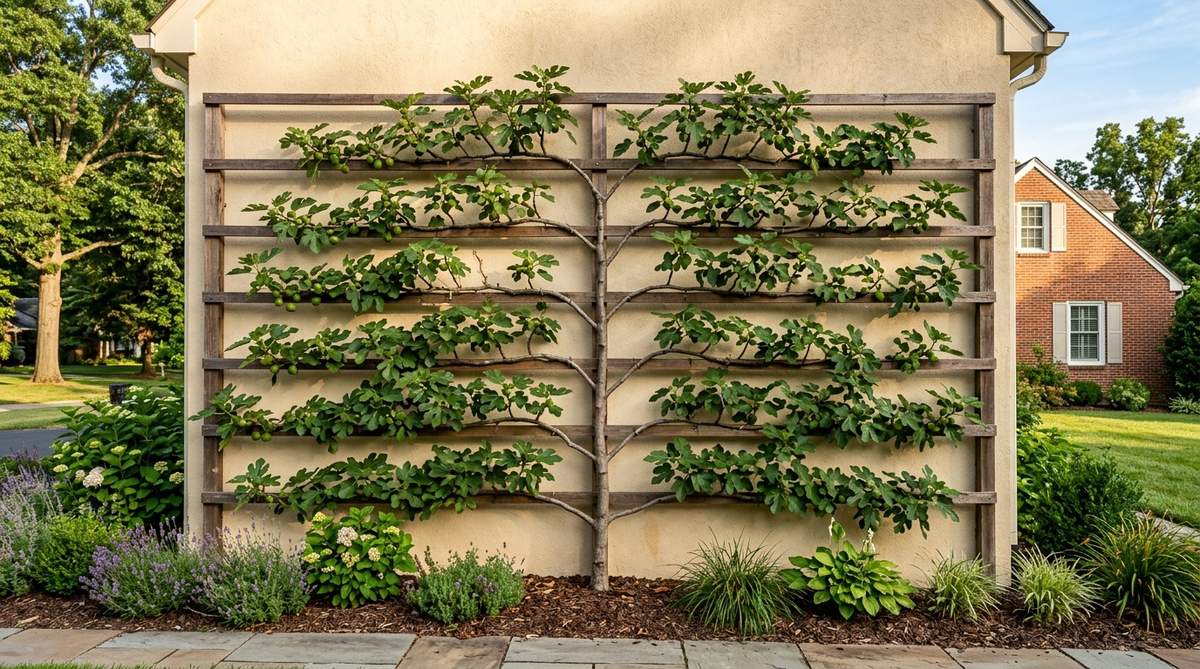
Training a fruit tree to grow perfectly flat against a wall feels like an ancient, aristocratic landscaping secret. This specialized wood garden decor ideas framework is the absolute best way to grow apples or figs in incredibly narrow side-yards or tight urban alleys.
Mount horizontal cedar slats flush against a warm, south-facing brick wall to create a rigid grid for tying down branches. This disciplined, geometric living wall gives a designer-level finish, turning a plain exterior into a living, producing piece of art.
The wooden framework costs about $40 to install, plus the cost of the bare-root tree. Pin this to your urban gardening board!
- Key Materials: Cedar slats, masonry anchors, soft tree-training wire.
- Vibe / Style: Sophisticated European courtyard.
- Difficulty: Advanced (requires masonry drilling and careful pruning).
- Budget Breakdown: Wood & Anchors: $40 | Tree & Wire: $50.
- Creator’s Tip: Use a hammer drill and proper masonry sleeves when attaching the wood grid to brick; regular screws will pull out of mortar under the heavy weight of a fruiting tree.
- Smart Sourcing: Soft rubber-coated plant training wire and heavy-duty concrete masonry anchor kits.
26. Bamboo Teepee Structures
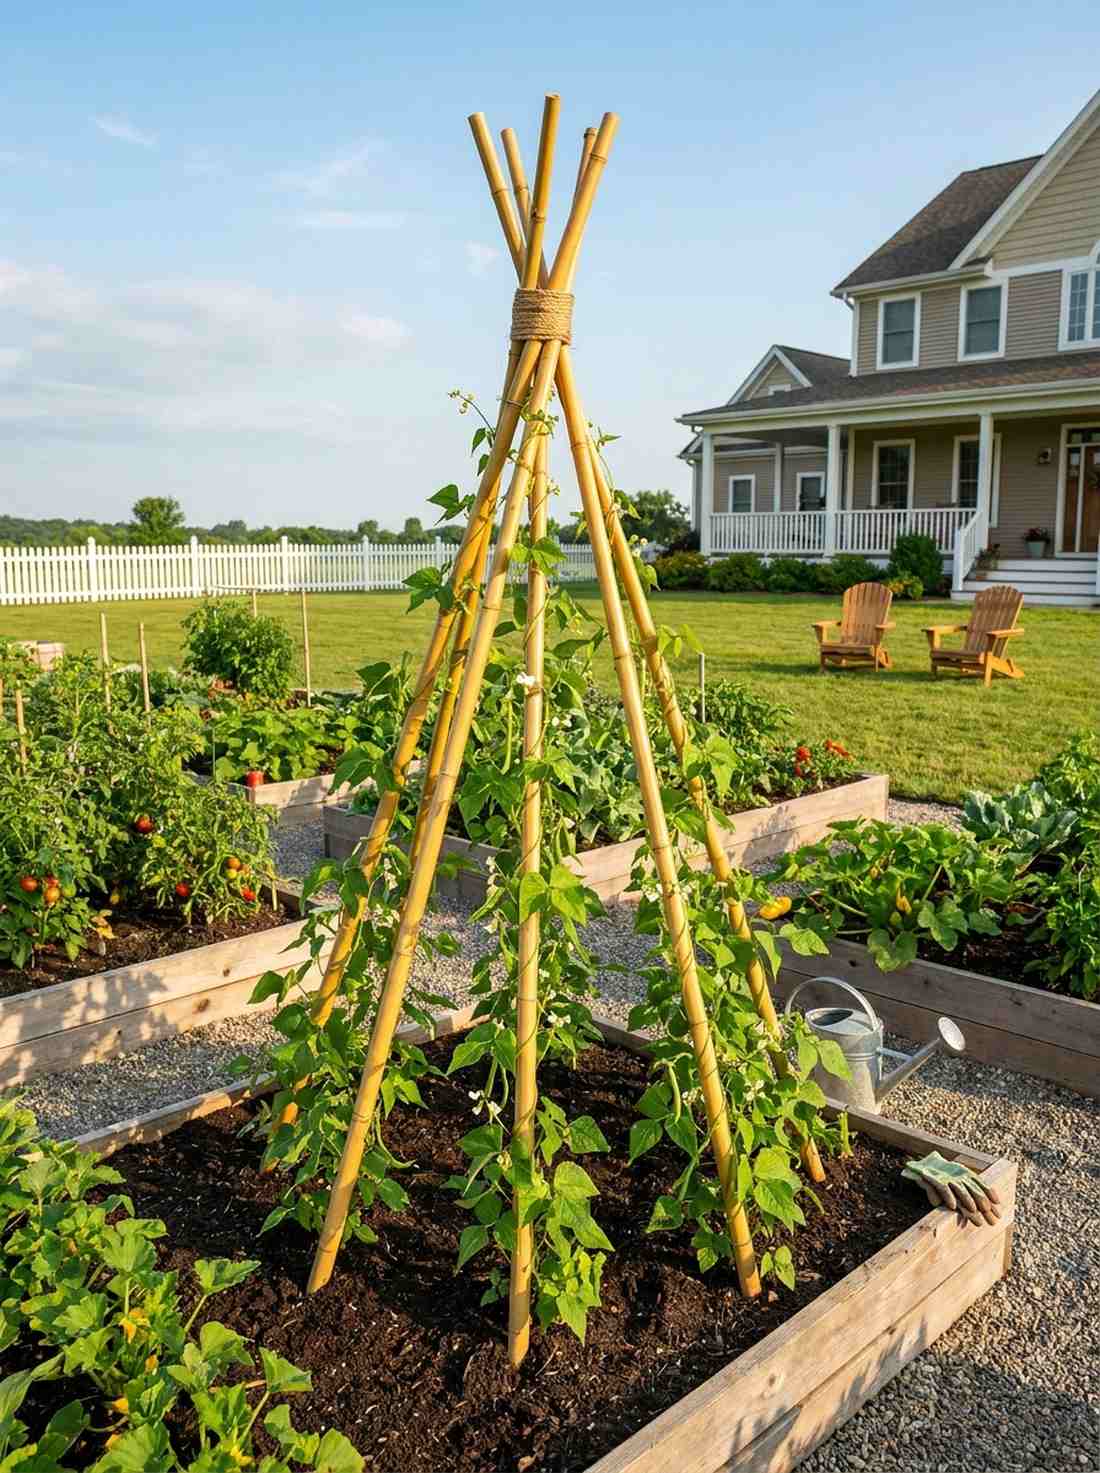
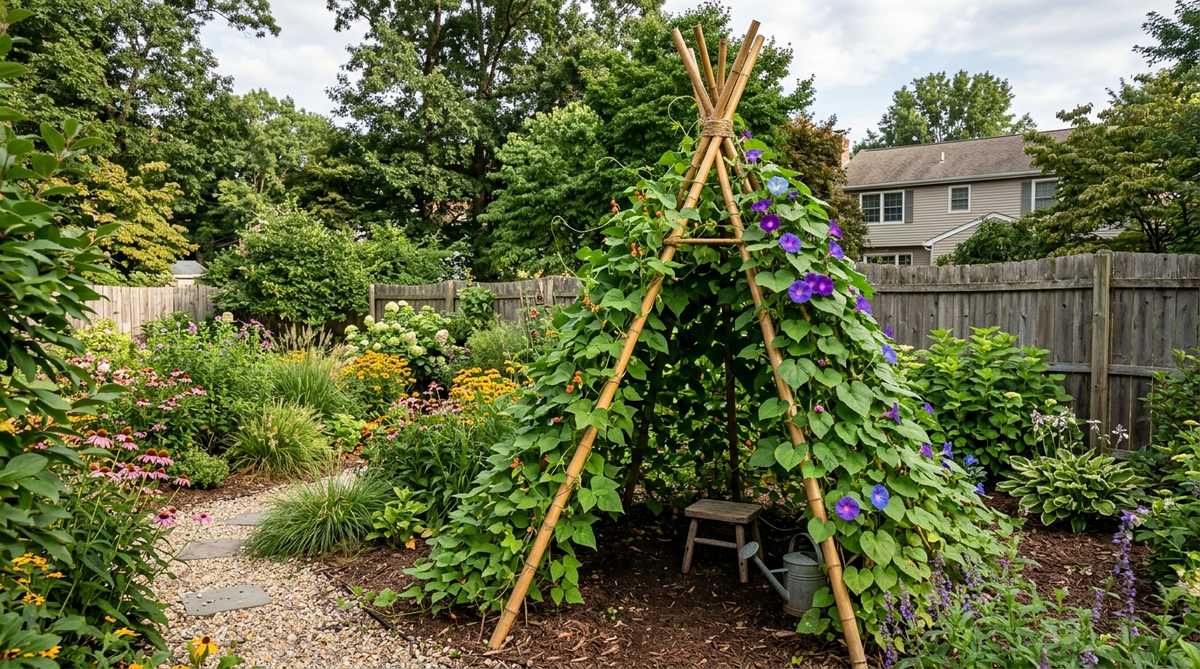
Watching vines spiral up this golden, cone-shaped tower feels like having a magical, living tent right in your vegetable patch. This lightweight garden decor wood setup is ideal for creating rapid vertical growth for pole beans or morning glories.
Lash several tall bamboo poles together at the apex and spread the bases wide, securing the joints with tight twine. This organic, highly functional structure looks far more expensive than plastic netting and adds a wonderful rustic height to flat garden plots.
You can build an 8-foot tall living teepee for less than $15. It’s a fast upgrade that completely changes the vibe of your veggie garden.
- Key Materials: 6 to 8-foot bamboo poles, heavy garden twine.
- Vibe / Style: Rustic organic farm.
- Difficulty: Very easy.
- Budget Breakdown: Bamboo poles: $10 | Twine: $5.
- Creator’s Tip: Plant the seeds on the *inside* of the teepee poles rather than the outside; as the plants grow toward the sun, they naturally pull themselves tighter against the wood framework.
- Smart Sourcing: Thick 6-foot natural bamboo garden stakes (bulk pack) and weather-resistant nylon lashing cord.
27. Lattice Privacy Screens
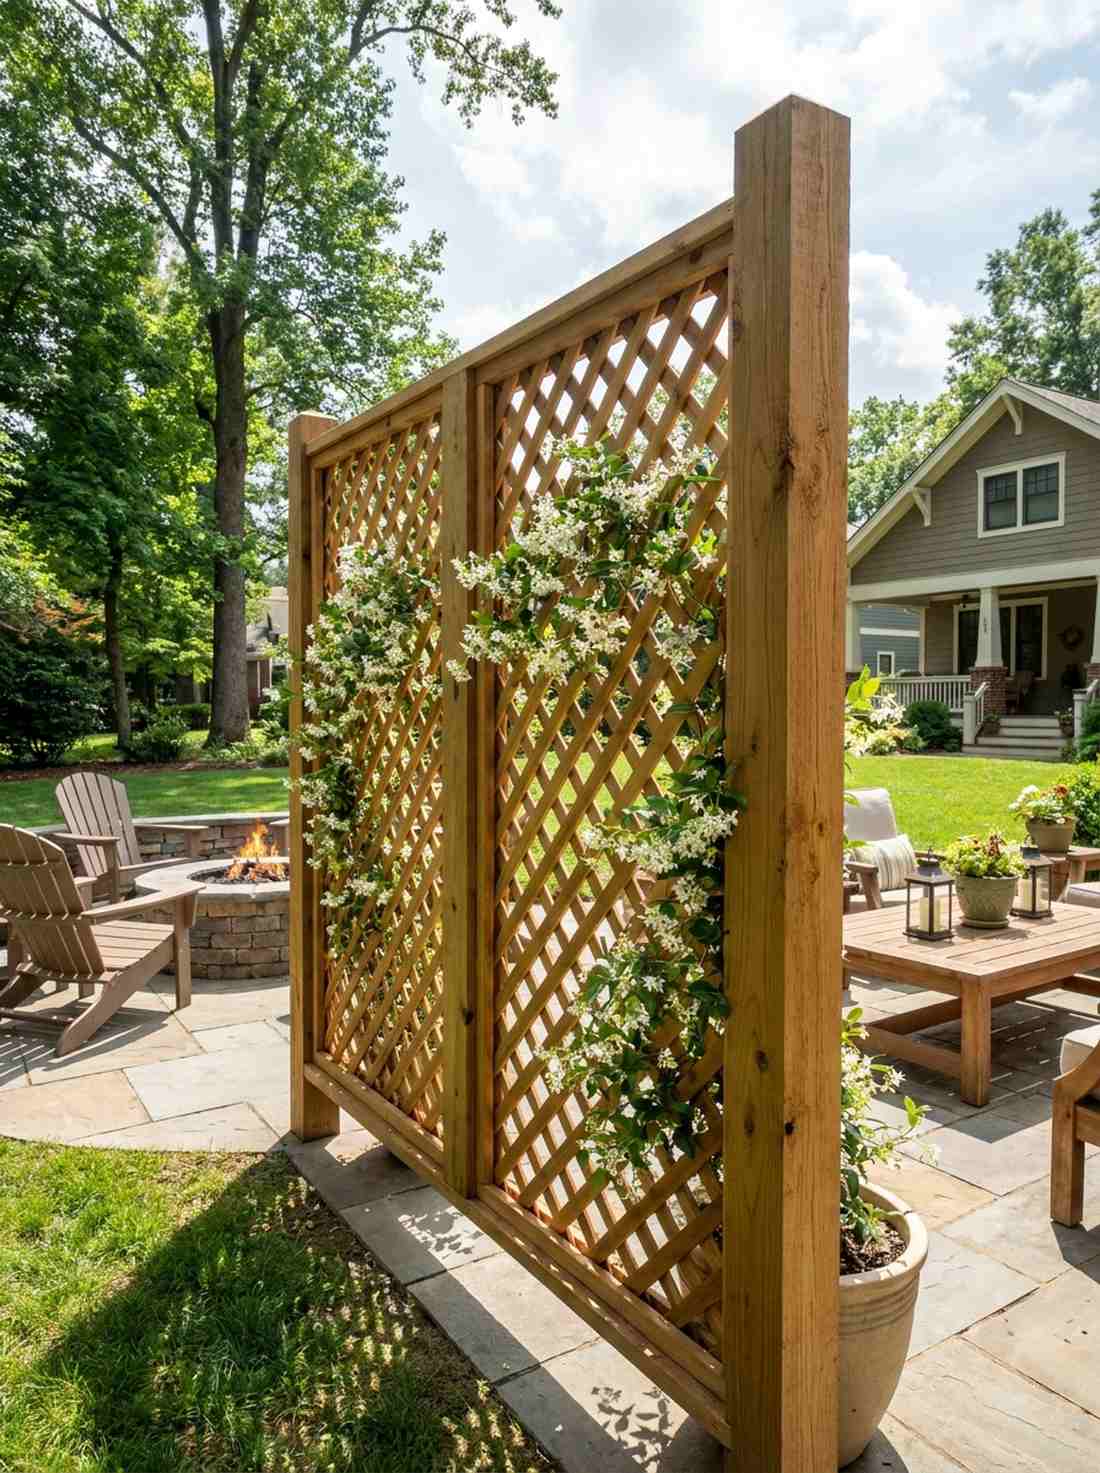
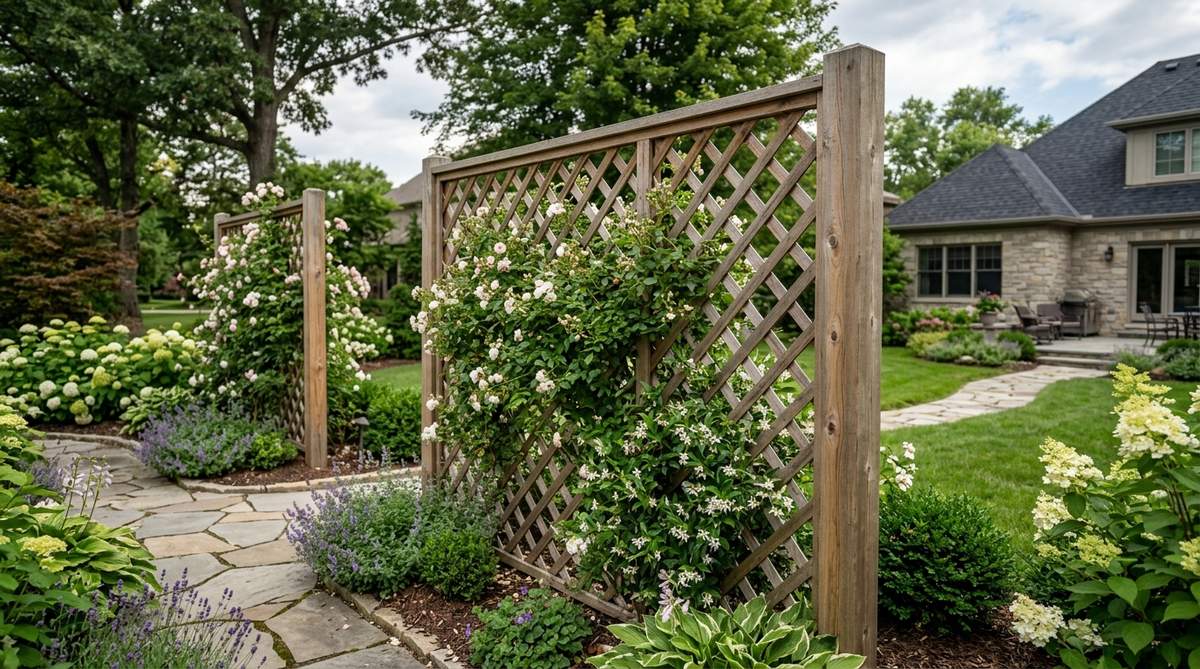
Sitting behind a beautiful wooden grid draped in fragrant jasmine feels like relaxing in an exclusive, secluded VIP cabana. This semi-transparent wood decor for garden architecture is perfect for blocking nosy neighbors without building a claustrophobic solid wall.
Frame sturdy diagonal cedar lattice panels between heavy wooden posts, allowing the gaps to filter sunlight and let breezes pass through. By elevating basic lattice with thick, chunky framing borders, it delivers a surprisingly premium look that redefines your property lines.
A framed 6-foot privacy section typically costs around $70 to $120 to build. Pin this if you desperately need patio privacy this summer!
- Key Materials: Heavy-duty wood lattice panels, 2×4 framing lumber, 4×4 base posts.
- Vibe / Style: Private garden sanctuary.
- Difficulty: Intermediate carpentry.
- Budget Breakdown: Lattice sheets: $40 | Framing wood: $30 | Posts/Hardware: $30.
- Creator’s Tip: Sandwich the thin lattice sheet between two 2×4 framing boards on all edges; this prevents the thin wood from warping and popping out during extreme heat and rain.
- Smart Sourcing: Heavy-duty diagonal cedar privacy lattice panels and premium exterior wood framing screws.
28. A-Frame Cucumber Trellis
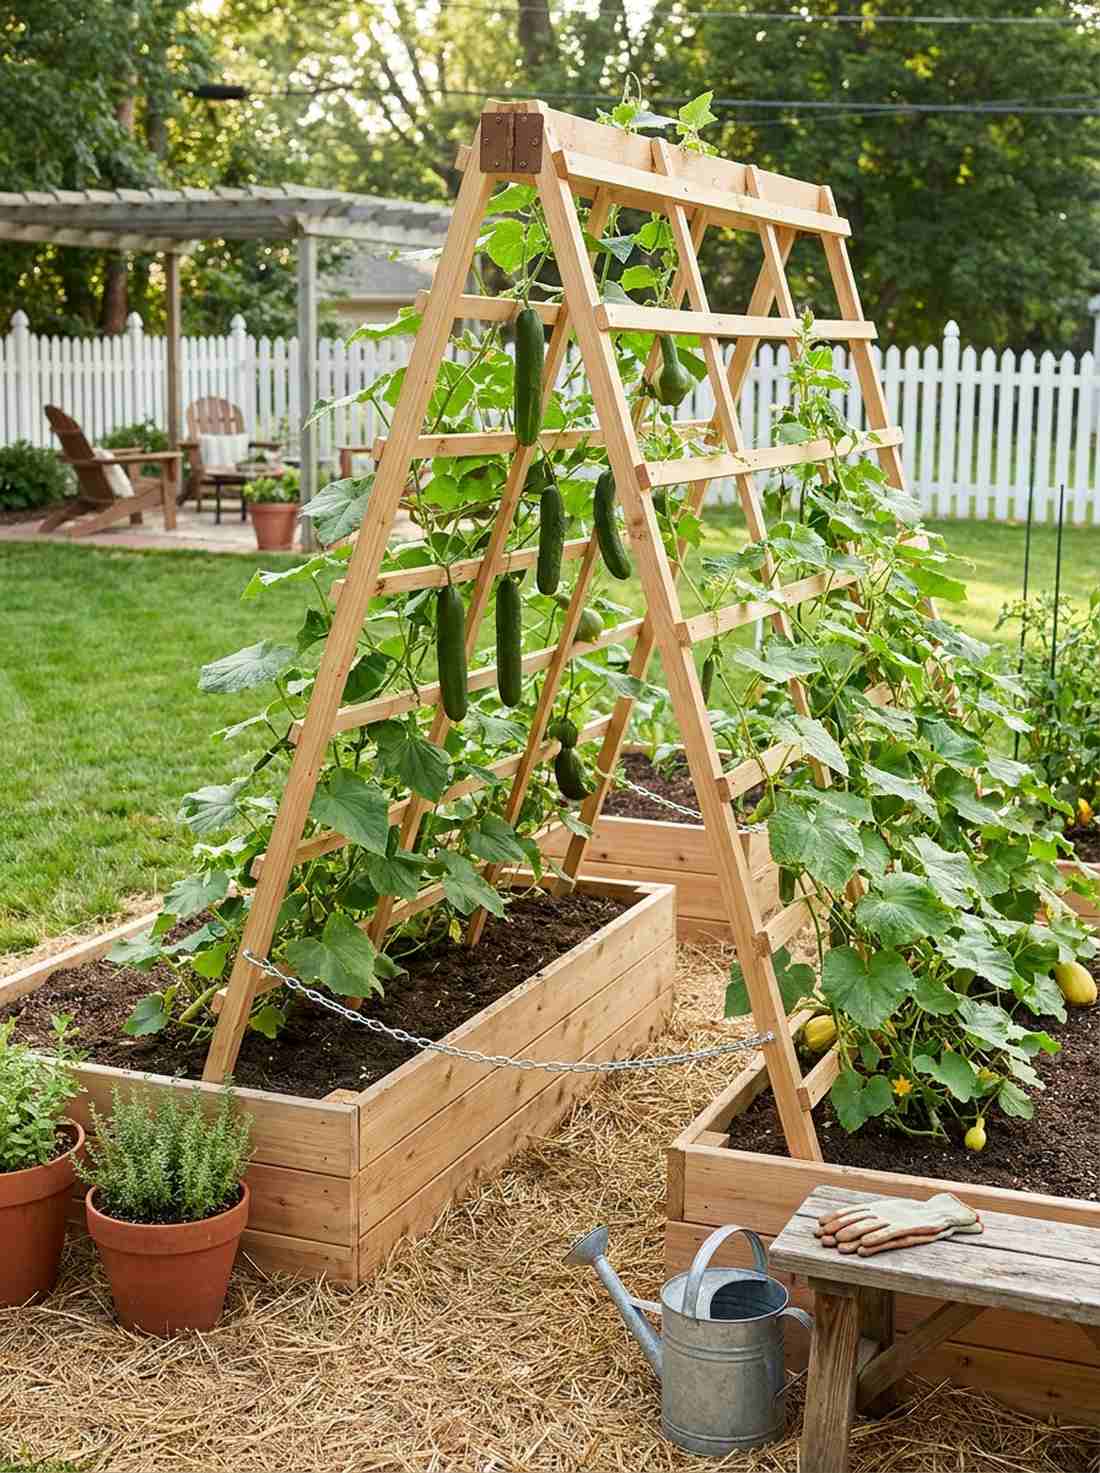
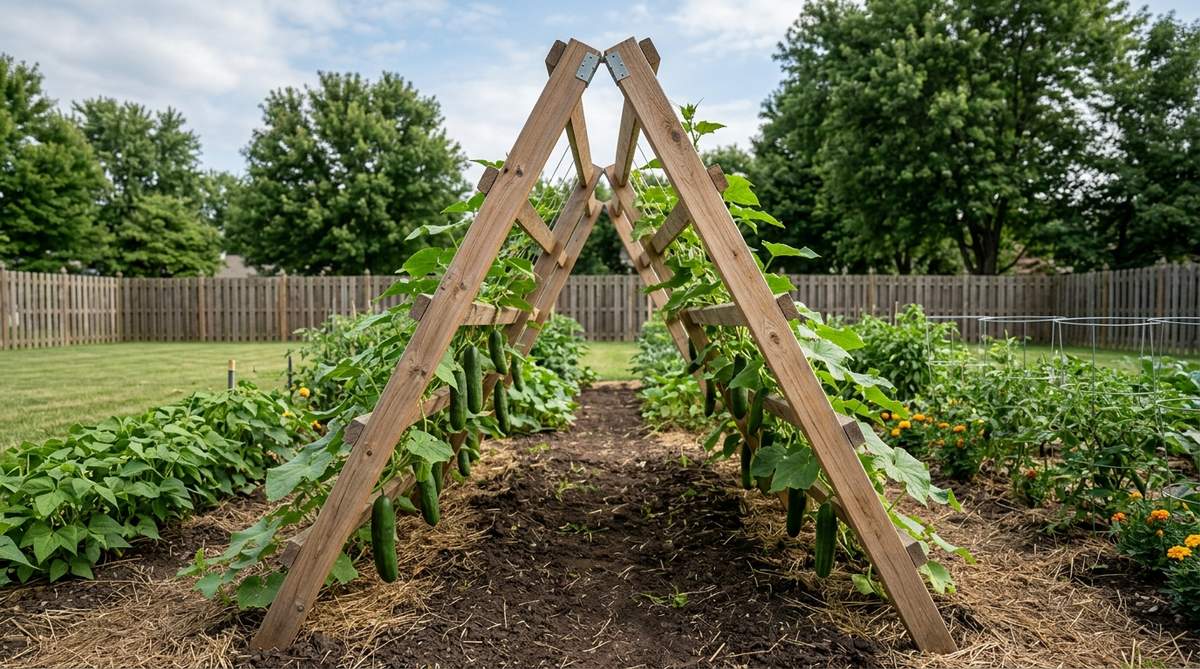
Harvesting perfectly straight vegetables that dangle effortlessly from an overhead rack feels incredibly professional and satisfying. This angled diy garden decor wood frame is the smartest way to keep your cucumbers and squash off the wet ground to prevent rotting.
Hinge two large slatted wooden panels at the top to form a freestanding tent over your raised beds, allowing vines to climb up both sides. This incredibly smart layout gives a bespoke touch to vegetable patches and practically doubles your usable growing area.
You can assemble this folding, reusable wooden frame for about $25.
- Key Materials: 1×2 furring strips, rust-proof top hinges, exterior staples.
- Vibe / Style: High-yield homestead.
- Difficulty: Easy beginner build.
- Budget Breakdown: Wood strips: $15 | Hinges/Hardware: $10.
- Creator’s Tip: Run a piece of chain or strong string between the two bottom legs so the A-frame doesn’t flatten out and collapse under the heavy weight of mature squash.
- Smart Sourcing: Heavy-duty rust-proof strap hinges and pre-cut wooden garden trellis kits.
Don’t overlook the tiny details! The next set of micro-projects cost almost nothing but bring the exact aesthetic that makes Pinterest gardens go viral.
Small-Scale Wood Projects for Garden Details
Finishing touches complete garden designs through small wooden elements that add personality and function. These quick projects require minimal materials while delivering significant visual impact.
29. Wooden Plant Markers
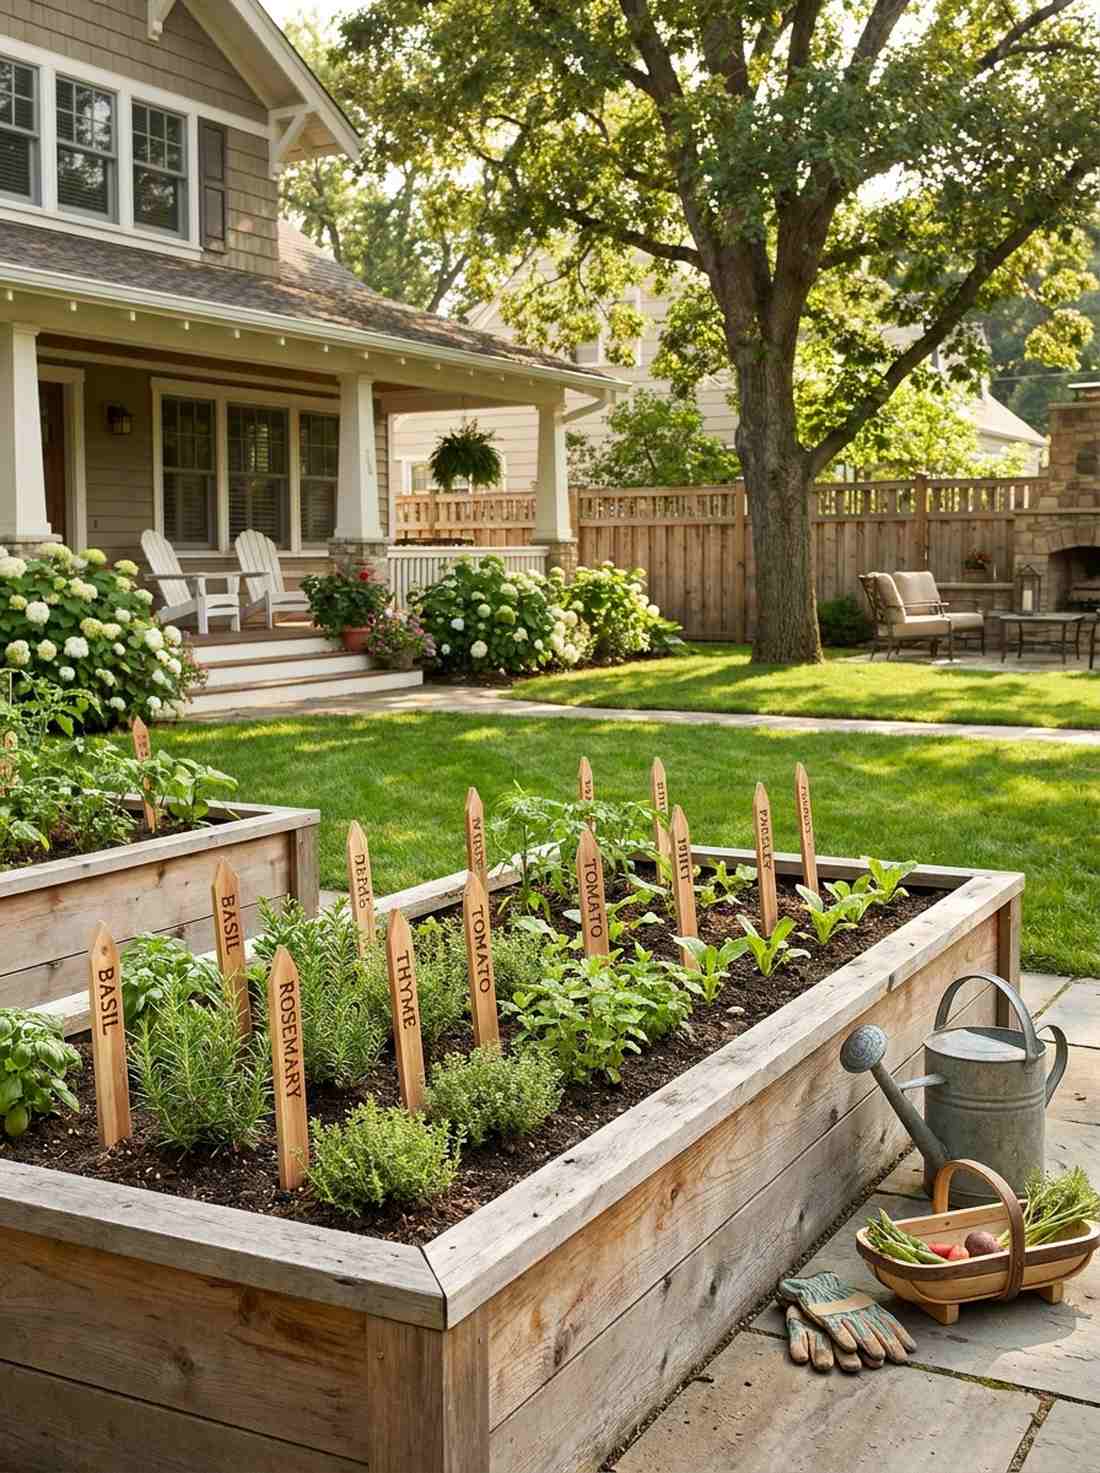
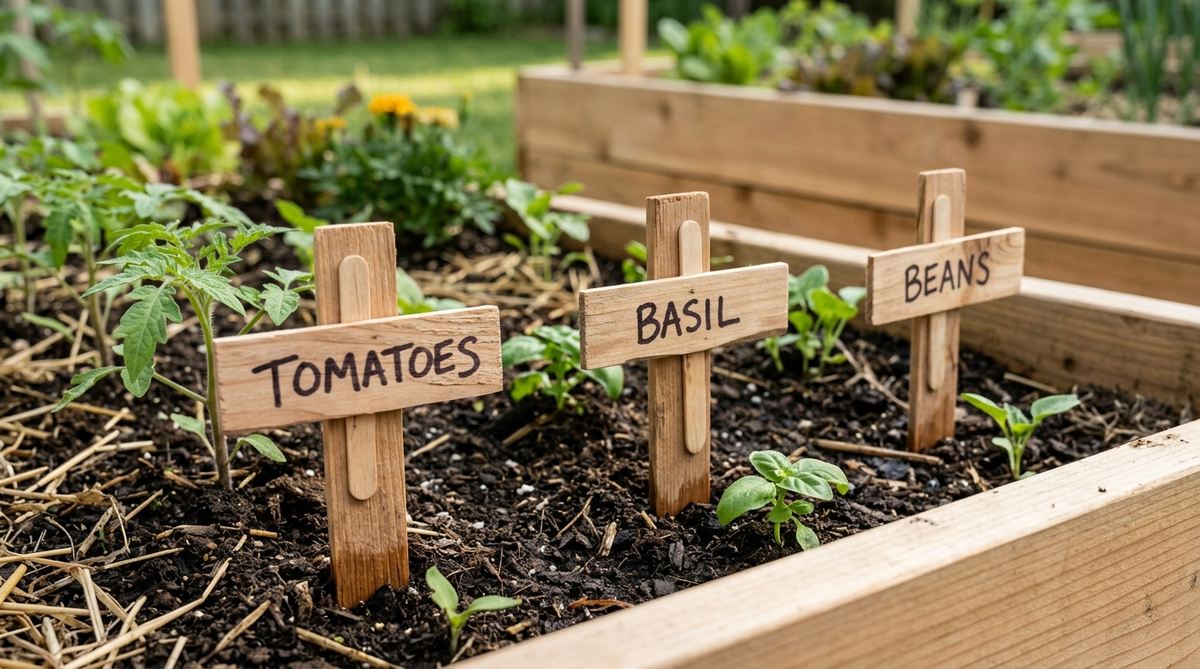
Seeing rows of perfectly labeled herbs with matching wooden stakes feels like walking through a professional boutique nursery. These tiny garden decor wood accents are perfect for organizing messy seed-starting trays or identifying young vegetable sprouts.
Cut thin cedar shims to a point and use a wood-burning pen to permanently etch the plant names into the surface. Avoiding ugly white plastic tags in favor of these natural markers presents a highly curated, earth-friendly aesthetic that looks phenomenal in close-up photos.
You can make 50 of these markers for under $10 using basic shims. Save this to your garden organization board!
- Key Materials: Cedar construction shims, wood-burning tool or waterproof paint pen.
- Vibe / Style: Neat, organic apothecary.
- Difficulty: Very easy craft.
- Budget Breakdown: Cedar shims: $5 | Wood burner: $15.
- Creator’s Tip: If using a marker instead of a wood-burning tool, spray the wood with a clear acrylic sealer *before* writing; this stops the ink from bleeding into the wood grain.
- Smart Sourcing: Blank pre-cut cedar garden stakes (bulk pack) and fine-tip precision wood-burning pen kits.
30. Rustic Wooden Garden Signs
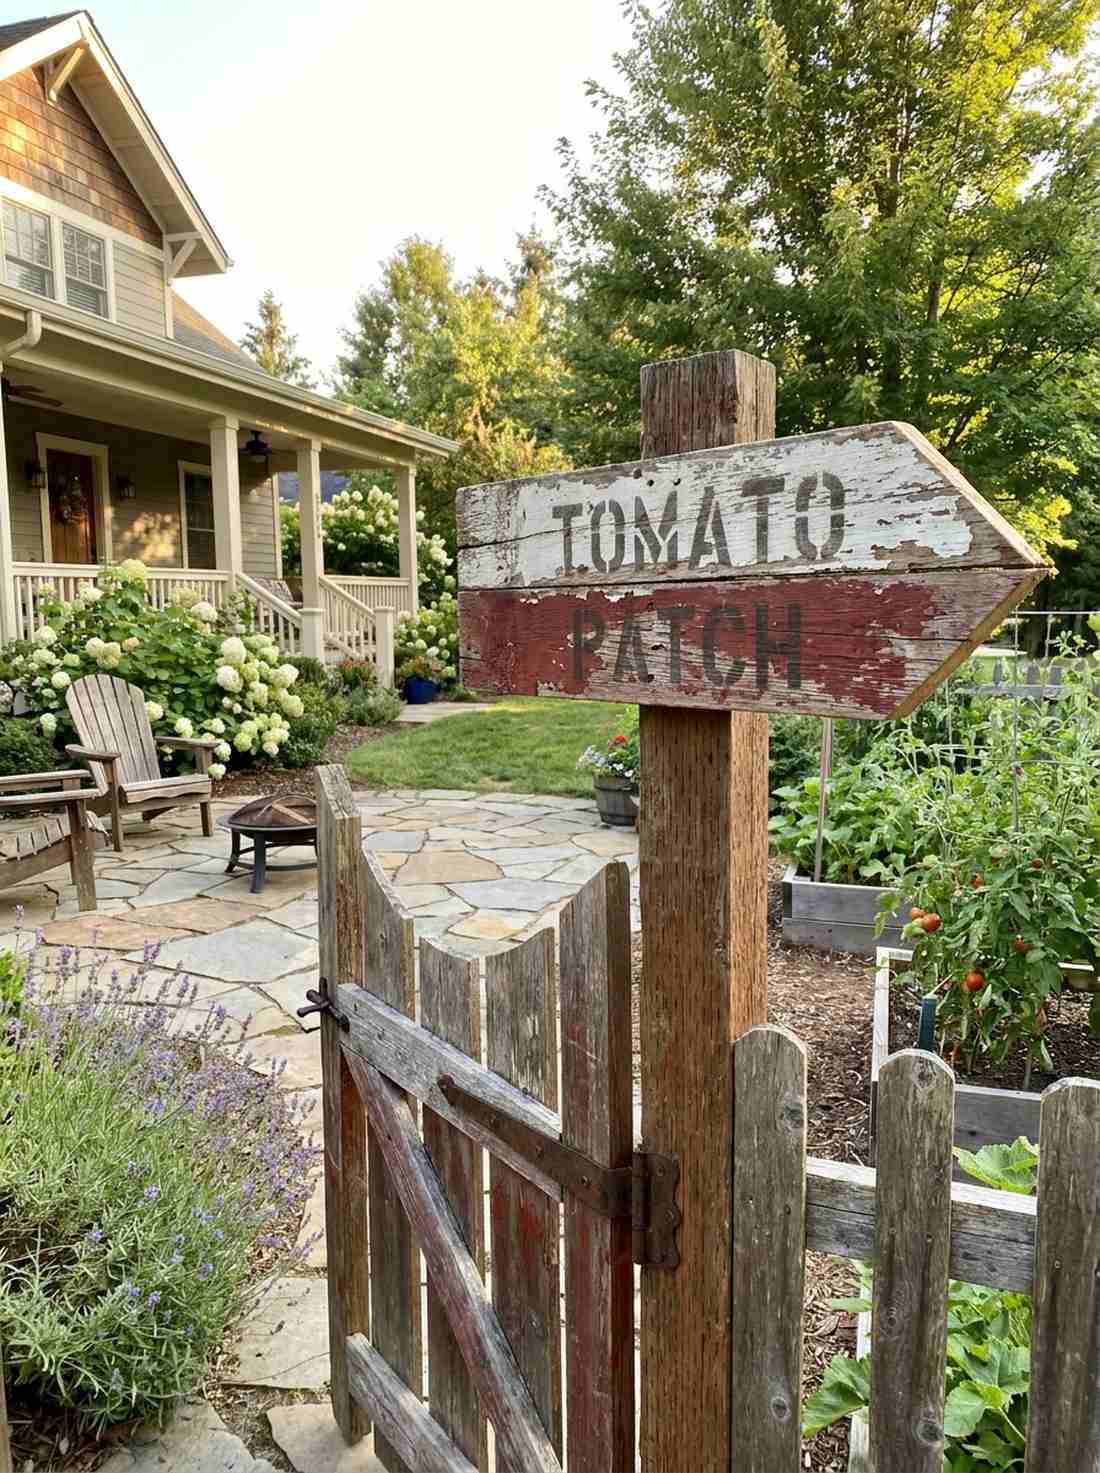
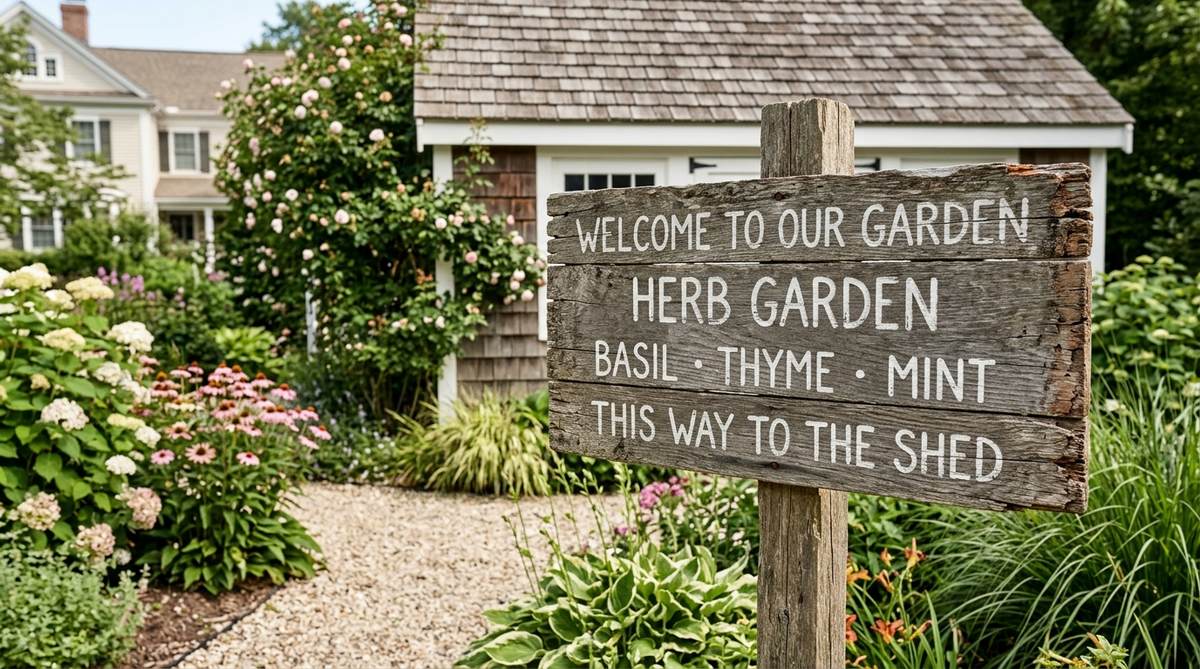
A hand-painted, weathered directional sign pointing to the “Tomato Patch” adds an irresistible, cozy charm to your yard. This personalized woodland garden decor touch is an excellent way to greet guests at the entrance of a side gate or patio.
Stencil vintage lettering onto a piece of heavily distressed, salvaged fence board and mount it on a sturdy post. This simple detail looks far more expensive than it is, mimicking the expensive custom signage found at trendy farmers’ markets and pumpkin patches.
You can craft a gorgeous custom sign for basically free if you have leftover paint and scrap wood.
- Key Materials: Reclaimed fence boards, exterior acrylic paint, letter stencils.
- Vibe / Style: Vintage farmhouse market.
- Difficulty: Easy craft.
- Budget Breakdown: Wood: Free | Paint/Stencils: $10.
- Creator’s Tip: Lightly sand over the painted letters once they dry, and seal the whole board with matte polyurethane to create an authentic, weather-beaten vintage look.
- Smart Sourcing: Reusable vintage farmhouse letter stencils and matte clear exterior acrylic sealant spray.
31. Log Round Stepping Stones
Hopping between these beautifully grained wooden circles feels like you’re exploring a magical forest trail. This low-profile wood garden decor ideas installation is perfect for providing clean footing through muddy flower beds without pouring concrete.
Slice thick, three-inch rounds directly from a fallen tree branch, sealing the tops to reveal the mesmerizing concentric growth rings. Nestling these organic discs into the earth gives a bespoke touch to your yard, turning garden maintenance paths into beautiful visual features.
This project is entirely free if you own a chainsaw and have a downed tree. Pin this clever upcycling idea right now!
- Key Materials: 3-inch thick hardwood log slices, clear water sealant, sand base.
- Vibe / Style: Whimsical forest floor.
- Difficulty: Moderate (requires safe chainsaw use).
- Budget Breakdown: Wood: Free | Sealant: $15.
- Creator’s Tip: Carve deep, rough grooves into the bottom of each slice before laying them in the dirt so they grip the soil and don’t slide around when stepped on.
- Smart Sourcing: Pre-cut extra-large natural wood slices and slip-resistant clear outdoor wood sealer.
32. Wooden Garden Tool Organizer
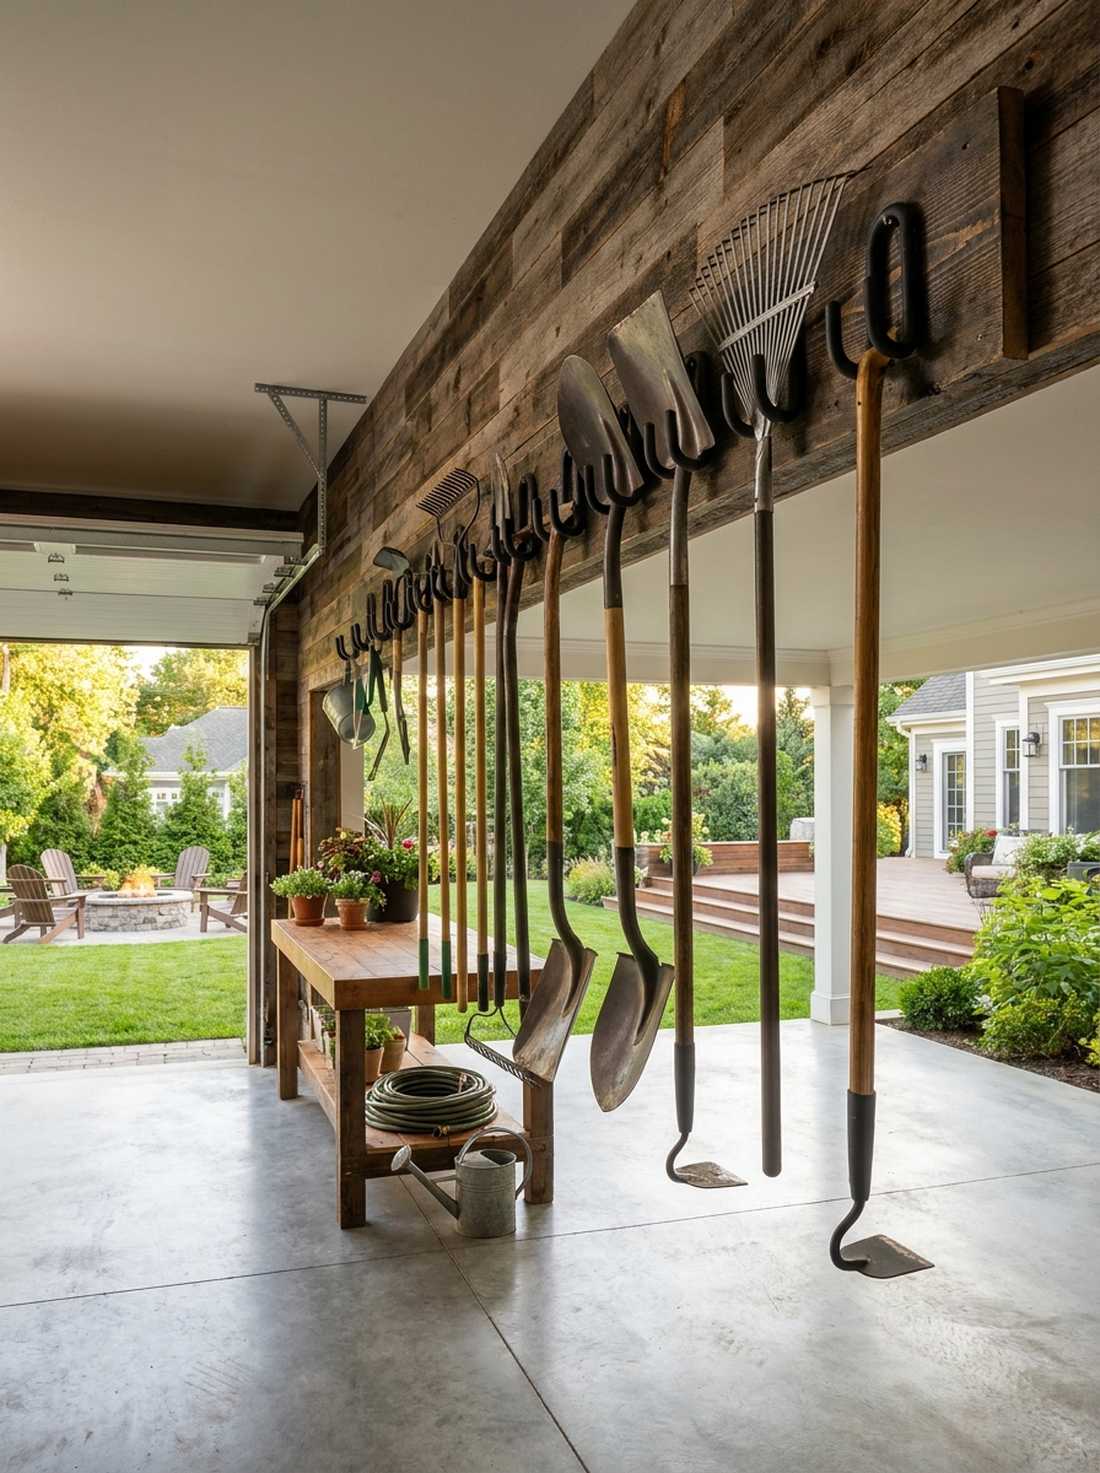
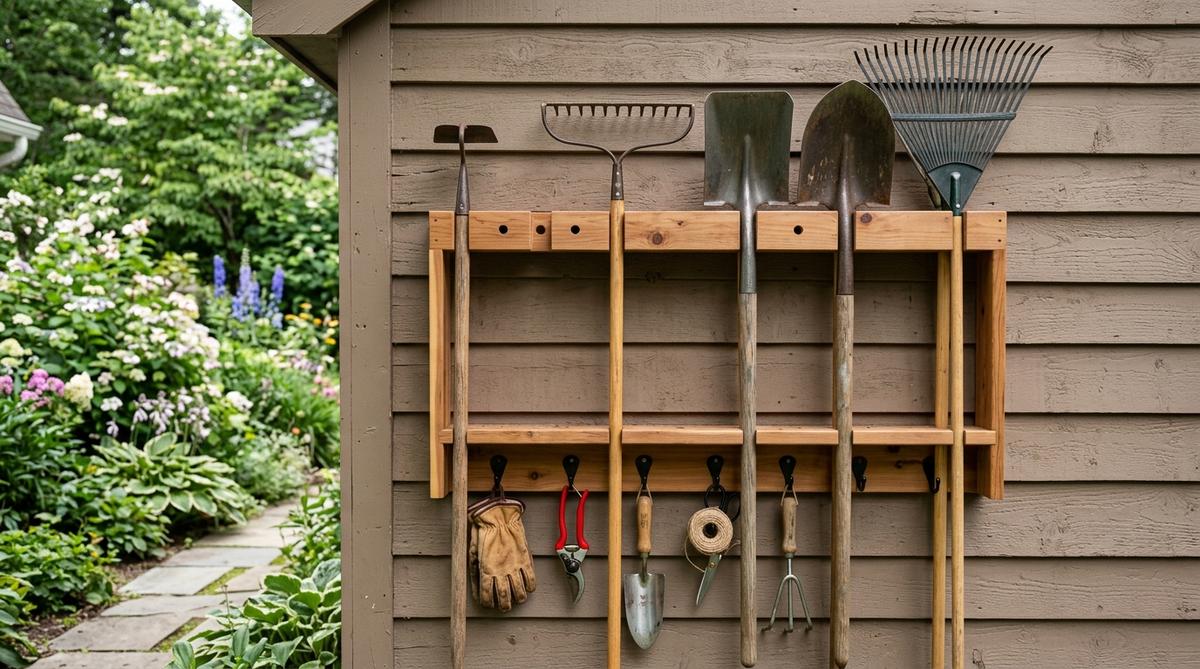
Opening a shed to see all your rakes, shovels, and hoes perfectly suspended on a custom rack feels incredibly satisfying. Building a dedicated diy garden decor wood storage rack is the ultimate way to clean up a chaotic garage or back patio wall.
Mount a thick, heavy horizontal board to your wall studs and attach spaced wooden pegs or heavy-duty hooks. Bypassing cheap plastic tool clips for this rugged, heavy-wood approach delivers a surprisingly premium look that actually holds the weight of heavy steel tools safely.
You can build this indestructible tool rack for about $20 in heavy lumber and hooks.
- Key Materials: 2×6 timber backing board, heavy-duty steel U-hooks, long wood screws.
- Vibe / Style: Rugged utility organization.
- Difficulty: Easy.
- Budget Breakdown: Backing board: $5 | Heavy Hooks: $15.
- Creator’s Tip: Mount the wooden backing board extremely high on the wall so the handles of long shovels hover off the floor, keeping the ground completely clear for sweeping.
- Smart Sourcing: Heavy-duty rubber-coated steel tool hooks (bulk pack) and high-torque wall stud mounting screws.
33. Branch Twig Garden Edging
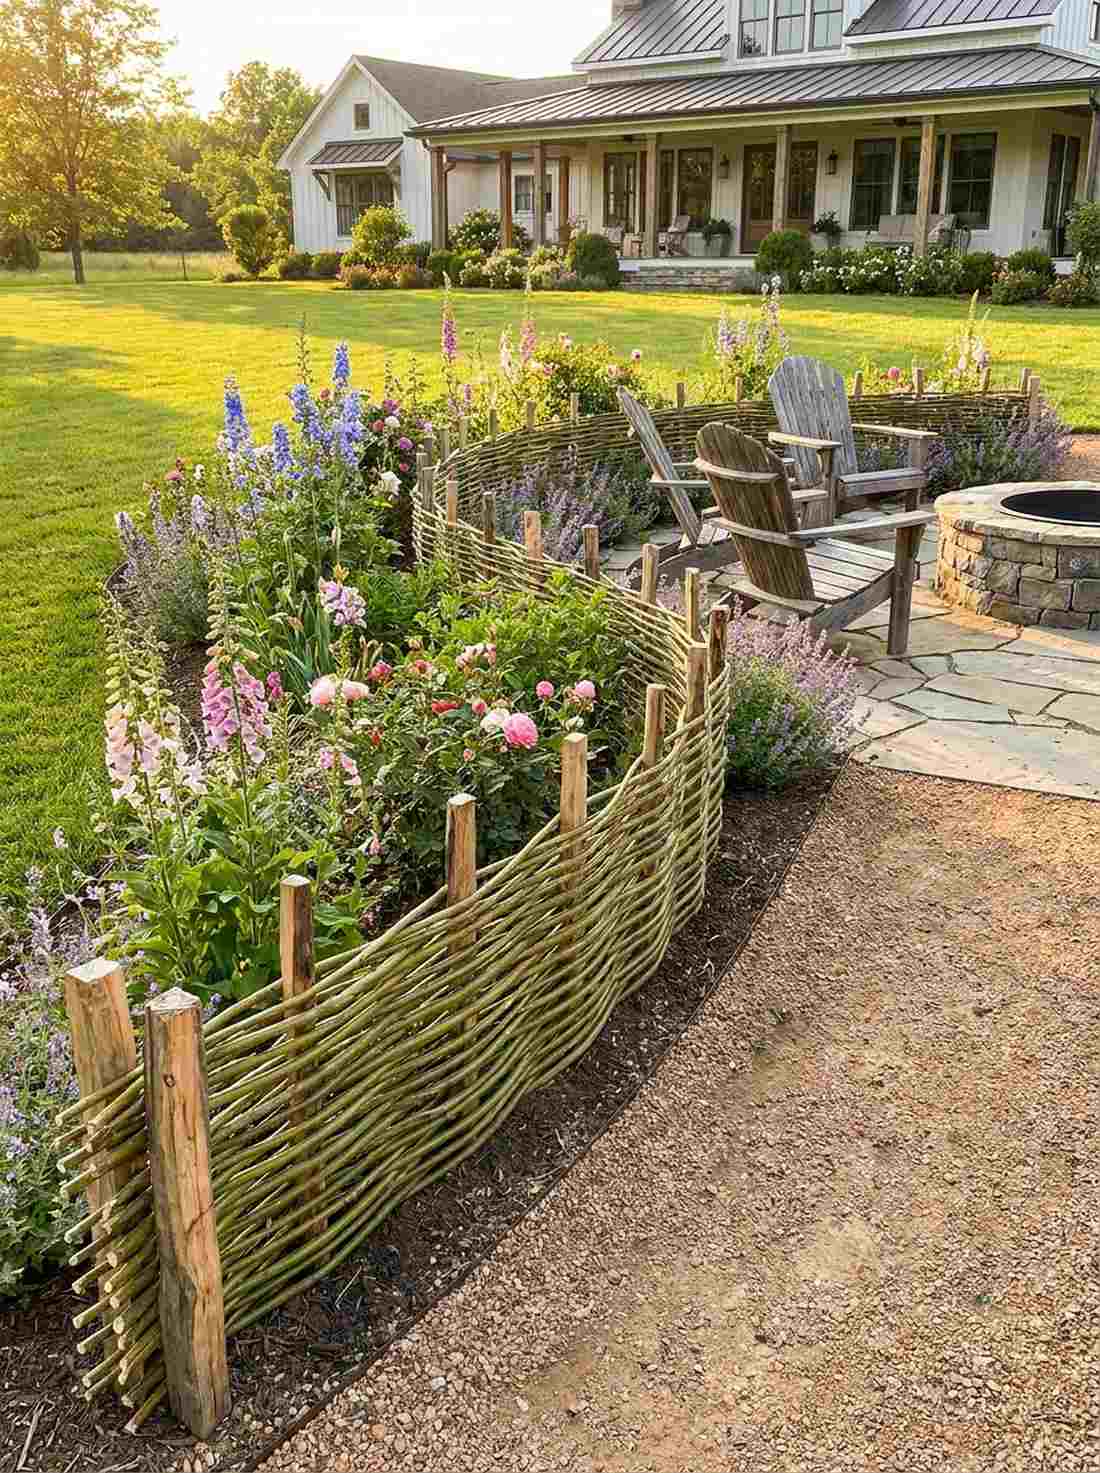
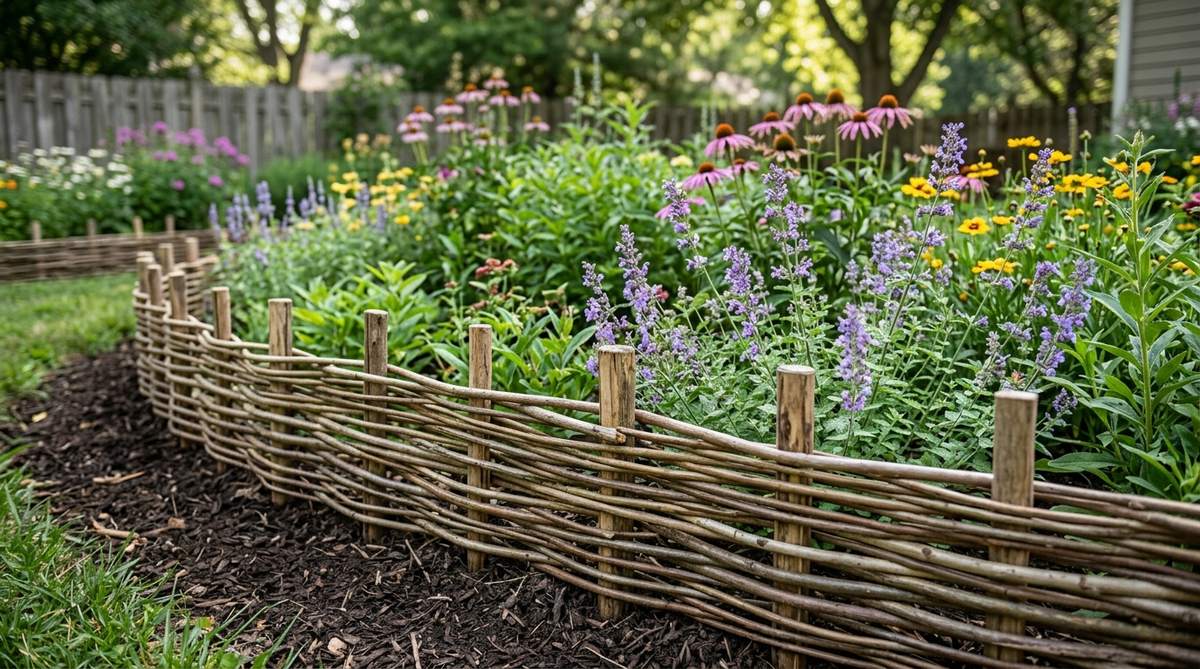
This intricate, woven wood border feels like a landscaping technique passed down through centuries in a quaint English village. The traditional wattle-fence method is a stunning primitive wood garden decor idea to gently corral spilling flower beds.
Weave thin, ultra-flexible green willow or birch branches back and forth between sturdy vertical stakes driven deep into the dirt. This organic, handmade boundary line looks far more expensive than cheap plastic landscape edging, giving your yard a highly-curated cottage core aesthetic.
If you have access to willow trees, this beautiful border costs absolutely nothing but your time. Pin this to your aesthetic garden borders board!
- Key Materials: Flexible green willow or birch twigs, thick wooden anchor stakes.
- Vibe / Style: Traditional English cottage garden.
- Difficulty: Intermediate (takes practice to weave).
- Budget Breakdown: Materials: Free (if foraged).
- Creator’s Tip: You must use freshly cut “green” twigs for weaving; dried branches will immediately snap in half when you try to bend them around the stakes.
- Smart Sourcing: Pre-woven flexible willow border rolls and heavy-duty wooden landscaping stakes.
34. Wooden Fairy Garden Accessories
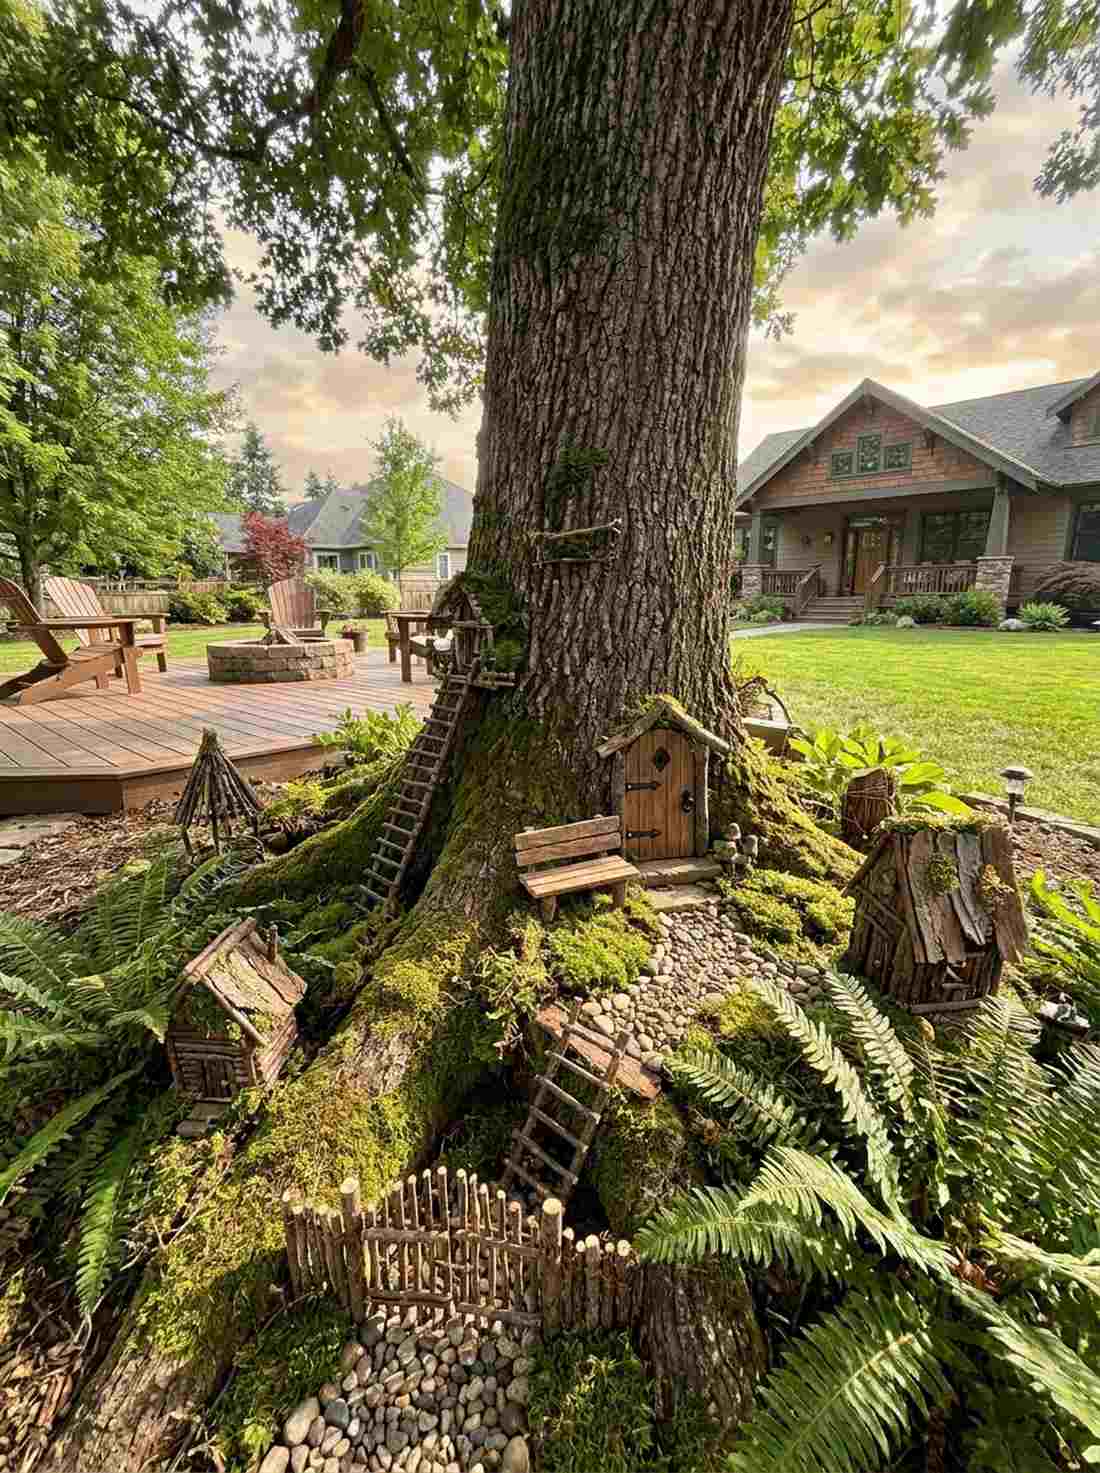
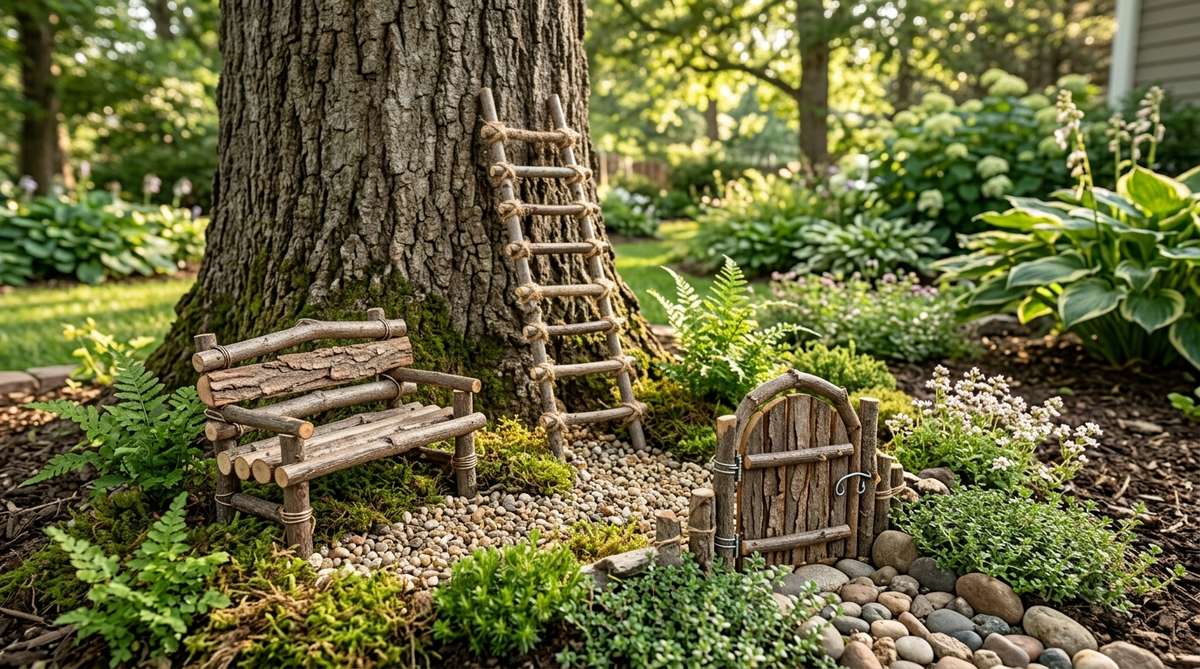
Tucking a tiny, handcrafted wooden bench and miniature door into the base of a giant oak tree feels like you’ve discovered a secret magical realm. These whimsical wood decor for garden miniatures are perfect for adding surprise elements to potted plants or shaded tree roots.
Bind tiny twigs, bark scraps, and moss together with thin wire to construct incredibly detailed miniature ladders, gates, and cottages. This intricate attention to detail delivers a surprisingly premium look, blowing cheap, mass-produced plastic fairy figures completely out of the water.
You can create an entire miniature village for under $10 using scavenged materials and craft wire.
- Key Materials: Tiny twigs, dried bark, craft wire, hot glue, preserved moss.
- Vibe / Style: Whimsical secret garden.
- Difficulty: Easy, detailed craft.
- Budget Breakdown: Wire & Glue: $10 | Twigs: Free.
- Creator’s Tip: Use a clear outdoor UV-resistant spray over your tiny creations so the hot glue and bark don’t disintegrate after the first heavy rainstorm.
- Smart Sourcing: UV-coated resin fairy cottage kits and pre-cut preserved moss sheets (bulk pack).
Frequently Asked Questions
What is the real cost to recreate these garden wood setups?
The cost varies wildly based on whether you scavenge or buy premium kits. If you source free pallets or downed logs, many projects (like pathways or signs) cost under $20 for just screws and sealant. However, if you want a premium, long-lasting aesthetic without the labor, investing in pre-cut cedar kits and heavy-duty steel hardware for raised beds or arbors will typically run between $100 and $300. The true cost-saver is skipping expensive contractors and doing the assembly yourself.
Where is the best place to use these wood layouts?
Chunky structural timber projects (like arbors and pergolas) should be used to anchor open spaces, acting as transitions or dining zones. Driftwood and smaller DIY accents work best in high-visibility “micro-spaces” like apartment balconies, patio tables, or flanking a front entryway. Heavy bark mulch and retaining walls are functional solutions that should strictly be placed in soil-heavy zones to manage water drainage and suppress weeds.